How to Turn a Photo Into a Polaroid With Photoshop (Photojojo Contest !!)
by fatrickuk in Design > Photography
47257 Views, 17 Favorites, 0 Comments
How to Turn a Photo Into a Polaroid With Photoshop (Photojojo Contest !!)

Ever wondered how you could turn a digital photo into a Polaroid? Here is an easy way to do it with Photoshop.Please vote if you like this entry.
Adjust the Picture Size
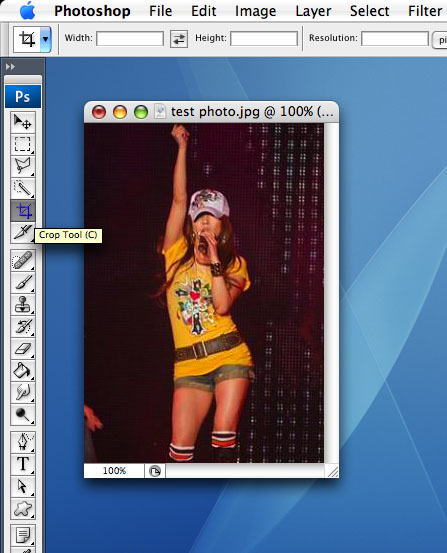
Open your photo with Photoshop and then use the crop function on the tool bar or go to Image > Image Size to resize your picture in order to fit it into a Polaroid
Make a Frame
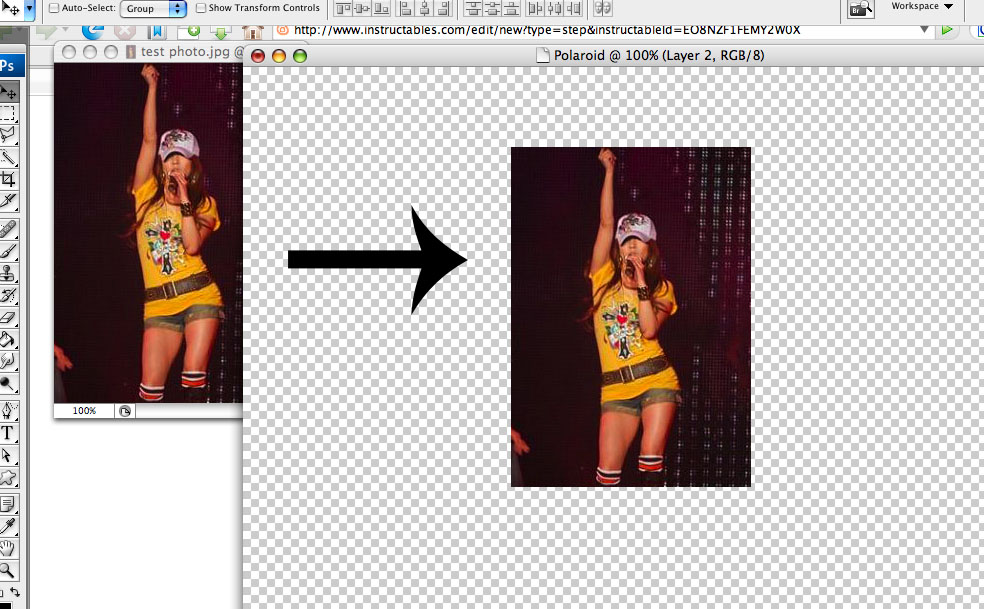
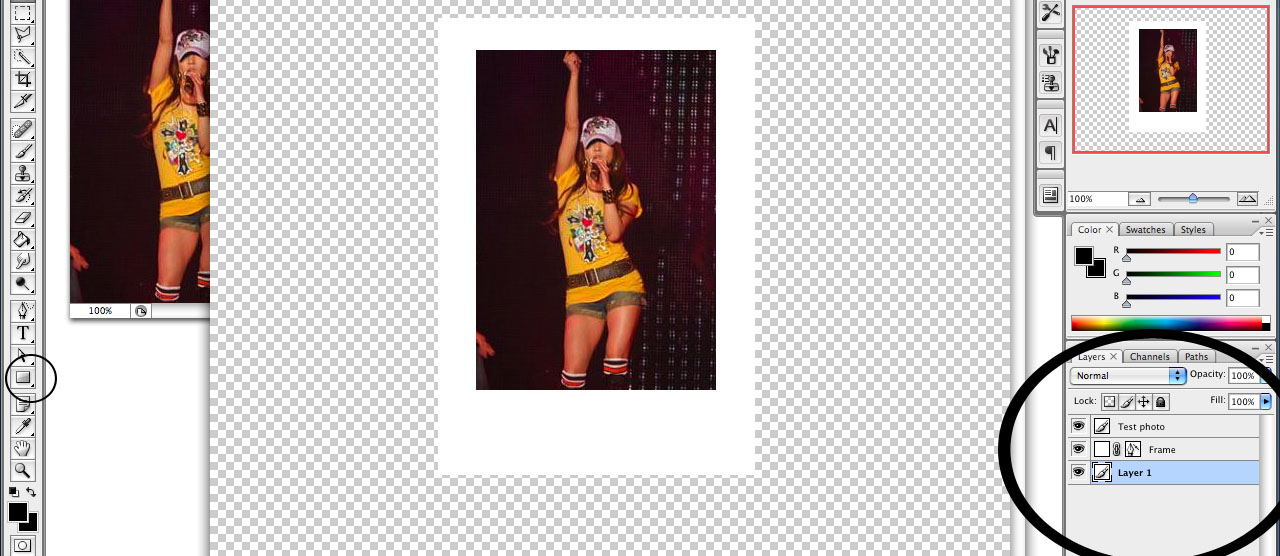
You need to make a frame with white border so that it would look like a Polaroid. Here are the steps:
- File > New (set width: 800, height: 600, transparent background as an example) > OK
- Drag your image to the new window
- Use the rectangle tool to draw out a Polaroid frame
- I renamed my image from layer1 to Test photo and the rectangle from Shape1 to Frame to avoid confusion
- After you drew the rectangle, you would notice that the white frame is on top of your image. To avoid that, drag 'Test photo' on top of 'Frame' under Layer panel at the bottom right corner.
Add Shadow to the Frame
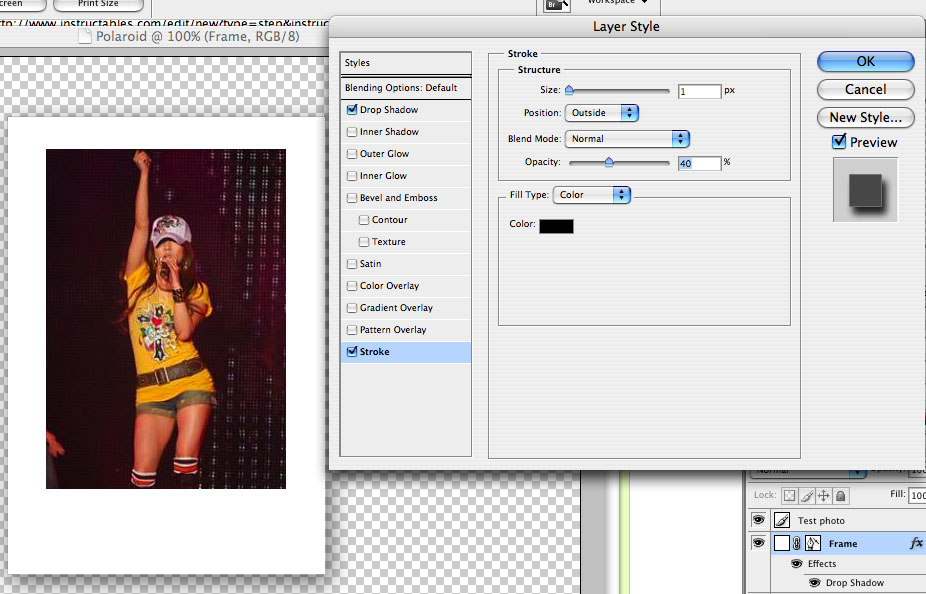
To enhance the 3D effect, you need to add some shadow to the frame
- Right click on the 'Frame' under Layer Panel > Blending Options
- Choose Drop Shadow (Opacity: 80, Distance: 8, Spread: 10, Size: 30)
- Choose Stroke (Size: 1, Opacity: 40, Color: Black) > OK
For the 'Test photo', you might want to add the Stroke effect to it as well. (Optional)
- Right click on the 'Test photo' under Layer Panel > Blending Options
- Choose Stroke (Size: 1, Opacity: 40, Color: Black) > OK
Make a Background and Add Some Writings
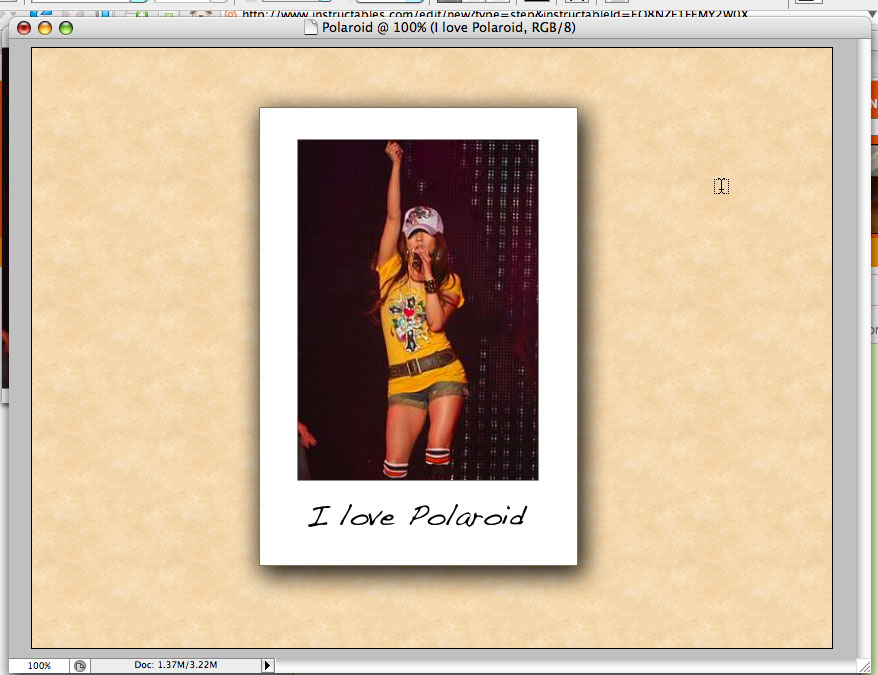
You may fill your background with different images or even with a pile of Polaroids. In this example, I used a simple pattern for my background
- Fill > Pattern > Custom Pattern > Choose any > OK
To enhance the Polaroid effect, add some writings on your photo as well.
- Use the Text tool on the tool bar > use the font Handwriting -Dakota (I personally prefer this because it looks like real handwriting.)
- Fill > Pattern > Custom Pattern > Choose any > OK
To enhance the Polaroid effect, add some writings on your photo as well.
- Use the Text tool on the tool bar > use the font Handwriting -Dakota (I personally prefer this because it looks like real handwriting.)
Rotate Your Photo
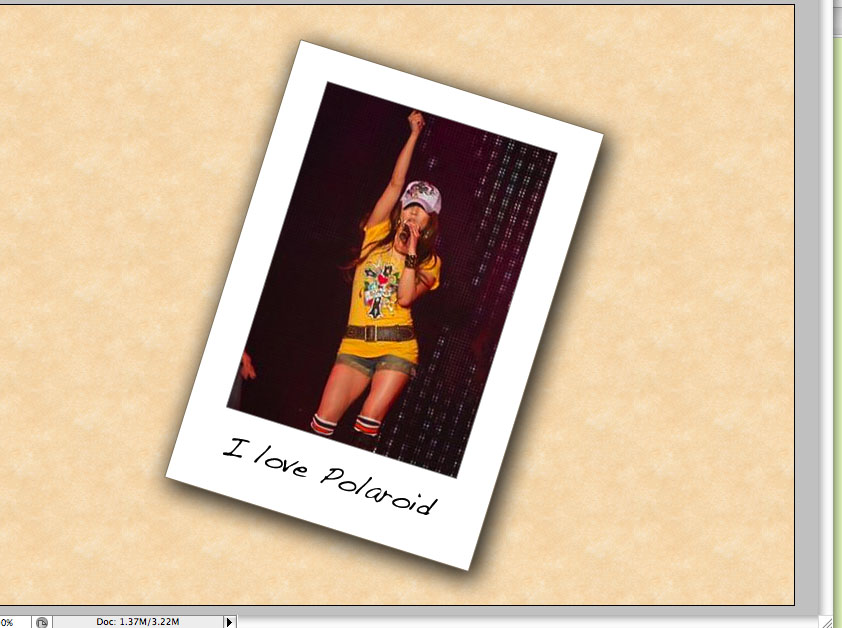
- Select 'Test Photo', 'Frame' and the 'Text' layers under Layer Panel
- Edit > Transform > Rotate
Use your mouse to rotate the angle of the Polaroid that you want
- Edit > Transform > Rotate
Use your mouse to rotate the angle of the Polaroid that you want
Stick Some Sellotape
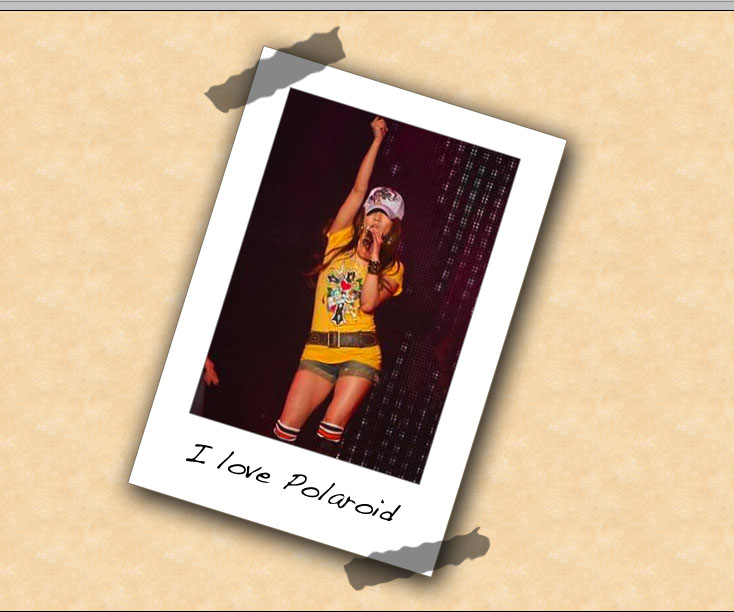
You might notice that just a Polaroid on a background looks a bit plain. Therefore I made some sellotape in order to make it more realistic.
- Use the rectangle tool to draw an rectangle in Black (set opacity: 40)
- Filter > Distort > Ripple (With this effect, your rectangle would look like sellotape)
- Make another copy of the rectangle
- Place your sellotape onto your Polaroid and then rotate it.
You might want to use Fill > Transform > Warp to adjust the shape of the sellotape
You are now done!! Please make a Vote if you like this instructable!! Thanks!!