How to Paint Foam Latex Appliances
by stuartbray in Craft > Costumes & Cosplay
138132 Views, 265 Favorites, 0 Comments
How to Paint Foam Latex Appliances
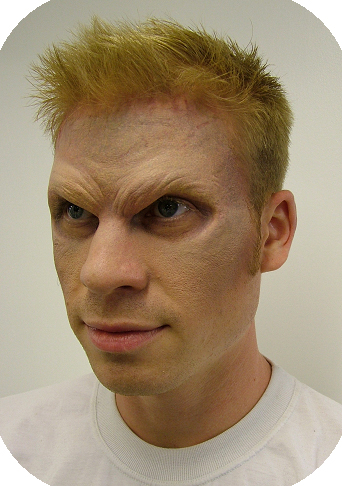
Shock! Horror! It's flat, opaque and looks nothing like skin whatsoever. When compared to its translucent cousins, gelatine and silicone, that foam rubber nose could look like an unwelcome option.
But foam latex does have its advantages. It is durable, absorbs perspiration rather than collecting it in pockets and it doesn't dissolve or melt. Best of all, you can repair, re-glue and re-colour knowing that it's opacity will hide a multitude of sins- that is if it's well painted! This article will cover a simple procedure for colouring a foam appliance on the face.
Incidentally, if you like this kind of thing why not check out the free mini ecourse on my site-sign up quick and easy at LearnProstheticMakeup.com!
Get Your Materials Together

You will need:
" Pros Aide & remover
" Acrylic paints (I like liquitex, but most brands will work fine)
" Rubber Mask Grease Paint (RMGP)
" Alcohol activated makeup (Skin Illustrator/Stacolor/Kryolan)
" Plastic cups
" IsoPropyl Alcohol
" Cheap bristle brush/chipbrush (12mm/1/2 )
" Cotton tipped buds such as Q-Tips
Mix Your Base
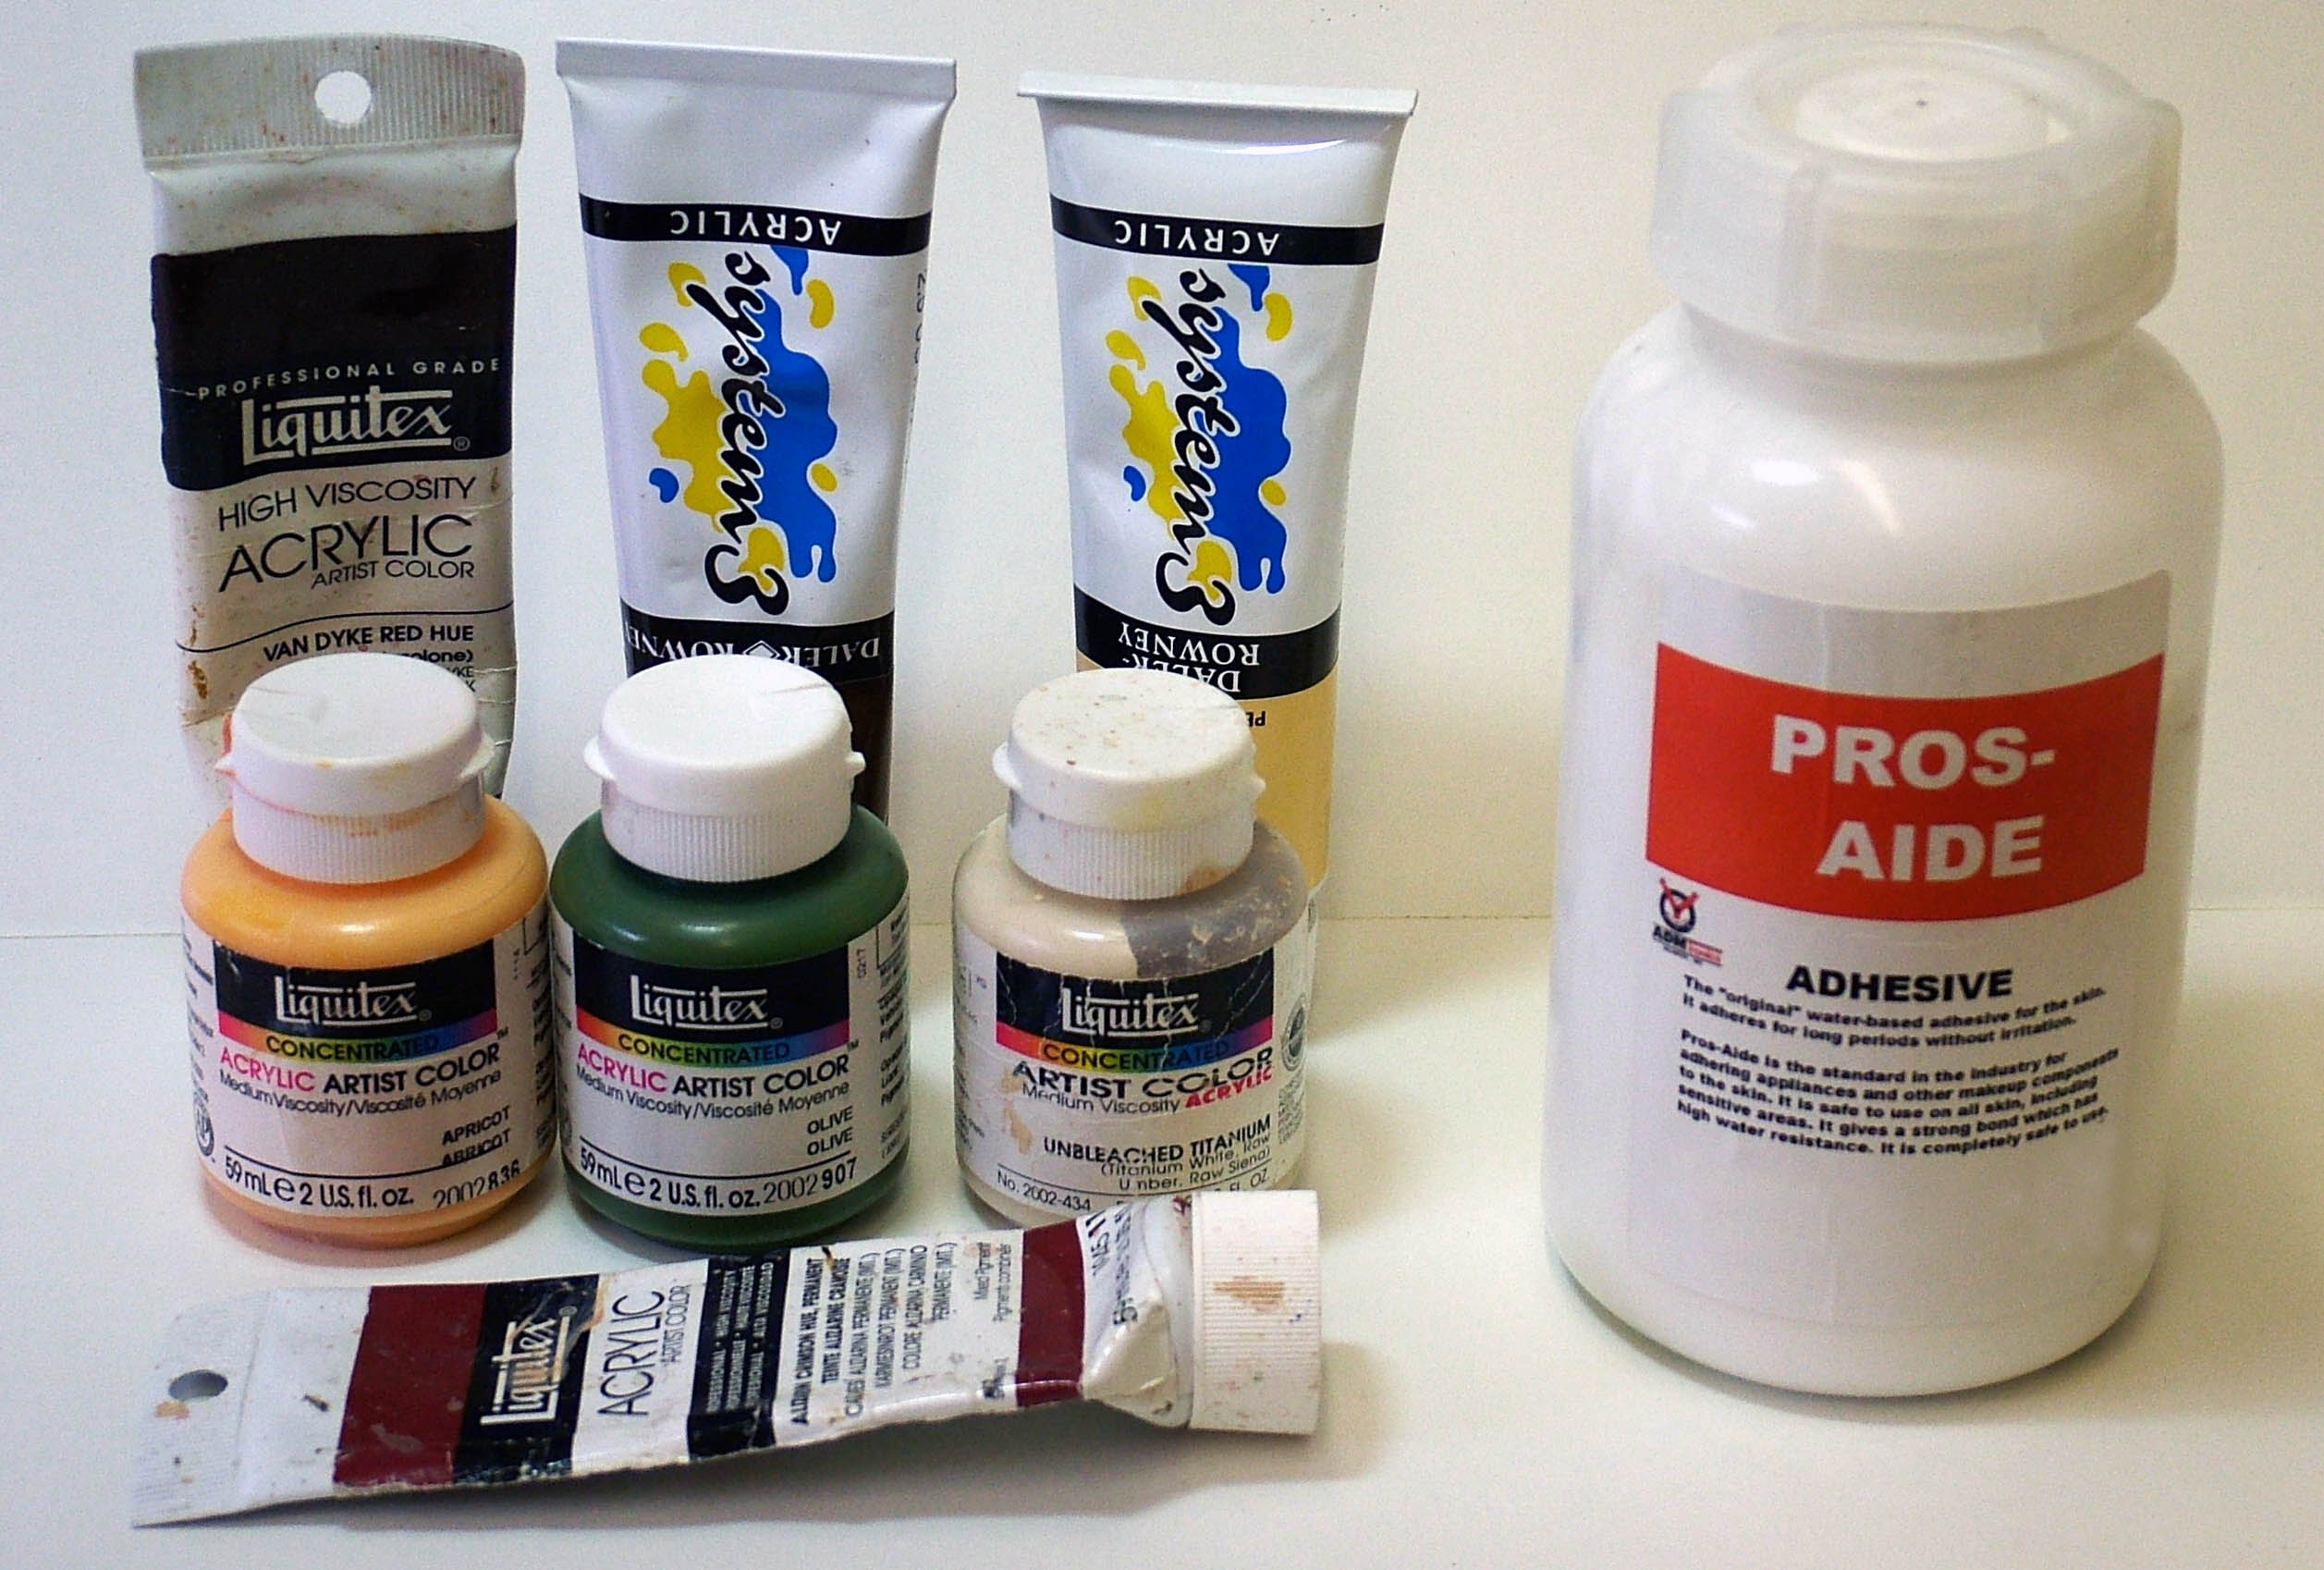
The combination of Pros Aide and Liquitex led to the name PA-X, a durable and flexible paint which can be used on both skin and foam latex. Invented by Dick Smith, it has become an industry standard for painting foam appliances.
You mix up the base colour of the subjects skin using the acrylic paints, getting as close as you can. You can tweak with washes and makeup later. It takes a while to confidently mix flesh tones, so have a play and try several attempts. A little goes a long way so you do not need to mix gallons of paint! Half an egg cup will be plenty.
For this makeup I started with Unbleached titanium (off white), adding reds, raw umber, yellow ochre and a little Olive. Once you are happy with the colour, add 40-50% Pros Aide and mix well. It will look lighter than before because of the whiteness of the Pros Aide but because Pros Aide dries clear the colour will return to normal. For darker skin tones, I like to start with a little warm colour like Apricot and add appropriate shades like Umber and Sienna to avoid going too cold.
Brushes
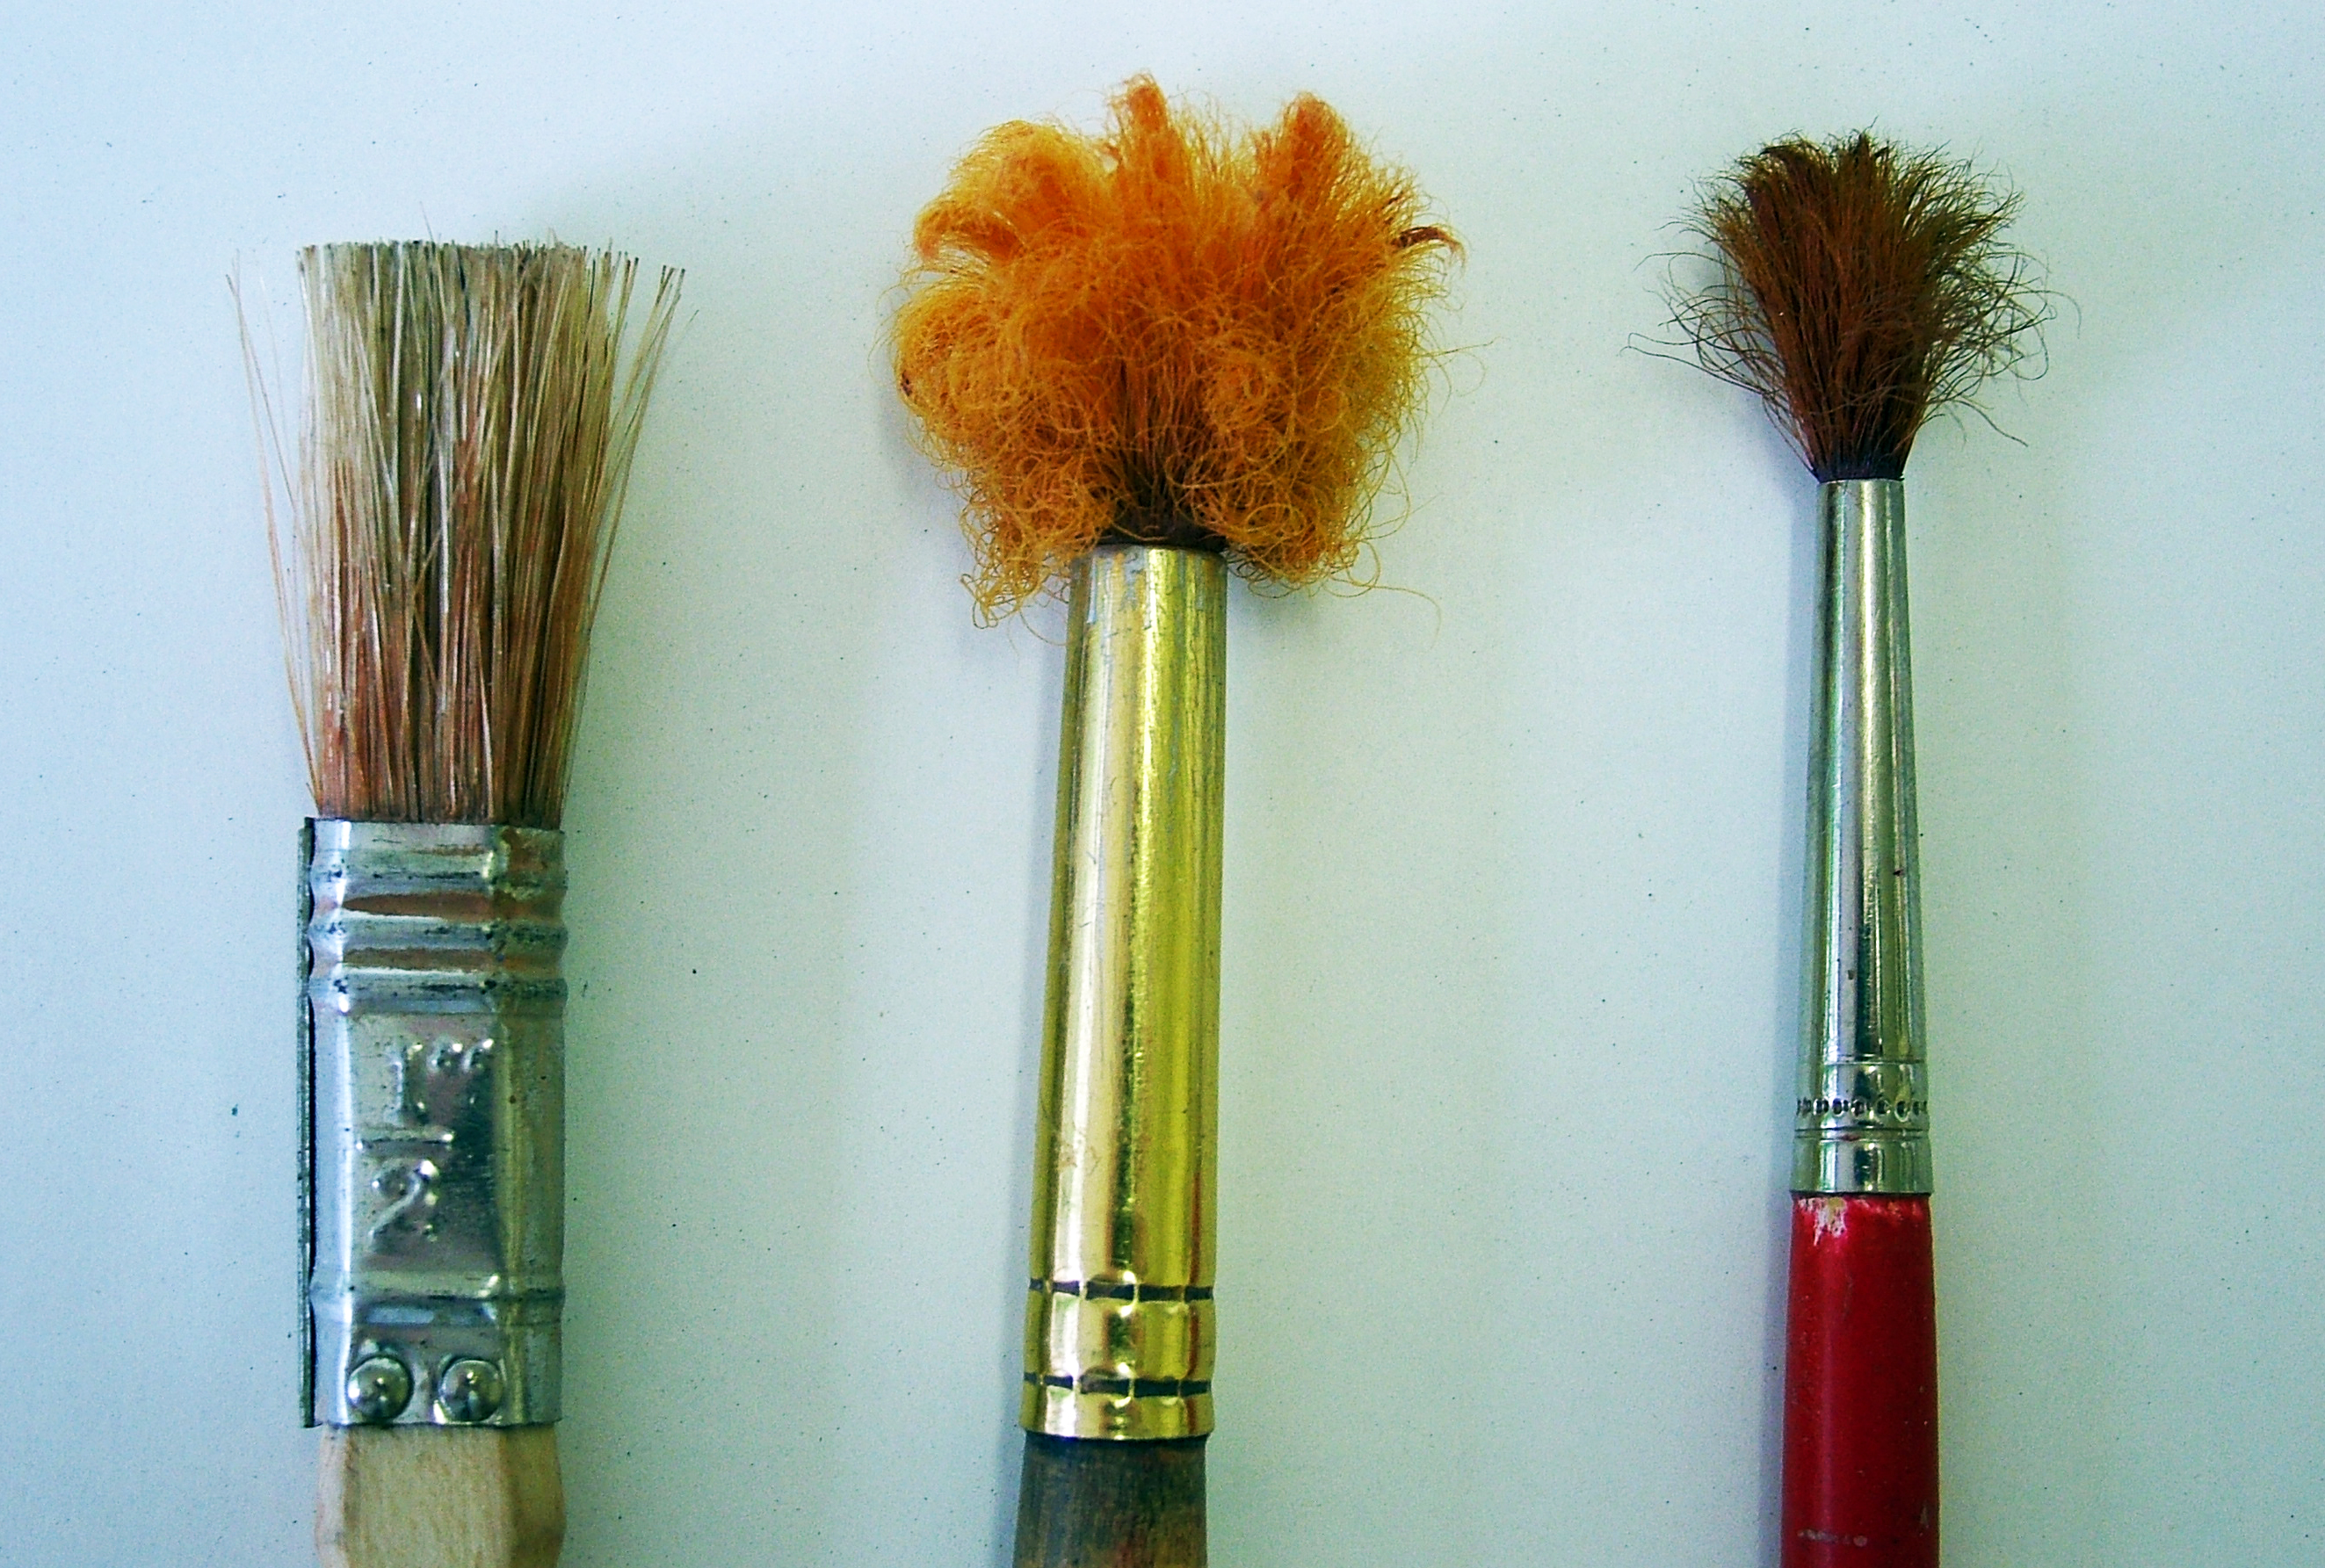
The big brush is a half-inch decorators bristle paintbrush, cut halfway down.
The ruined looking brushes are sable and synthetic mix brushes repeatedly stamped onto a surface and back-combed with a wire brush to spread the bristles. This makes applying natural looking stipples of colour much quicker.
Also, use a sharp blade and scrape the brush to create the curled tips.
The ruined looking brushes are sable and synthetic mix brushes repeatedly stamped onto a surface and back-combed with a wire brush to spread the bristles. This makes applying natural looking stipples of colour much quicker.
Also, use a sharp blade and scrape the brush to create the curled tips.
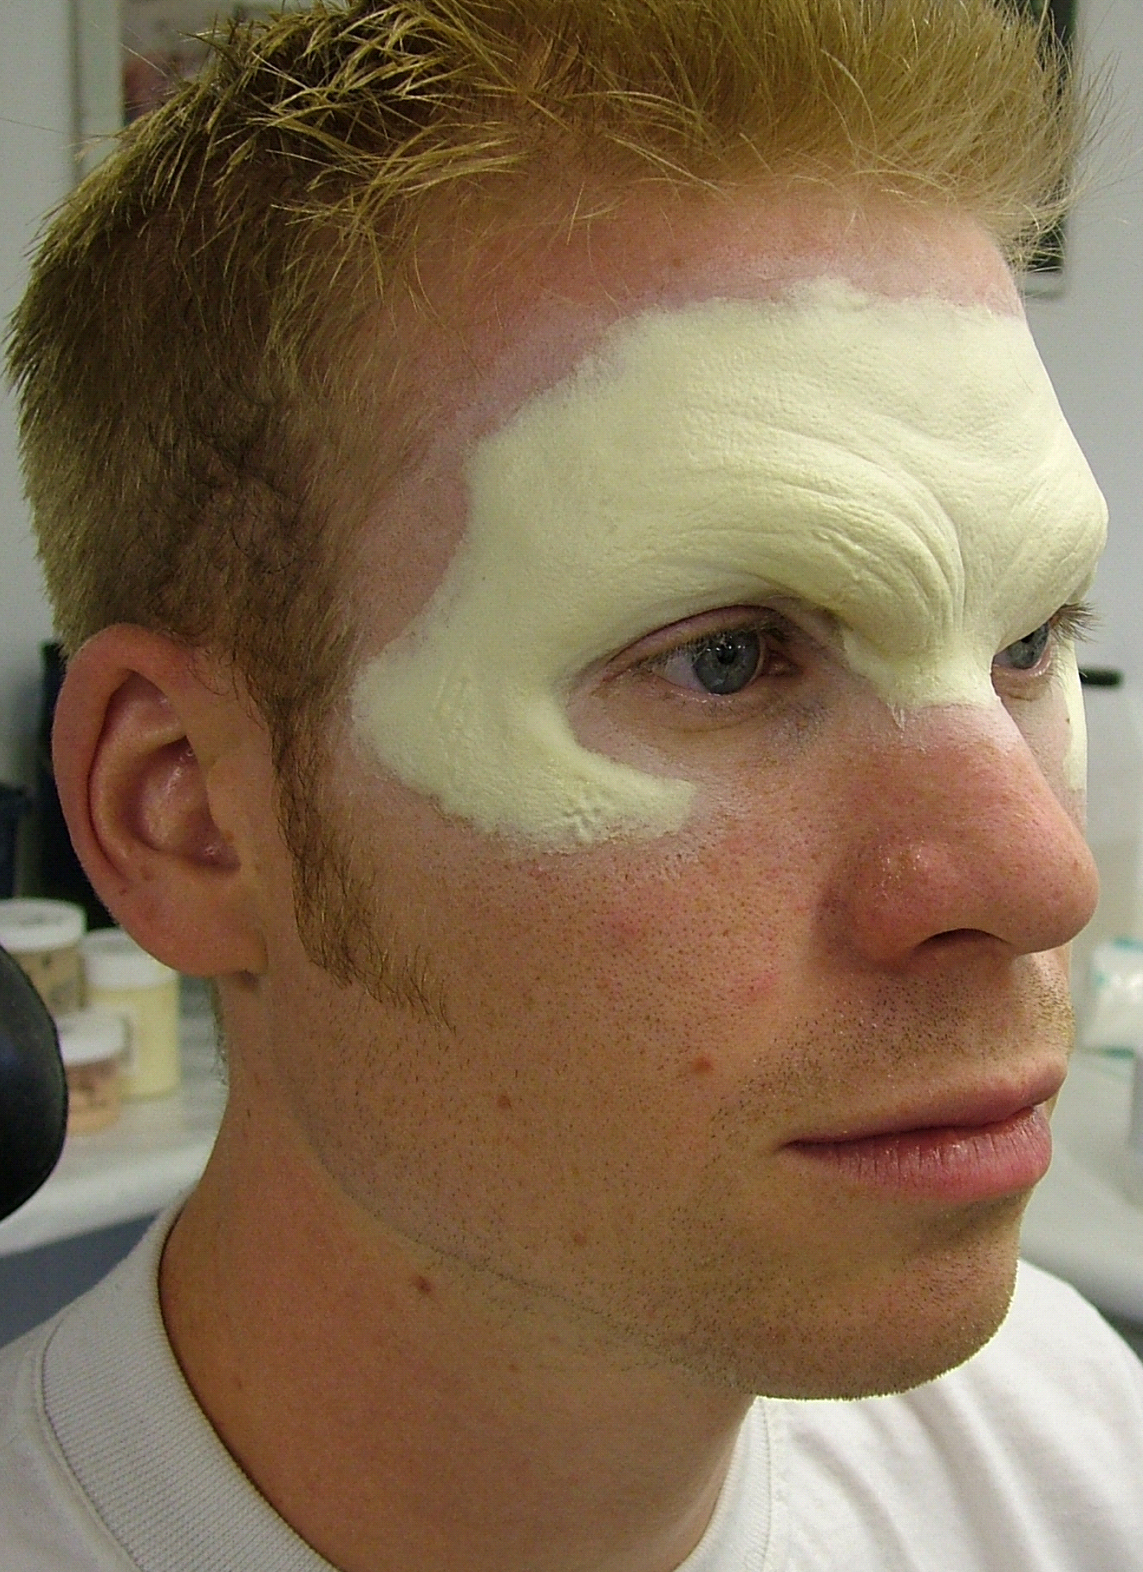
The appliance glued in place using the Pros Aide, edges worked a little with IPA alcohol. Give the whole appliance a coat of Pros Aide thinned with a little water. This seals the foam and prevents any paint soaking into the foam-after all it is essentially a latex sponge.
Dry carefully with a hairdryer, powdering as soon as it is dry. Pros Aide glue remains shiny and tacky when dry, so ensure you powder before any facial expressions are pulled as everything that touches will stick. If this happens, a little IPA on a brush or cotton bud will un-tack it.
Dry carefully with a hairdryer, powdering as soon as it is dry. Pros Aide glue remains shiny and tacky when dry, so ensure you powder before any facial expressions are pulled as everything that touches will stick. If this happens, a little IPA on a brush or cotton bud will un-tack it.
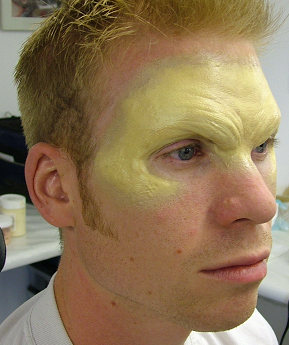
On with the first coat of PA-X paint (thinned with water), blended into the skin about 5-10mm beyond the edge of the piece. I used water to help blend. It is essential to avoid a sudden line where the paint finishes.
Try applying in a stippling motion. This will give you a more natural looking distribution of colour. It needs a few more coats, some lighter and some darker to break it up drying each coat before applying the next. It definitely needs some red.
Try applying in a stippling motion. This will give you a more natural looking distribution of colour. It needs a few more coats, some lighter and some darker to break it up drying each coat before applying the next. It definitely needs some red.
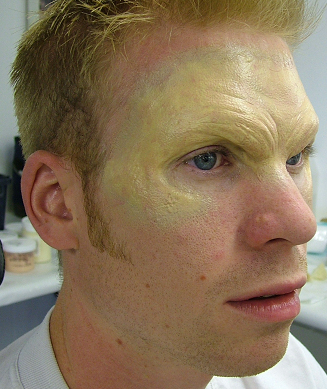
A few more coats of PA-X washes. Never dump a thick layer of paint on as it wrinkles horribly when the face moves. Layers of washes are better, giving gradual change. Squint and look from a distance, and ask yourself:- "Too red?" "Too orange?" "Too pale?"
Address these by applying colour wheel logic. 'Too red' needs a touch of green in the next wash. Take a little of your base PA-X onto a palette and add a drop of Olive. The Pros Aide in the PA-X will keep it flexible, so don't add more.
Address these by applying colour wheel logic. 'Too red' needs a touch of green in the next wash. Take a little of your base PA-X onto a palette and add a drop of Olive. The Pros Aide in the PA-X will keep it flexible, so don't add more.
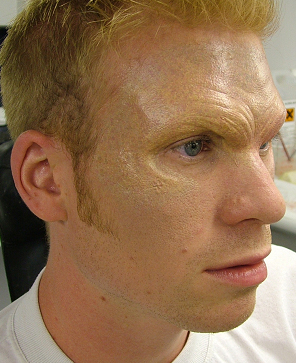
The finished PA-X paint job. There are about five layers of stippled washes. A light no-colour powder and we are onto the last stages.
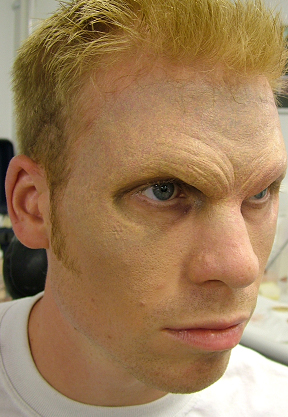
Again using a stippling motion, apply thin washes of Skin Illustrator. I have used Natural 1 & 2, Rice Paper and a touch of Brown for freckles.
The great thing with these alcohol colours is the washes can be thinned right down with IPA so you can apply tiny amounts of actual pigment, and the solvent evaporates quickly. Very handy for tweaking colour.
I also apply some washes using the cut down half-inch decorators brush. I dip the brush into the Illustrator wash, and flick the end bristles which distributes an 'airbrush spatter' evenly over the appliance and skin.
You could use an airbrush if wanted to, but for ease I like the paintbrush for quick colour changes and cleanup afterwards.
Step 6
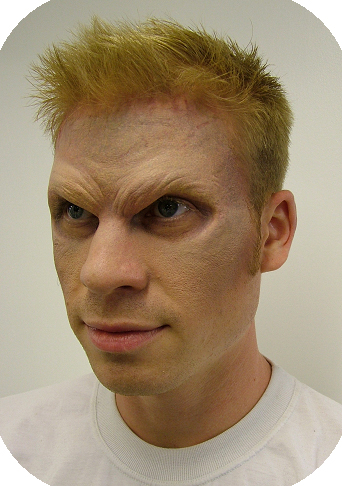
The final makeup. I used a little RMGP to shade around the eyes. Skin Illustrator paints dry matt, which helps subdue any unwanted shine from the PA-X. If you still get some shiny areas, try a little anti-shine cream.
Remove appliance with Super Solv, Pro Clean or similar.
Remove appliance with Super Solv, Pro Clean or similar.
Reference. Always Reference...

Reference is always a good thing, and it always pays to have good, varied images to keep your painting fresh and informed. Get into the habit of collecting reference photos to get an idea of natural looking skin on various people and skin types.
Once a foam appliance is on, it obliterates the skin colour underneath and it is easy to forget what was there. I like to take clear photos of the subject prior to makeup, and also collect good images from magazines.
I also found some good books, like the National Geographic books and portrait collections. These are also great tools to refer back to when designing your makeup. Also, photo sharing sites such as flickr (http://www.flickr.com/) are great. Just type in what you are looking for (old face, sunburn or freckles etc) and trawl away. Reference often leads you into new directions you had not planned on going!
Happy sticking!
Stuart
If you like this kind of thing why not check out the free mini ecourse on my site-sign up quick and easy at LearnProstheticMakeup.com!
There's more like this, looking at other aspects of makeup effects and prosthetics on the Free Downloads page.