How to Measure Thermal Comfort With Electric Imp and Ubidots
by UbiMaker in Circuits > Sensors
430 Views, 2 Favorites, 0 Comments
How to Measure Thermal Comfort With Electric Imp and Ubidots

Warm summer days are nice, right? But temperature is not all it takes for our bodies to feel comfortable; humidity plays a huge role as well. In this tutorial we will measure temperature and relative humidity of the environment, and then compute an index for Thermal Comfort using the Ubidots Cloud.This "index" is called Dew Point. Here's a table with the meanings according to the Dew Point values:
Dew Point \\ Human perception
24 - 26°C or 75 - 80°F \\ Extremely uncomfortable, oppressive
21 - 24°C or 70 - 74°F \\ Very Humid, quite uncomfortable
18 - 21°C or 65 - 69°F \\ Somewhat uncomfortable for most people at upper edge
16 - 18°C or 60 - 64°F \\ OK for most, but all perceive the humidity at upper edge
13 - 16°C or 55 - 59°F \\ Comfortable
10 - 12°C or 50 - 54°F \\ Very comfortable
Under 10°C or 50°F \\ A bit dry
A dew point between 13 - 16°C (55 - 59 °F) makes you feel comfortable, but a Dew point above 21°C (70°F) will make you feel too warm because the air would have too much moisture and your body wouldn't be able to cool down.
What We'll Need
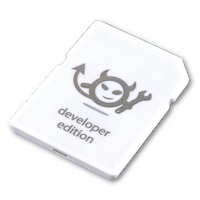
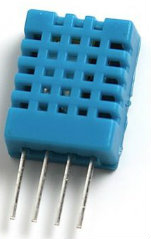
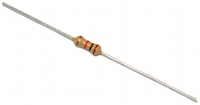
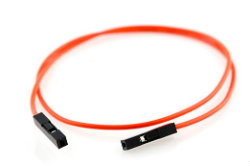
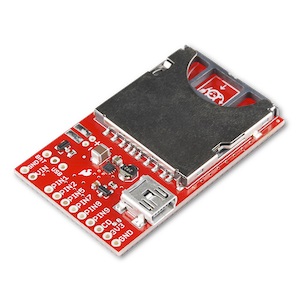
- An Imp
- An Electric Imp Breakout Board
- A DHT11 humidity and temperature sensor
- 10k resistor
- Three female to female wires
Wiring
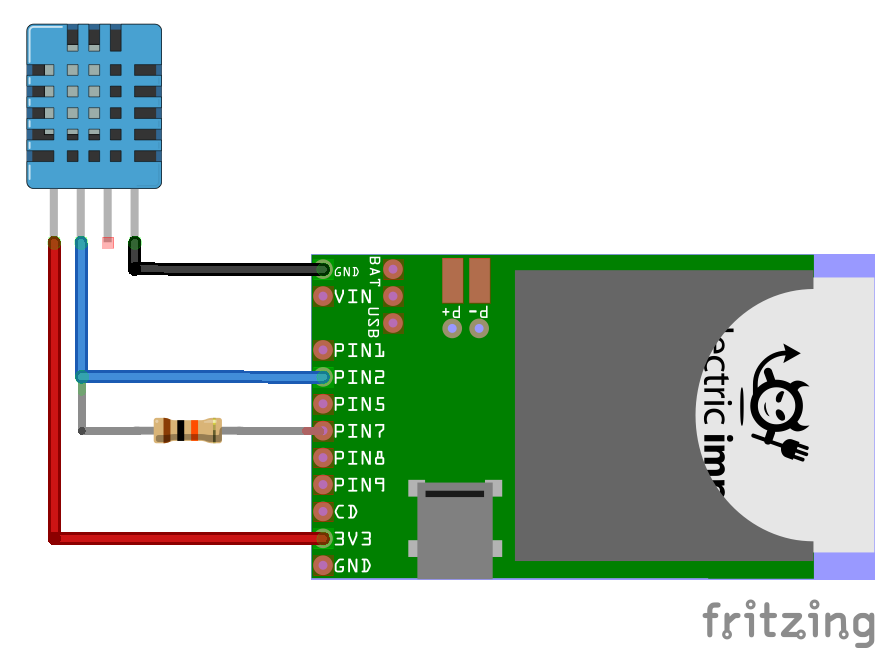
In the diagram above you can see how the DHT11 sensor should be wired to your Electric Imp board.
Create an Ubidots Account
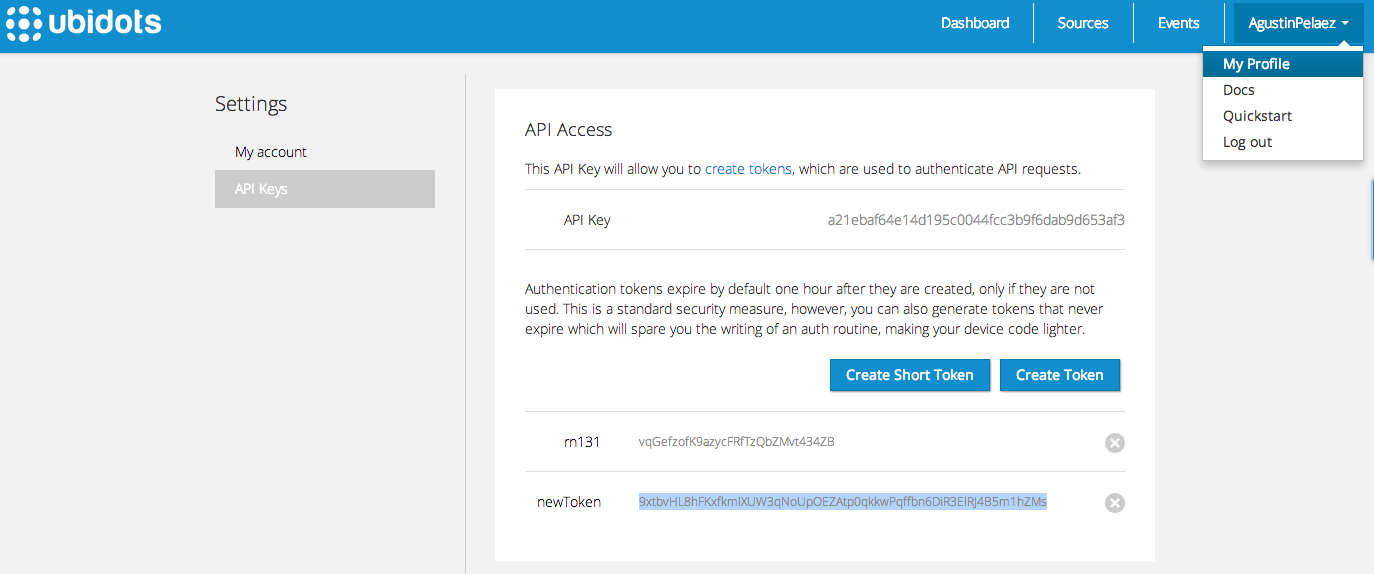
If you don't have a Ubidots account yet, go to Ubidots.com and create one. As logged in user create a token under “My Profile” tab. We’ll need it later for our Agent code.
Create a New Data Source and Variables


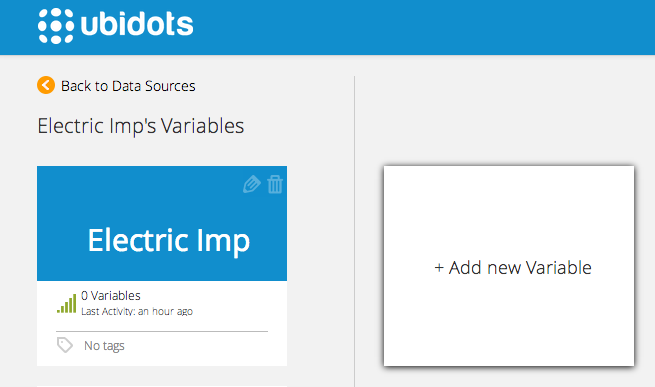
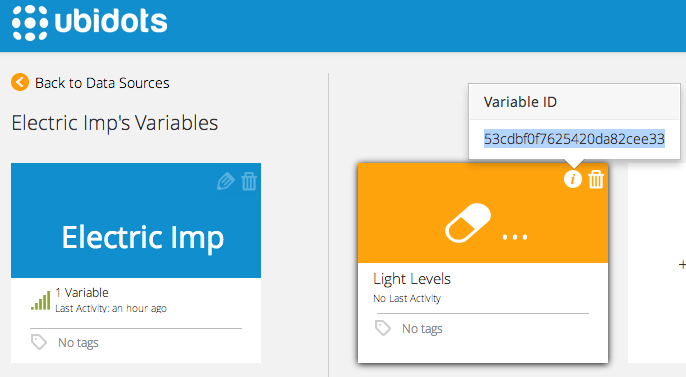
- Navigate to the “Sources” tab and create a data source called “Electric Imp” by clicking on the orange button located in the upper right corner of the screen.
- Click on the created Data Source and then on “Add New Variable”. Call the variable "Temperature"
- Repeat the step before for "Humidity". Take note of the variable’s ID. We’ll need it later for our Agent code
Device Code
Let's start coding! when working with Electric imp, you'll need two sections of code: one for device and another one for the agent. Thanks to Thomas Byrne for providing the class to handle the DHT11 sensor in Github. Here comes the device code (a bit long since it has the class to handle the DHT11):
<br><p>const SPICLK = 937.5;<br>// Class to read the DHT11 temperature/humidity sensor
// These sensors us a proprietary one-wire protocol. The imp
// emulates this protocol with SPI.
// To use:
//  - tie MOSI to MISO with a 10k resistor
//  - tie MISO to the data line on the sensor
class DHT11 {
    static STARTTIME_LOW     = 0.001000;    // 1 ms low time for start
    static STARTTIME_HIGH    = 0.000020;  // 20 us min high time for start
    static STARTTIME_SENSOR  = 0.000080;  // 80 us low / 80 us high "ACK" from sensor on START
    static MARKTIME          = 0.000050;  // 50 us low pulse between 0 or 1 marks
    static ZERO              = 0.000026; // 26 us high for "0"
    static ONE               = 0.000075;  // 70 us high for "1"

    spi                 = null;
    clkspeed            = null;
    bittime             = null;
    bytetime            = null;
    start_low_bits      = null;
    start_low_bytes     = null;
    start_high_bits     = null;
    start_high_bytes    = null;
    start_ack_bits      = null;
    start_ack_bytes     = null;
    mark_bits           = null;
    mark_bytes          = null;
    zero_bits           = null;
    zero_bytes          = null;
    one_bits            = null;
    one_bytes           = null;

    // class constructor
    // Input:
    //      _spi: a pre-configured SPI peripheral (e.g. spi257)
    //      _clkspeed: the speed the SPI has been configured to run at
    // Return: (None)
    constructor(_spi, _clkspeed) {
        this.spi = _spi;
        this.clkspeed = _clkspeed;

        bittime     = 1.0 / (clkspeed * 1000);
        bytetime    = 8.0 * bittime;

        start_low_bits      = STARTTIME_LOW / bittime;
        start_low_bytes     = (start_low_bits / 8);
        start_high_bits     = STARTTIME_HIGH / bittime;
        start_high_bytes    = (start_high_bits / 8);
        start_ack_bits      = STARTTIME_SENSOR / bittime;
        start_ack_bytes     = (start_ack_bits / 8);
        mark_bits           = MARKTIME / bittime;
        mark_bytes          = (mark_bits / 8);
        zero_bits           = ZERO / bittime;
        zero_bytes          = (zero_bits / 8);
        one_bits            = ONE / bittime;
        one_bytes           = (one_bits / 8);
    }

    // helper function
    // given a long blob, find times between transitions and parse to
    // temp and humidity values. Assumes 40-bit return value (16 humidity / 16 temp / 8 checksum)
    // Input:
    //      hexblob (blob of arbitrary length)
    // Return:
    //      table containing:
    //          "rh": relative humidity (float)
    //          "temp": temperature in celsius (float)
    //      if read fails, rh and temp will return 0
    function parse(hexblob) {
        local laststate     = 0;
        local lastbitidx    = 0;

        local gotack        = false;
        local rawidx        = 0;
        local result        = blob(5); // 2-byte humidity, 2-byte temp, 1-byte checksum

        local humid         = 0;
        local temp          = 0;

        // iterate through each bit of each byte of the returned signal
        for (local byte = 0; byte < hexblob.len(); byte++) {
            for (local bit = 7; bit >= 0; bit--) {

                local thisbit = (hexblob[byte] & (0x01 << bit)) ? 1:0;

                if (thisbit != laststate) {
                    if (thisbit) {
                        // low-to-high transition; watch to see how long it is high
                        laststate = 1;
                        lastbitidx = (8 * byte) + (7 - bit);
                    } else {
                        // high-to-low transition;
                        laststate = 0;
                        local idx = (8 * byte) + (7 - bit);
                        local hightime = (idx - lastbitidx) * bittime;

                        // we now have one valid bit of info. Figure out what symbol it is.
                        local resultbyte = (rawidx / 8);
                        local resultbit =  7 - (rawidx % 8);
                        //server.log(format("bit %d of byte %d",resultbit, resultbyte));
                        if (hightime < ZERO) {
                            // this is a zero
                            if (gotack) {
                                // don't record any data before the ACK is seen
                                result[resultbyte] = result[resultbyte] & ~(0x01 << resultbit);
                                rawidx++;
                            }
                        } else if (hightime < ONE) {
                            // this is a one
                            if (gotack) {
                                result[resultbyte] = result[resultbyte] | (0x01 << resultbit);
                                rawidx++;
                            }
                        } else {
                            // this is a START ACK
                            gotack = true;
                        }
                    }
                }
            }
        }

        //server.log(format("parsed: 0x %02x%02x %02x%02x %02x",result[0],result[1],result[2],result[3],result[4]));
        humid = (result[0] * 1.0) + (result[1] / 1000.0);
        if (result[2] & 0x80) {
            // negative temperature
            result[2] = ((~result[2]) + 1) & 0xff;
        }
        temp = (result[2] * 1.0) + (result[3] / 1000.0);
        if (((result[0] + result[1] + result[2] + result[3]) & 0xff) != result[4]) {
            return {"rh":0,"temp":0};
        } else {
            return {"rh":humid,"temp":temp};
        }
    }

    // read the sensor
    // Input: (none)
    // Return:
    //      table containing:
    //          "rh": relative humidity (float)
    //          "temp": temperature in celsius (float)
    //      if read fails, rh and temp will return 0
    function read() {
        local bloblen = start_low_bytes + start_high_bytes + (40 * (mark_bytes + one_bytes));
        local startblob = blob(bloblen);
        for (local i = 0; i < start_low_bytes; i++) {
            startblob.writen(0x00,'b');
        }
        for (local j = start_low_bytes; j < bloblen; j++) {
            startblob.writen(0xff,'b');
        }

        //server.log(format("Sending %d bytes", startblob.len()));
        local result = spi.writeread(startblob);
        return parse(result);
    }
}
rele <- hardware.pin9;
spi  <- hardware.spi257;</p><p>while(1){
clkspeed <- spi.configure(MSB_FIRST, SPICLK);
dht11 <- DHT11(spi, clkspeed);
data <- dht11.read();
server.log(format("Relative Humidity: %0.1f",data.rh)+" %");
server.log(format("Temperature: %0.1f C",data.temp));
agent.send("temp",data.temp);
imp.sleep(1);</p><p>}</p>
Agent Code
Now, here's the Agent code. NOTE!: Don't forget to put your own token and Variable ID in the HTTP call:
<br><p>device.on("temp", function(value) {<br>    server.log("Trying to post to Ubi the value:");
    server.log(value);
    local headers = { "Content-Type": "application/json", "X-Auth-Token": "NBbF3PWPxWc2IaO40aXOKnhIu8tOv92rYN3ibiEc7Jh6GV3KZUUCHtXuNz7Y" }; // Replace the token with yours
    local url = "http://things.ubidots.com/api/v1.6/variables/53d2beb37625424630223dac/values"; // Replace the Variable ID with yours
    local string = {"value": value};
    local request = http.post(url, headers, http.jsonencode(string));
    local response = request.sendsync();
});</p>
Creating a Derived Variable on Ubidots.
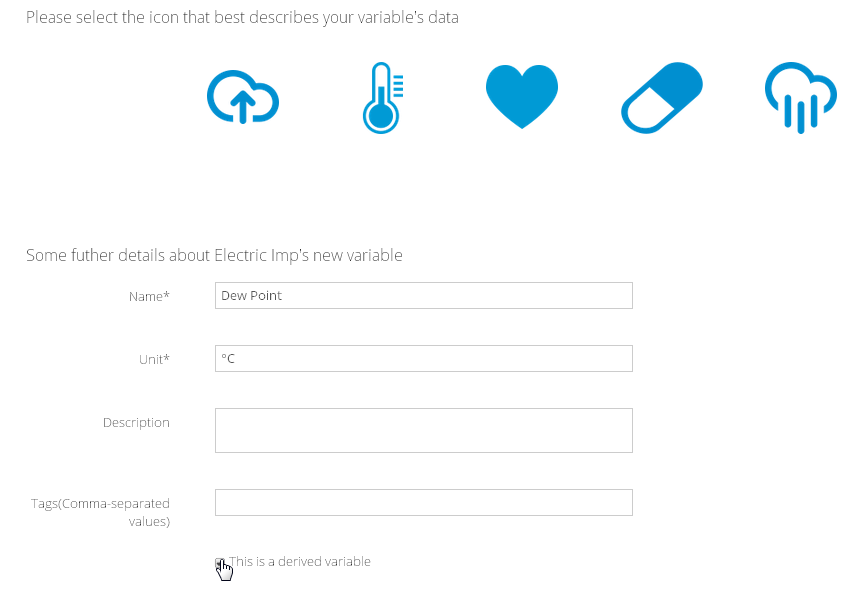
Just as you would add a new variable in Ubidots, go "Sources"--> "Electric Imp" (your datasource name) -->"Add new Variable".
Calculating Dew Point Value

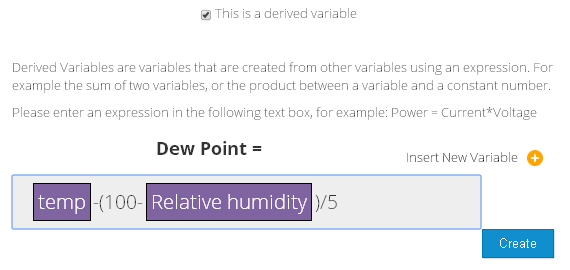
Enter the math expression to compute the Dew Point based on temperature and relative humidity.
Adding Widgets

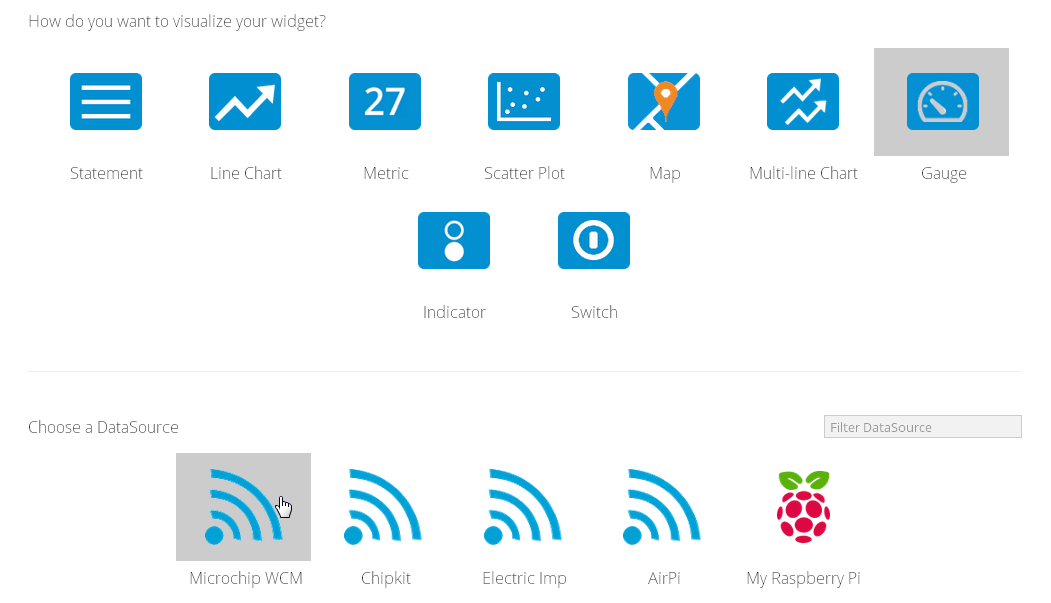
- Navigate to the "Sources" tab and click on "Add new widget".
- Choose your data source "Electric Imp" and your desired variable.
- You can try with: Line Chart, Gauge, Multilane Chart; you can have as many widgets as you want.
Wrapping Up
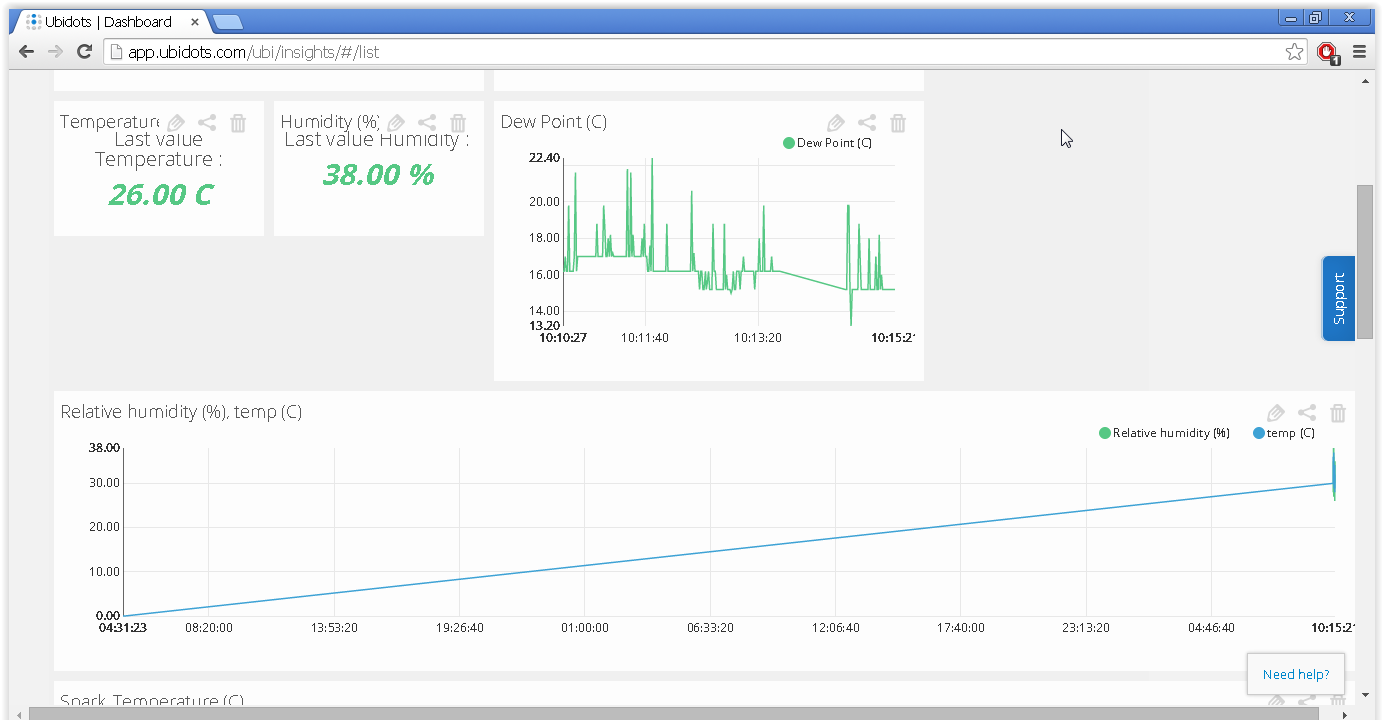
Great! you should now be able to see your data in your Ubidots dashboard. How about creating an SMS alert when the Thermal Comfort is about to get better? That's all for now. Check out how my Ubidots dashboard looks like.