How to Make a Step-by-step Instructable
by fungus amungus in Design > Websites
7929 Views, 37 Favorites, 0 Comments
How to Make a Step-by-step Instructable
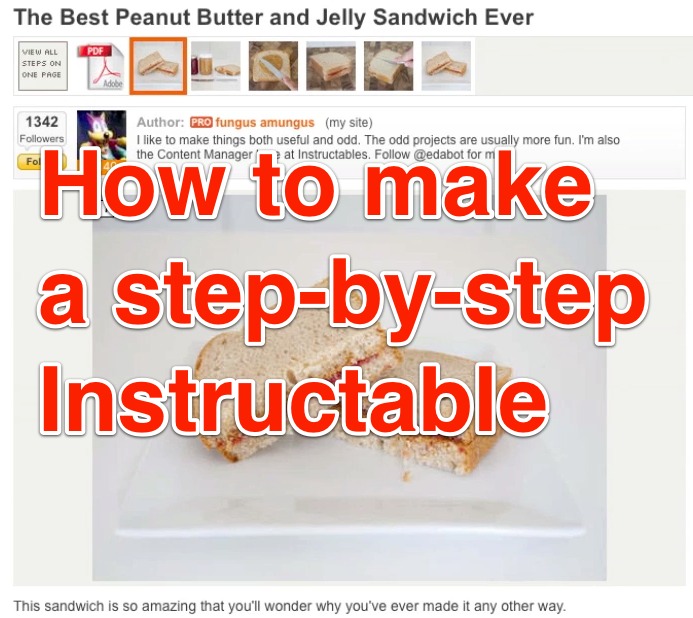
Want to share your ideas with the world, but you're confused by how to start? No worries, in this Instructable we'll cover how to make a basic step-by-step Instructable. There are even pictures provided so you can follow along for your first time out.
After this you should have no problems making your own Instructable. If you do, feel free to leave a comment below!
All right, let's get Instructablizing!
After this you should have no problems making your own Instructable. If you do, feel free to leave a comment below!
All right, let's get Instructablizing!
Video and Files
Downloads
Getting Started
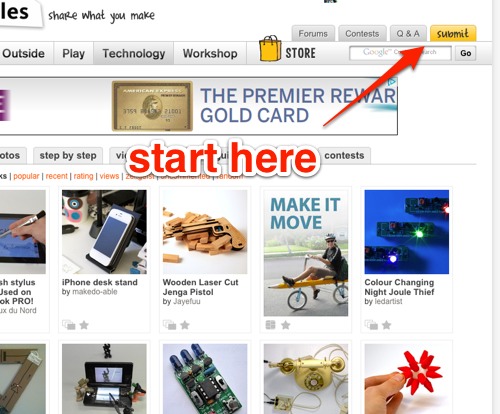
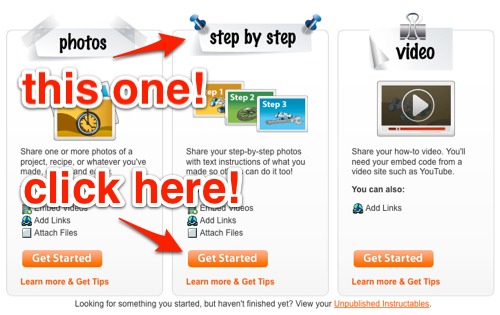
Getting started is easy.
- Click the "submit" button that's always on the top right of the screen.
- Click the "Get Started" button for the Step-by-Step option
Title and Description
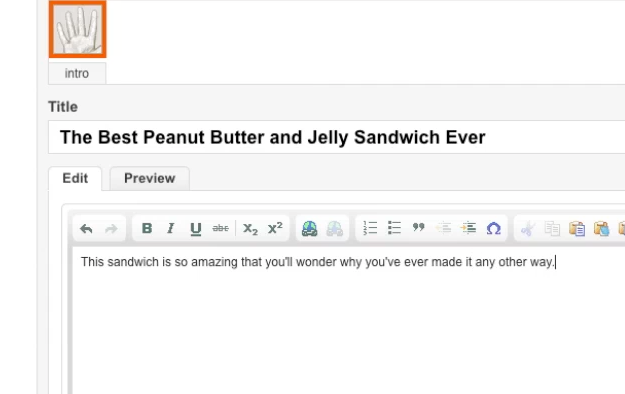
Here we are setting up the most important part of the Instructable: the intro page. What happens here will decide just how many people look at your Instructable so make it great.
For the title:
For the title:
- Make the title as descriptive as you can with as few words as you can
- Try saying it out loud and see if it describes your project
- Even better, try saying it to someone else
- You have more room to explain what's going to be happening here, but I like to keep this short and to the point as well.
- Convince readers that they want to read the whole Instructable
- How would you tell a friend about your project in 30 seconds or less?
Add an Image
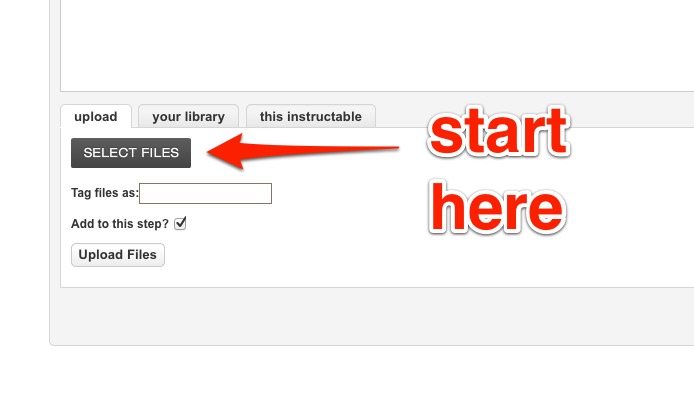
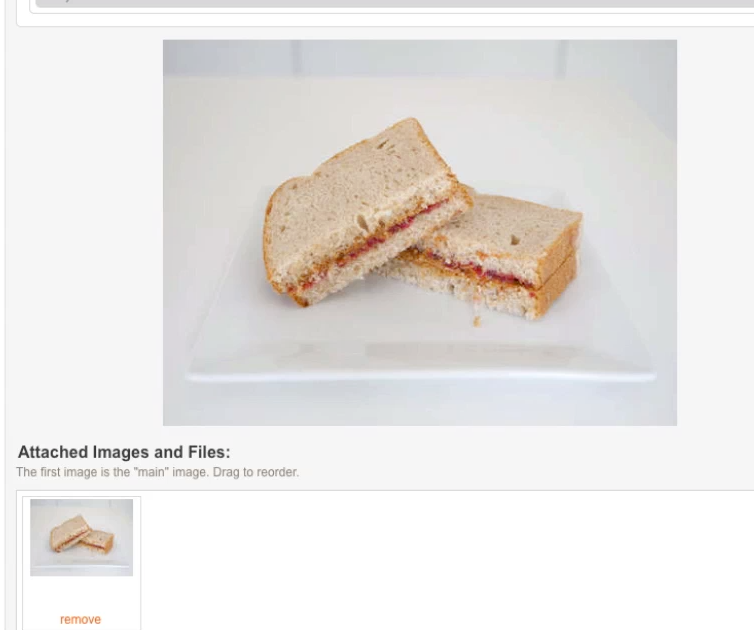
Now scroll to the bottom and under images click on "Select Files." This means you'll be choosing what image file you want to add to this page.
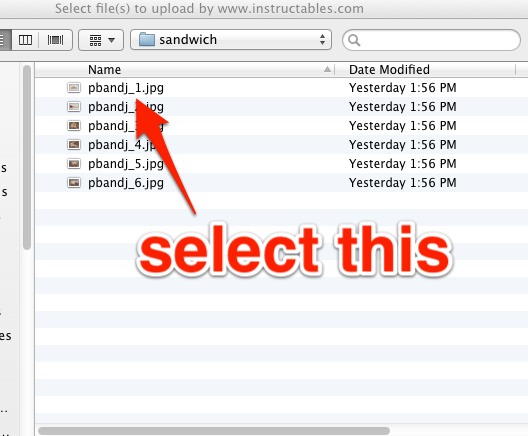
Next select the image you want. Here that would be pbandj_1.jpg.
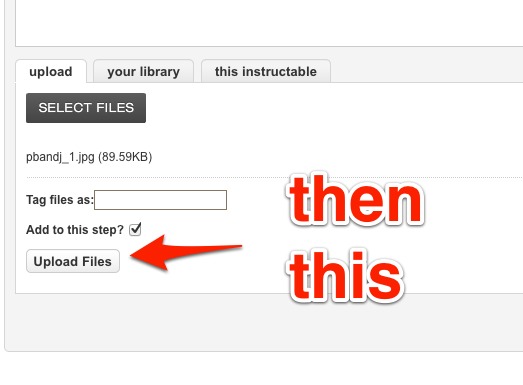
Back on the main screen, click "Upload" and you'll see the image pop up when it's done.
That takes care of how to add an image, but here are a few thoughts around what to do for your own main image:
Next select the image you want. Here that would be pbandj_1.jpg.
Back on the main screen, click "Upload" and you'll see the image pop up when it's done.
That takes care of how to add an image, but here are a few thoughts around what to do for your own main image:
- Make your item the primary focus of the picture
- If you can, clear out anything else that would distract when taking the photo
- Make sure it's in focus! If you want to fill the picture, then pull back a bit to make sure everything is focused and crop the photo later
Step 1
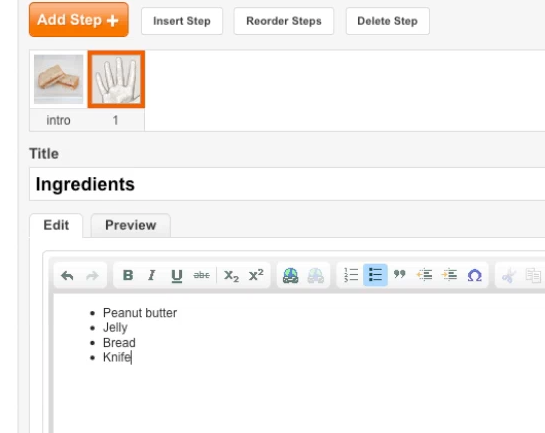
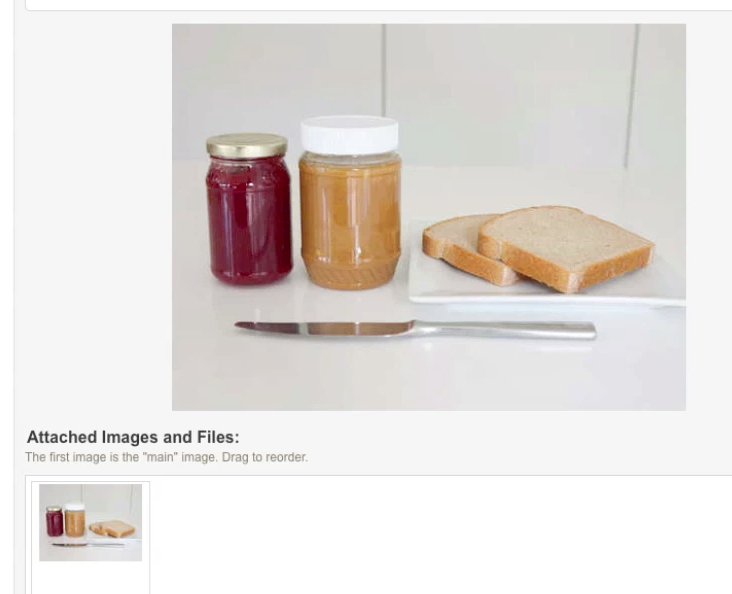
The first step of a step-by-step Instructable often covers what is needed. For recipes this can be all of your ingredients. For a workshop project this can include materials and tools. Just make sure you add everything that's needed here so readers can have a quick reference.
In this case it's pretty straightforward, right? Peanut butter, jelly, bread, and a knife. That's a party right there.
For the picture, upload pbandj_2.jpg just like you did for the intro.
In this case it's pretty straightforward, right? Peanut butter, jelly, bread, and a knife. That's a party right there.
For the picture, upload pbandj_2.jpg just like you did for the intro.
Multiple Pictures
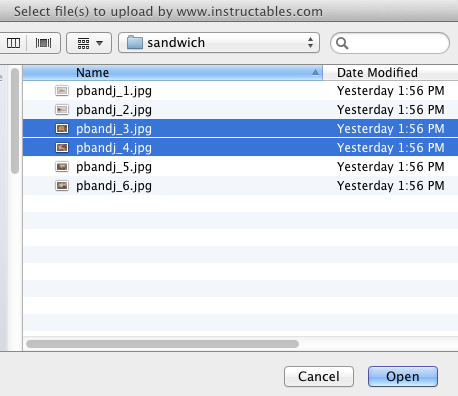
With the intro and ingredients out of the way, the Instructable is now properly on its way. In this step the first action, spreading the ingredients, is described. Since this one action covers two things happening, the peanut butter and the jelly, we're going to add two photos.
To do this:
To do this:
- Click "Select Files"
- Hold down Shift or Ctrl to select multiple pictures
- Click "Upload Files"
- You're good to go!
Add From Library
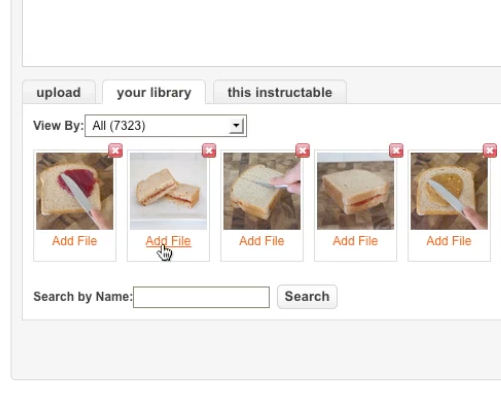
I like to end Instructables with the same photo as the Intro. The Intro shows what the results are and as a conclusion I like to show that the Instructable did reach its intended goal.
To reuse a photo you've already uploaded, click the "your library" tab and click "Add File" for the picture you want.
To reuse a photo you've already uploaded, click the "your library" tab and click "Add File" for the picture you want.
Publishing
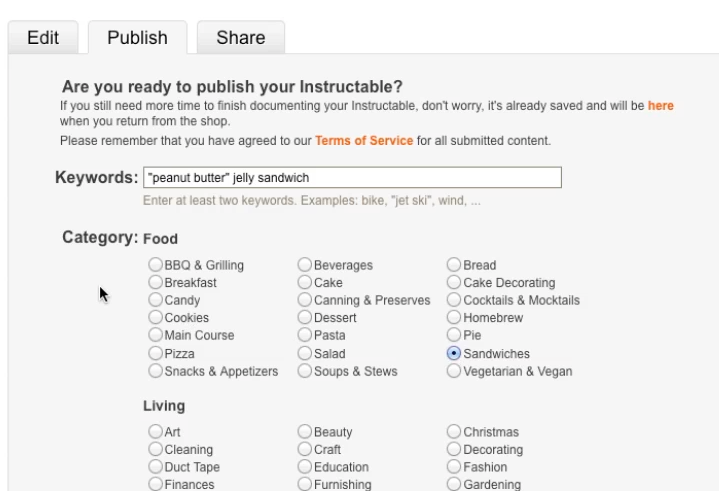
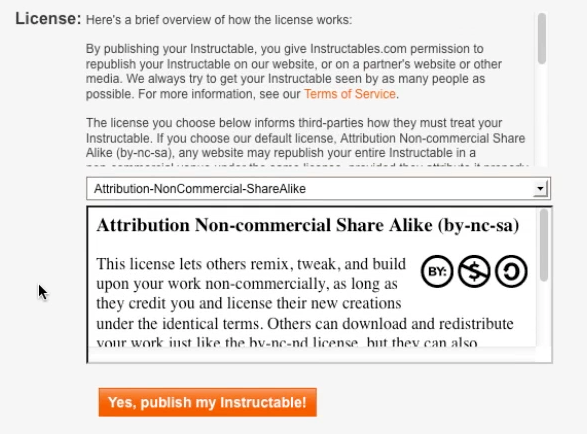
When everything is done, it's time to publish and share your work with the world!
So...
So...
- Click on the "Publish" tab
- Type in a few keywords that relate to your project
- Select a subcategory so that people can find your Instructable easily
- Select a contest to add it to if it's appropriate
- Choose your licensing option
- Click "Yes, publish my Instructable!"
Enjoy Your Instructable!
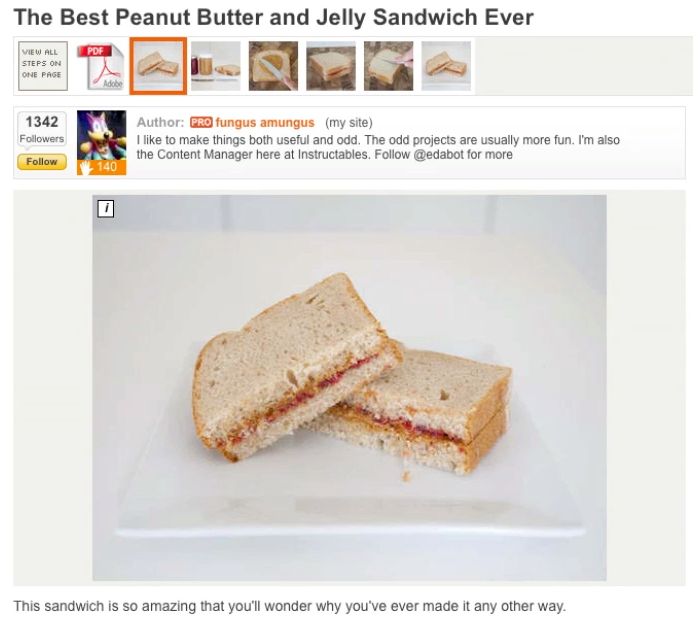
Your Instructable is now out there in the wild for everyone to enjoy.
There are many more things you can do with your Instructable, but the basics here are the most important. If you have any questions, feel free to post them in the comments below.
There are many more things you can do with your Instructable, but the basics here are the most important. If you have any questions, feel free to post them in the comments below.