How to Make a Simple Border for a Picture in Gimp!
by josephisleet in Design > Digital Graphics
22156 Views, 3 Favorites, 0 Comments
How to Make a Simple Border for a Picture in Gimp!


Ok I'm going to show you how to make a border in g.i.m.p.
First you'll Need
1 GIMP
2 An Image You Want To Add A Simple Border Too
5 Mins to spare :D
First you'll Need
1 GIMP
2 An Image You Want To Add A Simple Border Too
5 Mins to spare :D
Open Your Image
Ok open gimp and open the image you want to add a border to
I will be using a sig i made for a friend.
I will be using a sig i made for a friend.
Add Your First Border


Press R and select your biggest layer and highliught it(were adding the border to this one ) make sure colors black
make a new layer as big as the layer your bordering
and do edit - > stroke selection... and then 10
do it again with the color white and do 7.5 instead of 10
do it again with black and make it 5
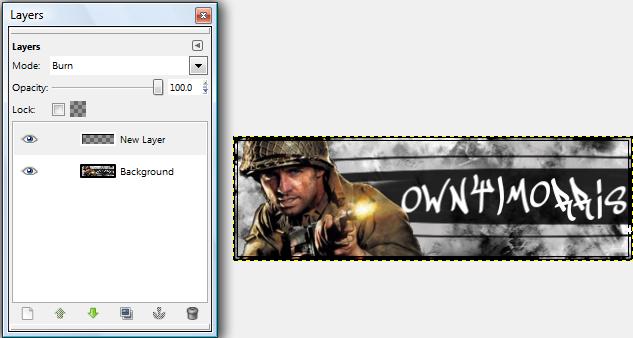
When youre done with that press Ctrl+L and click on your new layer make the mode Burn(or overlay or any other choices)
make a new layer as big as the layer your bordering
and do edit - > stroke selection... and then 10
do it again with the color white and do 7.5 instead of 10
do it again with black and make it 5
When youre done with that press Ctrl+L and click on your new layer make the mode Burn(or overlay or any other choices)
s what it should look like when your done with the whole proccess if you used a different mode it'll look different then this one. Because i used Burn.