How to Make a Main Menu in Unity
by jschap1 in Design > Software
259849 Views, 22 Favorites, 0 Comments
How to Make a Main Menu in Unity
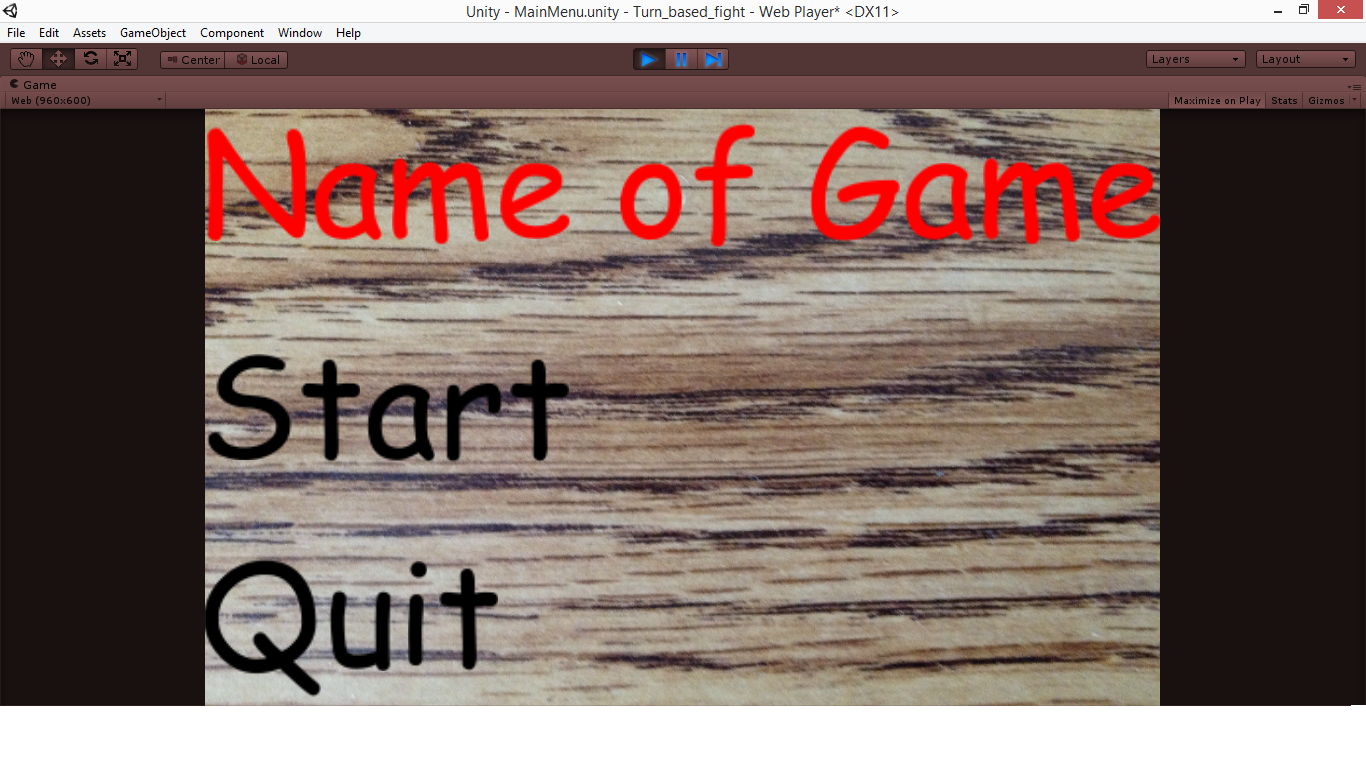
In this Instructable, I explain how to make a start menu for a game in Unity, a 3D game design software that is free to download. This is a simple menu, but the concepts can be easily applied to more complex main menus.
Menu includes:
Game title, start button, quit button with customized fonts.
Start and quit button change colors when hovered over.
Customized background.
Make a Plane & Position It in Front of the Camera
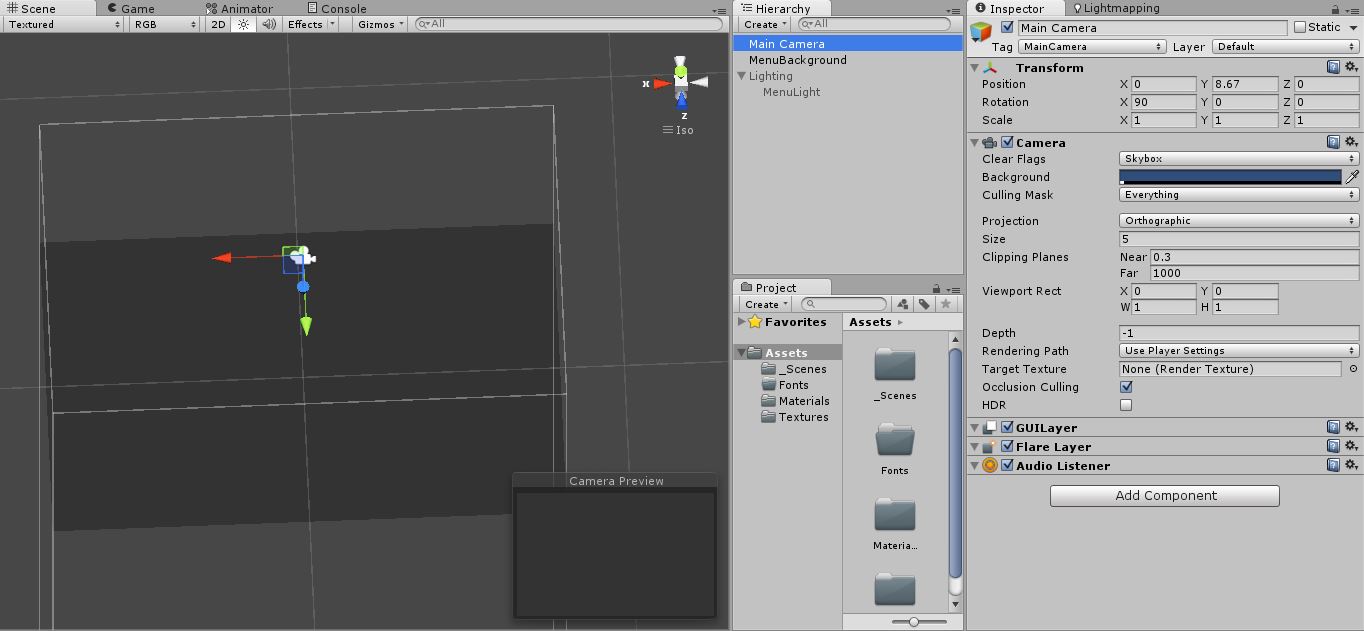
Open Unity and save the scene as MainMenu.
Click Create - Plane in the Hierarchy panel. Rename it "Background."
Rotate the Main Camera 90 degrees downward and change its Projection from Perspective to Orthographic.
Adjust the camera's transform so it is 8-10 units above the menu, looking straight down.
Scale the plane Background to fit the camera preview exactly.
When you are done, it should look similar to the image above.
Light It Up
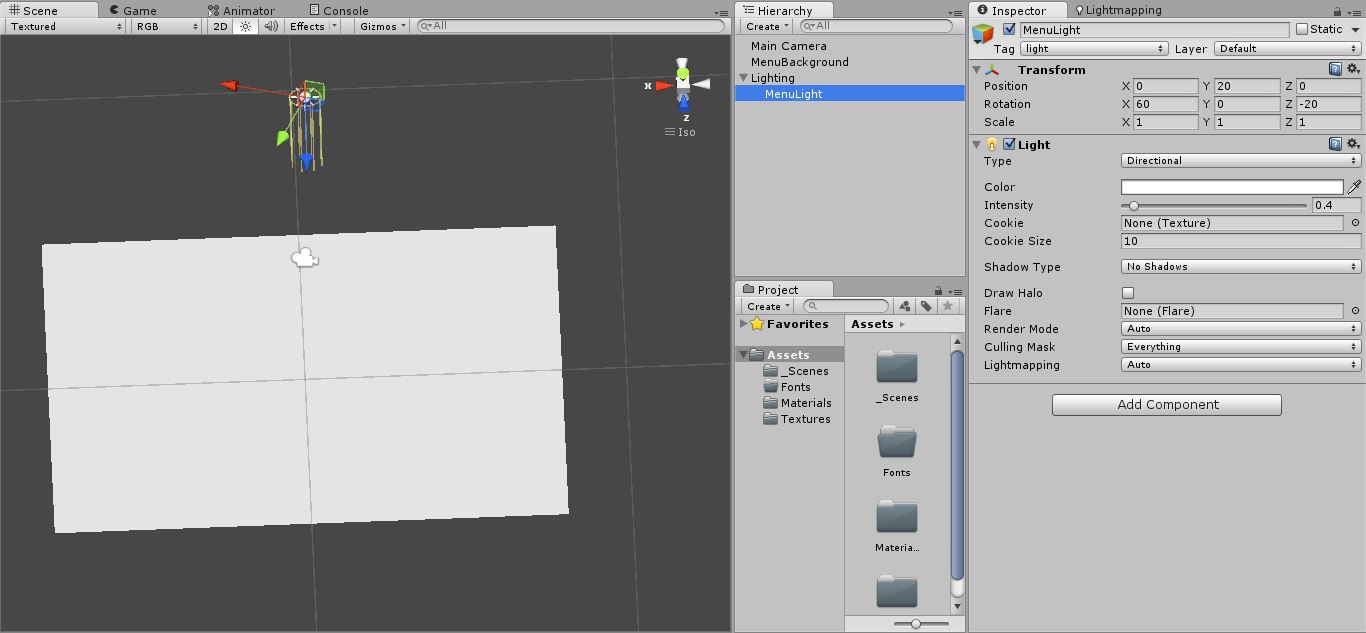
Add lights. Do this by selecting Create in the Hierarchy panel and clicking Directional Light.
It does not matter where in 3D space a directional light is; it will provide the same lighting no matter what.
Therefore, after adjusting the light's direction to shine down on the background, raise the light up 20 units or so in the Y direction to keep your field of vision clear in the scene view.
I adjusted the light to have a transform of (0, 20, 0) position and (60,0,-20) rotation.
I also changed its Intensity to 0.4.
Once again, see the image for what this should look like when you have completed the step.
Add a Texture
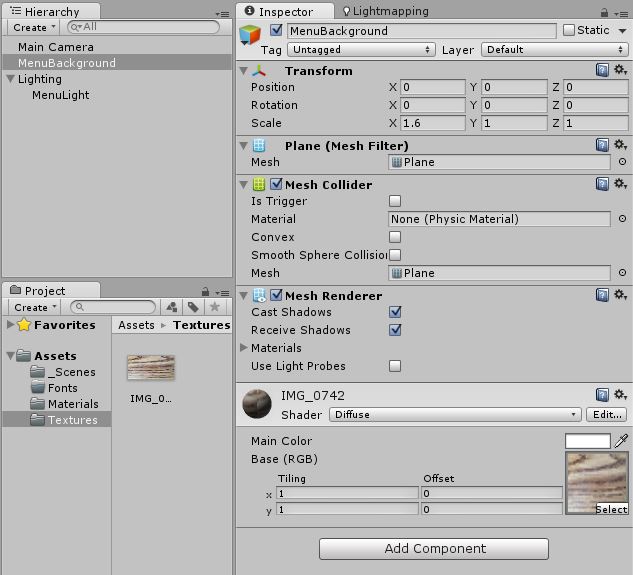
Our background is rather plain-looking right now, but we can spice it up easily enough. Just take a digital camera/smartphone and take a photo of something convenient and interesting, such as the floor, ceiling, walls, etc., and upload it to your computer.
Create a new folder called Textures in your Assets folder for the Unity project you are working on. Right click the folder in the Project panel in Unity and select, "Show in Explorer." Copy and paste the picture you took into the Textures folder.
With your Background selected in the Hierarchy, click and drag the picture from the Textures folder in the Project panel to Inspector panel, where it should be added as the new texture for the background. See the image.
Add Text
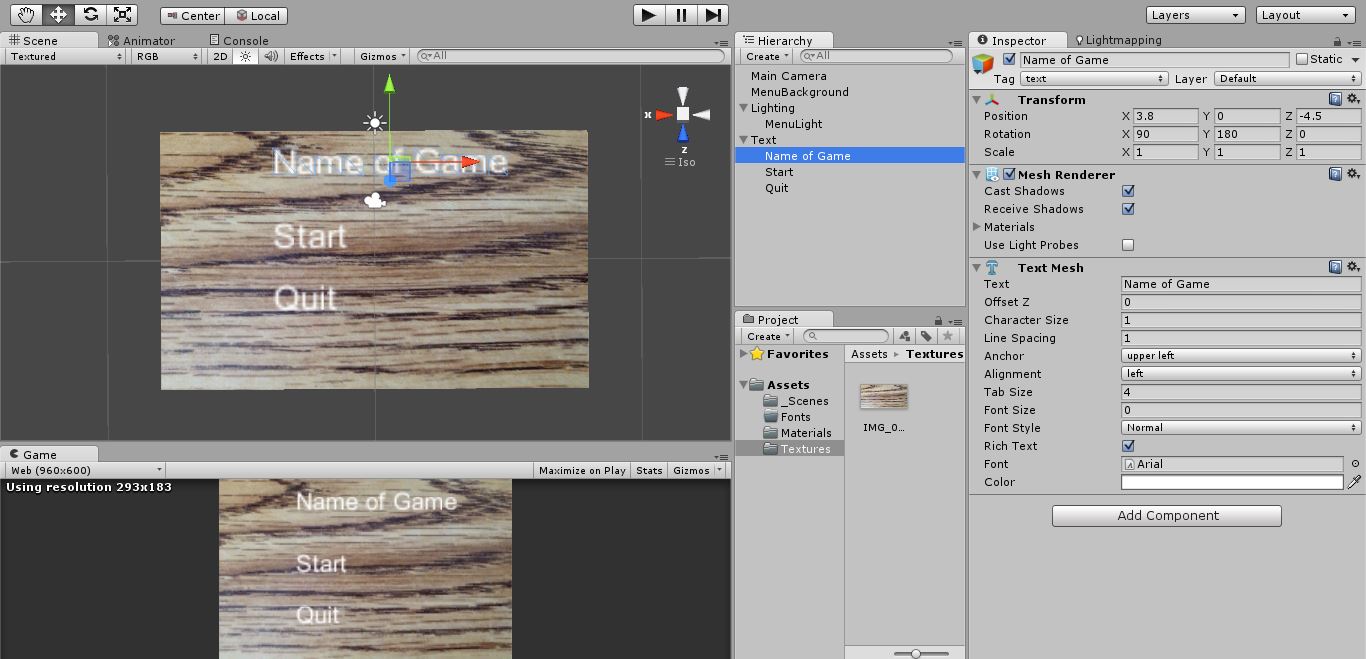
Create an empty Game Object using the Game Object dropdown toolbar at the top of the Unity window. Rename it "Text." Reset its transform.
Click Create - 3D Text in the Hierarchy panel. Reset its transform.
Rename the 3D Text object and enter the text you want it to display in its Text Mesh component in the Inspector.
Rotate it 90 degrees about the X or Z axis so that is displays properly in the camera's view.
Drag the 3D text object into the empty Text game object in the Hierarchy. Be
Duplicate the 3D text as desired.
Go Get Some Fonts (that You Already Have)
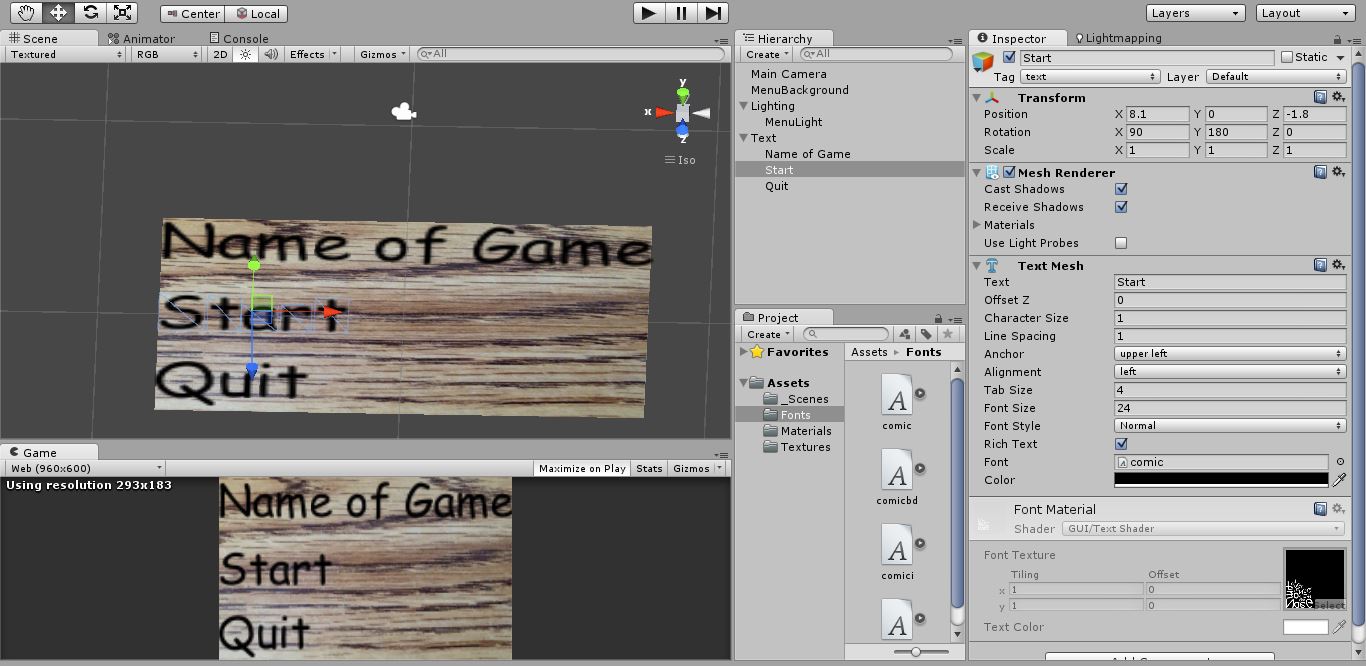
You already have lots of fonts. You can access them (on Windows) by opening Explorer and going to the folder called Fonts, which is located under OS/Windows/Fonts.
In the Unity project panel, create a new folder in Assets and call it Fonts, as well.
Copy and paste the fonts you want for your Unity project from your computer's fonts folder to the new Fonts folder you created within the Assets folder for your project.
Note: This will most likely copy over several different files for each font, one for regular, bold, italic, etc.
Select the 3D text whose font you want to change in the Hierarchy panel, and drag the desired font from the fonts folder in the project panel to the box labeled "font" in the Text Mesh component in the Inspector.
You can change the font color, size, and other other attributes in the Text Mesh component of the 3D text. This will appear in the Inspector panel, provided you have the 3D text you want to edit selected in the Hierarchy.
The text will most likely look a little blurry. You can clean this up by making the font size significantly larger, though this will mess up the camera's view at this point, so you would have to readjust the camera and the background plane's size.
Make the Text Change Color When You Hover Over It
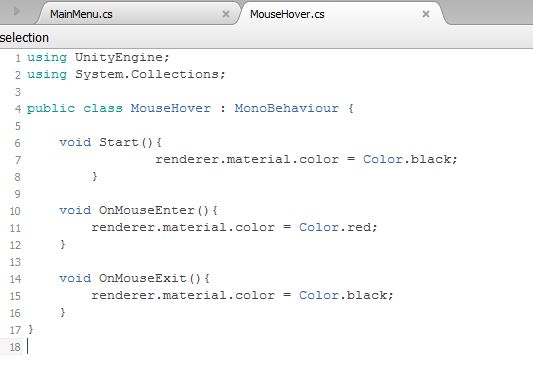
Create a new folder called Scripts in the project panel.
Create a new CSharp script and call it MouseHover.
Open the script in MonoDevelop.
There are three functions in this script. The first tells the text to be its original color. The second tells the text to change color when the mouse is touching it, and the third tells the text to go back to its original color after the mouse is no longer hovering over it.
void Start(){
	renderer.material.color = Color.black;
}

void OnMouseEnter(){
	renderer.material.color = Color.red;
}

void OnMouseExit() {
	renderer.material.color = Color.black;
}
Add the script to each piece of text by dragging it from the project panel to the 3D text object's name in the Hierarchy.
In order to make the script work, we need to add colliders to each of the pieces of 3D text so that the code knows whether or not the mouse is touching them.
To add a collider, select a piece of 3D text in the Hierarchy, go to the Inspector panel, and select Add Component - Physics - Box Collider. Add the box collider to each piece of text and check off the box that says "Is Trigger."
Test whether your buttons change color by clicking the play button at the top middle of the screen and hovering your mouse.
Write a Script to Control the Buttons
Create a new script and call it MainMenu. File it in your Scripts folder and open it in MonoDevelop.
Declare Boolean (true/false) variables, one for each button you would like to have on your menu. I have two buttons, so I wrote:
public bool isStart;
public bool isQuit;
Then, write a function called OnMouseUp(). This activates when the mouse button is released, which is a better way to activate a button than OnMouseDown() because it prevents the function from being executed repeatedly while the mouse button is held down.
void OnMouseUp(){
	if(isStart)
	{
		Application.LoadLevel(1);
	}
	if (isQuit)
	{
		Application.Quit();
	}
}
Application.LoadLevel(1) loads scene number 1 of the game. (The menu scene should be level 0. You can change which scene is which in Build Settings, under File.)
Application.Quit() quits the game, though this will only do something if the game is open as a PC/Mac application. Nothing will happen if the game is running in Unity or online.
Make the Buttons Do Things!
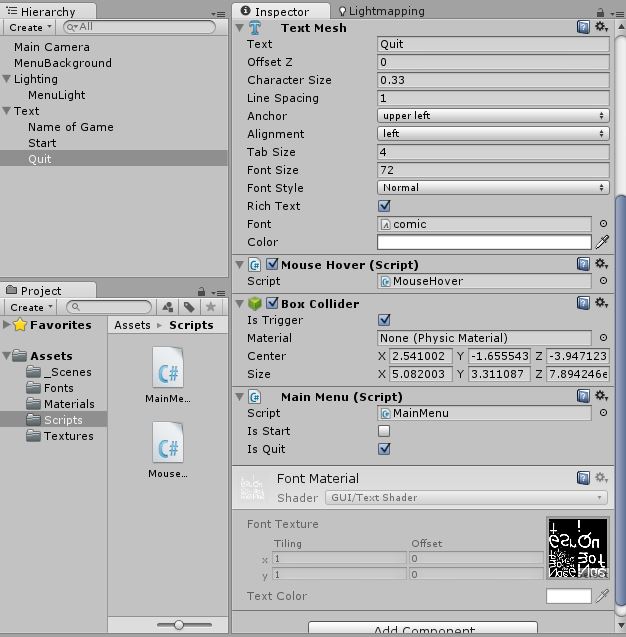
Add the MainMenu script to each of your 3D text objects serving as buttons.
Because you declared public bools for each category of button, they should show up in the Inspector for each button. Go to the Inspector, and check the appropriate boolean variable for each button. See the image above for what this should look like.
That's it, you are done! You can add an additional line of code to your MainMenu script to make sure it is working. Just tell it to change the color of the button when you click it (to a different color than when you hover over it).
void OnMouseUp() {
		if (isQuit) {
			Application.Quit ();
		} if(isStart) {
			Application.LoadLevel (1);
			renderer.material.color=Color.cyan;
		}
	}