How to Make a Logo Animation - After Effects
by CodyLandry in Design > Digital Graphics
109618 Views, 6 Favorites, 0 Comments
How to Make a Logo Animation - After Effects

Step One - Creating a Compositon
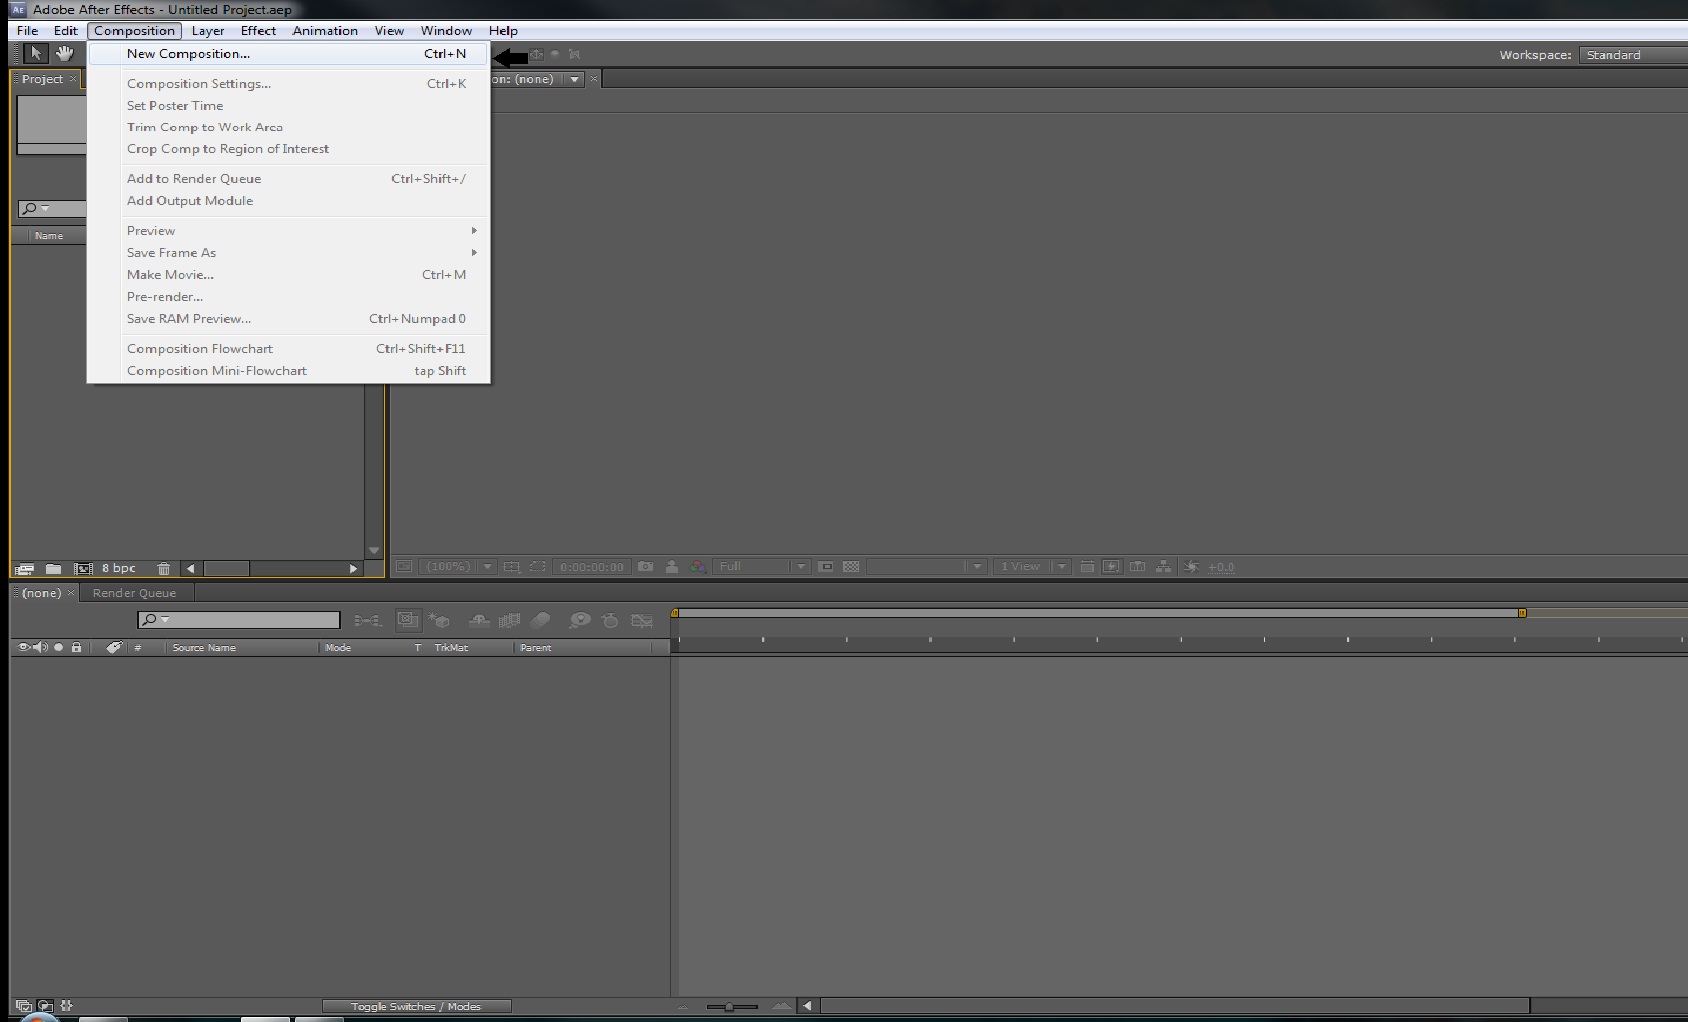
From the menu bar at the top of AE Select Composition > New Compisiton
Step Two - Composition Settings
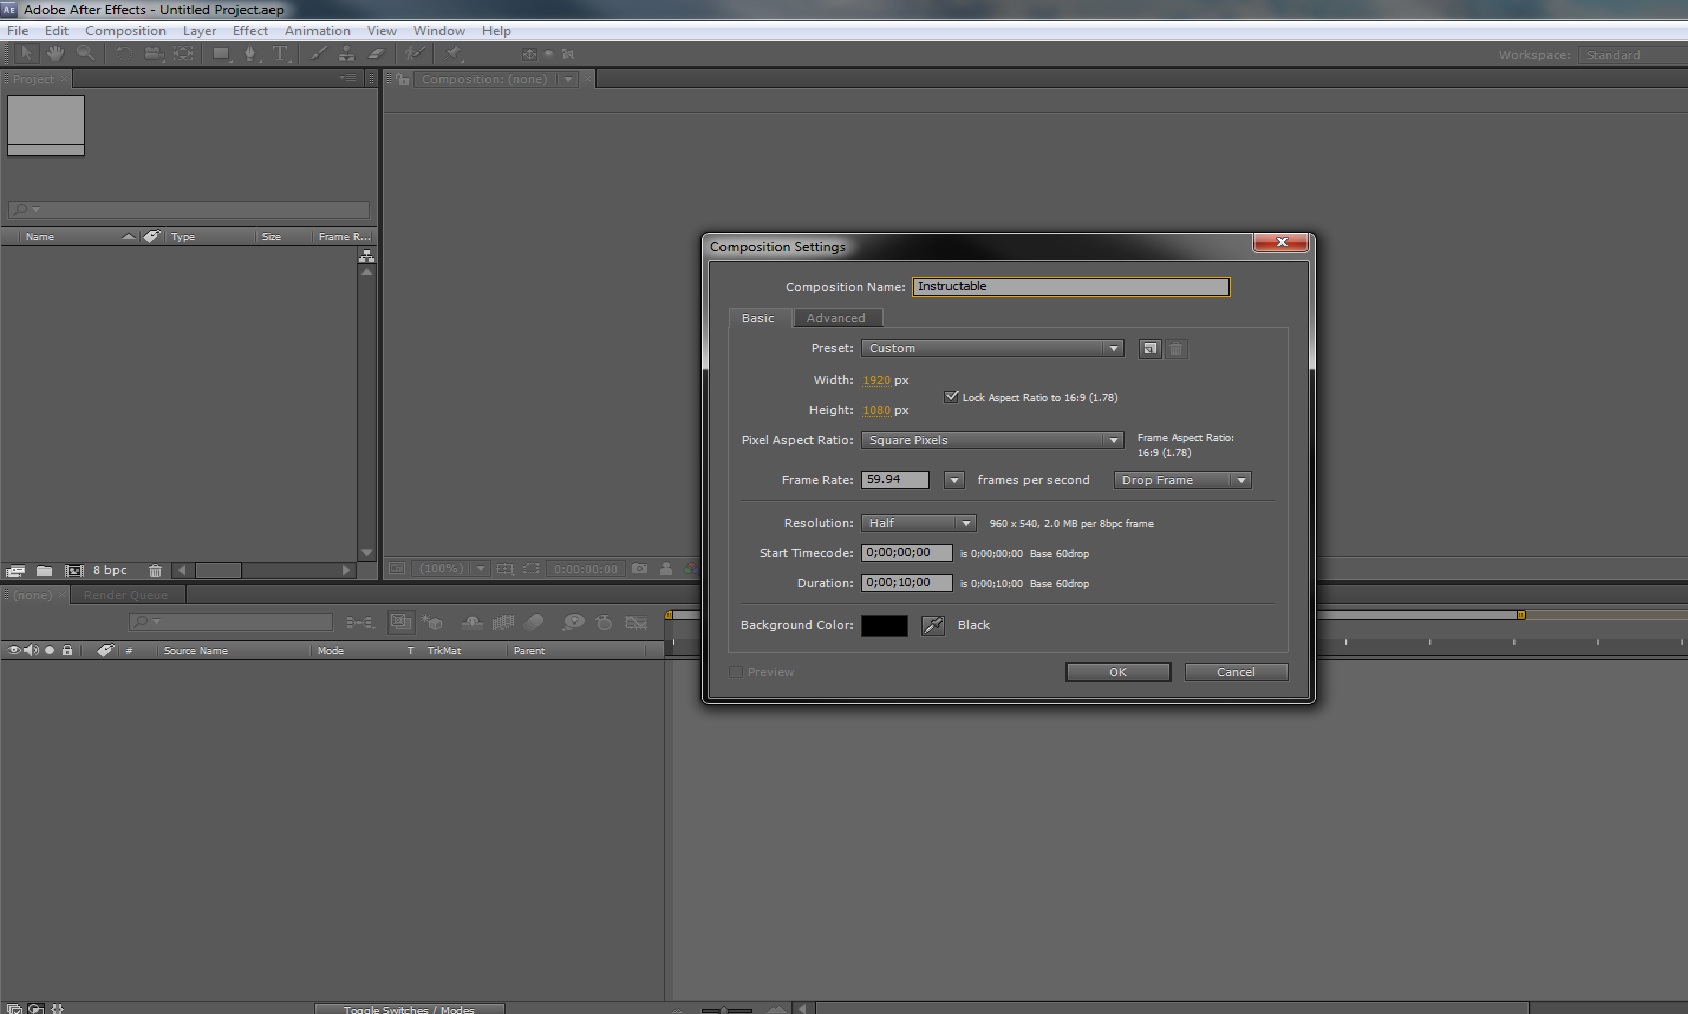
Copy over what I have to your composition settings, feel free to change some of the basic settings such as composition name, frame rate and resolution to fit your film. Click ok when finished.
Step Three - Creating a Solid
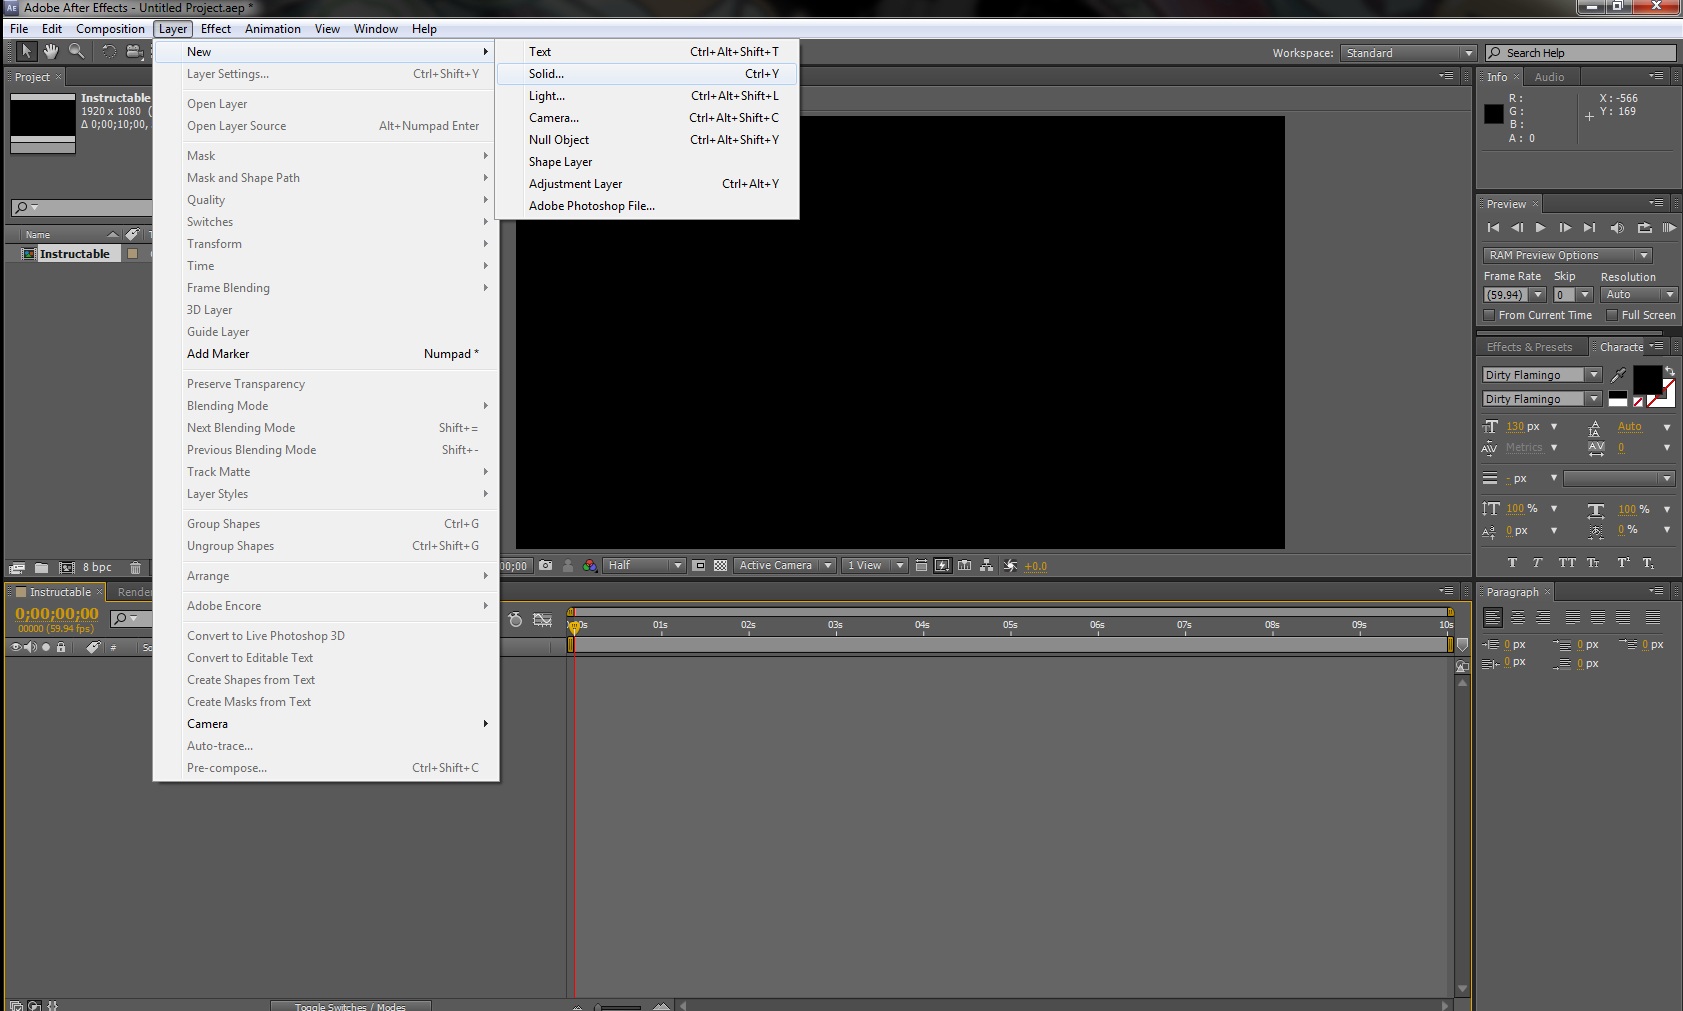
From the menu, select Layers > Solid
Step Four - Solid Settings
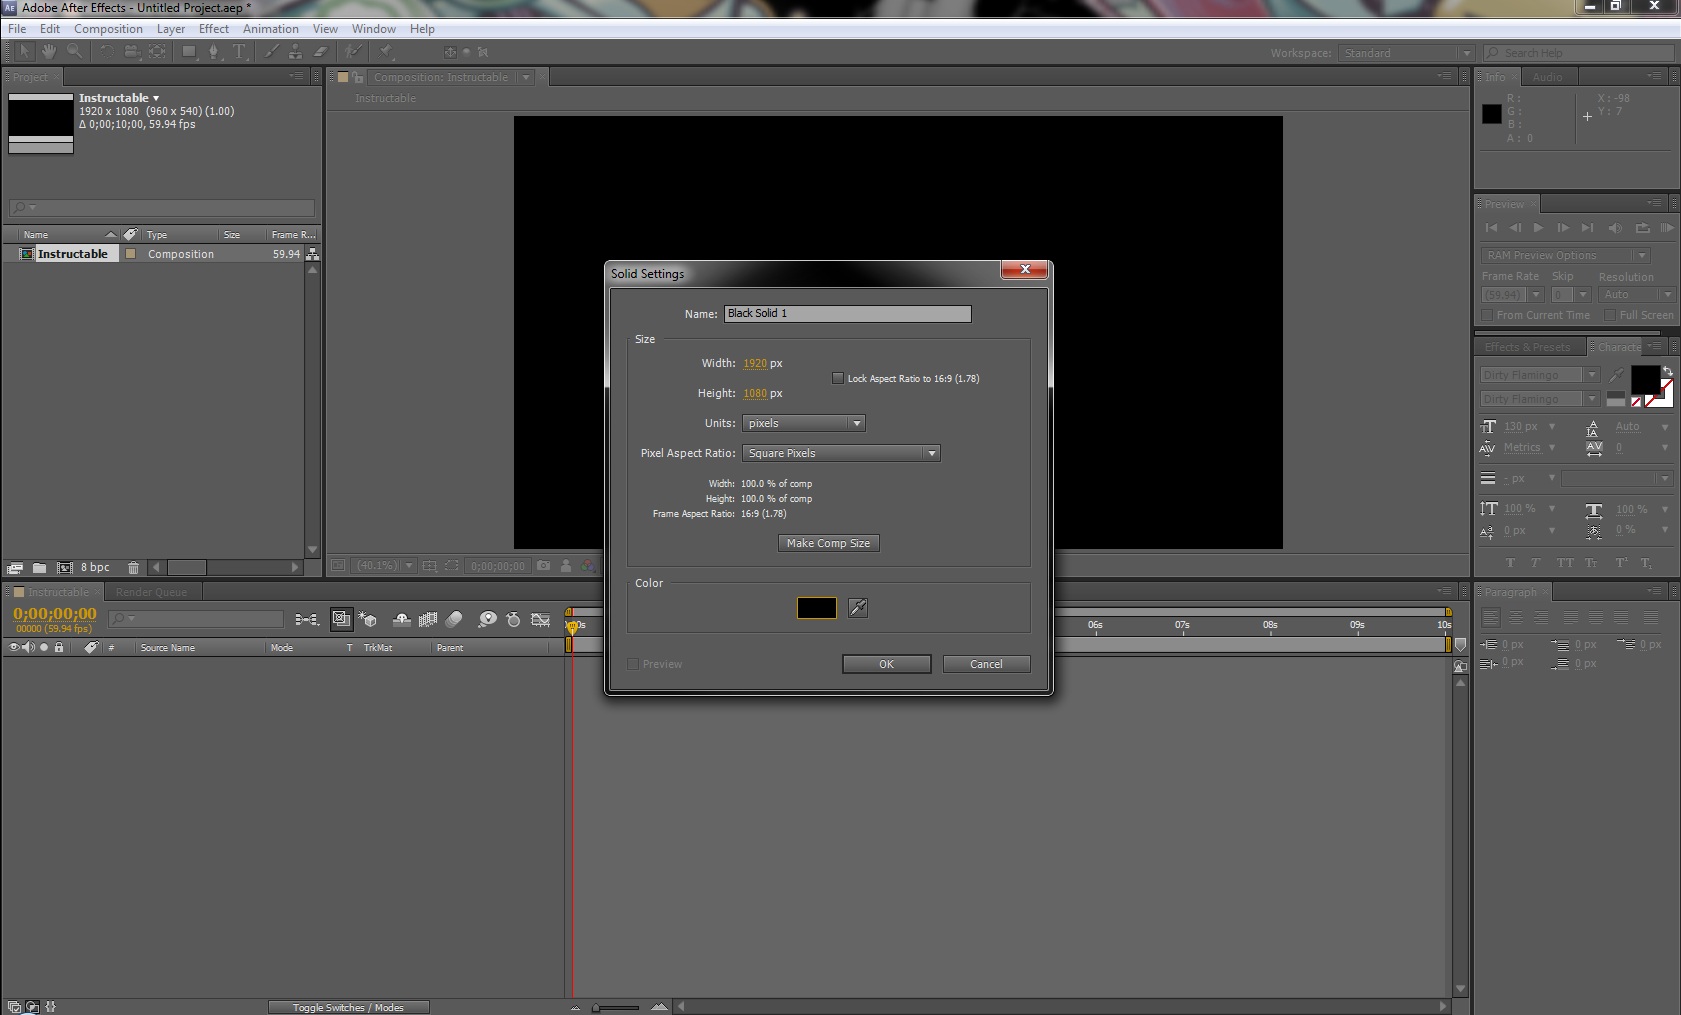
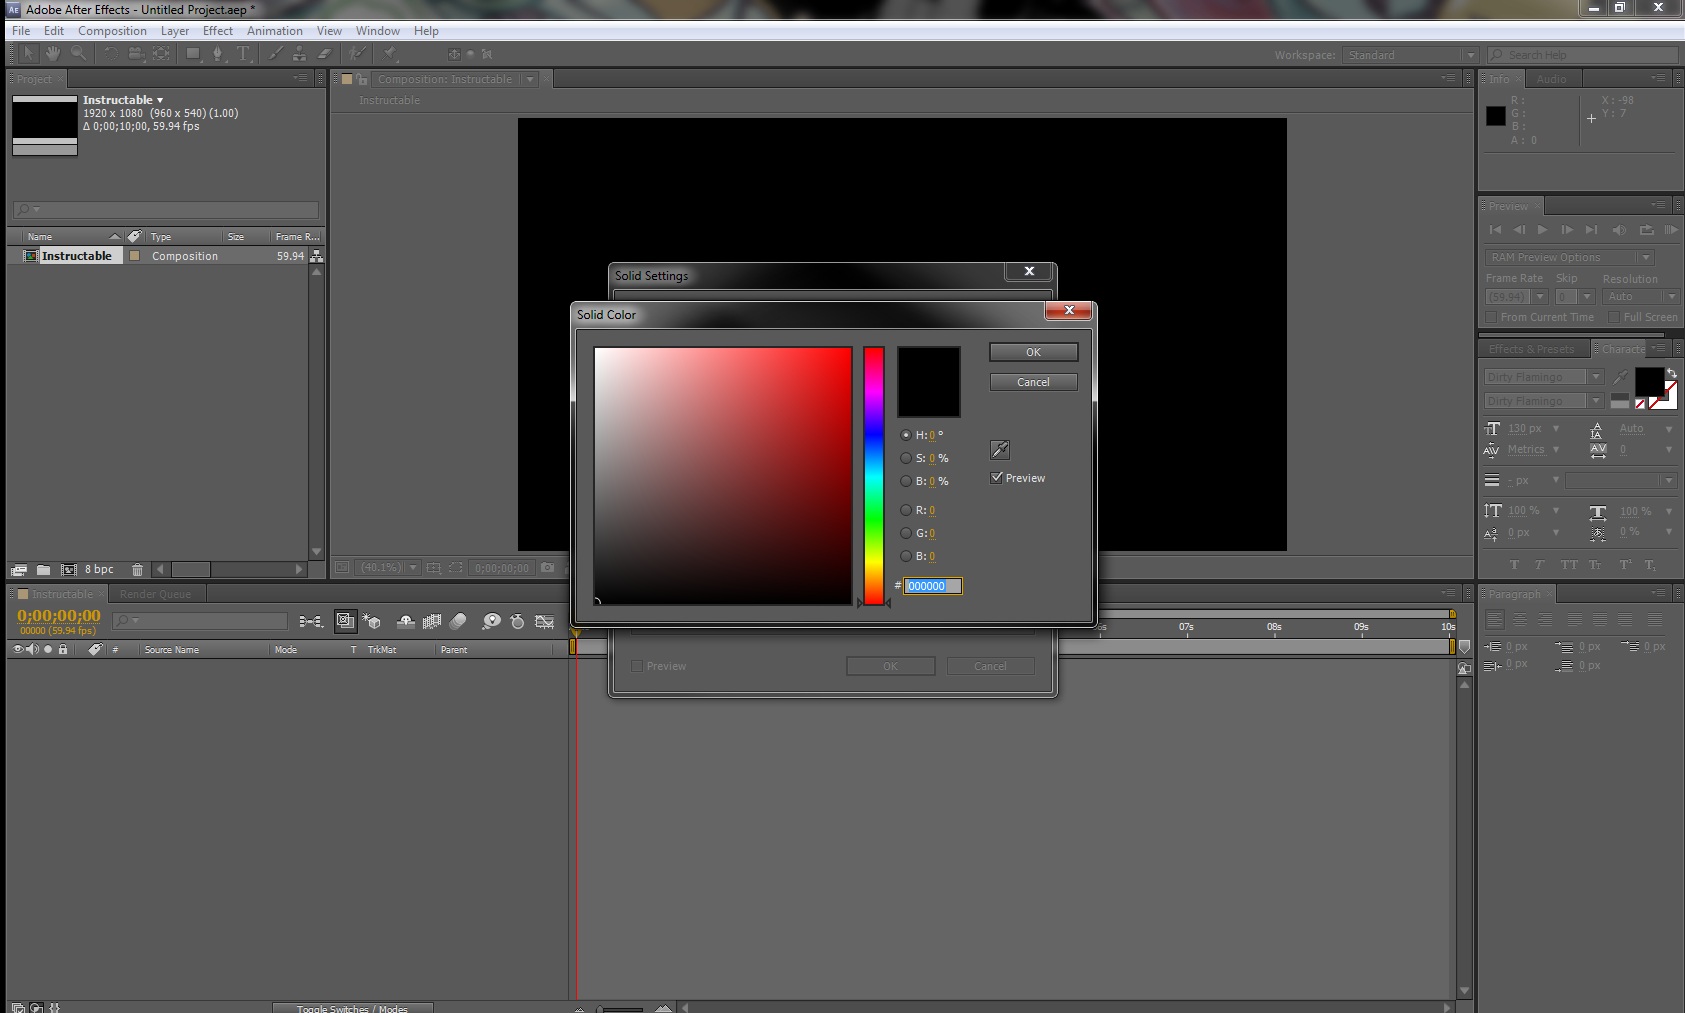
Make sure your solid settings are the same as your composition and make sure the colour code is #000000 for straight black.
Step Five - Creating a Text Layer
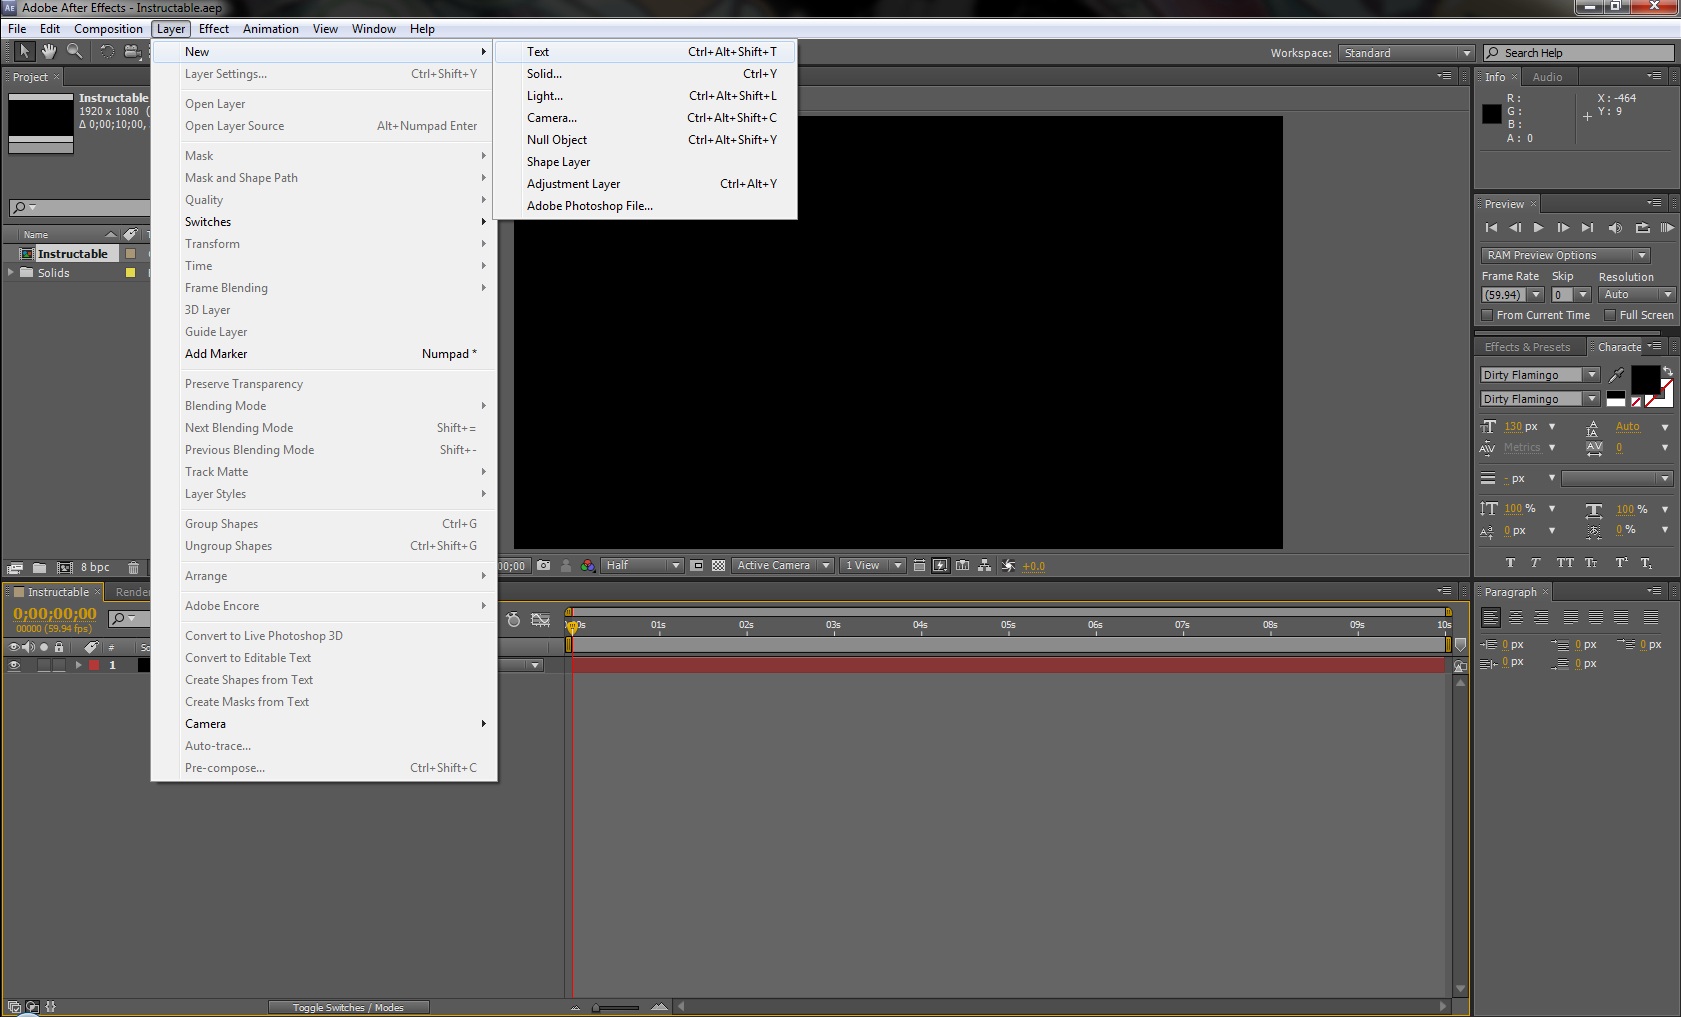
From the menu bar, select Layer>New>Text.
Step Six - Editing the Text Layer
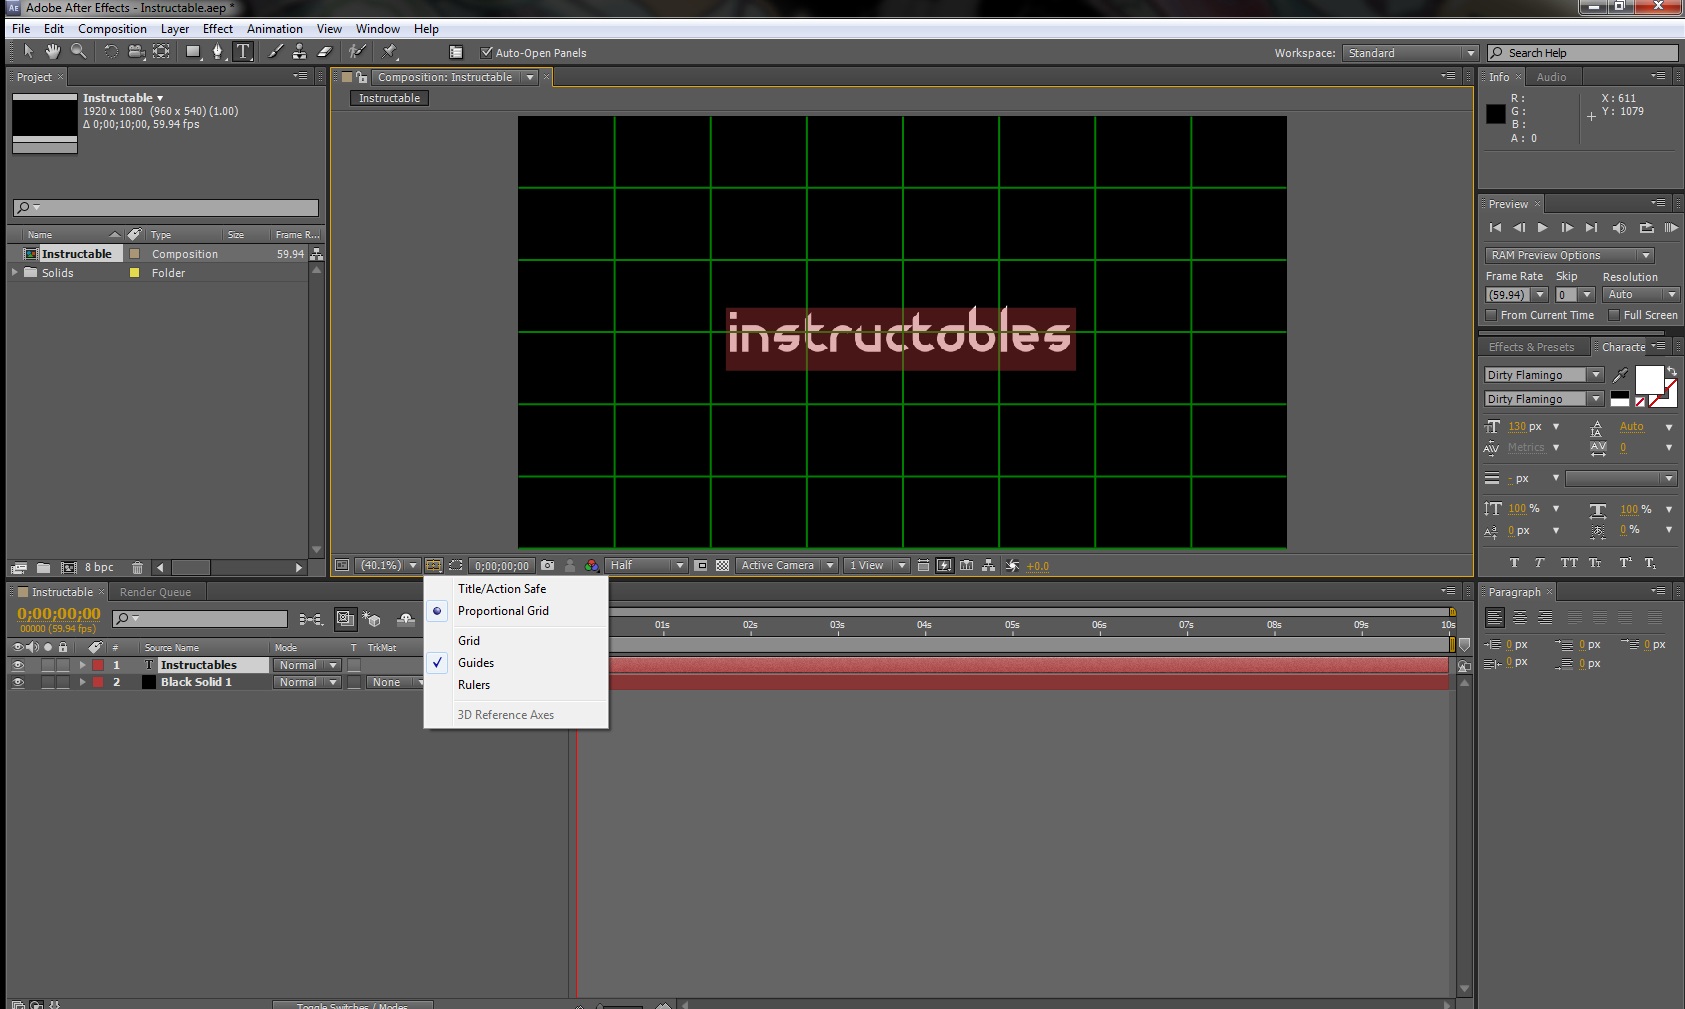
Edit the text layer to your liking, font, color, size etc. Make the text visible compared to your background (black on white/white on black etc.) Select the drop down menu as shown below, click on proportional grid to center your text to your composition.
Step Seven - Creating an Animation
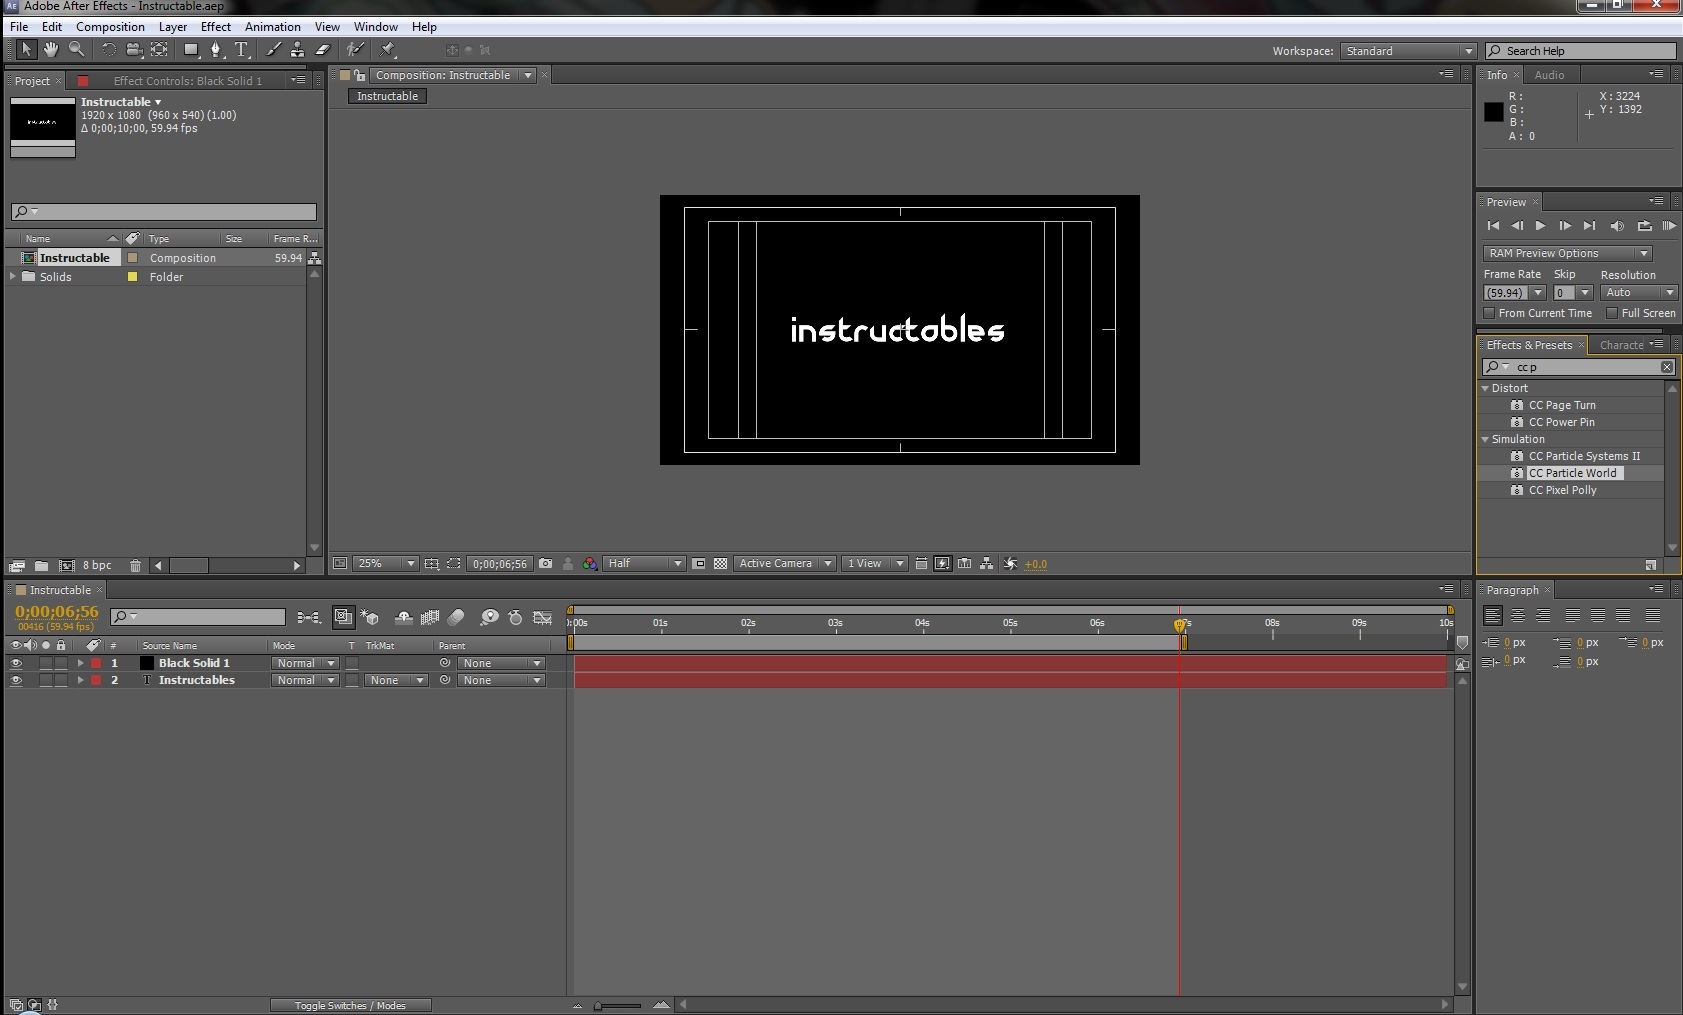
From the effects and presets menu select "CC Particle World" and drag and drop it to the Black Solid layer.
Step Eight - Ordering the Layers
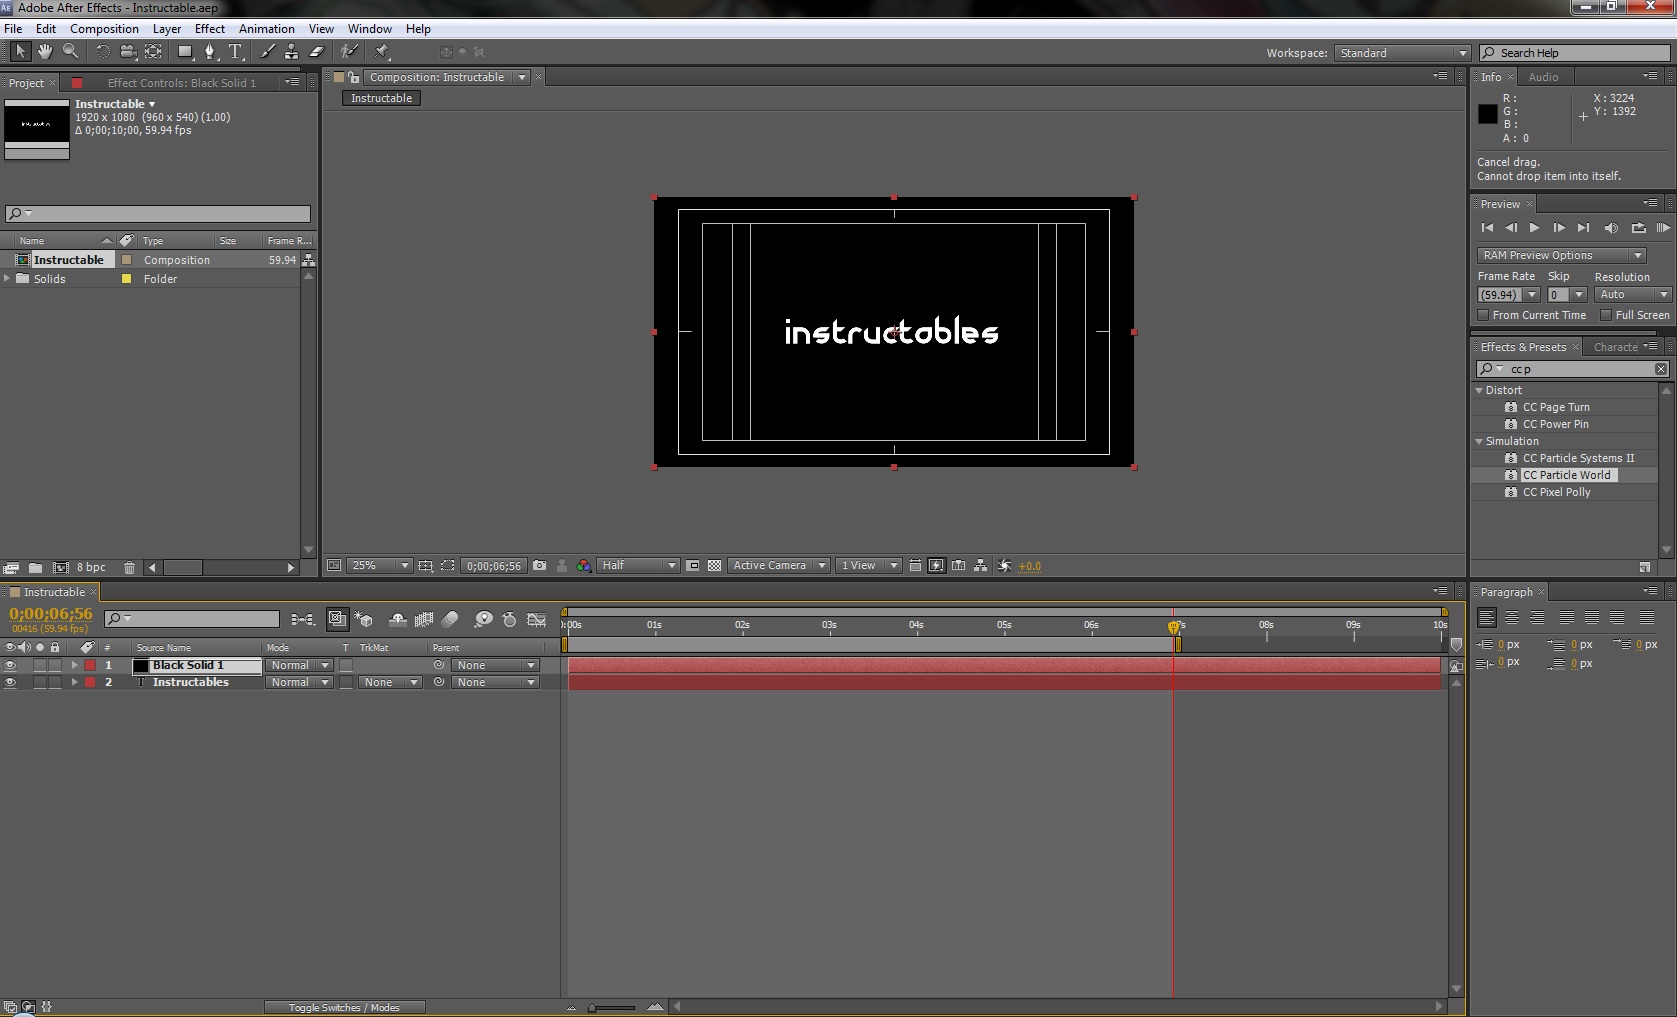
Make sure the Black Solid layer is on top of the text layer so the particles will form above the text and die out over time revealing the text. You can do this by drag and dropping the layer of the text layer
Step Nine - Configuring the Particles
Under the particle sub-menu change the particle type to your liking. Here you can change the colour settings of your particle. Under the "physics" sub-menu, change the gravity of the particle world to anything under 0.350 to appear as it is shooting out at the camera.
Step Ten - Animating the Particles
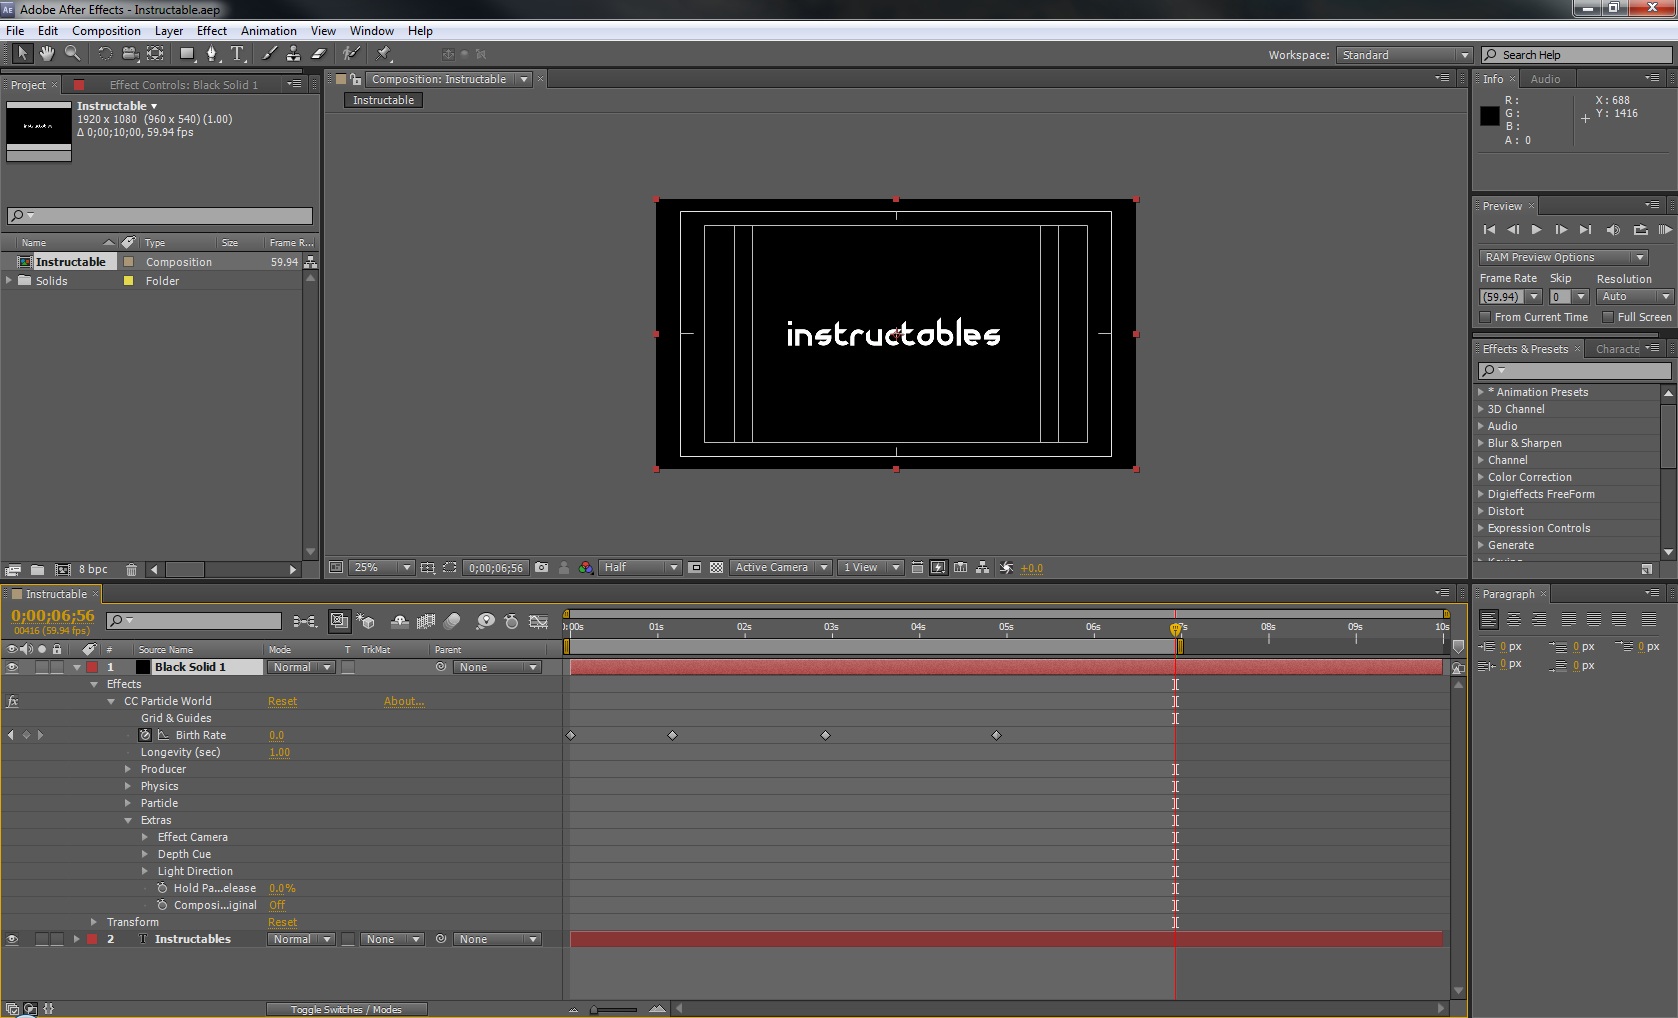
From the timeline, select the drop down arrow on the Black Solid then select Effects> CC Particle world. Click the little "stop watch" to animate the particles. Every 1 - 1.5 seconds create a key-frame You can add a key-frame by clicking the diamond in-between the arrows in the very left. Your last key-frame should be around 5 seconds. Extend the composition or work area another two seconds for the text to be fully visible and for the particles to fall off the screen. In order from first to last, each key-frame value should be :
Key-frame Value
1st (Beginning of composition) : 1-3
2nd: (1 - 2 seconds in) 70-90
3rd: (2.5 - 3.5 seconds in) 130-180
4th: 0
You can change the value of the birthrate key-frames by double clicking the diamond on the timeline.
Key-frame Value
1st (Beginning of composition) : 1-3
2nd: (1 - 2 seconds in) 70-90
3rd: (2.5 - 3.5 seconds in) 130-180
4th: 0
You can change the value of the birthrate key-frames by double clicking the diamond on the timeline.
Step Eleven - Rendering
From the menu bar, select Composition>Add to render queue, and click it. From the Output menu select the composition name to open an Explorer window to save the finished product to and to name it what you like.