How to Make a Fantasy Map in Photoshop
by lobsterfists in Design > Digital Graphics
222028 Views, 91 Favorites, 0 Comments
How to Make a Fantasy Map in Photoshop
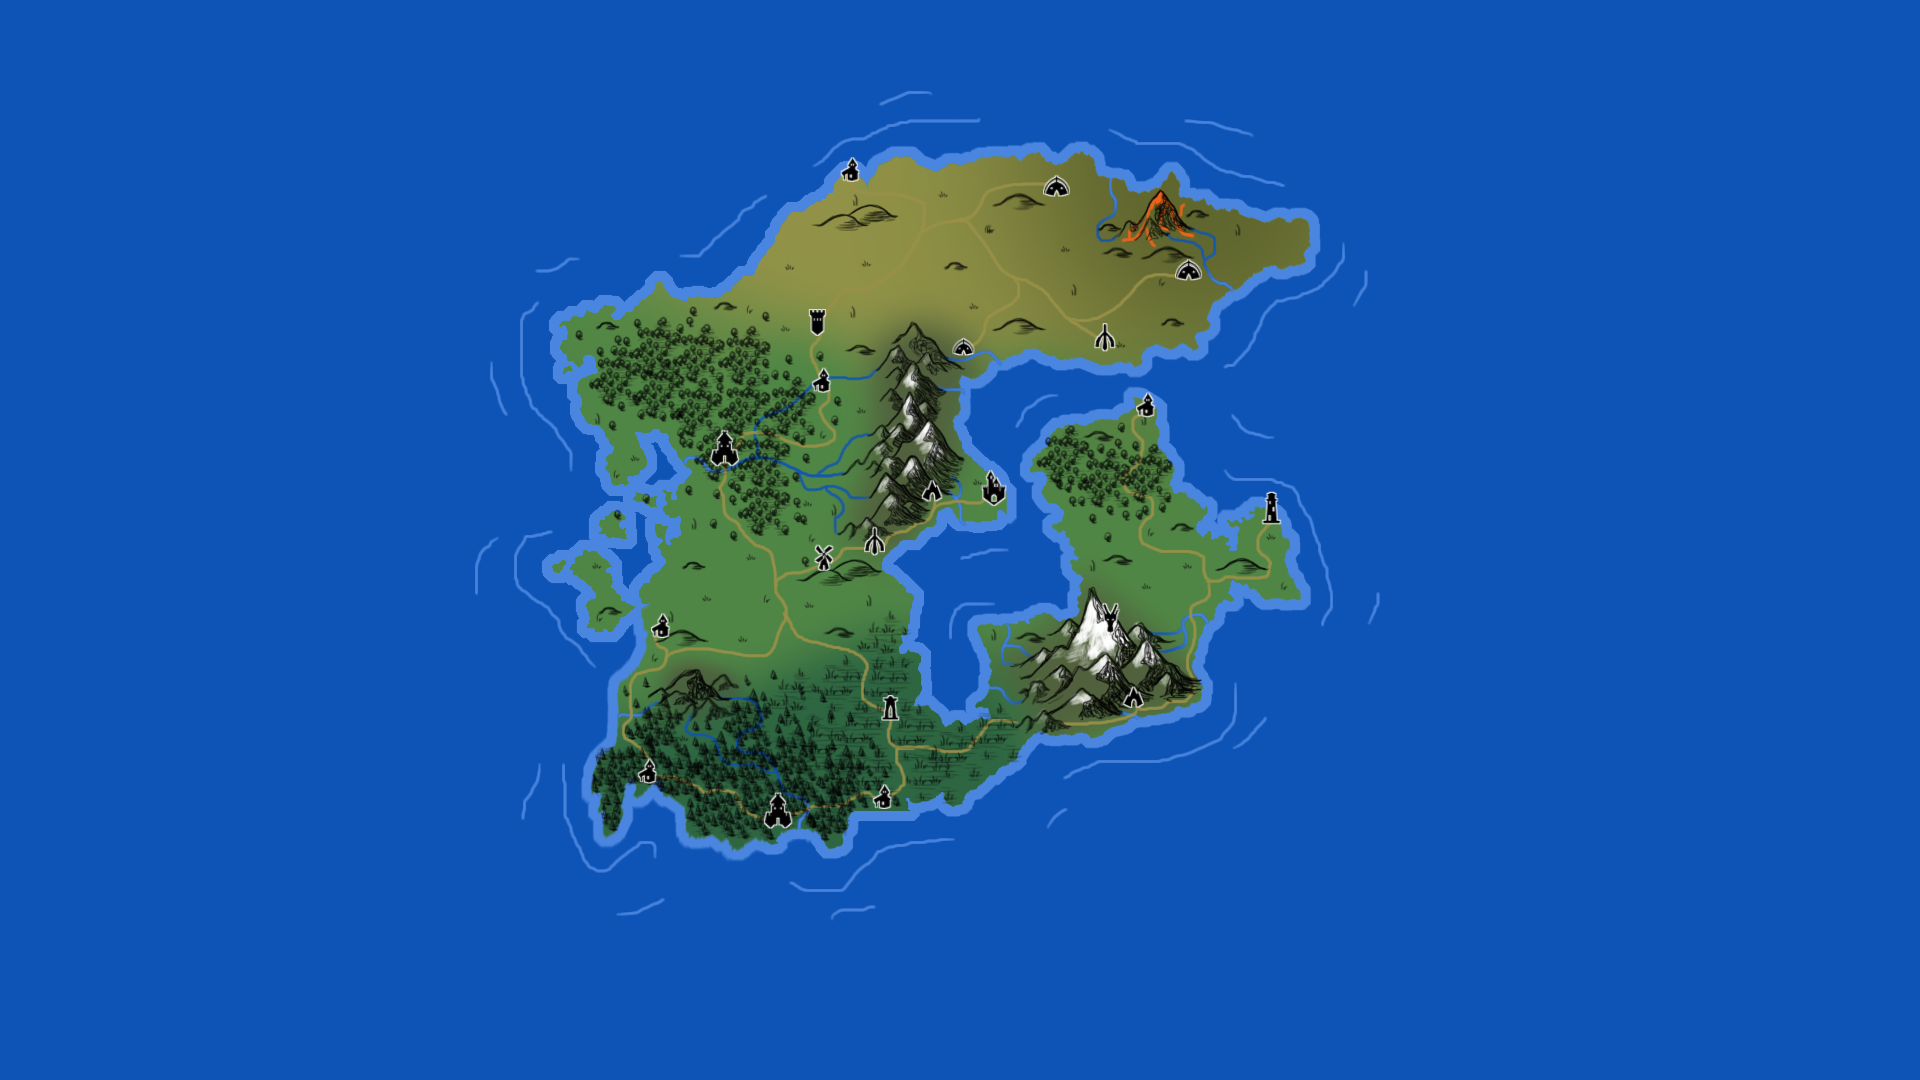
This is a tutorial to make a random continent map that you can use for anything that you want! This tutorial will help create nice looking maps that can range from all over the world!
Setting Up the Canvas
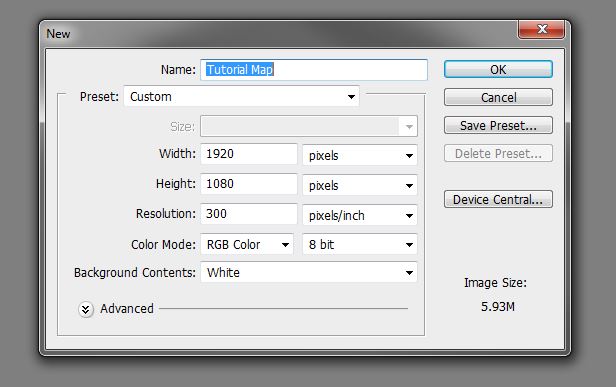
I generally start mine as 1920x1080 so then I can be able to use the map as a desktop background as I want, and also it is just a good size to use.
The Ocean
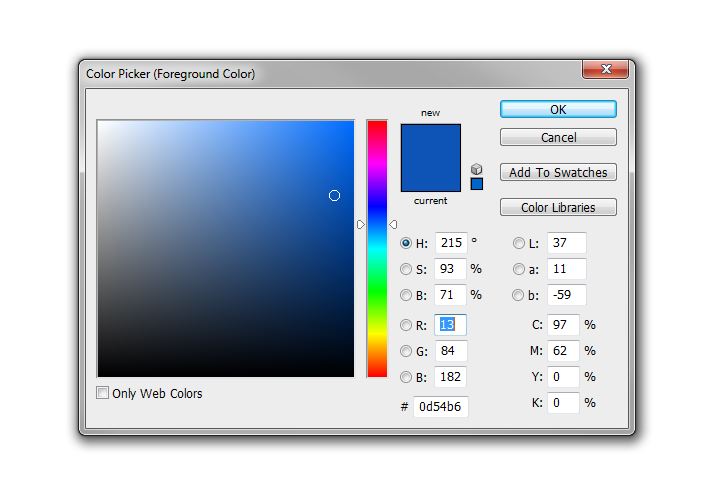
After you have your canvas, open the color picker, and choose a blue to use for the ocean, this is the color that I used, and then fill up the background with the blue.
Step One in Making a Continent
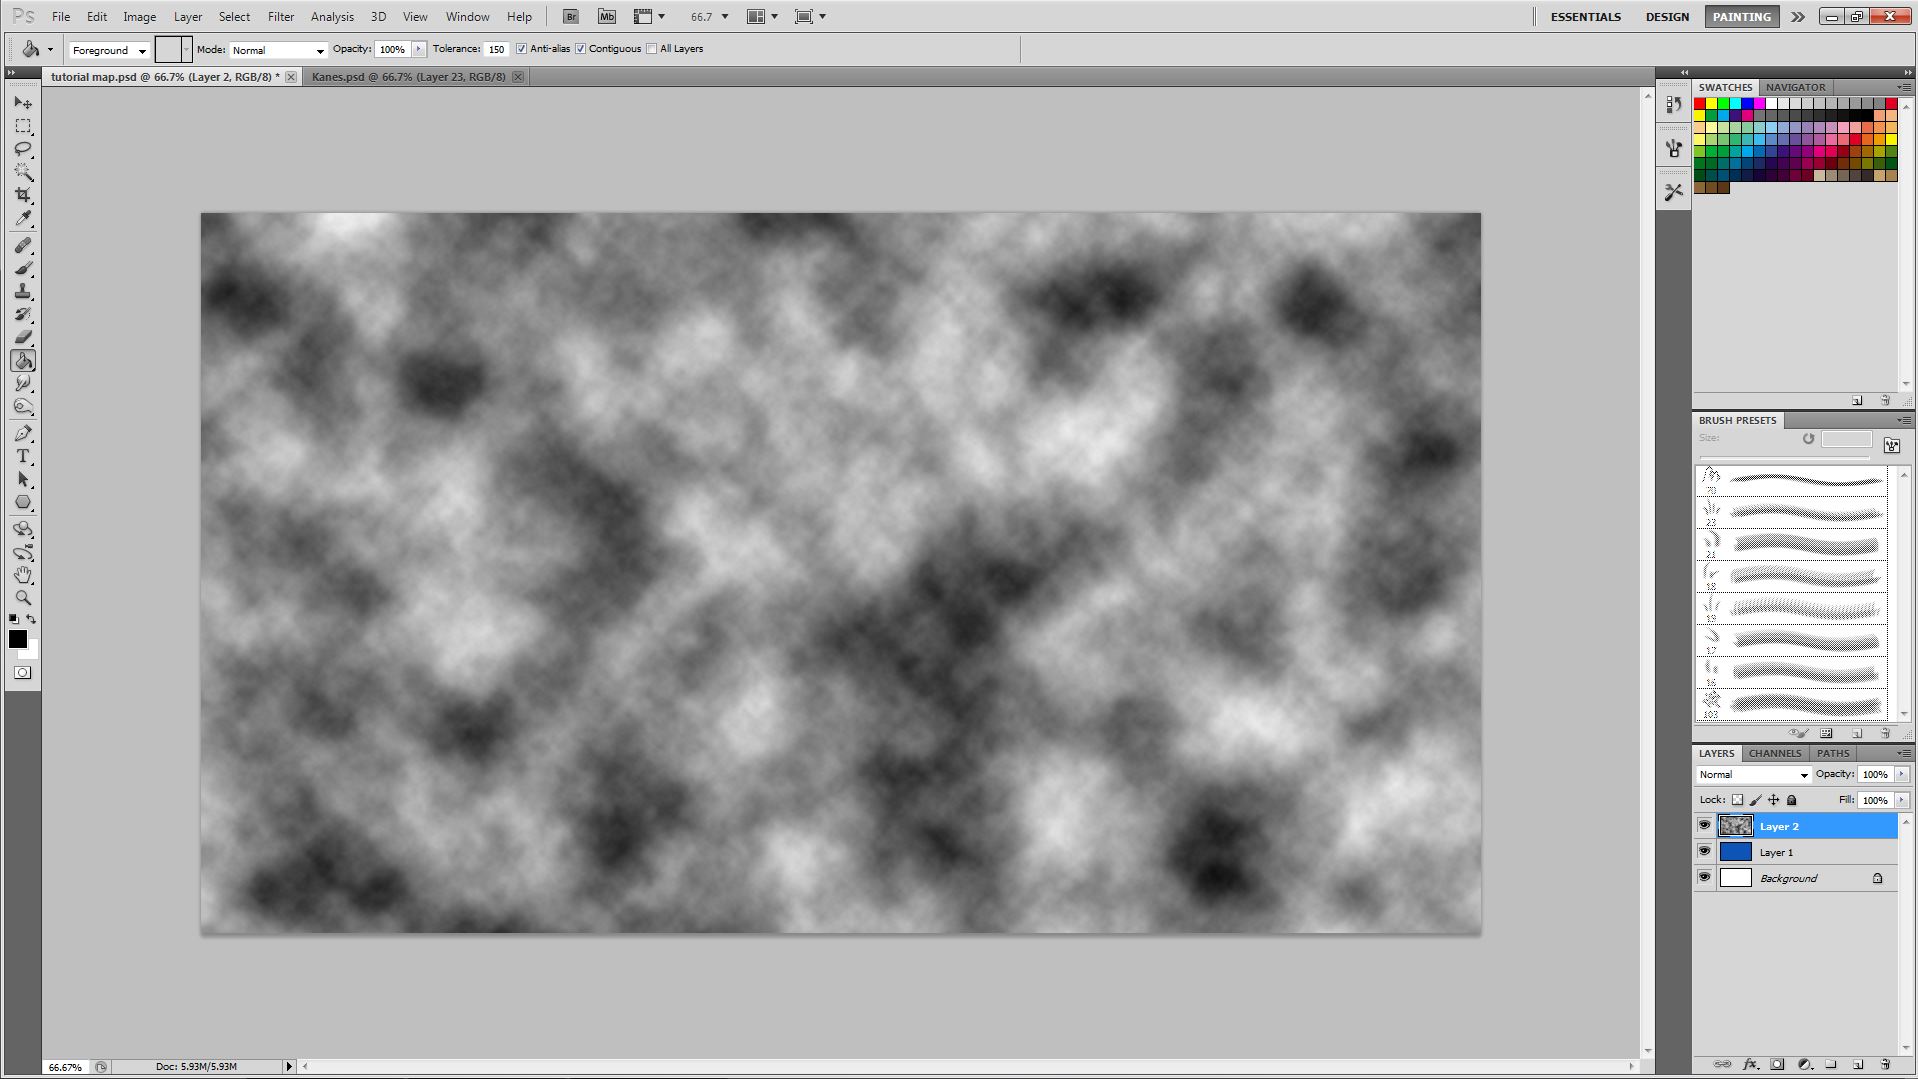
To get the continent shapes, first create a new layer, and make sure your color pallet is black and white. With the new layer selected, go to Filter -> Render -> Clouds. This should give a misty cloud image on your canvas.
Step Two in Making a Continent
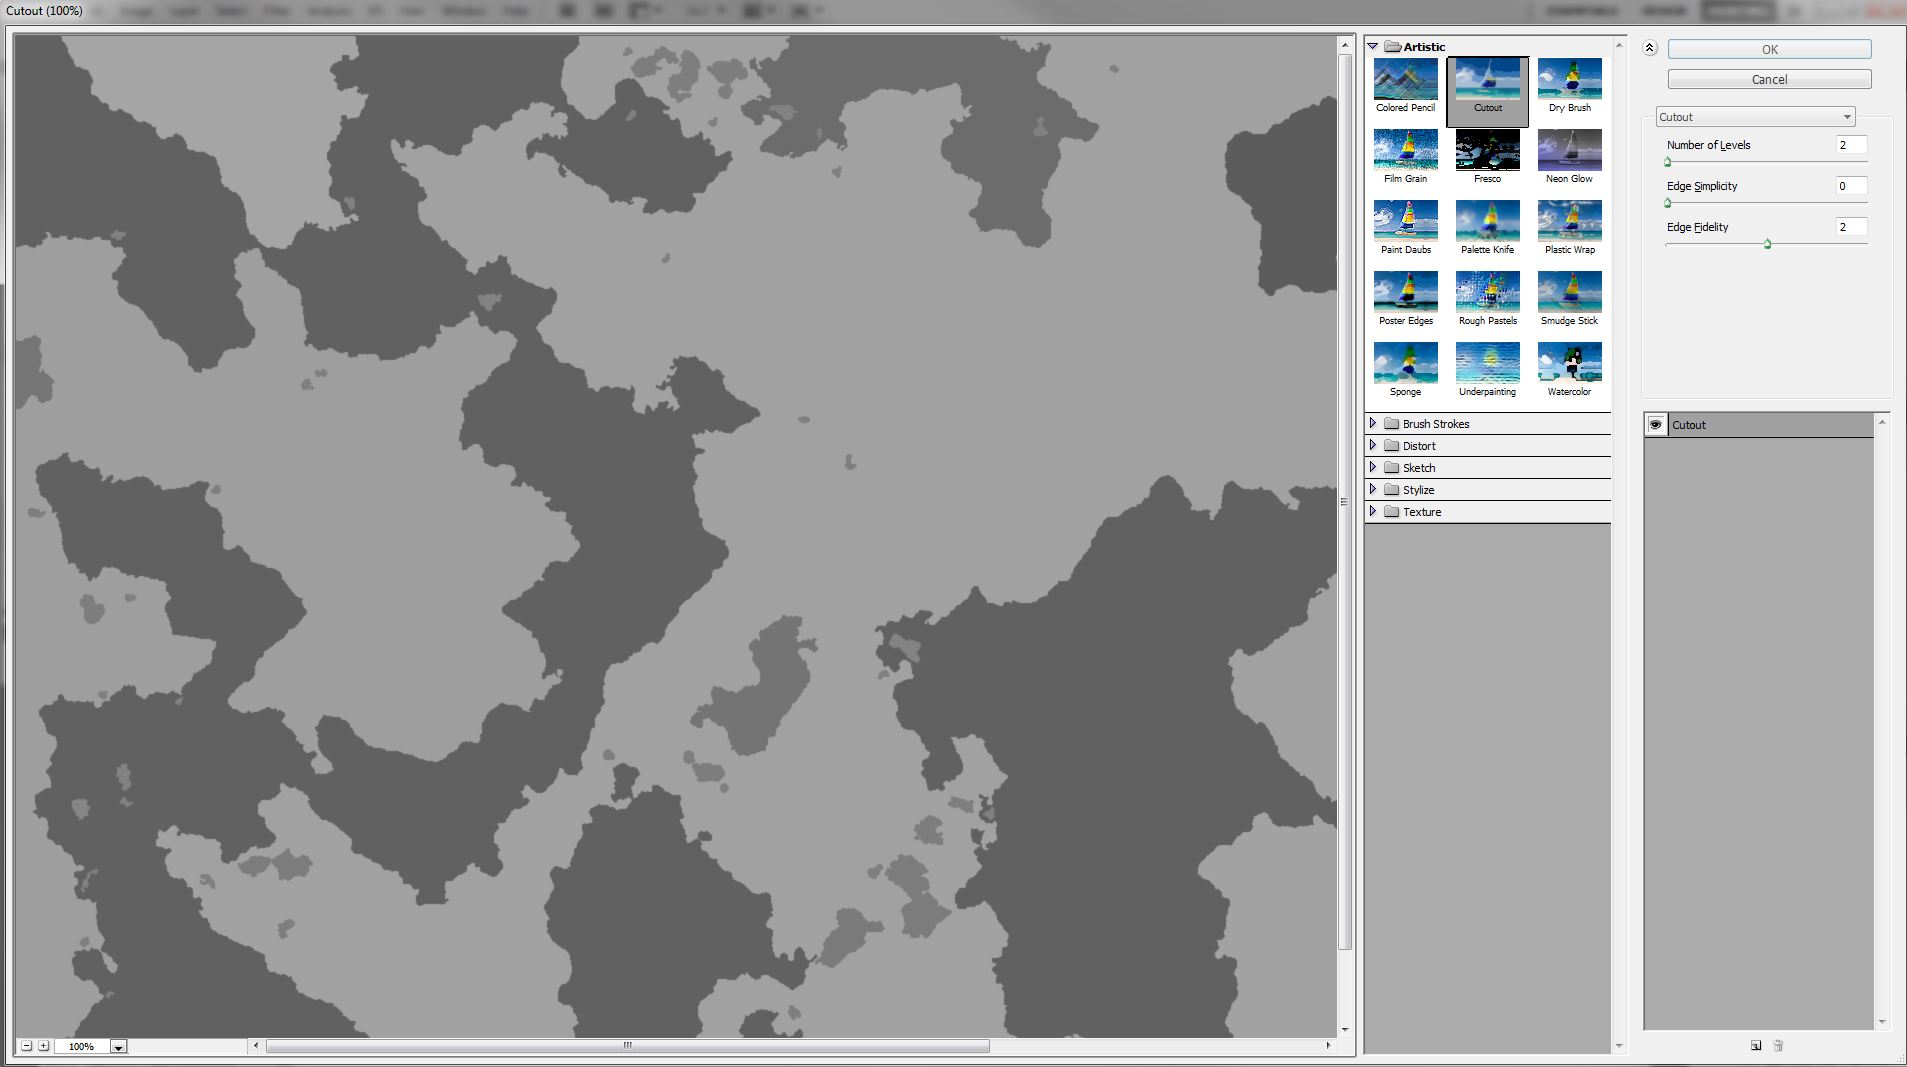
To get the hard continent outlines, go to Filter -> Artistic -> Cutout. Use the settings that I use, and you should be able to get hard sided shapes which have outlines of good coastlines, and many shapes that you can use for continents. Press OK to apply the filter.
Step Three in Making a Continent
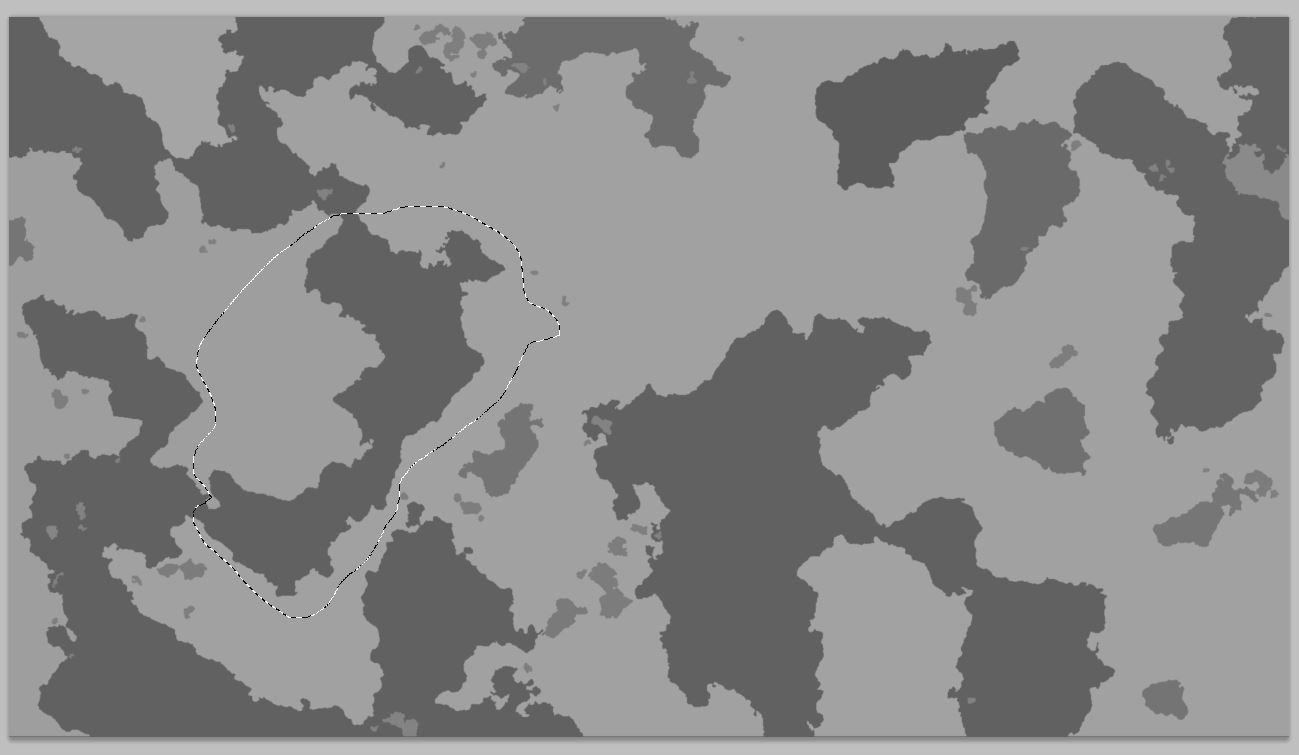
Grab the lasso tool and select figures that you could use for continents. They could just be used for coastlines, or just whole shapes or islands. Just select shapes that you would want to use and possibly think of the kind of shape you want your continent to be. You can use ctrl+i to invert the colors of the map.
Putting Them Together
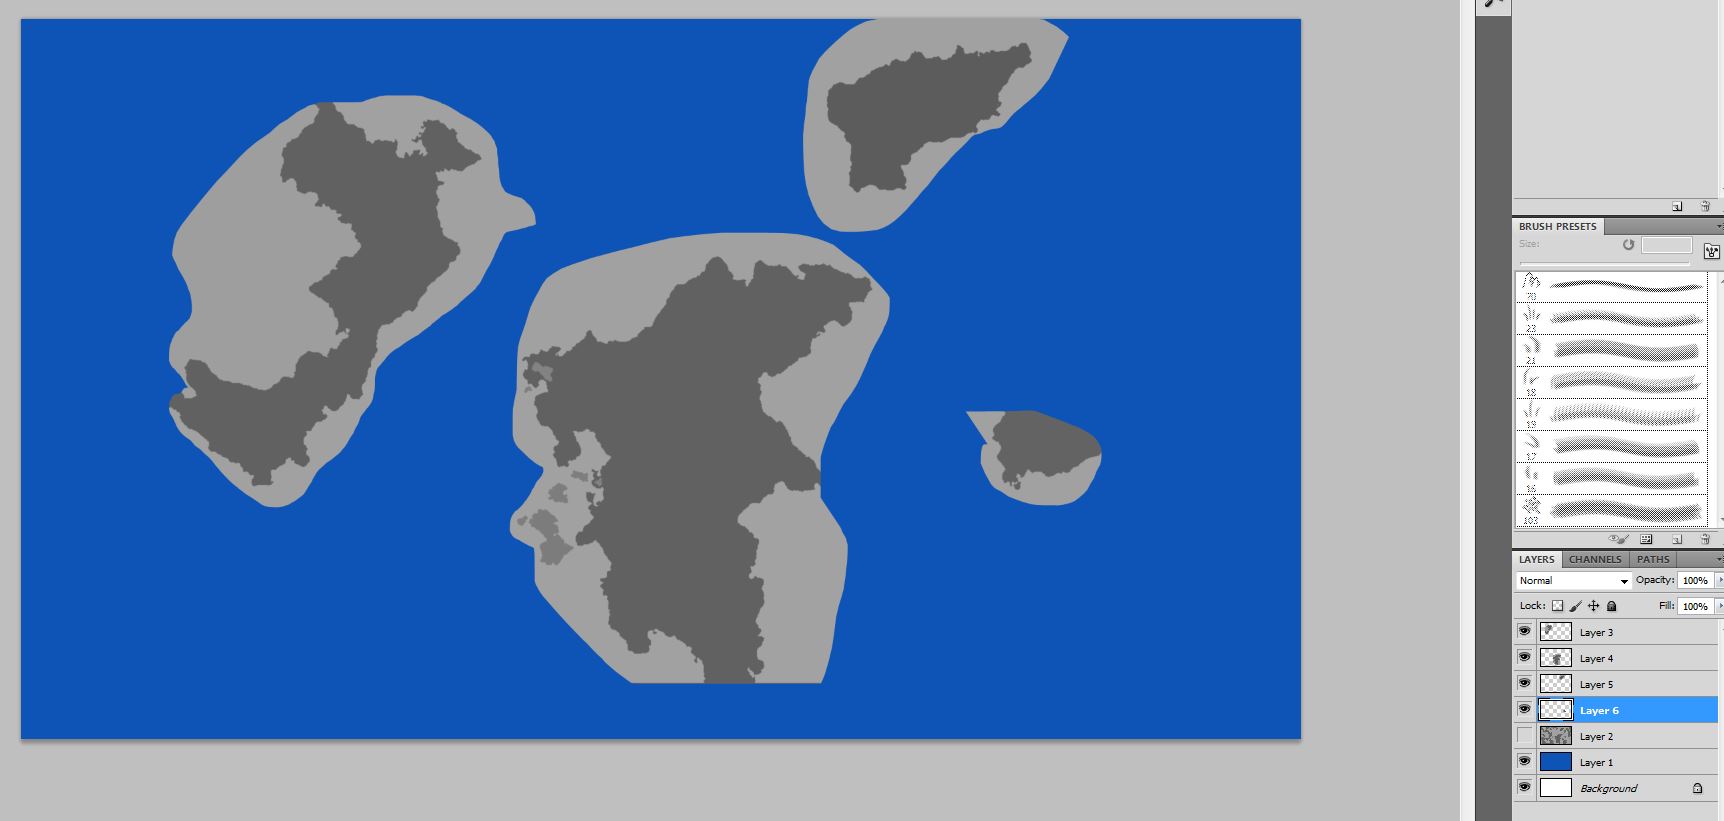
After you have chosen your landmasses, hide or delete the old clouds layer and select the Wand selection tool and delete the gray parts around the lands.
Form a Continent
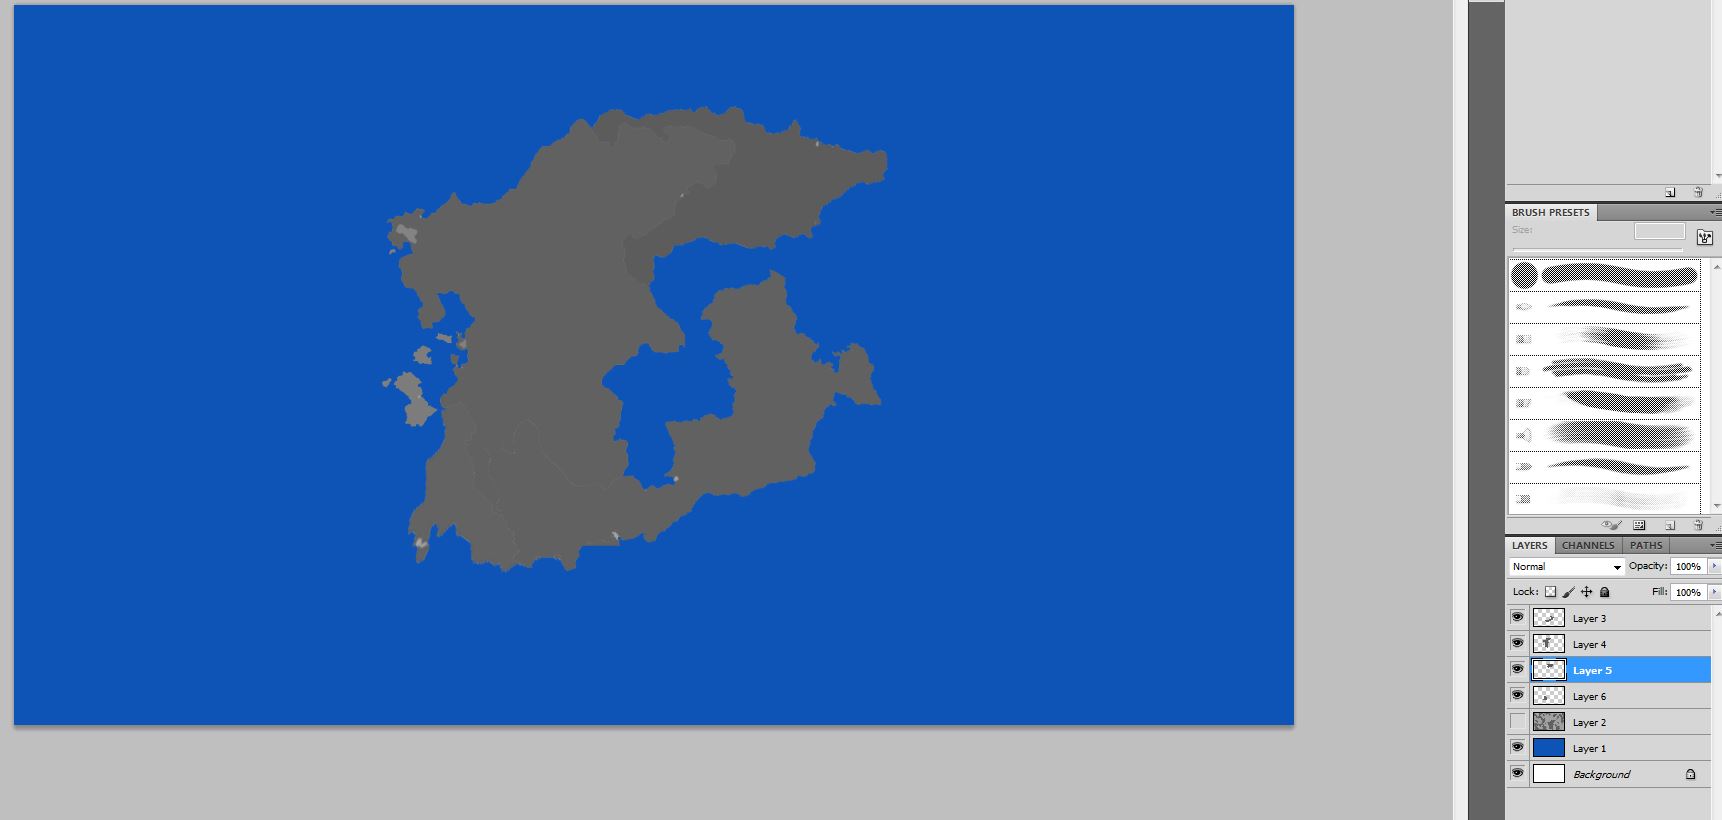
Adjust however you'd like to fit them together, you can even draw in the middle of the continent to fill it up and just use the shapes as coast line. Just transform them using ctrl+t into whatever shape you'd like.
Putting It Together
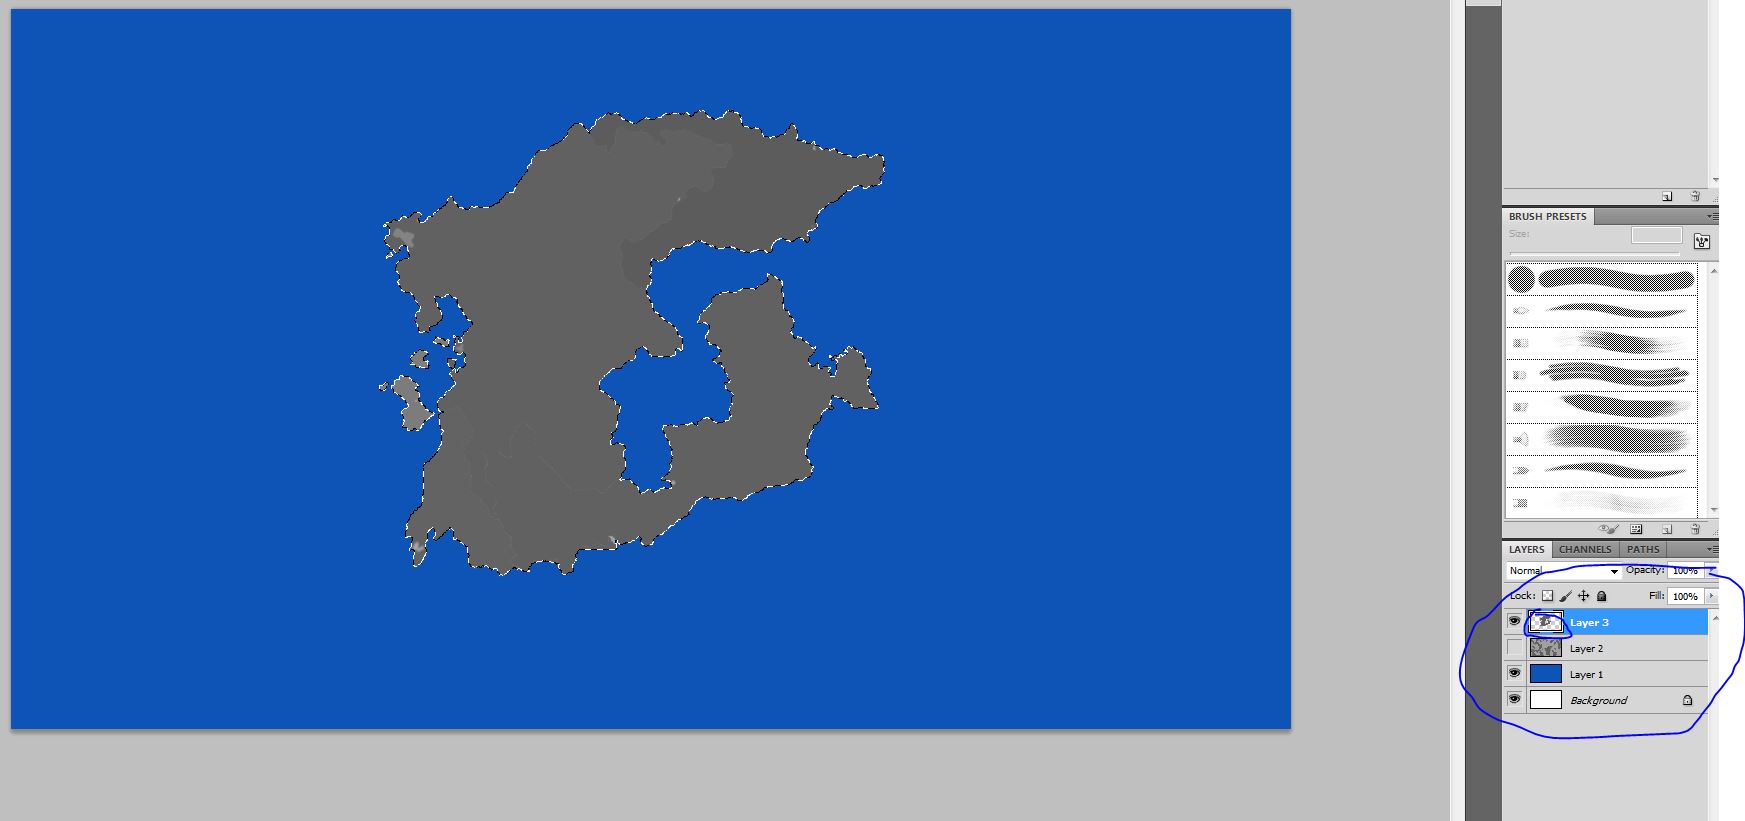
Merge the layers that make up the continent and then select the area of it by holding down ctrl and clicking in the box next to the layer name with the picture. It should automatically select the space it contains.
Colorizing
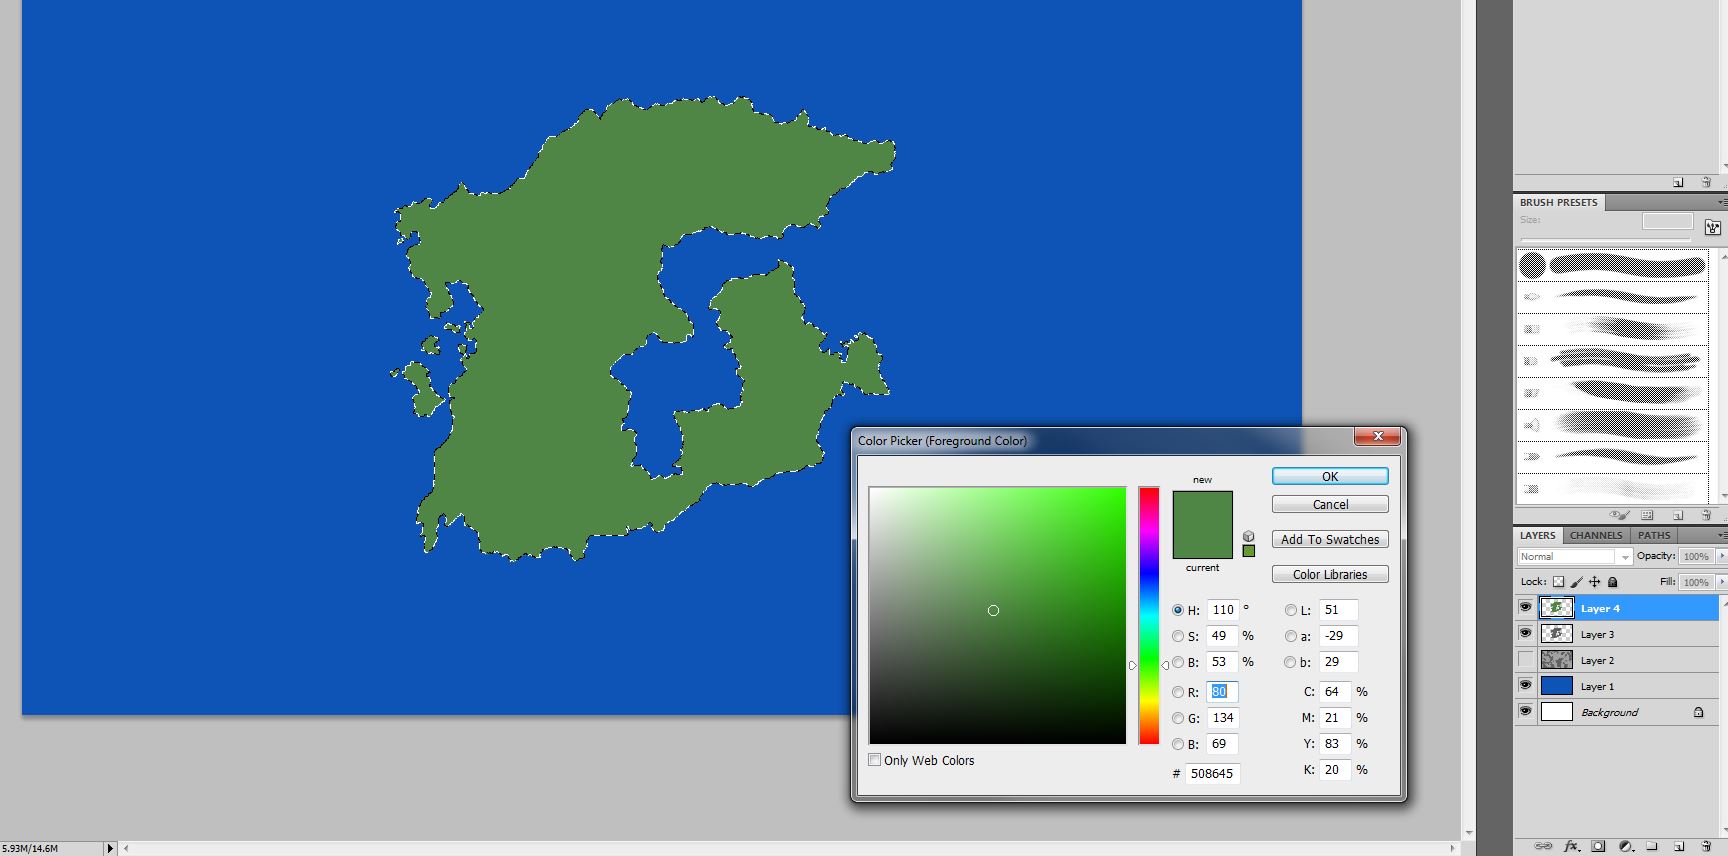
Create a new layer with the outline still selected, and give it a nice grassy green color to fill it with, or with whatever biome type you'd like. I kept the info for that color in the picture so you can use it if you'd like. Then get the fill bucket tool and fill the layer.
Adding a Coast
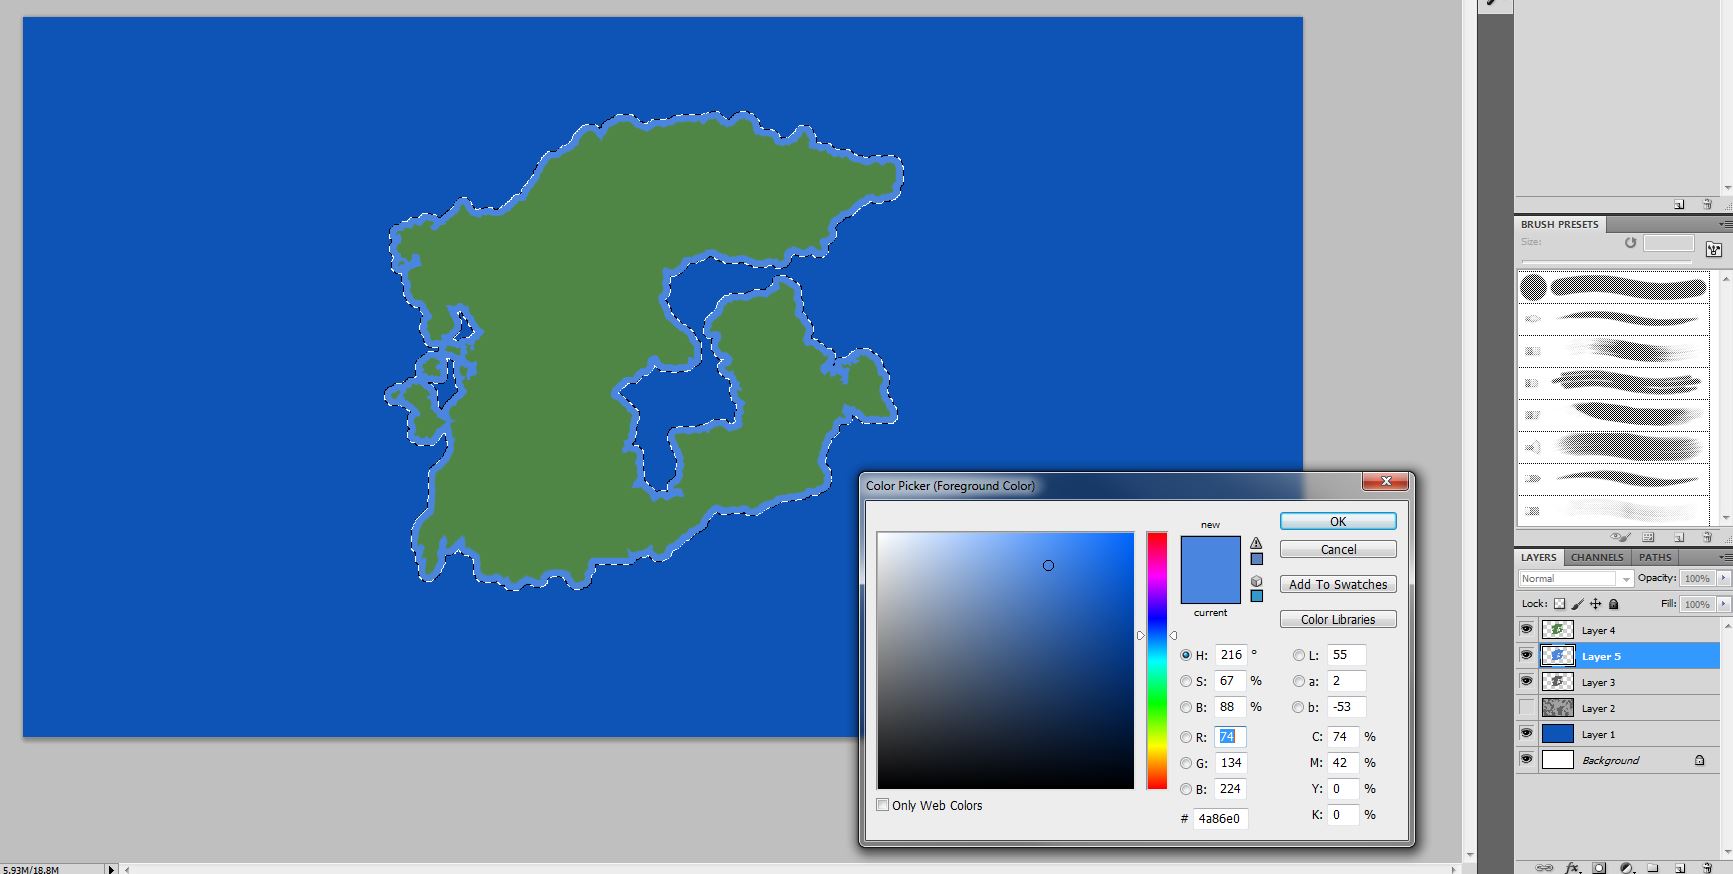
With the outline still selected, add a new layer below the continent one, and go to Select -> Modify -> Expand, and make it expand by 10 pixels. On this new layer fill it with a light blue color so it looks like a simple coastline around your continent.
Waves
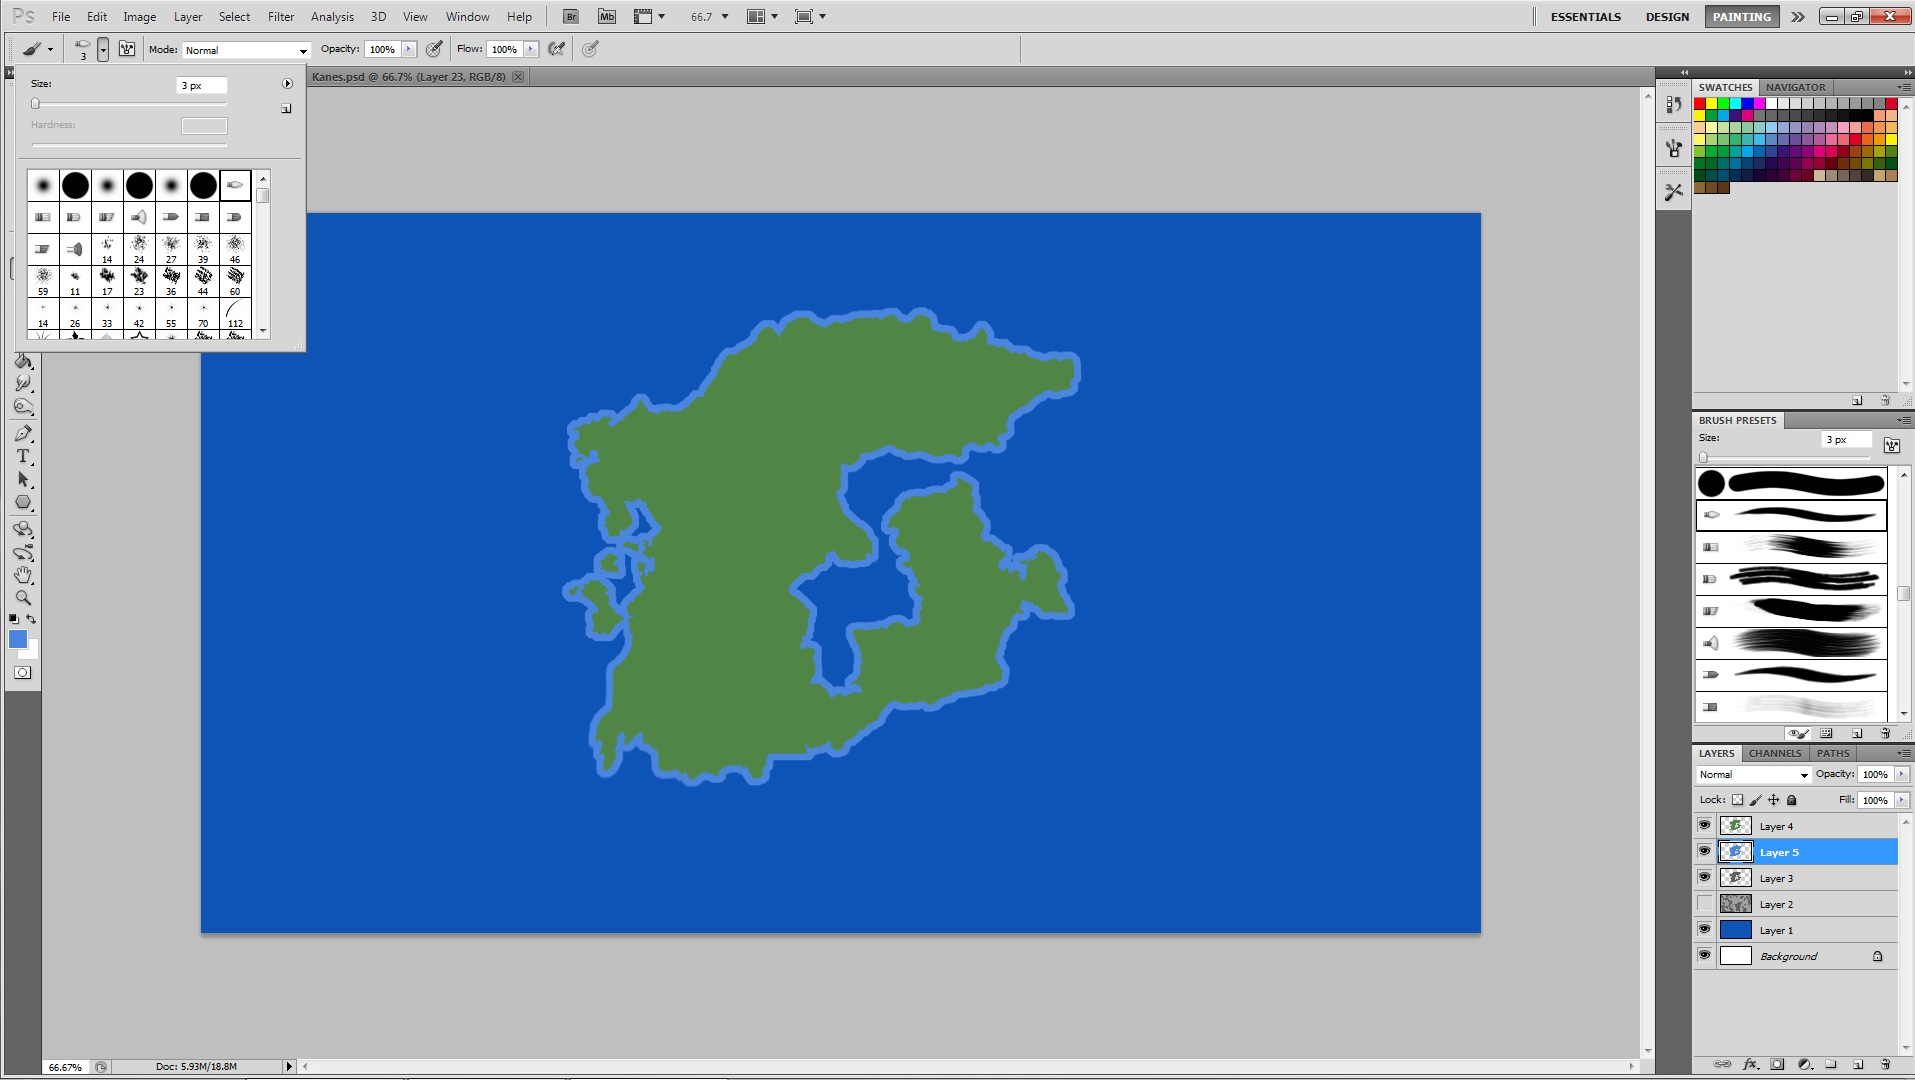
To create a ripple effect in the water around the continent, take the brush I selected, or just a regular one with a small pixel size, I used 3.
Ripples
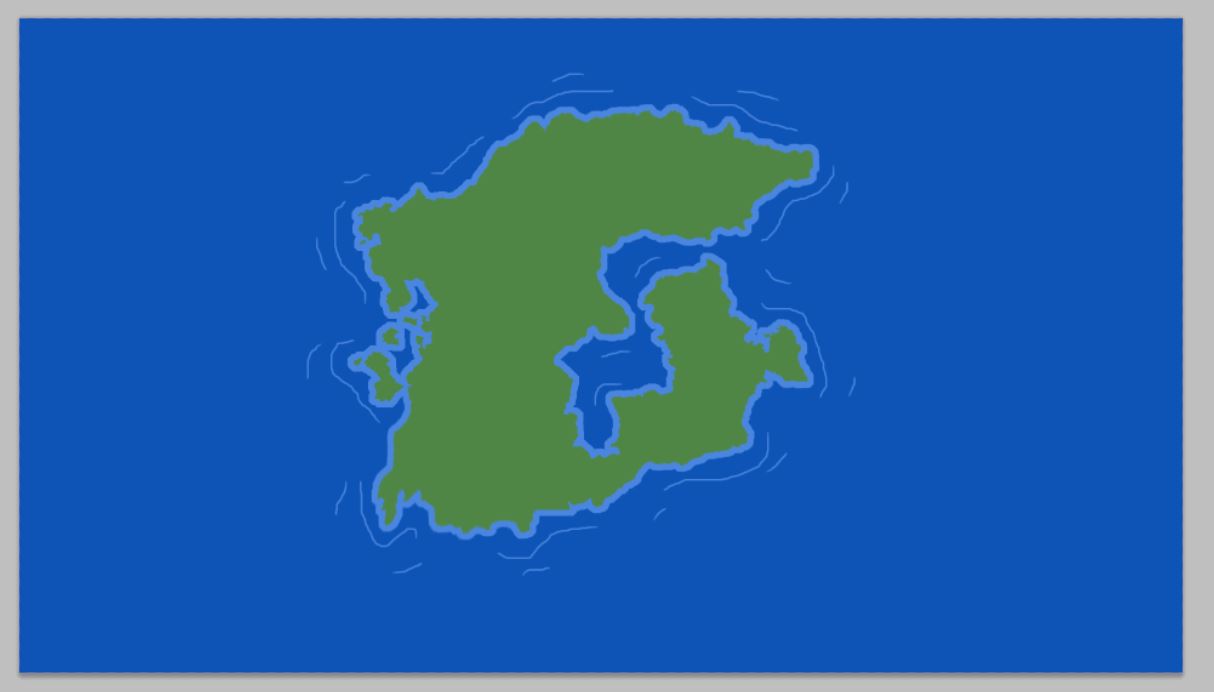
You can use the same layer as the coastline, just add small lines around the continent. Generally big ones near and then smaller line waves further away.
Adding the Moutains
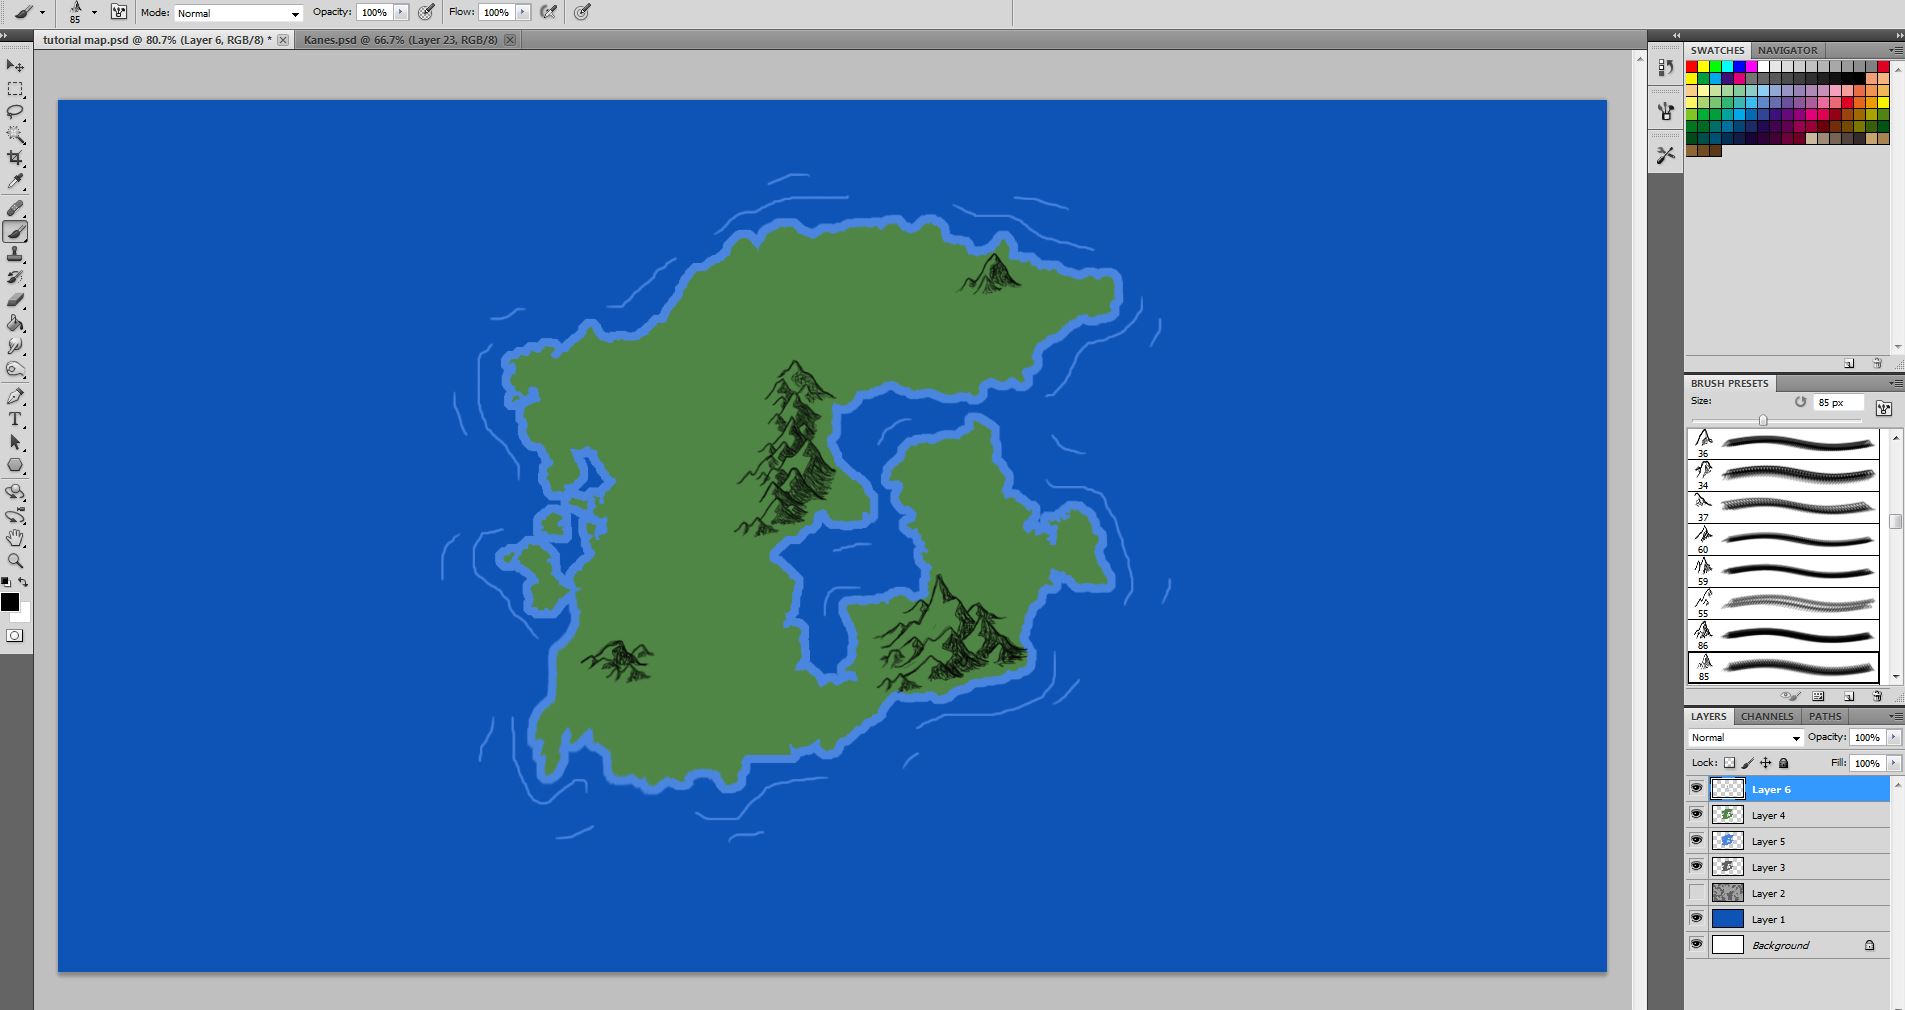
Next add a new layer and select back to a black color for the brush. For the mountains I am using this brush set, which I will use for the mountains, hills, grasses, and trees. It is a very good brush set and it perfect for what we need. Here's a link on how to install brush sets. After you have it, place mountain ranges however you'd like, and mix them up to make it look nice.
Starting the Rivers
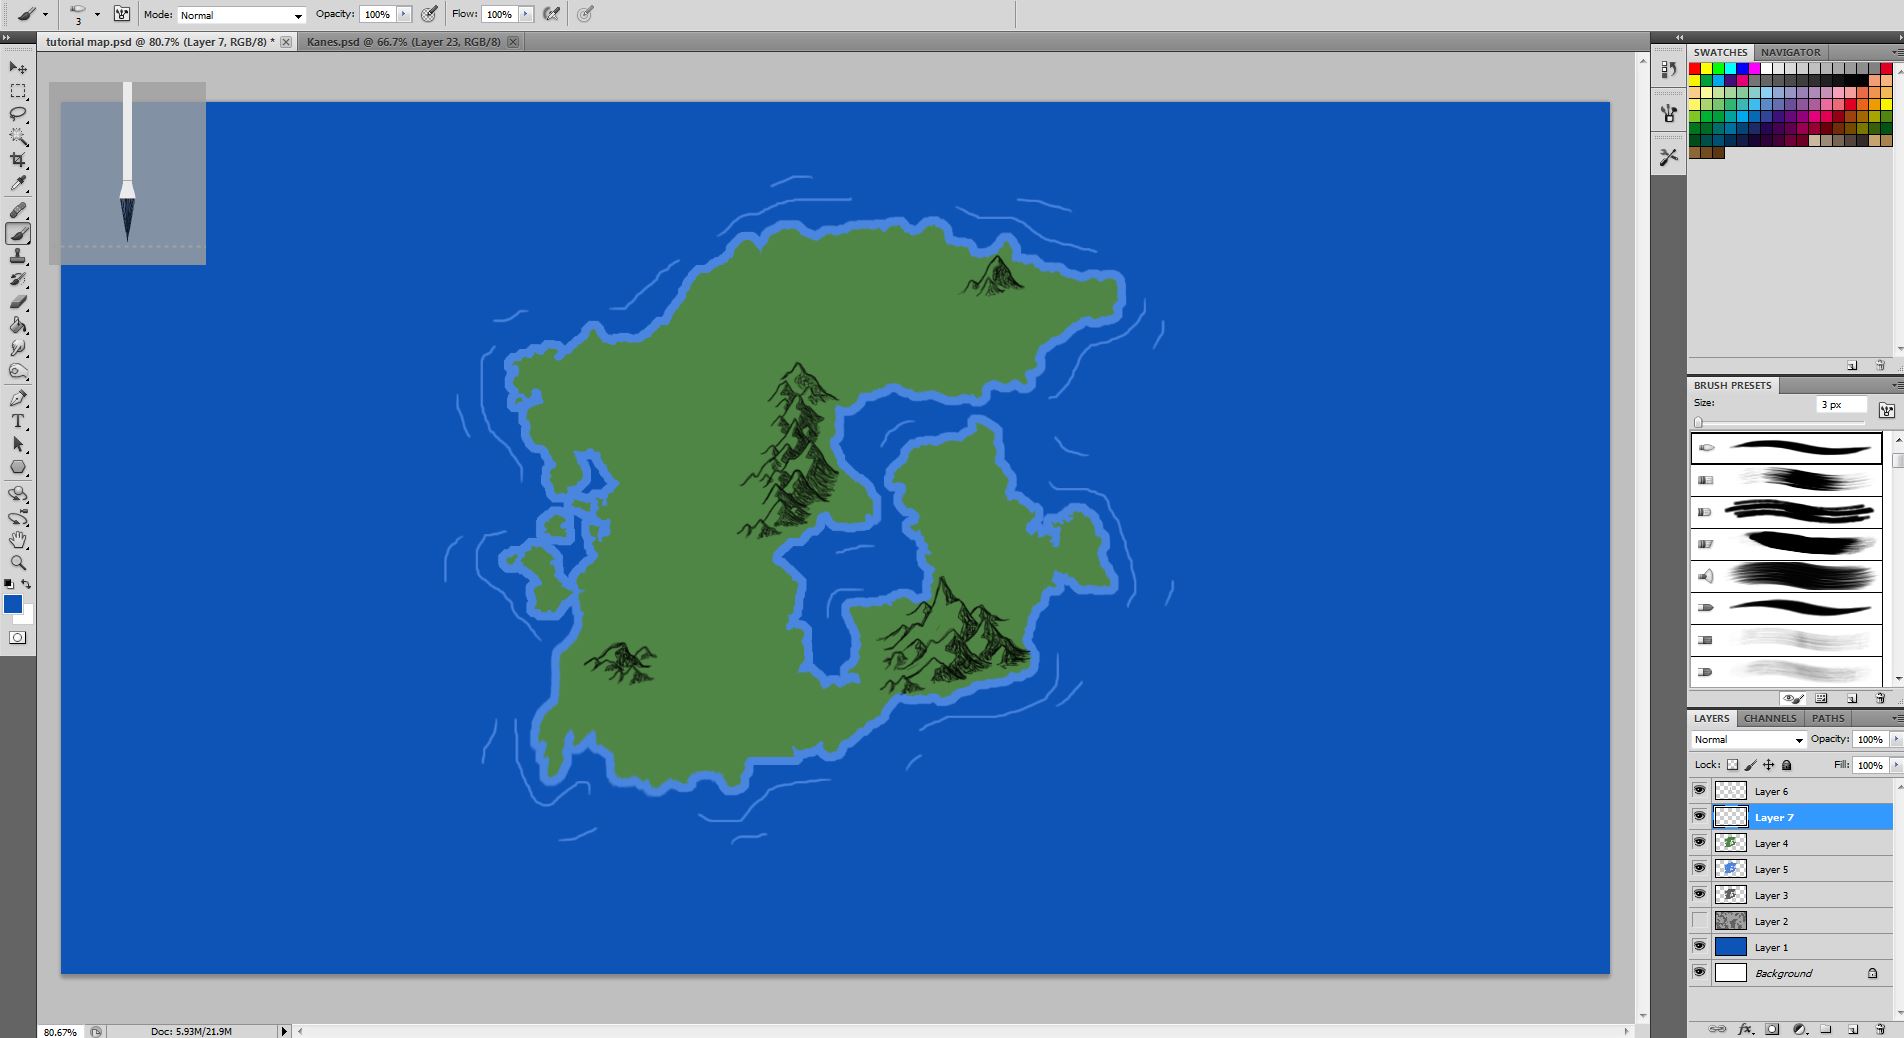
Next we make a new layer to put the rivers on. Again select a small brush like the one we used for the ripples and use the eye dropper tool to select the color of the ocean.
River Mechanics
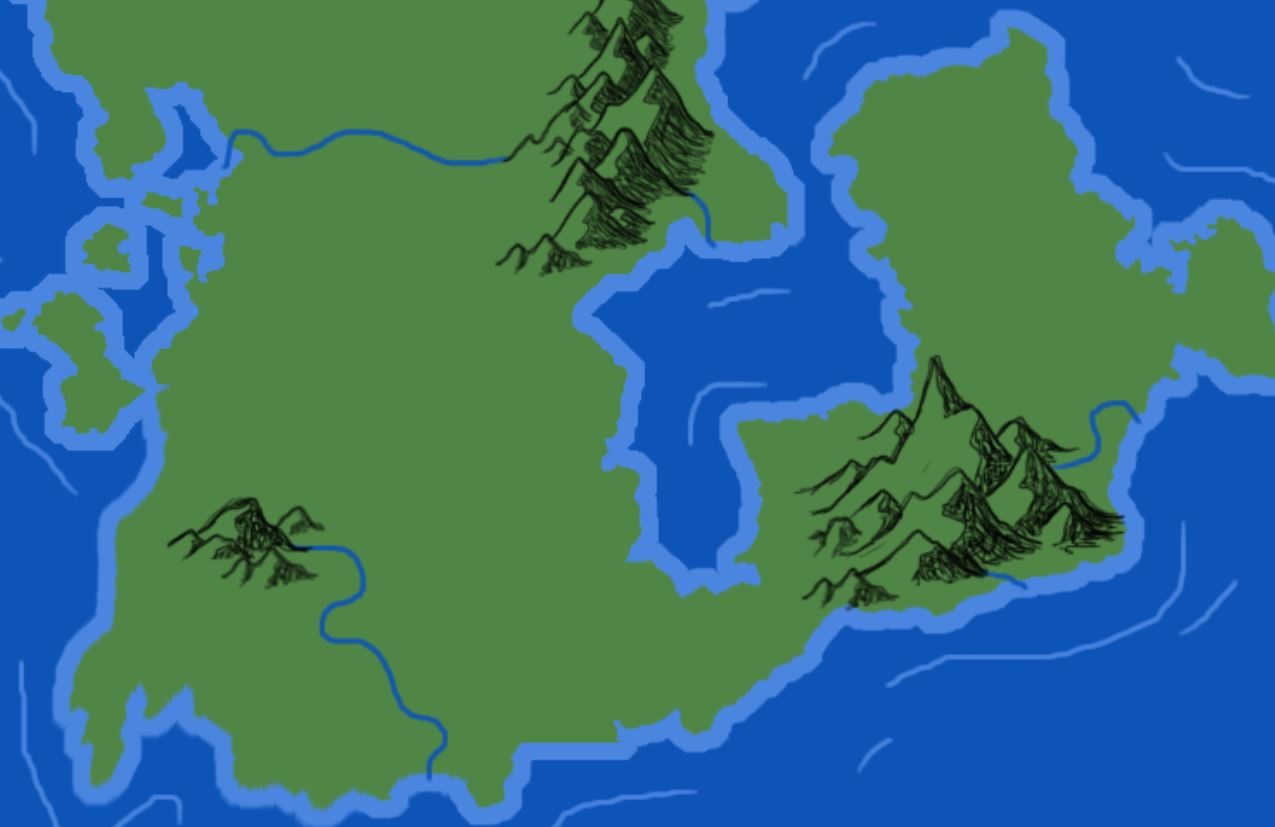
Draw a couple of rivers spreading out from your mountain sides. Don't forget that generally rivers do not split. Here I just drew a couple main rivers, and in the next step I will be adding more smaller ones.
River Systems
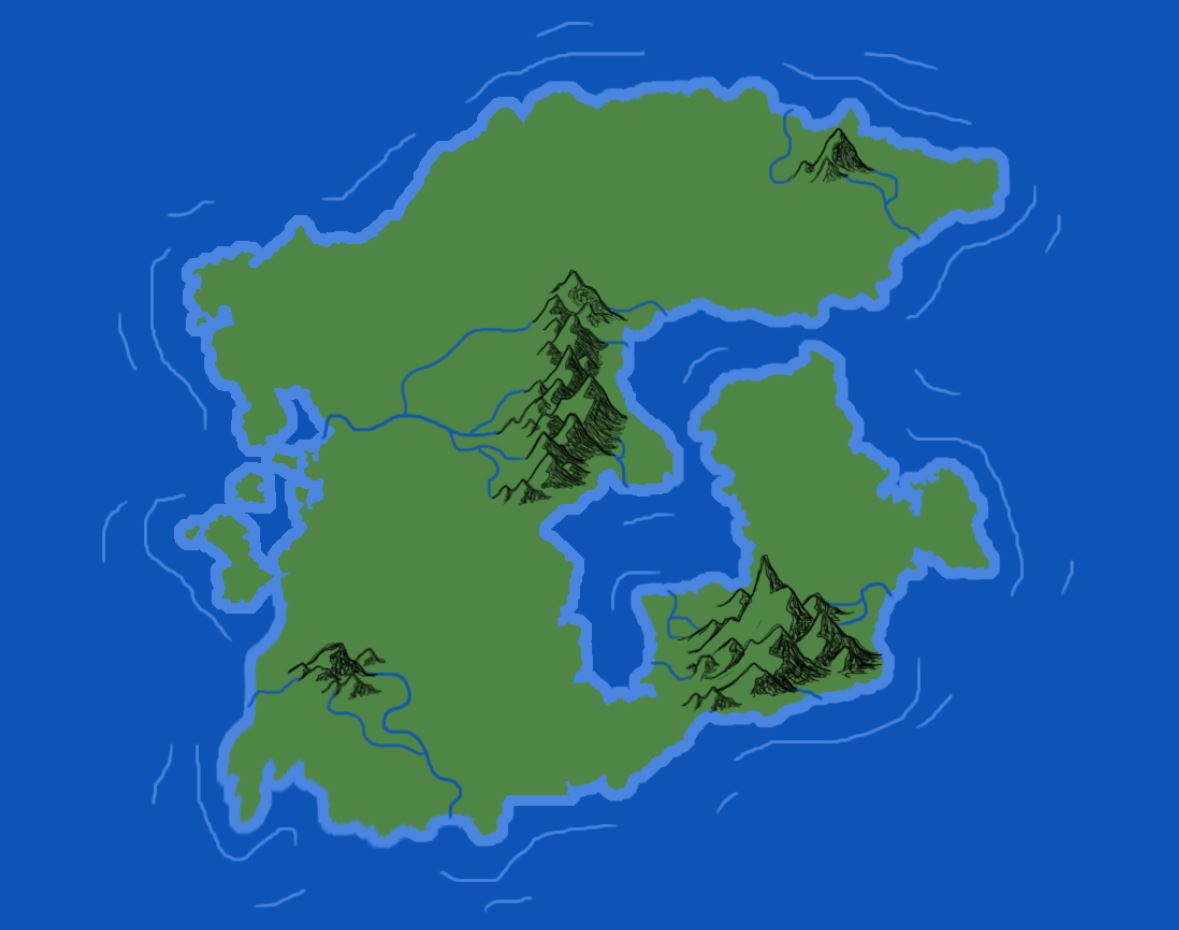
After having a main river canal/drainage basin pattern, get a slightly smaller brush size and add rivers that will flow into that one from different angles of the mountains.Like I said they generally don't split, but doesn't mean they can't, because this is your world and you can do whatever you want.
Coloring the Biomes
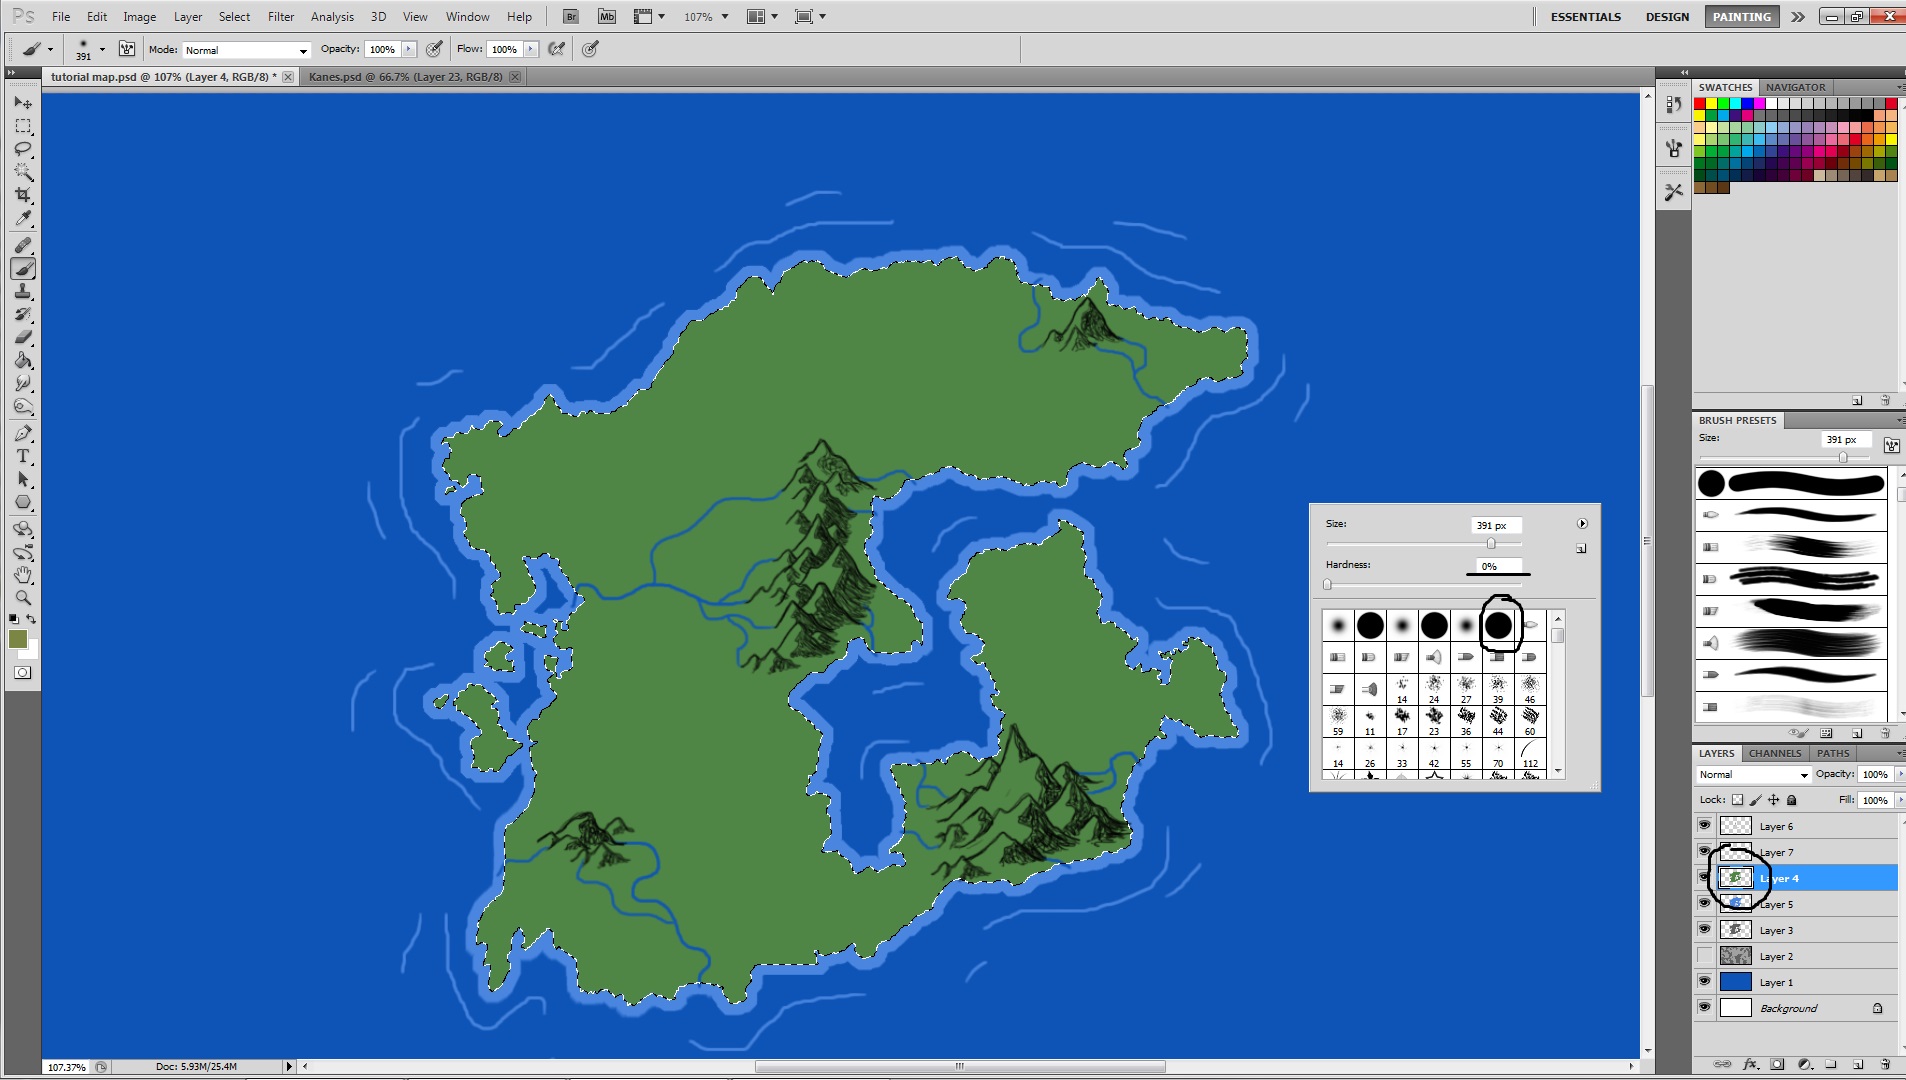
For this step we will be coloring the boimes of the continent. Ctrl-click the picture next to the layer name with the original green color, selecting it. Then open up your brushes and select the round one and turn the hardness all the way up to zero, and the size up as well, generally around 400 pixels, but can range to whatever size you need to fit it.
Adding in Biomes
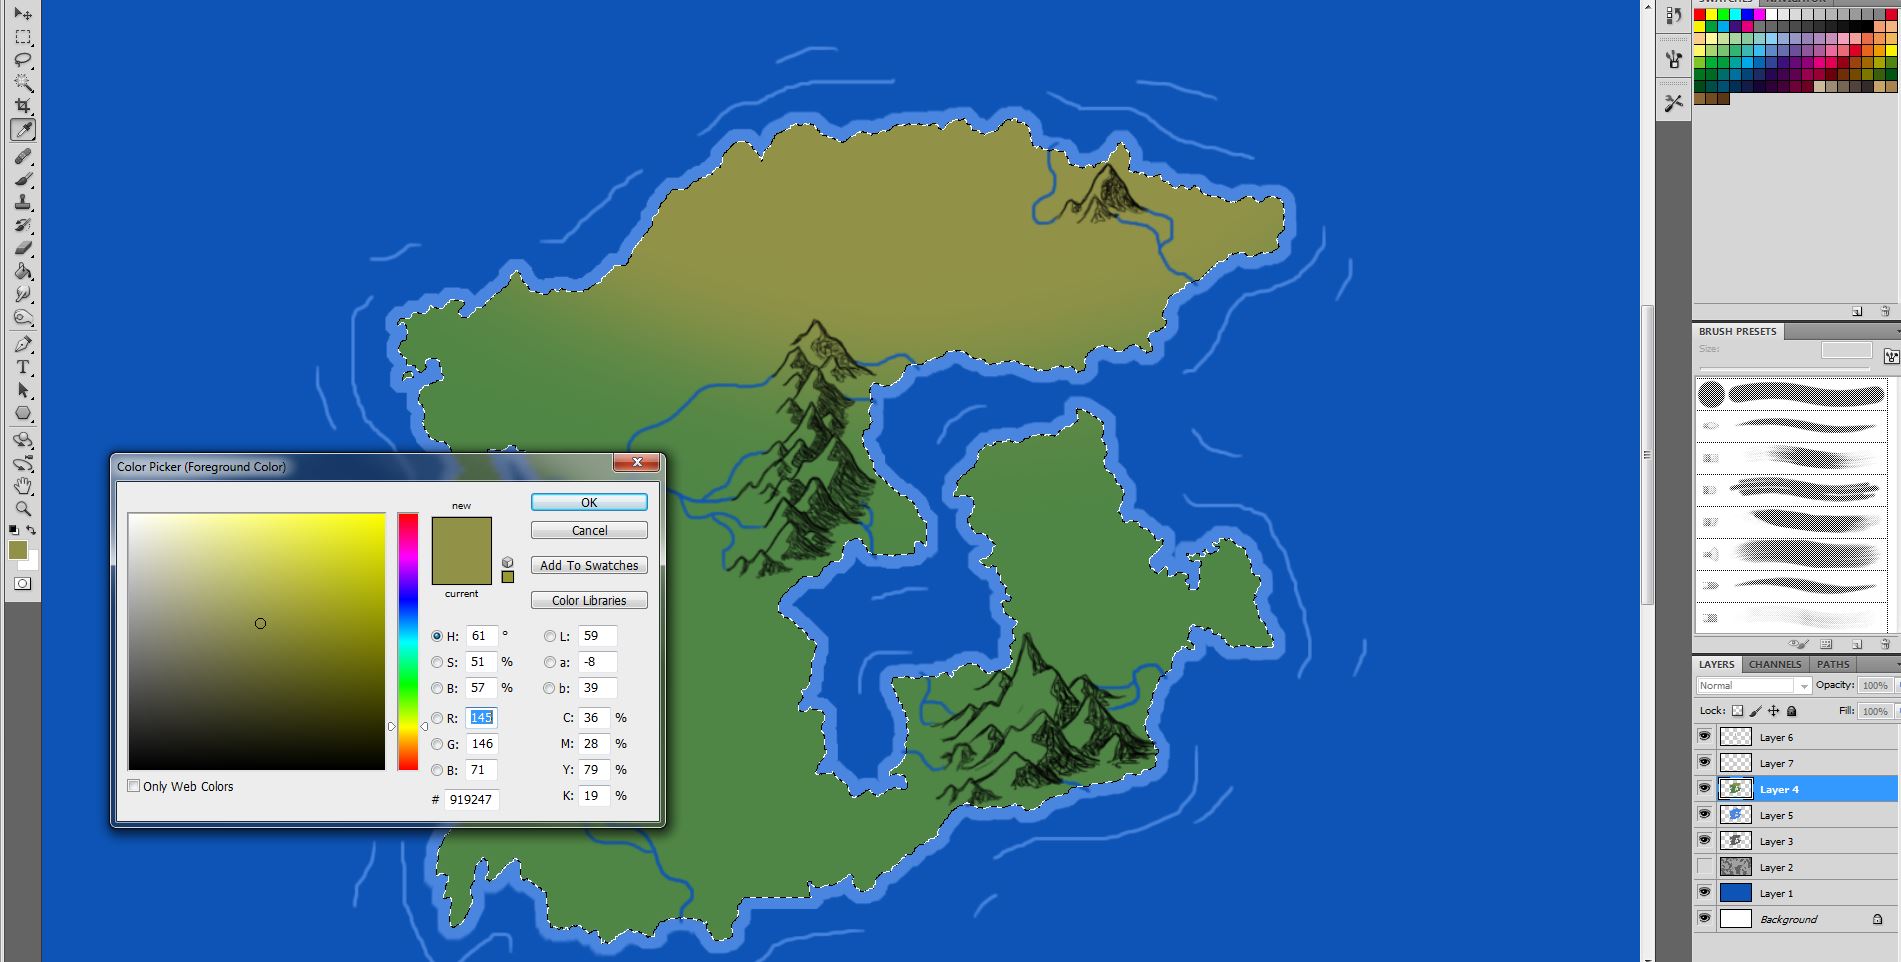
With the layer still selected, begin coloring in the parts of the biome. Here I used a slightly brownish-yellow for the sands and desert part of the continent.
Coloring the Mountains
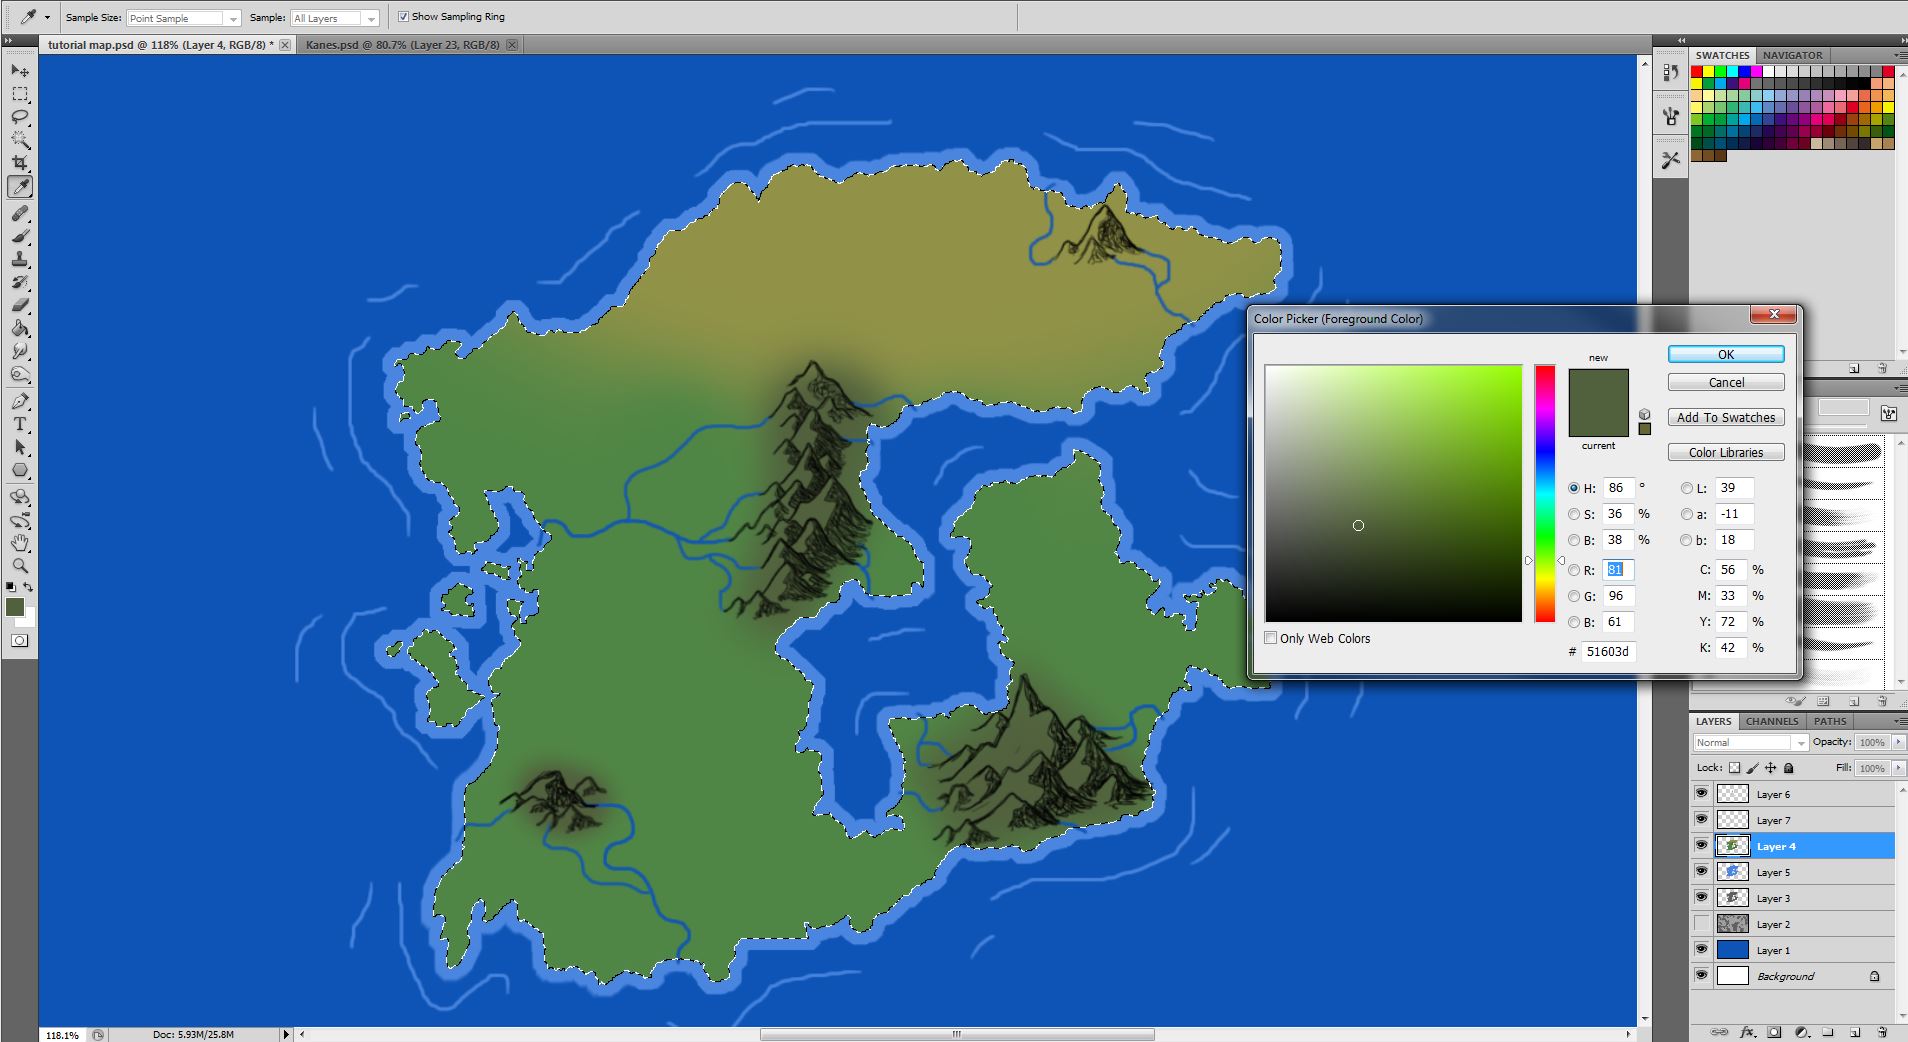
Take a brown color and do the same with under the mountains. You might want to decrease the brush size a little to make it neat, and the color of mountains can range from slightly dark green, to a dark brown, or even gray. If you go a little to far with color on the moutains, you can change it to the land green and just smooth it out.
Coloring the Forest/swamp
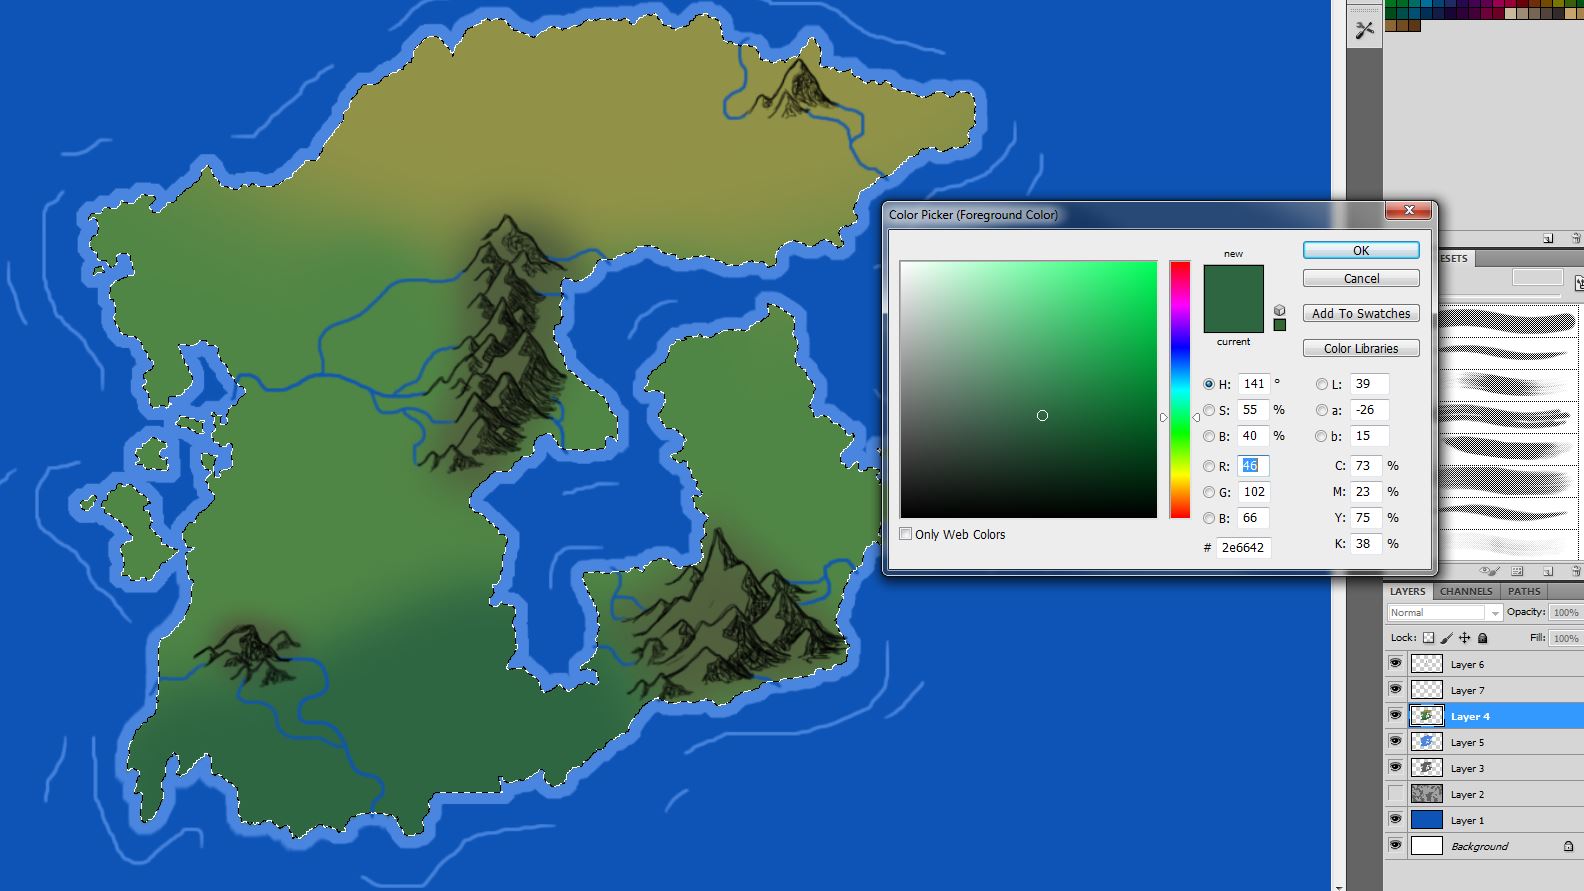
I decided for the bottom of the continent to be a mystic pine forest and add in a little swamp so I got a slightly dark turquoise/green color and added that to the bottom side of the map.
Coloring the Volcano
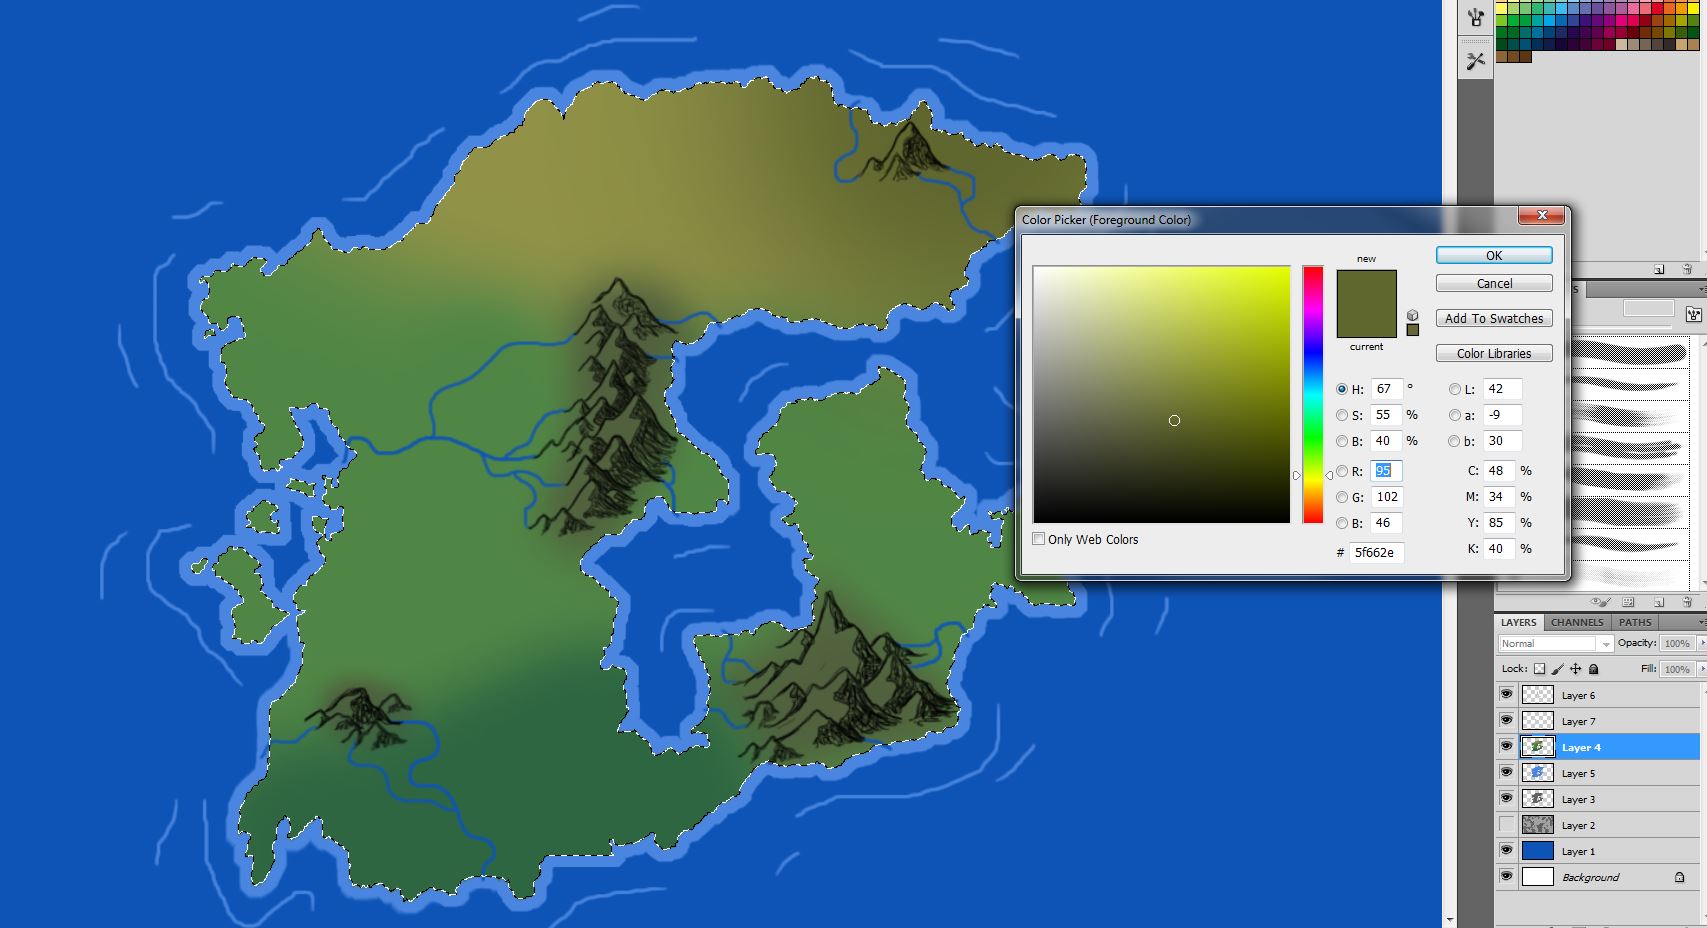
I want to make that top lone mountain a volcano, so I get an even darker yellow/brown to color in the land up there, to kind of make it look spooky and dreadful. And that would be all the biomes on this continent that I want. If you wanted to add snow, use the same technique but with white.
Smoothing the River Transition
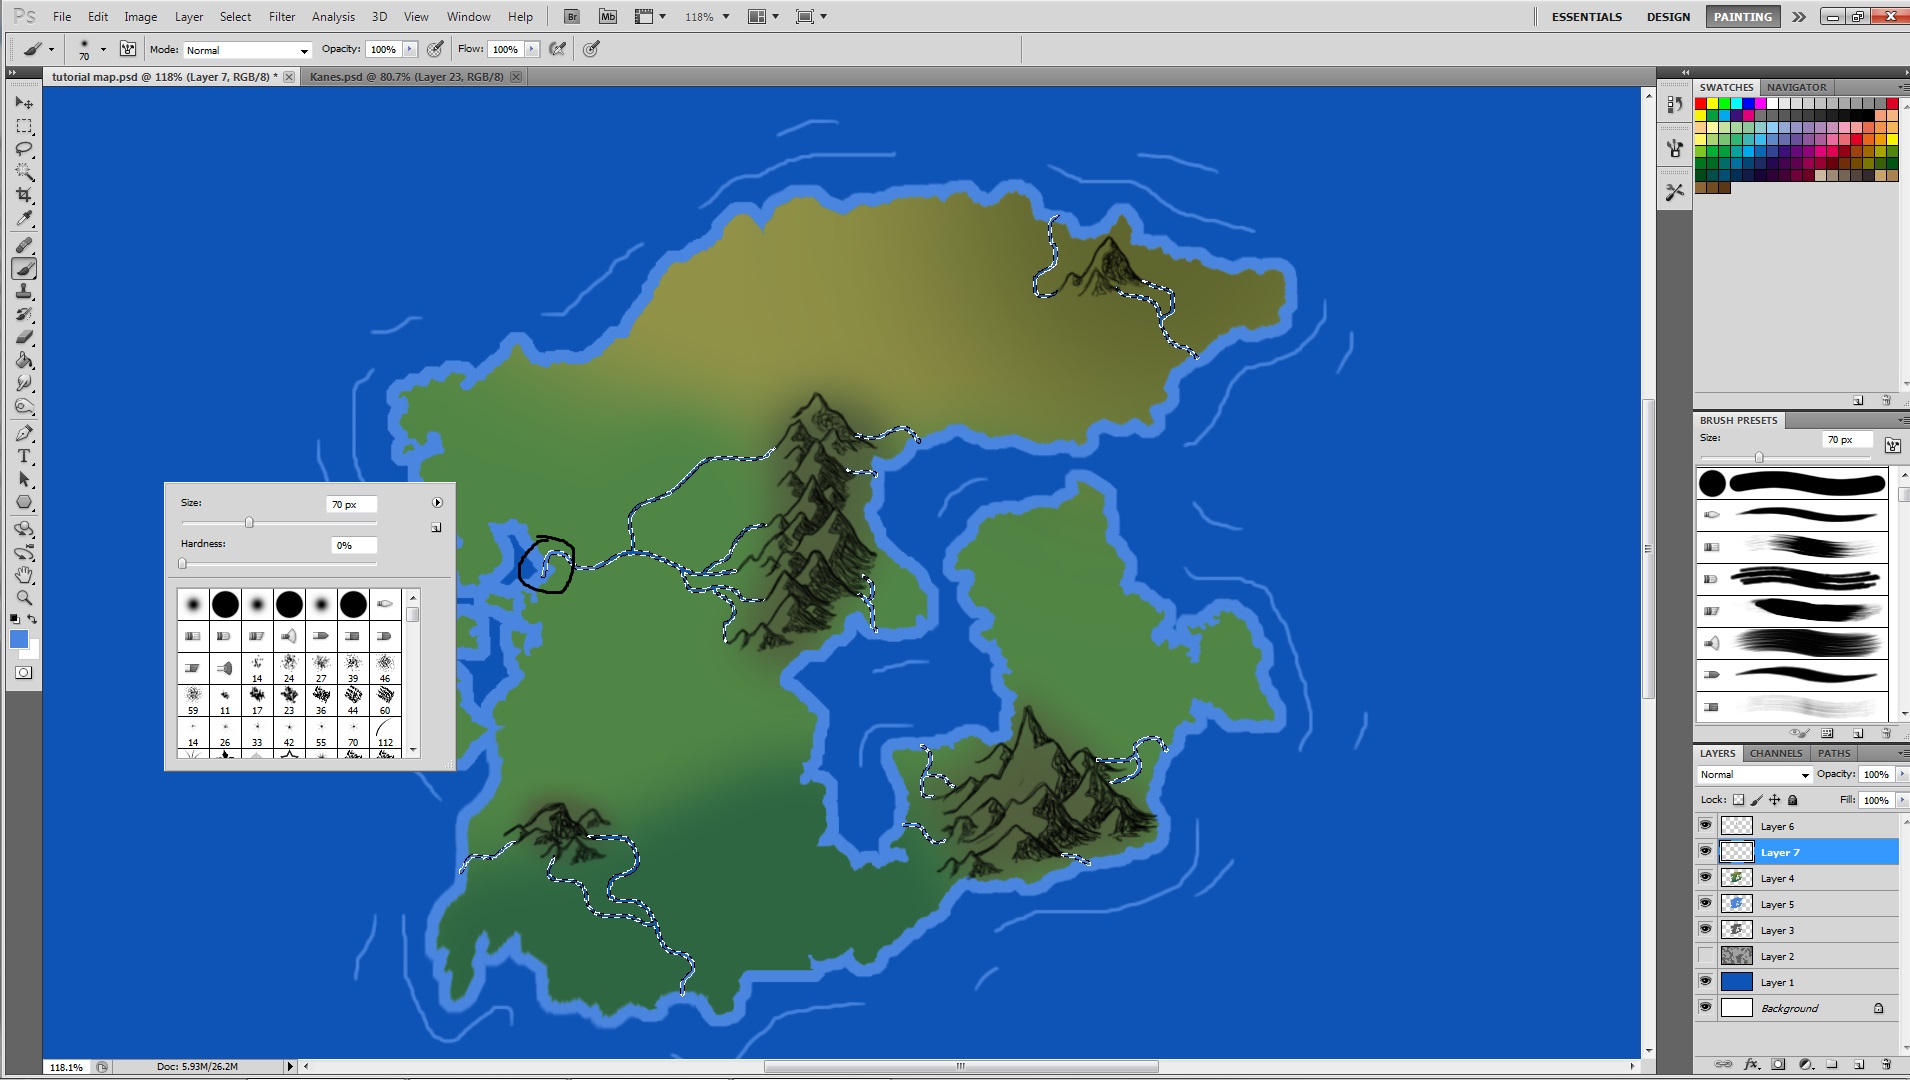
On the river layer, ctrl-click the box next to the layer name to select the rivers. Make your pallete color the one of the coast line and select a fairly small brush, ~70 pixels, and with zero hardness. As the water enters the coast area, press the brush so that it smoothly transitions from the dark blue rivers, to the light blue of the coast. you can always erase the small parts that stick out if you can still see the outline.
Adding Forest
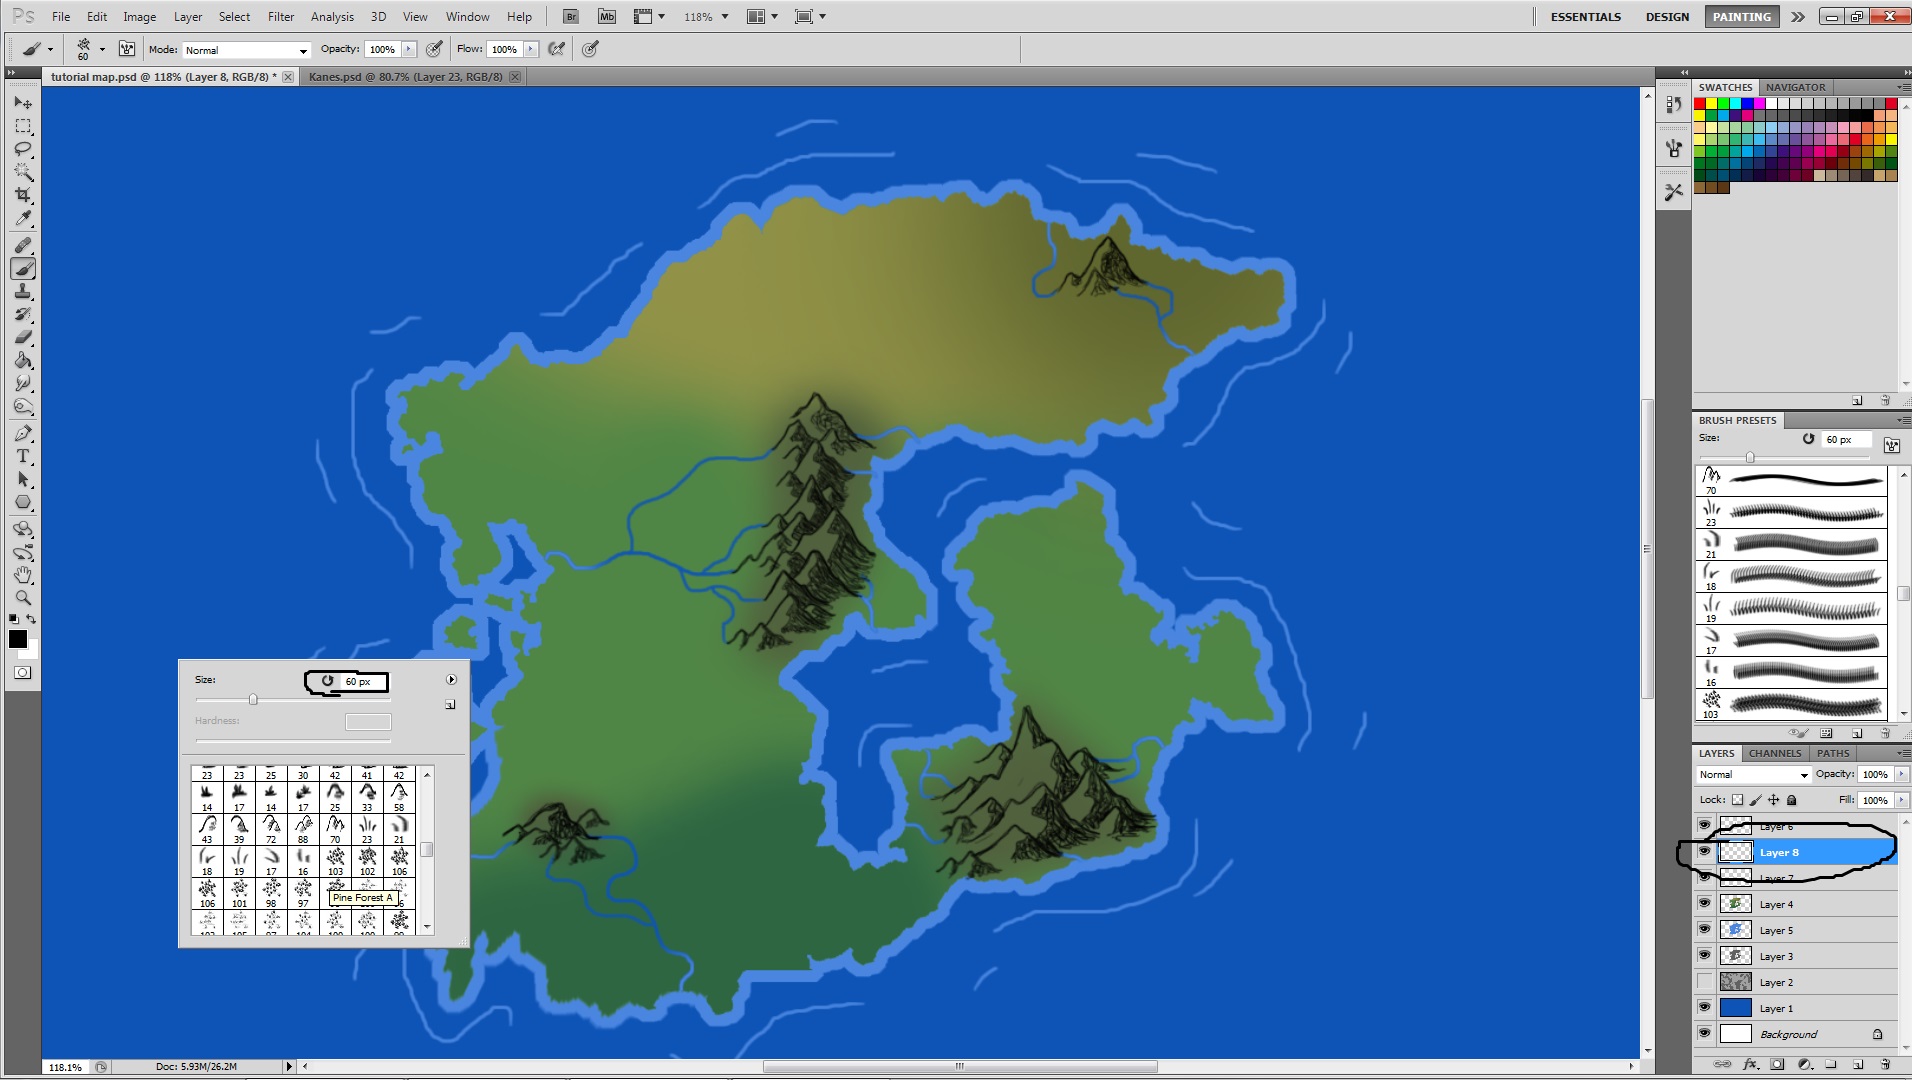
Create a new layer that will be used for the forest and trees. I am using the same brush set as earlier that has the mountains in it. Don't forget you can always use your own brush set if you'd like. Select black as your pallete color. Select whichever forest type you'd like, here I'm going to use pine trees for the south of the continent in the dark green part. Generally on this side map, I like to always make my trees at 60 pixels, which seems to work perfectly and looks nice, But you can always change the size depending on if you want bigger trees/smaller continent.
Putting in the Trees
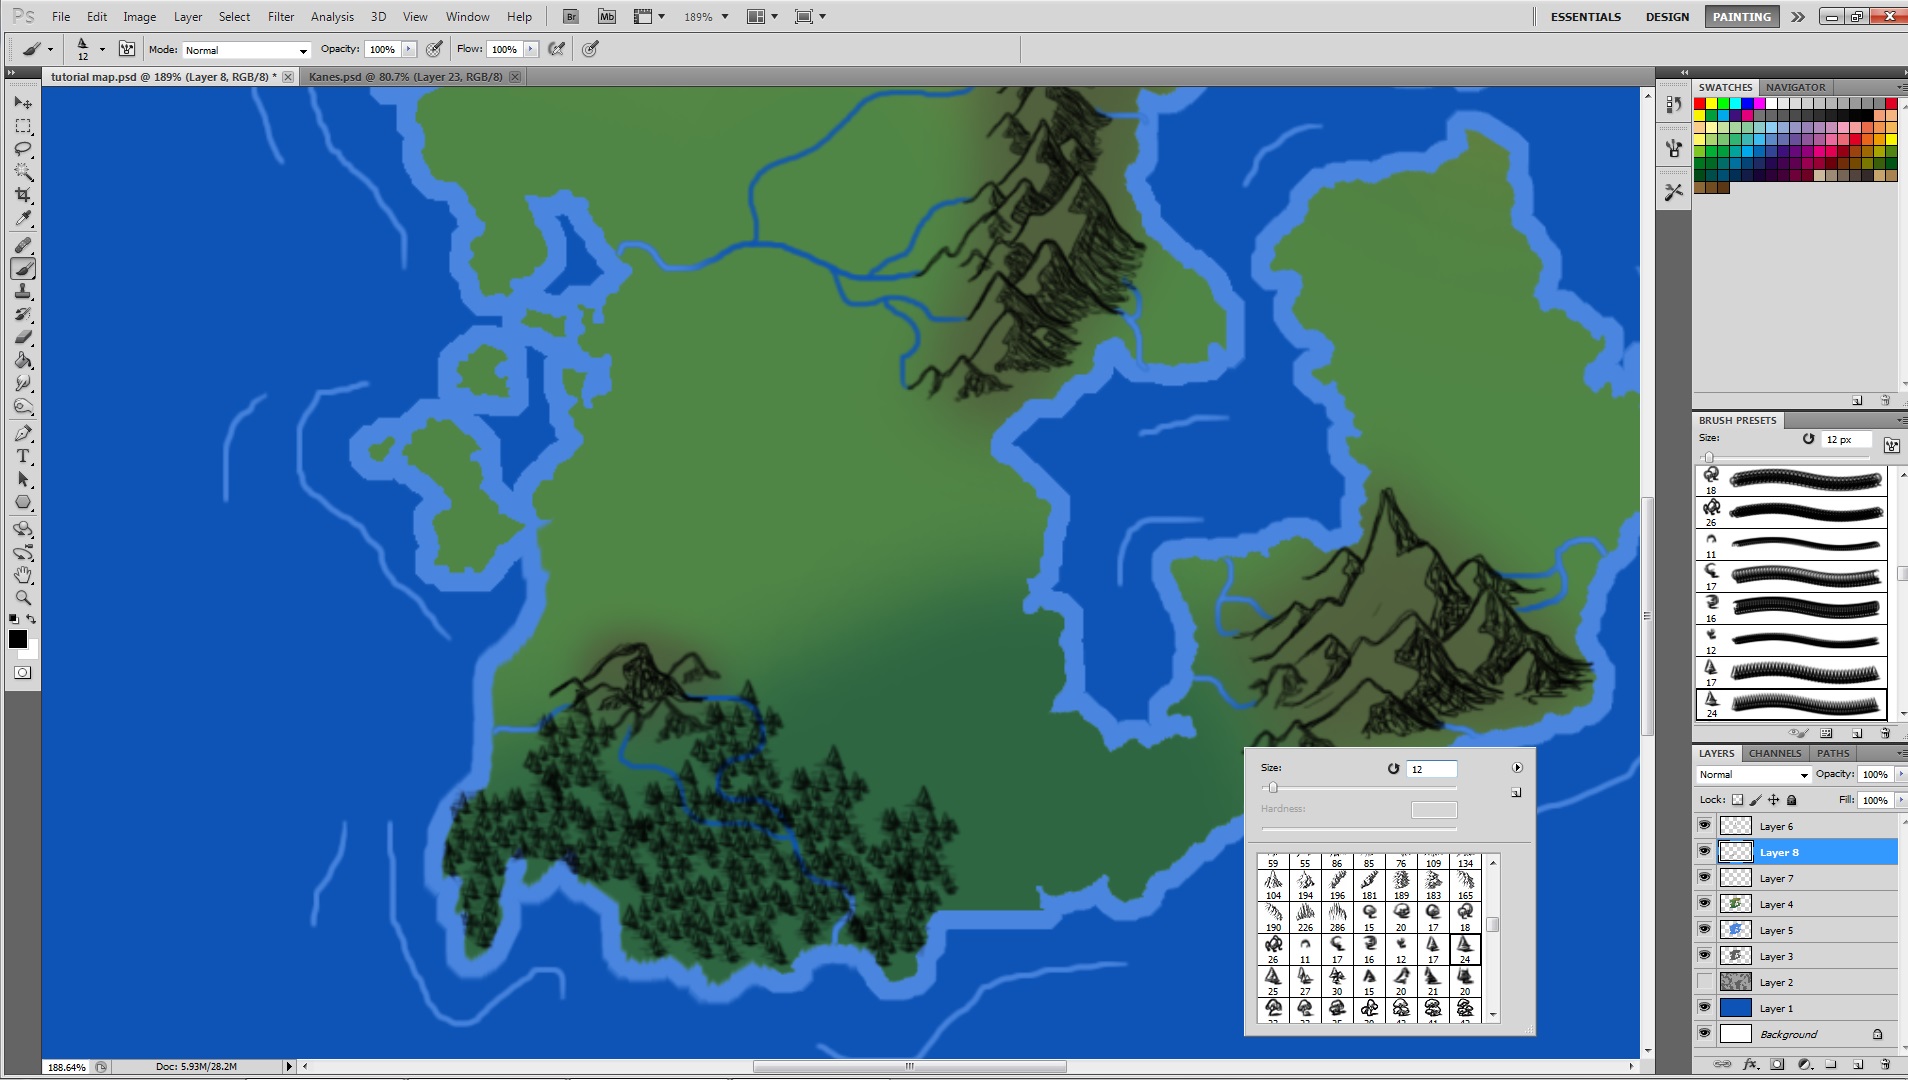
Begin plotting on the trees and fitting them together. You can leave some empty spots as after the bulk of the trees are put in select the singular tree brushes, scale them down a little, and then place them around in the empty spots. If some of the brush goes off the land just erase the ones floating in the water.
Smooth Tree Transition
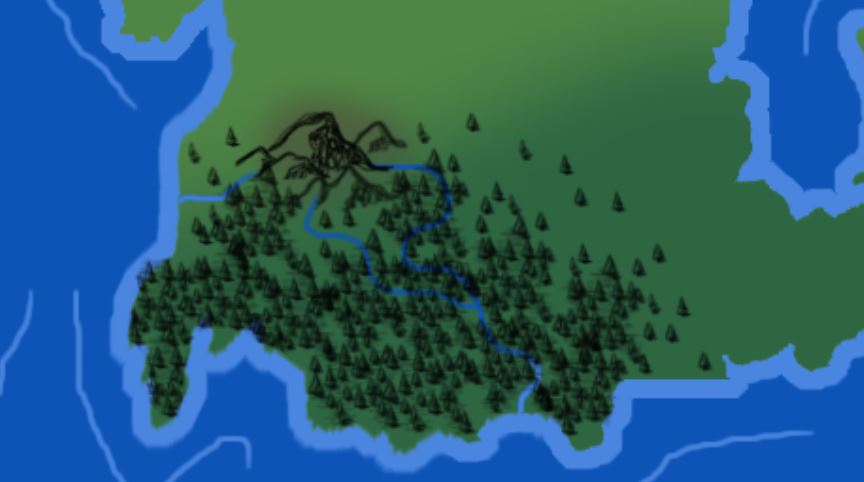
Using the singular tree brushes just slowly spread out the trees so it seems like the forest fades away, and use them to fill up empty space.
Fill the Rest of the Continent With Trees
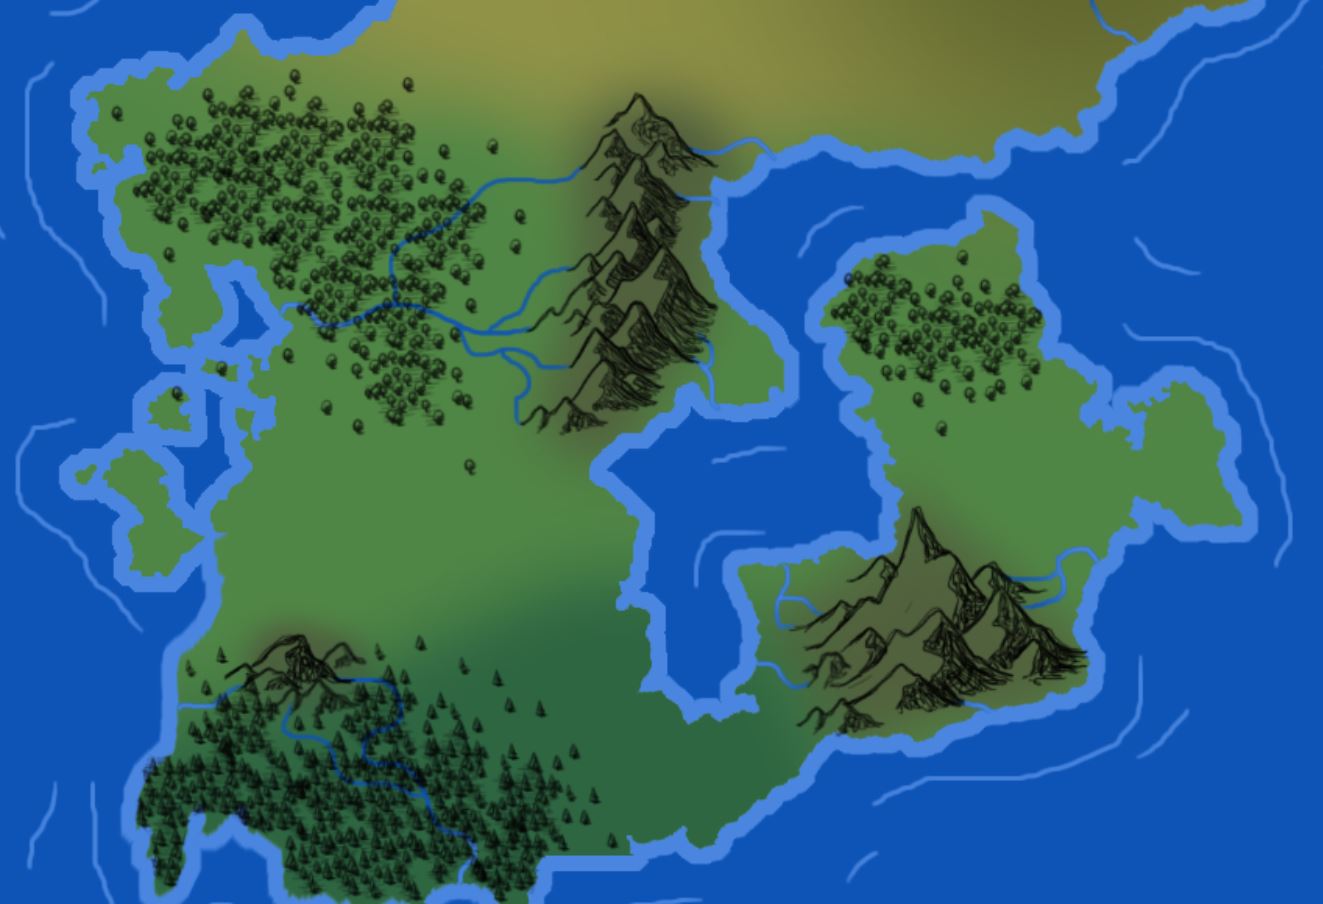
Using the other regular tree type, I continued to fill up the parts of the continent where I want forests, and did the same idea with the singular trees to fade them out.
Adding Swamps
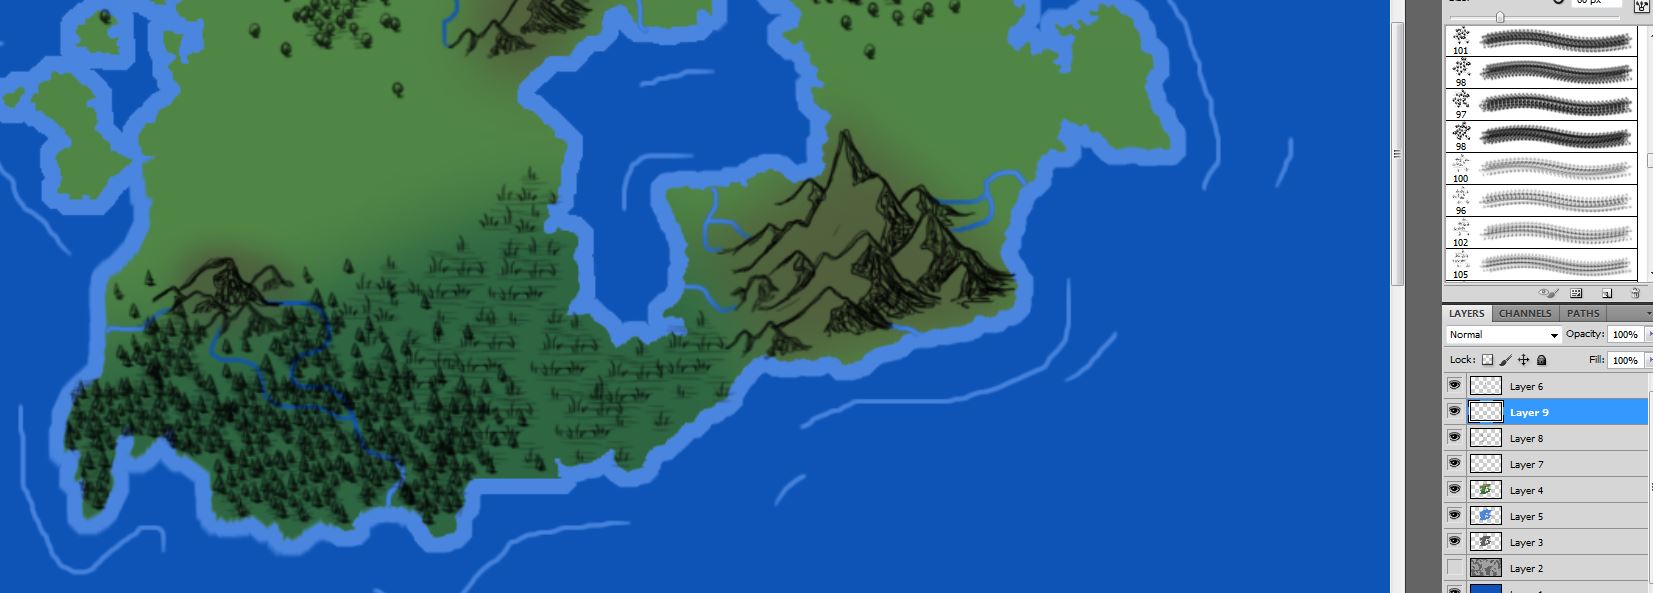
I made a new layer for this, but its the same exact idea as the trees. I picked the swamp brush and plotted them down in the areas where I wanted them. Still using 60 pixels as a generally size.
Adding Hills
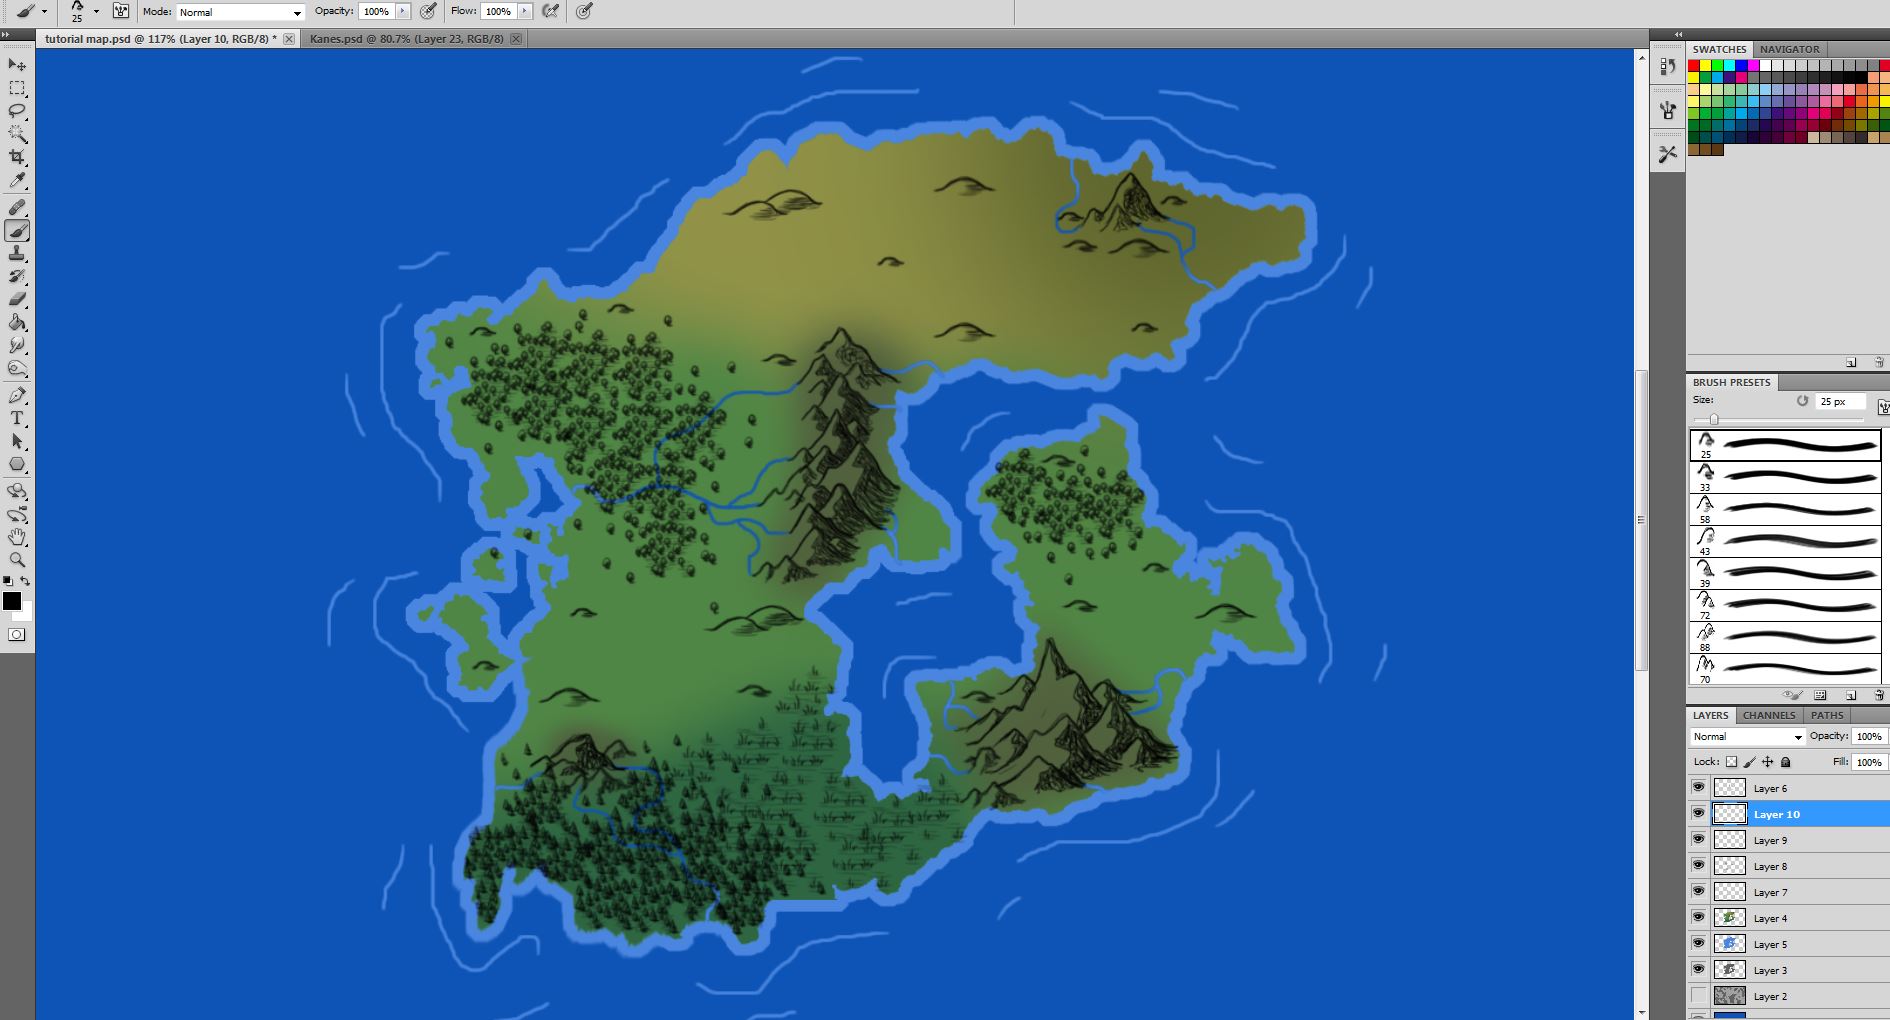
On another layer, select the hill brushes and place hills wherever you see best fit. Possibly more around mountains if you'd like, or just general ones to fill up the emptiness of the open areas.
Adding in Grasses
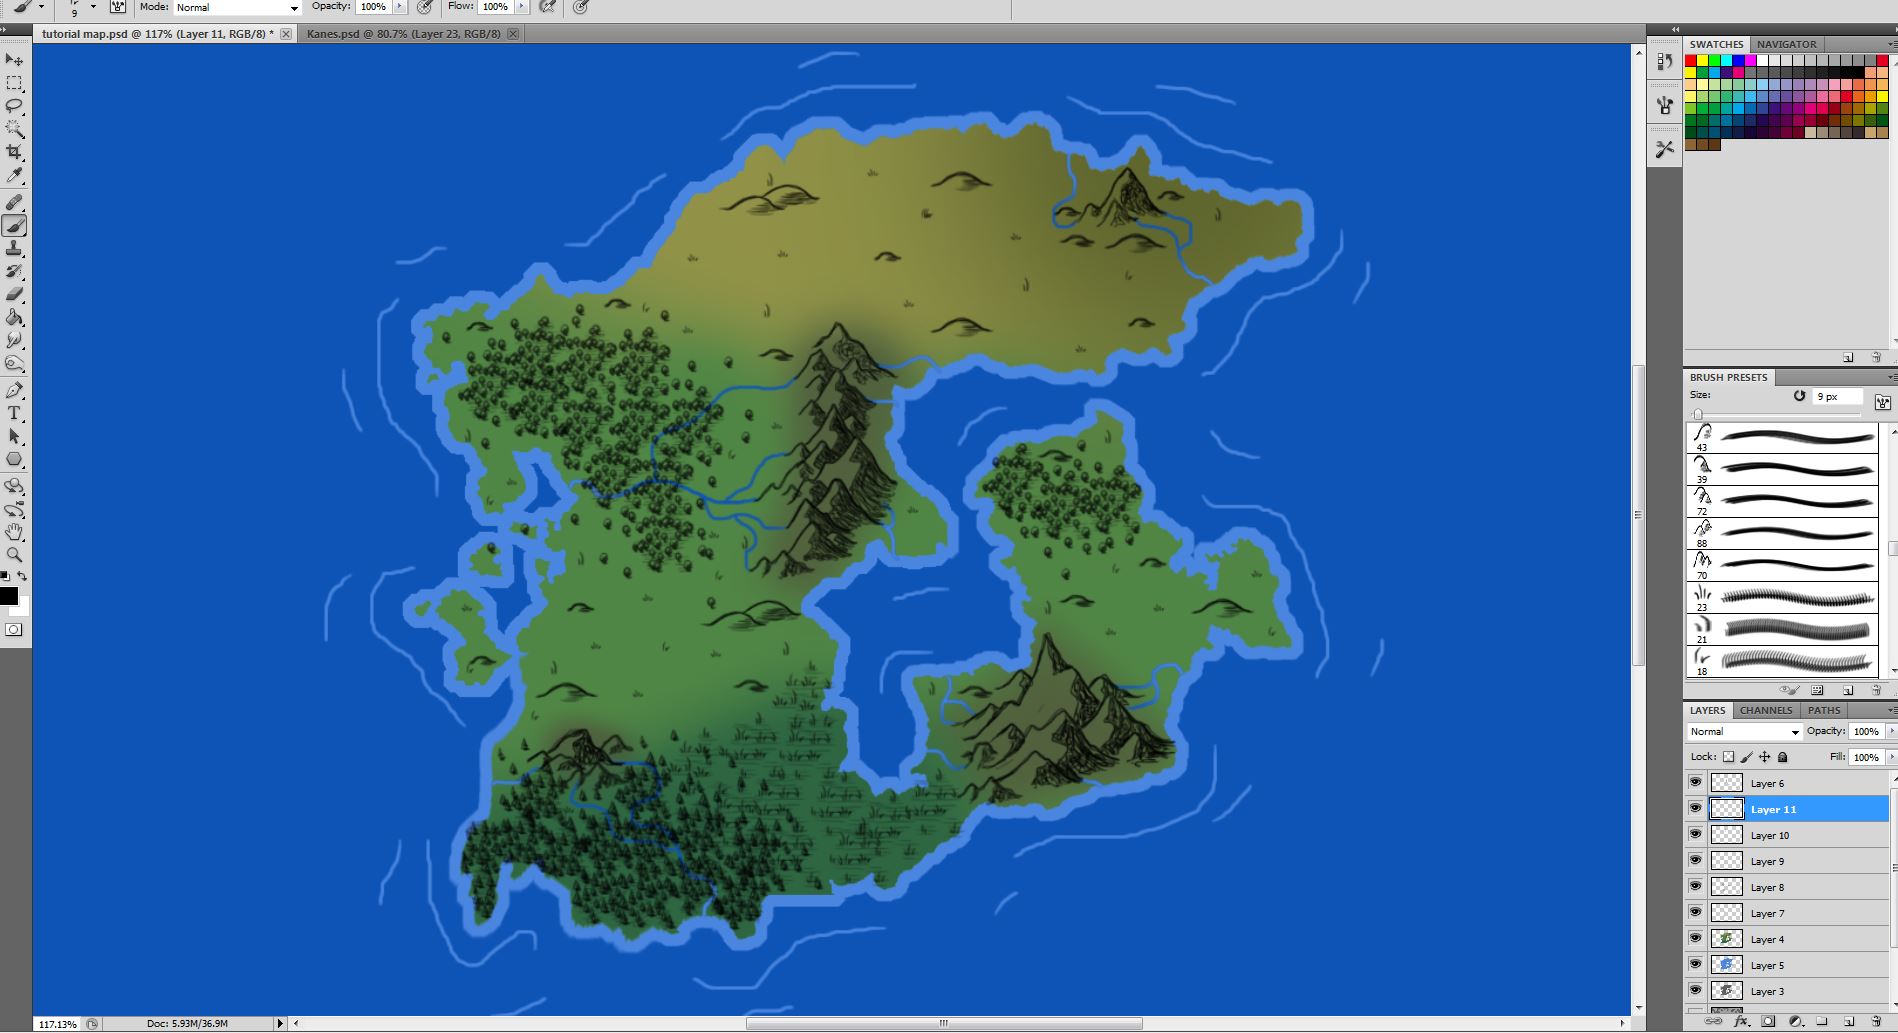
On another new layer, select the small singular grasses, and plop them around your continent. They really fill it up and make it look nice I think. I scale them down a little and just put them wherever you'd like or see best fit, such as grasslands or plains.
Adding Lava
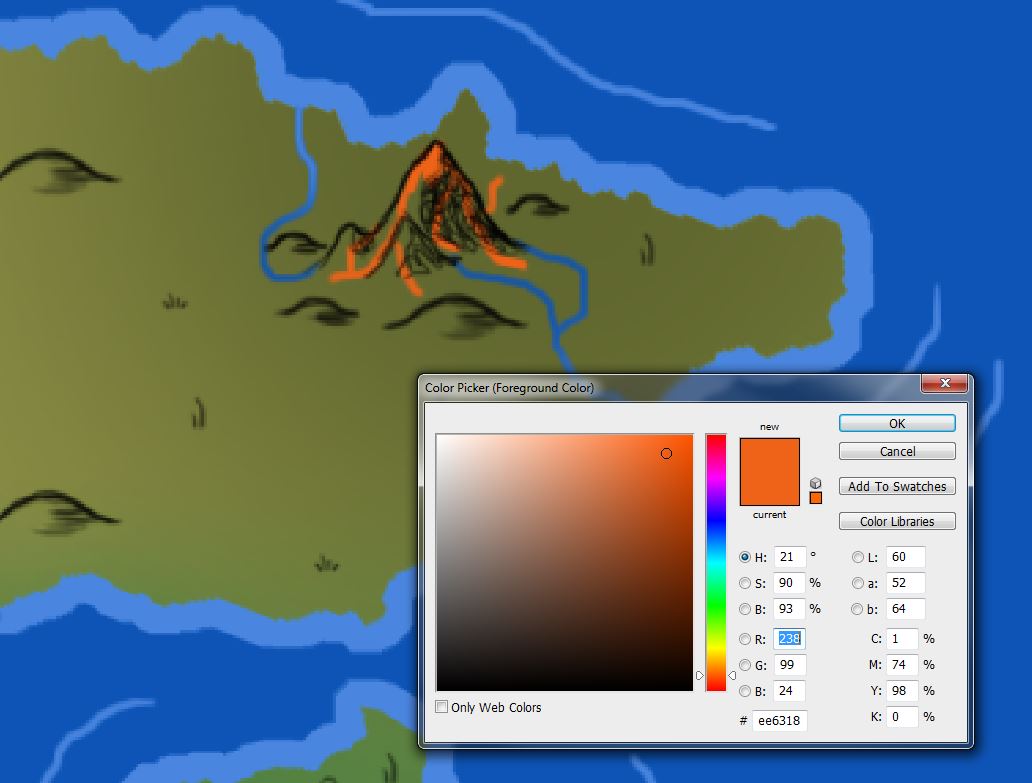
On another new layer, I just simple selected a small brush and picked an orange color to create lava. Put it under the mountain layer and draw in some lava flows.
Adding Snow Capped Mountains
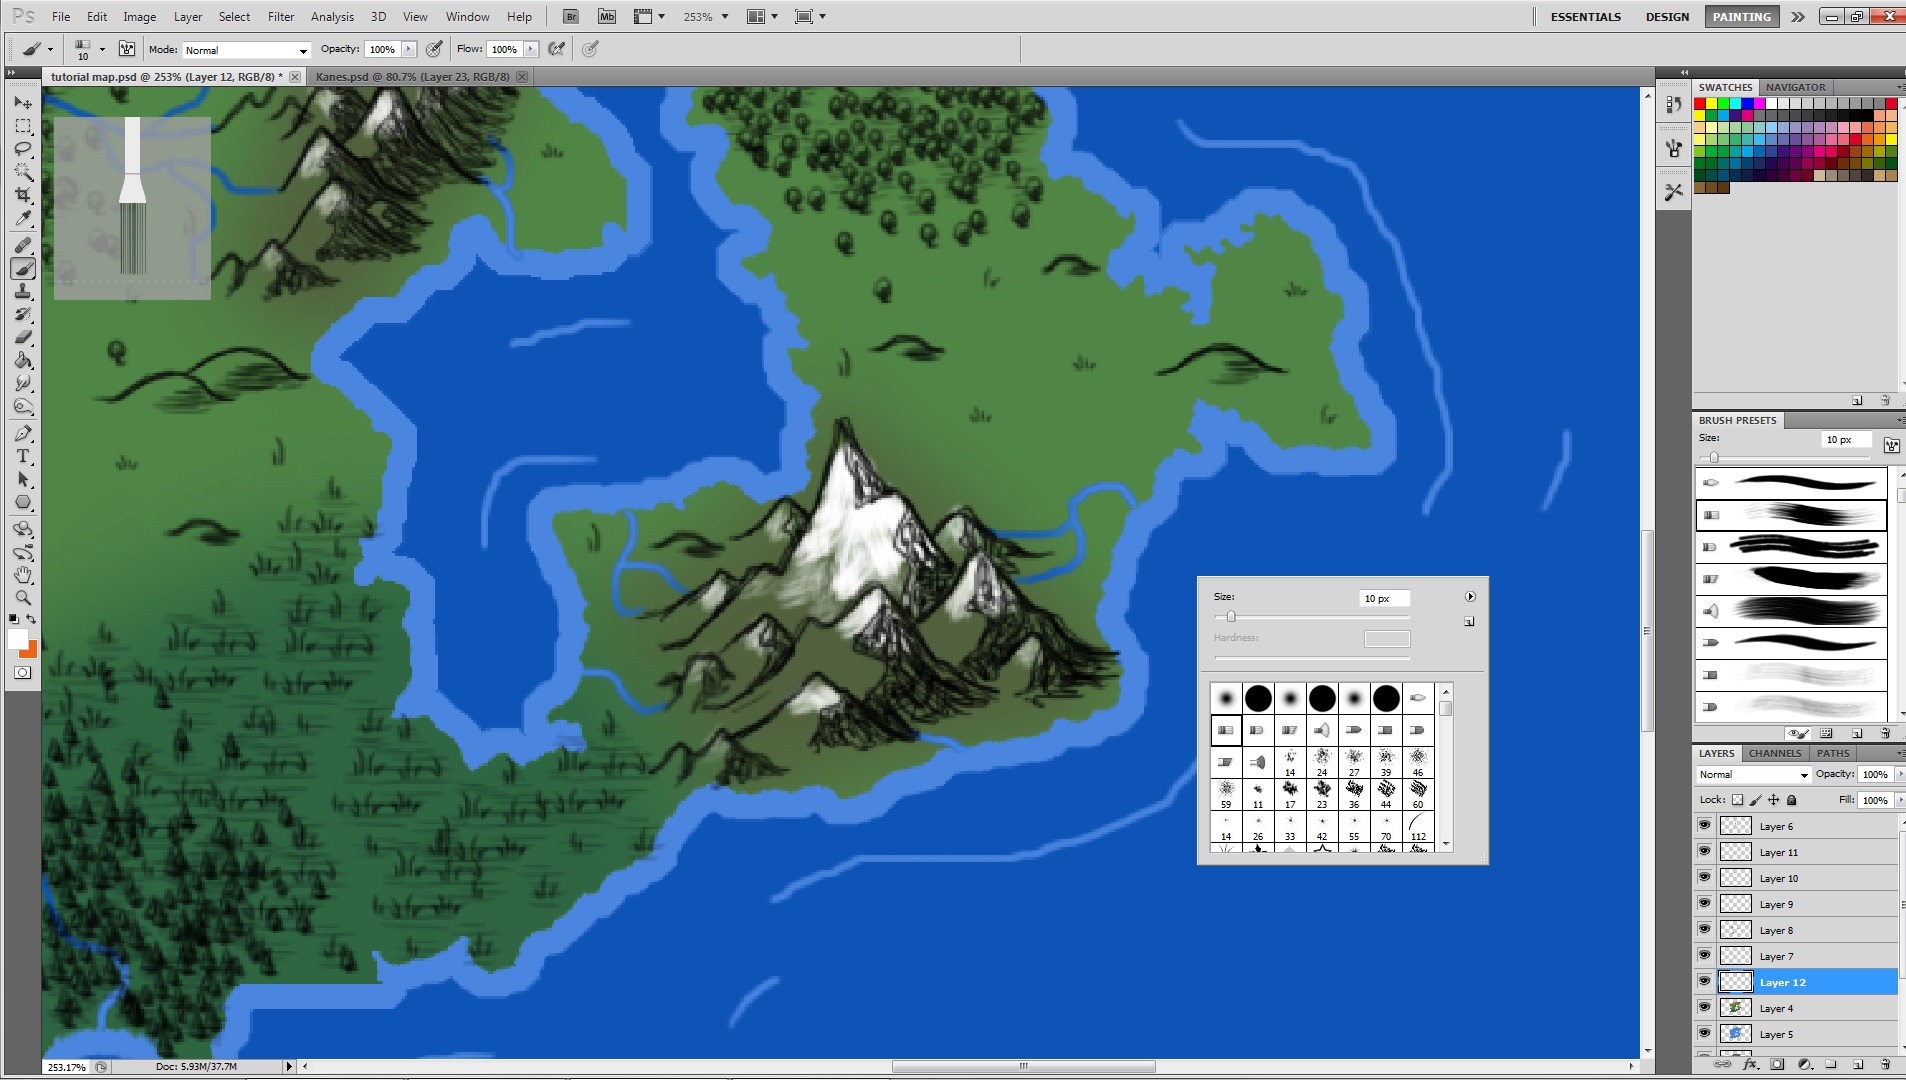
I used the same layer as the lava, but you can always add another. Select the color white, and generally I like using the brush that is pictured to create the snow on mountains as it has a very nice effect. Just color in the tips of the mountain tops that need them.
Adding in Settlements/places
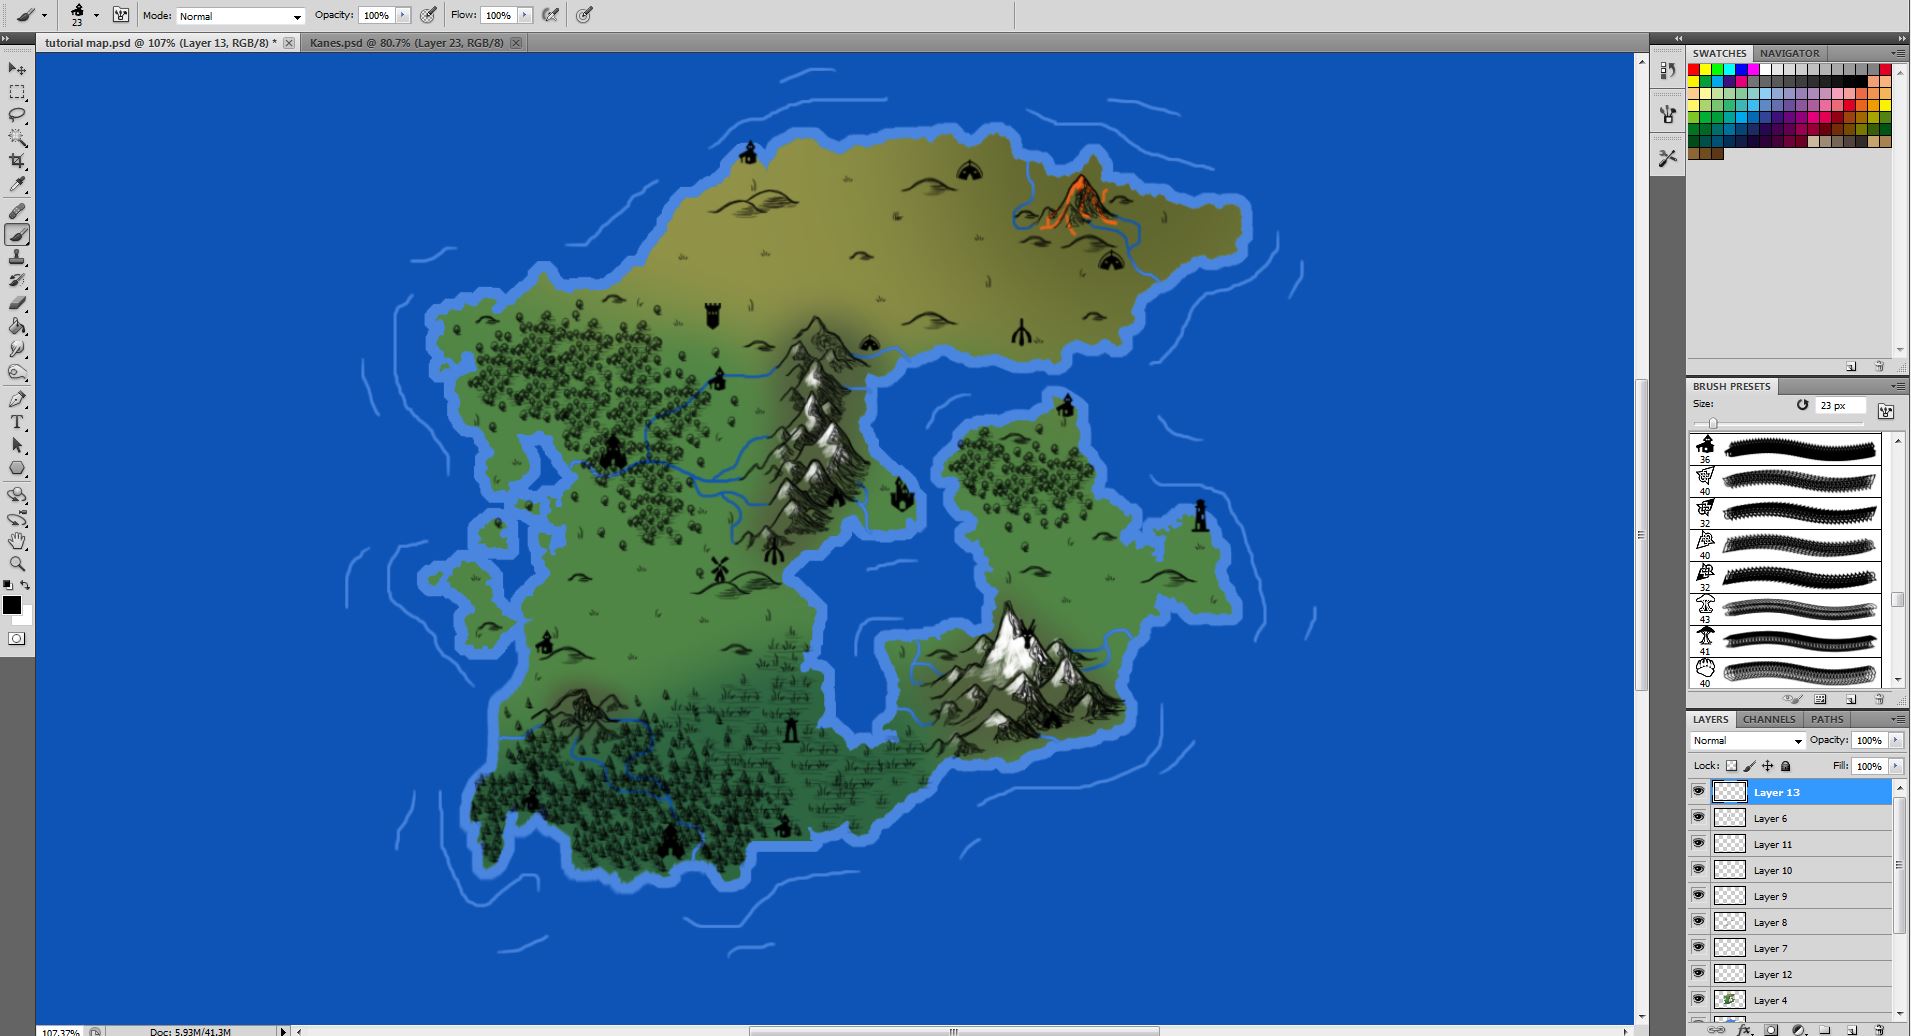
For my maps I like to use the Skyrim map markers brush set since they're very convenient and nice looking, but you can always make your own. Plop them down on a new layer on top, and make form however your world would like to be and it's lore.
Outlines of the Markers
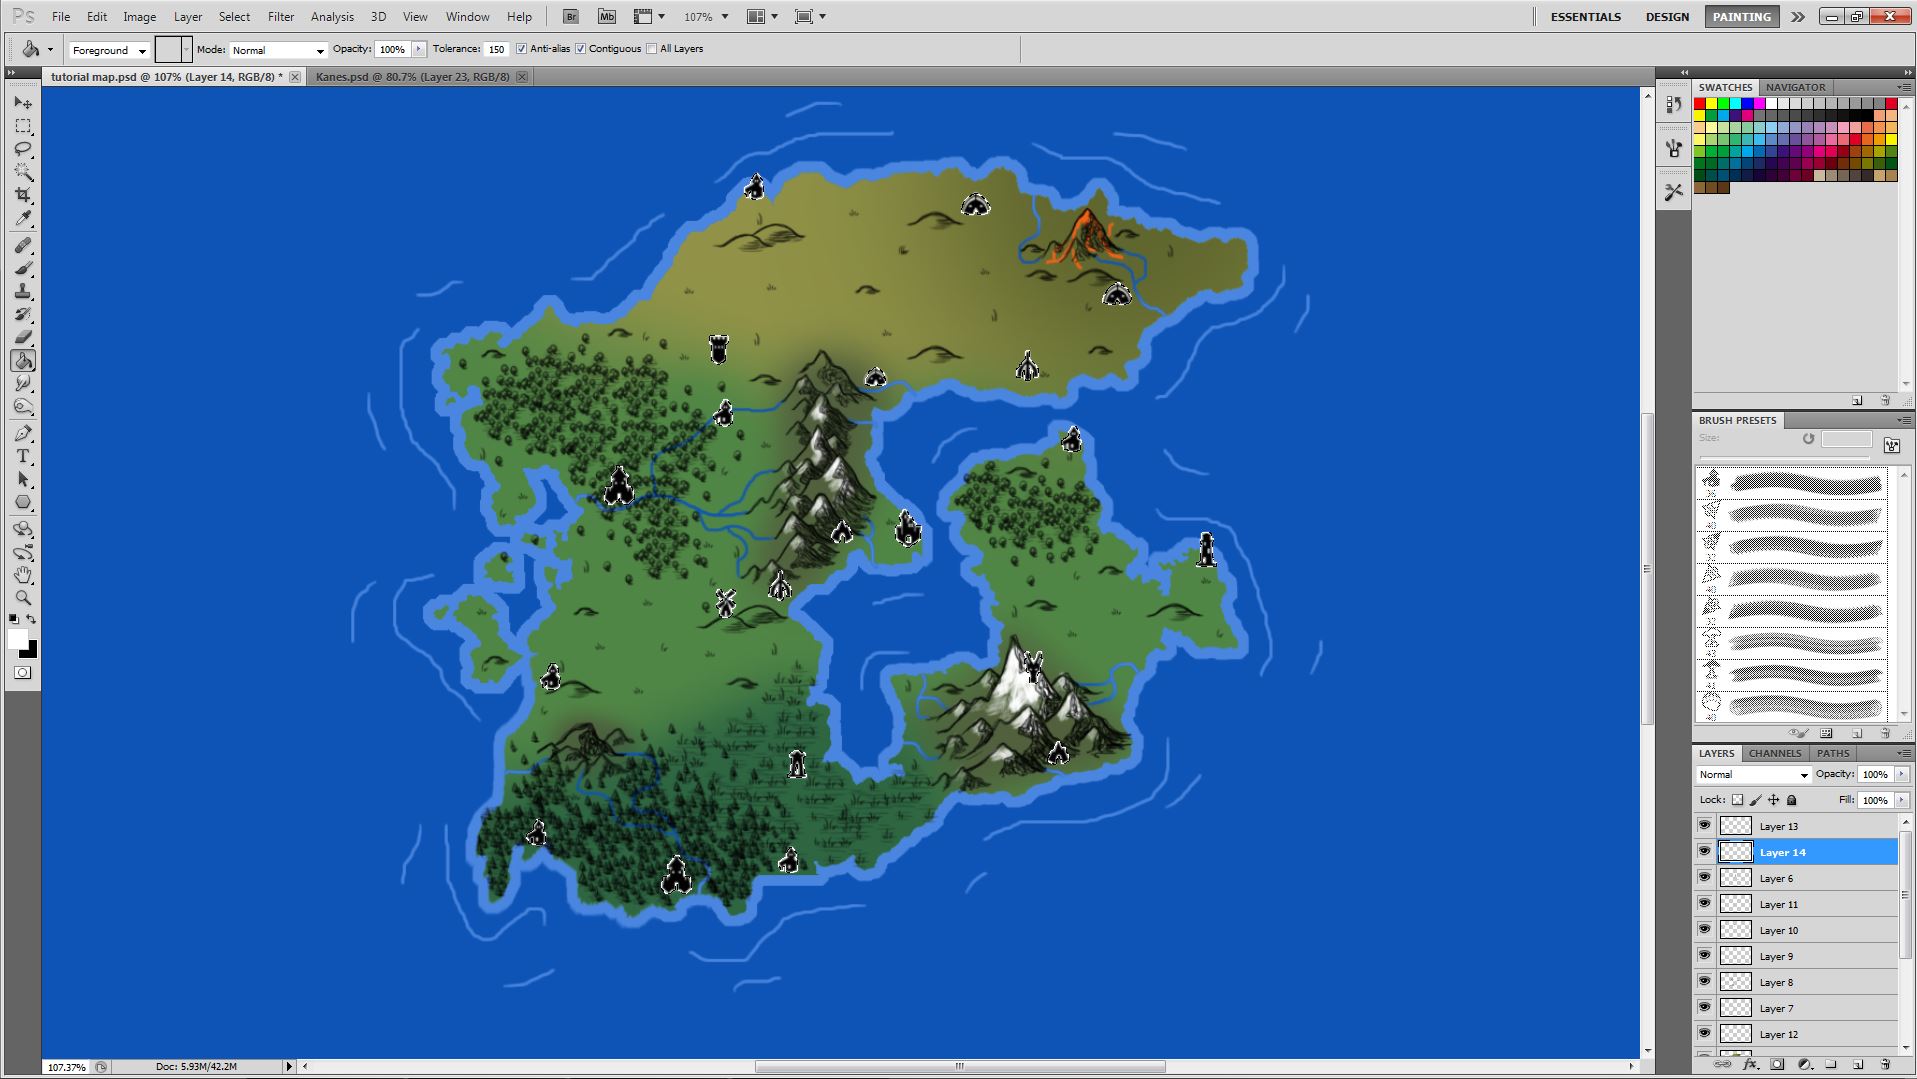
Add a new layer below the map marker one, and select the previous layers outline with ctrl and click the box next to the name. Then go to Select -> Modifiy -> Expand and I generally just expand it by one pixel and fill it in with white to make the markers stand out.
Roads
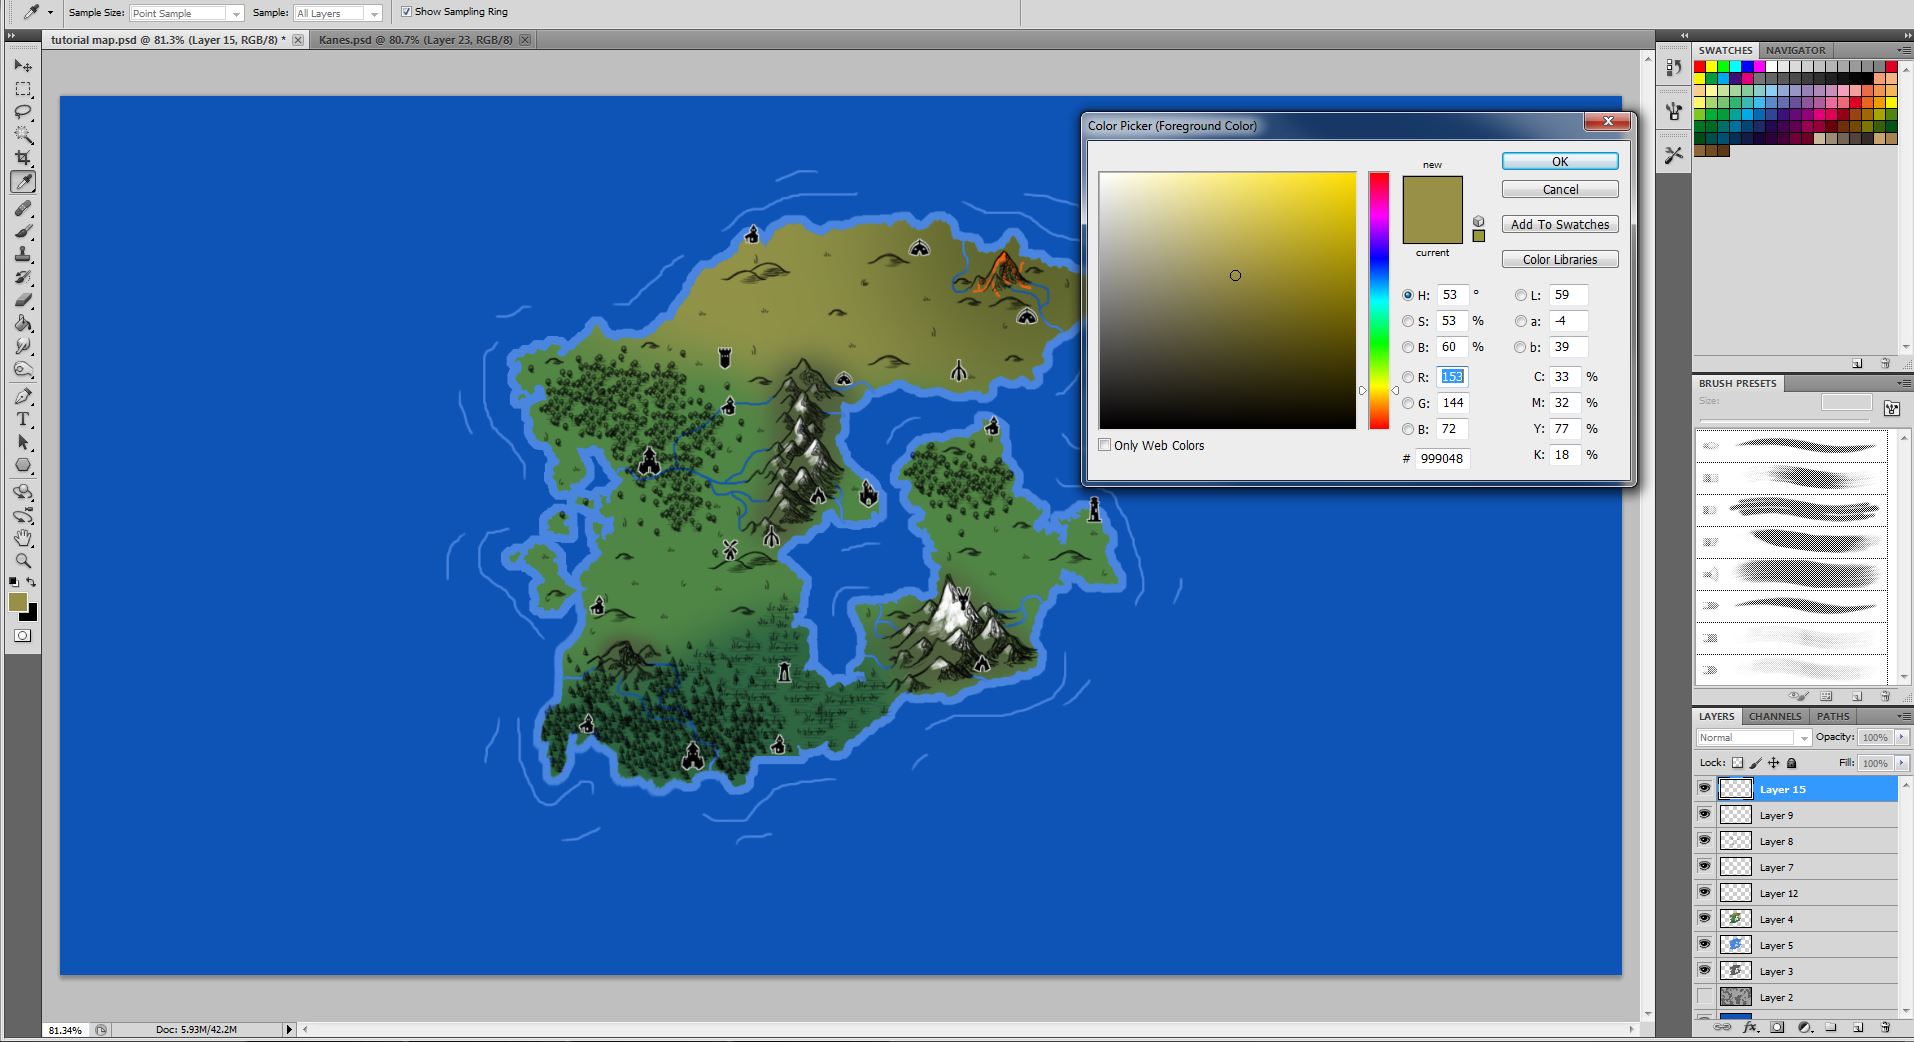
For the roads, I select a brownish tone and then take a 3 pixel brush just like I used in the rivers or ocean ripples. I would put the new layer that the roads will be on, under the tree's layer and over the rivers, so they can look like bridges.
Adding Roads
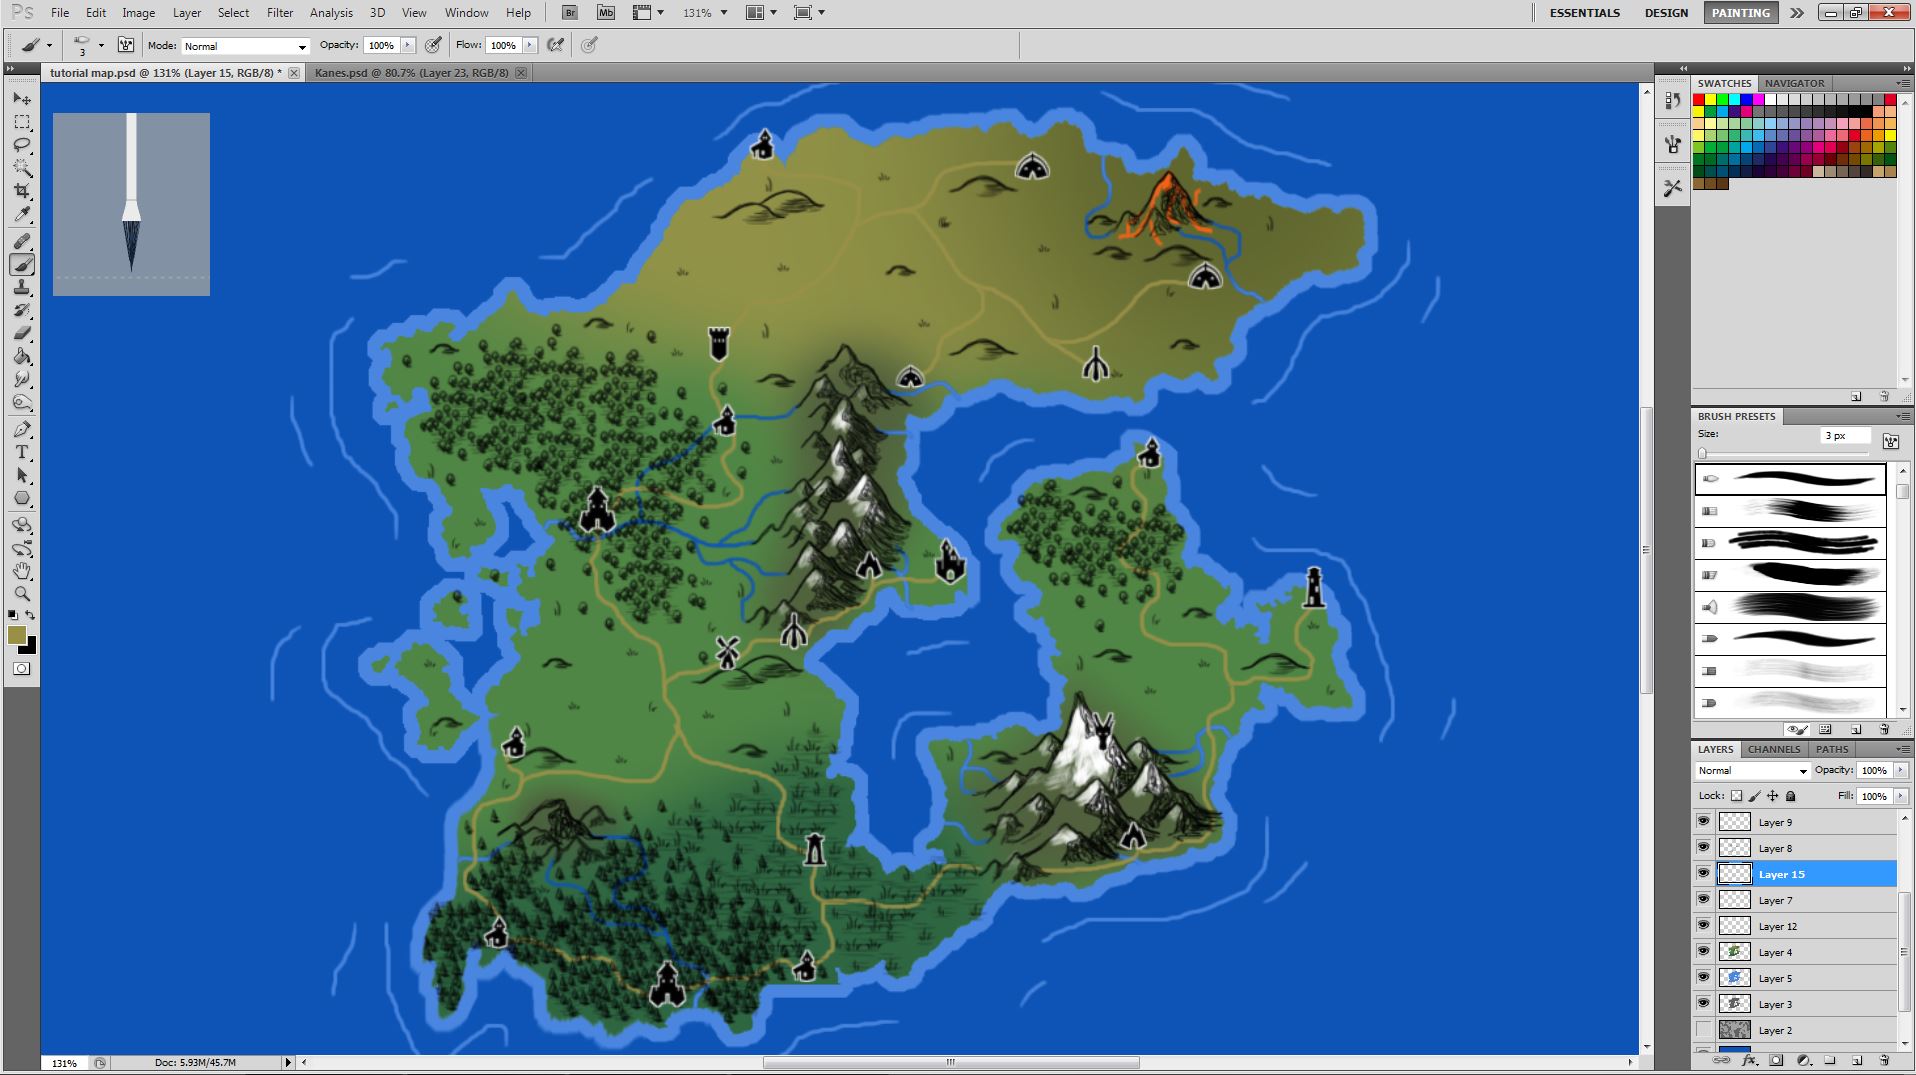
Just connect your areas wherever you'd like them to connect. Have them go behind mountains or hills or anything like that.
You're Done!
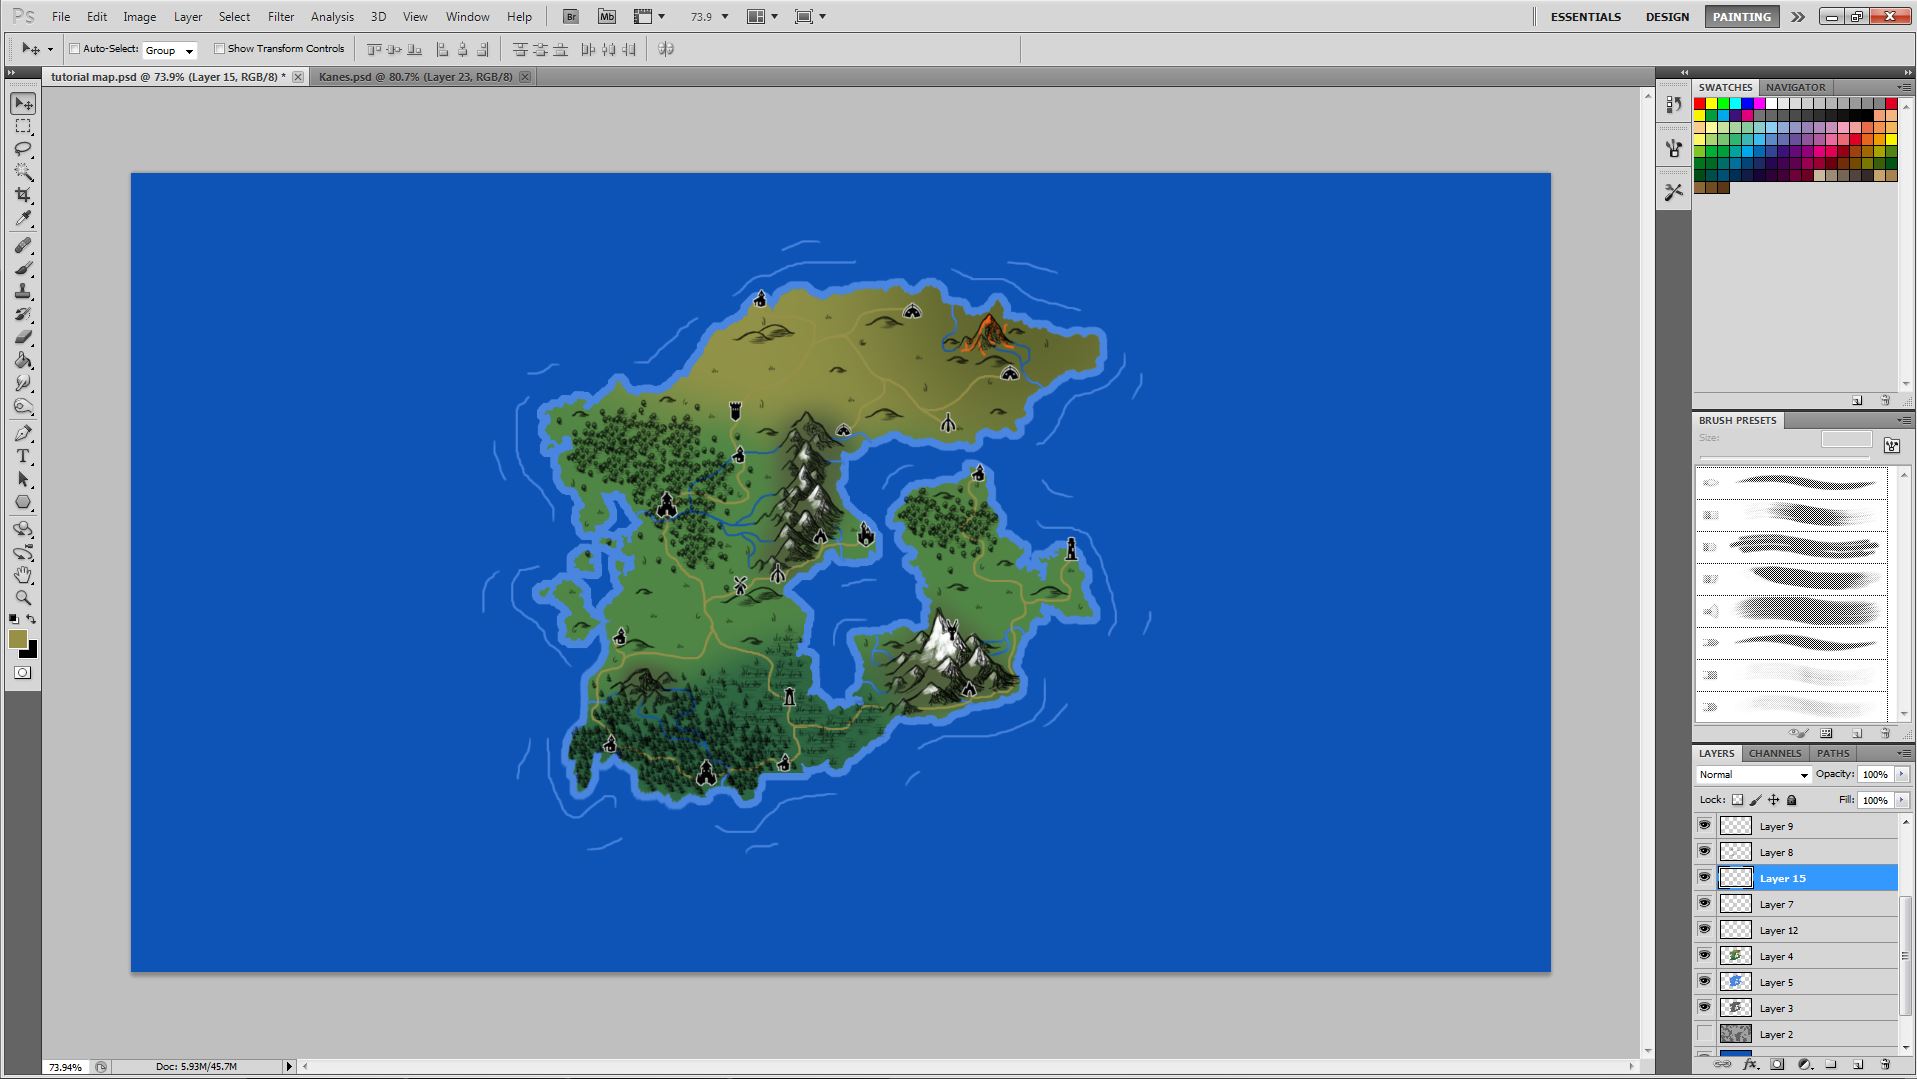
Thats all! Just save it as a .png or .jpeg, and if you used the size 1080x1920, they're perfect wallpapers too! I hope you enjoyed this tutorial! Add a compass if you'd like and text for town names and geographic features and you're done!