How to Make a Giant Touch Screen
by RobSmithDev in Design > Software
995 Views, 20 Favorites, 0 Comments
How to Make a Giant Touch Screen


Have you ever wanted a touch screen on your computer? Have you got a large LCD monitor that you wish was a touch screen? Have you got a projector and which you could turn the wall into a touch screen? Well, this guide will show you how.
You need:
1. A Kinect for Xbox 360, Kinect for Windows or OpenNI/Primesense Sensor
2. A copy of the Touchless Touch software from http://www.touchlesstouch.com
3. Some glue or gaffa tape.
4. USB extension lead
5. A USB mouse
6. Your LCD screen / projector
You need:
1. A Kinect for Xbox 360, Kinect for Windows or OpenNI/Primesense Sensor
2. A copy of the Touchless Touch software from http://www.touchlesstouch.com
3. Some glue or gaffa tape.
4. USB extension lead
5. A USB mouse
6. Your LCD screen / projector
Windows Setup

Connect your LCD screen or projector to a computer running Windows 7 or Windows 8.
On that PC, goto http://www.touchlesstouch.com/ download the Touchless Touch software and install it.
On that PC, goto http://www.touchlesstouch.com/ download the Touchless Touch software and install it.
Sensor Setup
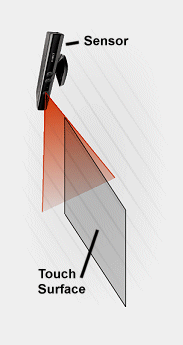
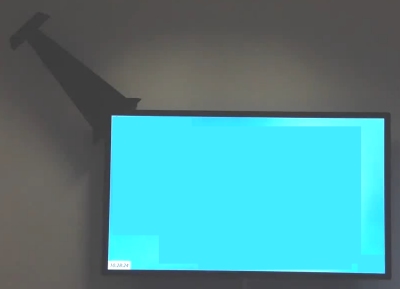
You need to affix the sensor so that it is flat level with the touch surface. If you are projecting onto a wall then the sensor must be mounted flat on the wall. For an LCD display you may need to construct a suitable mount.
The sensor should be mounted near one of the corners and angled to point diagonally to the opposite corner. It should be at least 60cm away from the corner of the picture.
There are several ways to attach it, the simplest is just to stick it to the wall with gaffa tape. If you feel a little more adventurous and are using a projector, then use a Kinect mount like this and fold it together, drill through to screw it to the wall.
It is important that the sensor be mounted flat and not twisted.
Connect the mouse to the USB extension lead and connect it to the computer.
Connecting It Together
Once you have the software installed and the sensor mounted plug the sensor into the computer. The computer should automatically detect and install the drivers for it.
If you are using a Kinect sensor make sure you have plugged it's power in or it won't work.
If your sensor is the Kinect for Xbox 360 you need to download and install the Kinect for Windows SDK, and then restart your computer.
If you are using a Kinect sensor make sure you have plugged it's power in or it won't work.
If your sensor is the Kinect for Xbox 360 you need to download and install the Kinect for Windows SDK, and then restart your computer.
Calibration Step 1
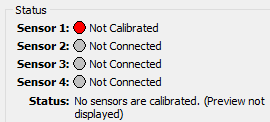
This is the most important step. If you get this step wrong the results will be poor. Take some time to do this correctly, and don't be afraid to repeat this process until you are happy with the results.
Go to the notification area in windows (the icons in the bottom right corner of the screen) and find the icon with the white hand with a finger pointing. Right click it and choose Configure.
If the message under Status says "Service Not Responding" then restart your computer and try again.
Hopefully you should now see something like the picture above.
Calibration Step 2
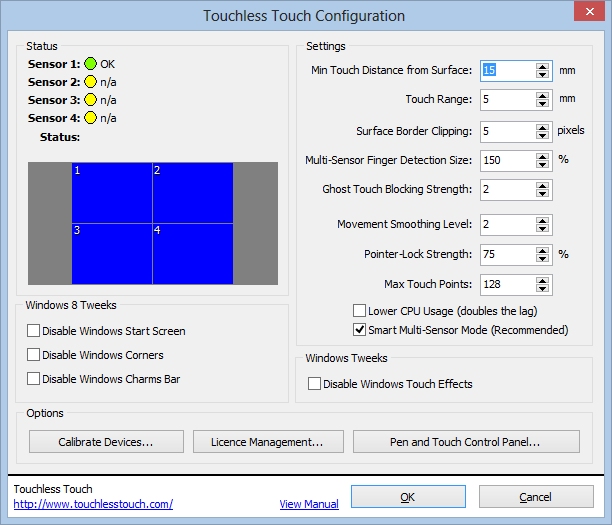
Press the Calibrate Devices button and follow the on-screen messages. Make sure you read each one carefully and follow the instructions in order.
There are a number of steps. The last being the most important one. These options fine-tune the set-up to work the best. Work through these from the top to the bottom, one at a time until you are happy with the results. The software will show you simulated touches as you touch the surface.
When you are happy with the results press Save and you will be returned to the configuration screen. If all is well, the first dot should be green. Press OK and wait for about 5 seconds. Your new touch screen is now active!
If you need more information, the product has a complete manual which you can view online.
Enjoy
Goto http://chrome.angrybirds.com/ and enjoy your new massive touch screen!
Below is a video of the software setup and working!
Below is a video of the software setup and working!