How to Make a CAPTCHA Image in GIMP
by 3leftturns in Design > Websites
6556 Views, 4 Favorites, 0 Comments
How to Make a CAPTCHA Image in GIMP
A Captcha is that little annoying picture with twisted words that sometimes are hard to decipher. They are useful, however as they prevent robot spam from cluttering the back end of the contact form. CAPTCHA is an acronym for “Completely Automated Public Turing Test To Tell Computers and Humans Apart”
Remember when making a captcha, that text like “1″ and “i” and “l” all look a lot alike. So do “o” and “0″ so choose your validation text wisely. This is why I like to use words as captcha rather than random text. If you’re going to make your user use an annoying captcha then make it easy to decipher. I can’t count how many times I’ve been frustrated at a form submission when a captcha wasn’t entered correctly because I couldn’t read it. The goal is to make the user able to read it, but the spam software not able to read it.
Captchas are easy to make and you can validate them with JavaScript so lets get started:
This article originally aired on my website: http://www.blog.andrewtjohnson.me/2013/12/28/how-to-make-a-captcha-in-gimp/
Step 1: Create a Workspace
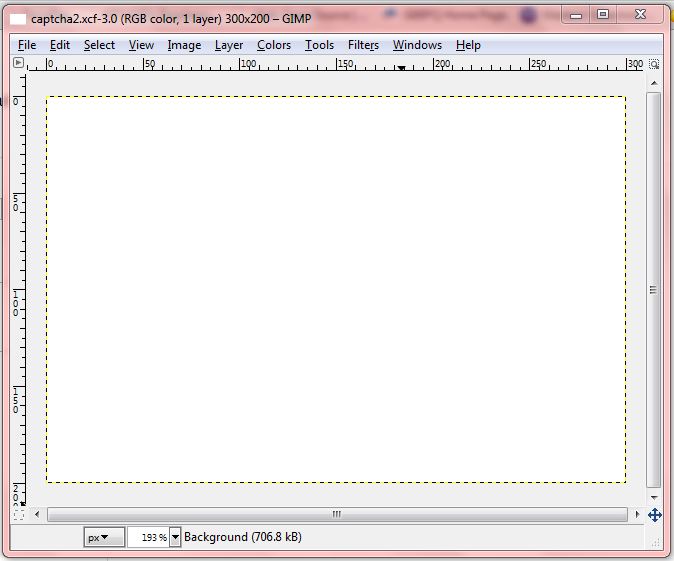
Step 1. Open GIMP and create a workspace. I used a 300px x 200px size and a background of white. You don’t want to get colors involved in a captcha as they are meant to be easily read.
Step 2: Create a Text Box
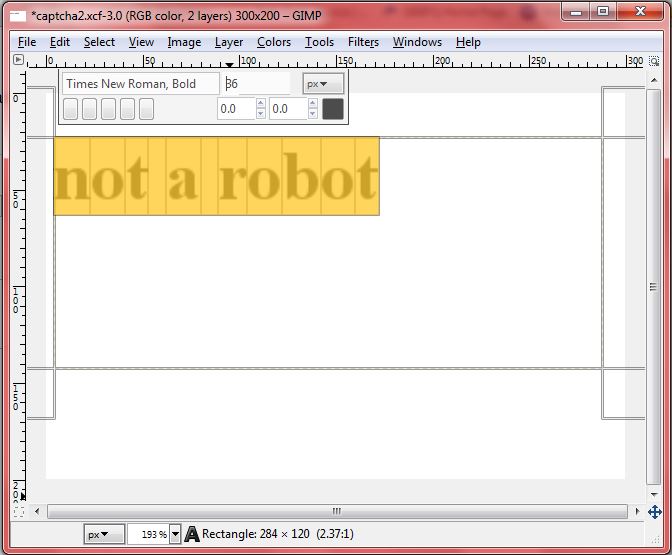
Step 2. Create a text box and type in the text of your captcha. Keep them short to a few words. Two is best, but I opted to make a clever phrase for the demo. I don’t like the captchas that don’t have dictionary words and are just random text and numbers, but those are more secure. Scale the text to fit 66% of your text box. You want some extra room for kerning and the transformation of the text. You will resize the text to fit the image size later.
Step 3: Center and Kerning
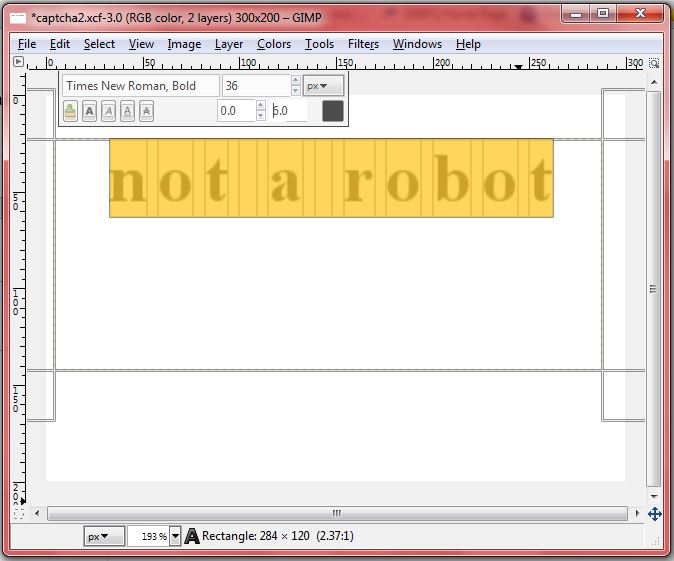
Step 3. Center the text horizontally and vertically and add kerning. Kerning is spacing between the letters. The number selector on the right in your text dialog will increase and decrease kerning. Fill to 75% of your available text box. If you need to resize the font size, do so now. Adding kerning will make the captcha easier to read when it gets transformed.
Step 4: Bounded Rectangle
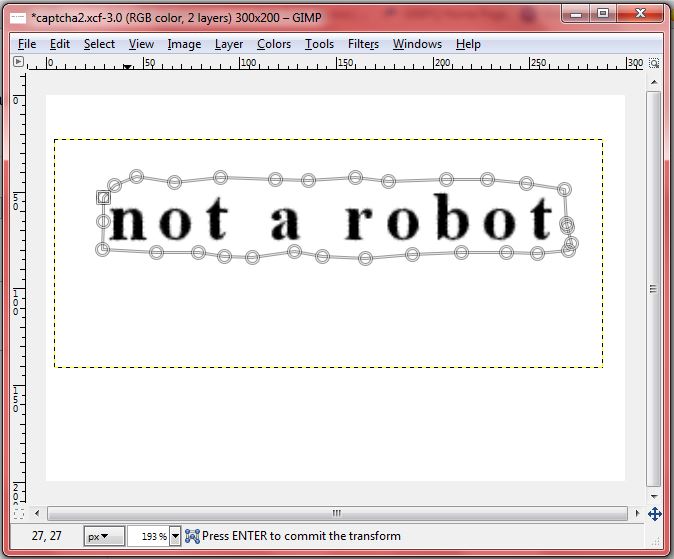
Step 4. Using the cage transform tool insert several nodes in a cage surrounding your text. Close off your polygon by clicking on the first one when you are done. I made a rough rectangle shape. Do several nodes or it won’t work well.
Step 5: Morph Polygon
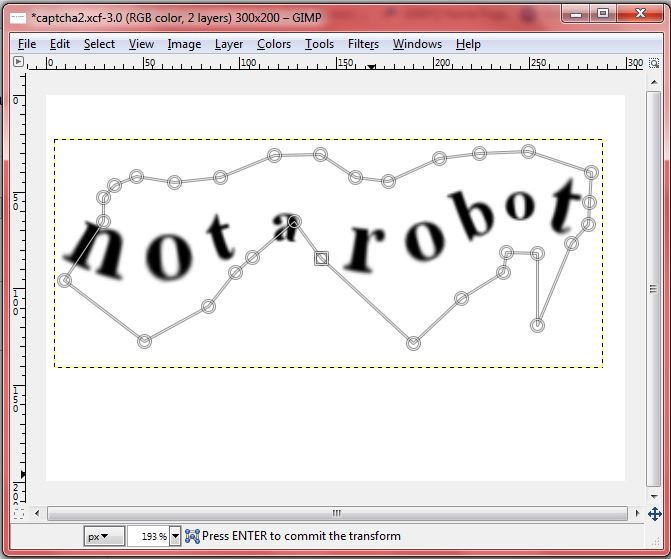
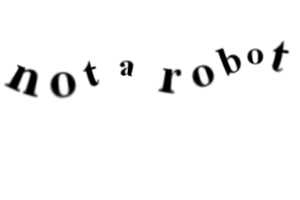
Step 5. Once the polygon closes on itself, the cage transform tool changes to allow you to transform the object. Move the nodes to transform the captcha into a morphed, but still readable image. You might notice your original text peeking from underneath the transformation. To remove this, check the box “Fill the original position of the cage with a plain color”. Once you are happy with your captcha, hit the enter button. This will save the transformation. The edges may look fuzzy, but on a website it won’t matter.
Step 6: Center, Scale & Export
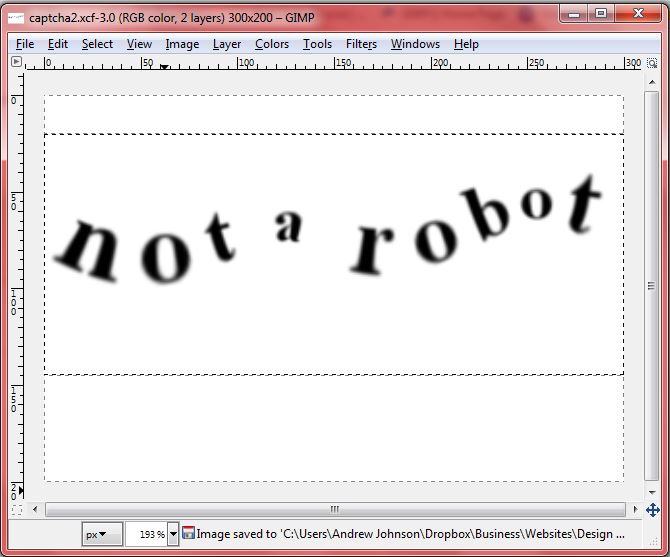
Step 6. Scale and move the captcha layer to fill the white space to your liking. I like to leave just a little white space on the edges and scale the layer to fit then center it. Export your captcha to your desired format, jpeg, tiff, png, gif or bmp. I used jpeg. Then upload the captcha to your site and you’ll have a robot spam trap that will even make the Jones’s jealous!