How to Fix Your IPhone 5s Front Screen
by Dillysang in Circuits > Apple
5695 Views, 9 Favorites, 0 Comments
How to Fix Your IPhone 5s Front Screen
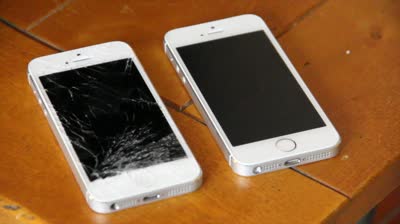
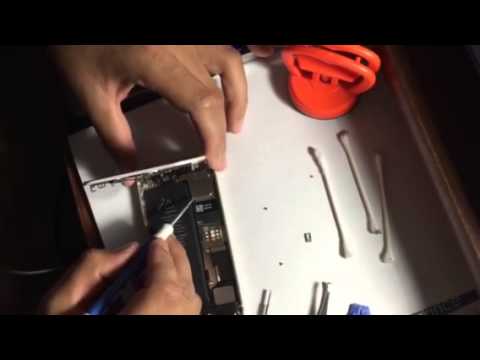
How to fix your broken iPhone 5s front screen at home, it is easy and doable at home.
The cost depending on where you buy your spare parts and tools from the website. I personally recommend amazon or eBay.
Also I have made a homemade YouTube video on the link below.
Tools You Will Need
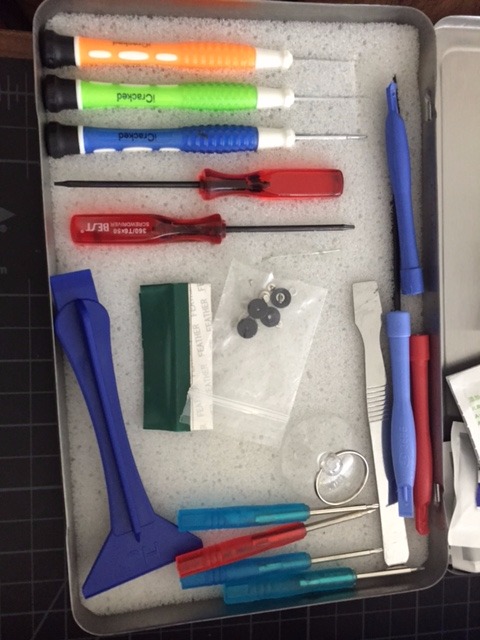
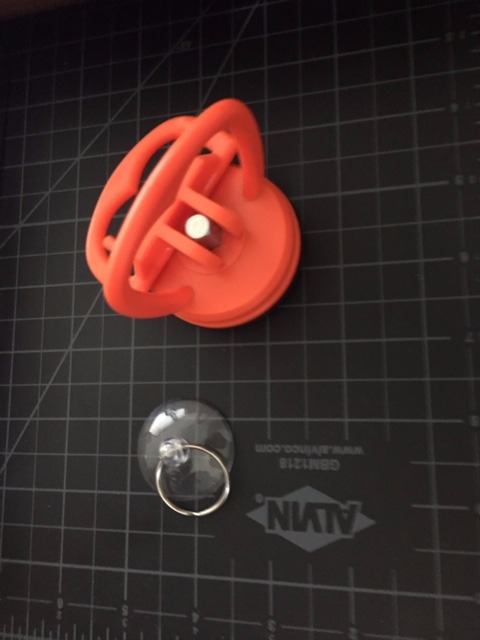
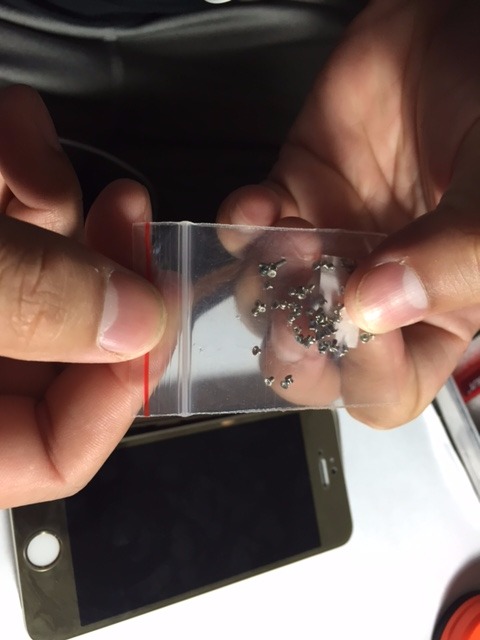
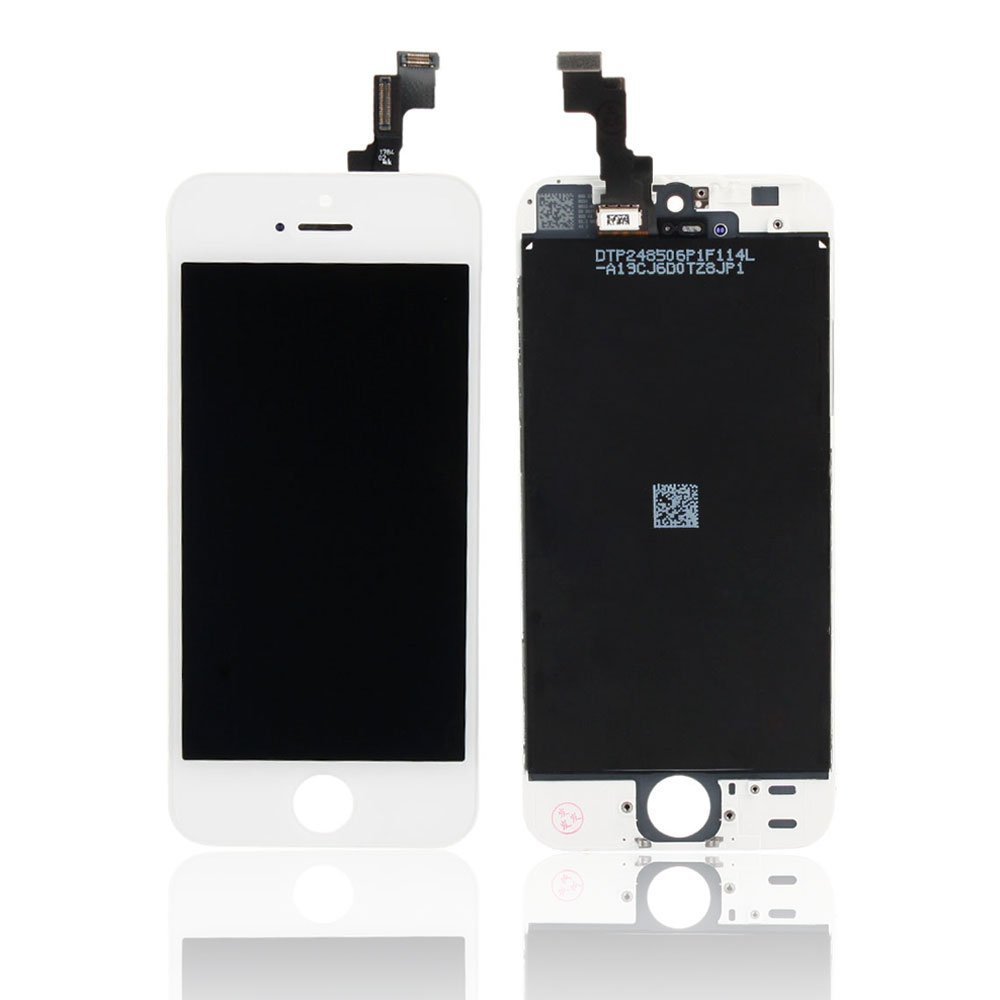
Here are some sample tools you will need. You can buy it from amazon or from eBay, but I prefer amazon. Look up "Complete Premium Repair Tool Kit for Apple iPhone" and the necessary tools should pop up.
Also, just for extra precaution, you will need to buy extra iPhone 5s screw in case it gets misplaced accidentally.
New iPhone 5s screen can also be purchased from either amazon or eBay.
Turn Off Your Phone

Make sure you turn the iPhone off before doing any maintenance.
Remove SIM Card
.jpg)
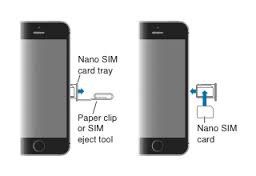
Notice that there is a small hole on the side opposite from the volume side; it contains your SIM card. Use a paper clip or SIM card eject tool to remove the SIM card to prevent losing your personal data. Please follow the instruction on the picture.
Remove the Two Bottom Screw
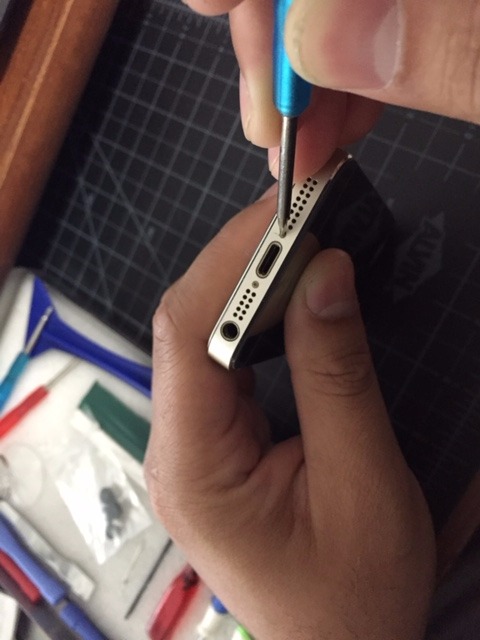
On the bottom of iPhone 5s, you will find two small screws. They need to be removed in order to open the iPhone. Use a philip screw driver to unscrew the screw from the bottom of the iPhone. Make sure the two screws are not misplaced.
Get Ready
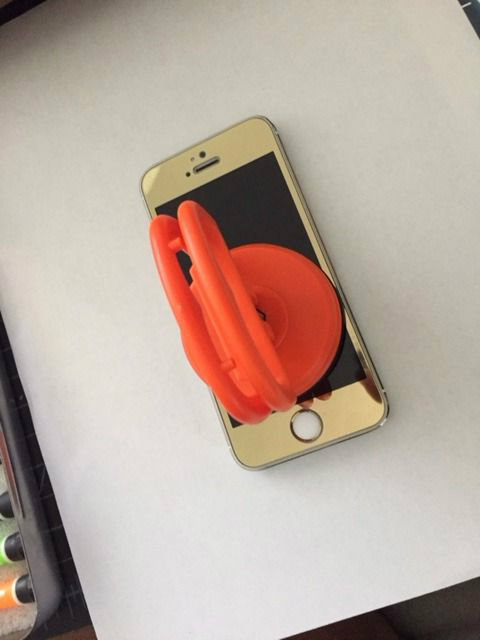
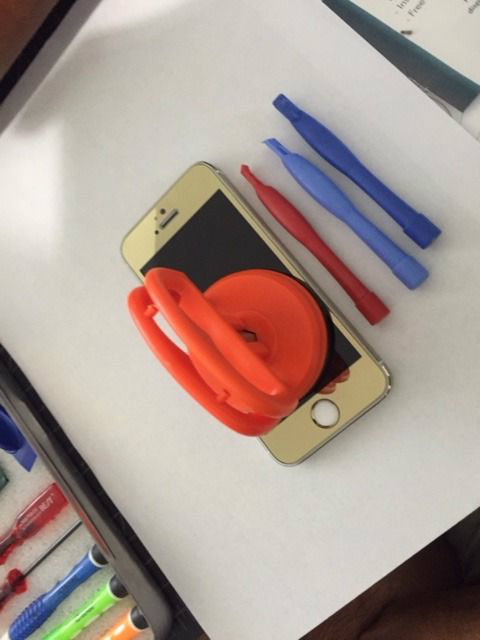
Use a white plain A4 paper as the platform, so that you can see the loose parts from the iPhone. It will give you more visibility to see the parts from your phone.
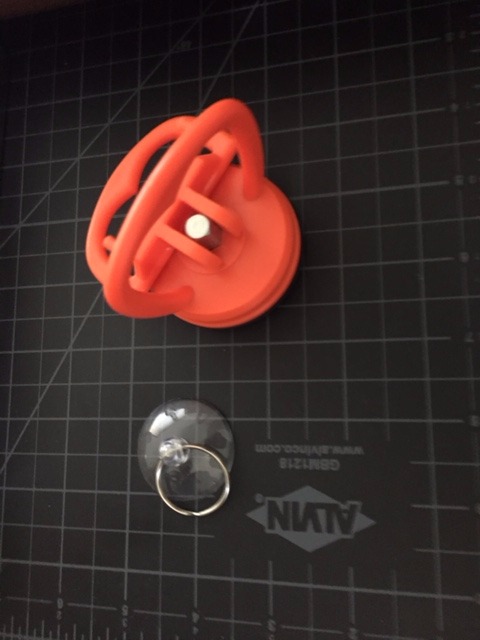
Use suction cup to pull the front screen and lift the bottom off.
The two different suction cups deliver different method of power. The large suction cup will deliver more power to pull the phone screen. The small suction cup will give you less power but more control on where you need to pull the screen up.
TIP: Keep in mind that if the screen is completely shattered then the small suction cup will be more useful.
Left Up Screen
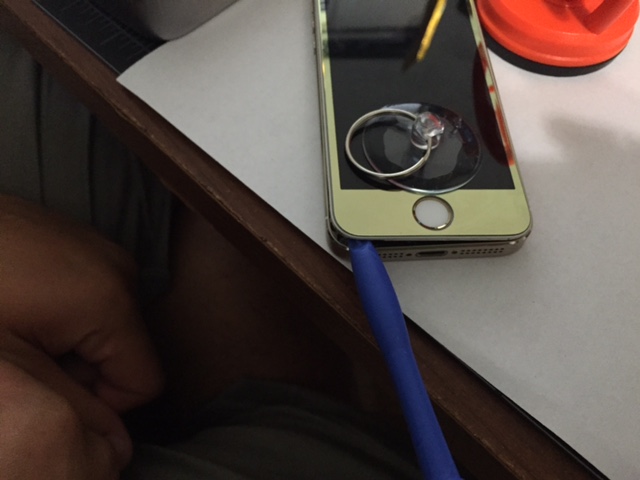
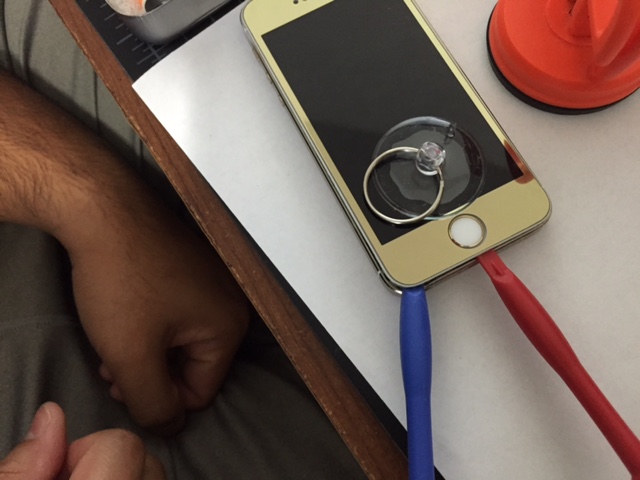
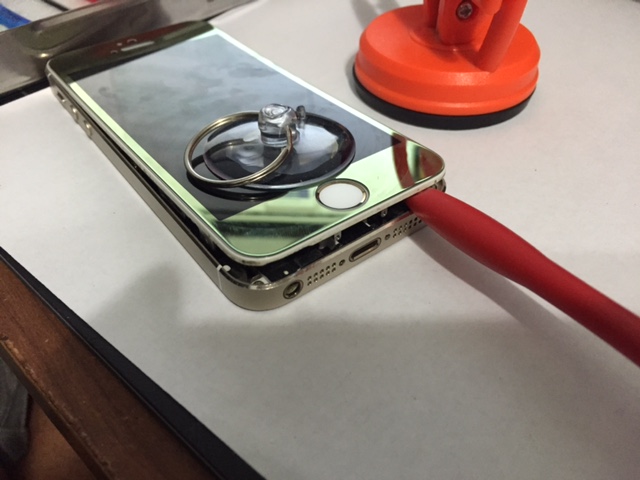
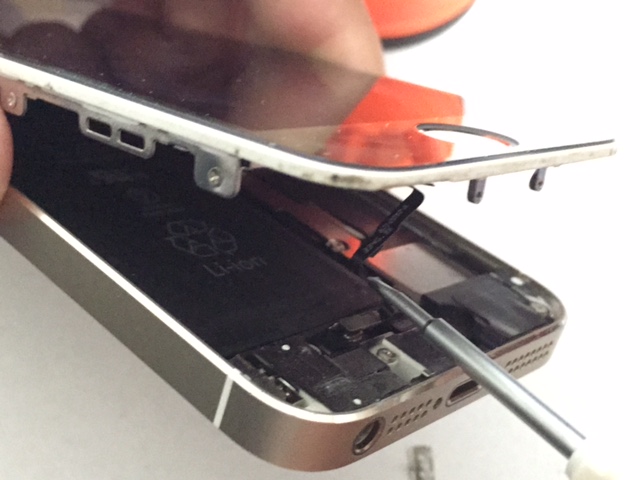
After you lift the front screen up, use the small pry tool to pry from one side and work your way in until you can lift the screen open.
***Do not lift the screen all the way up***
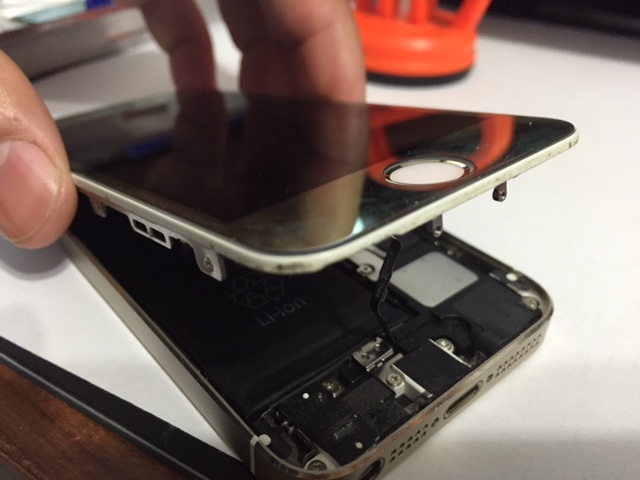
Be careful because there is a cable there. If the wire was yanked out then it will be more problem later.
Finger Scan Cable
.JPG)
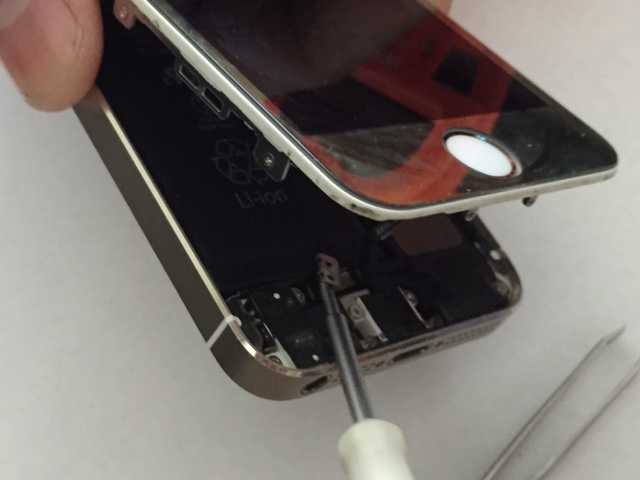
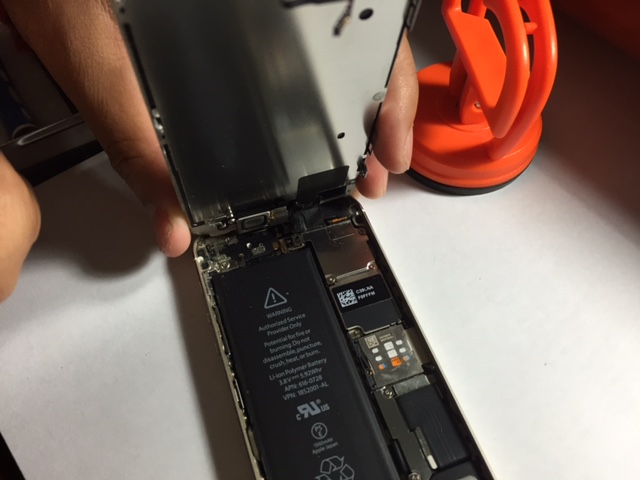
Once you pop your iPhone open, you will see the silver bracket that protects the finger scan cable. Remove the bracket by using the small philip screw driver. Detach the finger scan cable from the motherboard then the screen will be able to pop open, but not complete loose.
Remove the Digitize, Picture, and Camera Cable
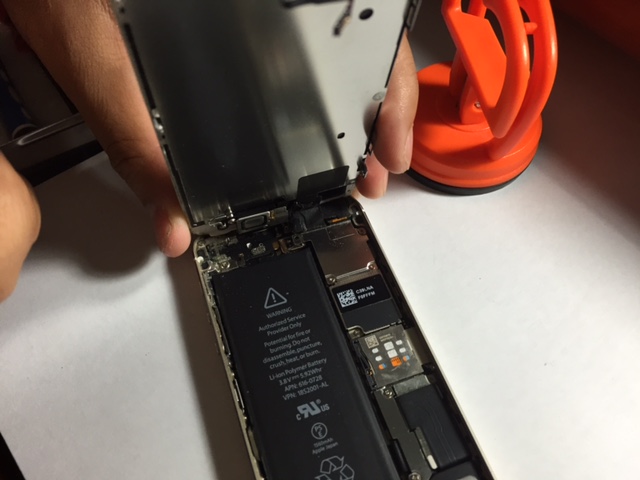
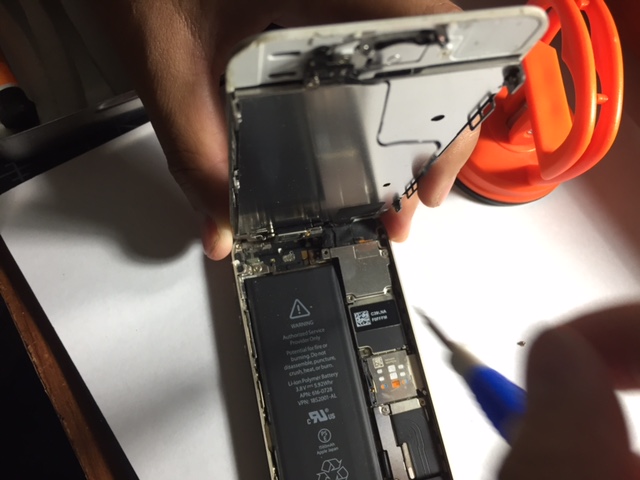
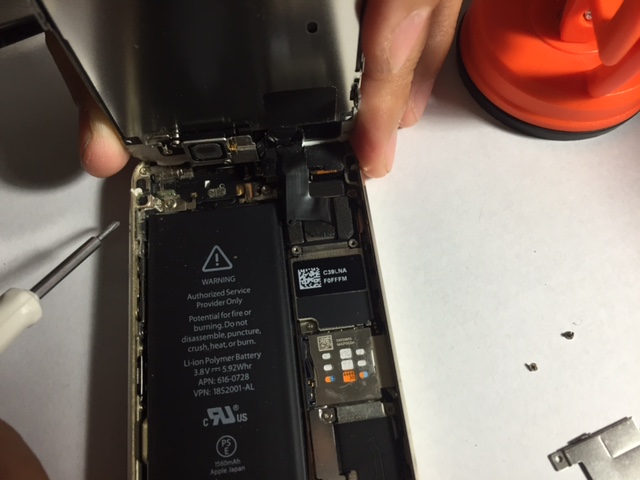
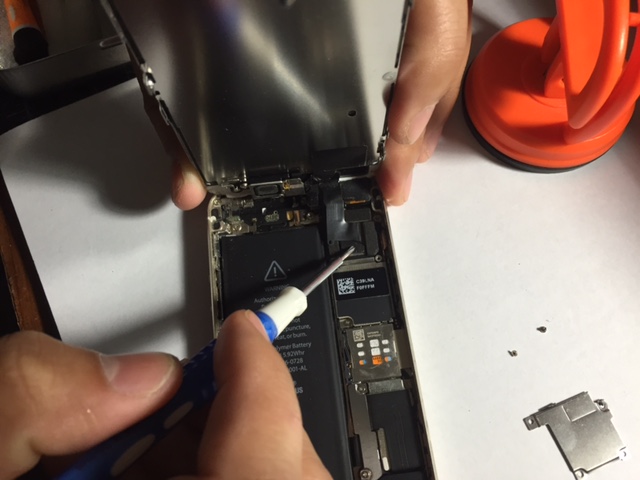
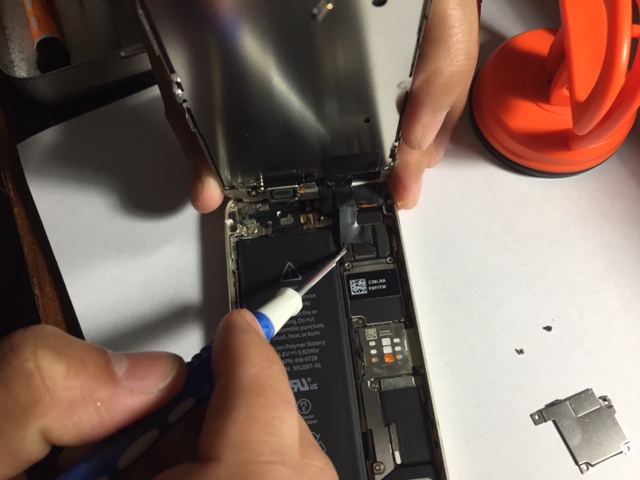
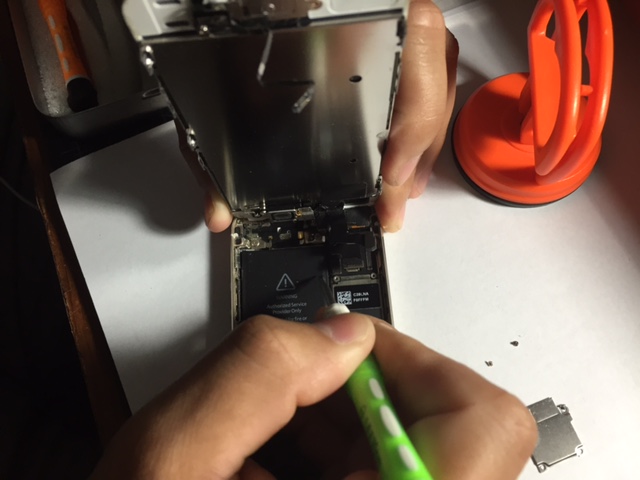
You will notice the silver plate that protect the digitize, picture, and camera cable at the right hand corner of your phone. Remove the silver plate by unscrew 4 screws around the plate. ***keep track of all of the small screws***
From the picture you will notice that the there are three cable attach to the motherboard of your phone. Remove each one of it from right to left. Once you have removed three cables, your front screen will be set free.
Loose Screen
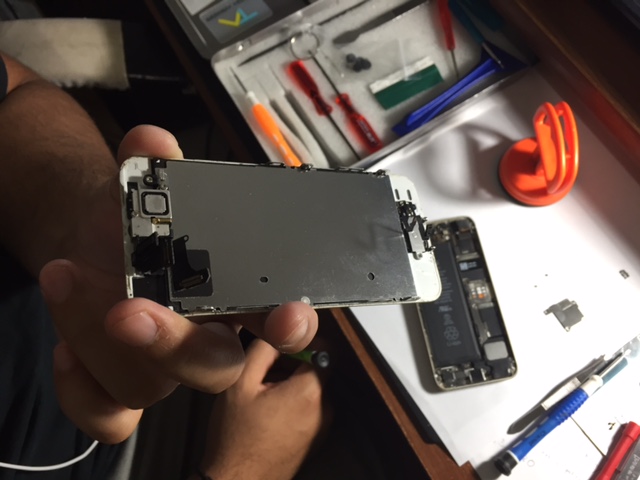
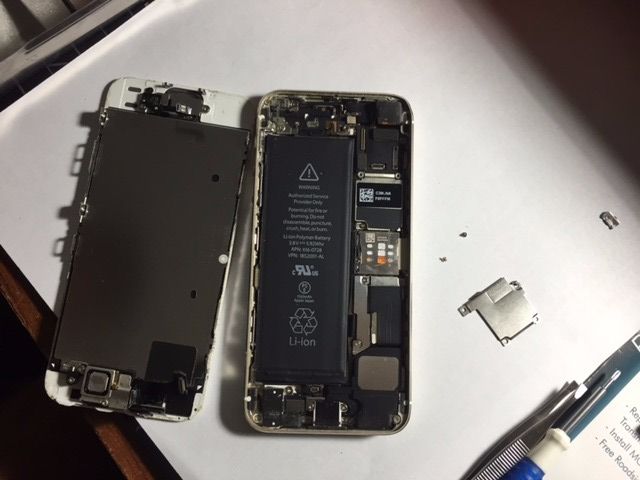
Now you able to see in side your phone.
If you want to removed or change your battery, now is the best time to do so.
Have the new iPhone 5s ready to install.
*Note*
-you should have total of 6 screws
-small finger print cable protection plate
-big silver plate from top right of your phone.
Extra (Battery Removal)
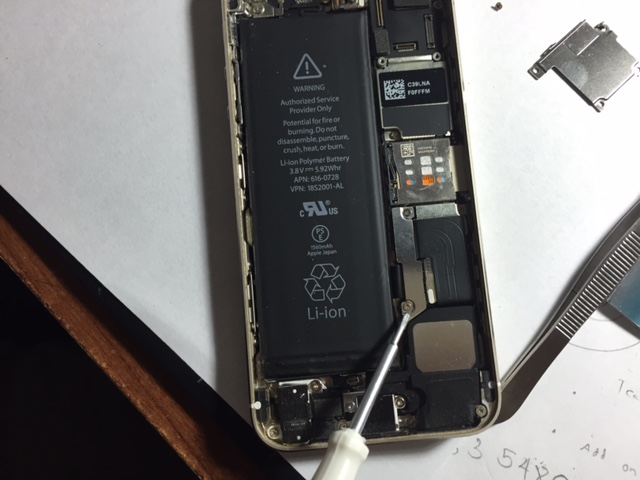
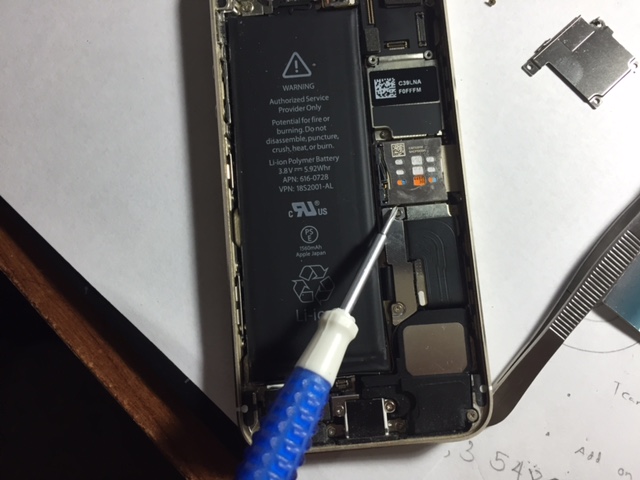
For battery removal step, there are two extra screws you will have to take care of before you are able to removed your battery.
This step will require a new battery because once it is removed you won't be able to use the old one again.
***Only remove battery if you have the battery problem***
Reinstall
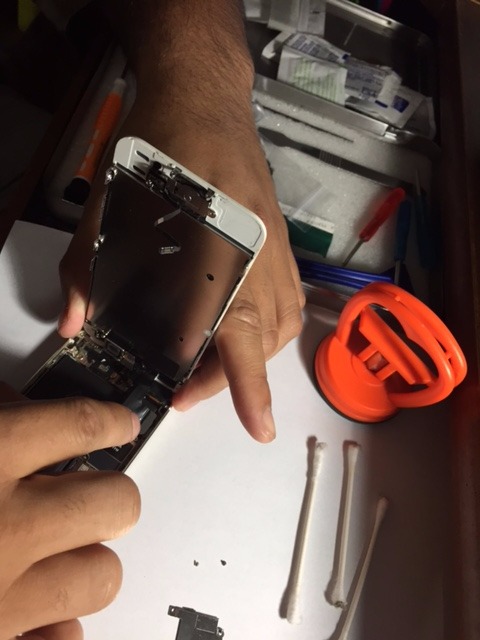
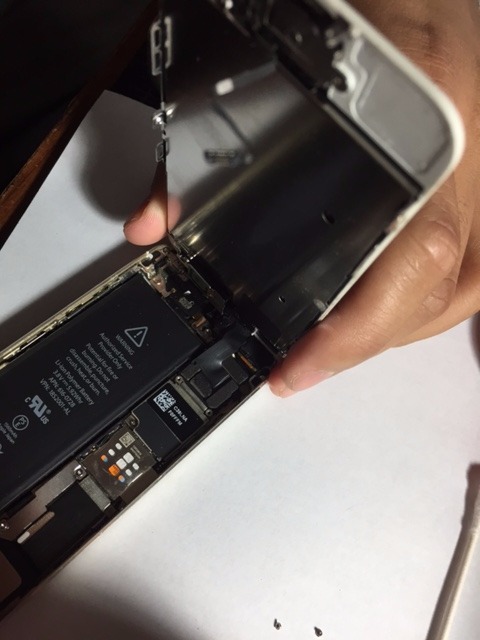
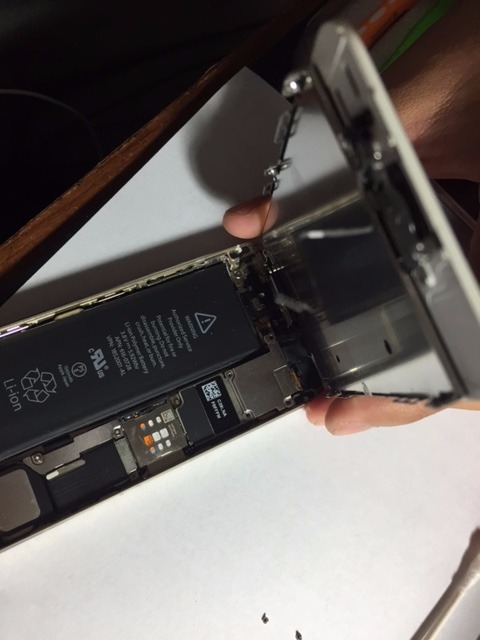
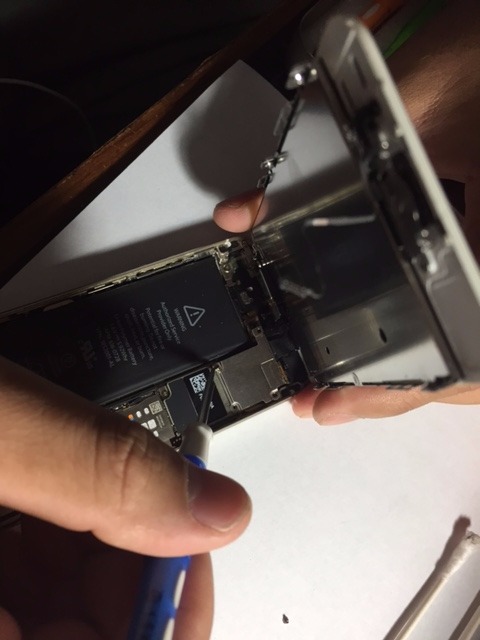
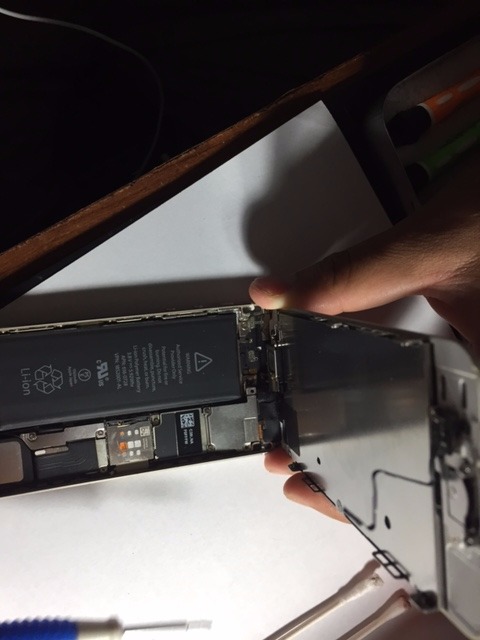
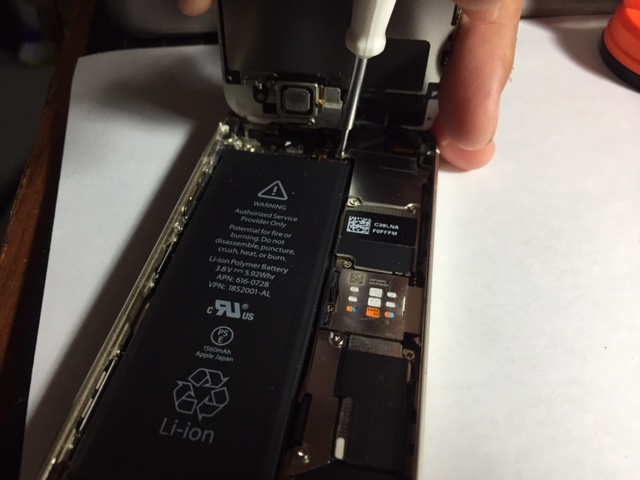
Put on your new screen, once you have the new front screen you are ready to reinstalled. Re-attach the digitize, picture, and camera cable to your motherboard. Be gentle and do not push too hard on the phone. Push until you hear a click on the cable.
Install the big silver plate, make sure you put four small screws back in on each corner of big silver plate to secure your cable.
Tip. Look at the picture for instruction.
Reinstall Finger Scan Cable
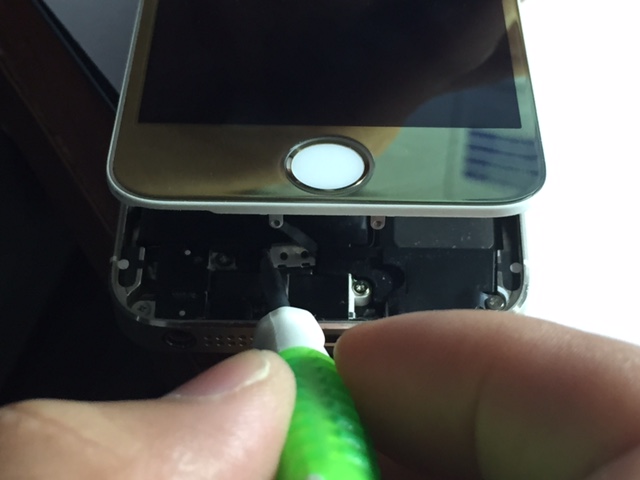
Reinstall finger scan cable by using the finger scan cable from your new screen then attach it to the motherboard.
Reinstall the small plate that protect the finger scan. This step can be tricky because the part is small causing it very hard to put it in the right place.
I would recommend using a tweezers to pick it up and put it on top of the cable then lightly press it in order to lock the plate in place.
Job Well Done
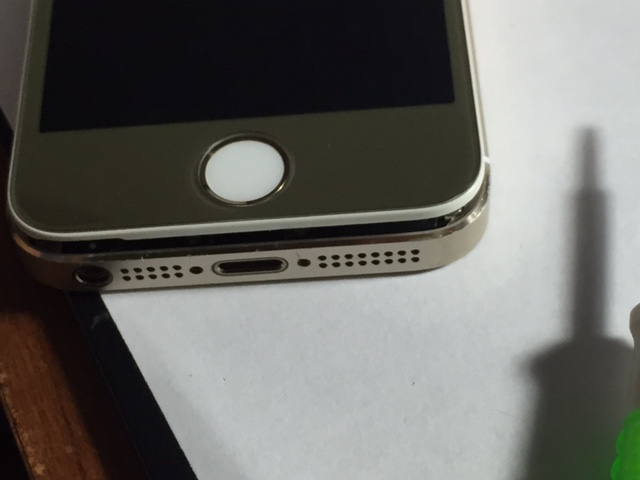
When closing the front of the phone, you will hear the snap from your phone, but you are not done yet. Don't forget to screw back the bottom of your phone. Right now you should have two screws unused to screw the bottom of your phone to finish the job. After everything is done, insert the SIM card back to the SIM card slot. Turn on your phone and you are finish.