How to Do Extreme Slow Motion[After Effects]
by CodyLandry in Design > Digital Graphics
14815 Views, 23 Favorites, 0 Comments
How to Do Extreme Slow Motion[After Effects]

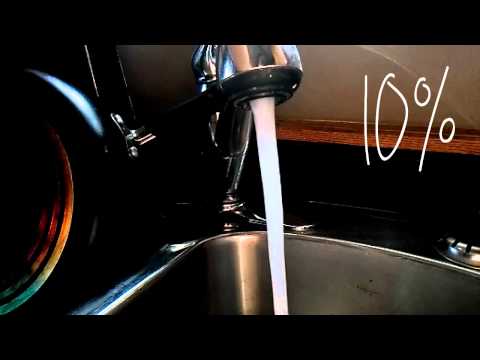
In this instructable I will teach you how to slow down your 120 frames per second footage smoothly in Adobe After Effects using the plugin Twixtor.
Preparing Your Footage
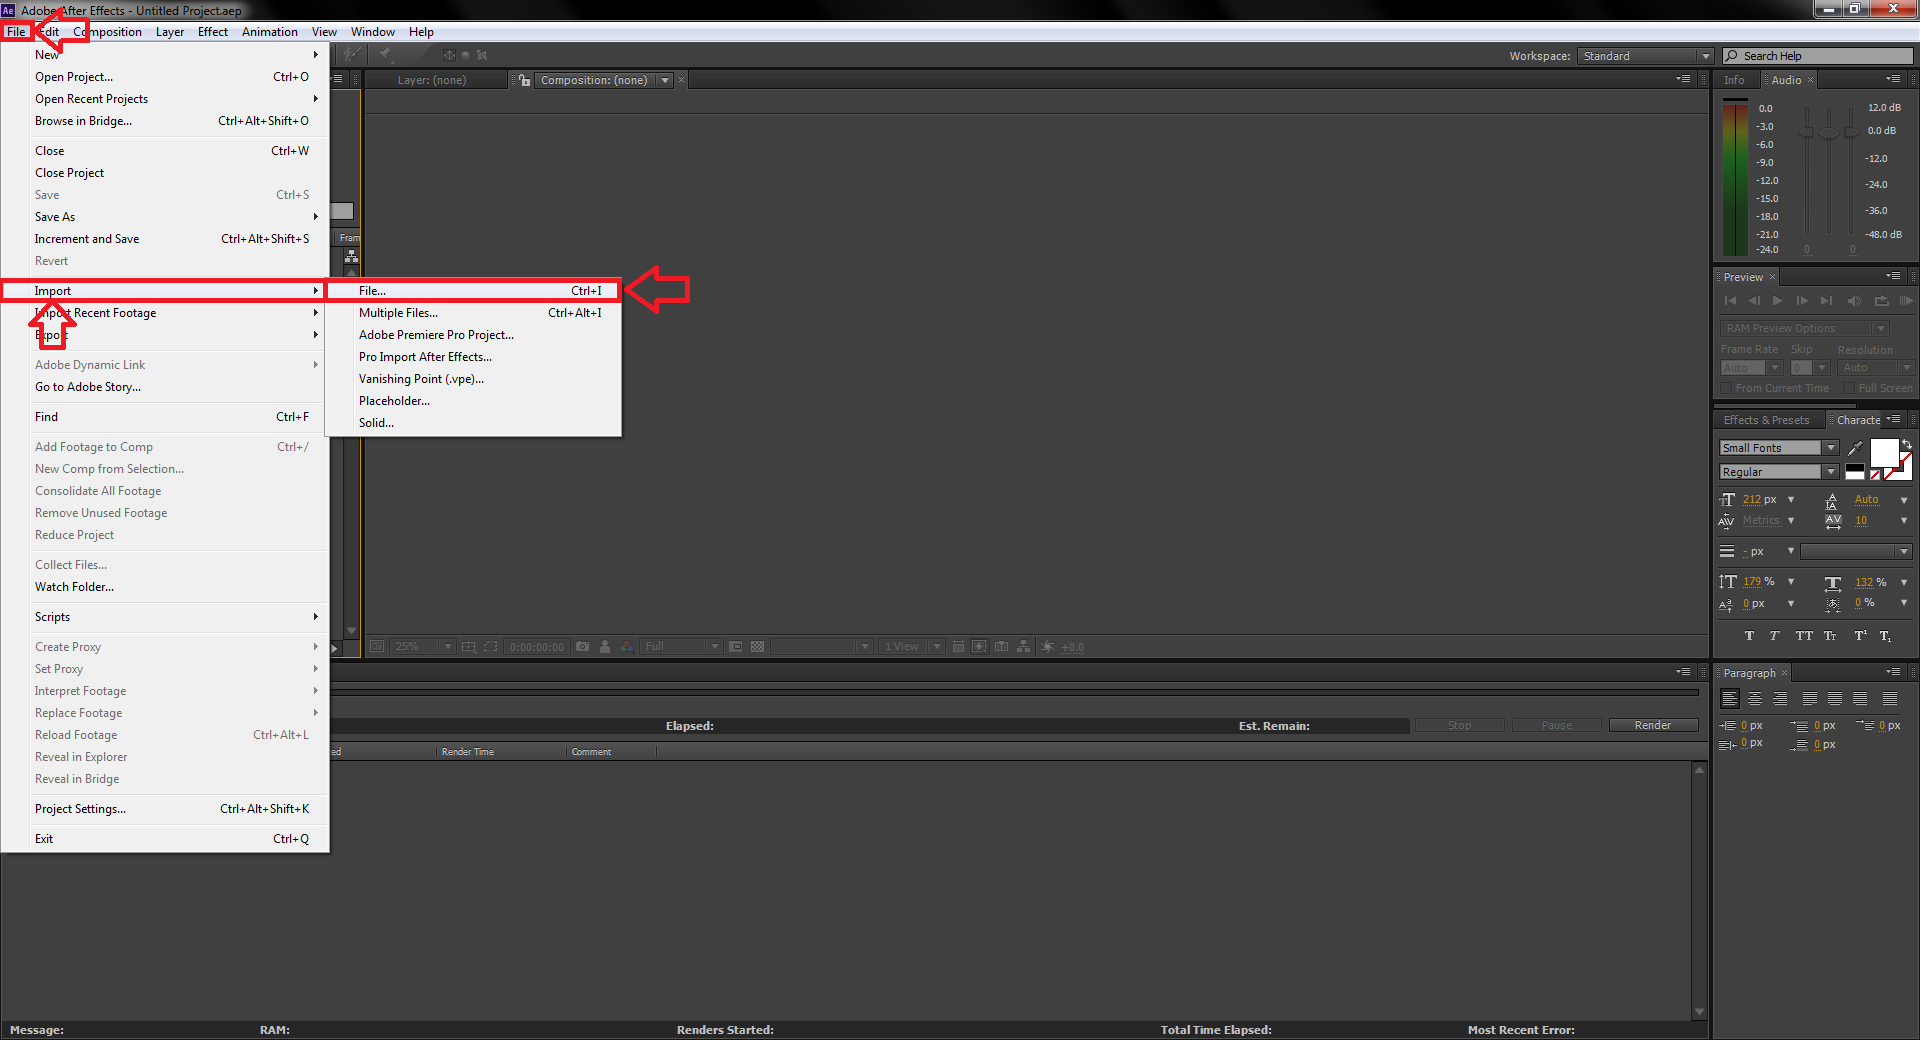
1.) When you open After Effects, you can import your footage by clicking File>Import>File...
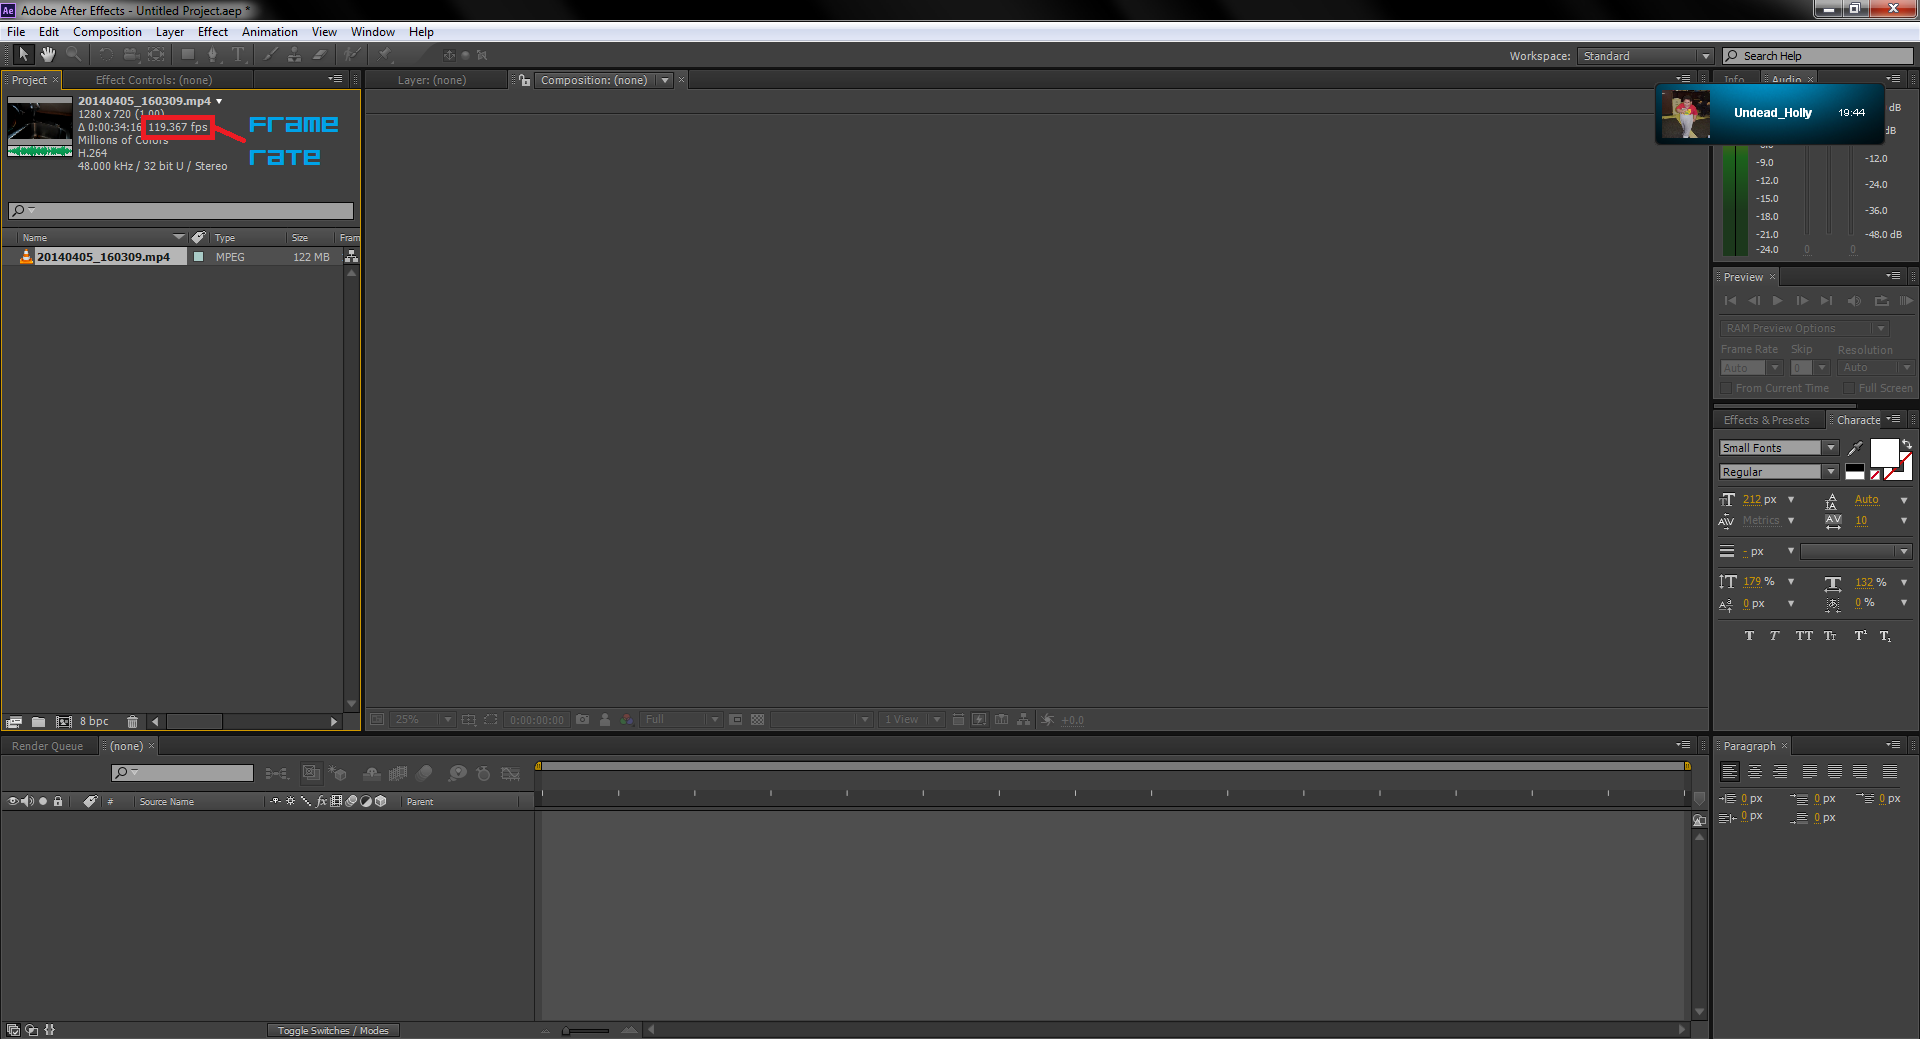
2.)You can view the exact frame rate of your footage here
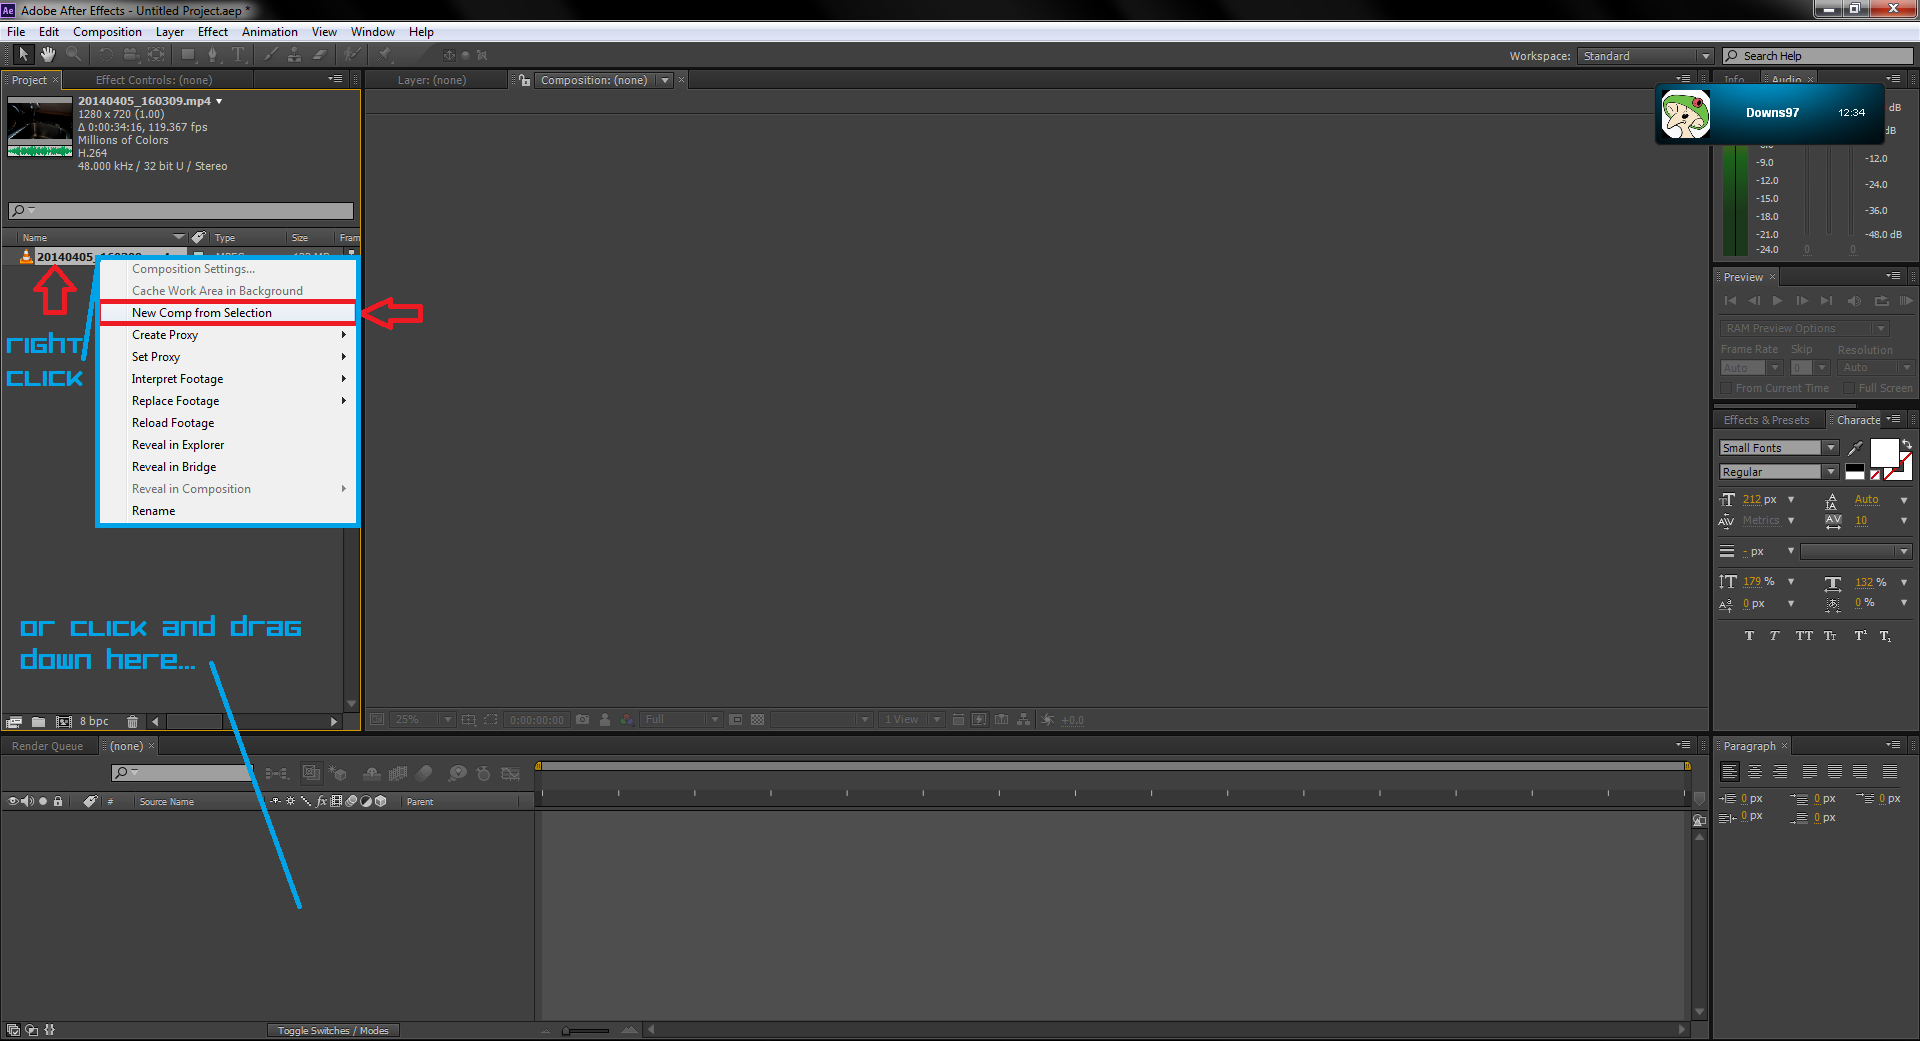
3.) You can right click your footage, select "New Comp from selection" or drag your footage into the timeline.
Applying and Using the Plugin
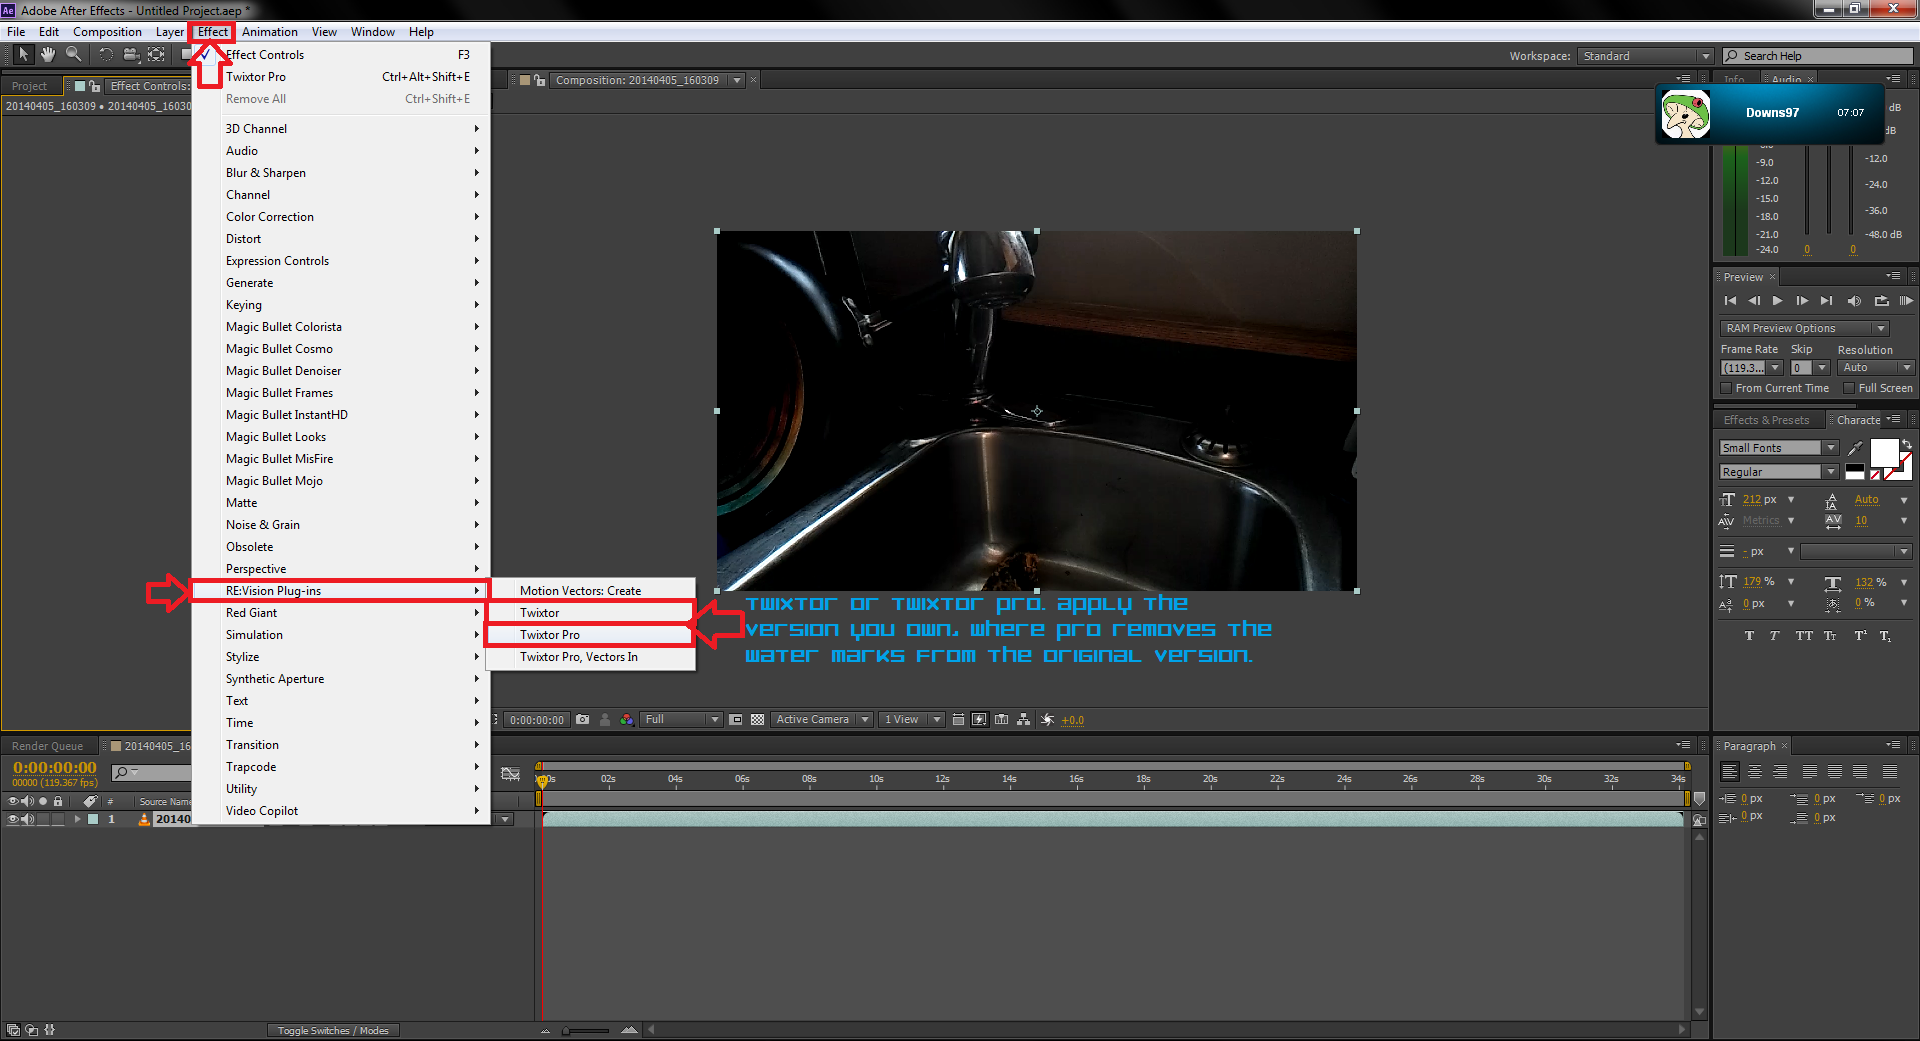
Select your footage in the composition from the timeline, and in the menu bar at the top of After Effects, select Effect>RE:Vision Effects>Twixtor or Twixtor Pro depending on the version you have.
Customizing and Adjusting the Settings of Twixtor
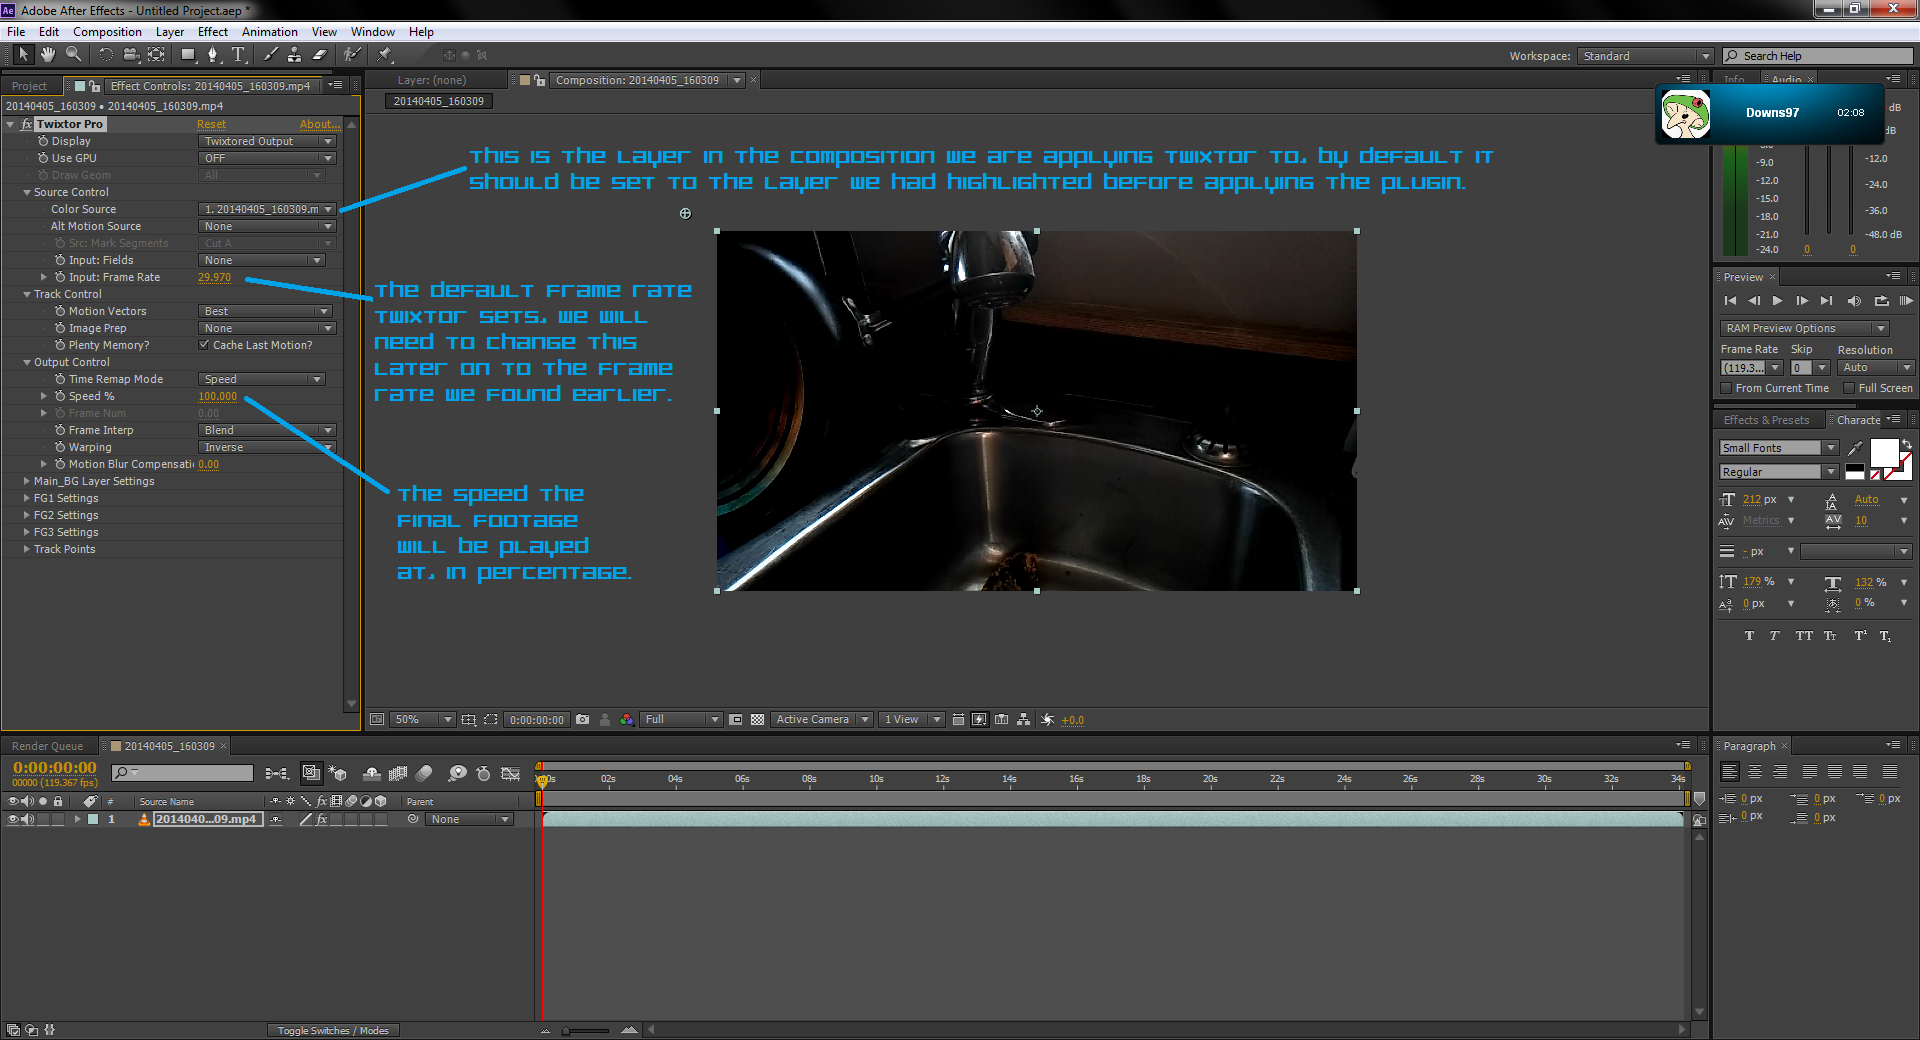
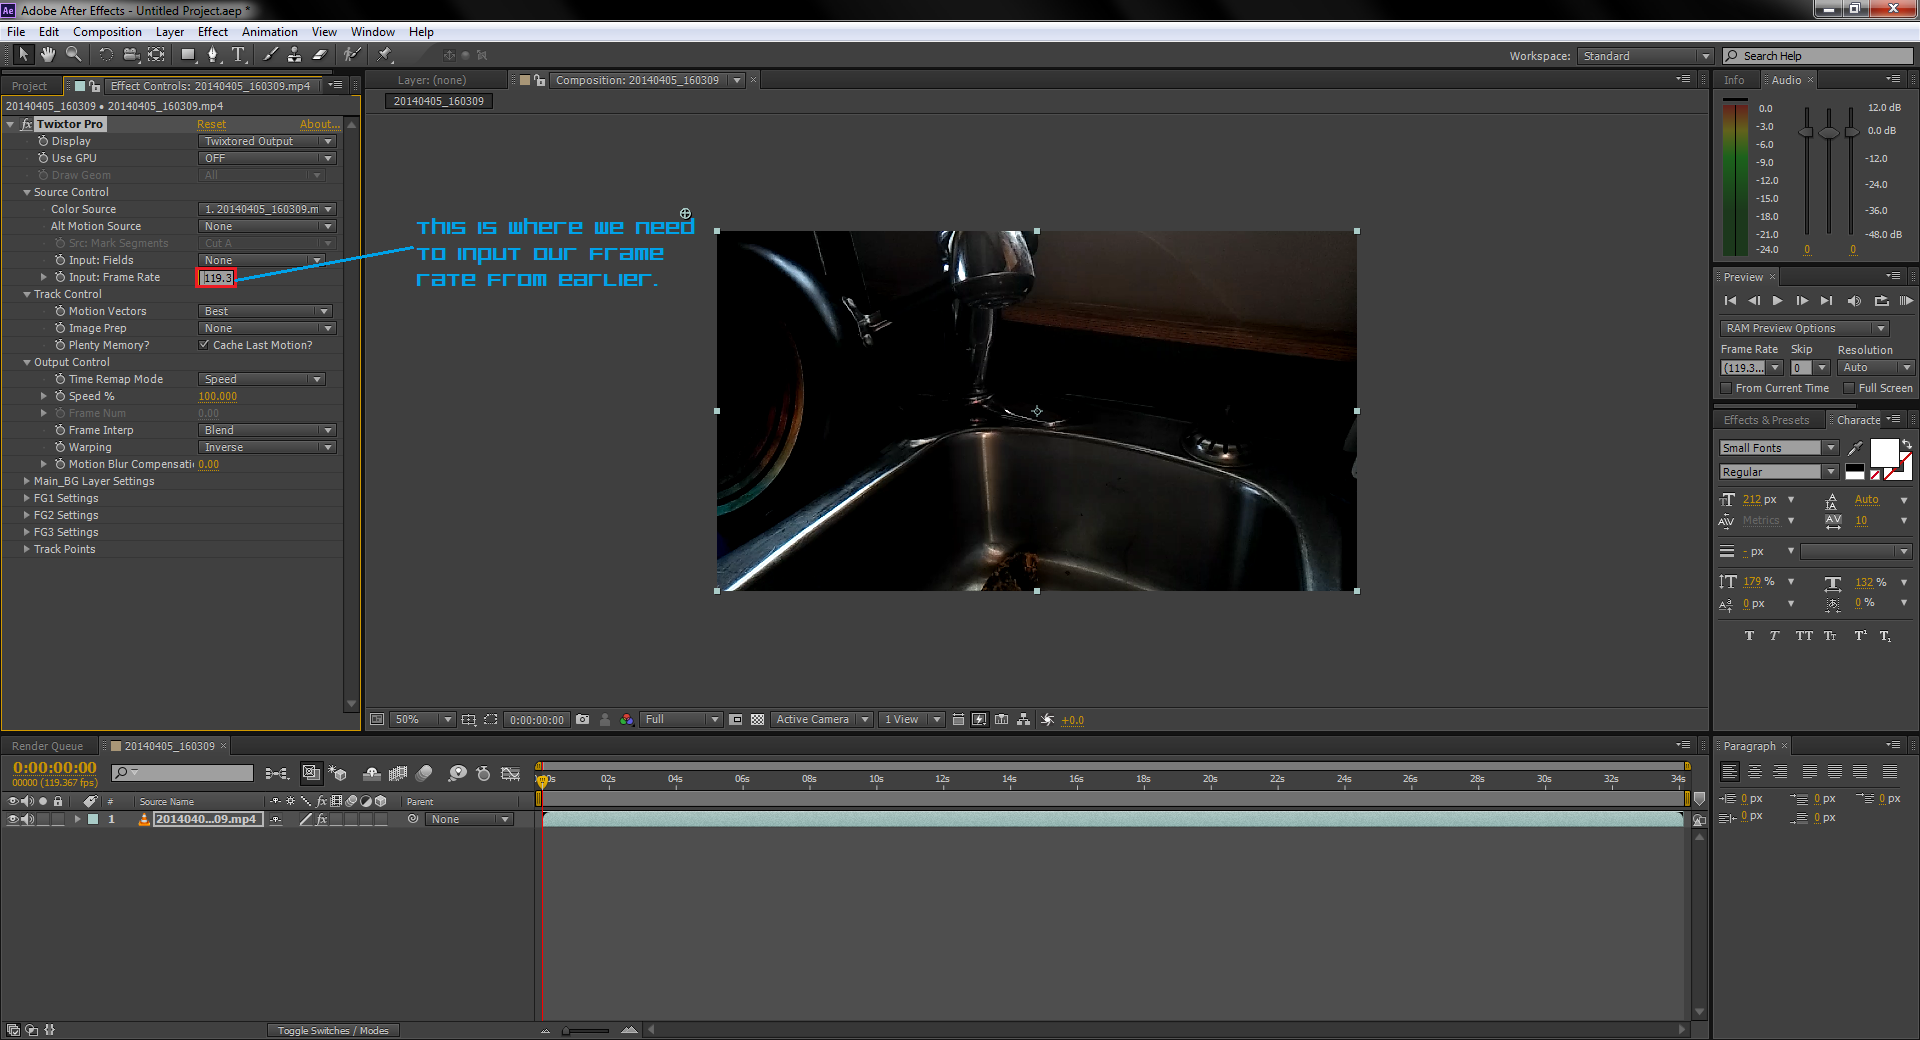
In the effect controls for Twixtor, input the frame rate of your footage you found earlier. The higher the frame rate, the slower and better your slowed footage will become. For this instructable, I will be using 120 frames per second footage.
After Effects uses the "tree-ing" system for organizational purposes, otherwise known as drop down menus.
Under Source Control, click on the yellow number beside Input:Frame Rate. It should be default set to 29.97. Set this to the frame rate you found earlier in the instructable.
Keyframing Your Slow Motion.
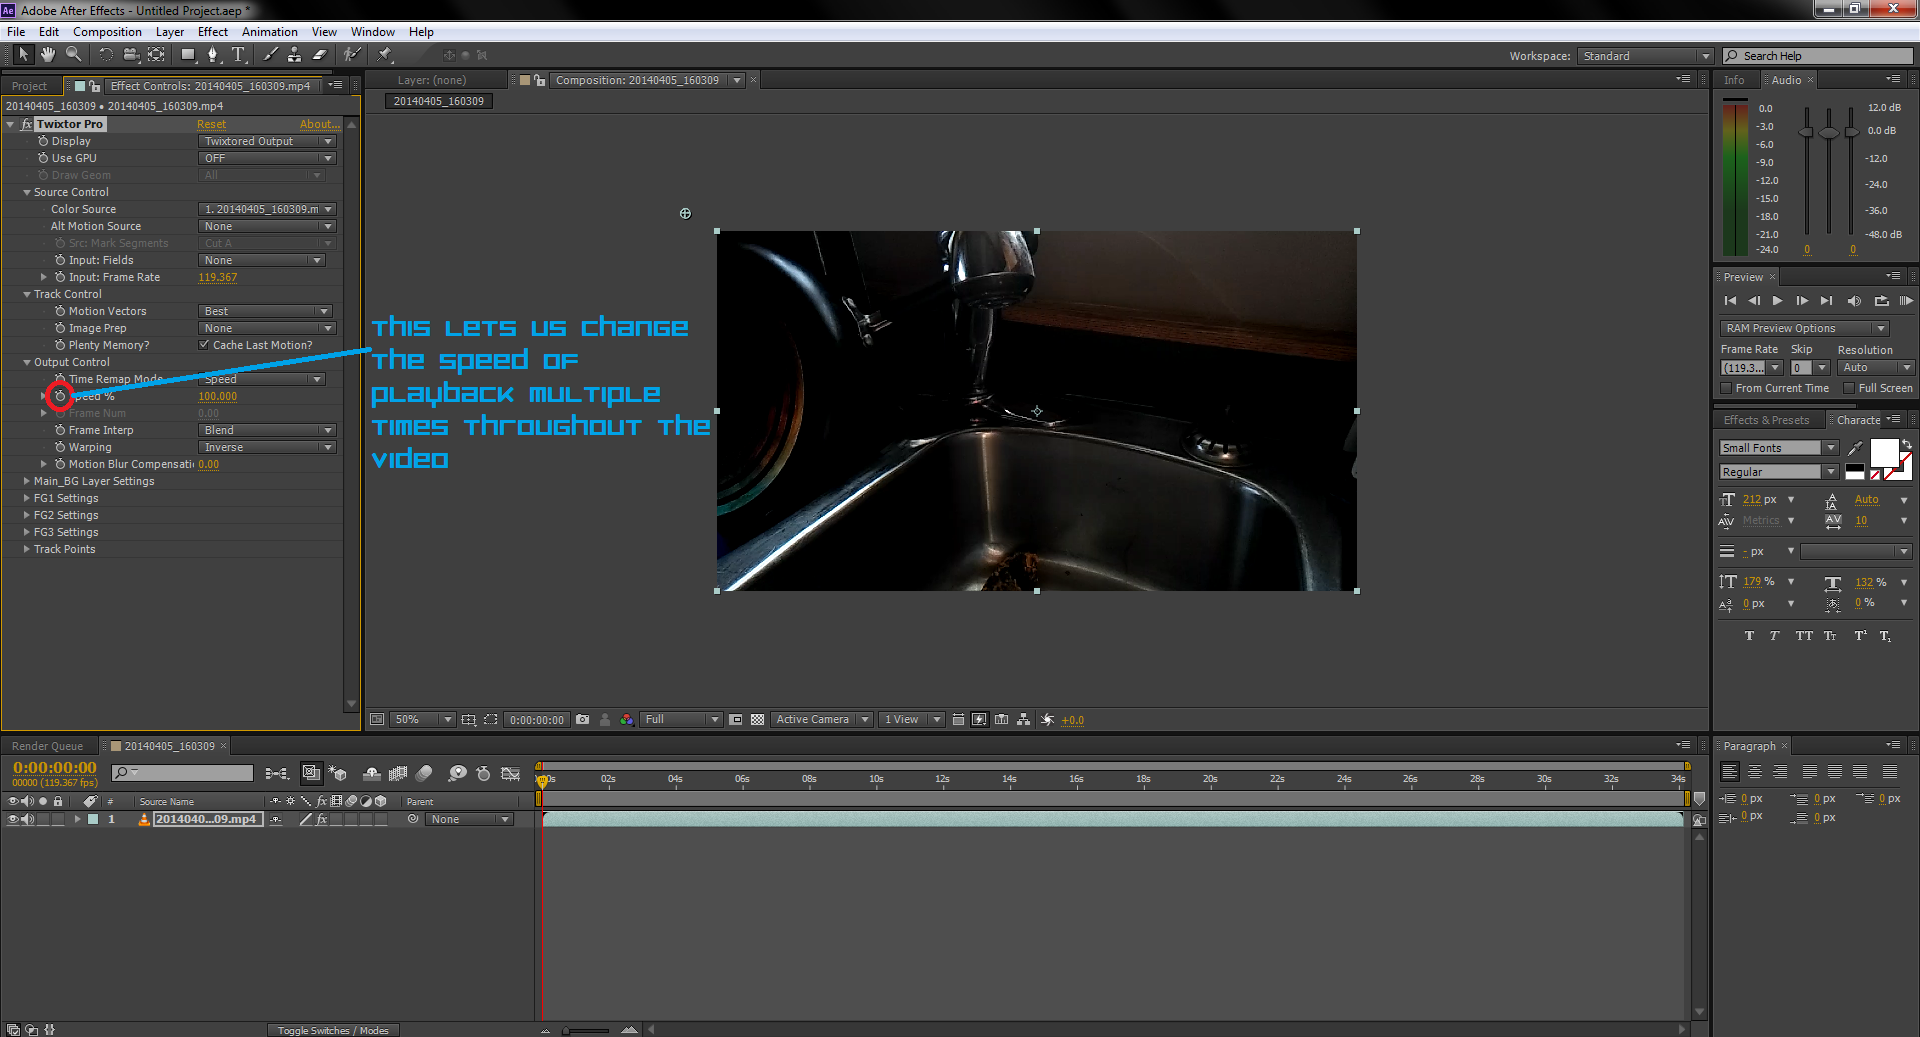
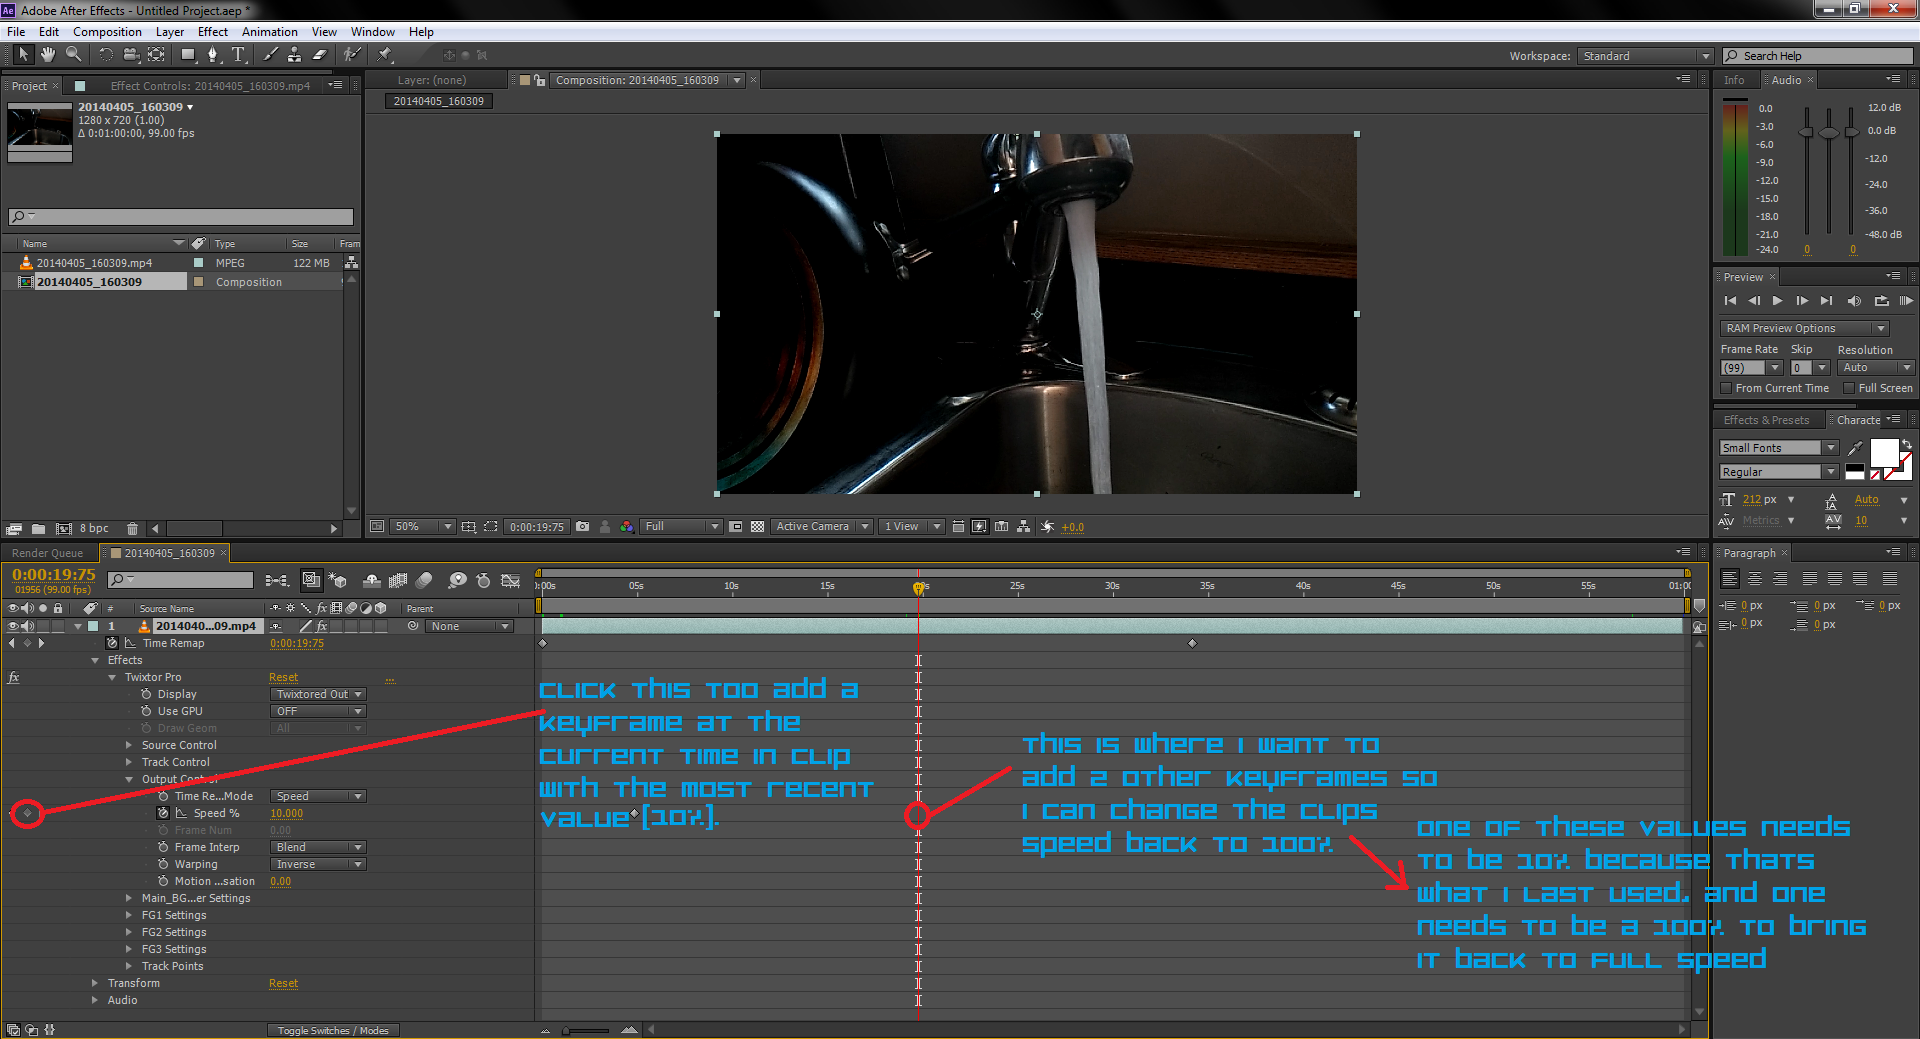
When using Twixtor we will be keyframing the output speed. Twixtor uses the output speed in percentages, so for example if you set this to "20.0" your video will be played back at 20% of its original speed.
Scroll to the part of your footage where you would like your slow motion to first start. Click on the little stopwatch right beside the "Speed %" in the output control, this will allow you to keyframe the value multiple times.
Zoom in all the way on your timeline by pressing the "+" button on the top row of your keyboard repeatedly. Skip ahead one frame and change the "Speed %" to your desired percentage.
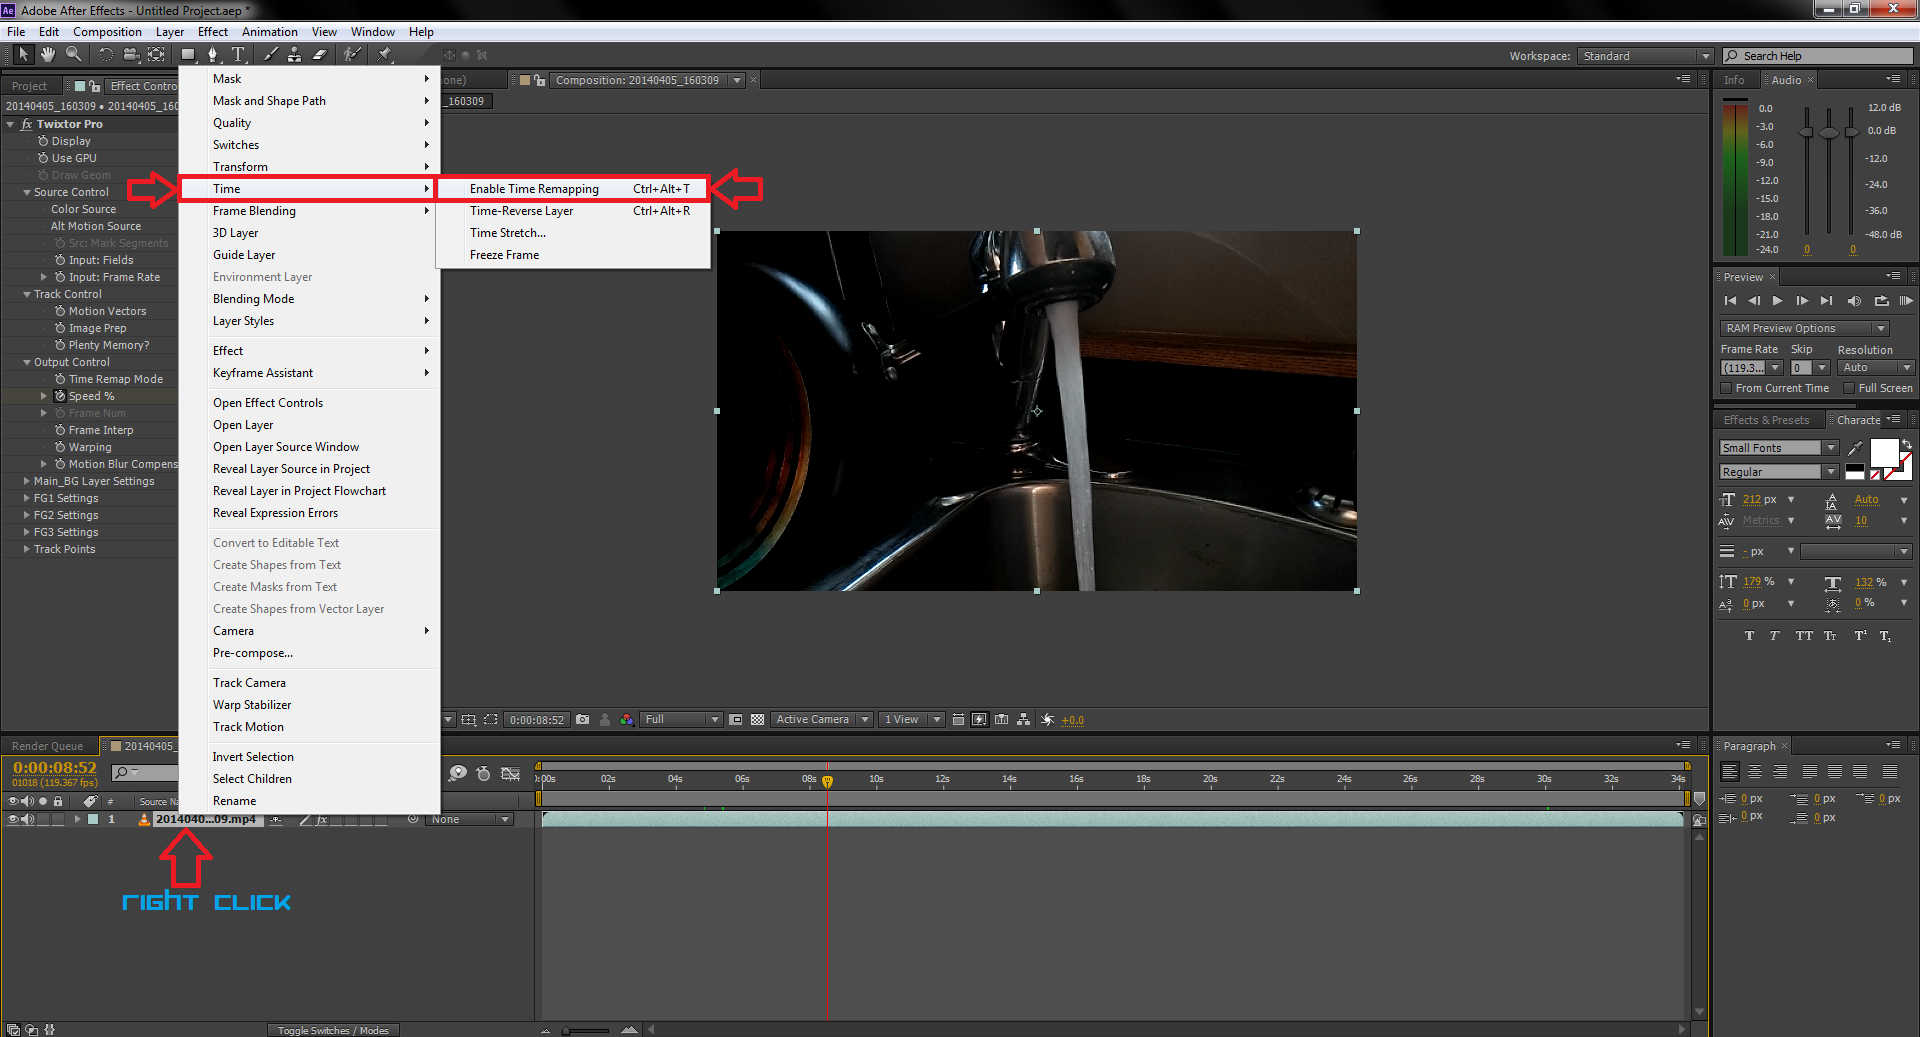
Right click your footage and enable time remapping in the menu via :
Right Click>Time>Enable Time Remapping
This will allow us to extend the footage to a longer duration since now it is a longer clip because it been stretched out.
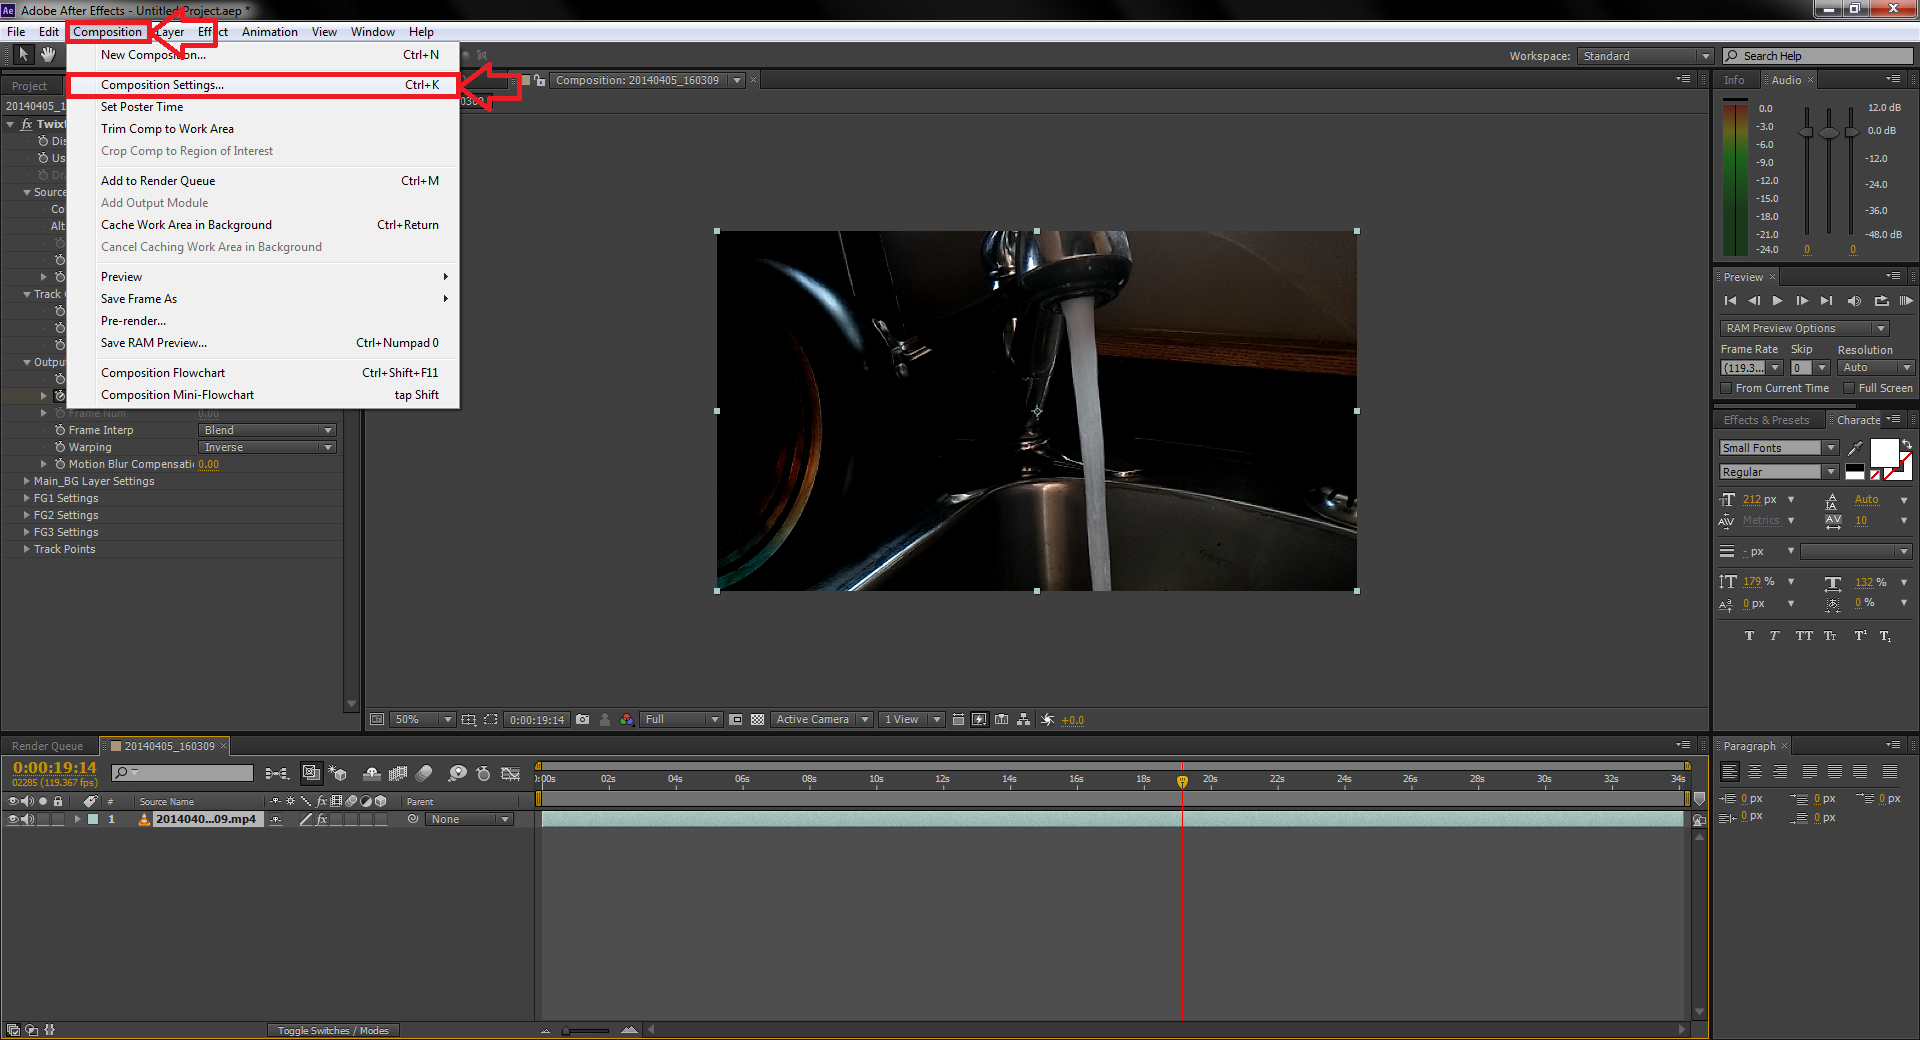
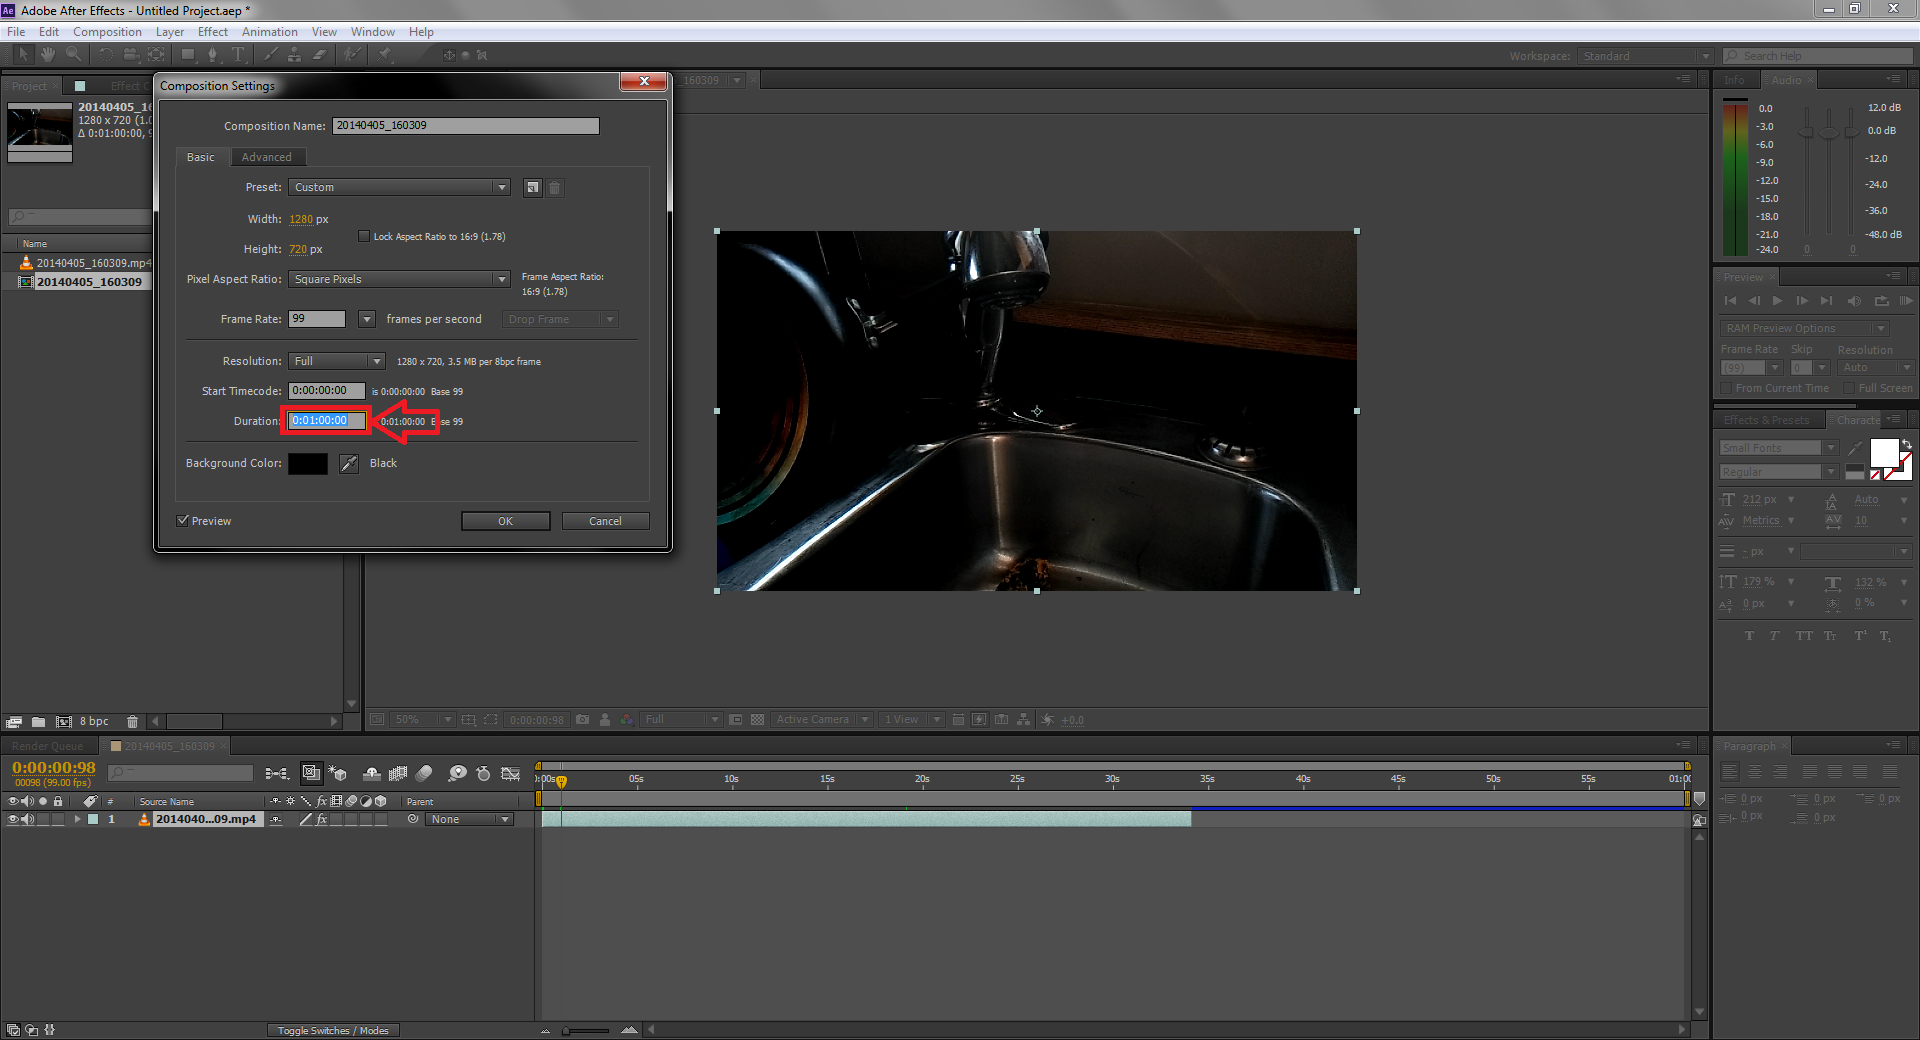
Since your video is stretched out now, you can only scroll through part of it. To change the composition settings to change the duration of your final product, go to :
Composition > Composition Settings
Depending on how long your original clip was, will vary on how long you need to set this value to, just remember your footage is 80% slower, and should be 80% longer. I set mine to 1 minute.
You can now click and drag your footage to the right to extend the duration of the clip.
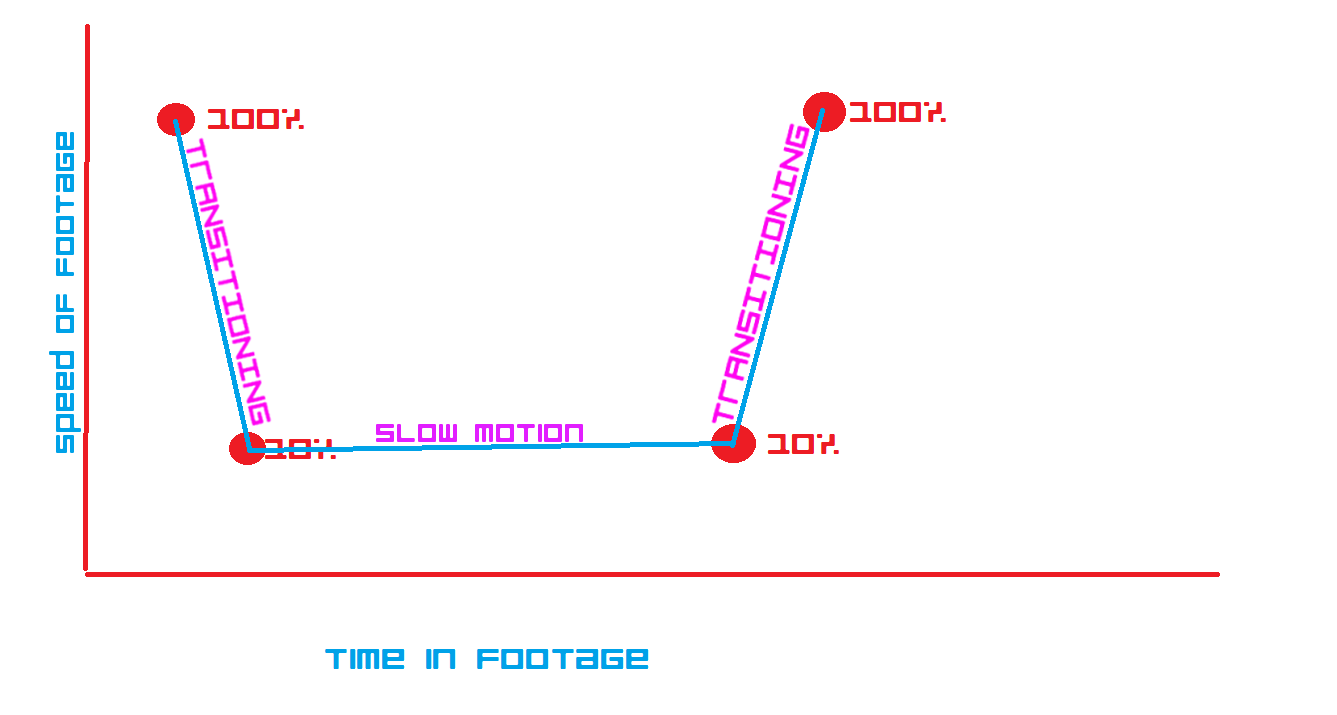
Some people like to change back and forth between slow motion and real time so some example keyframe values for that would be:
1.) 100%
2.) Skip ahead a couple frames
3.)10%
4.)Scroll to where you want it to go back to real-time
5.)Add keyframe with the same value (10%)
6.)Then have it scale back up to 100%
It should look a little something like in the third image.
I also made a graph of why we need to do things like this.
Congragulations! You're Done the Slow Motion, Now Add the Finishing Touches!
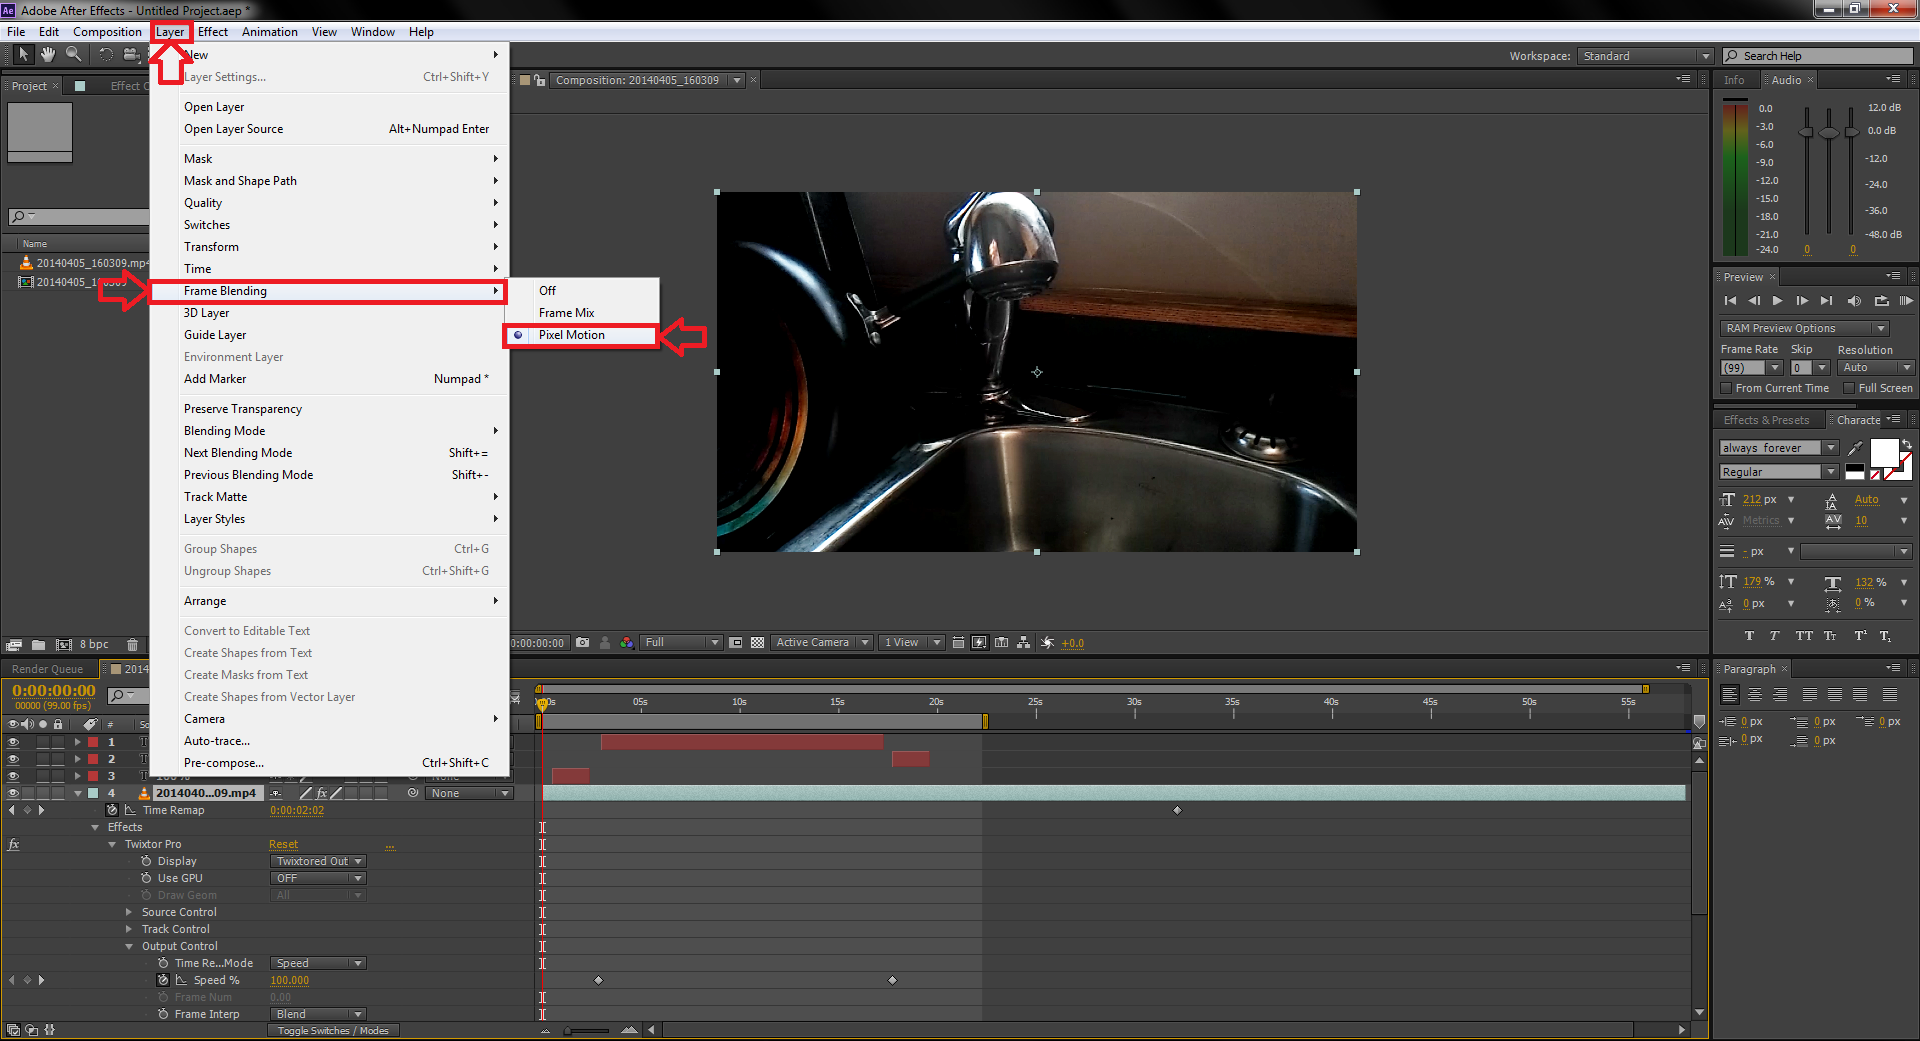
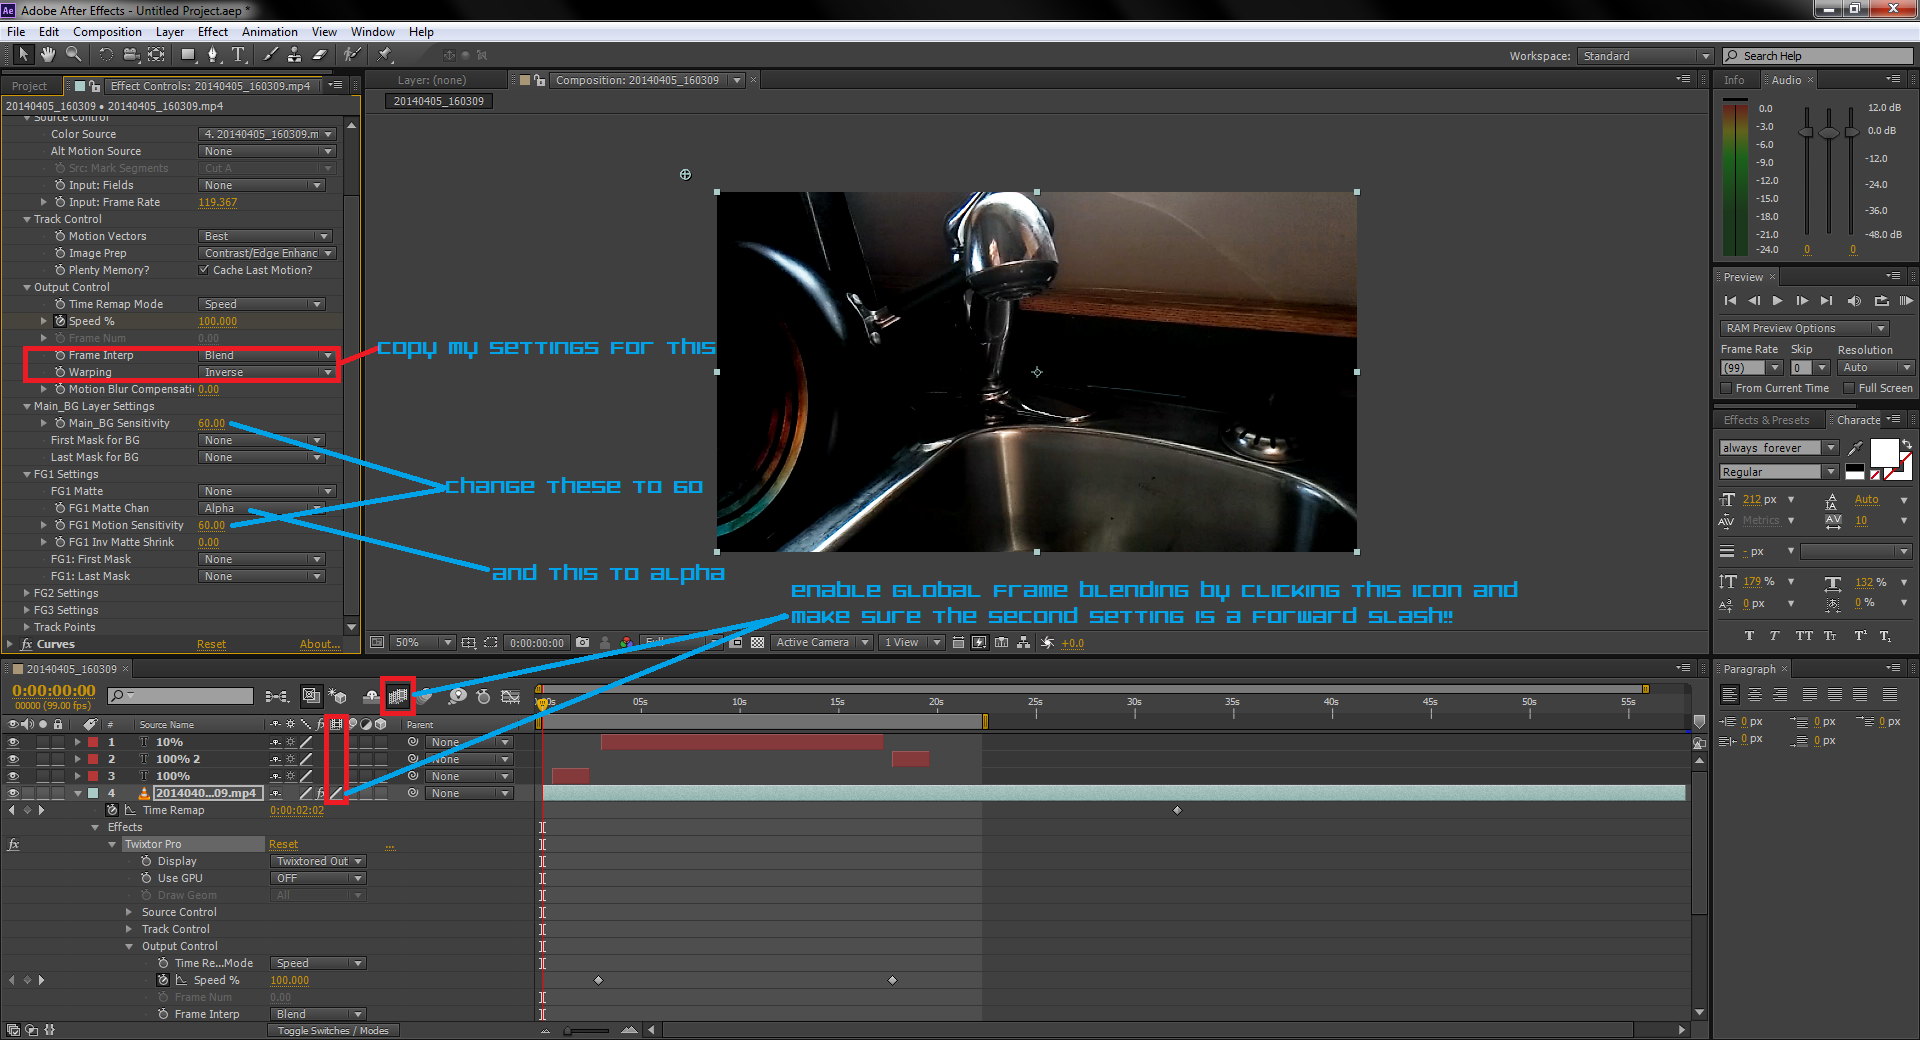
To make the slow motion smoother add pixel motion frame blending, and global frame blending on so you don't get a weird bubbly/water effect.
To enable this go to:
Layer > Frame Blending > Pixel Motion
Follow everything in the image to get the best results!!
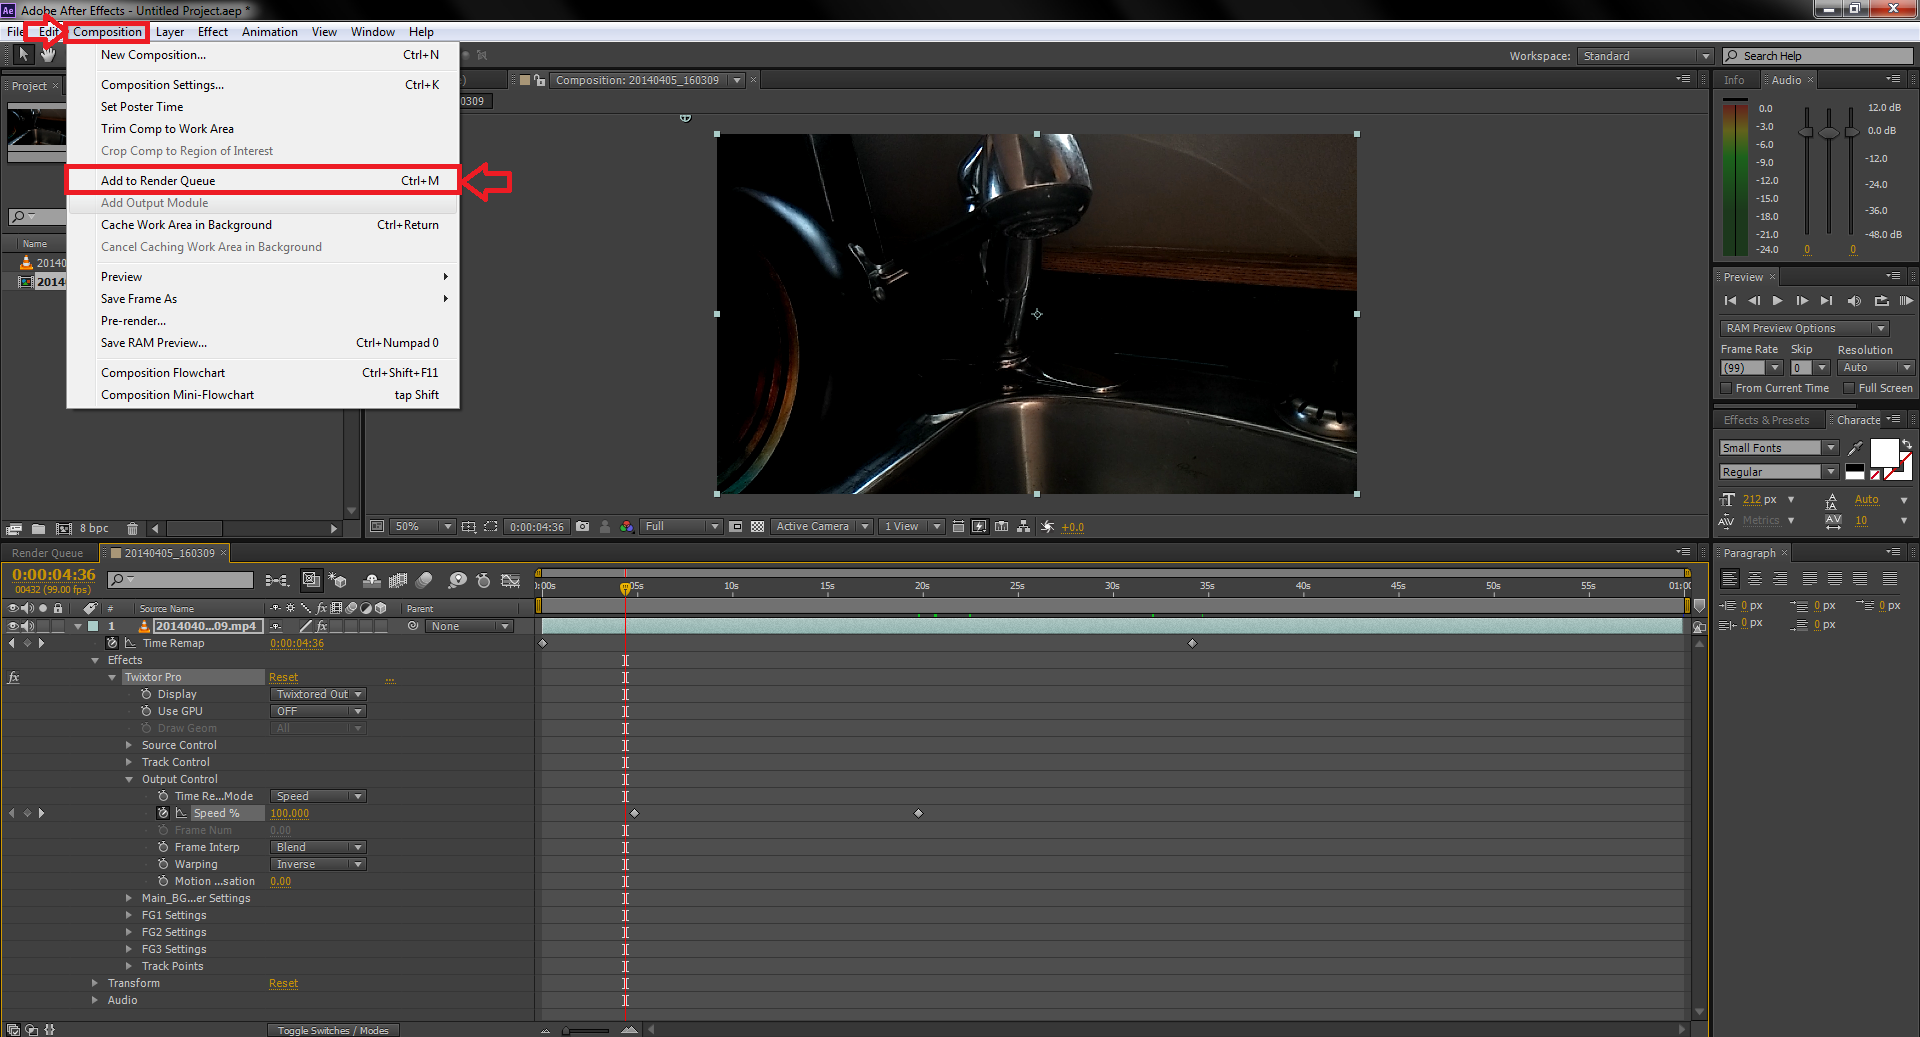
Add any other special FX, or anything else you might want to add to your clip and render(publish) it buy going to :
1.) Composition>Add to Render Queue
2.) Change the render settings to best fit your codec/file format that you require.
I added some colour correction (CC) because when my camera shoots at a higher frame rate it captures more frequently thus not letting in light fast enough so I needed to brighten up the video.