How to Do Voice Over in IMovie, and Why You Should
by MsSweetSatisfaction in Design > Video Editing
11935 Views, 132 Favorites, 0 Comments
How to Do Voice Over in IMovie, and Why You Should
I do voiceover for all my videos. What that means is that I film my videos and then once everything has been filmed and put into iMovie I begin recording my narration. There are some very specific reason as to why I do that, but more on that later.
For this instructable you will need to have access iMovie, and a microphone. Built in microphones will work for this, if it's good enough to speak to your parents on it'll work for video. However, I recommend upgrading as soon as possible. I use a Blue Snowball Microphone available here
Put Those Clips Into a Project
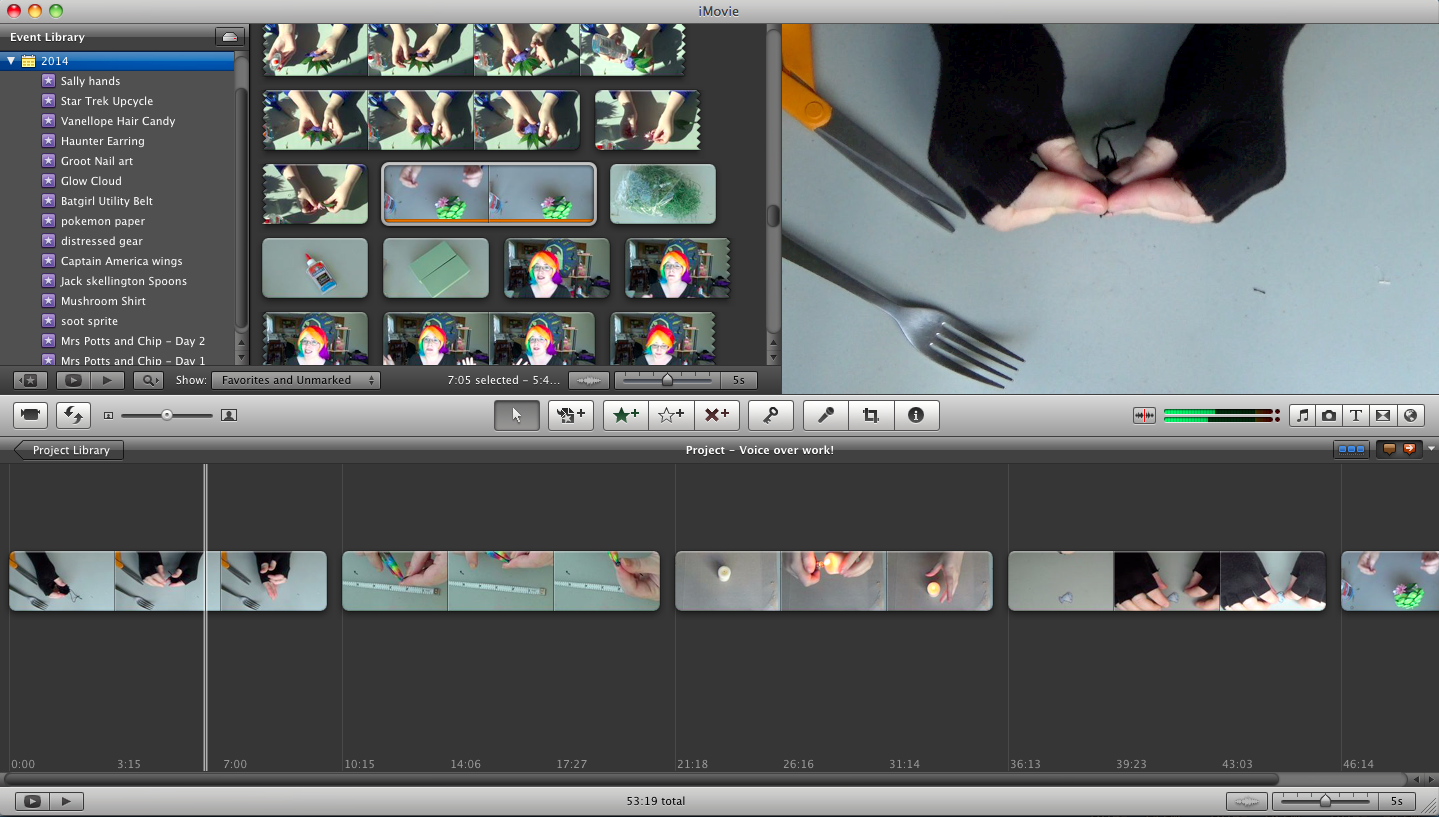
Start your new project and then put the clips you're interested in having in your final project.
I then proceed to do a rough edit of the entire video. Essentially I make sure that anything and everything I want to cover in the videos gets covered. It's really up to your own editing style, but this is my method.
At this point for me the video is usually 15-30 minutes long. But I don't worry about it because during the voice over process things get significantly shorter.
Clear Out Any Noise You Don't Need

Really think about your clips. Do you need any of that sound? If you're doing a music tutorial then I can see why you would need the background noise. However, any other noises, especially the sounds of power tools, are nothing but distracting if not unpleasant.
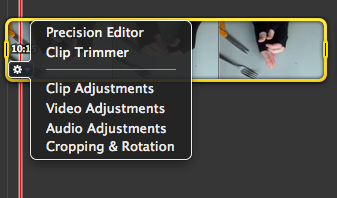
To get rid of your background audio you're going to want click the blue gear carrot menu and click on "Audio Adjustments"
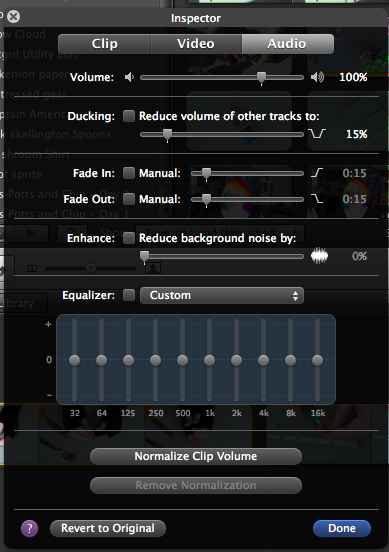
In the new menu drag the volume indicator all the way down to 0%
Click the "Done" button to set your changes.
Click the Microphone Button!
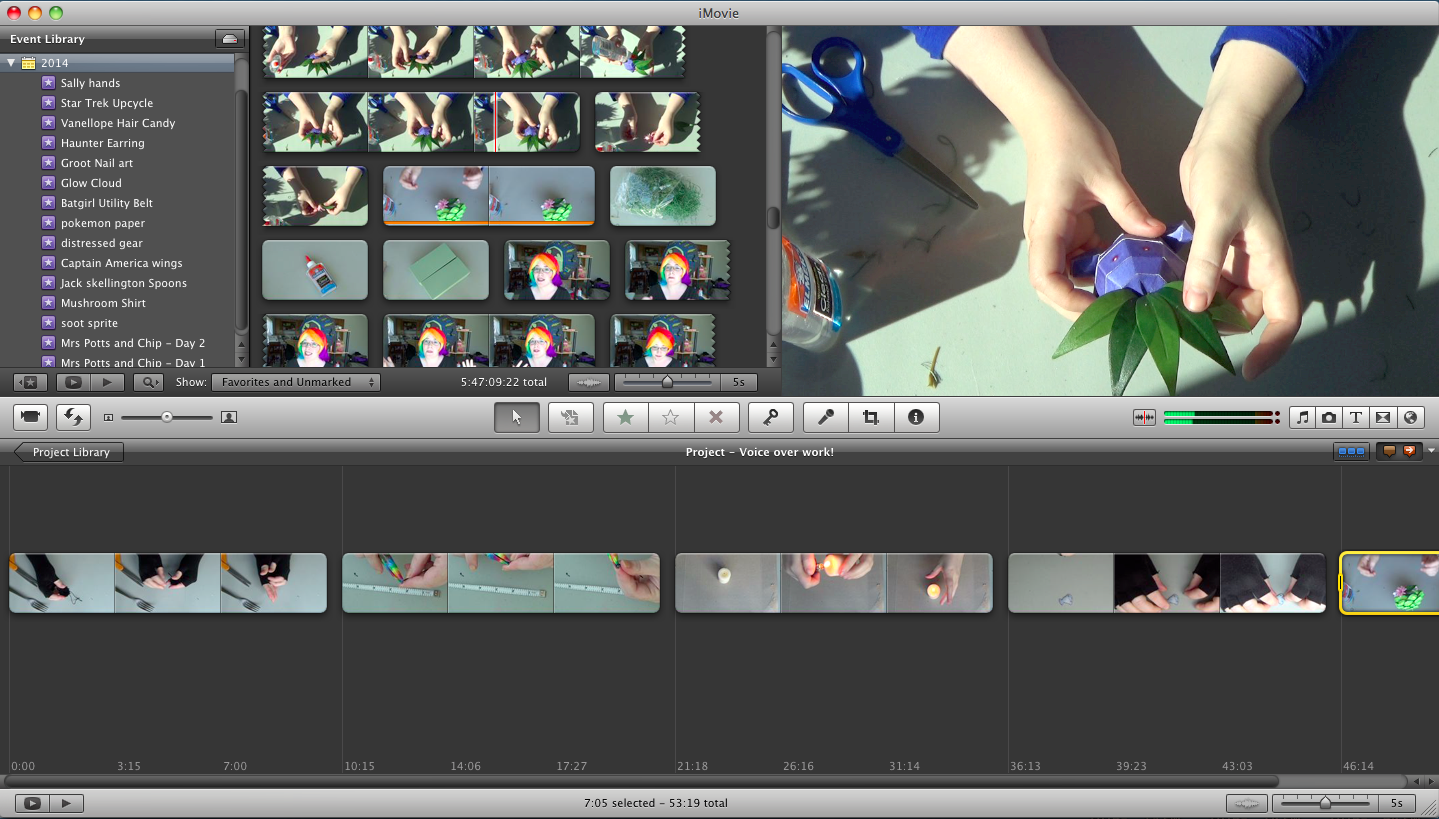
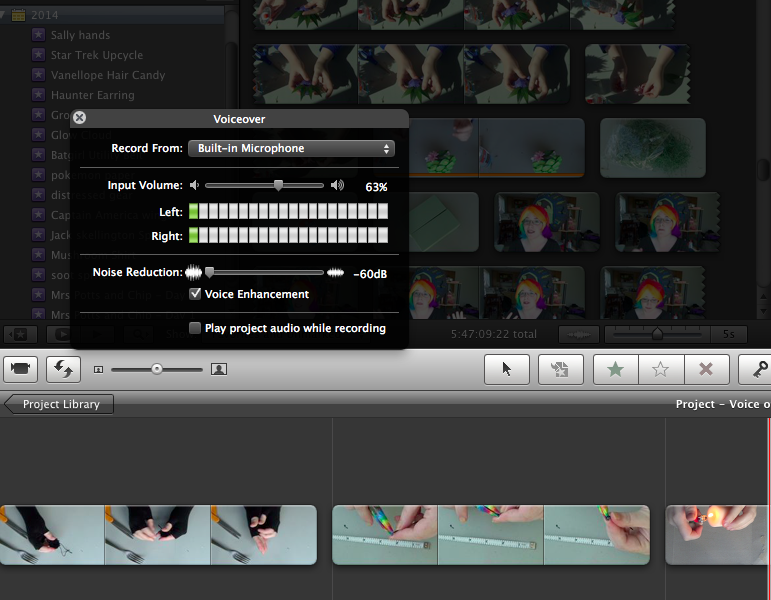
Once clicking the microphone the Voiceover menu appears. On this menu there are some options that are definitely worth paying attention.
The first one is the drop down menu that let's you select which microphone you wish to record from. As you can see I currently have my built in microphone selected but if you plug in a microphone the option to switch will show up in the drop down menu.
The second one is the input volume. Essentially how loud your recording is going to be and how sensitive the microphone is to it.
The third one is noise reduction. Turn the noise reduction up to have it dampen the background noise. I put mine on max personally.
The input volume and noise reduction are two options that can allow you to up the quality of your audio without upgrading you microphone. I can't give you exact numbers for this because it's going to depend on your microphone and where you are recording. My suggestion is to play with those two sliders for a while. To the best of your ability make yourself sound clear but not like you're in a fishbowl.
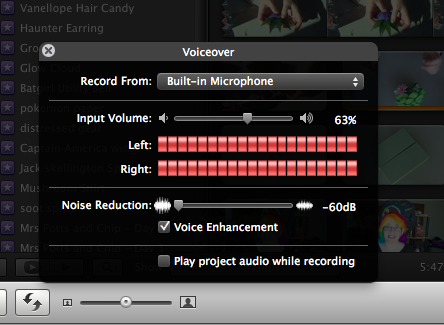
Watching the Sound lever indicators are a great start. Don't let yourself get into the red zone. If you consistently get into the red turn your input volume down!
Choose Where You Want to Start and Then GO!
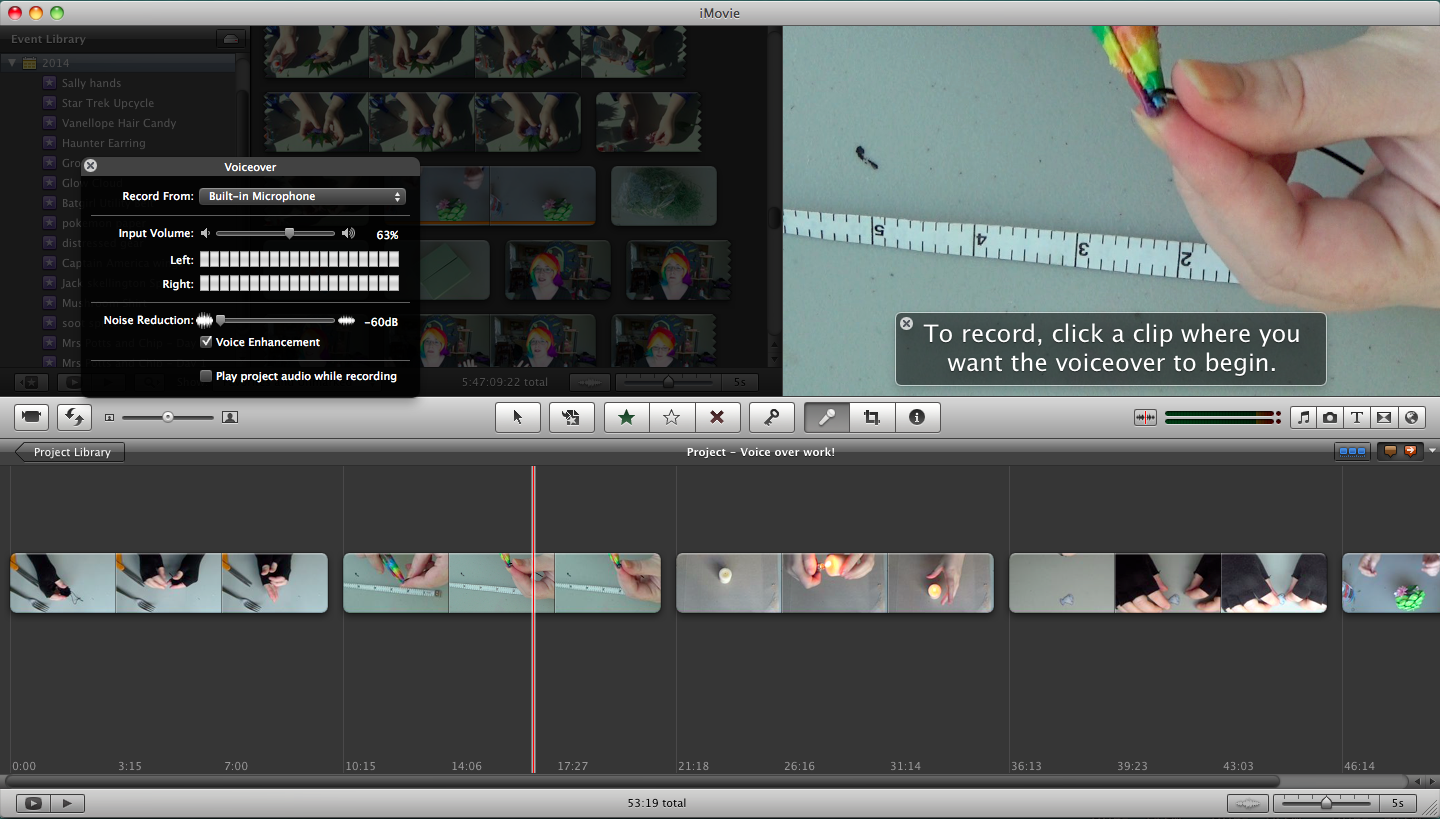
You'll note that when you have the Voiceover menu open you still have you regular red line indicating where the software thinks you are in the video. Clicking anywhere in the project will cause you start recording from where ever the red line is at the time. So line up where you want to start recording and then click.
You will get 3 beeps and then the recording starts! Talk, sing, make sound effects, the choice is up to you! To stop the recording click the mouse again or hit the space bar.
Finishing Techniques!
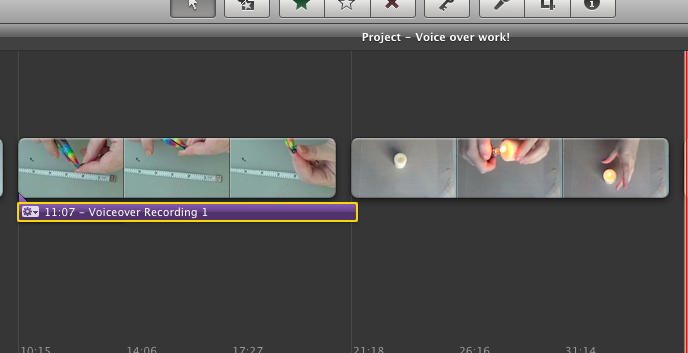
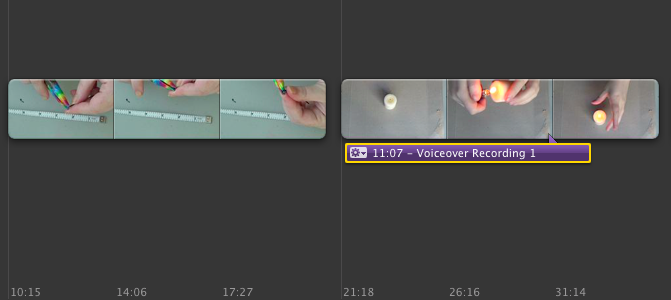
Now once you've recorded your voice over, you may discover that you really don't like where the voice over is. No big, just click the purple box that is recording and drag it around with your mouse. Or if you want to move it only a little you can use your arrow keys.
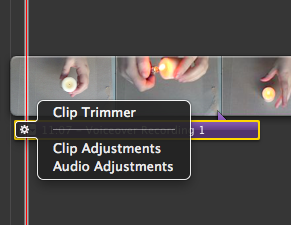
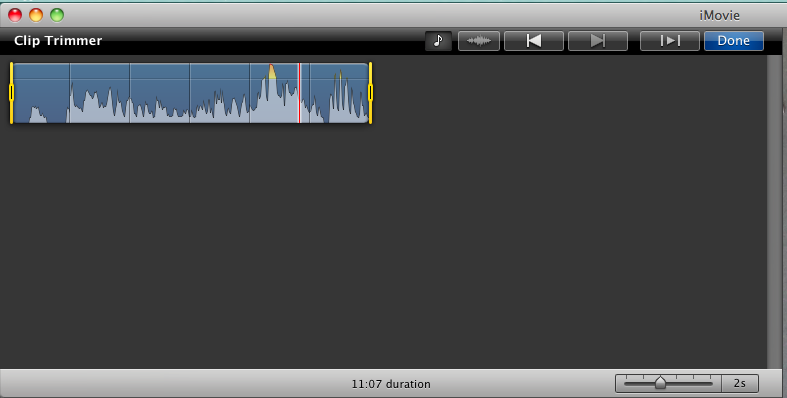
Or say that you only like part of your recording, or you accidentally recorded yourself slamming the space bar. Easy fix! Click that purple gear and then click "Clip Trimmer." It will appear in the upper left and it works the exact same as the Clip Trimmer with video.
Now this is where my video's get significantly shorter. I get rid of almost everything that I don't have a voiceover going over. Or if I can explain a process faster than show I speed up the clip in the "Clip Adjustments" menu to match the voice over. This causes my original project of 15-30 minutes to usually get edited down to 5 minutes. So really think about your video if you've explained what you're doing already do you need to show any thing else? Remember that people have the ability to re watch your video, but make sure you're being clear.
Why Do a Voiceover?

Well for one people are more likely to engage with the video because of the human element. We are community based creatures, as a whole we like hearing the other people talk. This is why I vote to verbally explaining as opposed to subtitles in videos.
The biggest thing is this though. If you are explaining something and doing the something at the same time what's the likelihood that you're doing both tasks to the best of your ability?
Therefore I recommend when you showing how to do something. Don't spend any energy on your verbal, focus solely on showing your process to the best of your ability.
Then later when your recording your voiceover you can focus solely on making a great voiceover.
This technique will create a much more professional video because your doing each task the best you possibly can and then combining them. As opposed to trying to do both at the same time to the best of your ability, which can result in you doing neither well.