How to Digitize a Sketch Using Inkscape
119711 Views, 53 Favorites, 0 Comments
How to Digitize a Sketch Using Inkscape
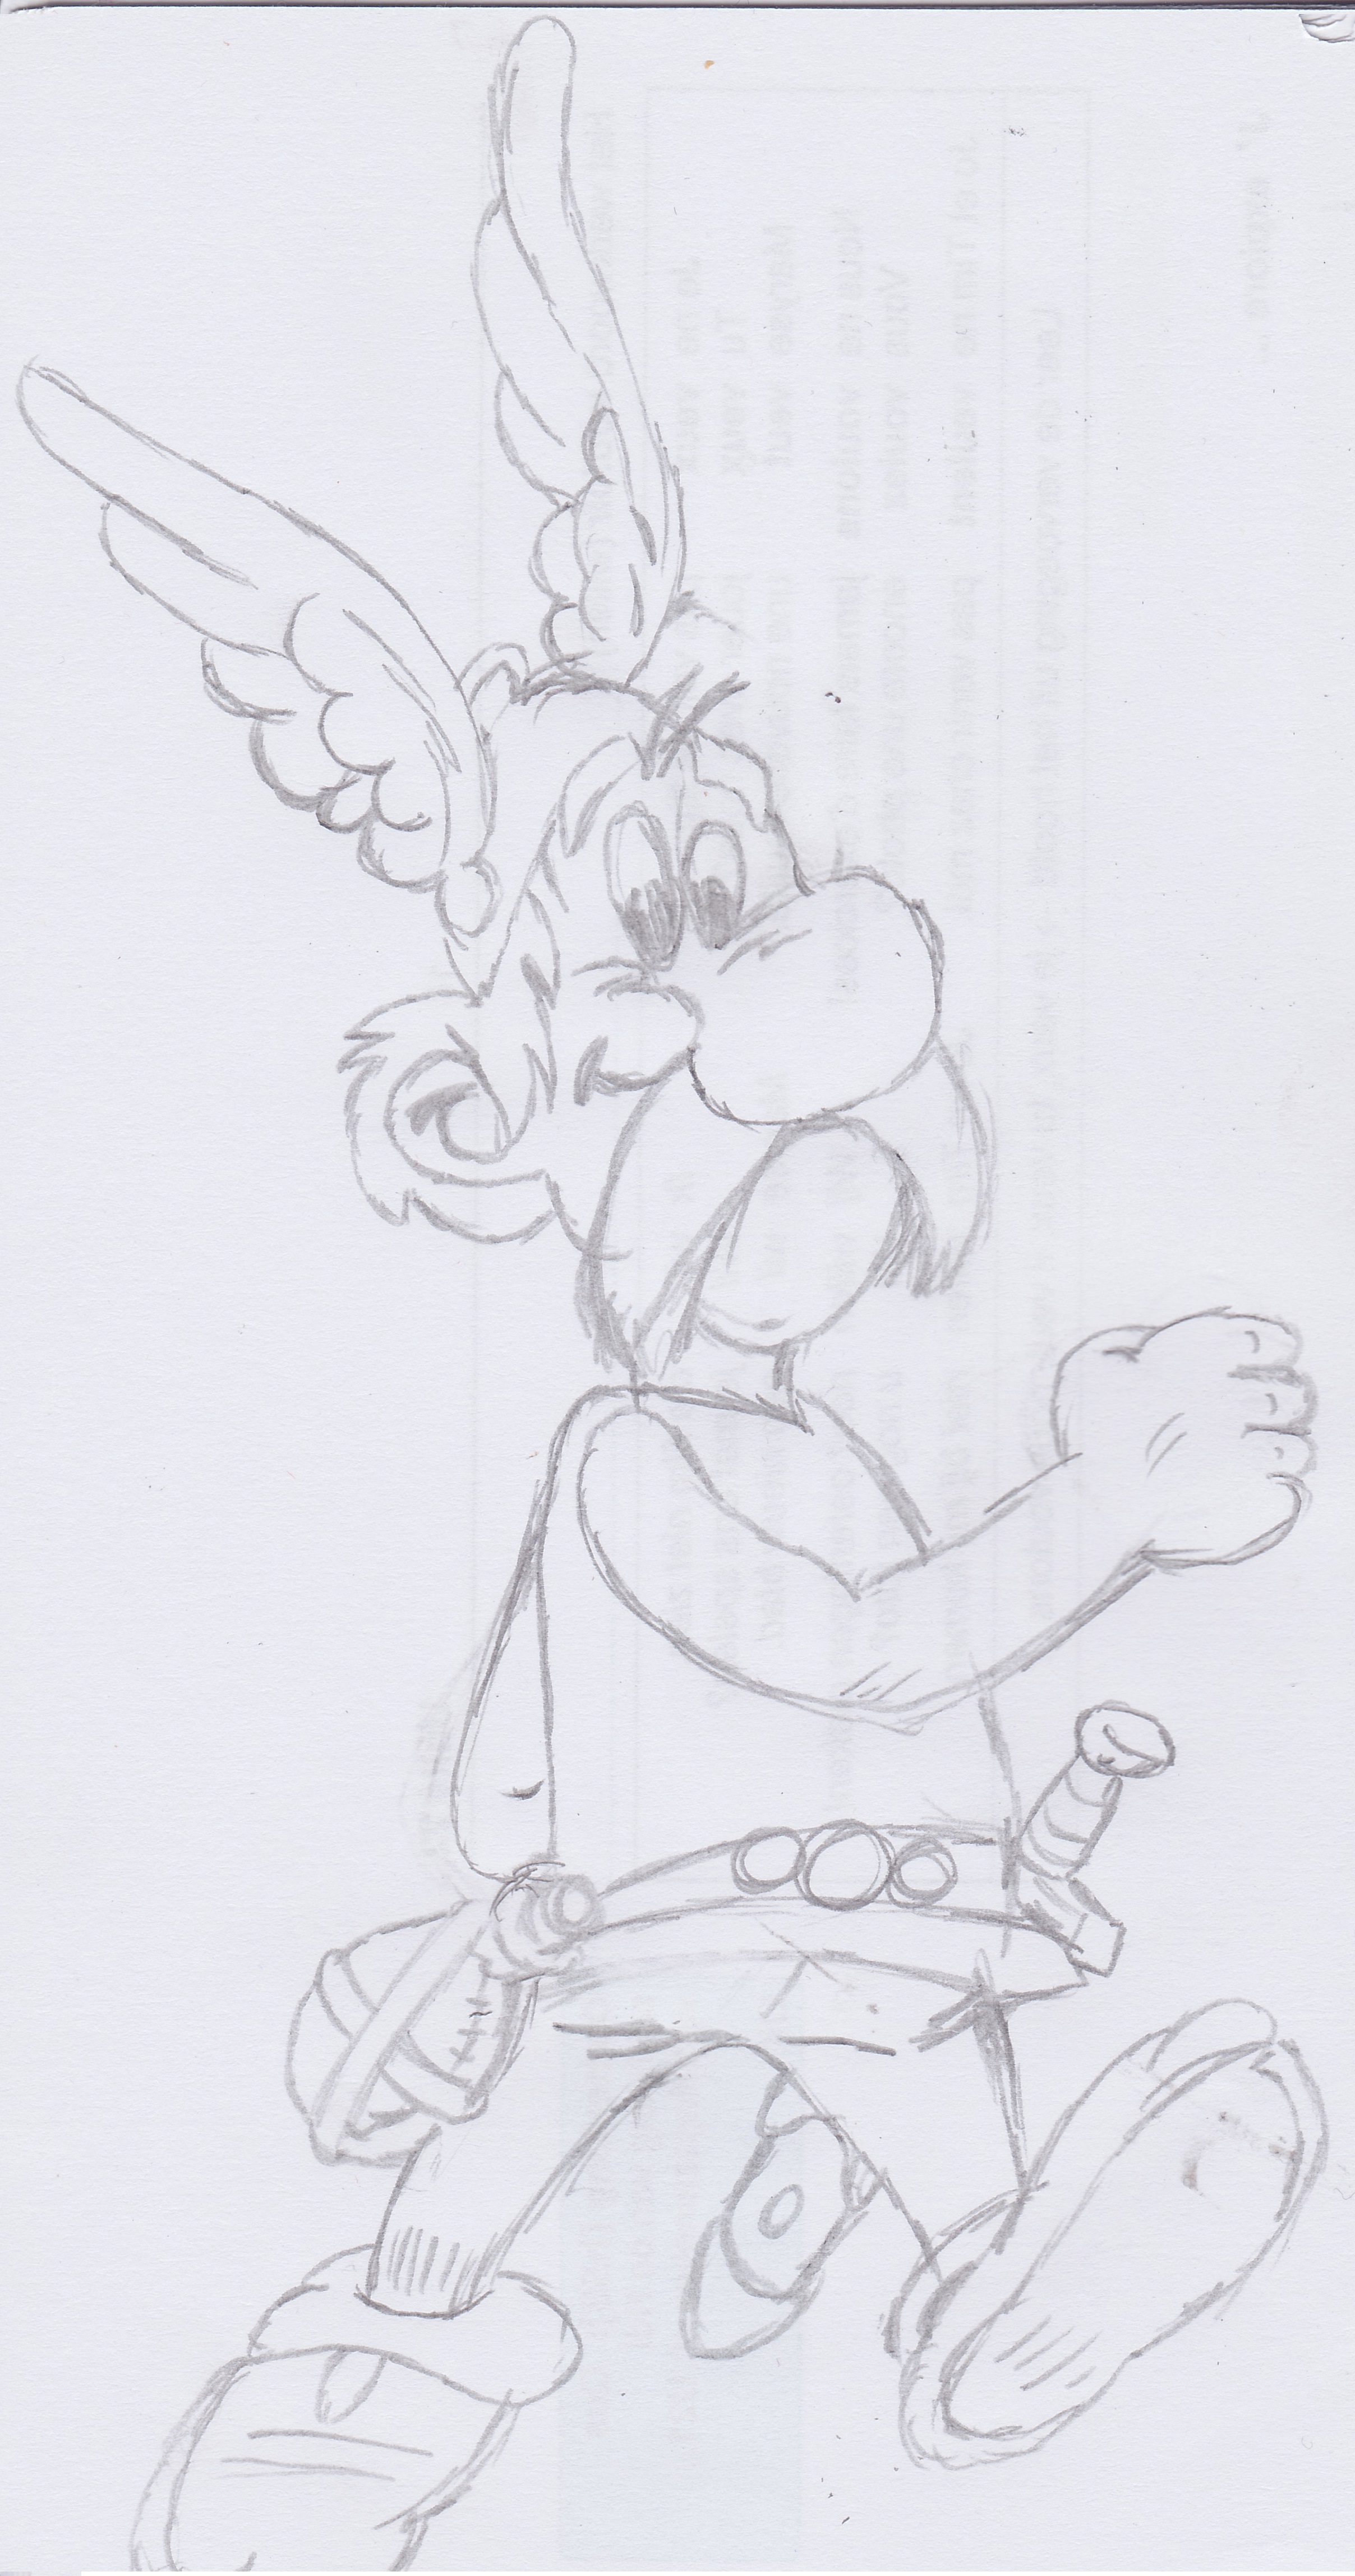
I often make some sketches or draw random stuff that turns out quite well. so i was looking for a way to take them off the scrap paper they were drew on. I used inkscape to turn them into vector images and give them a bit of color. Later, i used the same method to make logo's and templates for stencils.
There are a lot of applications for this that makes it worth explaining.
Scan Your Sketch
First of all, you need to scan your sketch. try to make your lines as dark as possible to make sure Inkscape "reads" the lines correctly.
you can go over the lines with a black pen, or edit the scan with any editing program to increase contrast, brightness etc
Open Sketch File and Generate Vector Drawing
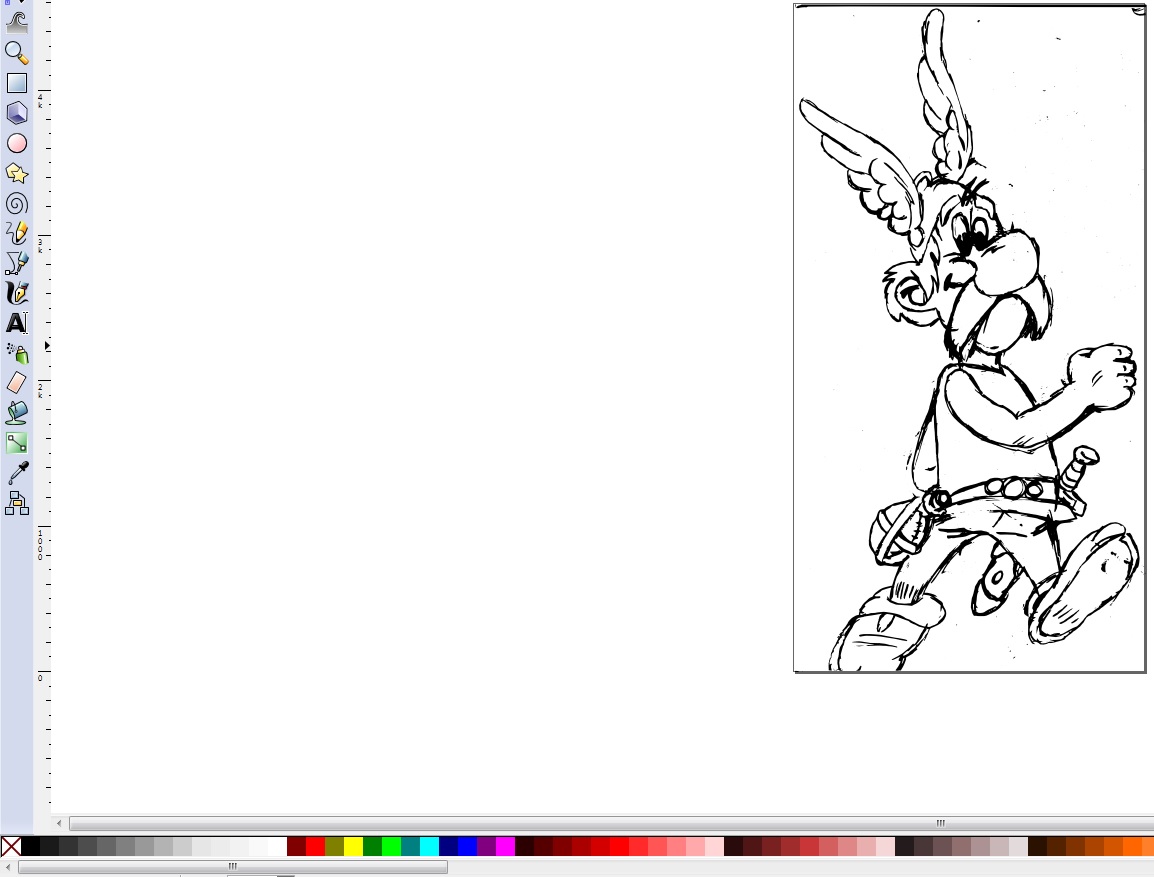
Open your scanned file using Inkscape.
Go to: path -> trace bitmap
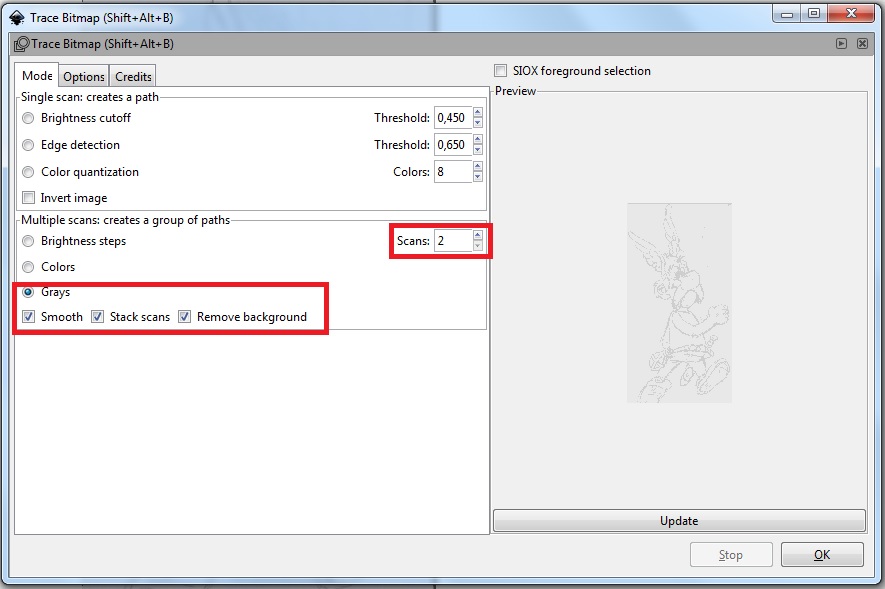
If your sketch is black and white:
if your sketch has only two colors (black and white) select two colors, select remove background and set the option to grays.
press OK to confirm.
Inkscape has now made a vector drawing consisting of two colors. you can still change the colors by selecting the object, and then selecting a color in the bottem toolbar.
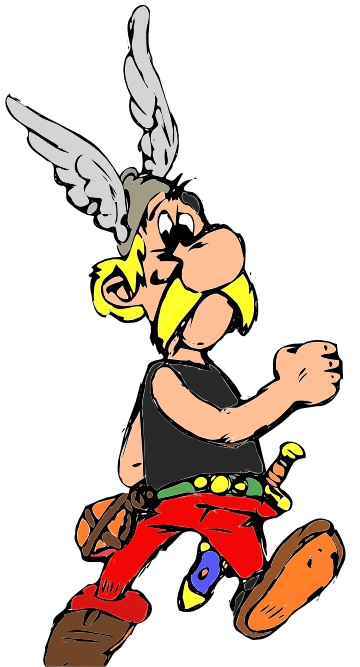
If you sketch has more colors:
If your sketch contains more colors than black and white, select the amount of colors you want your sketch to have. Make sure to select "colors" instead of "grays".
press OK to confirm.
You can again change the colors by selecting a layer and choose the color you want it to have.
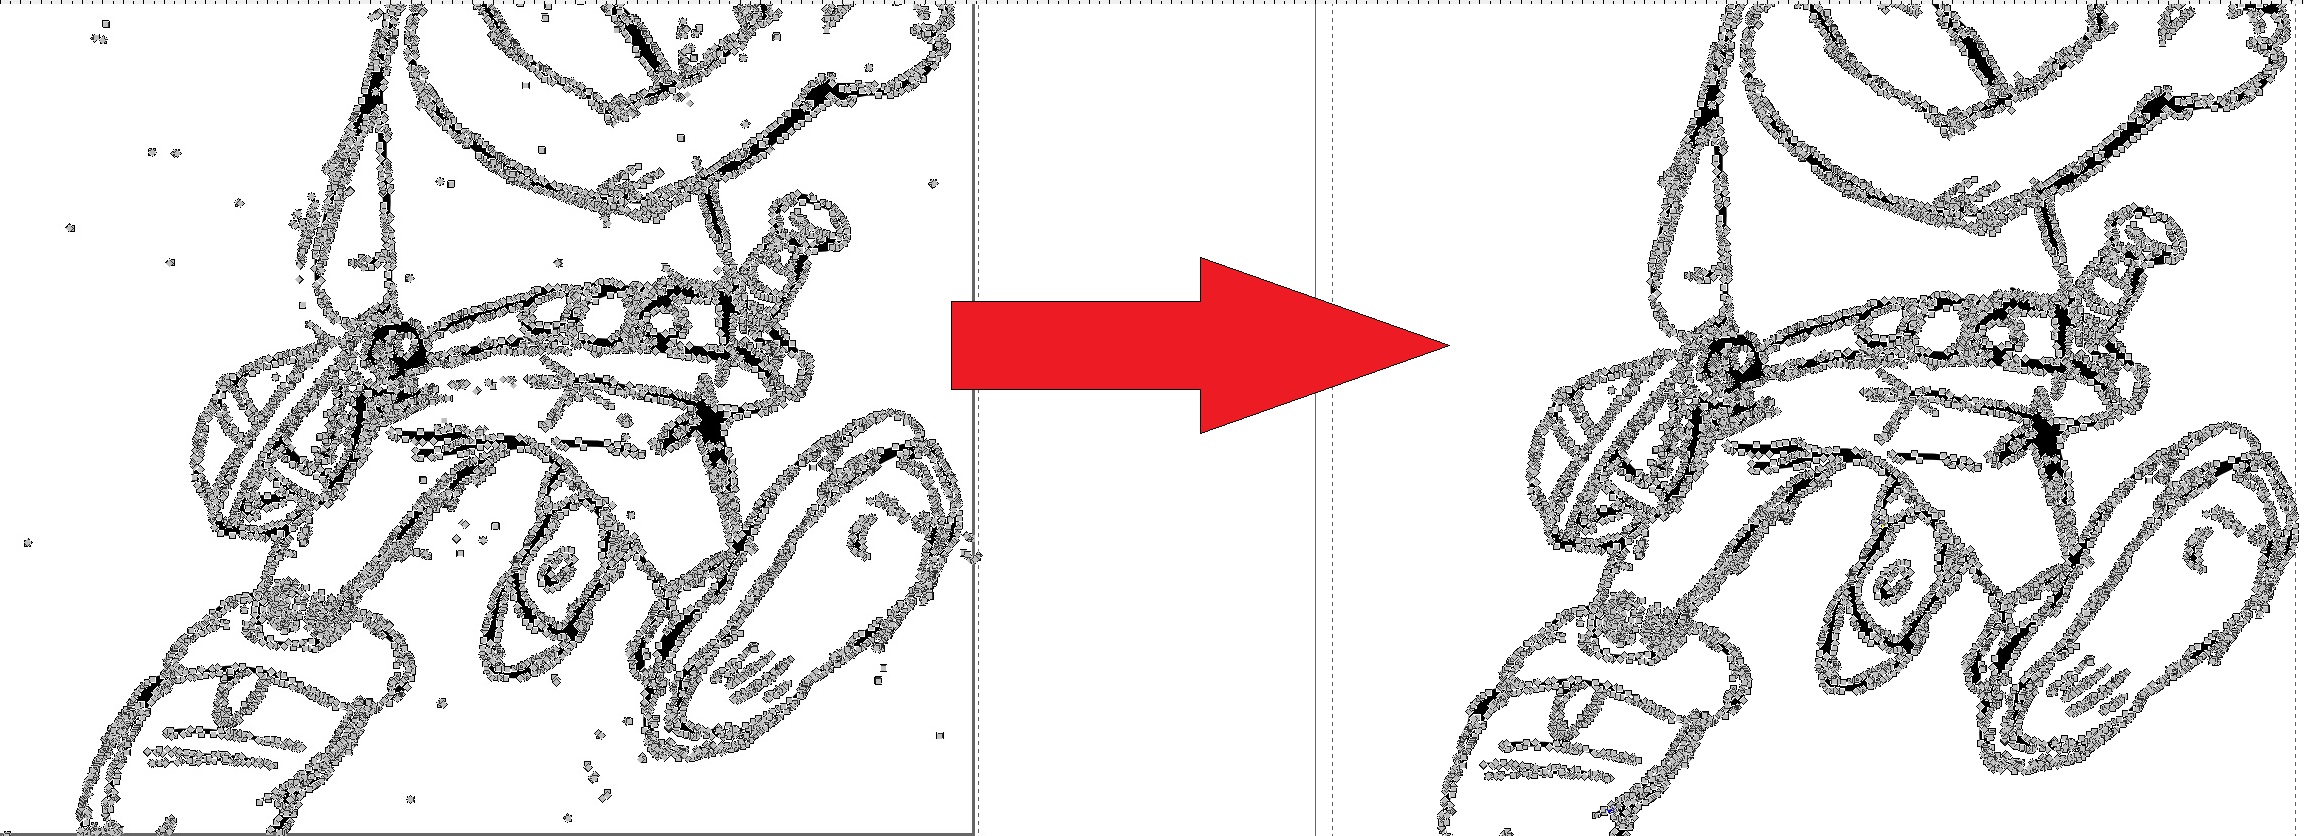
Smooth Out the Edges
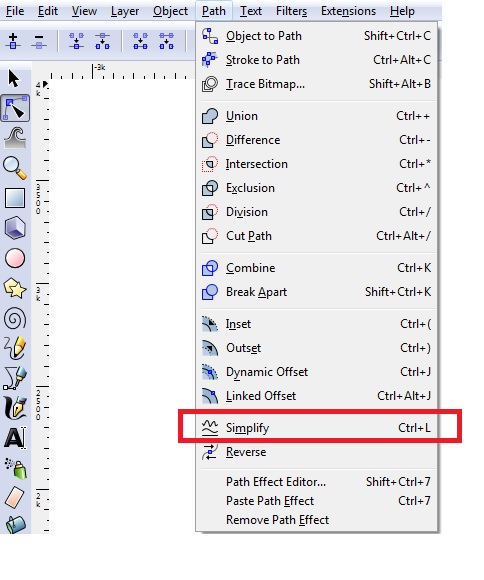
Under the tab "path" you can choose to simplify the drawing if necessary. this will smoothen the edges.
Remove the Remains of the Scan
The program might have detected some spots as a color when it is not part of the drawing. select these spots and delete them.
Shape the Edges
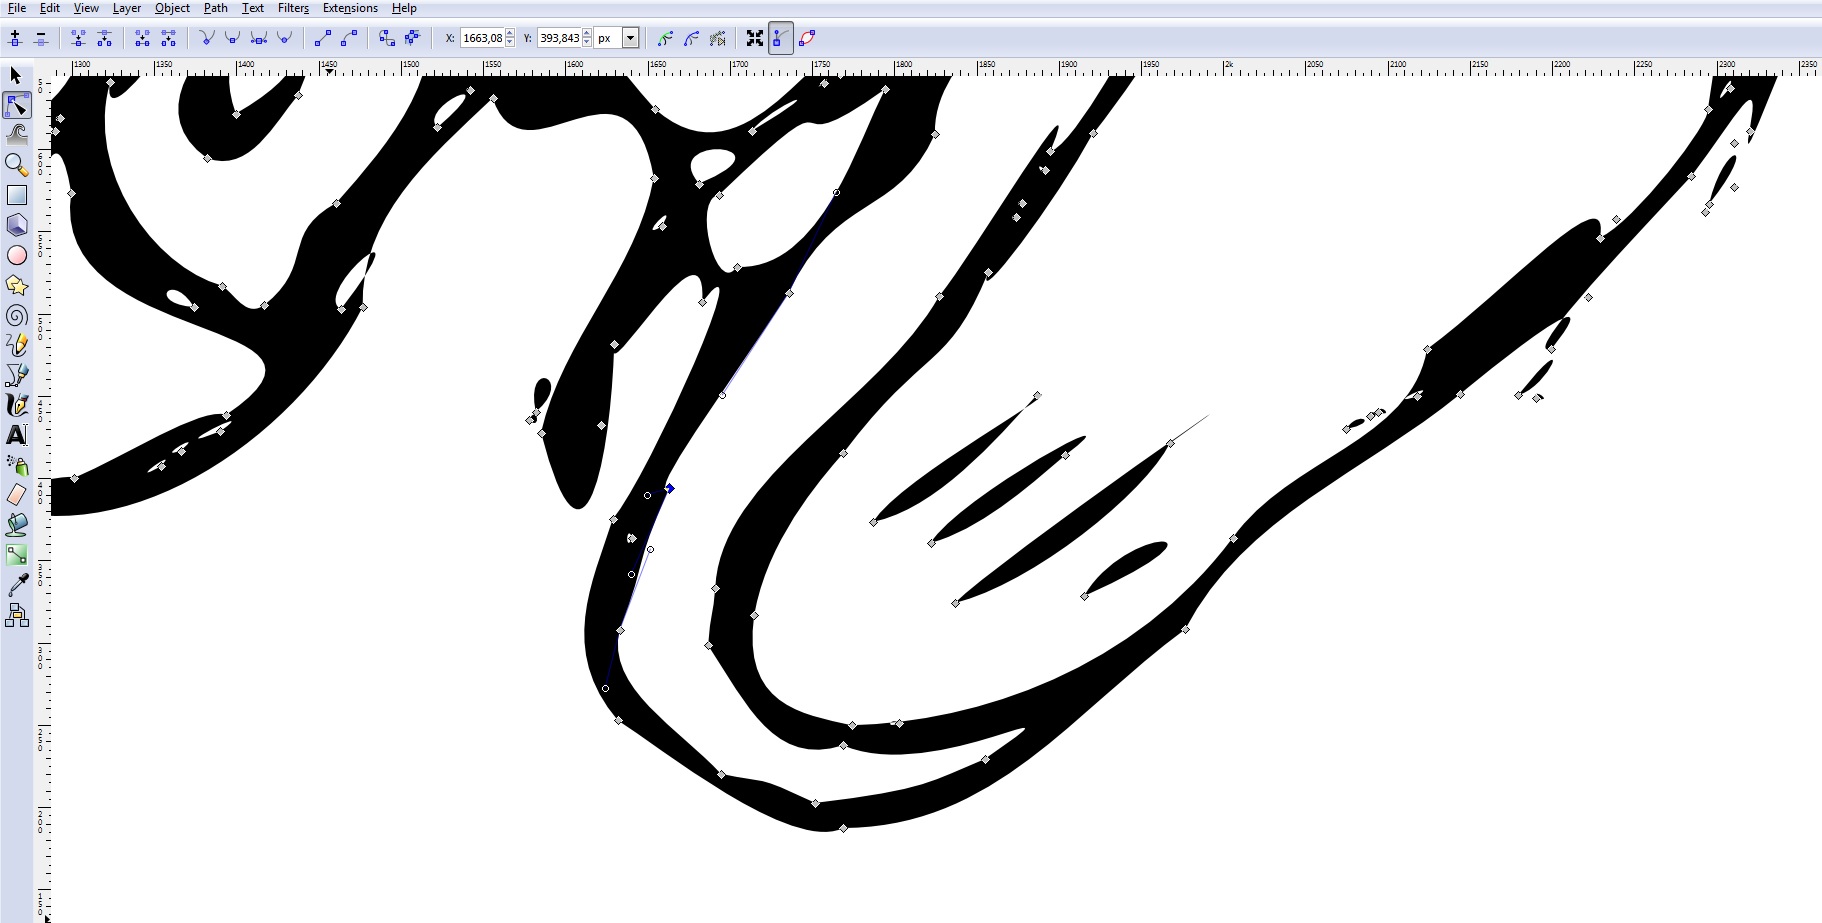
When you double-click the lines or shapes, you can see the nodes that make up the vectors.
By editing them, you can change the outlines if needed.
Fill in the Final Colors
if your sketch wasn't colored already, you can use the bucket tool to fill in the blank spaces.
Now you have your sketch digitized. you can leave it as a vector image, "save as" other image formats or export as png if you want to manually change the settings.