How to Create a 3D Printed Voronoi Spiral Centerpiece / Vase
by ajreynolds15 in Craft > Parties & Weddings
13512 Views, 100 Favorites, 0 Comments
How to Create a 3D Printed Voronoi Spiral Centerpiece / Vase
These are the steps I took to creating my 3D Printed Voronoi Spiral Centerpiece / Vase
This Spiral Centerpiece is perfect as a conversation piece at a wedding or other special events!
AutoCAD
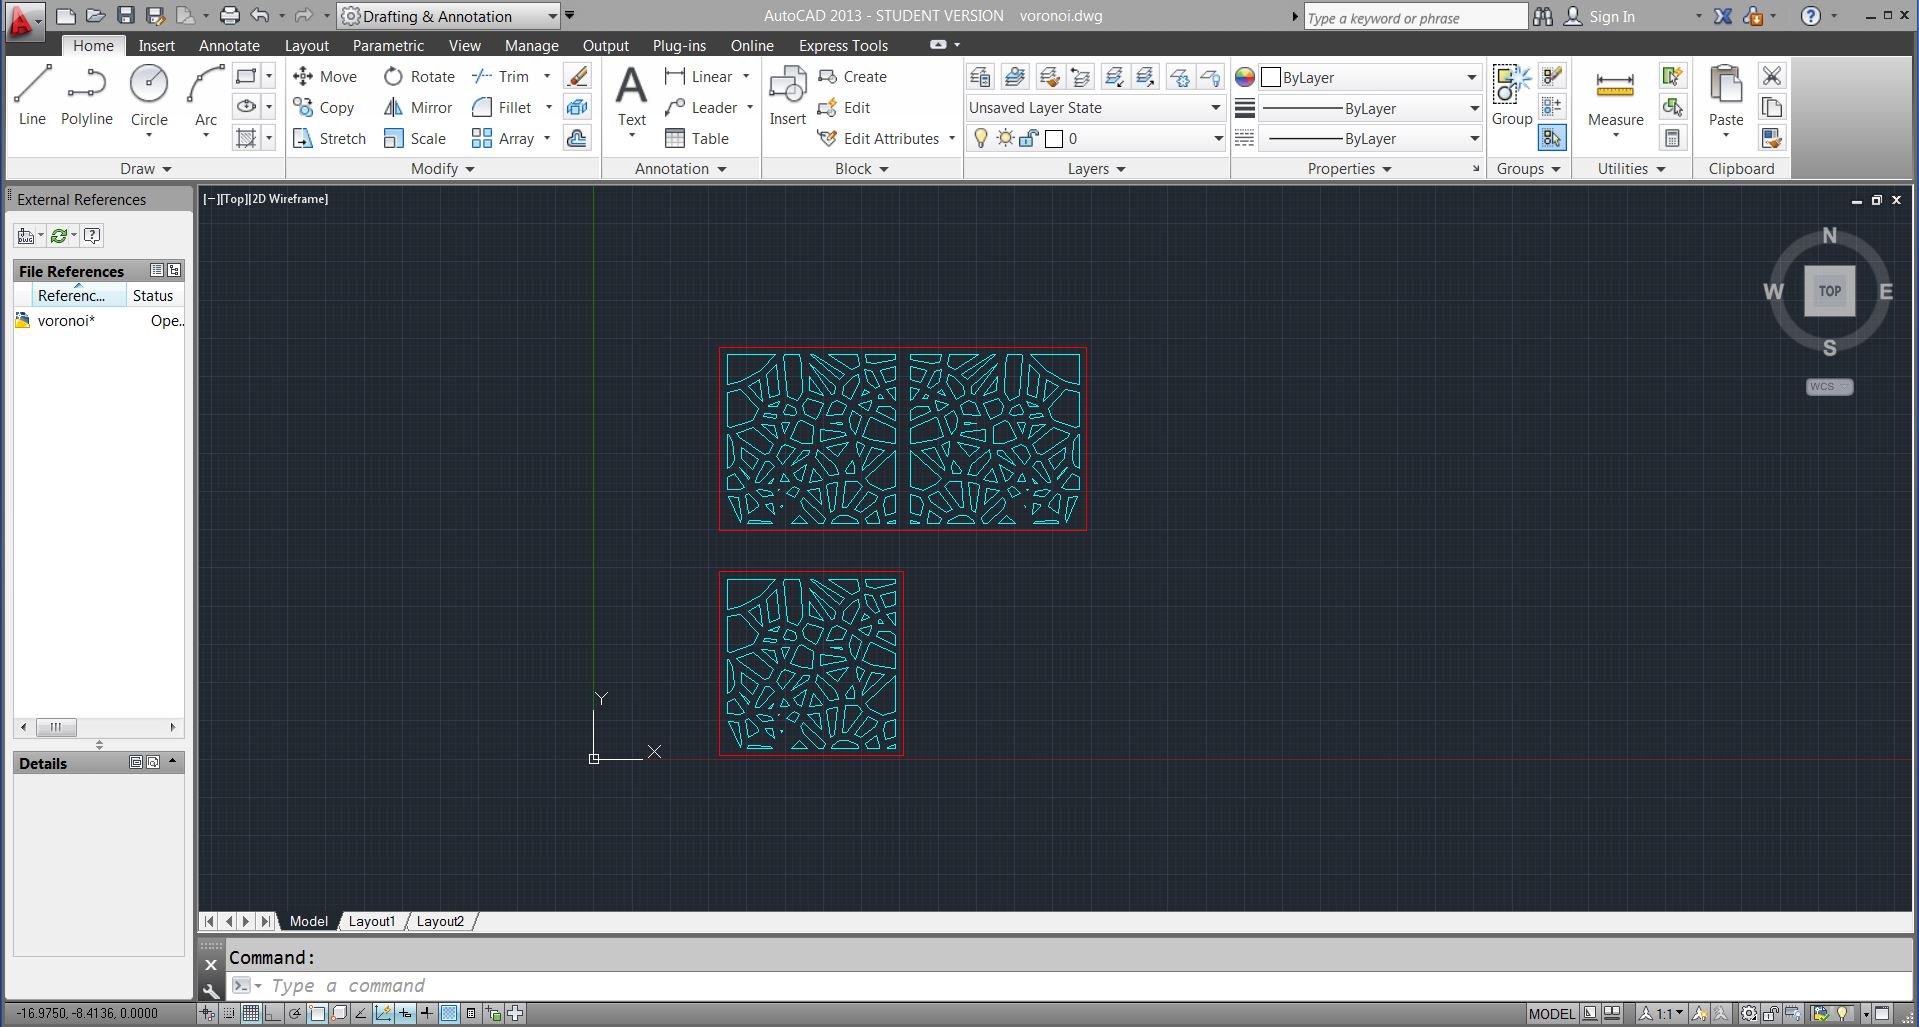
The first step I took to creating my centerpiece was I came up with a Voronoi pattern that was drawn digitally using AutoCAD. I made a rectangle and a square as my two outlining shapes because I wanted to start as a rectangular box and these would be each of the faces. After drawing up the design in autocad, the next step is to export as a DWG file to be able to import into Rhino.
Rhino Import
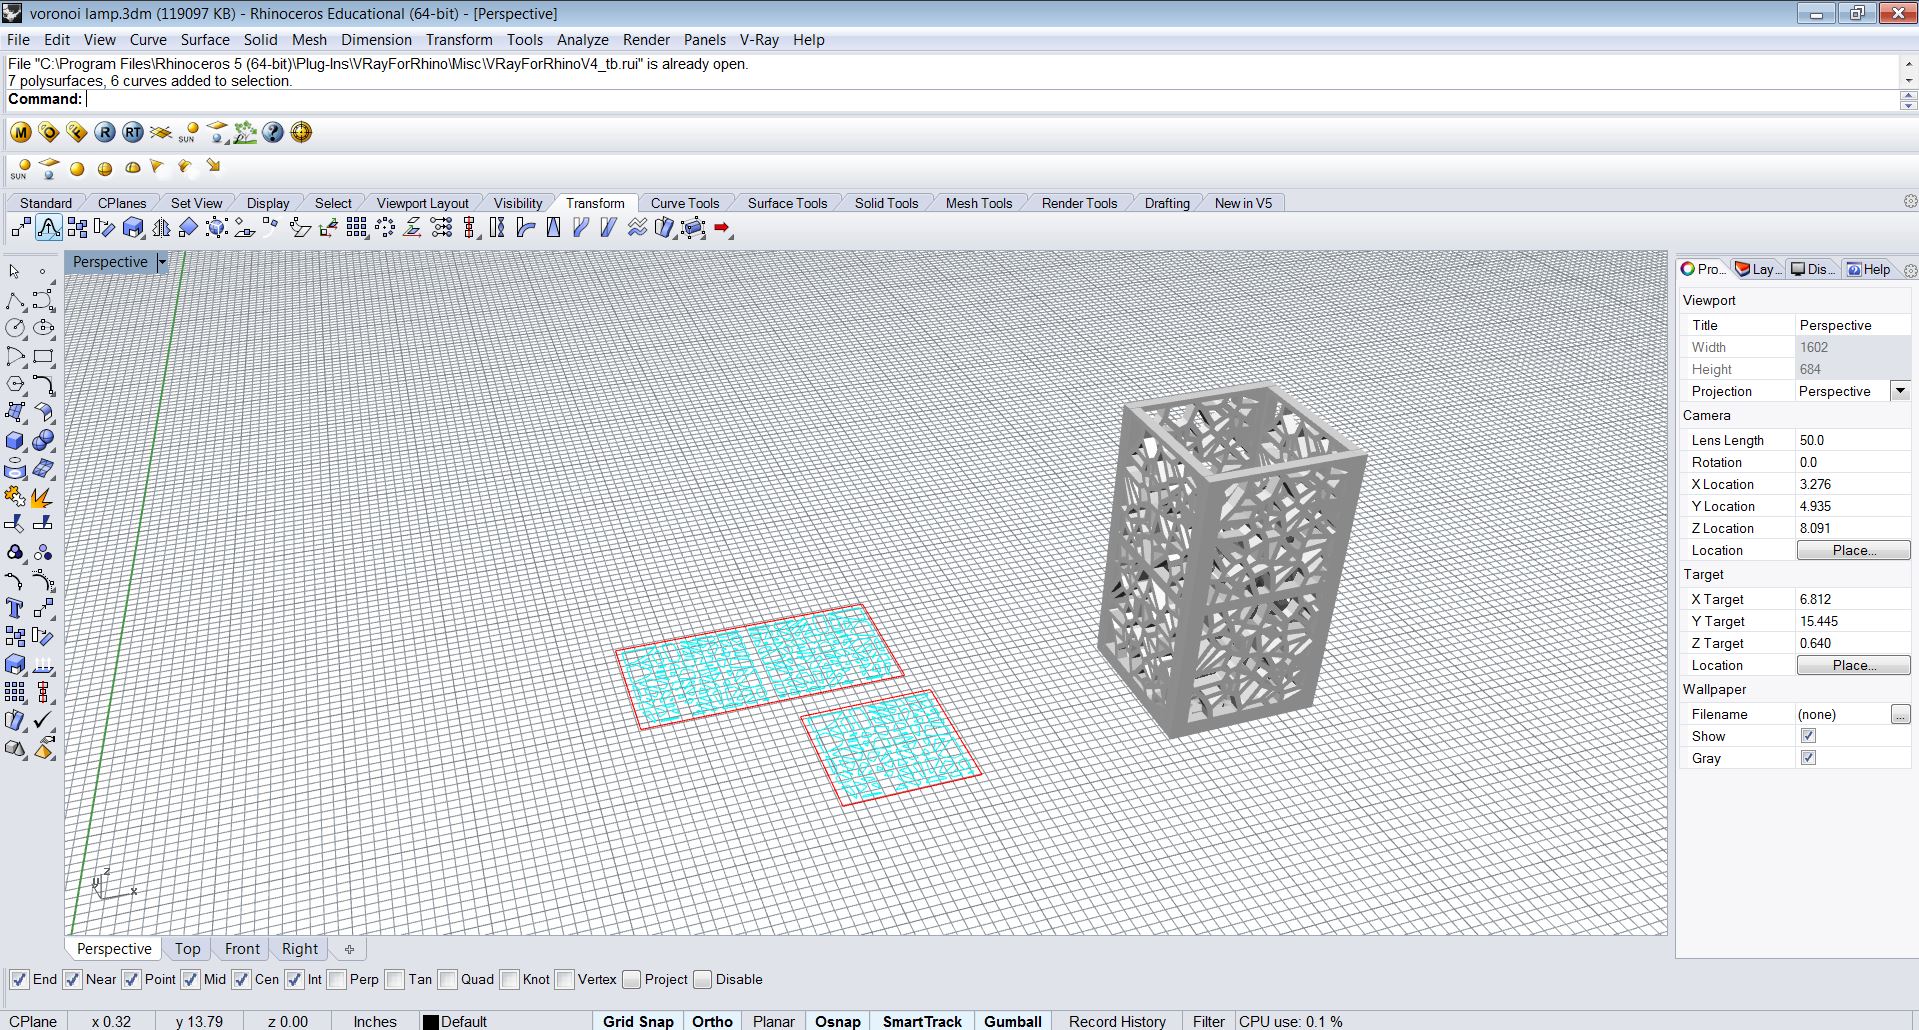
The next step is to import the DWG file into Rhino and extrude the lines to make thickness for the face of your side. When I did this, I highlighted all of the 2D lines at the same time and extruded them together to make a uniform thickness. Then you rotate the faces and create the rectangular box and Boolean union the faces together to create a uniform object.
Twist
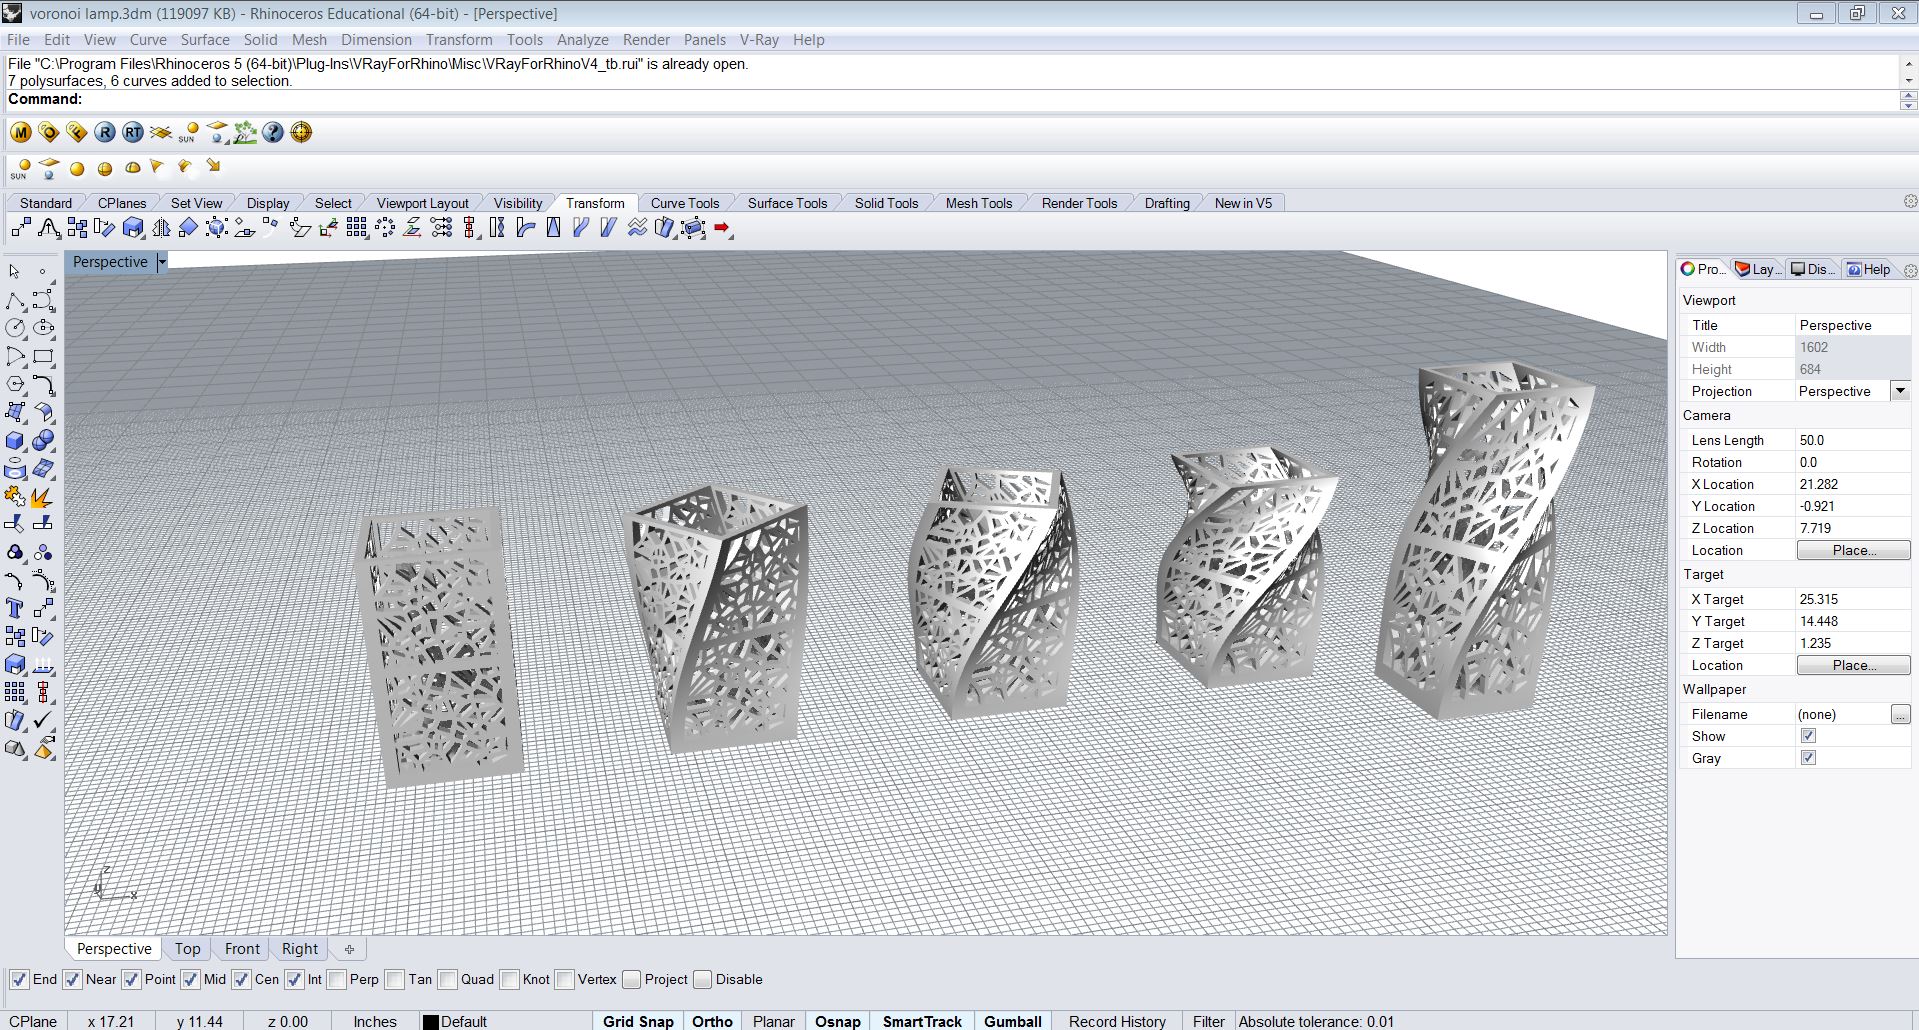
The next step is to twist the box to create the spiral. After the twist is to the right spot, you can stretch the spiral vertically to create more of an elongated geometric shape.
Taper

After the spiral has been twisted and stretched vertically, the next step is to taper the spiral to give the object some curves in it to give depth towards the base.
Export
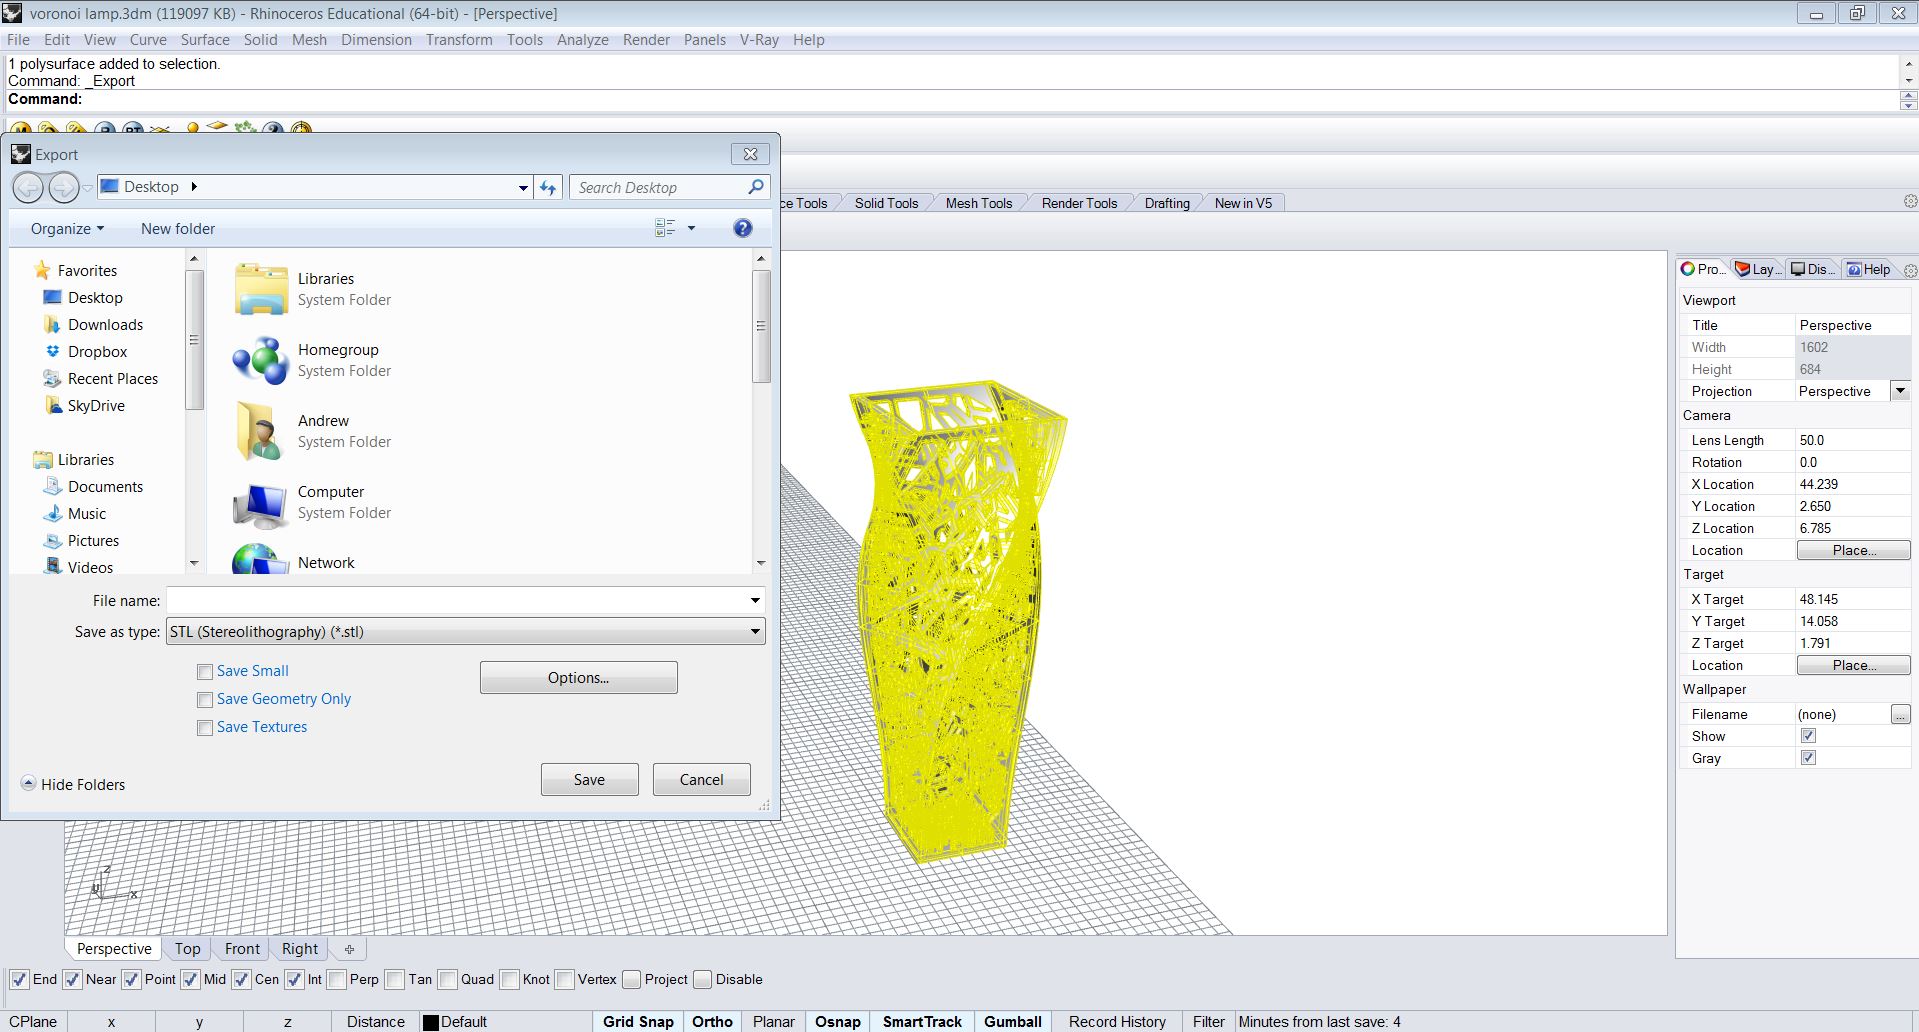
After the spiral is to the desired specifications, the next step is to export the spiral as an STL file type to be able to be 3D Printed.
3D Print!
![IMG_0176[1].JPG](/proxy/?url=https://content.instructables.com/FQ3/B53F/IAJHXPF5/FQ3B53FIAJHXPF5.jpg&filename=IMG_0176[1].JPG)
![IMG_0178[1].JPG](/proxy/?url=https://content.instructables.com/FRZ/UQWH/IAJHXPGG/FRZUQWHIAJHXPGG.jpg&filename=IMG_0178[1].JPG)
The next step is to 3D Print the spiral.
The file for the print can be found on my thingiverse page at
http://www.thingiverse.com/thing:857452
The spiral took about 8 and a half hours total to print.
If you don't own your own 3D Printer, I will gladly be able to print for you, just check out my 3D Hubs Page for details!
Flip!
![IMG_0180[1].JPG](/proxy/?url=https://content.instructables.com/FWU/KDYL/IAJHXSU3/FWUKDYLIAJHXSU3.jpg&filename=IMG_0180[1].JPG)
![IMG_0181[1].JPG](/proxy/?url=https://content.instructables.com/F6I/CSF5/IAJHXSU6/F6ICSF5IAJHXSU6.jpg&filename=IMG_0181[1].JPG)
![IMG_0182[1].JPG](/proxy/?url=https://content.instructables.com/F9N/LV0Q/IAJHXSVG/F9NLV0QIAJHXSVG.jpg&filename=IMG_0182[1].JPG)
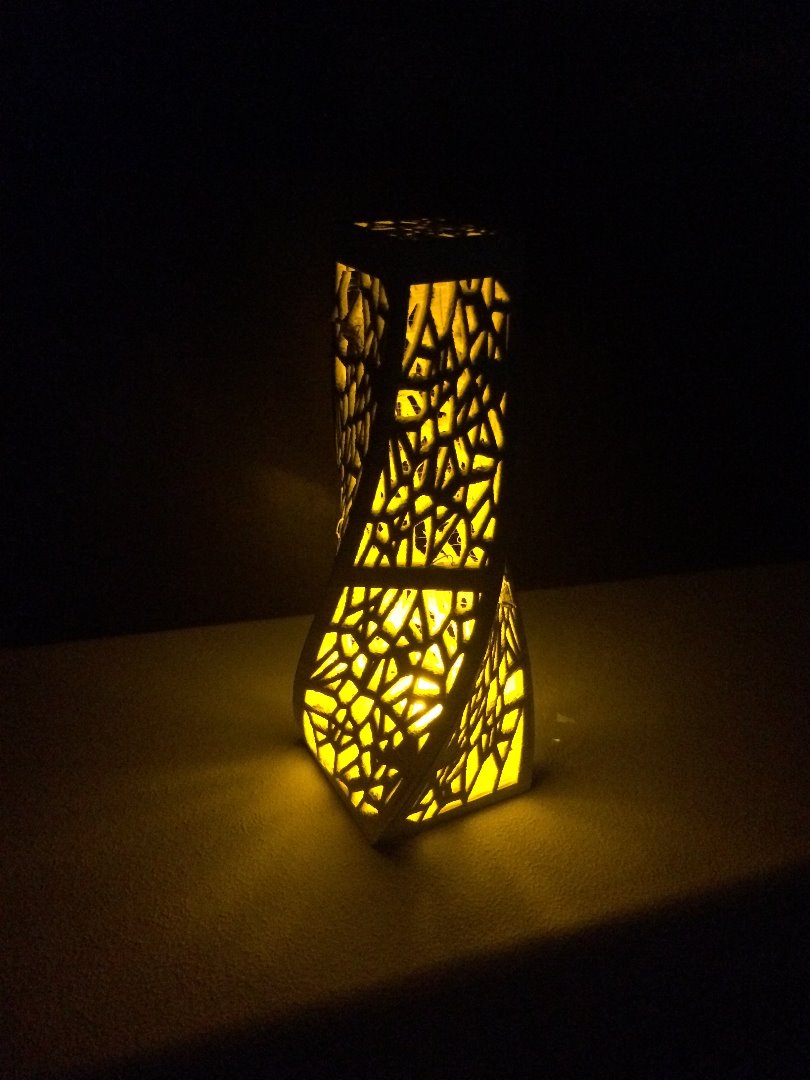
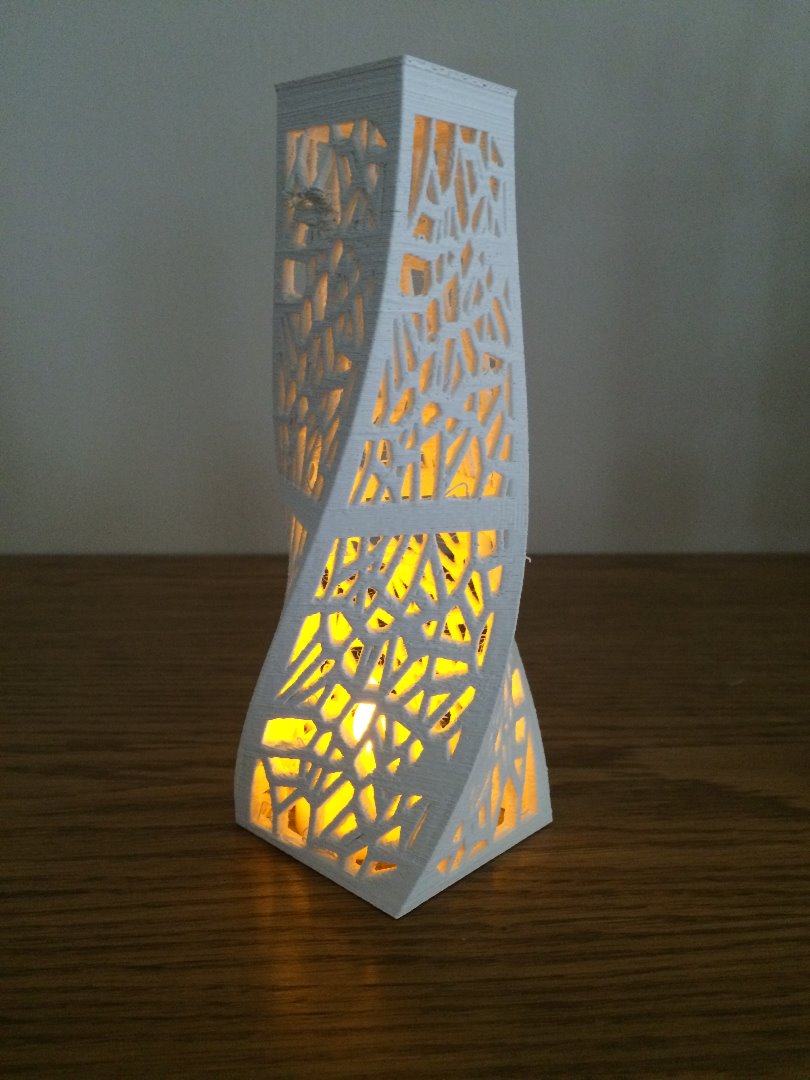
After the spiral is 3D printed, all you have to do is flip the spiral over and place a tea light underneath to light it up!
They sell tea lights at the dollar store for very cheap so they're quite inexpensive.
Finished!
Just turn off the lights and enjoy your 3D Printed Voronoi Spiral Centerpiece / Vase!