How to Connect HP 4050N Using Linksys Switch to Mac OS X Snow Leopard
by TerryFMJ in Circuits > Apple
3533 Views, 1 Favorites, 0 Comments
How to Connect HP 4050N Using Linksys Switch to Mac OS X Snow Leopard
I have an HP LaserJet 4050N that I use for my small business. It has the JetDirect card installed into it so the printer can be connected to a network using ethernet. Now, I also need to share my internet connection with other computers that are not wireless. The solution was to install a LinkSys 5-port switch into the mix.
My setup is as follows: iMac is connected to the internet via Airport. Next, I have a small ethernet cable coming out of the ethernet port on the iMac and going into the uplink port on the LinkSys Switch. Next, I personally have one ethernet cable running from the LinkSys Switch to my computer in the garage and one ethernet cable running from the LinkSys Switch to the JetDirect card ethernet port on the HP LaserJet 4050 Printer. The LinkSys Switch will allow for 3 more connections should you need them. This is how the cabling should run, pretty simple.
My setup is as follows: iMac is connected to the internet via Airport. Next, I have a small ethernet cable coming out of the ethernet port on the iMac and going into the uplink port on the LinkSys Switch. Next, I personally have one ethernet cable running from the LinkSys Switch to my computer in the garage and one ethernet cable running from the LinkSys Switch to the JetDirect card ethernet port on the HP LaserJet 4050 Printer. The LinkSys Switch will allow for 3 more connections should you need them. This is how the cabling should run, pretty simple.
Start Internet Sharing
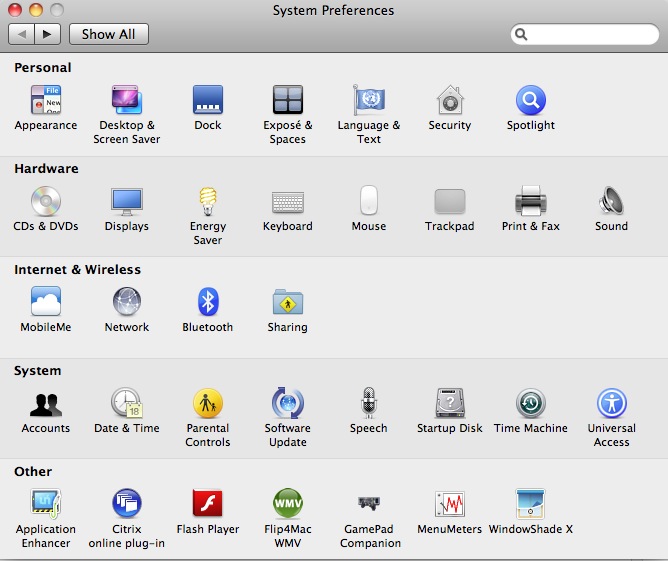
Now you need to get your Mac to see the HP LaserJet, so that it can print to it. First, you need to open "System Preferences" and click on the "Sharing" folder under "Internet & Wireless."
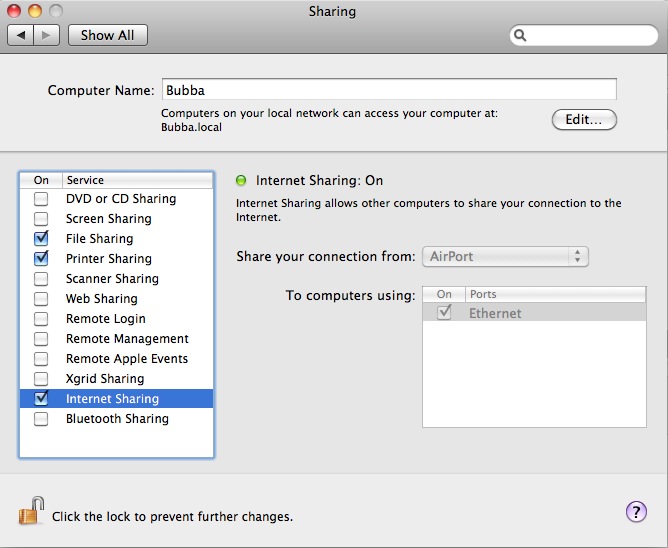
Next, you click on the check box for the "Internet Sharing" service. Since I use Airport to connect to the internet, I am sharing my connection from Airport to Computers using Ethernet. Once you make these selections, a small dialog box will pop up and ask if you want to "start" internet sharing. Click "Start."
Next, you click on the check box for the "Internet Sharing" service. Since I use Airport to connect to the internet, I am sharing my connection from Airport to Computers using Ethernet. Once you make these selections, a small dialog box will pop up and ask if you want to "start" internet sharing. Click "Start."
Setup the Ethernet Connection to LinkSys
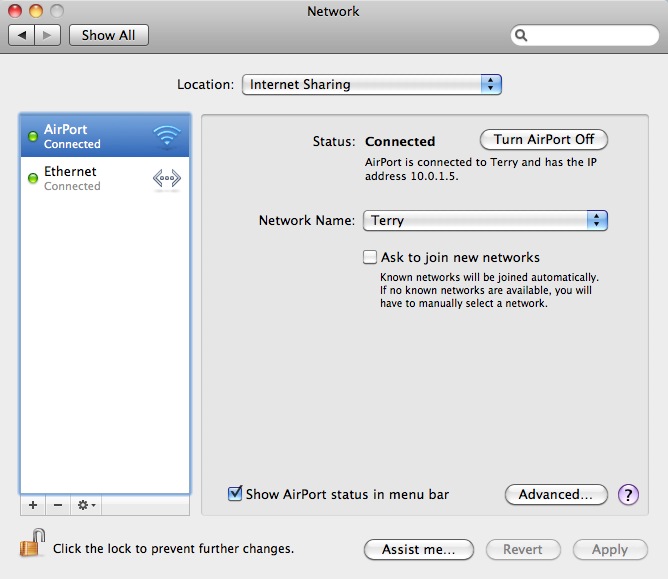
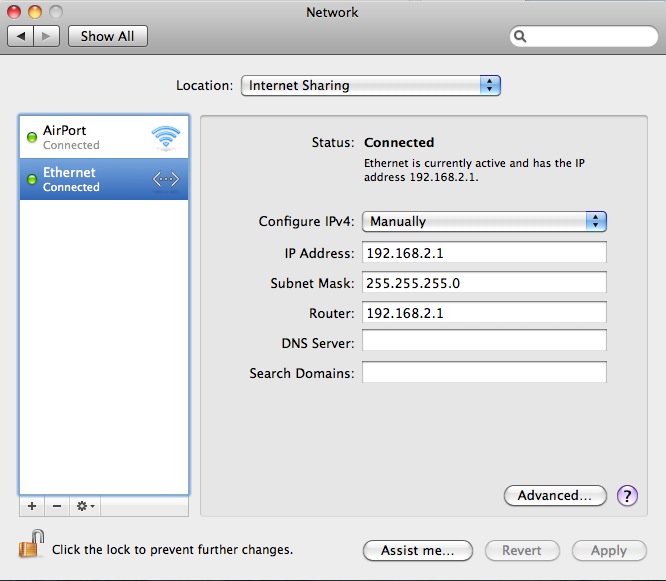
Go back to "System Preferences" and click on "Network." Your Network screen may not look exactly like mine, but should be close.
Click on the "Ethernet" service on the left side of this window/screen. Make the following selections:
Configure IPv4: Manually
IP Address: 192.168.2.1
Subnet Mask: 255.255.255.0
Router: 192.168.2.1
Click Apply
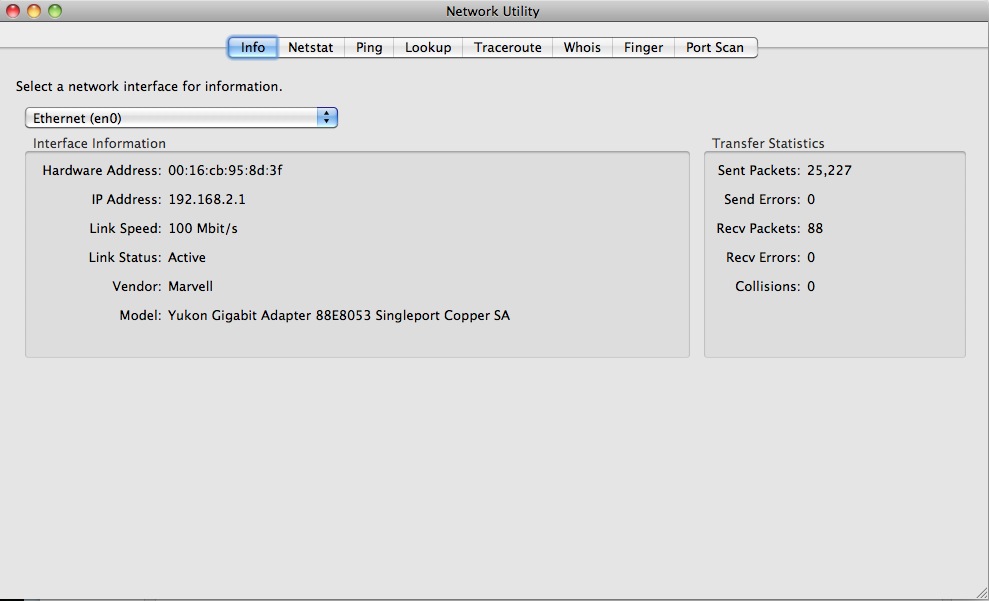
At this time, open "Network Utility" and check the "Ethernet en0" interface. The IP Address should exactly the same as the IP address that you manually typed into the Network screen.
Setup HP LaserJet I/O JetDirect Card on Printer
This is the tedious step, because it's not as friendly as Mac OS X. You will need to turn on the printer and press the "Menu" button seven (7) times to access the EIO 2 JetDirect Menu.
Press the "Item" button once to the right. It will say: CFG NETWORK=NO *
Press the "Value" button once the right (+), then press the "Select" button. It should say: CFG NETWORK=YES *
The attached video should help you configure the printer. Just make sure that you press "Select" after each entry when putting the numbers into the menu. I set my printer to use an IP Address of: 192.168.2.10. The IP Byte is where you put in the IP Address Numbers. The SM bytes are the Subnet Mask numbers. The LG bytes have no effect here, so they are 0.0.0.1. The GW Bytes are the "Gateway" bytes or server address, which is: 192.168.2.1.
Once you have set up your IP numbers, you're ready for the next step.
Adding the HP LaserJet Printer to Your Printers
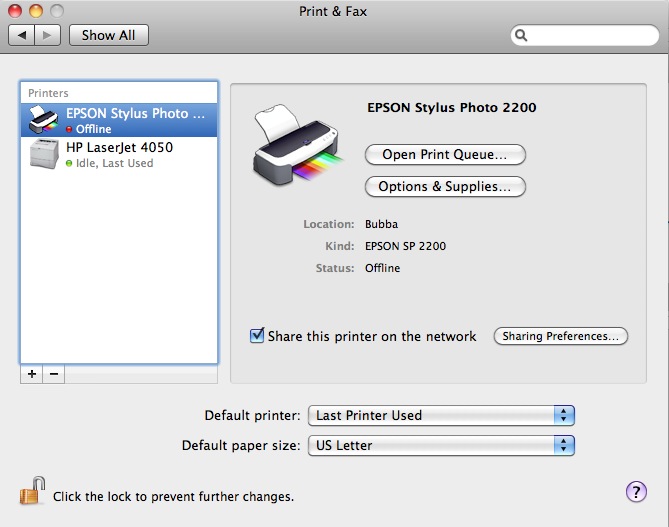
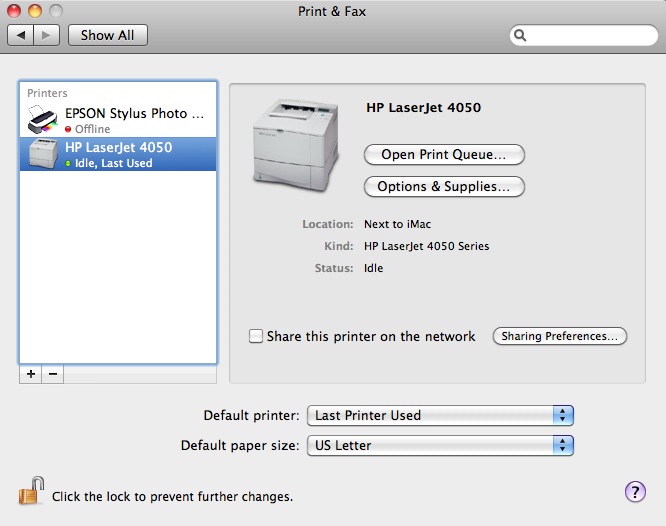
Open "System Preferences" again and click on "Print & Fax." Now, you're going to add the HP LaserJet 4050 printer to your list of available printers.
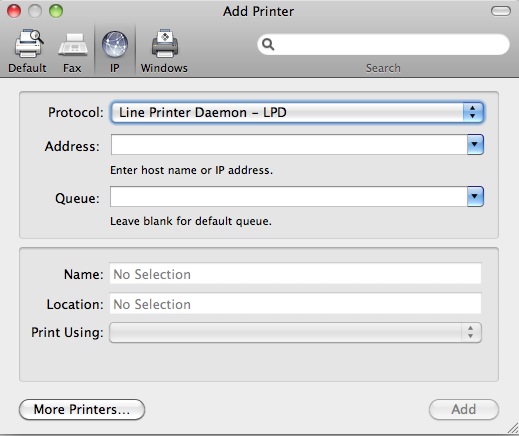
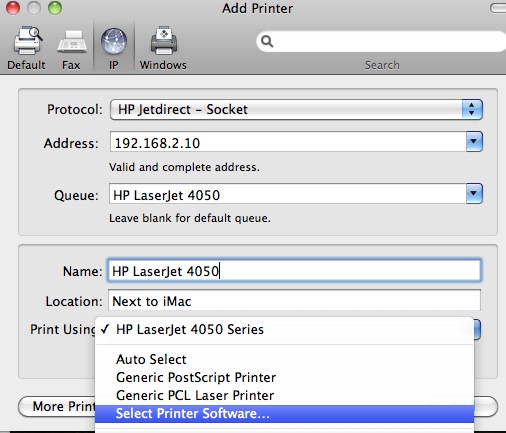
Click the "+" button. The Add Printer Dialog Box will come up. The choices are: "Default", "Fax", "IP", and "Windows"
You want to select "IP"
The Protocol should be "HP Jetdirect - Socket"
The Address will be the IP address you gave the printer in the CFG screen of the printer. Again, I used 192.168.2.10 for my IP Address. So, in this Address Field, you will type in the number you gave your printer.
The Queue field is where you can Name your printer. I called mine HP LaserJet 4050
In the Name field, you use the same name as Queue. Again, mine is called HP LaserJet 4050
Location: You can leave this blank, but I put the physical location of mine, which is right next to my iMac.
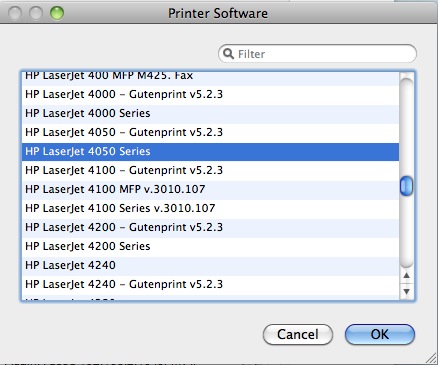
Print Using: HP LaserJet 4050 Series. This is where you select the printer driver. Click on the down arrow and select the HP LaserJet 4050 Series Software.
Click "Add" and you should see your HP Printer show up in your printer list.
Print Something With Your Networked Printer

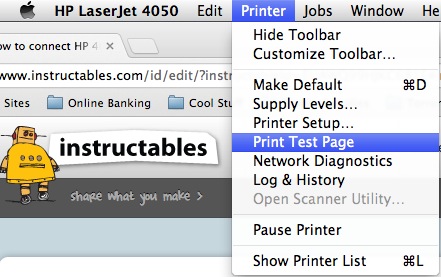
Open "System Preferences" one more time and select "Print & Fax"
Click once on your HP LaserJet 4050 to highlight it in Blue.
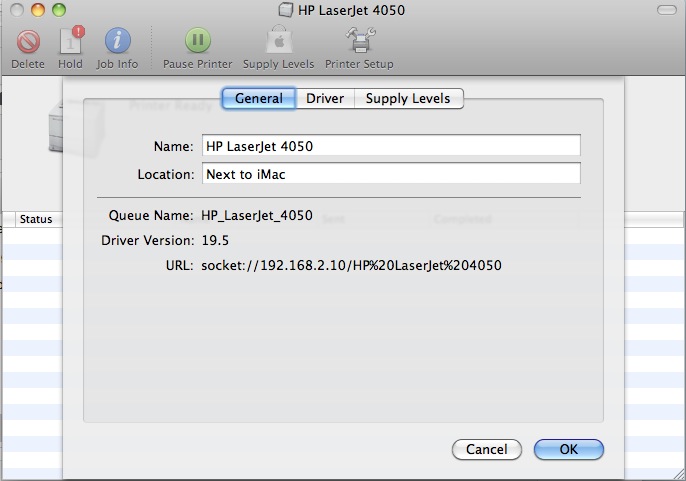
Double-click on the highlighted printer and it will open up the HP LaserJet 4050 Queue.
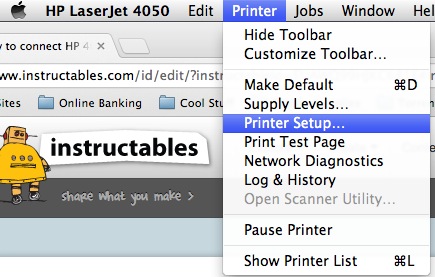
Click on "Printer Setup" to see all kinds of information about your printer. Notice the URL Socket will show the IP address that you gave your printer.
Now click on the "Printer" drop down menu and select "Print Test Page"
It should connect to your printer and print the test page.
Congratulations, you're done!!!
Note: this should work with any networkable printer, not just the HP 4050.