How to Add Ringtones and Backup Videos on a Verizon Vx8500 (aka Chocolate) for Free
by joe57005 in Circuits > Mobile
4861 Views, 7 Favorites, 0 Comments
How to Add Ringtones and Backup Videos on a Verizon Vx8500 (aka Chocolate) for Free
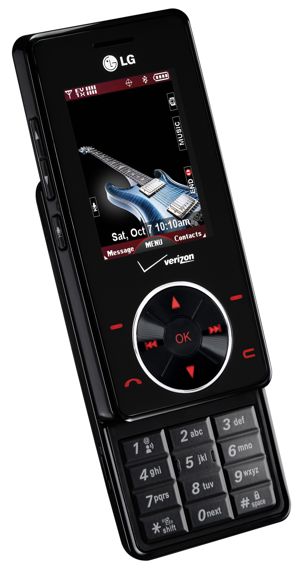
This will show you how to build a charge/data cable for the vx8500 (aka chocolate) and how to use the cable for uploading ringtones and backing up purchased vcast videos.
Disclaimer: I am not responsible for the actions of those reading this page. Any damage to phone equipment, any fees incurred, or illegal activity is the fault of the reader, not the poster. I only provide the information for educational purposes only.
Disclaimer: I am not responsible for the actions of those reading this page. Any damage to phone equipment, any fees incurred, or illegal activity is the fault of the reader, not the poster. I only provide the information for educational purposes only.
Gather Necessary Equipment...
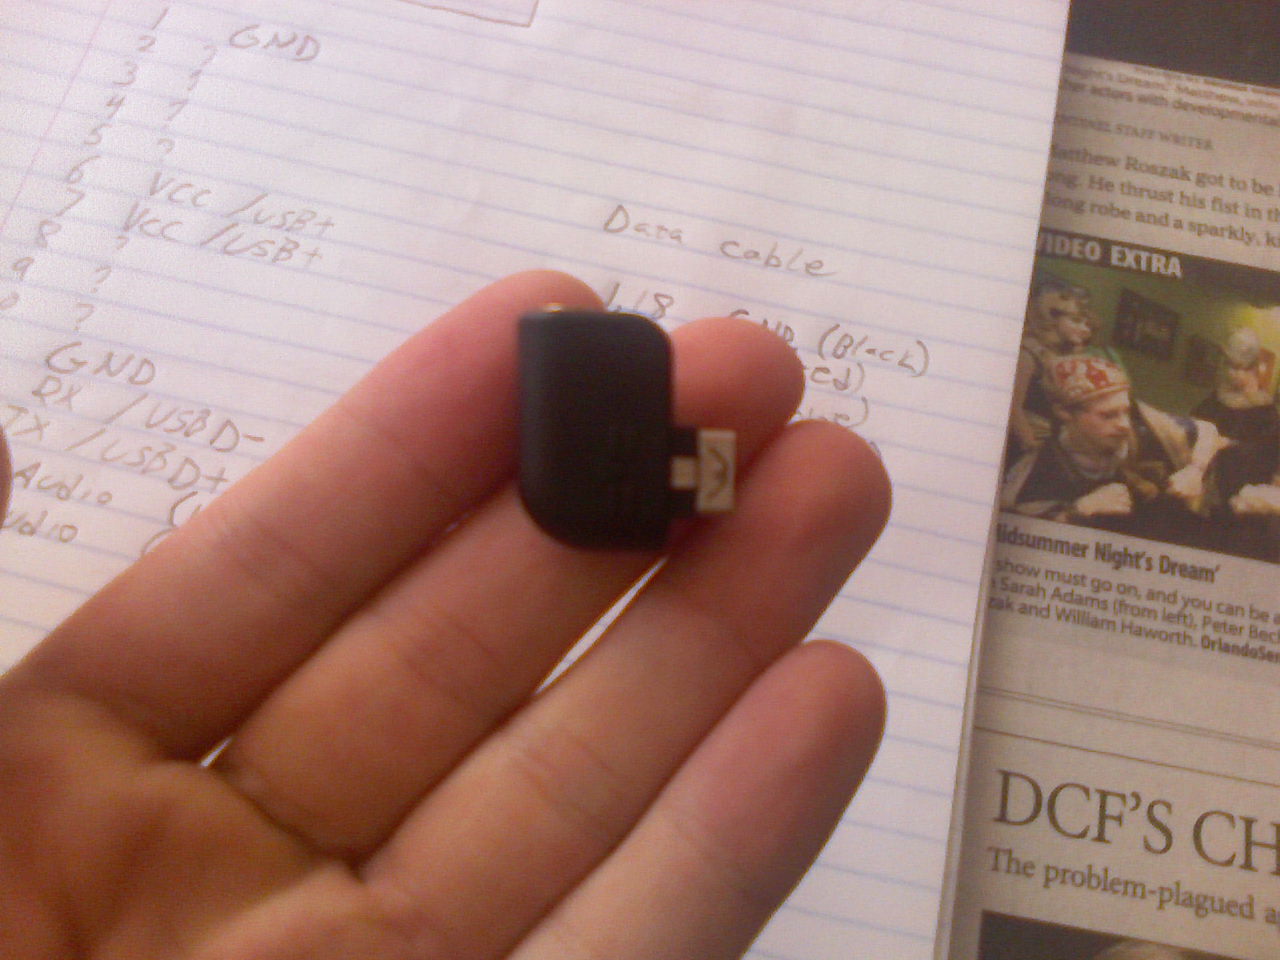
You will need the following:
1 Earpiece adapter for vx8500 (comes with the phone)
2 USB cable to mutilate
3 MicroSD card *optional*
4 Bitpim
5 Drivers (not necessary for linux, as for windows, you're on yor own.
i would try the drivers from my other phone tutorial first, they should work)
1 Earpiece adapter for vx8500 (comes with the phone)
2 USB cable to mutilate
3 MicroSD card *optional*
4 Bitpim
5 Drivers (not necessary for linux, as for windows, you're on yor own.
i would try the drivers from my other phone tutorial first, they should work)
Prep the Adapter (and Start Using Bluetooth Headsets)
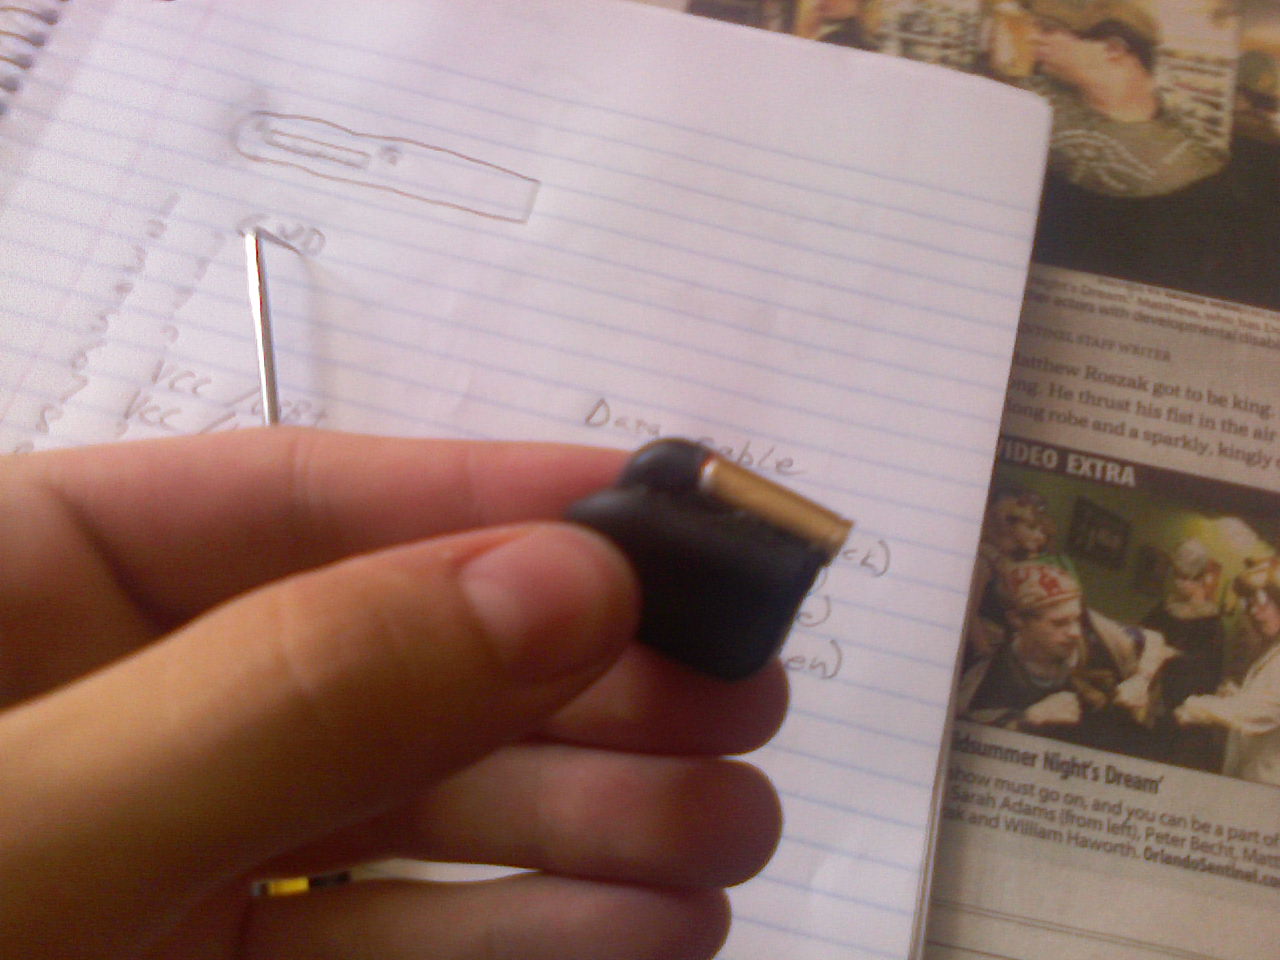
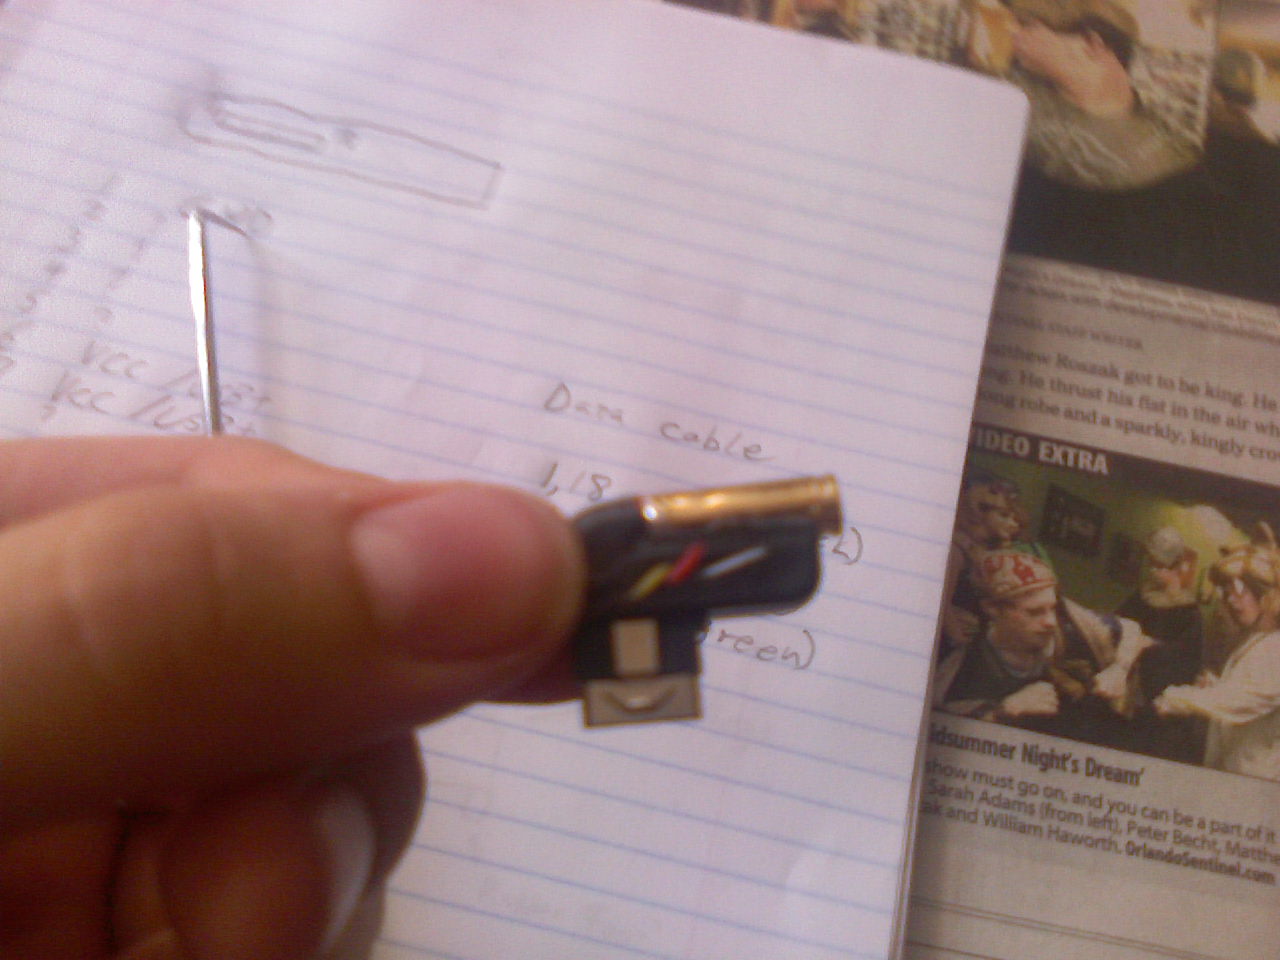
Using a sharp knife, carefully remove (DO NOT DESTROY) the rubbery plastic shield from the adapter. don't cut yourself.
Remove the Hot Glue and Jack
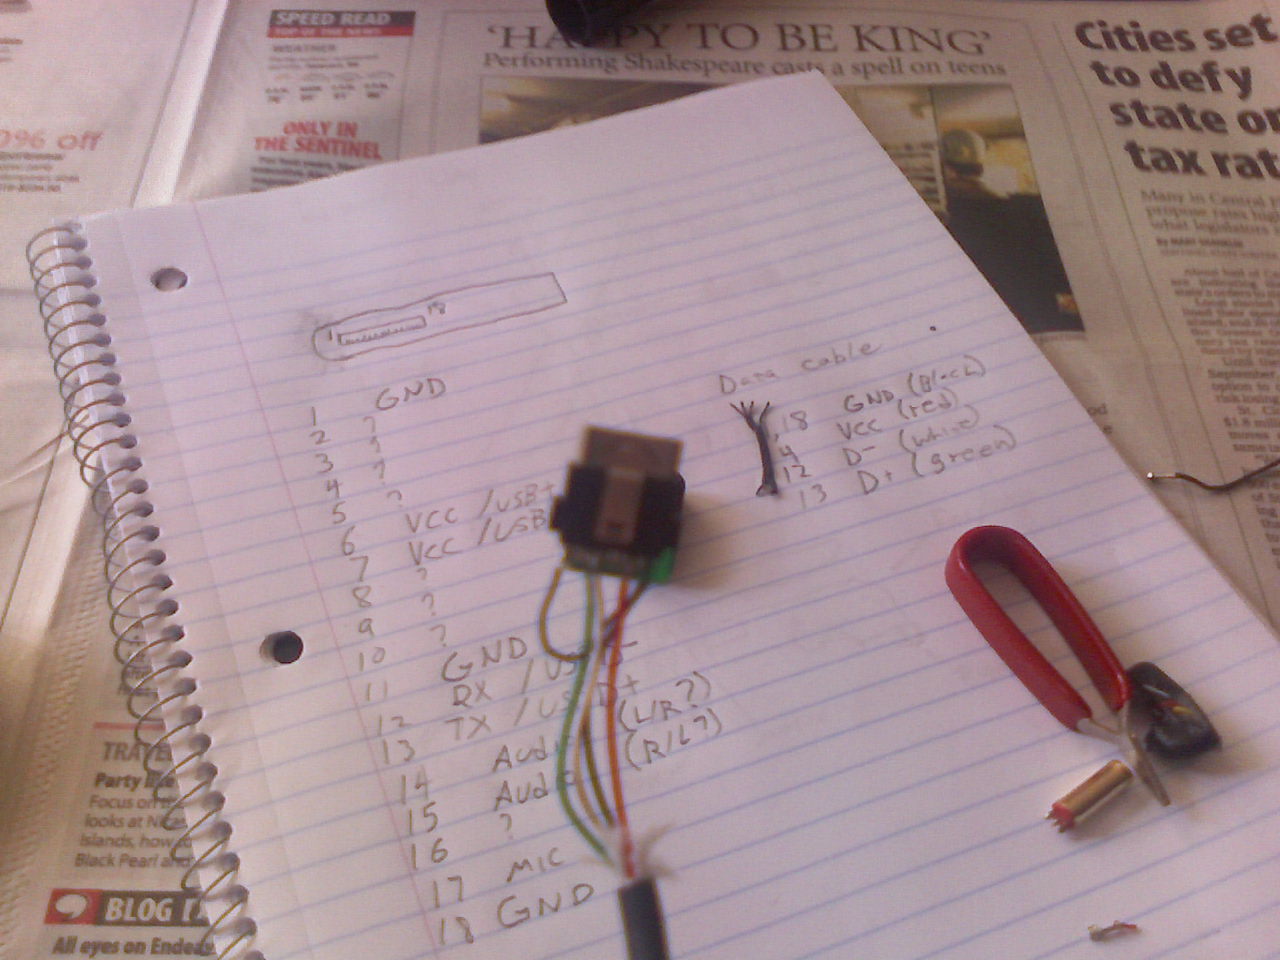
Carefully, very carefully, break off the headphone jack and excess pcb.
Solder Up the Wires.
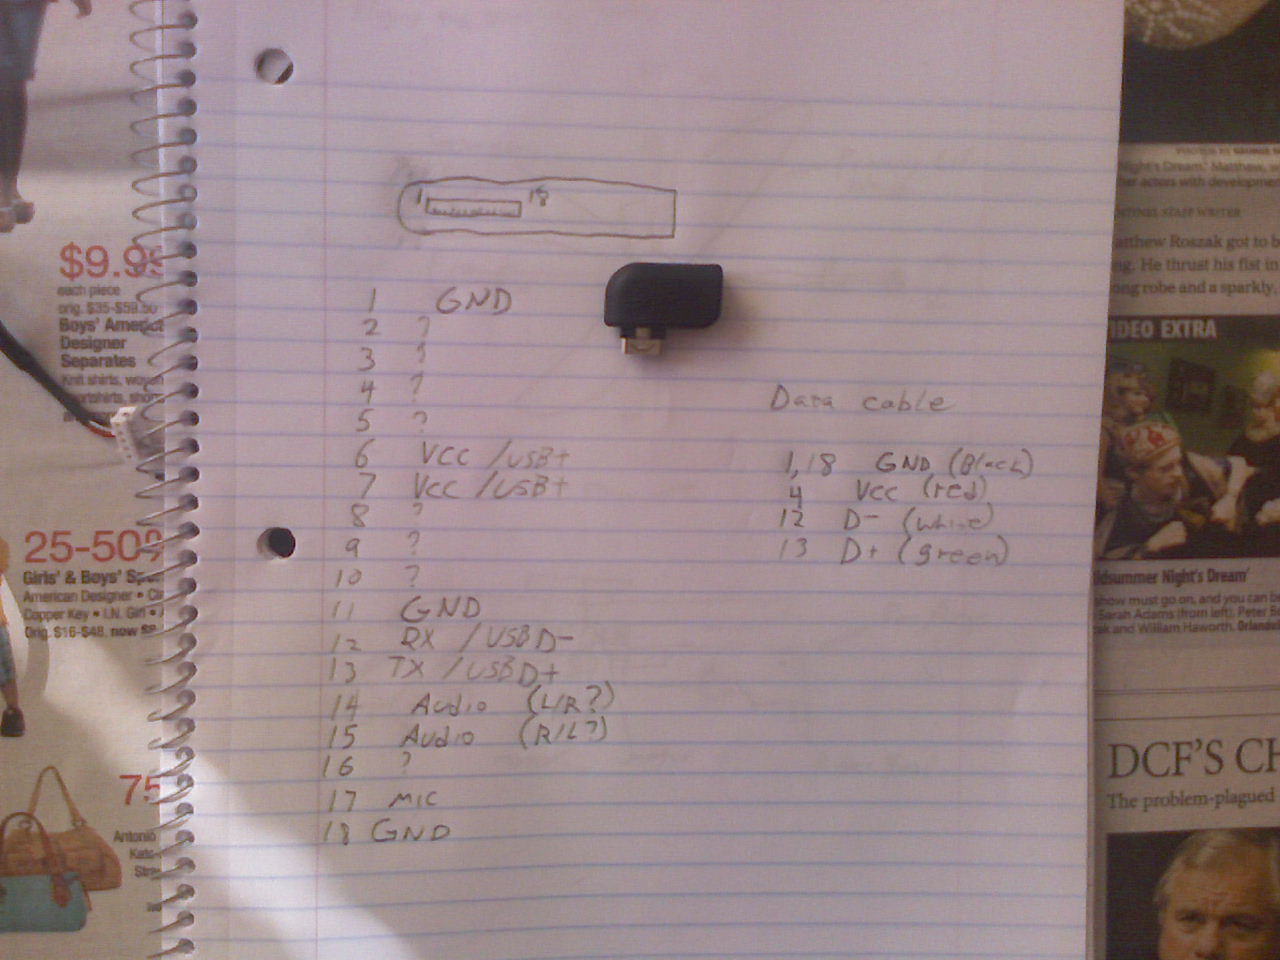
This is the hardest part of all. It's just as bad as soldering surface mounted components, so be careful, be patient, don't rush, and resist the urge to punch a baby if you screw up.
use these pinouts:
Phone USB
1 GND (black wire)
4 VCC (red wire)
12 Data + (green wire)
13 Data - (white wire)
solder the pins as indicated, please note, when i first built this i had the D+ and D- pins confused, so they may be backwards.
When you're done charring your fingertips and expanding your young neighbor's vulgar vocabulary, test the cable. using an EXTERNALLY POWERED usb hub, plug the cable in to your phone, ip the charge icon appears, you wired the power pins correctly. now plug the hub into your computer. (in windows) A window should appear telling you to install drivers. if it says something along the lines of "usb device malfunctioning/ not recognized" switch the d+/d- pins and try again. In linux, just open bitpim, if it recognized the phone, great, otherwise, try switching the pins, but first make sure bitpim is allowed to access the usb ports! (it only works for me if i run it as root)
Double Check and Make It All Pretty.
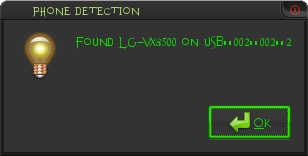
Check to make sure it works using bitpim. just hit phone info. if it works, put the rubbery plastic cover back on and hot glue it in place.
Ringtones!!!
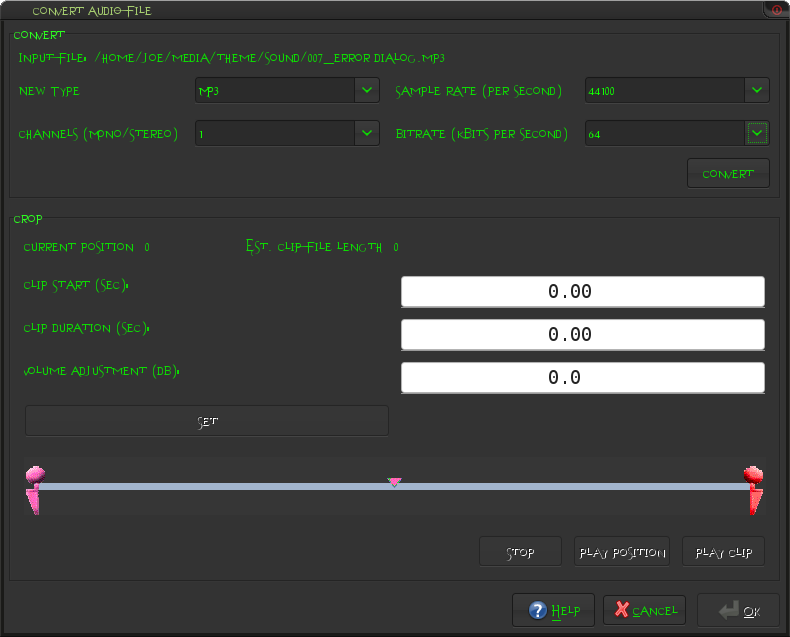
I'm assuming you've already cut up a song to use as a ring tone, if not, use a sound editor to cut the song to about 25 seconds. (verizon cuts to voicemail bfore the 25s it up)
open bitpim and click media > ringers in the side panel.
click the add ringer button (the two eighths notes with a plus sign)
select your file
set is as mono (it only has one external speaker, and it will save more space for better quality)
select the sampling rate (44100 is good, for smaller size go lower)
select the bitrate (64 is good, go lower for smaller size, quality will suffer)
click convert, and if you need, cut it further or make it louder
click ok
click Send phone data (the phone with the arrow pointing to it)
check ringer and select Add
click ok.
wait.
reset phone.
Backing Up Vcast Videos.
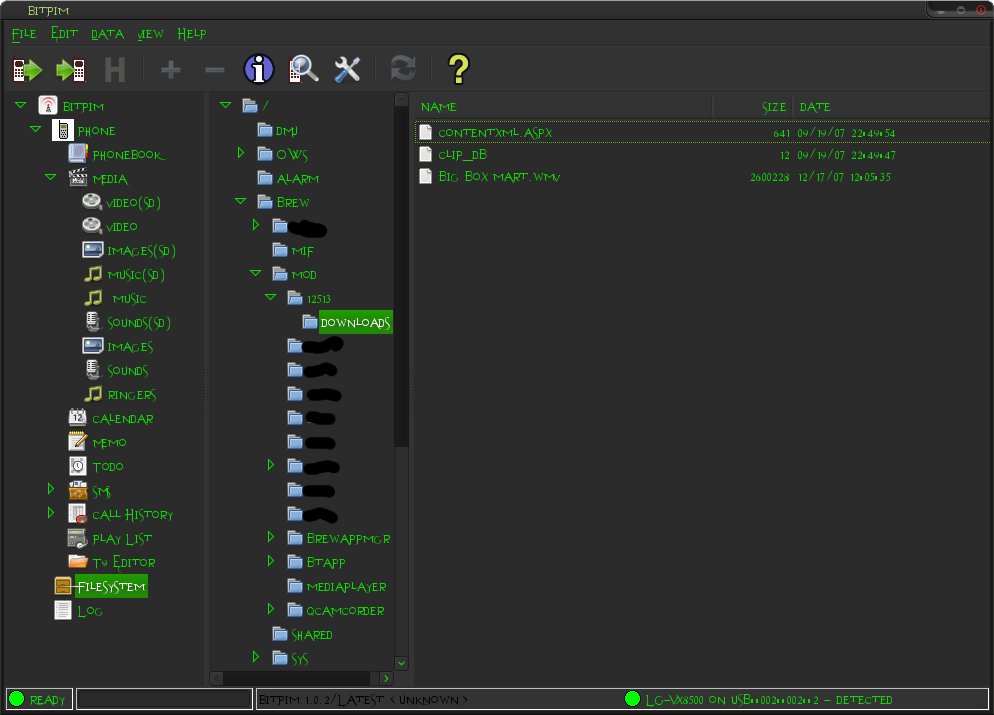
Warning: this step take a very long time even for small files and accesses you phone's filesystem (but doesn't write), which is inherently dangerous.
follow these instructions very carefully and you should have no problem.
click view > view filesystem click on filesystem
click filesystem on the sidebar
navigate to /brew/mod/12513/downloads (the numbered folders may be different)
you should now see some videos (.wmv, .asf, .3gp, .mp4)
right click one and select save.
wait.
wait more.
this could be a while.
while you wait, why not look at some of my other fine instructables?
choose where you want it saved and click save.
if you're in ubuntu linux, make sure you don't save it in the root desktop, instead of your desktop! (at first i thought it didn't save, but then i saw it save three times in the wrong folder!)
you can also put it on your memory card.
to do that
first rename it to .3gp or .mp4 (the media player won't show .wmv)
and save it under my_flix
Other Stuff You Can Do....
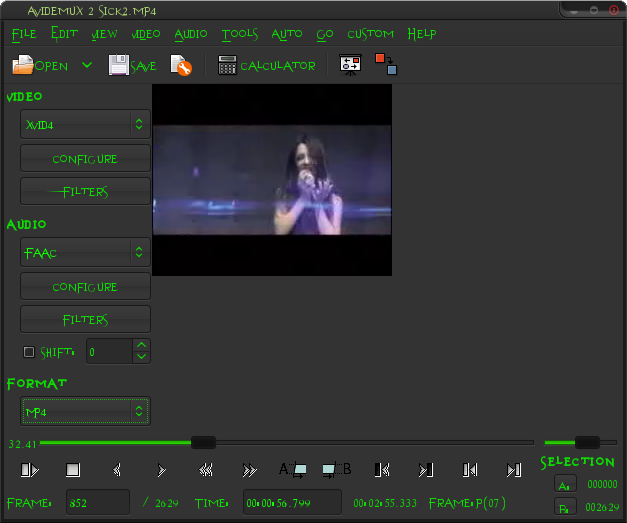
This has nothing to do with the cable but i thought i'd show you anyway.
Add your own videos:
download avidemux,
open your video
select xvid4 as the video format
click configure
select a bitrate (single pass quantizer)
under motion/misc uncheck 4mv
set number of b-frames to 0
and uncheck everything under b-frames
don't mess with the quantization unless you know what you're doing. (like me!)
click ok.
click filters
add mplayer resize and set it to 240x192 (nothing larger will work well)
add resample fps and set it to 15 fps (nothing higher will work well)
hit close
set audio to faac
click config and set the bitrate (56 is okay)
click filters
resample it to 44100 hz
and mix it to mono
hit ok
set the format to mp4 and save it.
copy it to my_flix and enjoy.