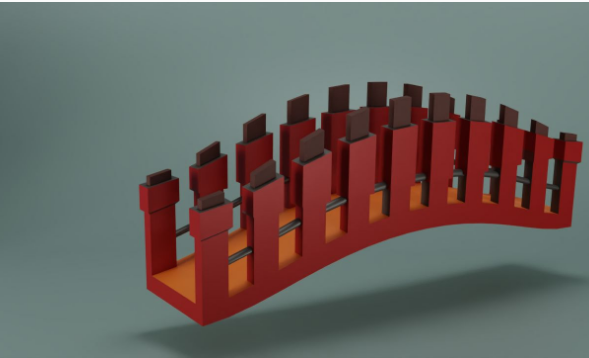
How to Use the Inflate Tool (Bridge) in SelfCAD
by Julie80 in Design > Digital Graphics
98 Views, 1 Favorites, 0 Comments
How to Use the Inflate Tool (Bridge) in SelfCAD

Learn How to Use the Inflate Tool (Bridge) in SelfCAD with the help of this tutorial
How to Use the Inflate Tool (Bridge) in SelfCAD
Designing intricate structures like bridges requires a blend of creativity and precise engineering. SelfCAD, with its comprehensive suite of tools, makes this task accessible and efficient for designers of all levels. Among these tools, the Inflate tool stands out for its ability to enhance and refine 3D models with ease. This article focuses on how to use the Inflate tool in SelfCAD to design a bridge, highlighting its practical applications and advantages in creating robust and aesthetically pleasing structures. Through a step-by-step exploration, we will uncover the capabilities of the Inflate tool, demonstrating how it can add shape and detail to bridge components. By the conclusion of this essay, readers will be equipped with the knowledge and confidence to utilize this versatile tool in their own bridge design projects, leveraging SelfCAD's functionality to bring their architectural visions to life.
To access the interactive tutorial to this article, visit https://www.selfcad.com/tutorials/354886448t5mo3293x4g3ou603d61x4x3f6y
Once you’ve launched the editor;
From the 3D Shapes category on the toolbar choose Cube; Set width to 500, height to 20, width segment to 19, depth segment to 9, position y to 50.
Tick the checkmark to finalize cube
Click solid + wireframe button to set rendering mode
Click to activate face selection
Click on highlighted region to select it
From the modify category on the toolbar choose extrusion; Set extrusion amount to 70
Click apply button to apply extrusion
Set use vertex normals to true, extrusion amount to 5
Click apply button to apply extrusion
Set use vertex normals to false, extrusion amount to 15
Click apply button to apply extrusion
Click add option to add next macro step
Set operation to inset, Set amount to 5
Click add option to add next macro step
Set operation to extrusion; Set amount to 10
Click to finalize extrusion
From the deform category on the toolbar choose inflate; Set y to 48 using highlighted gizmo
Click ‘x’ to close transformation panel
Click on highlighted region to deselect it
From the 3D Shapes category on the toolbar choose Cylinder; Set top radius to 4, bottom radius to 4, height to 500, position y to 100, position z to 44, rotation z to 90
Click to finalize cylinder
Click copy button to copy selected objects
Click move on the toolbar; Set z to -44 using highlighted gizmo
Click ‘x’ to close transformation panel
Click highlighted part on selection cube to turn off region selection
Click on mesh 8, mesh 4 to select
Click stitch & scoop on the toolbar ; From the tool panel choose union
Click to finalize union
Click solid button to set rendering mode
From the deform category on the toolbar choose inflate
Set y to 61 using highlighted gizmo, Set y to -62 using highlighted gizmo
Click ‘x’ to close transformation panel
As you continue honing your design skills, remember that SelfCAD offers a wealth of resources to support your learning journey. To deepen your understanding and explore more advanced features, consider checking out the interactive tutorials (https://www.selfcad.com/tutorials) available on the SelfCAD website. The tutorials page provides a treasure trove of guides, tips, and tricks that cater to designers of all levels.
More structured learning experience can also be accessed at the SelfCAD Academy (https://www.selfcad.com/academy/curriculum/), https://www.youtube.com/@3dmodeling101, and 3D Modeling 101 series (https://www.youtube.com/playlist?list=PL74nFNT8yS9DcE1UlUUdiR1wFGv9DDfTB). This comprehensive resource offers in-depth courses taught by industry experts, allowing you to master the intricacies of SelfCAD at your own pace.