How to Use Unsupported Controllers With an IOS 9.3.5 Device
by eng249groupInstructable in Circuits > Apple
6069 Views, 4 Favorites, 0 Comments
How to Use Unsupported Controllers With an IOS 9.3.5 Device

Materials Needed:
PlayStation 4 Controller
Lightning Charging Cable
Laptop running Windows 10
iPod Touch 5th Generation
Laptop Mouse
Laptop’s Respective Charging Cable
(1-3)
1. Connect the iPod Touch 5th Generation to the laptop using the provided Lightning charging cable.
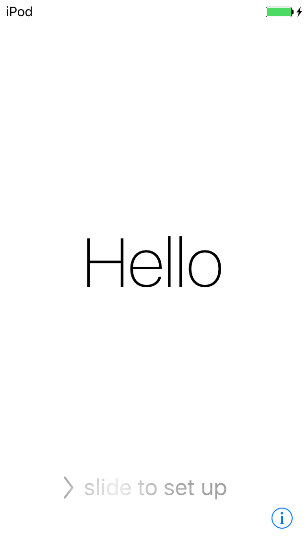
2. If the screen isn’t awakened, press either the home or sleep button on the iPod Touch.
3. Slide right on the iPod to begin setting up the device
(4-5)
4. If not signed into Wi-fi already, click “isunet” and have Kyle Lebre enter his login information. If it is already connected, proceed by tapping “Next” at the upper right-hand corner of the screen.
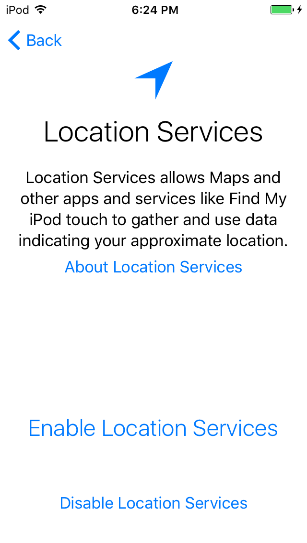
5. On the Location Services screen, click “Disable Location Services”
(6-17)
6. Click “Ok”
7. On the Create a Passcode screen, click “Passcode Options”
8. Click “Don’t Add Passcode”
9. Click “Continue”
10. Sign into this dummy Apple ID:
Apple ID: testacctbbb@gmail.com
Password: LavarBall2
11. Hit next in the upper right-hand corner
12. Click “Agree” on the Terms and Conditions screen
13. Wait for the Apple ID complete its initial setup
14. When asked whether to use Siri, click “Turn on Siri Later”
15. When asked whether you will allow Apple to collect diagnostic information, click “Don’t Send”
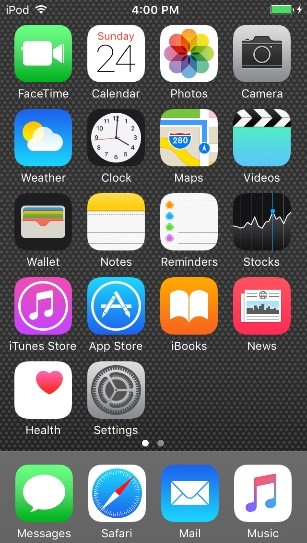
16. Click “Get Started” on the Welcome to iPod screen
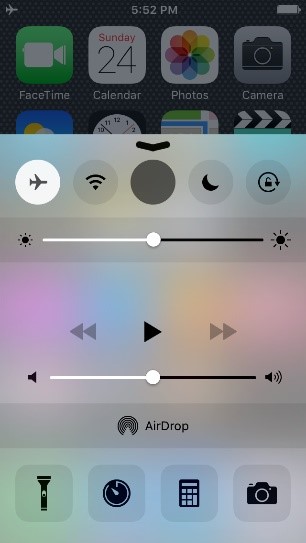
17 Once you are at the home screen, swipe up from the bottom of the screen to open control center.
(18)
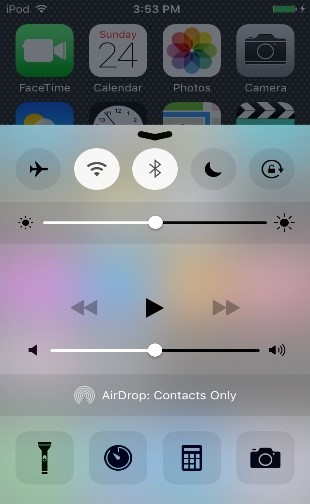
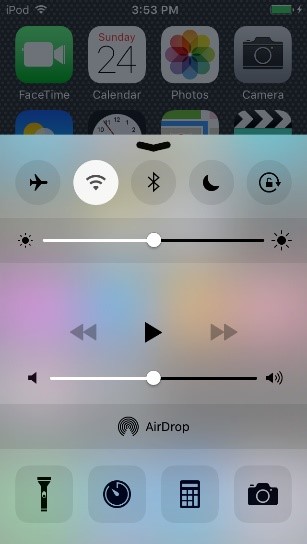
18. Turn off Bluetooth
(19-21)
19. Close the control center by either tapping the visible home screen or swiping down on the draggable arrow.
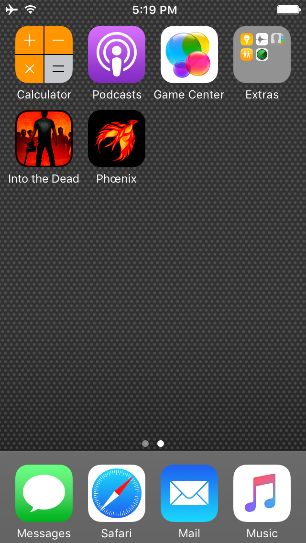
20. Open the App Store on the first page of the home screen by tapping on the “App Store” icon.
21. When prompted about Family Sharing, click “Not Now”
(22-24)


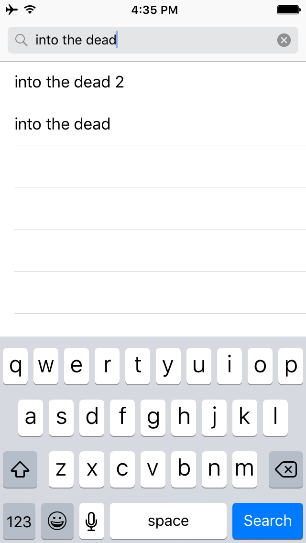
22. On the App Store home screen, click the Search button on the bottom of the screen
23. Type "into the dead" in the search bar at the top of the screen
24. Press Search
(25-27)

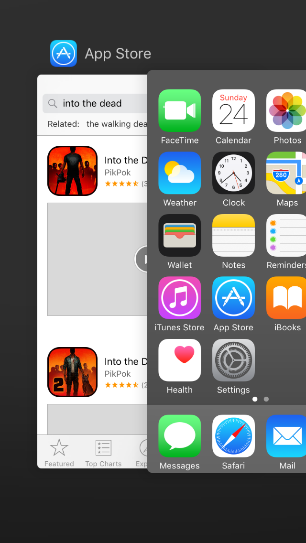
25. Press the download option next to "Into the Dead" by the developer PikPok
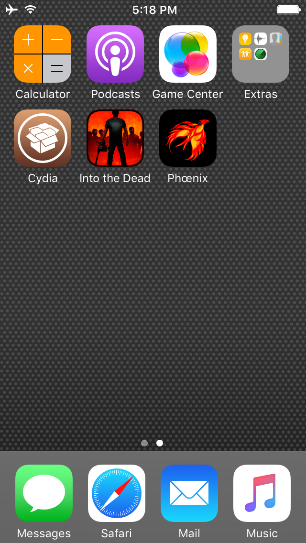
26. Enter "LavarBall2" as the password for the Apple ID
27. While that is downloading, close the App Store by pressing the home button twice and swiping up on the App Store to the left of the home screen
(28-29)
28. On the laptop, open Google Chrome by double clicking its icon
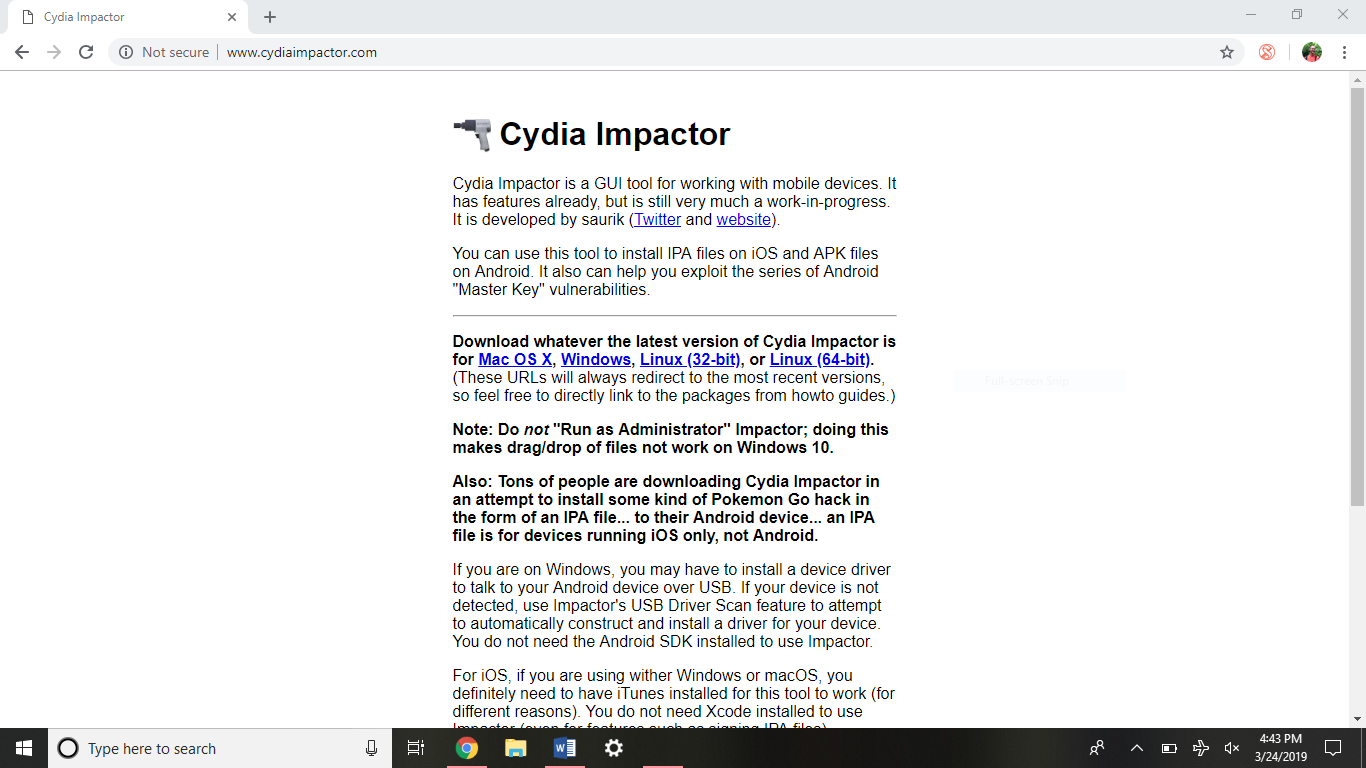
29. From an open tab, download Cydia Impactor for Windows from this site by typing in this address: http://www.cydiaimpactor.com/ (click the Windows link on the page)
(30-32)

30. Next, download the iOS 9.3.5 jailbreak from this site by navigating here: https://phoenixpwn.com/ (click the download link on the page)
31. If either download fails or delays beginning for longer than 10 seconds, retry downloading the source
32. Open Cydia Impactor's Installation (Impactor_0.9.51) folder, it should be on the lower window of Google Chrome.
(33-35)
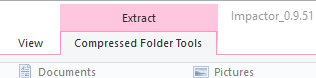

33. Extract Cydia Impactor by clicking the “Compressed Folder Tools” option in the upper part of the window
34. Then click "Extract all" below "Compressed Folder Tools"
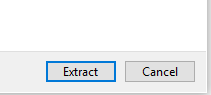
35. Click "Extract" in the lower area of the window that pops up.
(36-36.5)
36. Double click the "Impactor" file (the only file that has the file type of Application) in the window that pops up next.
36.5. Click “don’t check for updates” if a prompt asking about updates shows up.
(37-40)

37. Drag the Phoenix Jailbreak IPA file from the downloads folder or the bottom bar of Google Chrome into the open Cydia Impactor window.
38. Enter this as the Apple ID: testacctbbb@gmail.com
Password: LavarBall2
39. Wait for the process to complete
40. Close the Cydia Impactor window on the laptop
(41-42)
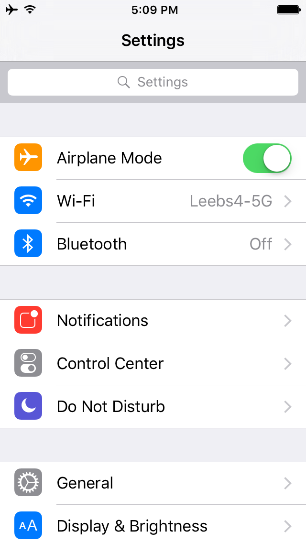

41. Unlock the iPod, navigate to Settings on the first page of the home screen.
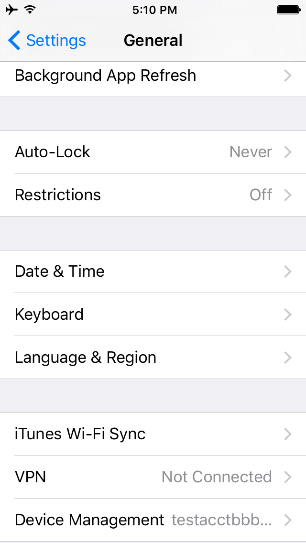
42. Click General > Device Management > and click testacctbbb@gmail.com, the only developer app listed
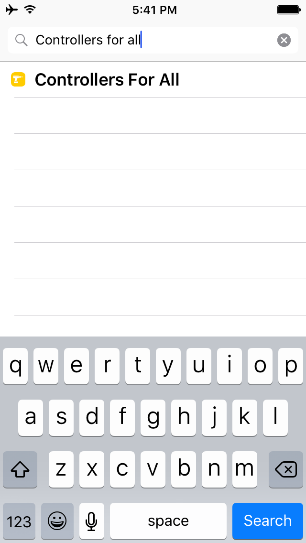
(43-45)
43. Click "Trust testacctbbb@gmail.com"
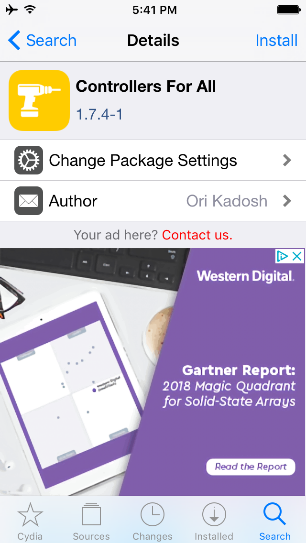
44. Go back to the home screen by pressing the home button
45. After swiping left to the second screen of the home page, click on the Phoenix icon
(46-54.5)

46. Click the “Prepare For Jailbreak” option
47. Click “Accept” at the bottom of the screen
48. Click “Dismiss” on the advertisement for the developer’s free mixtape
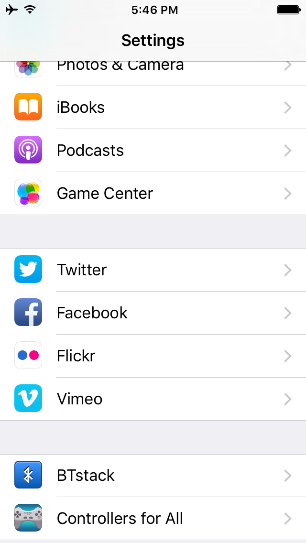
49. Click “Proceed With Jailbreak” on the bottom of the screen
50. Click “Begin Installation” on the bottom of the screen
51. Click “Use Provided Offsets”
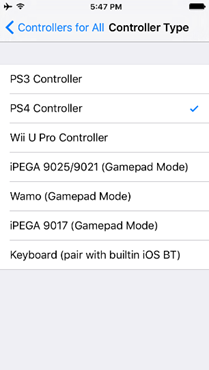
52. Wait for the process to complete, the iPod will reboot
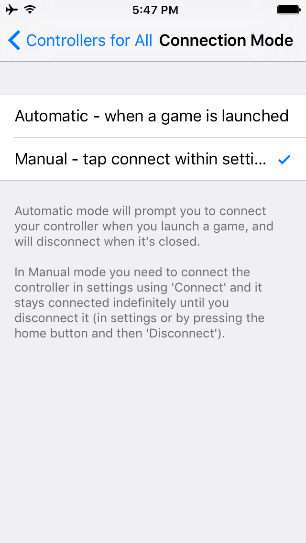
53. Once the iPod reboots, unlock the iPod by sliding to the right
54. Click on the brown “Cydia” icon on the second page
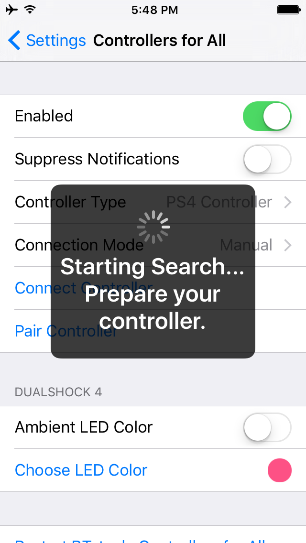
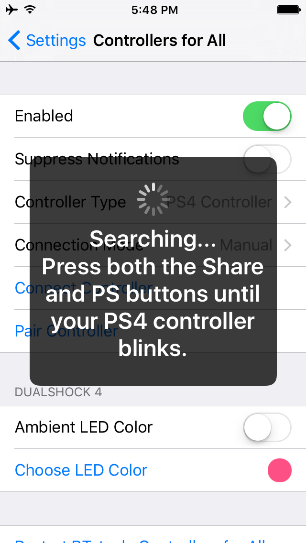
54.5 If the iPod does not show a brown icon that says “Cydia”, retry the jailbreak. (This means you must go back to step #44, and redo everything after it.)
(55-58)
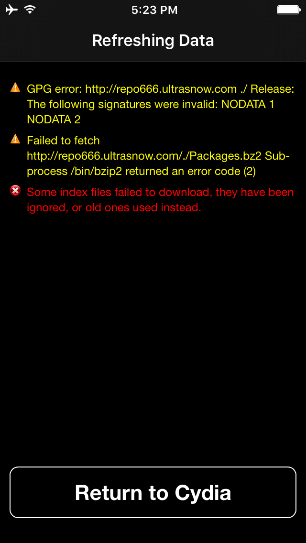
55. When the “Failed to fetch” warning for an unavailable repo shows up, click “Return to Cydia”
56. When the Essential Upgrade screen appears, click “Complete Upgrade”
57. Wait for the process to complete. Cydia will either crash (by the app closing and home screen reappearing) or “Restart Springboard” will show up on the bottom of the screen.
58. If Cydia closed, reopen it by tapping on its icon. If it didn’t close, click “Restart Springboard”
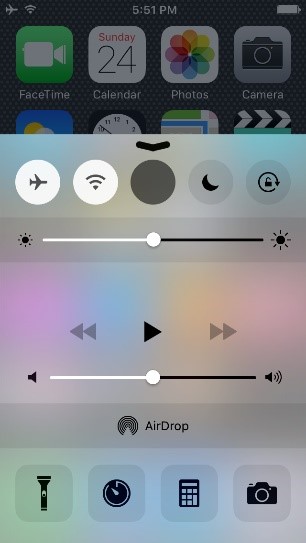
(59-63)
59. Navigate to “Sources” on the bottom of the screen and click “Edit” in the upper right-hand corner.
60. Remove “repo666.ultrasn0w.com” by clicking on the red minus button and then Delete.
61. Wait for the process to complete and click “Return to Cydia”.
62. To lessen possible confusion, click the Edit button again and the red minus button on the source named “ModMyi...”
63. Click “Delete” and wait for the process to complete
(65-69)
65. Click “Return to Cydia” at the bottom of the screen.
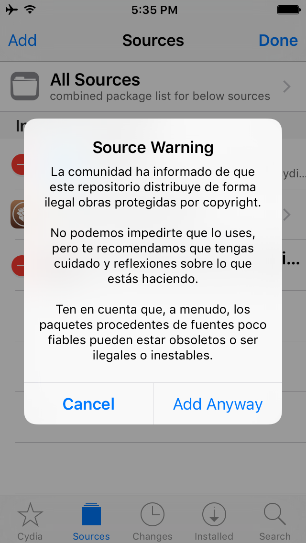
66. Click “Edit” and “Add” and then add this source: http://repo.xarold.com/
67. Click “Add Source”.
68. Click “Add Anyway”.
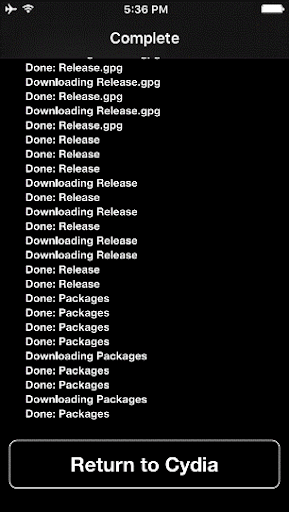
69. Wait for the process to complete, then click “Return to Cydia” on the bottom of the screen.
(70-74)
70. Once that is done, click the “Search” option in the lower right.
71. Then click on the search bar at the top and search for “Controllers for all”.
72. Click the only entry, “Controllers For All”.
73. Click “Install” in the upper right-hand corner
74. Click “Confirm” in the upper right-hand corner
(75-79)
75. Wait for the process to complete.
76. Click "Restart Springboard" at the bottom of the black screen when completed.
77. Wait for device to show lock screen.
78. Unlock device and enter the settings app on the home screen.
79. Scroll down until you find "Controllers For All"
(80-84)

80. Click on "Controllers For All" and enable.
81. Under controller type, click "PS4 Controller."
82. Go back and go into the "Connection Mode" setting.
83. Click "Manual."
84. Go back, click on "Pair Controller." When prompted, hold down the Share and PS buttons on your controller.
(85-89)
85. The controllers LED will blink rapidly when paired.
86. Once paired, click dismiss.
87. Click on "Connect Controller" and press PS button on controller when prompted.
88. Double tap device home button and swipe up on every application to close them.
89. Return to home screen by clicking home again.
(90-End)

90. Swipe up from bottom of the screen and turn on airplane mode.
91. Swipe down to close and enter the "Into the Dead" application.
92. Open the app and press the "X" button
93. At this point you should be paired and able to use the analog sticks to control the application.