How to Use UDK 3 Basics

In this tutorial, I will teach you how to use UDK 3. I will show you how to add CSG, light points, and how to test out your map.
Making the Base Map
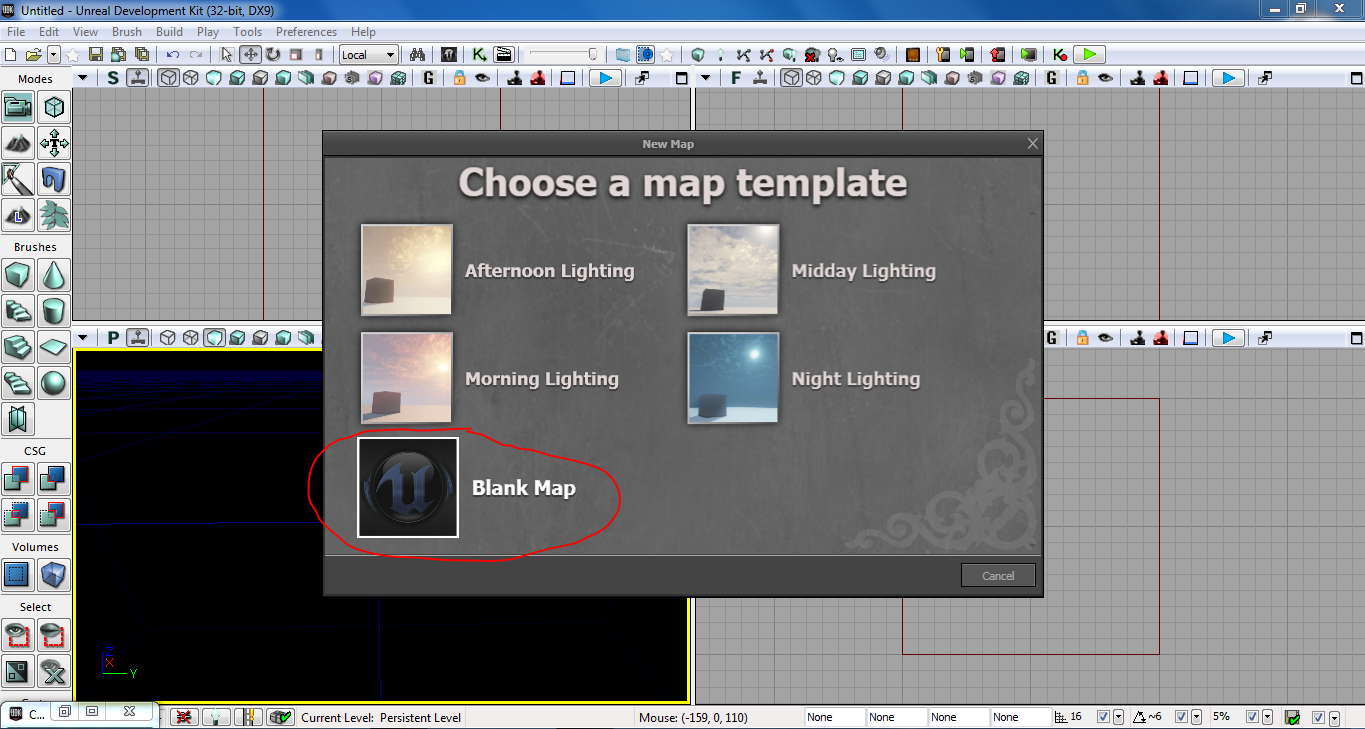
When you open UDK 3, you will see this menu. For this tutorial, I will be using Blank Map, but you can use the others. The others have natural looking lighting and skies pre-set in the map.
Adding CSG (Floor/Walls/Ceiling)
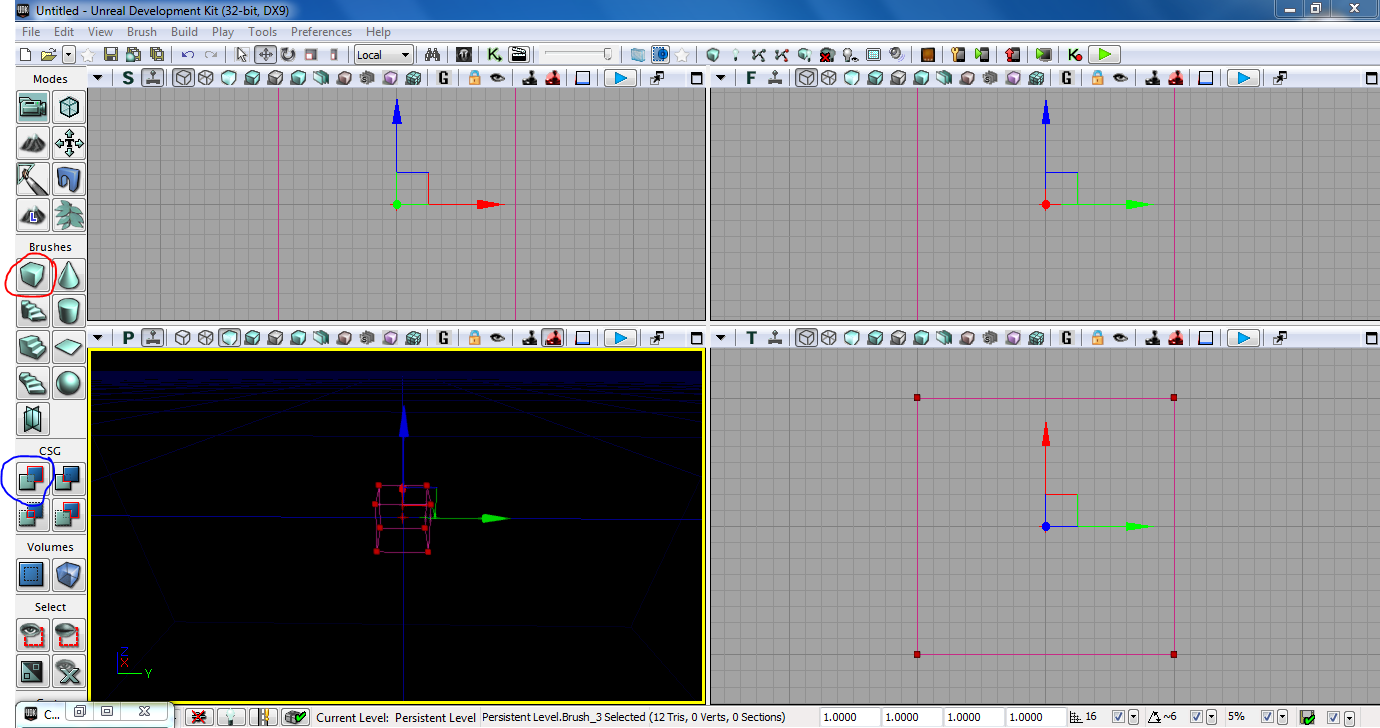
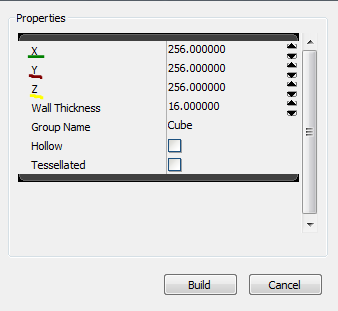
The brush circled in red is where you can choose from certain shapes and the thing circled in blue is how to add the outlined shape as CSG. You can also right click on the shape, shown in the second image, to show more options. For the cube, X and Y are flat planes, and Z is upward vertical planes. For the platform I make, I use
X:1024
Y:1024
Z:64
Adding Texture
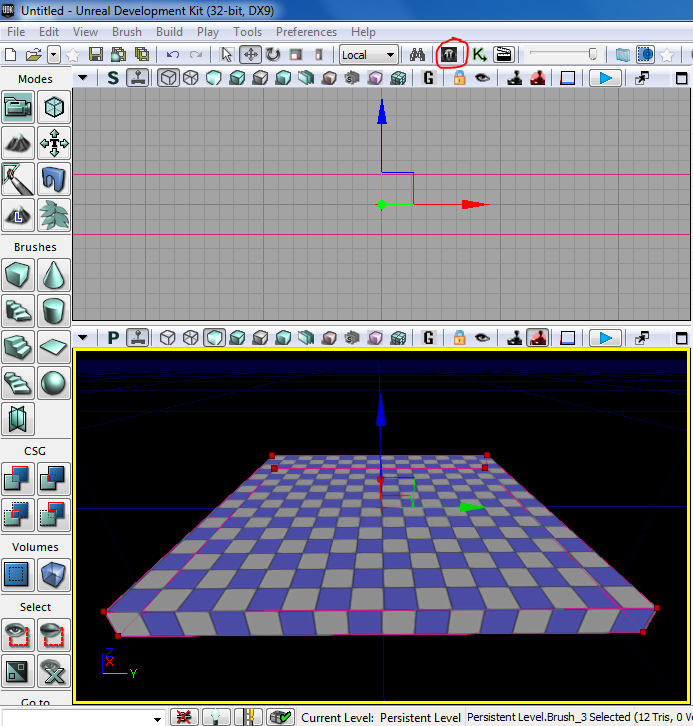
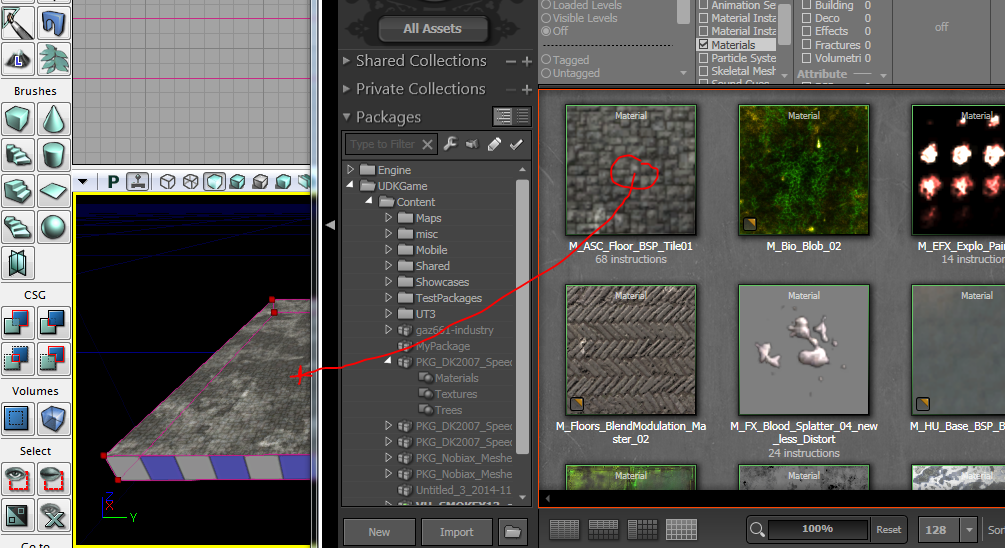
To add texture to CSG, Open content browser, circled in red in the first image, find a material you like, then drag it over to whatever CSG you want to apply it to.
Adding Light
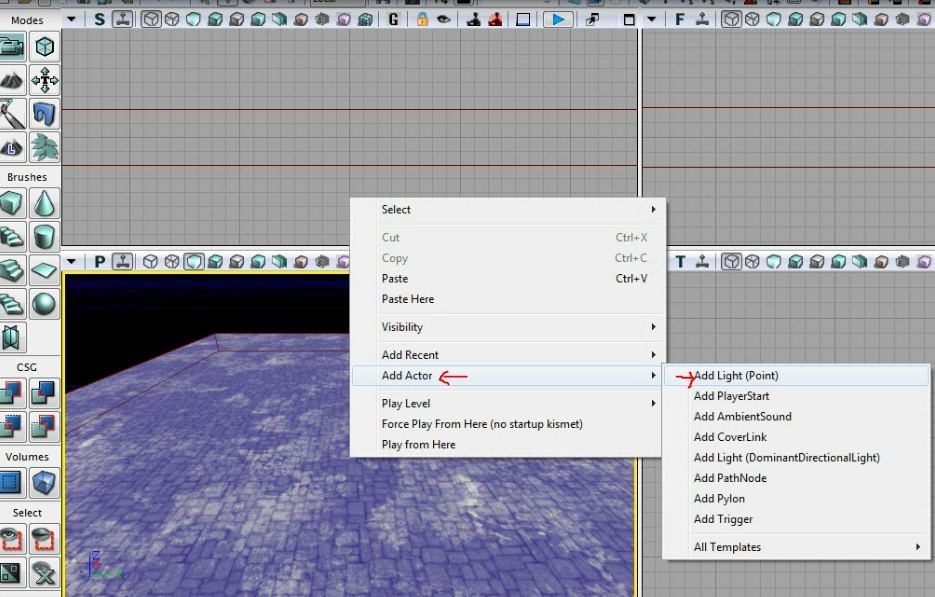
Light in UDK 3 is either skylight, which can create sunset, daylight, ect. or light points, which can be anywhere and works like a light bulb. To add light points, right click on CSG, textured or not, and "Add Actor" then "Add Light (Point)" Then you can drag it around using the 3 planed arrows that are blue, red, and green.
Building/Testing
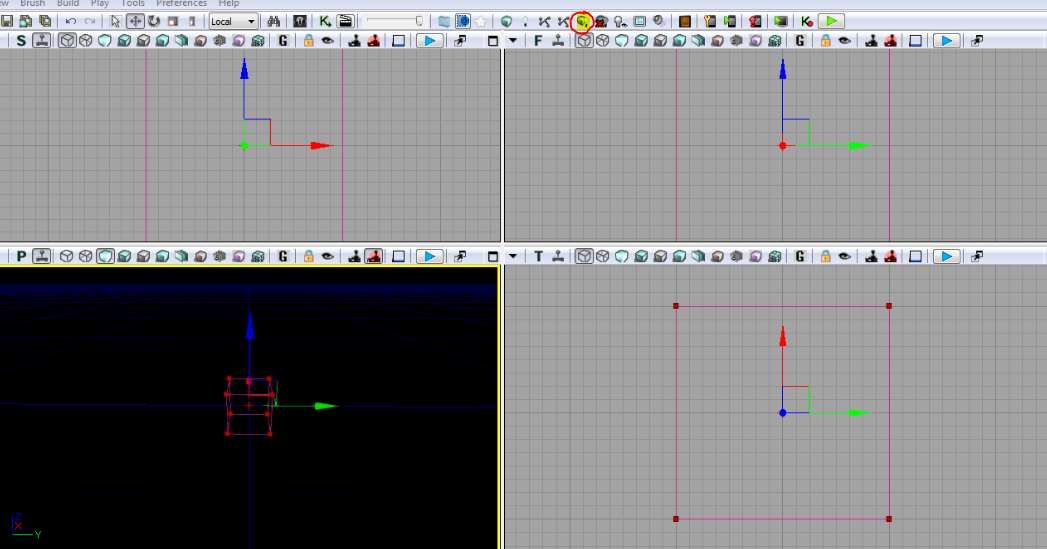
Building the map in UDK 3 is what allows for light to be active and for the engine to fix any other errors. To build light, CSG, ect, click build all, highlighted and in red in the image. After that finishes, some errors may show, which should be fine. You can just close the error boxes.
Test Run
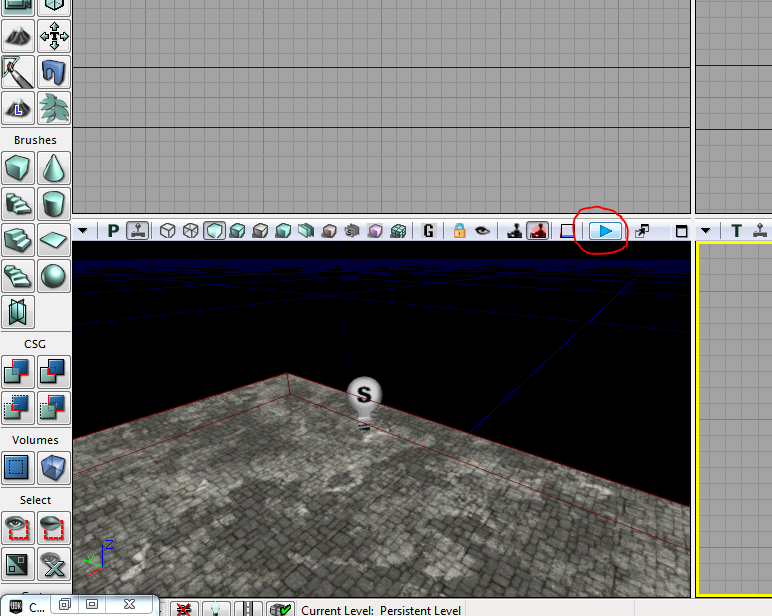
To test run the map, you can press the blue arrow highlighted. This will play the map from where your camera is, spawns you in as a character, and you can walk around freely using WASD and the mouse to look around. That is how you can use the basics of UDK 3, and you can use this tutorial to build basic maps. To see how it looked when I did it, check out this video: https://youtu.be/doDV2Y-K-Rs