How to Use Touch Sensor Wheel With MP3 Player
by Alex_chu in Circuits > Arduino
1631 Views, 1 Favorites, 0 Comments
How to Use Touch Sensor Wheel With MP3 Player
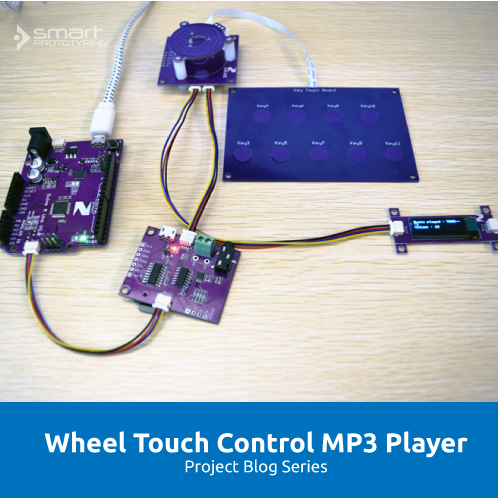
In this project, we will build a Capacitive touch controller composed of a Wheel Touch Sensor and a Keyboard Touch, to work with an MP3 player module by Zio. We will be able to adjust the player’s volume using the Wheel Touch Sensor and select different music files using the Keyboard Touch.
Schematics
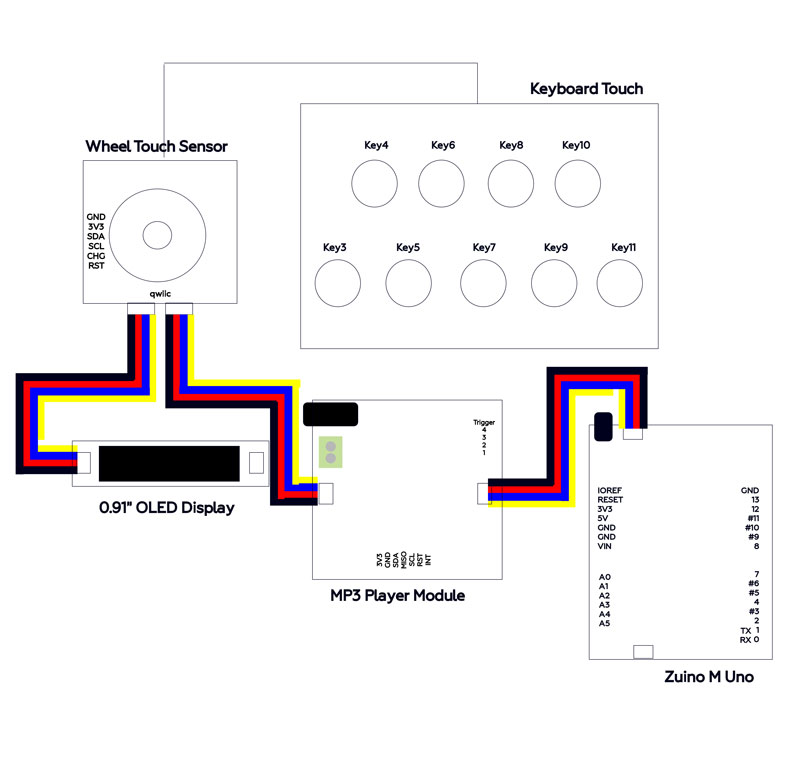
Setup
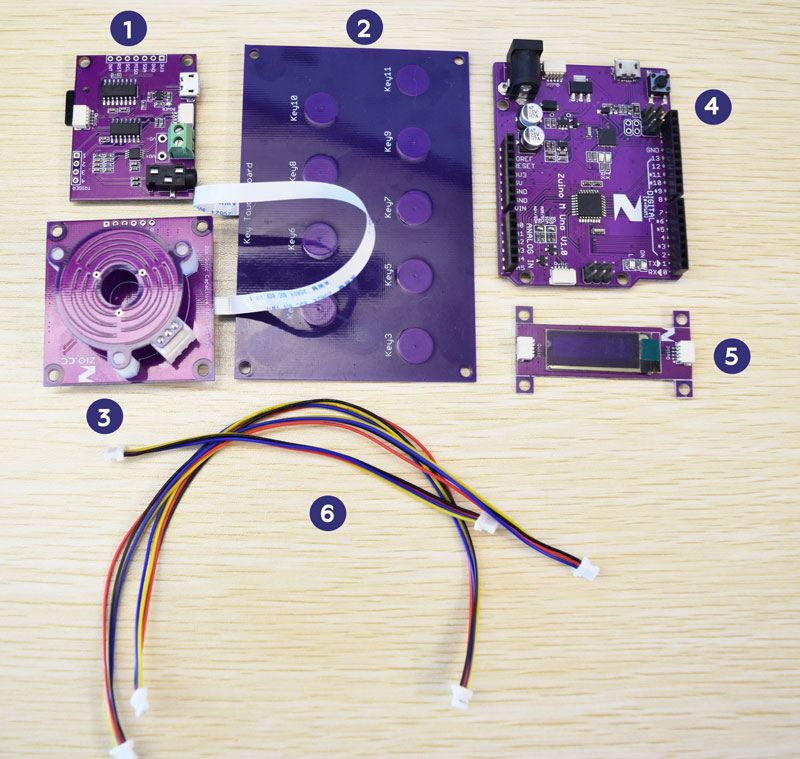
For this project we use the following components and modules:
Daisy Chain All the Modules Together
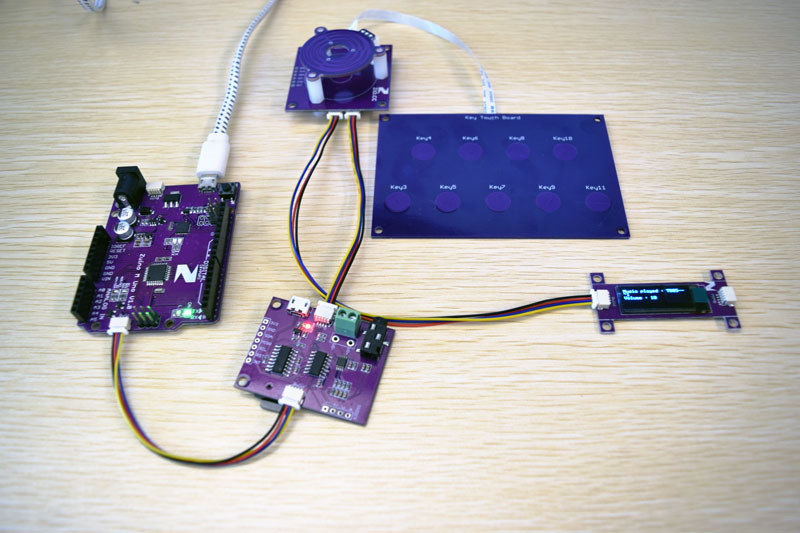
We love using Qwiic modules for most of our project because it is pretty easy and simple to set up and assemble. You only need to daisy chain all the Qwiic modules together. There is no wiring complications nor the need to connect the modules in a particular order. All this can be done in less than 5 mins!
Note: The Capacitive Touch Sensor should be set up with the Keyboard Touch and Wheel Touch module connected together with a ribbon cable.
Install Required Libraries
You need the following libraries to run the project code in your Arduino IDE:
Code
Download the project code and upload it to your board. You can download the full source code of the project from our Github page.
Code Explaination
The sketch code comes with two files. Wheel_touch_sensor.ino and Wheel_touch_control_mp3.ino. The file names are pretty much self-explanatory where the first file controls the keyboard touch and wheel touch sensors and the latter the MP3 player module.
In the code, we specified that keys number 3 to number 11 will play track according to the MP3 track number (that is the order that the file is saved in the SD card).
<<Wheel_touch_sensor.ino>> file
//display which key is pressed or not, 1 = pressed and 0 = not pressed

for(uint8_t i=3;i<12;i++) //from key 3 to key 12    {
 Serial.print("Key");
 Serial.print(i);
 Serial.print(": " );
 Serial.println(qtouch.isKeyPressed(i));

if(qtouch.isKeyPressed(i)==1){ //if a key is pressed, play the song corresponding to the key number

mp3ChangeVolume(volume);
mp3PlayTrack(i-2);
displaymag();
delay(1000);
  }
}
Each key of the keyboard touch represents one of the songs inside the memory card, the first track will be key3, the second track the key4, and so on.
<<Wheel_touch_control_mp3.ino>> file
void mp3PlayTrack(byte trackNumber){
mp3Command(COMMAND_PLAY_TRACK, trackNumber); //Play track
}
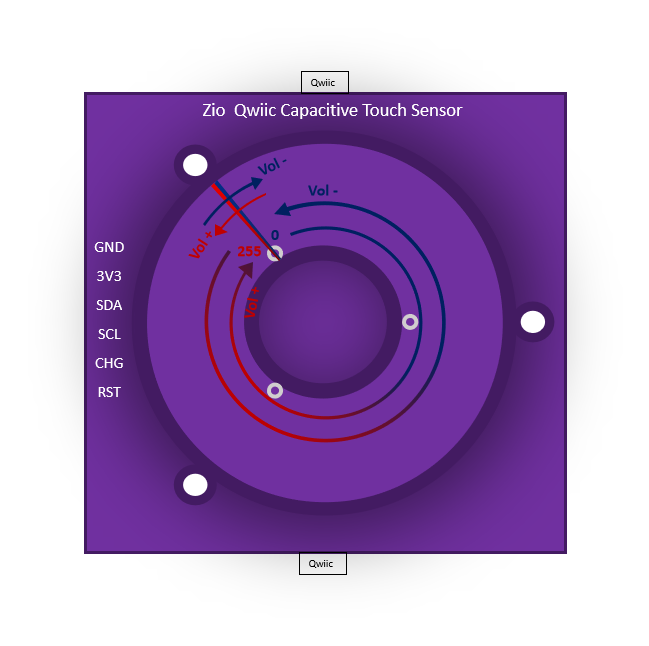
For the volume control, the Wheel touch sensor will read the value of the part where it is touched by the user, and wait 100 ms before reading the value again (to confirm after this delay where does the user has moved his/her finger).
It will try to compare between 2 values (First and second) to detect Up or Down.
When first reading < second reading the wheel will detect this movement (clockwise) as UP. The opposite will happen (in anticlockwise movement) where the first reading > second reading.
<<Wheel_touch_sensor.ino>> file
digitalWrite(13,HIGH);
touchWheel.update(); //sliding on the wheel
uint8_t P=touchWheel.getSliderPosition(); //for getting the position of the finger on the wheel
Serial.println("TOUCHING...");
Serial.println("P");
Serial.println(P);
delay(100);
touchWheel.update();
uint8_t P2=touchWheel.getSliderPosition();
Serial.println("TOUCHING...");
Serial.println("P2");
Serial.println(P2);

if (P2>P){ //if we slide our finger to the clock side, volume up

volume++;
mp3ChangeVolume(volume);
displaymag();
}
else if (P2<P){//if we side in the other side, volume down

volume--;
mp3ChangeVolume(volume);
displaymag();
}

delay(100);
}

digitalWrite(13,LOW);
How It Works
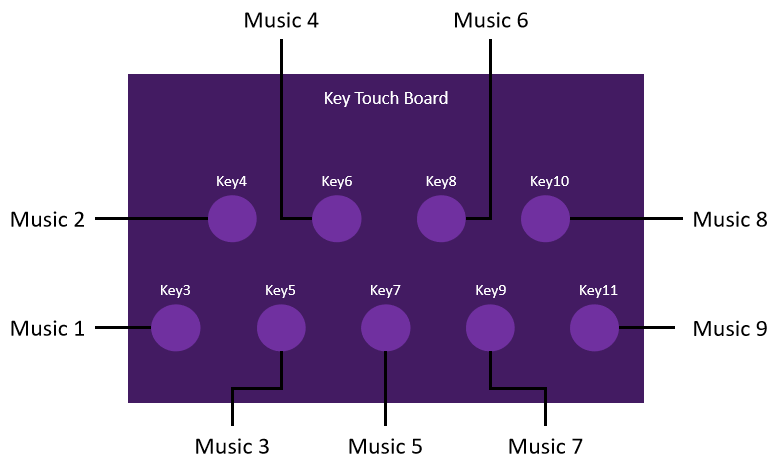

As mentioned earlier, the keyboard touch controls the music file program of the MP3 player module. These music files are located on the external memory stored in the SD card. For this project demo, we stored 7 music files and each key is assigned to a music file from the MP3 player module.
.png)
The wheel touch sensor adjusts the volume of the MP3 player module. Sliding your finger clockwise will increase the volume of the MP3 player while sliding it anti-clockwise decreases the volume.