How to Use Text to Immortalize Your Favourite Ride!
by Birdz of a Feather in Workshop > Laser Cutting
968 Views, 5 Favorites, 0 Comments
How to Use Text to Immortalize Your Favourite Ride!
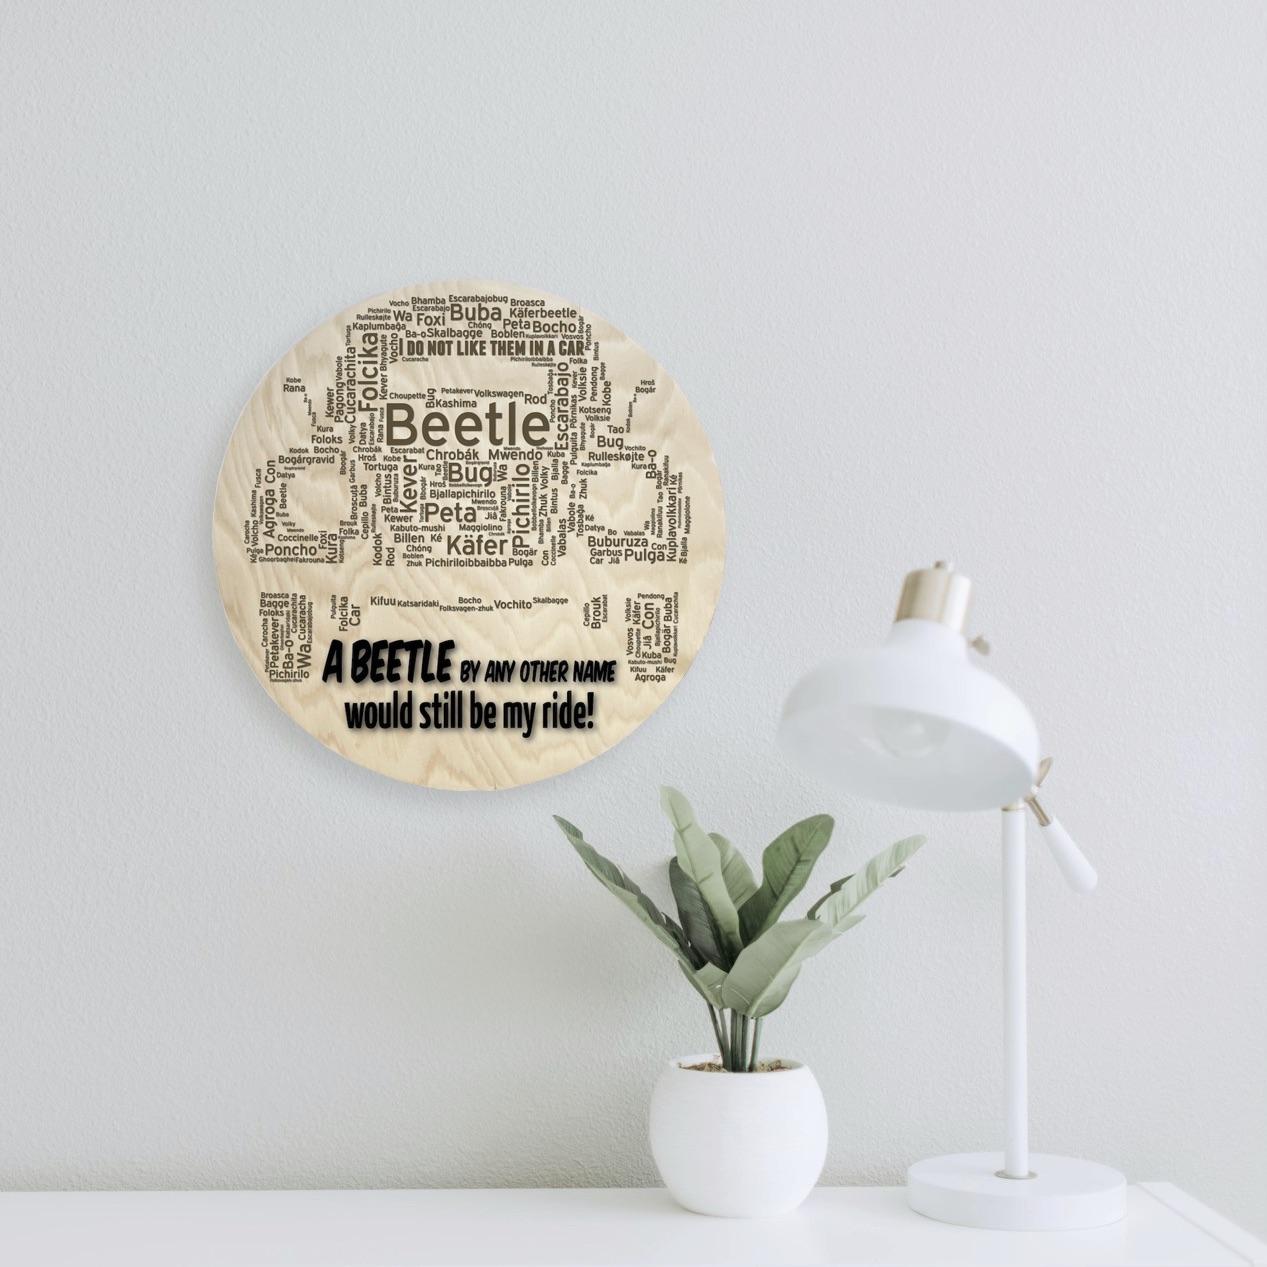
We love finding unique ways to create with our laser, and nothing is more unique than using word art to form the shape of our favourite classic car - the Volkswagen Beetle! Have you heard of word art? In this Instructable, we'll show you step-by-step how to create your own unique wall decor piece to commemorate YOUR favourite ride!
Follow along by watching the video above or read on for the 'Ible!
Supplies

* [If you’re looking for some of the things we used, we’ve got you covered (disclosure): Clicking on the affiliate links below means we may receive a commission. We earn from qualifying purchases which we proudly donate to Alzheimer's research. But don’t worry, you don't pay a cent more and you'll be helping to support our fundraiser!]
You will need:
Honeycomb panel (optional)
Birch wood round - or cut your own on the laser
Procreate
Illustrator
Inspiration
Are you a classic car fan? You may have seen our upcycled kitchen cabinets which we turned into a one-of-a-kind VW desk! We also did a needle felted VW beetle, by upcycling a sweater.
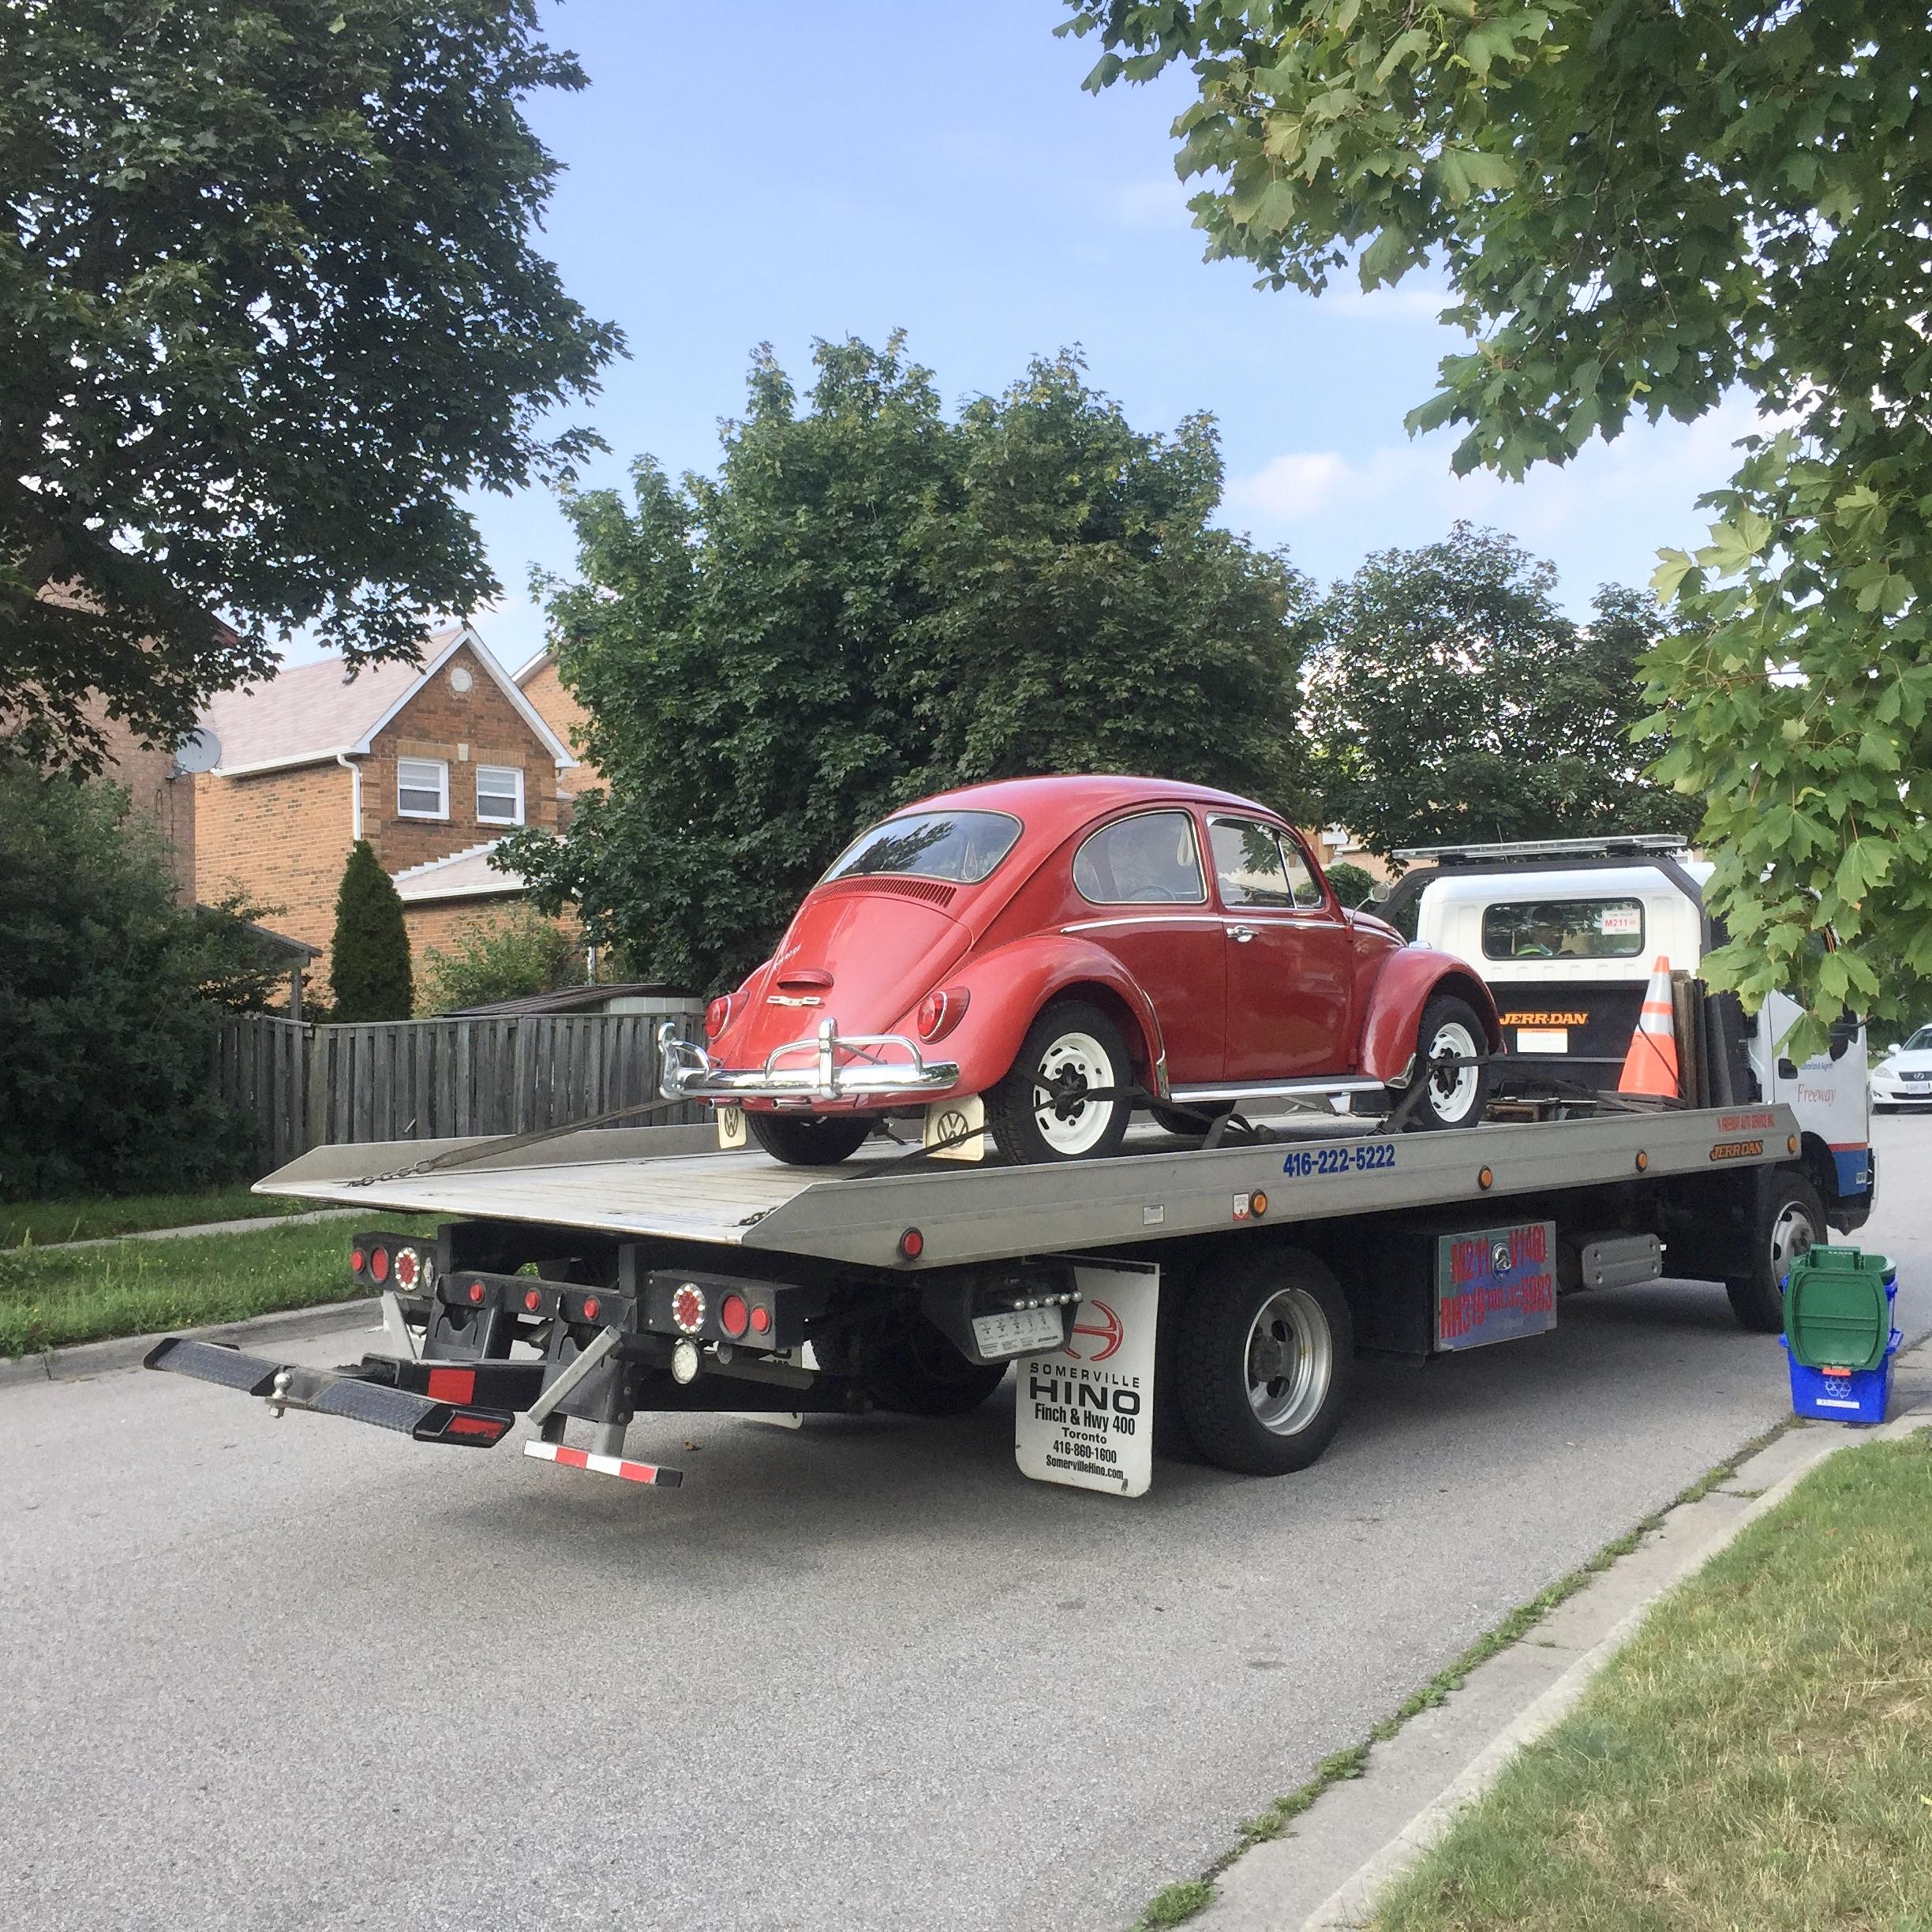
Although we loved our Beetle, sadly Hubs said goodbye to it in the summer of ’21. The plan was to make room in the garage so I could have an outdoor space to putter in. Spoiler alert: as fast as Hubs moved his car out, he moved in hundreds of sewing machines for HIS new hobby, one of which we upcycled into DIY bookends.
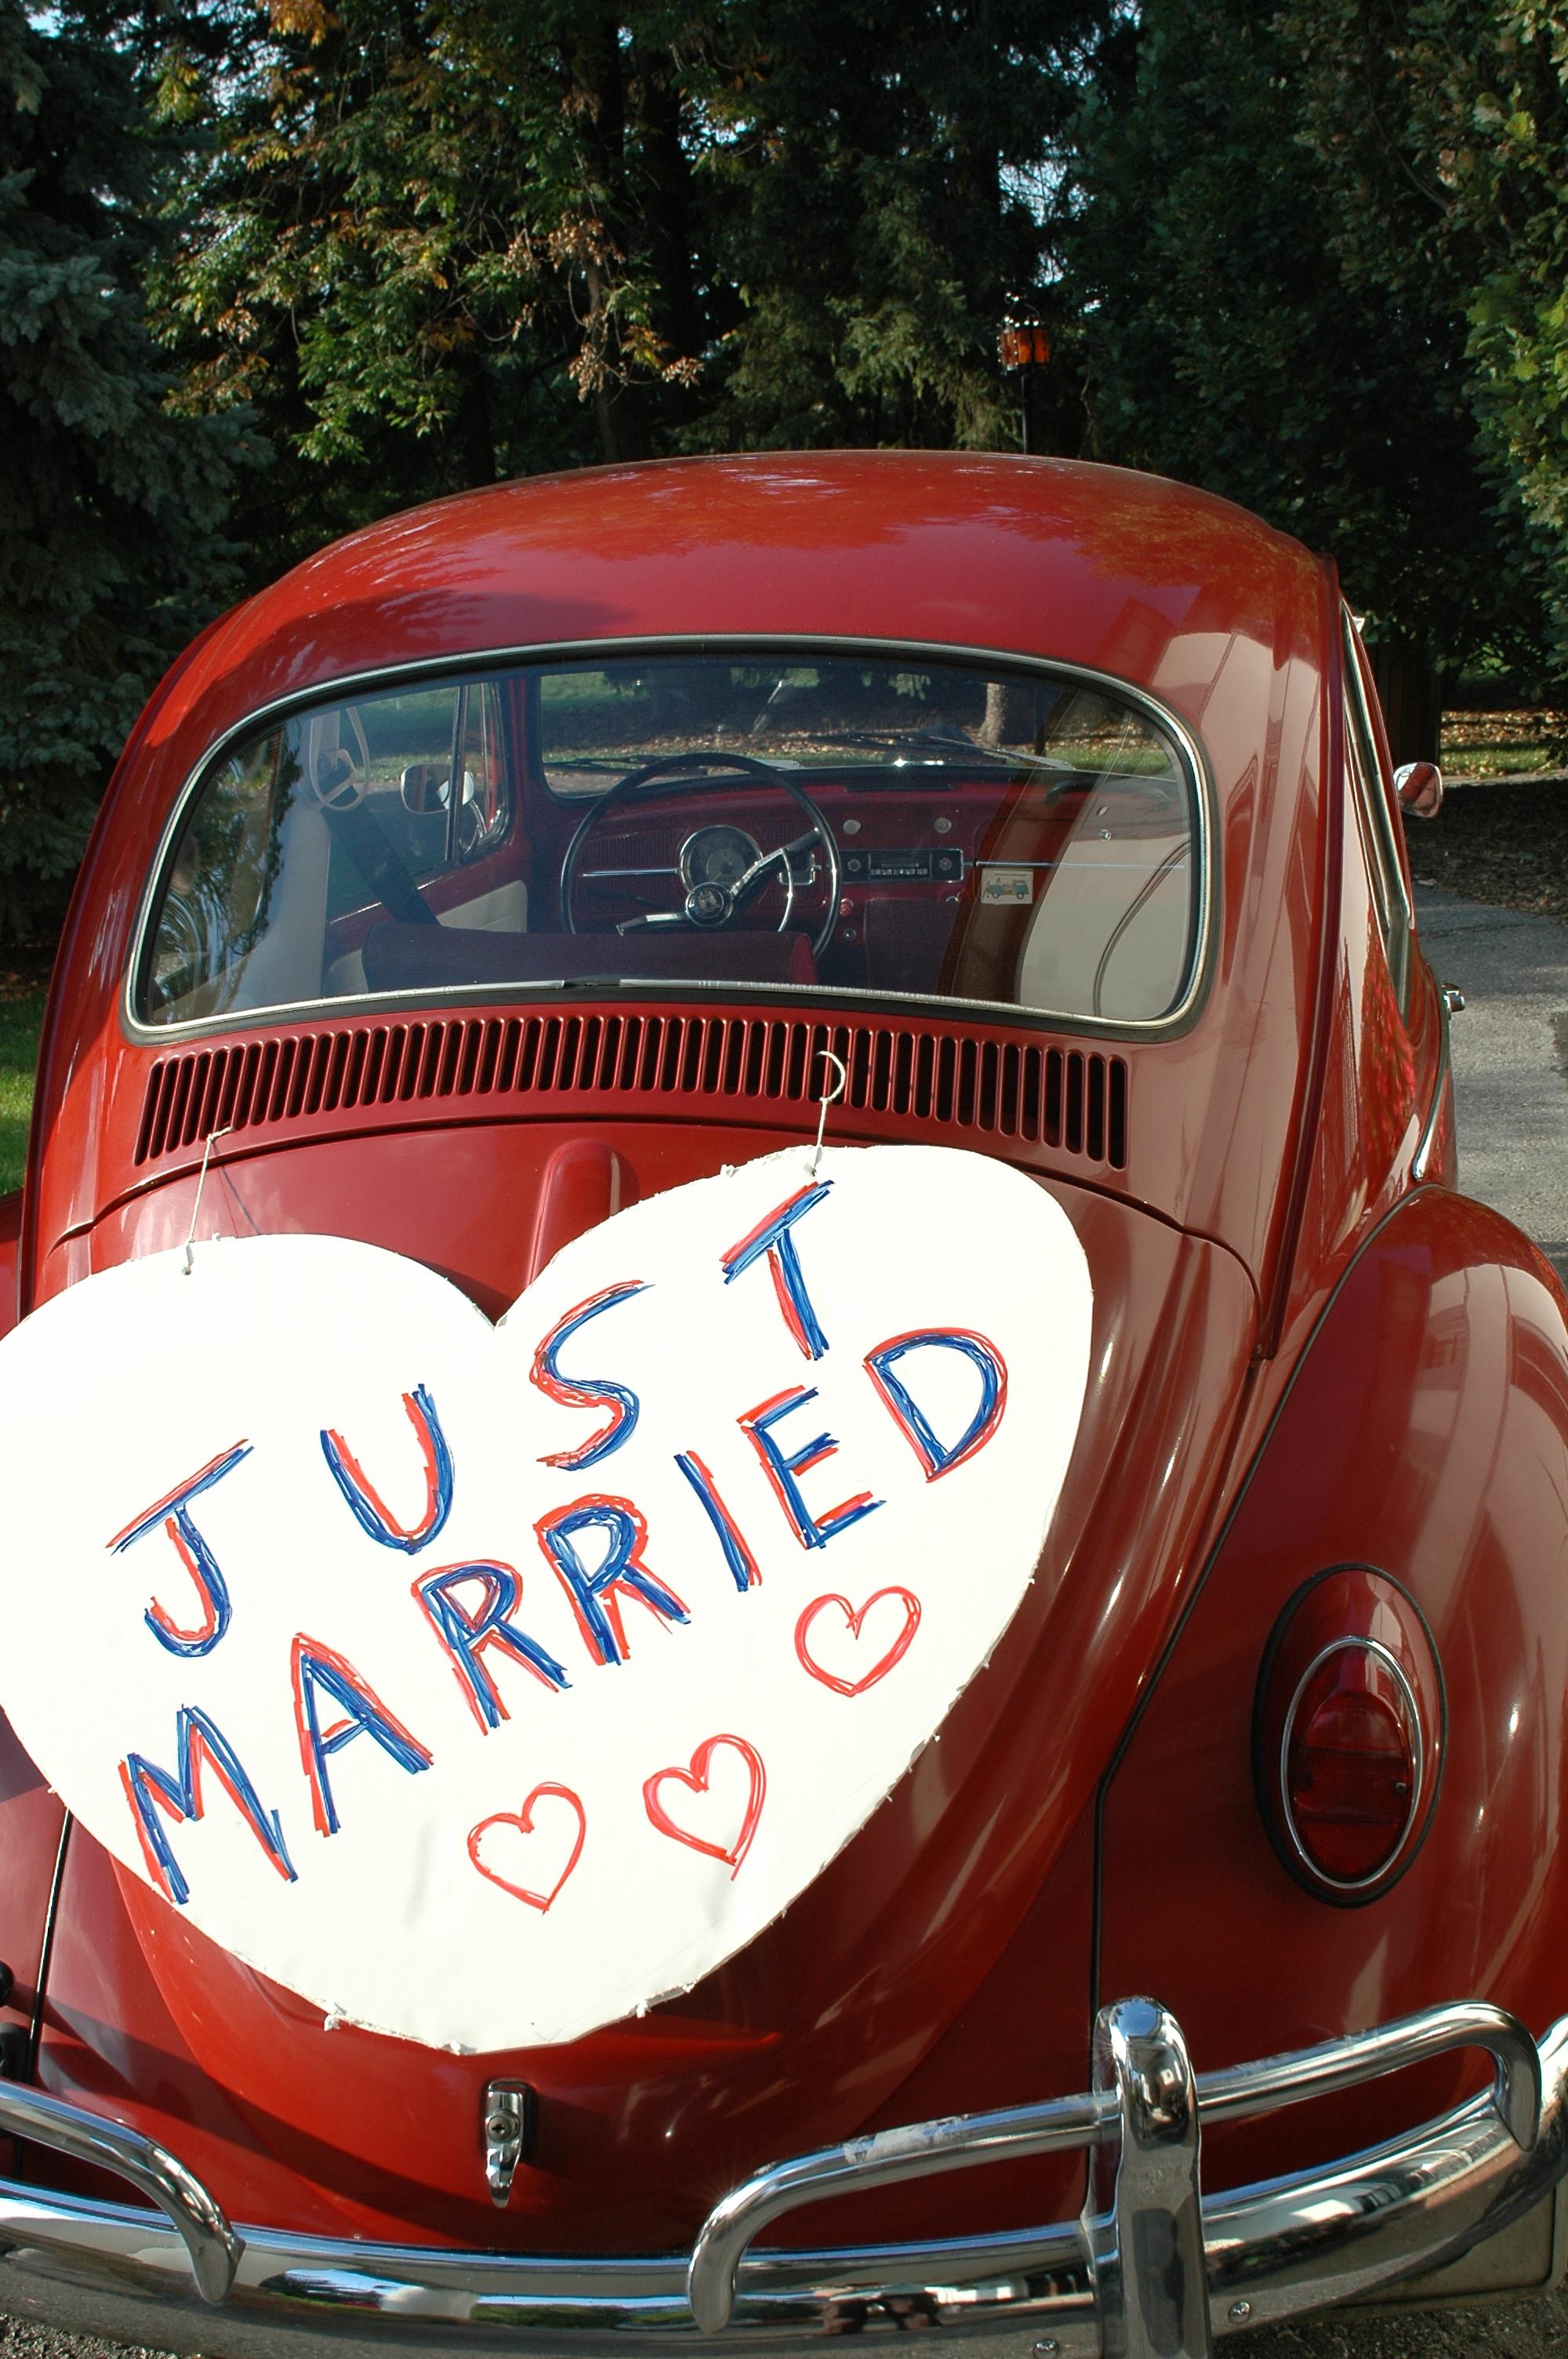
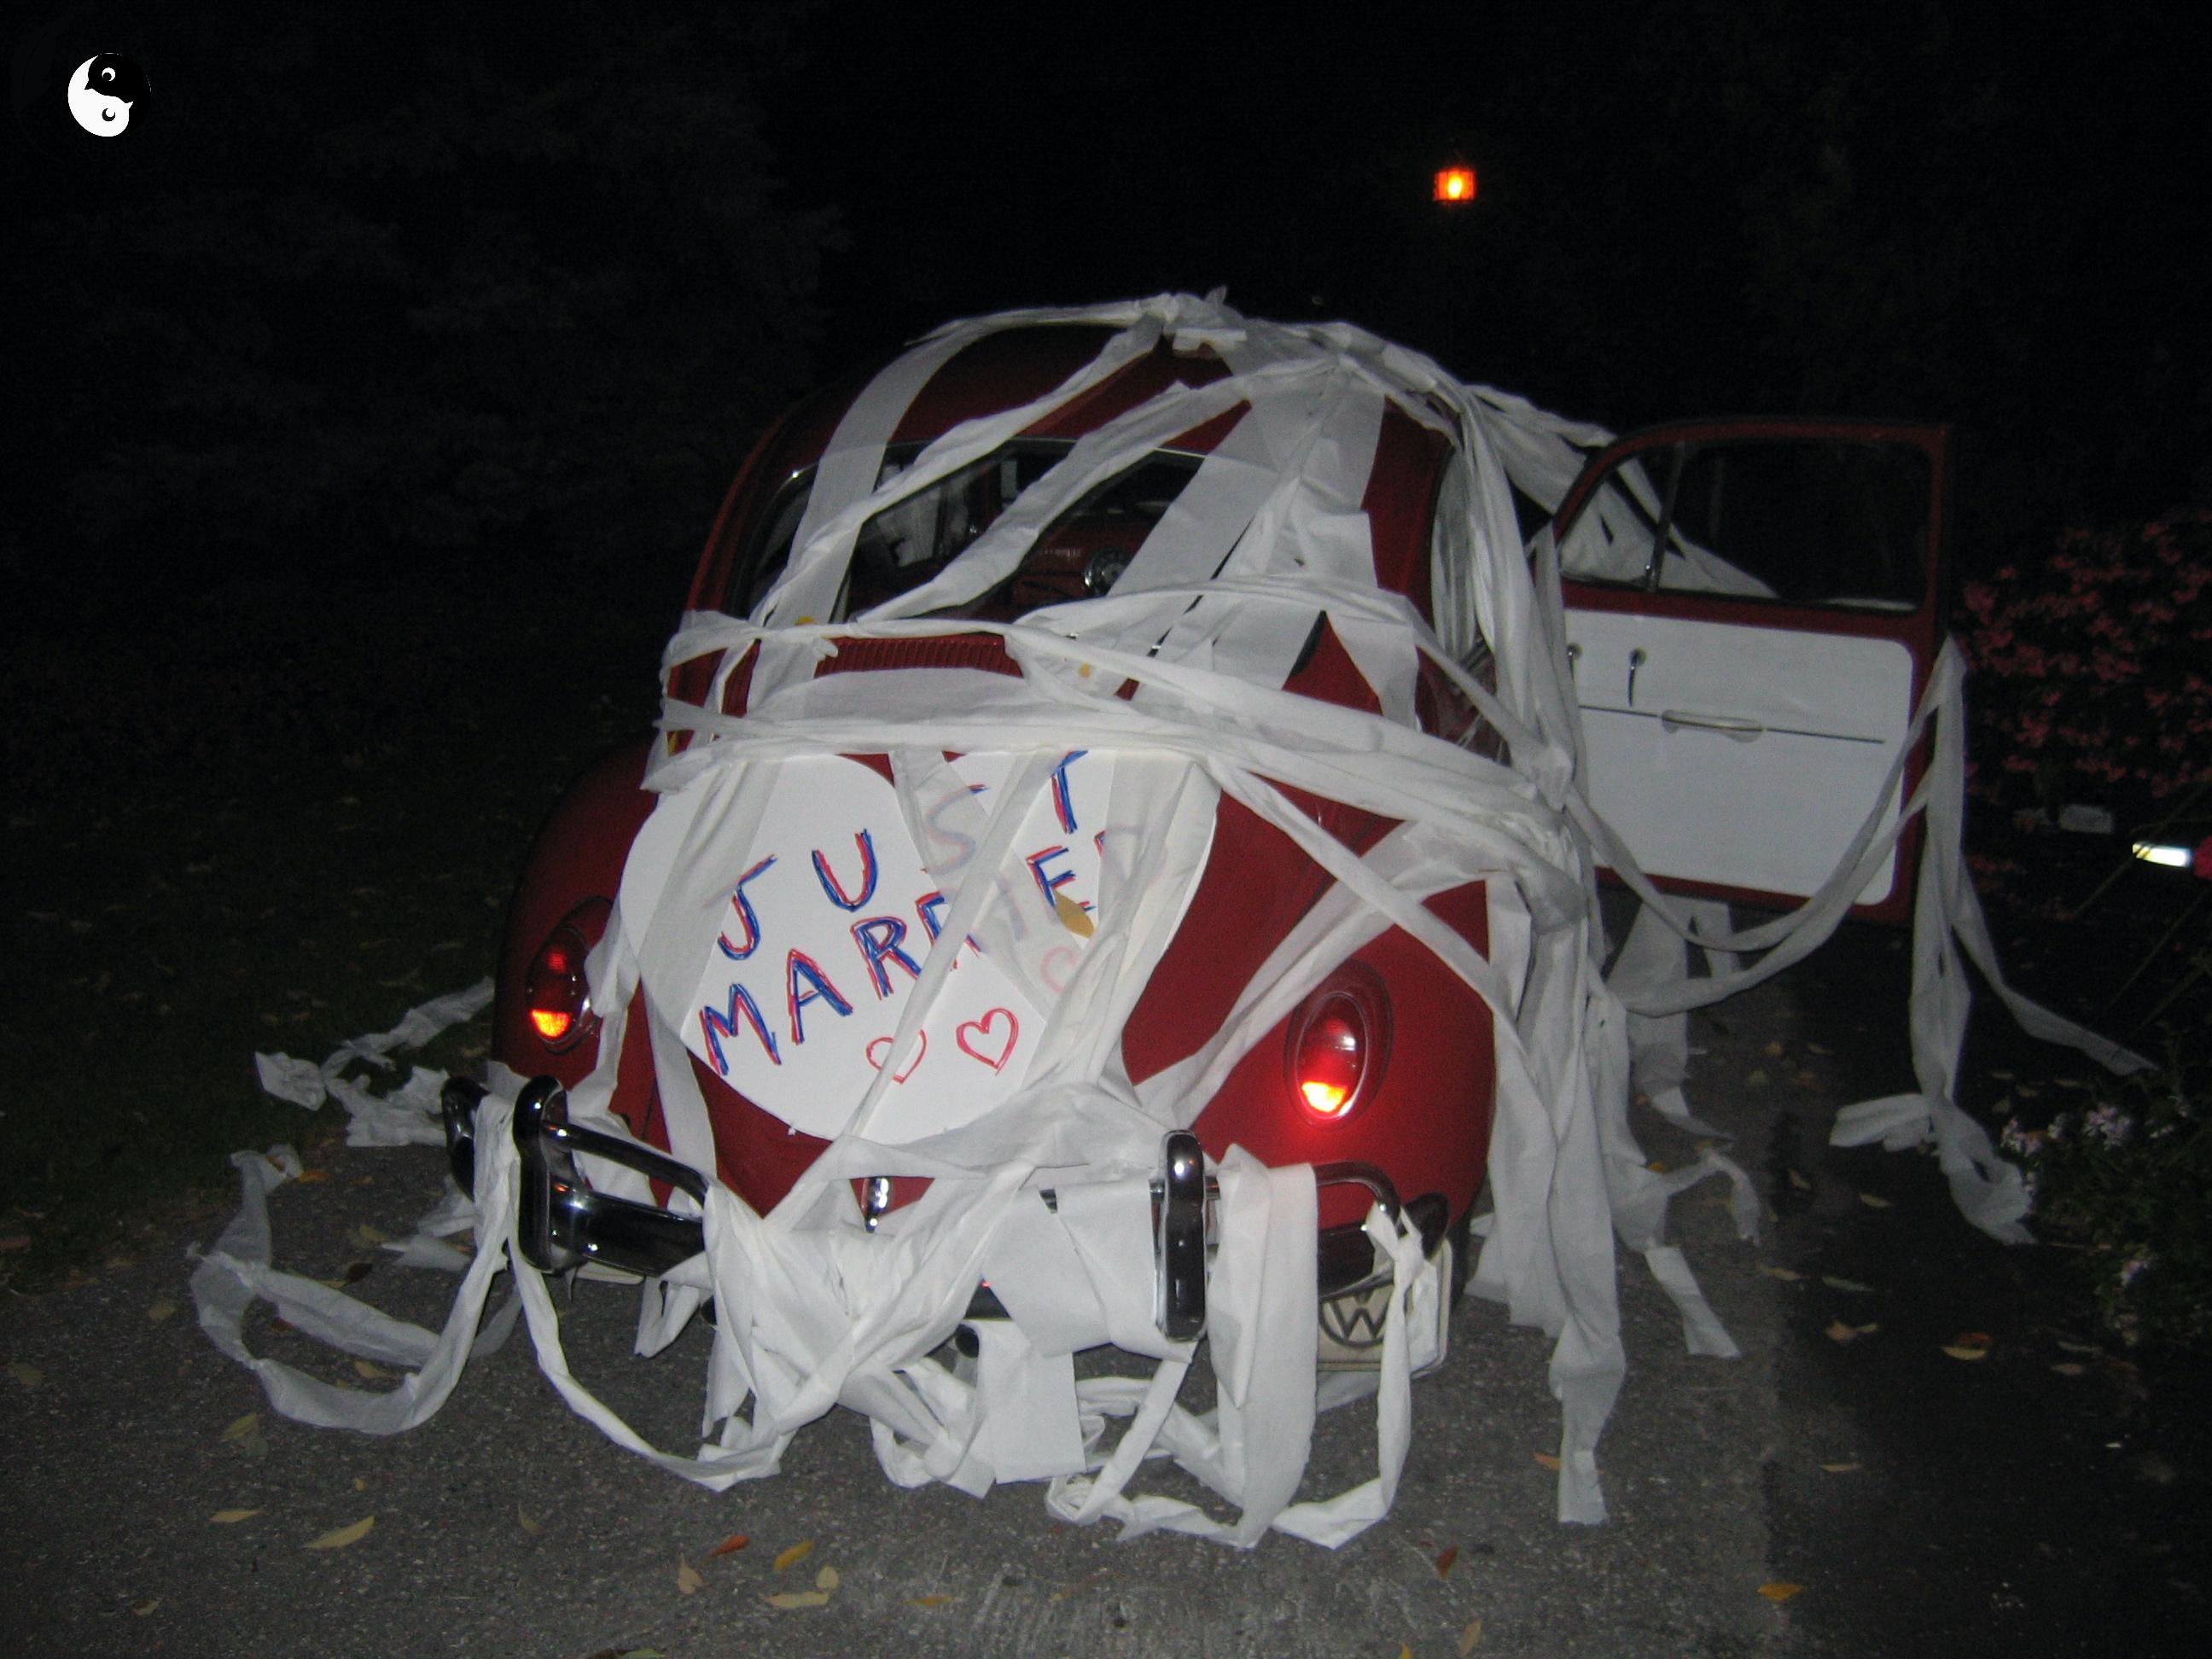
We have lots of great memories with this car! It featured prominently in pictures when we got married. We had so much fun hamming it up for the camera with our Beetle. Then our guests REALLY had fun with the car. Out came the toilet paper! It took us a while before we could actually leave that night! If only we knew then how valuable toilet paper would become so many years later during the pandemic!
So that’s the inspiration behind our word art design. Now for the project!
Word List
To make your own unique text art design, it doesn’t necessarily have to be a car. It could be anything! And you don’t necessarily need to laser print it. Although, it’s really cool to engrave on wood, you could print it and frame it – or even create a t-shirt (like I did for for my husband)! There's actually a screen printer accessory you can use with a laser that can print T-shirts!
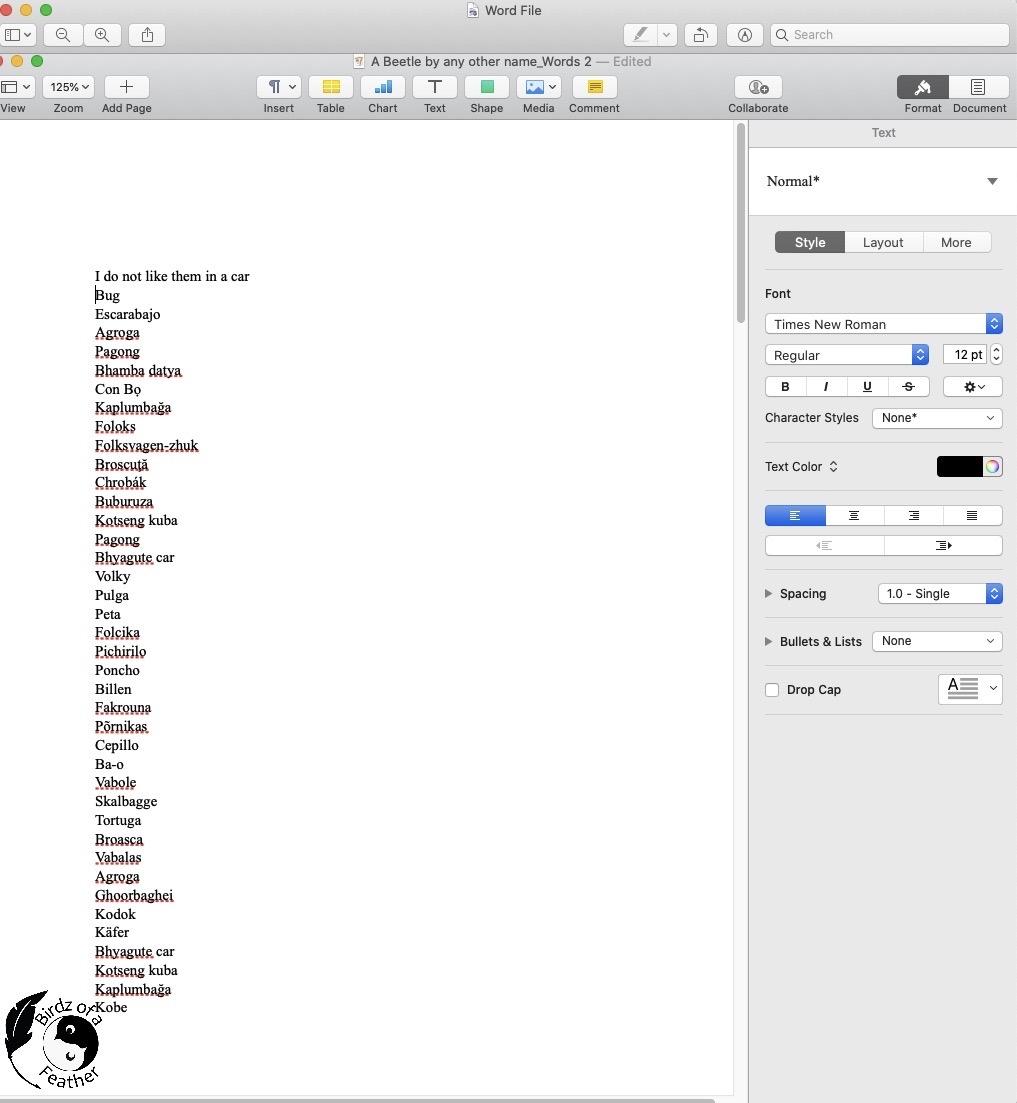
First create your list of words. Our list consists of words of how the Volkswagen Beetle is known in different parts of the world. It's best to save whatever words you choose on Notepad (if you're using a Mac), or any word processing software you prefer, for importing into Wordart.com later.
Did you notice the nod to Dr. Seuss at the top of the list? That’s a shout-out to Hubs who’s a huge Dr. Seuss fan.
Draw Your Design
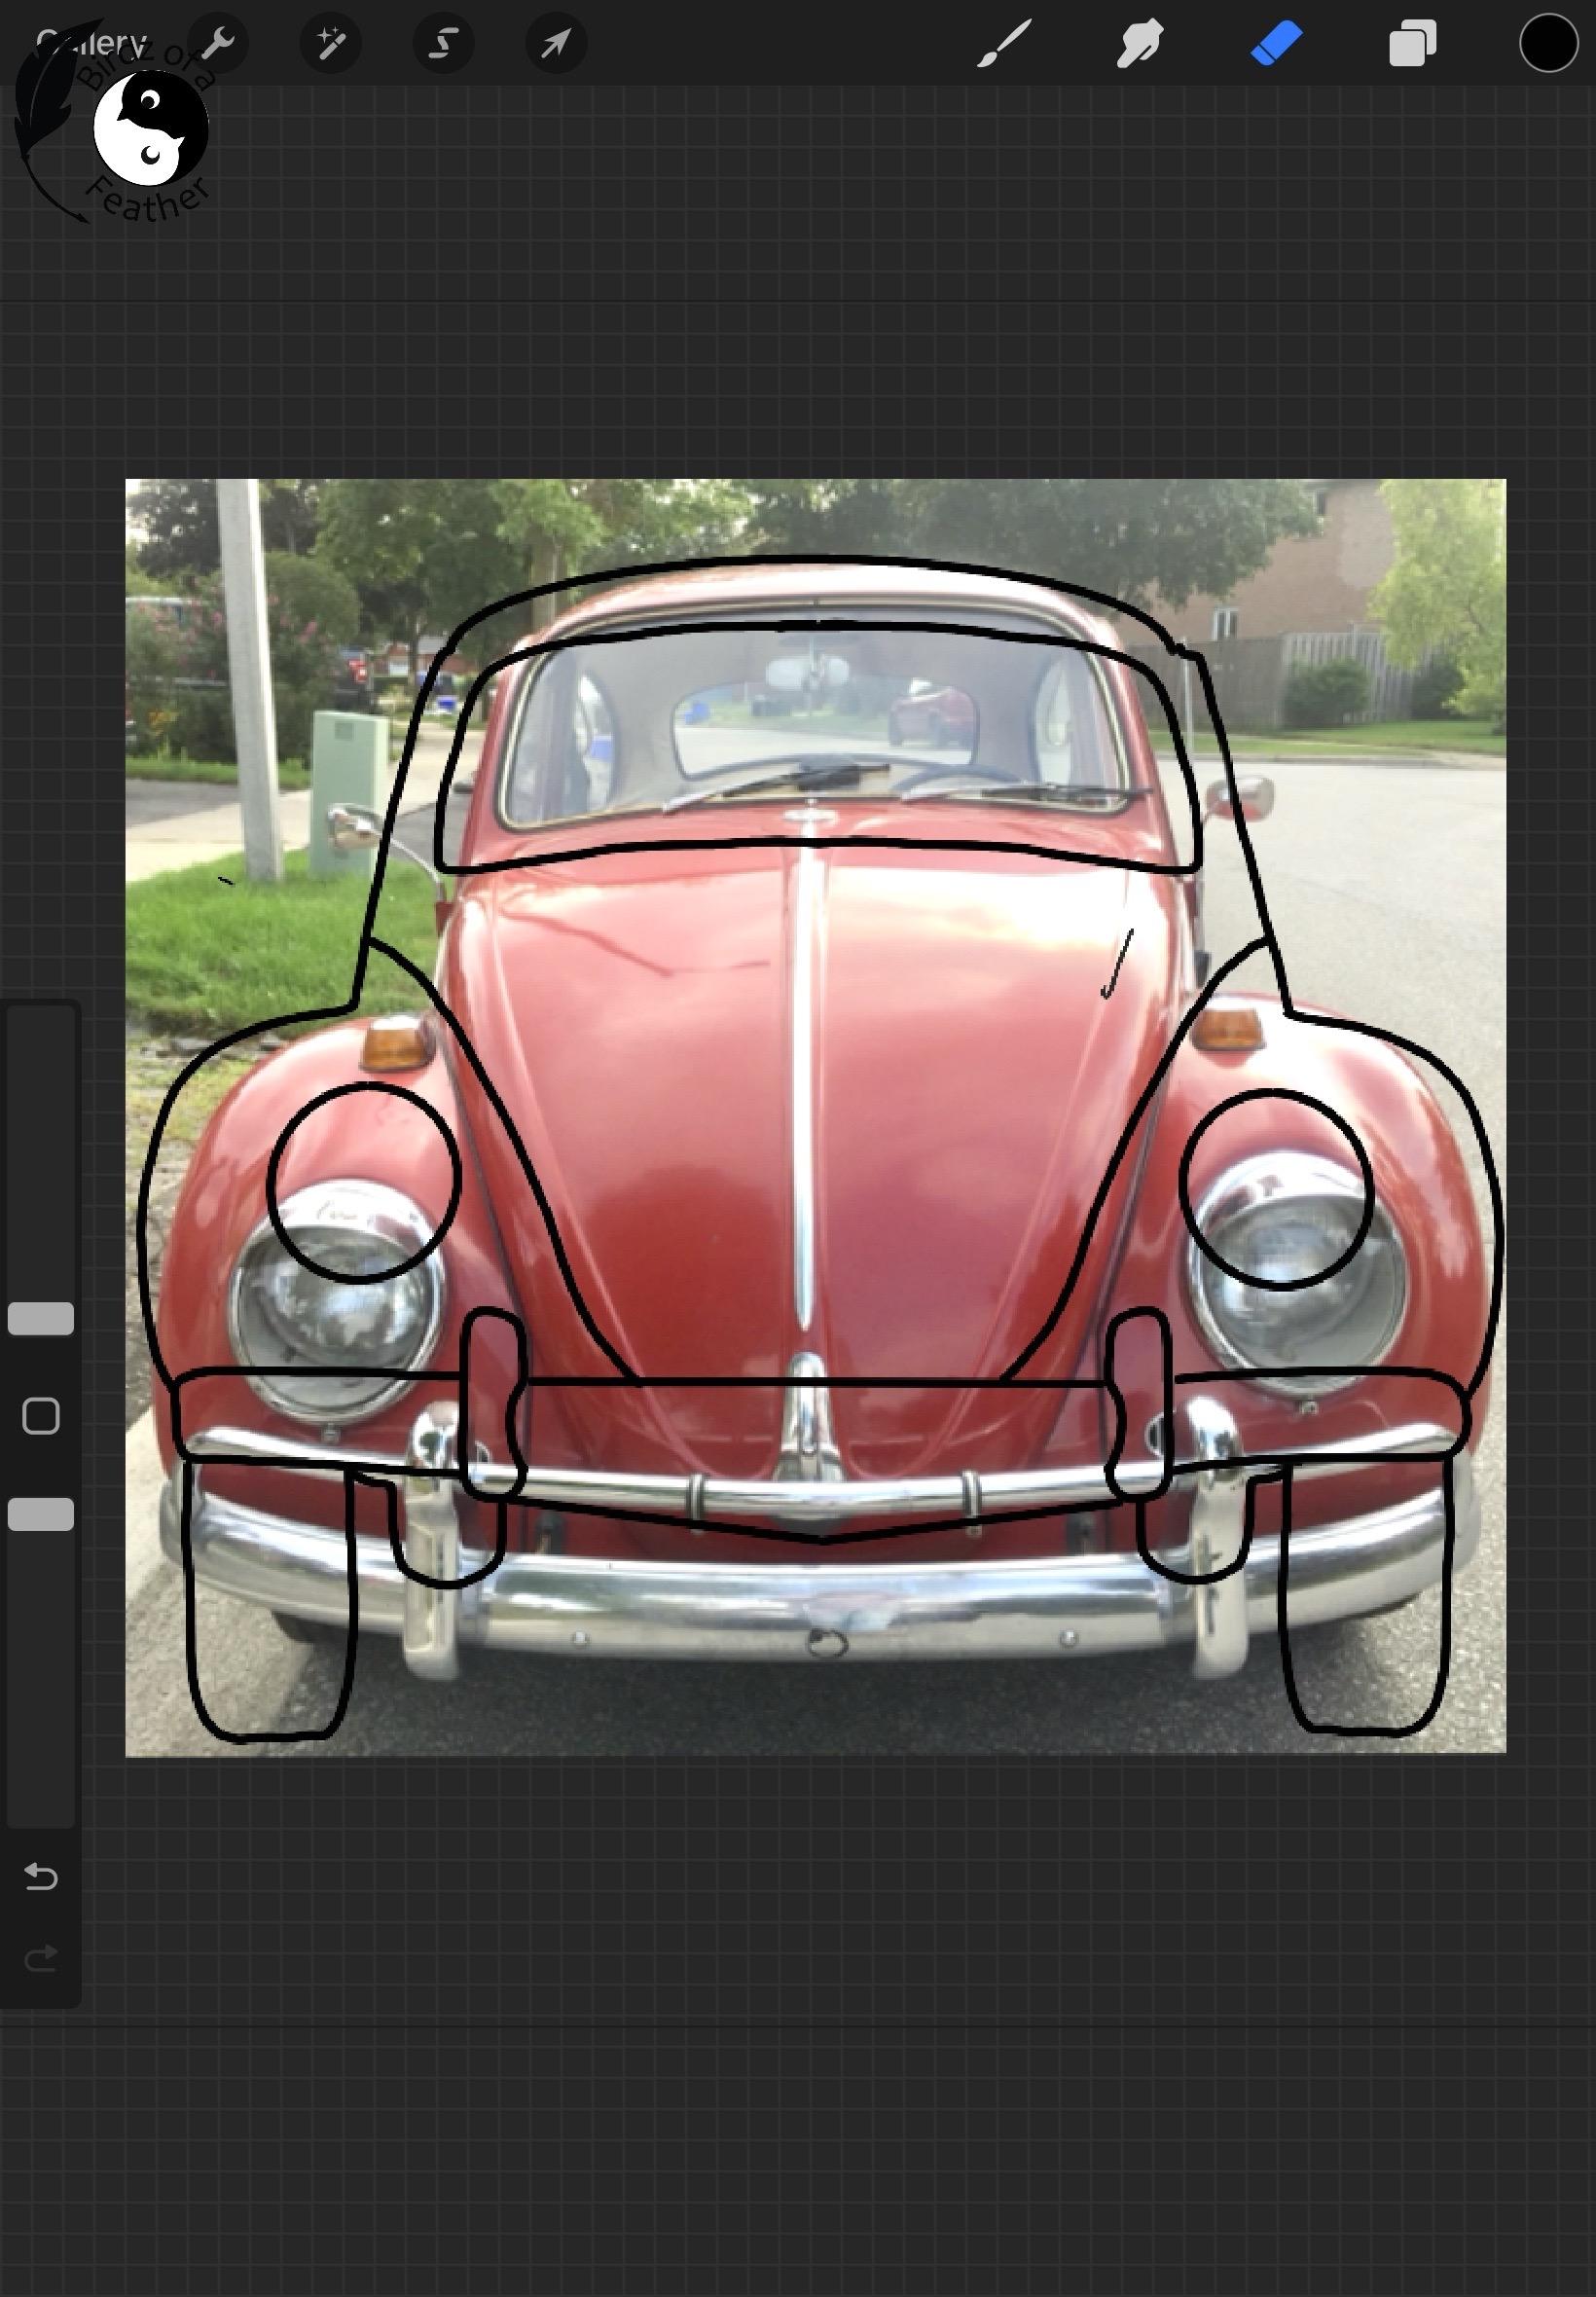
I use procreate on my iPad for the initial sketch, but you could also draw and scan your artwork. In Procreate, I love that you can literally trace right over your picture on a different layer. I didn’t quite have the right angle on my photo, but you can easily improvise; just erase and redraw until you like what you see. This isn’t my first rodeo with word art, but it is my first time trying out the Wordart.com site generator, so I had to experiment a little. First, I coloured everything in to try it out.
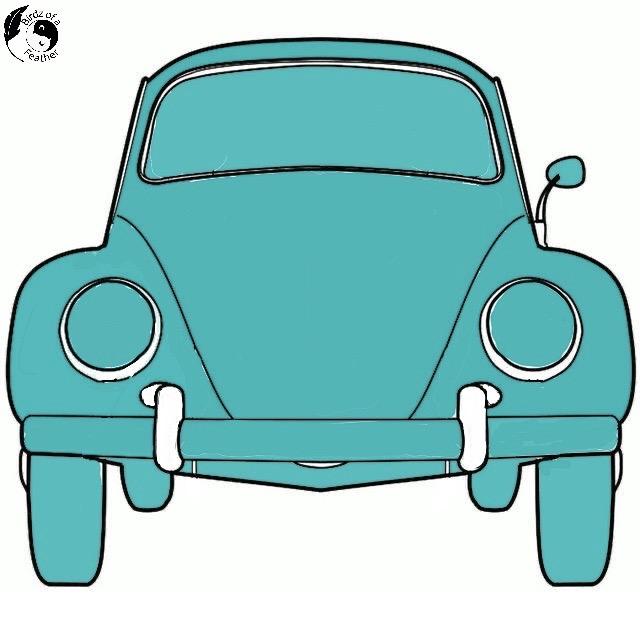
However, jumping ahead, the trick isn’t to colour everything. When everything fills with words, it’s way too busy. It took me a few tries to get the look I wanted. By leaving some white space in your drawing, the words won’t fill those spaces and it will give you a more realistic representation, as you’ll see shortly.
Export Your Design

Once you’re happy with your design, turn off the photo layer and export it as a jpg or png.
Open Word Art on Your Computer
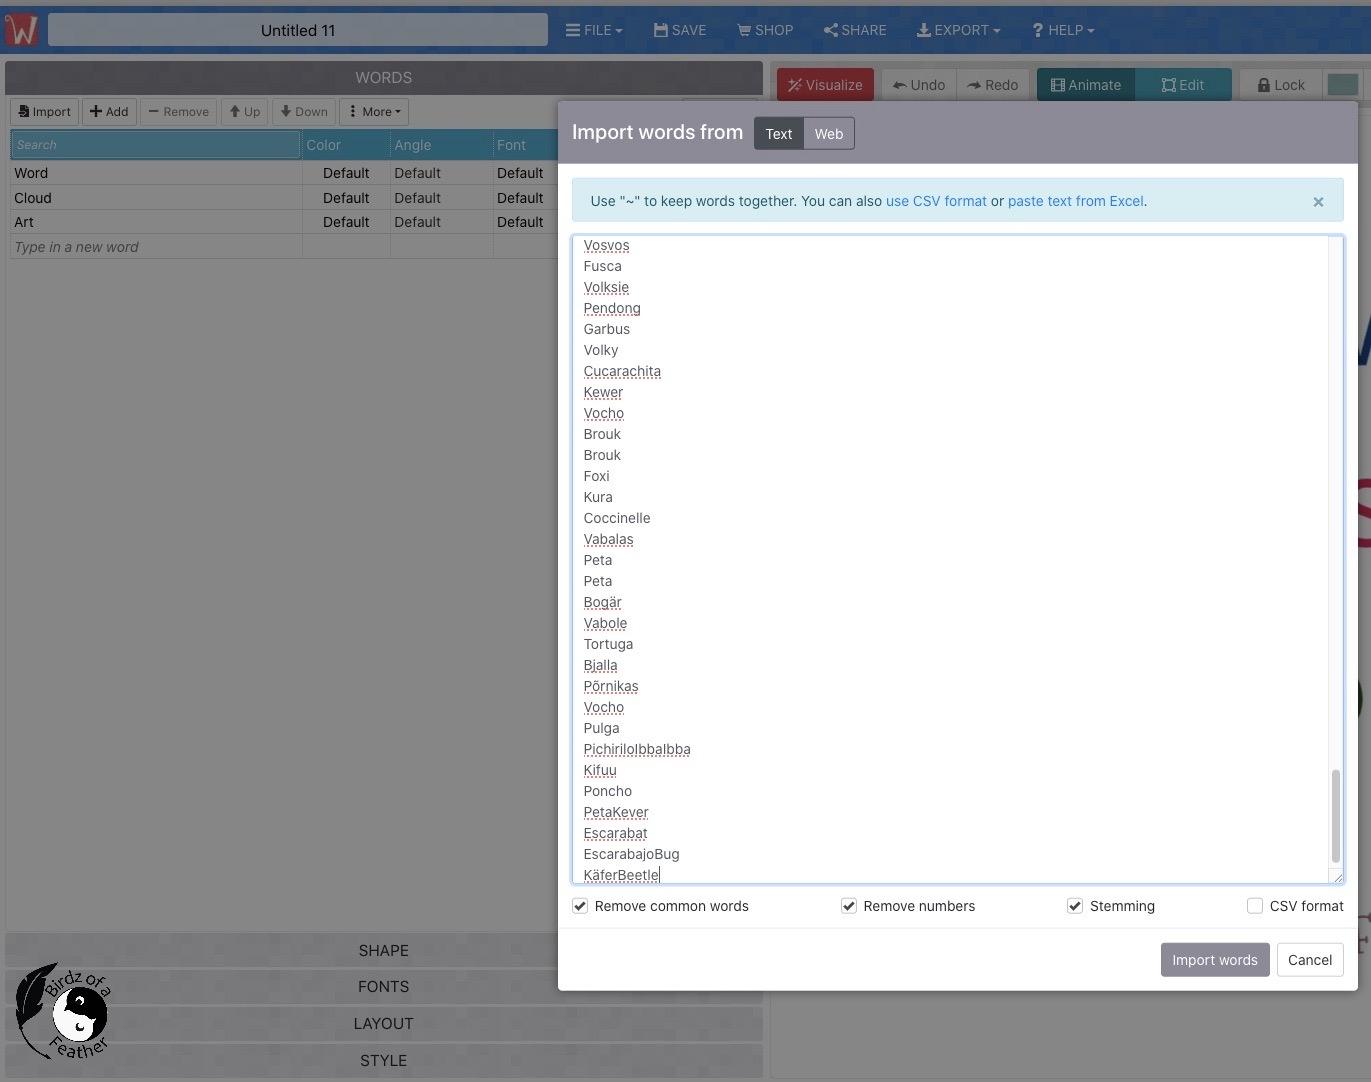
Open up Wordart.com. The tabs will take you through each step. First, you'll enter your words. You can type in words individually, but that will take forever! So be sure to have your list ready and import it all in one go.
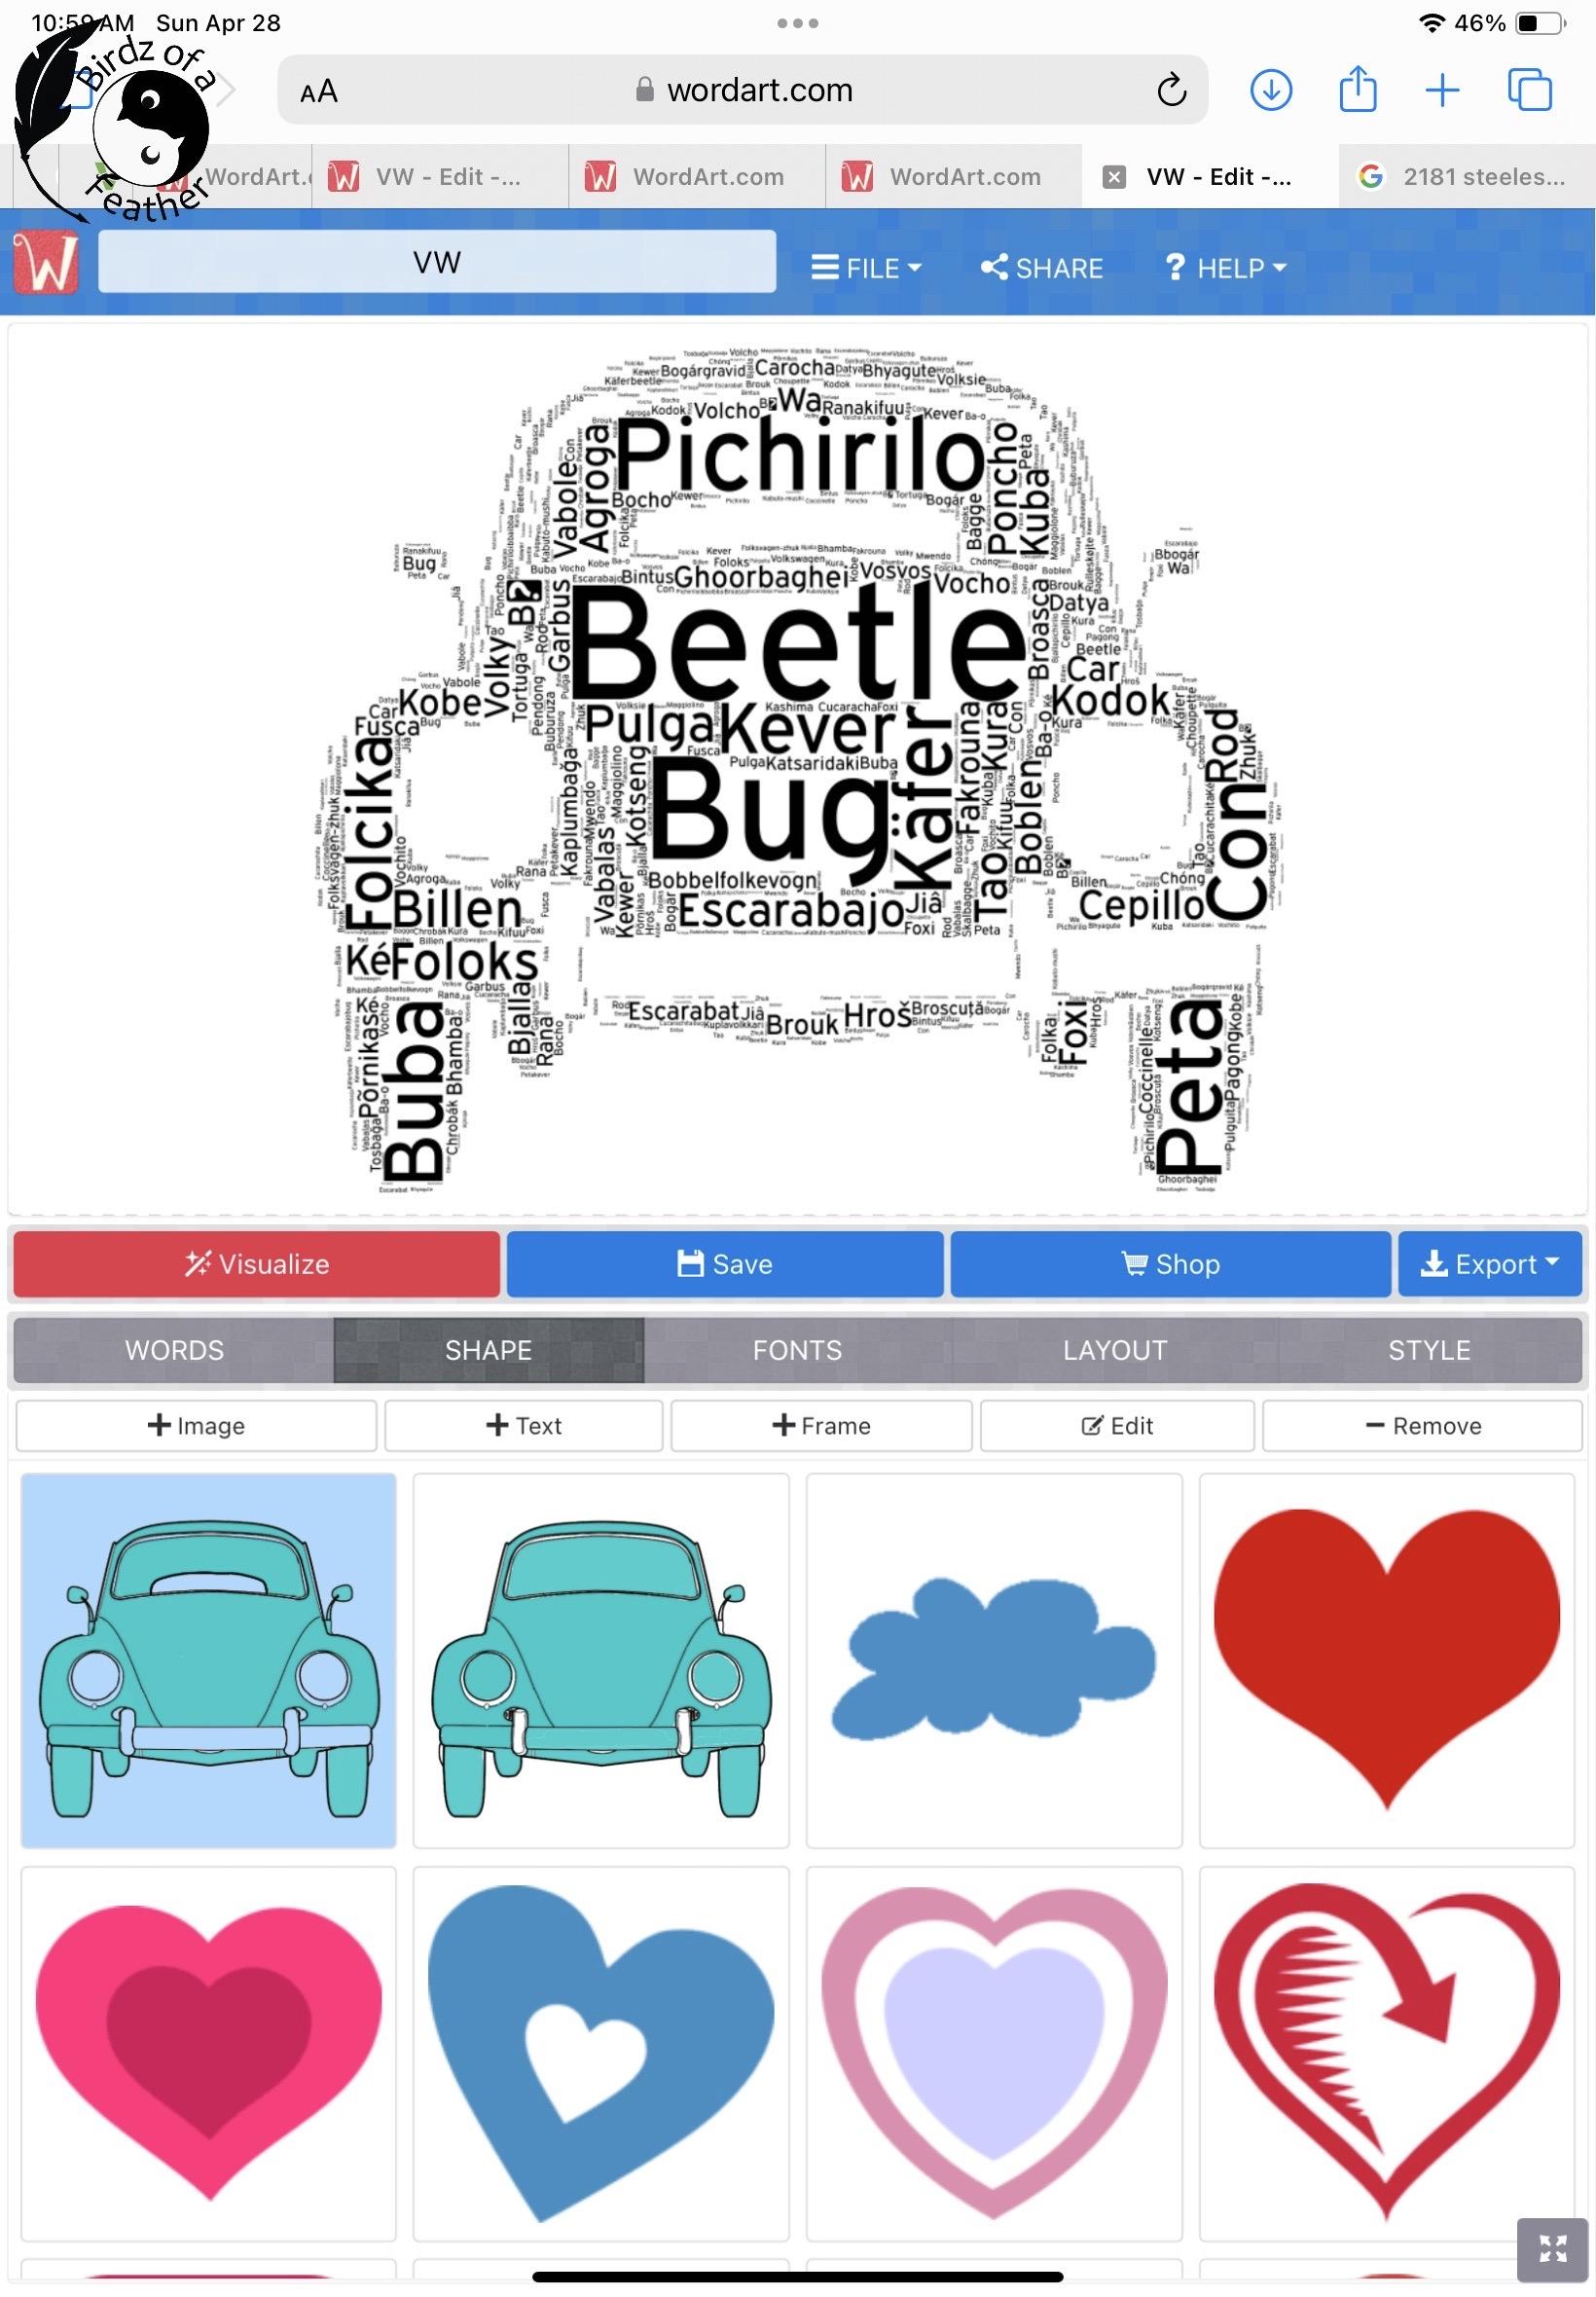
Add Shape
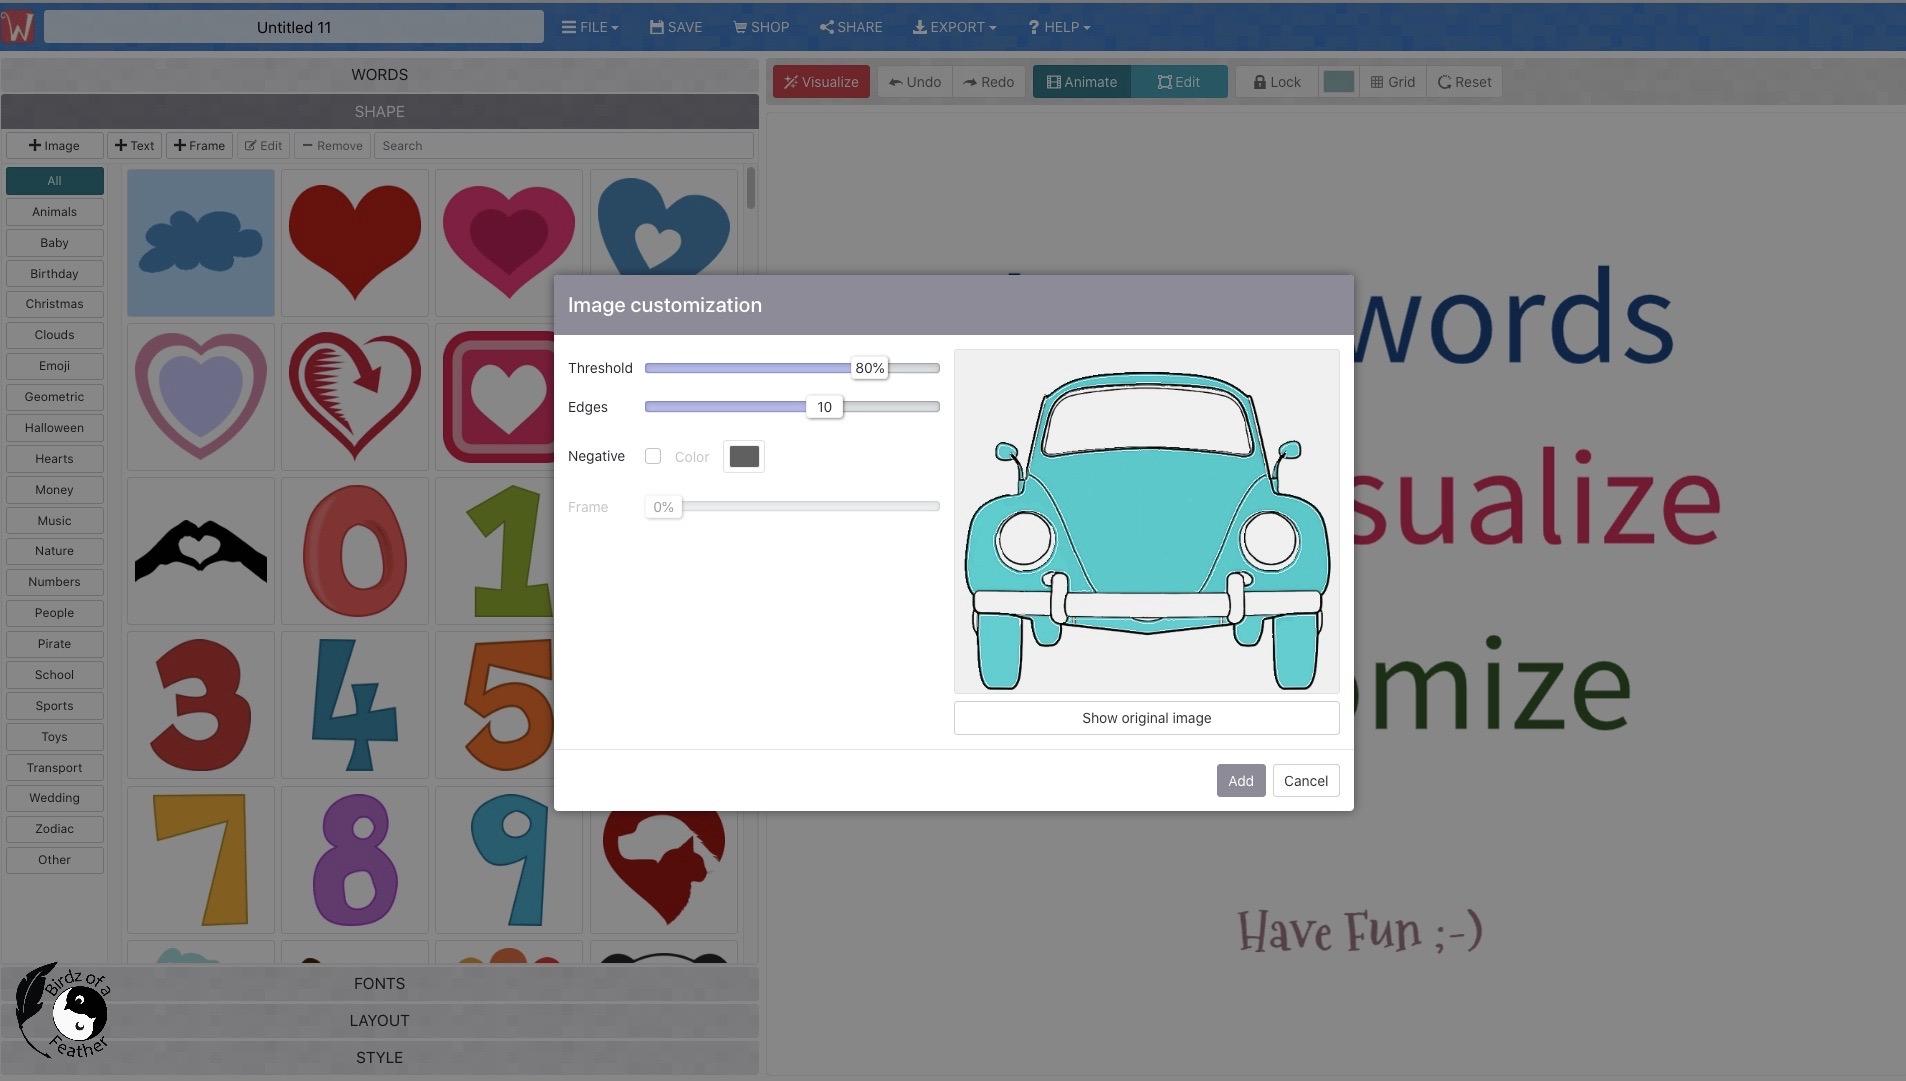
Onto the next tab: Shape. If you don’t want to draw your own shape, you can choose from the designs on the site. Otherwise, import your own image.
Add Font
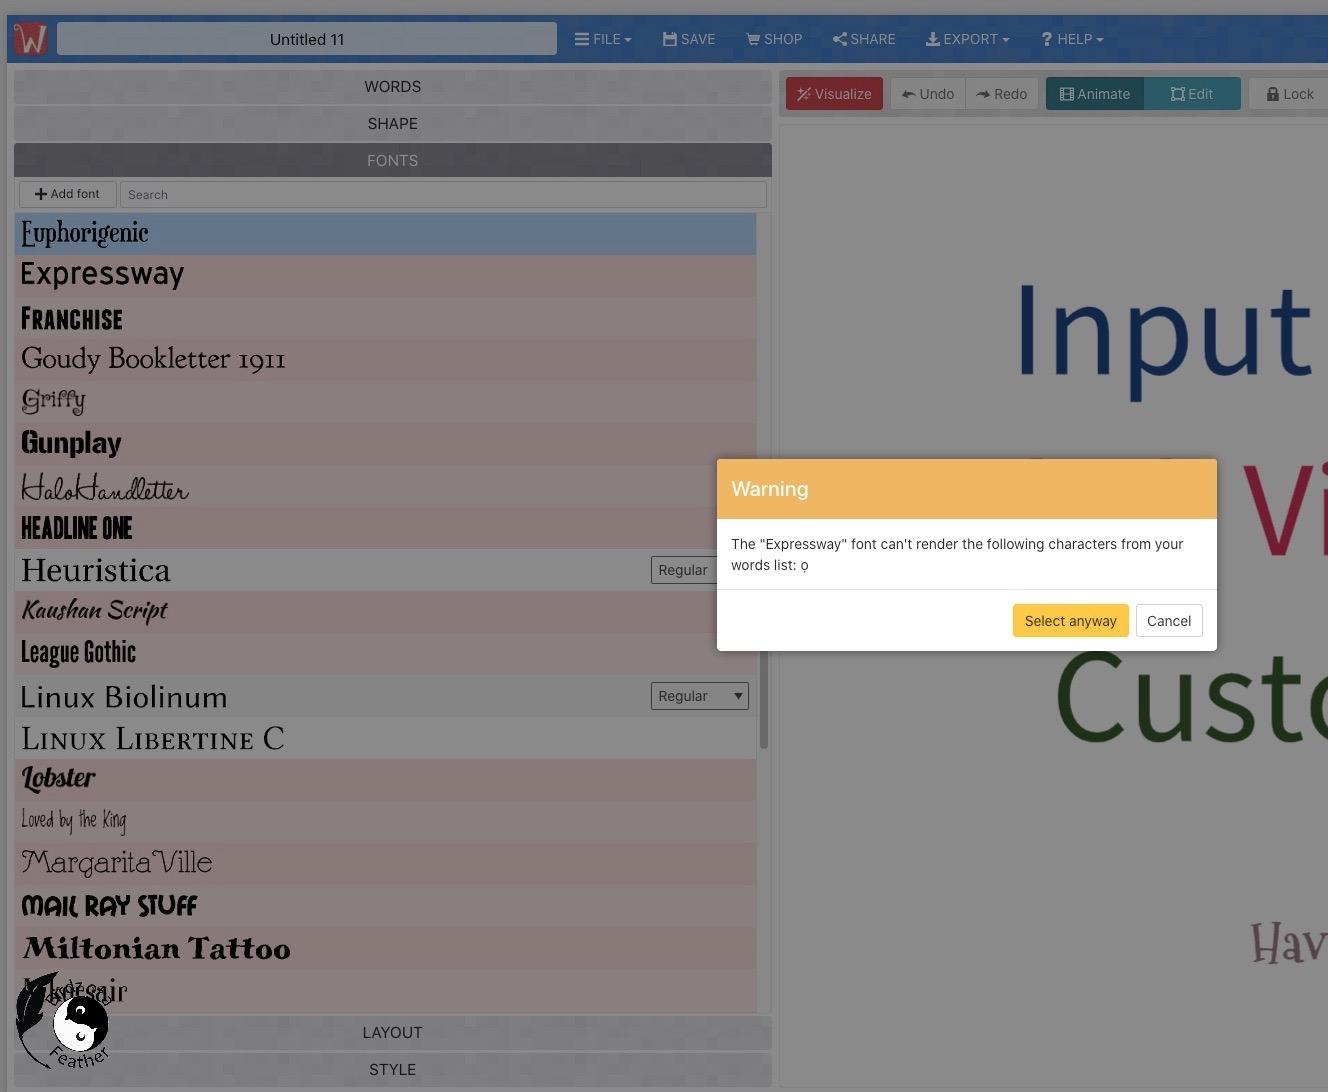
I wanted a plain, easy to read font so I chose 'Expressway'. Note that the one drawback is that the font you choose might not support special characters if you have them. I chose to ignore the warning as it only affected one word.
Choose Layout
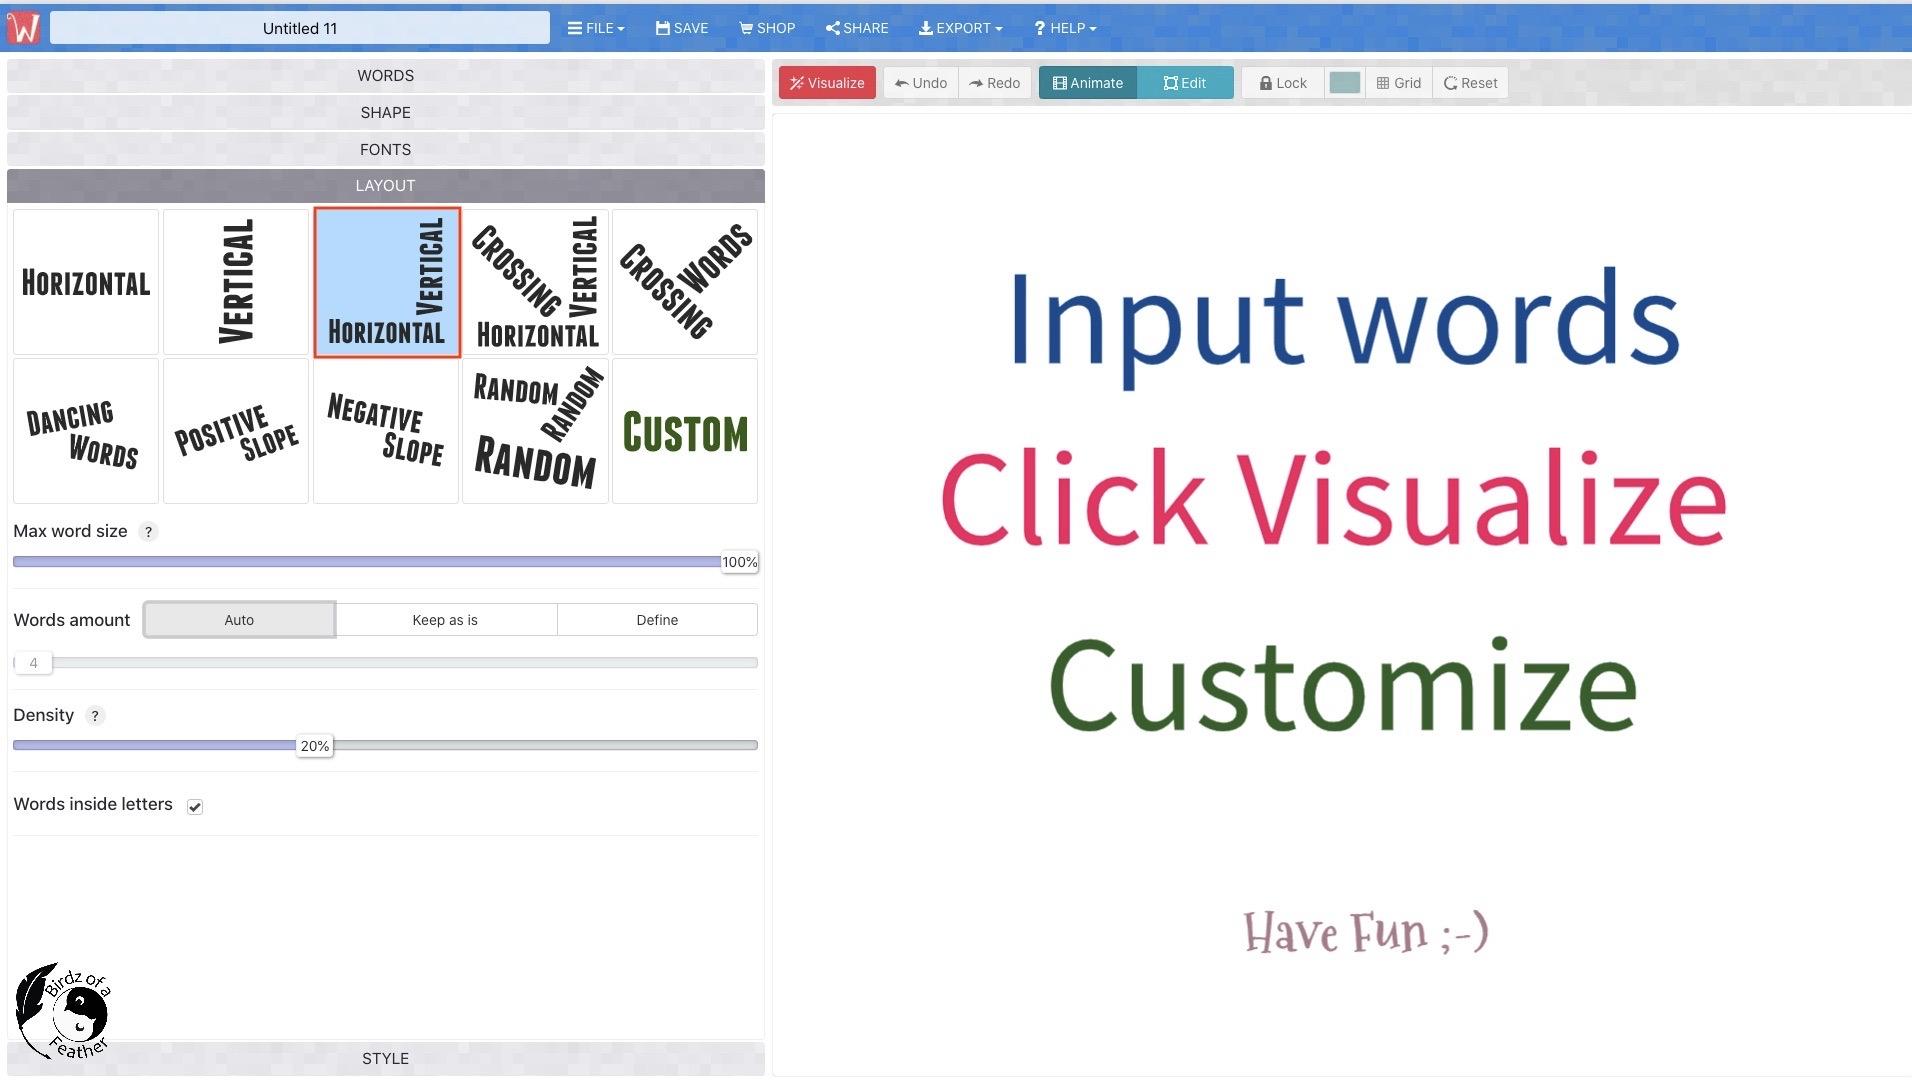
I like the idea of vertical and horizontal words, so that’s what I choose. Feel free to experiment.
Now click the red Visualize button and your word art will magically appear!
Pick Style
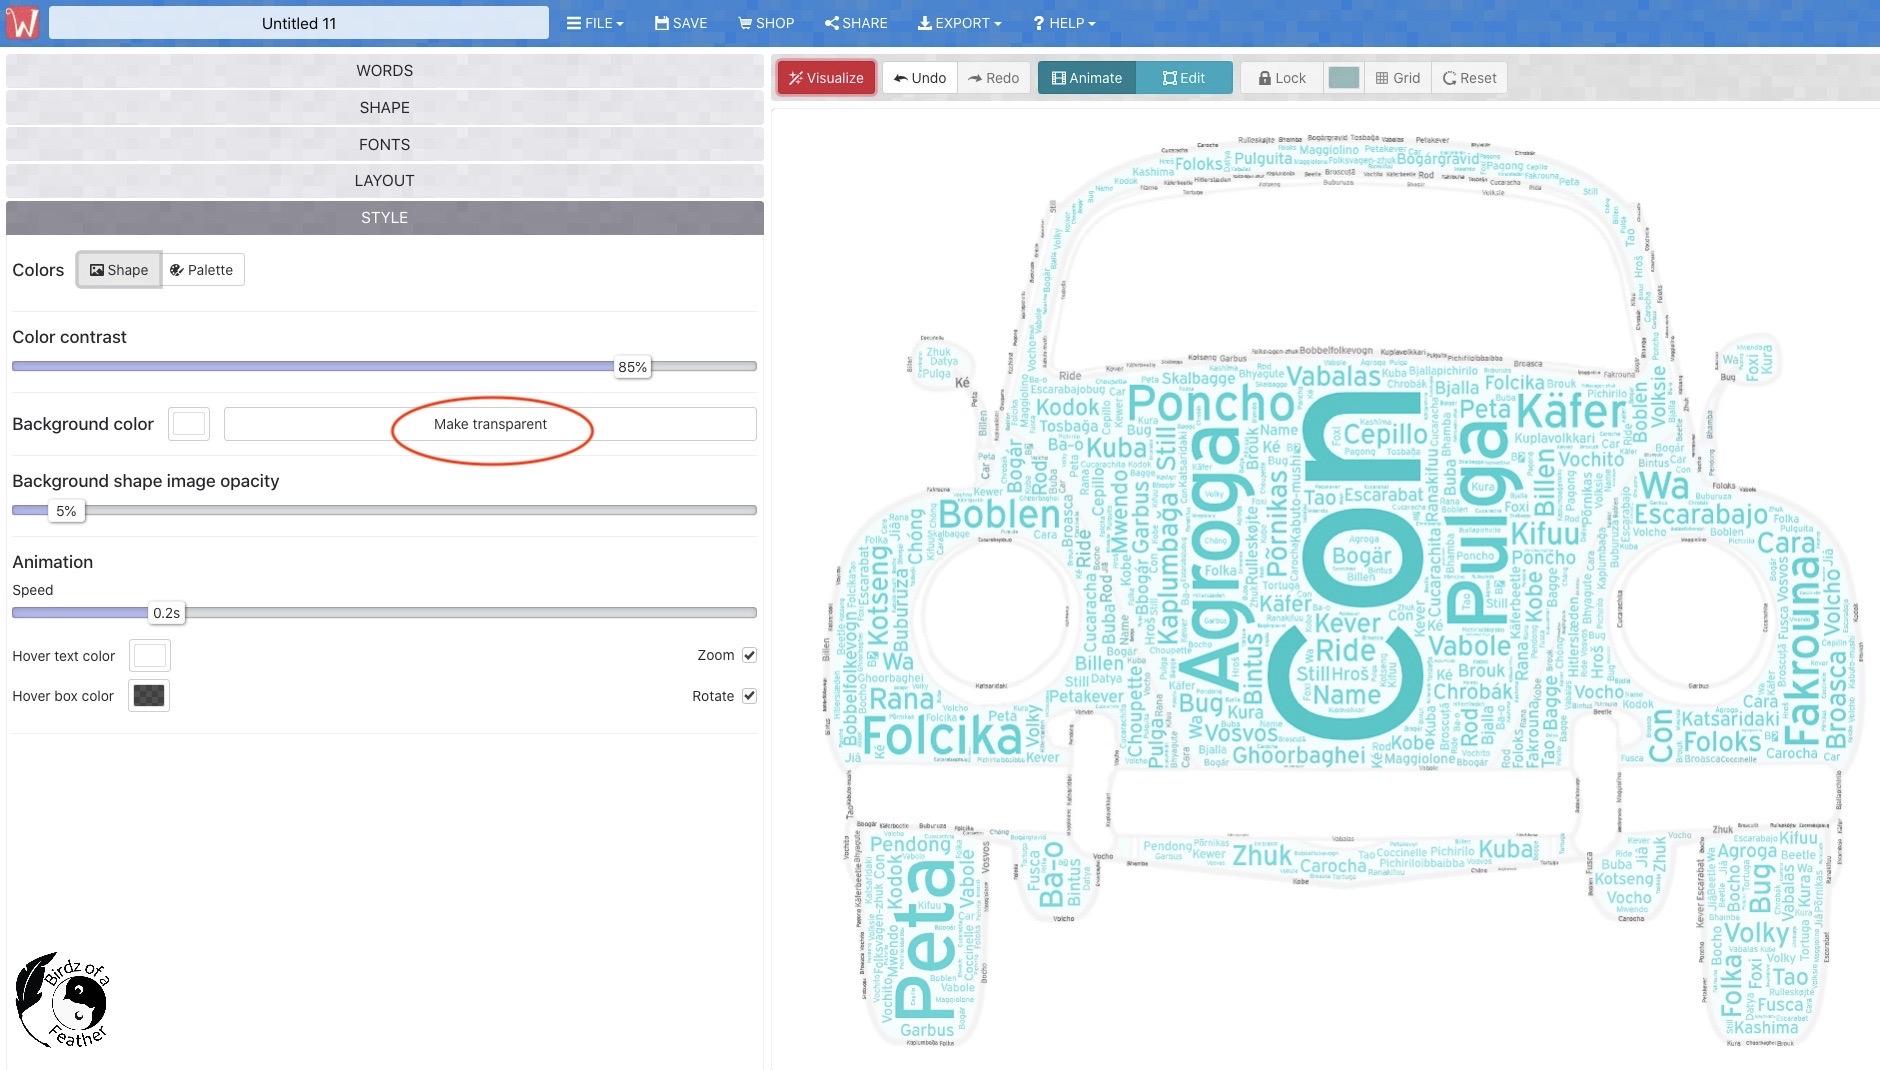

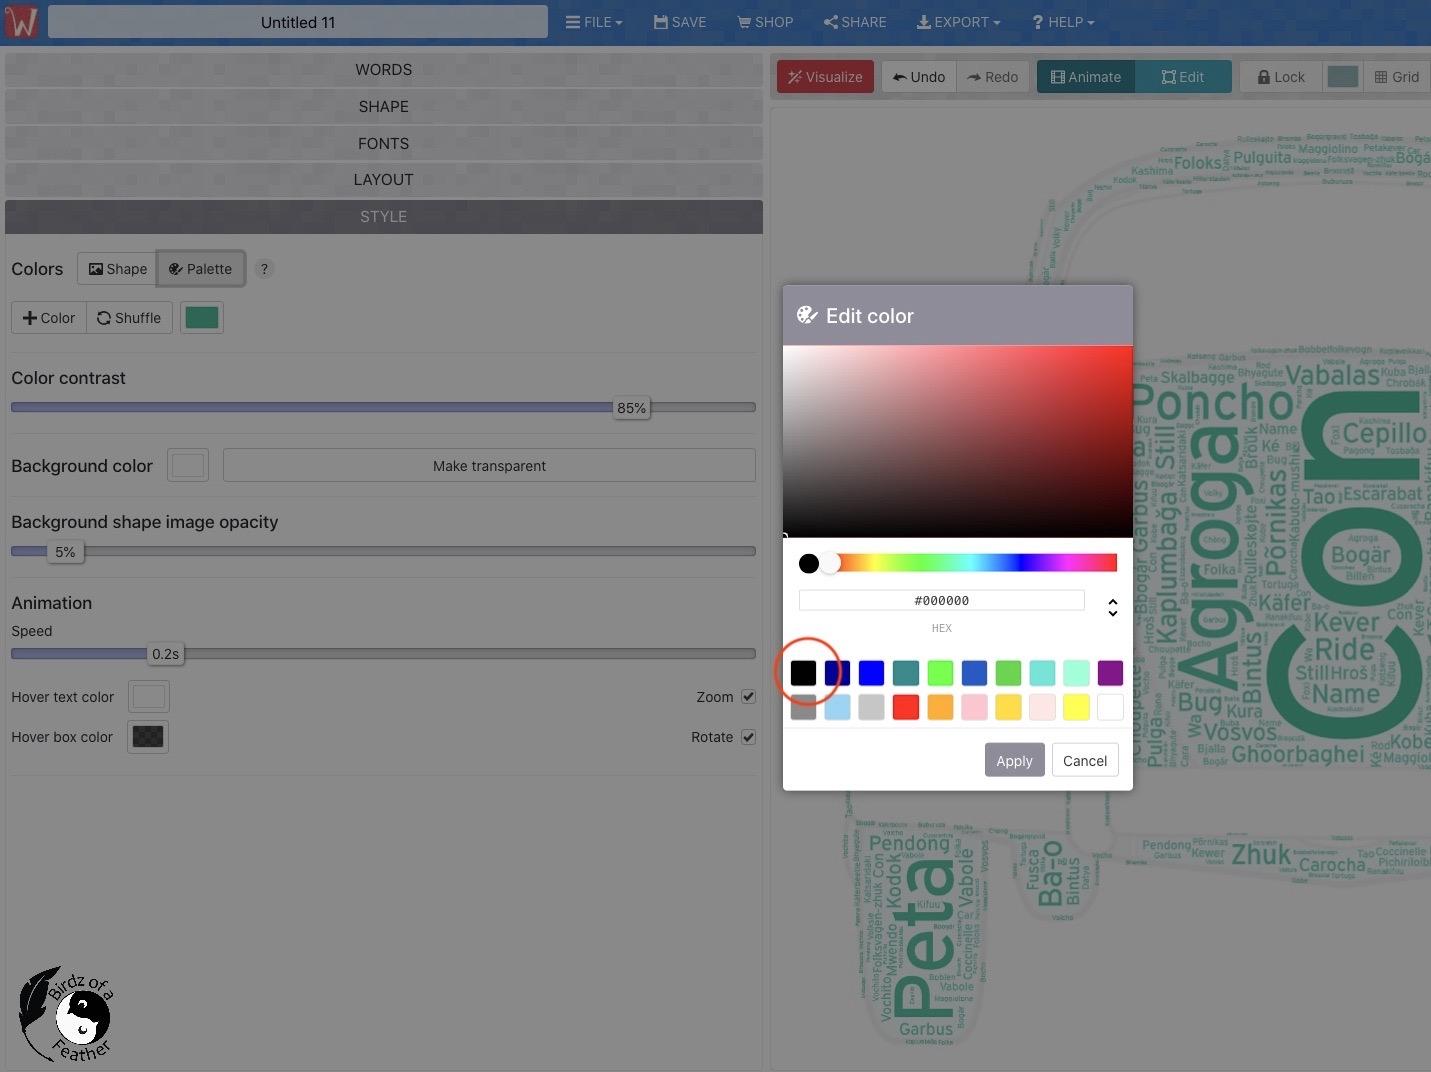
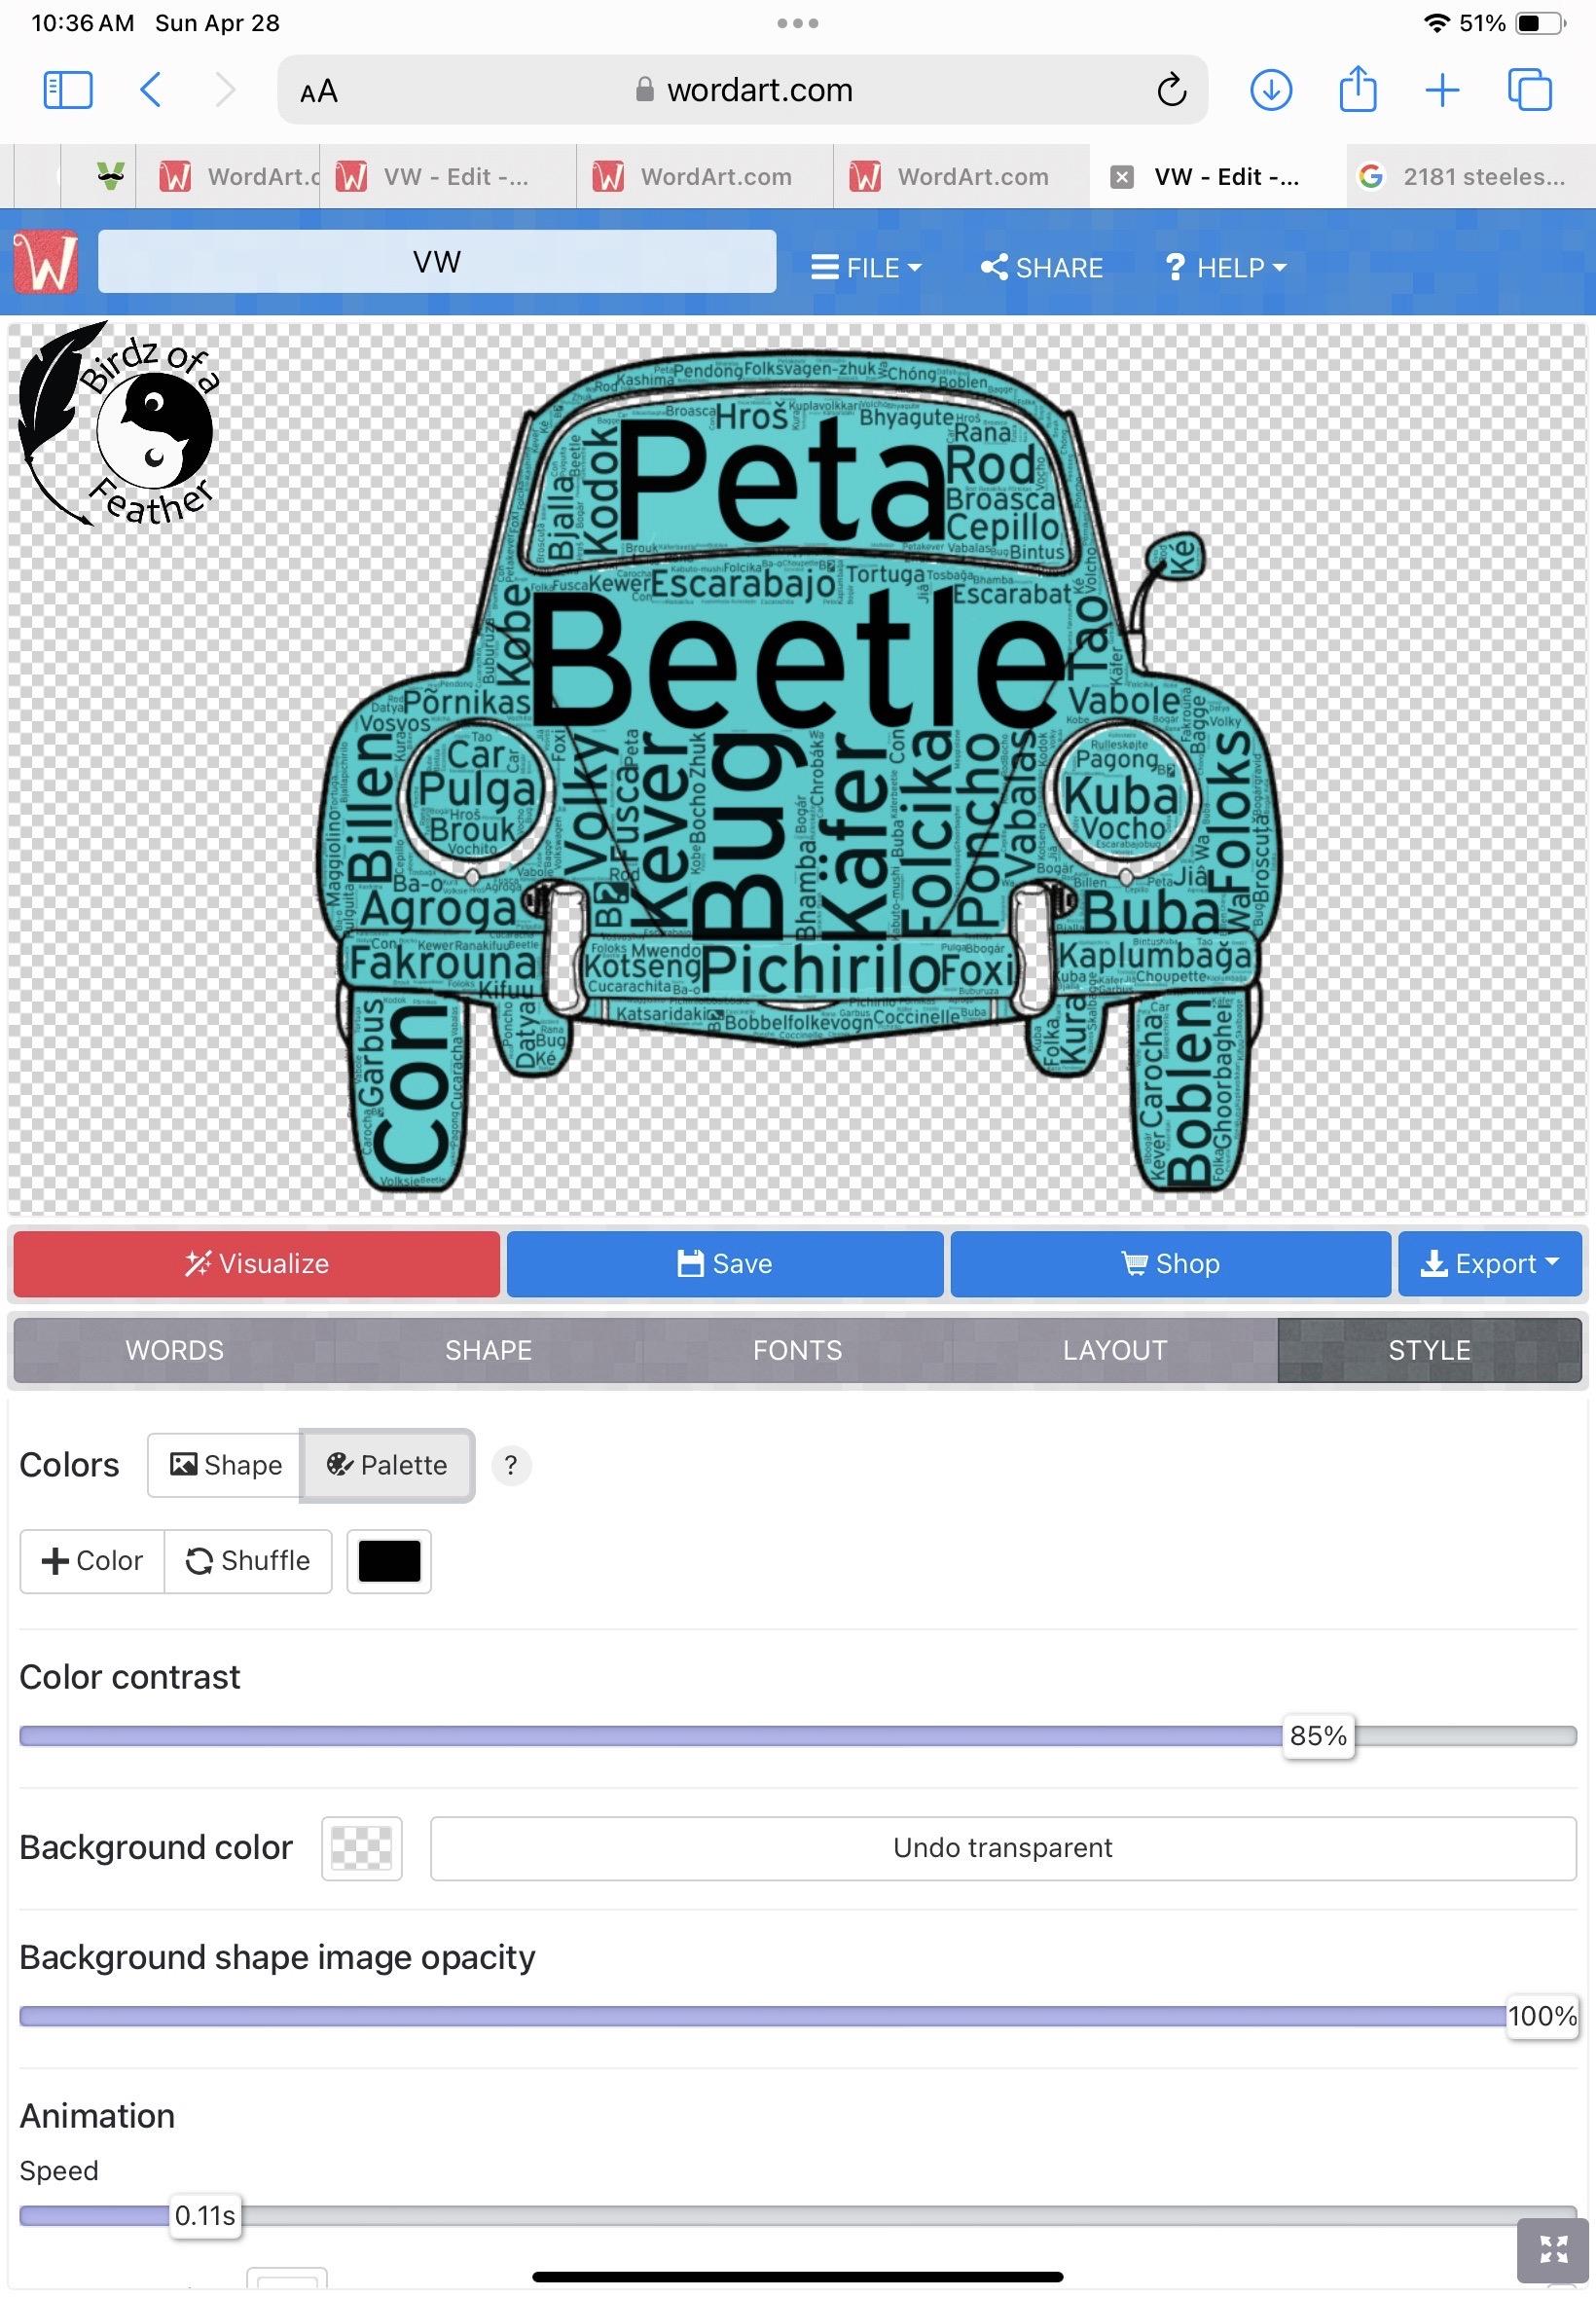
Next, you can choose the style. For my wordart, I don’t want a background so I choose transparent. I also want it just black and white. So click on palette and deselect all the colours that appear. Change the last colour block to black.
Opacity and Contrast
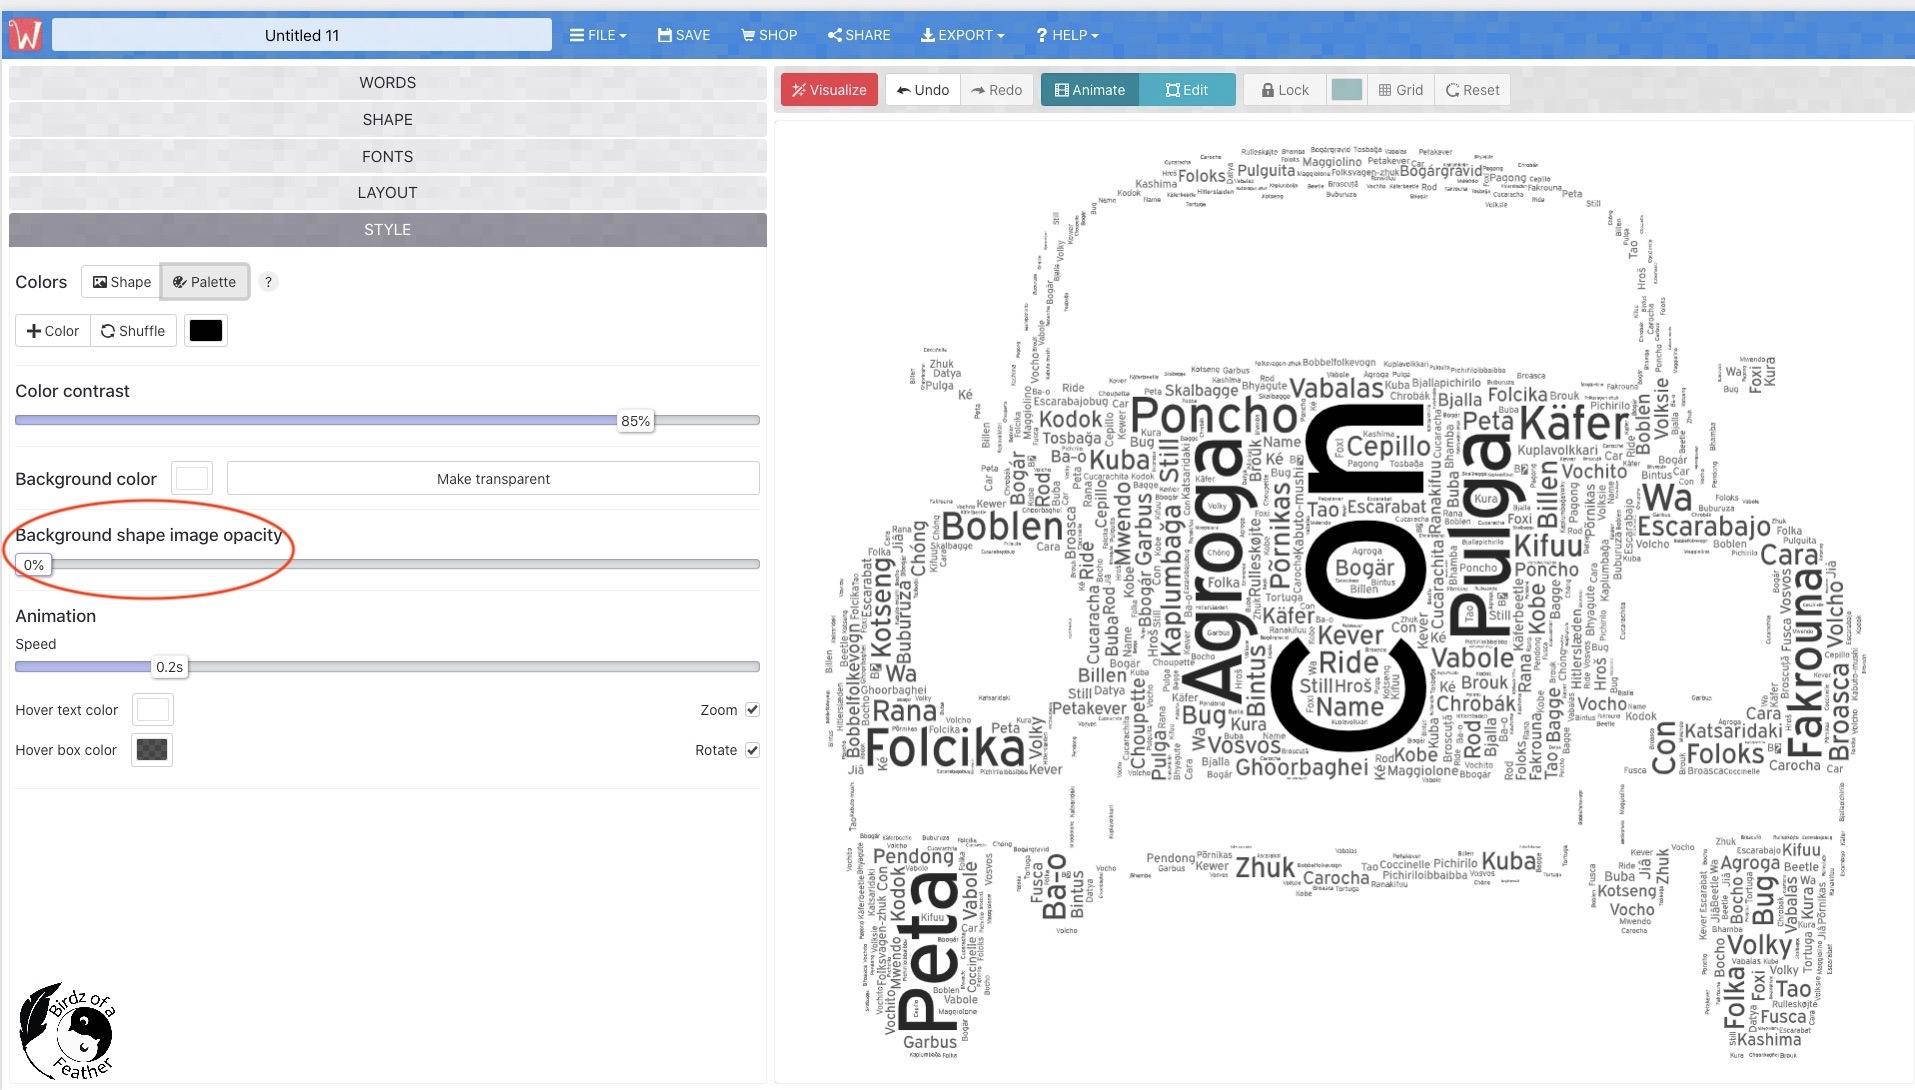

Lastly, I don’t want any part of the original artwork to show through, so I bring the opacity down to zero. That leaves me with just the words forming the shape of the car.
Notice that there are no words where I left blank spots.
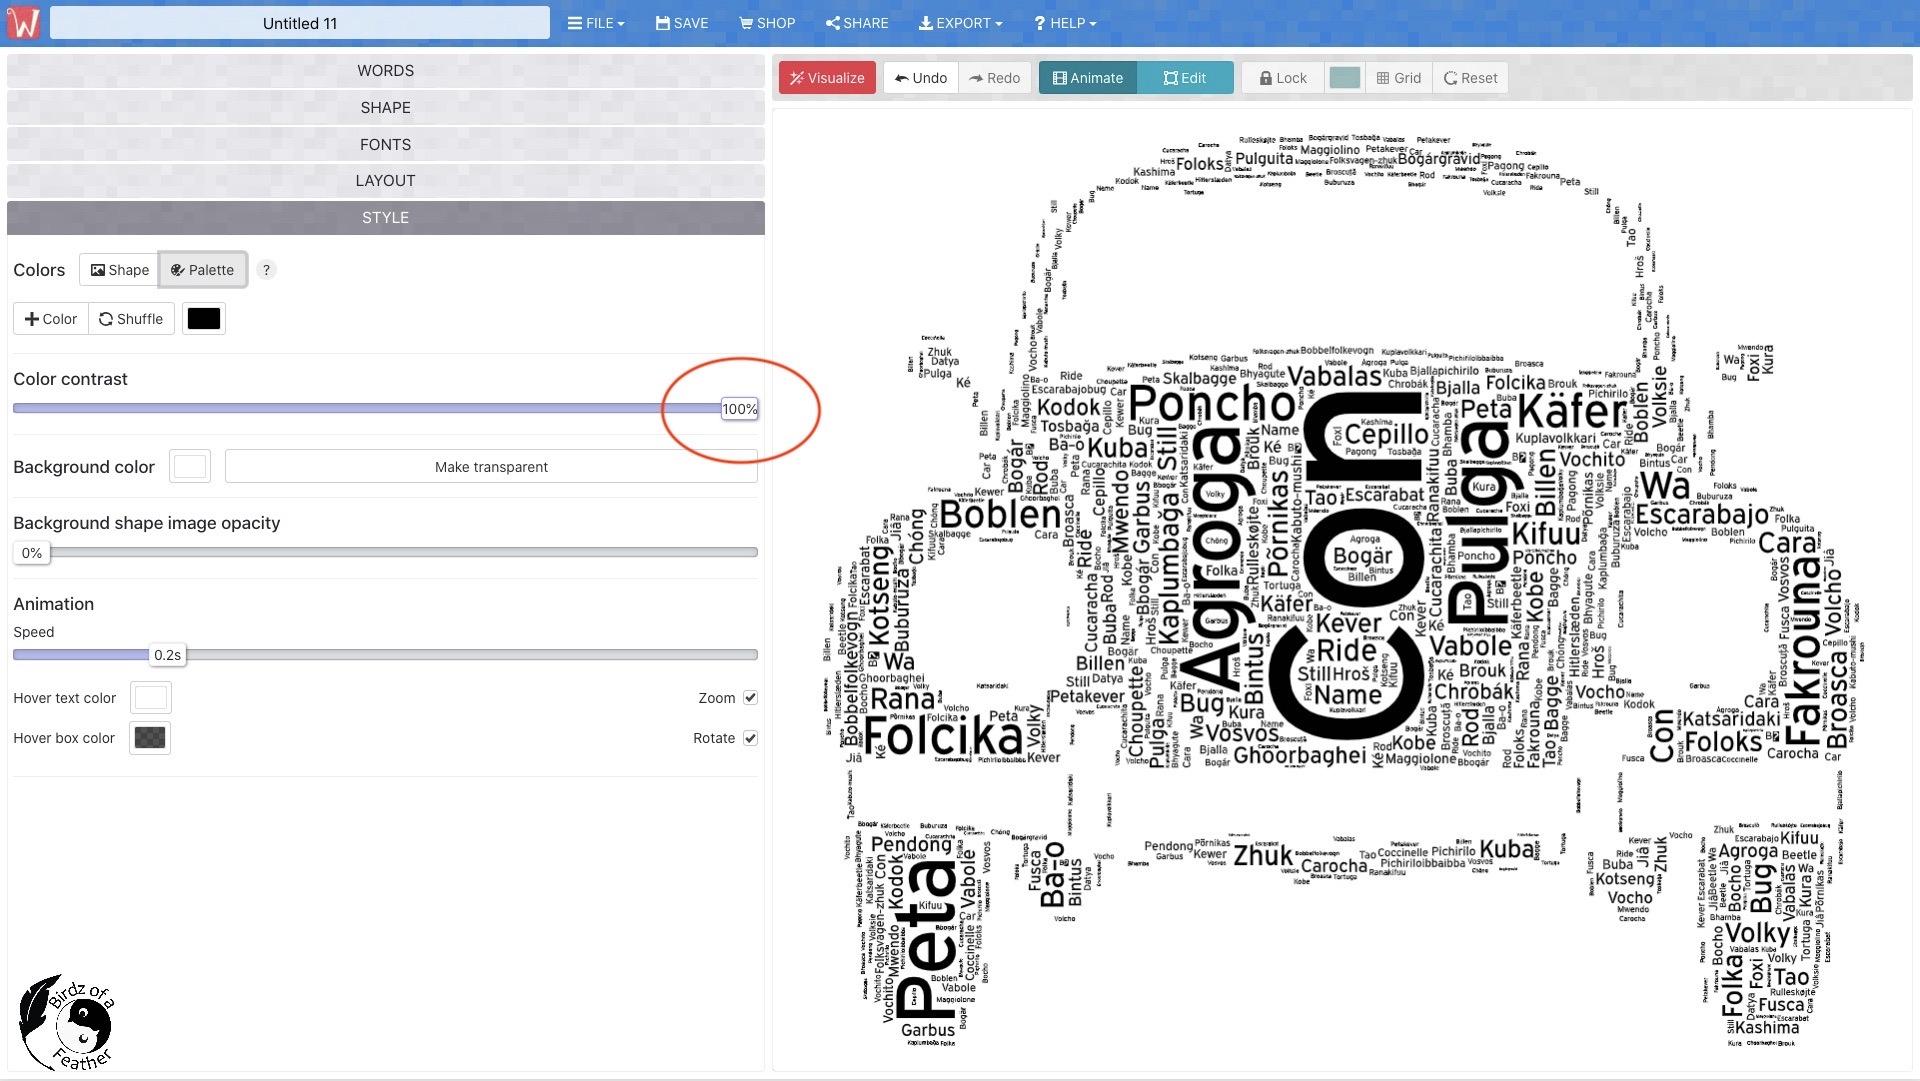
If you just wanted to print this, you could play around with the colour contrast. Because this will be laser printed, I want as much contrast as possible; 100%.
Keep in mind that every time you upload revised artwork that you have to click on the ‘Visualize’ button to update it.
I played around with moving the position of a few words on the list. That will juggle the horizontal and vertical positioning around. So if you like a version, save it before doing this. You can also undo and go back it you don’t like how it looks.
In the end, I wanted to see ‘I do not like them in a car’ prominently, so back in Procreate I coloured in the front window and reimported the drawing.
After ‘visualiizing’ again, that leaves just the back window free of words.
Engraving Your Design on a Laser
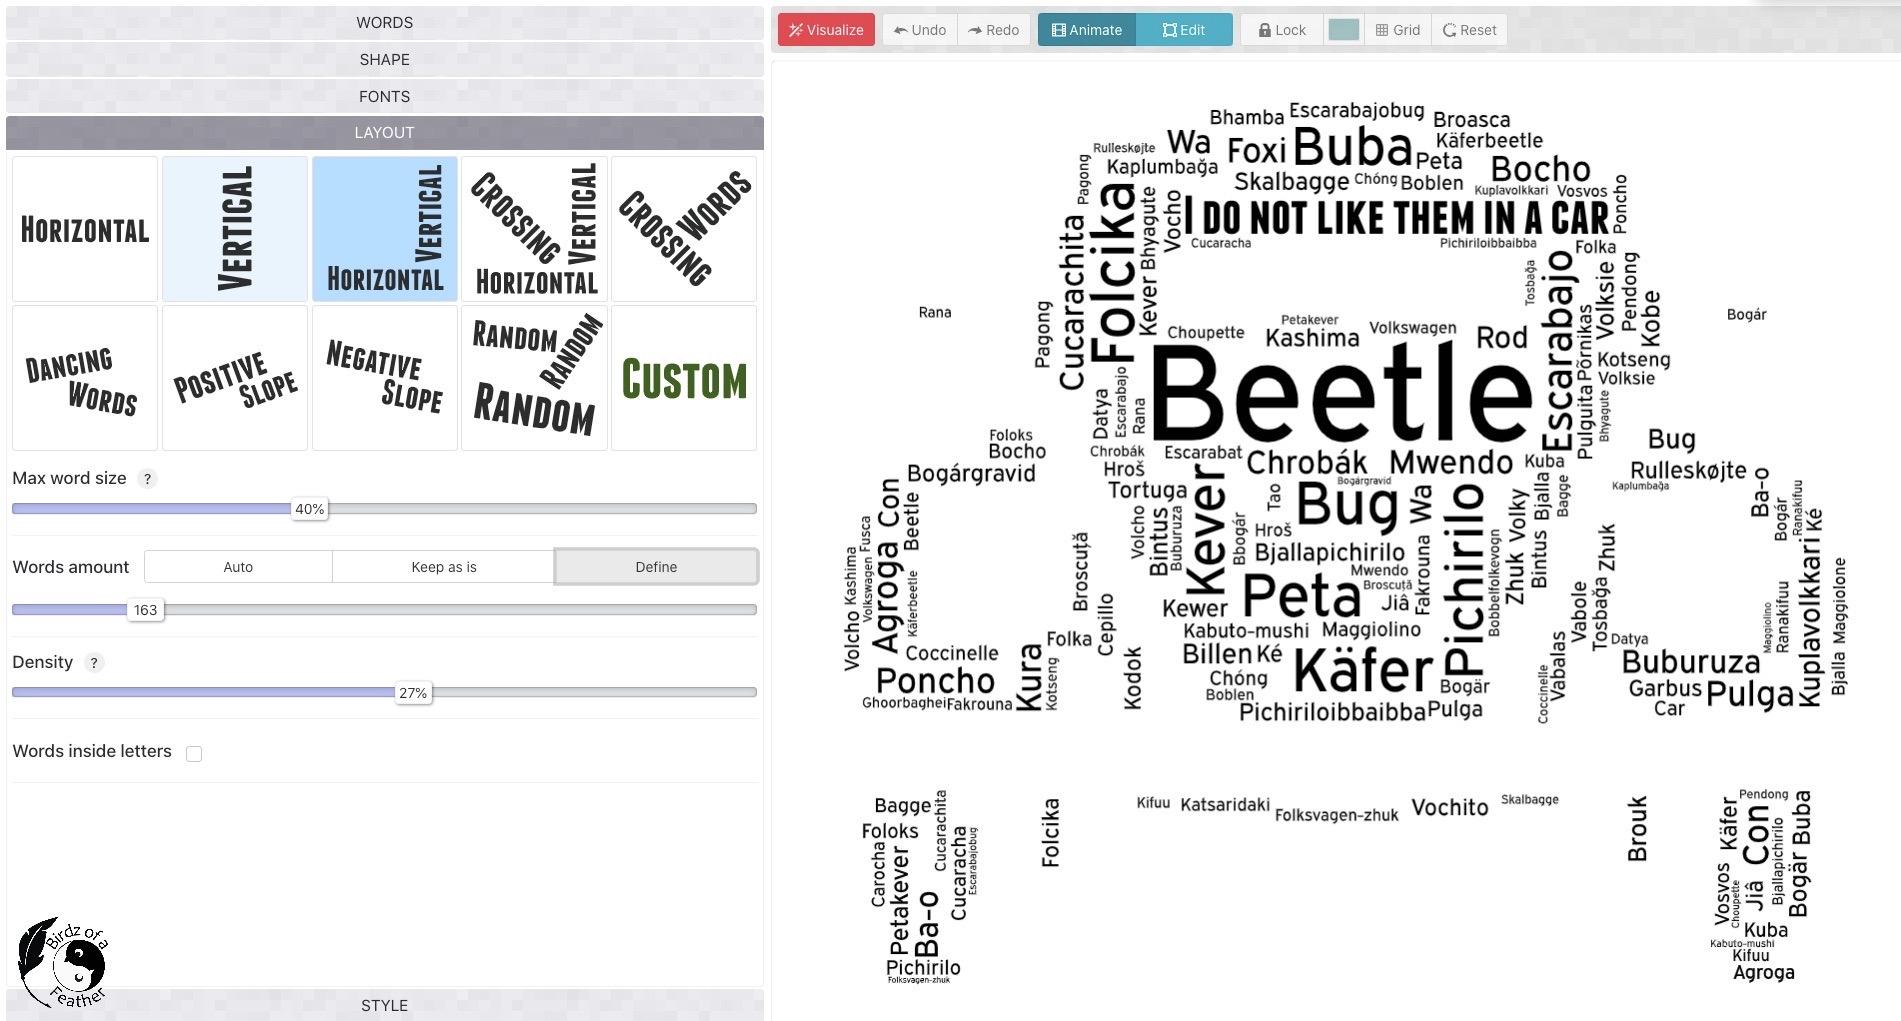
When I was about to engrave the design, I realized just how long my design would take to process, so I went back to the drawing board and drastically reduced the word count. I went from 800 words as you see above, to 163. I also changed the density slider to 27% to create more breathing room between the words.
No matter how many times I visualized the beetle, I still couldn’t quite get the detail to my liking (for instance, the side mirrors). So I did joush it up in Illustrator to add some of the detail around the mirrors and bumpers back in, as you’ll see in the final reveal.
Measure the Material
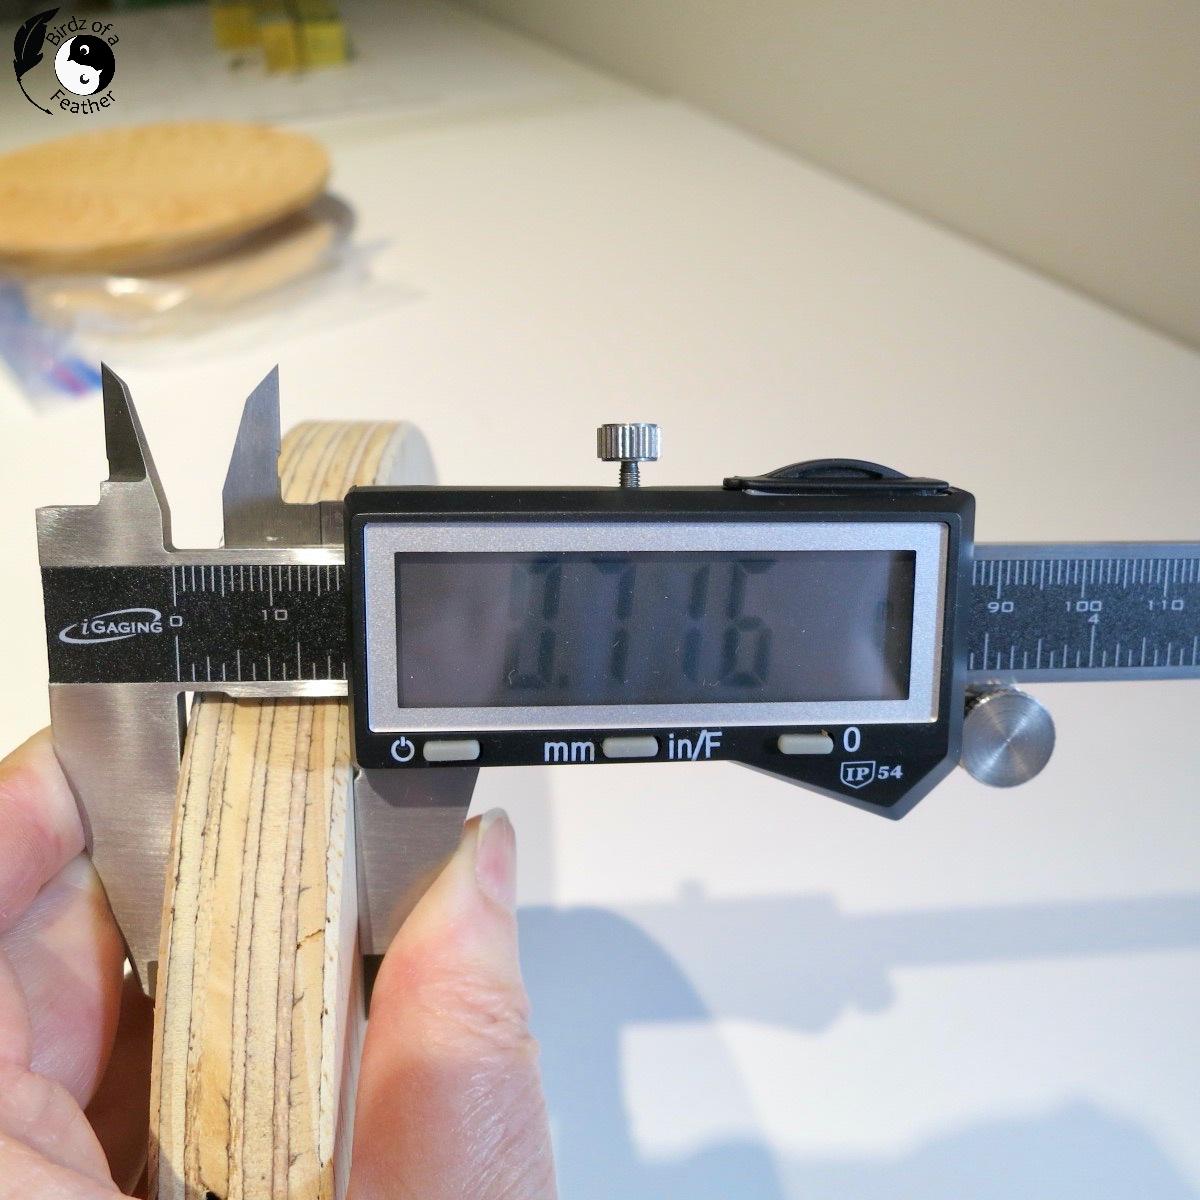
It’s important to have an accurate measurement of your material, in this case an upcycled wood round. I don’t find the xTool’s aimed measure to be accurate (perhaps it has something to do with the height of the honeycomb). So the best thing you can do is purchase digital calipers to measure your materials and enter the number manually.
Test First
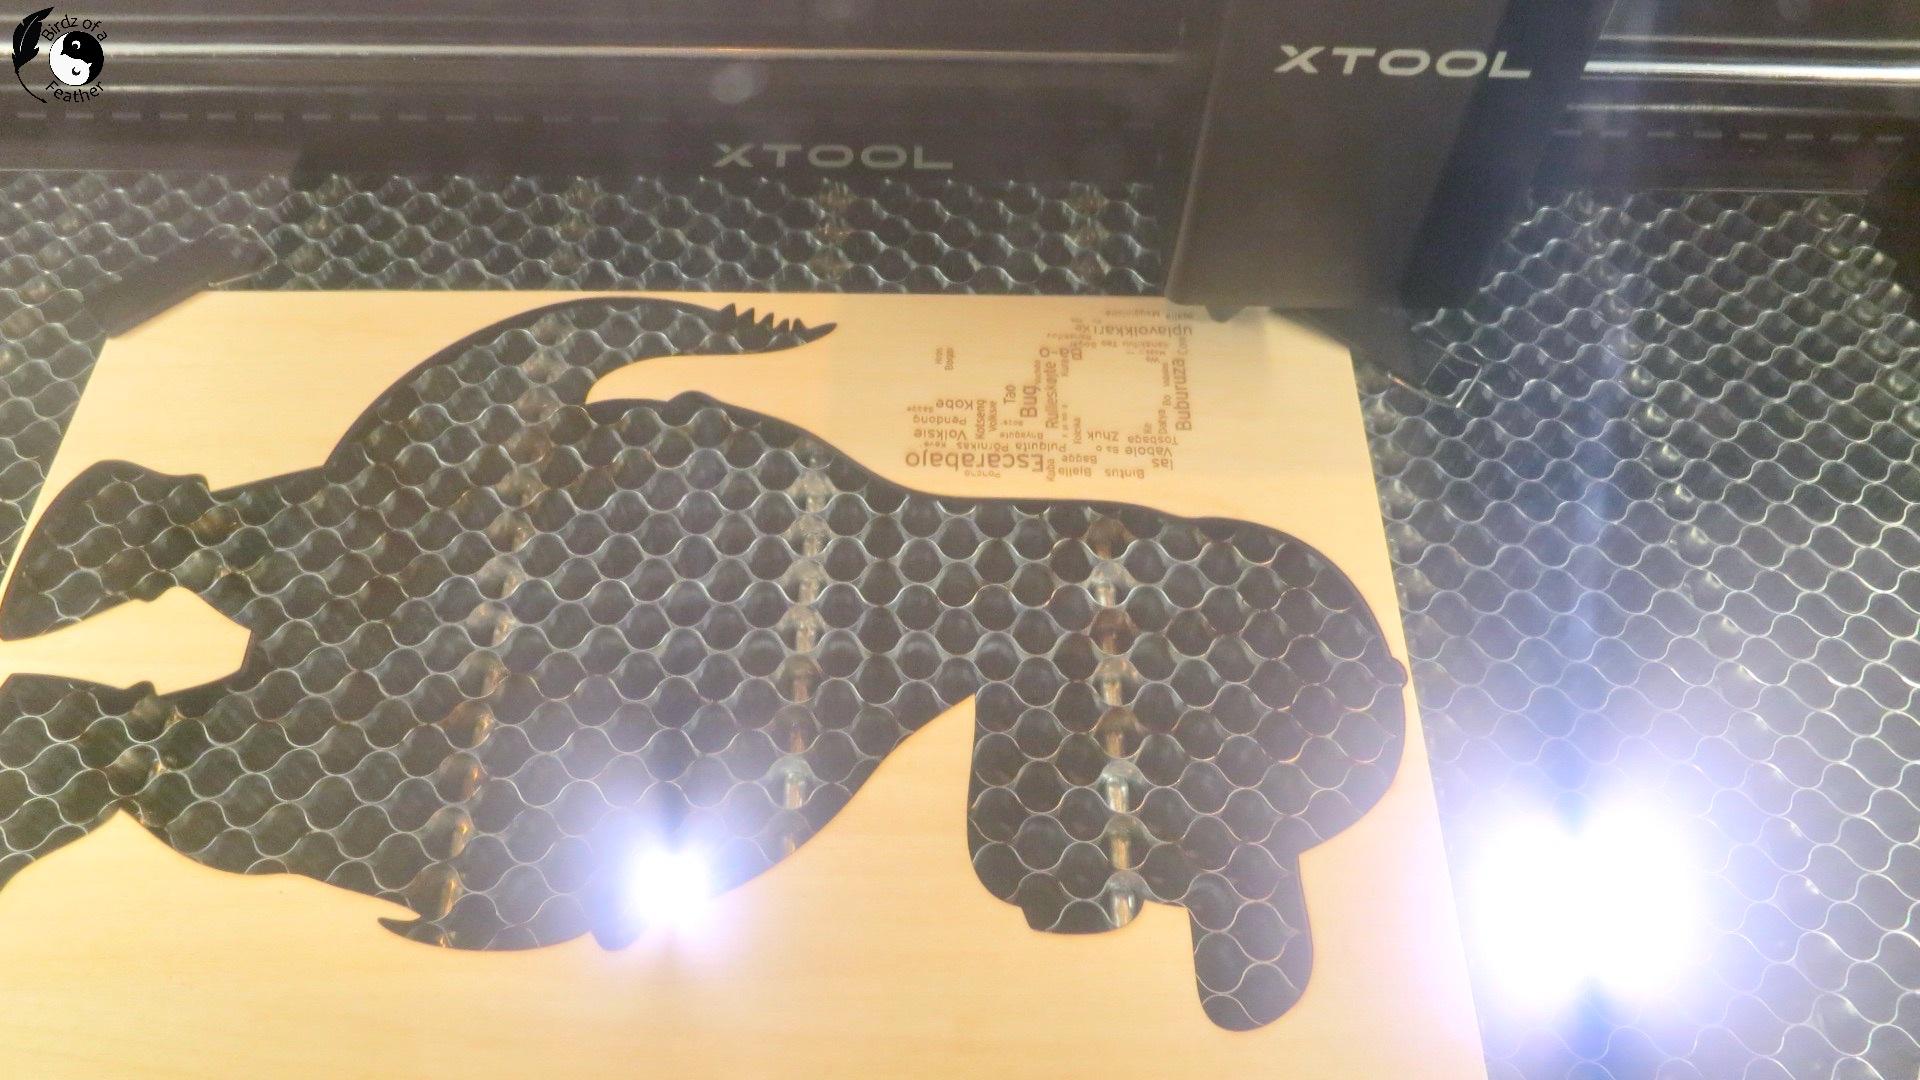
Time to fire up the xTool P2 laser! Before engraving the actual material, I did a test run on a scrap of wood. This is left over from our Dinosaur Wall Art.
It took quite a long time to process just this little sample. But I was more curious to find out if the xTool P2 could handle engraving tiny words and still be legible. And it did not disappoint!
I was amazed to see that my word art design idea was going to work perfectly in the laser machine!
Set Up the File
Here are the steps to set up your file for engraving on the xTool P2 Co2 Laser.
- Import your SVG. Power on your laser device and connect it.
- Move the design onto the canvas.
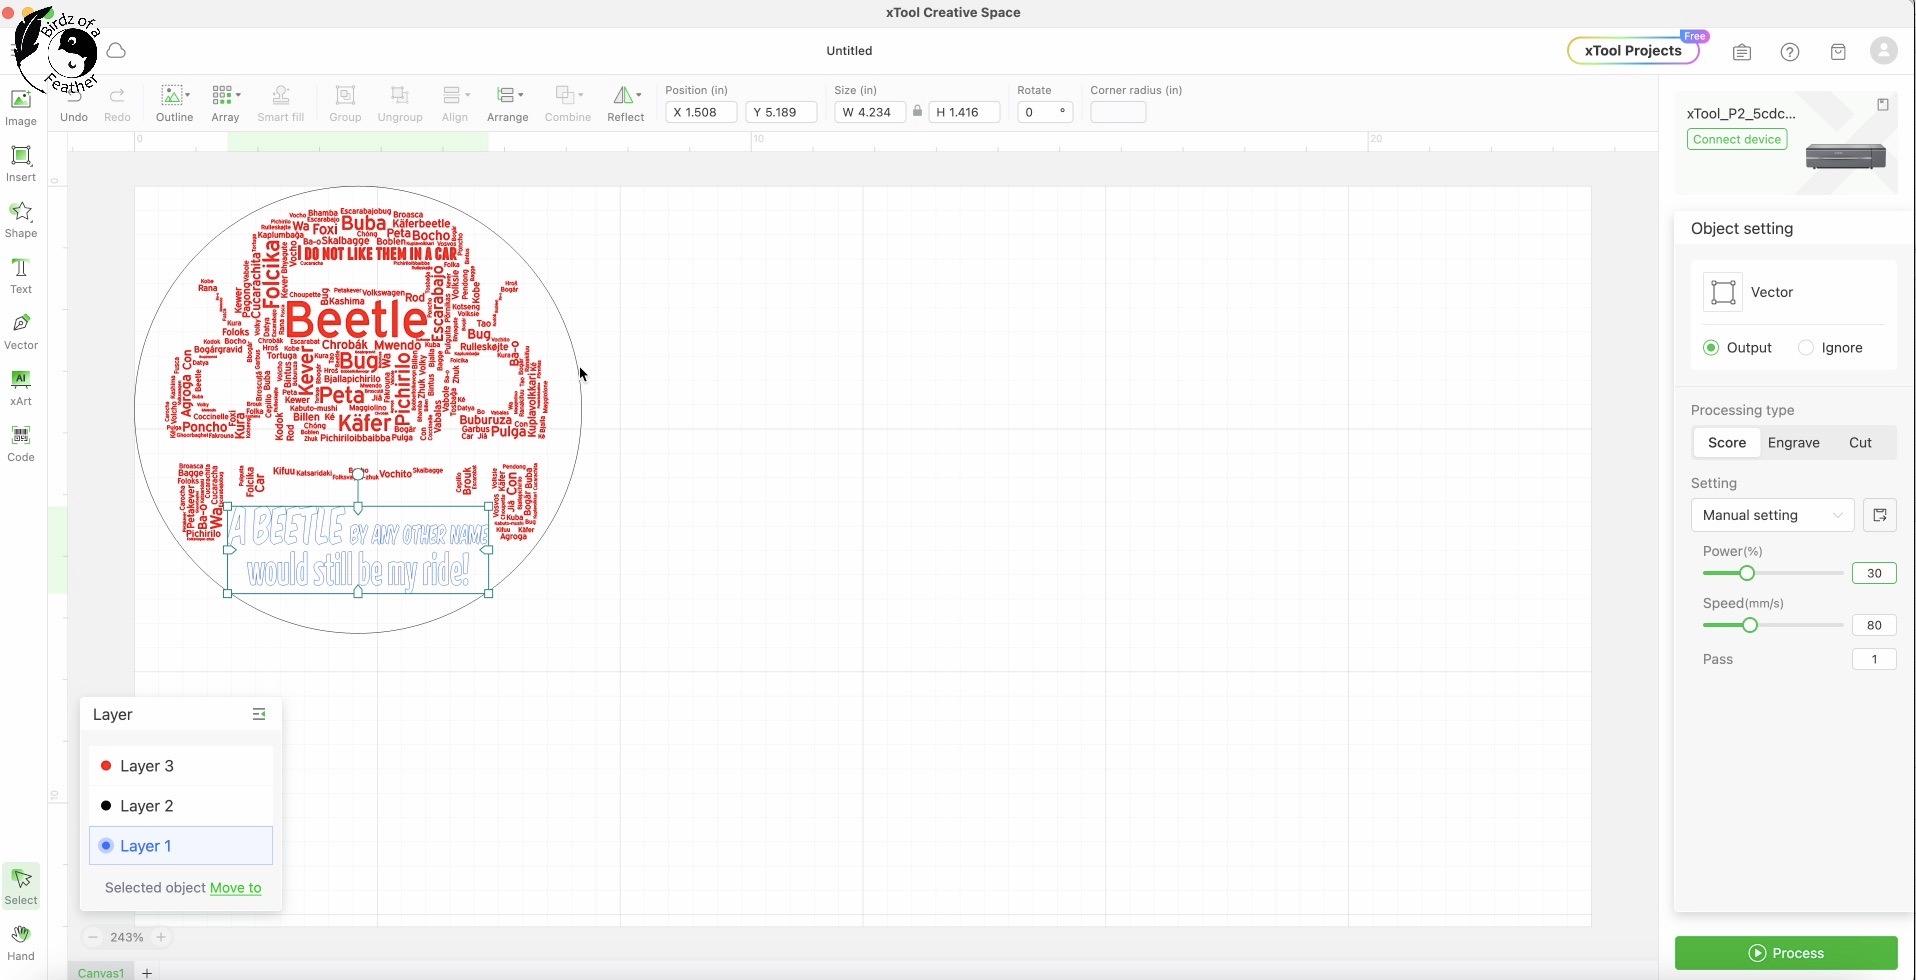
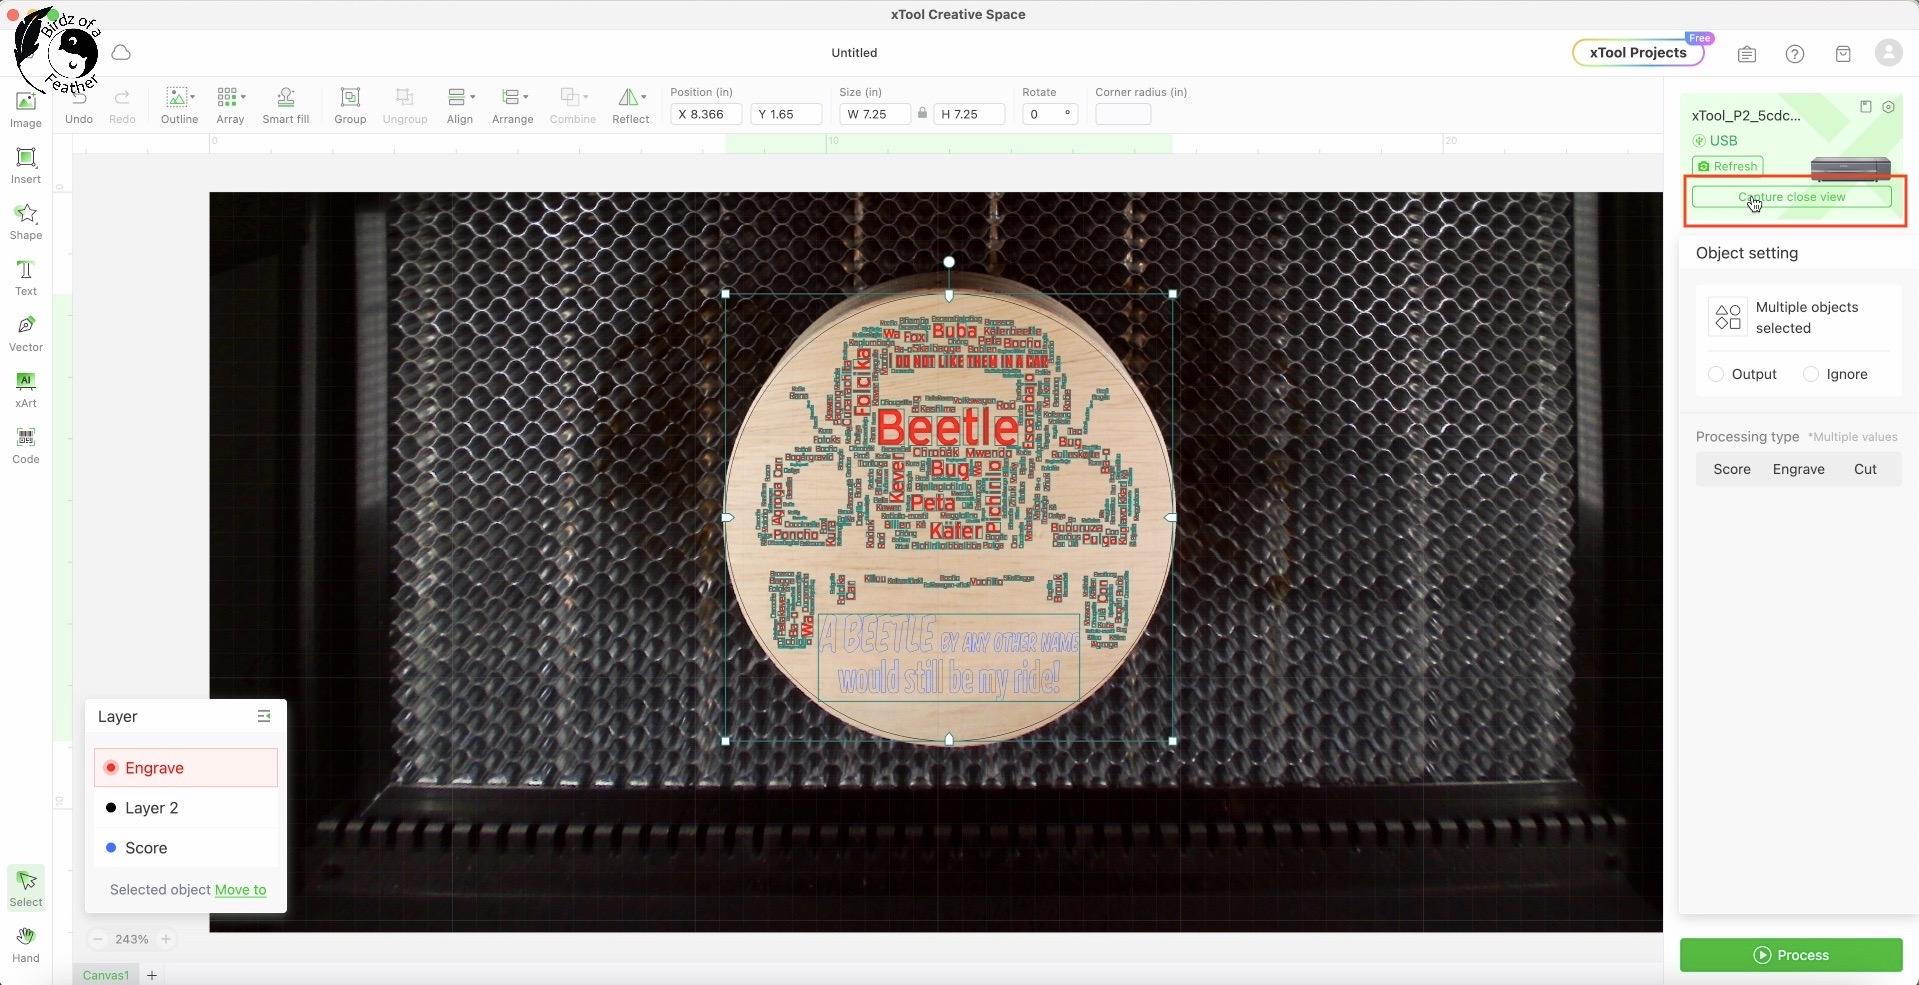
- Click on each colour of the artwork to assign it a function: ‘score’, ‘cut’ or ‘engrave’ setting as appropriate. In my files, red = engrave, blue = score and black = cut. In the next step, you’ll see I also rename the layers in the lower left corner.
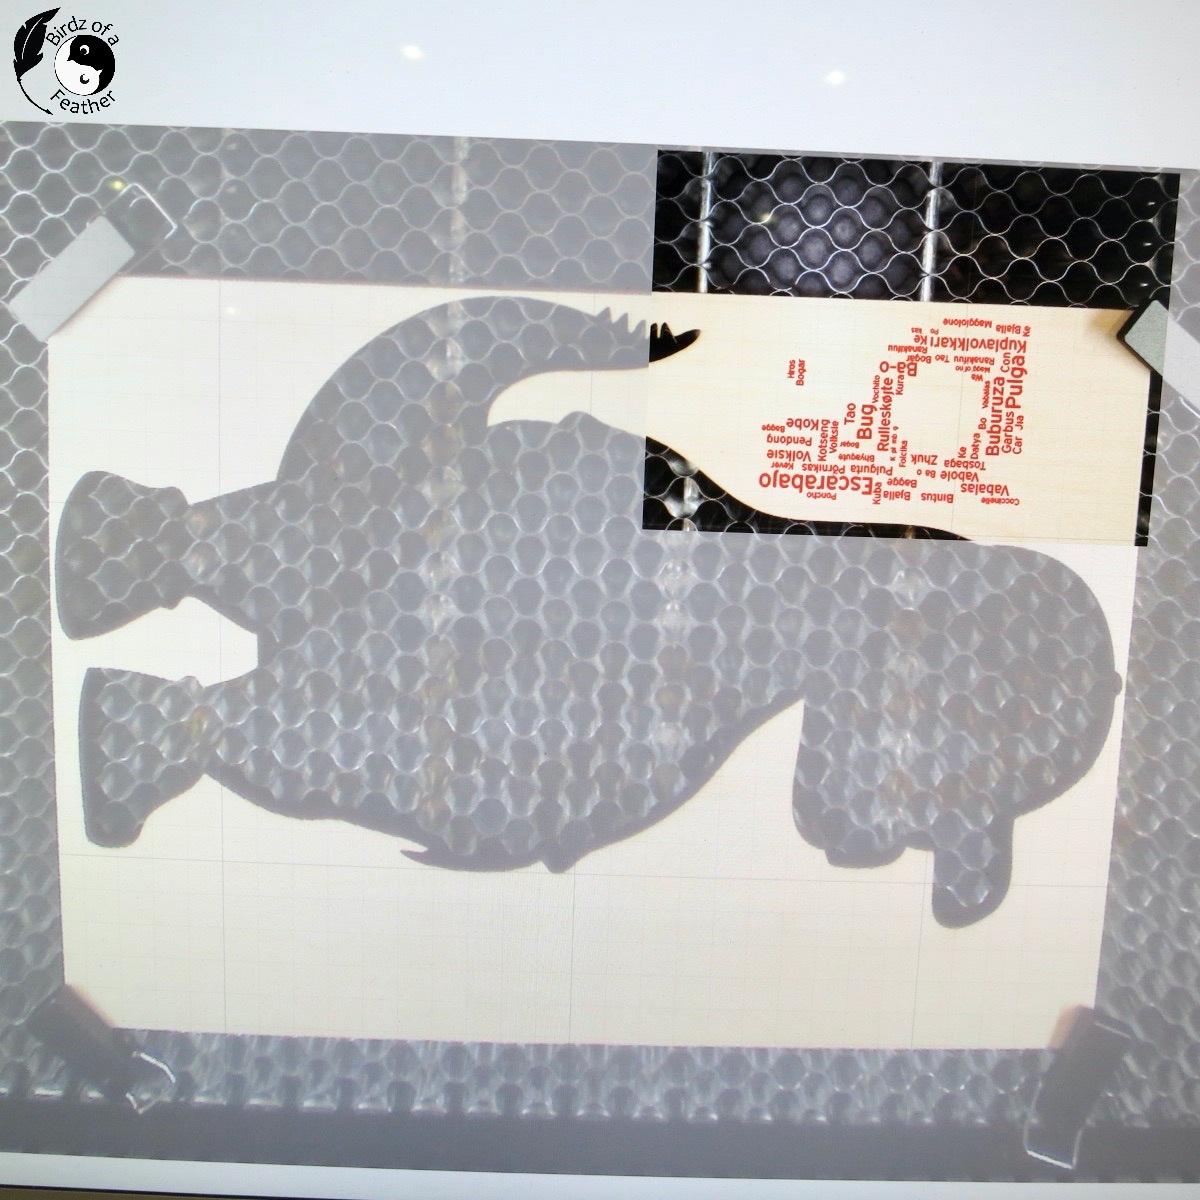
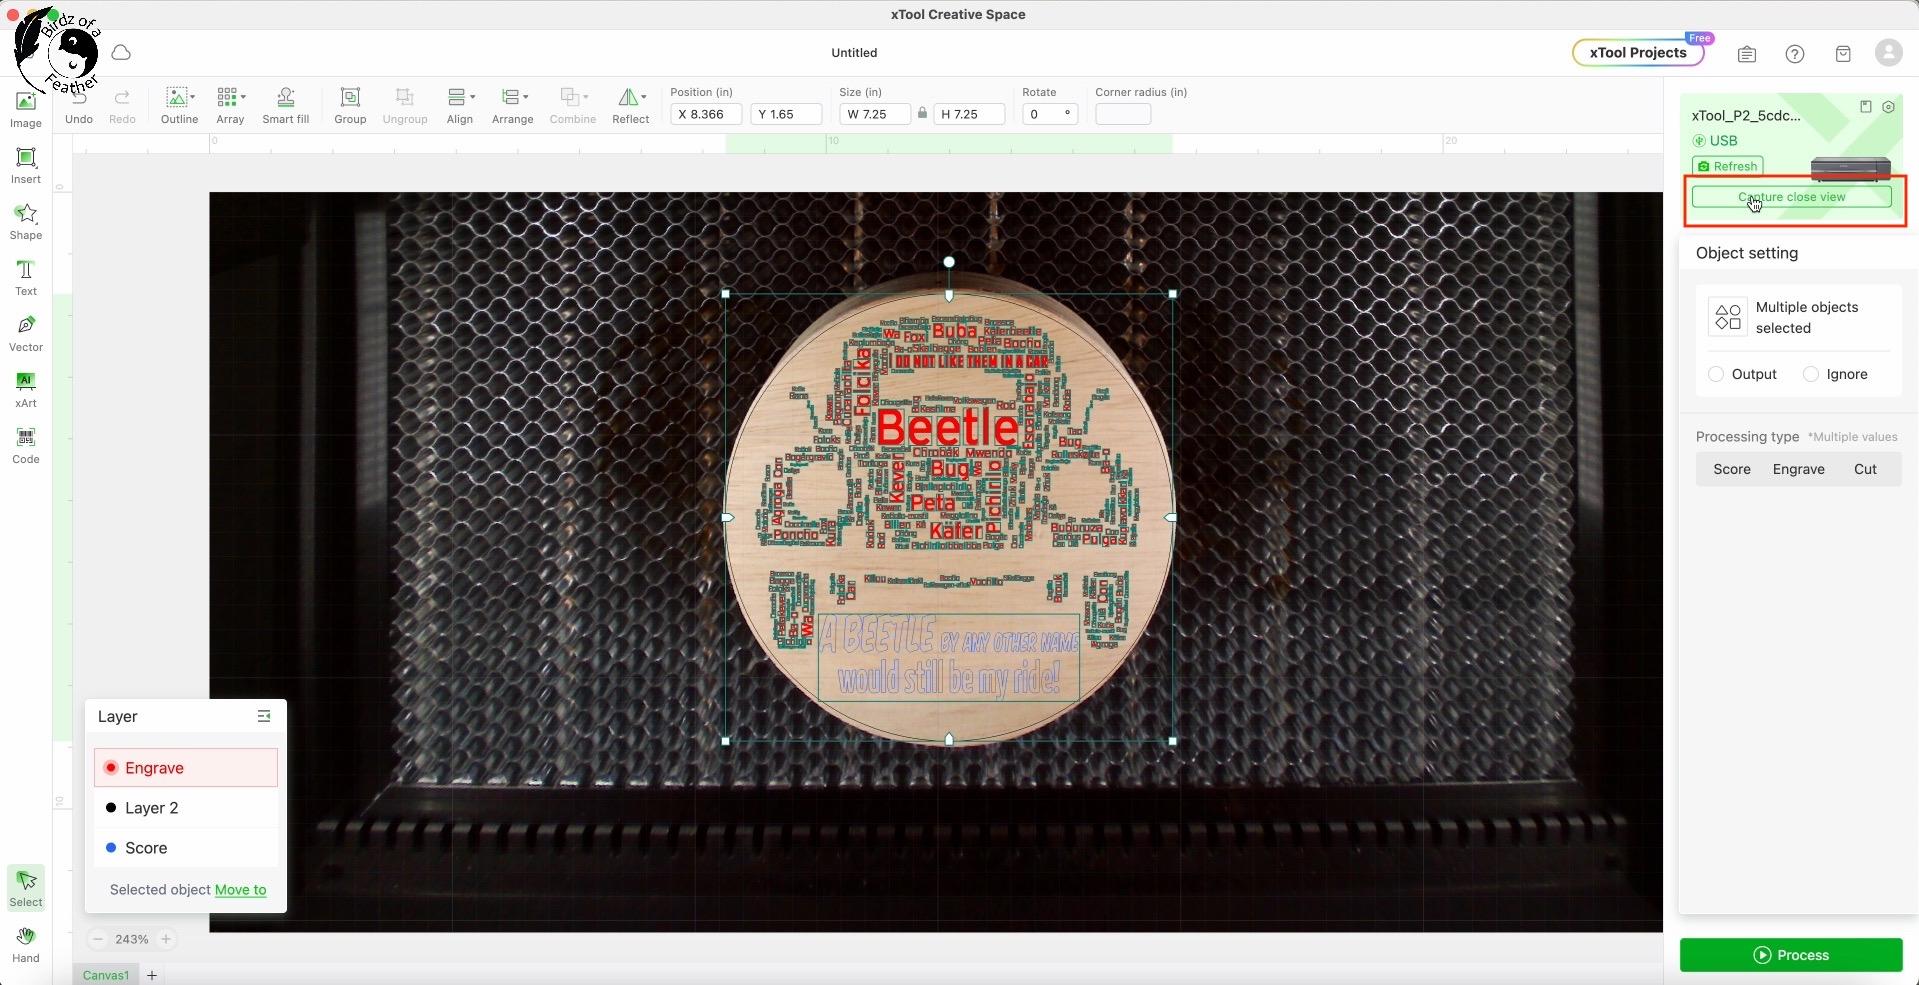
- Capture close view. For now, I still have a black line around the artwork. But because my round is already cut out, I won’t need that (I actually delete it later). However, it WILL be helpful to use that line in conjunction with the close view camera to accurately position the artwork onto the round.
- Enter the settings for each function. For score, I’m choosing to use 20/100/1. For engrave, I choose 10/100/1. I rename the layer names to reflect the function (instead of layer 1 and layer 2).
You can see the highlight of the close view camera in the lower right corner in this screenshot. Zoom in by holding the control key and swiping the mouse so see the fine detail that will help you position your artwork.
Measure Twice, Laser Once
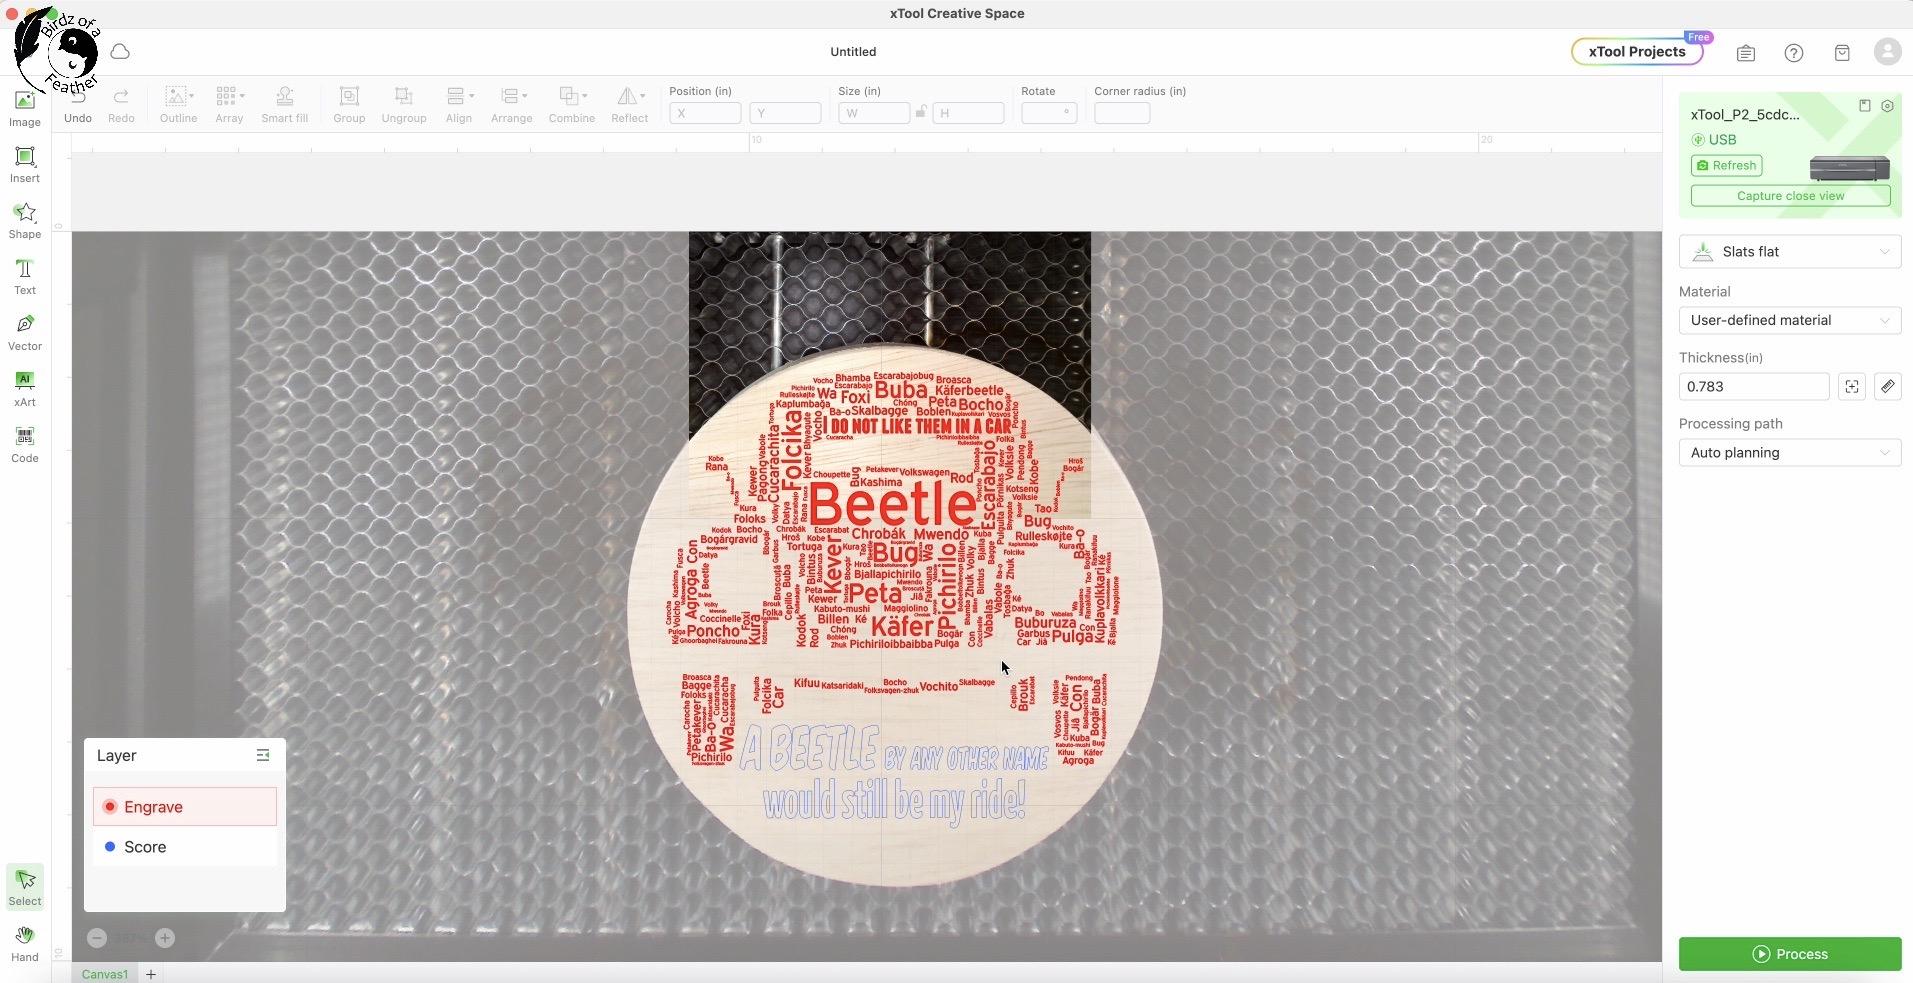
6. Now, type in the thickness of the material. As I mentioned before, the aimed measure isn’t very accurate. It calculates the thickness at .783.
However, the digital calipers measured the thickness at .716. So I opt to enter it manually.
7. Hit process.
When you’re happy with everything click the green process button. Click process in the next screen and press the start button on the xTool P2 laser.
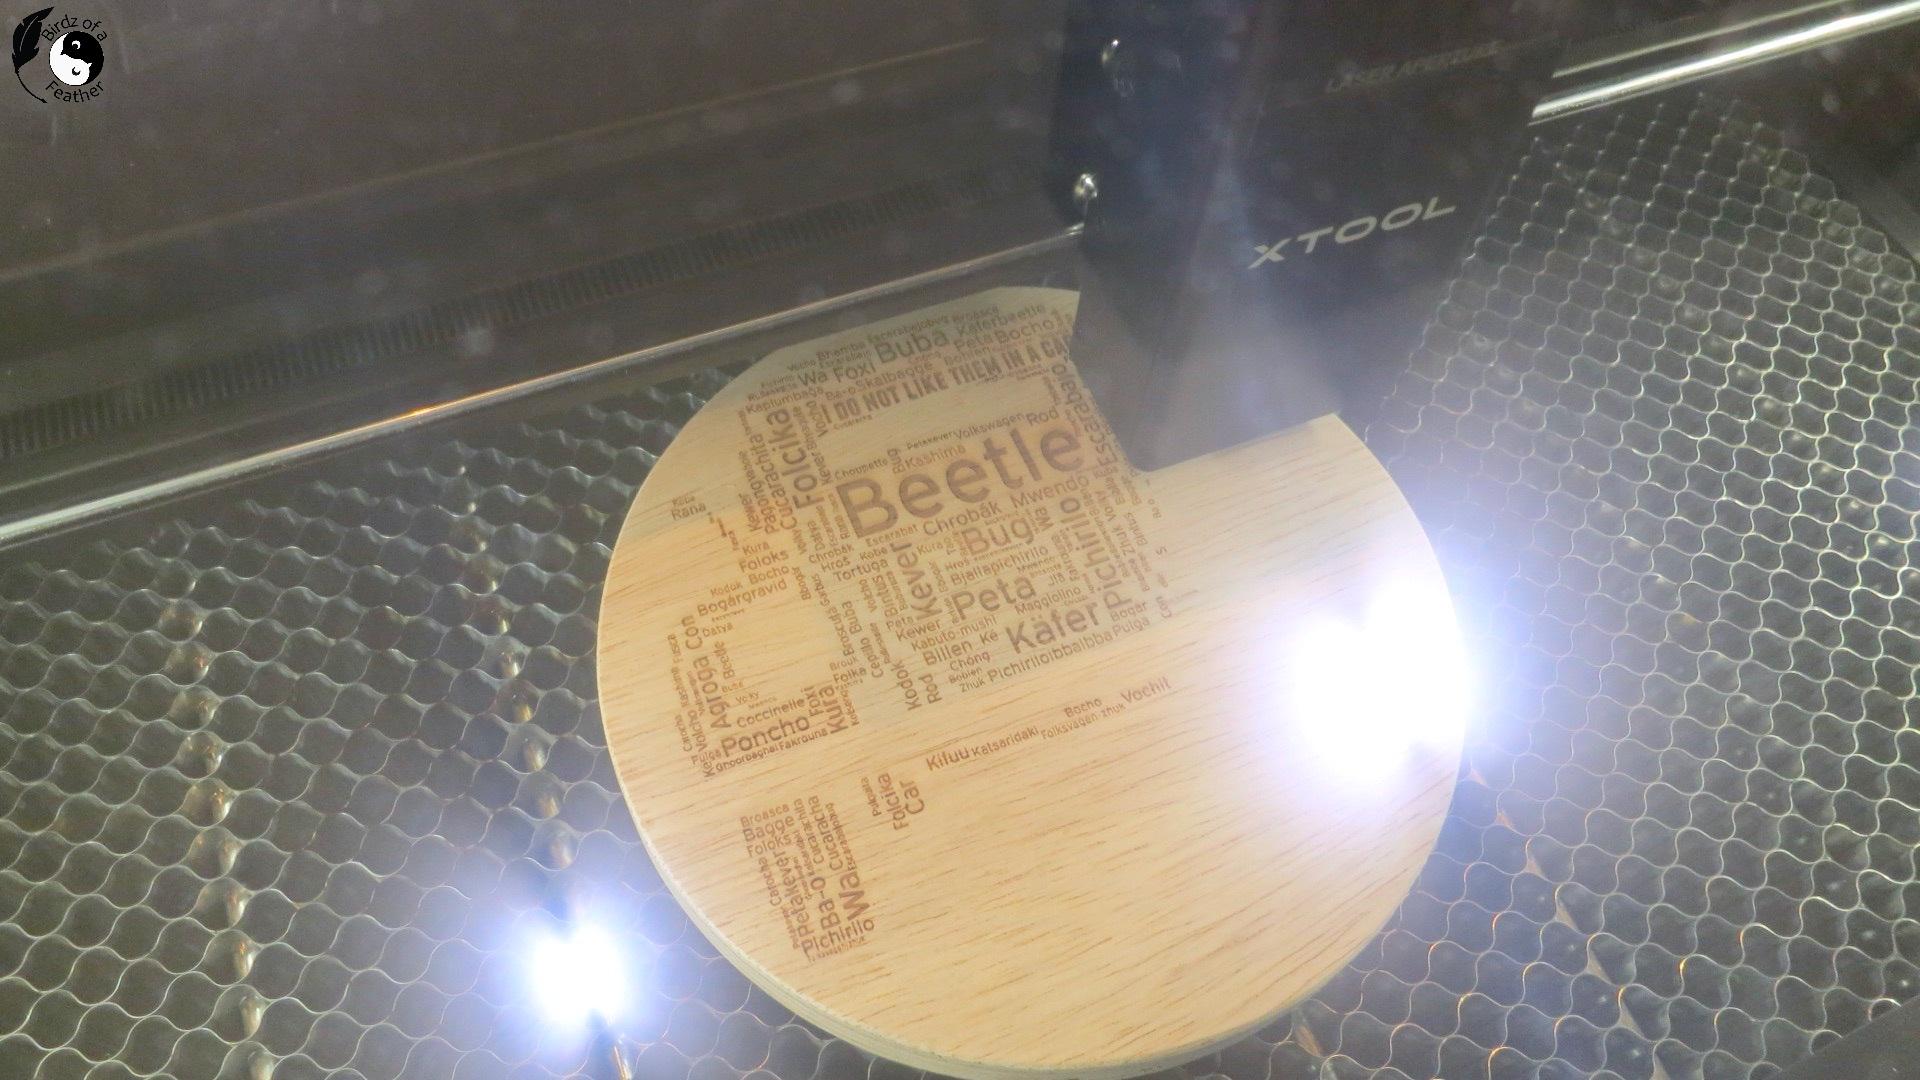
Don’t you just love it when your artwork engraves just as you imagined!
After Processing
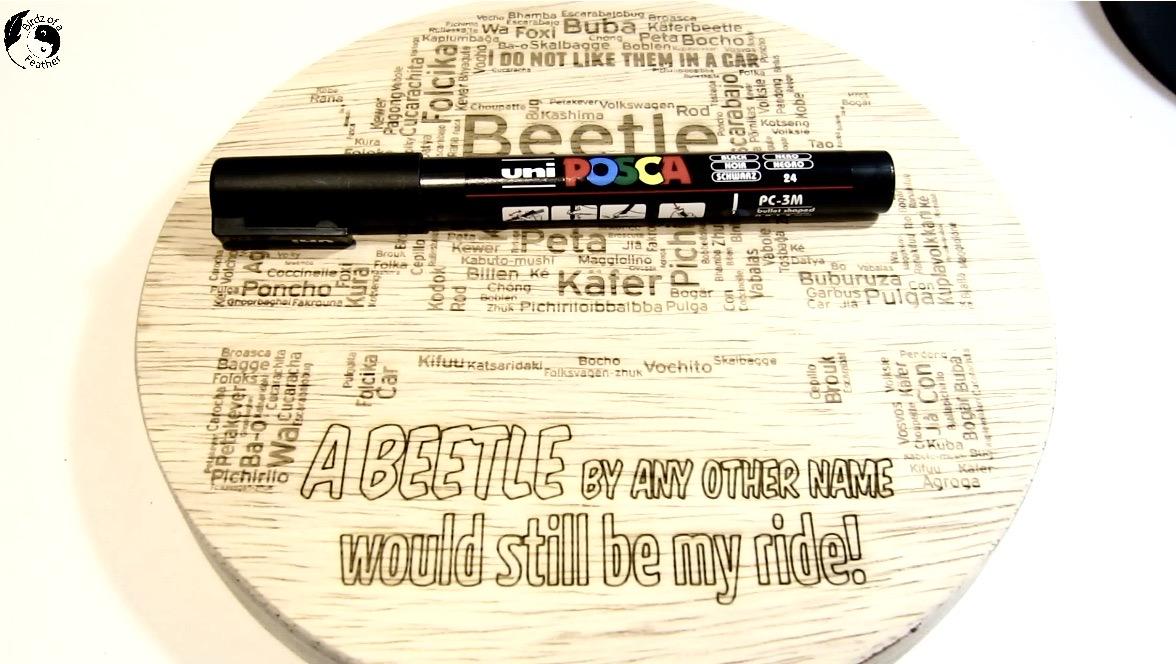
Once the processing is done on the xTool P2 laser (this took 1 hour, 45 minutes!), I’ll colour in the wording with a black Posca Paint Pen. Other option would be to cut out the phrase in black acrylic, but working with cast acrylic is a post for another time! Then seal with a clear water-based lacquer.
You know how we love to upcycle. However, for a project like this, it’s better to use a wood with less grain so it doesn’t compete with the graphic.
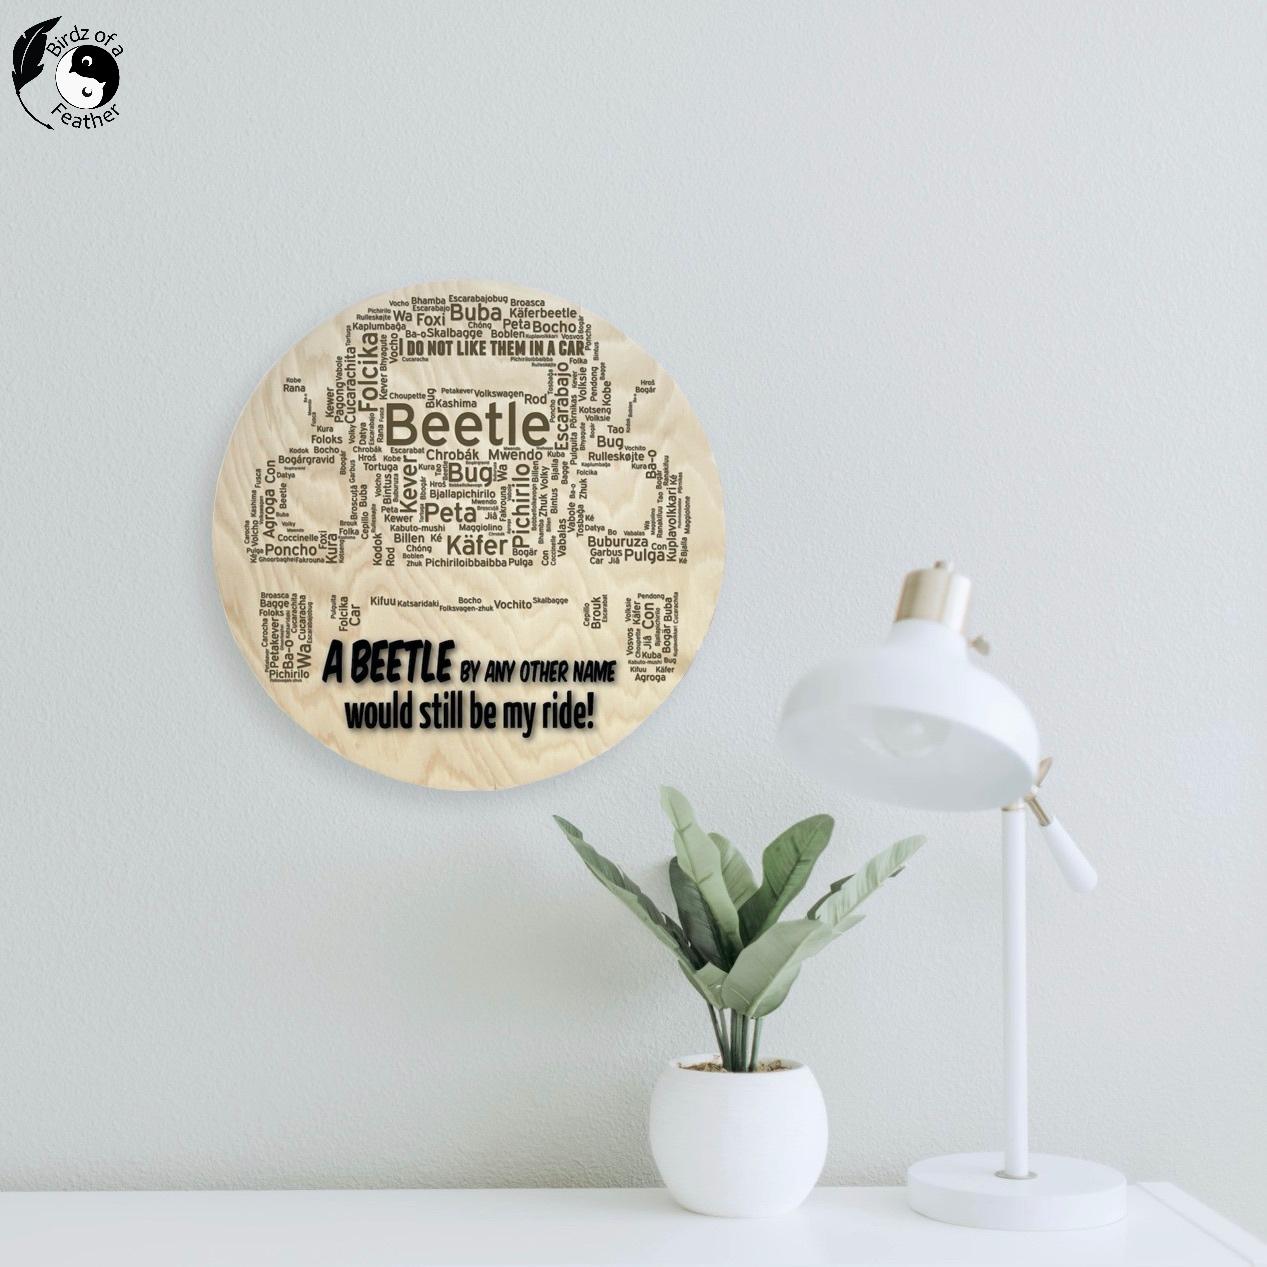
Designing With Text Reveal
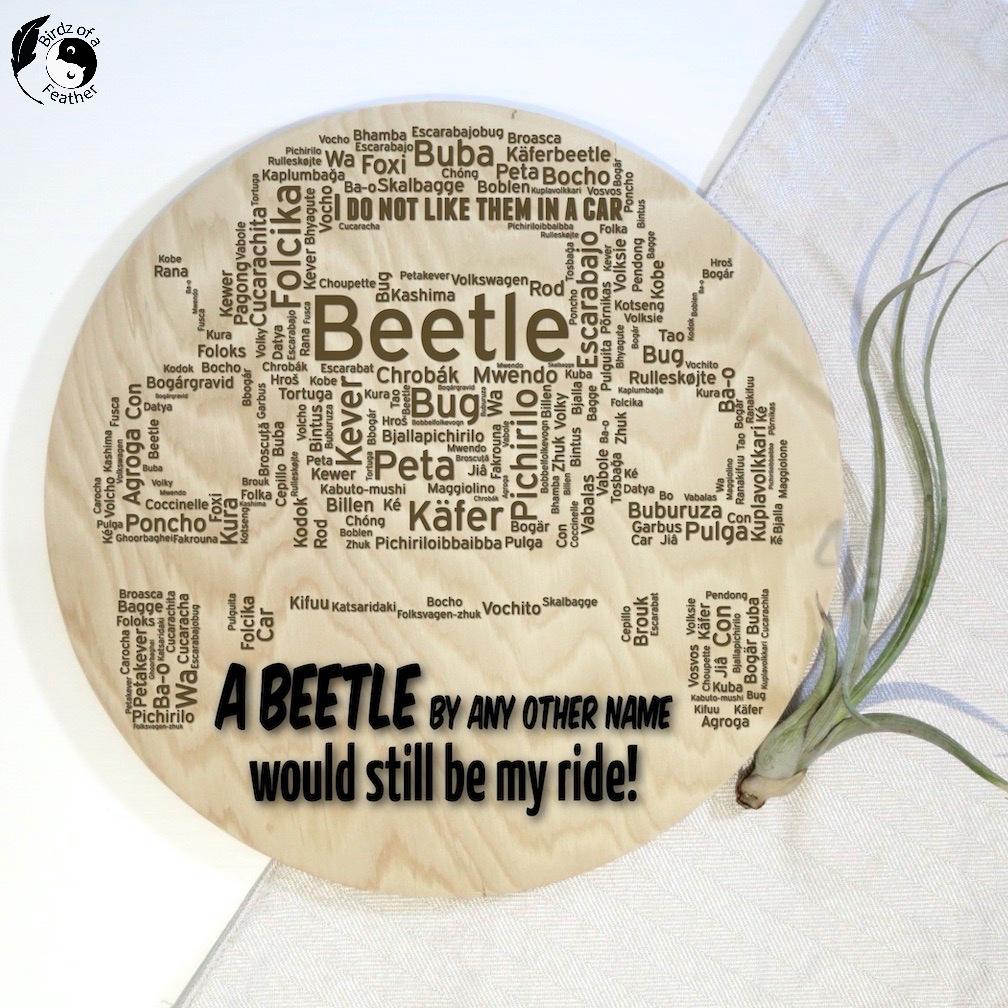
Working with text produces such a cool effect – especially when it’s laser engraved on wood! I love this piece almost as much as the inspiration behind it!
Do you have a favourite car you’d like to capture in word art? Leave us a comment and let us know!
If you're just getting into laser craft, check out our other projects! And if you like to learn new skills, don’t forget to get your craft mojo on at Birdz of a Feather and subscribe! You can also follow us on Pinterest, Facebook, YouTube and Instagram.

Fall Into Fabulous
One of the things I love most about blogging is connecting with other makers, and this Fall we’ve created something truly inspiring together.
Grab 16 digital goodies from top creators — planners, recipes, colouring books & more — including our Beginner Crochet e-Book!
Every dollar of our commission goes straight to Alzheimer’s research — a cause close to our hearts. Your purchase through this link means you’re not just treating yourself; you’re making a real difference.
Grab it now — the bundle is only available for a limited time! Let’s make this Fall fabulous and full of hope. 💜