How to Use Sensor21.com for Sensor Monitoring
by mutlu.yaglioglu in Design > Websites
765 Views, 6 Favorites, 0 Comments
How to Use Sensor21.com for Sensor Monitoring
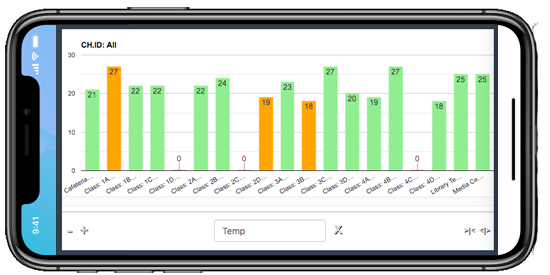
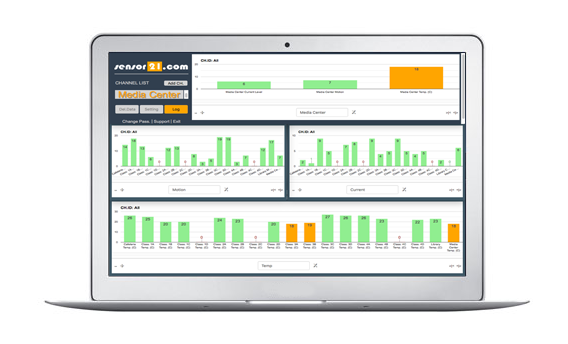
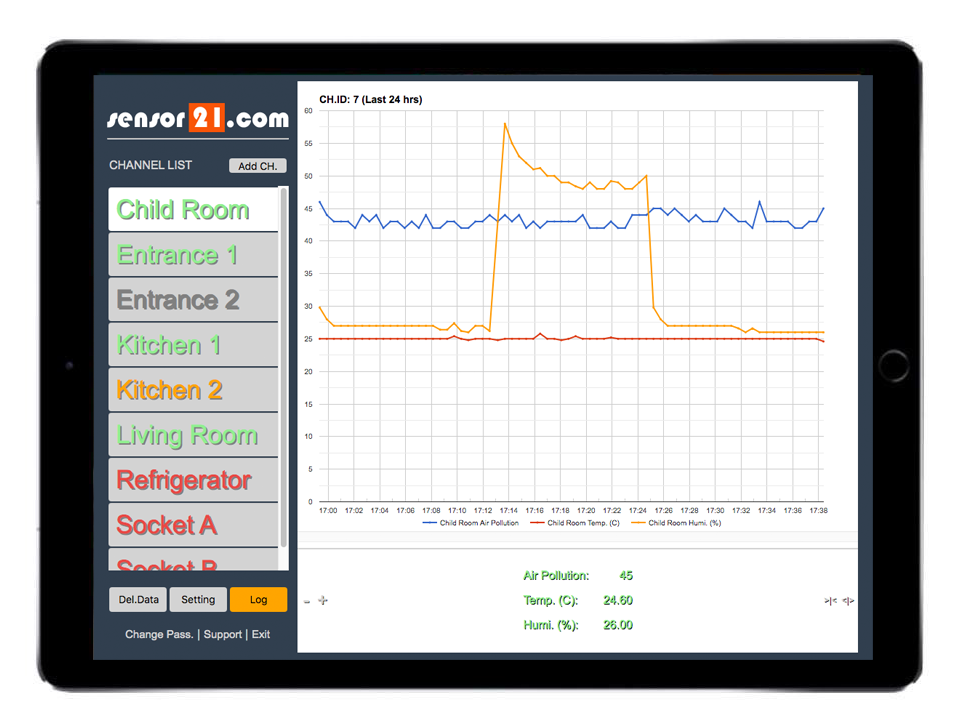
If you need a platform to monitor and control remote devices and sensors for your DIY projects, sensor21.com may be a good solution for you. It has a ready to use user friendly GUI. Easy to add sensors and monitor them with graphs. Set alarms for e-mail notification per sensor. Filter and compare different sensor data in 1 chart. Control remote on/off switches and more.
Configuration at Sensor21.com
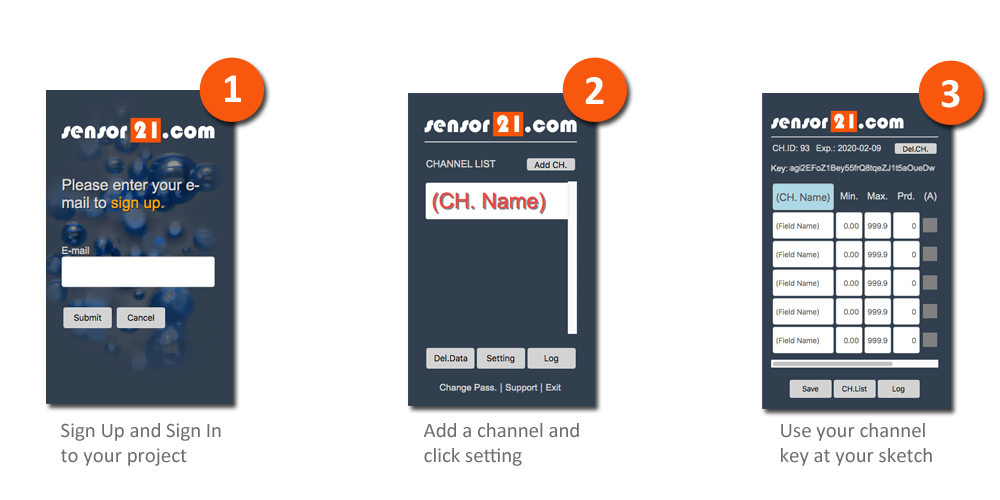
1- Sign up to sensor21.com
2- Add Channel to your project
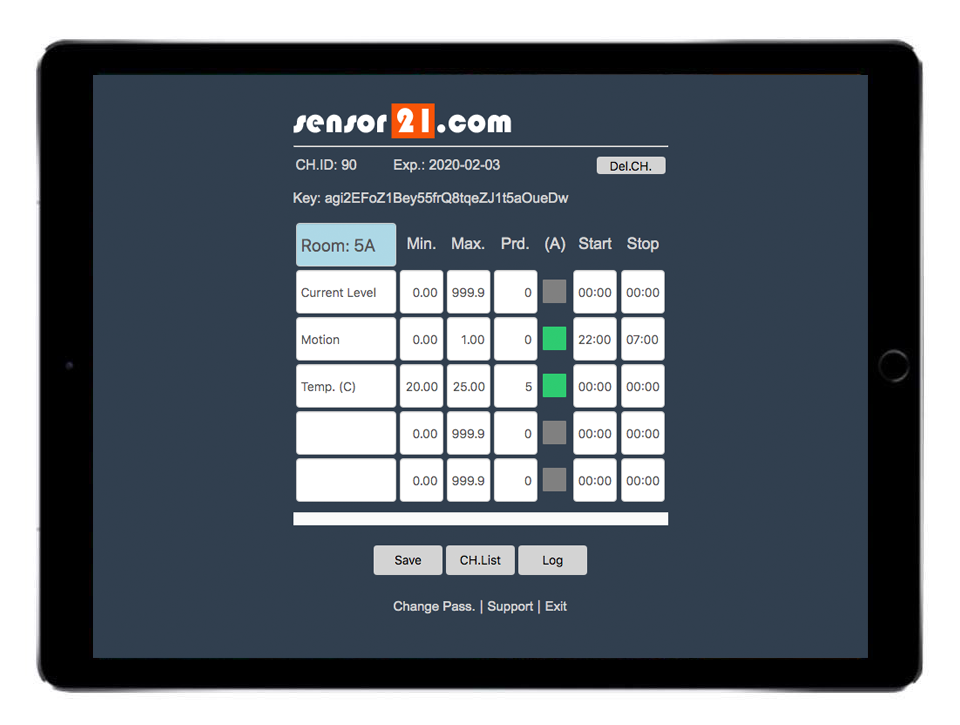
3- Enter Channel name and sensor names in that channel
Configuration at MCU (ESP8266)
1- Wire DHT11 temperature/humidity sensor data pin to NodeMCU D4 pin.
2- Update the api key with yours at the sample sketch provided.
3- Upload the sketch to nodeMCU.
4- Make sure all library items are working in your sketch
5- Connect nodeMCU to your local wifi network
a- Connect to nodeMCU access point
b- Enter local wifi parameters
6- Your sensor data will be shown in 5 minutes at sensor21.com