How to Use Raspberry Pi Pico With Arduino IDE
by Harsh Dethe in Circuits > Raspberry Pi
7654 Views, 10 Favorites, 0 Comments
How to Use Raspberry Pi Pico With Arduino IDE
Raspberry Pi Pico has created a buzz in the maker's community ever since its launch. If you don't know what Pico is or how it is used, I recommend you check "How to get started with Raspberry Pi Pico" which covers the configuration and set up of MicroPython to program the Pico.
Although MicroPython is easy and efficient to use, it still is a learning curve for those who are already good with C/C++. So in this instructable, we will see how pico can be programmed using Arduino IDE.
Supplies
Setting Up the Arduino IDE
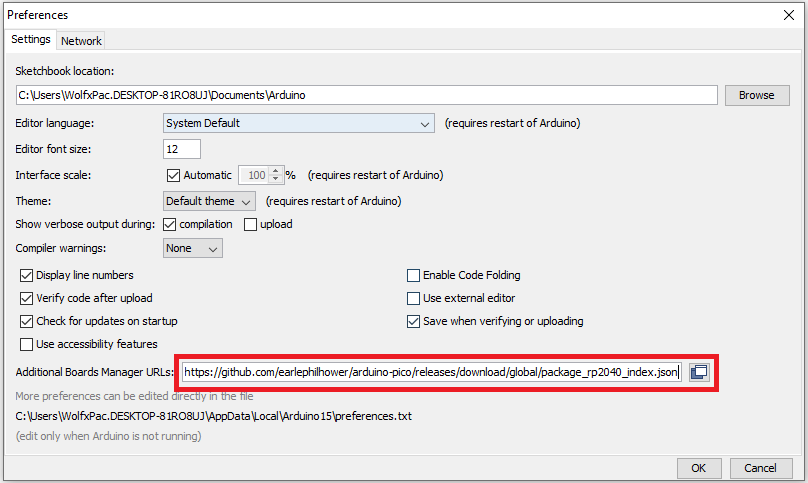
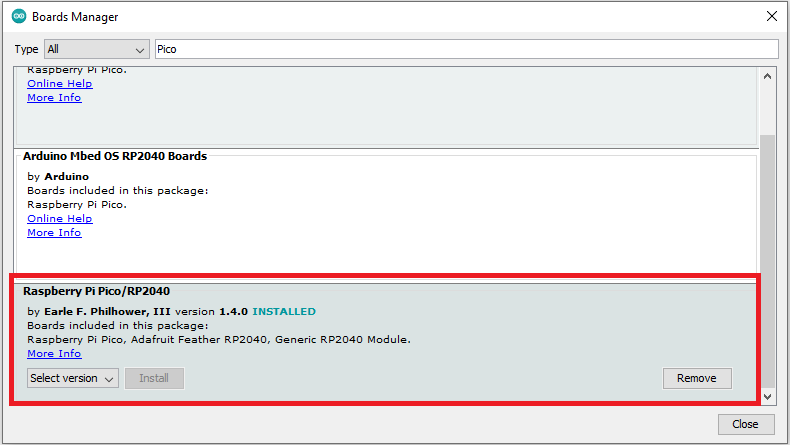
Before we can start uploading codes to our Pico we need to set up the Arduino IDE so it recognizes the Pico board. Thanks to Earle F. Philhower we can now add Raspberry Pi Pico onto our Arduino IDE. To do that first, download and install the IDE and follow the steps given below.
- Open the IDE and go to Files >> Preferences.
- In the "additional boards manager URL" add the following link.
https://github.com/earlephilhower/arduino-pico/releases/download/global/package_rp2040_index.json
- Next click on OK to close the window, and go to Tools >> Boards >> Board Manager.
- In the search box type "Pico" and install the board named "Raspberry Pi Pico/RP2040 by Earl F. Philhower"
- It will take a few seconds for downloading and installing the boards depending on your connection speed.
Once the boards are installed, restart your IDE.
Uploading First Program.
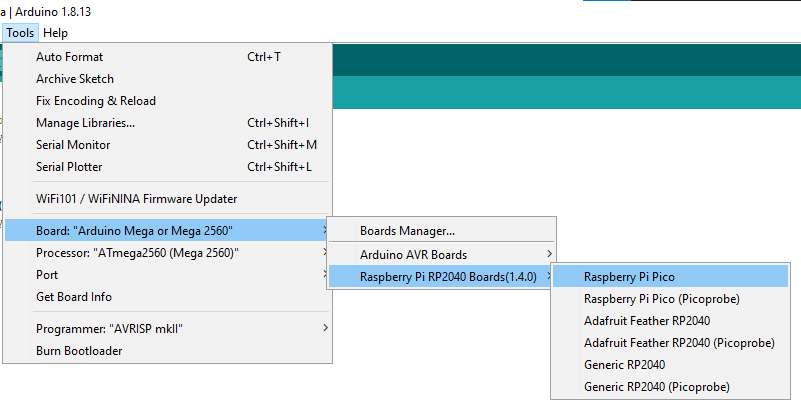
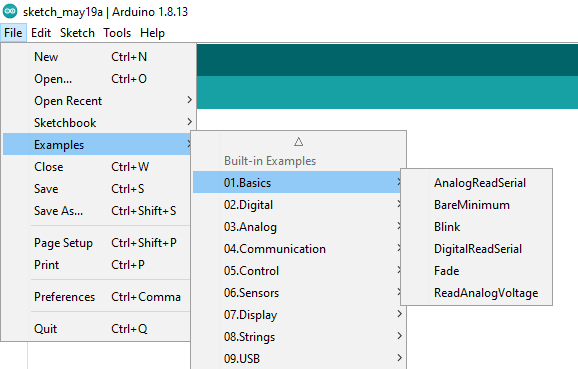
Now that our IDE is ready to program Pico, we can start by selecting the board.
- Go to Tools >> Board >> Raspberry Pi Rp2040 Boards and select Raspberry Pi Pico.
- Now connect the board to your computer using a USB. But make sure you hold down the "BOOTSEL" button while you connect. This will open the Pi as a storage device.
- Next, go to File >> Examples >> Basics and select Blink. This will open a new window with Arduino's default blink sketch.
- Just press the upload button and wait for a few seconds.
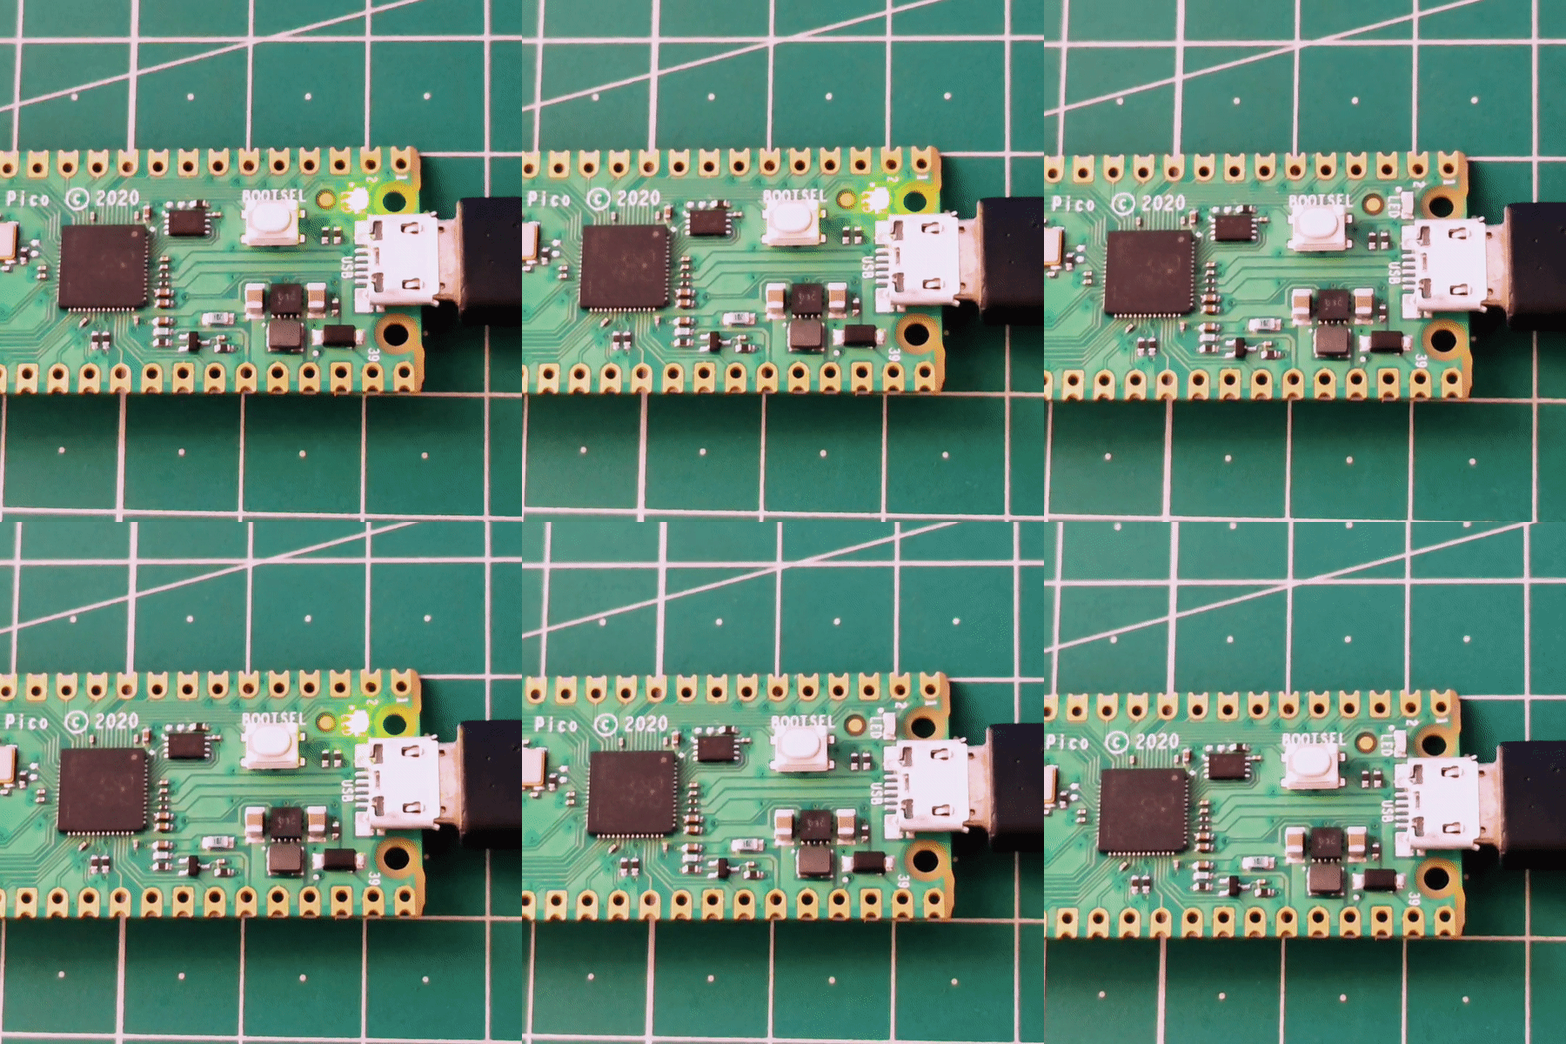
You should notice that the onboard LED (Green) will start blinking every second.
Conclusion
.gif)
So now you can use Pico with Arduino IDE and explore the advanced capabilities of this wonderful microcontroller.
In the future, we will see how to use different sensors with Rpi pico and build projects.
Hope this instructable was informative and you learnt something. If you have any queries feel free to leave a comment.
Do check out: How to get started with Raspberry Pi Pico for more information and specifications of Pico.
Also, you can follow me on Instagram and Facebook to stay updated on new projects and blogs.