How to Use Push Switch With SkiiiD
by skiiiD in Circuits > Arduino
195 Views, 0 Favorites, 0 Comments
How to Use Push Switch With SkiiiD
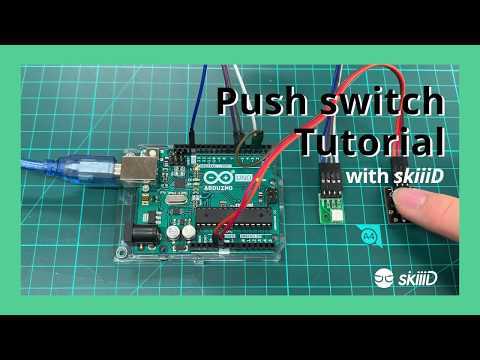
This project is an instruction of "how to use Segment 3642BH with Arduino via skiiiD
Before start, below is a basic tutorial for how to use skiiiD https://www.instructables.com/id/Getting-Started-With-SkiiiD-Editor/
Launch SkiiiD
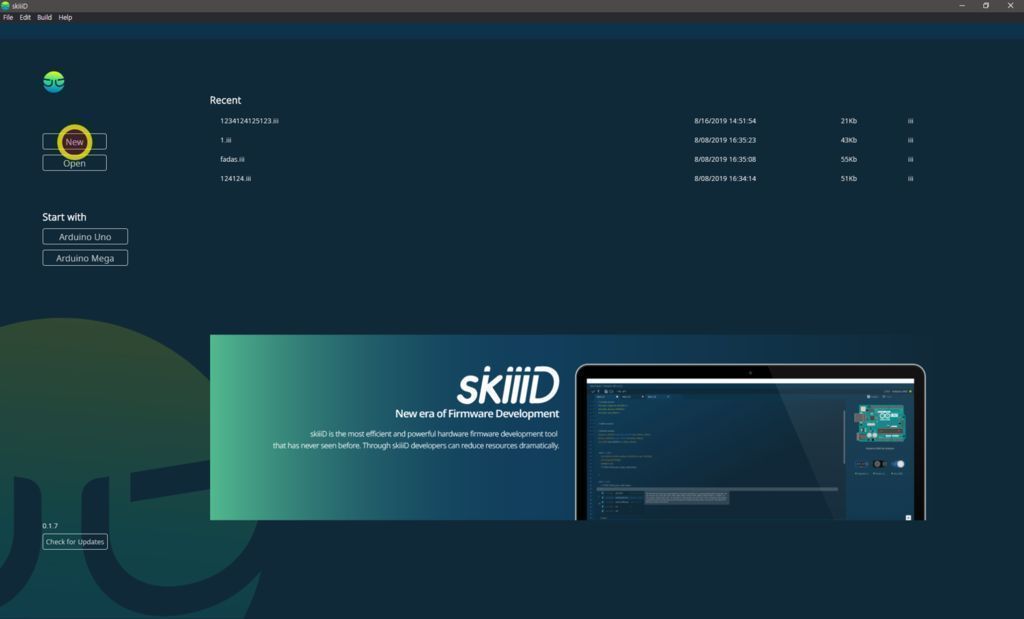
Launch skiiiD and select New button
Select Arduino UNO
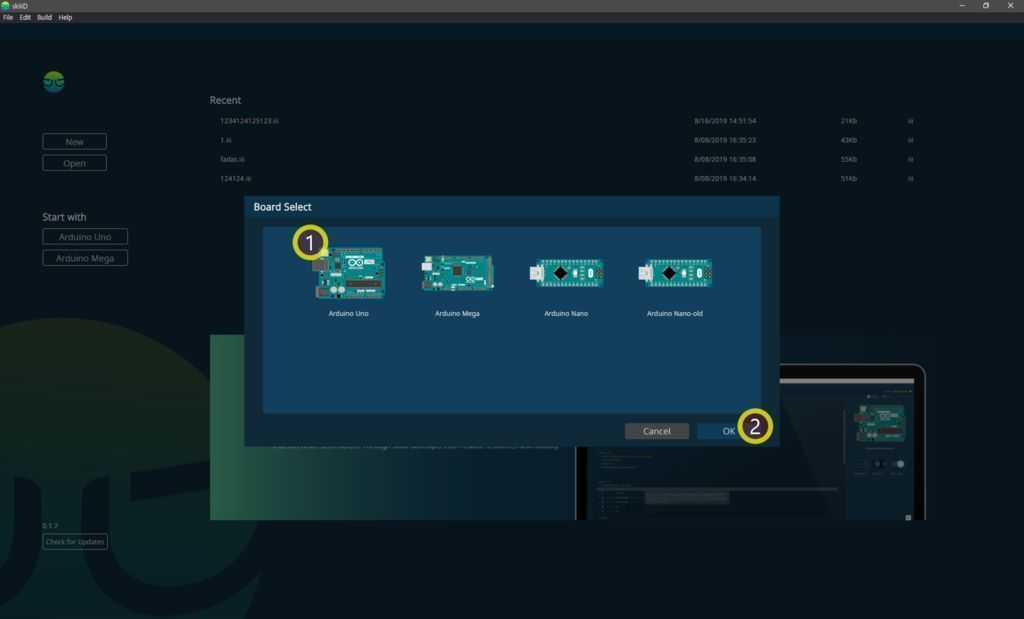
Select ① Arduino Uno and then click ② OK button
*This is Tutorial, and we use Arduino UNO. Other boards(Mega, Nano) have the same process.
Add Component
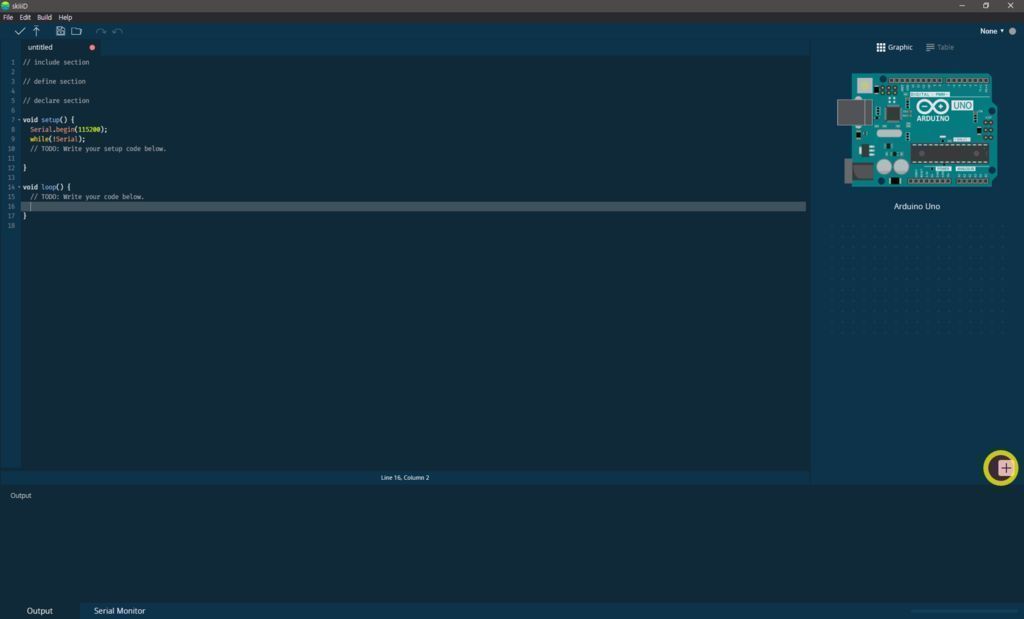
Click '+' (Add Component Button) to search and select the component.
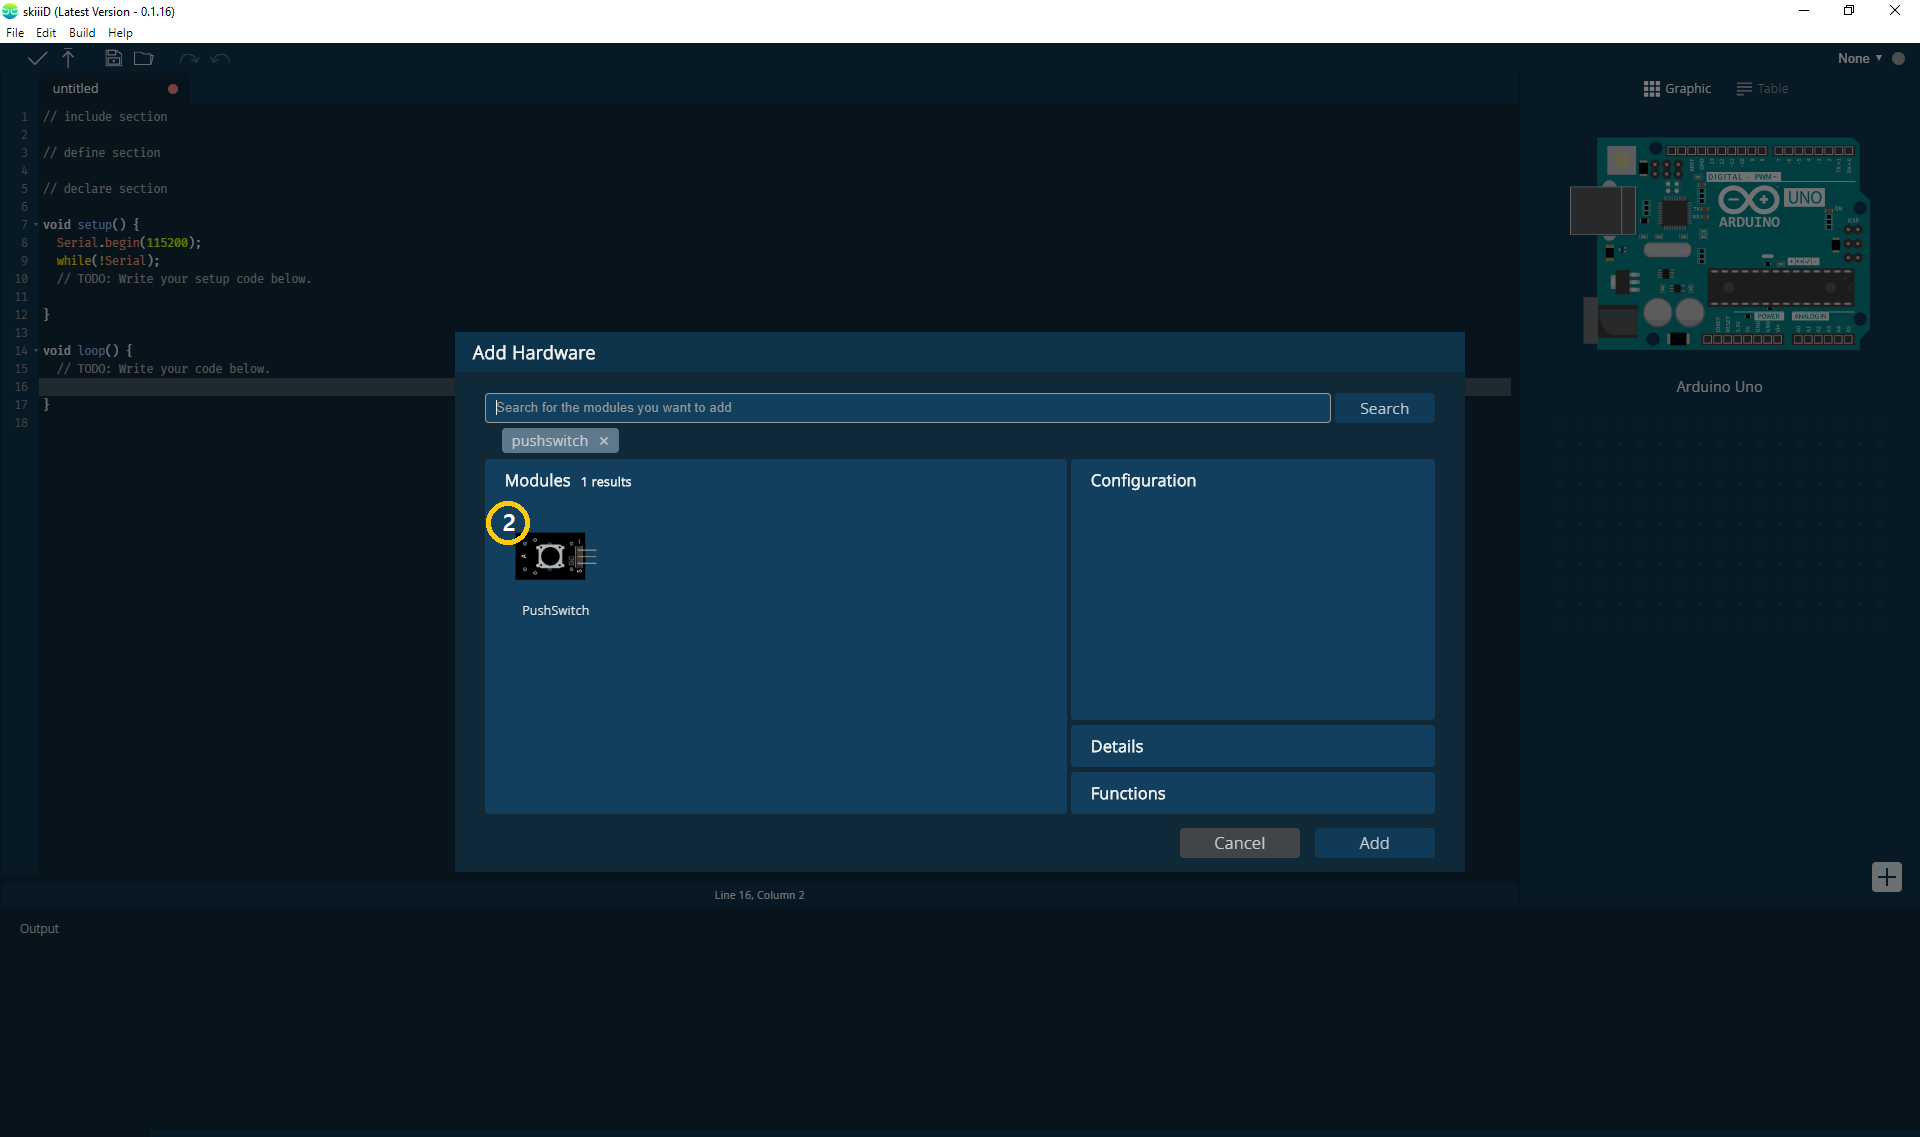
Search or Find a Component
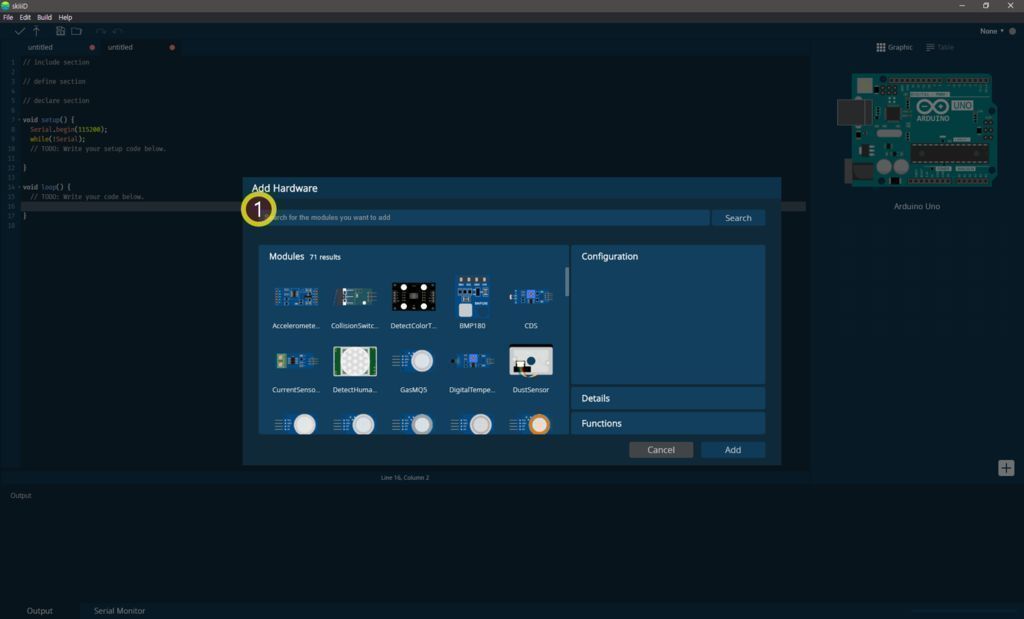
① Type 'Pushswitch' on the search bar or find the Buzzer module on the list.
Select Push Switch
 12_24_2019 3_32_39 PM.png)
② Select Pushswitch Module
Pin Indication and Configuration
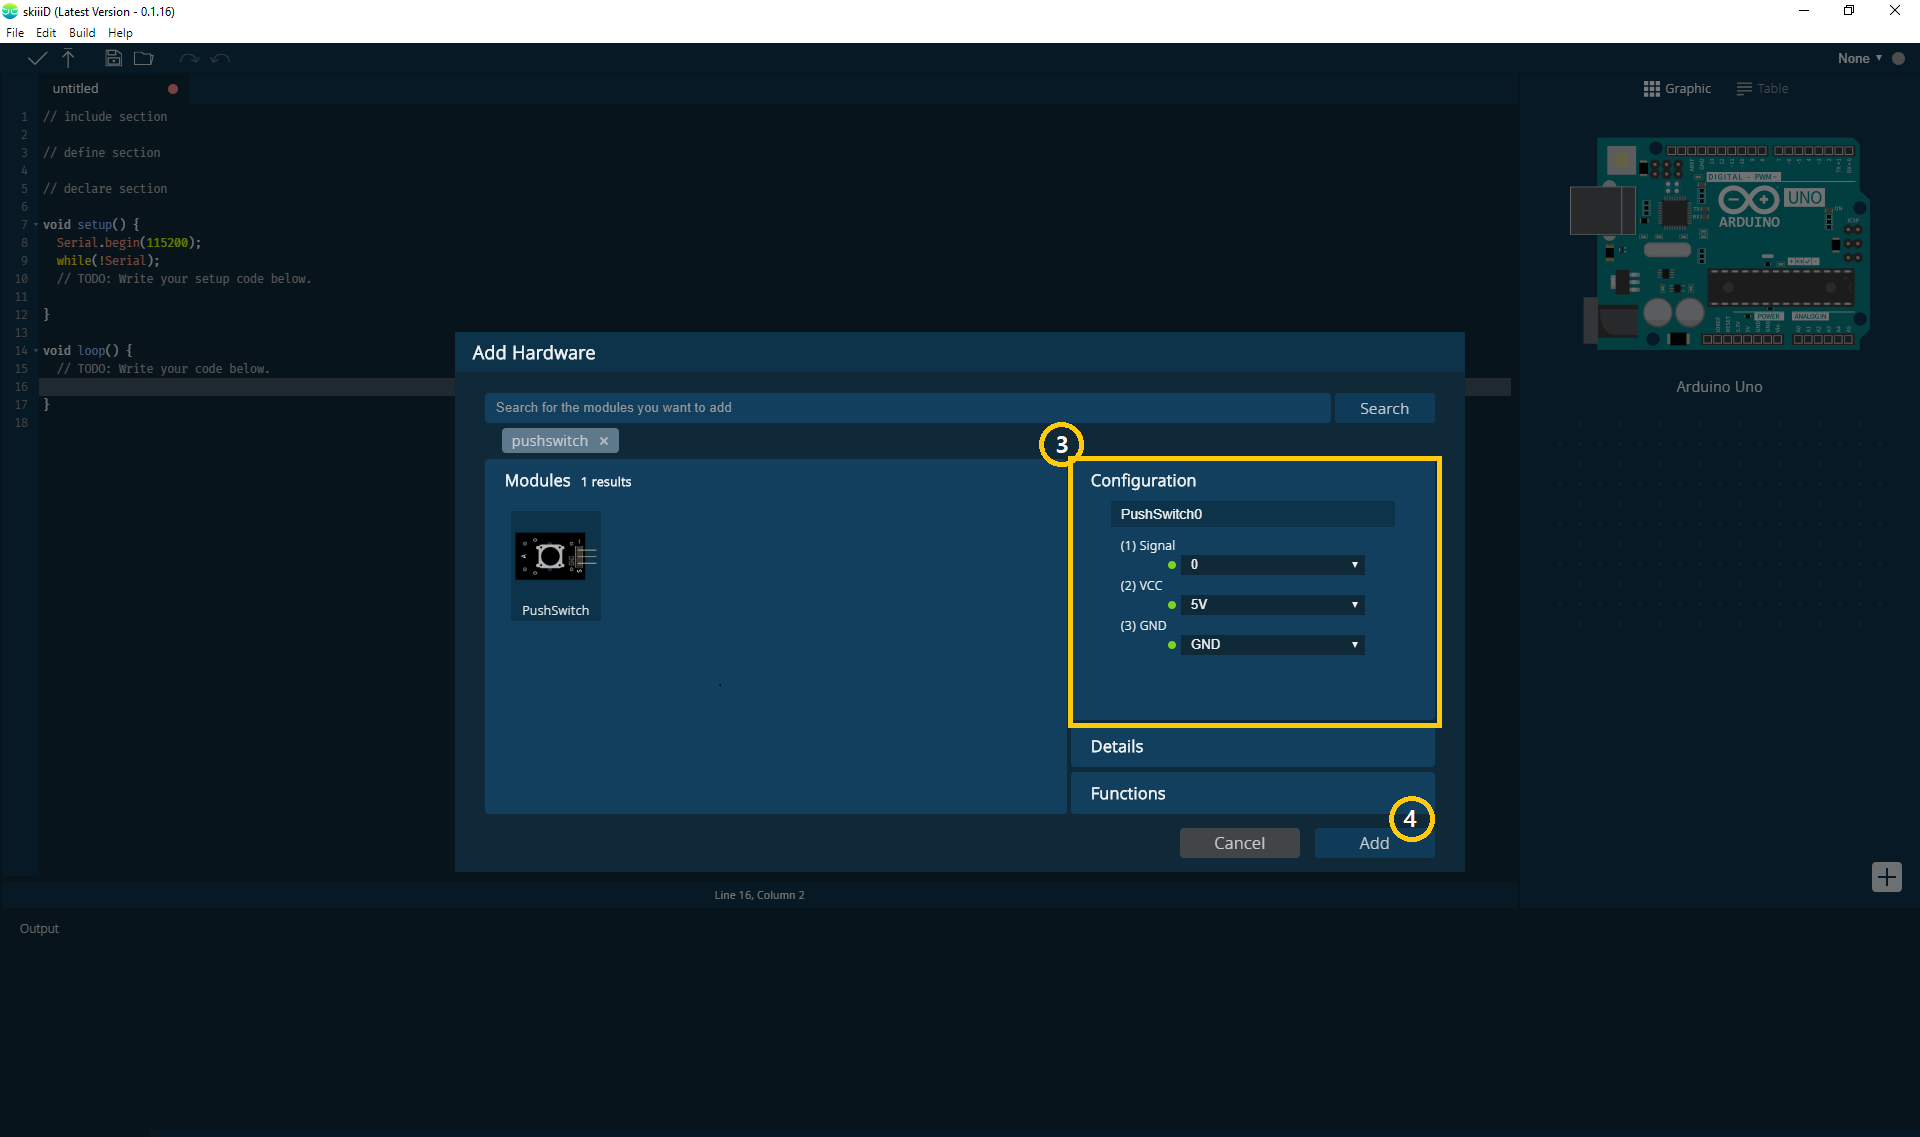 12_24_2019 3_33_55 PM.png)
then you can see ③ pin indication. (You can configure it.)
*This module has 4 pins to connect skiiiD Editor automatically indicate pin setting *configuration available
[Default Pin Indication for Button Module] in case of Arduino UNO
signal: 0
VCC: 5V
GND: GND
After configuring pins ④ click ADD button on the right below side
Check Added Module
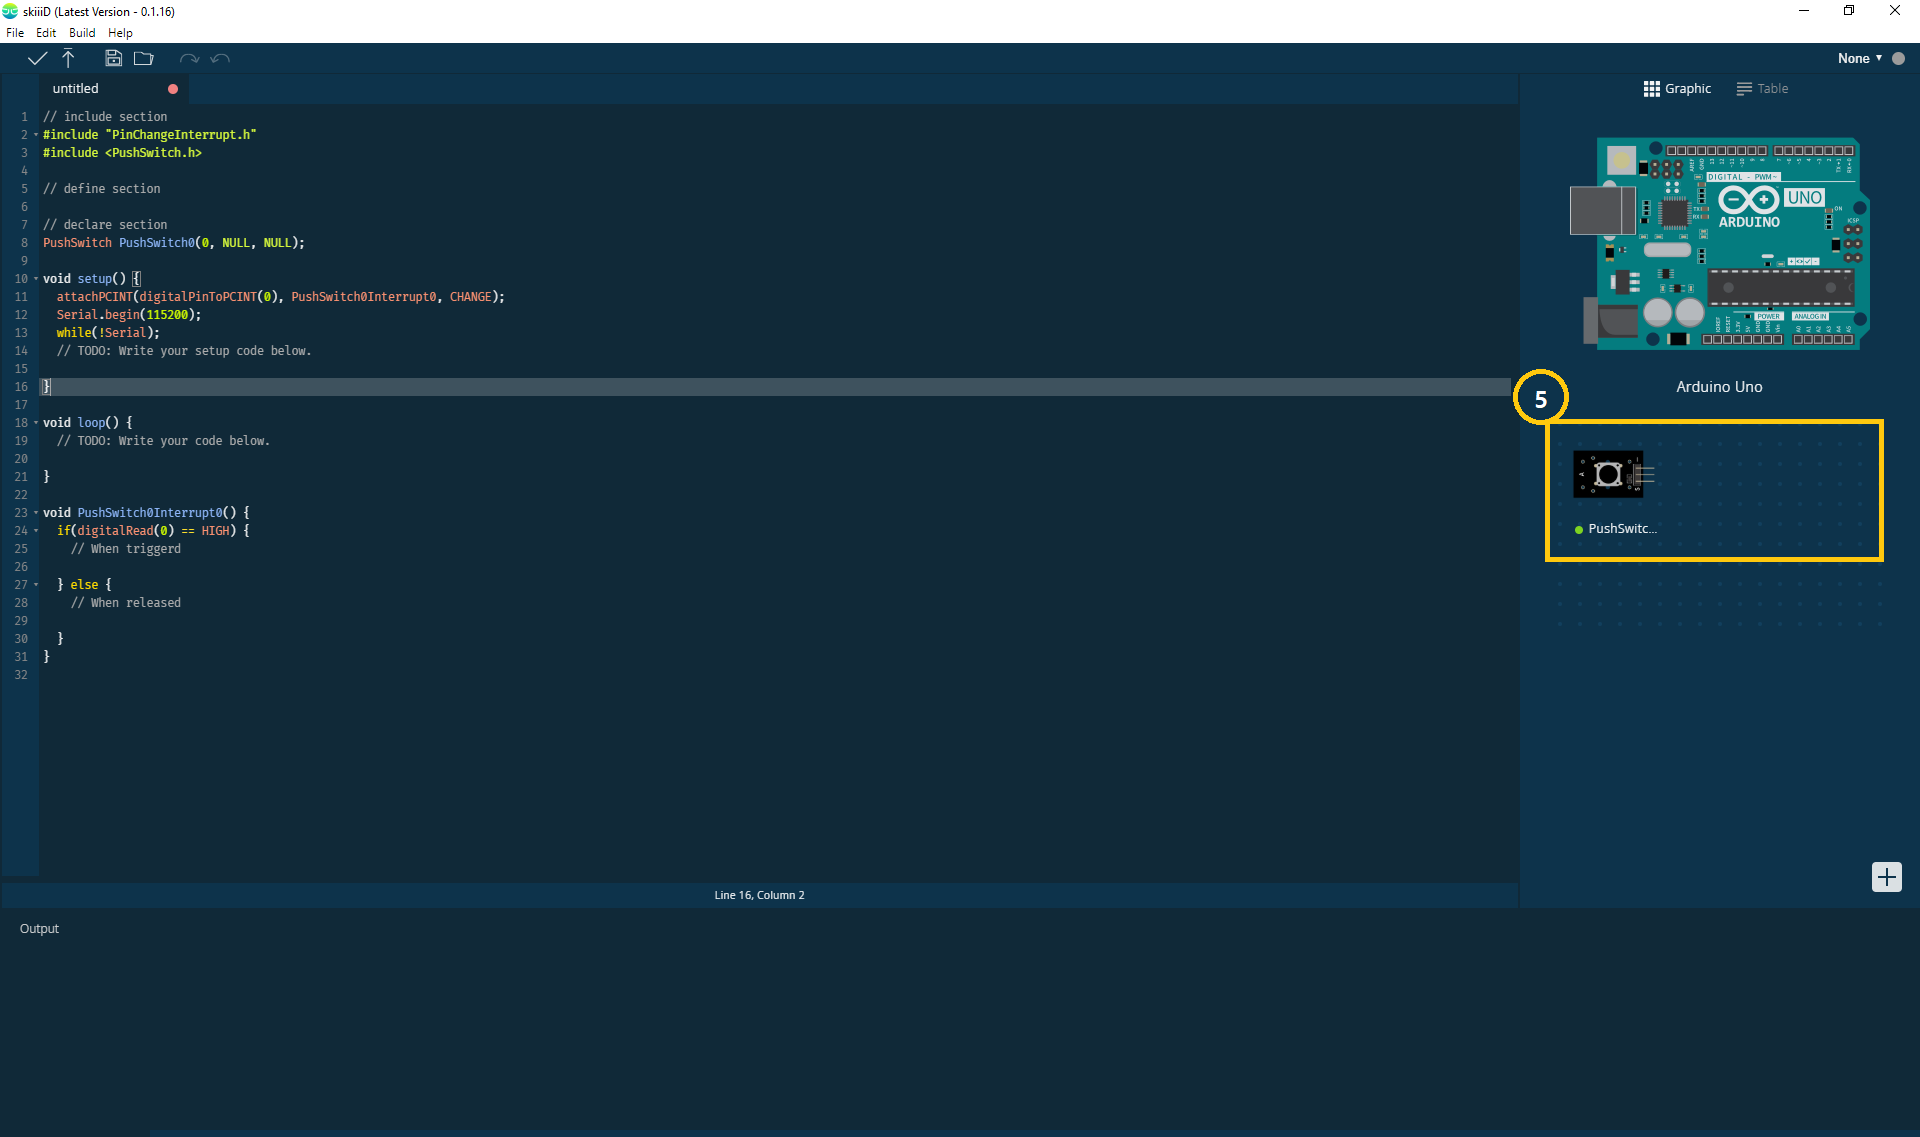 12_24_2019 3_34_05 PM.png)
⑤ Added Module has appeared on the right panel
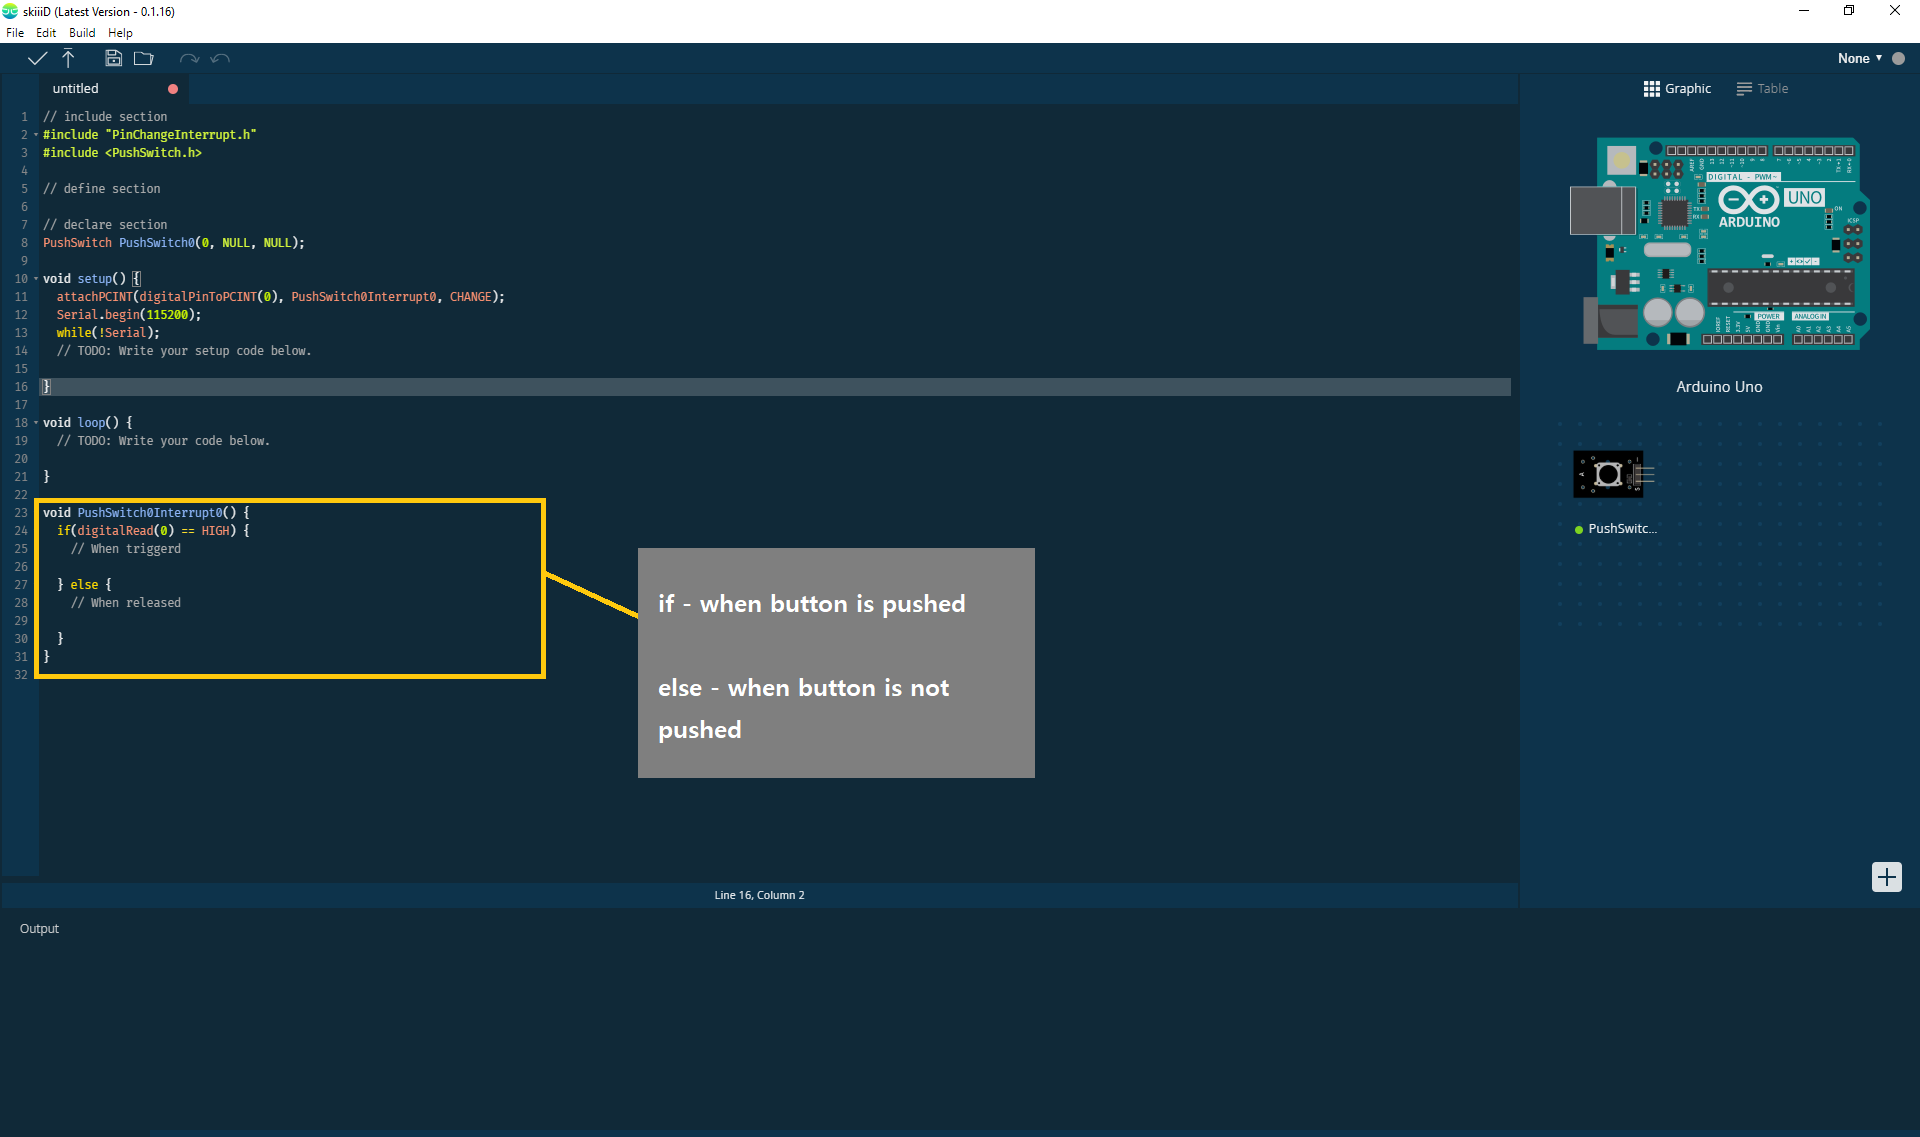
SkiiiD Code of Push Switch Module
 12_24_2019 3_34_17 PM.png)
skiiiD Code is intuitive function-based codes. This is based on skiiiD libraries
if(digitalRead(0) == HIGH)
- when switch is pushed.
else
- when switch is not pushed.
Contact and Feedback
We are working on components and boards libraries. Feel free to use it and feedback us, please. Below is contact methods
email: contact@skiiid.io
twitter: https://twitter.com/skiiiD_official
Youtube: https://www.youtube.com/channel/UCfS2RQL3m3hVoHkFo...