How to Use Magical Select in Paint 3D and PowerPoint Editing Photos
by babybayrs in Design > Digital Graphics
9474 Views, 2 Favorites, 0 Comments
How to Use Magical Select in Paint 3D and PowerPoint Editing Photos


In this Instructable, I will show you how to use magical select in paint 3D (free pre-installed on windows 10 computer) and PowerPoint to select the parts desired in two photos and combine them to make one photo. It's a editing skill I learned and use a lot lately.
Supplies

.JPG)
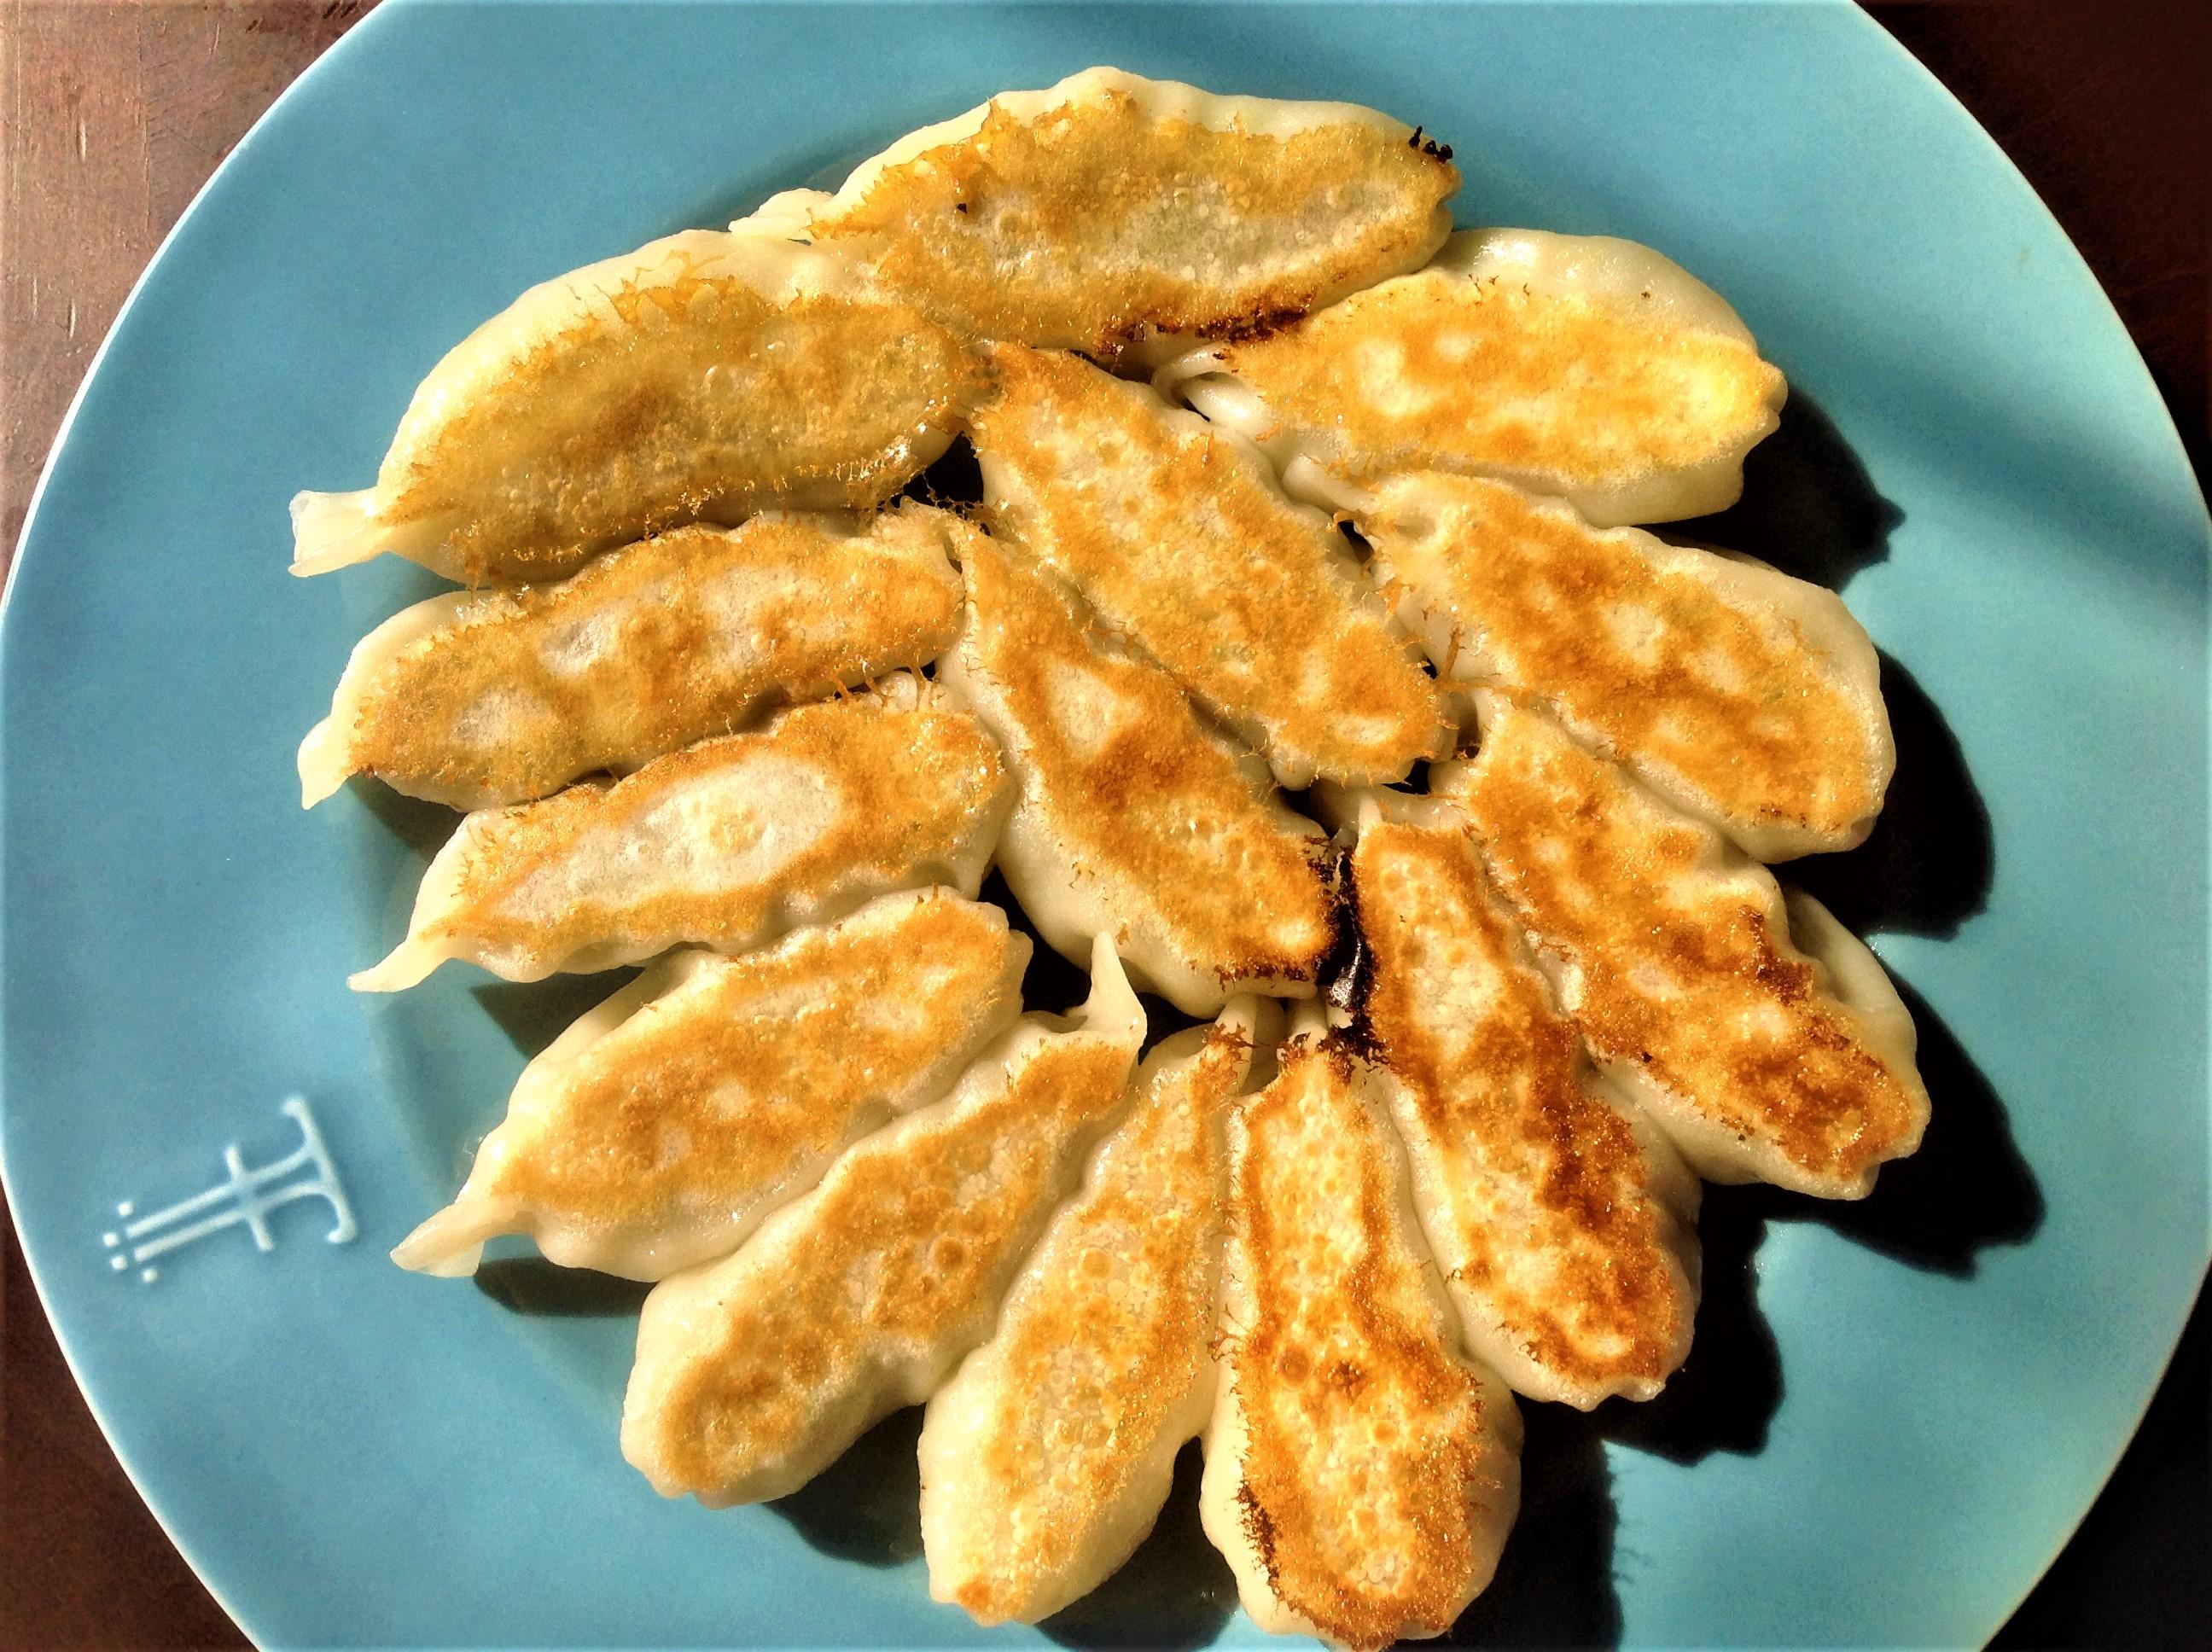
Two digital photos
Paint 3D software(pre-installed on Windows 10 computer)
PowerPoint
Open a Blank PowerPoint Document
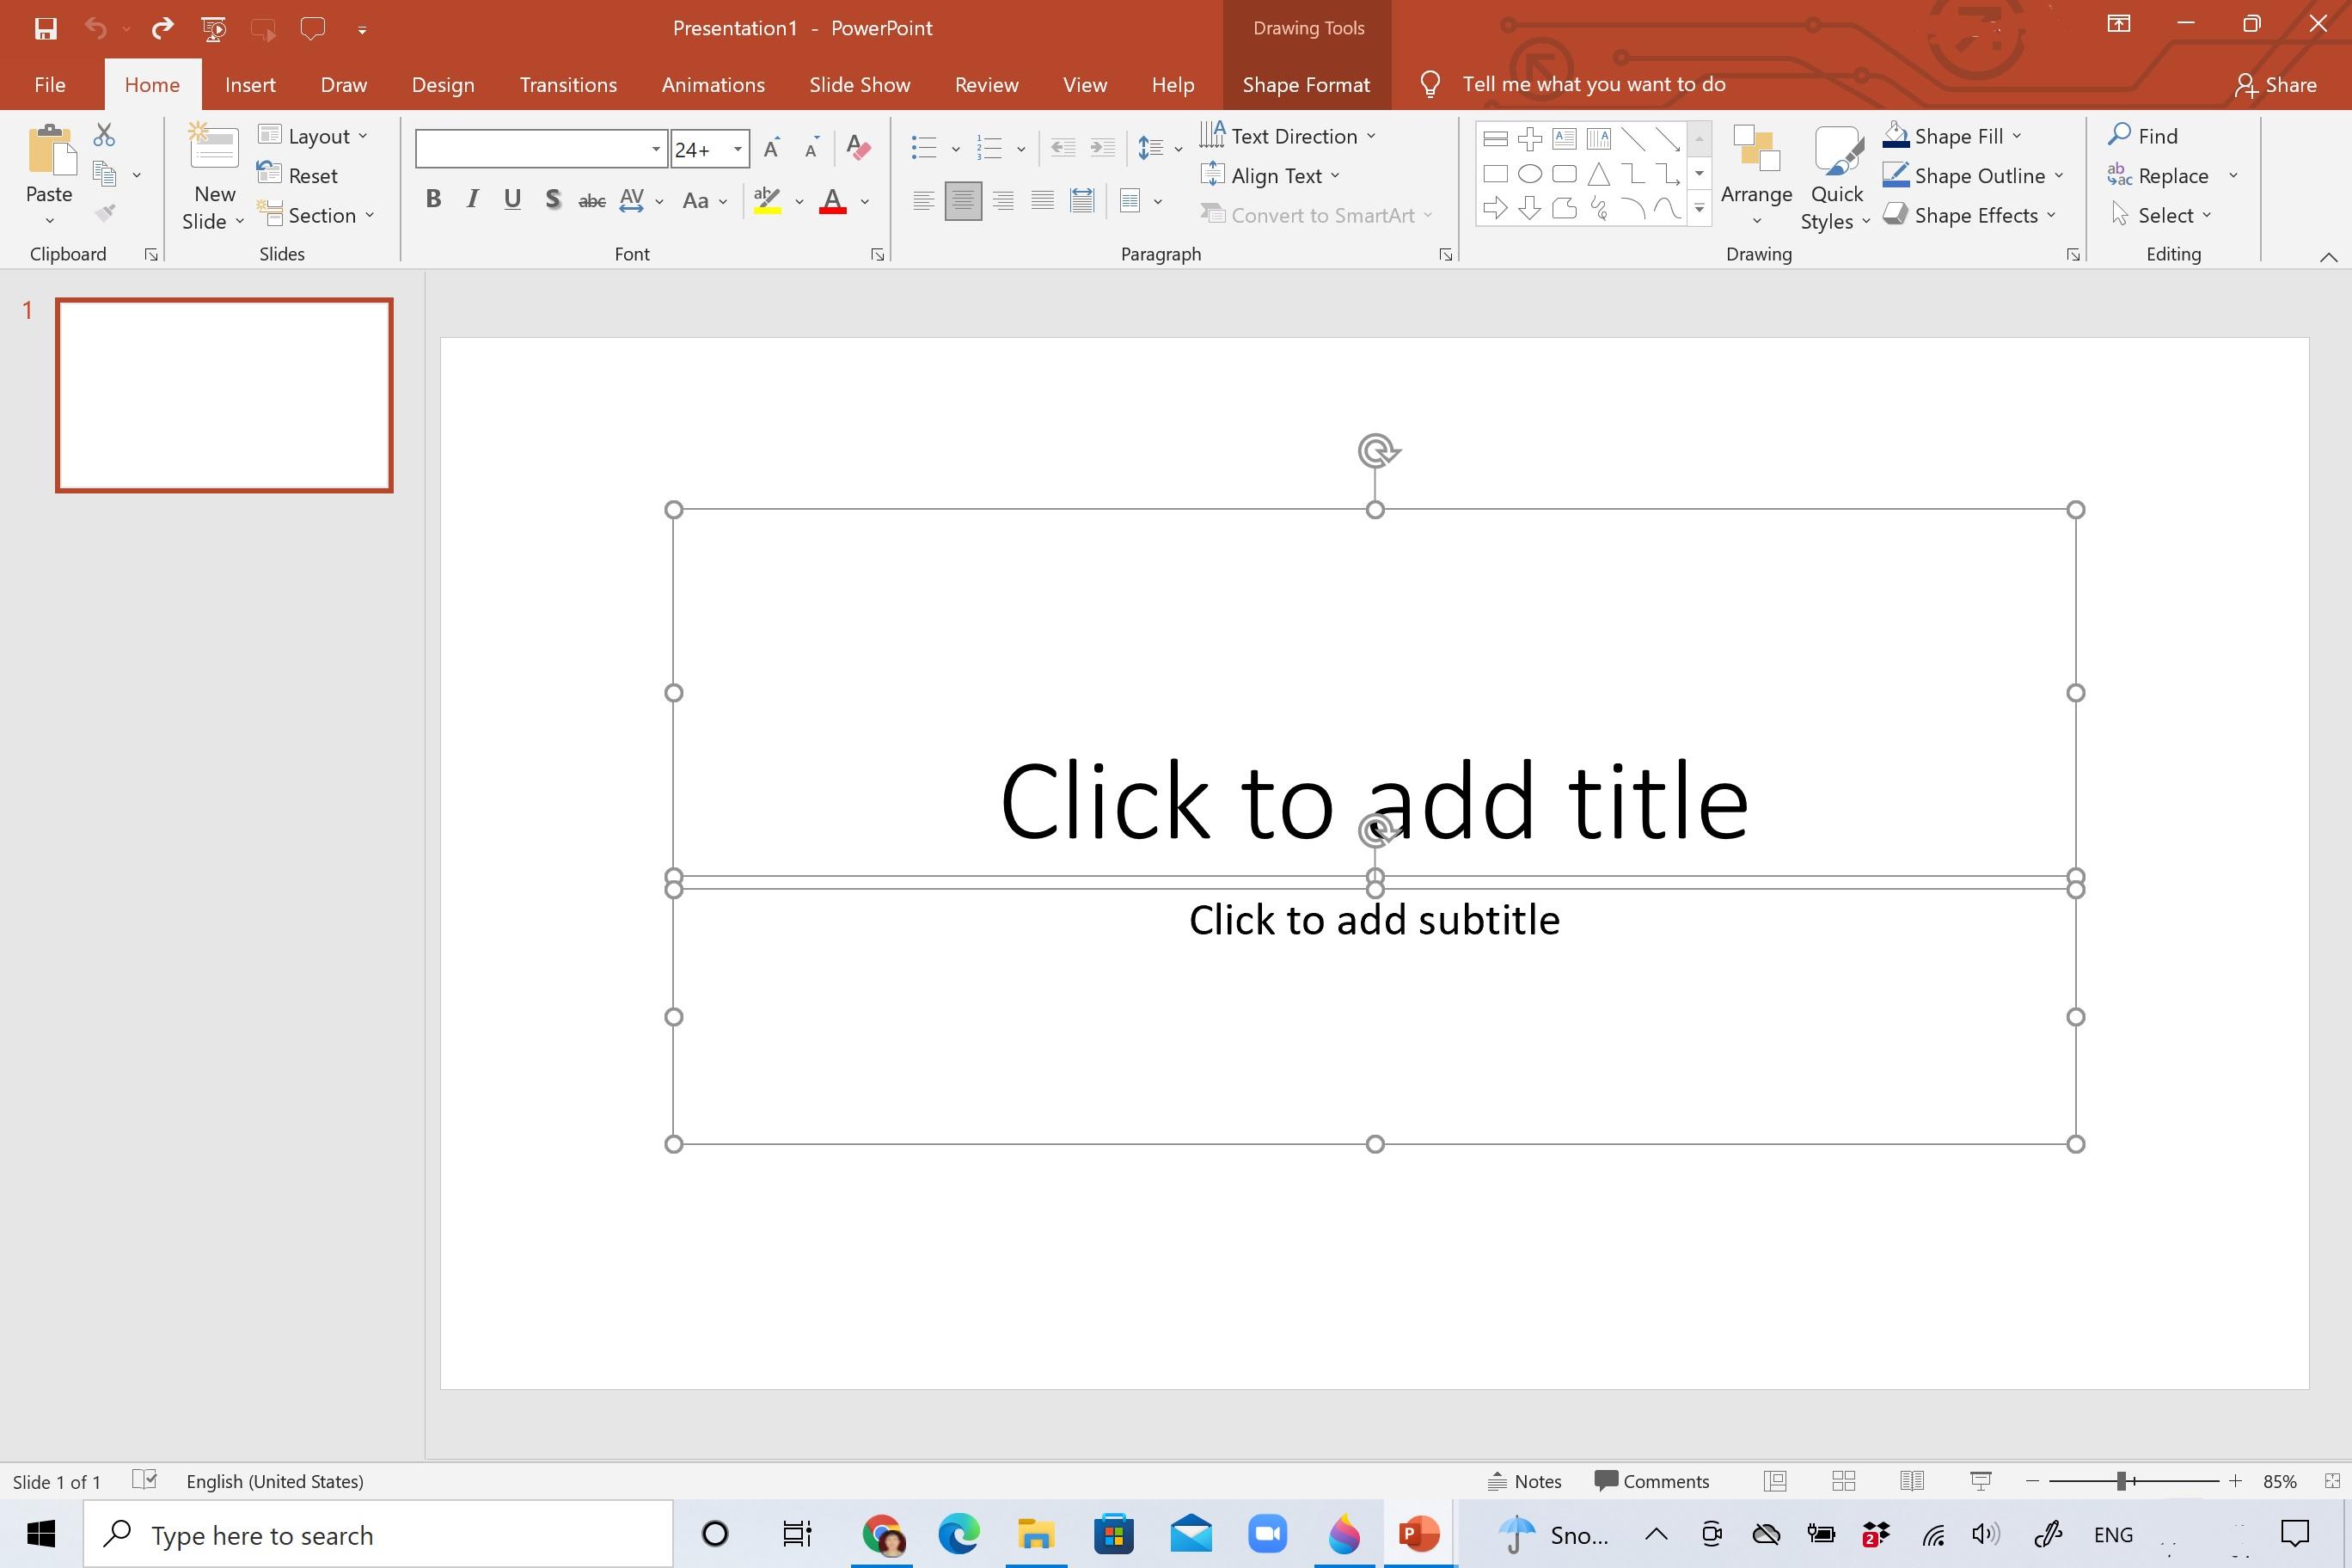
Select and delete the "Click to add title" and "Click to add subtitle".
Search, Find, and Open Paint 3D to Work on 1st Photo
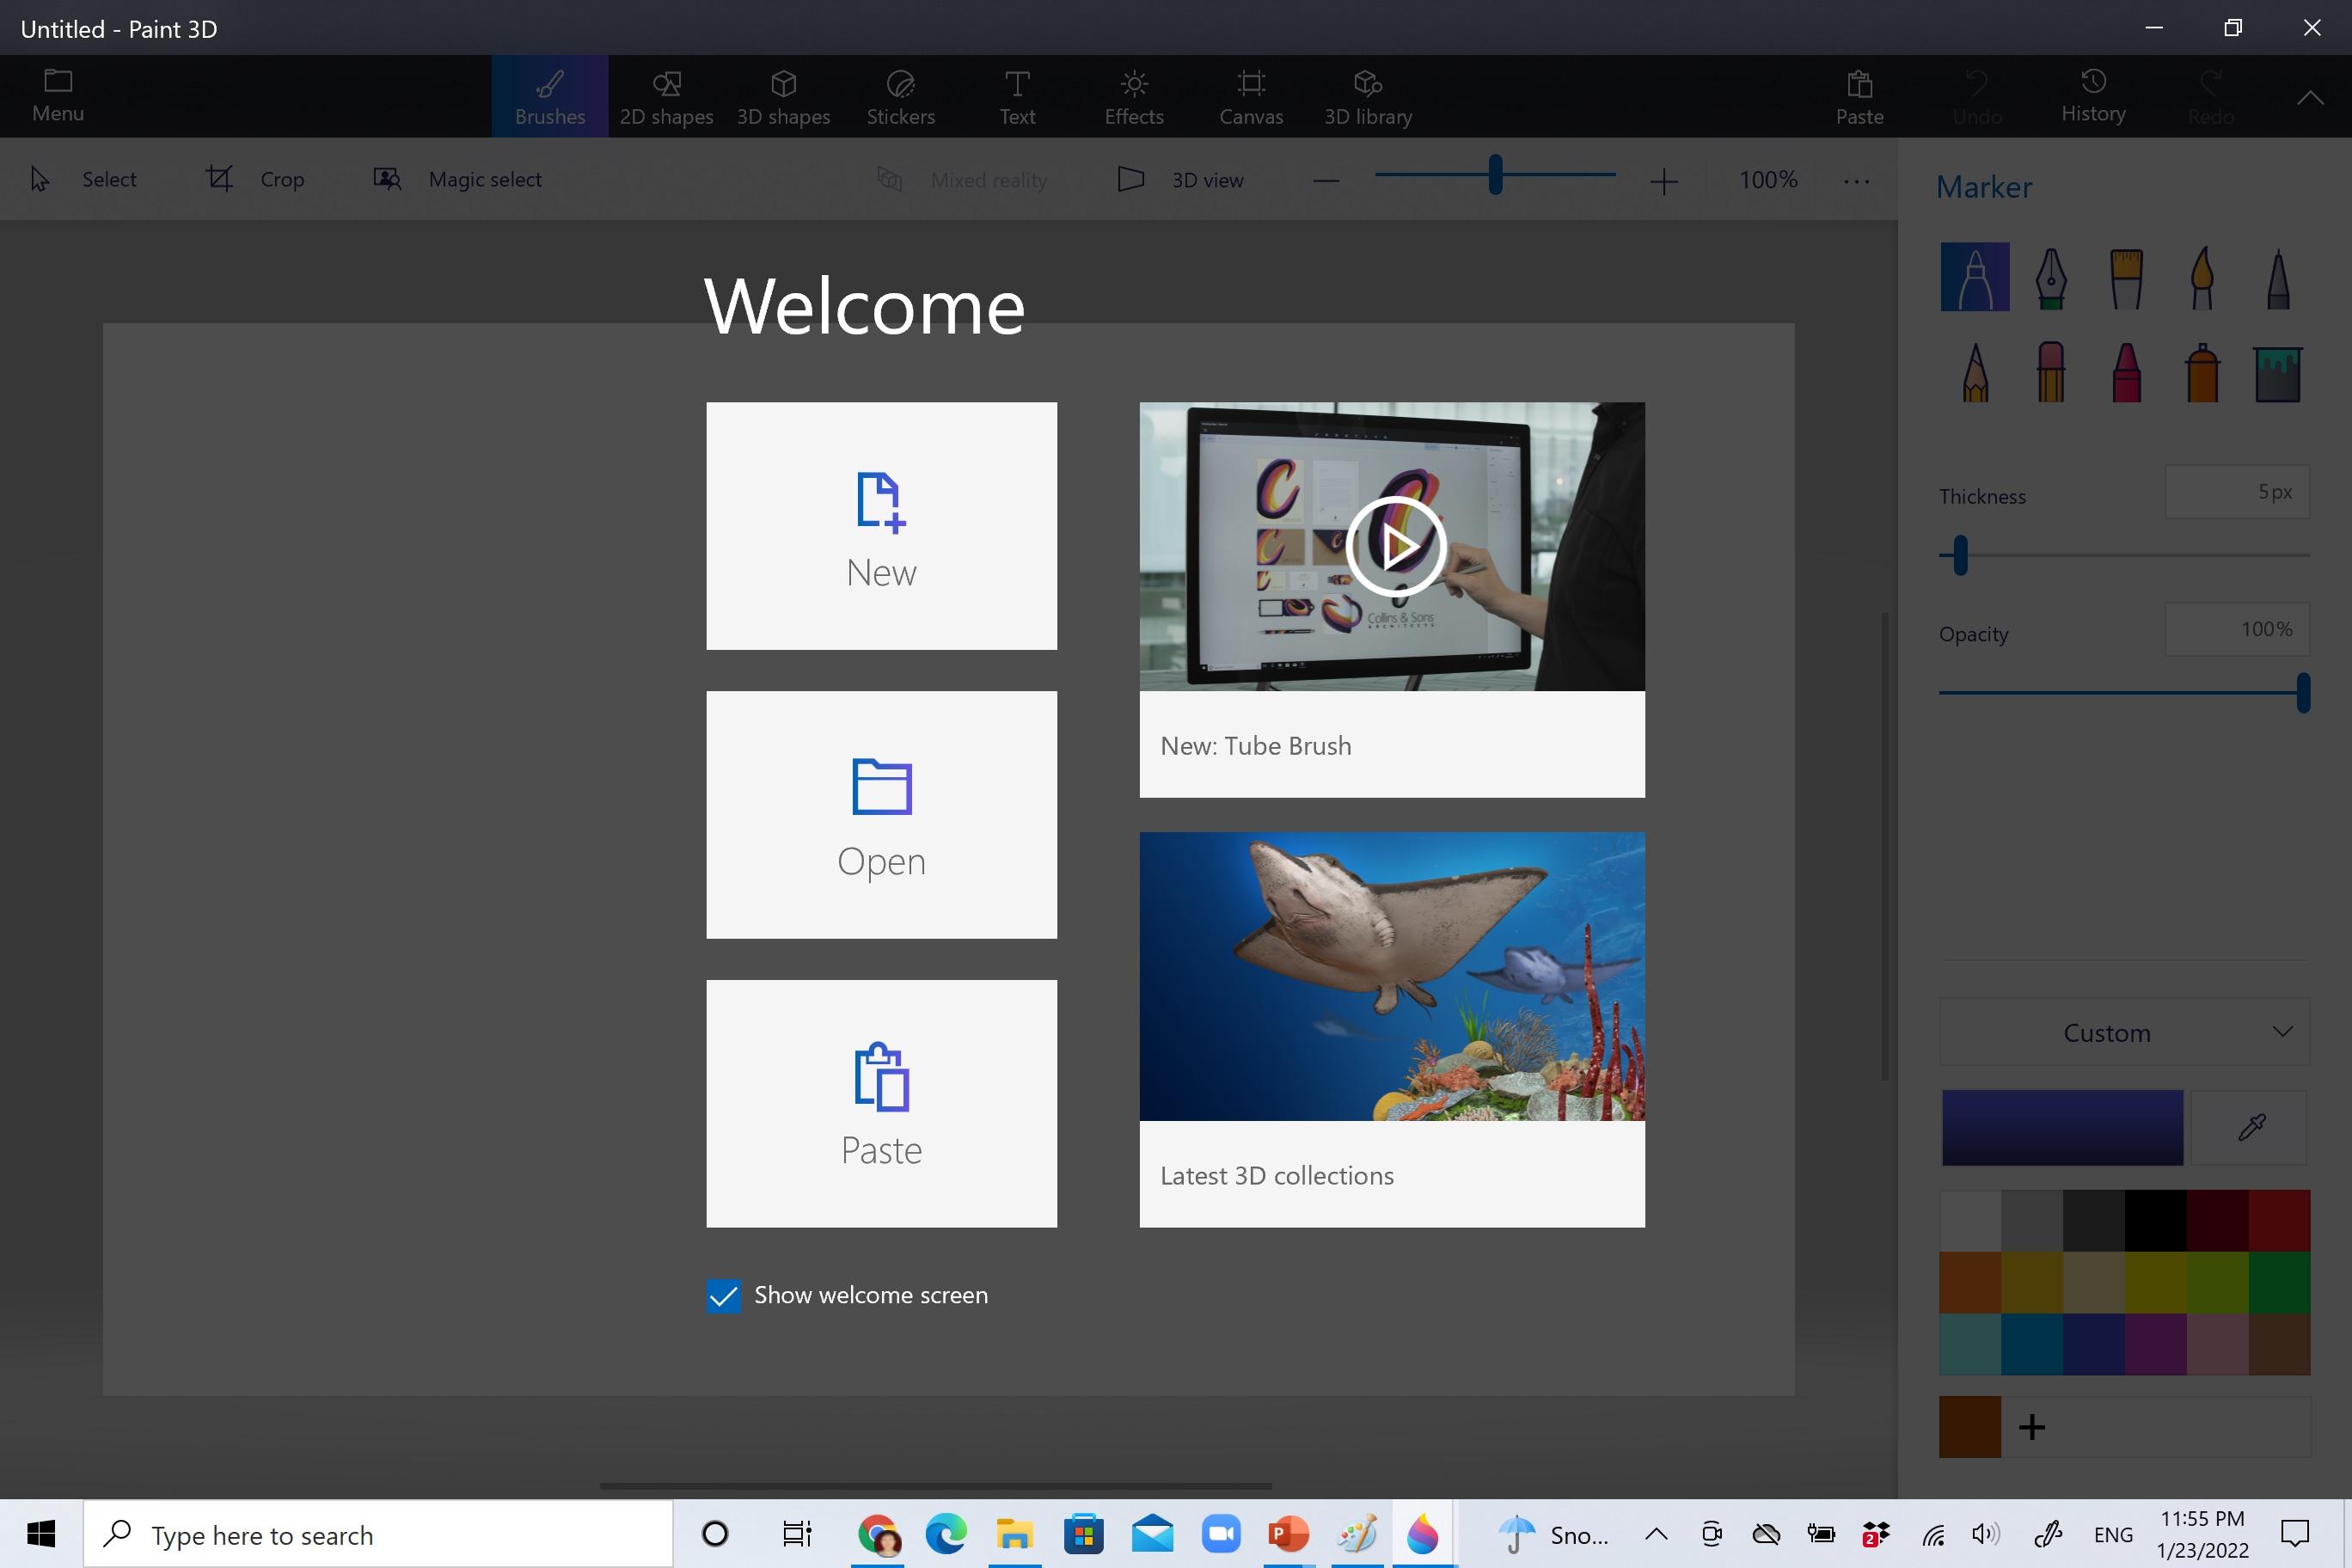

Type "p" or "paint 3D" in the "Type here to search" box by the Windows sign on the lower left corner of your computer.
Click "Paint 3D".
Click "New".
Click "Menu" on the upper left corner of the Paint 3D window, then "Browse Files" to import the first photo to work on or right click in the main white area to paste the first photo to work on if you already copied the first photo.
Use Magical Select in Paint 3D to Select Just the Potstickers
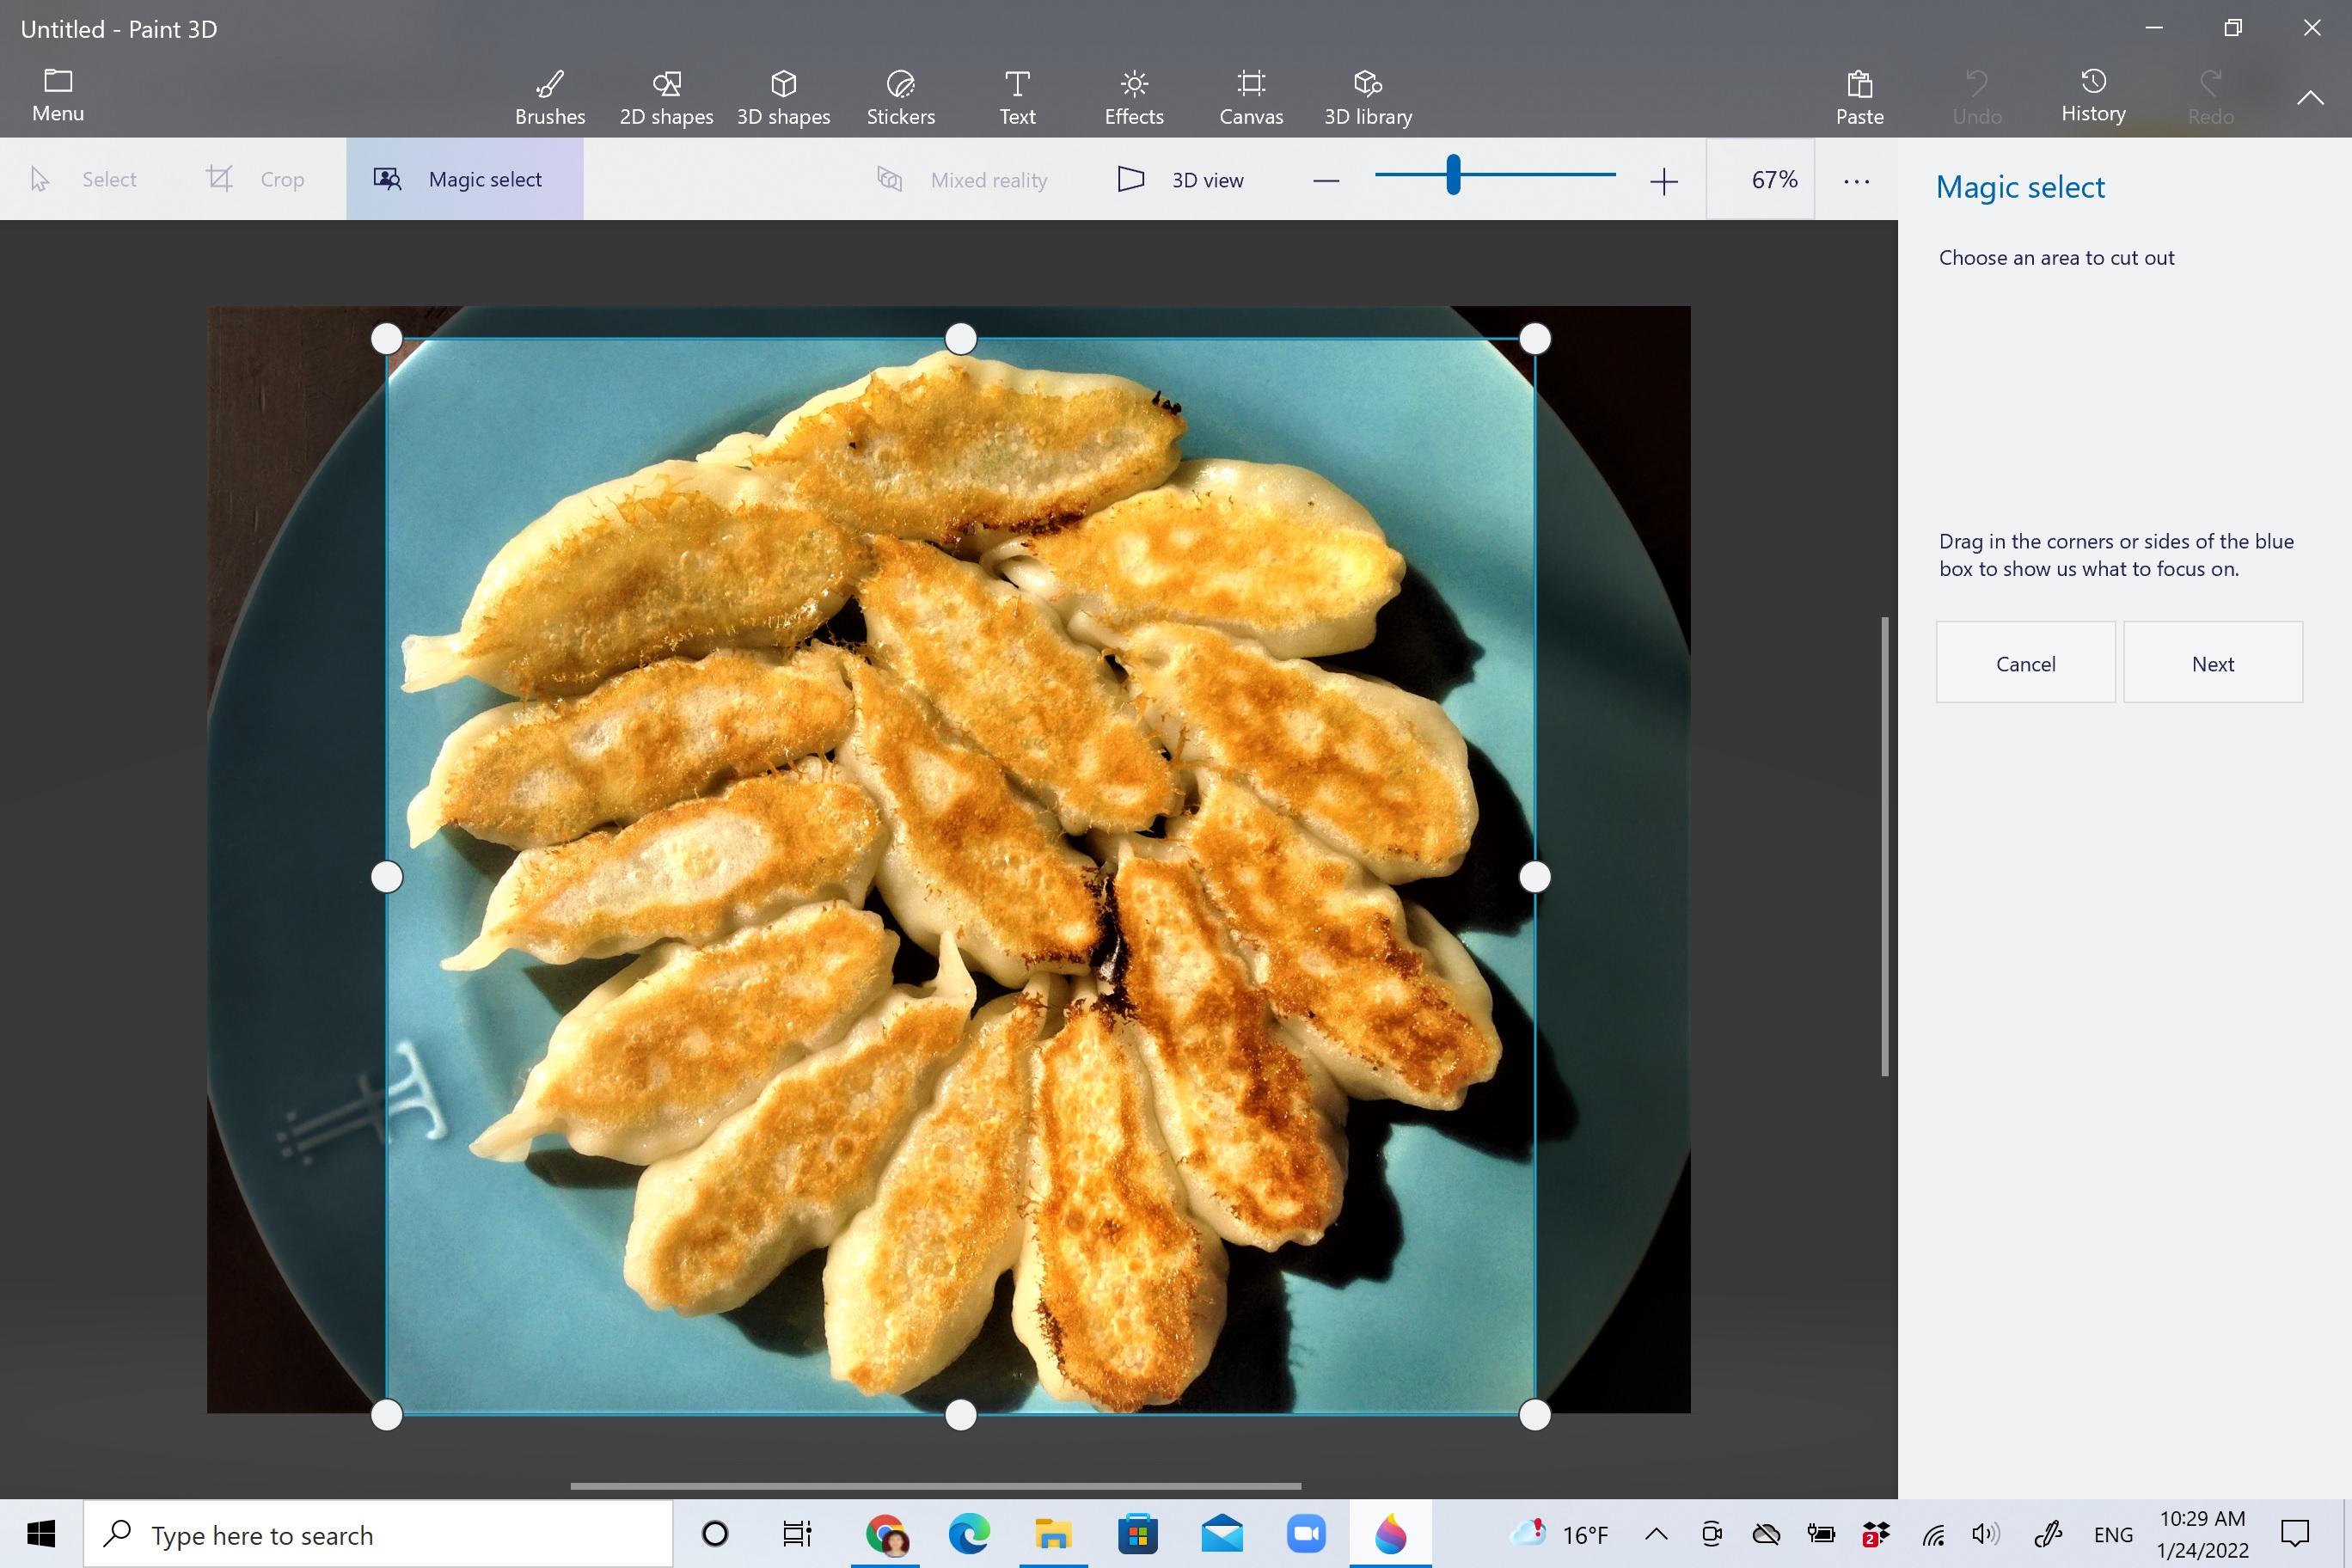
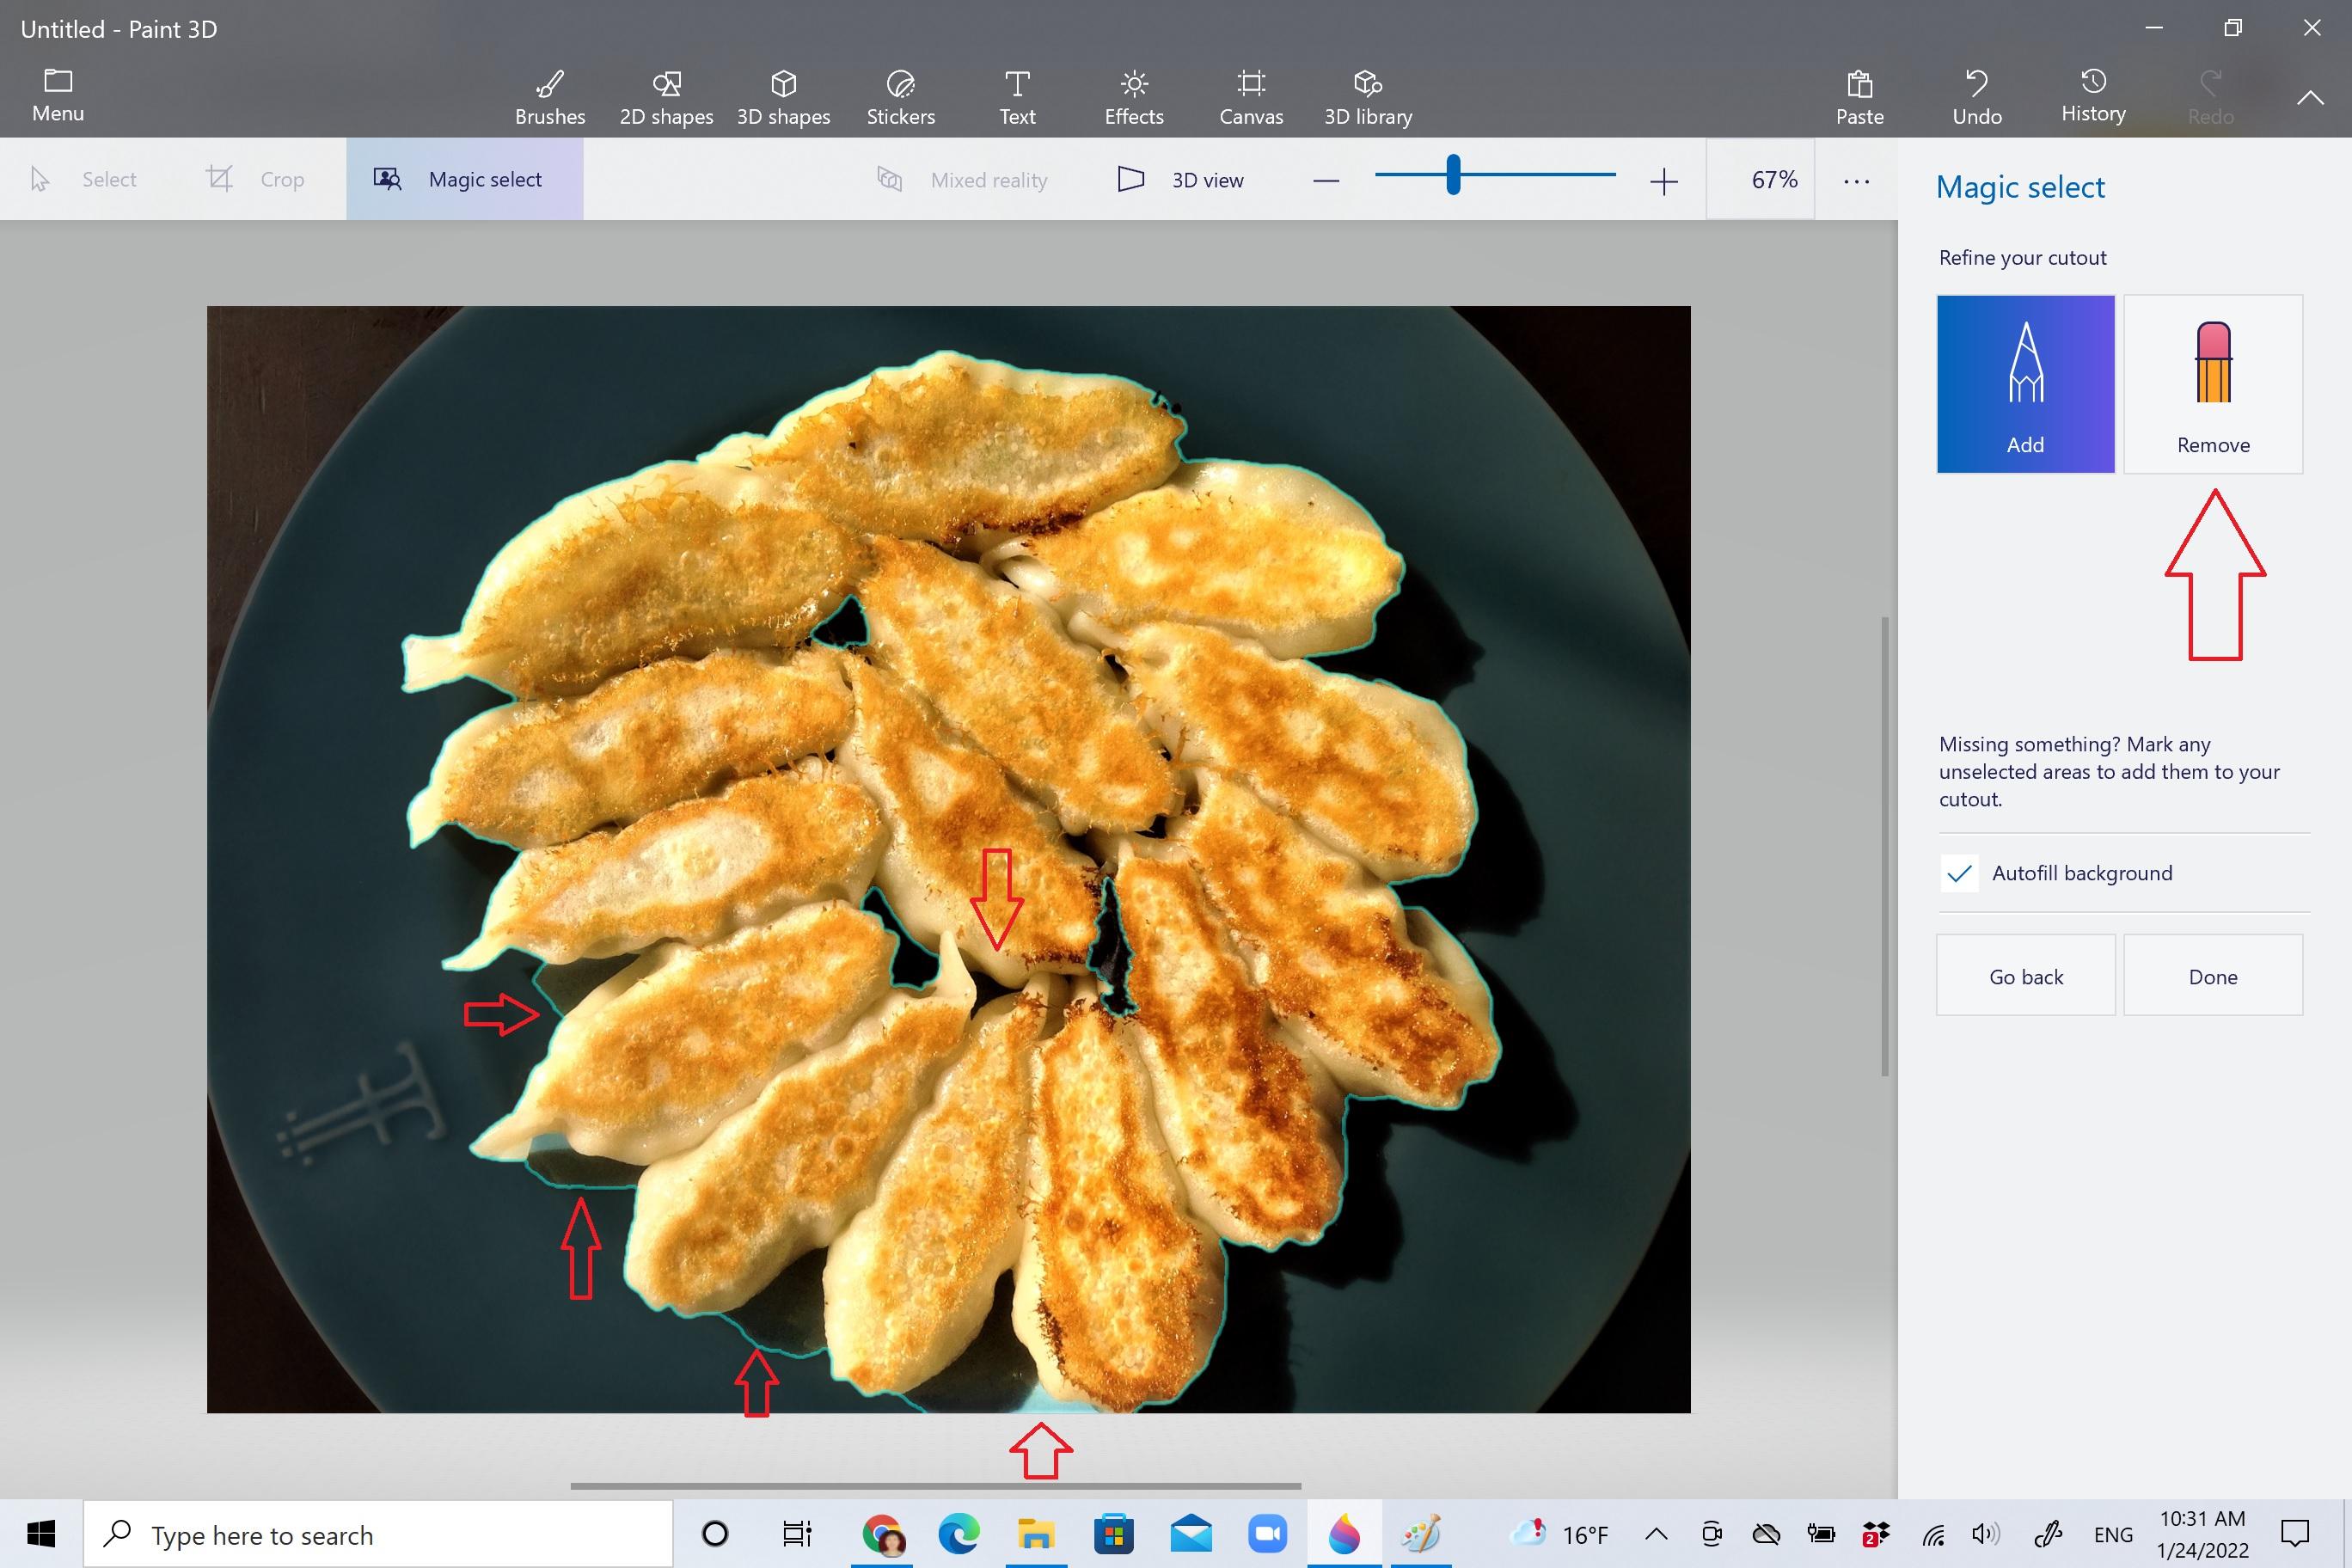
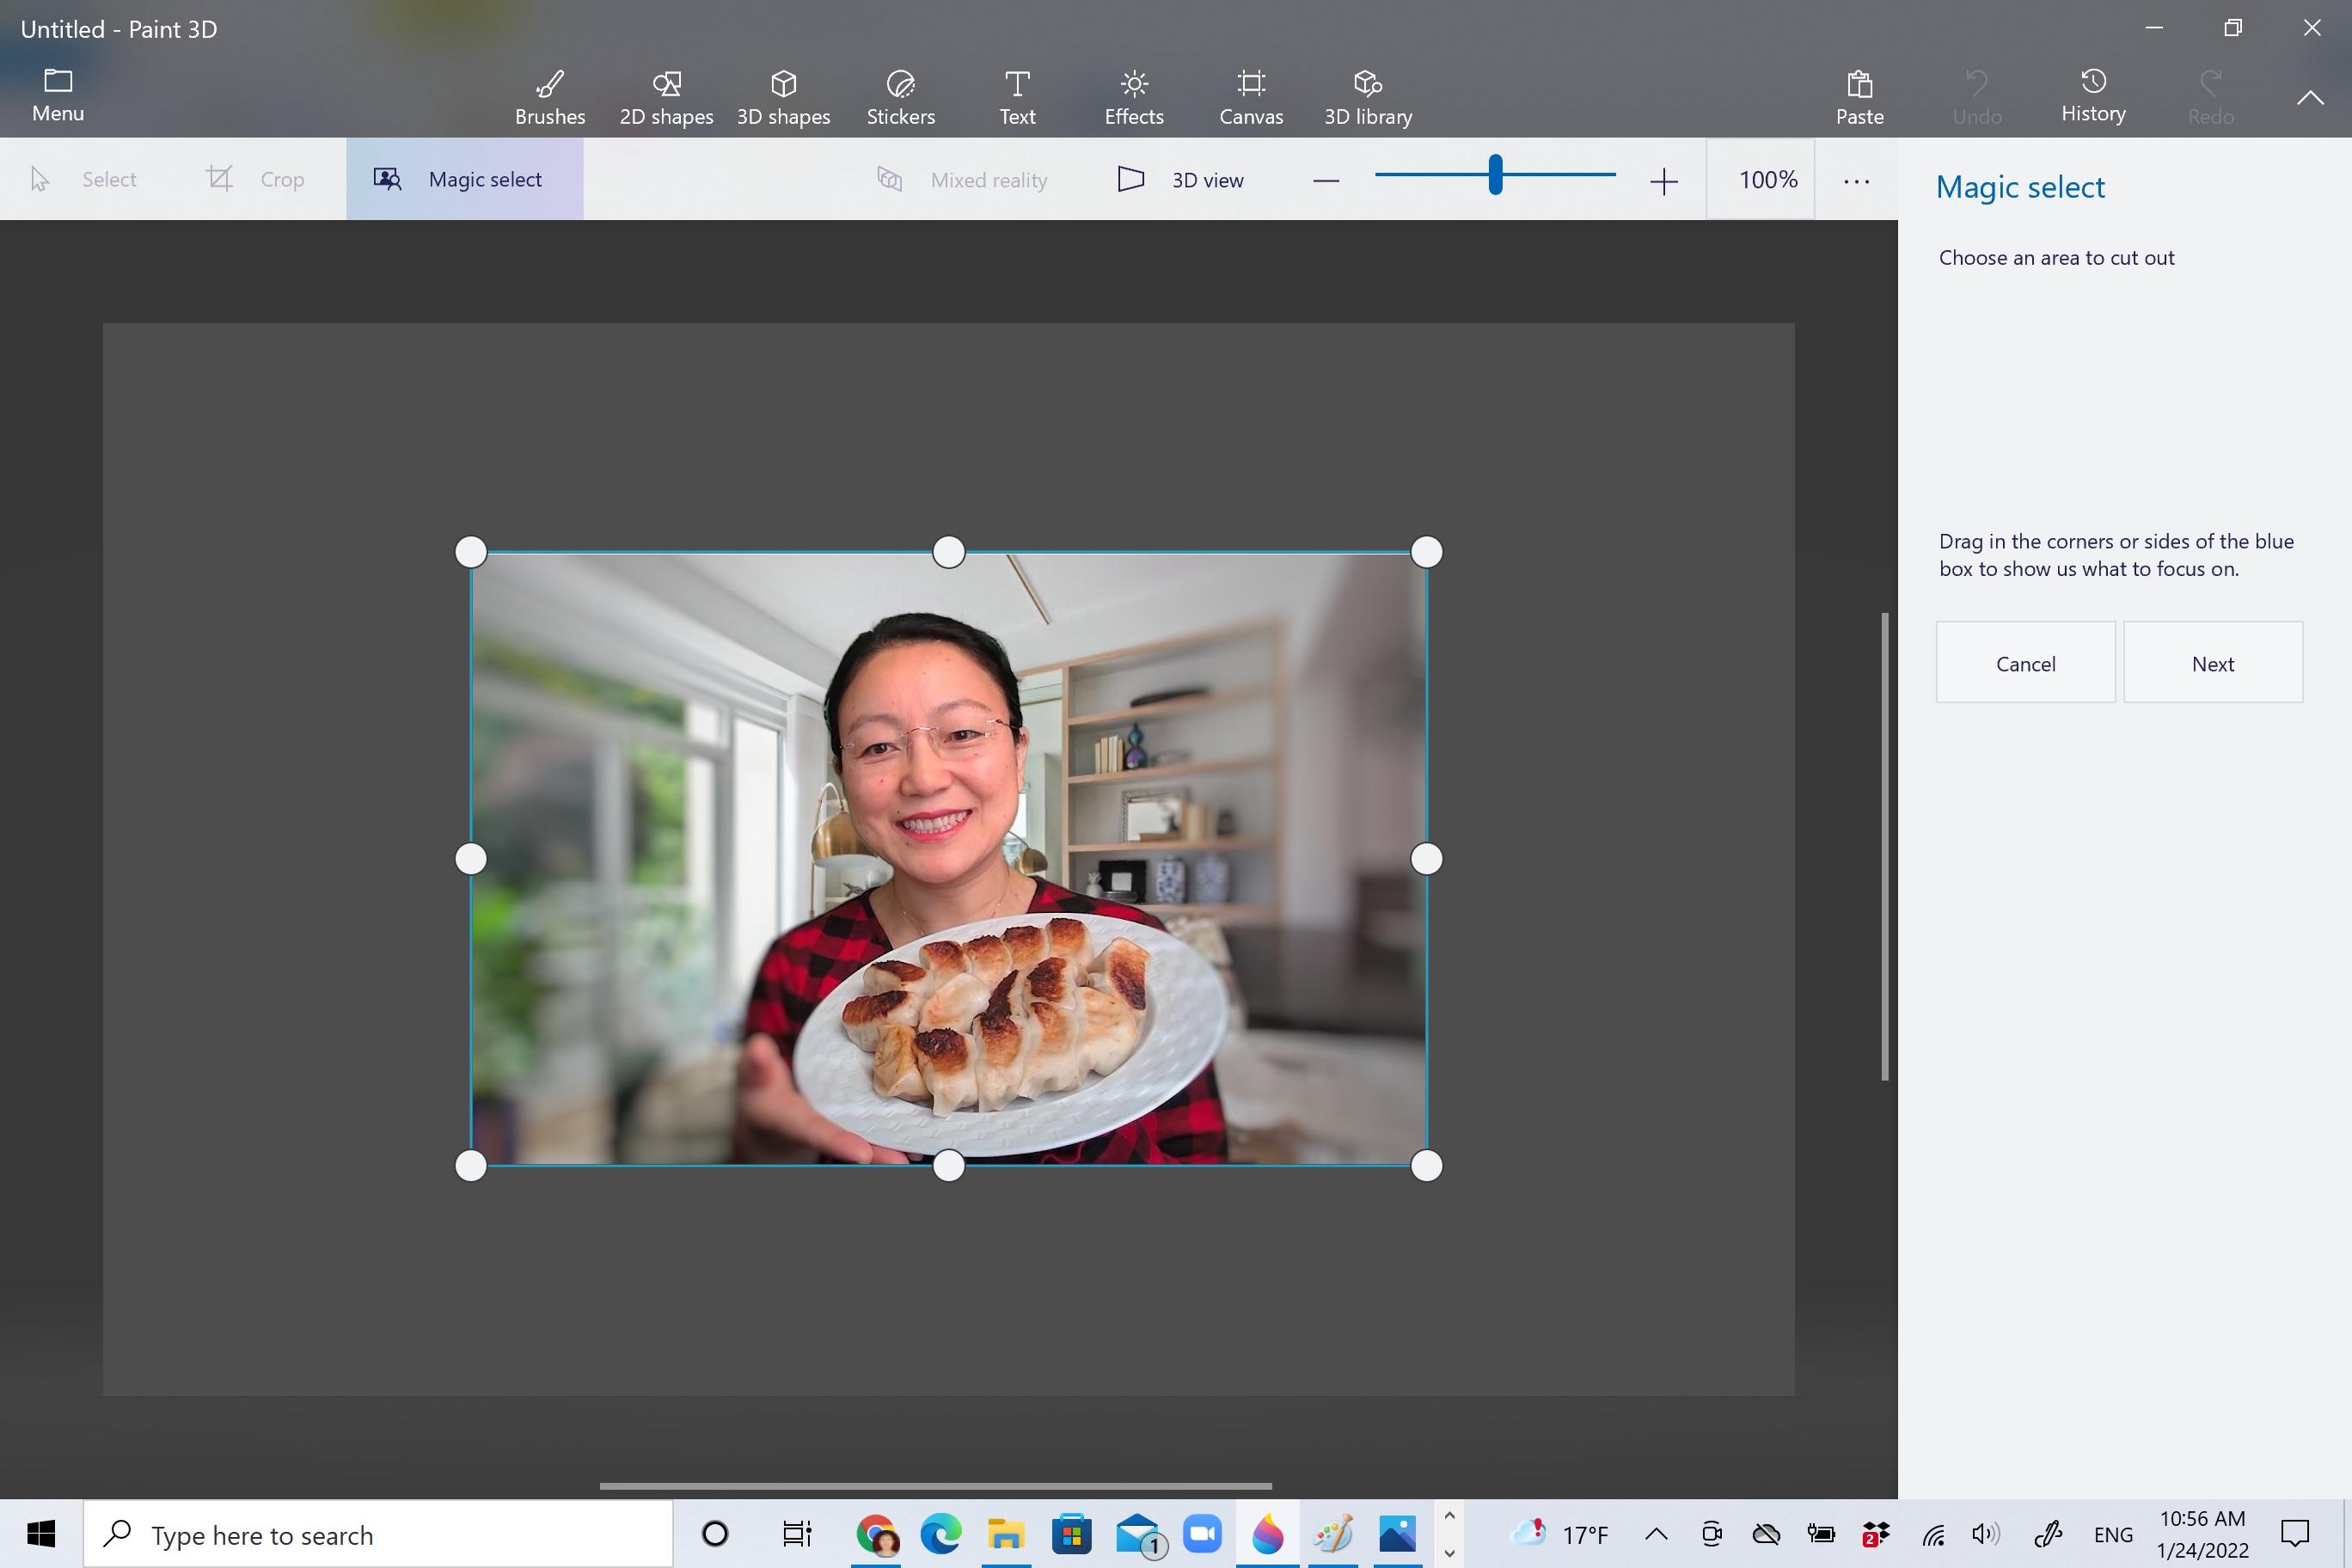
Click "Magical Select" which is the third option on the top bar of Paint 3D window.
Move the sides of the selection box as close as possible to include the area you want to select, click "next" which is on the right side of the Paint 3D window.
Any area that's lit and in the blue outline will be selected. So click the "remove" selection option on the right side of the window, click and drag the cursor over the five areas pointed by the arrows to remove those spots from selection and click "Done." Sometimes if the magical select misses areas you want, then you use "add" to add those spots to your selection.
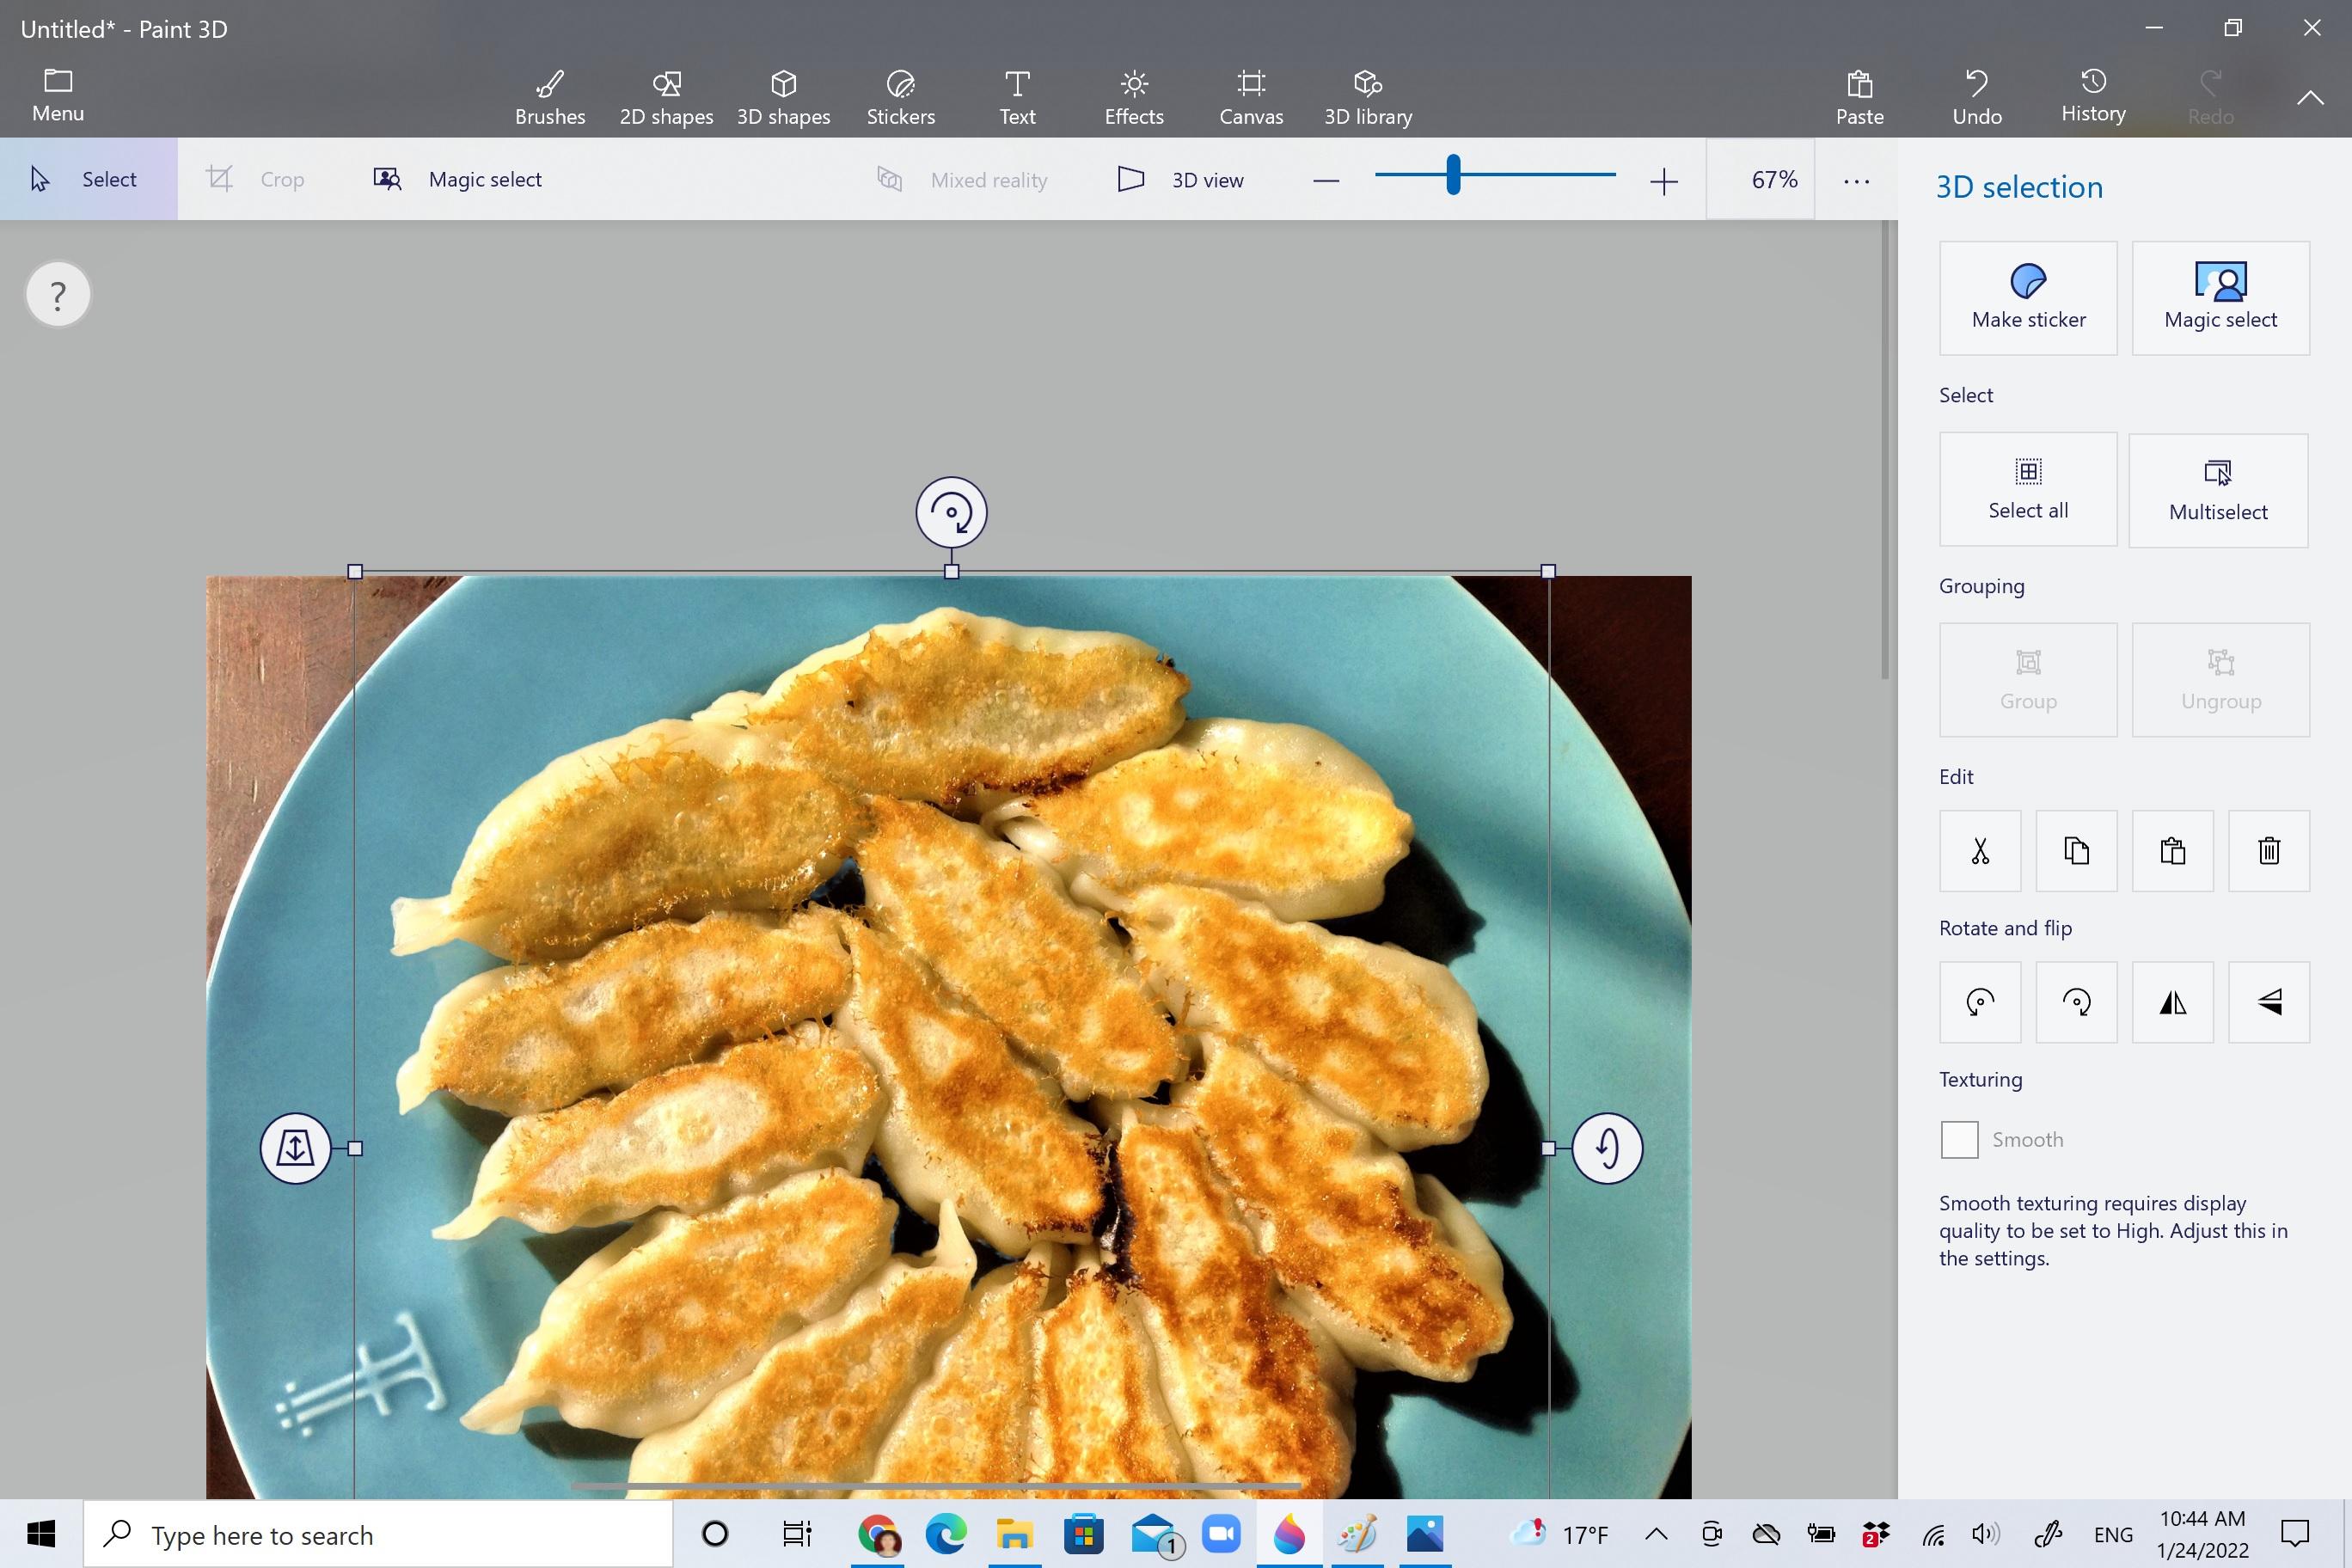
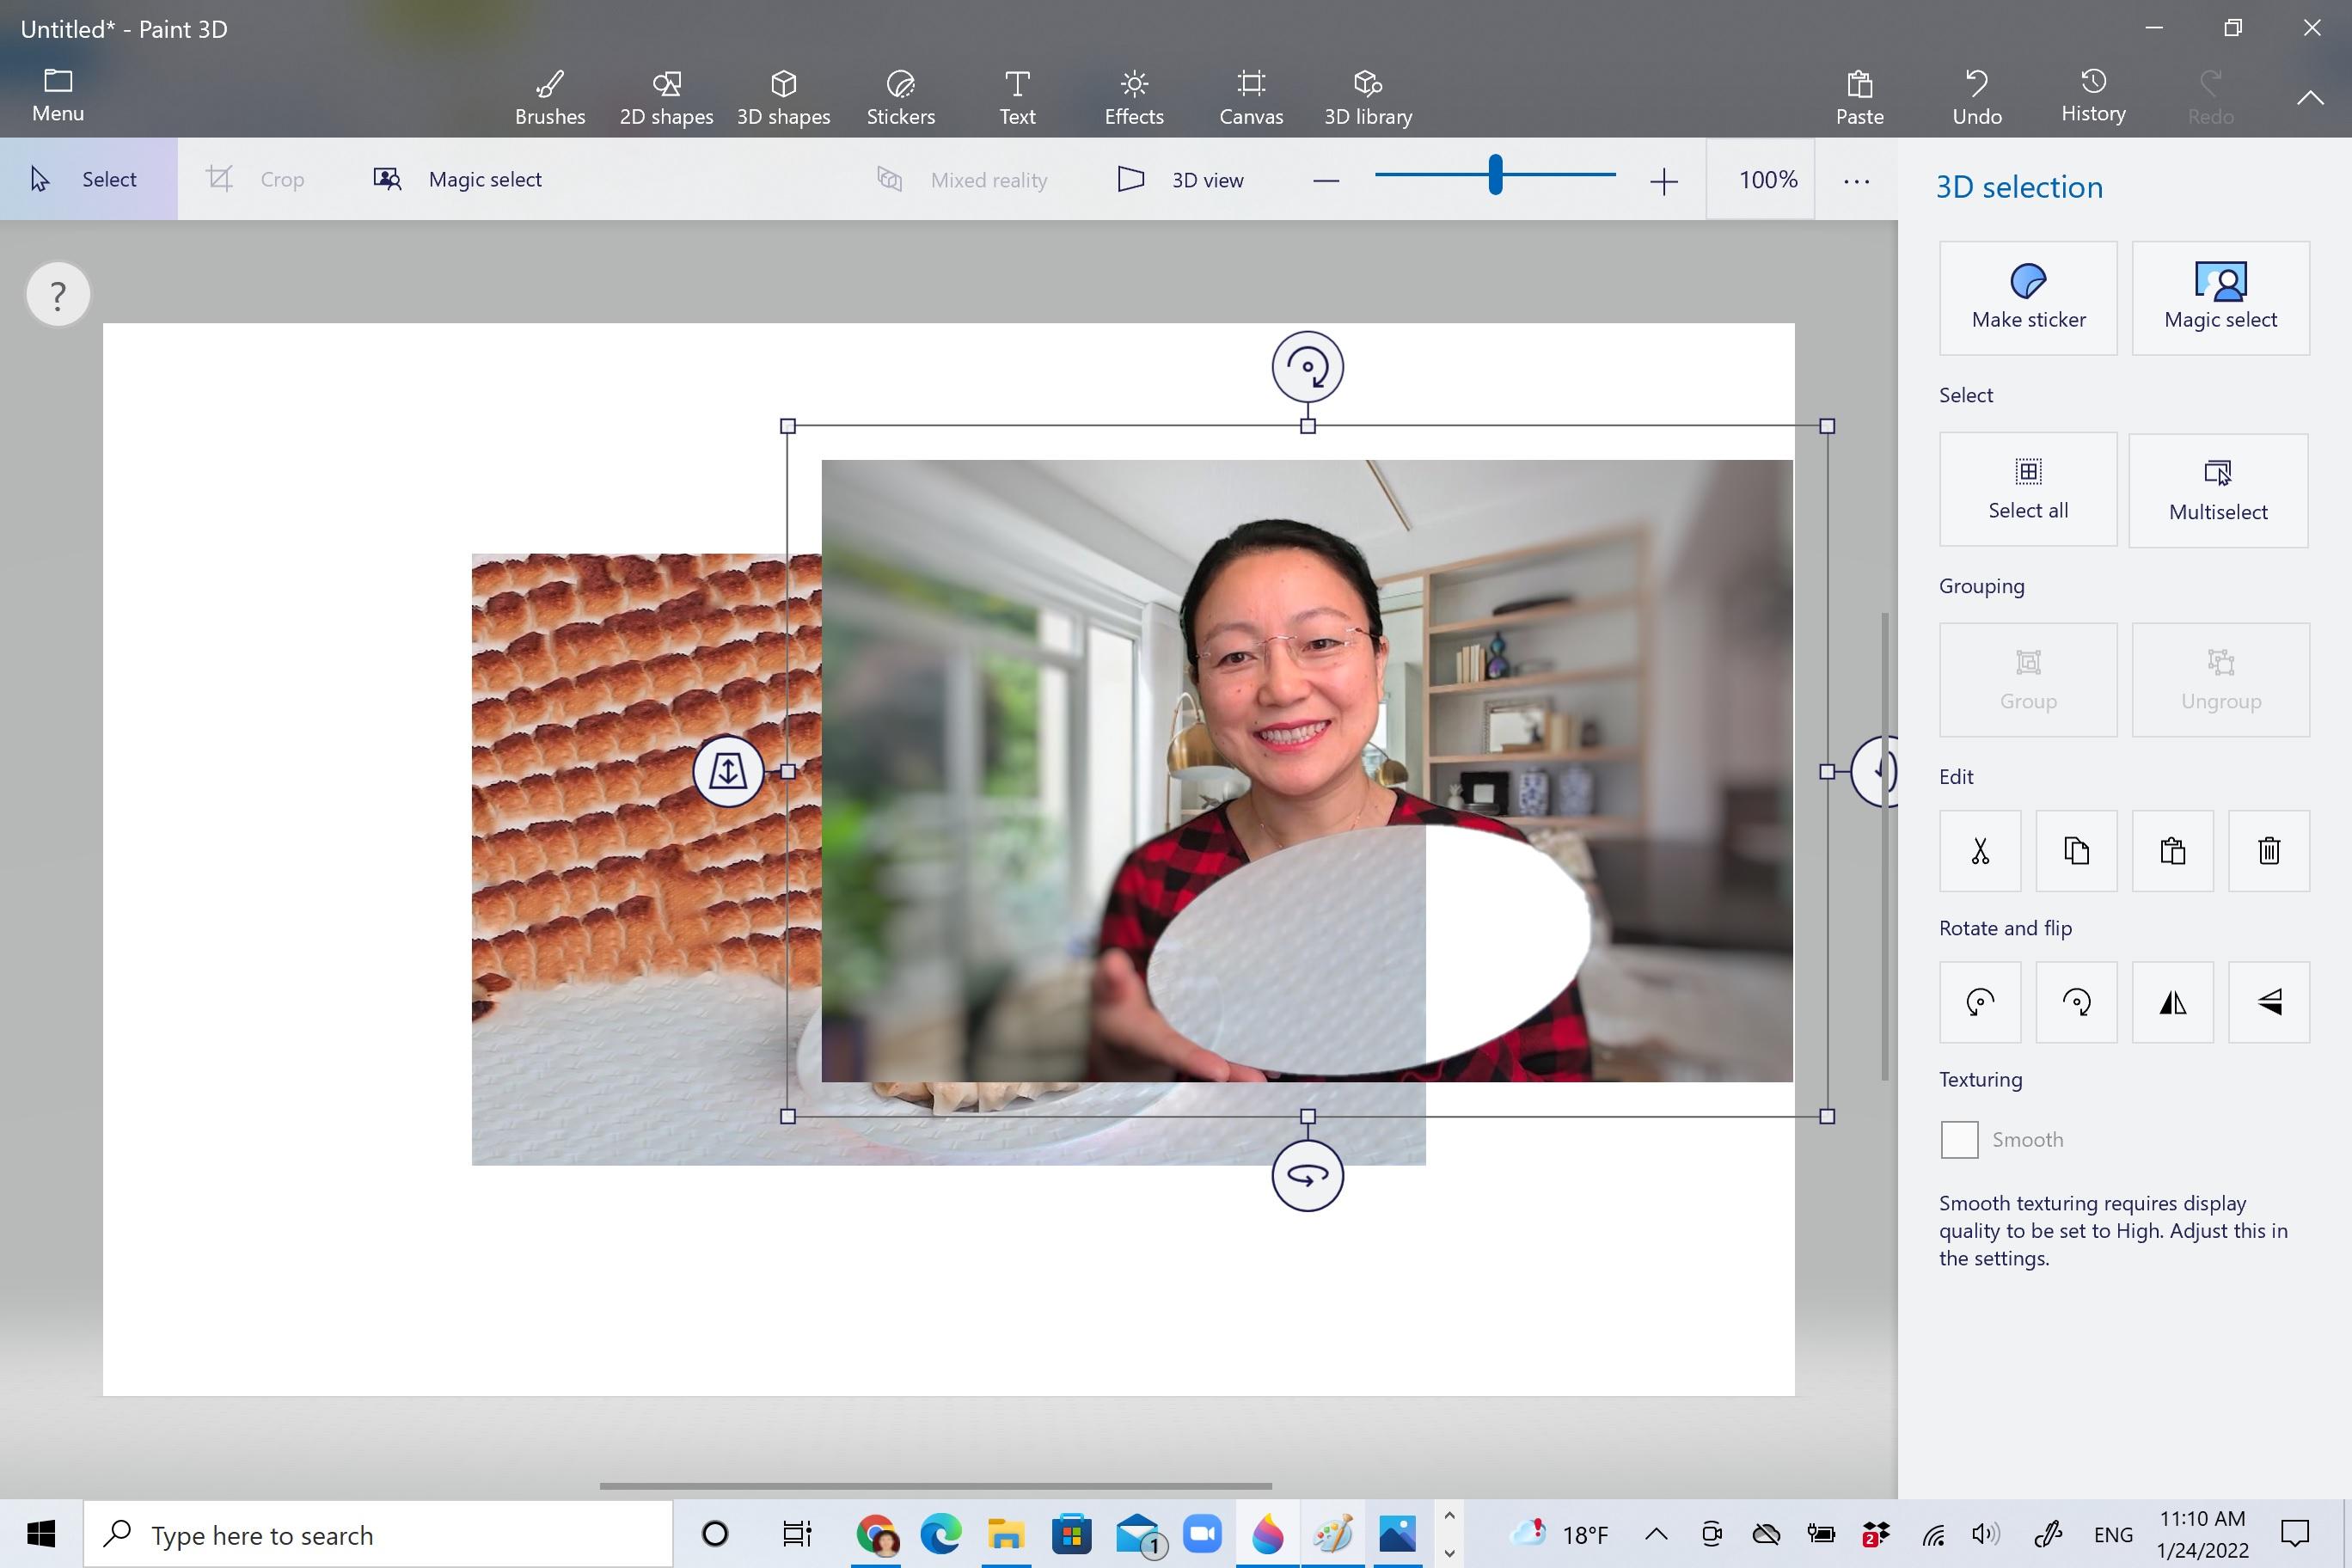
Now in the new window, there is a thin line of box around the selected area, click on the selected area and drag to aside, you'll see what the magical select has done for you.
Right click non the magical selected area, and copy, then paste it into your blank PowerPoint.
Done with selecting the desired part from the first photo.
Magical Select Everything But the Potstickers and Plate in the Second Photo
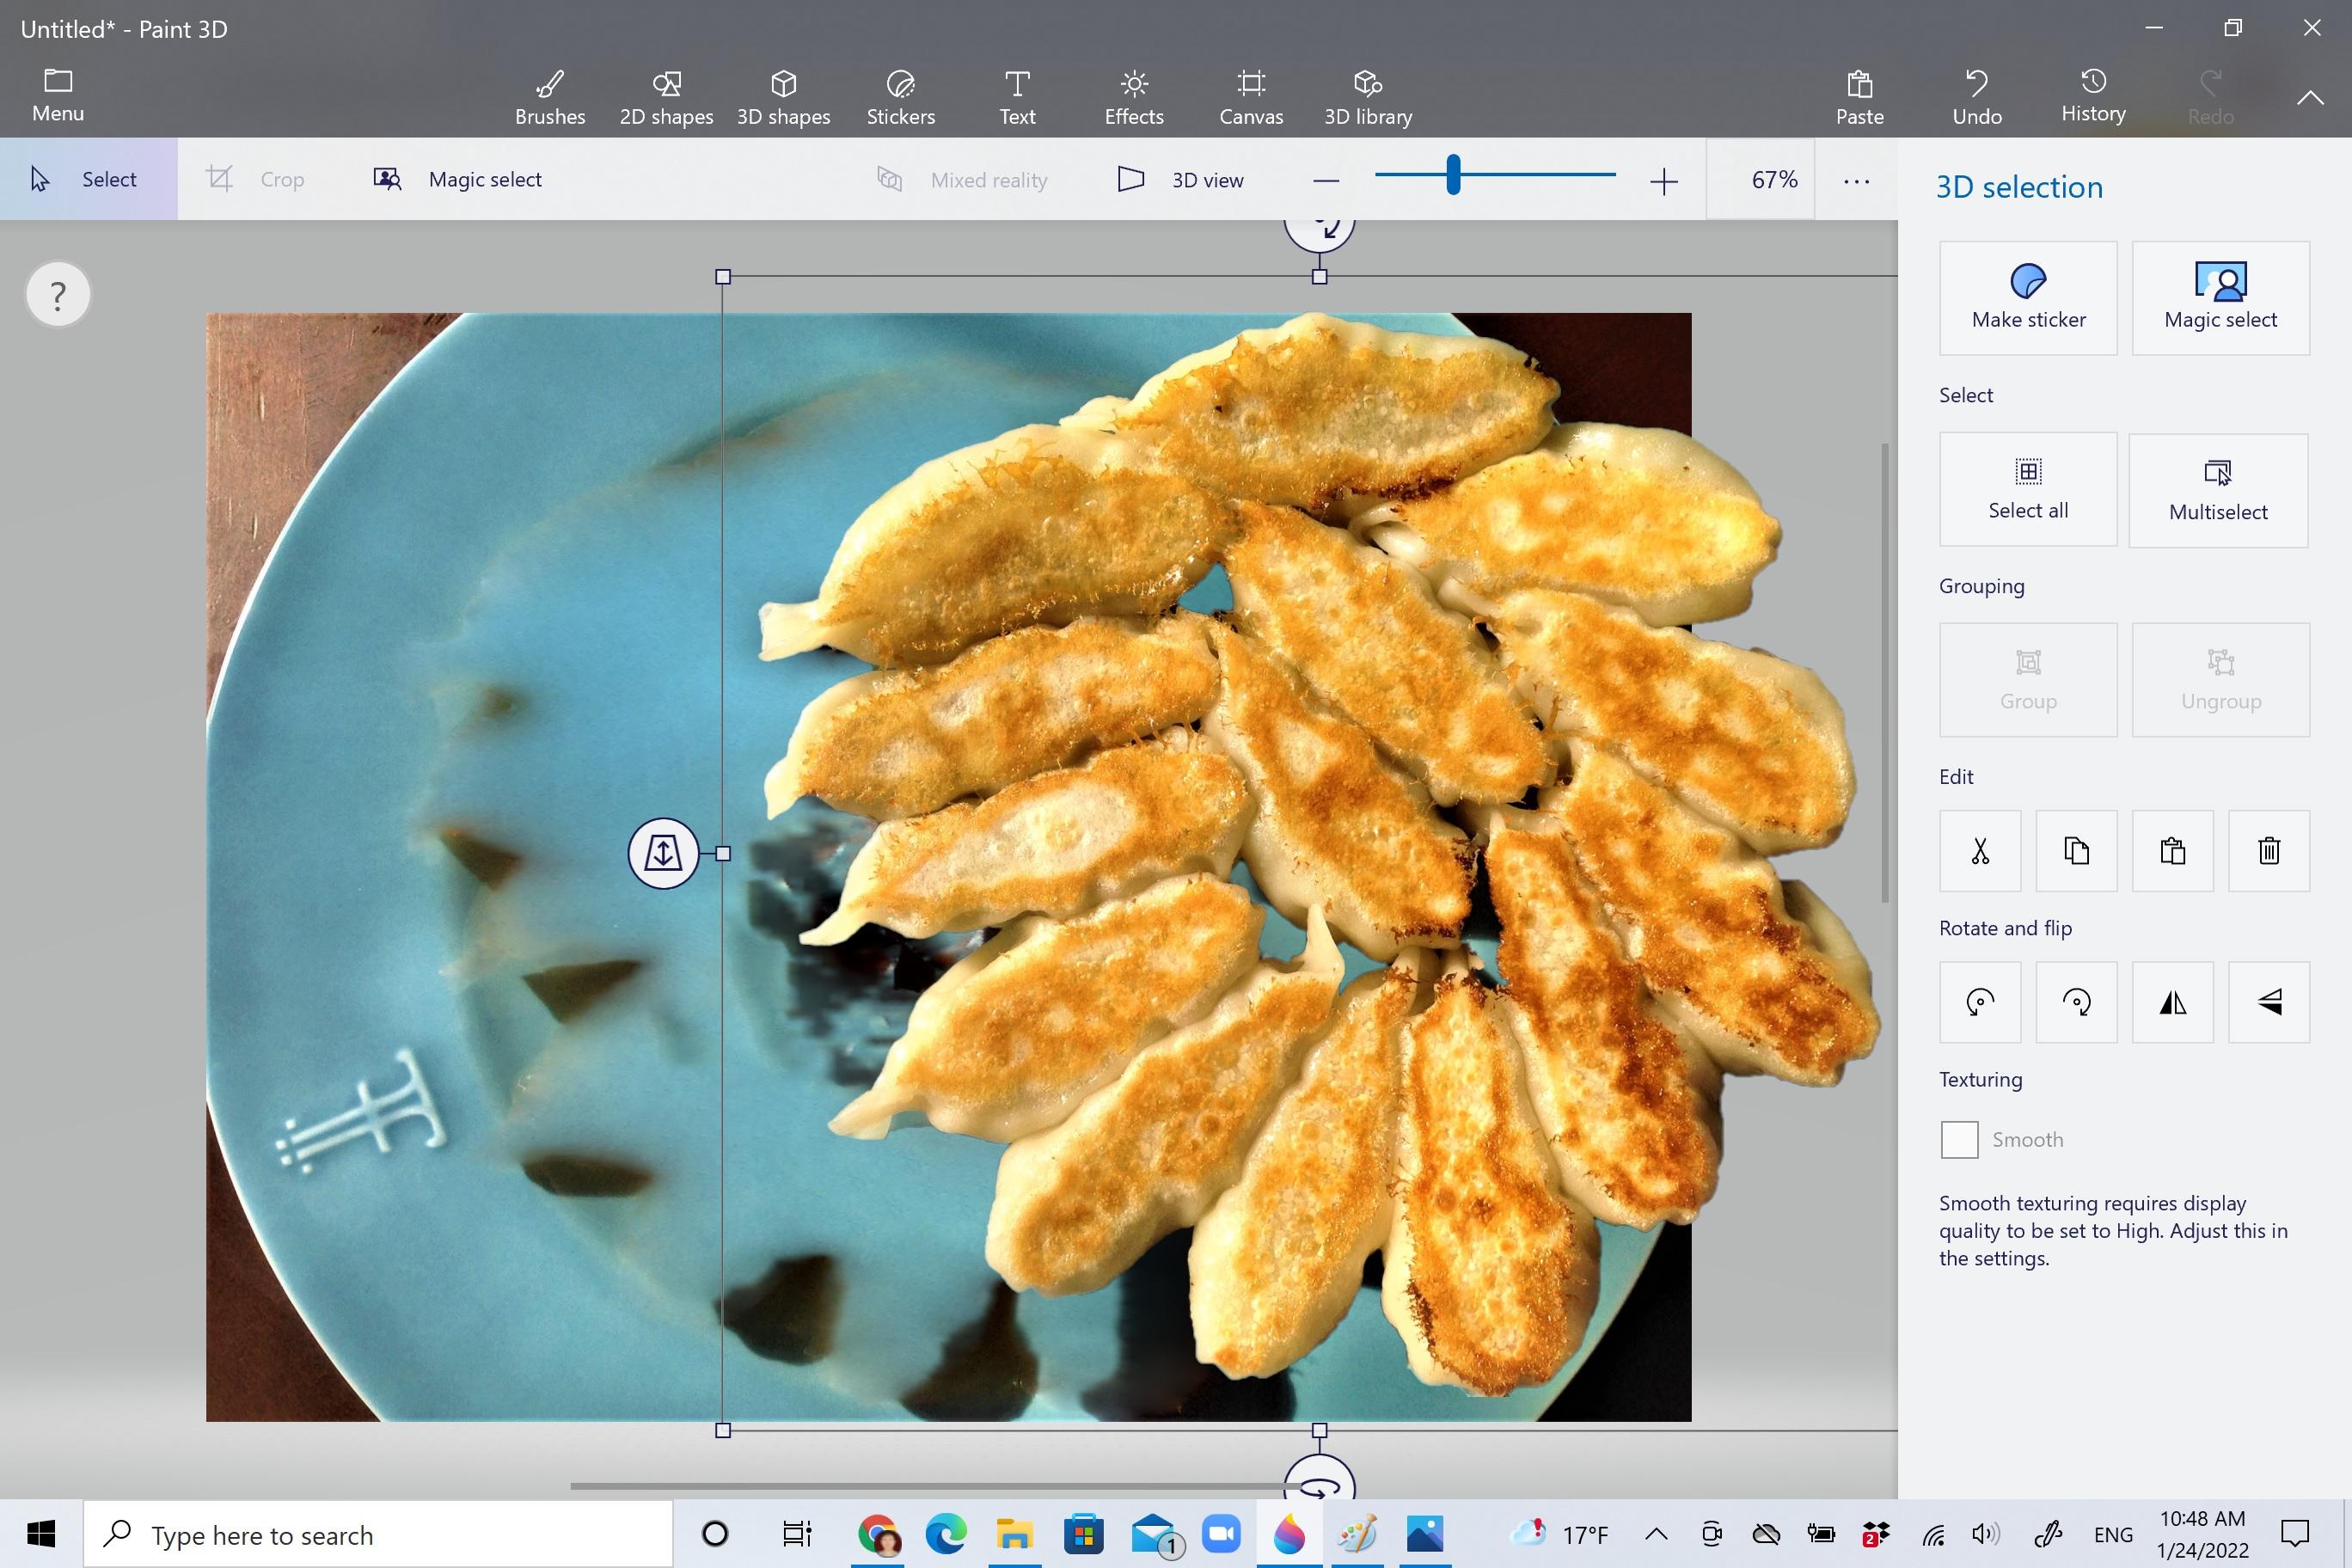
Click "Menu" in Paint 3D, and then "new" to bring in the second photo.
Click "Magical Select" and then "Next".
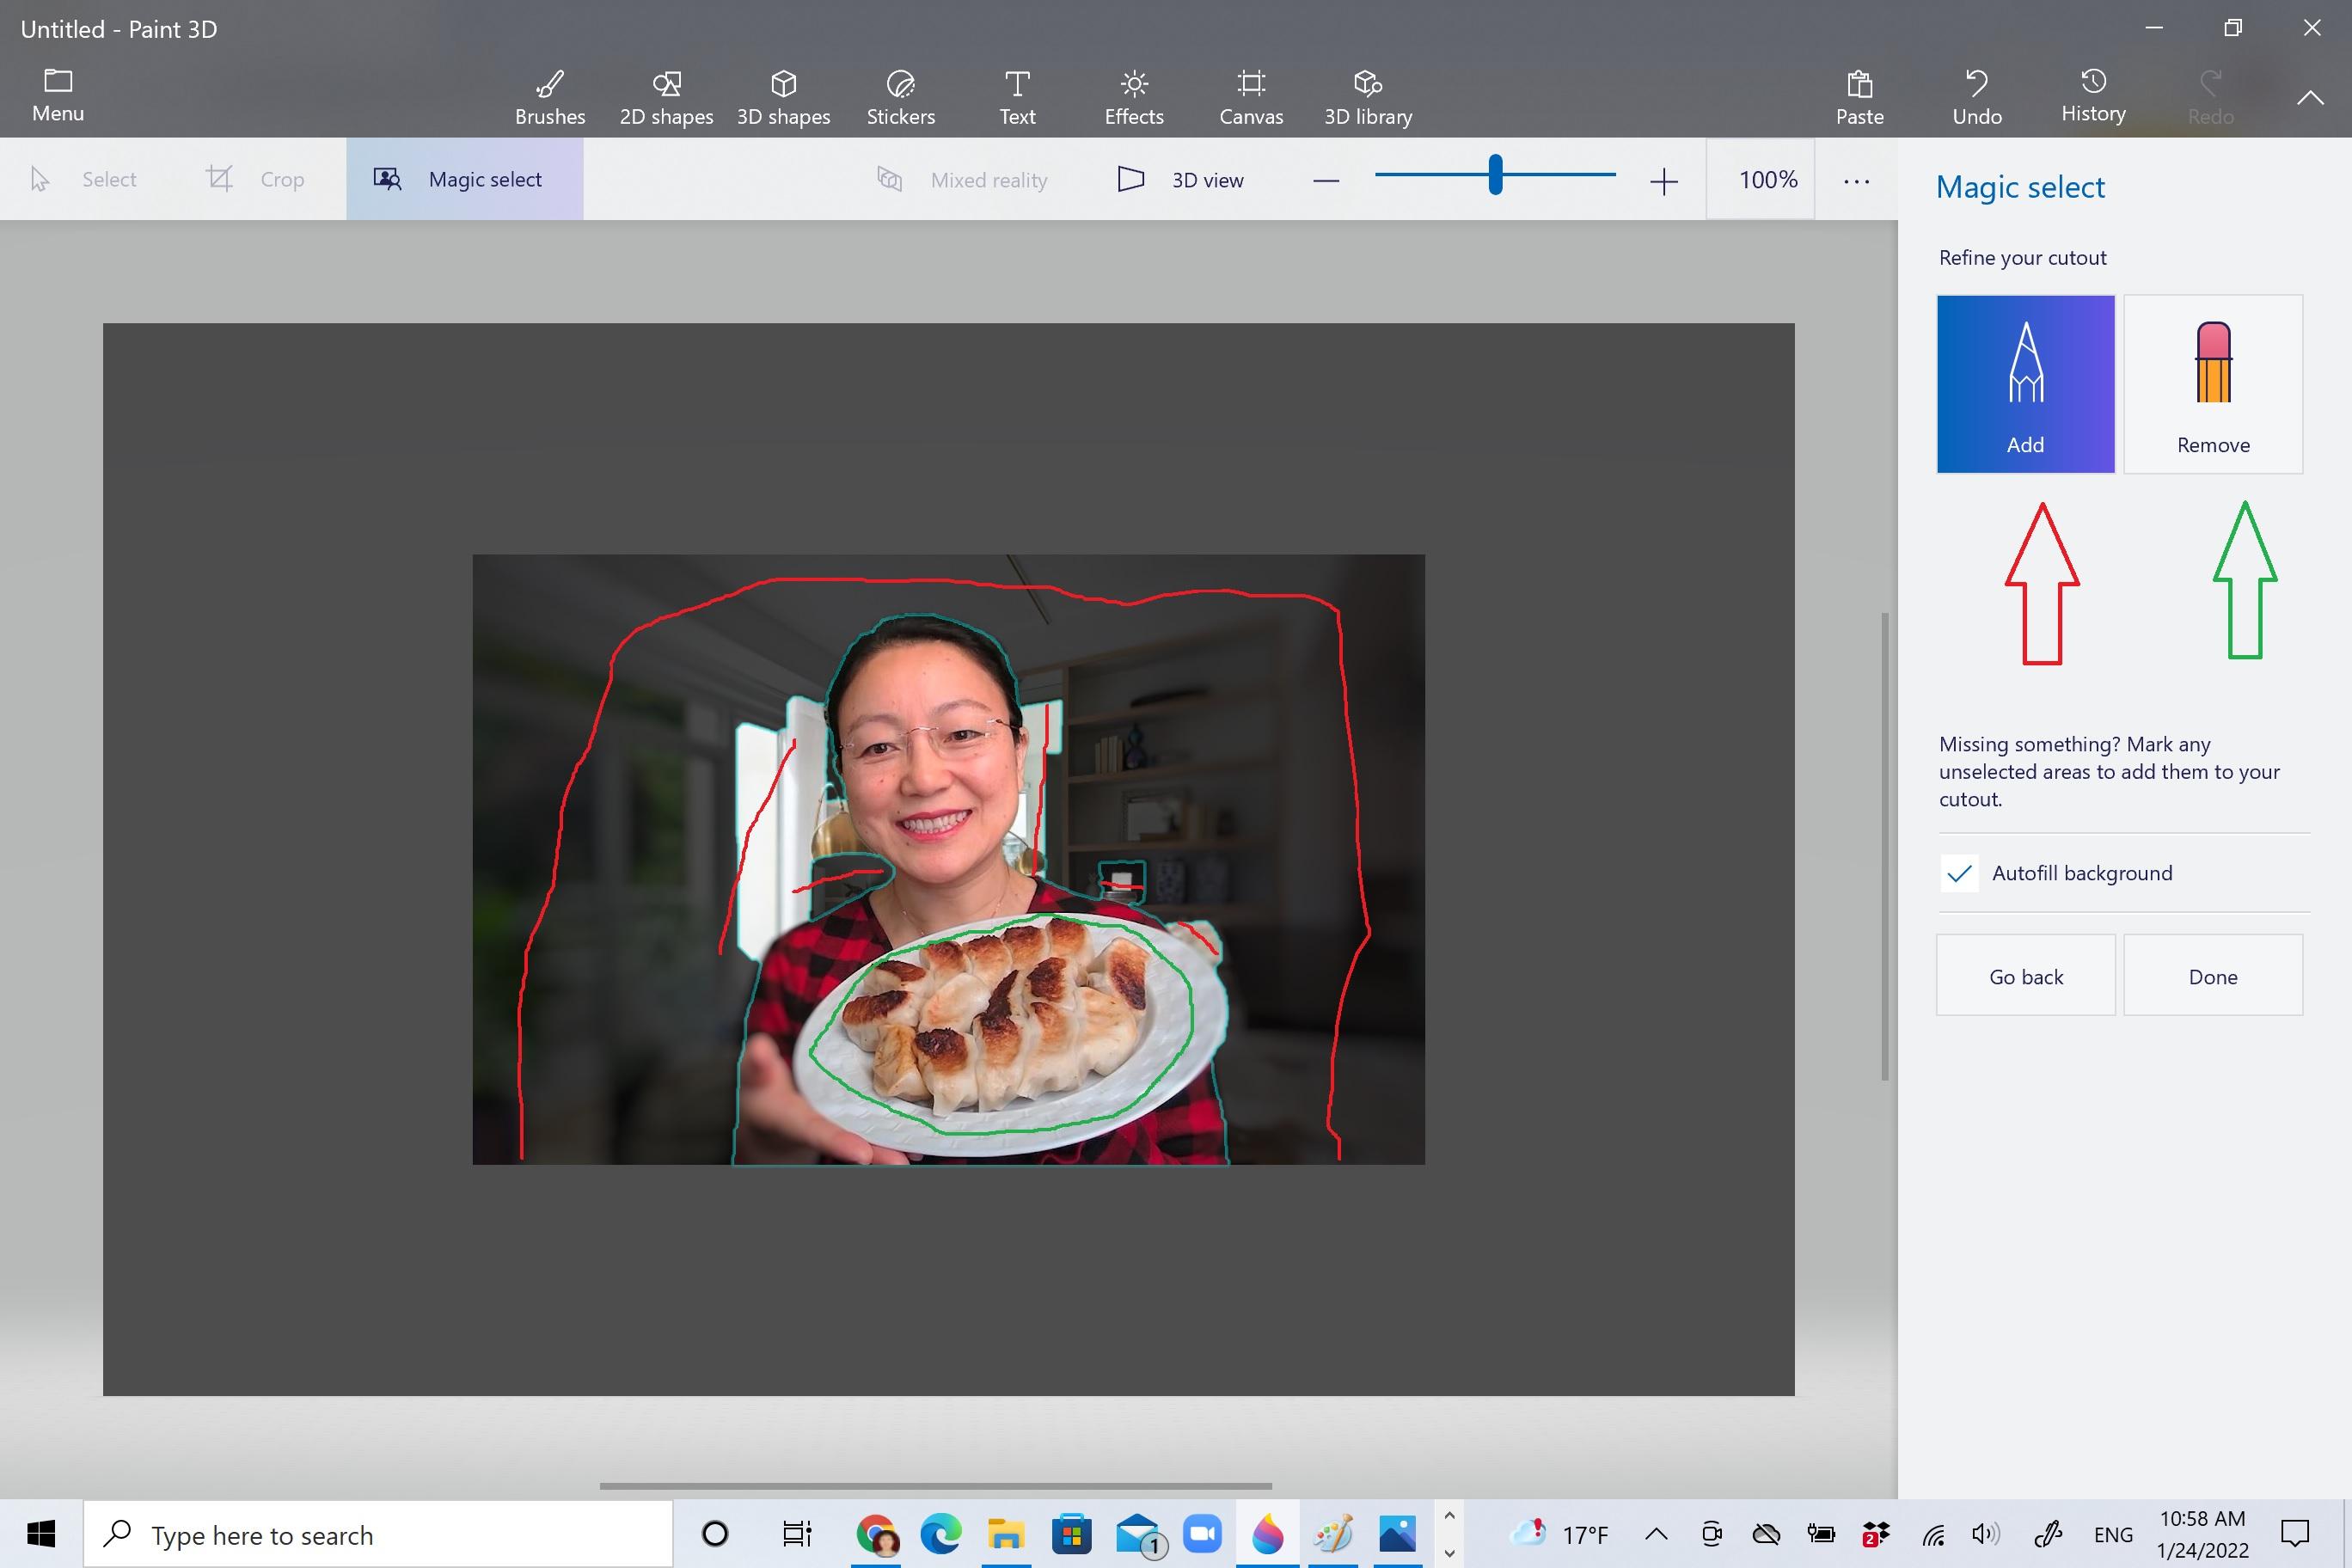
Click "Add", then click and drag a line across any area you desire to select (shown in red), click "Remove" and click and drag a line outline the plate (shown in green), click "done".
Again click and drag the selected area aside to see what magical select has done. This is so fun. I can do this all day long without any purpose.
Again, right click the selected area and copy, then paste it to the PowerPoint.
Finish Editing in PowerPoint

.jpg)
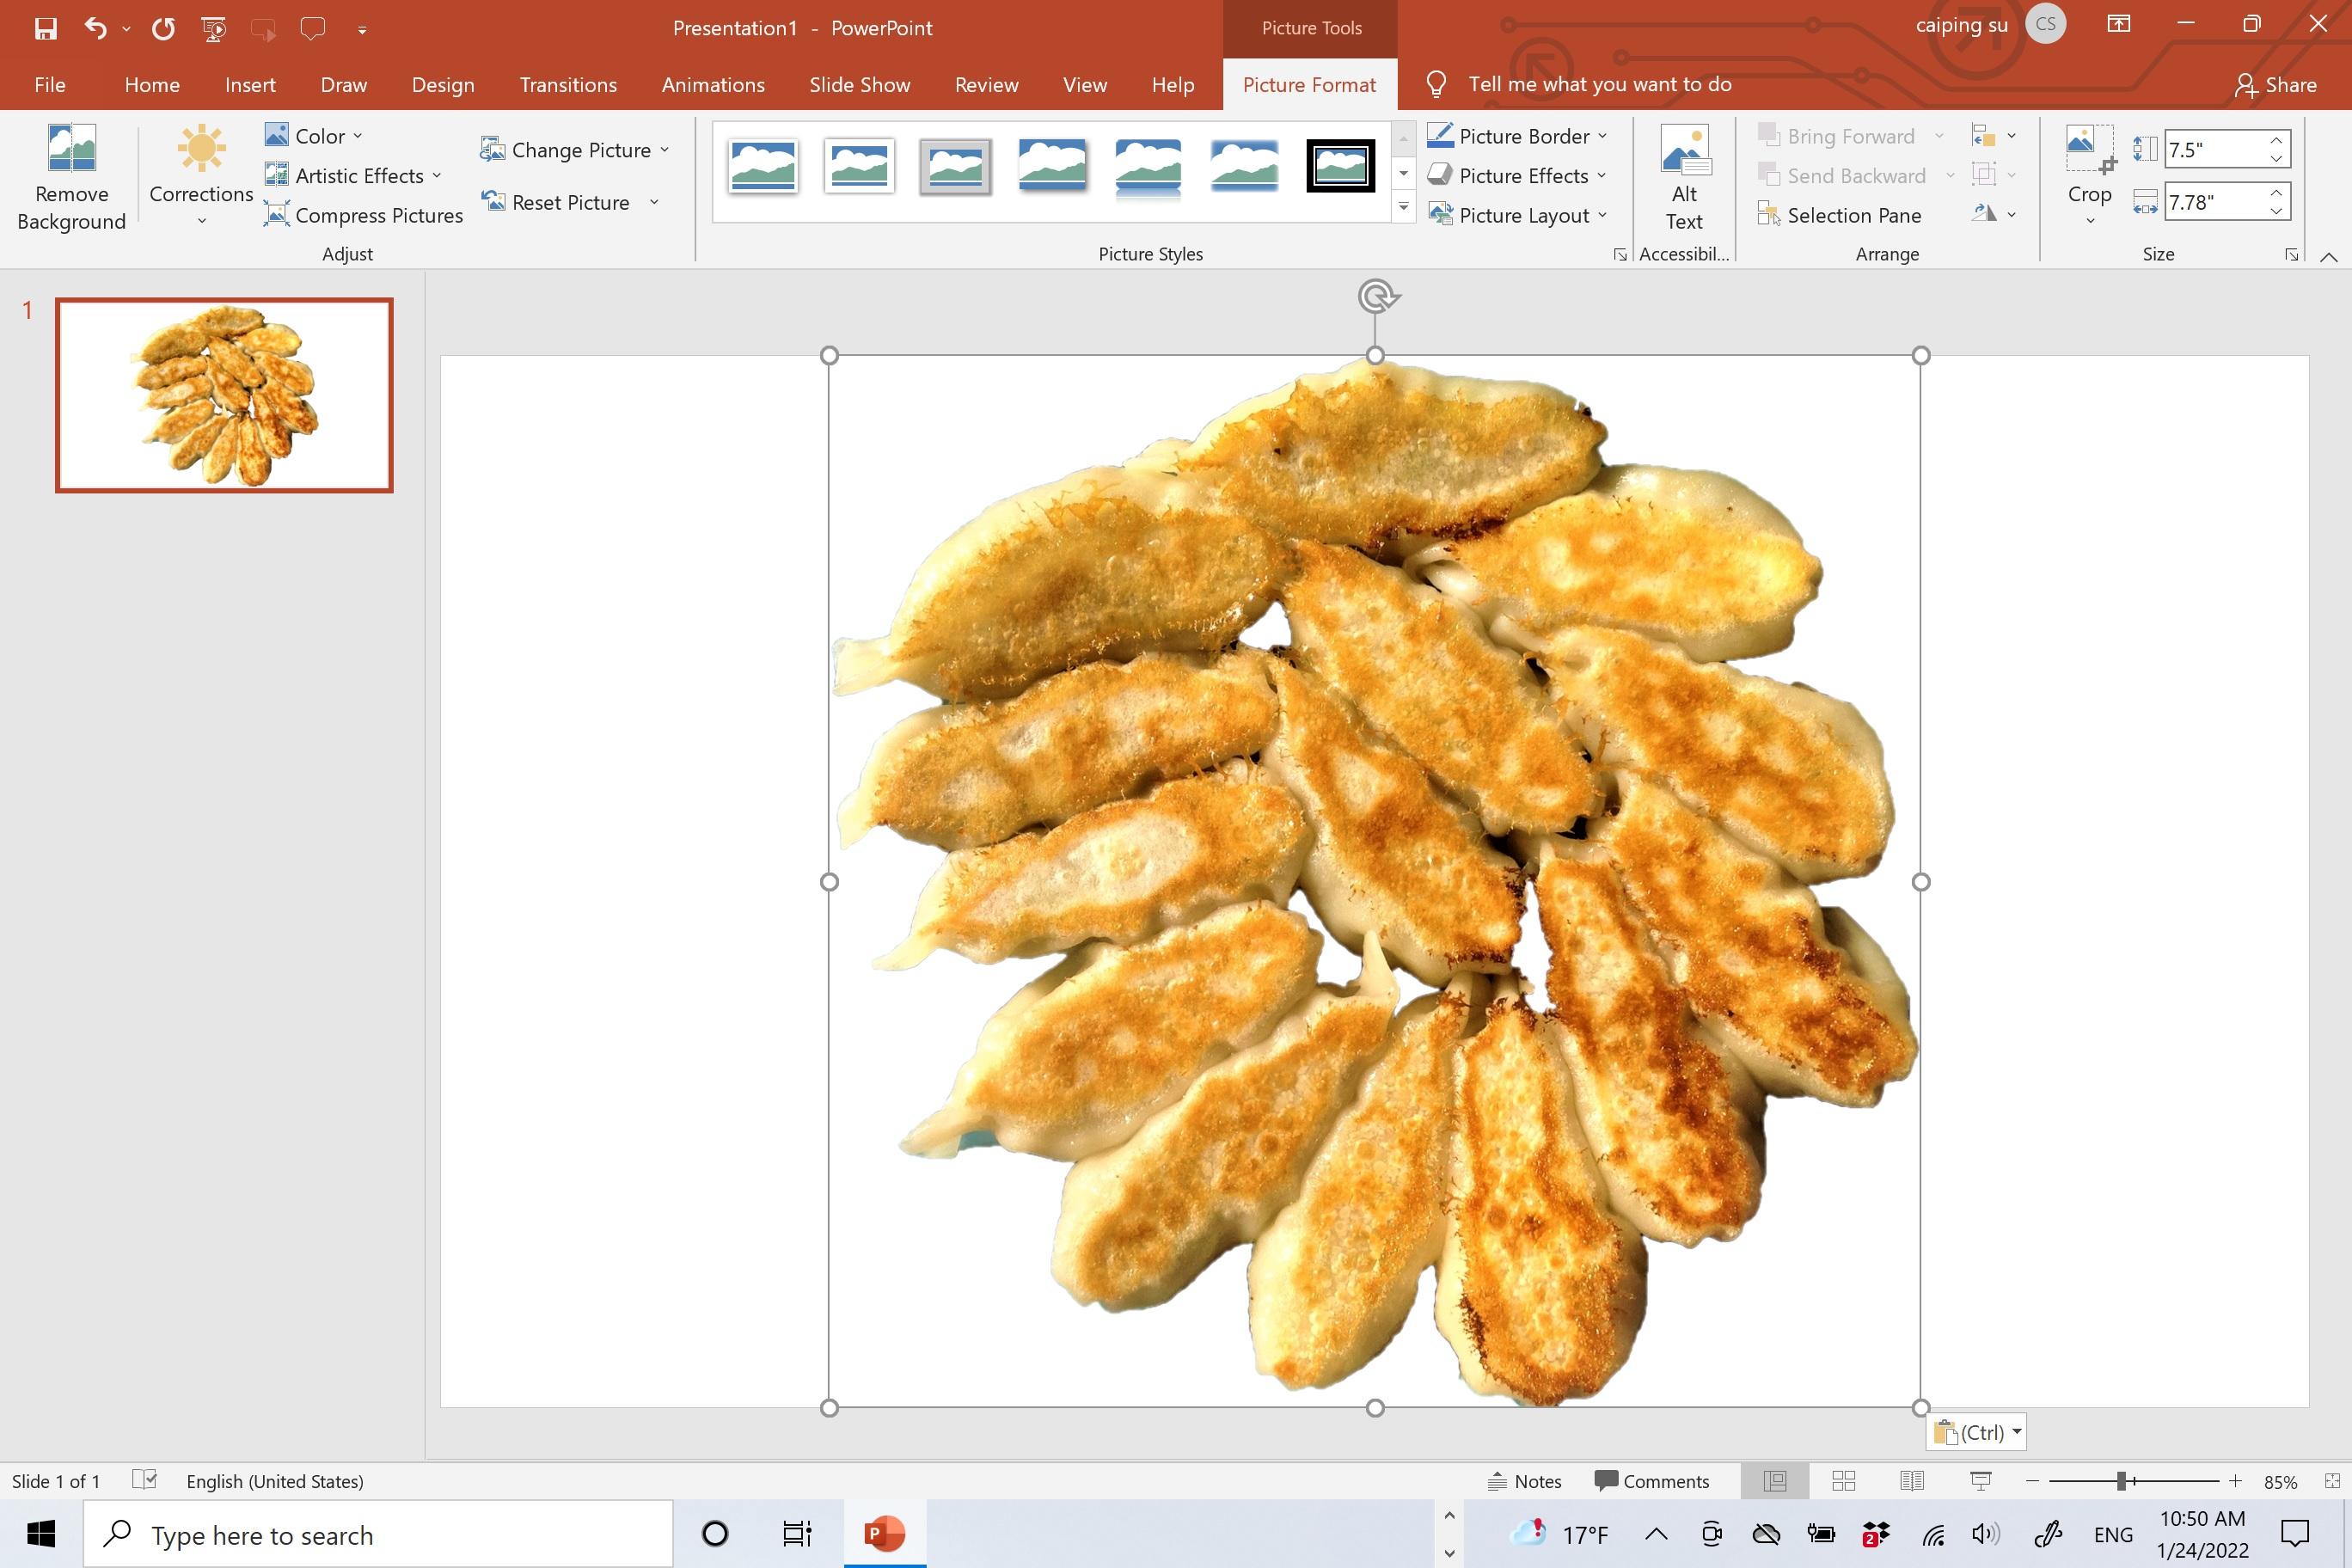
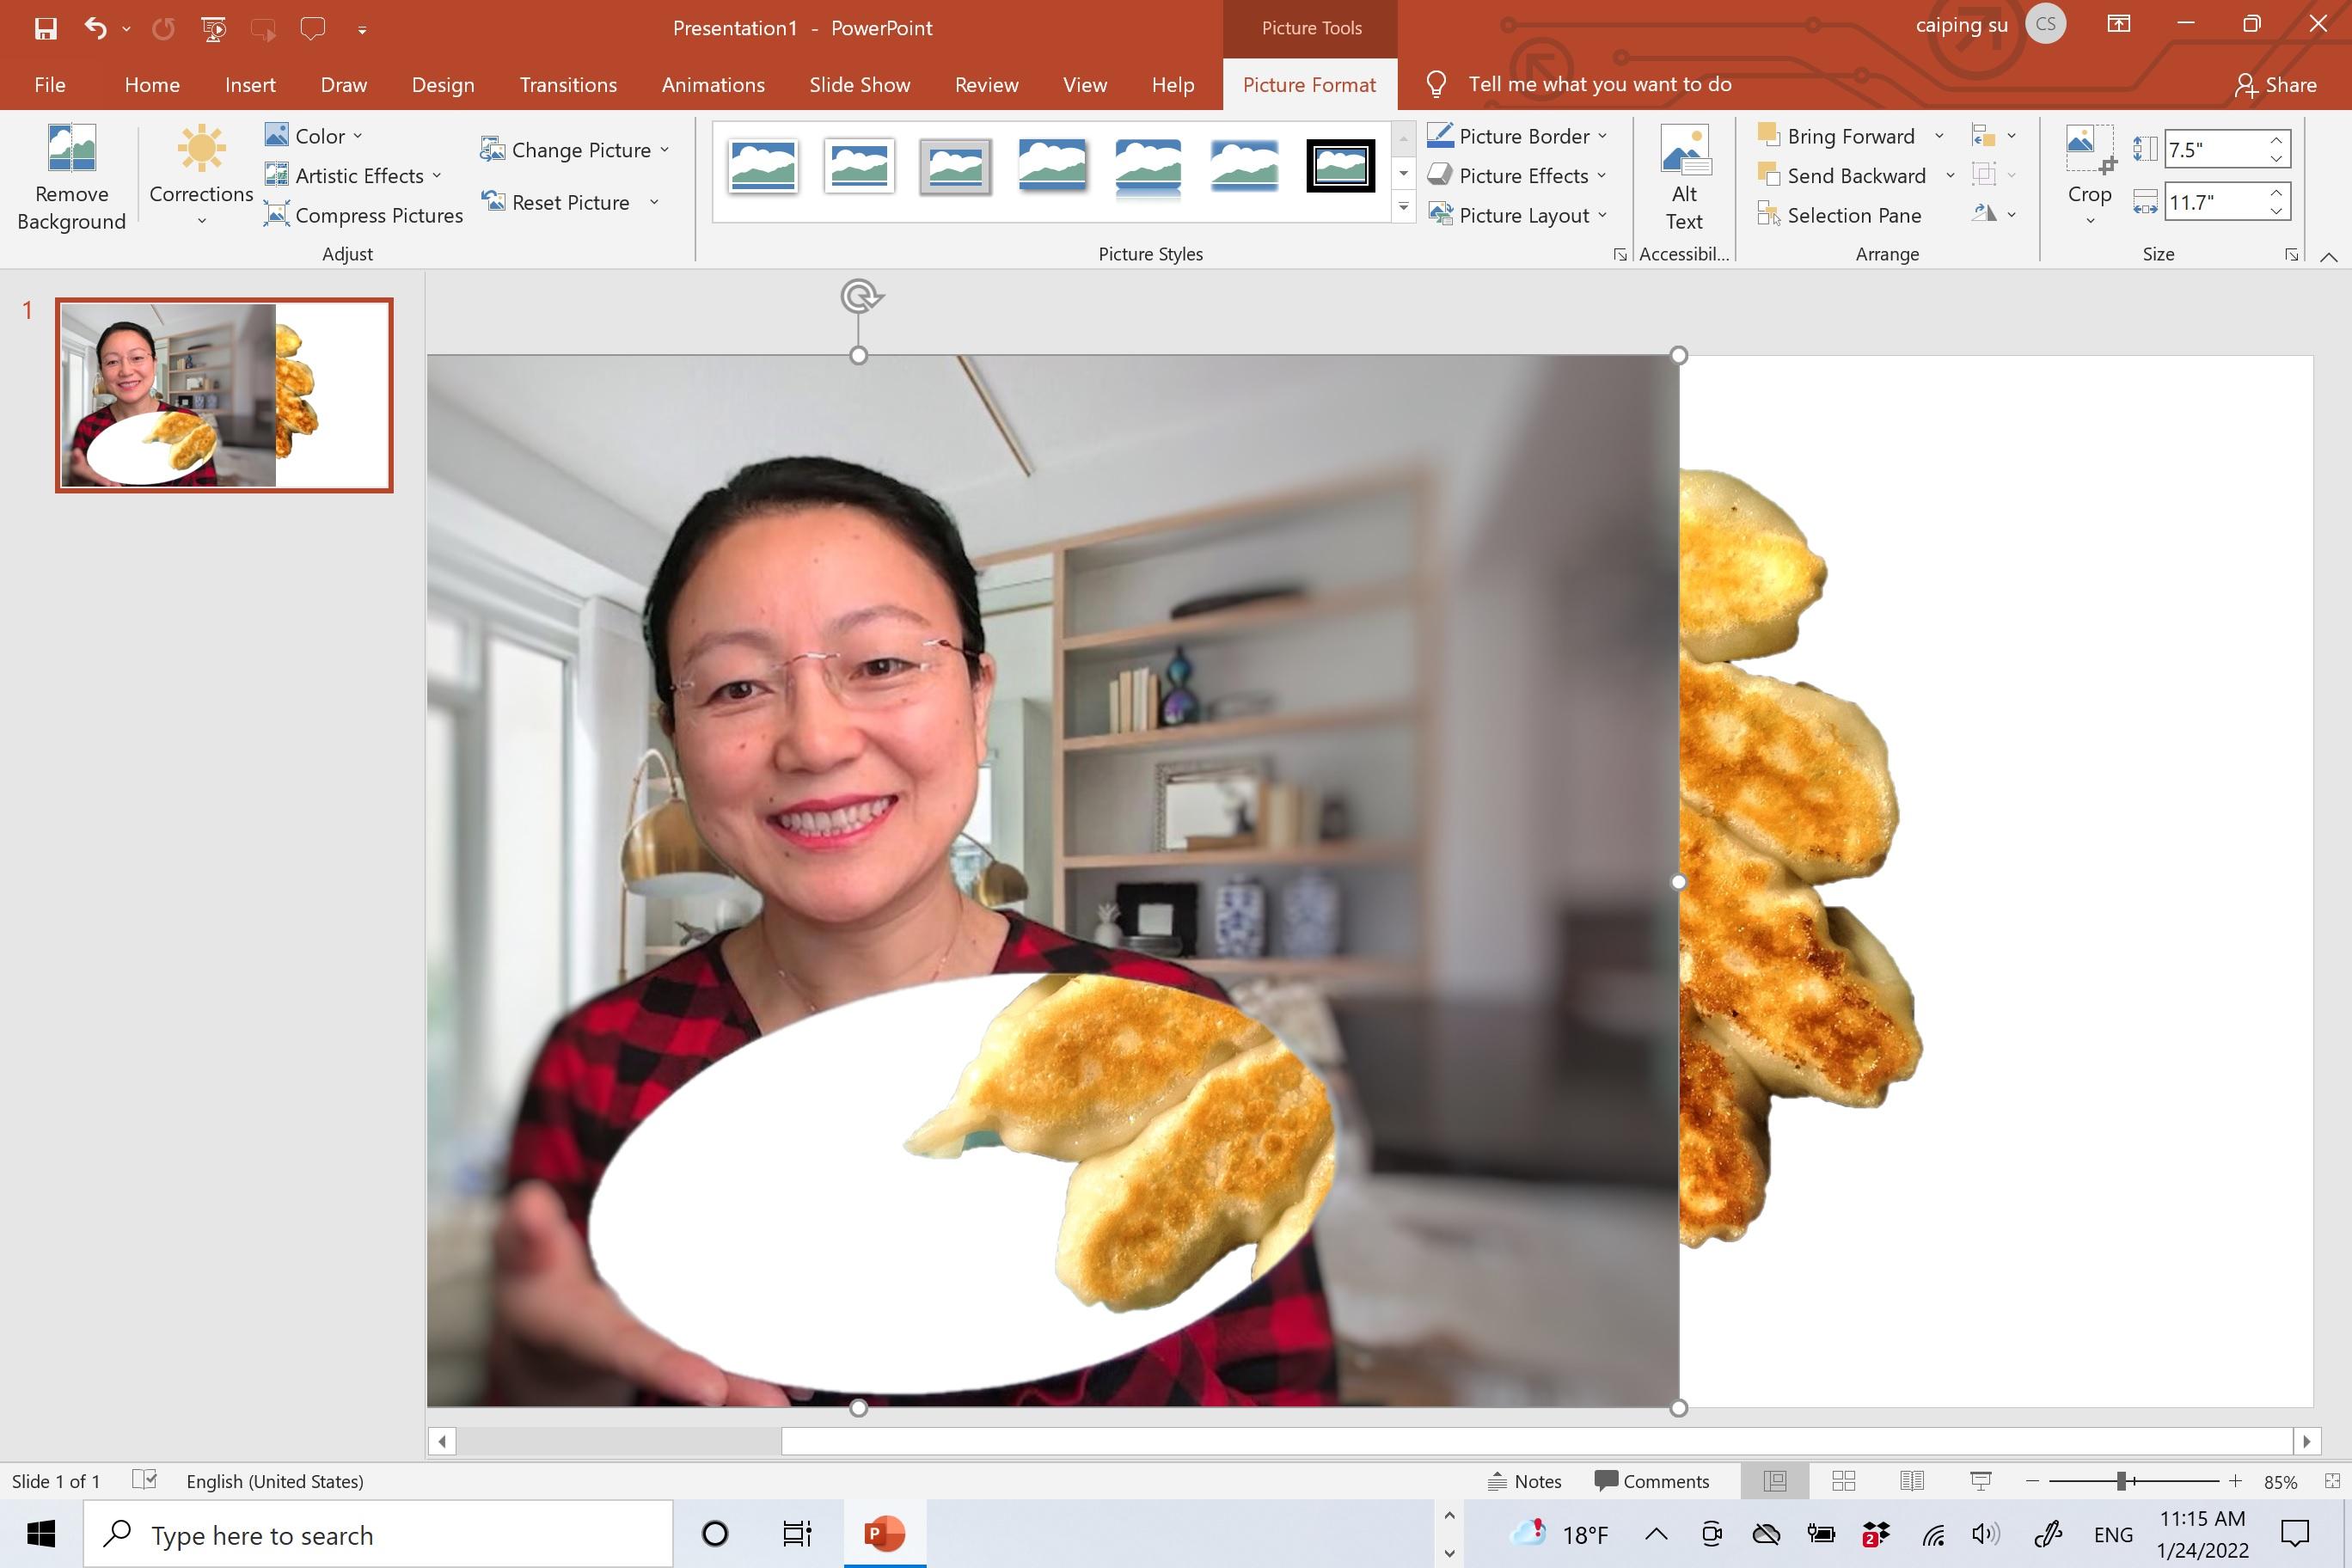
From this point on, a lot people are familiar with editing photos and texts in PowerPoint. These edits include:
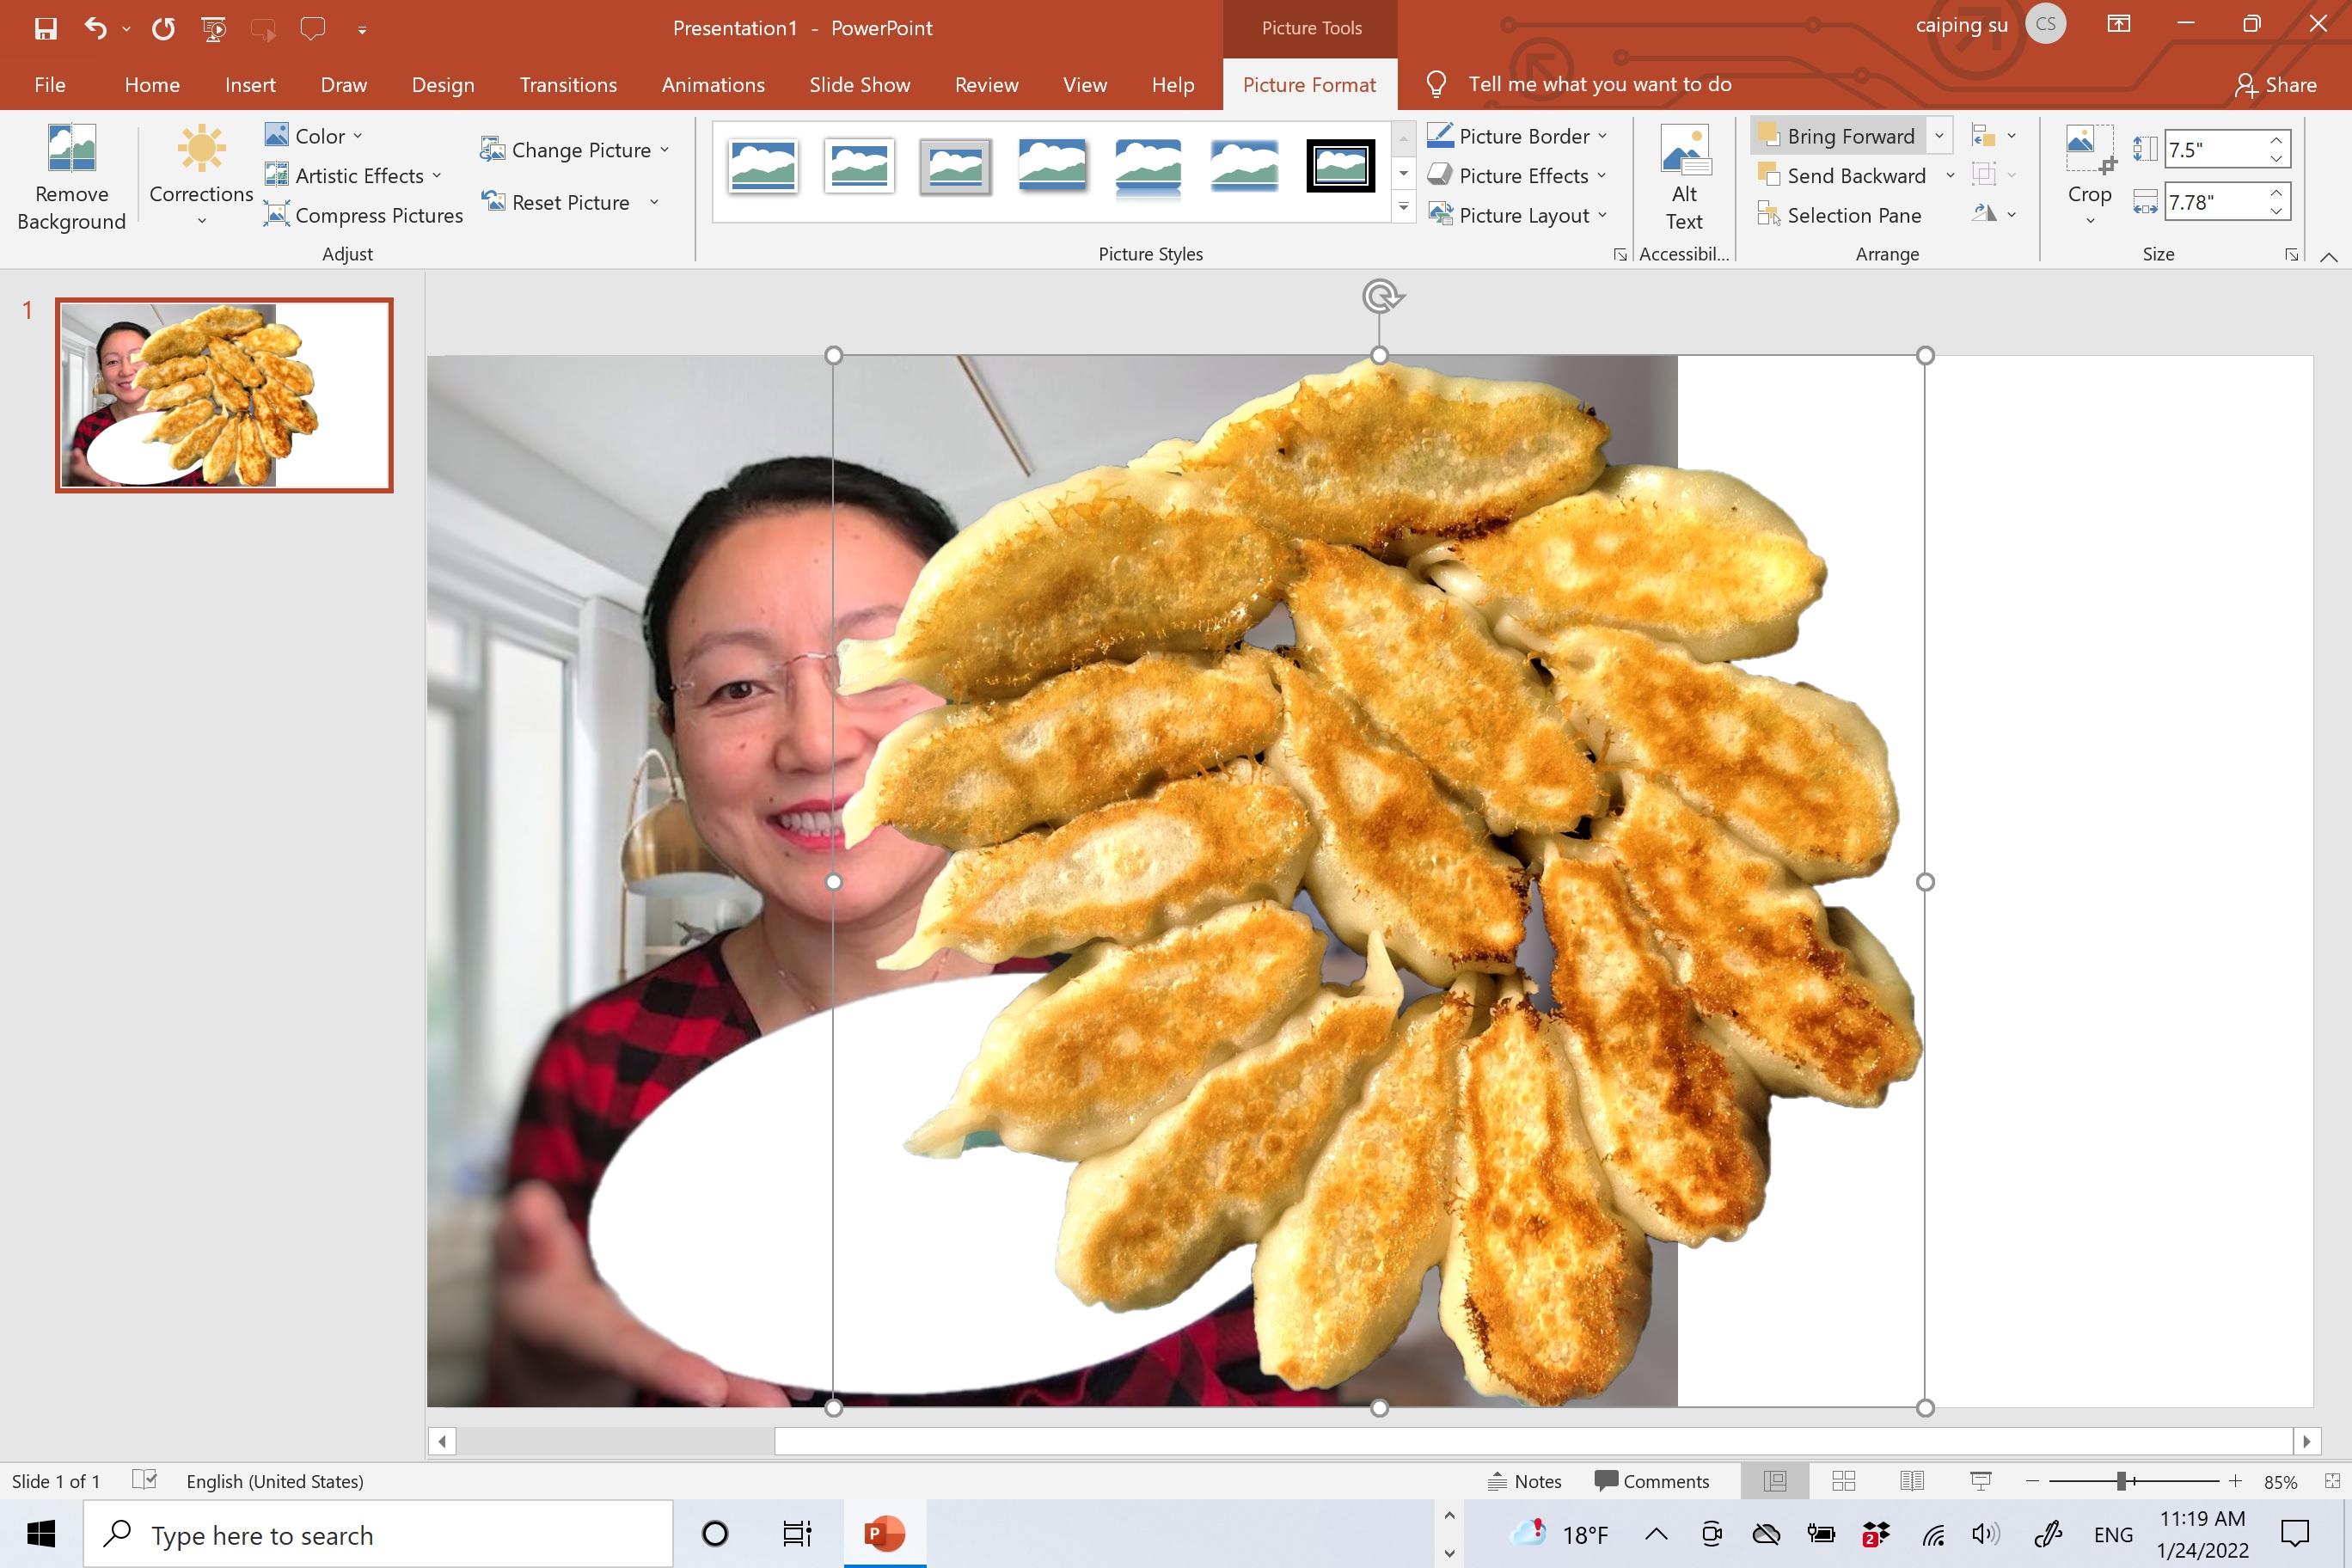
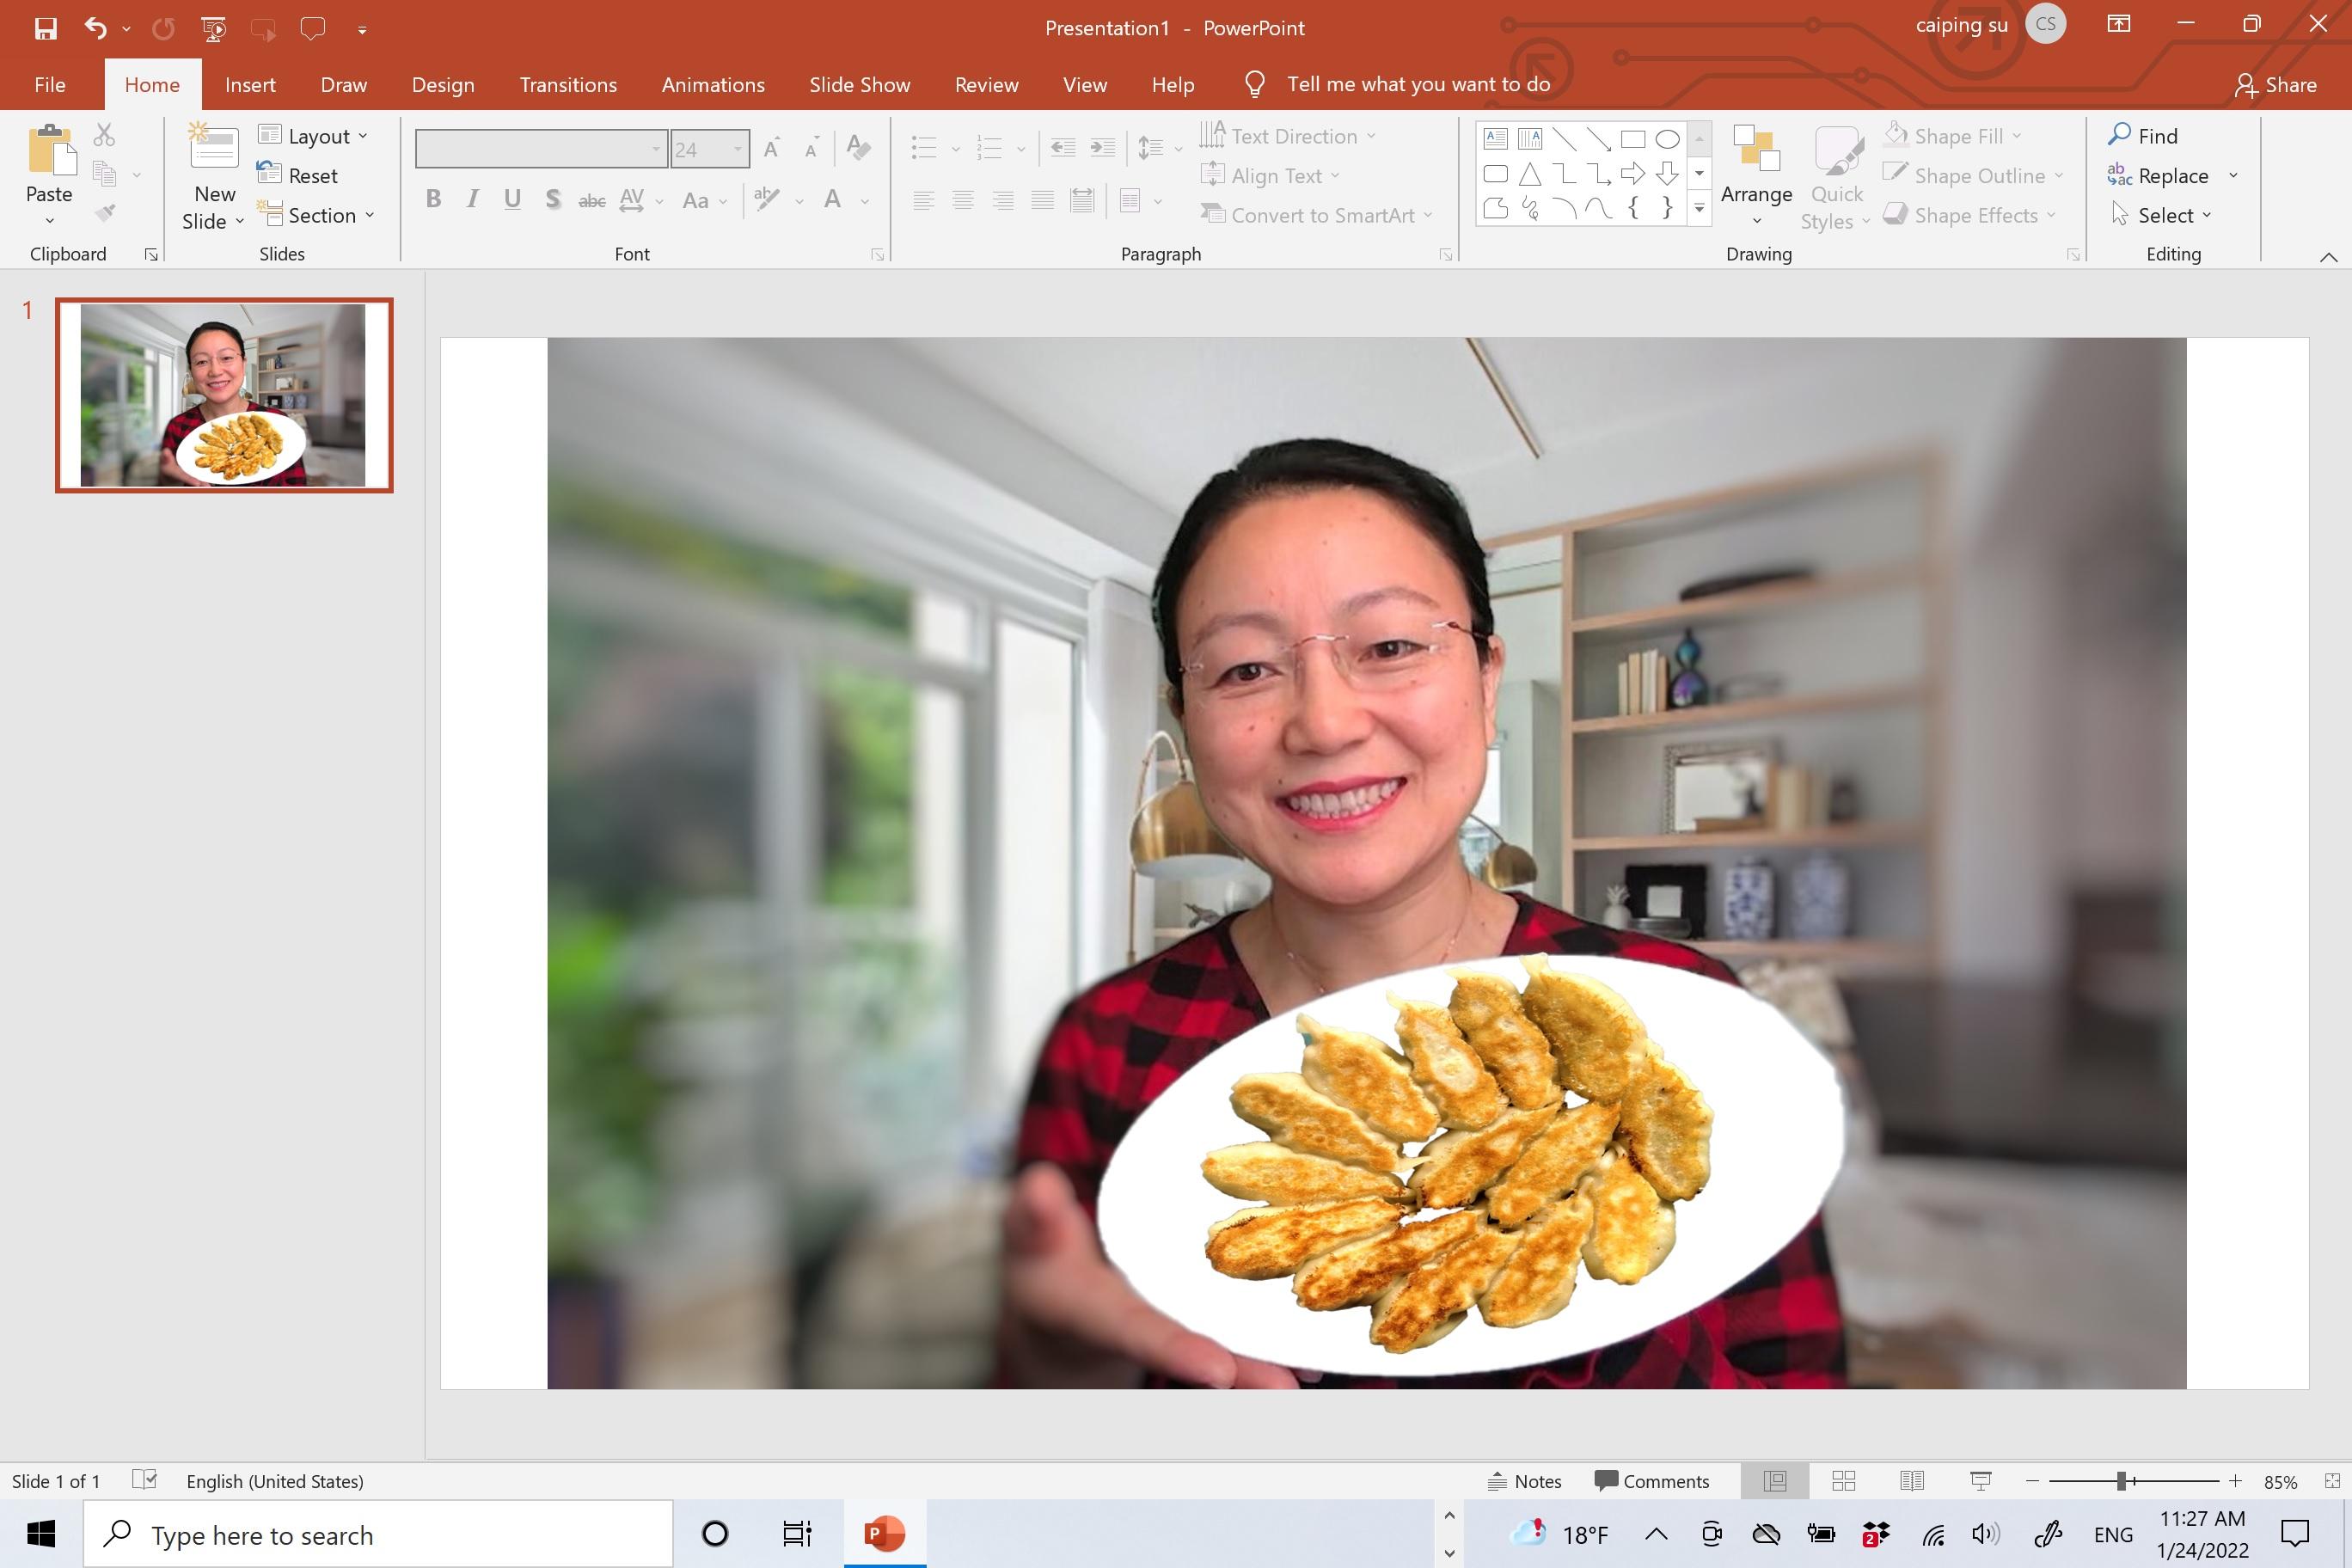
Click on the Potstickers and "Bring Forward", resize it to fit on the plate.
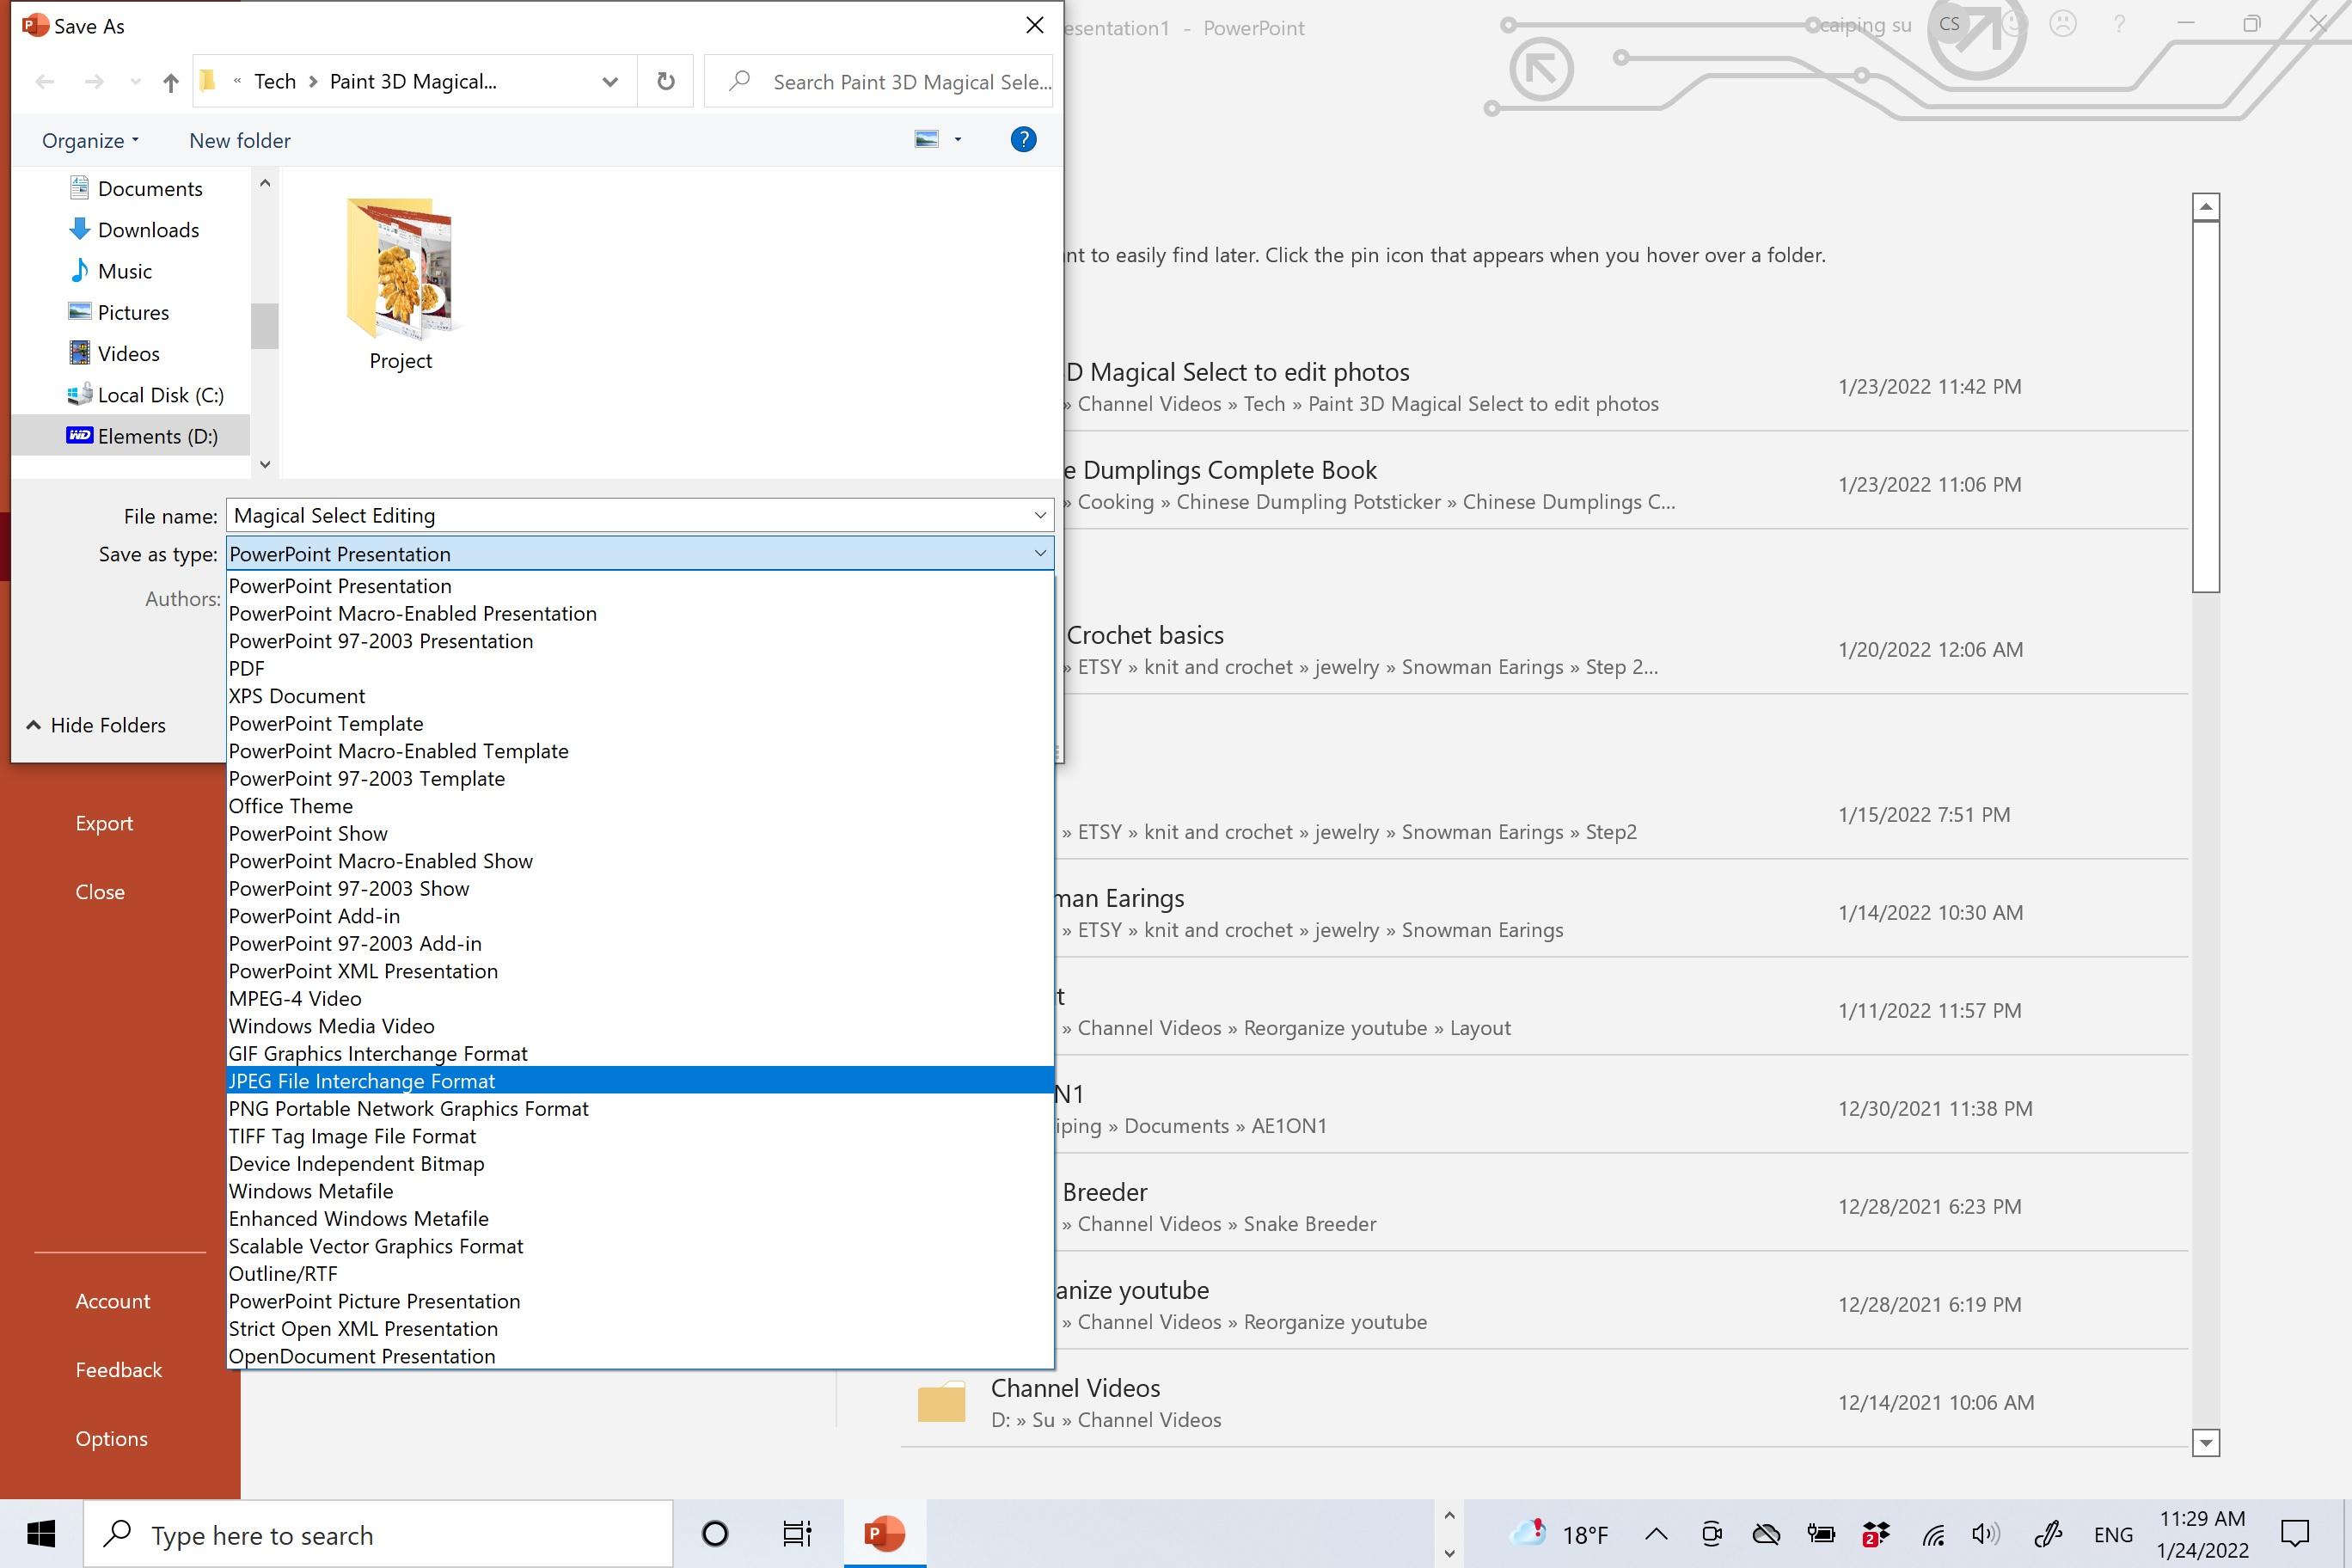
Next, click "File", "Save As", give a "File Name", choose JPEG or PNG for "Save as Type", Click "Save" and you're done.
This is exactly how I made the thumbnail photo for the trailer video on my youtube channel. If you find this sharing helpful, please heart this Instructable and share it with your friends to let me know you liked it.