How to Use Krita
.png)
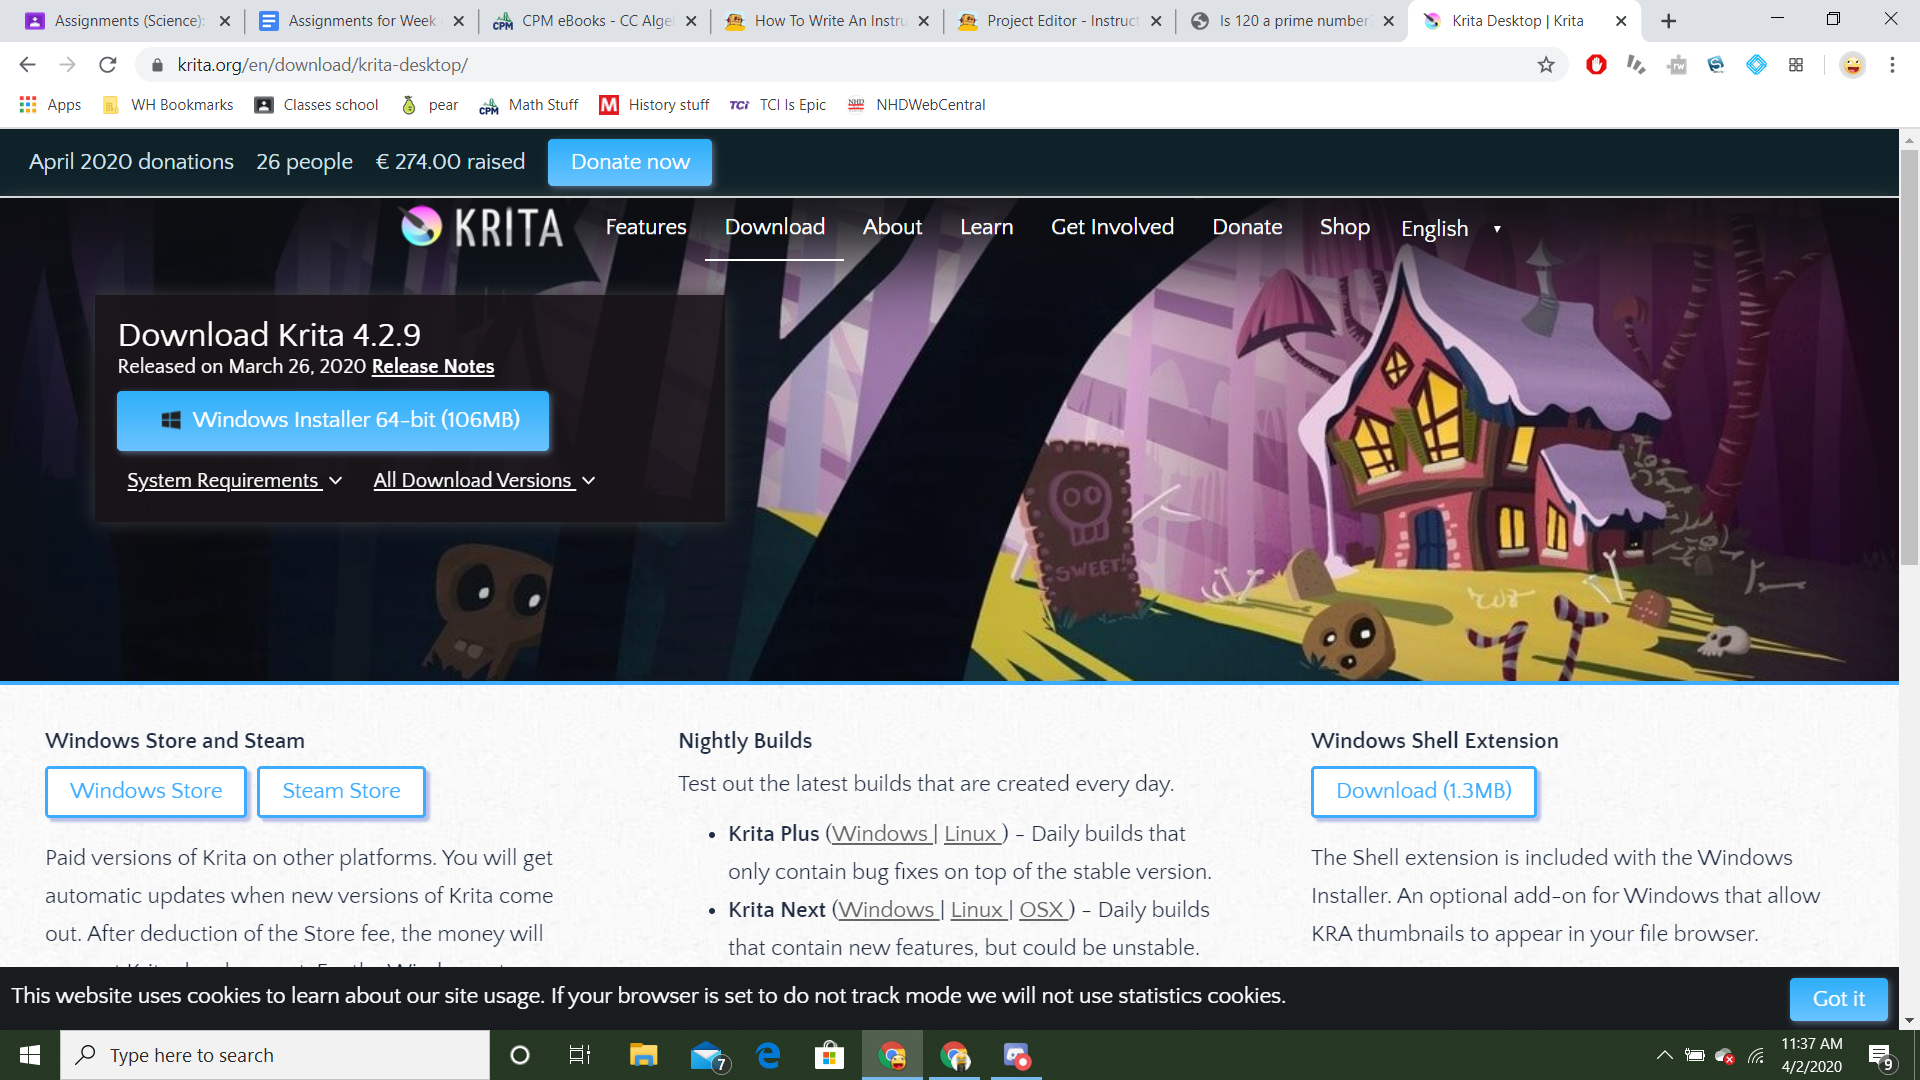
The first step to using Krita is actually downloading it. Go look up Krita in google and the click the first result. Then click get Krita now then click the download button. It should download and a shortcut will appear on your desktop.
Starting a Project.
.png)
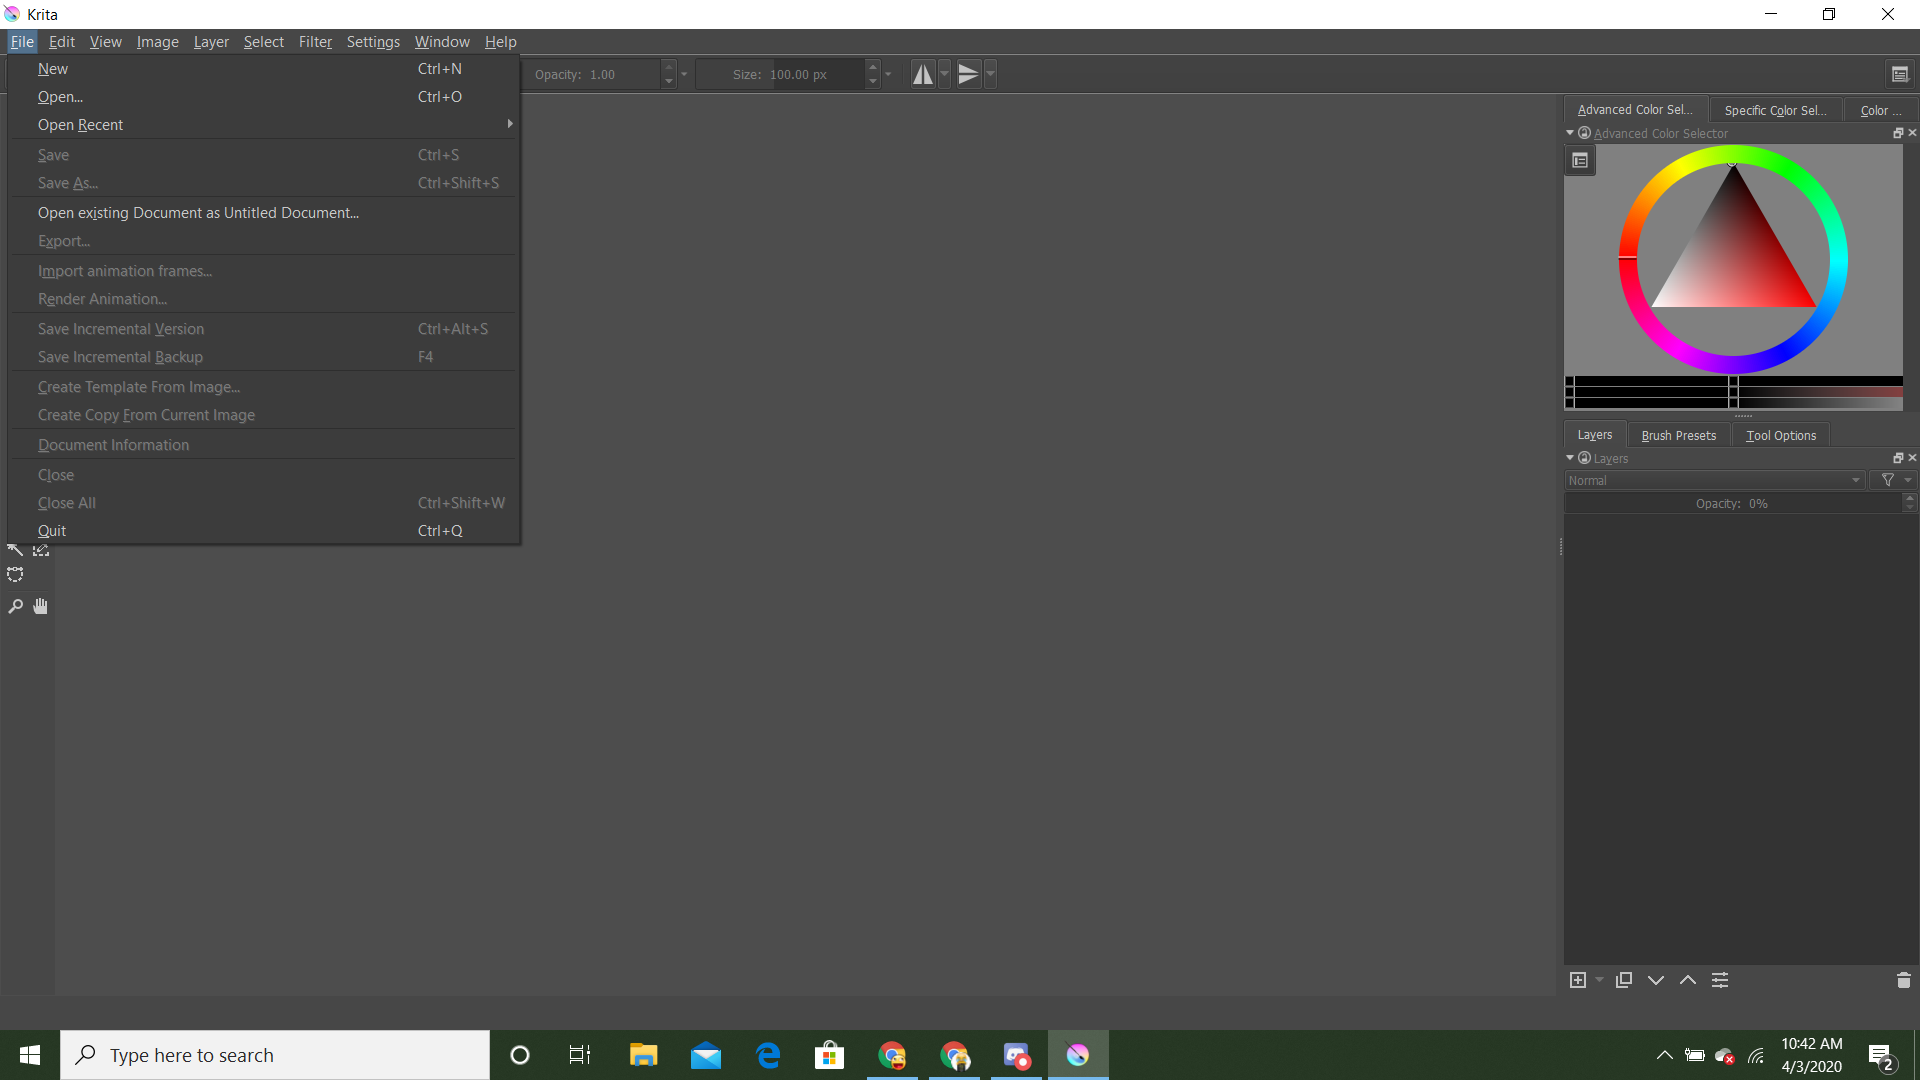
When you open up a project you will see a blank screen. Go to the top left and click file. Once you click it you will have two options one is new and the other is open. New will make a new file with the size you can change. Open will create a file with the size conforming to the file you chose also will place the image you chose.
The Tools
.png)
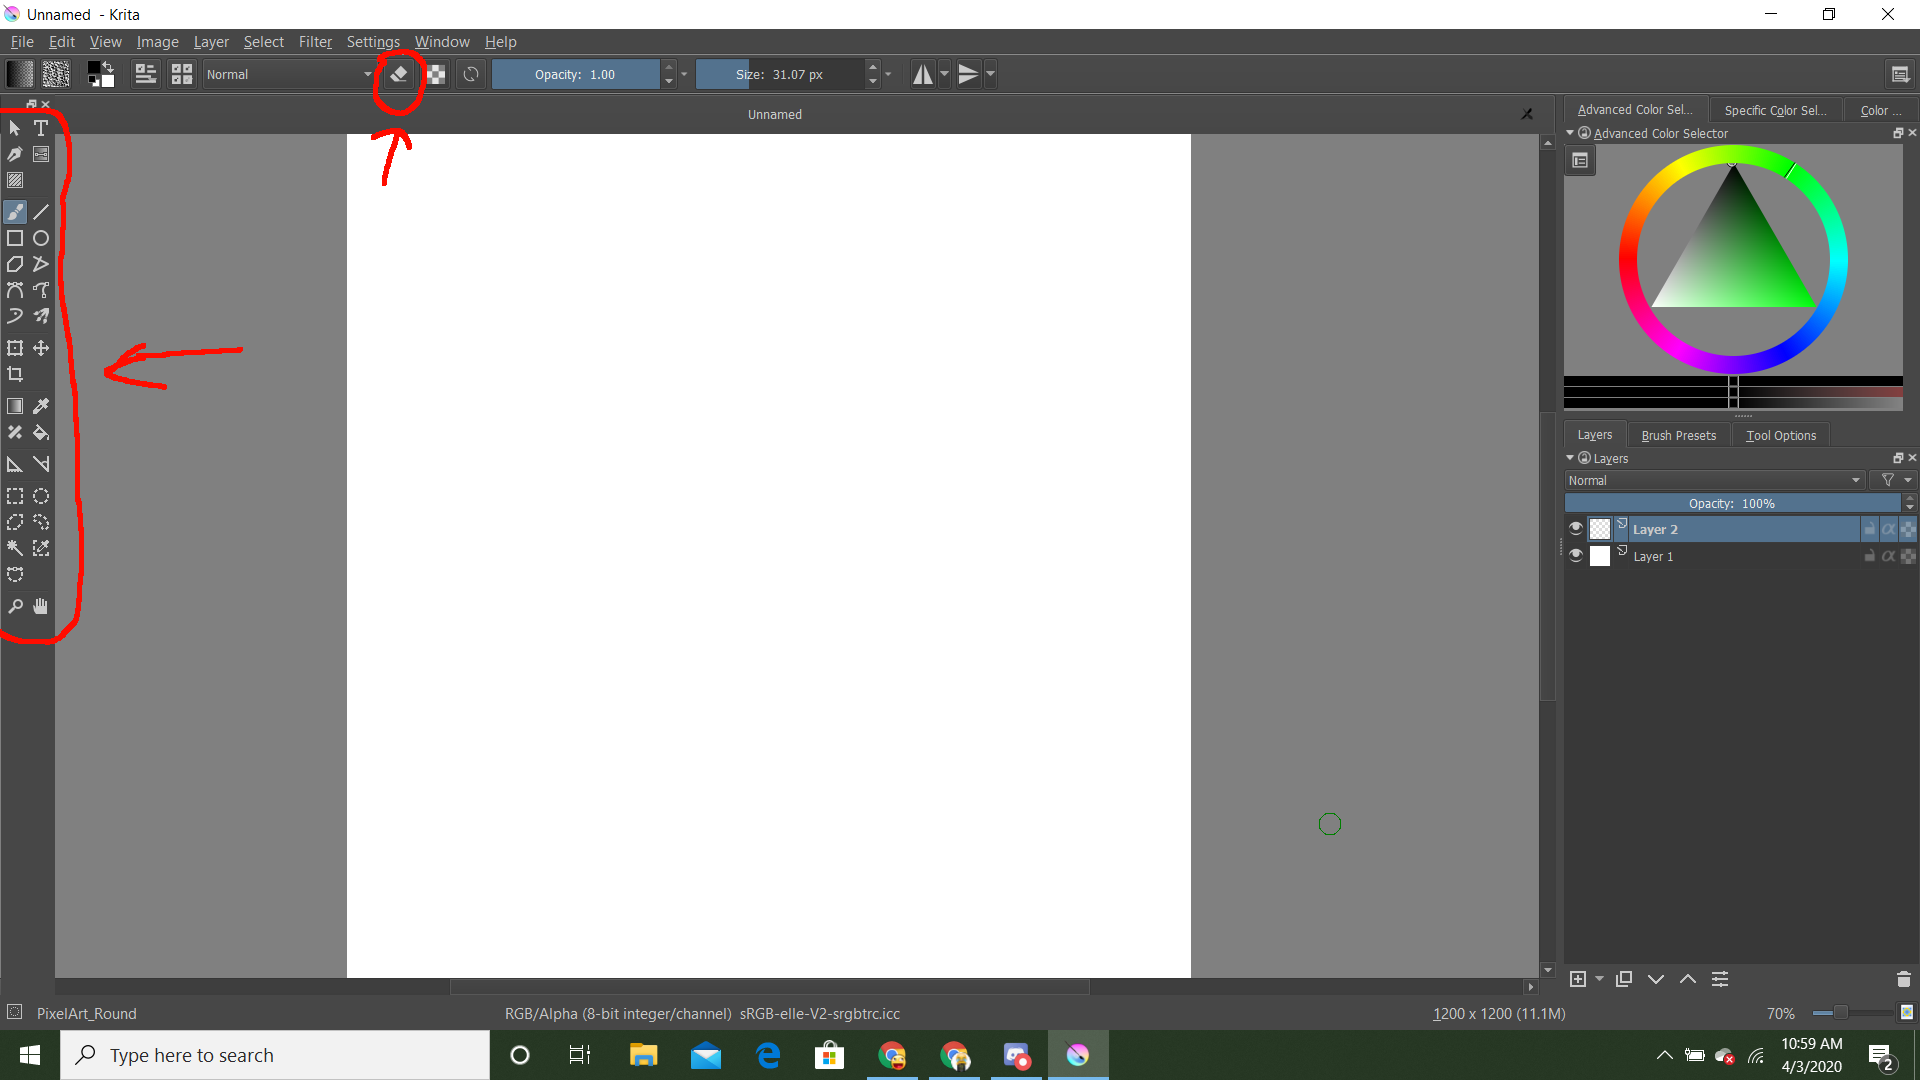
On the left side of your screen there will be a variety of tools. These tools range from being normal paintbrushes, text creators and fill tools. One thing you might notice is on the side of the screen there is no eraser tool. The eraser tool is located at the top of the screen and makes it so all brushes erase instead of drawing.
Tool Options
.jpg)
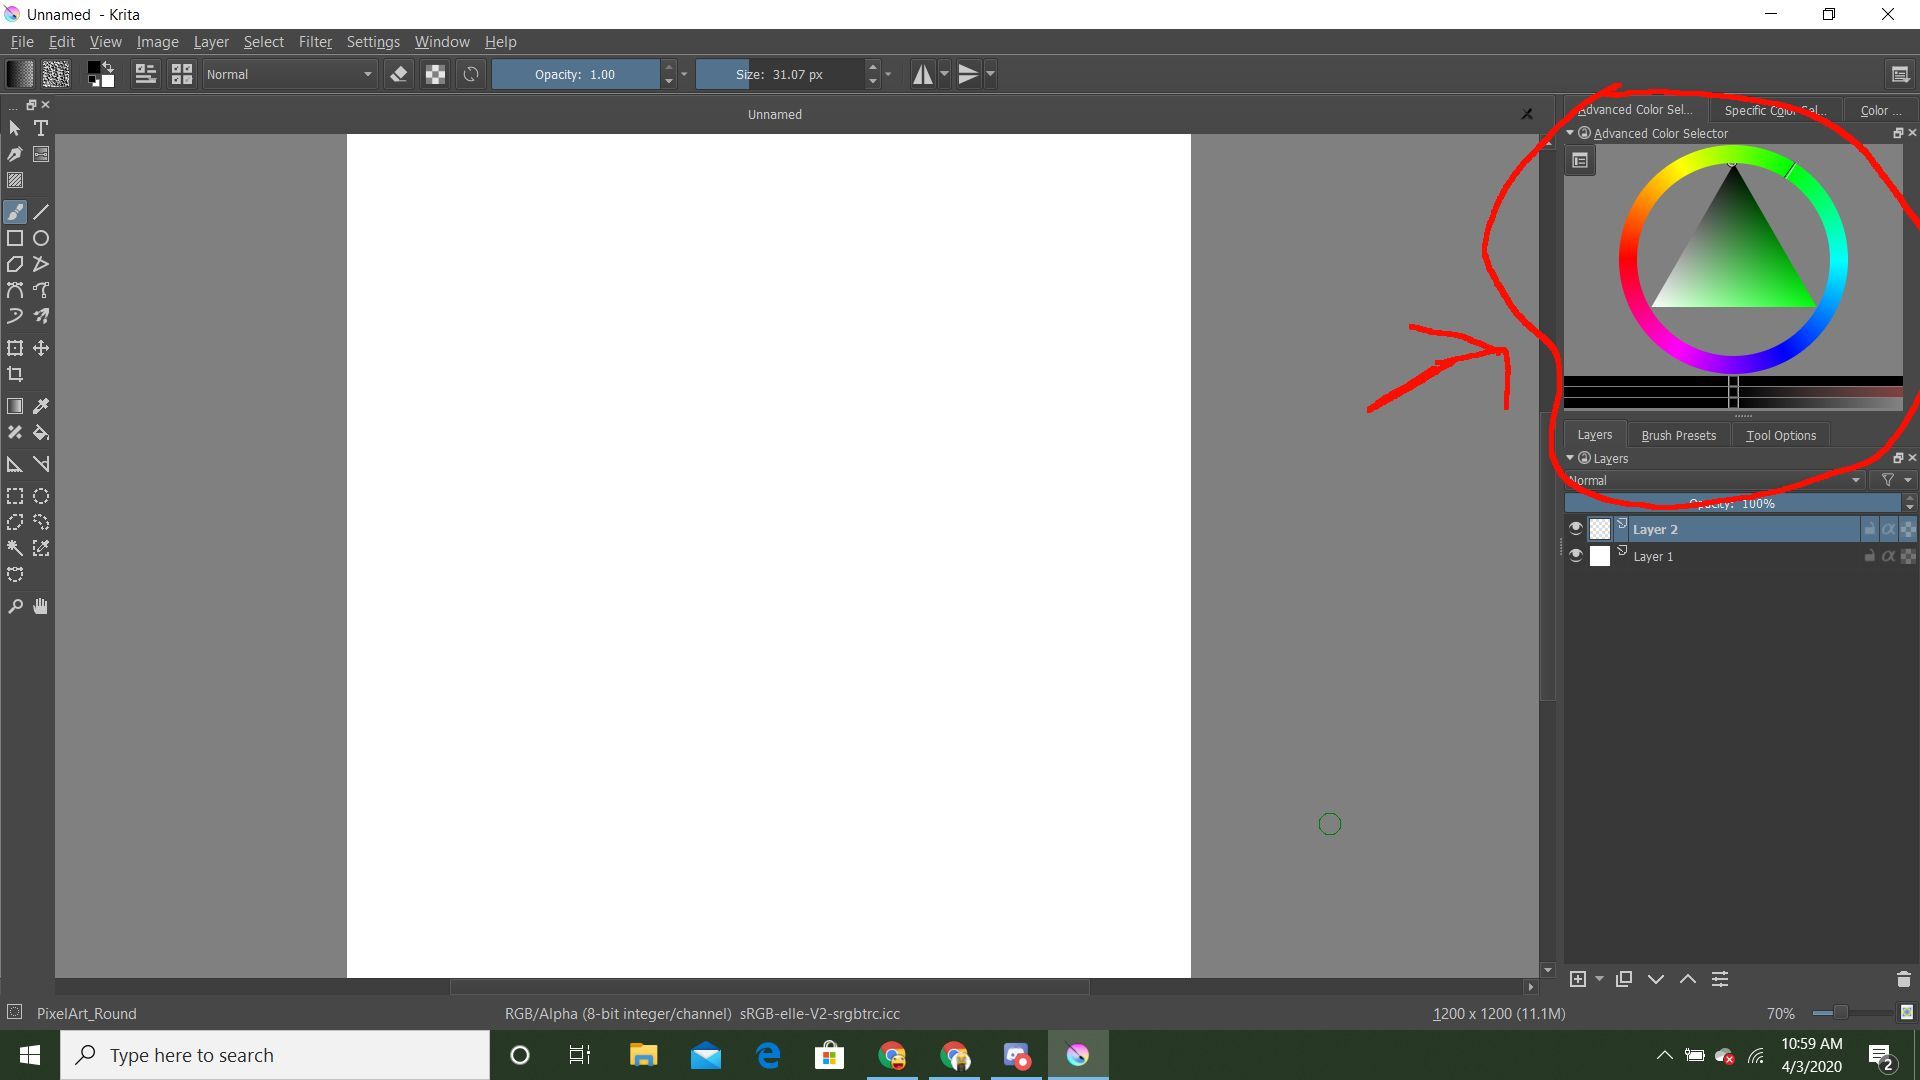
On the right side of your screen you will see a color wheel. Clicking on this color wheel will change the color that comes from all brushes. Below the color wheel there is brush presets clicking this will show you different types of brushes.
Layers
.jpg)
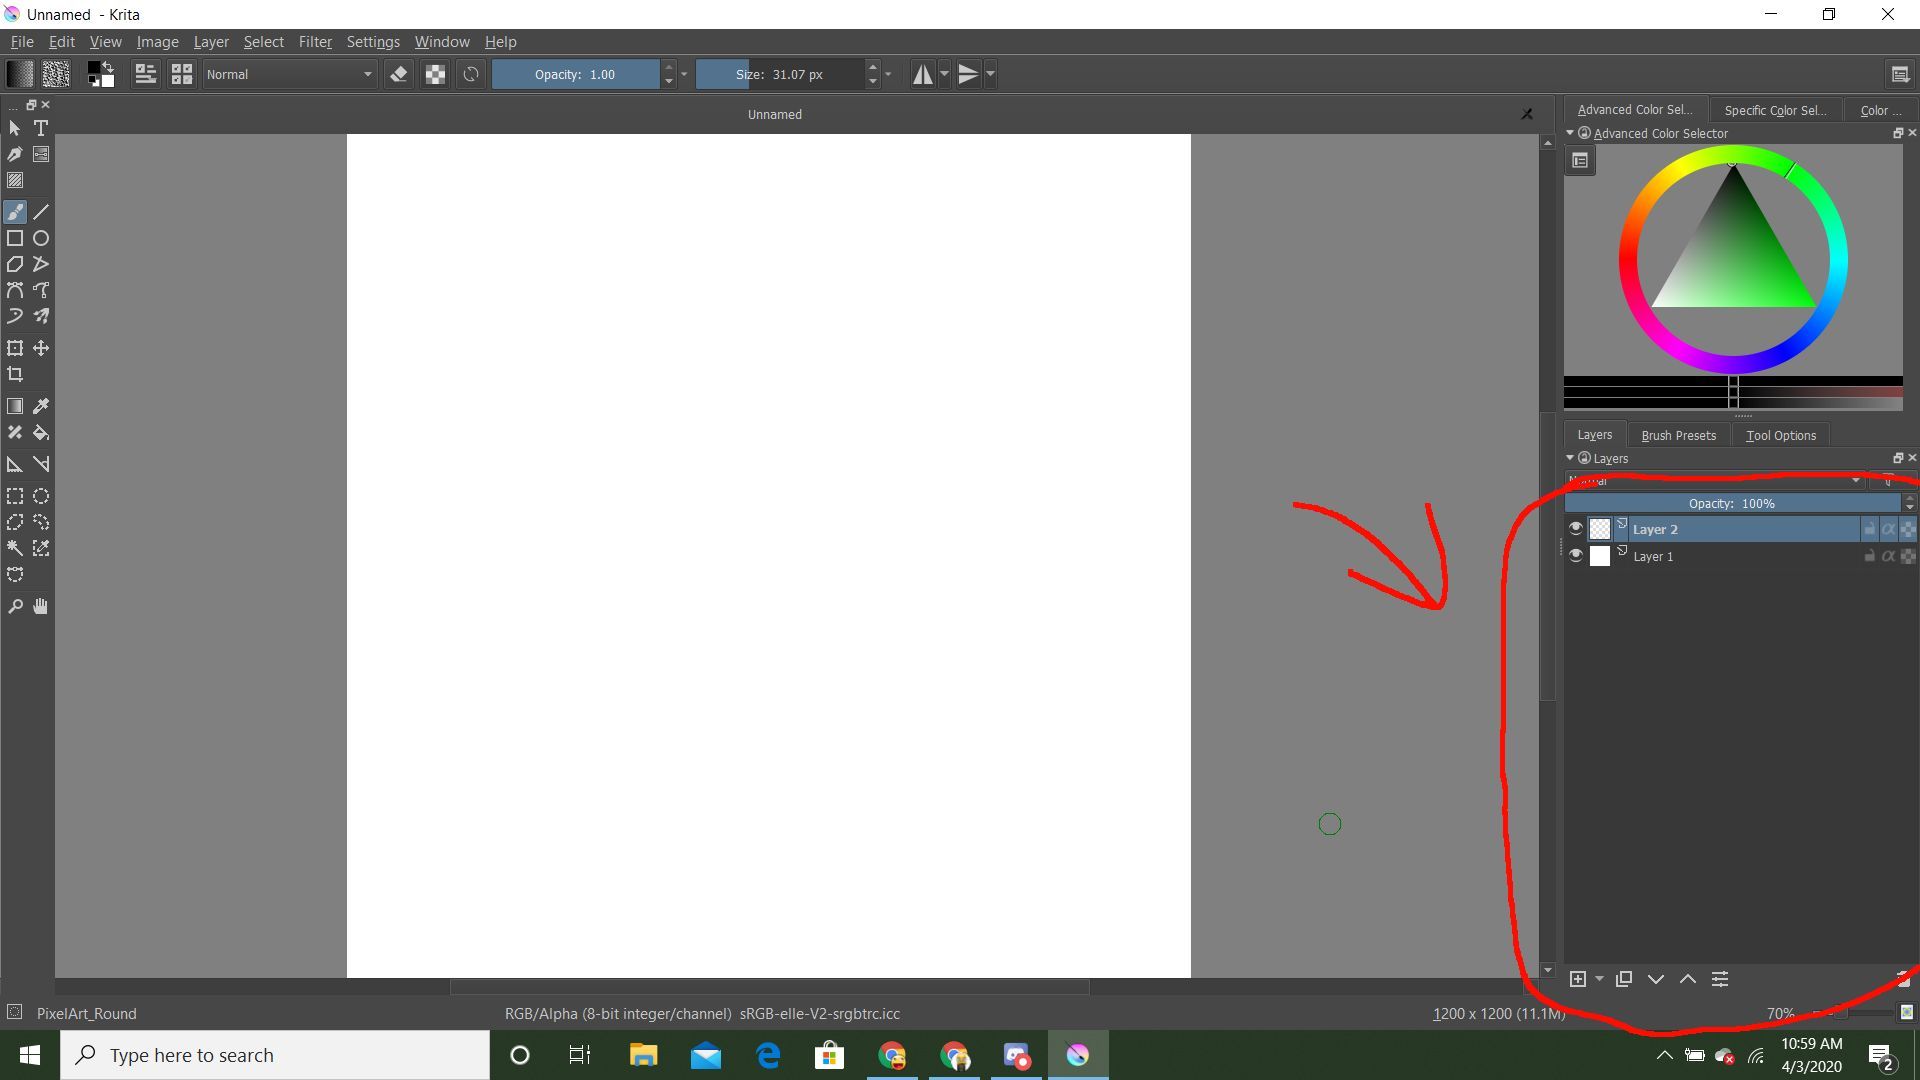
Using different layers is very important. If you want to add layers go to the bottom and click the button that looks like a square with a plus in it. click on a layer to move to it or click and hold it to move them around.
Saveing
.png)
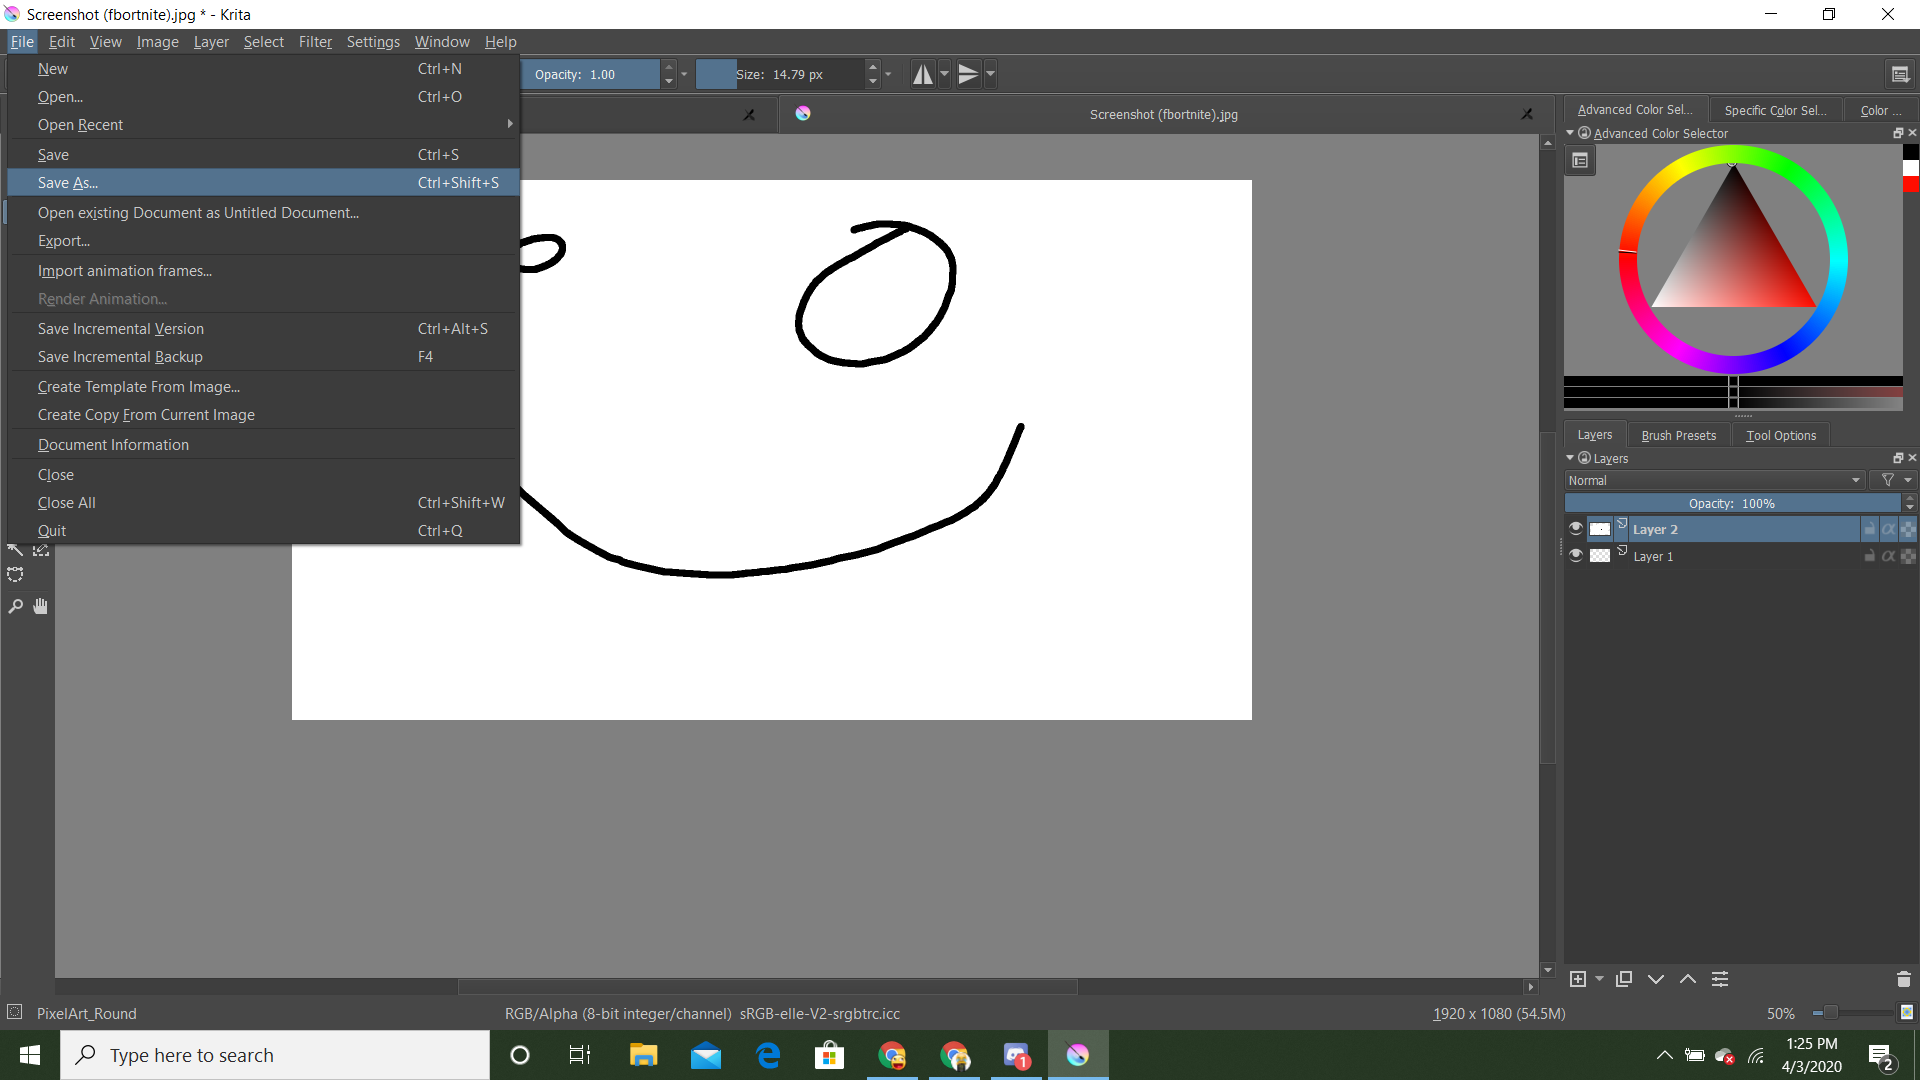
Once your done or whenever you want to save go up and click file then click save as. If you want to save it to keep working on it use the krita type file but if your done change it to something like a png or jpeg.