How to Use Autodesk's Fusion 360 With Othermill for Cutting 3D Shapes
15082 Views, 55 Favorites, 0 Comments
How to Use Autodesk's Fusion 360 With Othermill for Cutting 3D Shapes
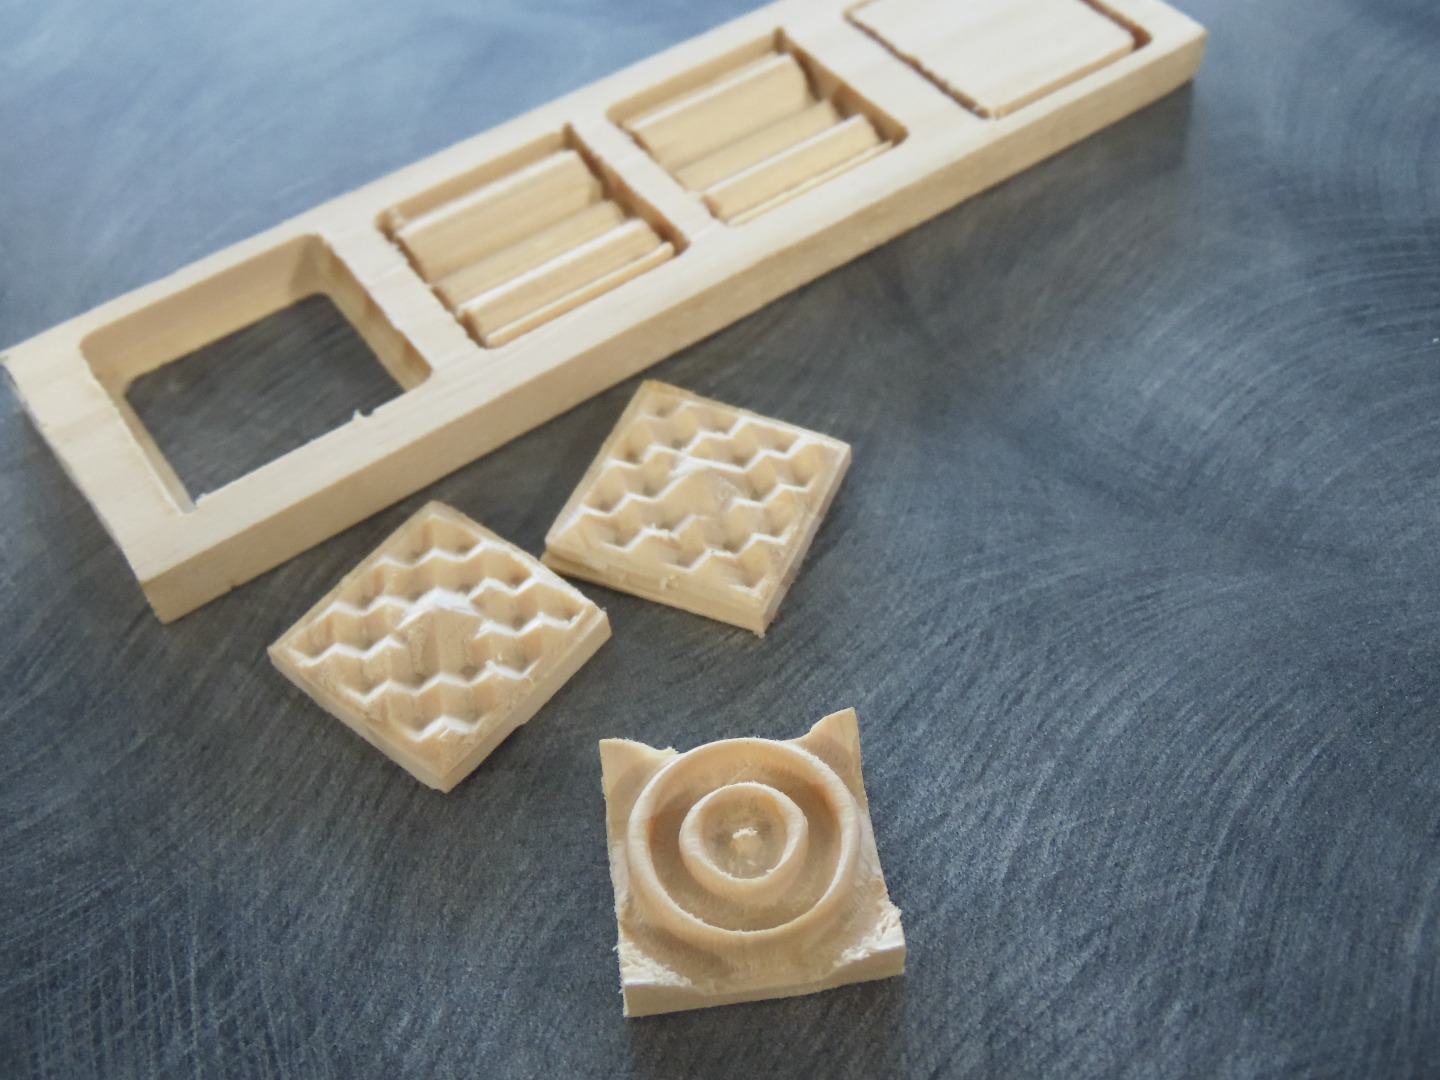
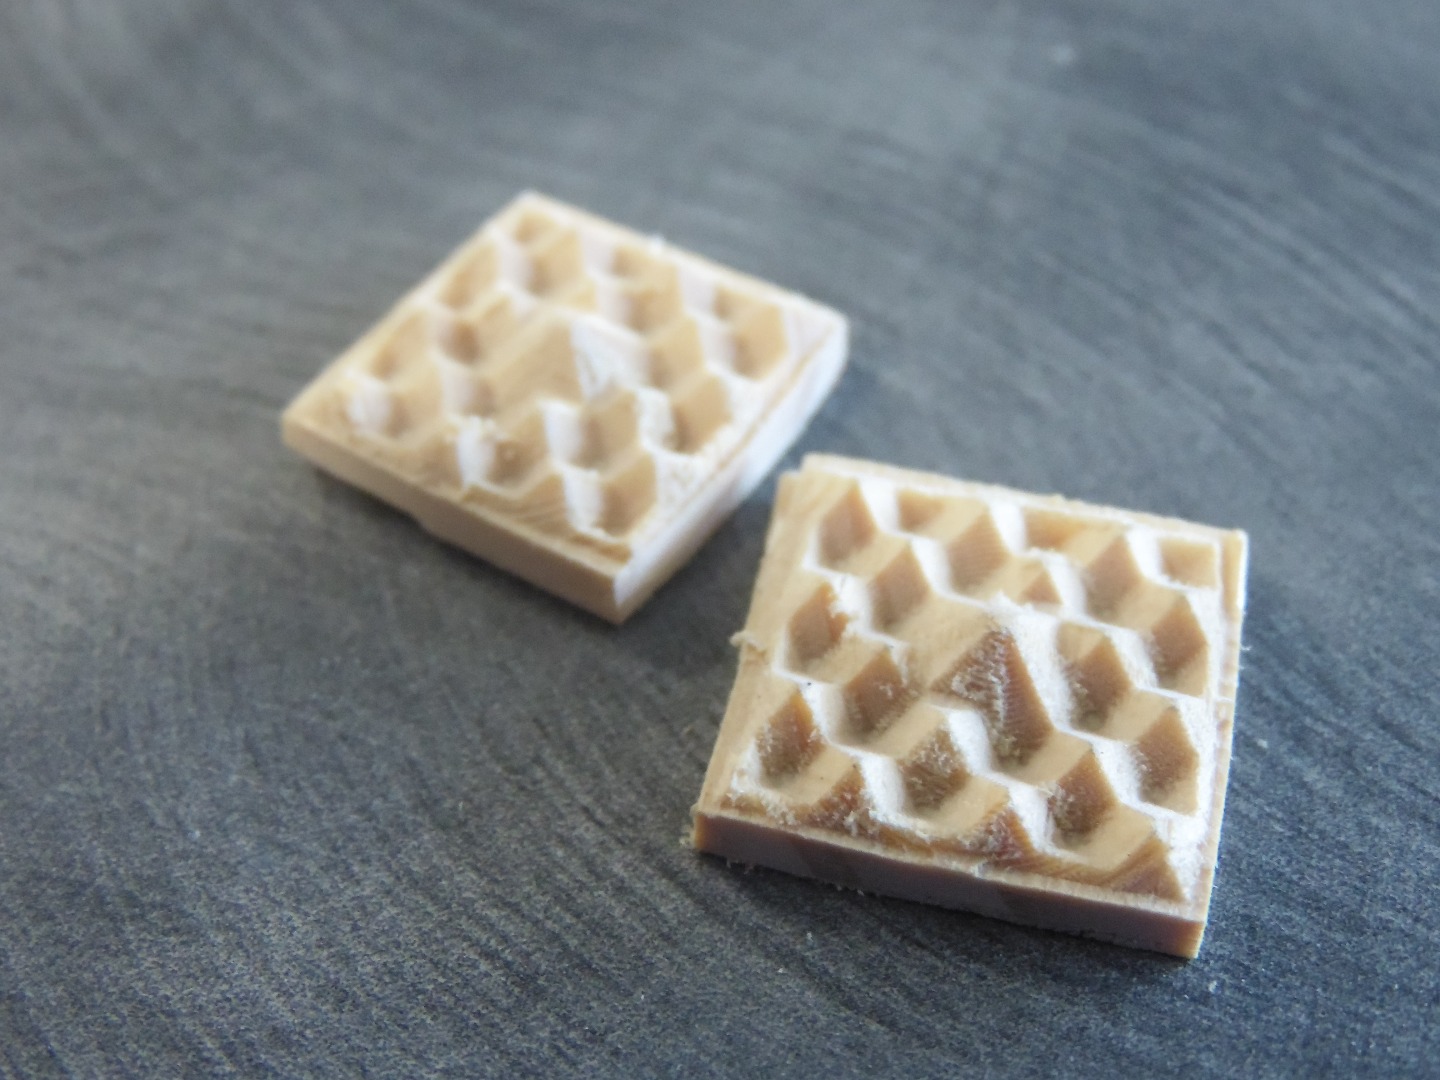
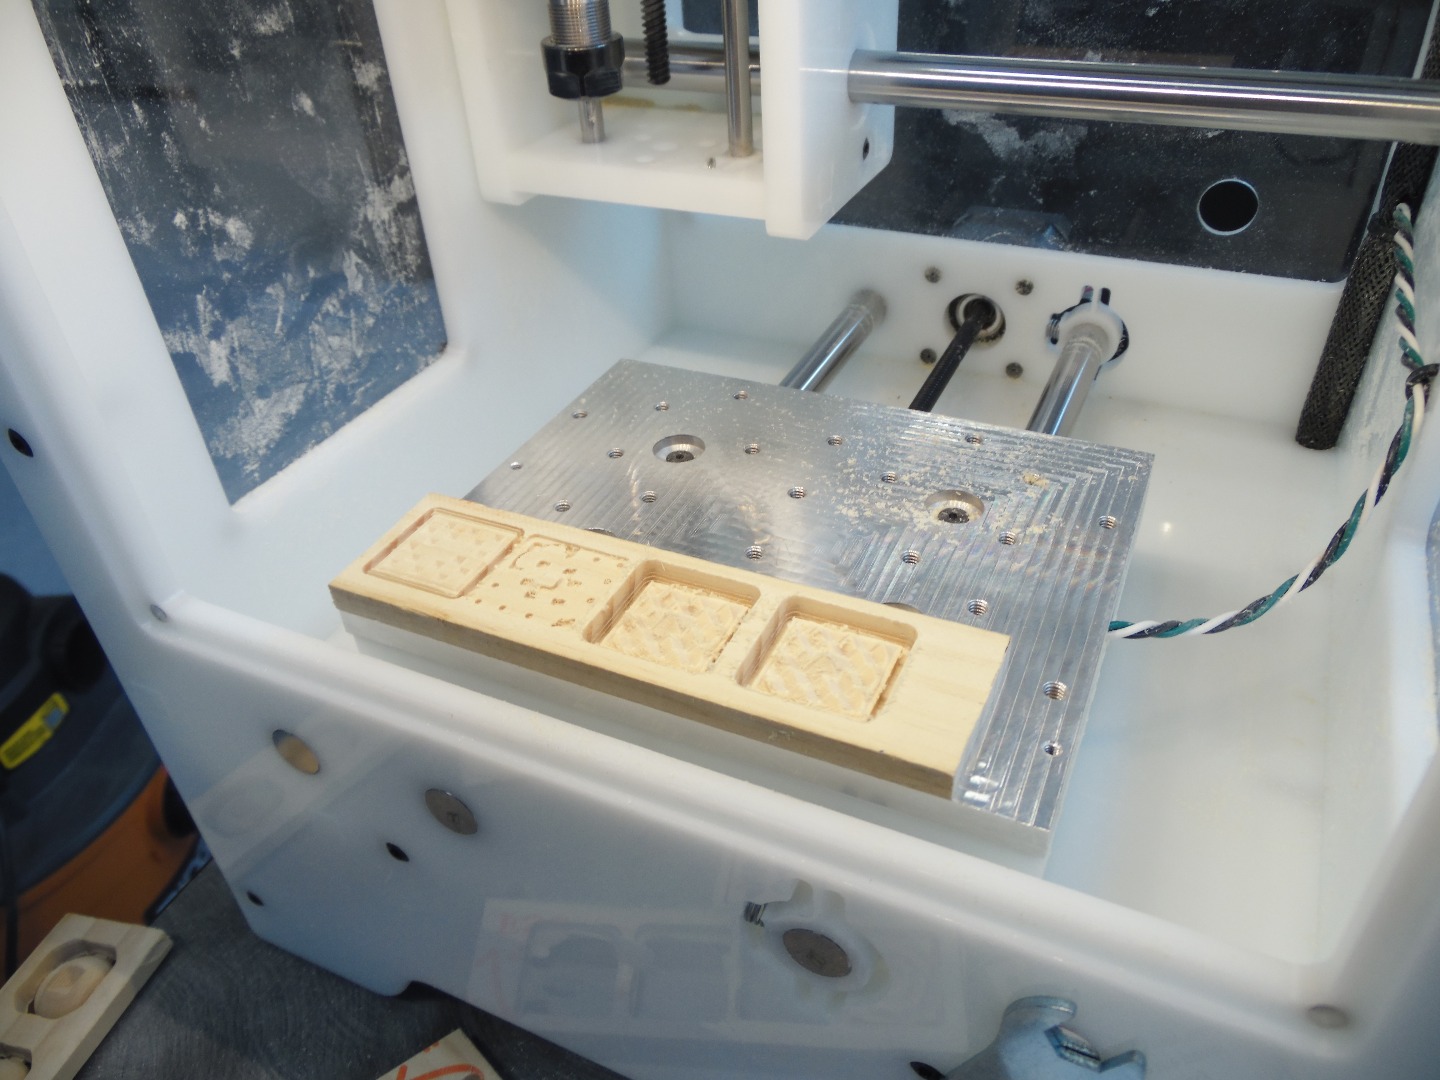
Recently, with some recent developments at the University I am attending, I've been given access to a lot of amazing tools. One of these is the Othermill, a miniature 3-axis CNC machine. Part of my current position as the makerspace manager is to become acquainted with the new equipment and create educational programs to teach people how to use them. This is also the first time I've used CAM Software or a CNC machine, so this should be a great beginner's guide to CNC, but I will assume that you have some knowledge of 3D modeling, as this Instructable will focus on CAM/CNC.
Fusion 360 is a program that I've been playing with for about a month now. It's incredibly capable compared to other software I'd use and is free for students. I really enjoy the interface, and it has both CAD and CAM capabilities making it perfect to use with the Othermill, and other CNC's.
Let's get started!
-
Contents:
- Video
- Terminology
- Modeling
- CAM
- Setup
- Roughing Pass
- Smoothing Pass
- Exporting Toolpaths
- Otherplan
- Conclusion
Video
Terminology
When first getting acquainted with CNC machines, there's a fair amount of specific terms that will help a lot in our understanding if we get their definitions out of the way at the beginning.
- CNC - "Computer Numeric Control" - for our purposes, all this means is that there is a tool being controlled by a computer. This could be a laser, 3D printers extruder, or robot arm, but in this case, it's a really fast spinning milling bit
- CAD - "Computer Aided Design" - referring to software, these applications allow someone to design a 3-dimensional model of a part. For our purposes, the part we design is what we will be cutting on the Othermill.
- CAM - "Computer Aided Manufacturing" - referring to software, these applications take in information about the machine we are using and the 3D model, and translates those things into toolpaths or commands for the CNC machine. Files created in this way are often saved as "g-code".
- g-code - a file containing commands that the CNC machine will understand. This file tells the Othermill what to do.
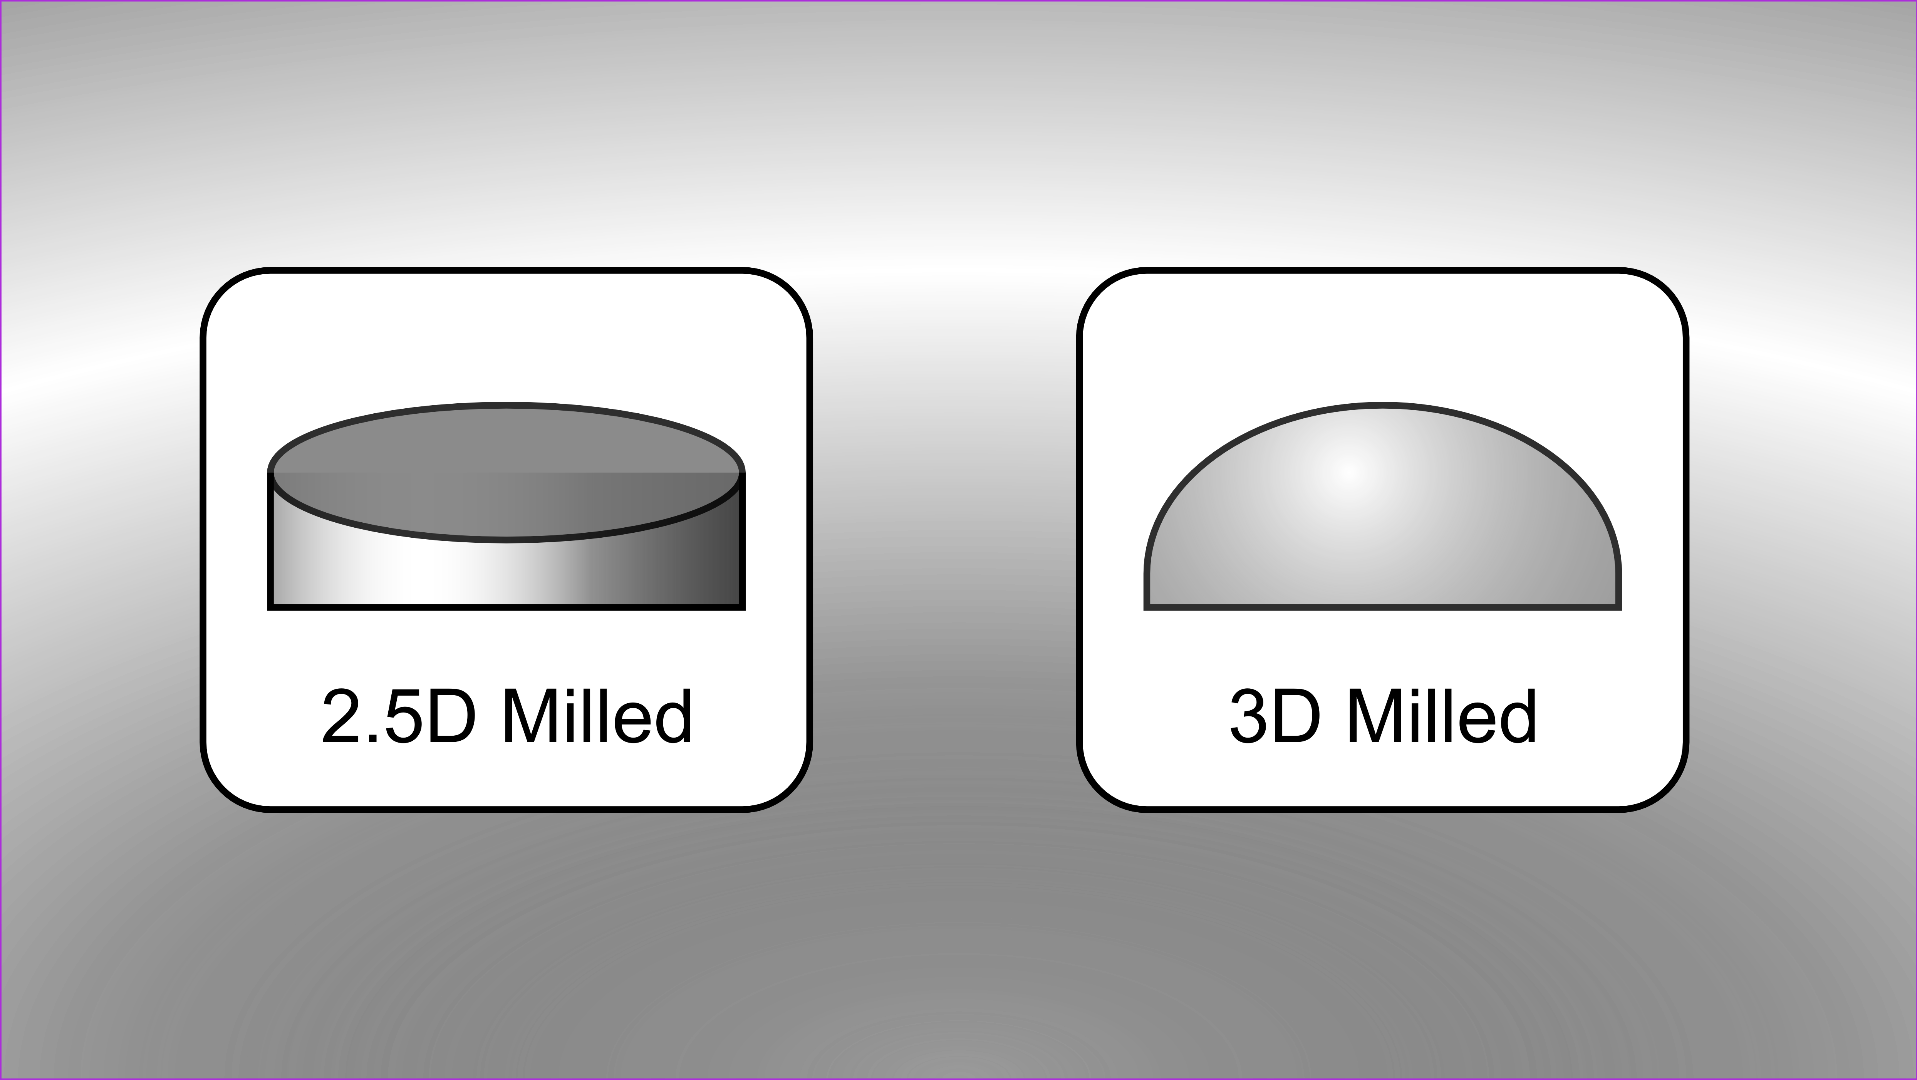
- 2.5D Milling - Cutting a 3D object from a 2D file. This can be a little confusing, but think about it this way: you are looking straight down at a sheet of plastic that is half an inch thick, cut a circle out of it and remove the circle. What shape do you have? A cylinder. We cut something in 2 dimensions, but the result was 3-dimensional, thus it is deemed "2.5D Milling". The pictures might be helpful in understanding.
- 3D Milling - creating curved or angled 3D shapes. If you wanted to create the top half of a sphere, you need to be able to mill in 3 dimensions. The sides of the shape are curved, making it distinctly different than the cylinder example above. This is true 3D milling.
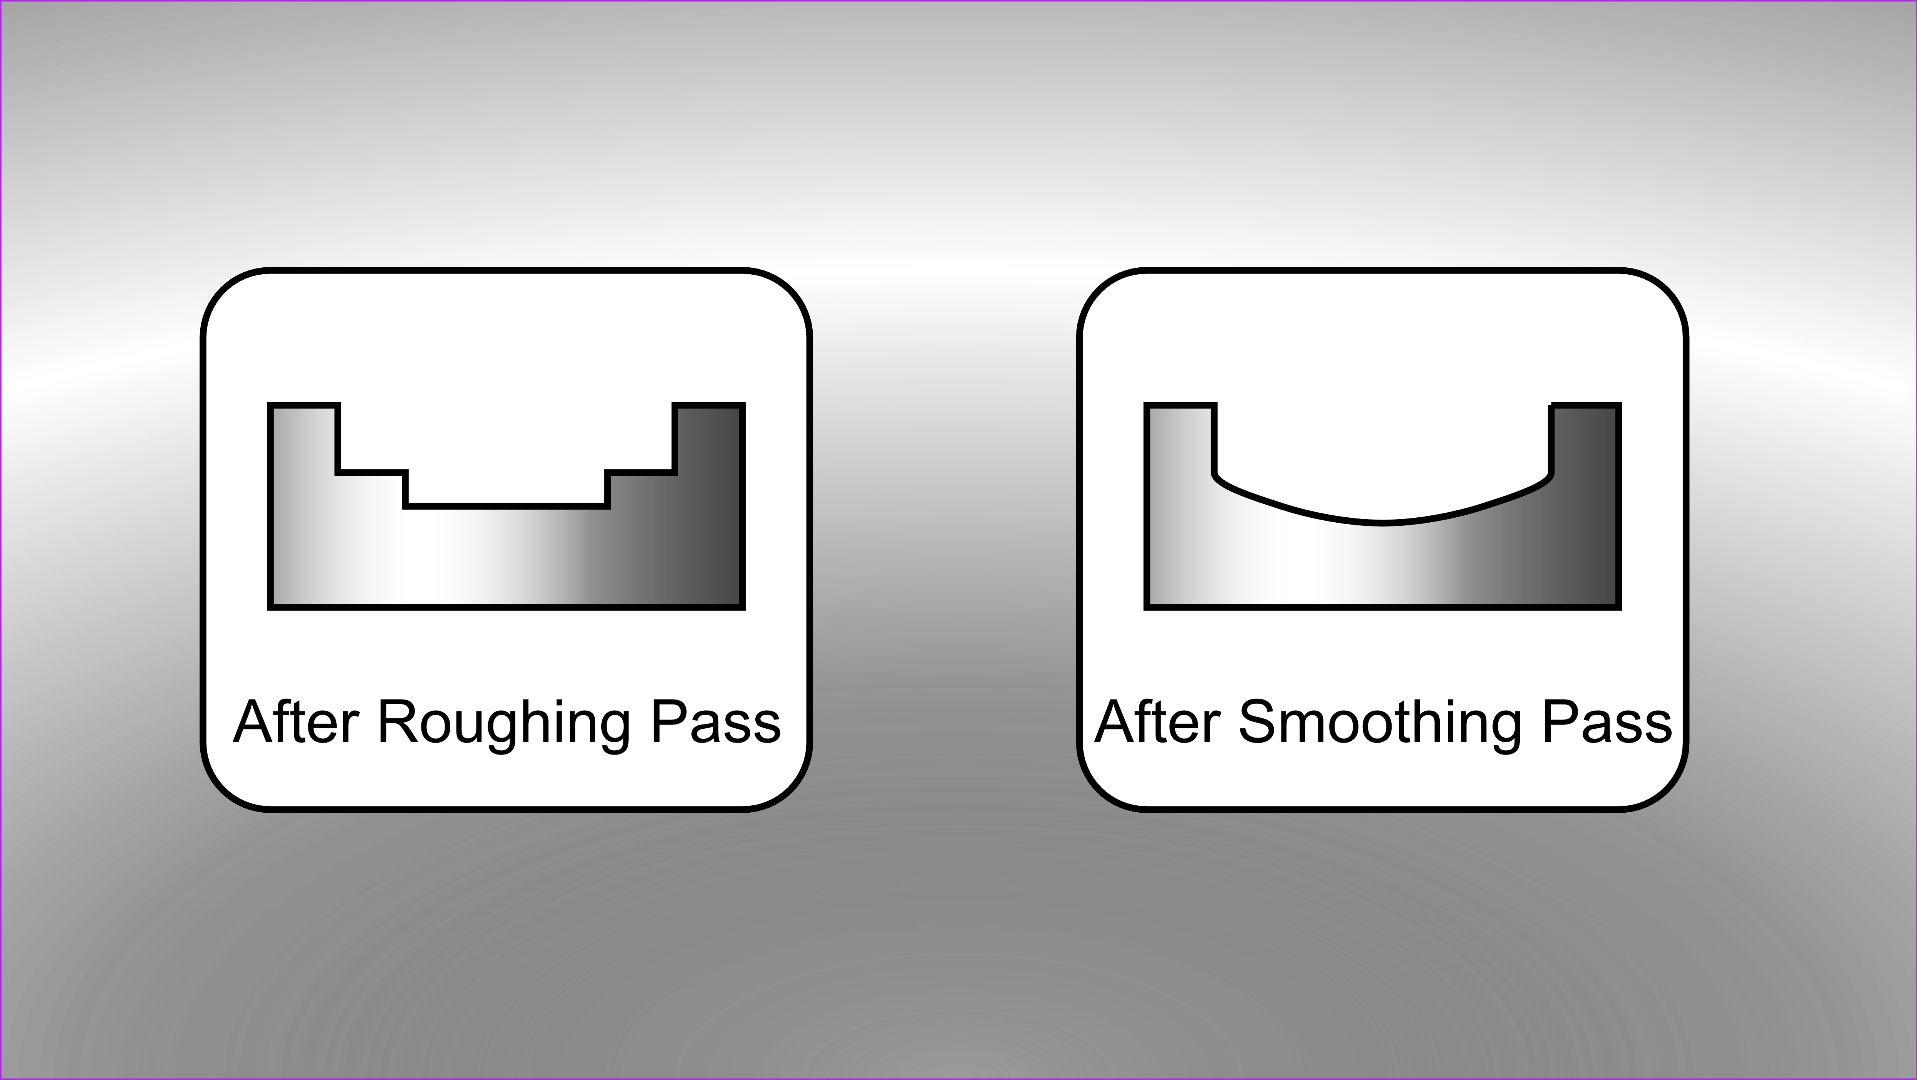
- Roughing Pass - A series of commands that the CNC machine follows, intended to remove a large amount of stock material in a timely fashion, but without a smooth finish
- Smoothing Pass - A series of commands that the CNC machine follows, intended to remove smaller amounts of stock material, create fine details, and smooth surfaces
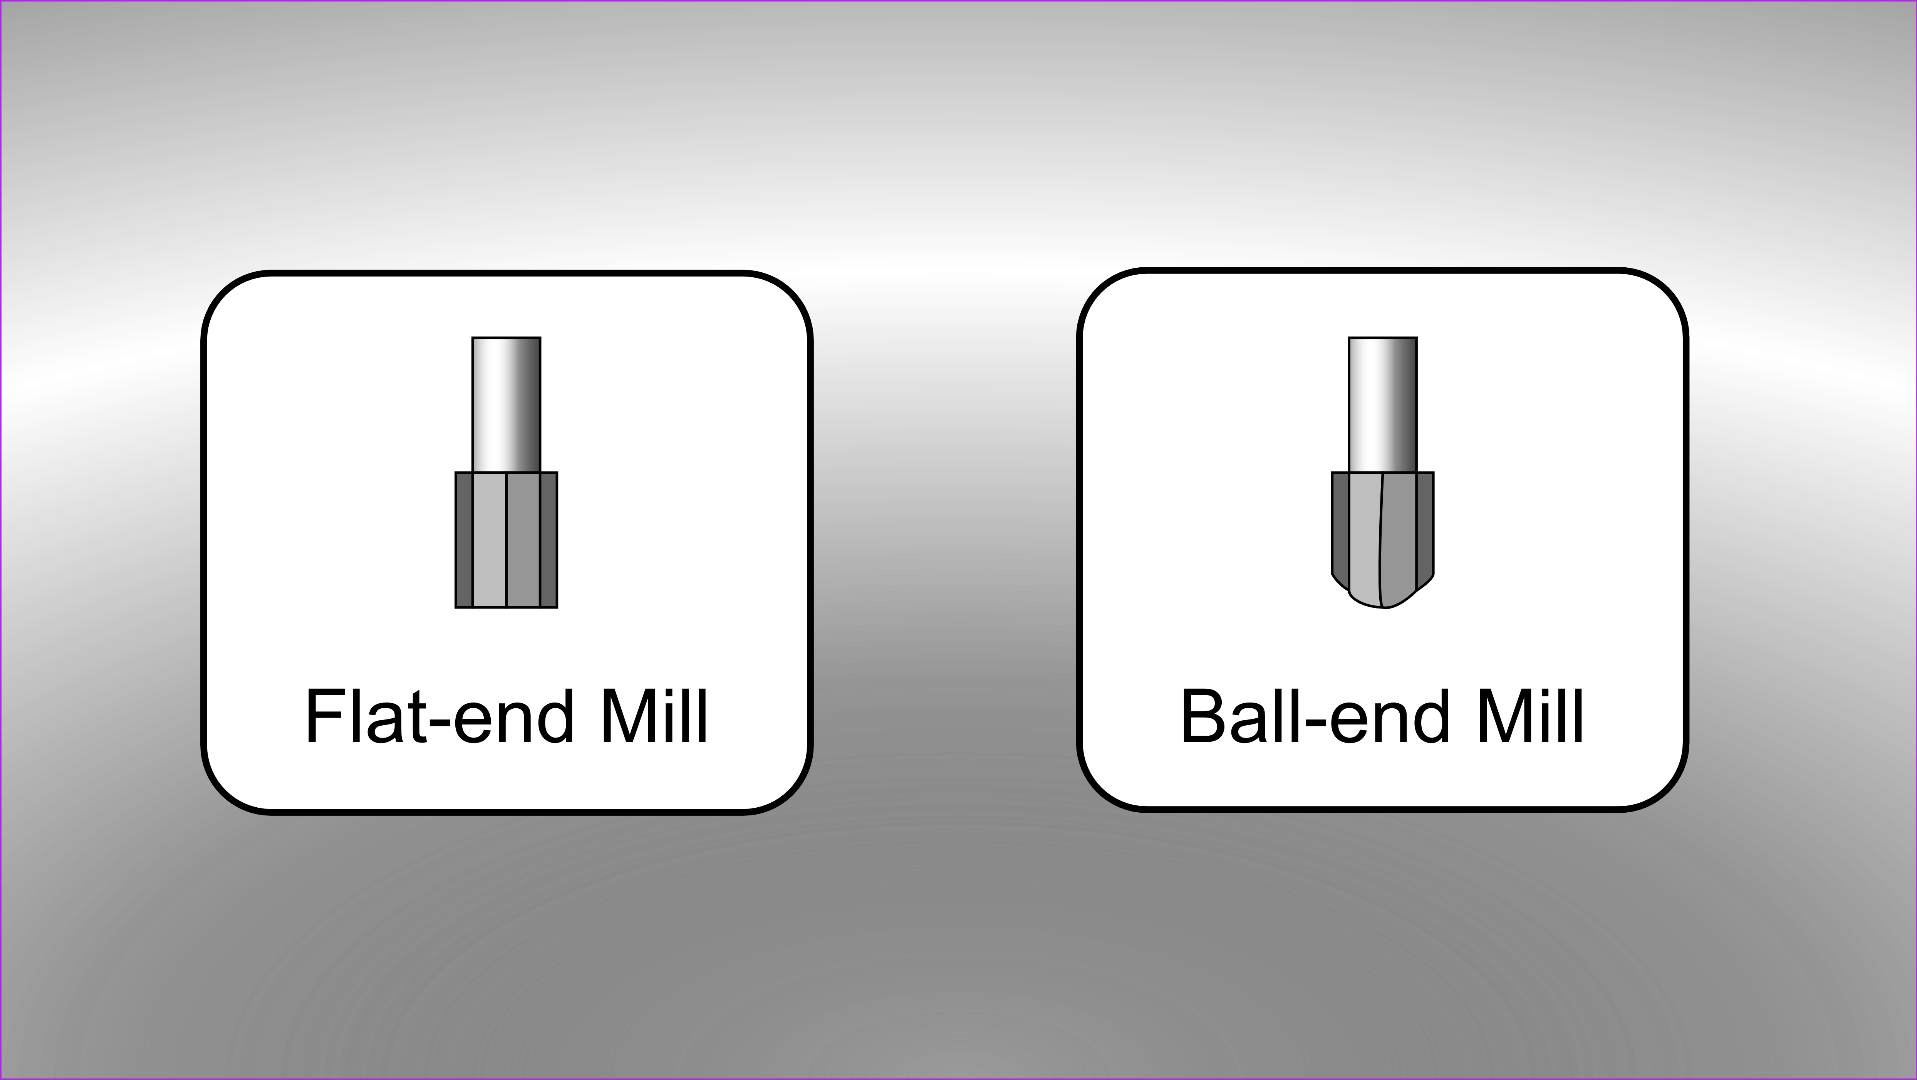
- Flat head mill - A milling bit with a flat end. These are most commonly used for roughing operations and cutting along precise edges
- Ball head mill - A milling bit with a rounded end. These are most commonly used for smoothing operations and 3D curves
Modeling
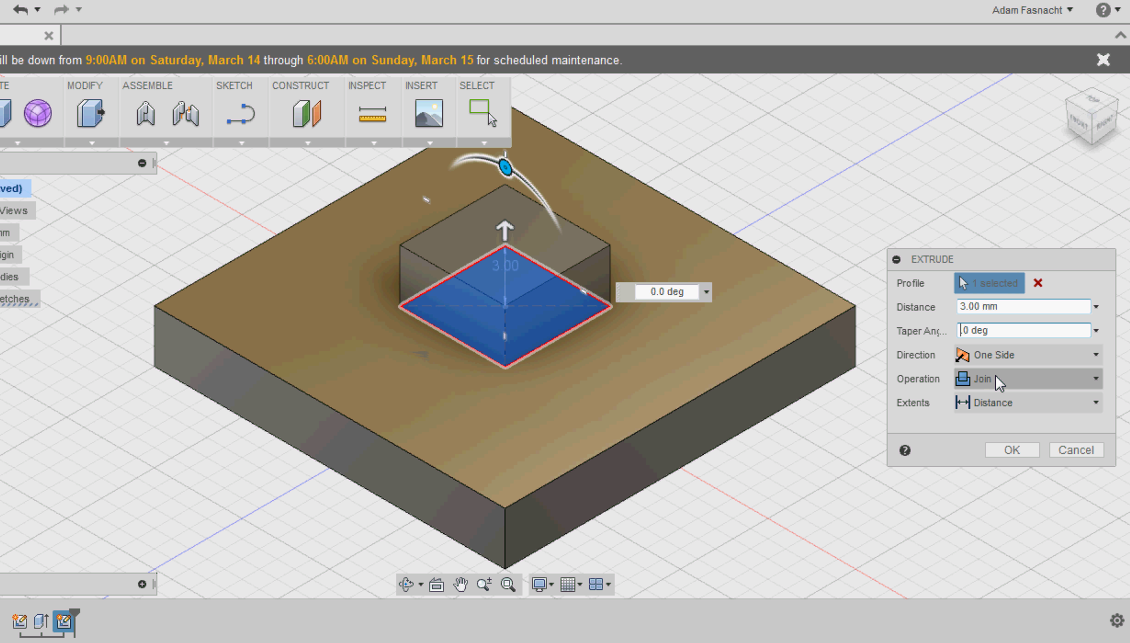
If you have some experience in 3D modeling, Fusion 360 is pretty easy to use. By hovering over nearly any button, a pop-up will appear giving a description of what it does, which is really helpful to have constant reminders. Typical Press/Pull, extrusion, fillet and chamfer commands are easy to find in addition to some more advanced functions.
In this case, I've modeled a 20x20x6 mm shape to be cut out of roughly 1/4" plywood. It has a lot of slanted edges perfect to be milled in 3D. I won't be going into detail of how it was created, but if you're interested you can watch the video of the process.
CAM
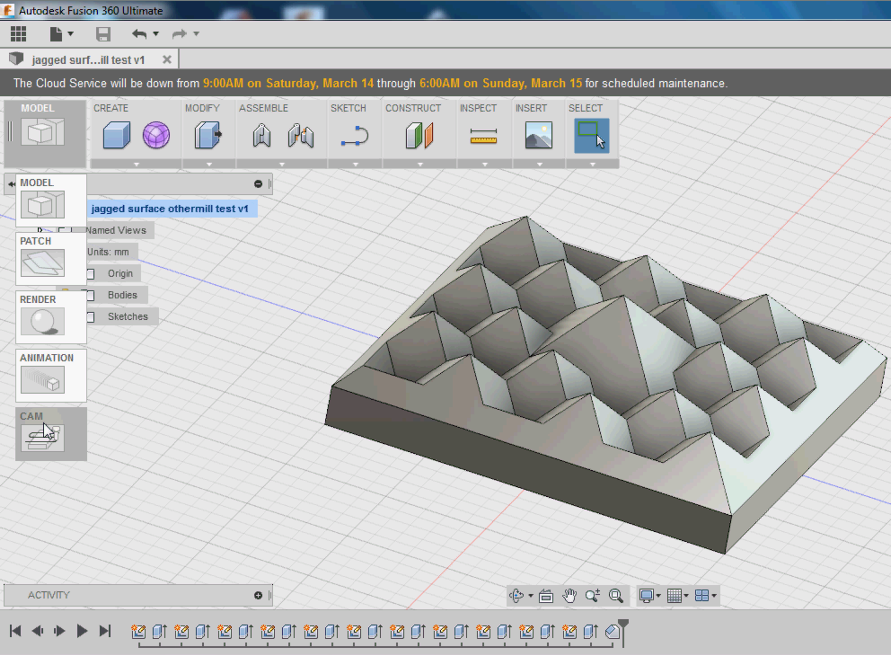
In the upper left, click on "Model". A drop down menu will appear and click the furthest down option - "CAM" - to switch to CAM mode. This is where the magic happens.
Setup
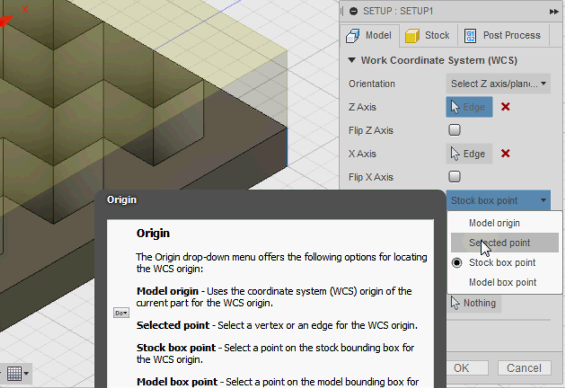
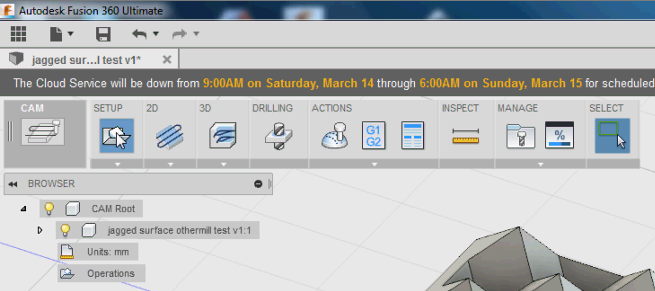
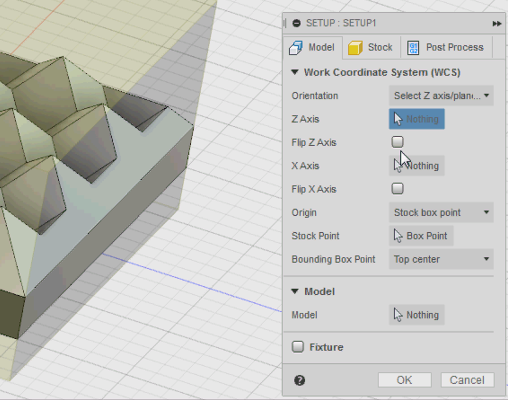
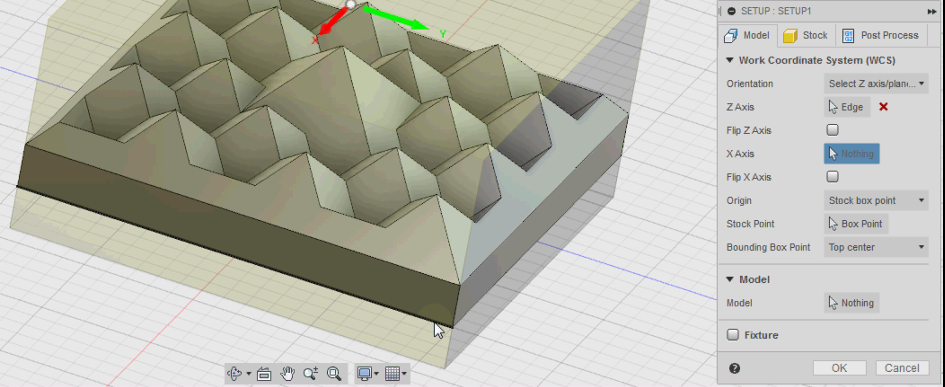
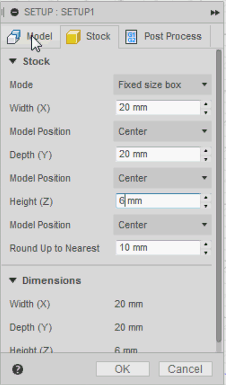
Click on "Setup". It should be directly to the right of the drop-down menu we just used. This will bring up a setup dialogue box on the right side of the screen. There will be three tabs: Model, Stock, and Post Process. We will only be using Model and Stock.
In the Model tab, which should be open by default, click the box next to the first option: "Orientation". Use the drop down menu to select "Select Z-axis/plane and X-axis. Then select an edge to serve as your Z-axis. This should be a line that is vertical on the screen, if you are looking at the model from the home position. Then select an edge to act as your X-axis.
Click on the "Stock" tab, and redefine the depth of whatever your stock material is. In this case, measuring the thickness of 1/4" plywood yields about 6mm, so the depth should be 6mm. The width and height should be directly related to your model and shouldn't need to be changed.
Click back to the "Model" tab. Click on the box next to "Origin", and use the drop down menu to choose "Selected Point". You should then select a point on your model at the greatest Z-height, and ideally as close to the corner as possible.
Click "OK" at the bottom, we're done with setup!
Roughing Pass
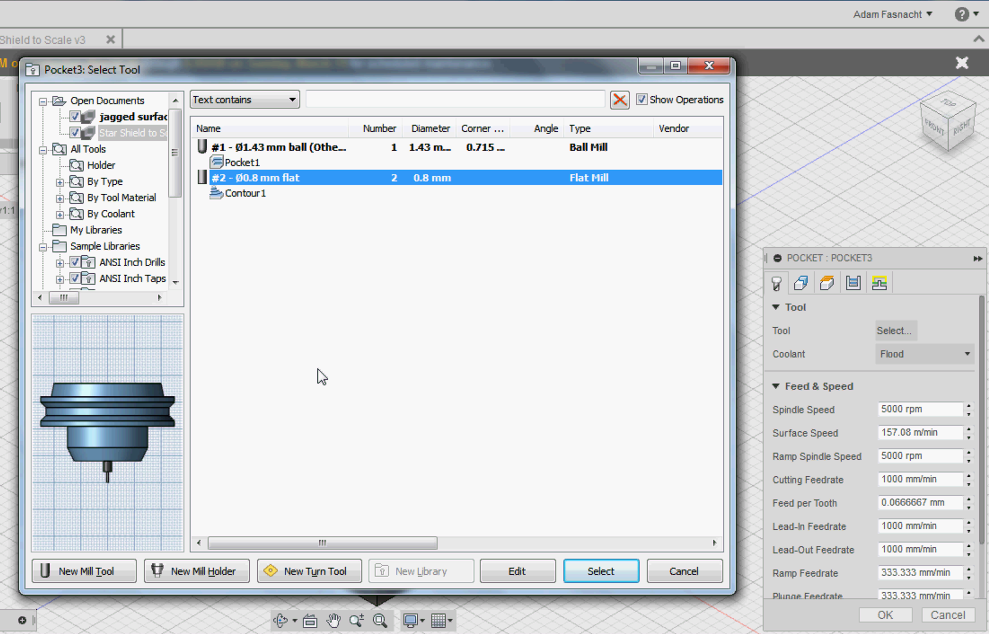
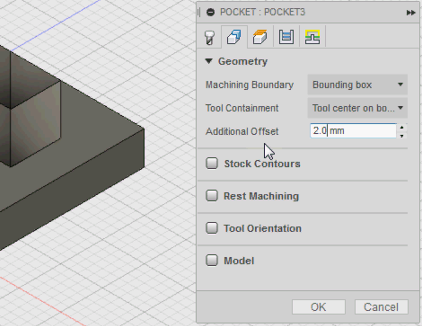
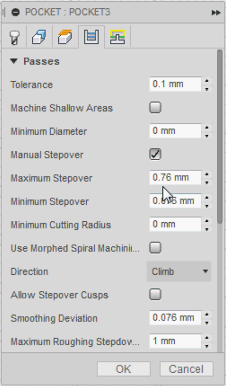
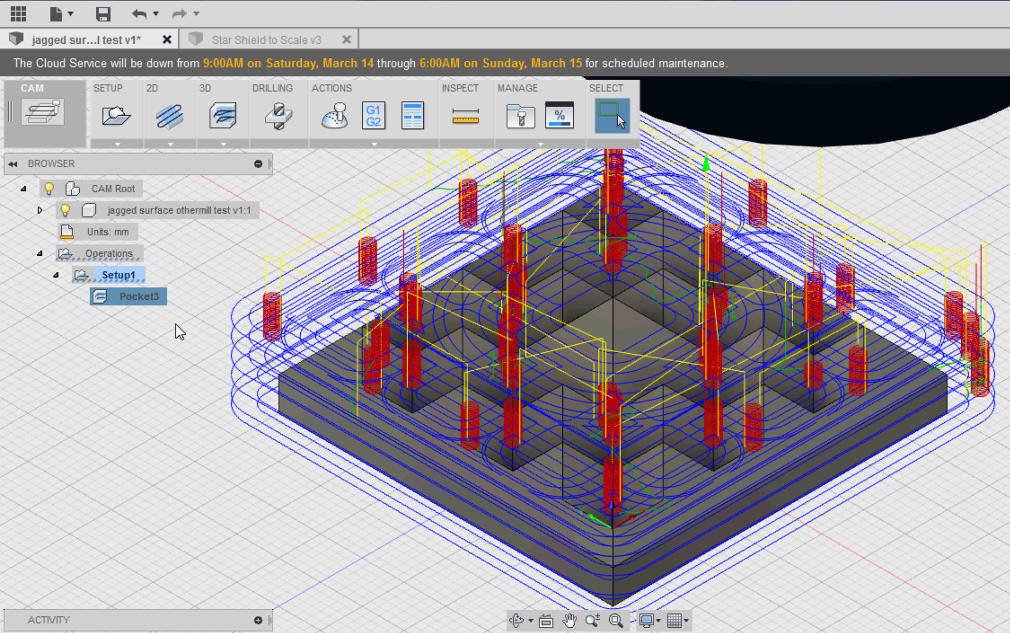
Click the down arrow on the "3D" button. There are two options for roughing passes: Adaptive Clearing or Pocket Clearing. Fusion 360 will show a pop-up box with a description of both options so you can choose what's best. For this model we will be choosing Pocket Clearing, which will bring up a dialogue box on the right side of the screen again. This box will have five tabs: Tool, Geometry, Heights, Passes, and Linking. We will be using the first four.
Under the tool tab, click on the box that says "Select". This will open up a dialogue box where you can choose from a plethora of pre-programmed bits, or add you own based on your measurements. While there might be some Othermill-sized bits pre-programmed, I went ahead and added the ones I would be using by measuring them with calipers and adding them manually, just to be safe. The next step will go over adding new bits.
Click the "Geometry" tab. In the text box next to Additional offset, enter "2". By adding 2mm surrounding the part, this will let the machine know that we want the part to be completely cut out.
Click the "Heights" tab. Click the down arrow next to Clearance Height. In the Offset text box, change 10mm to 5mm. This is optional, but it will lower the distance the cutting head moves when retracting, thus lowering the amount of time it takes for a job to run. Click the down arrow next to Retract Height. In the Offset text box, change 5mm to 2mm.
Click the "Passes" tab. The important thing in this tab is called Stepover. To ensure this goes well, click the check box next to Manual Stepover. Because this is a roughing pass, we want the stepover to be only slightly smaller than the diameter of the bit we are using. This will allow more material to be removed more quickly with a rough finish, which is what we're going for.
Click "OK" at the bottom and the toolpaths will be generated! You can hit "Simulate" on the toolbar at the top to preview the movements of the machine.
Adding Milling Bits
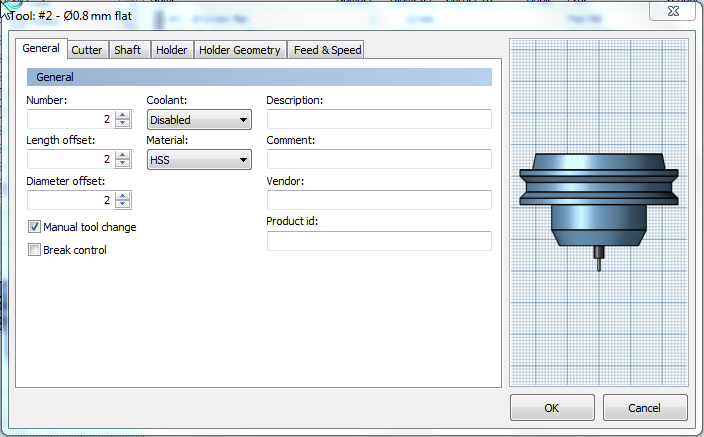
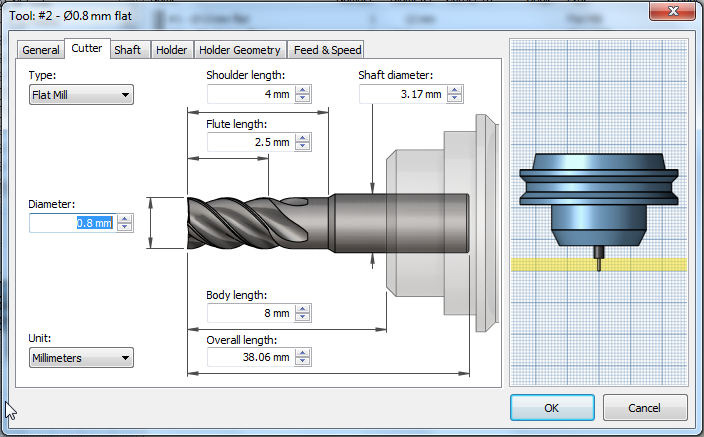
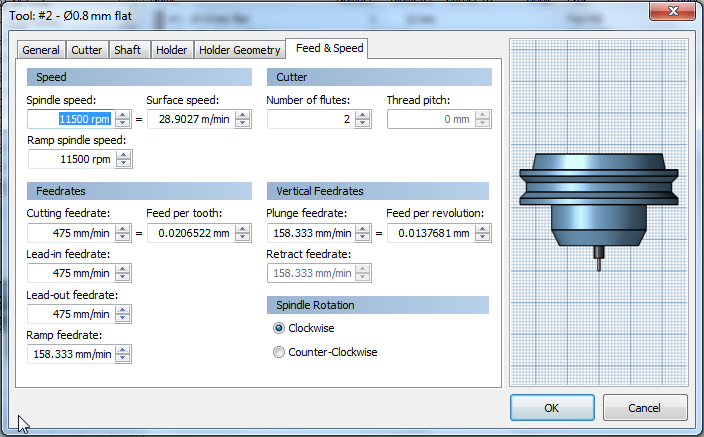
It's important to have the appropriate bit for your purpose. The process of adding bits is made pretty simple with Fusion 360, and only involves measuring different parts of the milling bits with calipers, and entering the data appropriately. The screenshots in this step show the numbers that worked well for me for milling 1/4" wood with the 1/32" Othermill flat end milling bit.
Smoothing Pass
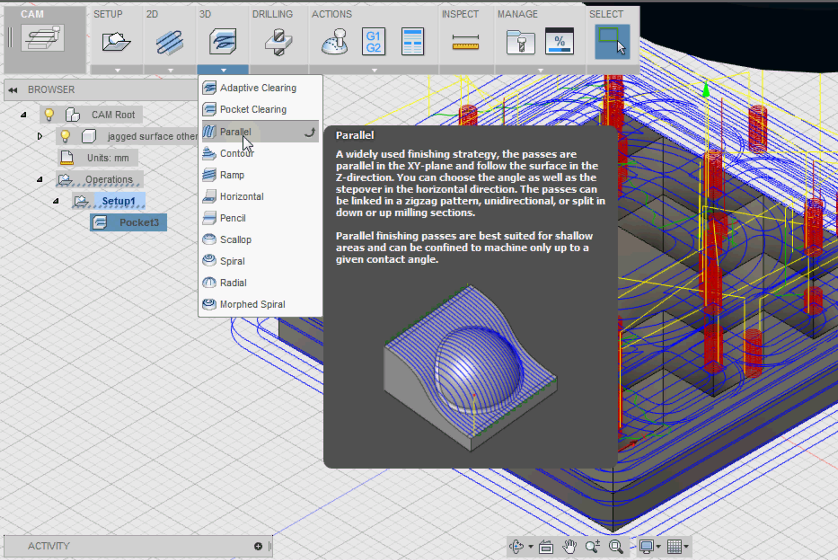
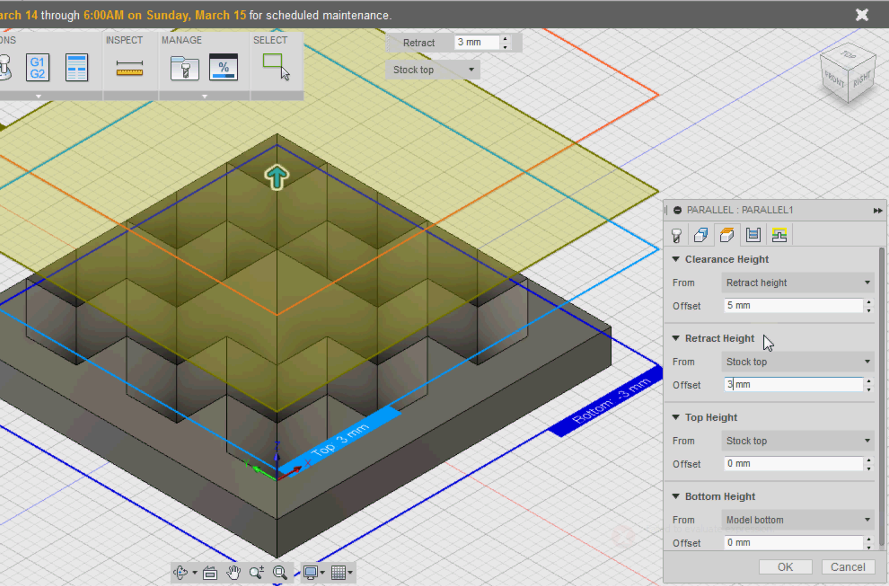
Click the down arrow on the "3D" button. There are nine options for roughing passes: Parallel, Contour, Ramp, Horizontal, Pencil, Scallop, Spiral, Radial, and Morphed Spiral. Again, Fusion 360 will show pop-up boxes with descriptions for each of the options so you can choose what's best. I've found that Parallel Clearing is pretty simple and yields good results. A dialogue box on the right side of the screen again with five tabs: Tool, Geometry, Heights, Passes, and Linking. We will be using three of these.
Under the tool tab, click on the box that says "Select". Select the desired tool. A ball-end mill is most often used for smoothing operations.
Under these conditions, we should be able to ignore the "Geometry" tab.
Click the "Heights" tab. We will be changing the same values we changed for the roughing pass, but in case you forgot: Click the down arrow next to Clearance Height. In the Offset text box, change 10mm to 5mm. This is optional, but it will lower the distance the cutting head moves when retracting, thus lowering the amount of time it takes for a job to run. Click the down arrow next to Retract Height. In the Offset text box, change 5mm to 2mm.
Click the "Passes" tab. Because this is a smoothing pass, we want the stepover to be very small so that the surface comes out, well, smooth. Click in the text box next to Stepover and change the value to 0.1mm.
Click "OK" at the bottom to generate our smoothing toolpaths! You can hit "Simulate" on the toolbar at the top to preview the movements of the machine.
Exporting Toolpaths
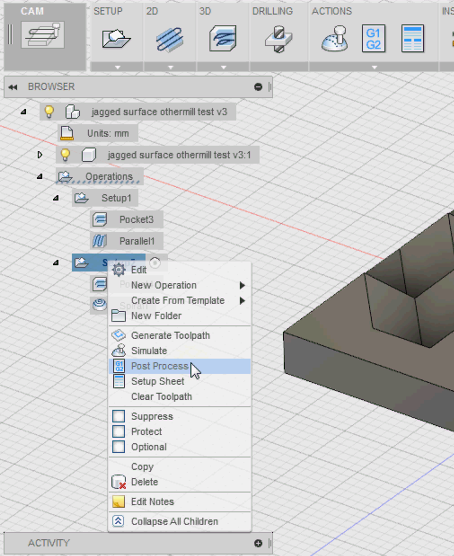
On the left hand side of the screen, underneath the toolbar, there will be a block that says, "Setup1". Underneath, there will be blocks describing the different toolpaths that have been generated. If you chose the same bit for both the roughing and smoothing operations, then right click the Setup block, and choose "Post Process".
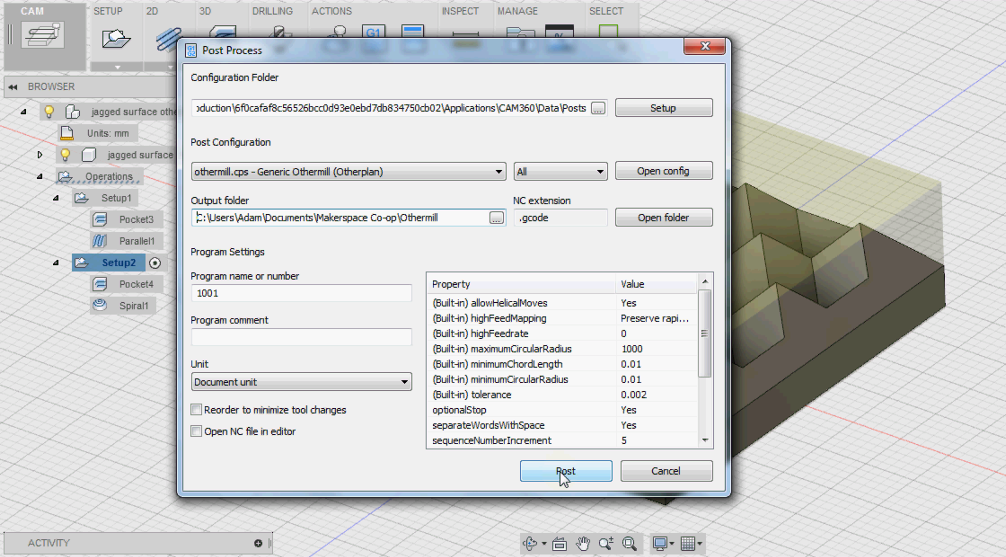
This will bring up a dialogue box. Under Post Configuration there is a drop down menu. Select "othermill.cps - Generic Othermill (Otherplan)". You can choose an output folder underneath that if you'd like also. Click the "Post" button at the bottom of the dialogue box and save your file.
If you are using two different bits - one for roughing, and one for smoothing - you should export two files, but right-clicking on the toolpath itself instead of the Setup block.
Otherplan
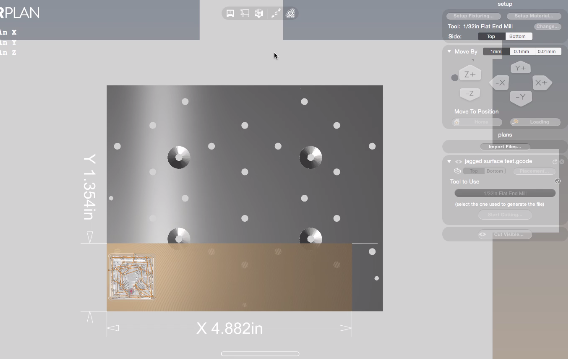
If you weren't using a Mac earlier, you'll have to get your g-code files over to one with Otherplan installed by whatever method your heart desires.
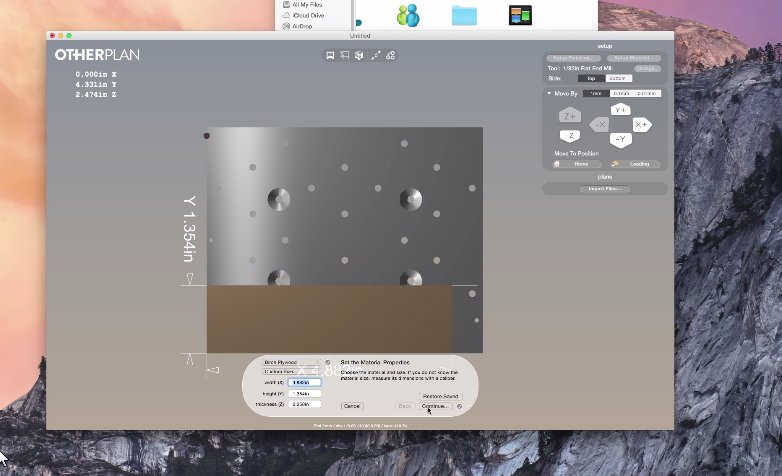
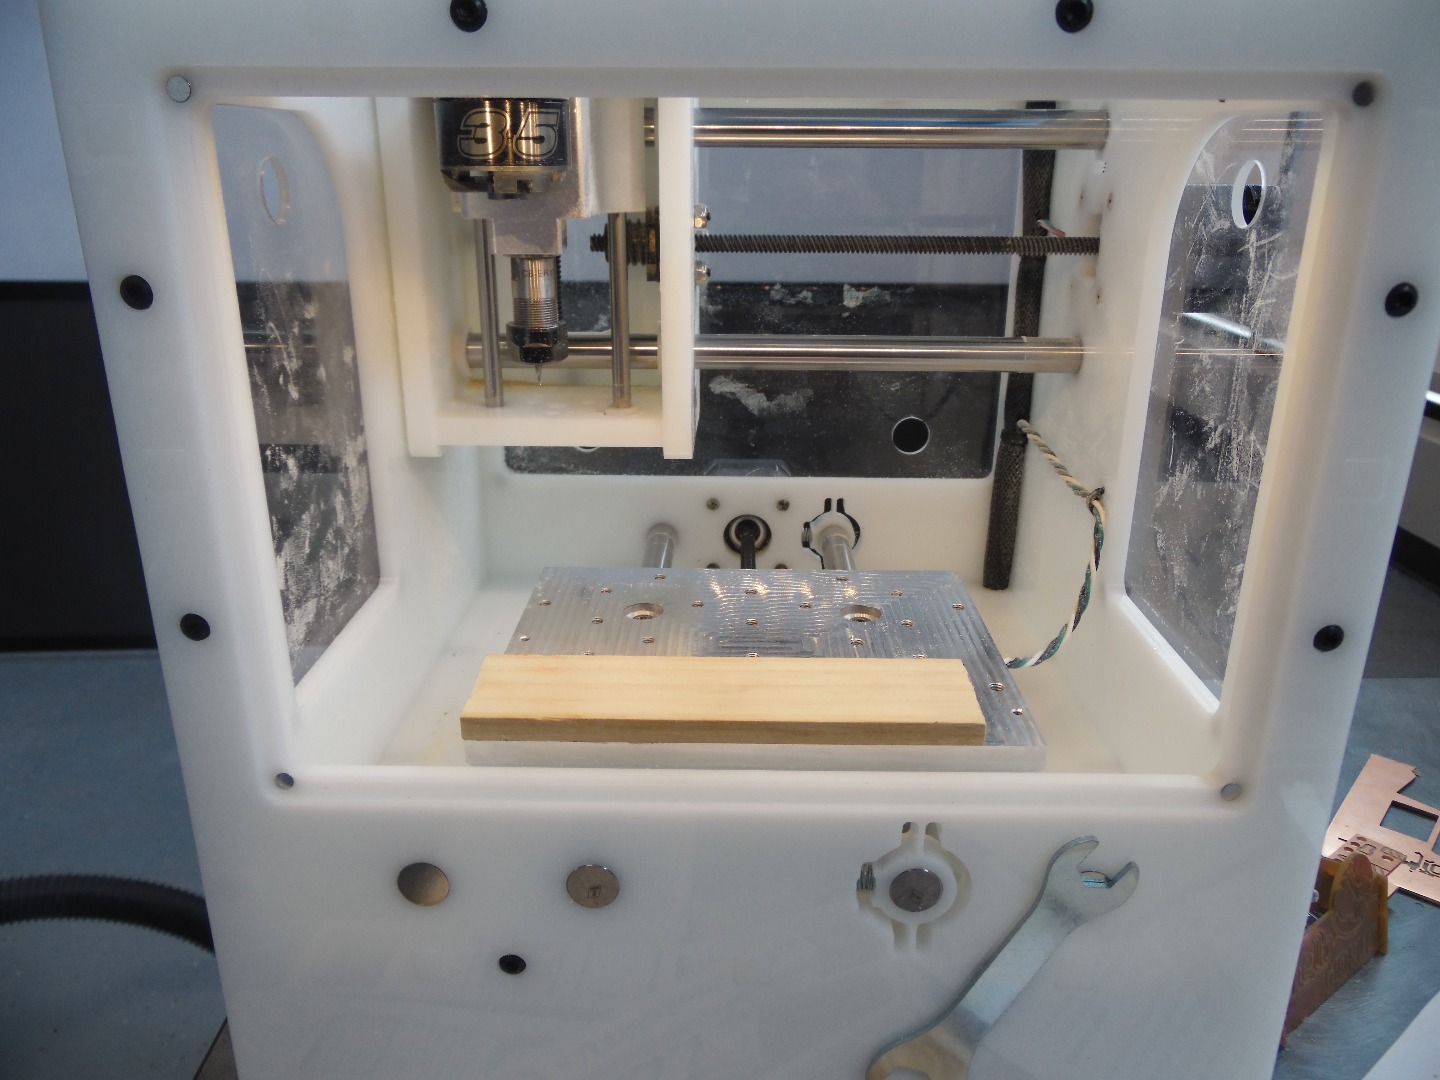
Open Otherplan, choose "Setup Material", and enter the dimensions of your stock material. I'm using 1/4" wood in the form of paint stirring sticks that you get at the hardware store, so my dimmensions are kind of unique, and the stock is held to the platform using double-sided tape, as is Othermill's recommendation.
Maker sure the appropriate bit is loaded in the spindle, or select the "Change" button next to Tool.
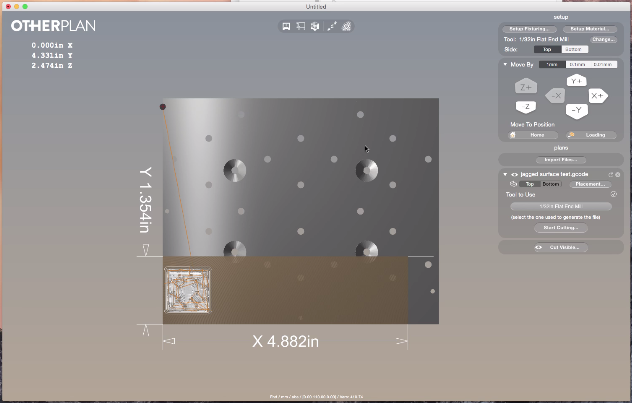
Drag your g-code file into Otherplan, select the appropriate bit, and position your job on your stock material.
Select "Start Cutting" when you're ready to begin!
Conclusion
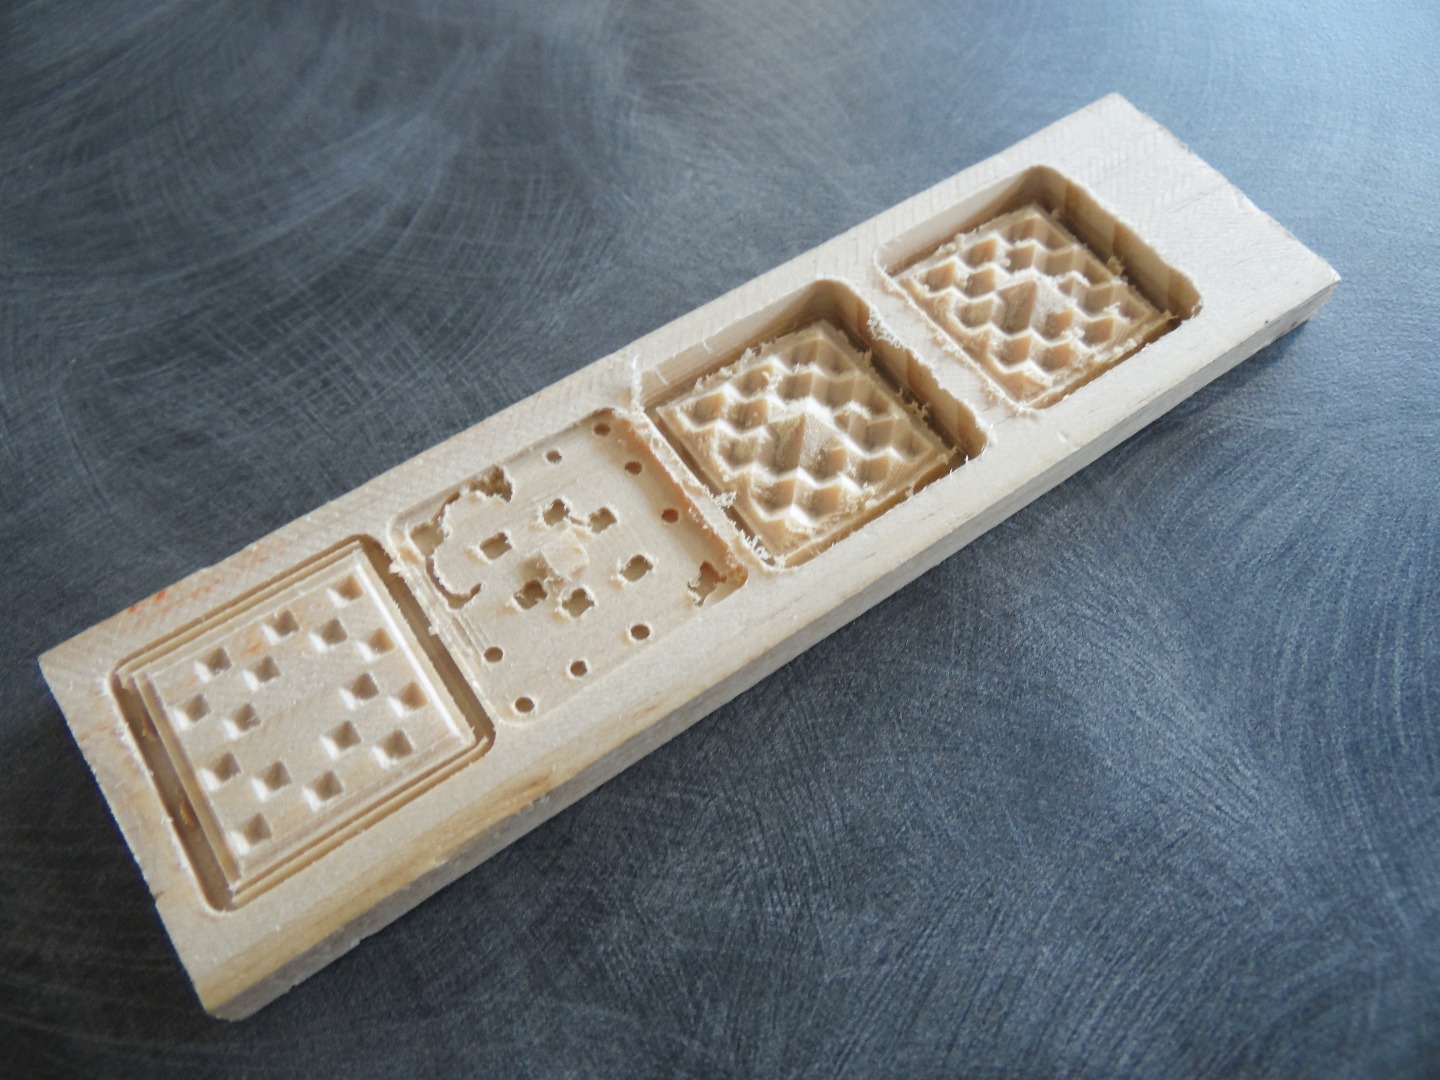
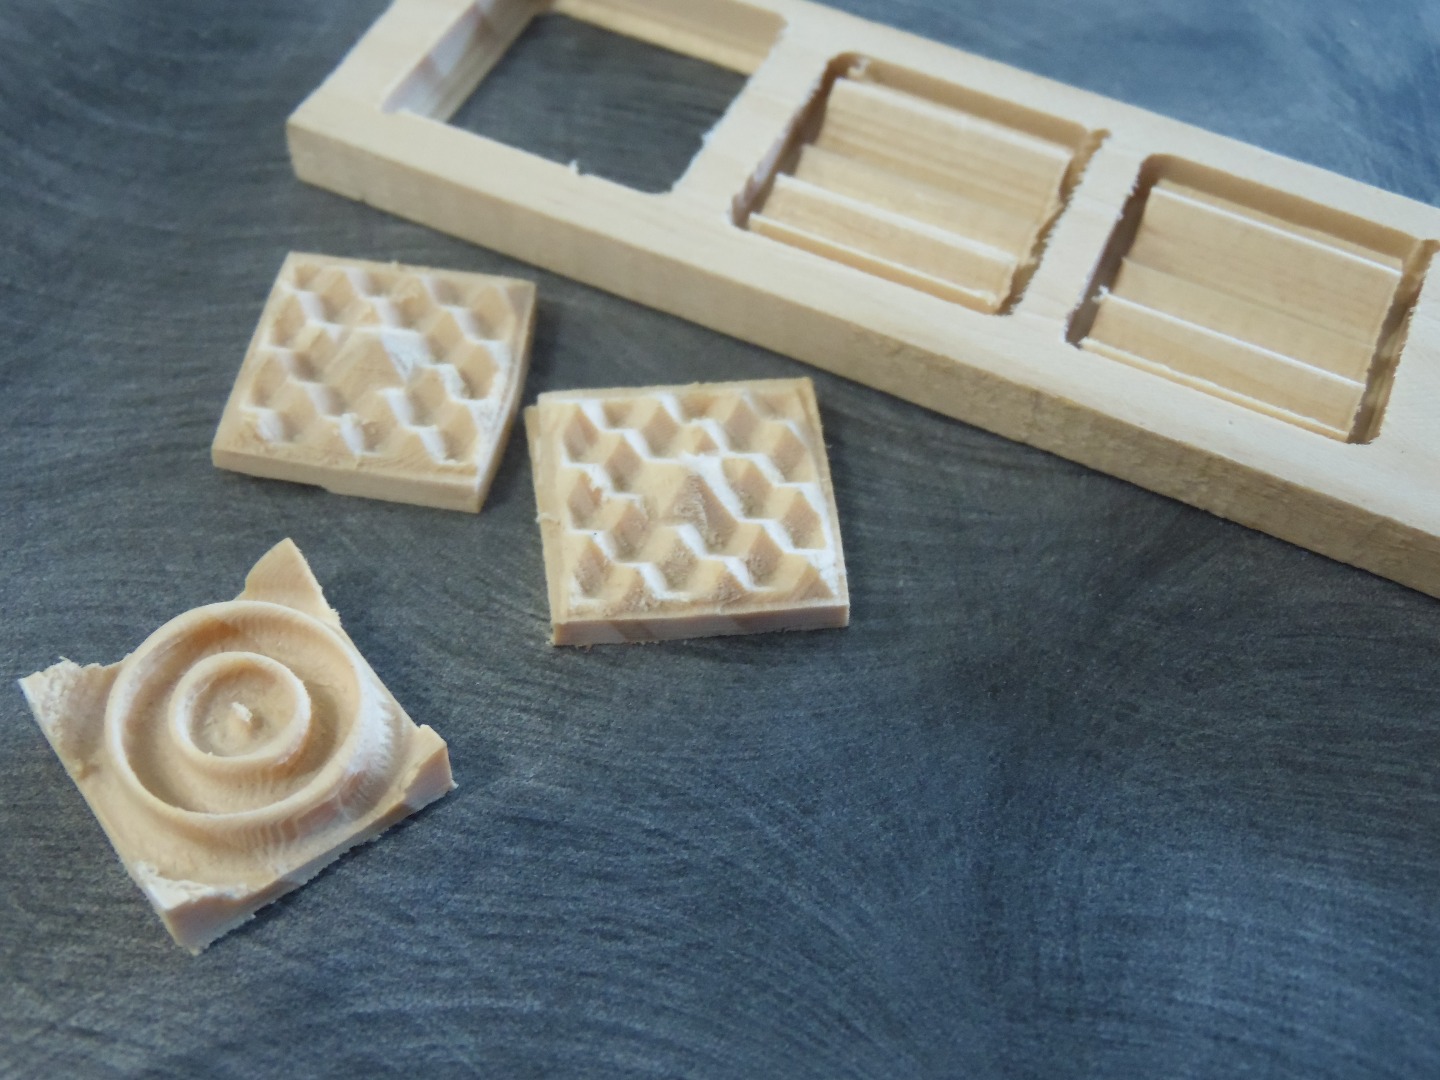
When the Othermill is done cutting remove your parts from the build platform, and use them for whatever you're making! Depending on the file, it can definitely take some trial and error to be able to get it right, so I'd recommend practicing on a relatively soft or non-dangerous material like soft wood or machine wax before going straight for the final product. In the first image you can see where I didn't define the axiis correctly, and ended up not cutting down enough on the work piece.
Good luck! Thank you for reading!