How to Set Up Dotnet on Raspberry Pi
by Francoix_Badreau in Circuits > Raspberry Pi
15427 Views, 3 Favorites, 0 Comments
How to Set Up Dotnet on Raspberry Pi

NET Framework on Raspberry Pi - what's that and, what's more, WHY? Running Microsoft .NET Framework or also called just Dotnet on Raspberry Pi sounds a little bit weird and tricky at first glance. But it turns out pretty smart and reasonable at the second, more close look.
First of all, in case you are a newbie, let's clarify the two major questions: What is Raspberry Pi and what is Microsoft .NET Framework.
RASPBERRY PI
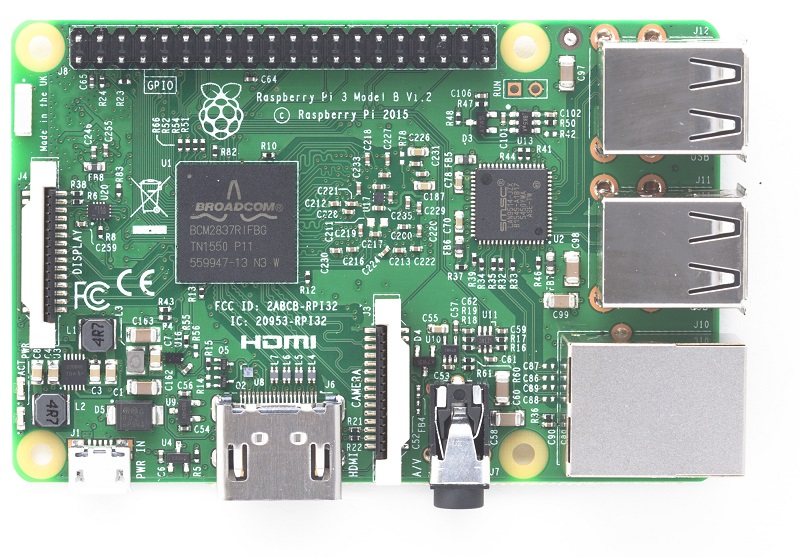
Raspberry Pi is a low energy consuming device, that looks like an ordinary PC motherboard but much (I mean MUCH) smaller. It uses different types of processors the other our PCs and laptops do. The one that is in our everyday computer devices is called "x86" while RPi devices have "ARM" ones. Almost all RPi owners use open-source software. For example Debian of Raspbian operational system, Chromium web browser, etc. A lot of applications are kept in a place on the web called Repository and is supported by the Raspberry Pi foundation.
Mainly all advanced operations within the system of Raspbian are carried out with an app called command line, which I am also intended to use in my tutorial.
In case you haven't purchased an RPi device for your project yet the best and fastest way now is to make an order on Amazon. As for the project, any type or RPi device will do well, so you can choose any model, depending on your budget.
MICROSOFT .NET FRAMEWORK
Dotnet Framework by Microsoft is a software that runs only on Windows OS. It provides a big and worked out library of classes ( that's why it's also called a "Framework Class Library" or FCL in short). In a nutshell, it enables a software developer to use code written in other coding languages. It is an app virtual machine, providing services such as security, memory management, and exception handling.
WHY USE IT ON ARM DEVICES
It's the right question although the answer is very simple. If you are a developer and use an ARM-device for some kind of a Raspberry Pi project ( either IoT, or AI, or even Robotics) you will definitely need to fulfill some "coding issues" on that hardware. This feature set up on Raspberry Pi gives a developer much more freedom and flexibility in doing their job avoiding switching between different programming languages. And if you are not working on any special project on Raspberry Pi you may simply use it as a working machine for coding on this cross-language framework which is very convenient and energy-savvy. In fact, the most advanced raspberry Pi model consumes 40 times less energy than a typical PC (forty times - this is not a mistake)
Install Emulator
So, as you have already understood all the pros and cons of using .NET Framework on Raspberry Pi., let's get to its installation. As usually, you will need an emulator for that. And again, in my personal tutorial I'll be using ExaGear Desktop, which, in my opinion is quite a good choice. If you don't like it or are already using another emulator, or would like to look for some alternative, you are free to do that. Note, that with another type of an emulator the installation process stays almost the same.
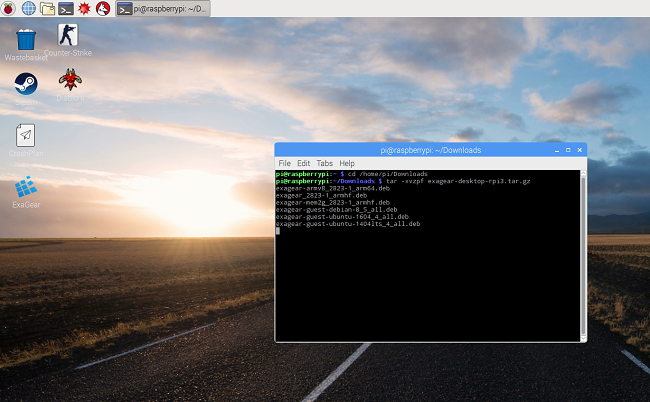
1. Well, step on: Download your emulator for raspberry Pi. It should get into Downloads folder in you RPi file system. So get inside this folder and unpack the emulator:
cd home/pi/Downloads
tar -xvzpf exagear-desktop-rpi3.tar.gz
2. After that use thos command to install the emulation software:
sudo ./install-exagear.sh
Launch X86 As a Guest System
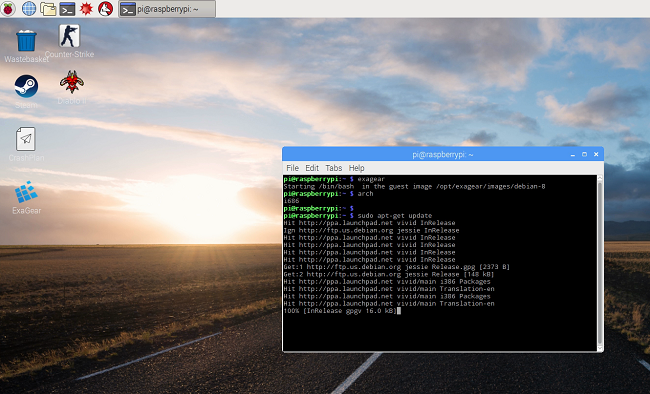
3. Start the guest x86 system with the command:
exagear
4. Check x86 system work:
arch
5. See this?
i686
Everything's fine go on to the next step! ;)
Download and Set Up Wine
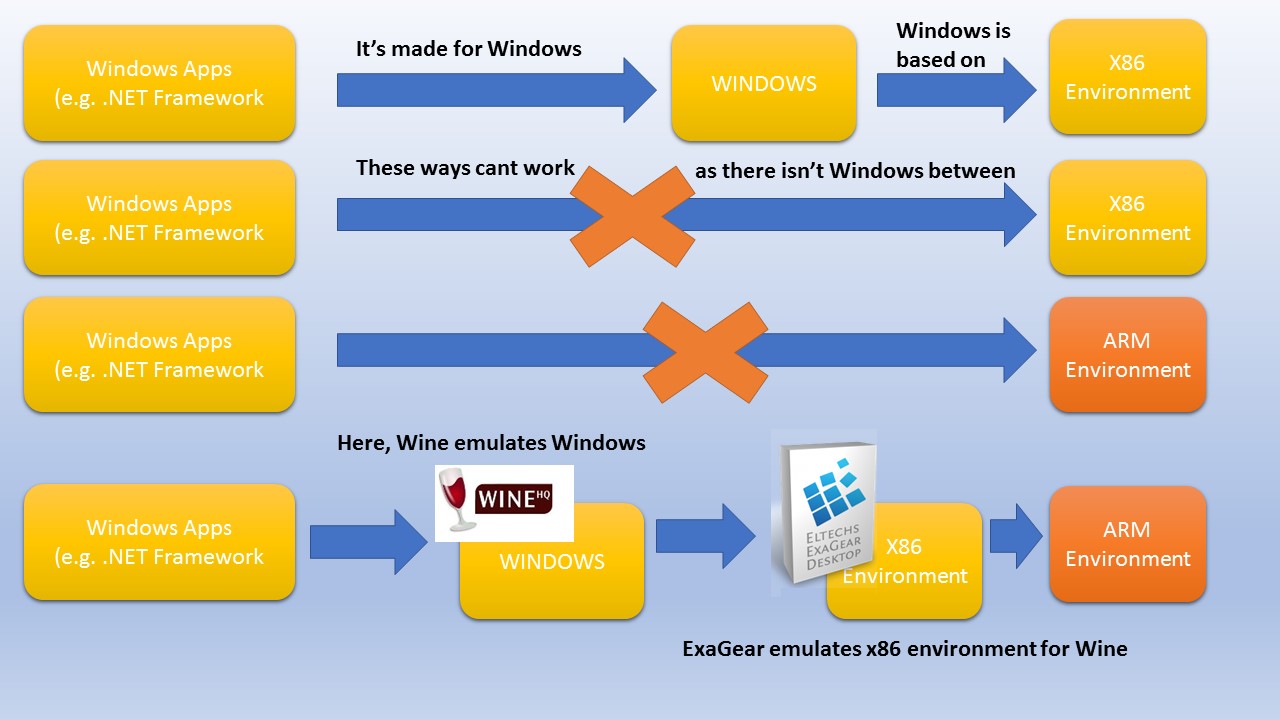
As I have already told in my previous instructables, Raspbian have it's own exclusive ARM working environment. So it's impossible to run anything on it created for x86 environment. Moreover, x86 environment itself requires an additional help to run the apps, made for Windows. So, for you to understand the whole chain, see the scheme, I have specially made to illustrate the process
6. You should install Wine inside guest x86 system usine command line:
sudo apt-get install wine
If you use ExaGear just like me, you need to make sure it has a special version:
wine --version
You should see this on your screen: "wine-1.8.1-eltechs" (the digits may vary)
Install .NET Framework. Part 1: Winetricks
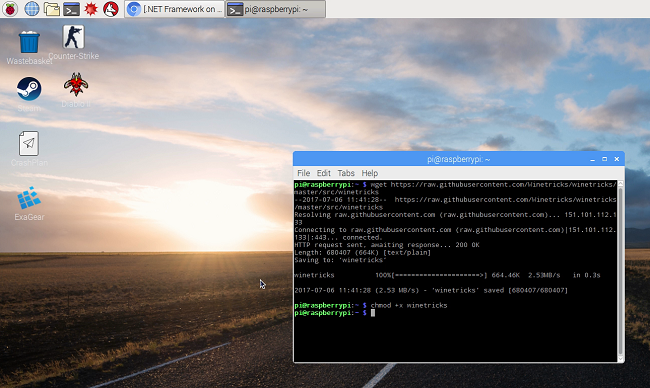
Before installing .Net Framework you'll have to download and install a few additional packages called "Winetricks":
sudo apt-get install cabextract
wget https://raw.githubusercontent.com/Winetricks/winetricks/master/src/winetricks
chmod +x winetricks
In case you use Ubuntu, do the following:
./winetricks dotnet40
We need this to consiquentely installinf .NET Framevwork versions 2.0, 3.0 and 4.0 one after another. It does work only this way. As soon as you finish with that, move to the next step
Install .NET Framework. Part 2: Version 4.5
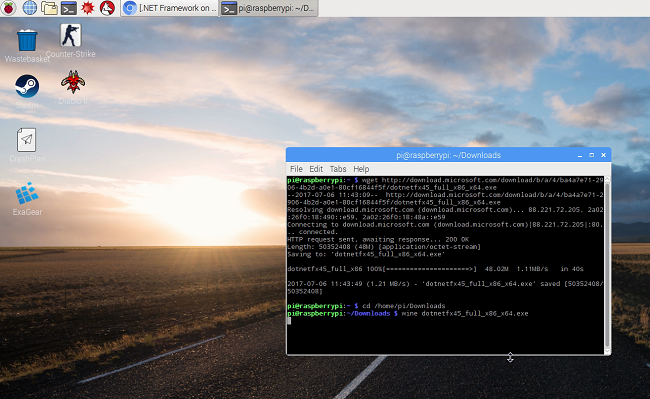
Now, you need to download and install .NET Framework 4.5 under Wine:
wget download.microsoft.com/download/b/a/4/ba4a7e71-2906-4b2d-a0e1-80cf16844f5f/dotnetfx45_full_x86_x64.exe
wine dotnetfx45_full_x86_x64.exe
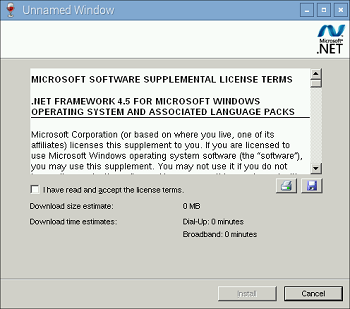
Then you should see the installer manager window. Just follow the prompts and finish up the installation. That's it!
Important UPDATE! It seems ExaGear is no longer in service. If you haven't purchased the ExaGear license yet, so, I think you'd better use QEMU (https://www.qemu.org/). The general principle will be the same.