How to Send and Receive WhatsApp Messages From ESP8266 - Arduino IDE
by mati181818 in Circuits > Arduino
13639 Views, 17 Favorites, 0 Comments
How to Send and Receive WhatsApp Messages From ESP8266 - Arduino IDE
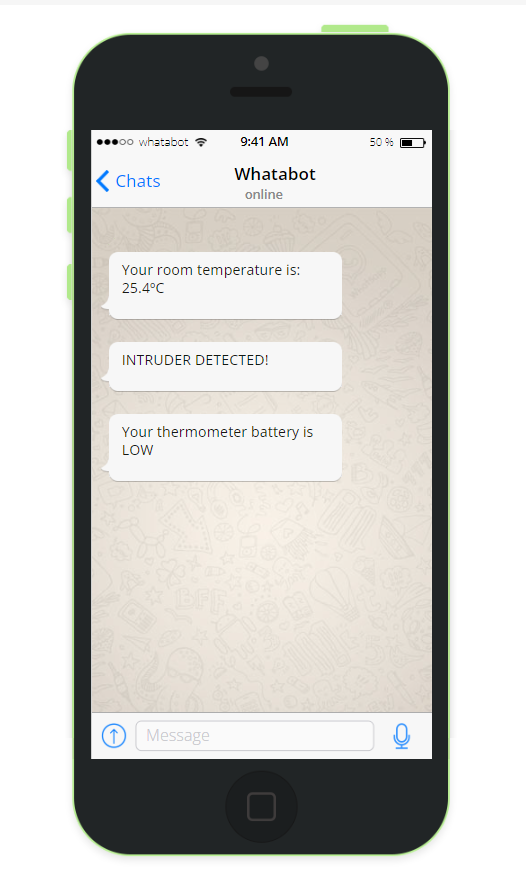
I'll explain how can you send yourself WhatsApp messages in a very easy way from your IoT devices. In this case from ESP8266 - Wemos D1 Mini - Using the Arduino IDE
Supplies
. Wemos D1 mini
. whatabot.io opened
. Arduino IDE
. Wifi access
Add ESP8266 Boards in Your IDE
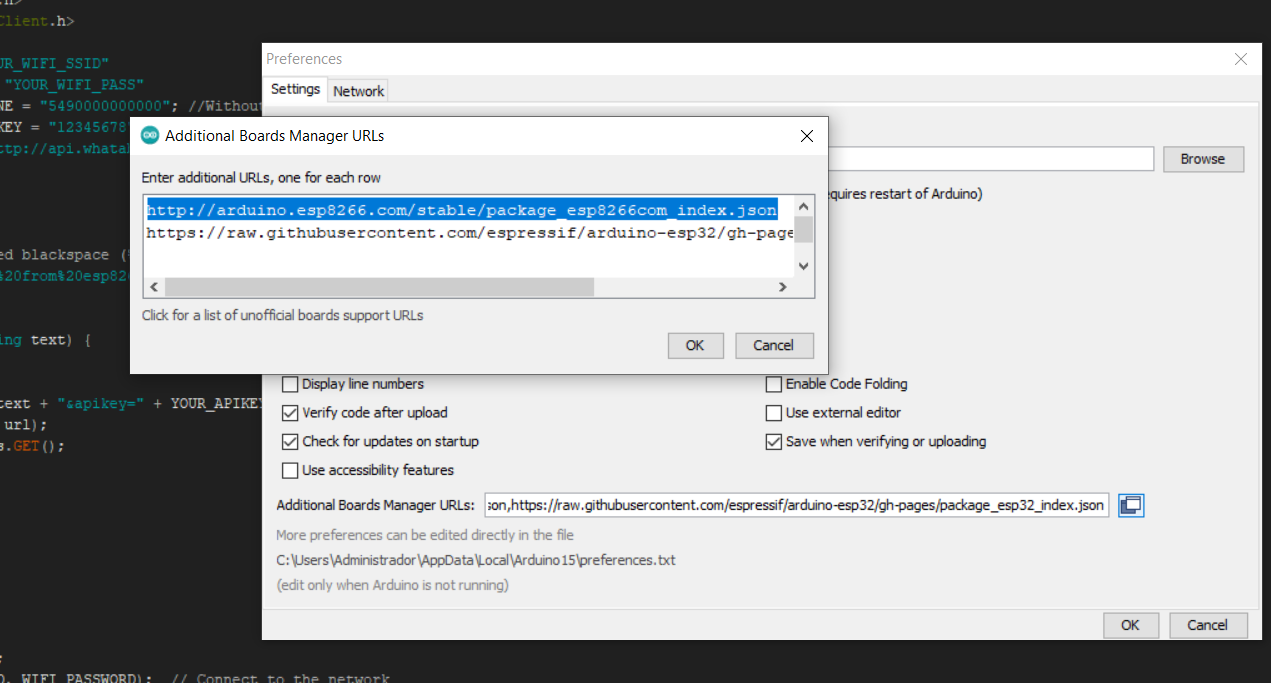
Add this: http://arduino.esp8266.com/stable/package_esp8266com_index.json in your additional boards manager URL list in your Arduino IDE.
Steps:
1- Go to File
2- Click on Preferences
3- Add the URL in Aditional Boards Manager URLs field
Download ESP8266 Boards
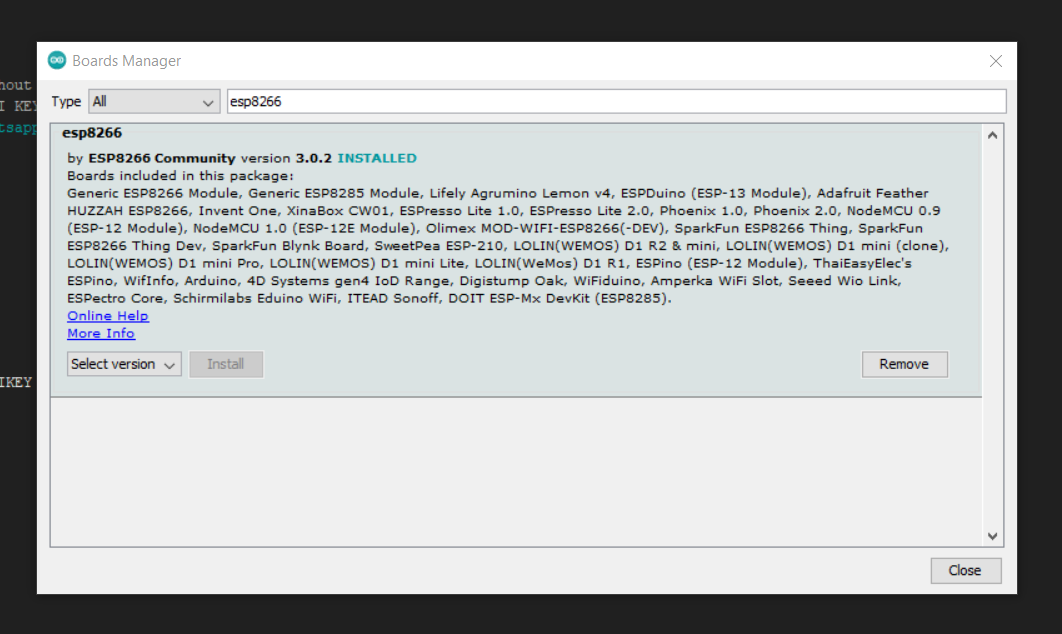
Then go to:
Tools/Board/Boards Manager
Search for esp8266 and click "Install"
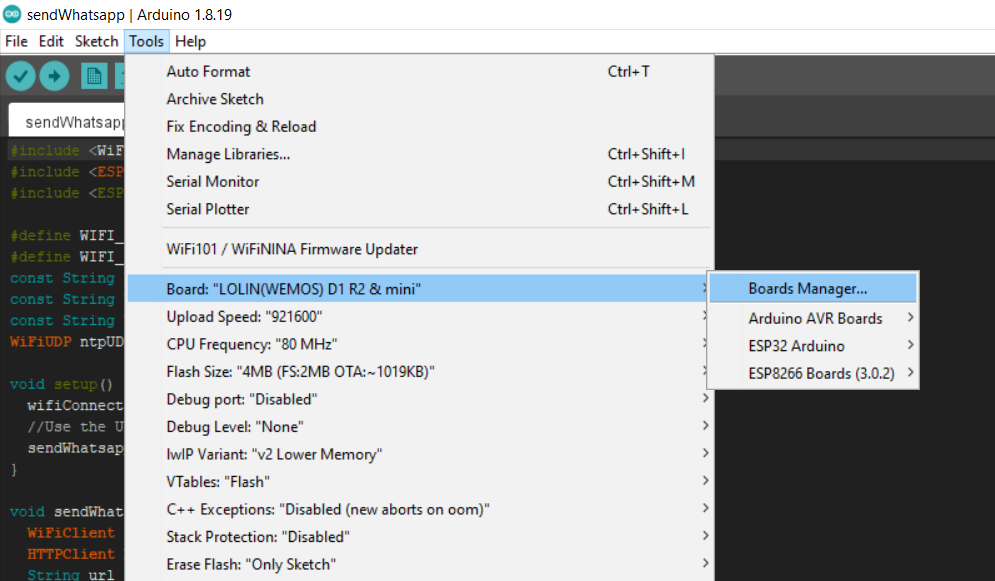
Select the Board You Have
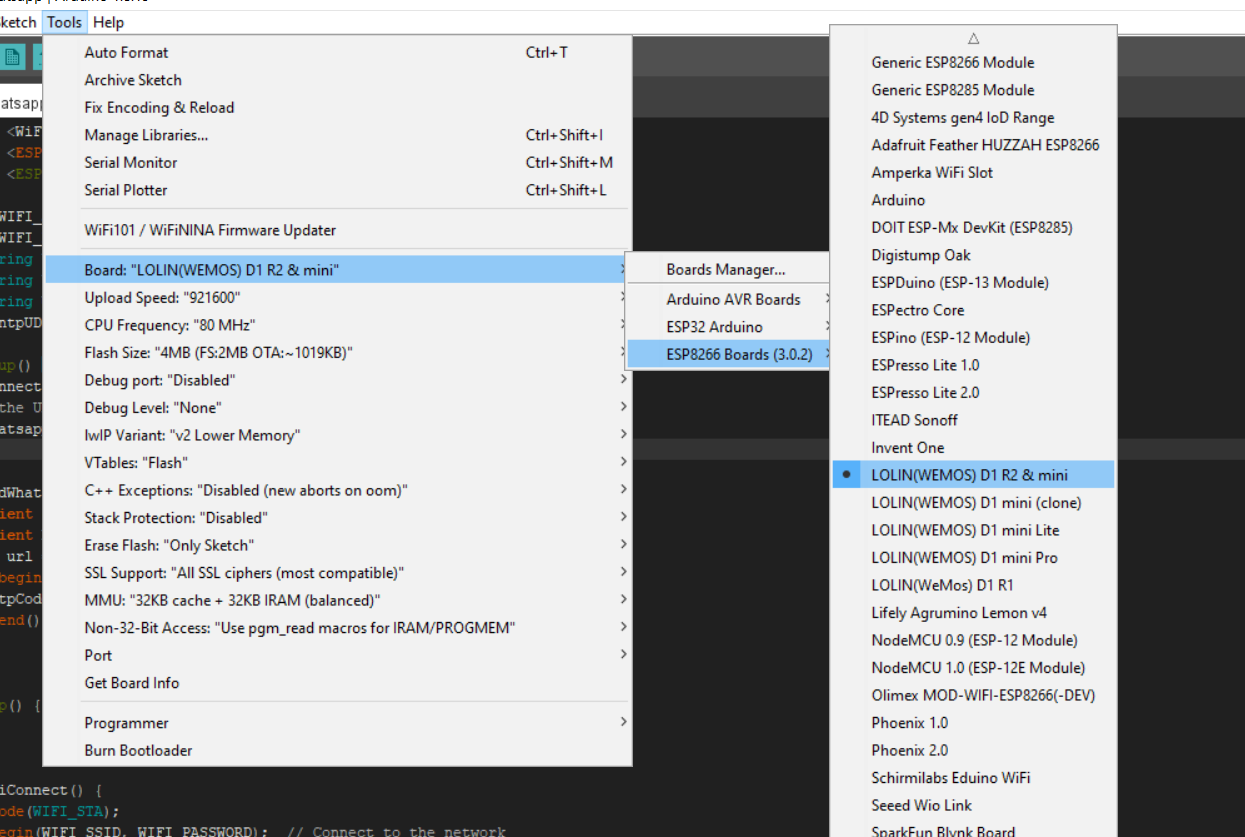
In this case, we will select "LOLIN(WEMOS) D1 R2 & mini"
Enter to Whatabot.io and Follow It's Steps
You have to:
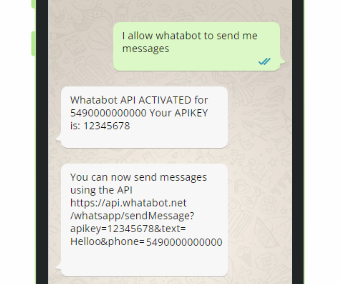
Go to https://whatabot.io/get-started
Add the number posted there in your contacts
Send the following whatsapp to this number: I allow whatabot to send me messages
Copy and save the apikeywhatabot sent you
Install the Library From the GitHub Repository
Download the soruce code.zip from https://github.com/WhatabotAPI/WhatabotAPIClient/releases/tag/1.0
Add the .ZIP library like this:
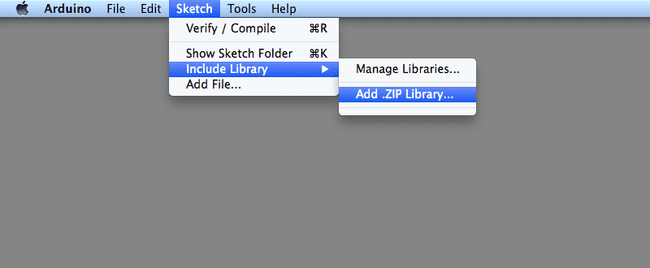
reference: https://docs.arduino.cc/software/ide-v1/tutorials/installing-libraries/#importing-a-zip-library
Install the WiFi Manager Library

Go to: Tools/Manage Libraries
Search for the library named WiFiManager (by tzapu)
Install it
Install ArduinoJson Library
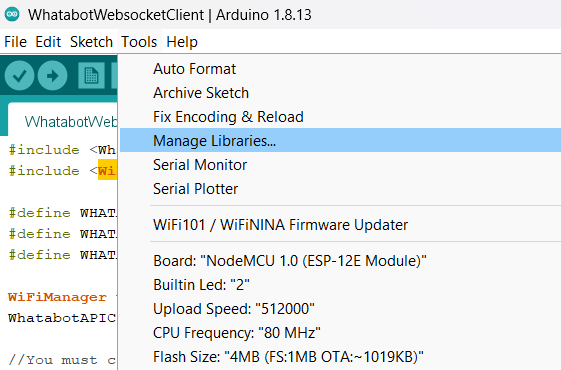
Go to: Tools/Manage Libraries
Search for the library named ArduinoJson (by Benoit)
Install it
Select the Example Called WhatabotWebsocketClient

Go to File/Examples/Whatabot API Client Library/WhatabotWebsocketClient
Replace the Variables With Your Data
Variables needed:
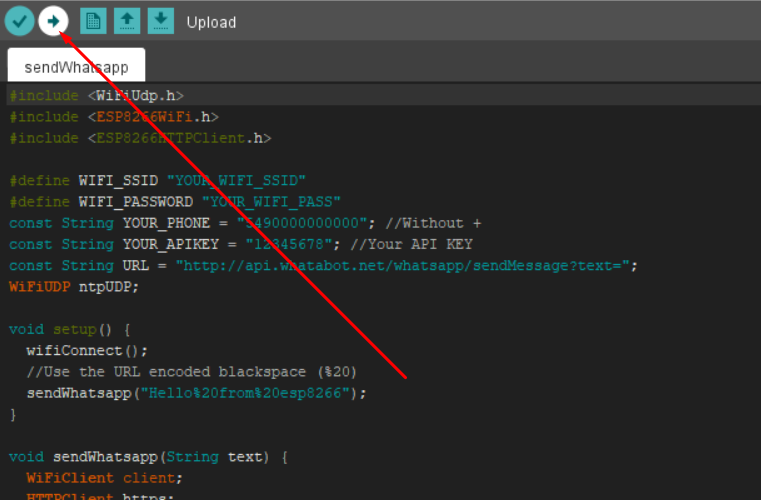
1 - WHATABOT_CHAT_ID = "YOUR_PHONE_NUMBER"; //Without +
2 - WHATABOT_API_KEY = "YOUR_WHATABOT_API_KEY";
Example:
1 - YOUR_PHONE = "5490000000000";
2 - YOUR_APIKEY = "38rhjd-123d-432d"
Upload Your Code and Start Receiving and Sending Whatsapp Messages
Note that the first time you execute this, the library WiFiManager will generate a wifi network called "WhatabotAPI"
. You have to connect to it with your mobile or pc (Password: whatabotapi)
. With the web browser, enter to 192.168.4.1
. Press the button "Configure WiFi"
. Follow the steps to connect the arduino to your router
That's all folks!
Your Board Is Not Recognized?
If you have a CH340G based board, follow the instructions posted here:
https://www.instructables.com/Instalar-driver-para-CH340G/