How to Sculpt a VW Beetle From Wool
by Birdz of a Feather in Craft > Felt
7367 Views, 39 Favorites, 0 Comments
How to Sculpt a VW Beetle From Wool

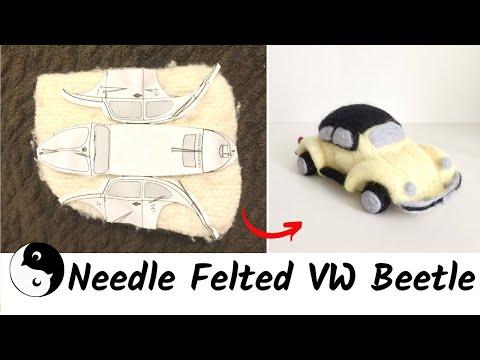
I love the shape and form of a VW beetle and was sad when Volkwagen discontinued them. They certainly had the cool factor going for them. So I'm going to show you how to sculpt your own out of wool!
I took a beginner course in needle felting at my local stained glass studio just over a year ago and then quickly became enamoured with sculpting wool - and 'breaking the rules'. When you're new to a craft, it's easy to get creative with your own techniques because you don't know what you don't know! So I took a shortcut: this needle felted VW Beetle convertible started off as a wool sweater!
Besides the stress reduction that naturally comes from poking a felting needle in and out of a mound of wool thousands of times, I love that one can easily stop and return to this project at any time. My needle felted VW Beetle is a LOOOONG project. But for anyone ambitious enough to give this a go and work along with me, there’s a 2-hour video tutorial right above. If you go to the actual YouTube page, the steps are time stamped so you can easily click the link and pick up right where you left off!
Supplies
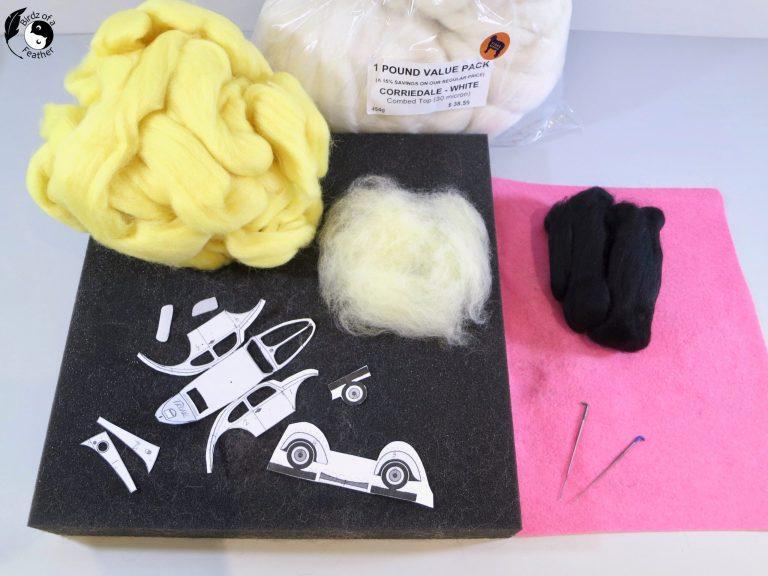
Wool roving: Corriedale lemon yellow, white (top), licorice, grey and cherry red
38 gauge needle felting needle. I used a triangle style but would suggest playing with a variety of styles like this deluxe felting needle set. It will give you a good selection of speciality needles to try! See 'Step 2' for more information on needle types and sculpting with needles.
Thrifted wool sweater
The Inspiration

We are a VW-loving family. My husband lovingly restored the oldest VW single cab truck in Canada. It was brought to Canada and displayed in 1953 at the Canadian National Exhibition and I was even able to find an original picture of it (bottom left in collage)! Hubs also restored our red 1966 bug, which I have immortalized as a desk for my studio (1), in stained glass (2) and in vinyl, albeit a newer version (3).
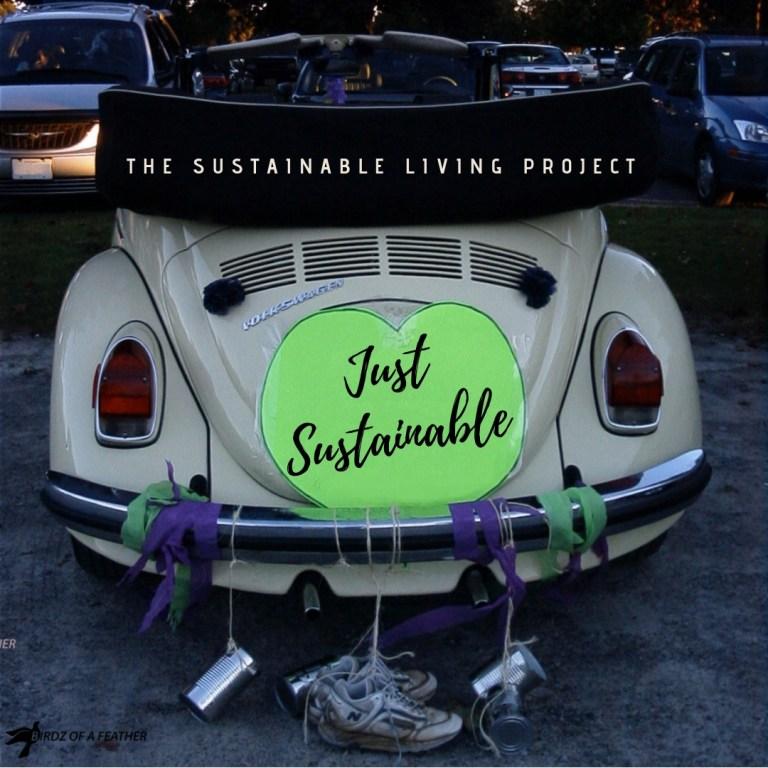
The only thing I haven't crafted as a beetle is a convertible. We jumped on the sustainable bandwagon in 2016 when we wrote a series of blogs for IKEA’s sustainable living project and never looked back. As part of our later Sustainable Sunday series, I tweaked a picture of our friend’s cabriolet, taken at the wedding of her son, to introduce the first post. Her convertible is my inspiration for this project. And, of course, my miniature version is sustainable because we’re using a thrifted sweater as the base!
Sculpting With Needles
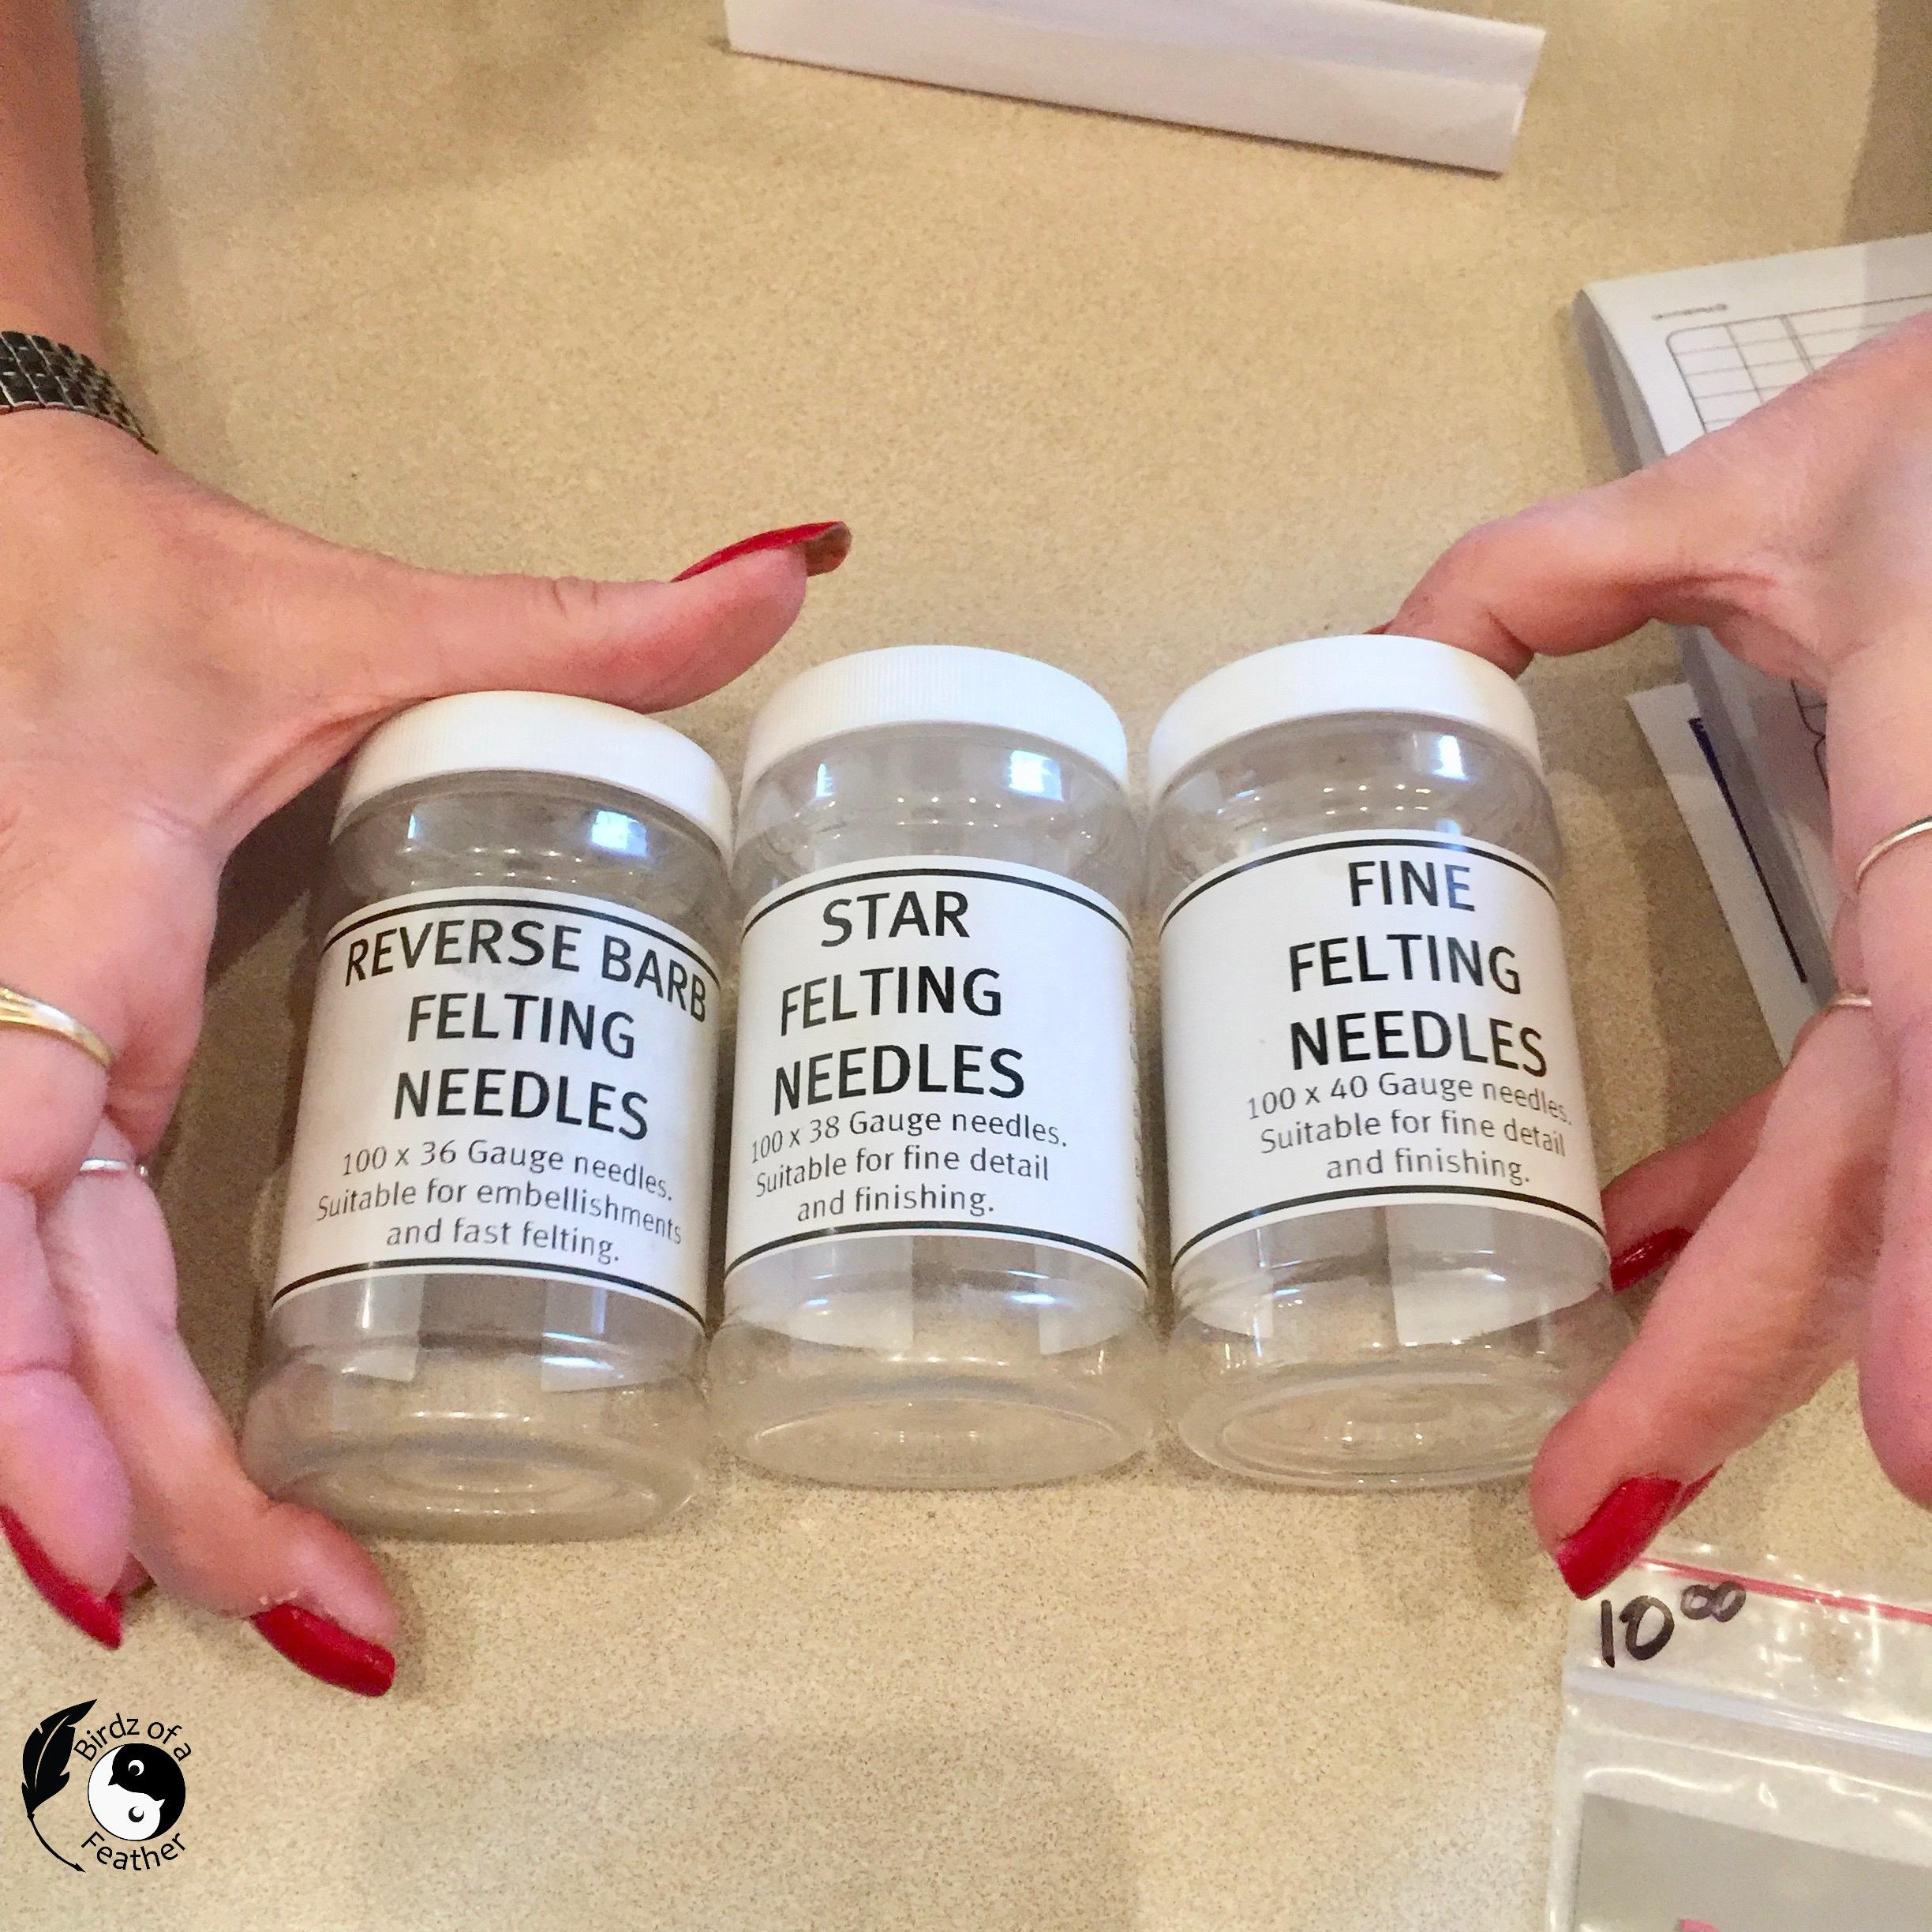

There are a variety of needles for needle felting but for this project, I used a 38 gauge triangle needle. I didn't have any spiral needles when I created my beetle, but you can also use a 38 or 40 gauge spiral needle from the start or to finish and add detail and embellishment.
About Felting Needles
A felting needle has small barbs along the end that catch the scales of the fibre, meshing them together when stabbed through wool. The more you stab, the more the fibres come together into solid felt. The higher the number, the finer the needle. For instance, a 40 gauge needle is finer than a 36 gauge one.
Felting needles are delicate and can break if used incorrectly so make sure you stab into the fibre at the same angle without twisting or bending the needle. If the needle doesn't go into the wool easily, don't force it. Change to a finer needle - or if the piece is firm, stop felting to avoid over felting.
The needles do go blunt with use, so if pieces are not felting, it's time to change your needle!
Types of Felting Needles
Here's a breakdown of the various types:
- Triangle Needle: most commonly used; has three sides
- Star Needle: has 4 sides, with two barbs on each edge, which is great for details and joining the fibres together more quickly
- Spiral Needle: a twisted blade with two barbs on each of the three edges. A spiral needle won't leave large dents or puncture marks, which makes it perfect for finishing.
- Speedpoint Needle: has 3 sides, 2 barbs on each edge. The special shape pulls the fibres together more quickly which increases speed and strength. Because of that, it requires less energy to felt so you don't have to poke as hard as with a Triangle needle.
Felt the Sweater

Start with a 100% wool sweater and felt it in hot water in the washing machine. Then toss it into the dryer to shrink and felt it even more. It will likely pill, but that doesn’t matter because you won’t even see it. You find a great Instructable on how to felt wool sweaters by Paige Russell.
Print the Pattern and Cut Out

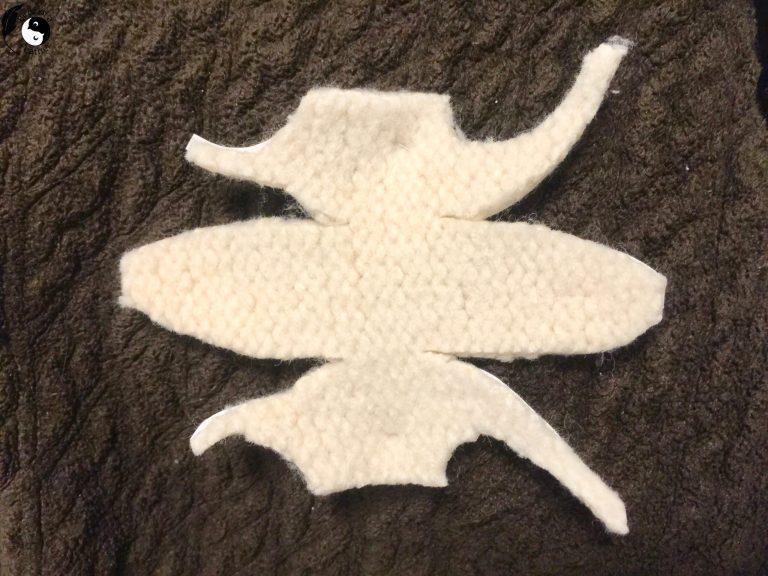
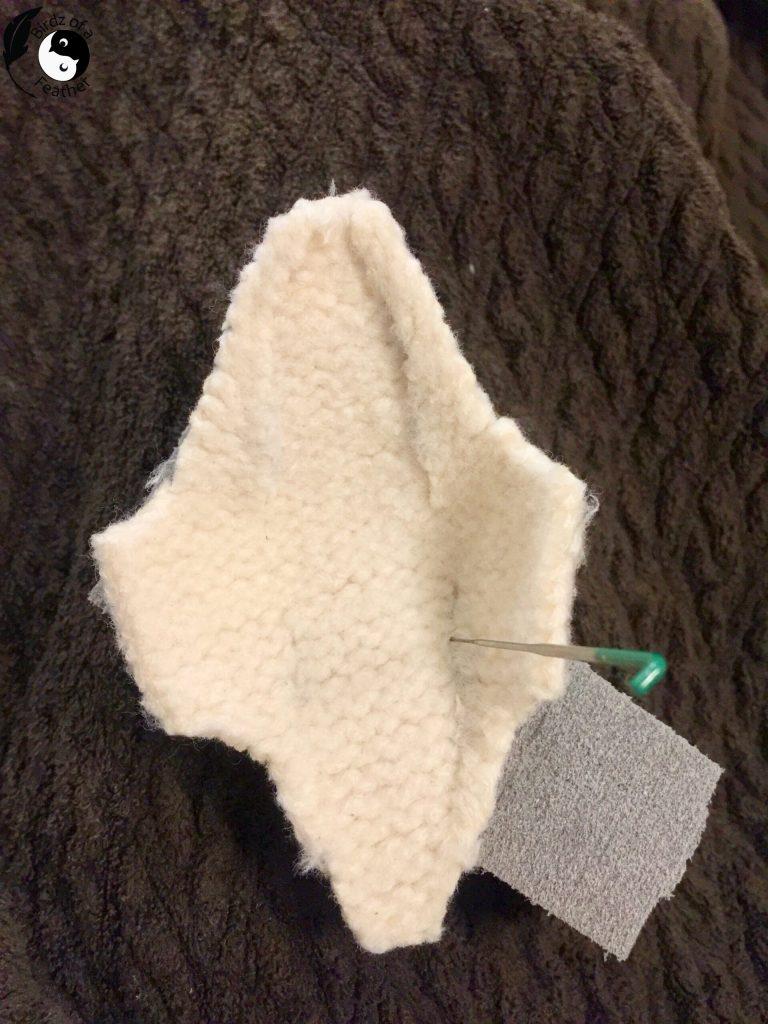
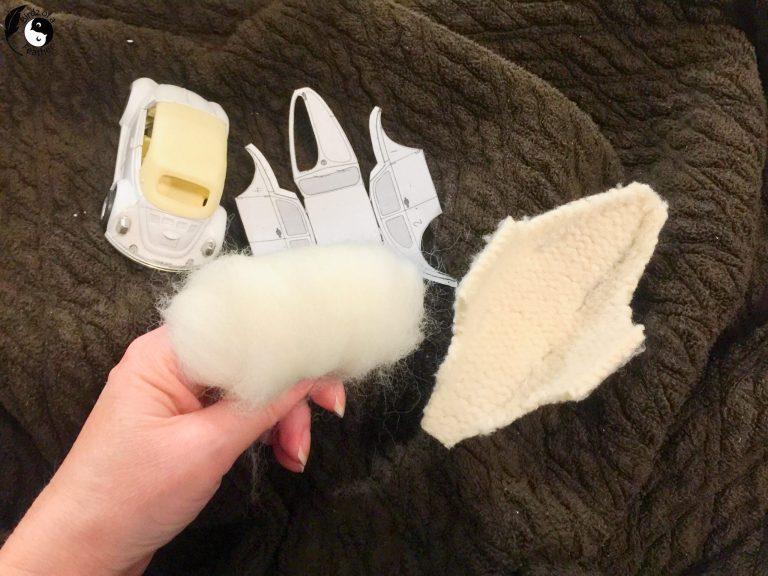

I started this project on a cold winter night. Hubs had gone to bed and I was snuggled up in a brown blanket by the warmth of the fireplace. Instead of reading, I suddenly had the urge to craft.
As a trained fashion designer, I’m no stranger to taking 2-D patterns and making them into 3-D objects. For the needle felted VW Beetle, I’m using the same principles. Print out the first page of the paper pattern (you'll find the free pattern here), then cut it out and pin it onto the sweater. There's a little bit of seam allowance along the side hoods to line up the overlapping the pieces. You may find it helpful to mark this line with marker (as shown in the last picture).
Cut the sweater out, but hold onto your paper pattern because it's going to be used to help sculpt the other layers of the beetle too.
Be sure to put a piece of foam under the work so you don’t stab yourself with the felting needle. Since this is an impromptu crafting session, I’m use a small scrap of foam (you see the real foam pad I use later).
Bend the pattern into its 3-D shape and overlap the seams. Poke the felting needle along the seams to bring the VW beetle shape together.
After the shell is formed, insert a rolled wad of core white to support the base.
Now you can needle felt the sweater to the core all around the exterior to further shape the foundation. You’ll see the familiar beetle shape start to form when you needle felt a line into the front and back hoods of the car (last pic).
Sweater Base Progress


If you’ve been reading Birdz of a Feather posts on Instructables, you’ll know that Hubs and I are VW enthusiasts. So of course I have this toy beetle convertible to compare against. If you don't have a model like this, keep some pictures handy to refer to as you sculpt the wool.
See how the sweater really helps nail the initial shape of the felted VW Beetle in these pics? Using this sweater method takes all the guesswork out of sculpting the shape from scratch!
Tip About Colour

In the morning, I move everything over to the dining room table and a proper felting pad. I top the felting pad with pink felt (1st pic) to extend the life of the pad from all the needle pokes.
I could not find a buttery yellow wool felt, so I created my own! Take equal parts lemon yellow and white then pull and stack the fibres together to blend them into a cohesive soft yellow. You can see the color it creates in the picture above.
Car Body (0:18 on Video)


Note the time stamps in the title for each step; watching the video will help explain the techniques used. You'll also find a listing of all time stamps in the description on the YouTube video.
Print and cut out page two of the paper pattern. From here forward, I continue to use the pattern to its fullest advantage.
For the body, tear off two equal size pieces of yellow roving for the sides, then needle around the perimeter of the pattern. Once secured to the felting pad, fold in the edges and you’ll have the exact shape you need. I didn’t end up shaping the wheel wells on the sides until the side pieces were actually on the car.
Lift the side off the felting pad, work it a little further with your needle to hold it together. Attach the good side facing up, then needle felt it directly onto the sweater foundation base. Once secure to the car, push the felt upward from underneath to clear where the wheels will eventually attach. Then turn the car upside down and lightly felt the wheel wells in a rocking motion to curve them. This part will get felted together with the fenders later so don't over felt.
At this point, it will look like a billowy yellow blob for a while until all the needle sculpting work is done. It’s necessary to keep the base layer fluffy as each section is ready to be worked so you can easily attach additional elements. It's almost impossible to attach into wool that's already felted firm so keep that in mind as you work.
Front Hood (10:17 on Video)
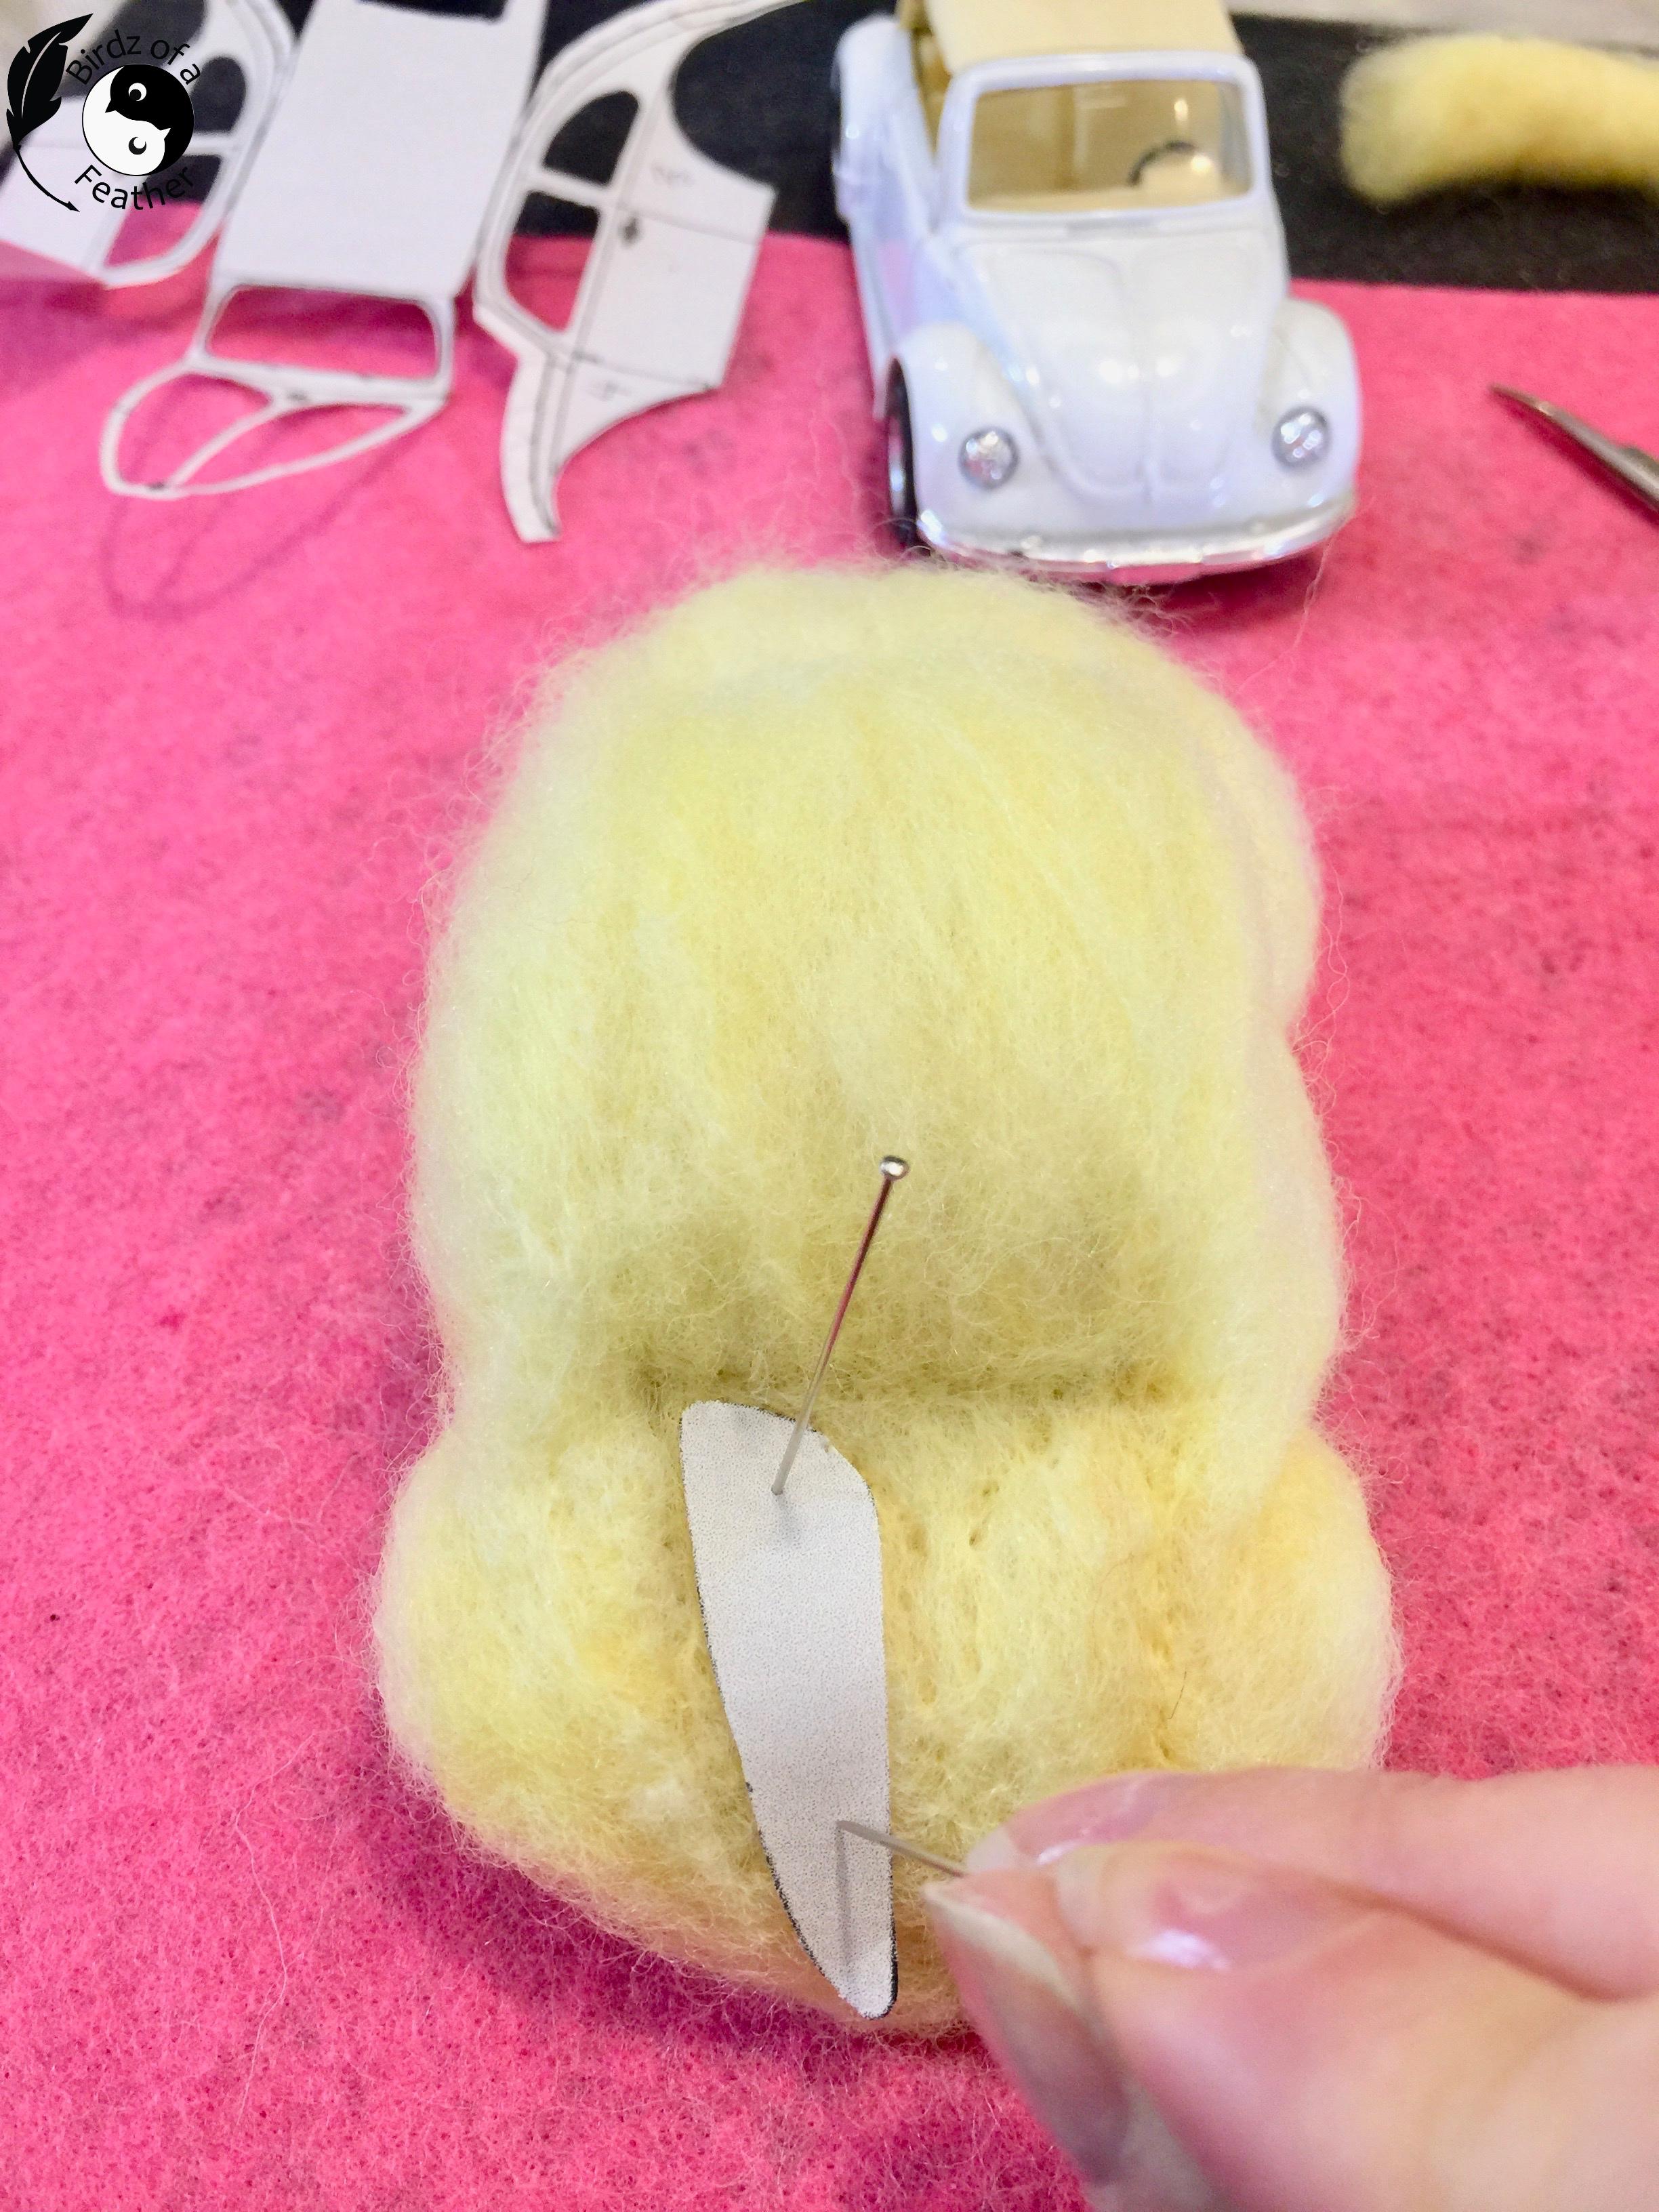

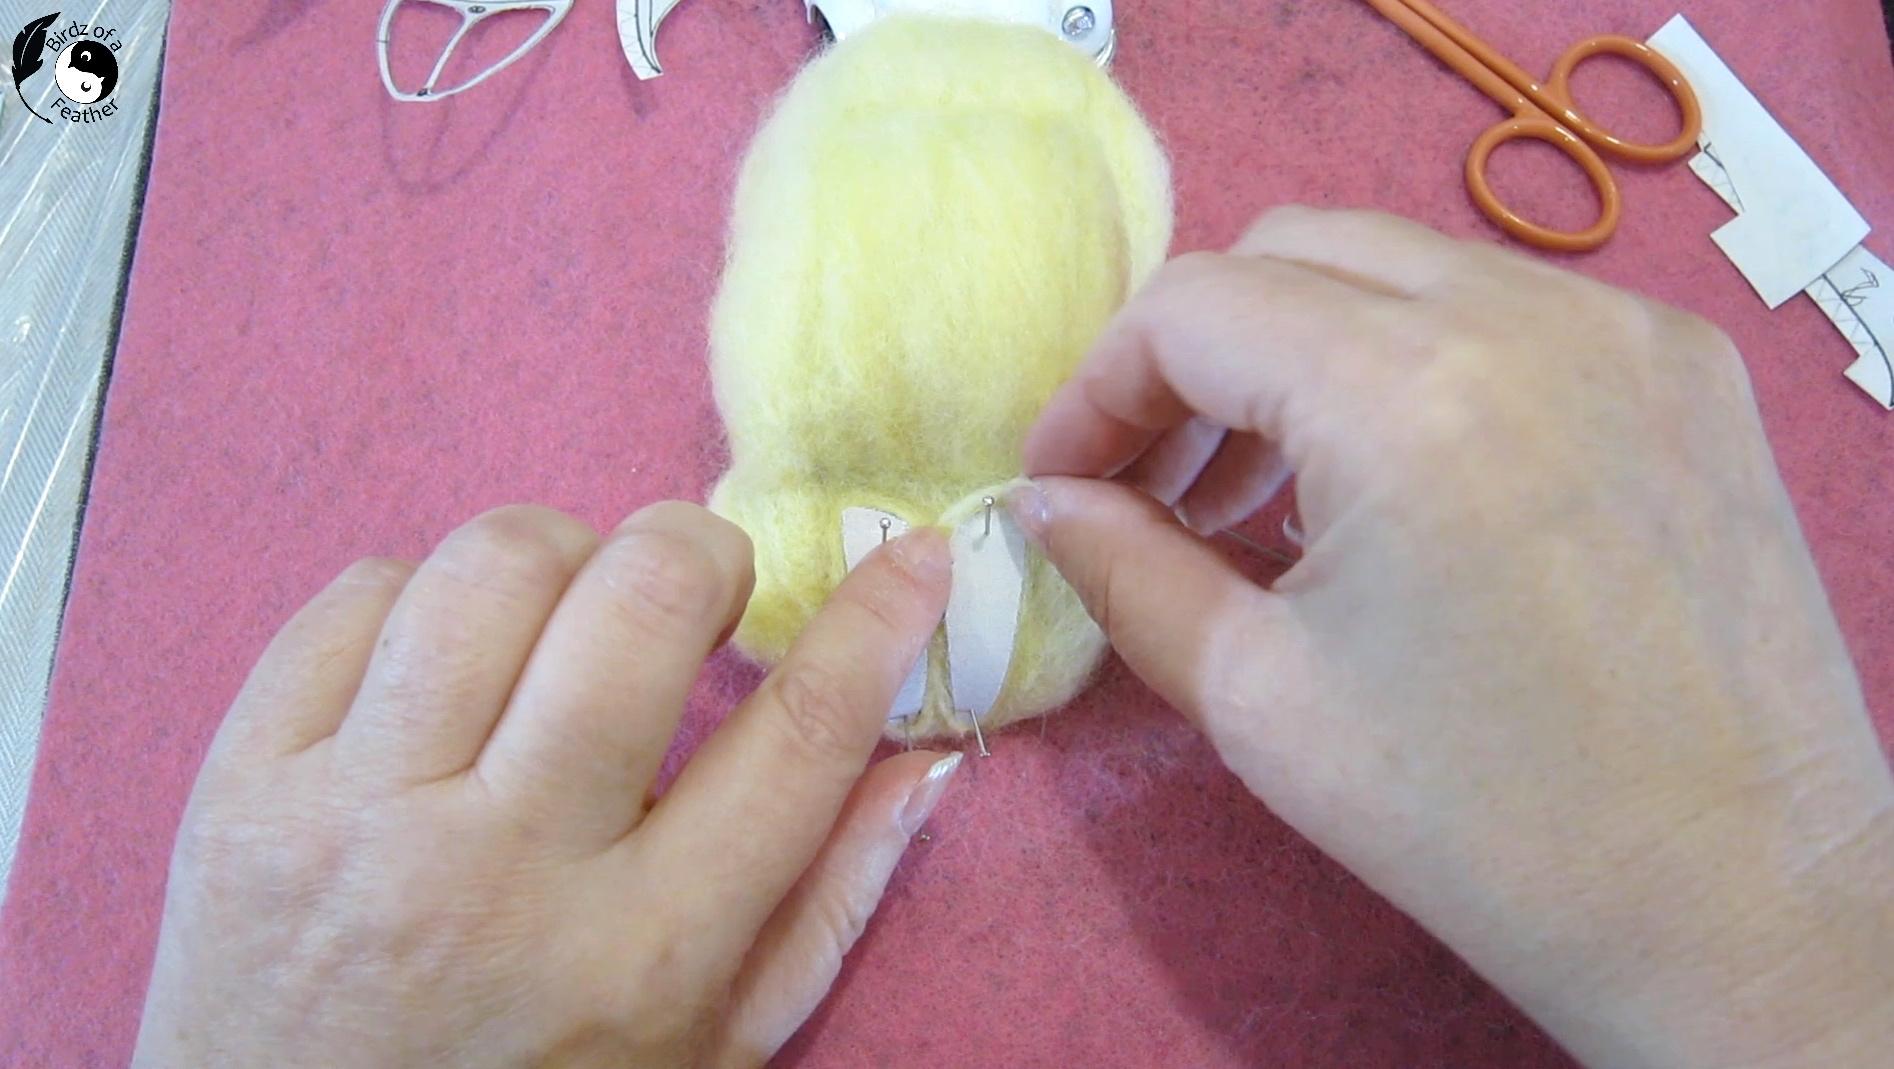


For the hood, cut out the interior sections of the paper to use as a pattern (see 1st pic). Pin both pieces to the car hood.
Roll fine pieces of roving between your thumb and forefinger to stretch it out and slightly felt it. Place around the pattern, then needle felt the roving around the perimeter as you go. Lift off the pattern. Concentrate your needle felting on the interior perimeter to sculpt the hood.
You'll do the same outlining technique when it comes time to do the front (and side) window(s) (last pic).
Roof (20:47 on Video)

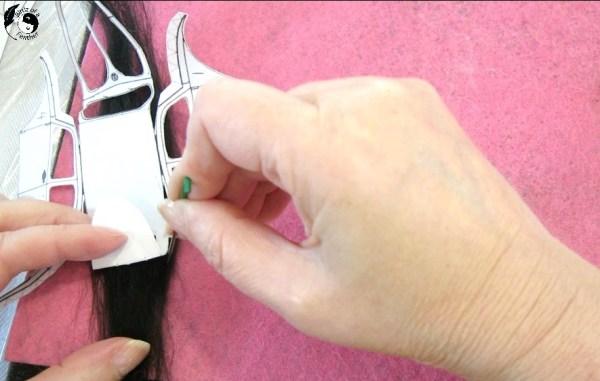

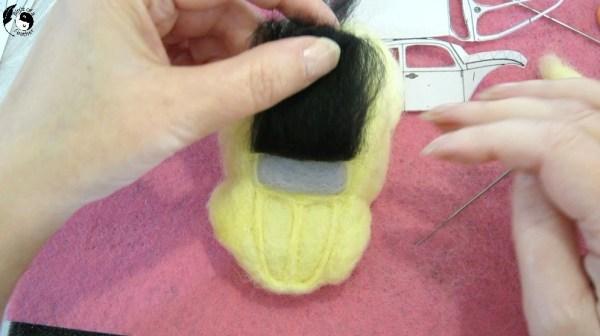
Break off a piece of black roving roughly the same width, but longer than the length of the roof. Tip: I’m working on the left side of the felting pad so I don’t accidentally cross-contaminate my yellow and black colours.
Place the pattern on the wool roving and 'draw' a line across at the front and back - above the windows - by stabbing the needle into the felt pad repeatedly. Remove the pattern and carefully lift the wool off the pad. Then fold one edge over and lightly needle felt that area together.
Apply the roving to the front of the roof over where the window will go on the body of the car. Needle felt along the line you previous drew on the roof. Flip it up and you’ll see you have a clean line in the front (last pic). Tack the other end to the back and then lightly felt through the middle of the roof. Leave the exterior edges for now because we’ll be adding more along the sides later.
Windows (13:02 and 33:13 on Video)
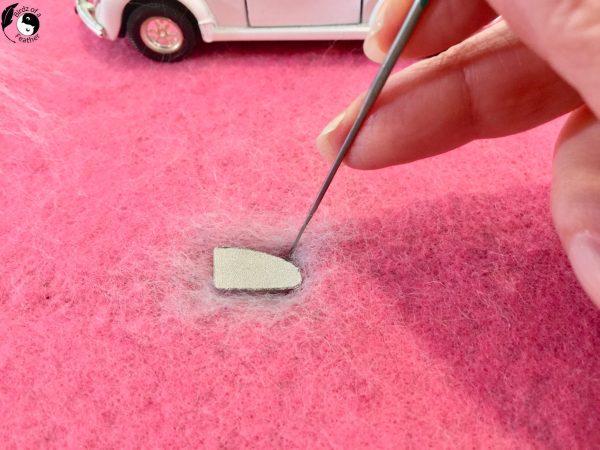
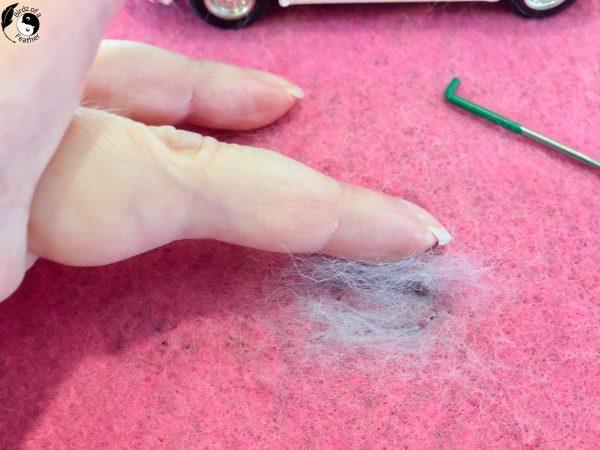


The smaller pattern pieces like the windows are a little fiddly, but I use the same technique as the body of the car to shape the windows. First, stab around the perimeter into the felting pad.
Remove the pattern, then fold all the edges in. Lift the piece off the foam and continue felting with the needle to further solidify the shape.
Then use the negative space of the pattern. Pin the window shapes into the paper pattern on the car body, as shown (3rd & 4th pics), and tack them right in place at the corners. Using the negative space in this way, the pattern takes the guesswork out of placement!
Remove the pattern and finish felting the windows onto the car body completely.
Do all the windows in the same manner, tacking them at the corners to hold them onto the car, then lift the pattern off and finish felting. The back window is applied over the black roof done in the previous step.
Fixing Inconsistent Work (42:10 on Video)


If you accidentally over felt a piece and it's too small, sometimes you can use a blunt darning needle to reposition the wool where you want it and re-felt it in place. You can also use the blunt needle to help fan out the roving, like on the roof (2nd pic). See time stamp 42:10 on the video to see that in action.
If that doesn't work and the piece is still too small, just add in more felt where it's needed using the pattern as a guide.
Fenders (47:05 on Video)


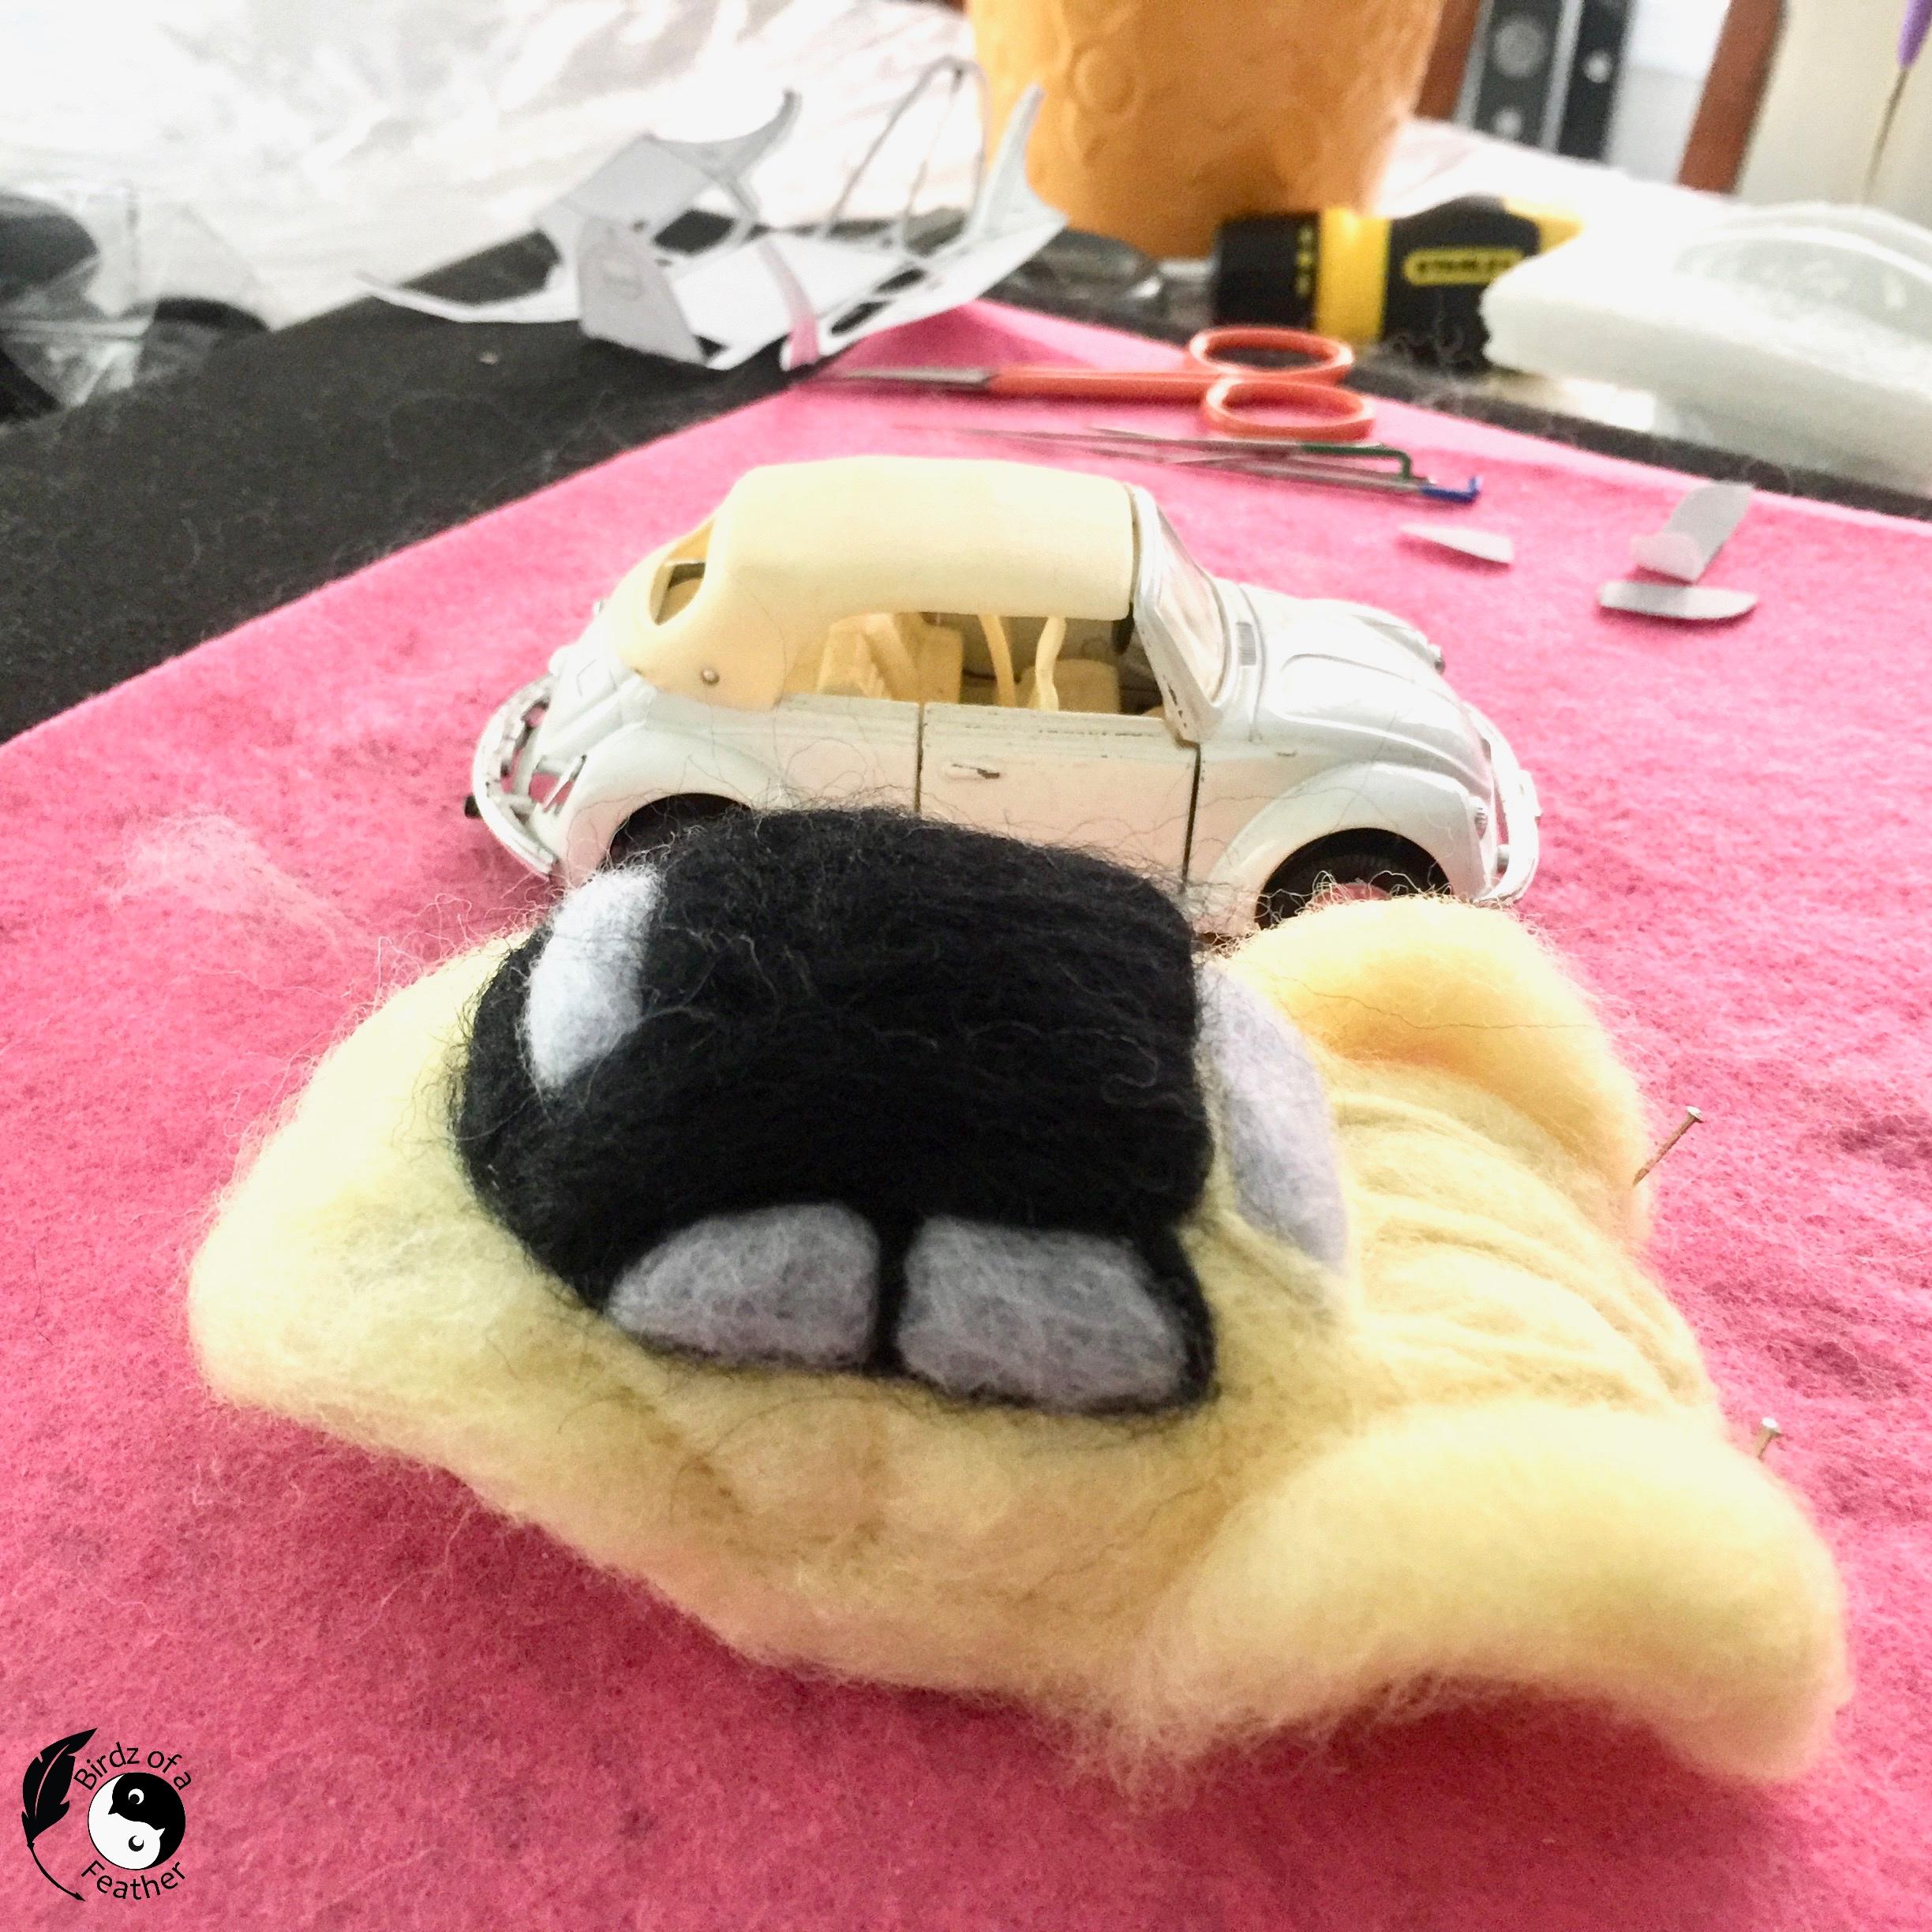
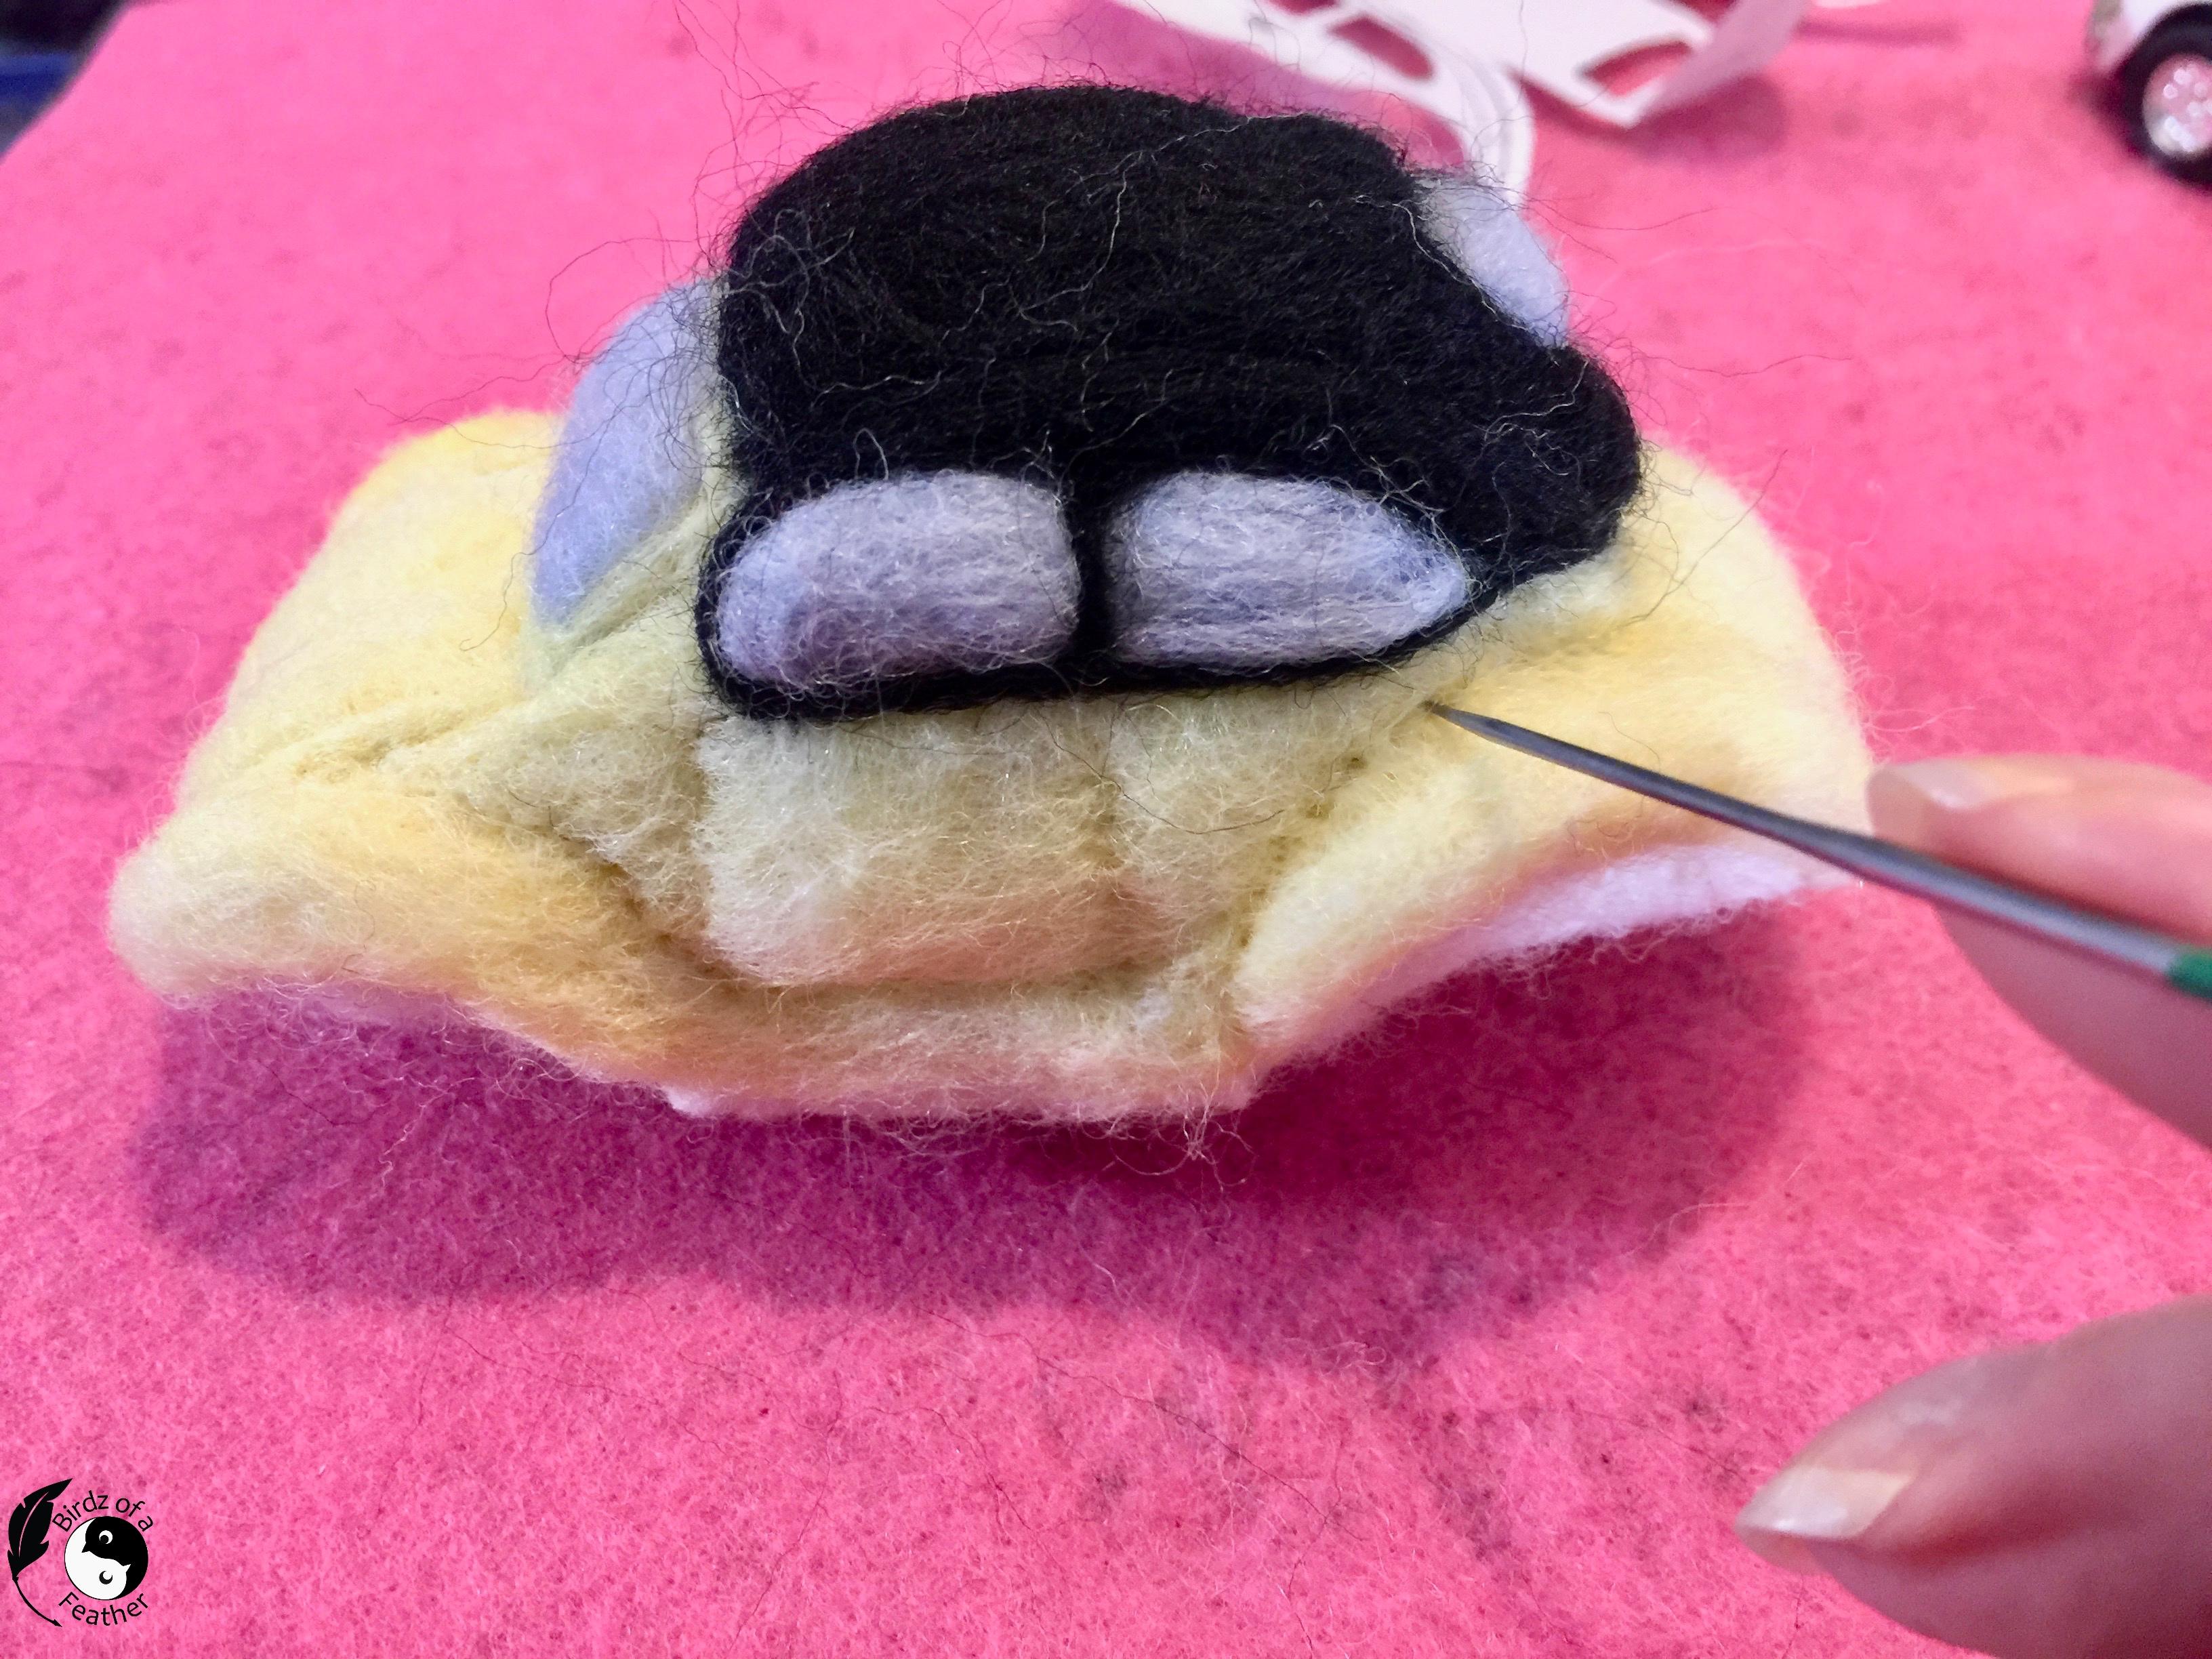

For the fenders, we're going to butterfly the pattern. Use a piece of roving that's double width so you can outline the perimeter and then flip/mirror image the pattern where you see the dotted line on the paper pattern. Remove the pattern, then fold in the outer edges and lightly felt.
Fold in half along the line of the mirror image and lightly felt. Bring back the pattern piece and use it as a guide to straighten and tuck in the edges. Don't over felt; it still needs to be fluffy to attach.
Pin at the fenders at the bottom first (5th pic) and then all the way along the line of the fender to secure to the body of the car. Felt the fender on at this seam.
On the sides bring the fender over the wheel rim and felt the two pieces together, keeping the curve as you go. You can felt in one direction first, then turn the car upside down and felt from the bottom up. The 4th-last picture shows the first fender on the front. Complete the other three in the same way. Be sure to define the line of the fender as they are attached; you can also define the shape of the doors (2nd last pic).
When all the fenders are on, ensure that they are well attached to the sweater form/body of the car from underneath by flipping the car upside down (last pic). But don't poke so deep that you have the white fibres coming through the hood - or any other area of the car.
Headlights (57:58 on Video)
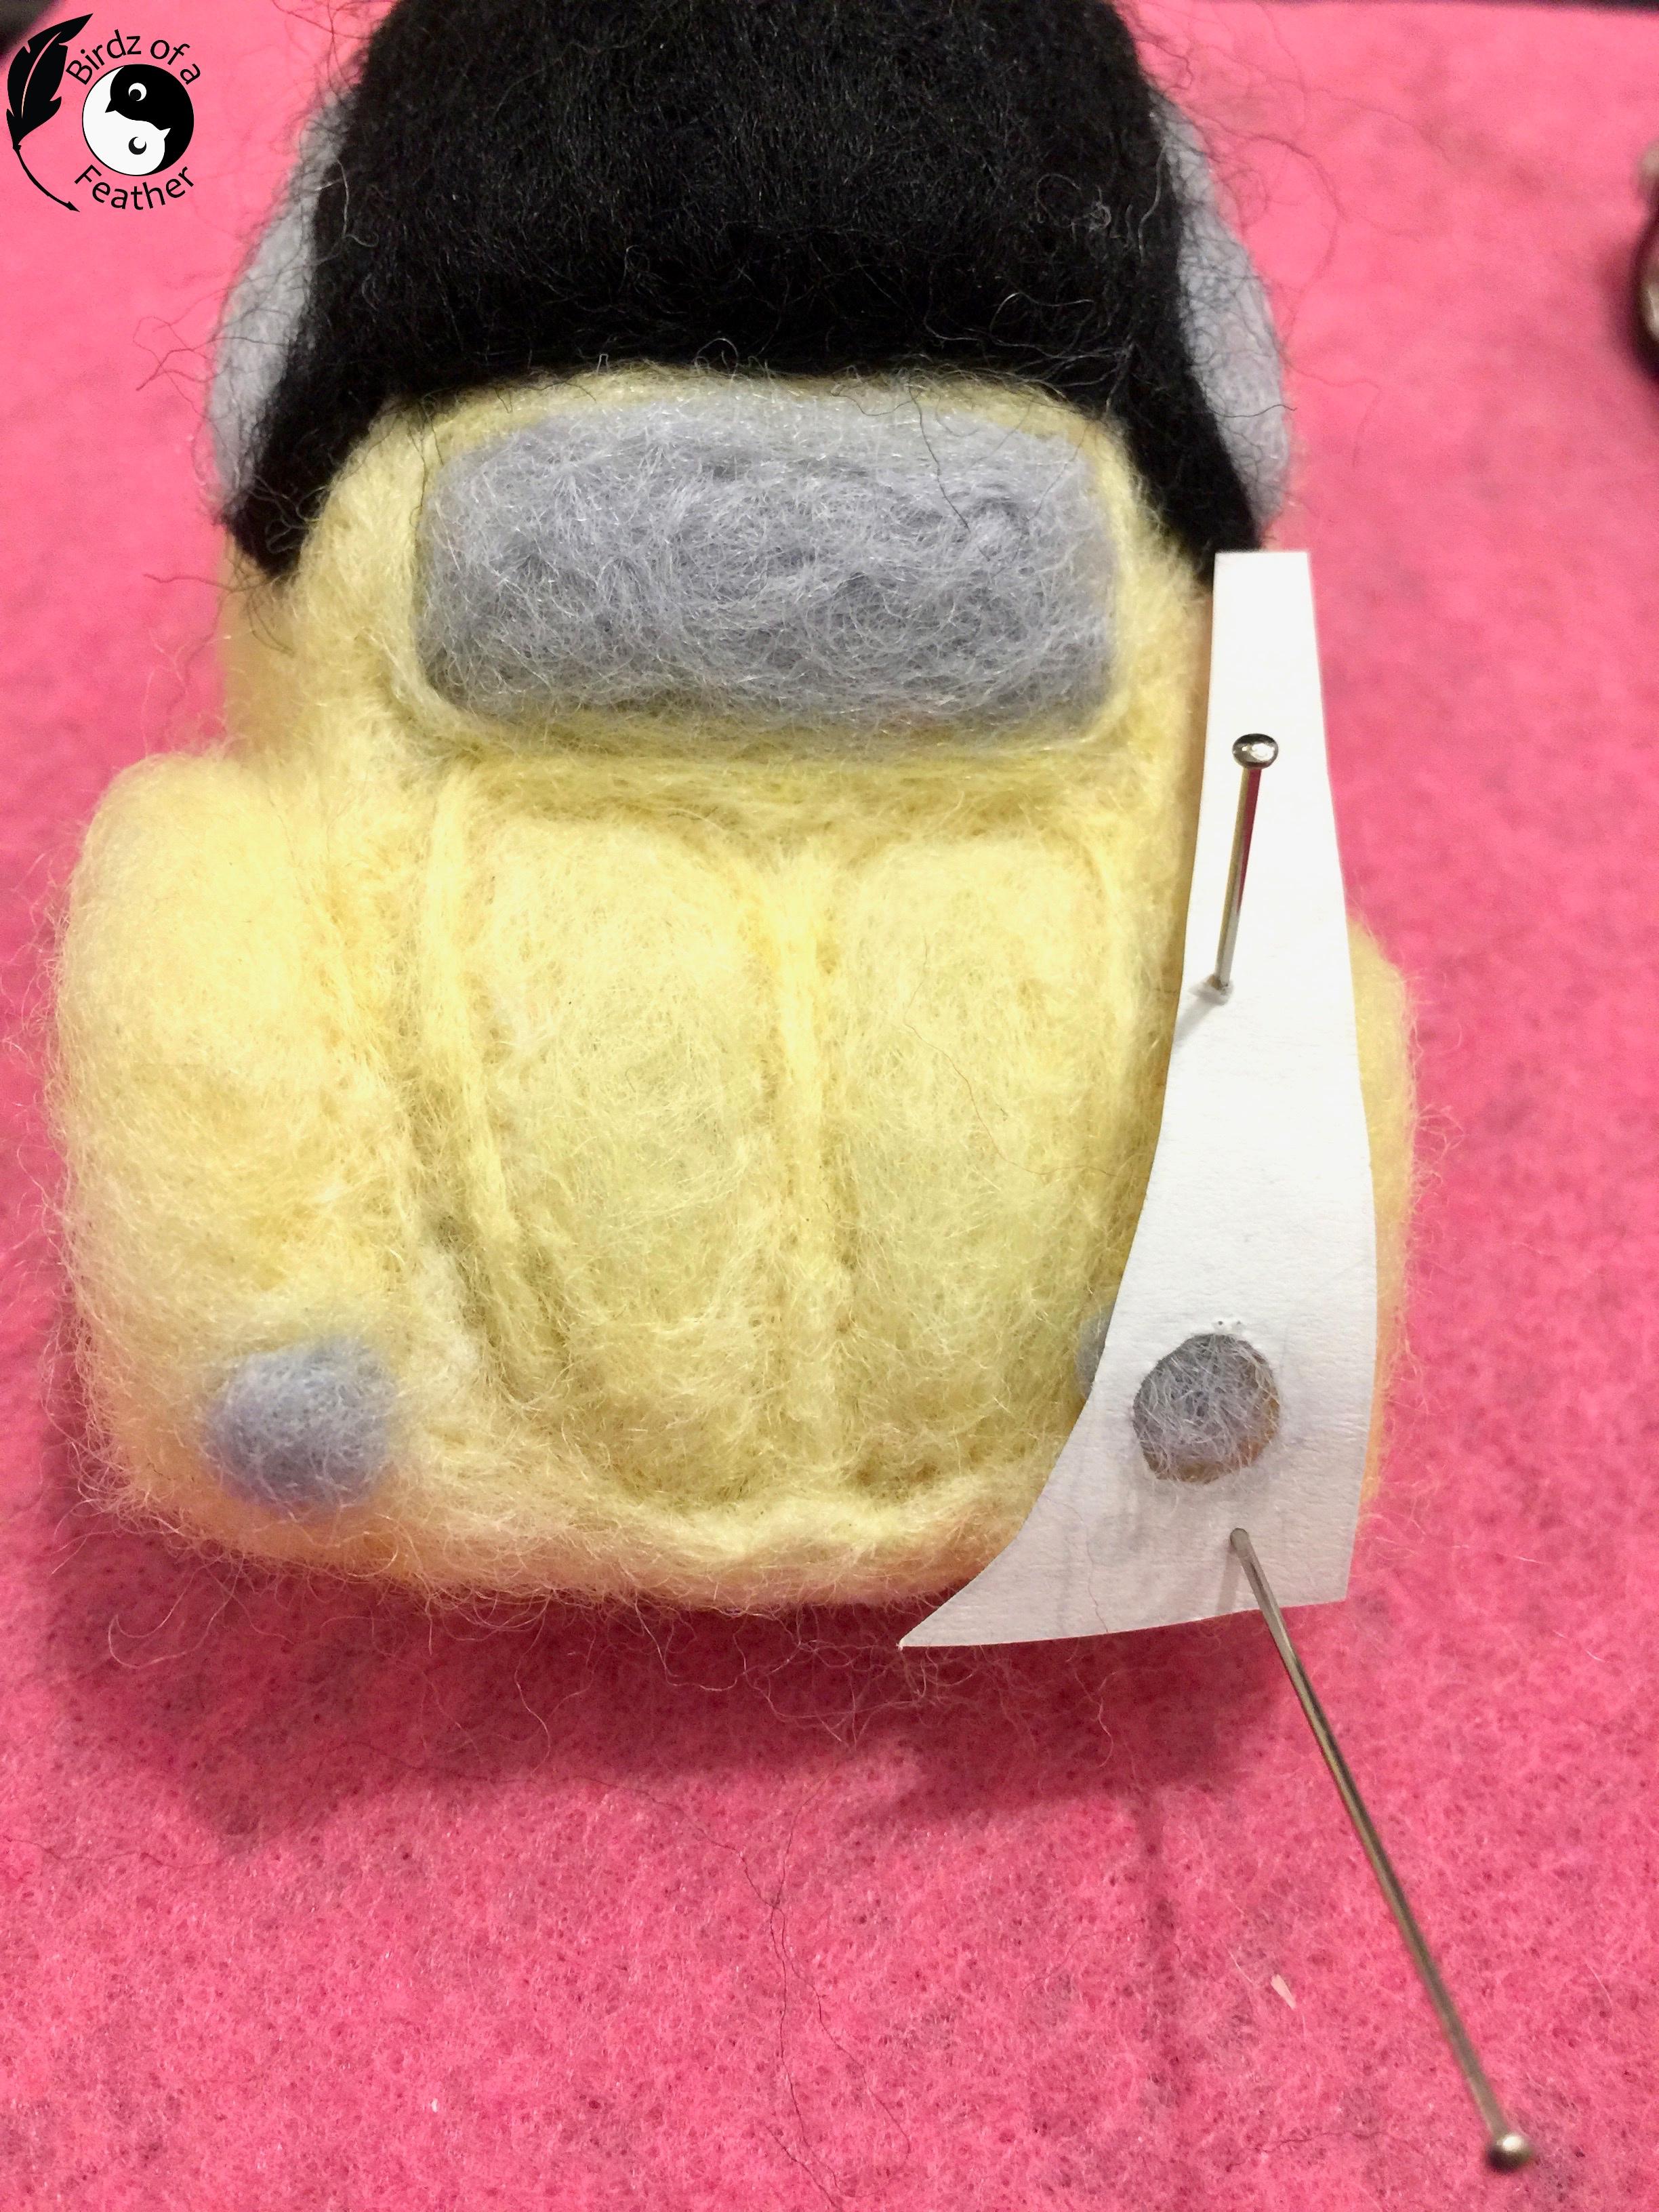

Cut out the circle inside the front fenders and use the negative space in the pattern to position the headlights. In this case you can roll a tiny piece of wool into a ball, insert it into the circular space and needle felt it directly onto the body. The pattern helps maintain the circular shape and also keeps things symmetrical.
The back headlights protrude from the car so felt a tubular shape and add a bit of red wool onto the tips for the safety lights. Be mindful to keep your fingers out of the way; it can be tricky to work with such tiny pieces. At this point, you can also fashion a handle for the back trunk forming a half circle and then creating an indentation. Needle felt around the perimeter as well as from the inside to attach. Apologies I couldn't get these smaller parts on film; I had to get up close and personal without a camera to block my view!
Bumpers (59:42 on Video)

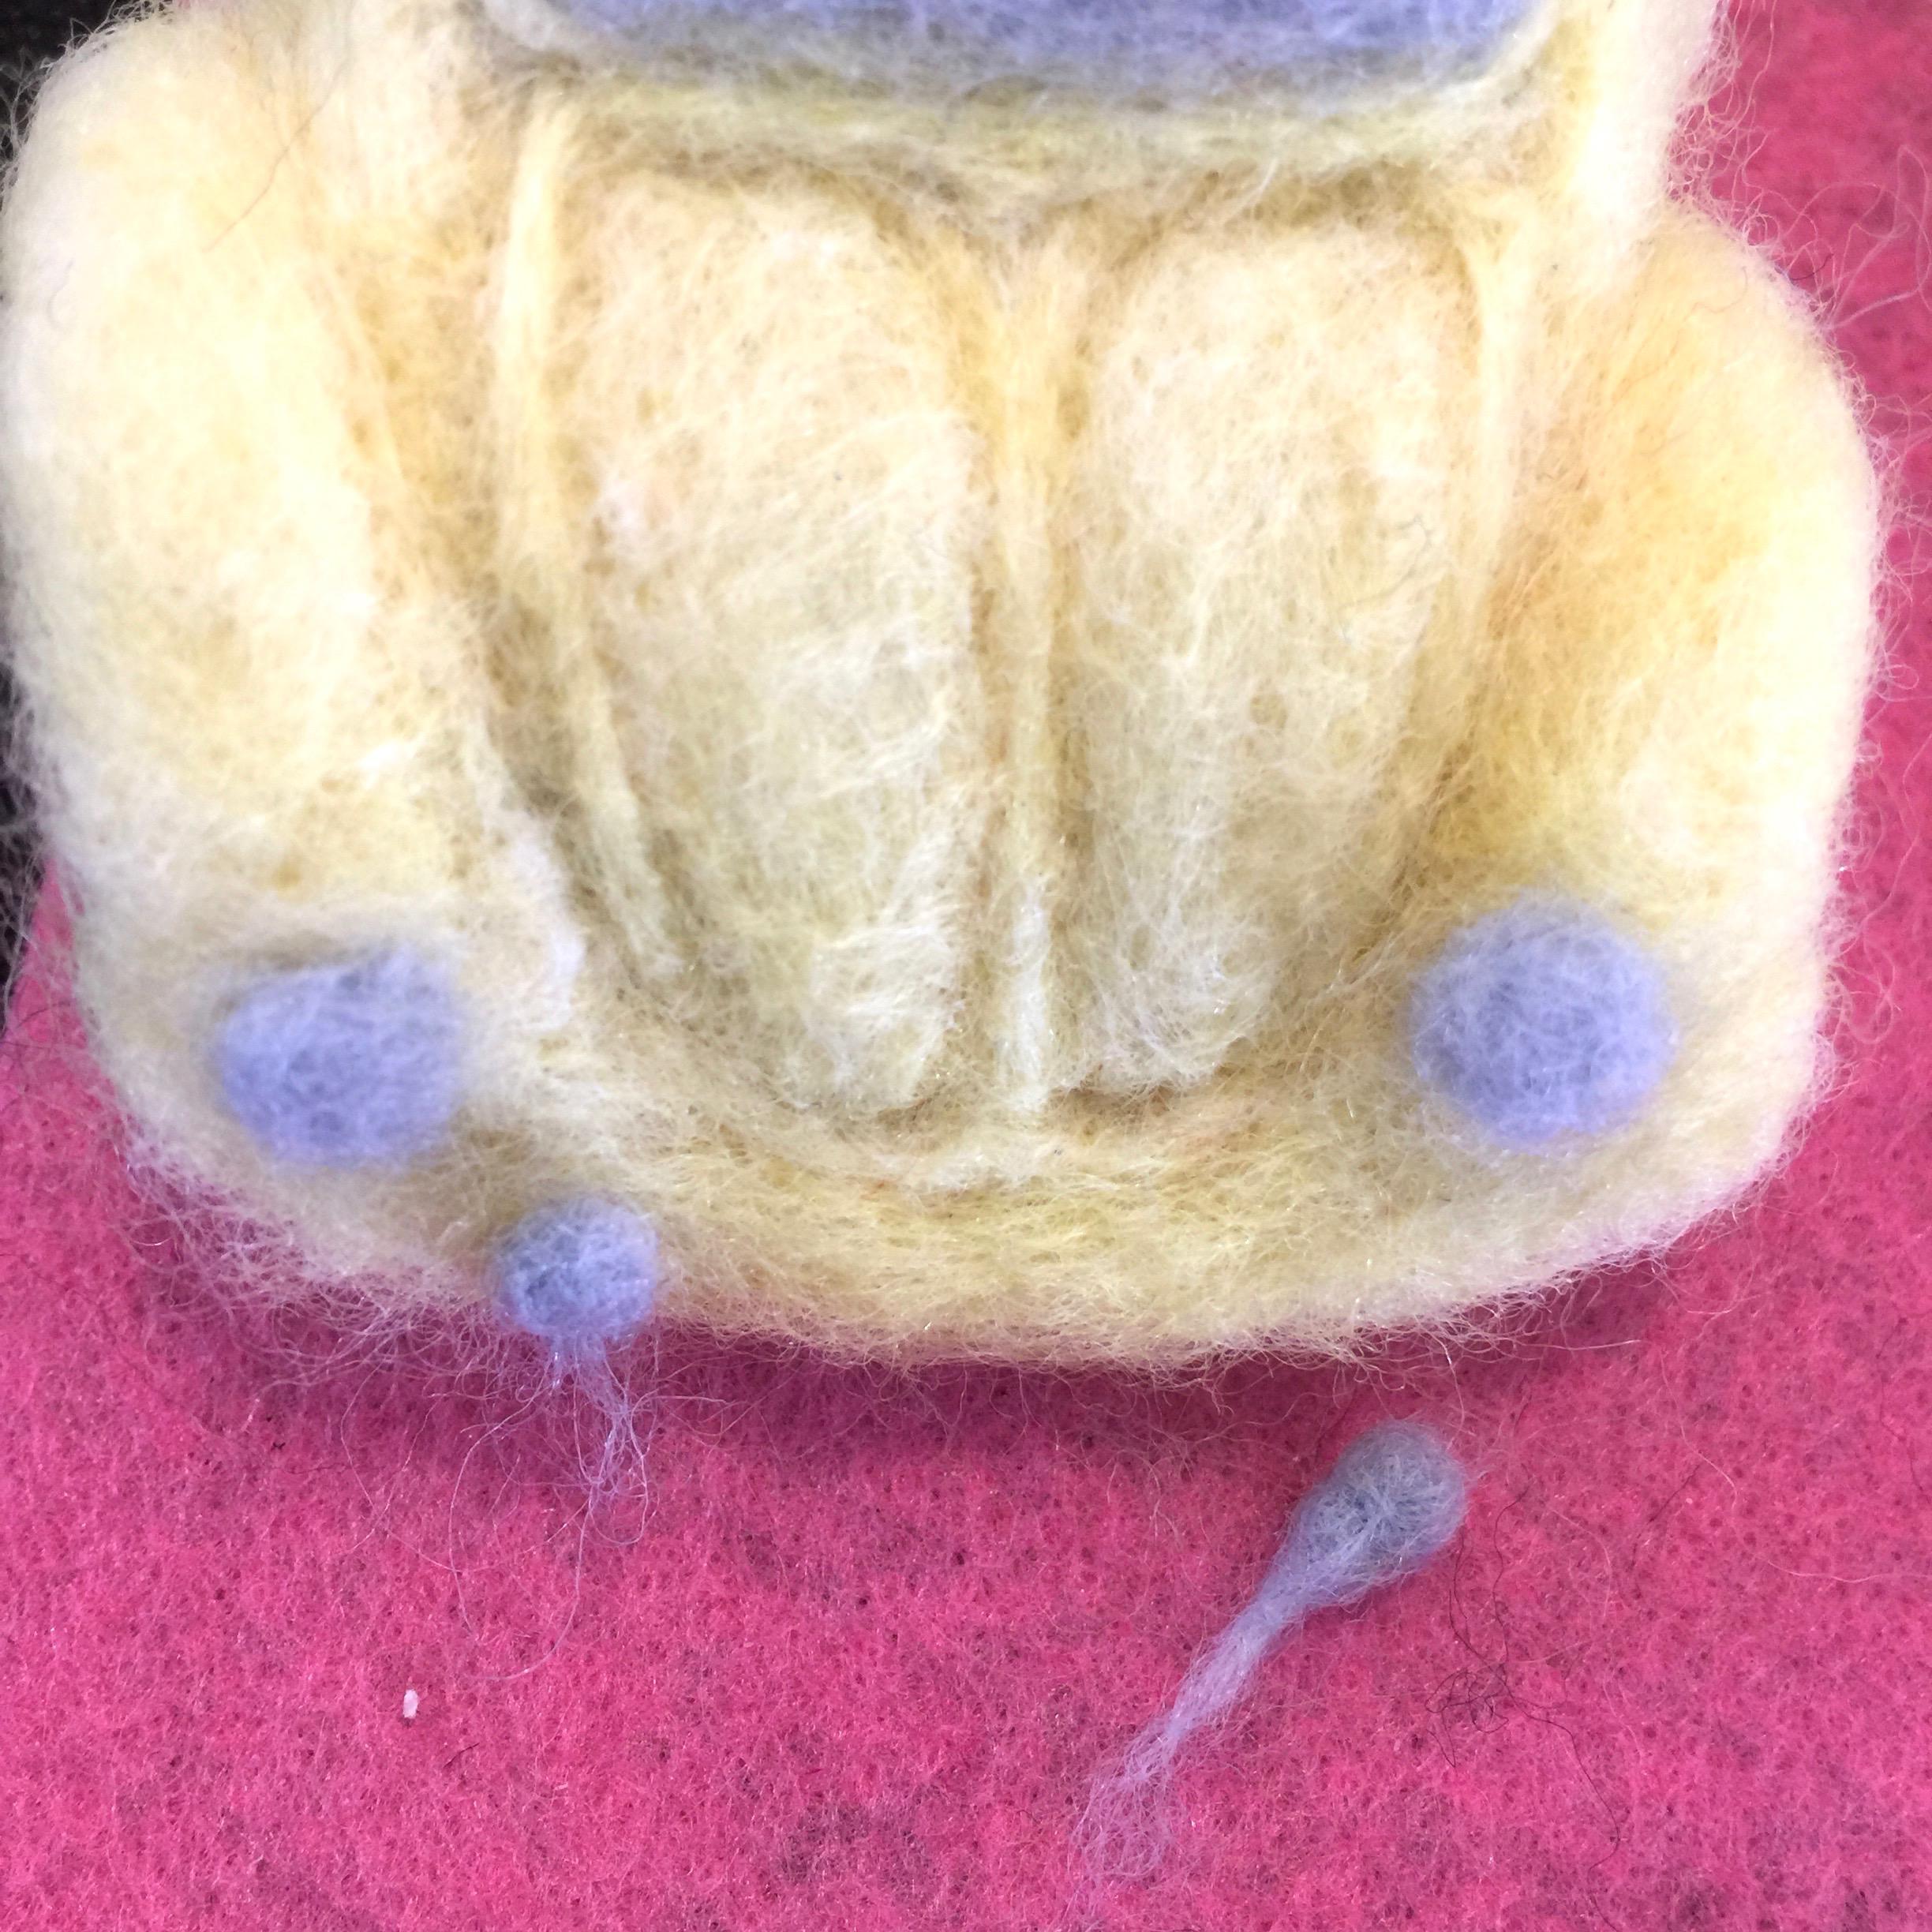


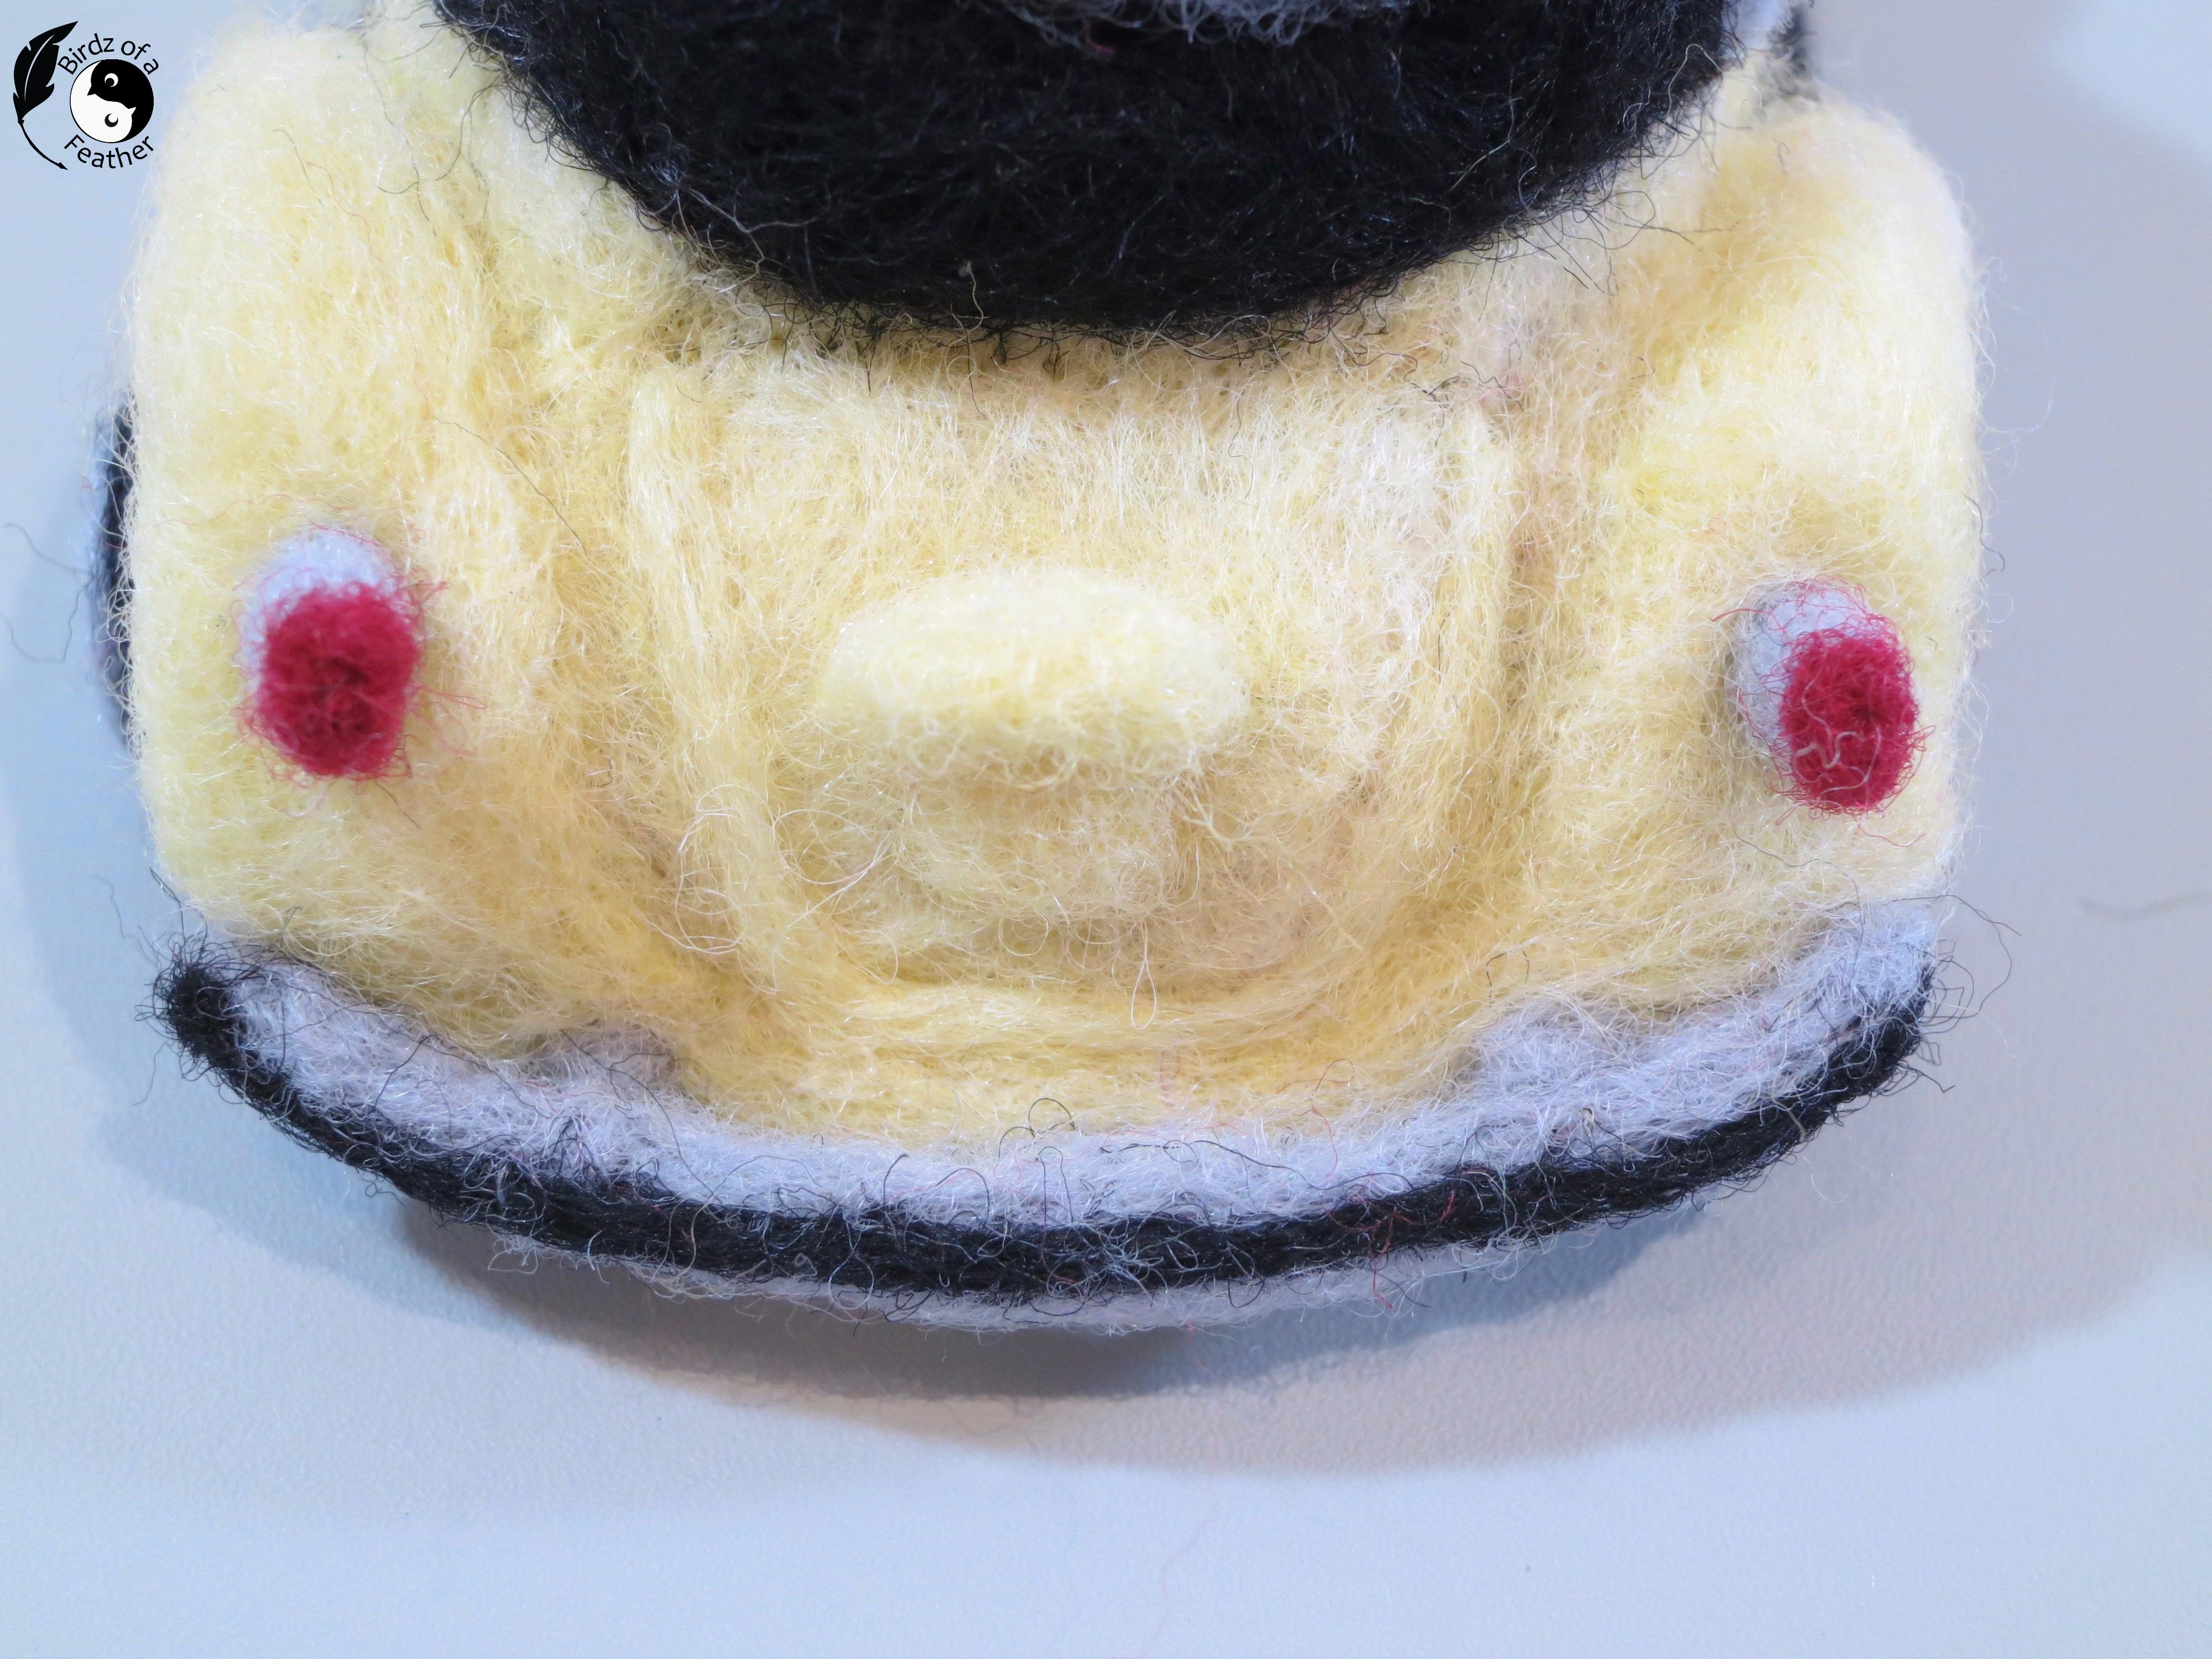

The bumper is made up of a few pieces of wool; grey for the metal bumper guard, stand-offs and license place, and black for the rubber strip.
For the front stand-offs, roll grey felt into a circle and felt, leaving a tail. Use the tail to hold it then felt each one into place, working in the tail (2nd pic).
The back stand-offs are more tubular. So form them a little longer than the front, leaving a wispy end. Attach these first from underneath, then bring them forward and secure around the perimeter so they protrude from the car.
Using another piece of grey, form the back bumper. Stab a rectangular shape into the felt pad and fold the edges in. Shape as you see in the 3rd pic. Run a thin line of black down the centre. Then bring the two edges of grey together in the back (5th pic). Once the edges are done, put the bumper face down onto the felt pad and roll it as you stab through the back to curve it. Again, don't stab so deep that grey fibre come through the front; you only want to shape the curve.
For the front bumper, fashion a license plate and felt it on before curving like you did the back. As you see in the 5th pic, the front bumper still needs to be curved like the back before being attached. As you curve the bumpers, hold then up to the car to see how they look and finesse accordingly.
Use pins to position both bumpers and felt through the bumper into the stand offs to secure.
Door Runners (1:14:54 on Video)


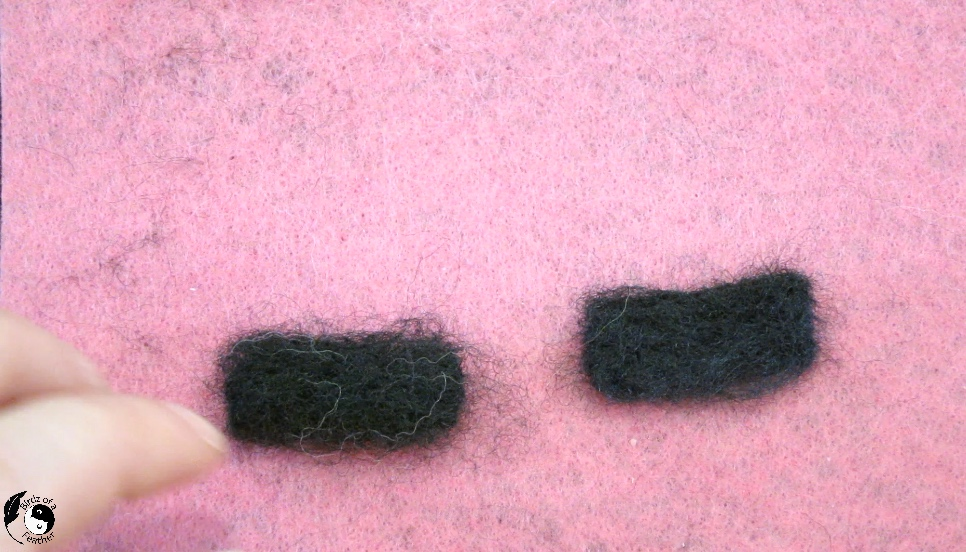


Use the pattern to roughly form two black rectangles. Bring all the edges in until they are neat and tidy.
See the comparison of the 3rd and 4th pictures. Keep felting until the runners are fairly compact, but still bigger than the pattern. We'll use the excess on one edge to attach it to the car.
Put the runner face down onto the door of the car as shown in the 2nd-last pic. Felt it onto the car along the bottom edge, then flip it down. Felt from the edge into the body of the car so it sits correctly in place.
Attach the short edges of the door runners by needle felting through the bumpers to hold it in position.
Wheels (1:24:00 on Video)


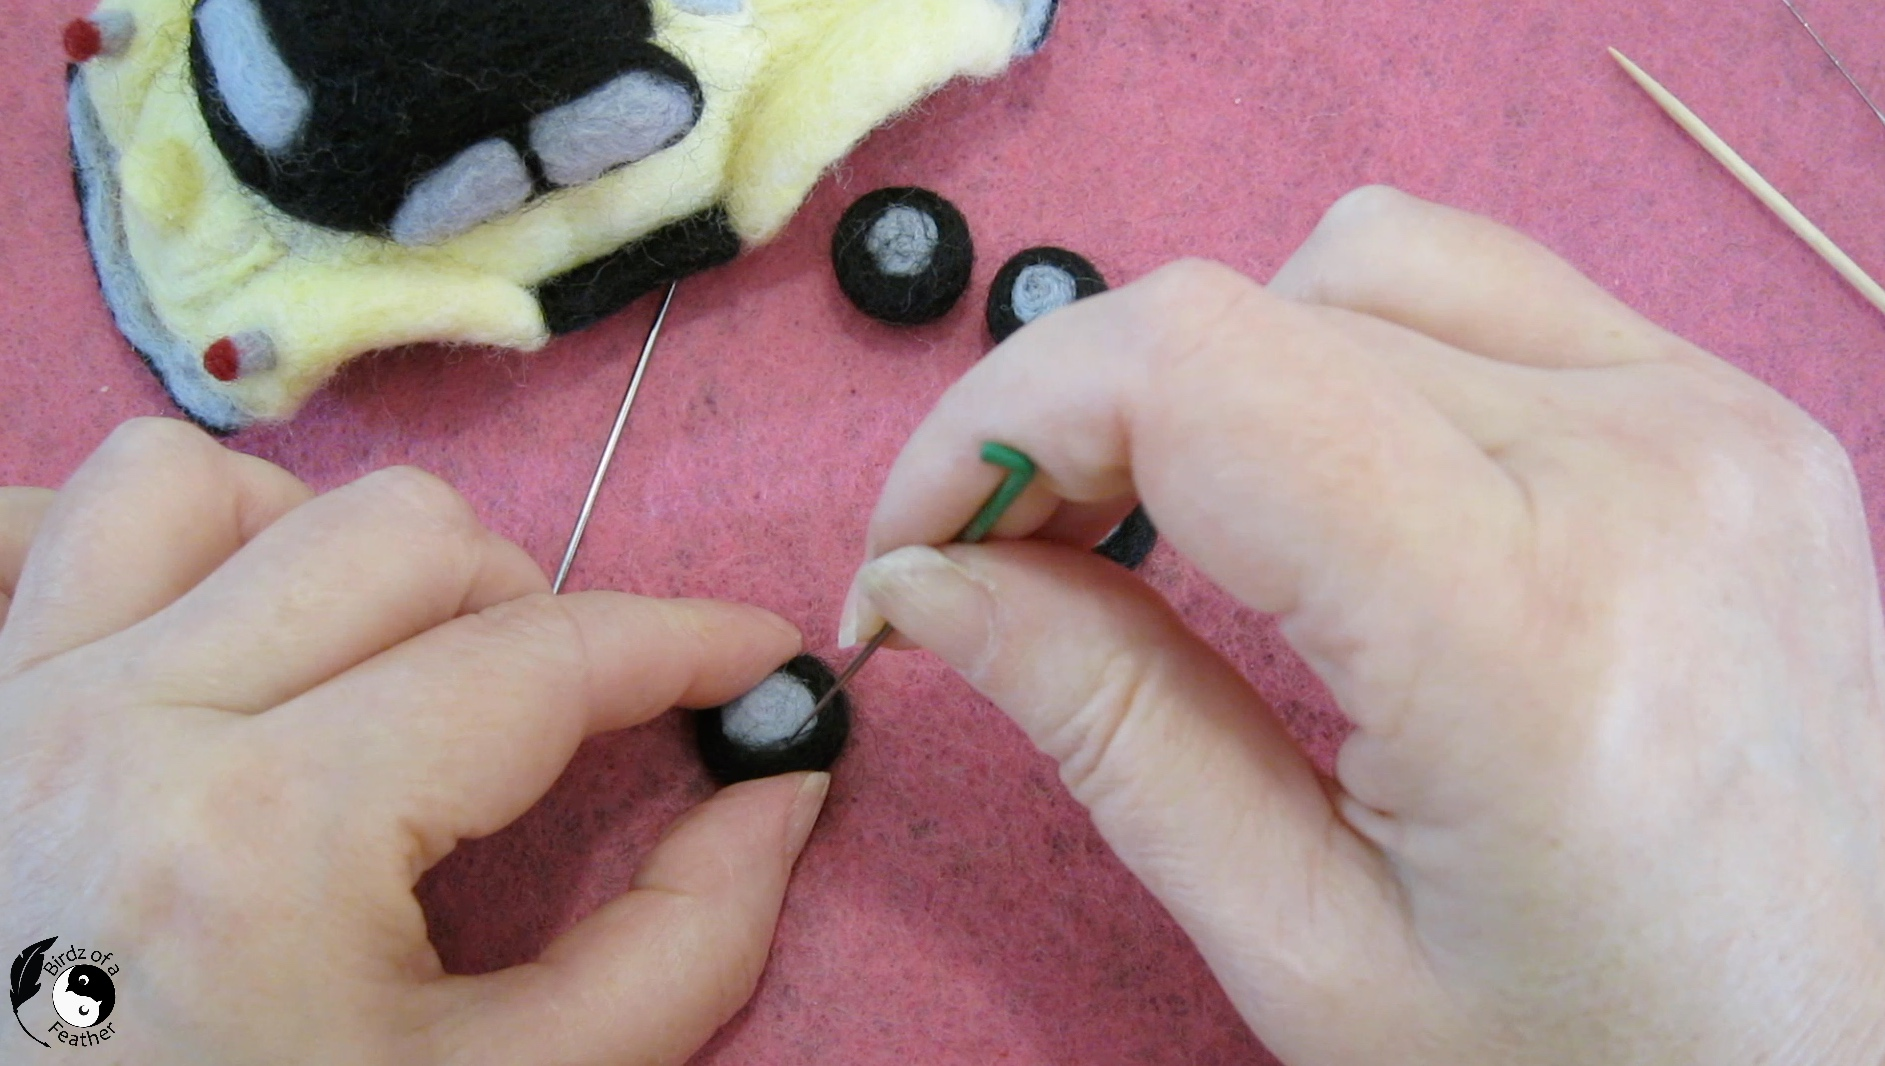

Split a piece of black roving into 4 pieces and do the same with the grey.
The wheels are done in 4 stages (see next step for last two):
1. Roll the grey inner wheel onto a toothpick. Remove from toothpick and use a darning needle to steady while you needle felt it. Once firmer, you can remove the darning needle and continue to felt all surfaces.
2. Stab in the end of the black and wind it around the grey. Needle felt all surfaces of the black maintaining the shape. You'll be adding another layer of black in the next step, so no need to felt completely yet.
At this stage, the wheels are still far from perfect.
Wheel Rims


The first pic shows all the pieces needed to complete the wheel rim of the tire. You'll also need additional pieces of black roving to do a second layer for the tire just as you did in the previous step.
3. Add another piece of black roving and wind around as before to build up the tire. Felt all surfaces of the tire maintaining the shape.
4. Put the pattern back onto the grey part and add ball up some grey roving. Add into the centre of the pattern. Felt lightly, then add a strand of roving around the perimeter of the grey to build up the rim.
Aim for consistency with the size of each wheel.
Attaching Wheels (1:47:19 on Video)
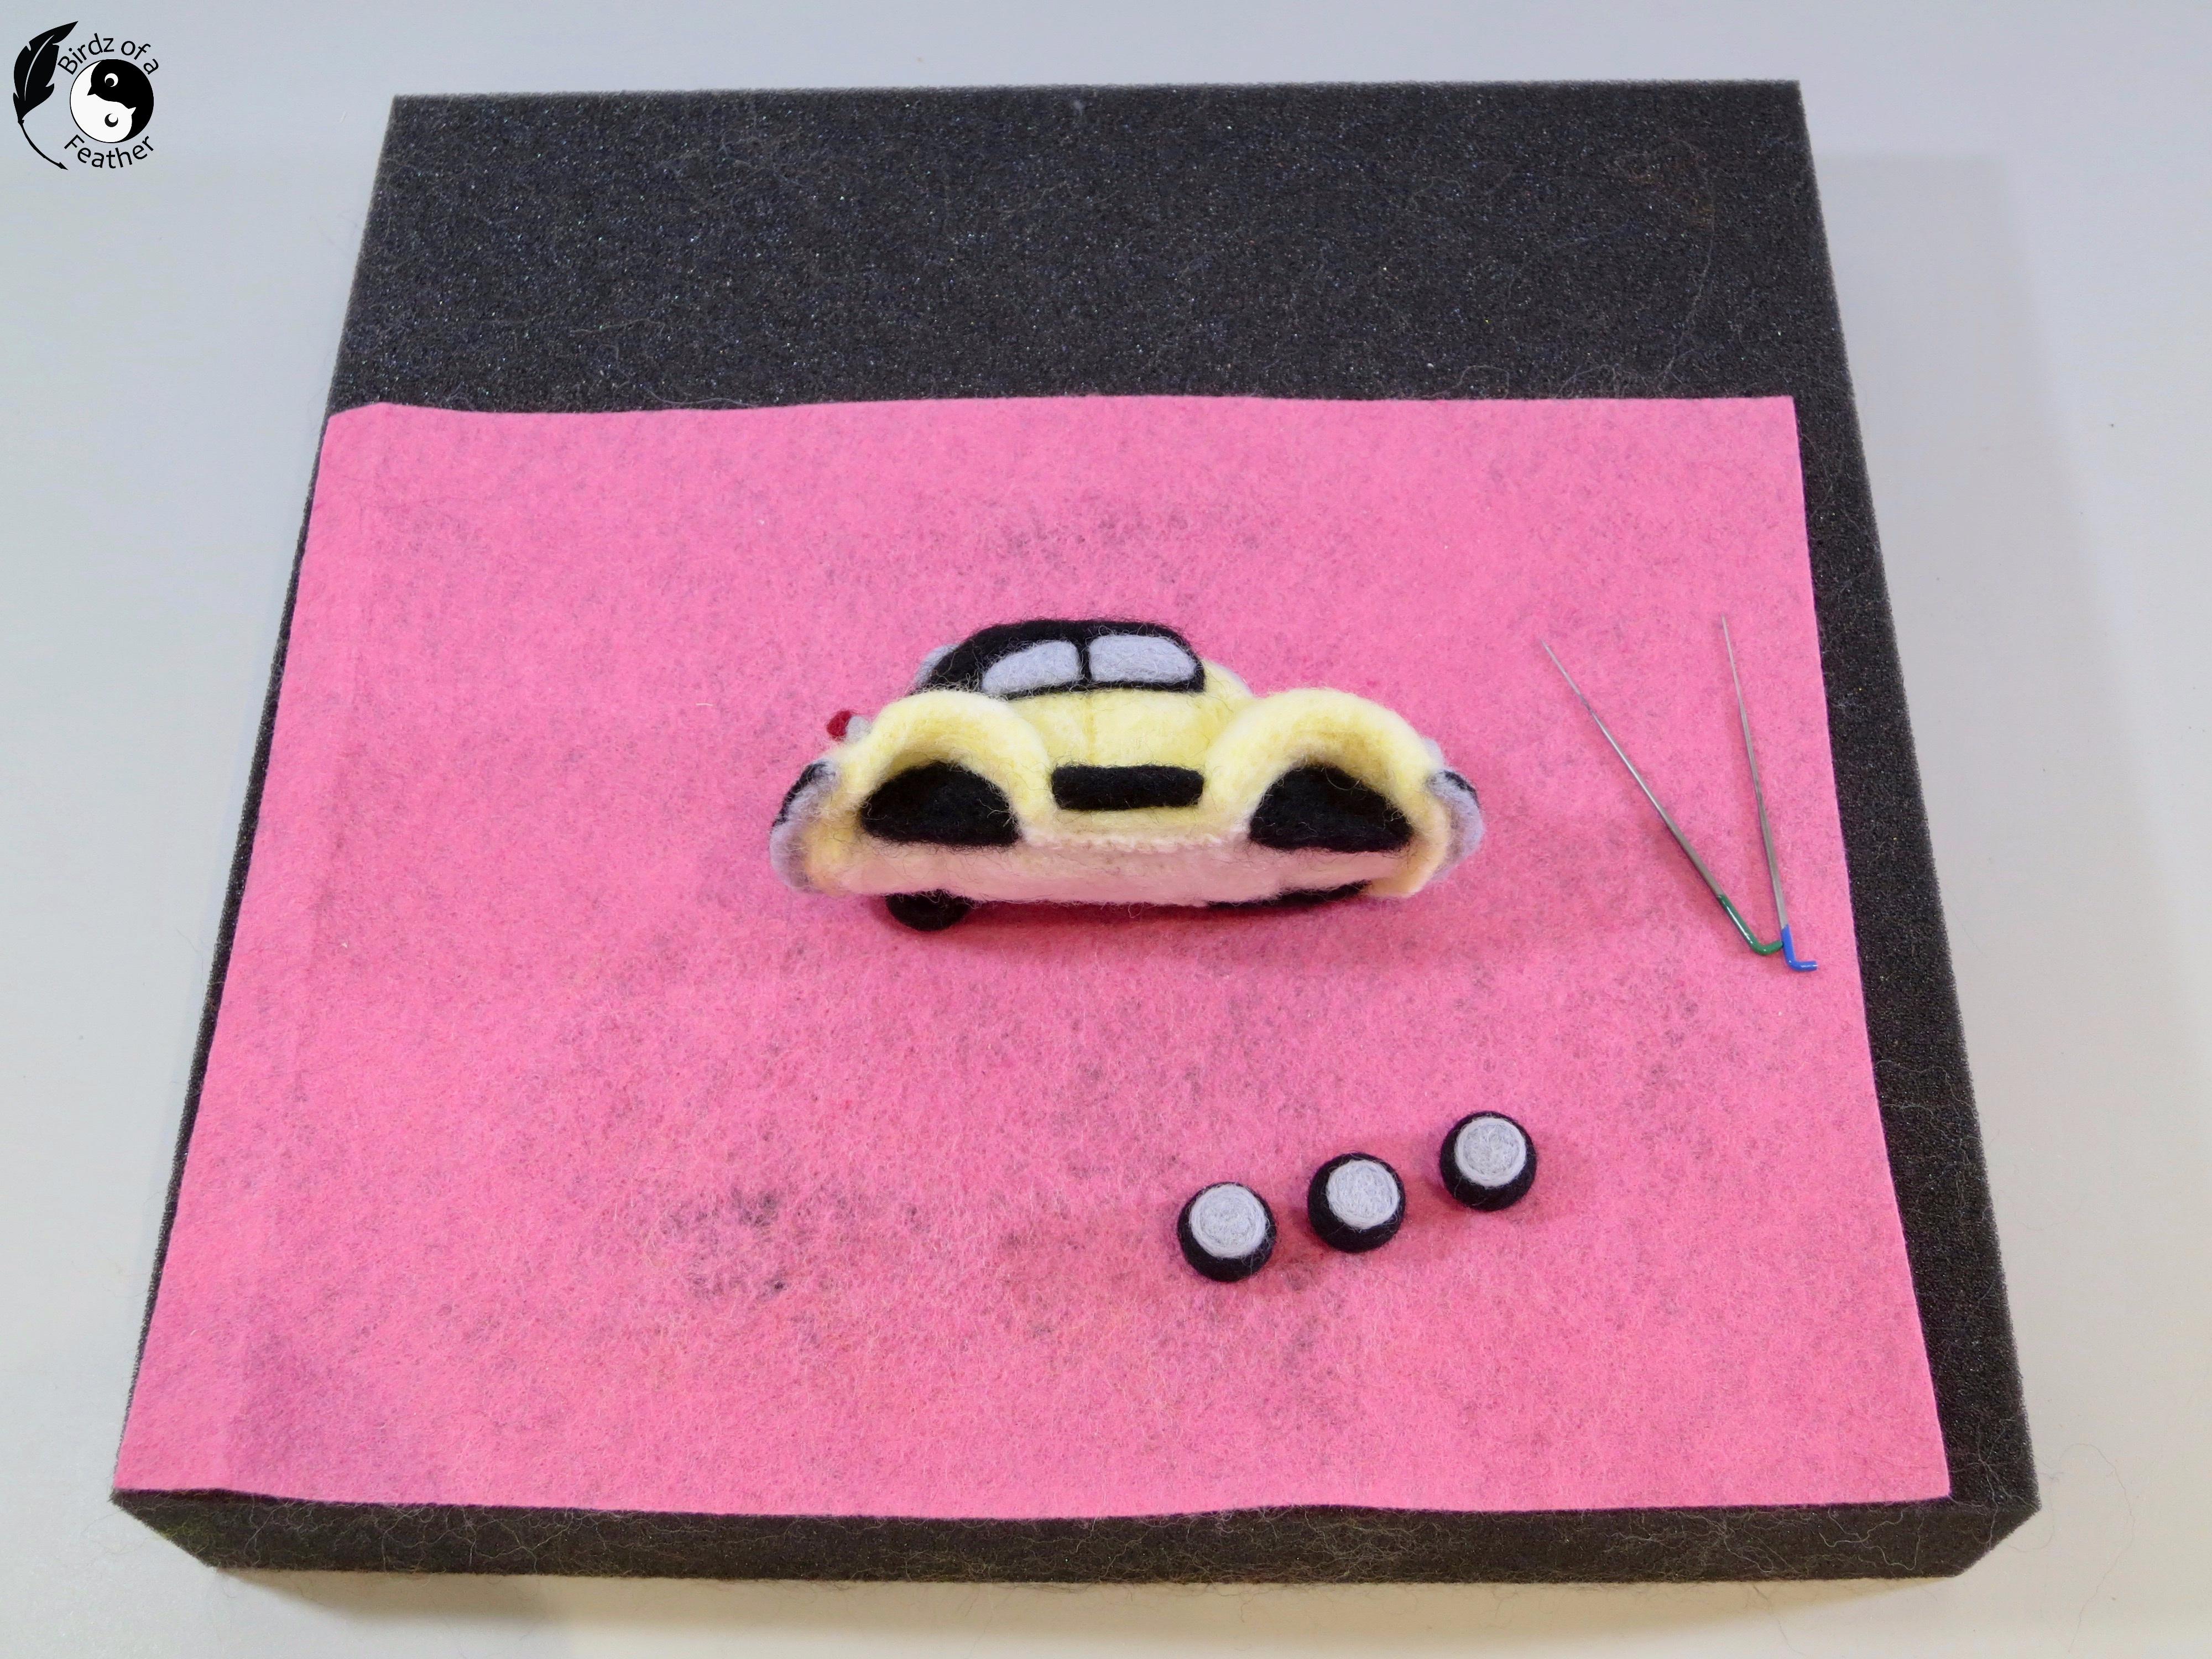
Add some black roving into the wheel well area on the body of the car, felting it into the core as shown in the picture to hide the white. Then pin the wheels in place with the car upright, ensuring they all touch the ground. Needle felt through the tire rim into the now-black wheel rim. Turn the car upside down and also felt from the wheel well area into the back of the tire.
Touch up any loose fibres on the car.
Vroom V(W)room
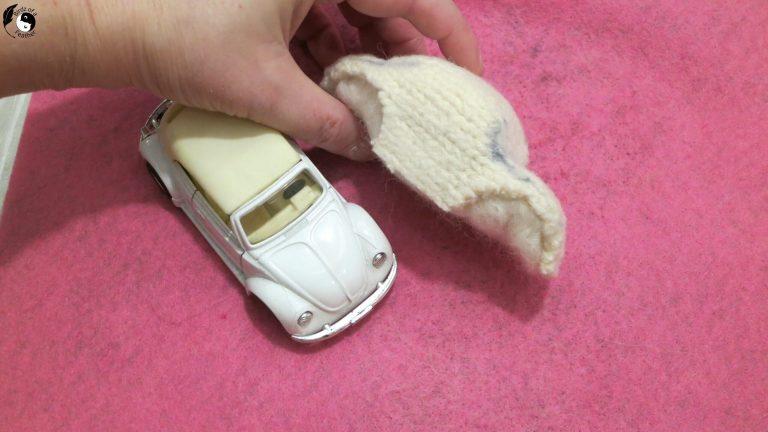


The first pic is a reminder of the sweater base we started with.
You can embellish your VW Beetle as much or as little as you like. Here’s how mine looks after adding details like the bumpers, running boards, tail lights and wheels.
Who would ever guess it all started with an upcycled sweater before moving on to sculpting?
Would you like a simpler project first so you can work your way up to this one? I've got you covered: check out my Instructable on how to needle felt a duck.
Alzheimer's Fundraiser


Vote for us in the Sculpt and Carve Challenge! Recently, both my husband and I lost our Moms just months apart to Alzheimer's, so if we place in this contest we will donate the equivalent of any winnings to research to help find a cure.
But that's not all! Starting this year our, we're also fund raising for Alzheimer's through pattern sales in our new shop (like the crocheted Kayla pillow cover pattern shown above). Importantly, 100% of proceeds from all pattern sales will be donated to benefit Alzheimer's. So if fibre art is something you enjoy, please consider buying one of our patterns as a donation or help to spread the word by sharing the link.
Get your craft mojo on and subscribe to us on Birdz of a Feather. You can also follow us on Pinterest, Facebook, YouTube and Instagram.

Fall Into Fabulous
One of the things I love most about blogging is connecting with other makers, and this Fall we’ve created something truly inspiring together.
Grab 16 digital goodies from top creators — planners, recipes, colouring books & more — including our Beginner Crochet e-Book!
Every dollar of our commission goes straight to Alzheimer’s research — a cause close to our hearts. Your purchase through this link means you’re not just treating yourself; you’re making a real difference.
Grab it now — the bundle is only available for a limited time! Let’s make this Fall fabulous and full of hope. 💜