How to Resize, Crop, and Desaturate a Photo Using Abobe Photoshop
by davidn2 in Design > Digital Graphics
2610 Views, 5 Favorites, 0 Comments
How to Resize, Crop, and Desaturate a Photo Using Abobe Photoshop
Adobe Photoshop is a digital image editing application for the Internet, print, and other new media disciplines. Photoshop editing skills have a broad relevancy. Social Media is extremely popular in today’s society. Sites like Pinterest, Facebook, LiveJournal, Model Mayhem, LinkedIn, Photo.net all have size limitations for images. With the ever expanding social media, Photoshop has many tools and effects that allow users to alter and enhance photos.
This Instructables article will show you how to resize two different ways, crop, and desaturate a photo using Adobe Photoshop with a PC or Mac. Below you will find a video that demonstrates how to desaturate a photo.
This Instructables article will show you how to resize two different ways, crop, and desaturate a photo using Adobe Photoshop with a PC or Mac. Below you will find a video that demonstrates how to desaturate a photo.
Step 1: How to Resize a Photo (1st Option)
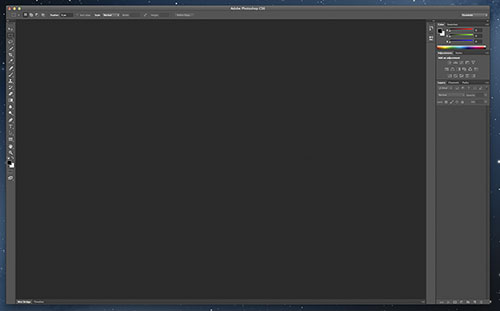
Open Adobe Photoshop, which should look like this.
Step 2

On the menu bar, click on “File” and then choose the “Open” option.
Step 3
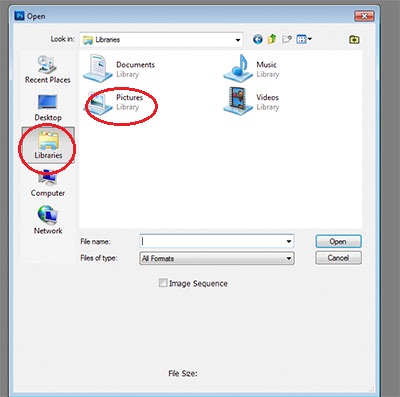
Click ‘Libraries’ and the double-click on ‘Pictures Library’.
Step 4
Double-click on ‘Sample Pictures’
Step 5
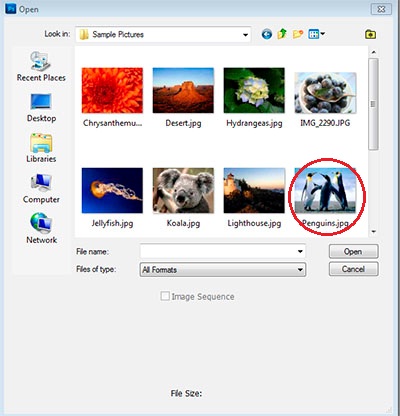
At this point we will be using a sample picture of penguins to illustrate further usage. This is a default picture that comes with all PCs, if you have a Mac do not worry, you may choose any photo of your liking in your photo library. Double click on the penguin picture to select photo and the penguin photo will appear in Photoshop.
Step 6
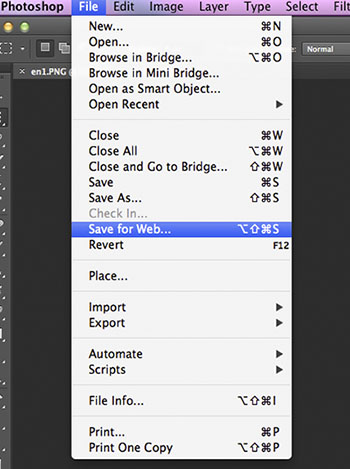
Go to the menu bar and click on ‘File’ then choose the ‘Save for Web and Devices’ option
Step 7
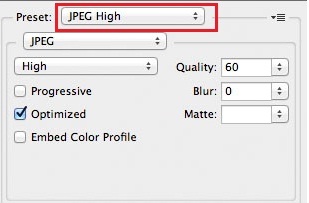
On the ‘Save for Web’ window, check if the present option is set to ‘JPEG High’. If not click the down arrow on the preset option and choose the ‘JPEG High’ option.
Step 8
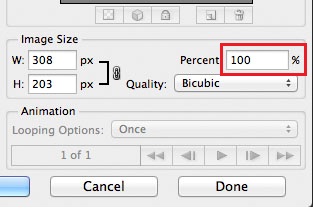
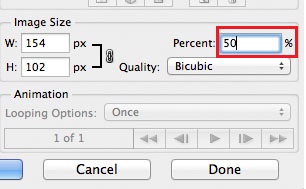
In the Image Size section of the window, change the percentage setting and press Enter (ex. 100% to 50%)
Step 9
Click Save to replace the original image
Step 1: How to Resize a Photo (Option 2)
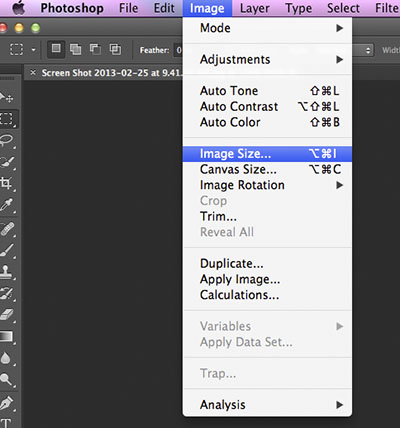
Go to the menu bar and click on ‘Image’ then choose the ‘Image Size’ option.
Step 2
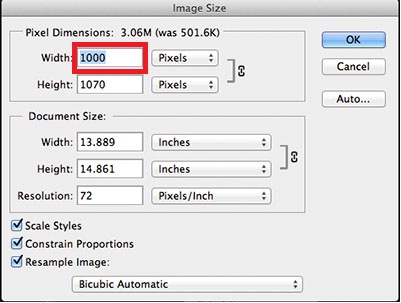
In the Image Size, adjust the pixel dimension by picking either a new width or height (ex. if the width was 1000 pixels change to 800 pixels). When you change one dimension, the other is automatically adjusted.
Step 3
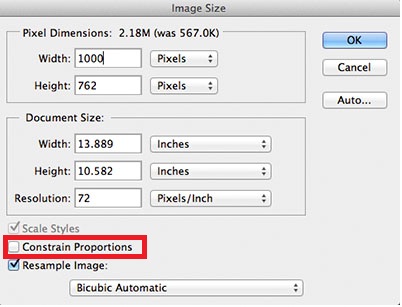
If you want to change both width and height, unclick the ‘Constrain Proportions’ checkbox (The links will go away on the pixel dimensions)
Step 4
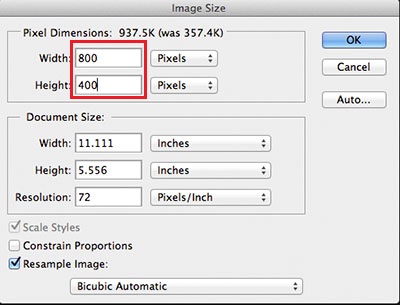
Change the width to 800 and the height to 400 and then click the OK button. (Note: You will notice that the image is resized, but is distorted. In order to resize the image to these dimensions, we will need to use the crop tool. Before we do that let’s redo out last edit.)
Step 1: Cropping a Photo
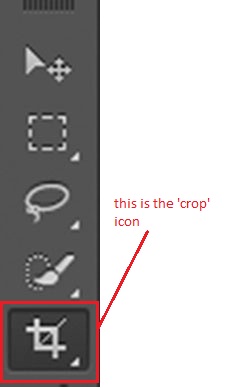
Click on the Crop Tool.
Step 2
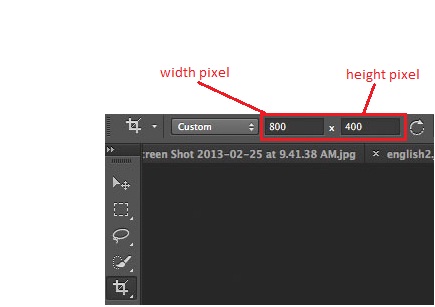
Now configure the Crop Tool. Enter 800 for the width and 400 pixels for the height
Step 3
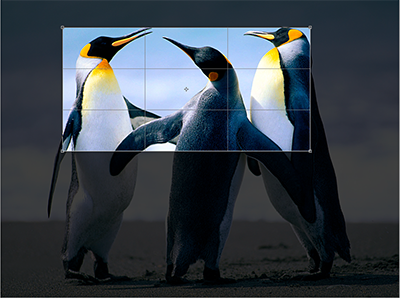
Put your cursor over the picture, hold down the left-click and then draw a box around the part of the photo that you would like to keep and then release. (Note: If you make a mistake, you can press the ESC key and start over)
Step 4
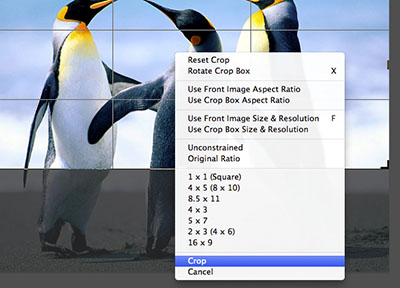
Right-click inside the box that you drew and choose ‘Crop’. (Note: Now the image is 800 by 400, but now it is not distorted.
Step 1: How to Desaturate a Photo
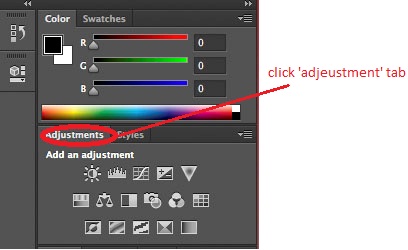
Click on the Adjustments tab on the right
Step 2
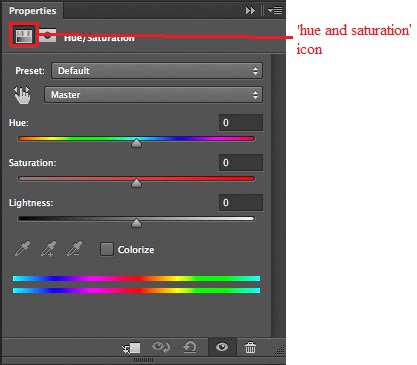
Click on the Hue/Saturation icon which will give you a second layer over the photo.
Step 3
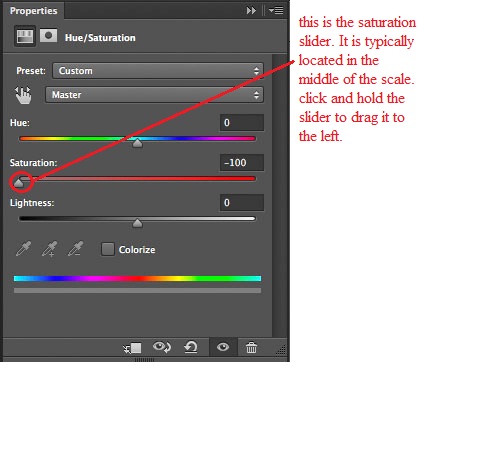
Hold Left-click on the Saturation slider (the grey triangle) and slide it all the way to the left. This will remove all the color saturation from the photo.
Step 4
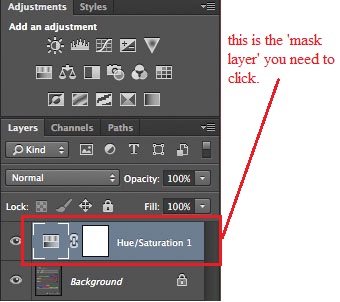
Click on the Hue/Saturation layer and then click on the layer mask. This is the white square.
Step 5
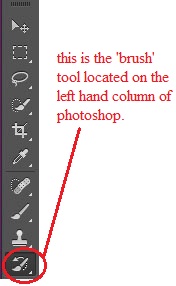
Next go to the Tools menu bar and click on brush tool on the left.
Step 6
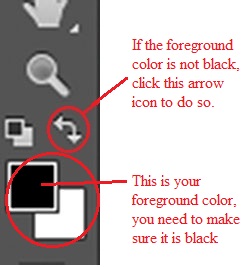
You are going to paint over the photo with this brush. But before you do, make sure that your foreground color is black.
Step 7
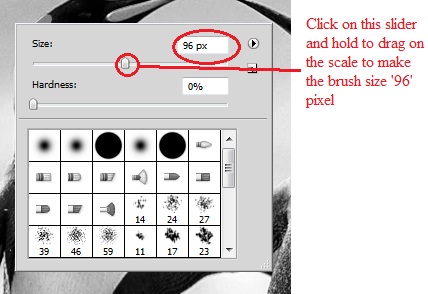
right click on the image and increase brush size to 96 pixels
Step 8
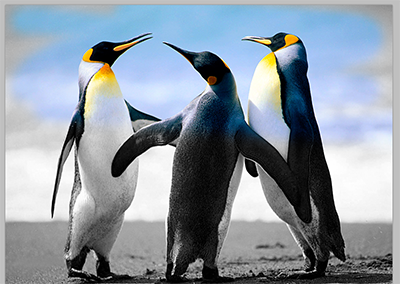
paint over the image where you would like the color back