How to Replace HDD/SSD SATA Cable in MacBook Pro
by KeithC81 in Circuits > Apple
22871 Views, 23 Favorites, 0 Comments
How to Replace HDD/SSD SATA Cable in MacBook Pro

Did your Mac suddenly stop booting up? Are you getting a weird folder with a question mark icon on boot-up (as shown above) instead of the normal Apple logo? Your first thought might be that your hard drive/solid state drive has failed and you're panicking because you didn't back it up like you meant to. Don't worry because that may not be the case. Your drive may be just fine and instead it is your SATA cable connecting to the drive that is malfunctioning.
The question mark folder icon indicates that the computer can't locate the startup disk. That could mean a couple of things--either the drive is, in fact, failing; or the computer just can't find the drive because there's a short in the drive's data cable. If you have already checked out the drive and made sure it is indeed still working, this process is the next thing you should do.
This guide will take you through the simple steps in replacing your drive's SATA cable safely and easily. By following this guide, you will save yourself time and money because replacing this part yourself is cheaper and faster than paying and waiting for it to be done by Apple. This process doesn't require much time or previous technical knowledge. As long as you have about 15 minutes and can work a screwdriver on small screws, you will have no problem.
Required Materials
There are only a few items needed for the repair:
- The new replacement cable - These can be found all over the internet like this one on Amazon. Just be careful to make sure that the one you buy is compatible with your model Macbook Pro.
NOTE: If you want to make your life a little easier, you can buy a cable that has the IR sensor bracket already attached so you don't have to take the bracket off the old cable and put it on the new one. It is a pretty small and fragile connection so if you don't want to worry about accidentally breaking the connector, buy one with the IR sensor bracket on it, like this one.
- A Precision Phillips-head Screwdriver
- A Small Container - This will be used to hold the small screws that are removed from the computer since they can easily get lost.
- An Anti-Static Wrist Strap (optional) - This or some other static discharging device is always a good idea when working with delicate electronics so that an accidental static discharge from your hands doesn't fry something inside the computer. Also being careful to touch something conductive before you touch your computer is also a valid method of discharging static.
- A Spudger (optional)
Preparations
1. Shut down the computer.
2. Unplug the computer.
3. Make sure the computer is cool enough to touch.
If the computer has recently been stressed pretty hard, the inside can be very hot. Make sure it's cool enough to work on before going any further.
4. Touch a large metal object in order to discharge static from your hands.
5. (Optional) Put on anti-static wrist strap.
Remove the Backplate
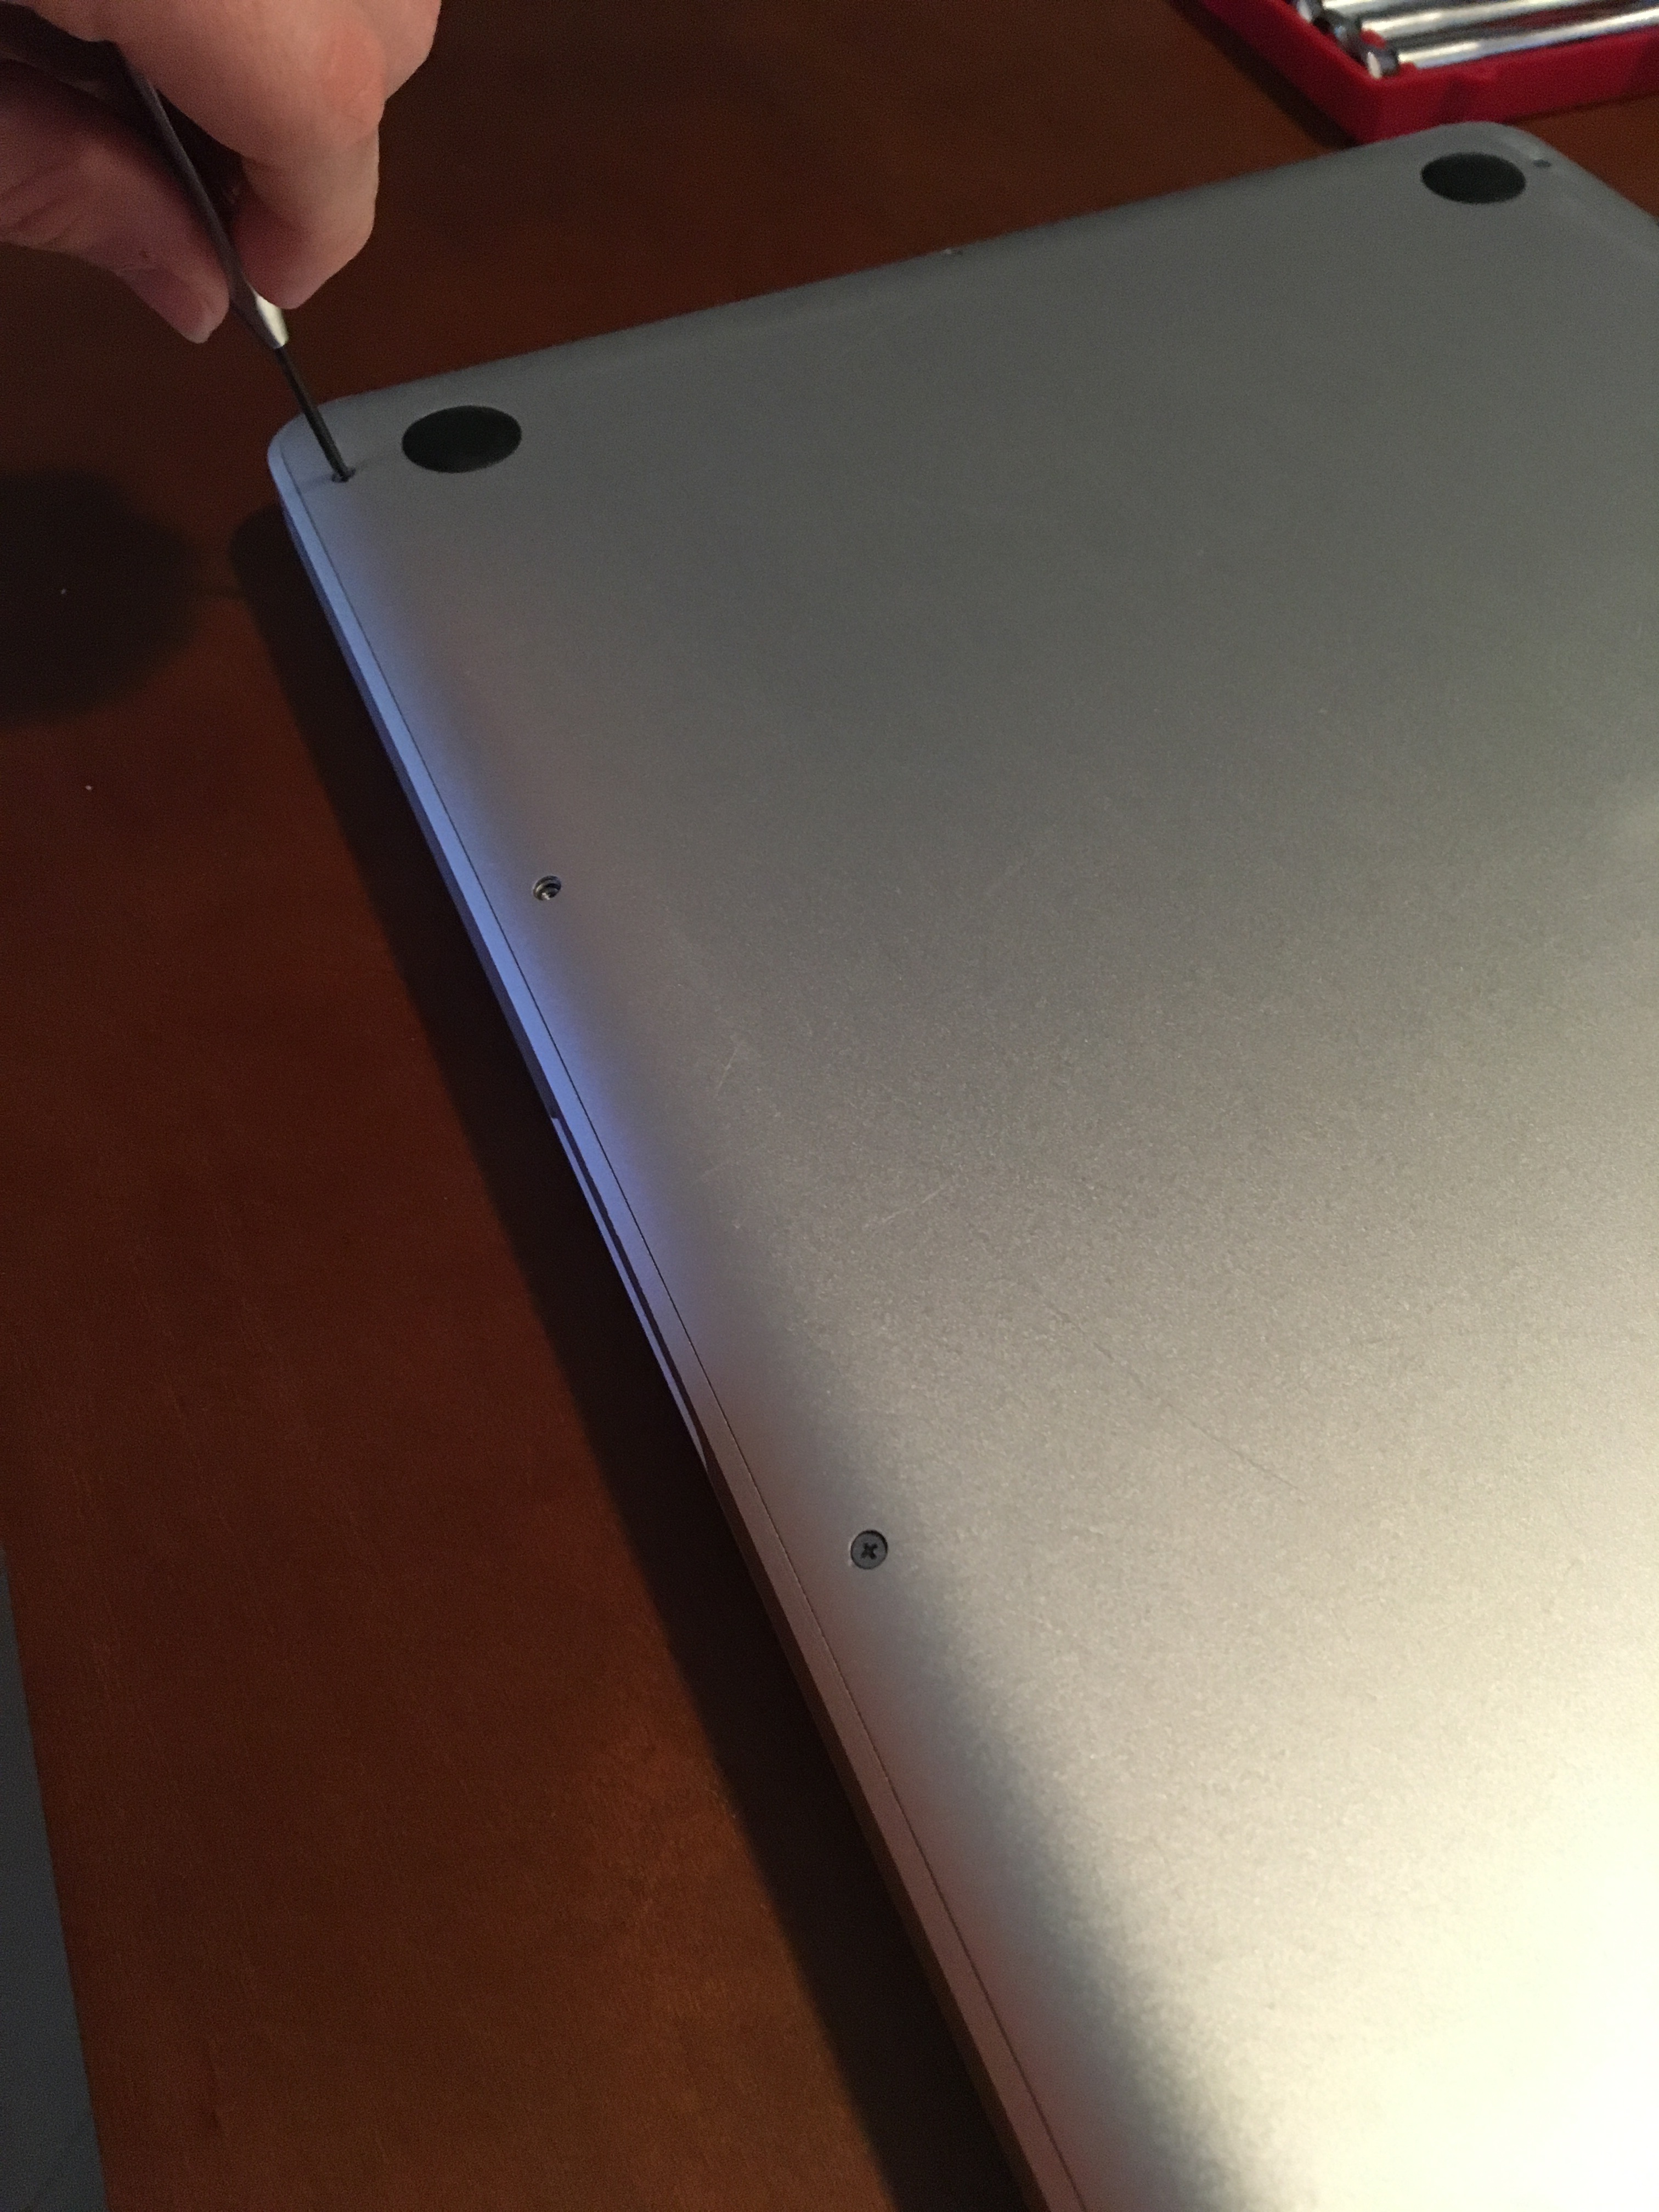
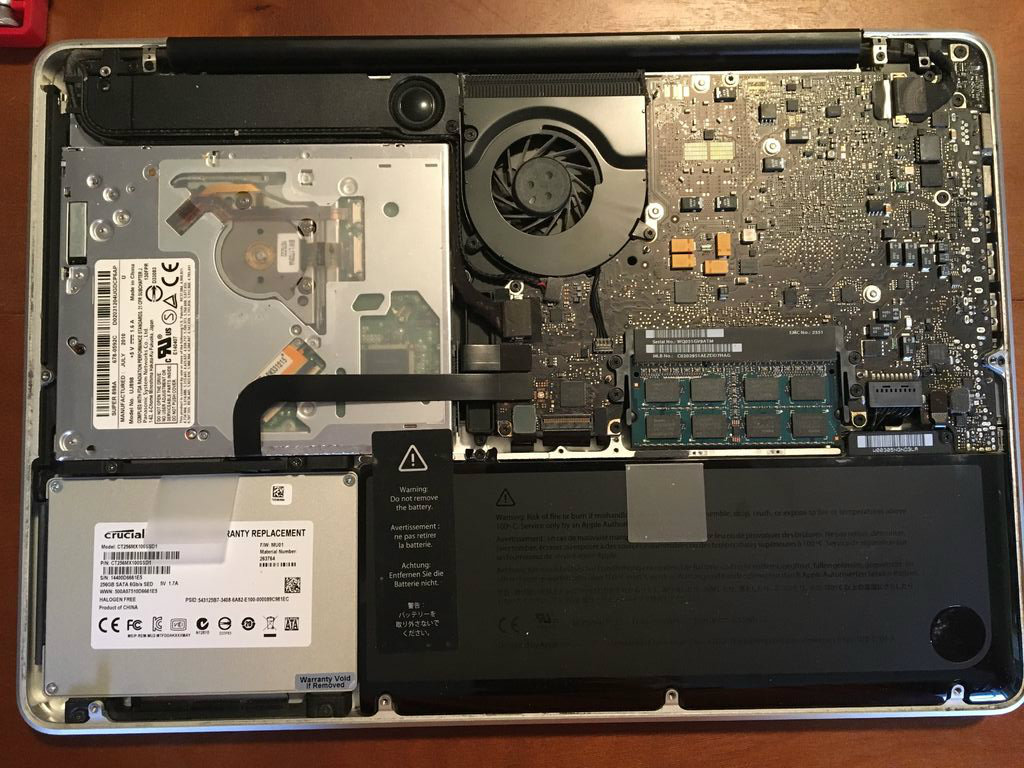
1. Remove the ten screws around the perimeter of the plate and put the screws into the small container.
2. Remove the backplate from the body of the computer by lifting up on the edges.
NOTE: Three of the screws near the screen hinge are much longer than the other screws so take note of which holes those came from so they can be put back correctly at the end.
Detach the Battery
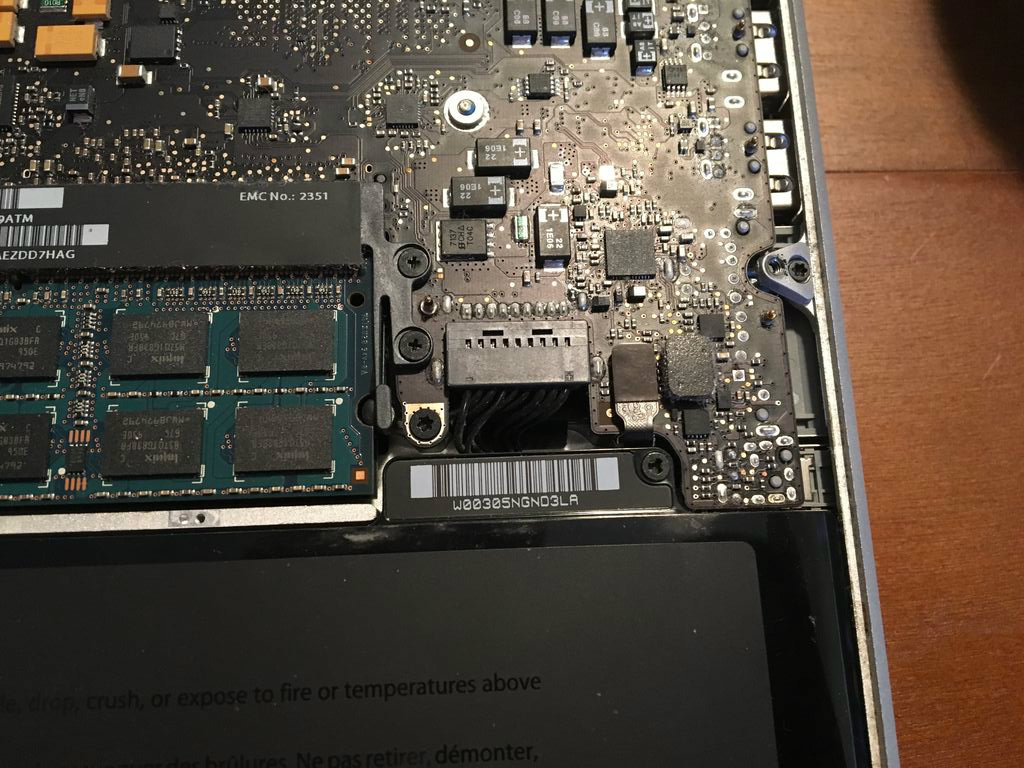
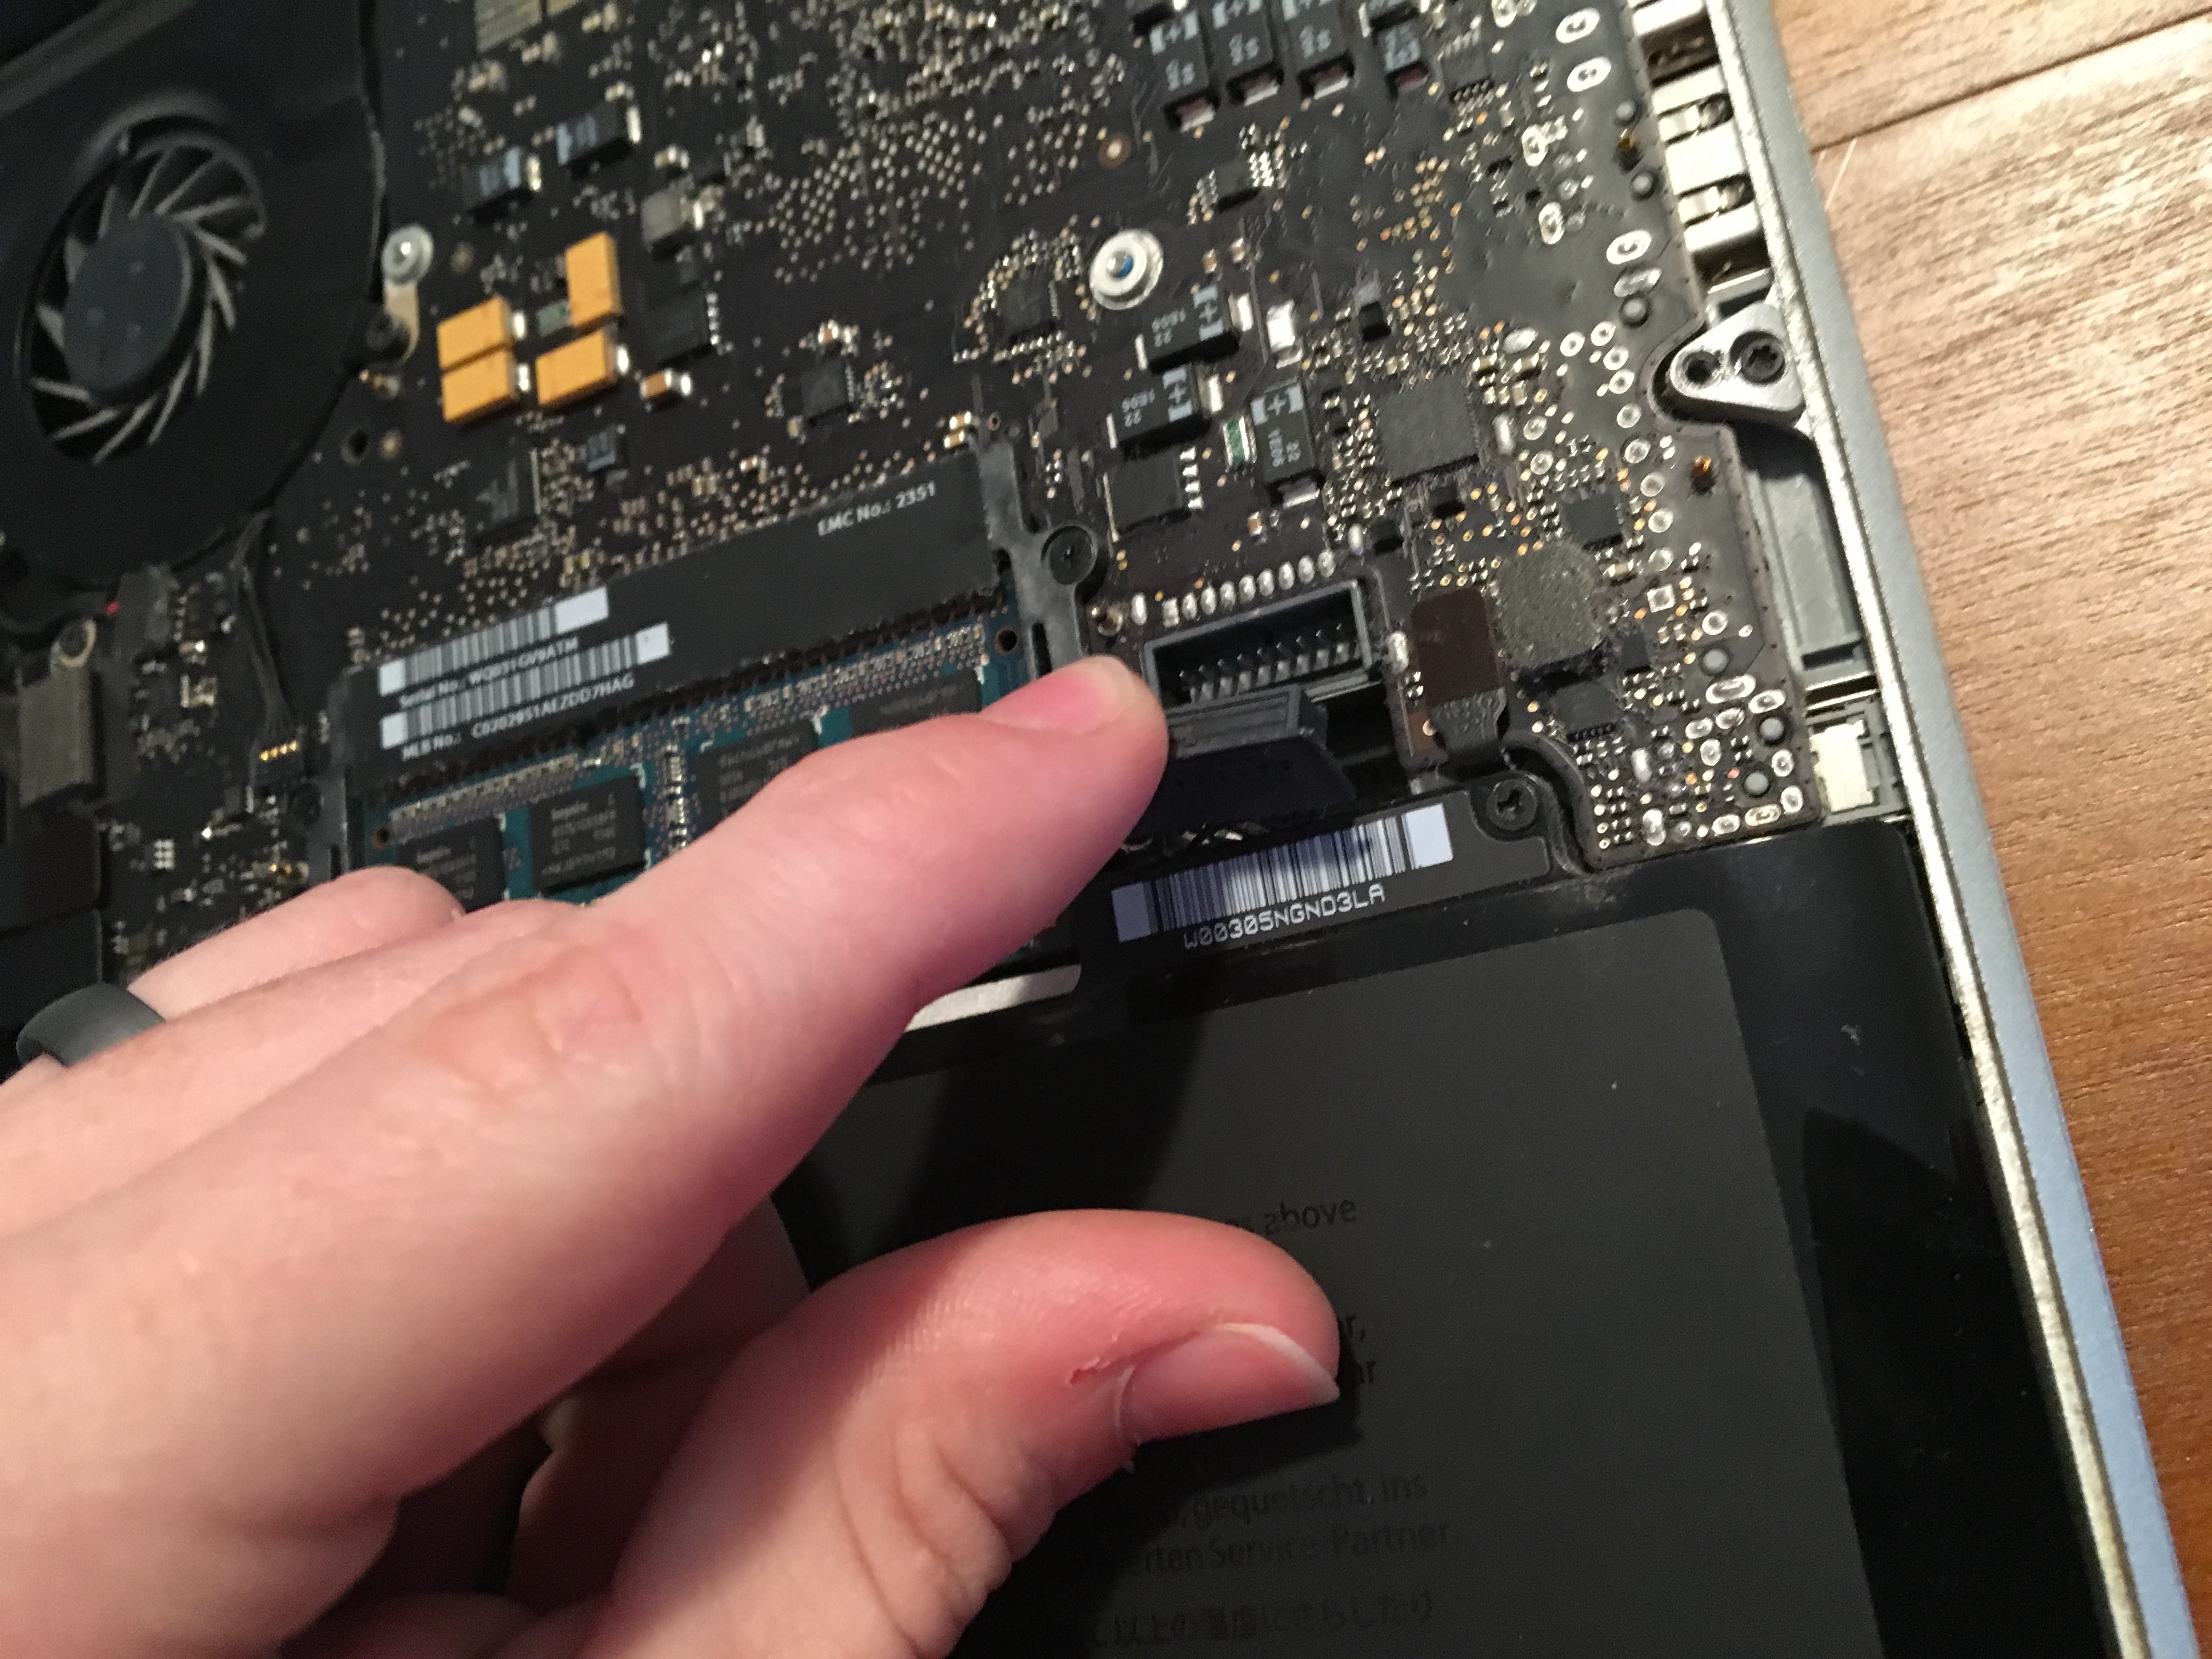
1. Find the plug for the battery.
The battery is the big black brick that is taking up most of the space at the bottom of the computer. You will see some wires coming from the right side of the battery to a small black, plastic rectangle. That is the plug.
2. Use the spudger or your fingers to carefully detach the battery.
Locate the Drive to Be Removed
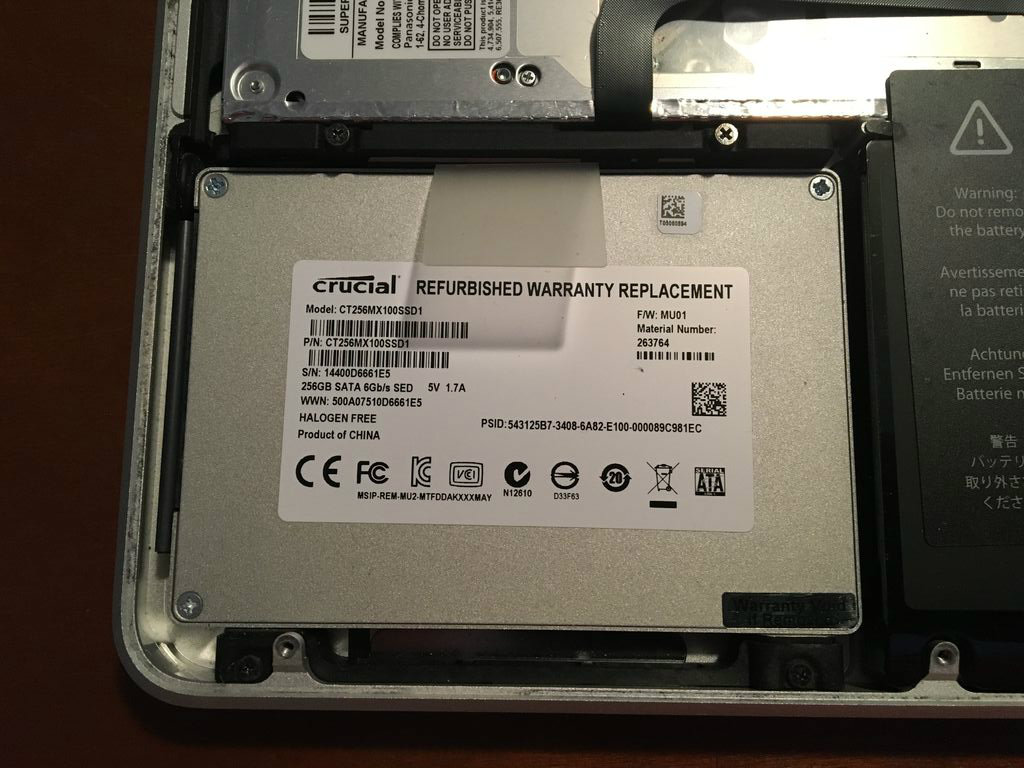
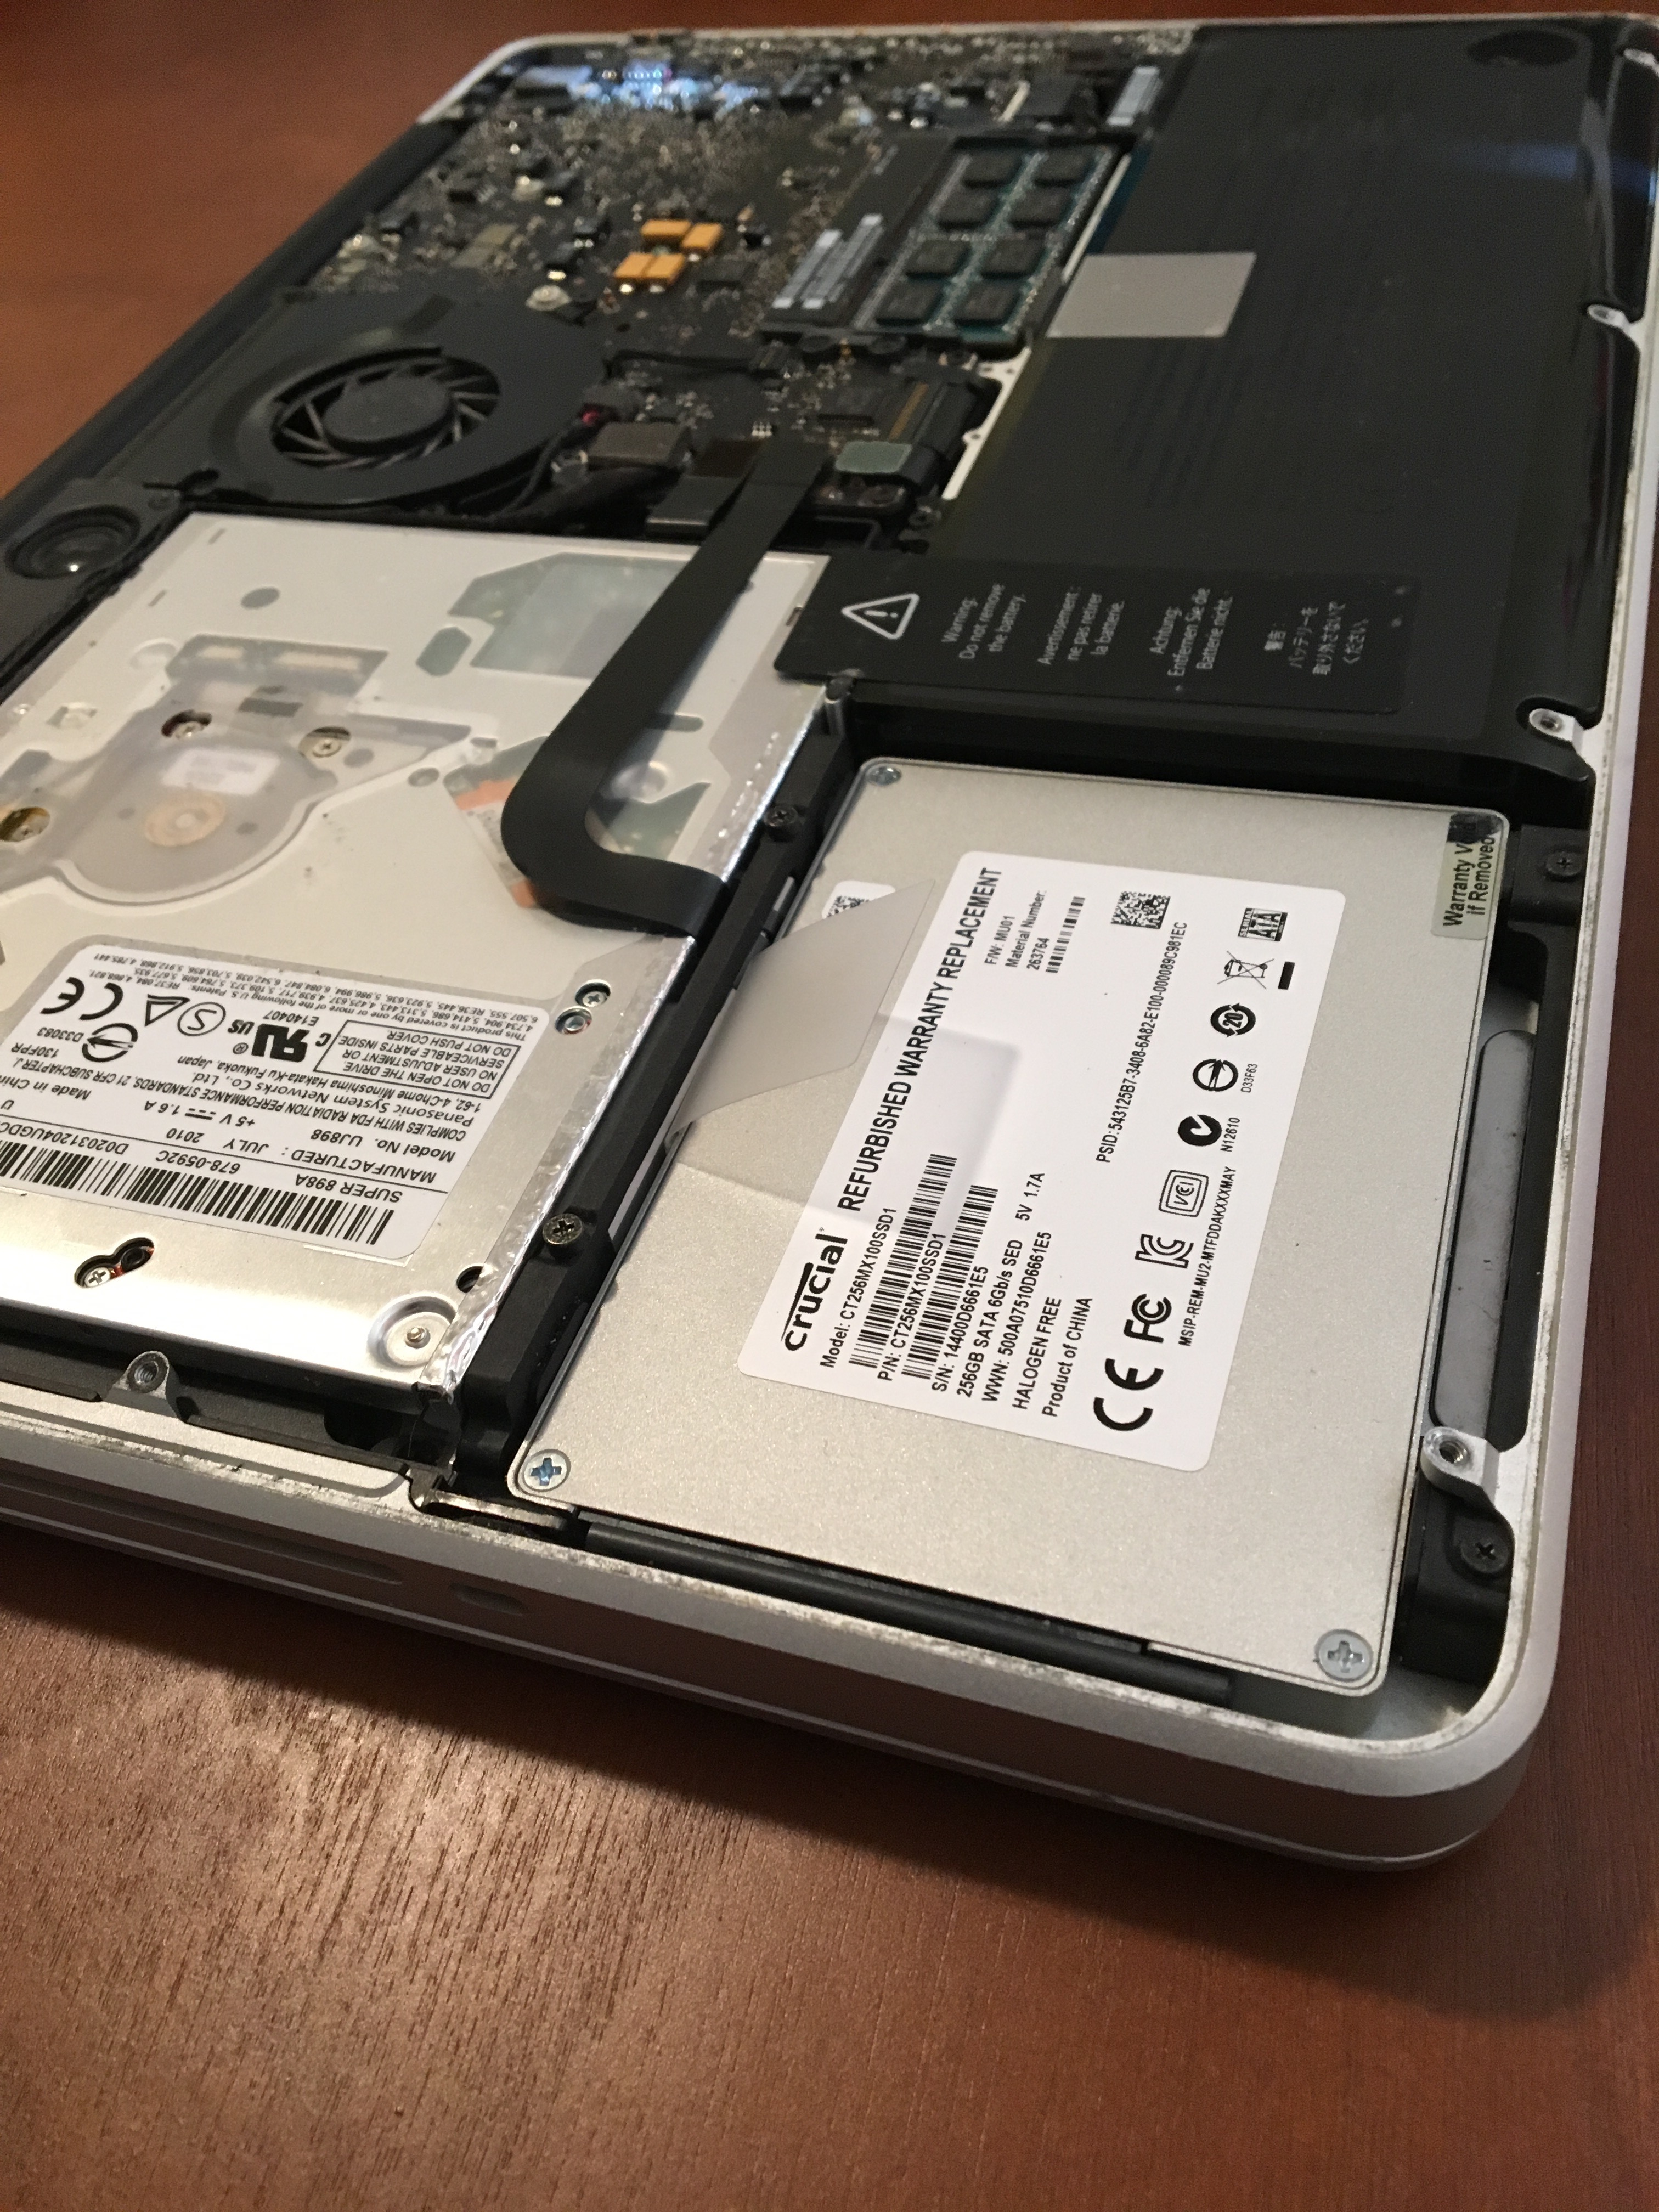
1. The drive is in the lower left hand corner. It is usually a silver colored rectangle about 3 inches by 4 inches.
Remove Hard Drive Bracket
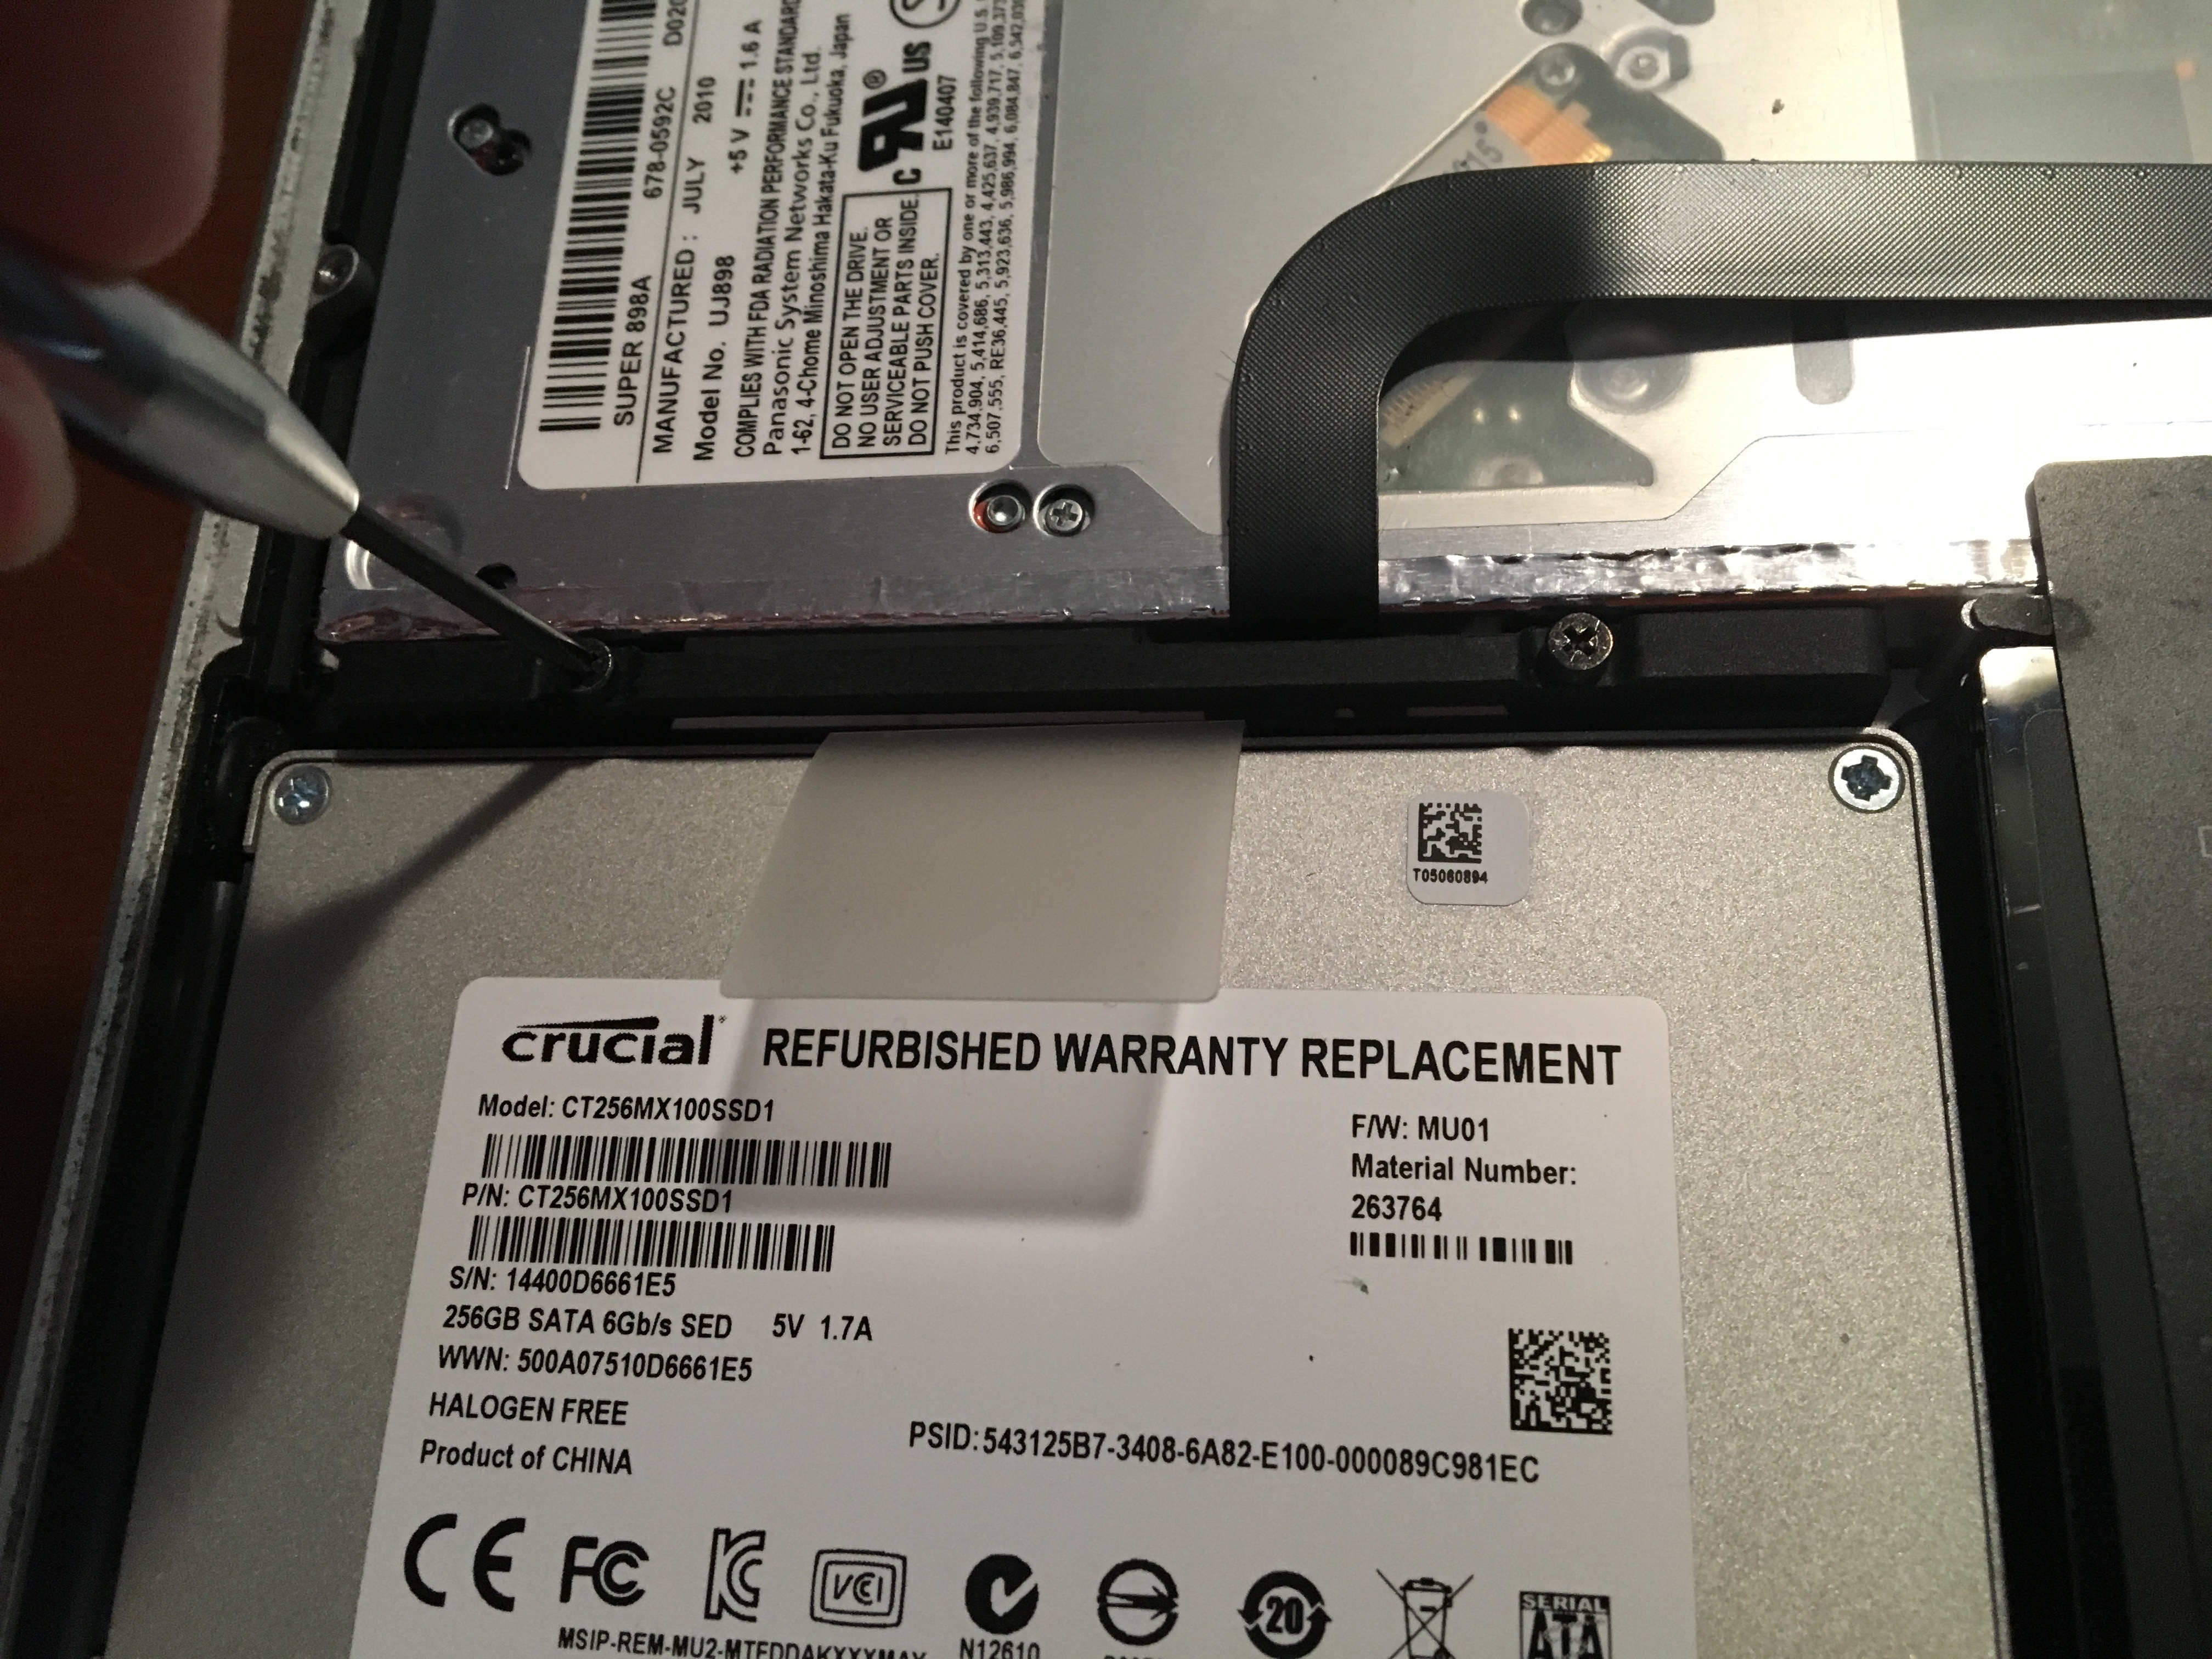
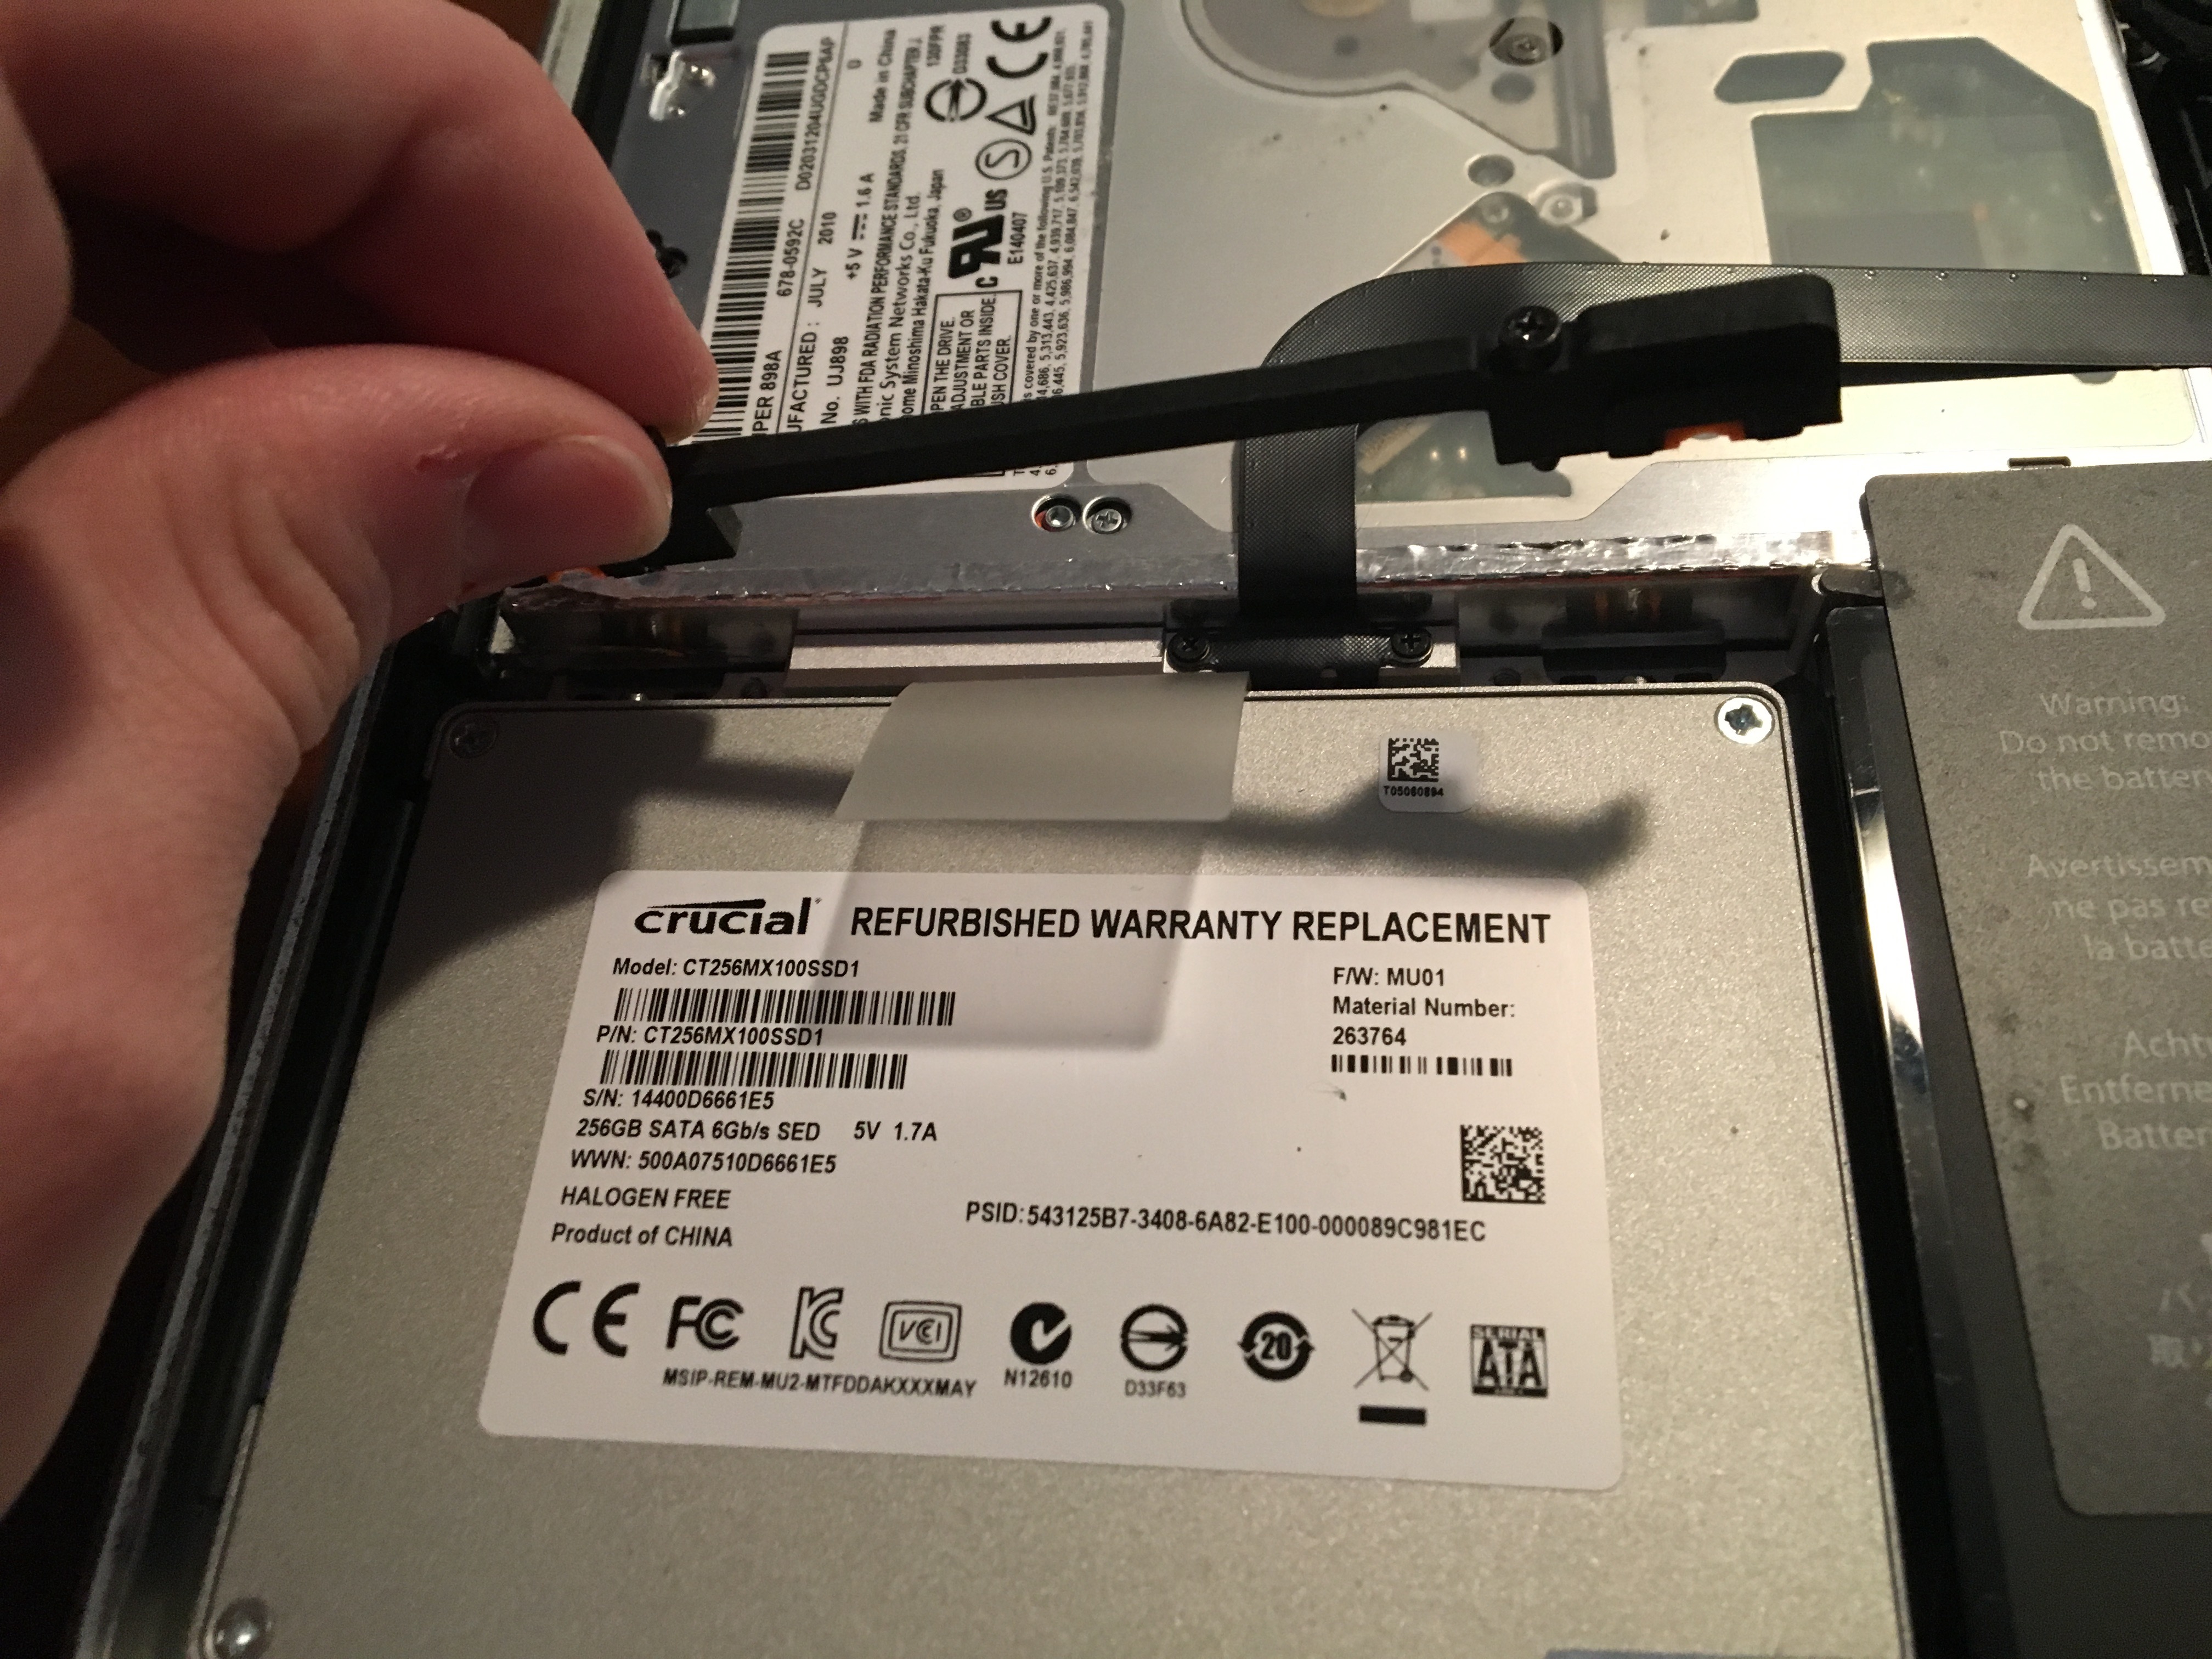
1. Unscrew the two screws on the bracket holding the drive.
2. Pull out the bracket and set it aside.
Detach the Drive
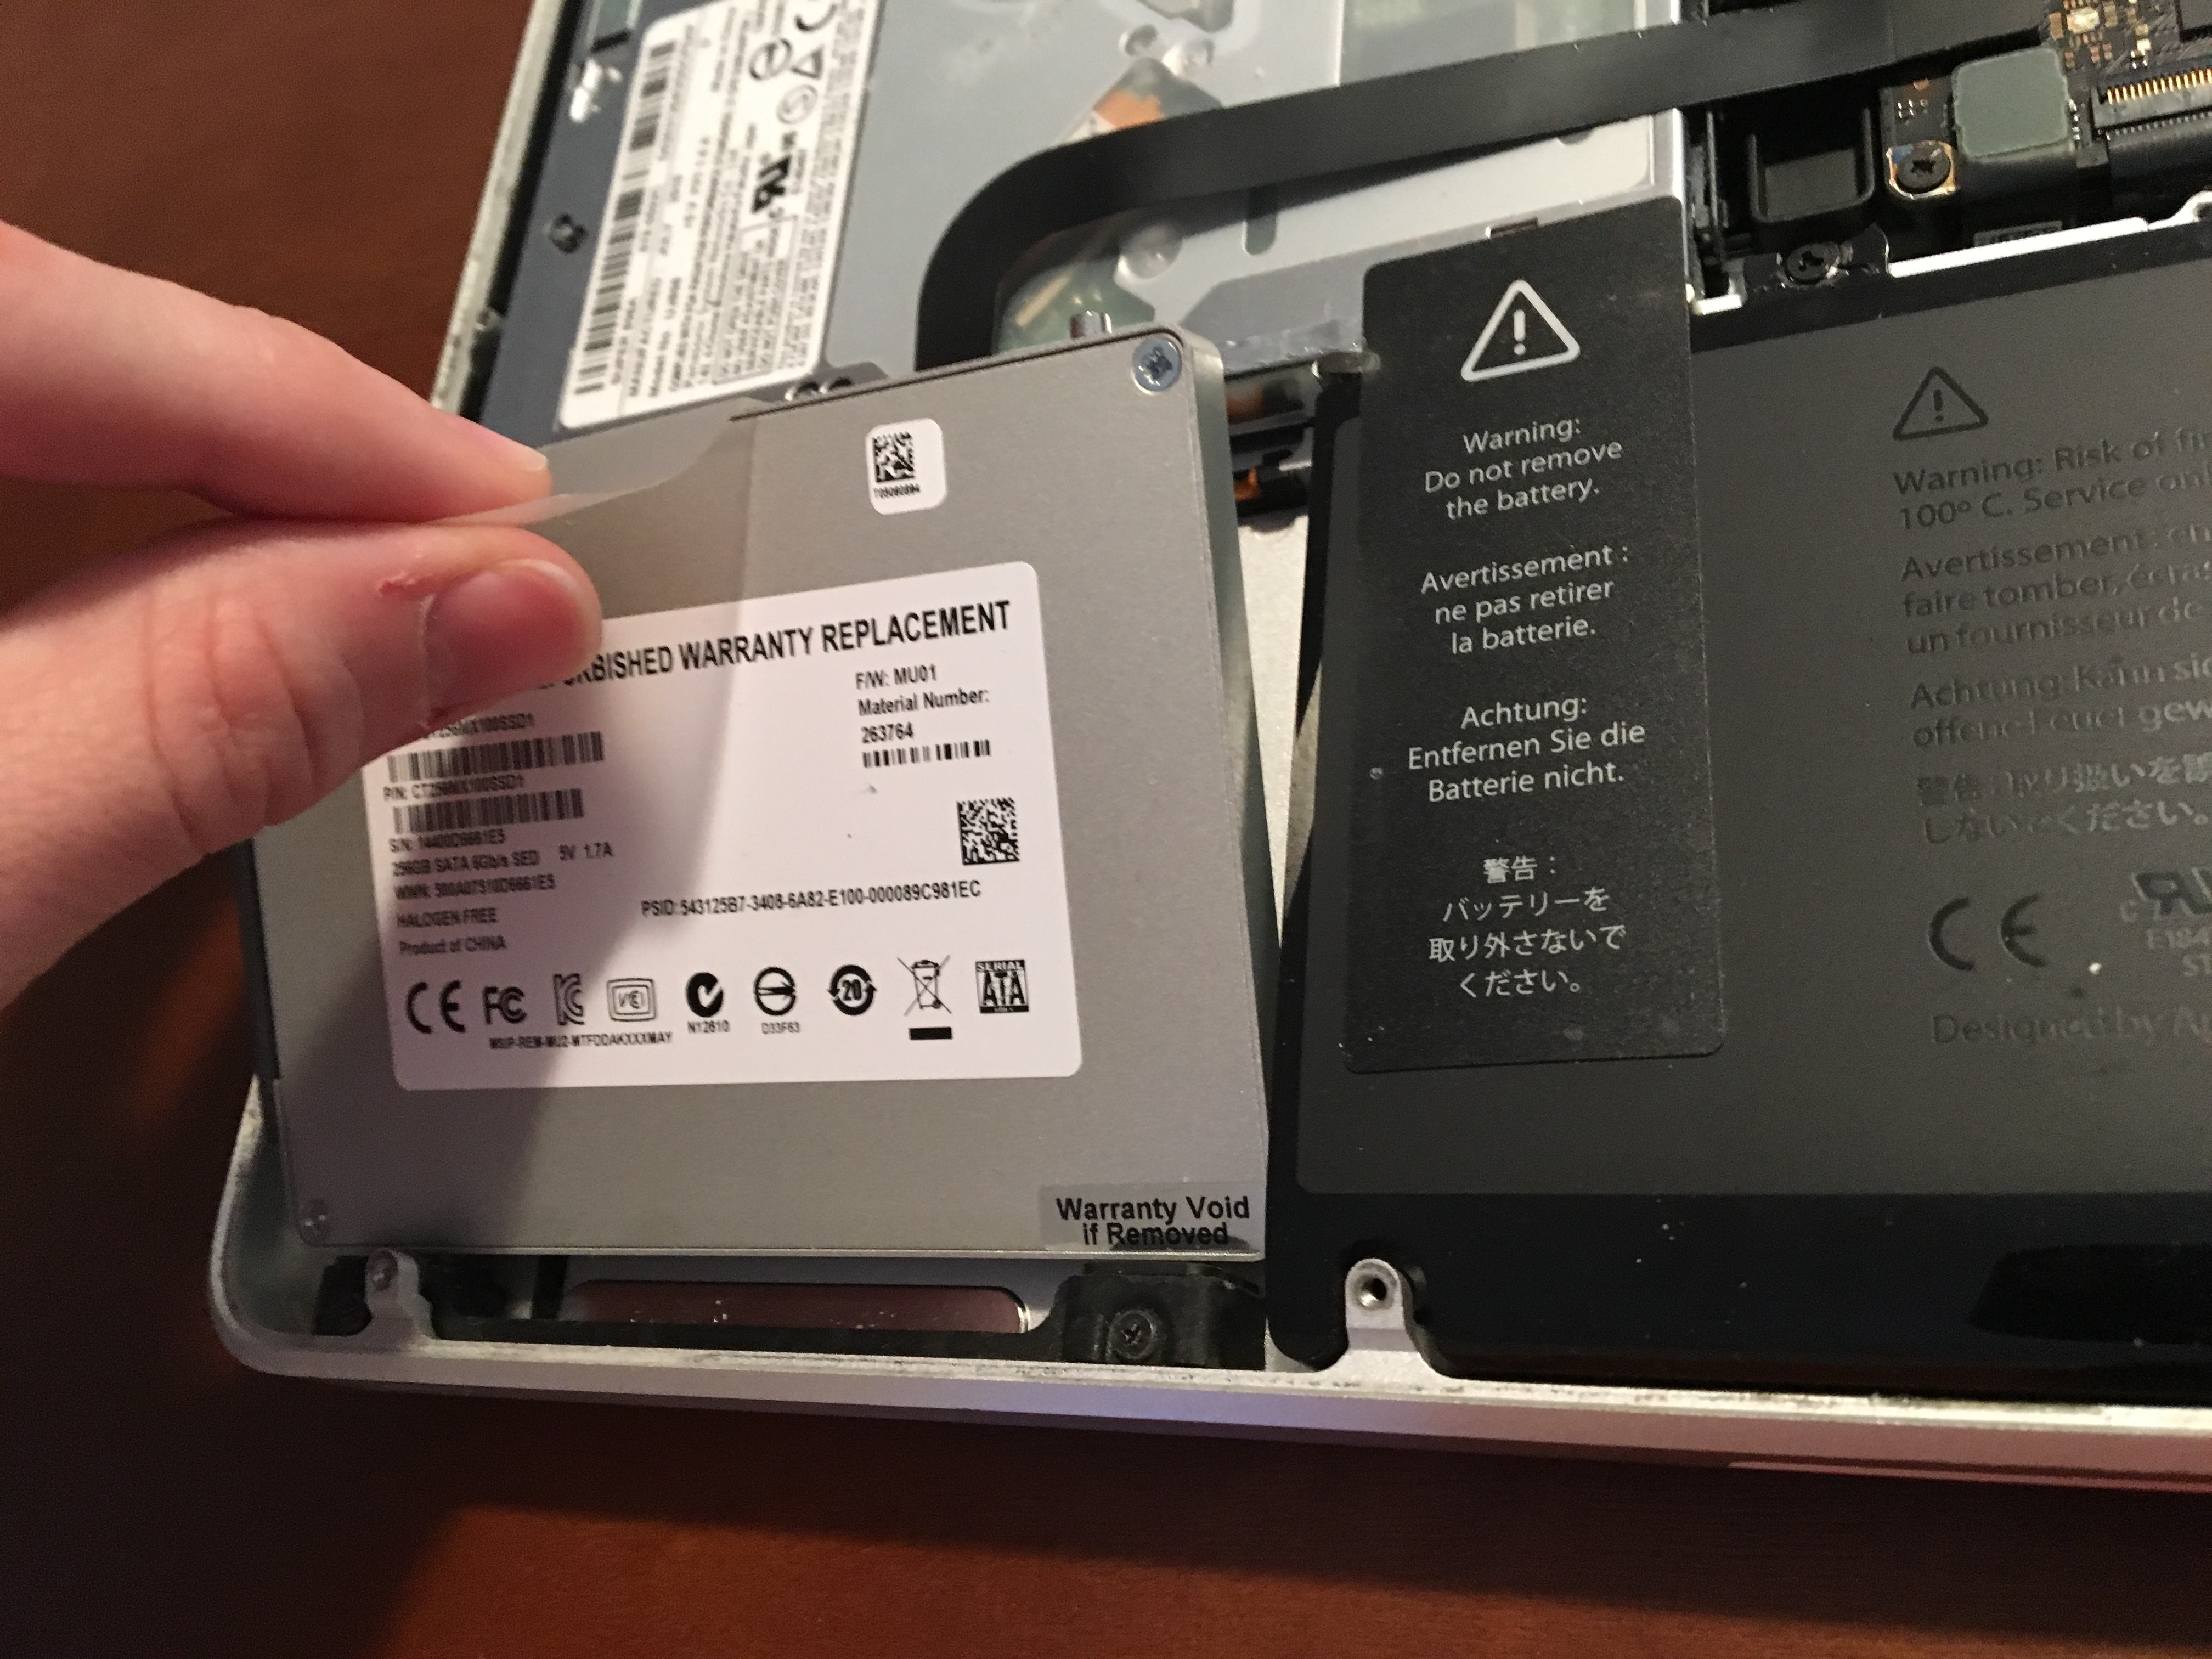
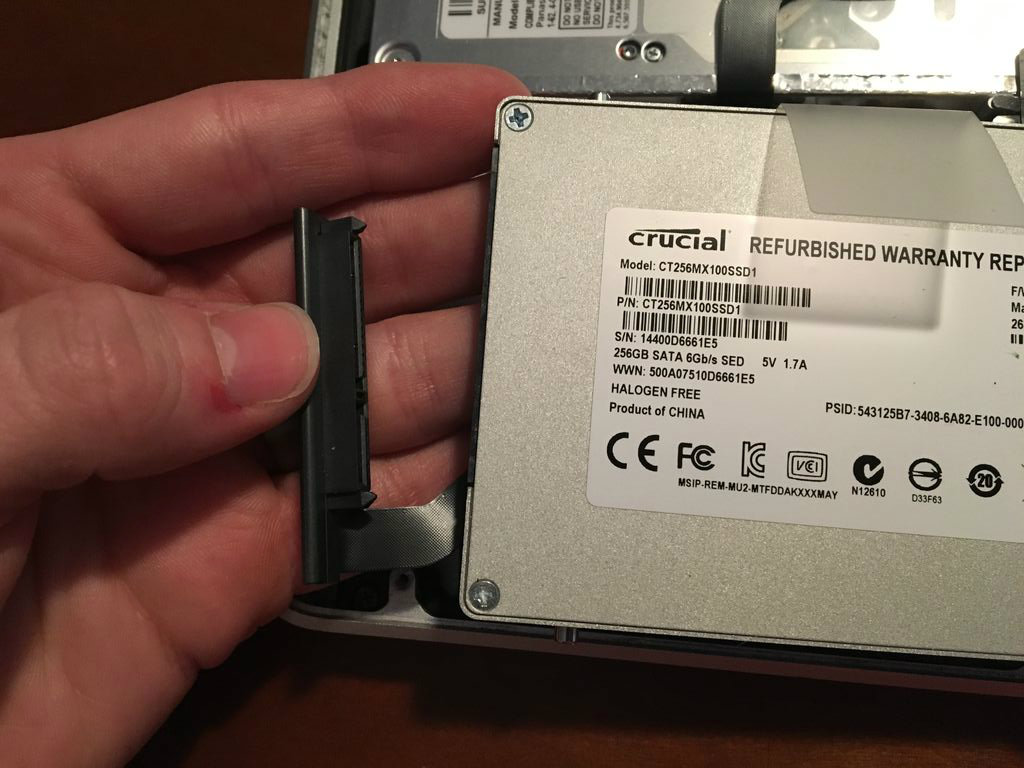
1. Pull on the plastic tab attached to the drive to pull it out of place being careful not to pull it out too far because it is still attached to the SATA cable.
NOTE: If there is no plastic tab, you can use the spudger or your fingers to pull the drive out of place.
2. Disconnect the SATA connector on the left side of the drive by pulling straight out.
3. Set aside the drive.
Remove the SATA Cable Screws
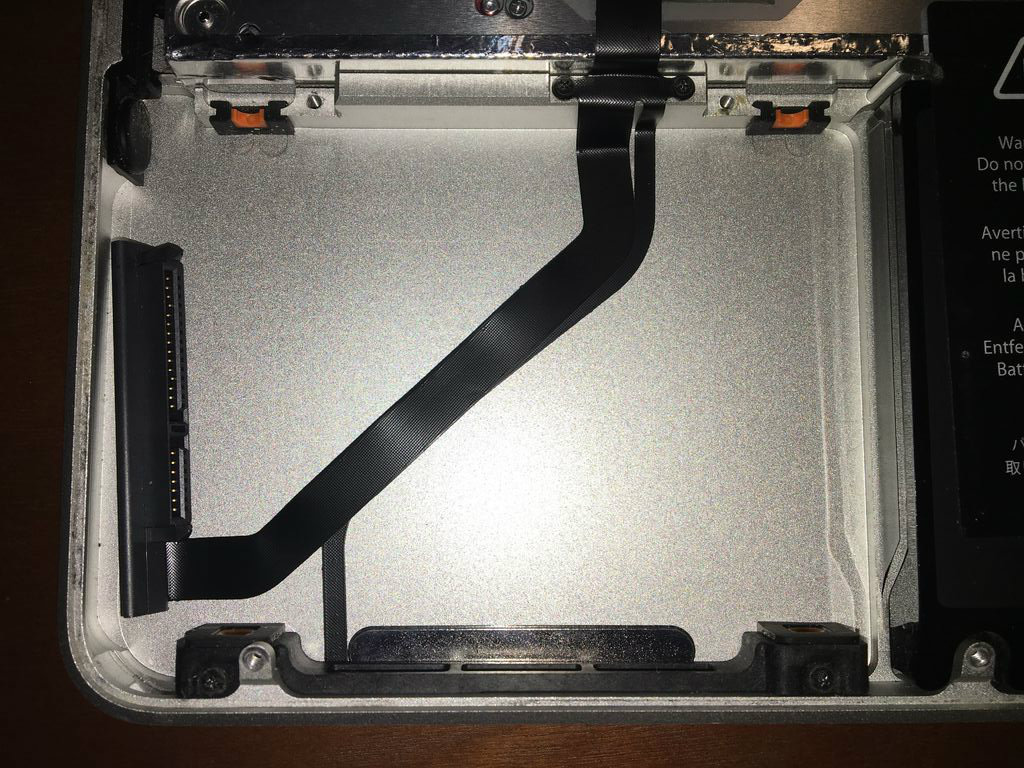
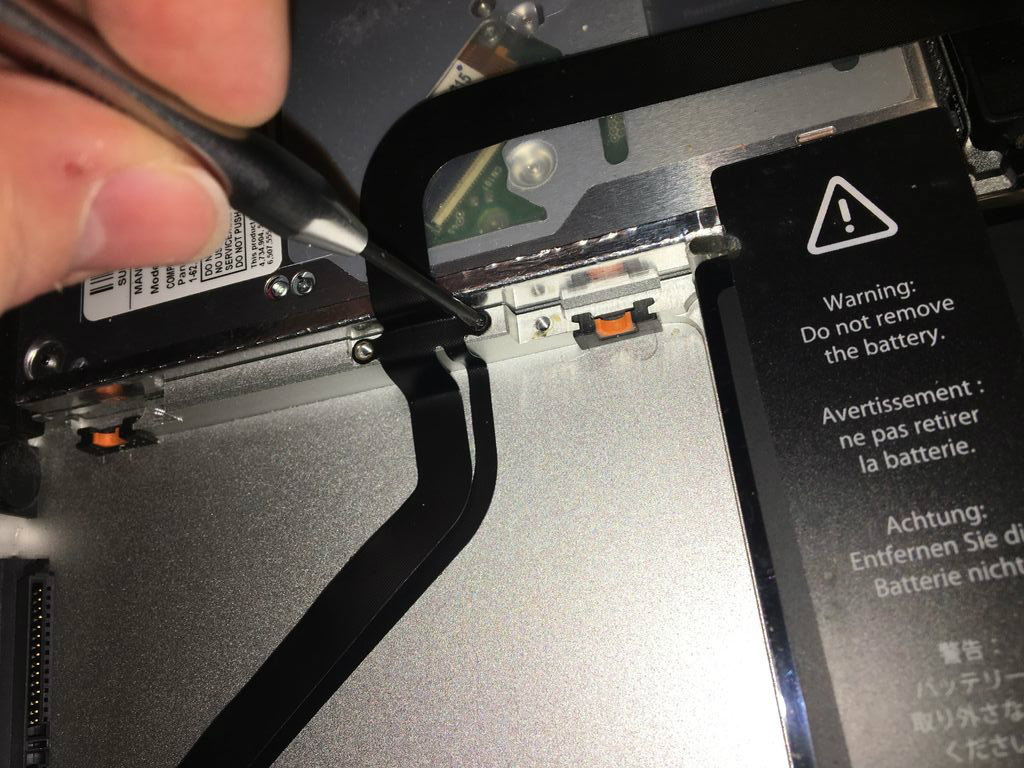
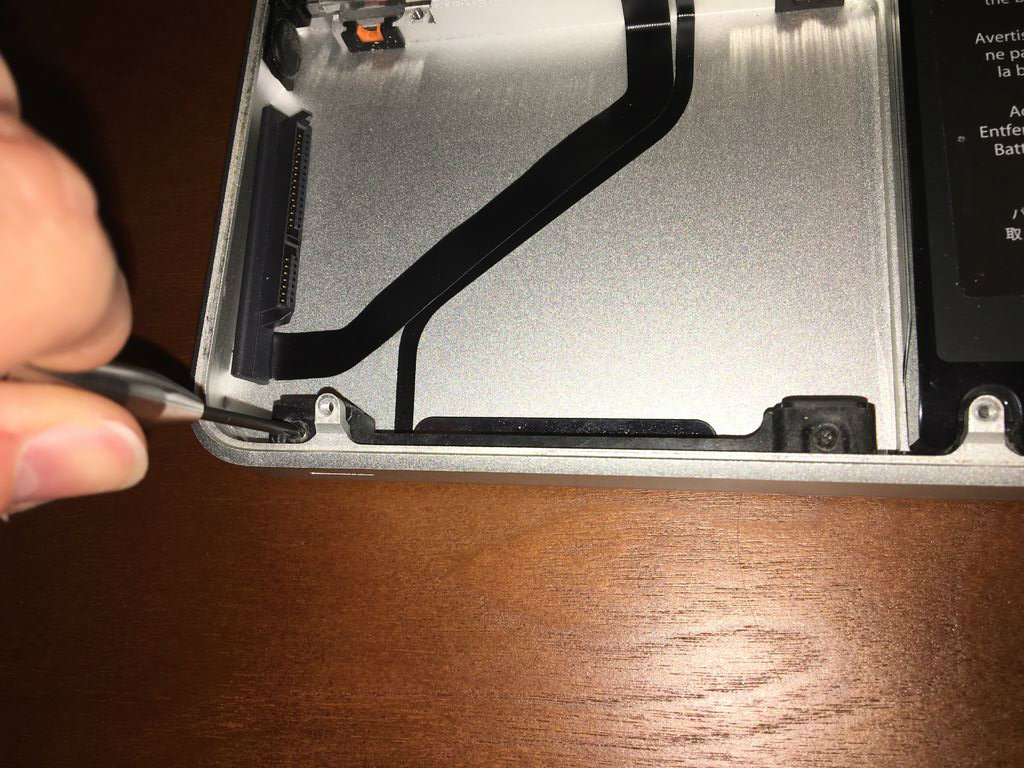
1. Remove the four screws fastening the SATA cable to the chassis.
Two of the screws are right under where the bracket was and the other two are right on the bottom edge of the computer holding in the IR sensor bracket.
Remove the Old Cable
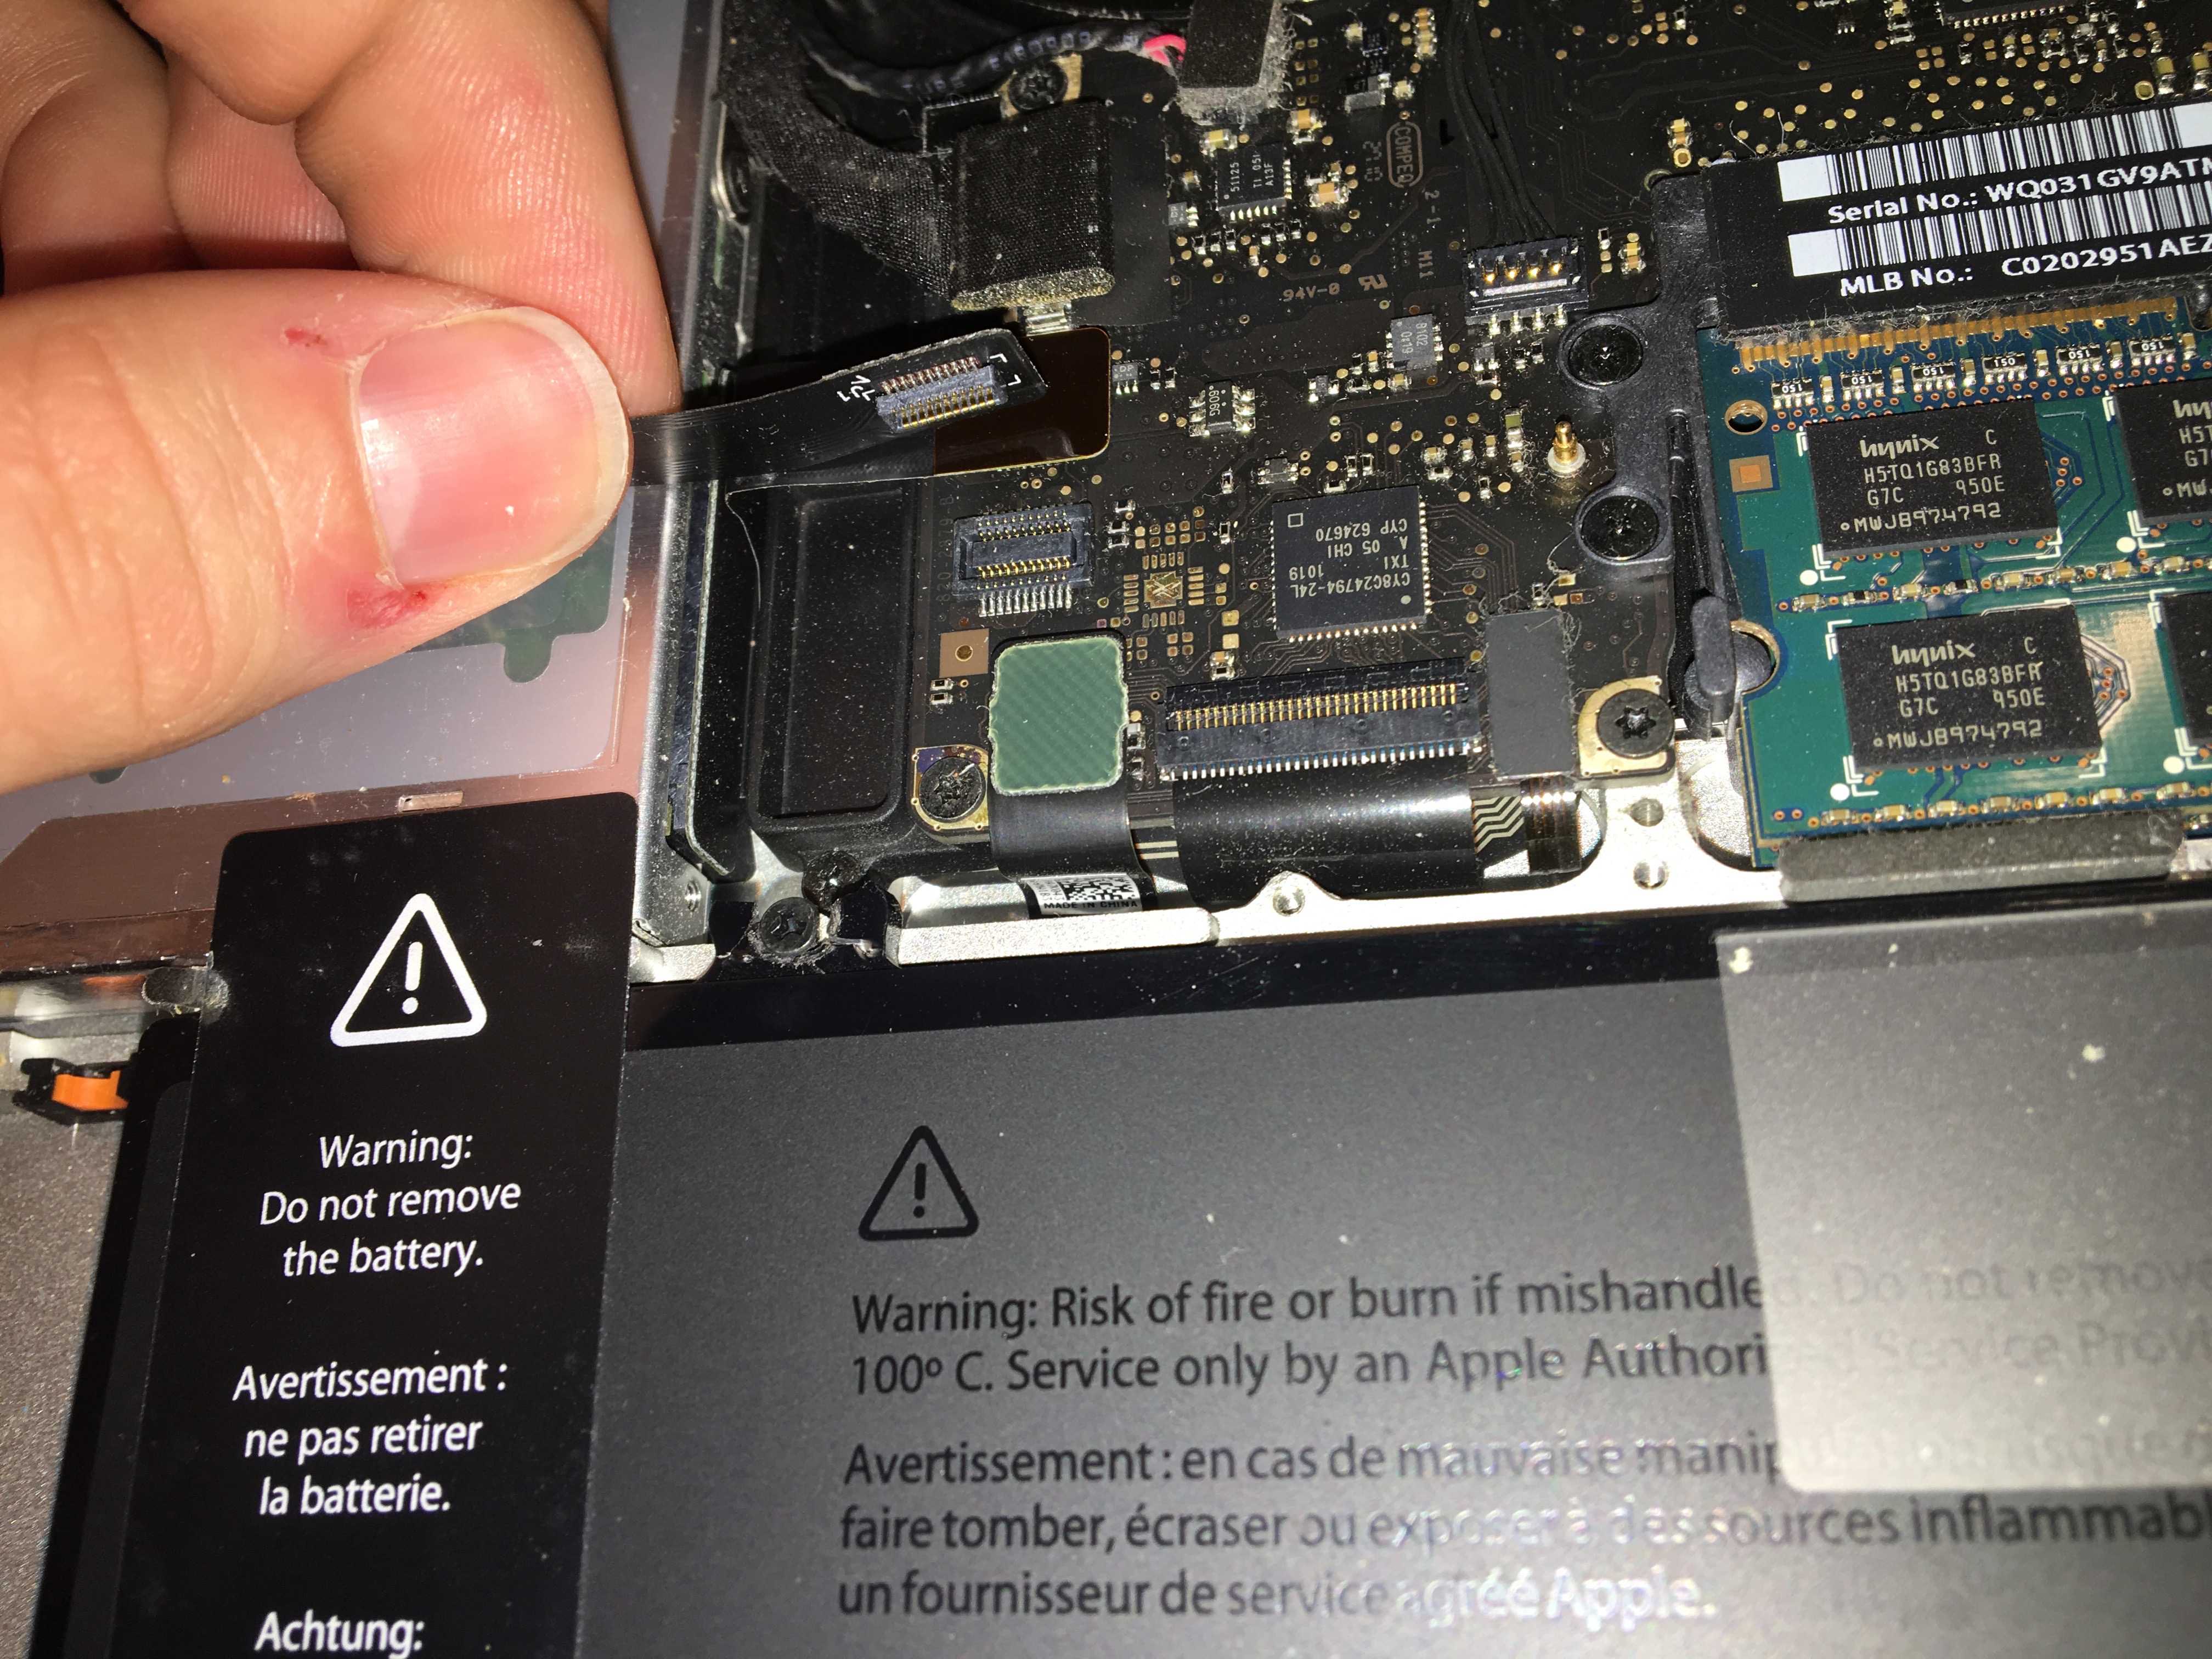
1. Carefully slide the IR sensor out from under the screw mount
2. Peel the old cable off of the computer chassis.
3. Carefully disconnect the remaining end of the cable using the spudger or your fingers.
4. Set aside the old cable.
Remove the IR Sensor Bracket From the Old Cable
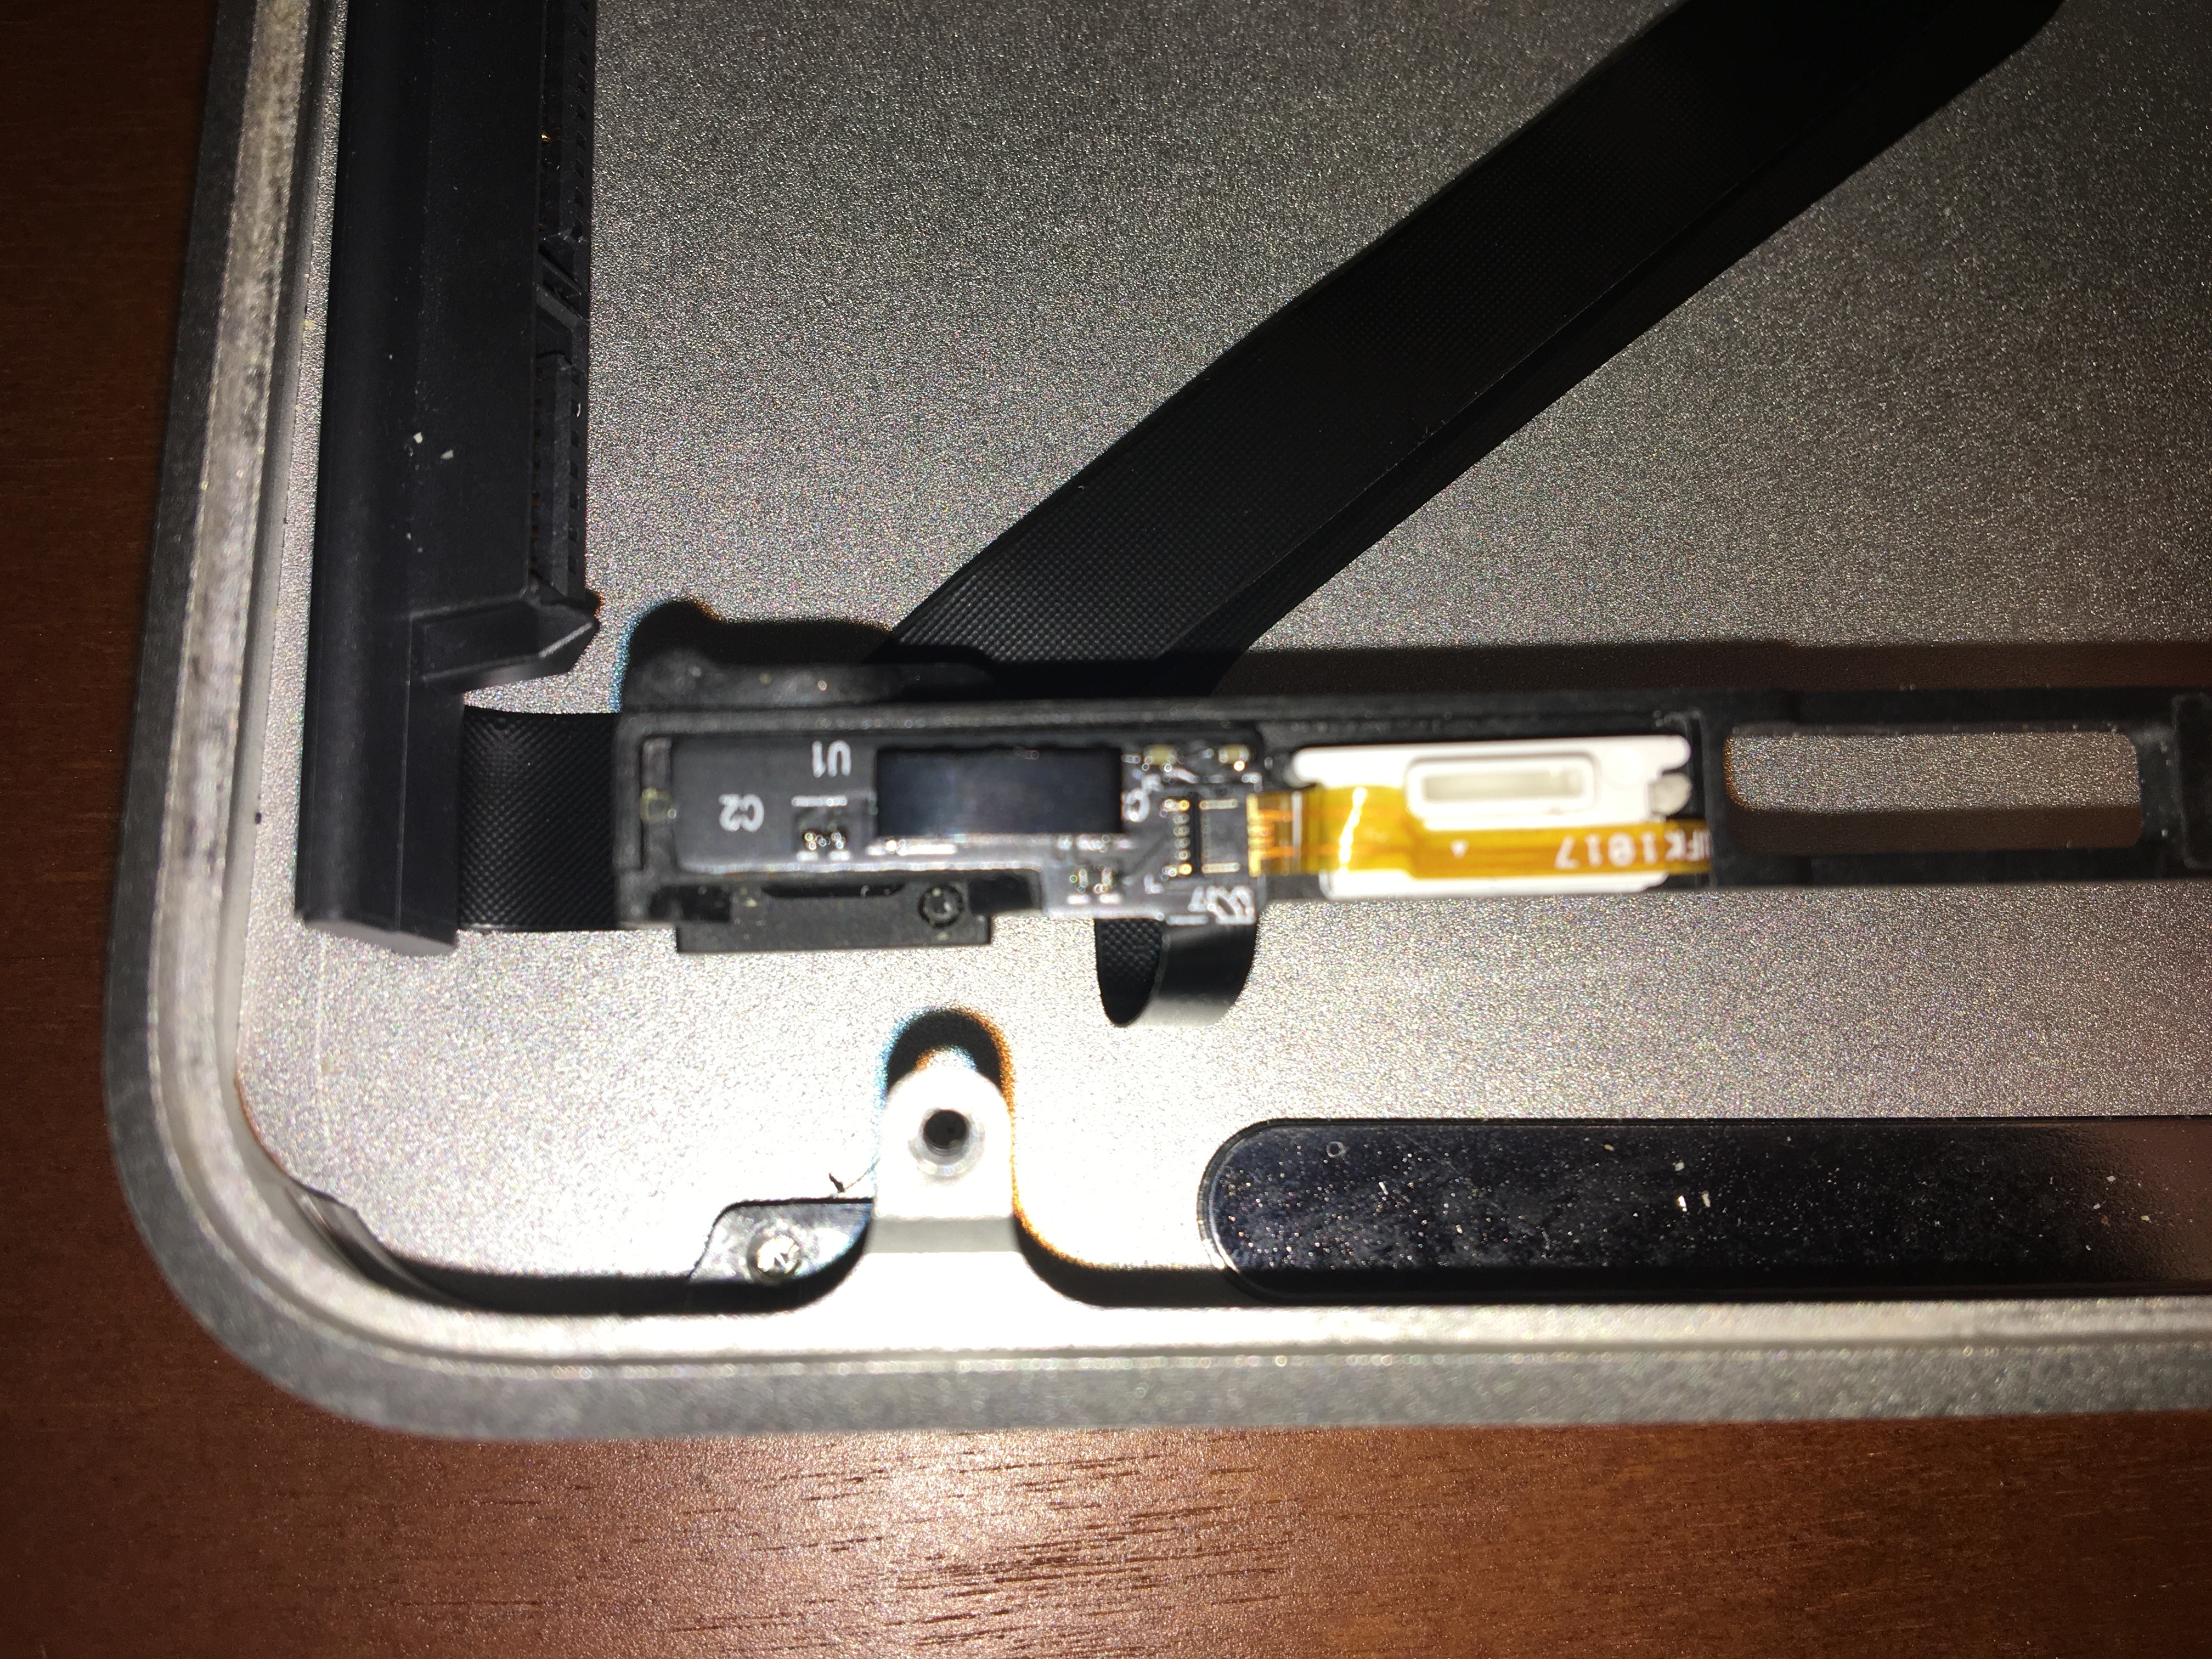
NOTE: This step only needs to be done if your new cable didn't come with an IR sensor bracket already attached.
1. Pull up on the end of the cable where it attaches to the bracket to peel off the little chip that is stuck onto the bracket.
2. Pull out the little yellow cable that goes into the sensor light.
CAUTION: Be careful when removing the piece because it can be a little fragile. Don't force it out. Grasp it firmly at the base of the connector and ease it out.
Attach IR Sensor Bracket to New Cable
NOTE: This step only needs to be done if your new cable didn't come with an IR sensor bracket already attached.
1. Very carefully insert the yellow sensor cable into the sensor bracket.
CAUTION: This is a fragile piece. Don't force it in or kink the cable. Try to ease it in as much as possible.
2. Peel off the adhesive covering on the bottom of the IR chip attached to the cable.
3. Stick the chip onto the bracket where the old one was.
Attach New Cable to Computer
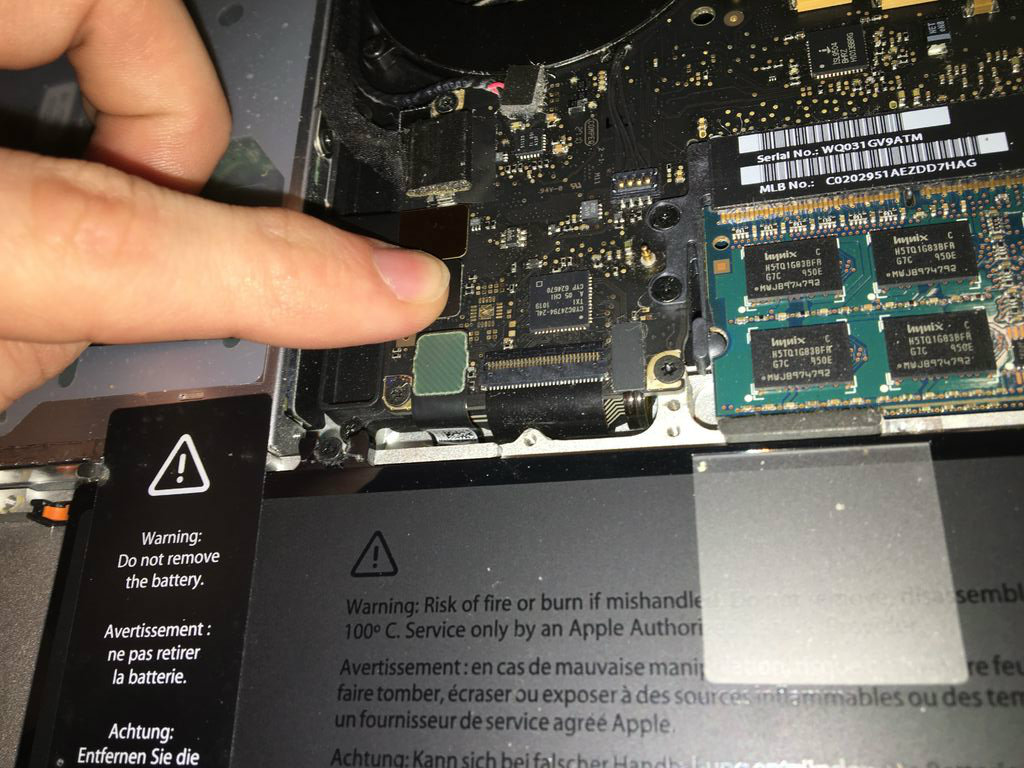
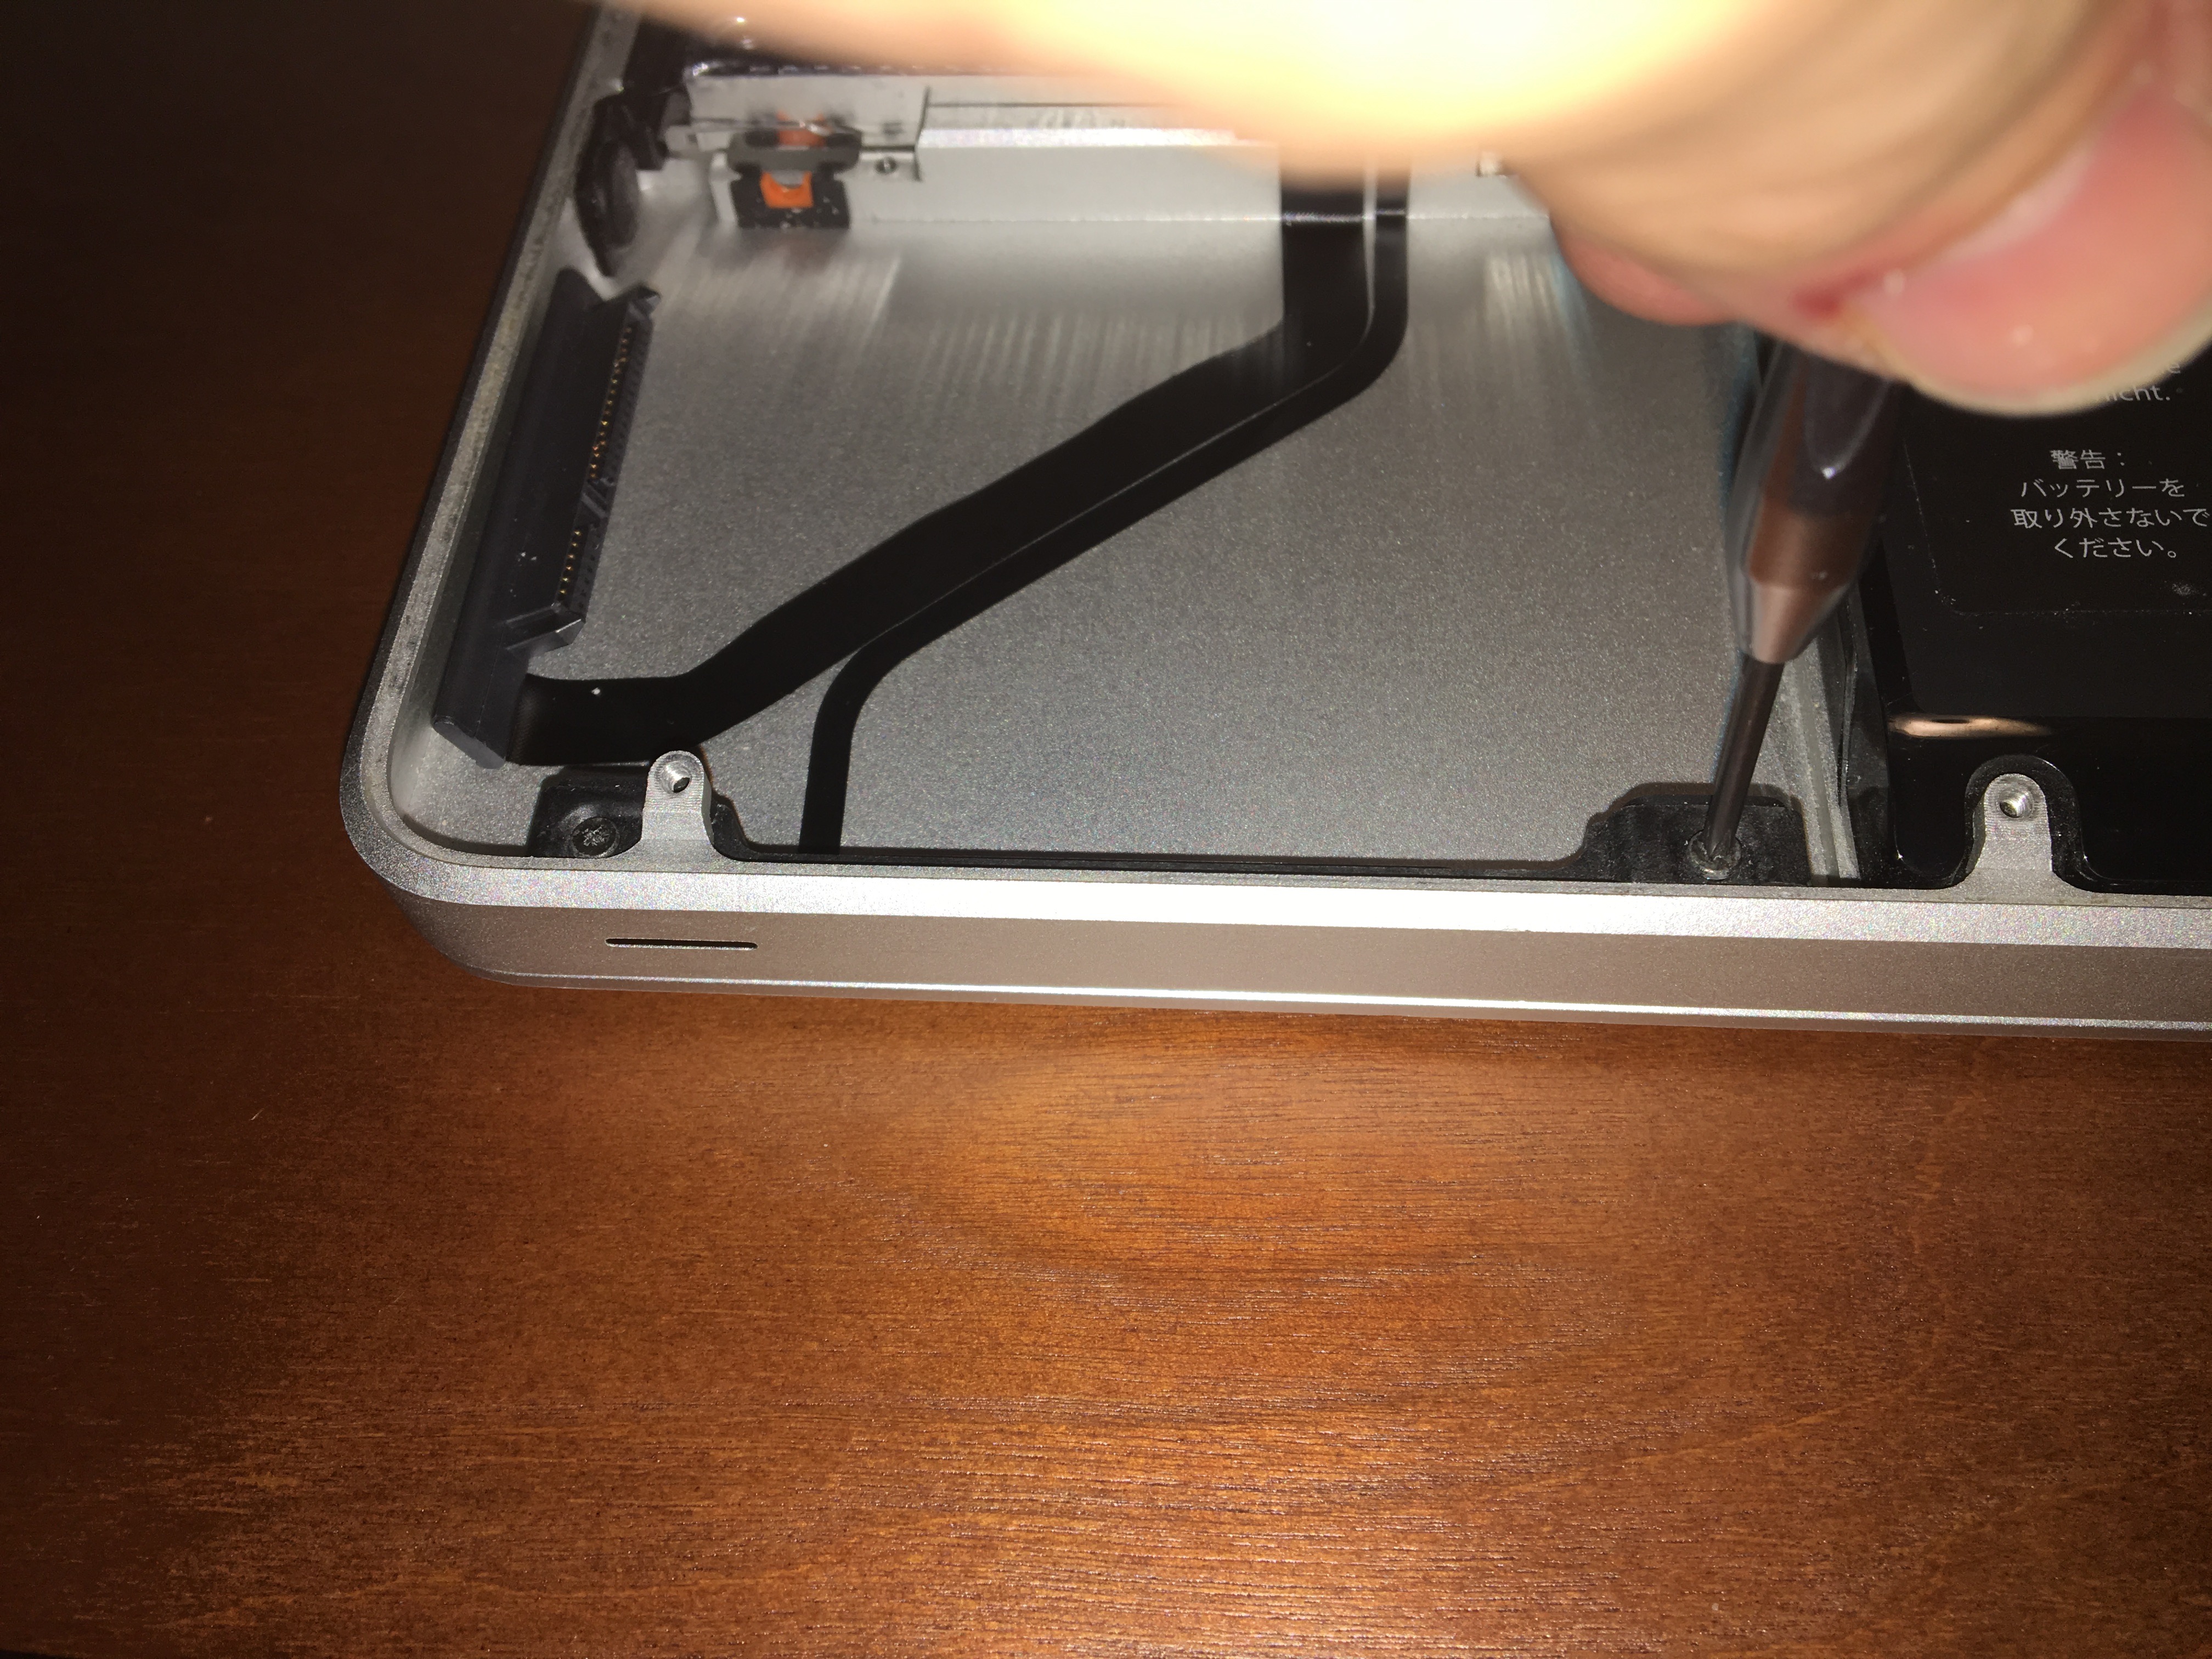
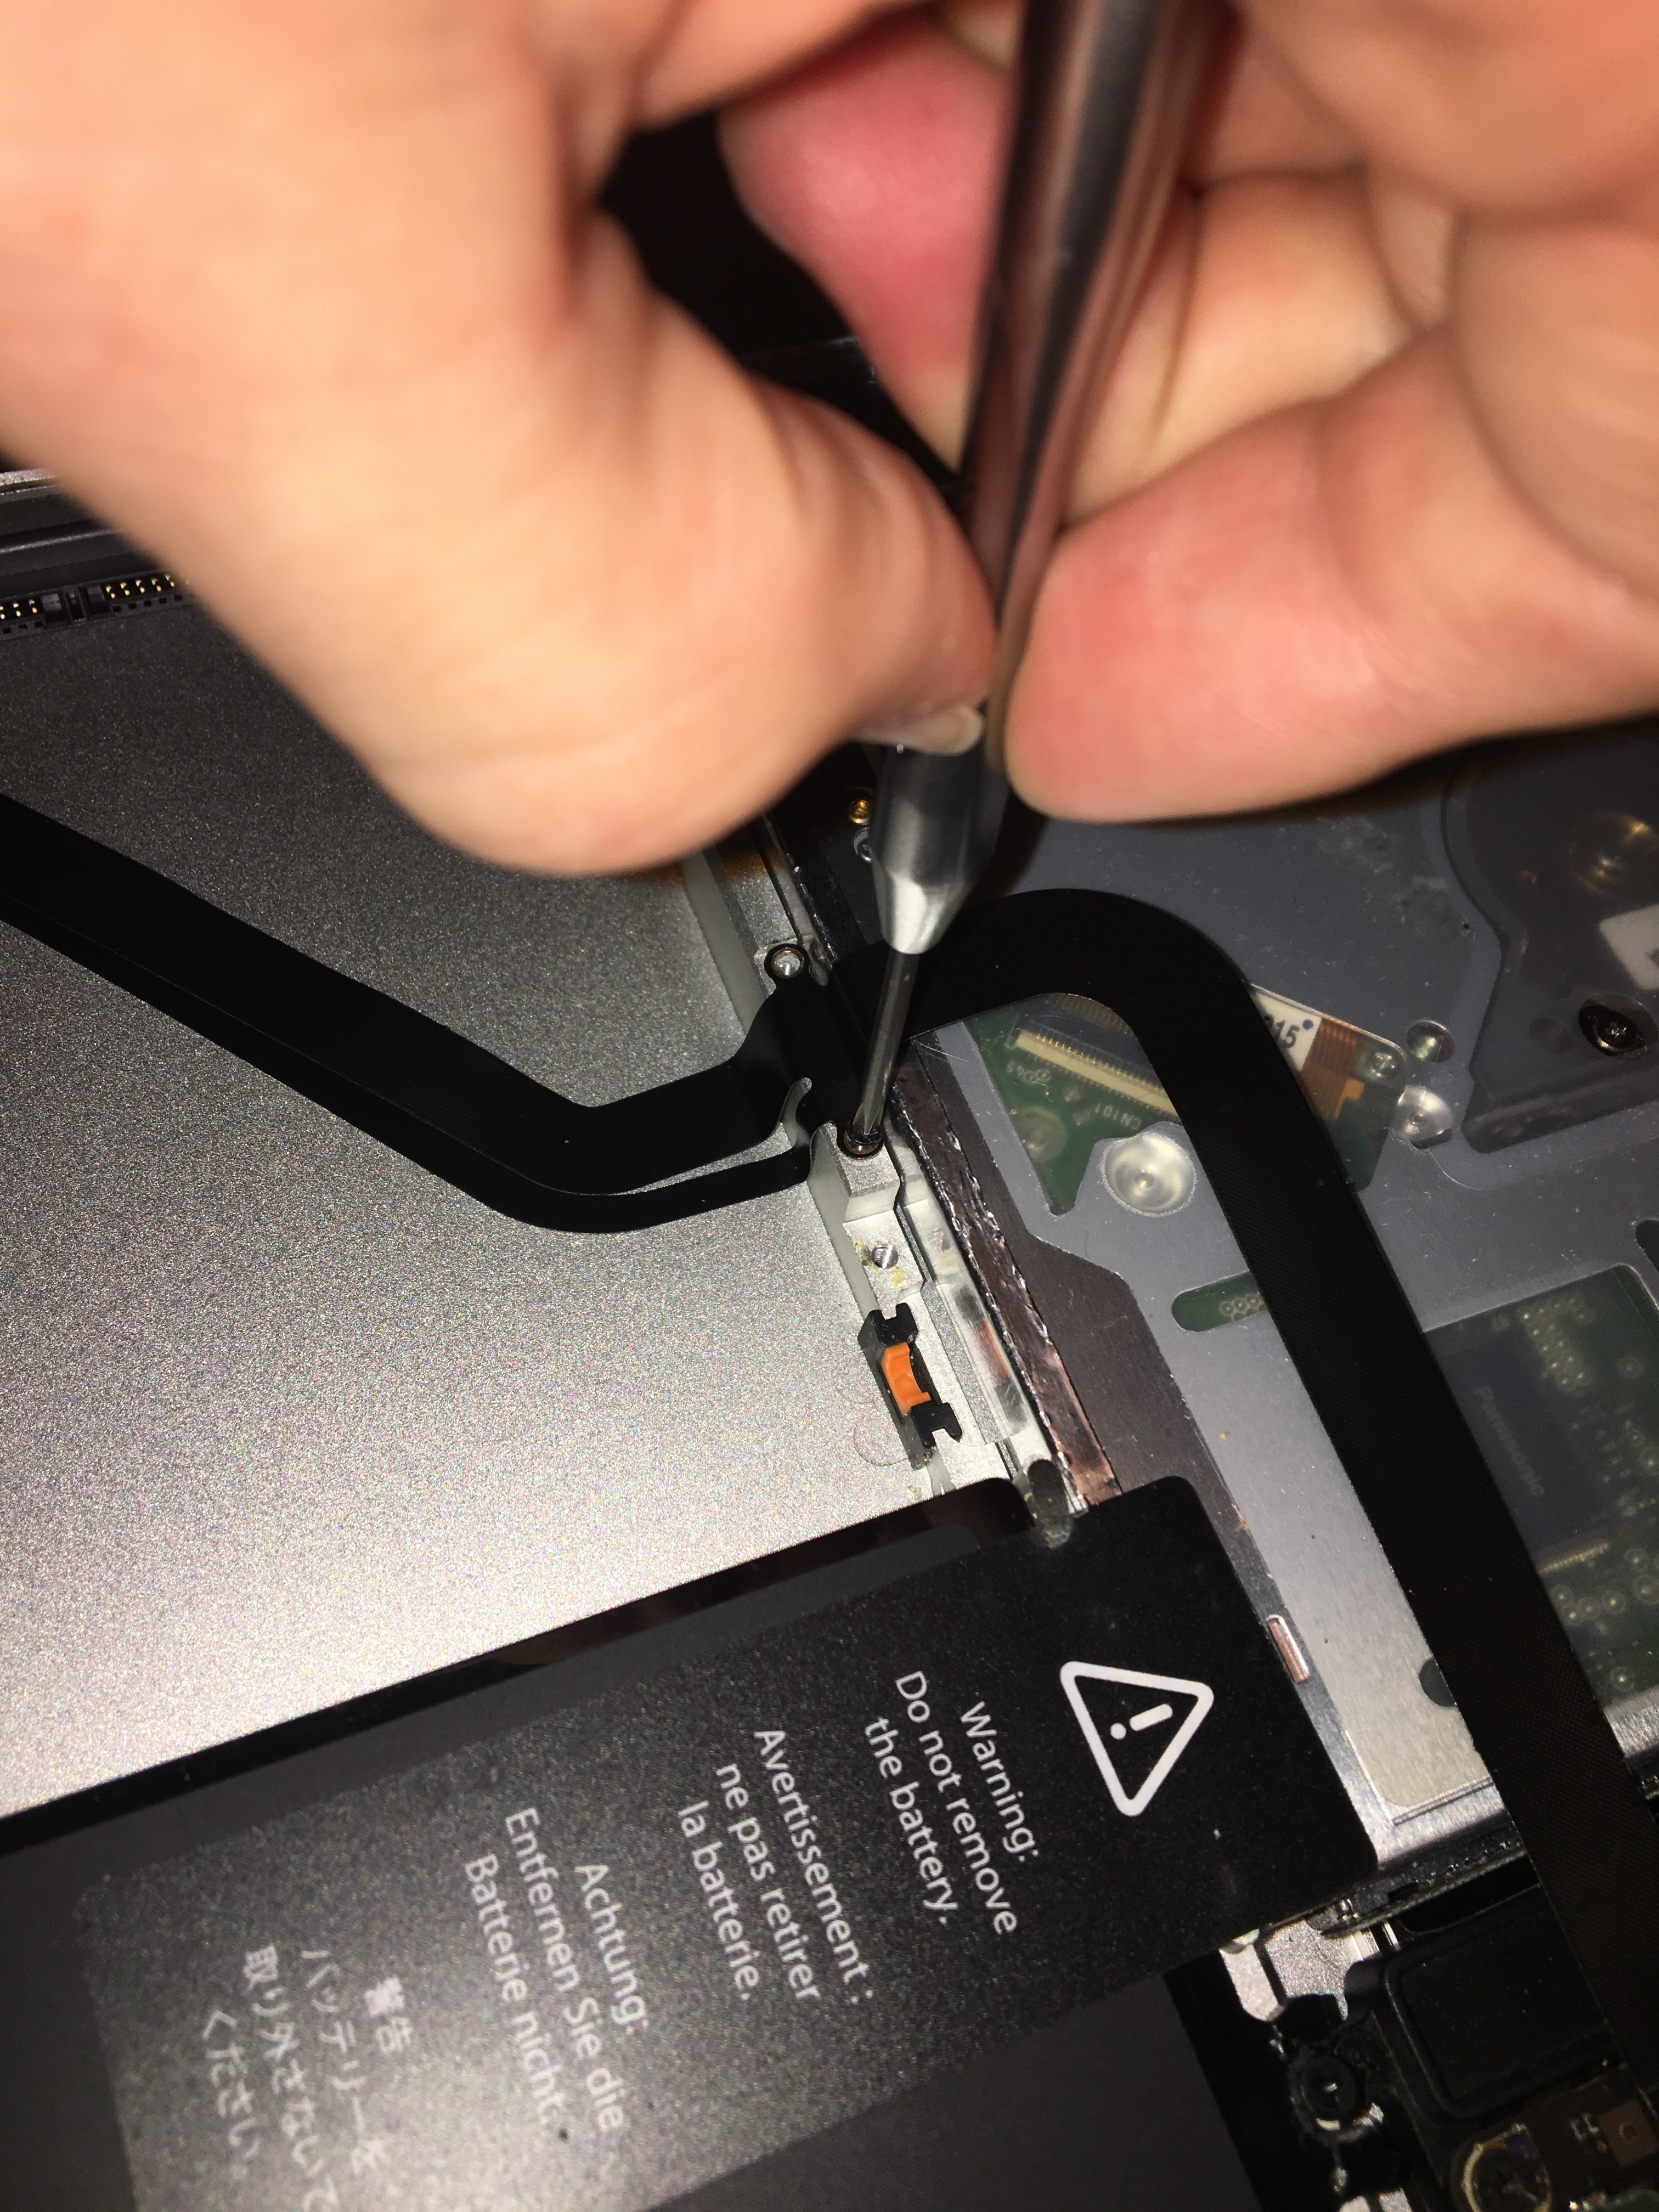
1. Attach the end of the new cable that plugs into the computer.
2. Slide the IR bracket back under the screw mount.
3. Insert the screws back into the IR bracket the secure the bracket in place.
4. Screw in the screws that go under the drive bracket.
5. Peel off the adhesive covering on the bottom of the new cable.
6. Stick the cable to the computer chassis so that is lies flat.
Reattach the Drive
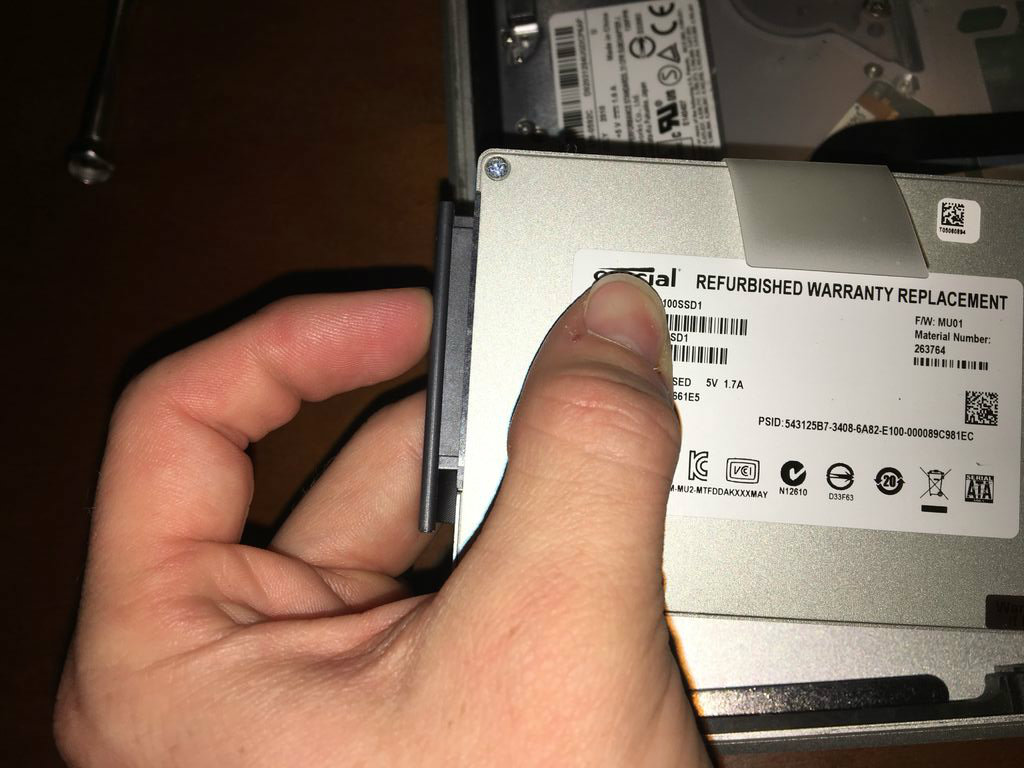
1. Plug the drive into the new SATA cable.
2. Put the drive in place.
Reattach the Drive Bracket
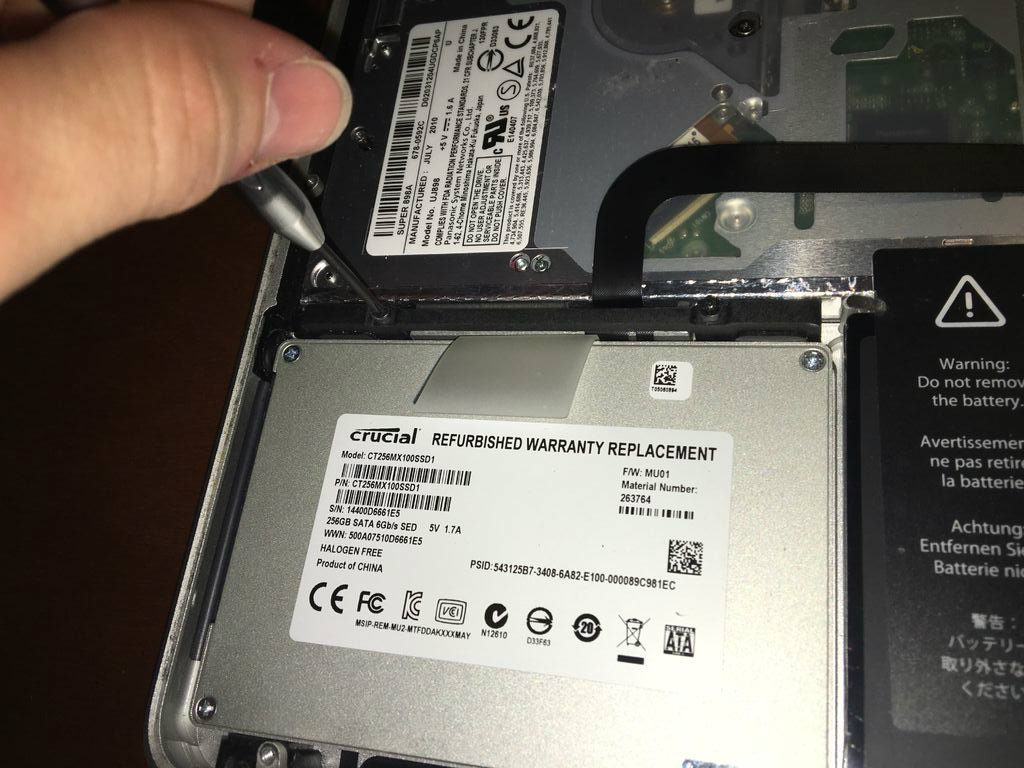
1. Put the drive bracket back in place.
2. Screw in the bracket.
Plug in the Battery
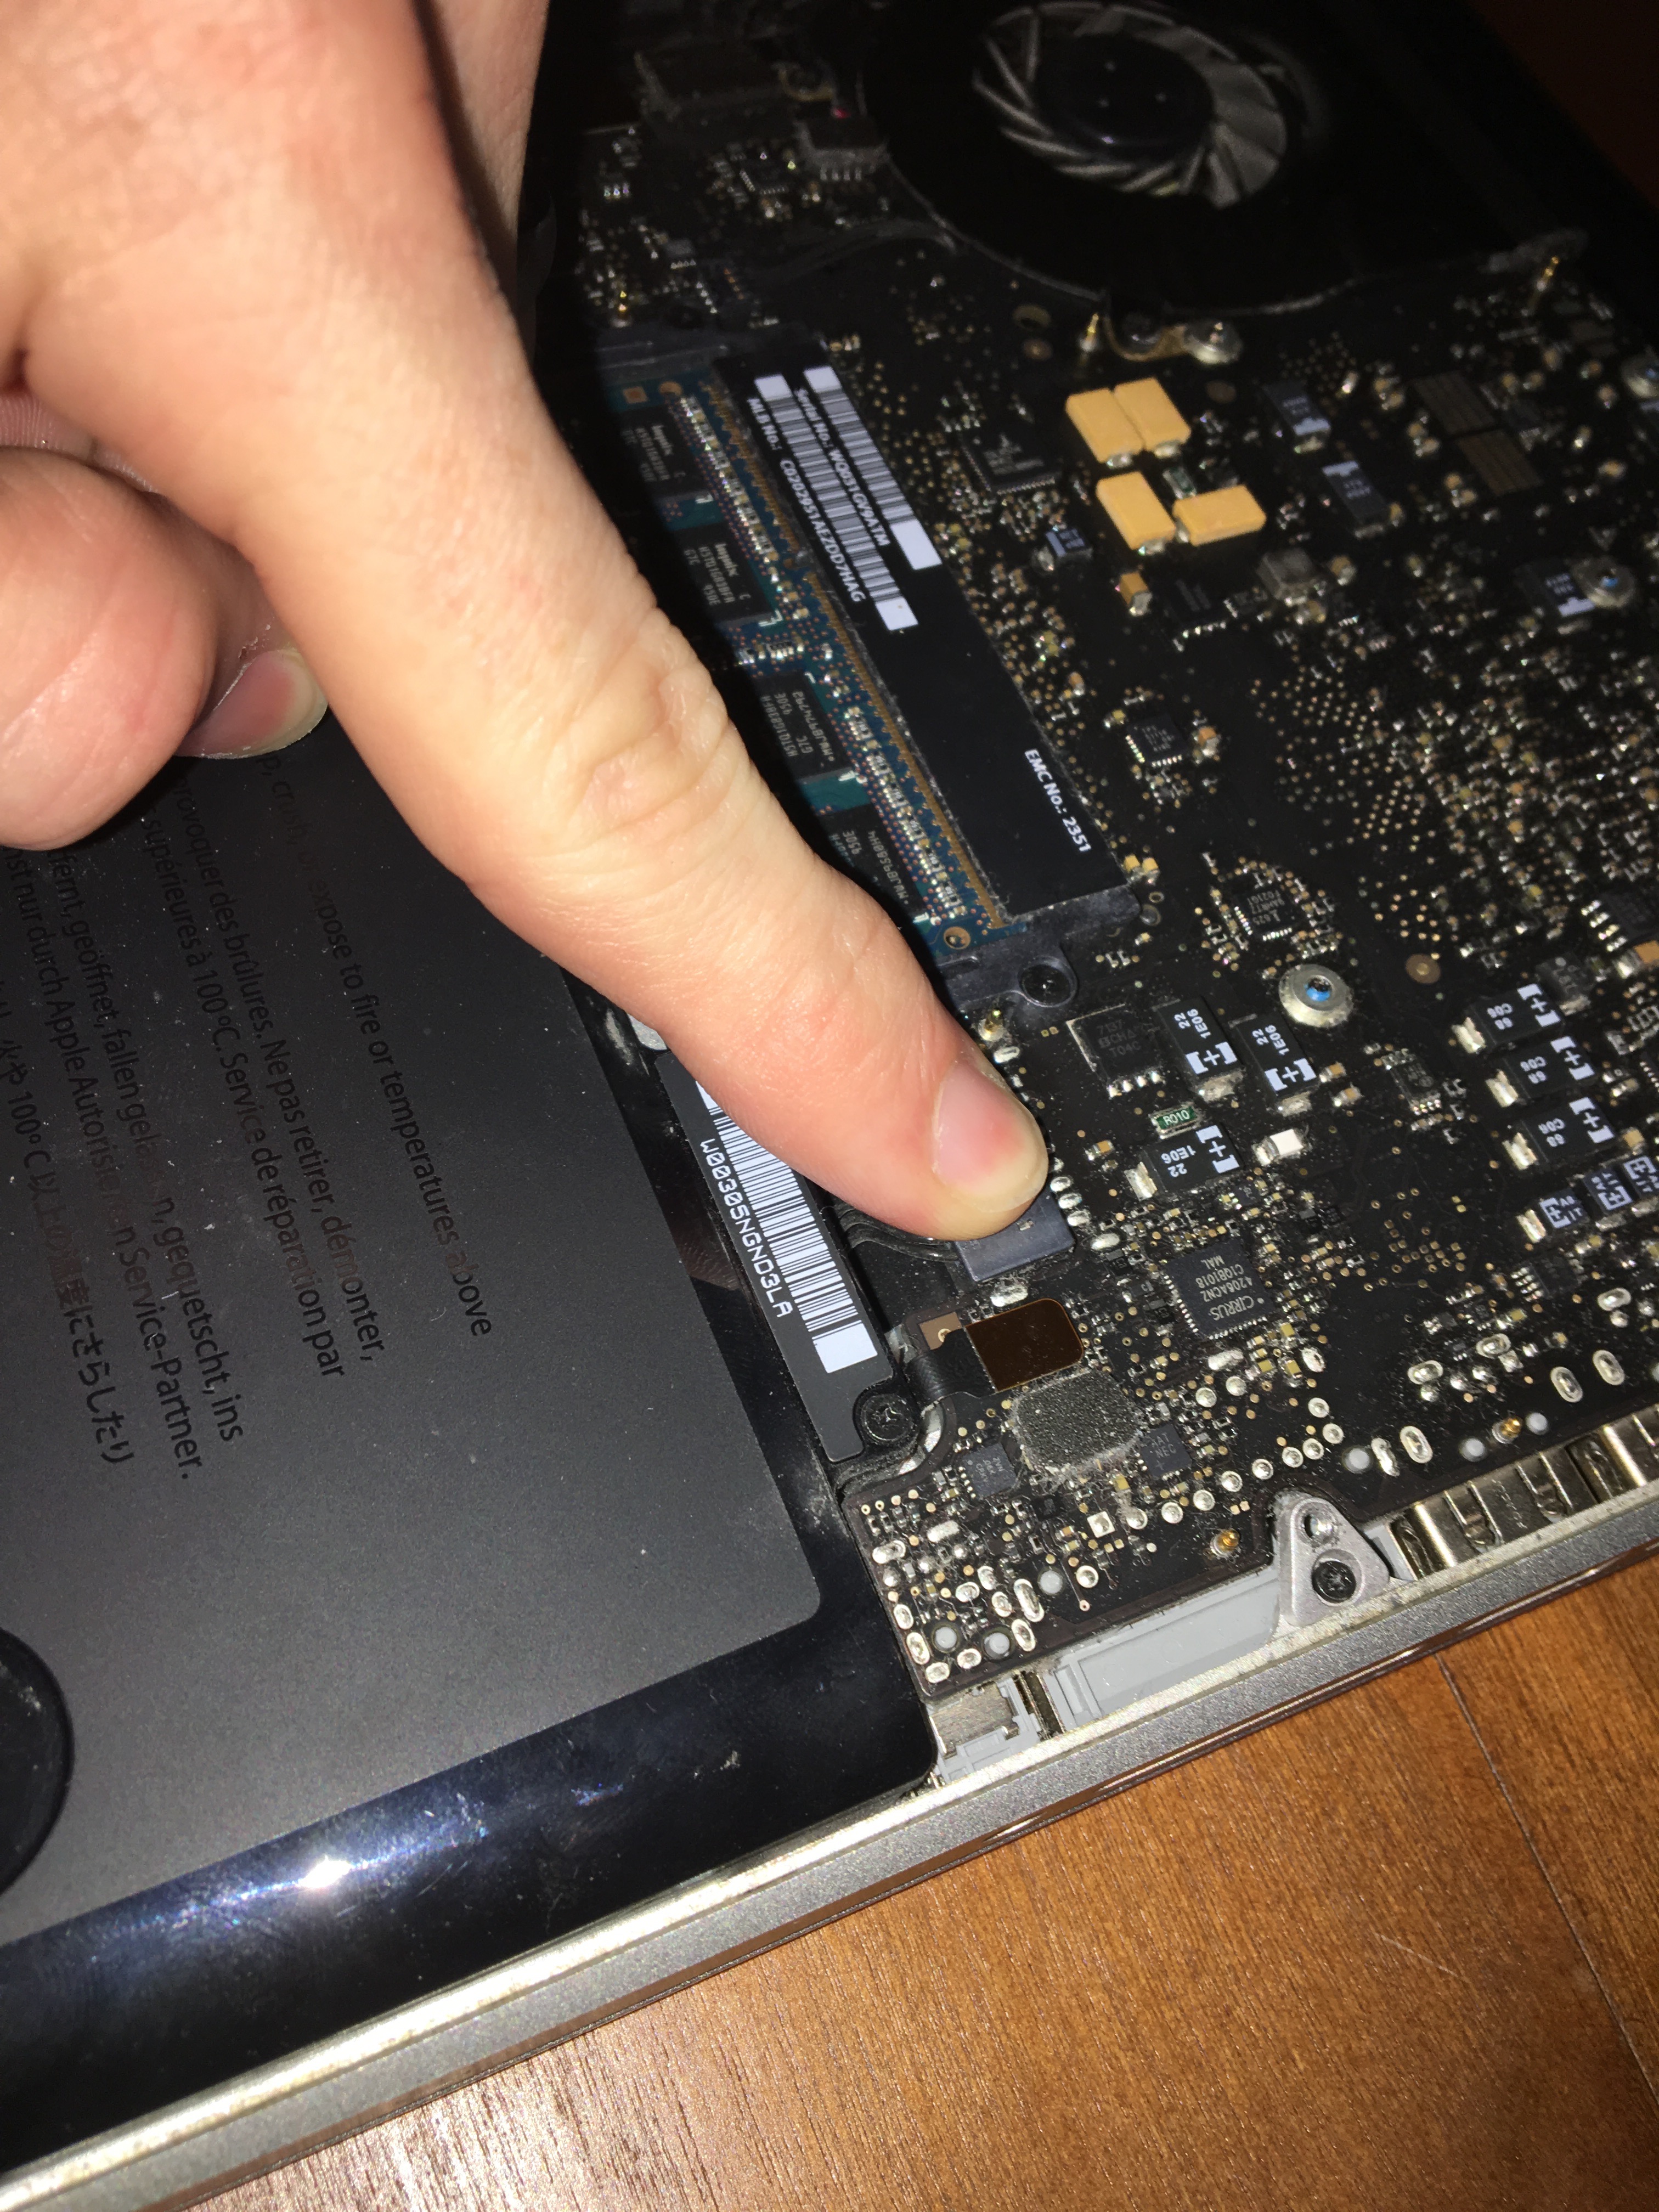
1. Plug the battery back into the motherboard.
Put on the Backplate
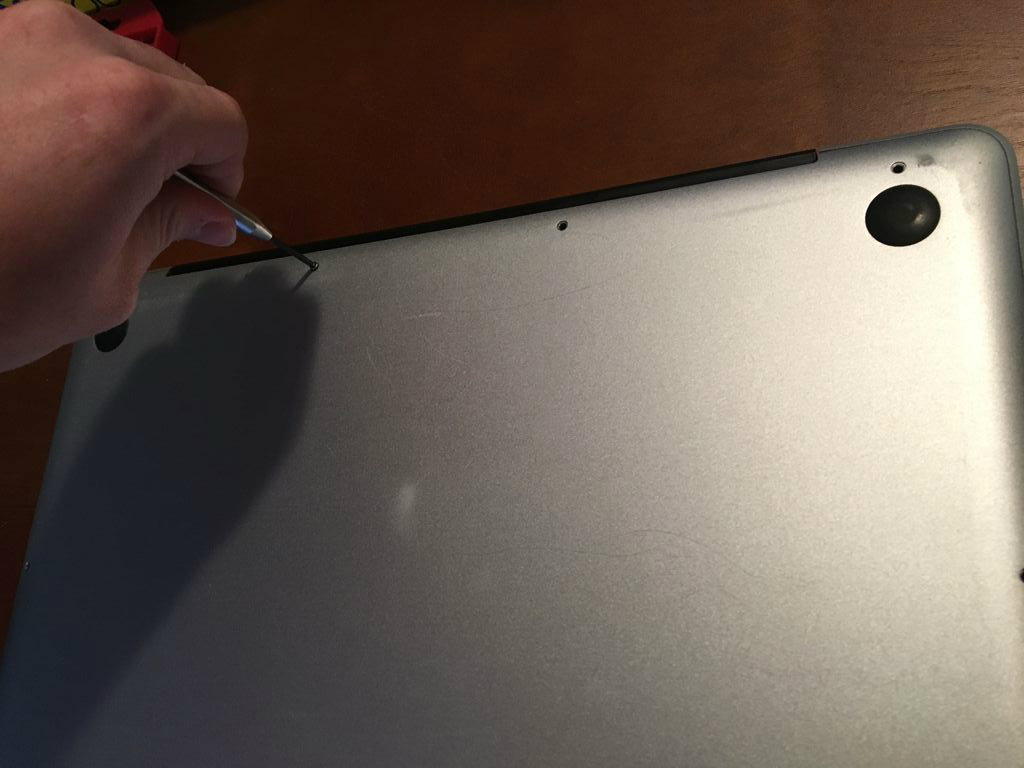
1. Put the backplate back into place.
2. Screw in the backplate being careful to put the longer screws back in correctly.
Start the Computer
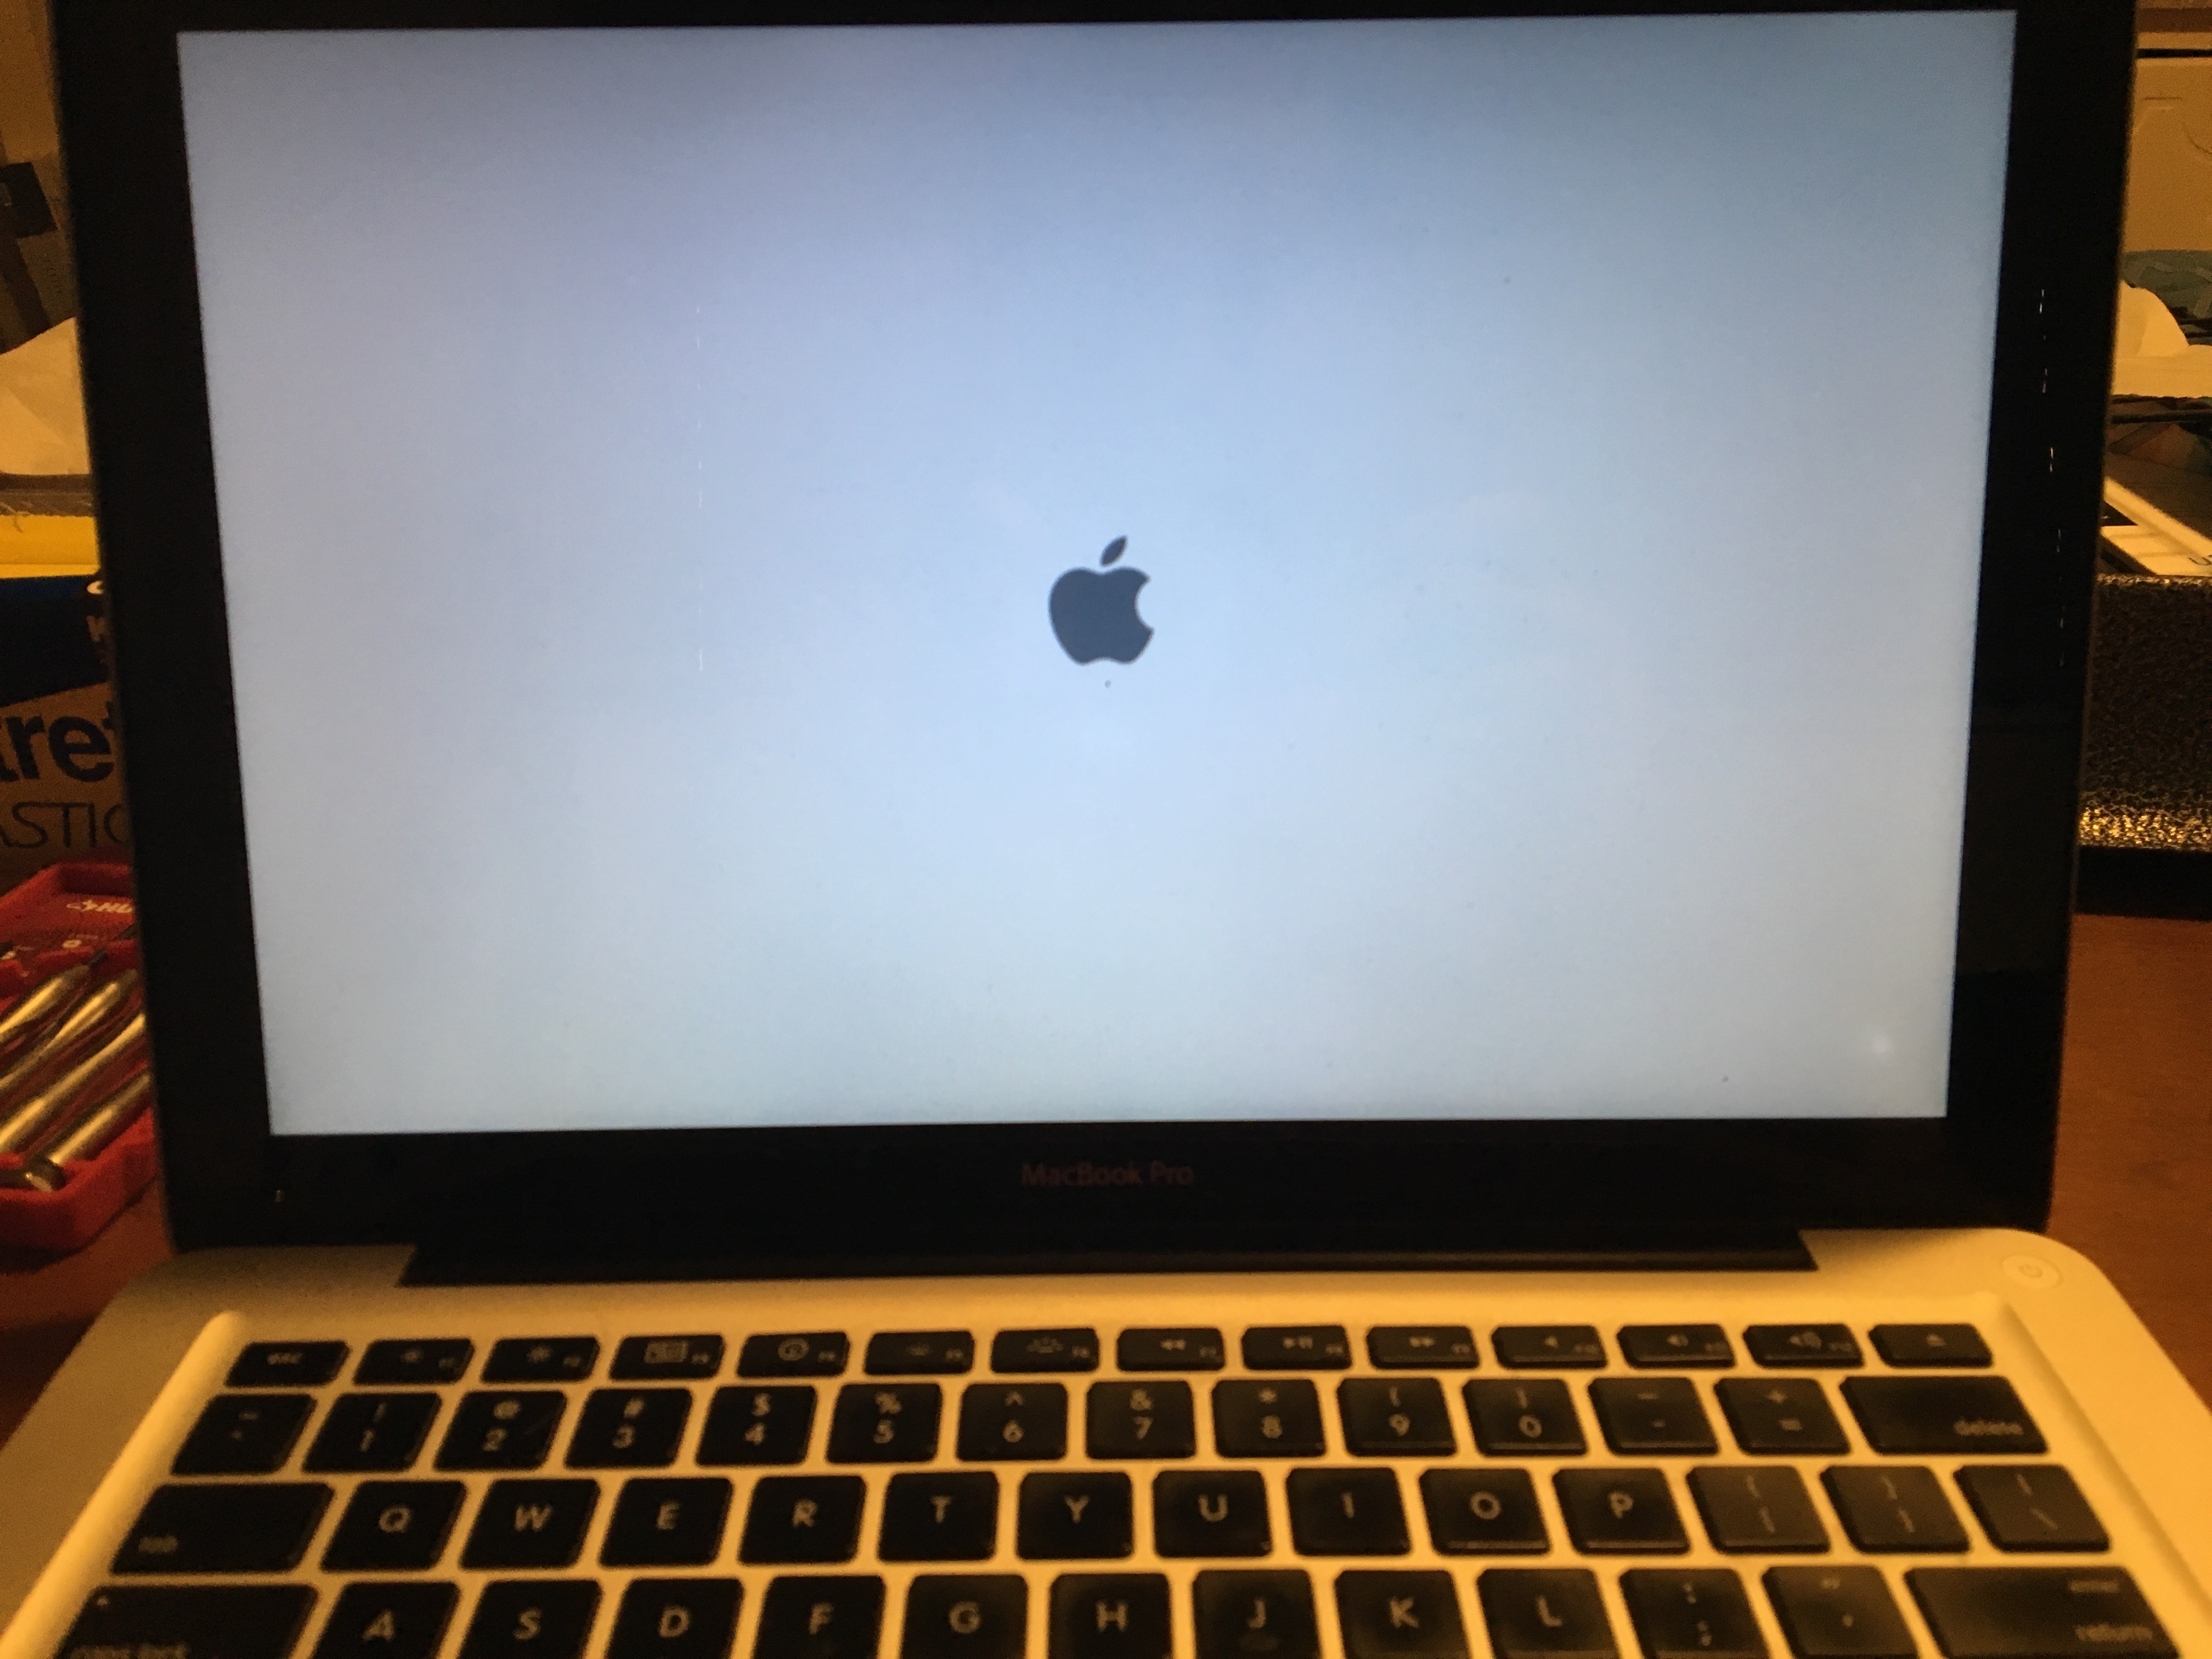
Turn the computer back on and it should start up normally.
Conclusion
Now that the new cable is installed, everything should be up and running like normal. You shouldn't have any more problems with the computer not booting up and you don't have to worry anymore about having lost all of your data. Additionally, you fixed it yourself for the fraction of the price of getting it done professionally! Now enjoy your working computer.