How to Render a Non-Basic Shape Tinkercad Model in Fusion 360
by CMFDesign in Design > Digital Graphics
1875 Views, 14 Favorites, 0 Comments
How to Render a Non-Basic Shape Tinkercad Model in Fusion 360
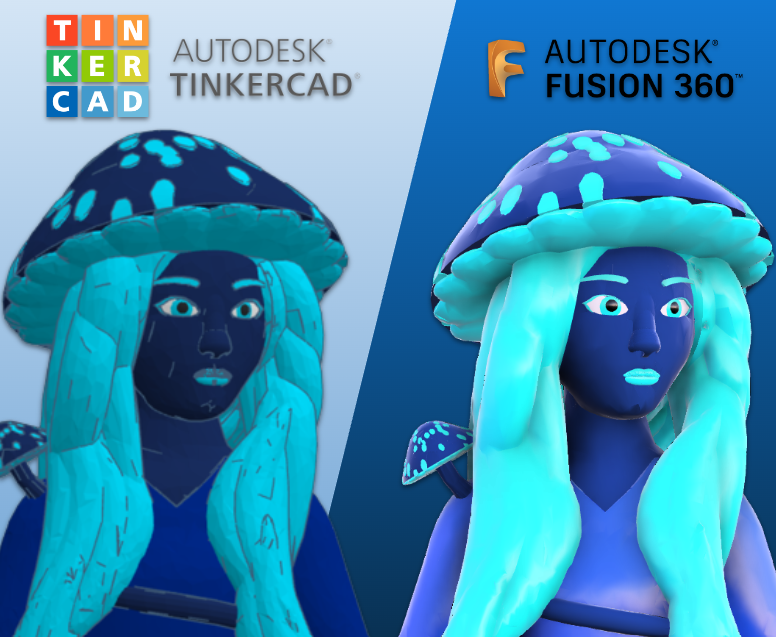
Tinkercad has created a way to easily export designs you create to Fusion 360 to make a stunning render. While this accounts for basic shapes, it doesn't account for self-made parts or re-imported designs turned into STL or OBJ files. In this Instructable, I will show you the super simple step-by-step process you can use to take your designing one step further by rendering your amazing Tinkercad models using Fusion 360.
The design used in this tutorial was entirely made by me and can be accessed here: https://www.tinkercad.com/things/gZ99yfX1N9D
Supplies
You'll need:
- A Tinkercad account, which you can make for free using an email, Apple, Microsoft, or Facebook account
- The Fusion 360 app, which you can either purchase as a business or use for free under the personal use option
Picking the Model You Want to Render
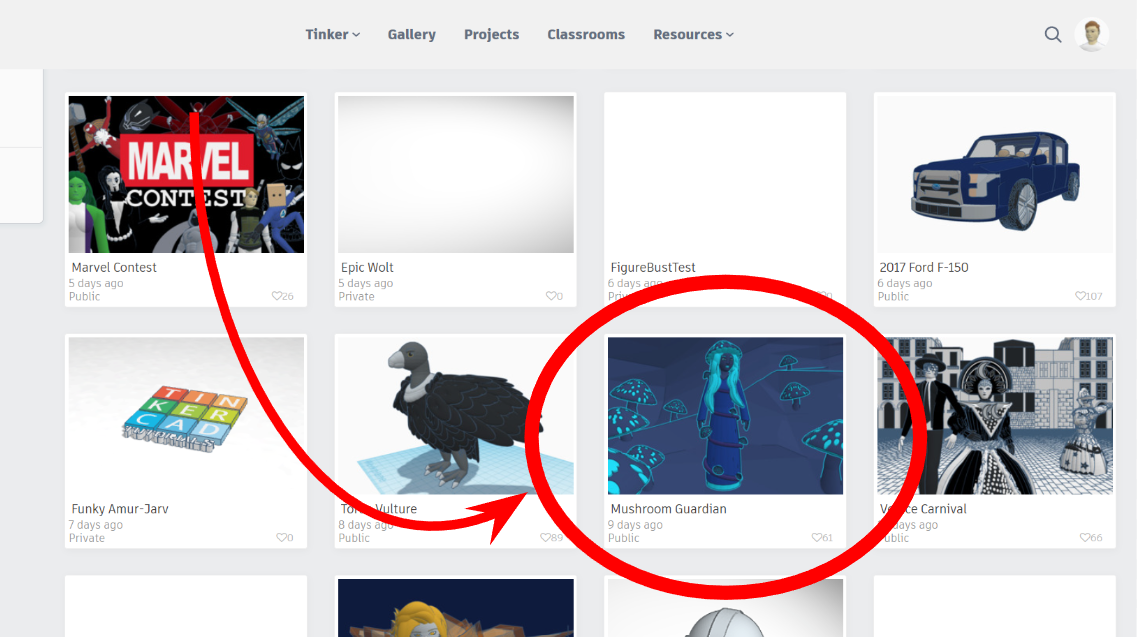
You can render literally any model you've made on Tinkercad. Simply hover over the one you want to render and click the "Tinker This" button in the top left corner to open it and start the exporting process.
Opening the Model and Positioning
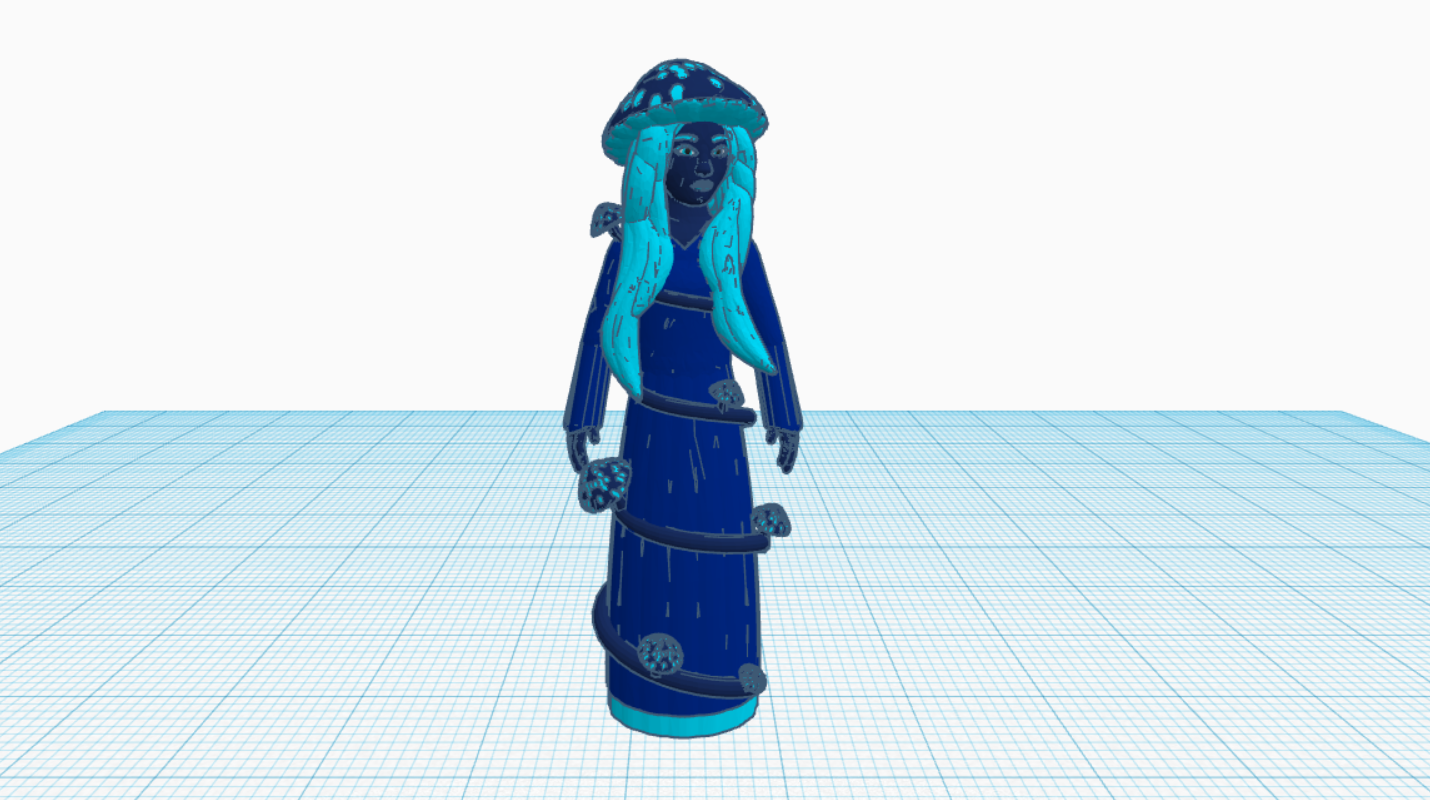
Next, after opening your choice model, you want to clear out any excess objects that aren't part of what you want to export. This could include scenery, excess shapes left over from tinkering, etc. Then, make sure the object isn't hovering over the ground. You can do this by selecting the shapes in the object, and pressing D to bring them all down to the workplane. Finally, group all like colors together. This will allow you to add color to the rendered model later on. In this example, I have 5 different colors. Now, you're ready to export the model.
Exporting the Model From Tinkercad
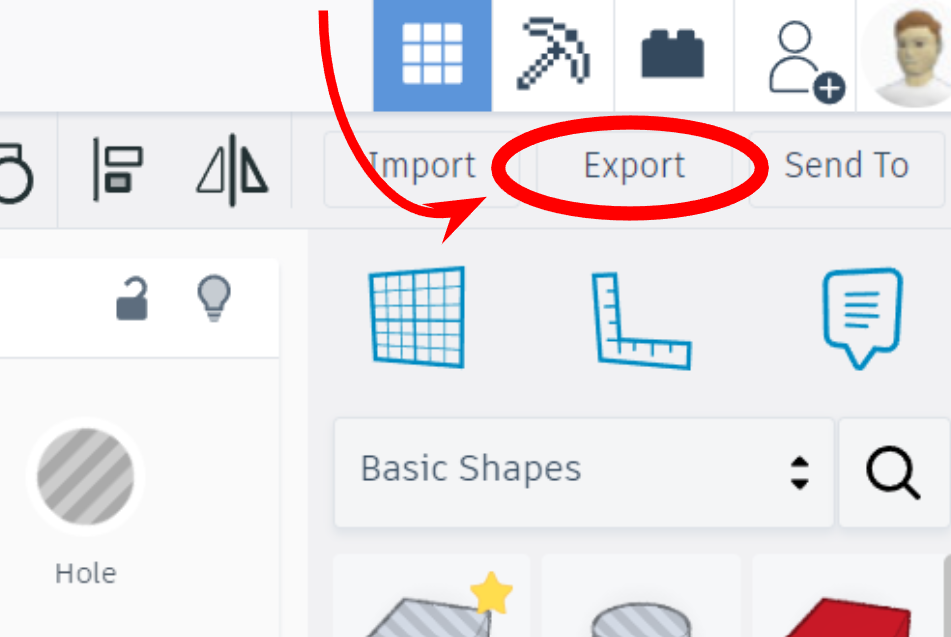
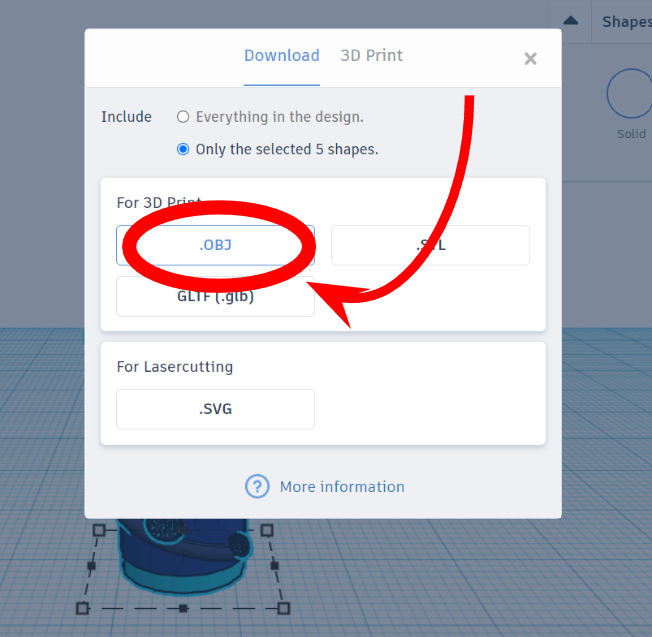
Now that everything has been polished and squared away, select the model, click the export button near the top right corner of the interface, and export by clicking the OBJ button. Make sure you use the OBJ button because this specific file type retains all the information necessary to color the model in a later step. Now, open up your Fusion 360 app, because it's time to get rendering!
Importing the Model to Fusion 360
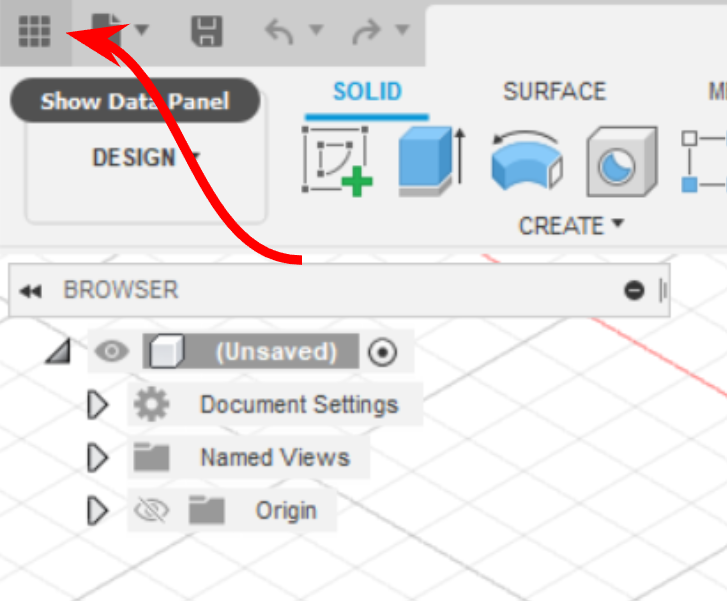
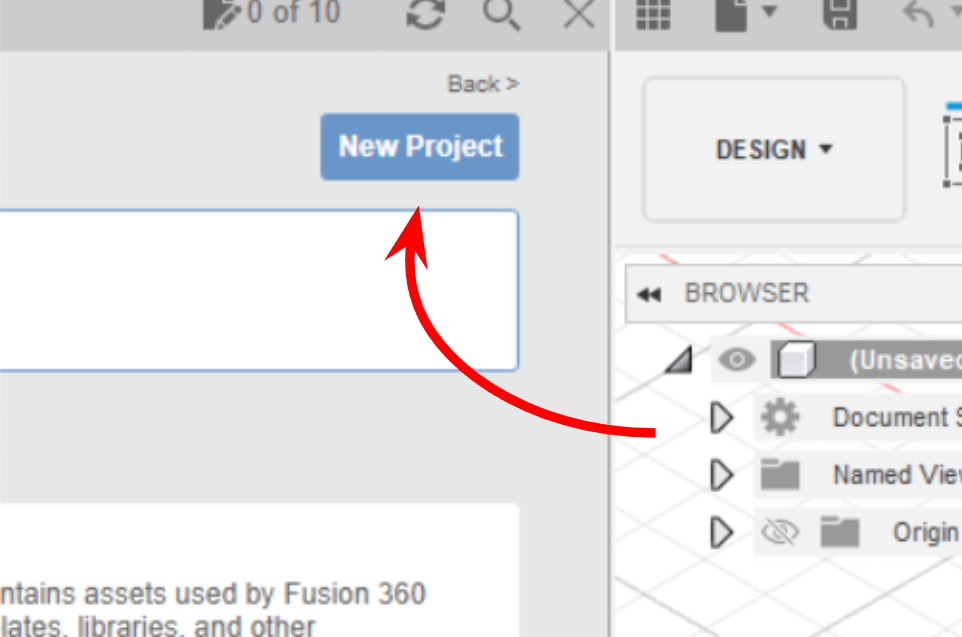
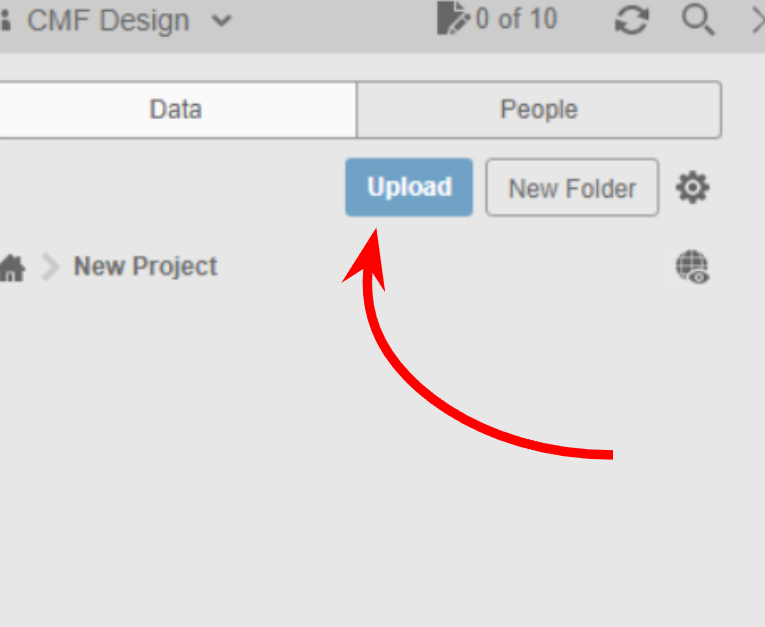
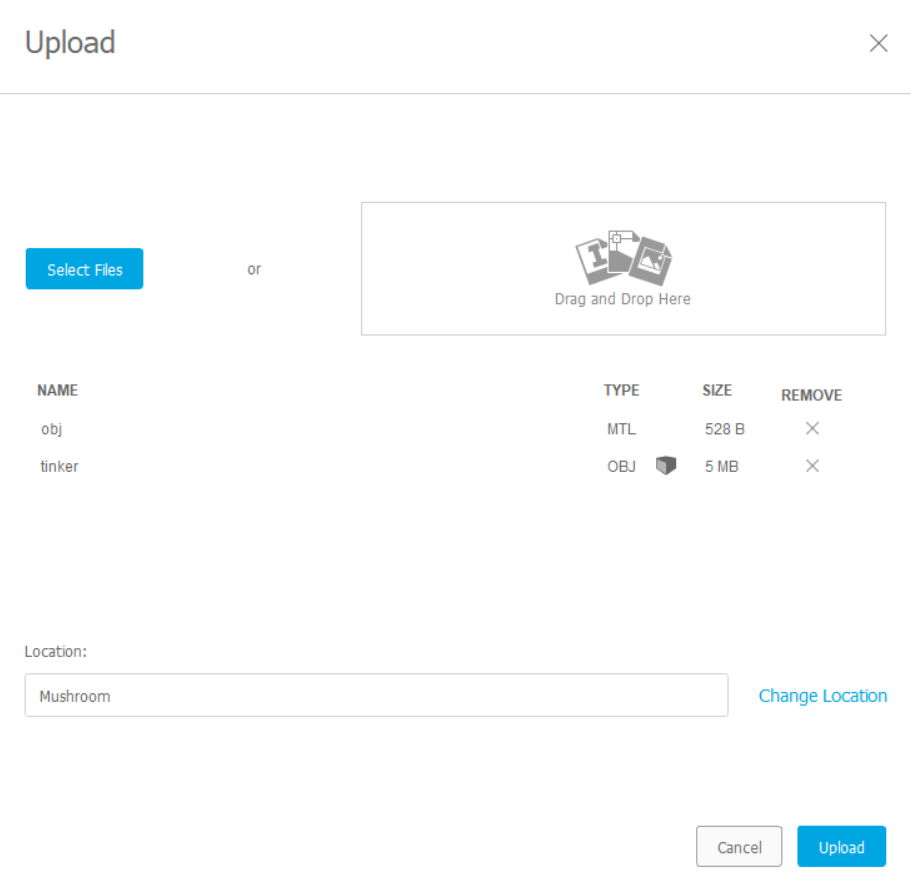
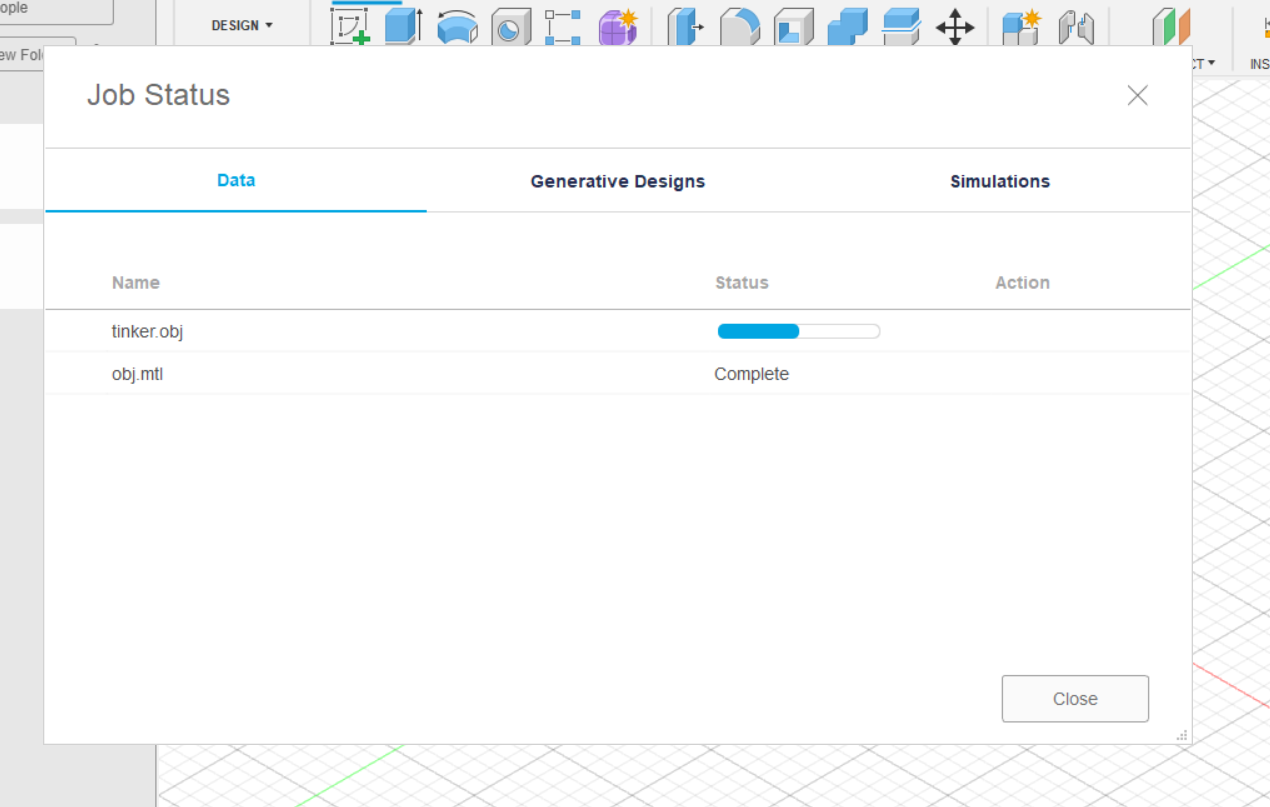
Before we begin this step, it's important that you unzip or extract the files from the ZIP file you got when you exported by OBJ from Tinkercad. There should be an OBJ file and an MTL file inside, both of which you should extract. Now, to import a model to your Fusion workplane, click the nine square button in the top left corner and create a new project. Double click the new project and click "Upload" to upload your files, both the OBJ and MTL files.
Making the Model Editable
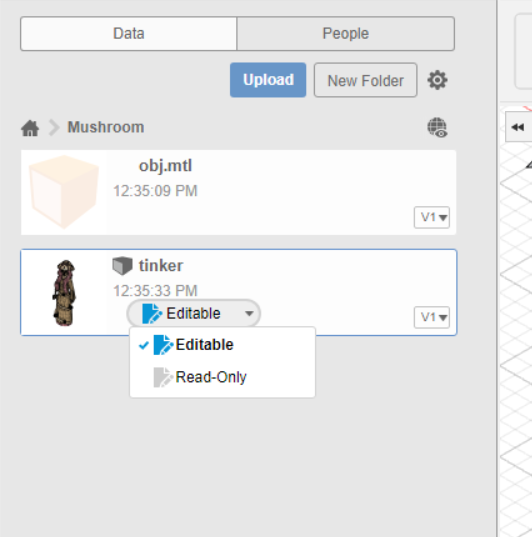
Once the model has fully imported, the OBJ file should have a dropdown menu with two options under the title. Make sure to check "Editable" so you can further edit the design.
Adding the Model to the Workplane
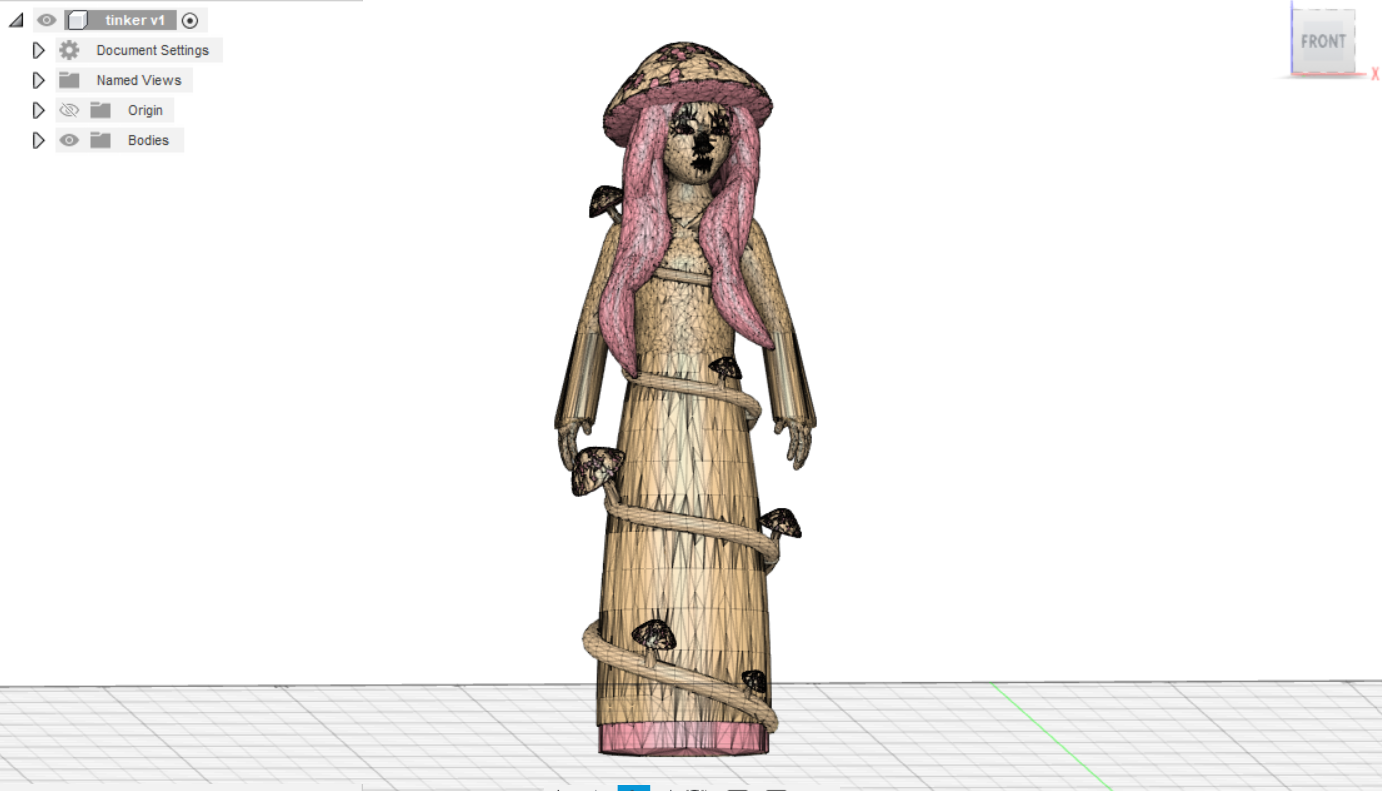
Once you've made the model editable, double click to add it to the workplane. You may notice that none of the colors from the original Tinkercad creation have transferred over. Sadly, OBJ transfer to Fusion doesn't transfer colors, but we'll fix this in a later step.
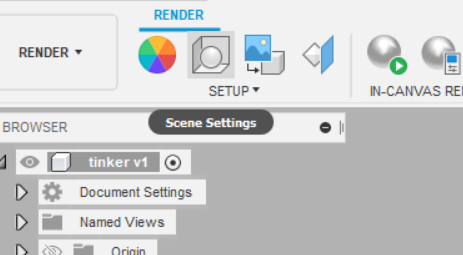
Accessing the Rendering System
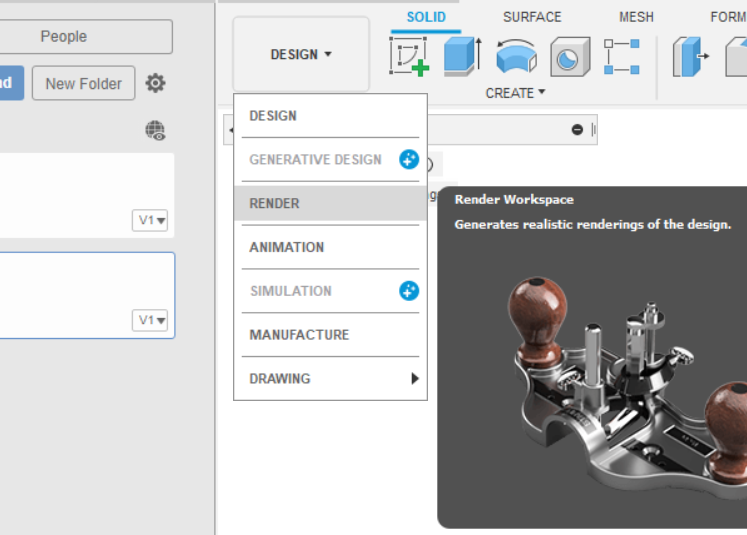
To access Fusion's rendering system, click the gray rectangle labeled "Design" to open a dropdown menu. From there, click "Render", and it should take you to the rendering interface. Now we're ready to start adding colors.
Adding Color to the Model

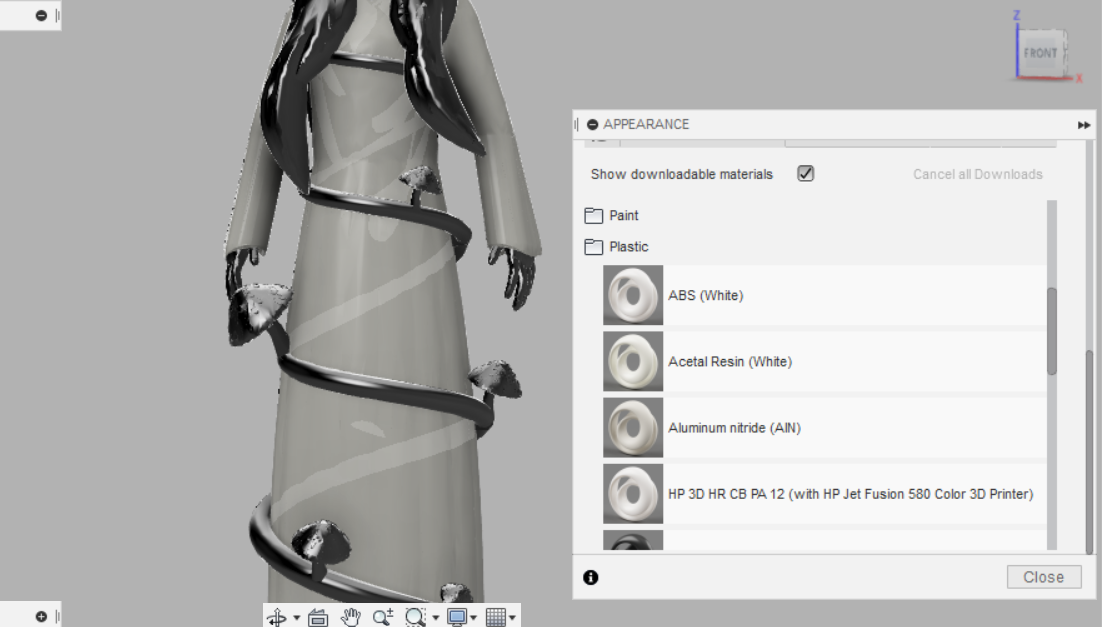
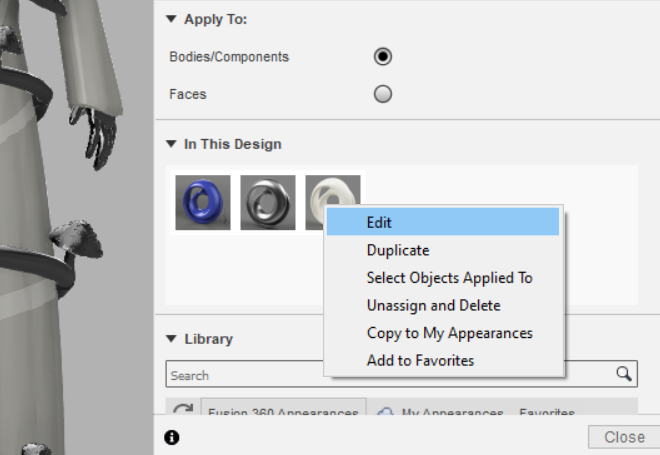
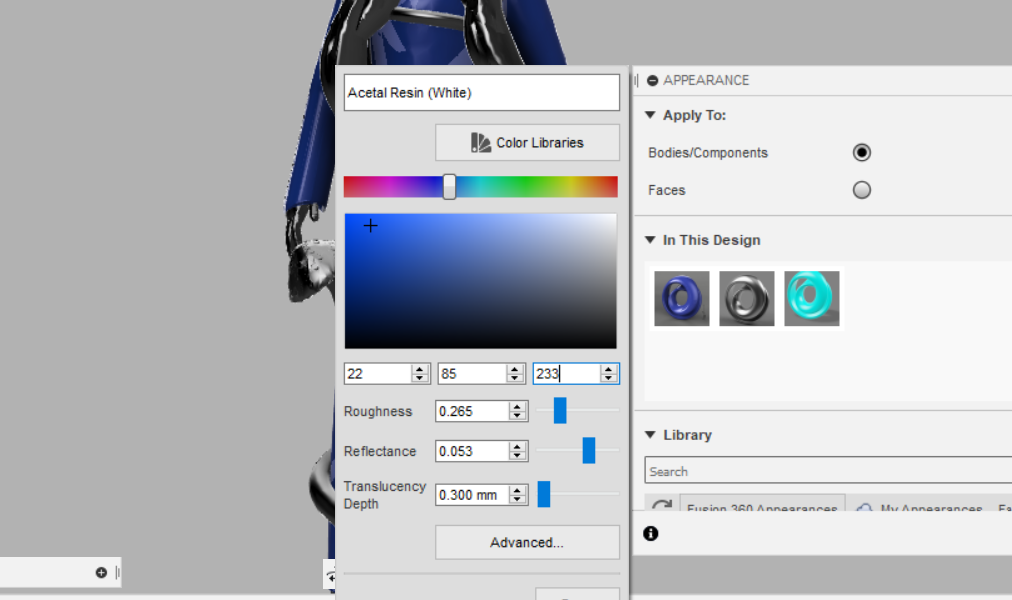
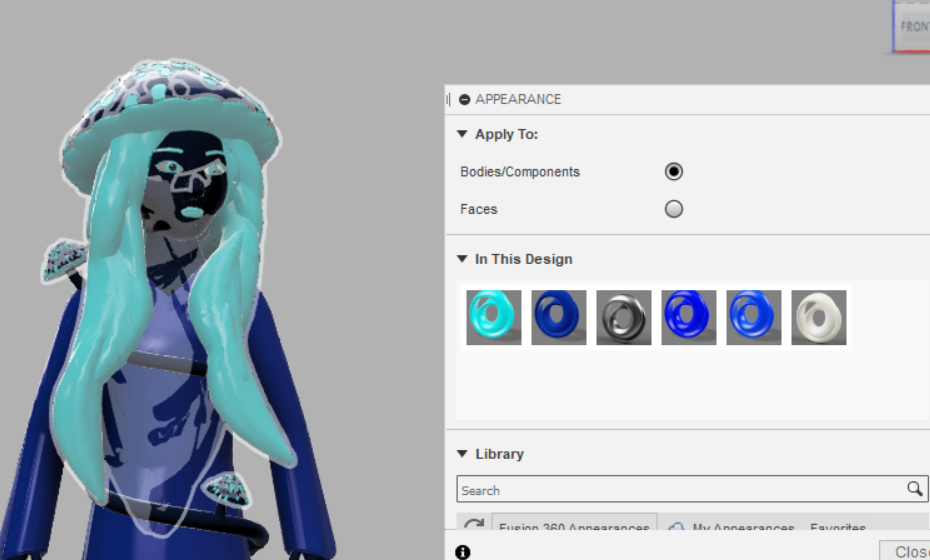
To start adding the colors, click the small six color wheel icon in the top left corner labeled "Appearance". After clicking it, a small user interface should appear to the right of your screen. On that interface, scroll down to where you see folders with different titles on it, such as "Plastic" or "Paint". Select the one that you think best applies to your model and pick one of the textures from the folder. You may notice a download button near a few of them. Just click that button to be able to use that texture in your model. Drag that texture out to the exact area which you want to color, and change the color by right clicking the dragged out color, which should be at the top of the interface if you scroll up, clicking edit, and using the RGB color picker to change the color. Do this for all the different colors of the model.
Changing the Lighting
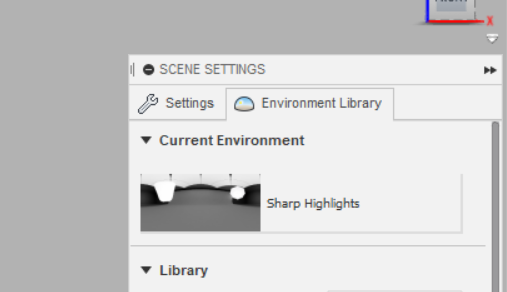
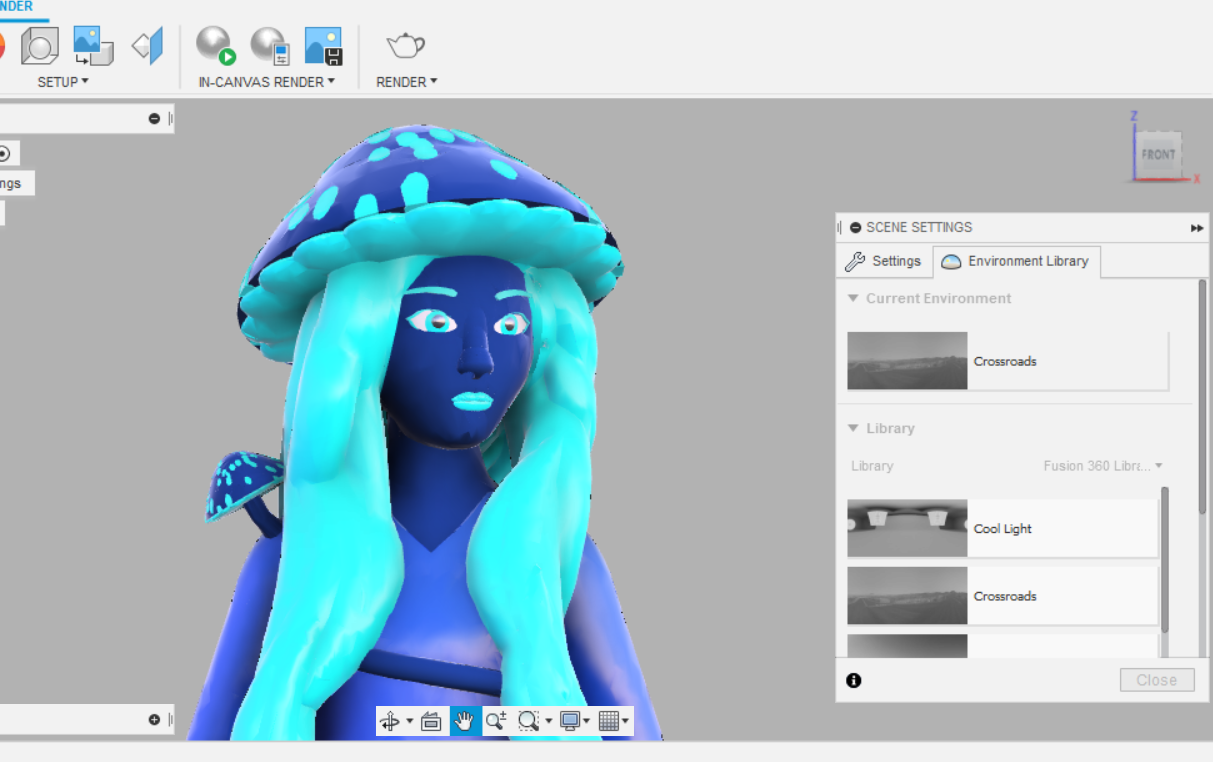
To change the lighting on the model, go to "Scene Settings", which is to the right of "Appearance", and click on it. Once on it, you'll be prompted with an interface similar to the previous one. Select the "Environment Library" tab and take a look at the ones provided. Pick which one you think would best fit your model and drag it to the "Current Environment" section to apply it. Once again, you may need to download a few of the lighting effects, just click the download button to use it.
Changing the Backgroud Color
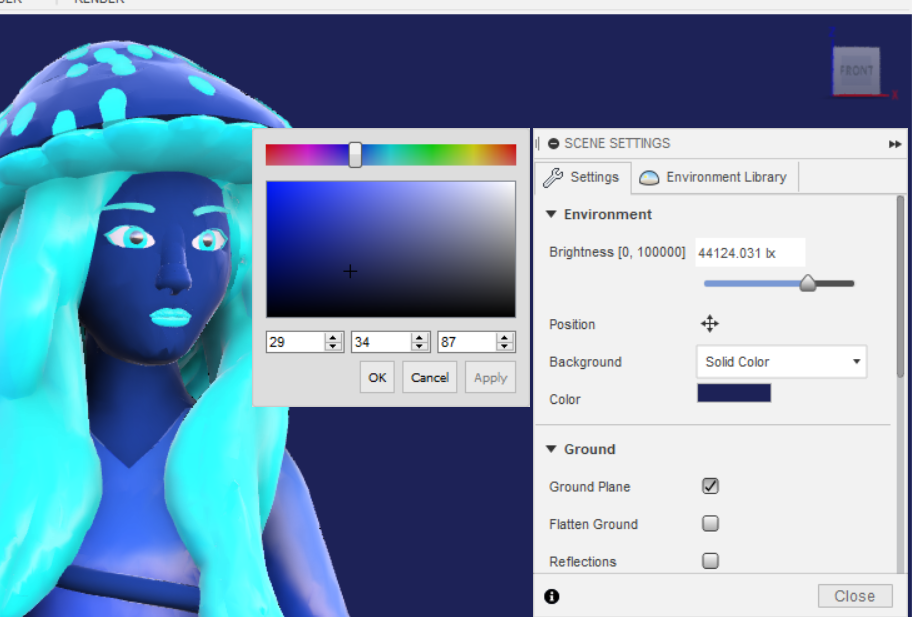
To change the background, click the "Settings" button on the same "Scene Settings" interface and scroll to "Environment". There, select the "Color" button to change the color, or use the dropdown menu to change from Fusion's assorted background library.
Exporting the Final Image
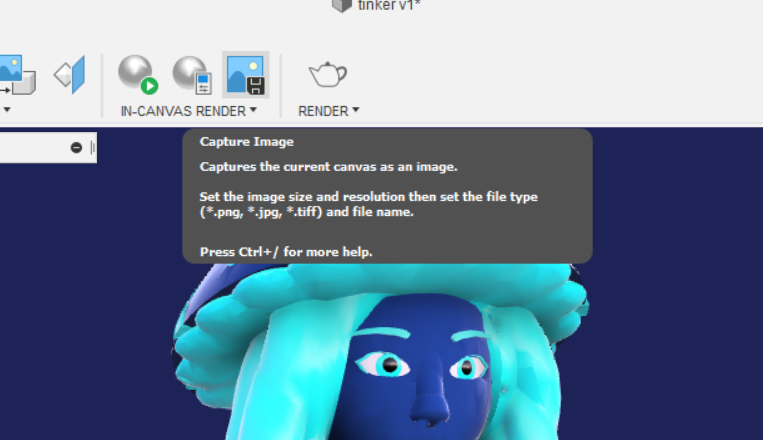
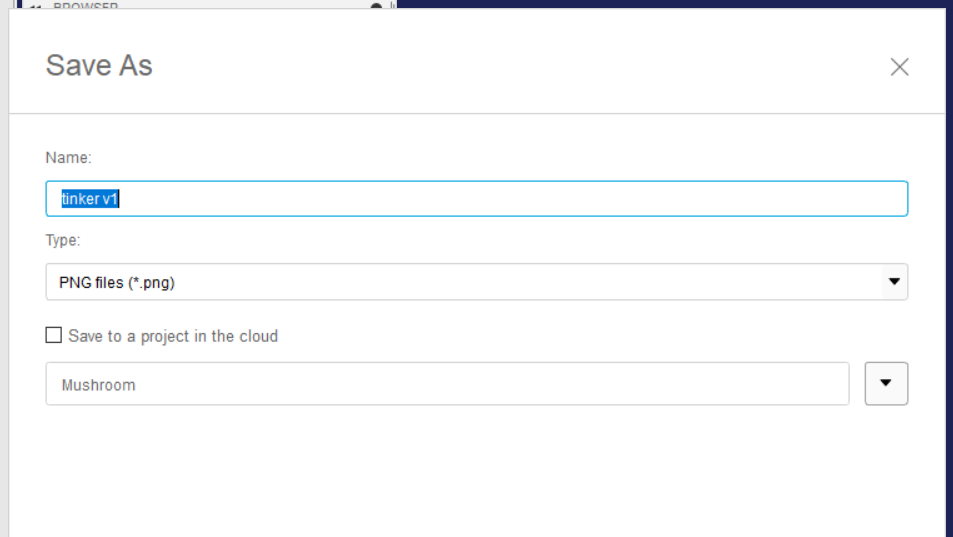
To export the final image, go to the "In-Canvas Render" section on the hotbar towards the top and select "Capture Image". From there, give it a name and define the type you want the exported file to be, and hit "Save".
You're Done!
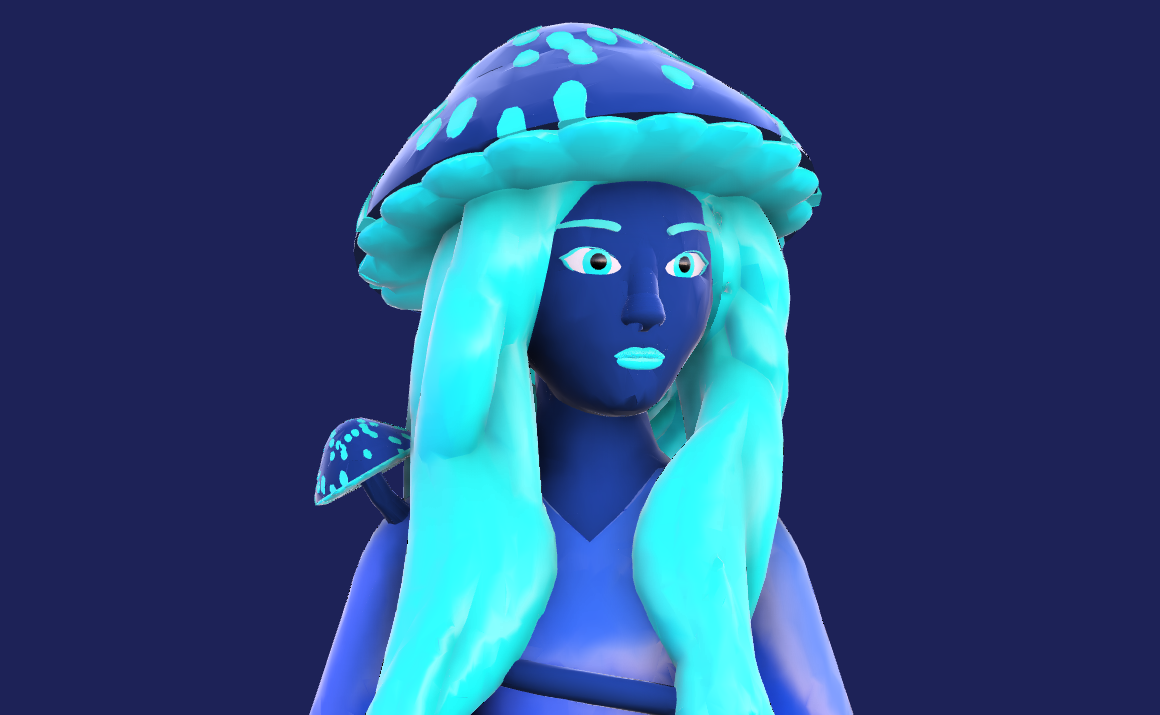
You've done it! You've successfully rendered an epic Tinkercad design using Fusion 360! Thanks for taking the time to read through this Instructable, I hope you learned something worthwhile from it!