How to Remove Green Screen in Adobe Premiere Pro CC
by In The Kitchen With Matt in Design > Digital Graphics
116943 Views, 38 Favorites, 0 Comments
How to Remove Green Screen in Adobe Premiere Pro CC
In this video production basics tutorial I will show you how to take out the green screen in Adobe Premiere CC. Removing or keying the green screen or blue screen background out is fairly easy to do using Premiere. I usually use After Effects to remove the green, but Ultra Key in Premiere does a great job as well. There are a number of reasons why you may just want to use Premiere. If you aren't doing very many motion graphics, and let's say you just want to have your subject with a different background and not much else happening, Premiere is a great choice. If I can do it, you can do it, let's get keying! :)
Don't forget to follow me and check out my other instructables! :)
If you have any questions or comments leave them down below and I will get back to you as soon as I can. :)
Follow the easy steps below or watch the video tutorial or do both! :)
Import Footage and Background
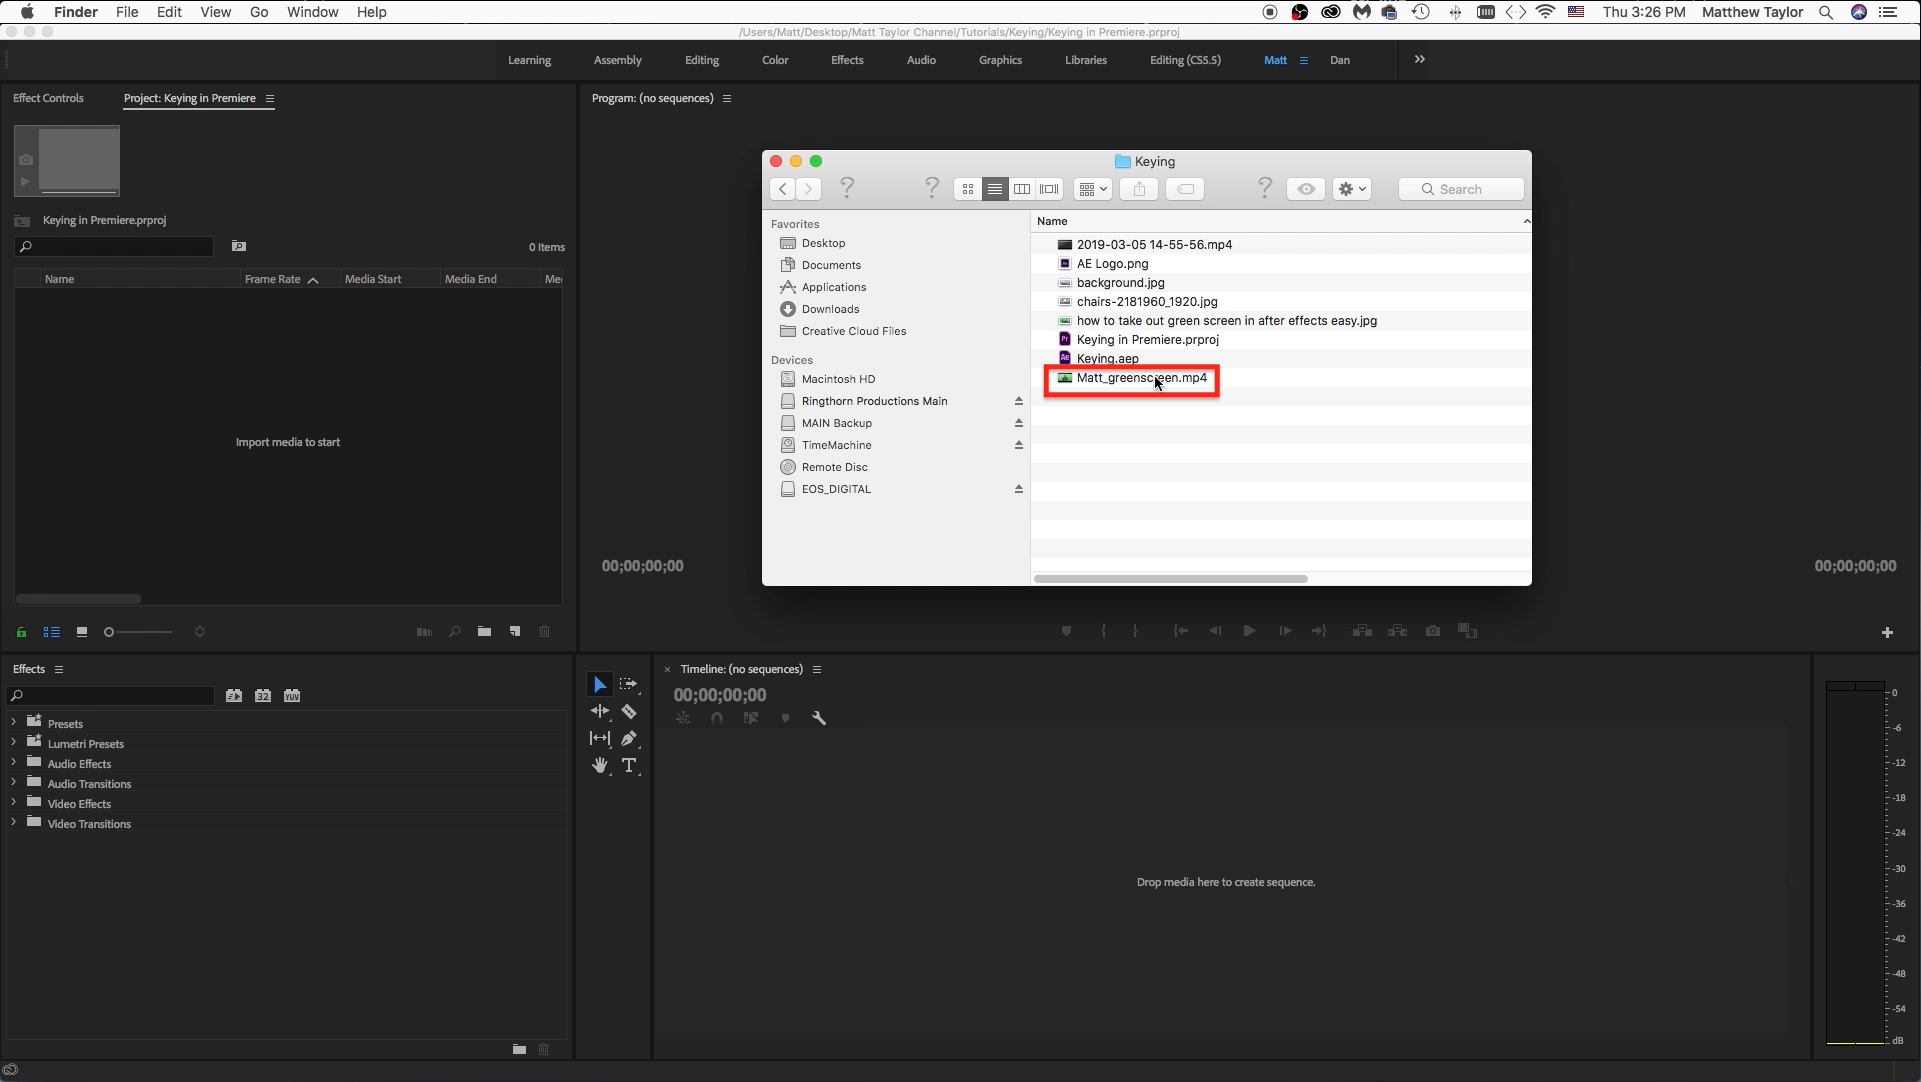
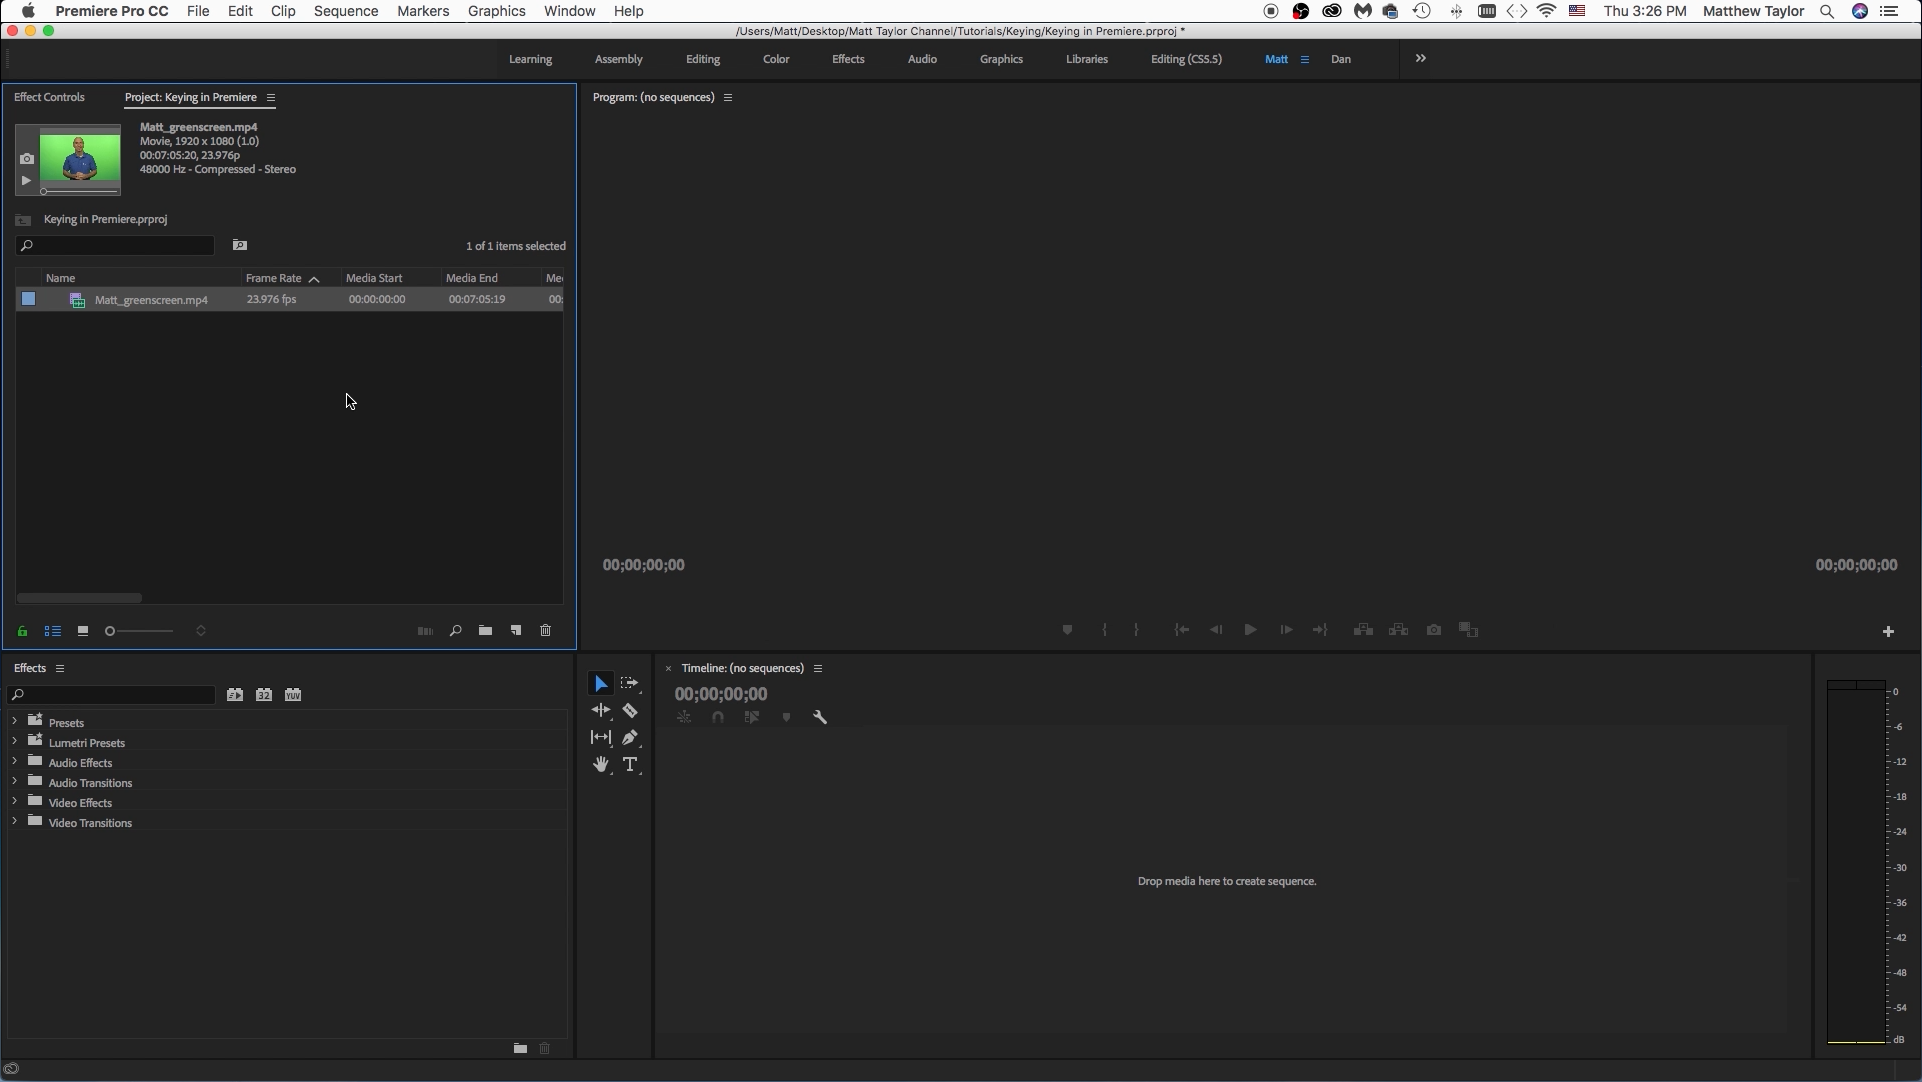
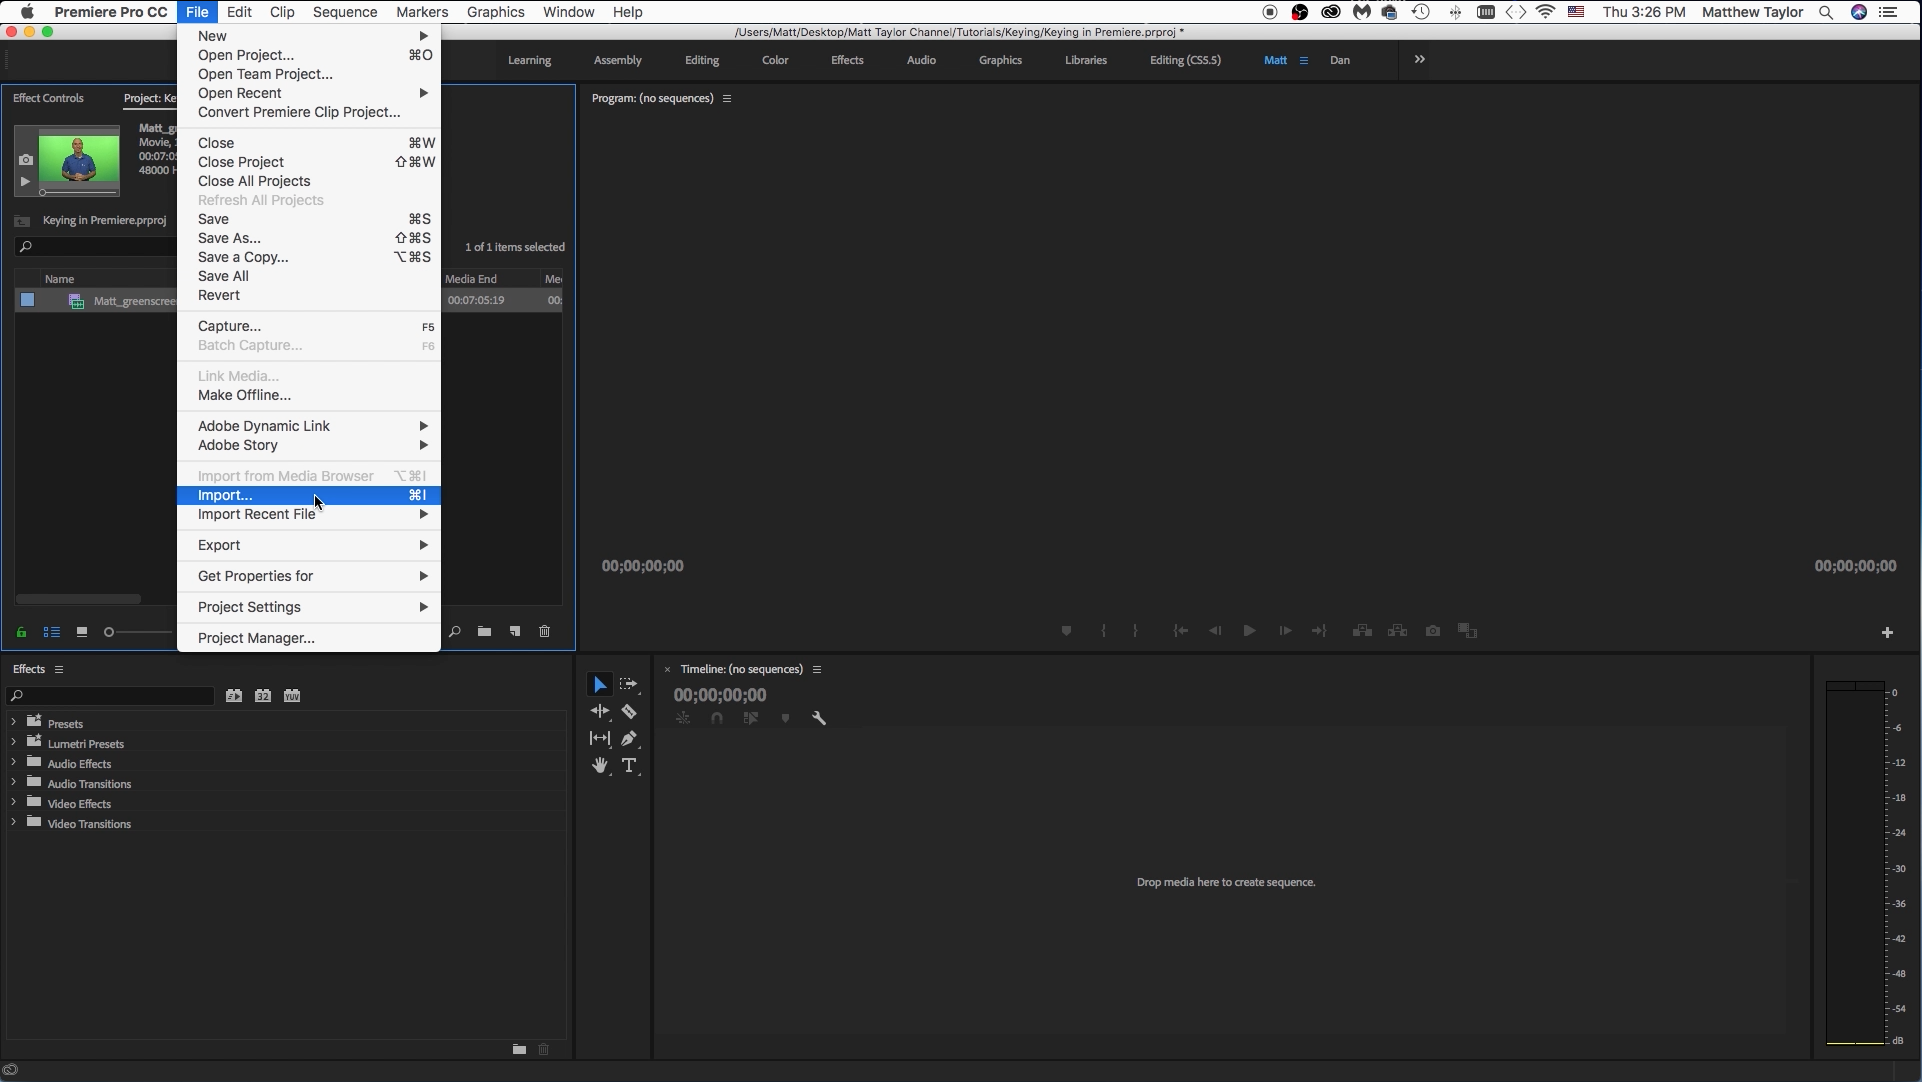
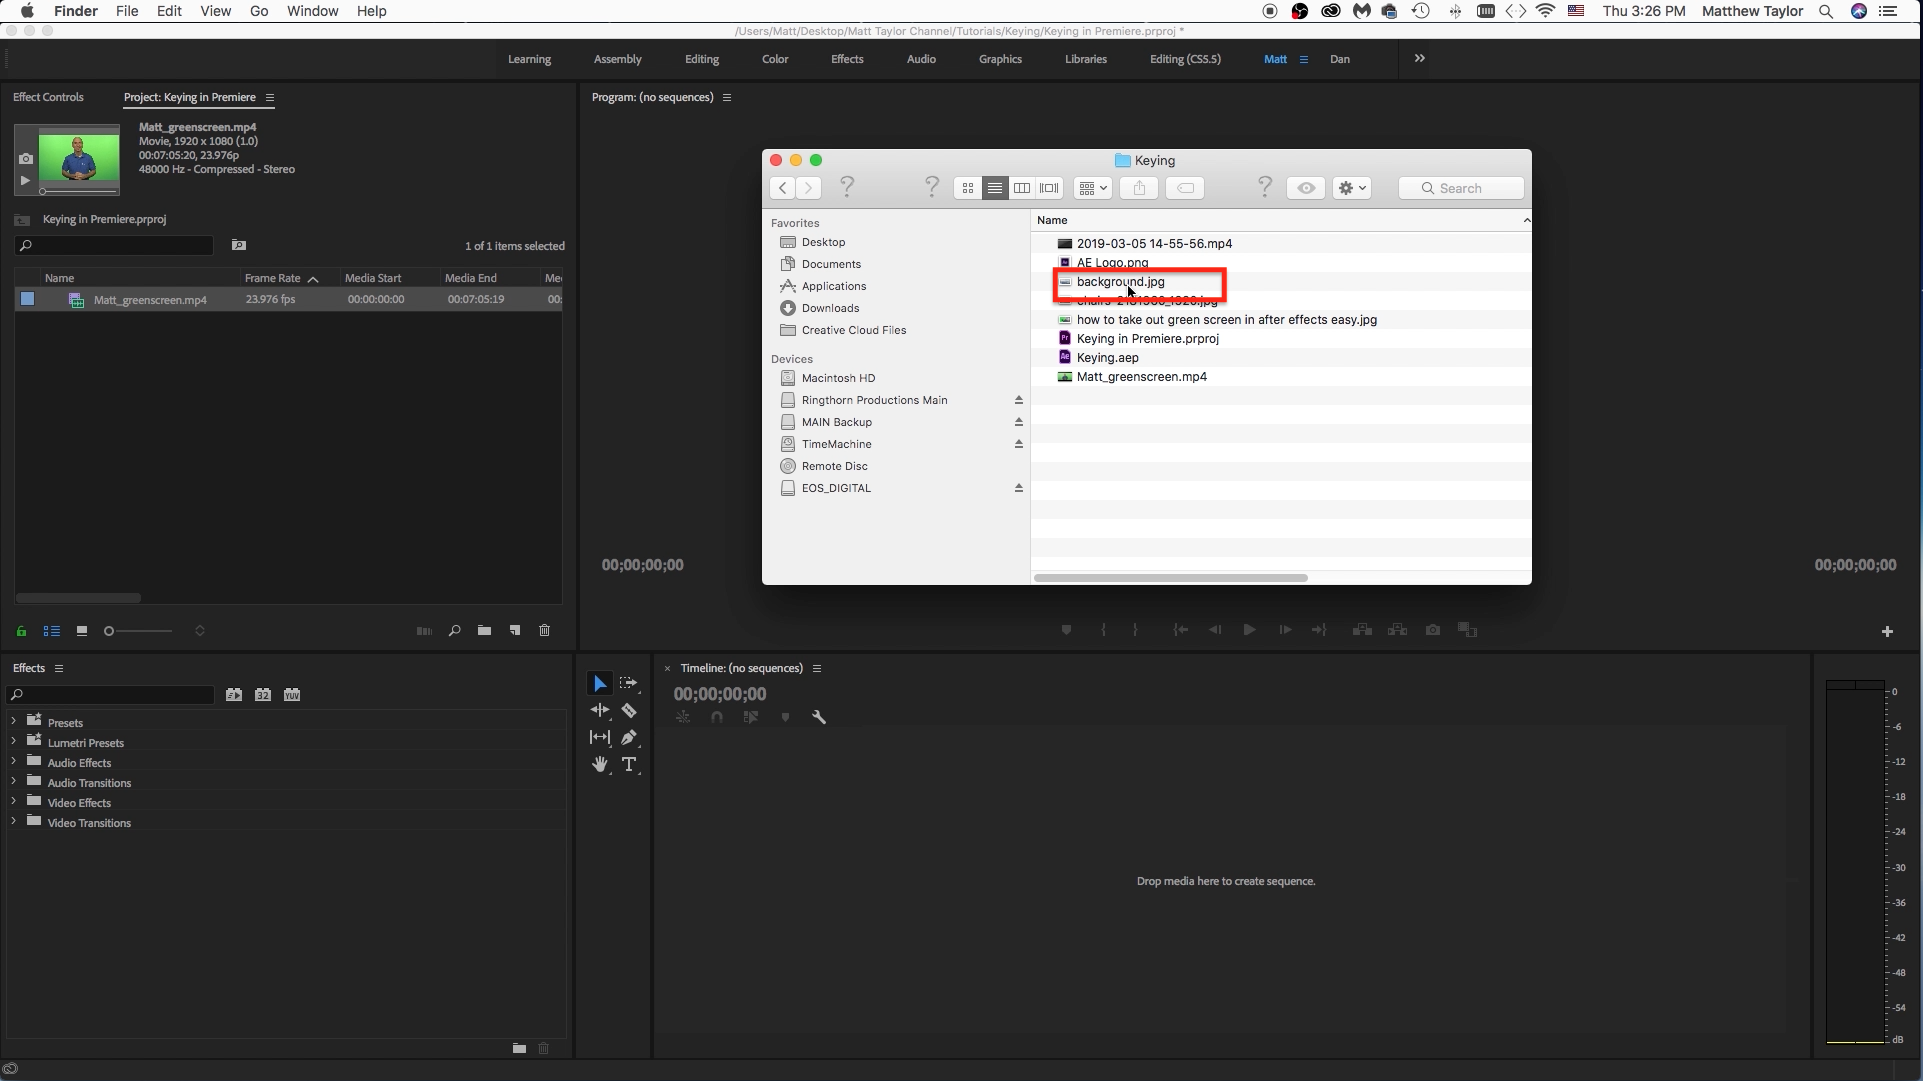
Open up premiere and created a new project. Next let's import our footage and background. You can drag the footage and background over to your project panel or you can go to "file" then "import" and do it that way.
Create New Sequence
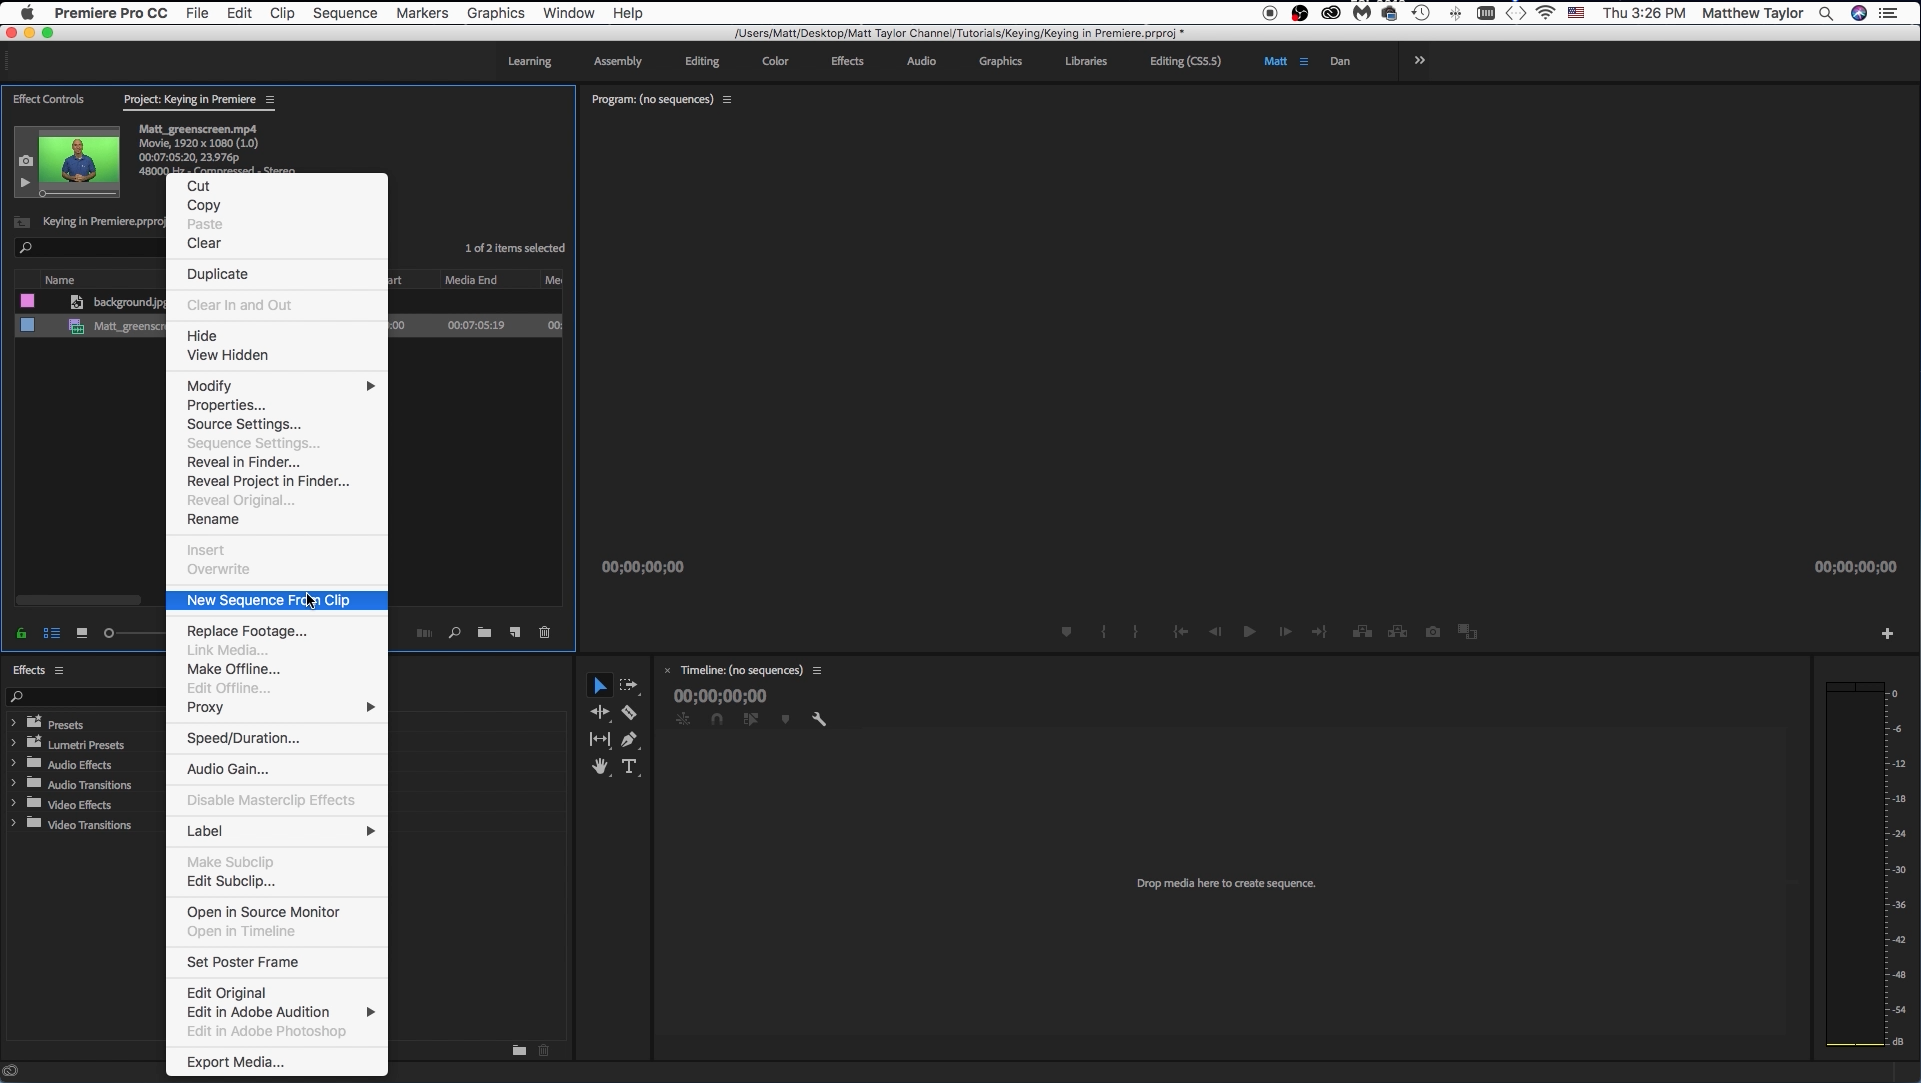
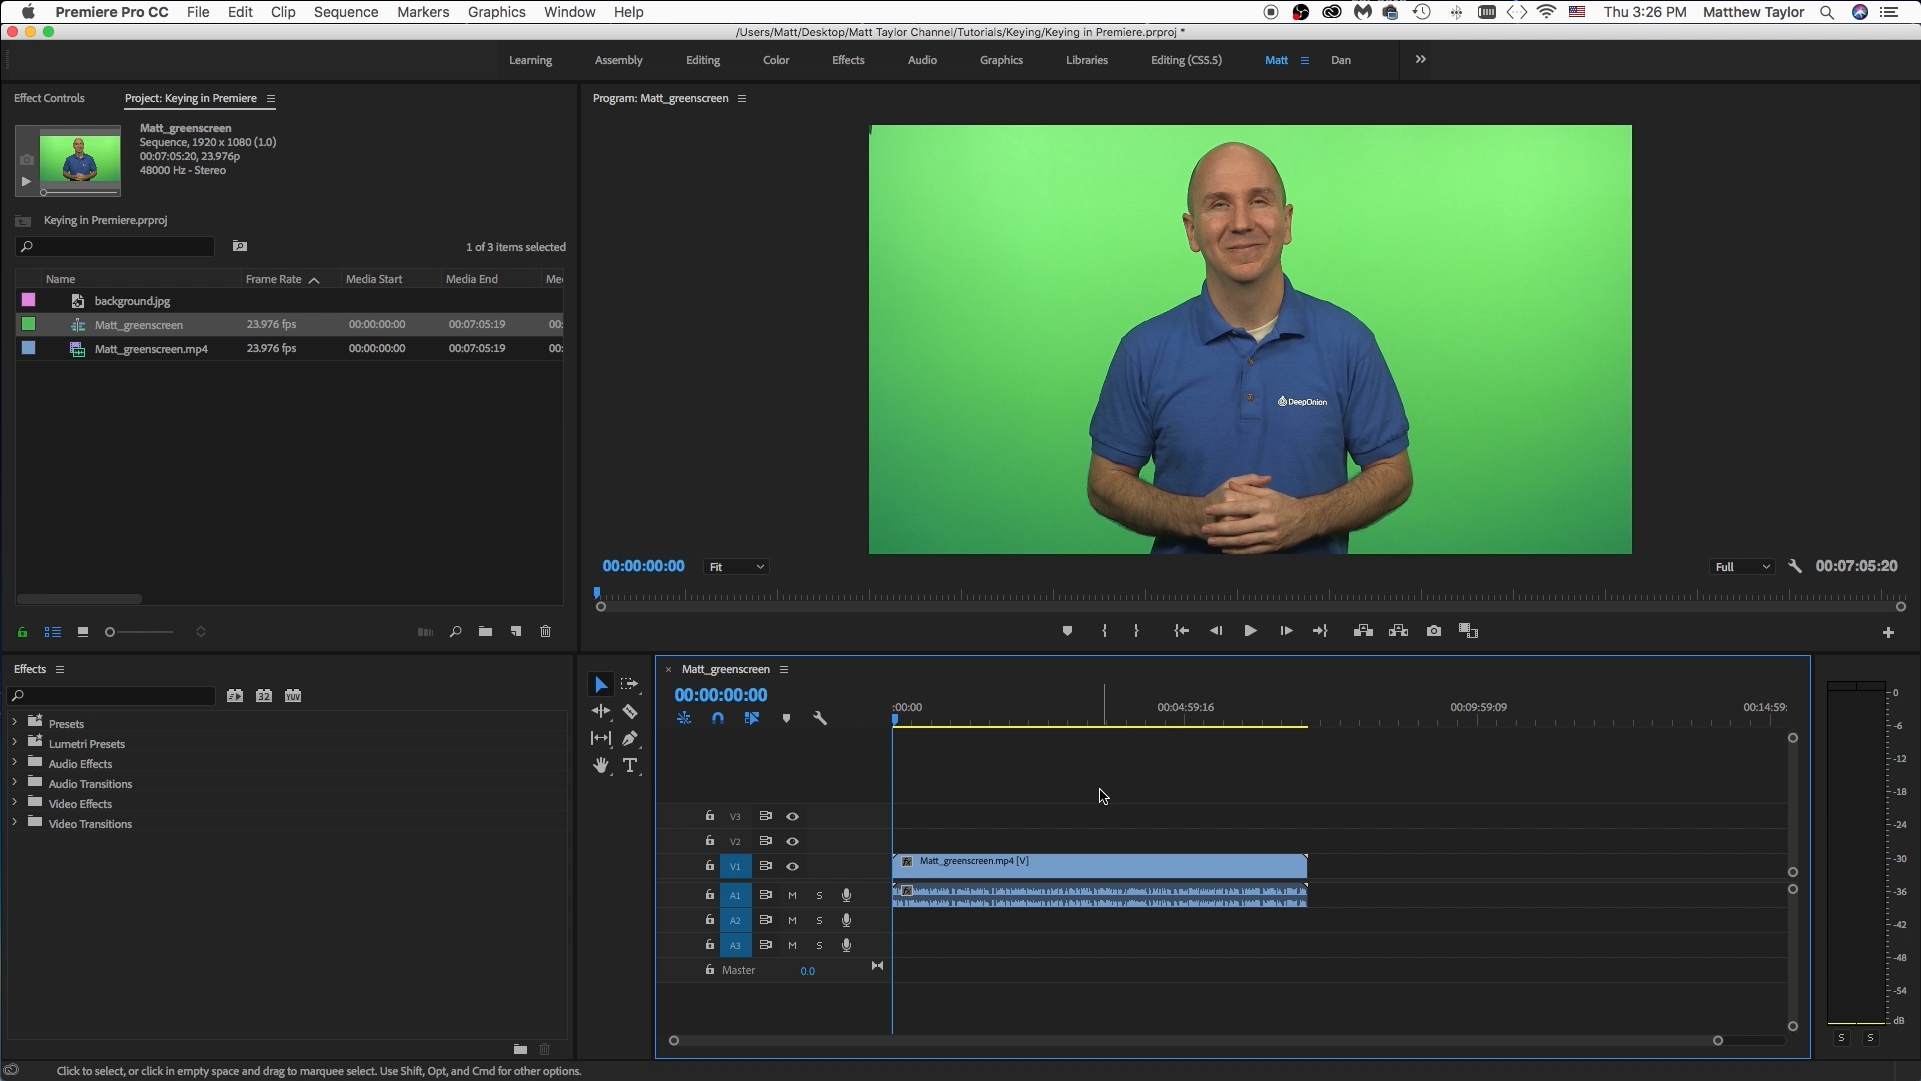
Now let's create a new sequence with our footage. Right click on the footage and then select "new sequence from clip". This will create a new sequence with your footage.
Background

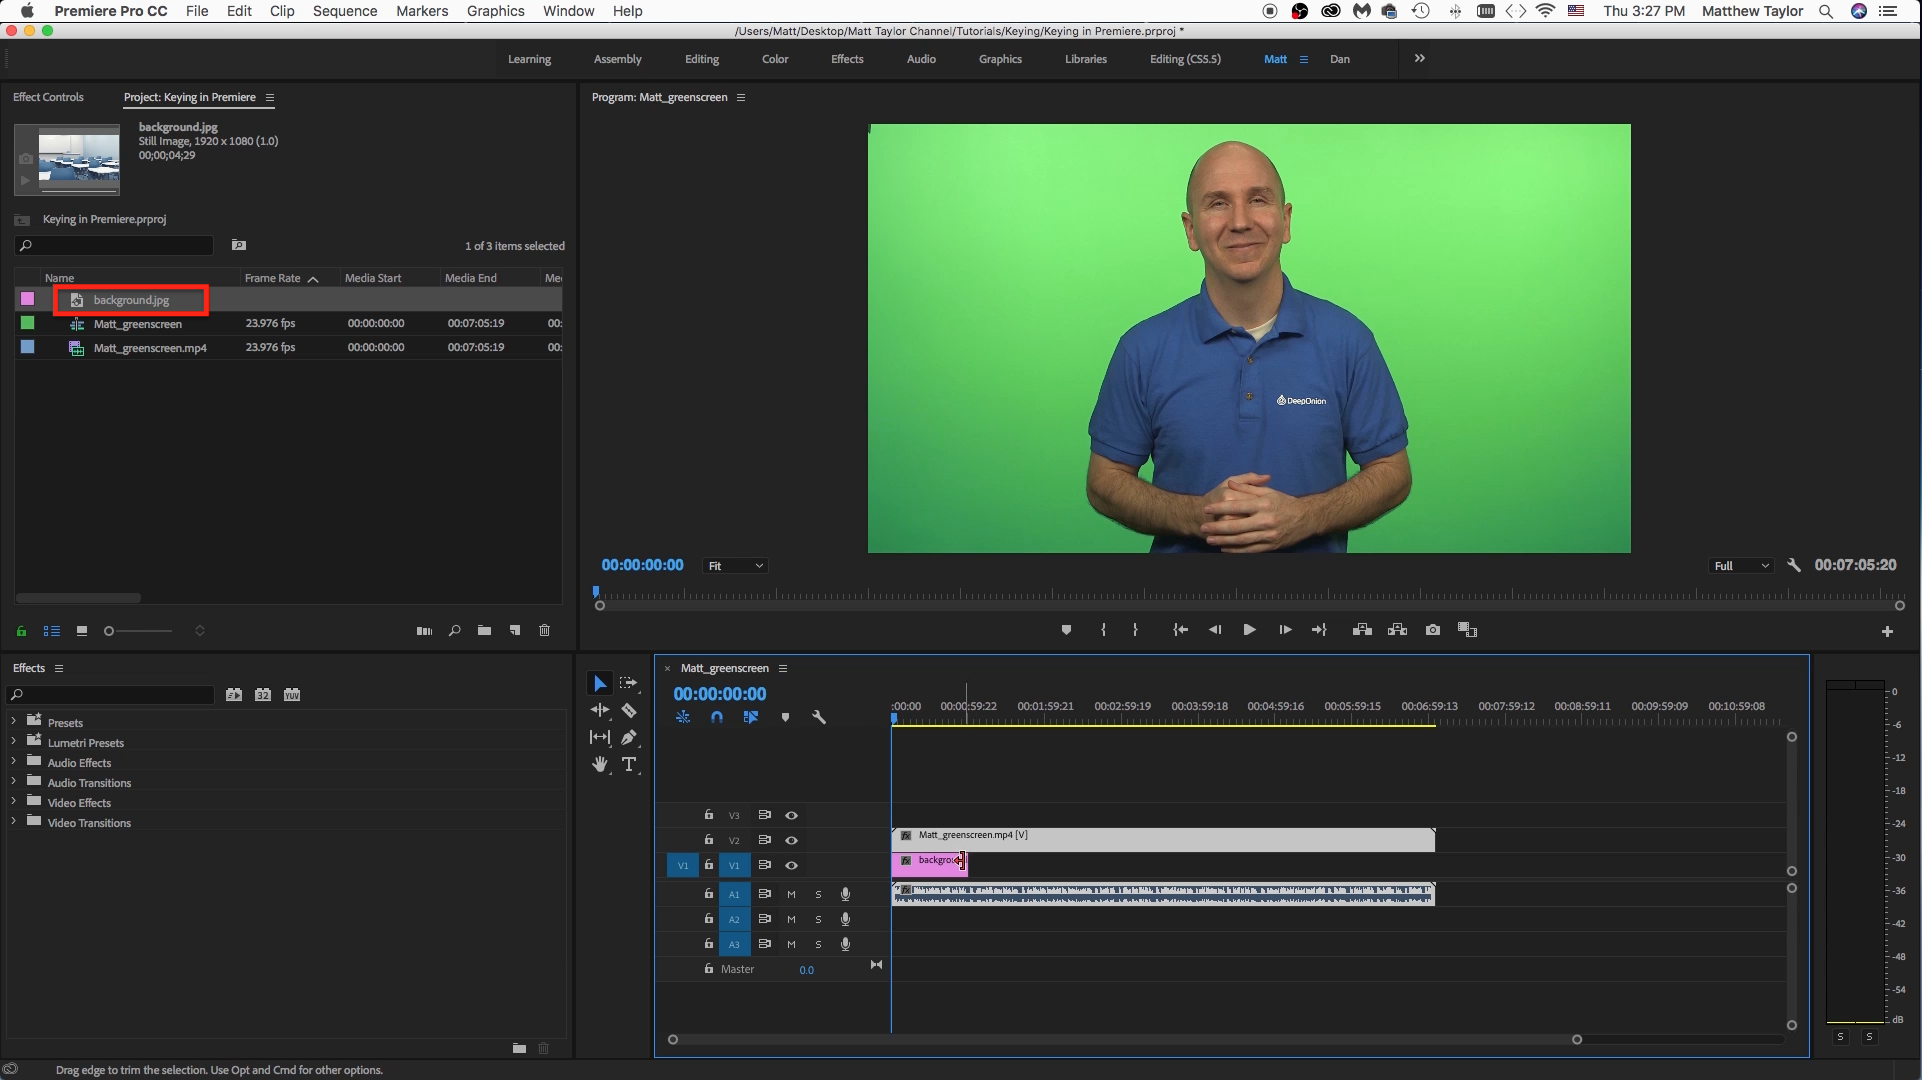
Now we need to grab the v1 layer and raise it up to v2. This way we can drag the background over into our sequence and place it below the green screen footage. Drag the edge of the background to the right to match the length of the footage. Or you may have more then one background that will be changing throughout the video.
Ultra Key Effect


Now we need to start keying out that green screen. We will do this by using the "Ultra Key" effect. In the effects panel you can type "Ultra Key" or just "key" and you will find the effect. Grab that and drag it over and place it on your green screen footage, in this case V2 (Video layer 2, Matt_Greenscreen)
Color Picker
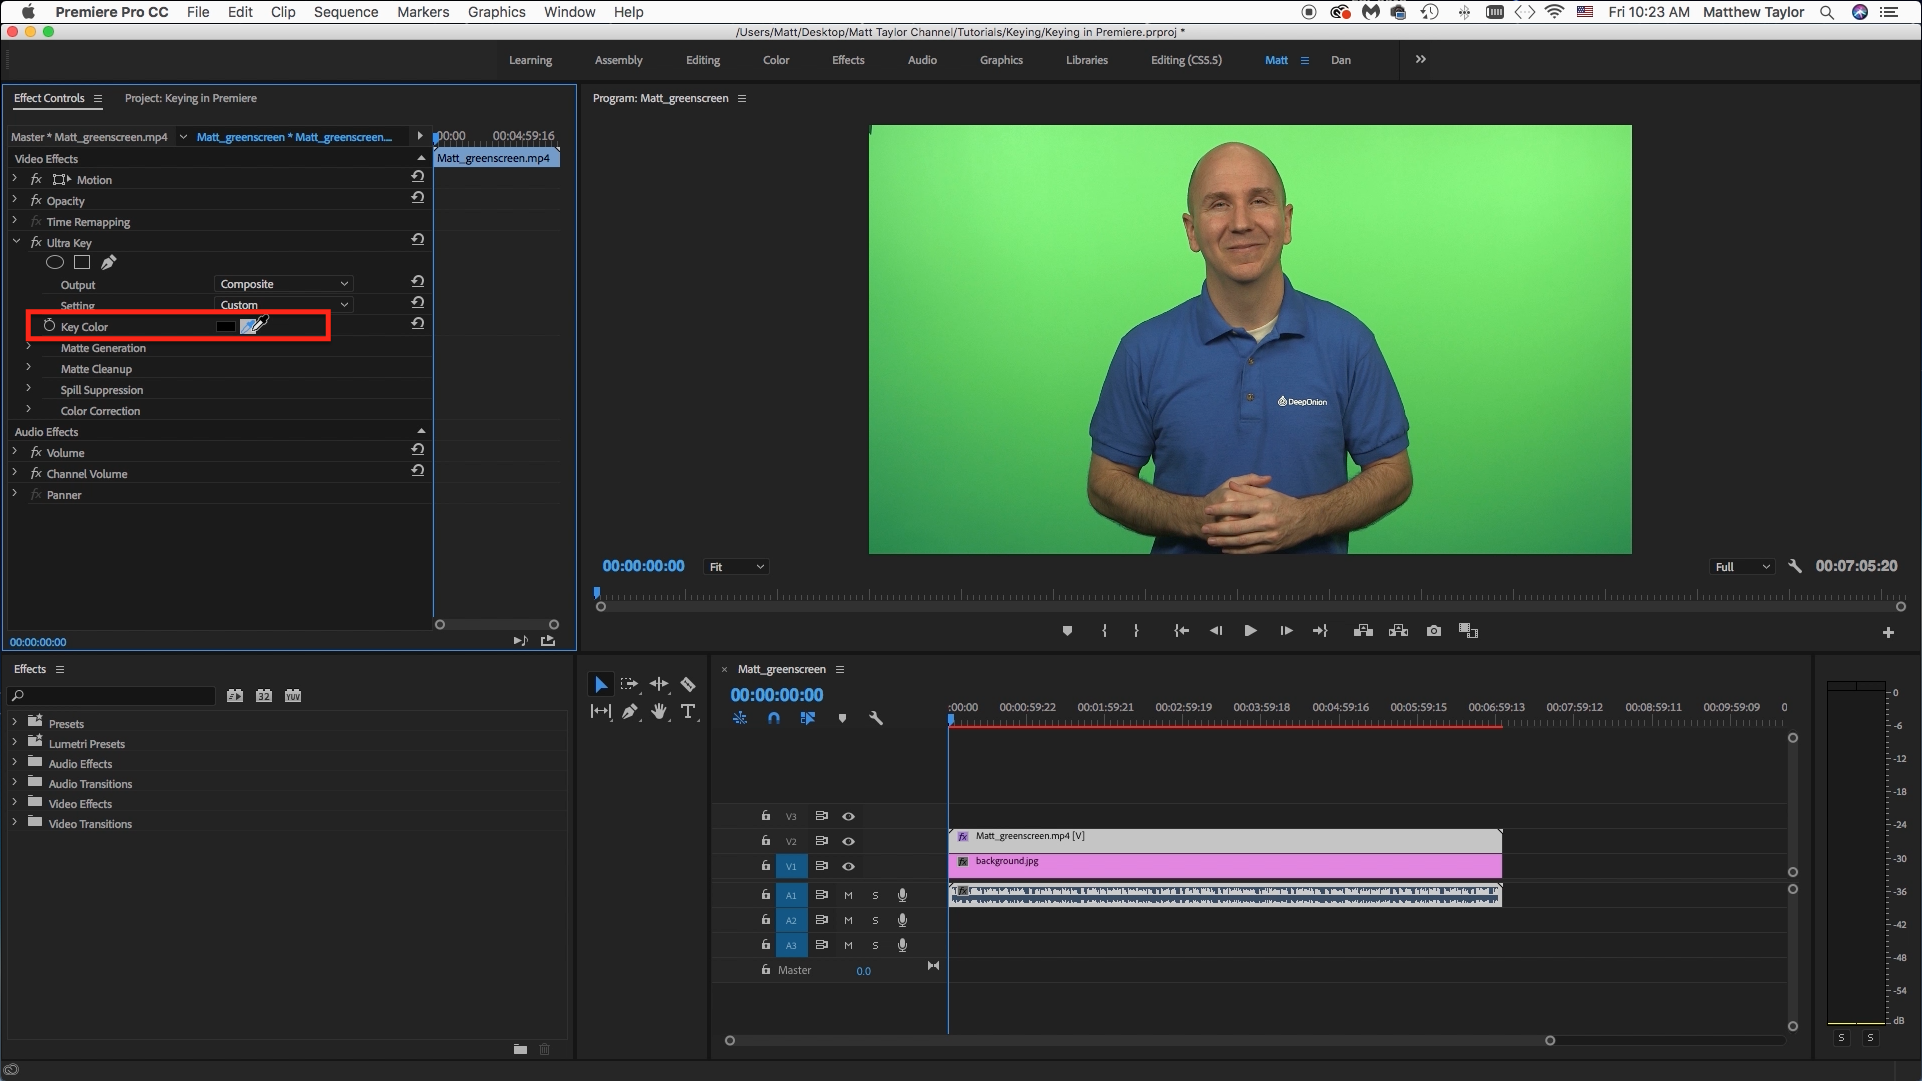

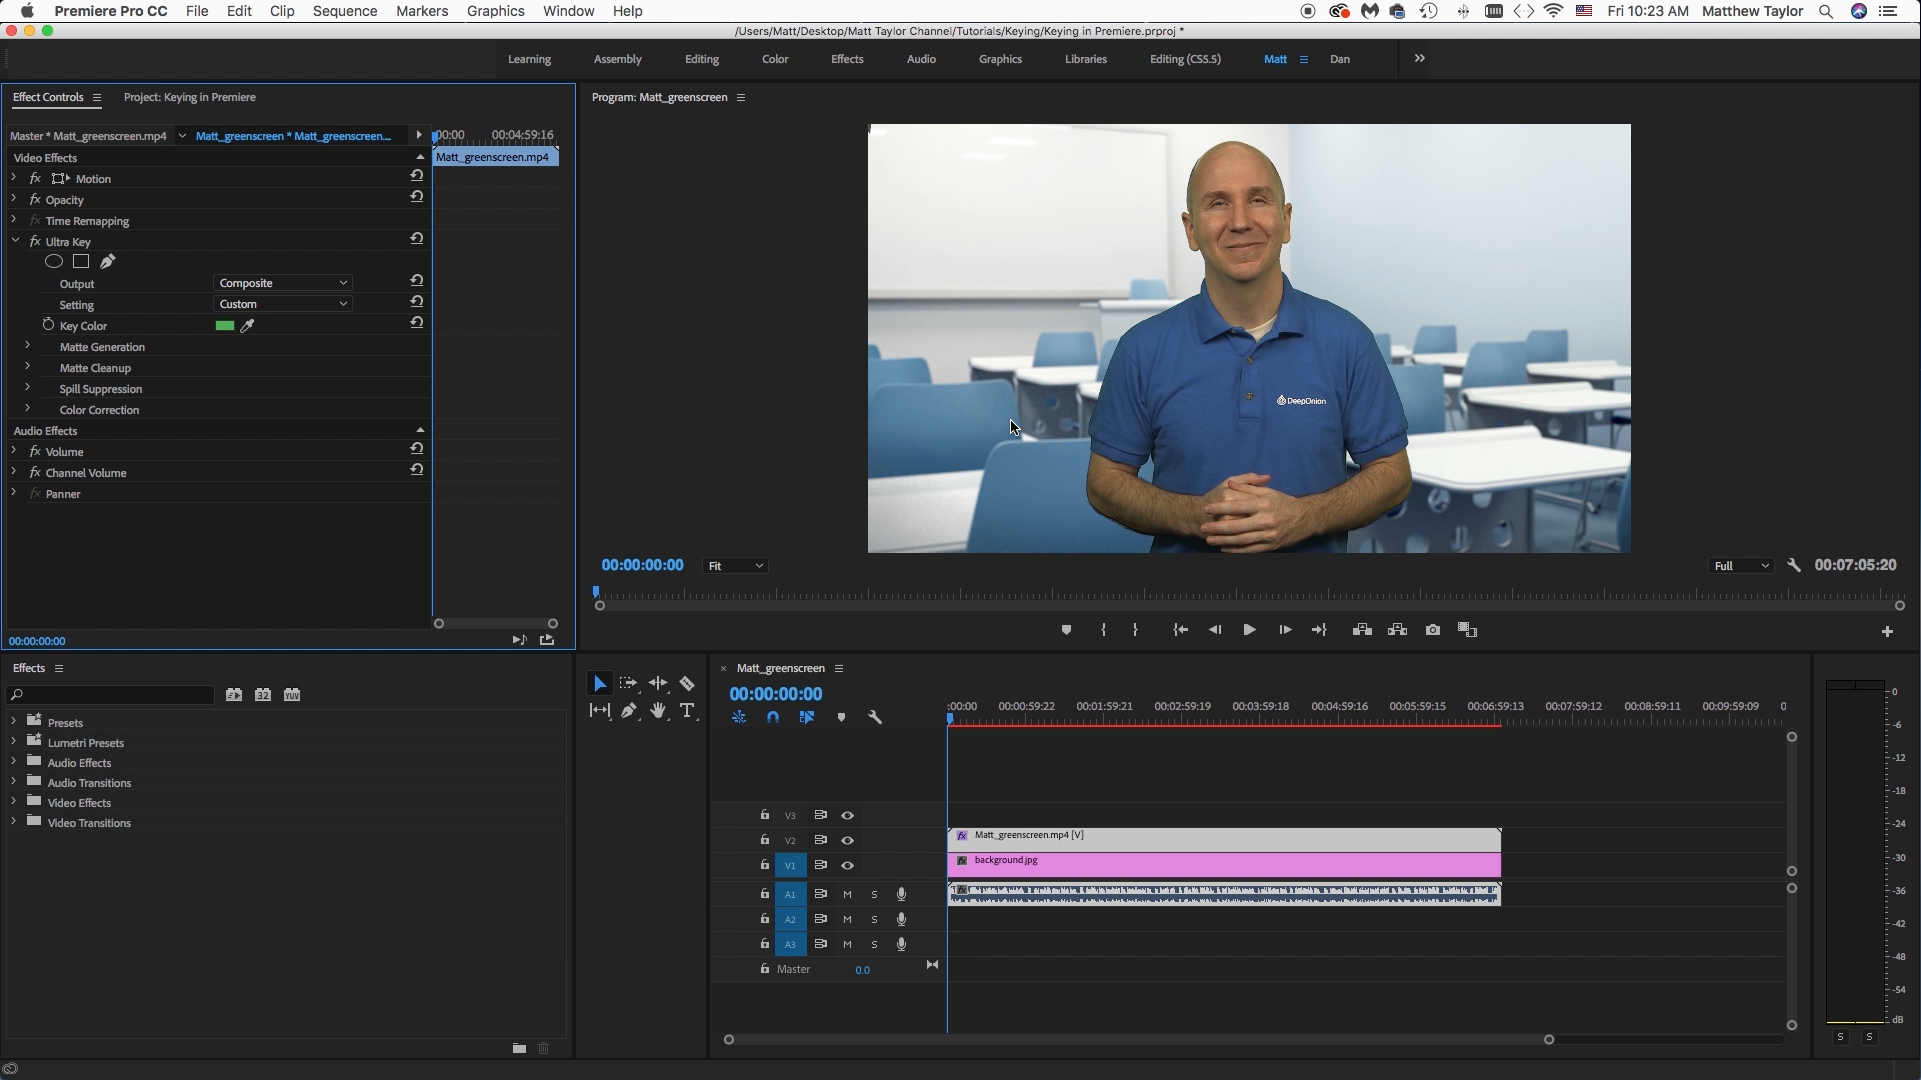
Now go over to the effects panel at the top left, we will see that the effect has been applied. It hasn't done anything yet because we need to use the eyedropper to select the color that we want to take out, which in this case is the green screen. Click on the eyedropper then click on the green. Here is a tip, it is important to have a well lit and evenly lit green screen background, it makes the keying process easier. After we click on it, you will notice the background disappear. It does a decent job just with that one click, but we need to fine tune it so it looks much better.
Cleaning the Matte
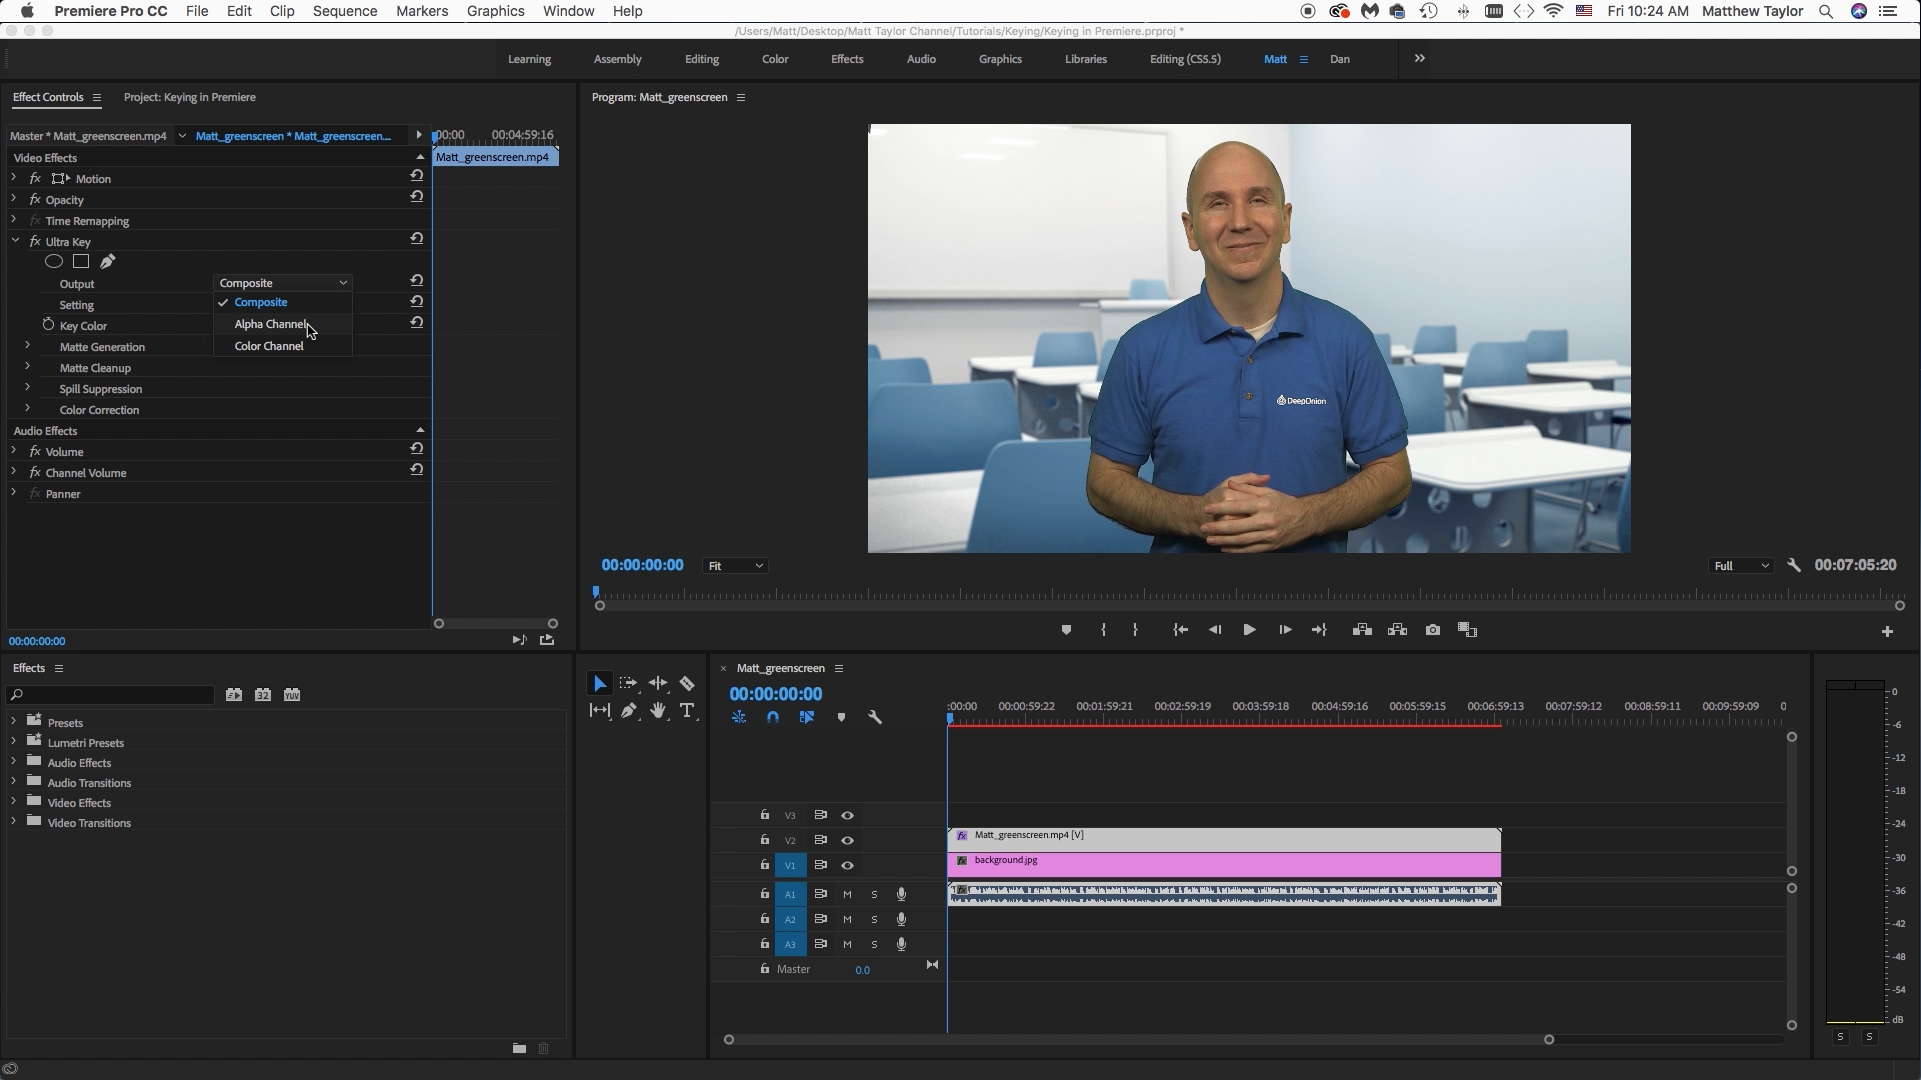
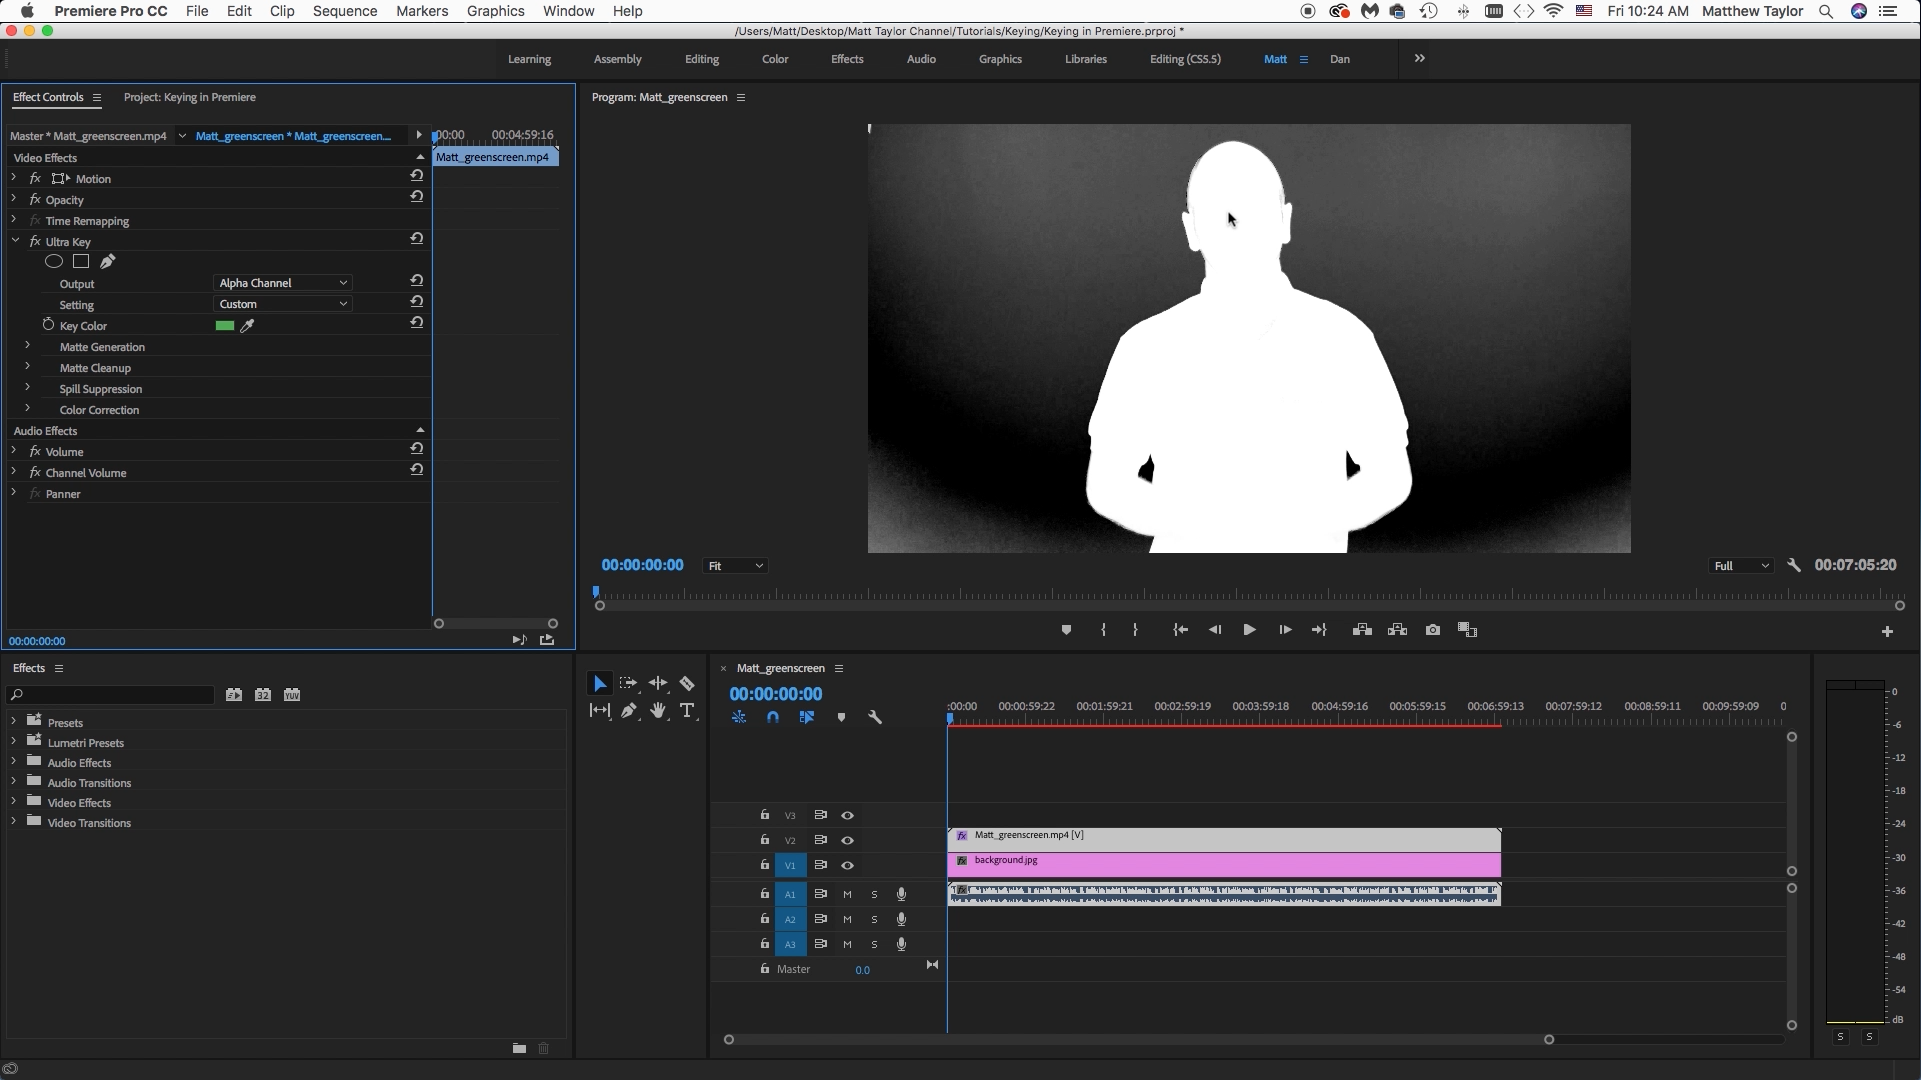
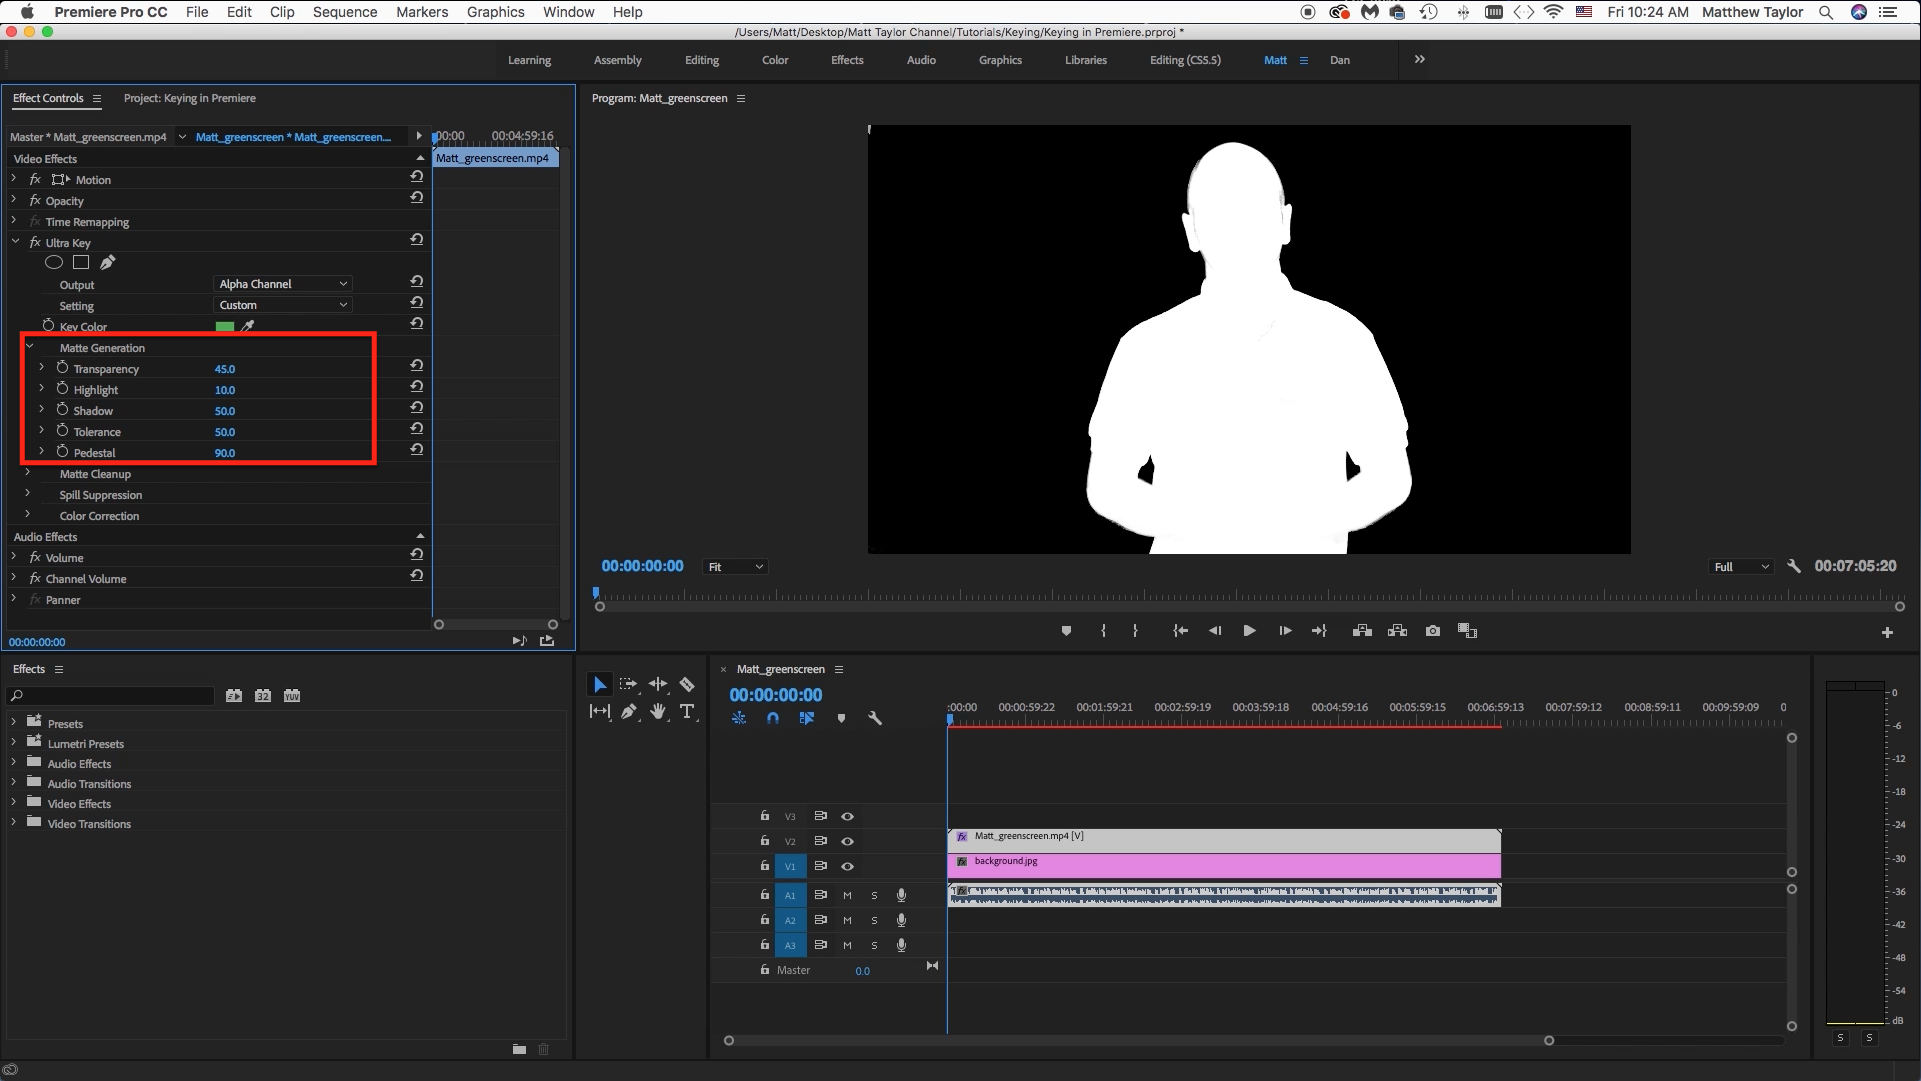
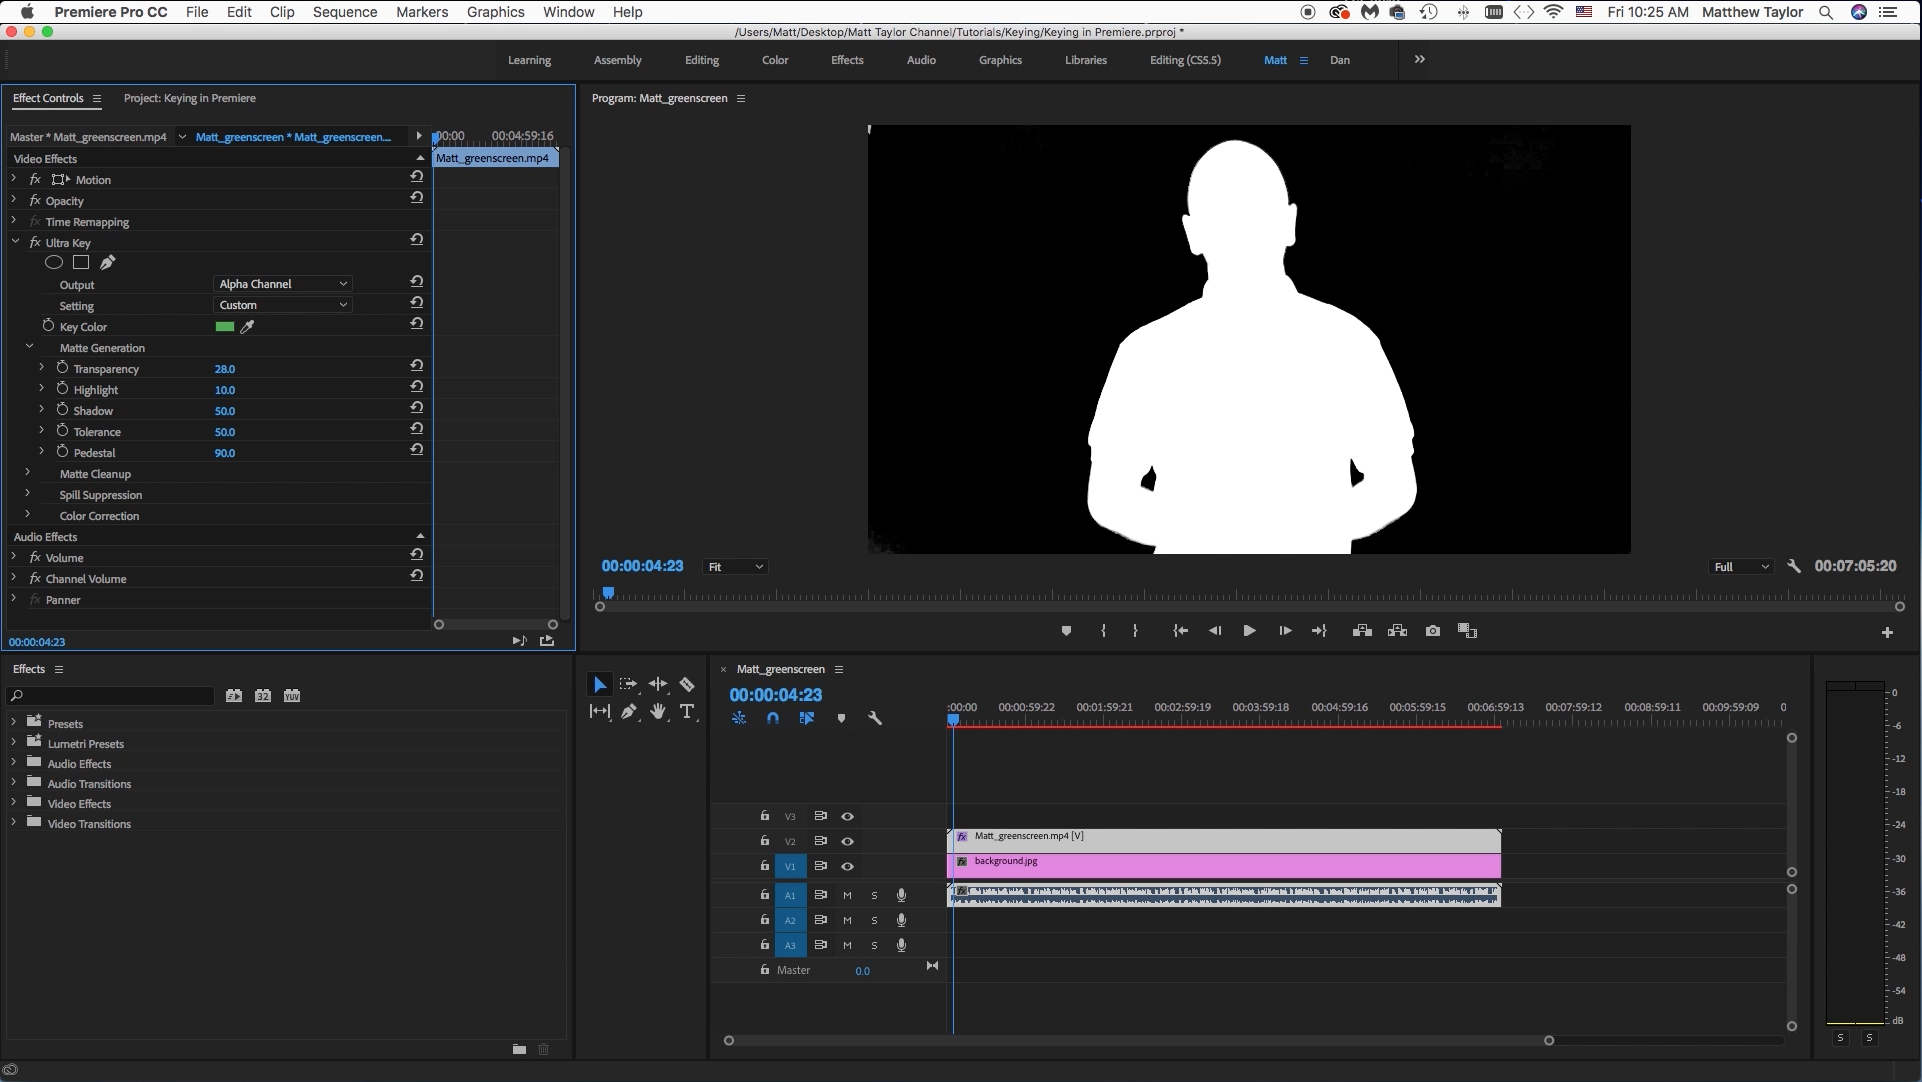
Next switch from "composite" output to "alpha channel" output. See how much noise is there. Ideally we want solid black for the background and solid white for the subject. Open up the "Matte Generation" drop down and play with the settings. Usually you will do a high "Pedestal" setting and then you will work with the "Transparency" setting. I can't just give you values that will work every time, it will vary depending on your footage. This looks pretty good with the settings I used.
Cleaning Up the Edges
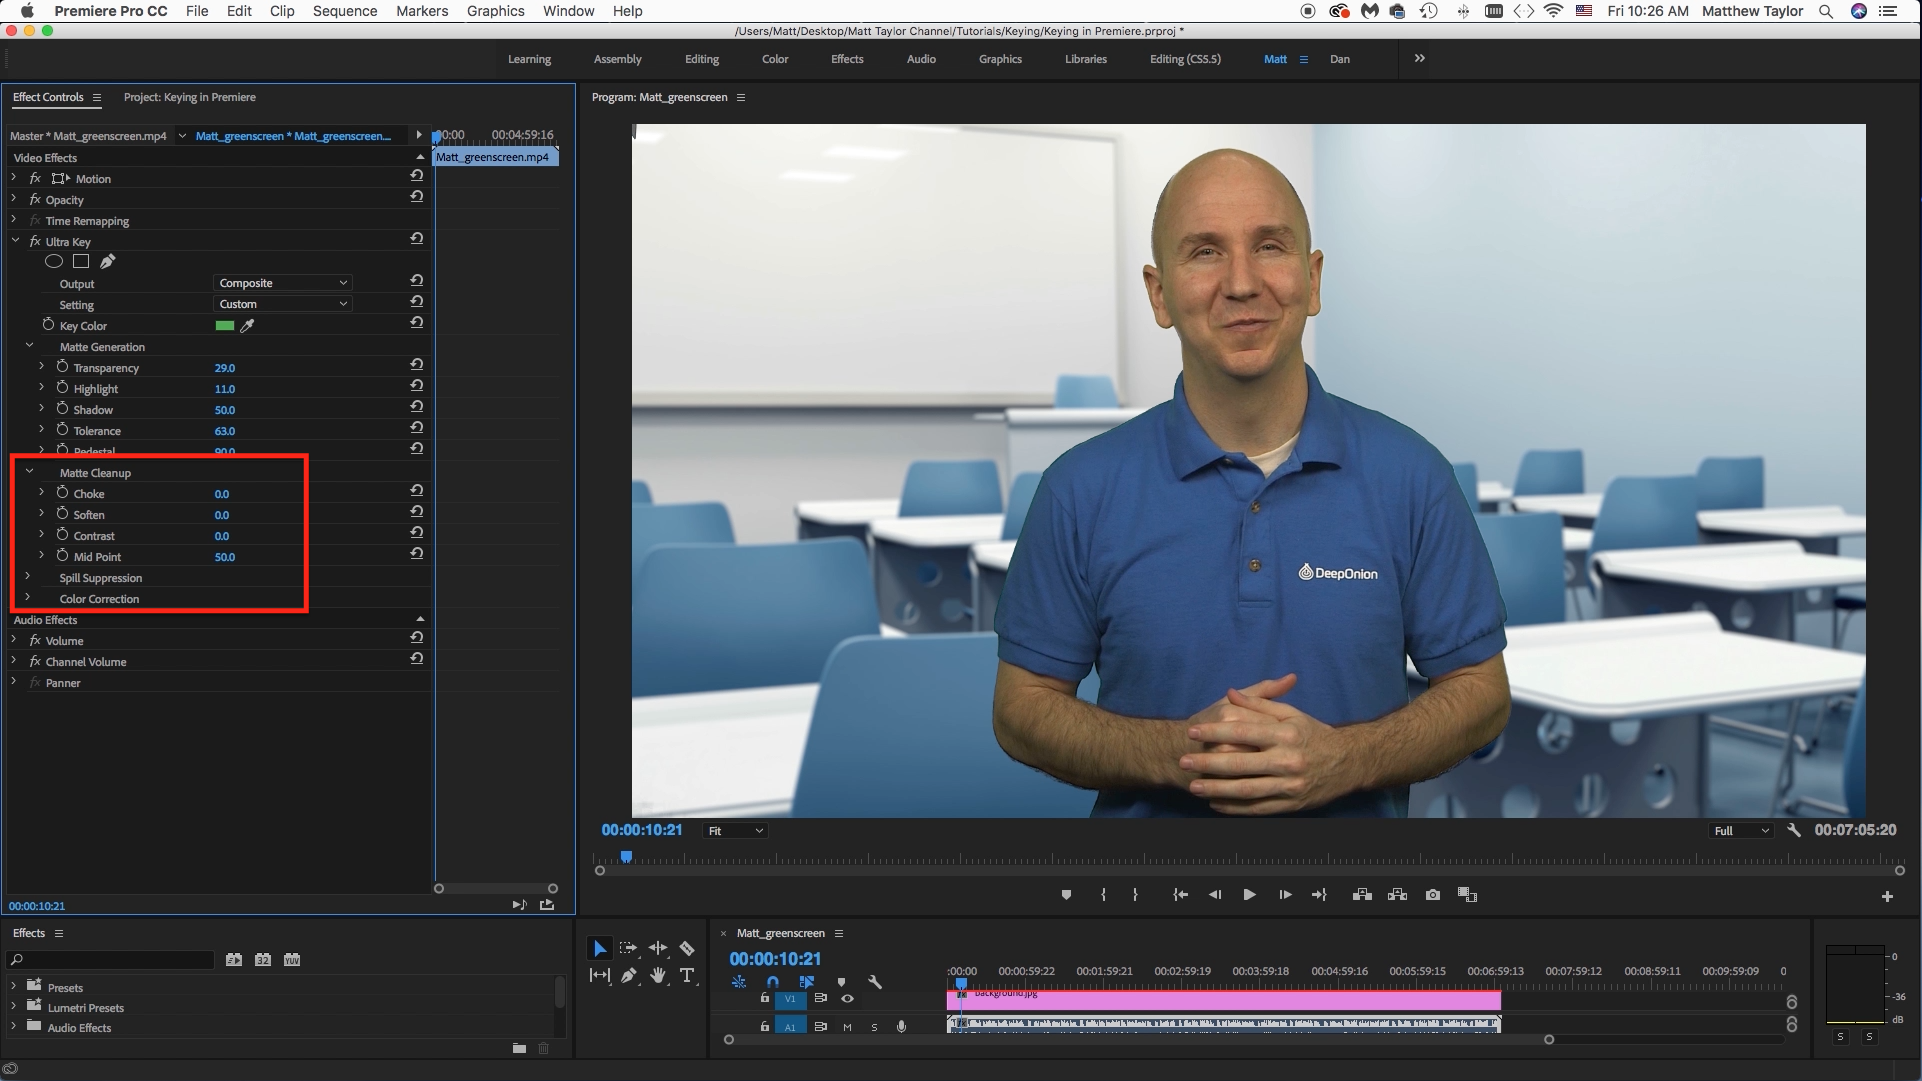
Now let's clean up the edges a little bit by using the "Matte Cleanup" settings. You will want to adjust the choke amount, this will take away any outlines that might be there. We don't want the subject looking like a cartoon with a black outline. You can adjust the other settings as well to see how they effect your footage.
Spill Suppression
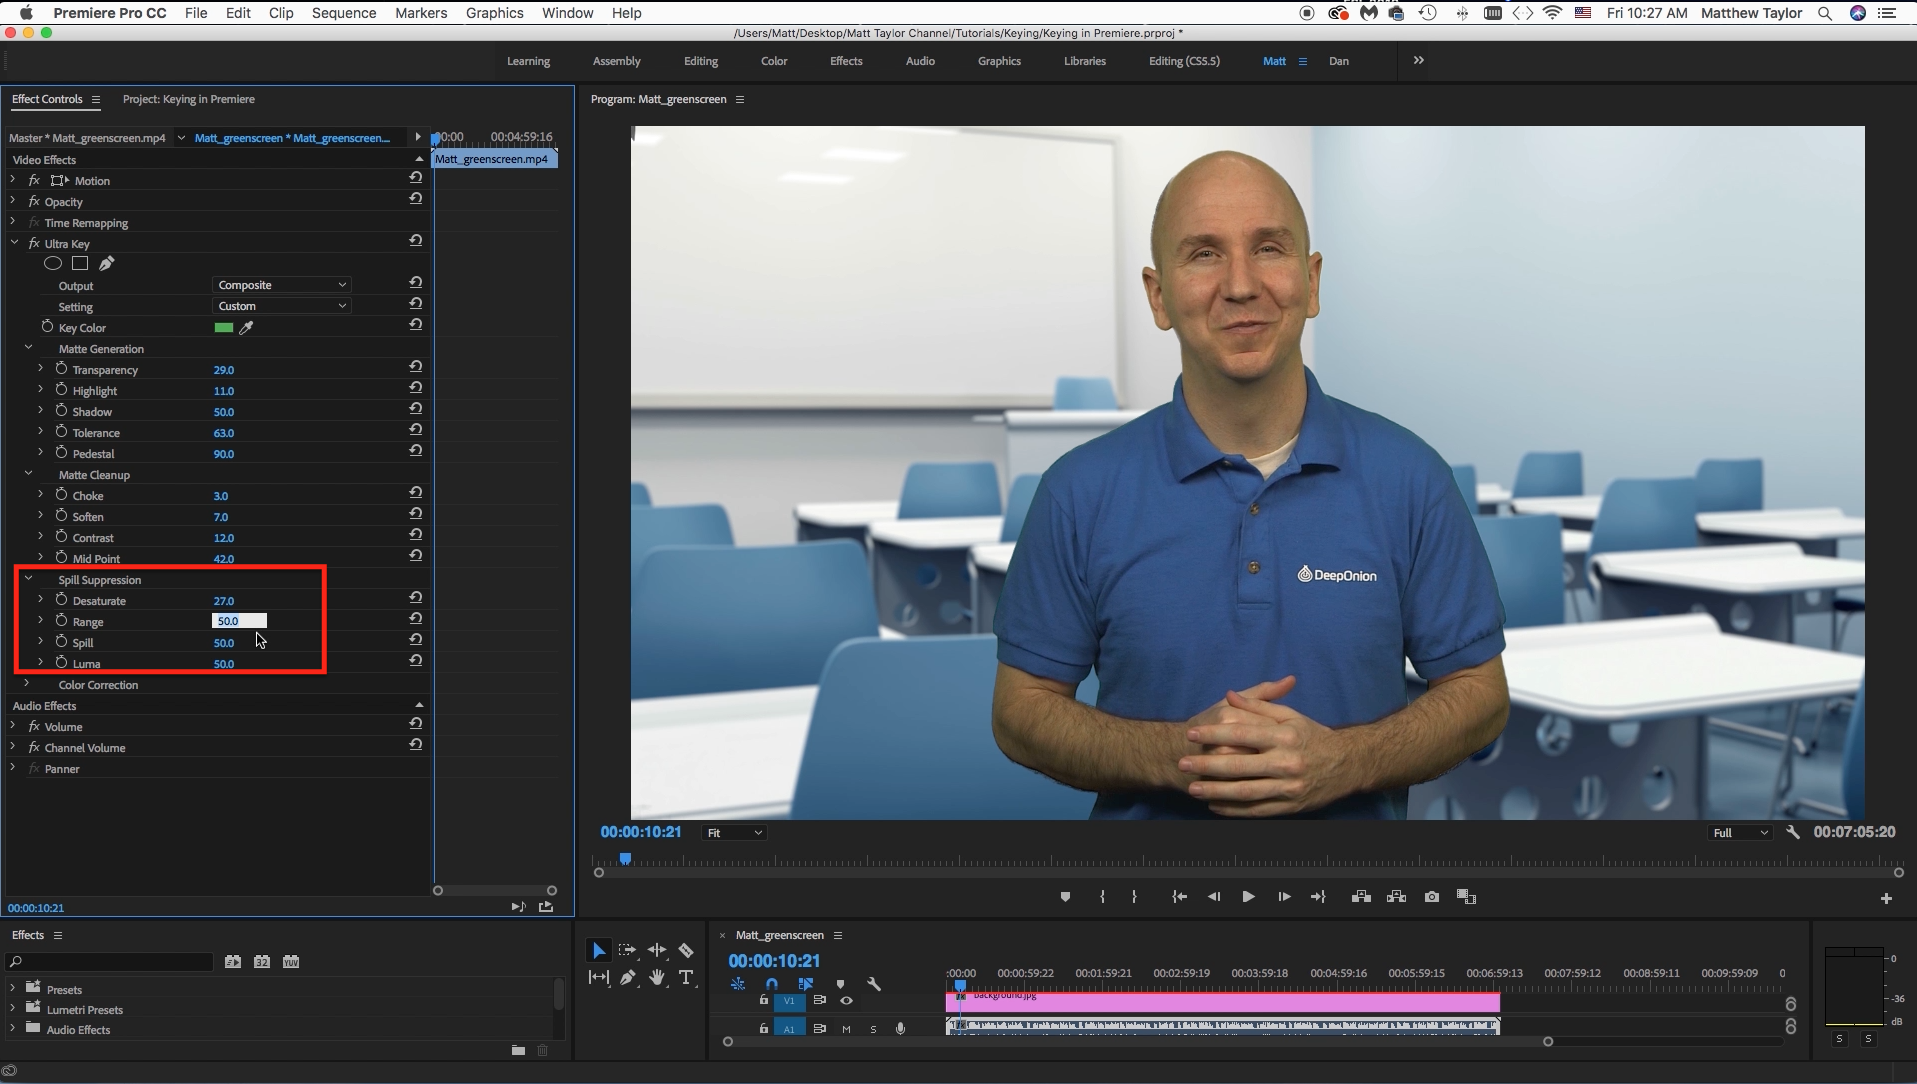
Sometimes there will be a bit of green screen spill on your subject. You can remove that by adjusting the "spill suppression" settings.
Crop and Move/Scale
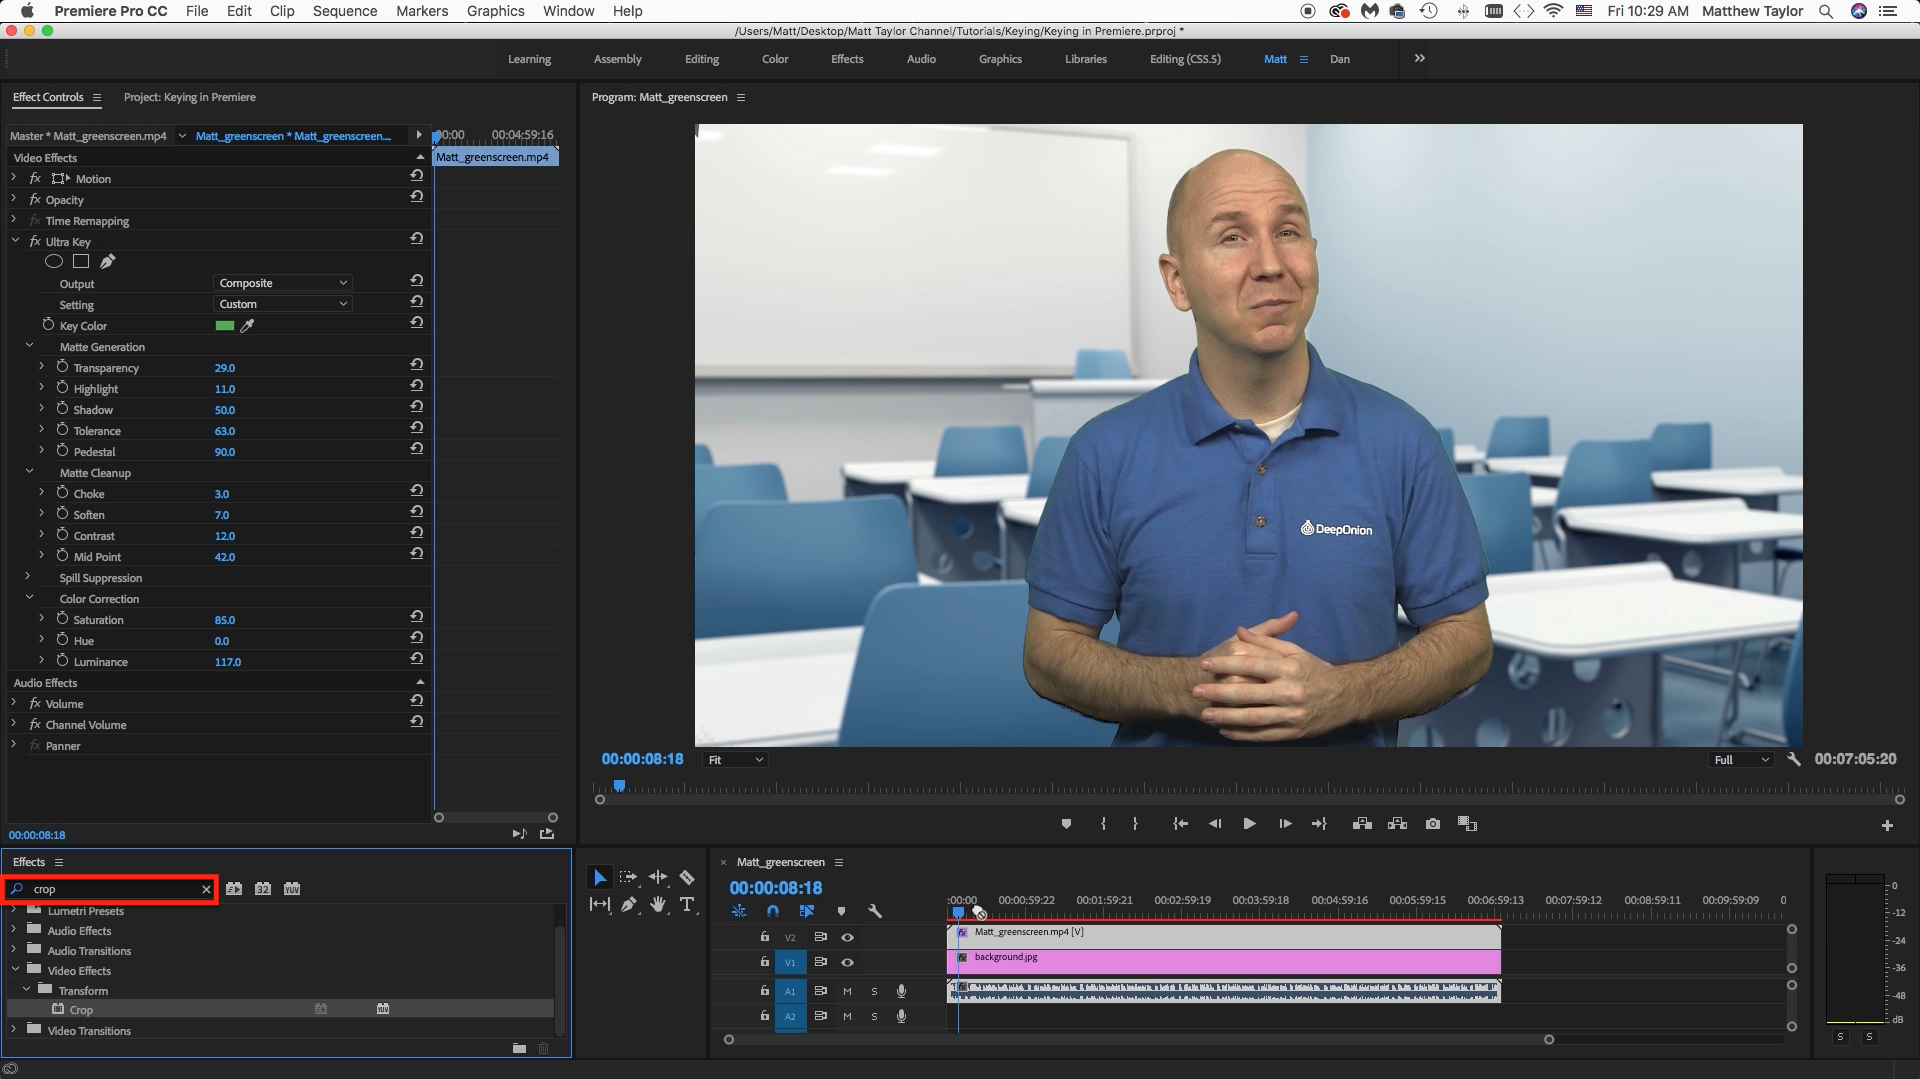
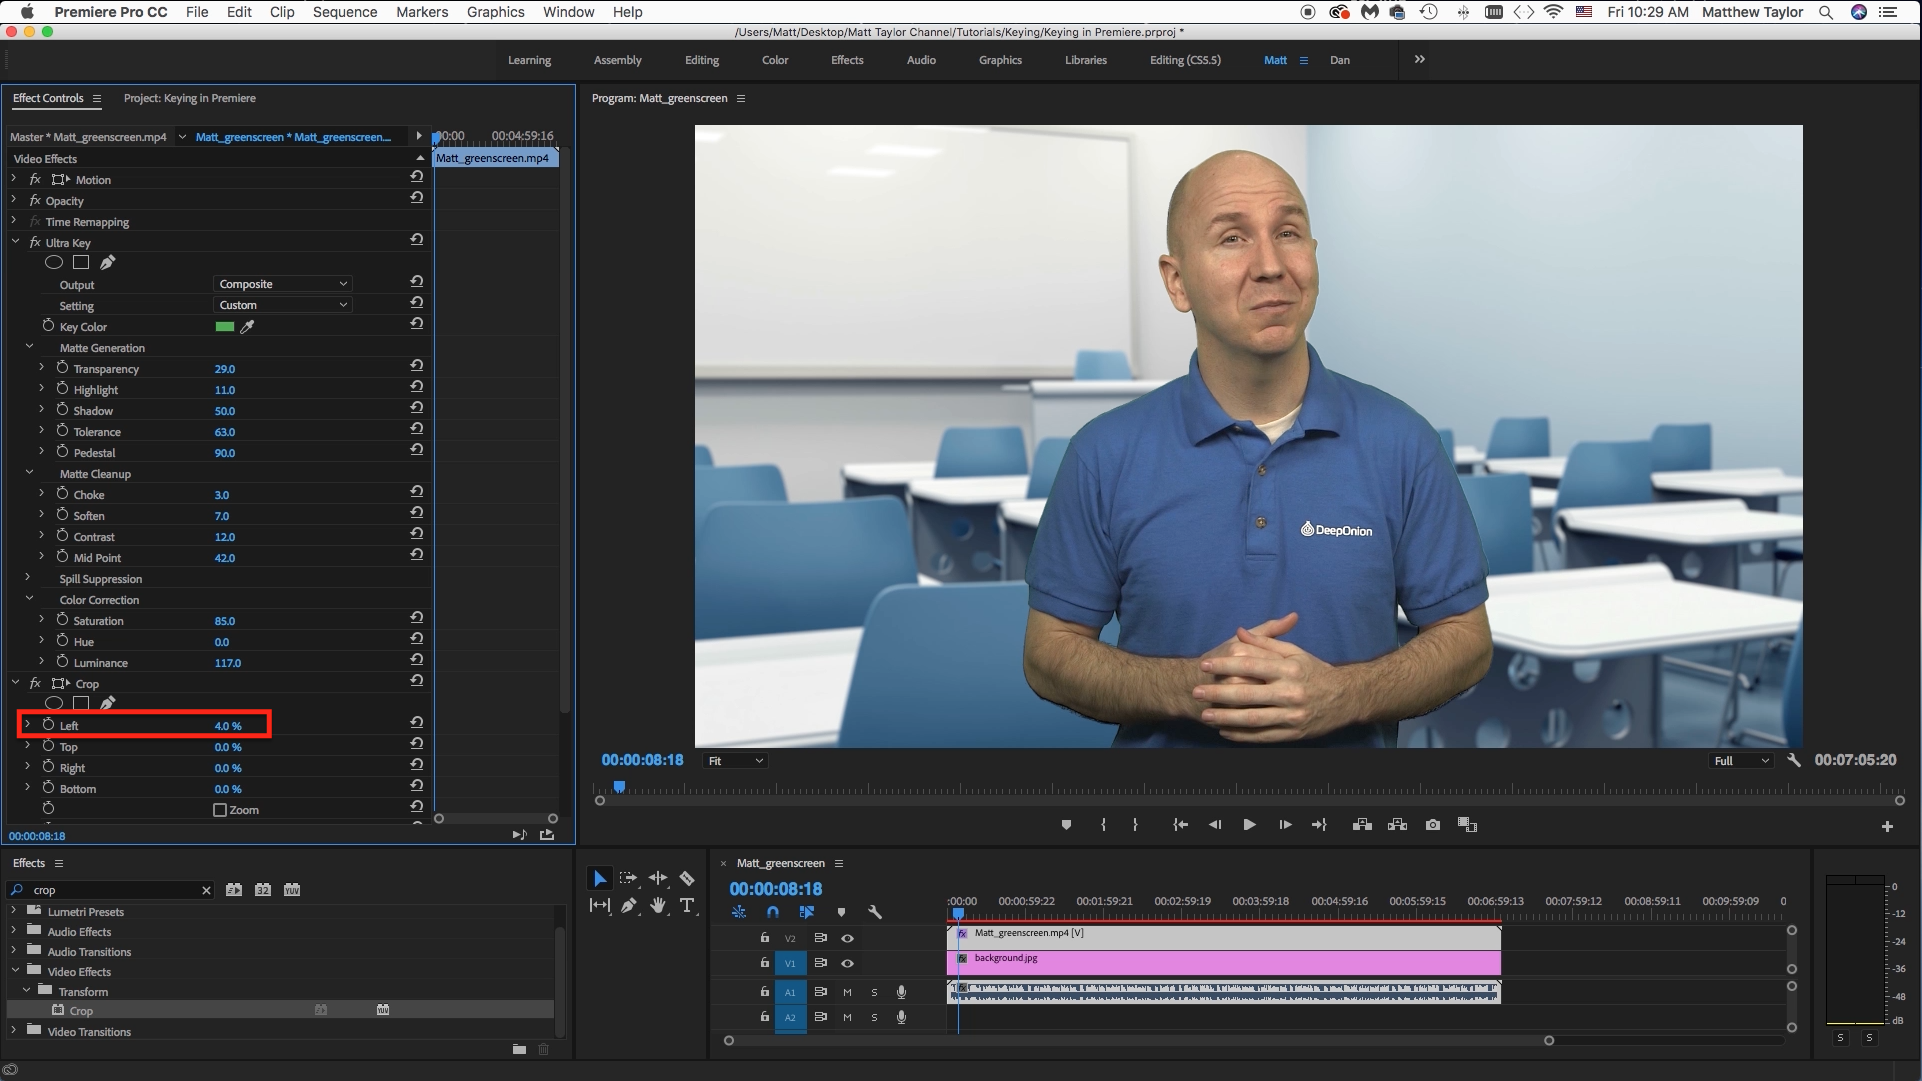
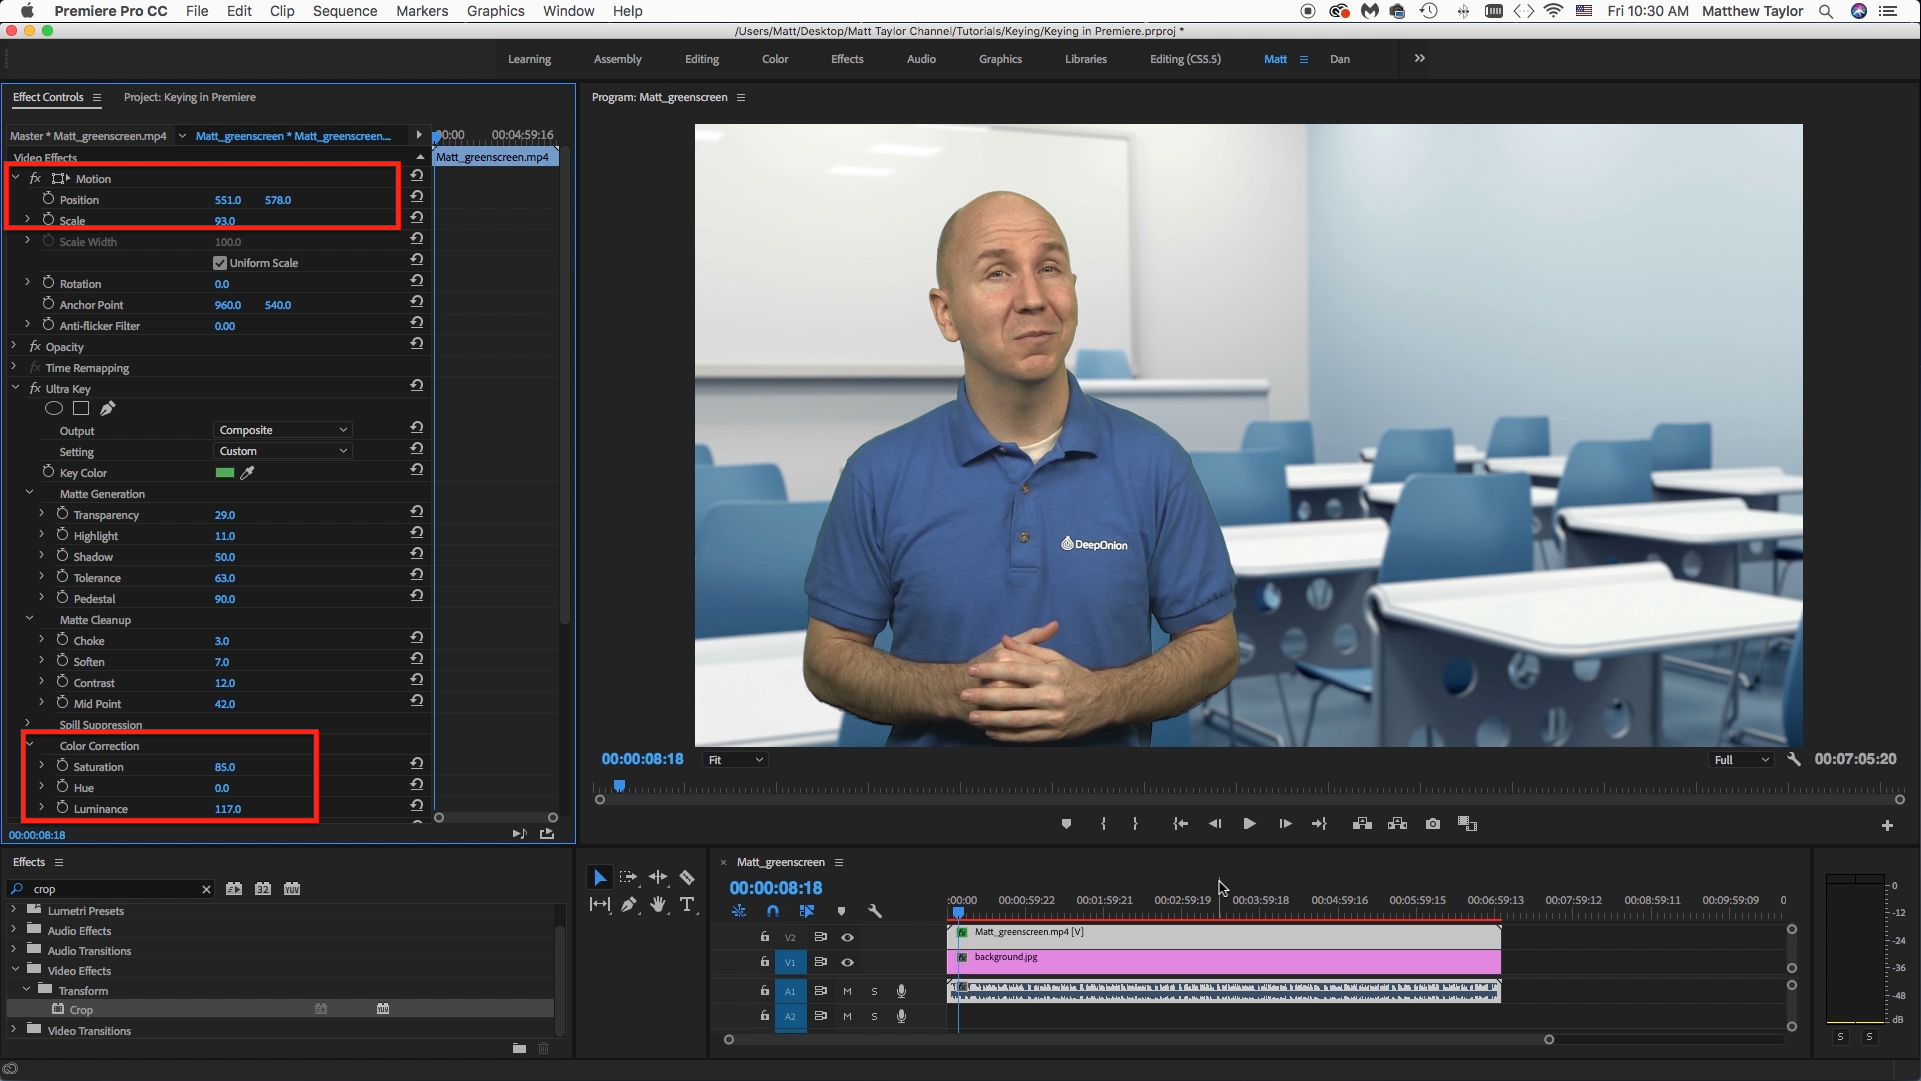
Now let's crop out that corner of the light that is showing in the top left corner of the footage. In the effects area type in crop. Next drag that over to your footage. Then select which ever side you need to bring in. In this case I did a slight adjustment to the left crop. Now I want to stage my character in a better location. Because let's say I want to bring up text and other graphics on the right hand side of me. So I will just use the motion settings and move me over to the left and then scale me down a bit. There we go!
Video Tutorial
Now watch those steps in action by watching the video tutorial! :)