How to Program ESP32 M5Stack StickC With Arduino IDE and Visuino
by RonFrtek in Circuits > Arduino
30564 Views, 17 Favorites, 0 Comments
How to Program ESP32 M5Stack StickC With Arduino IDE and Visuino
.png)
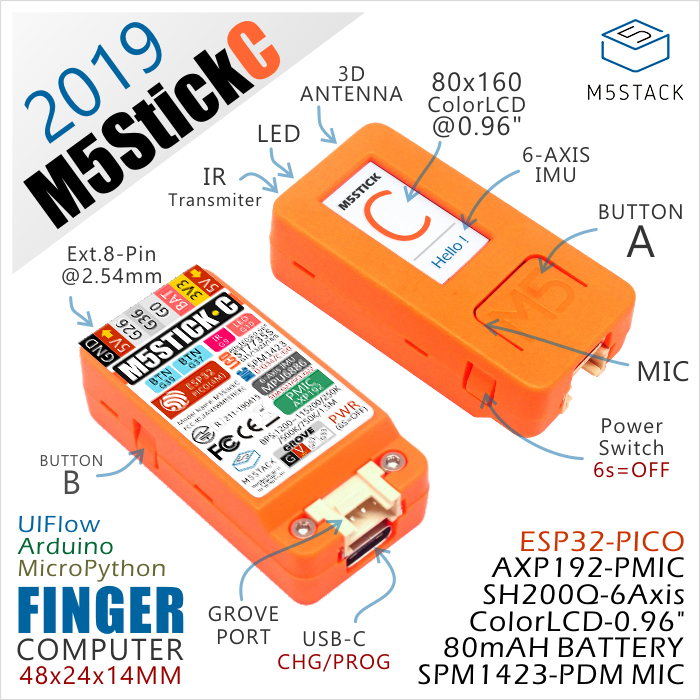
In this tutorial we will learn how to program ESP32 M5Stack StickC with Arduino IDE and Visuino.
Watch a demonstration video.
What You Will Need
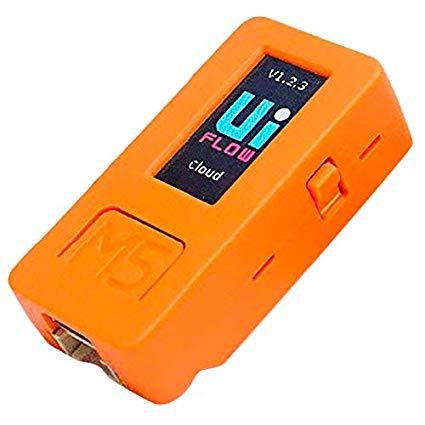
- M5StickC ESP32: you can get it here
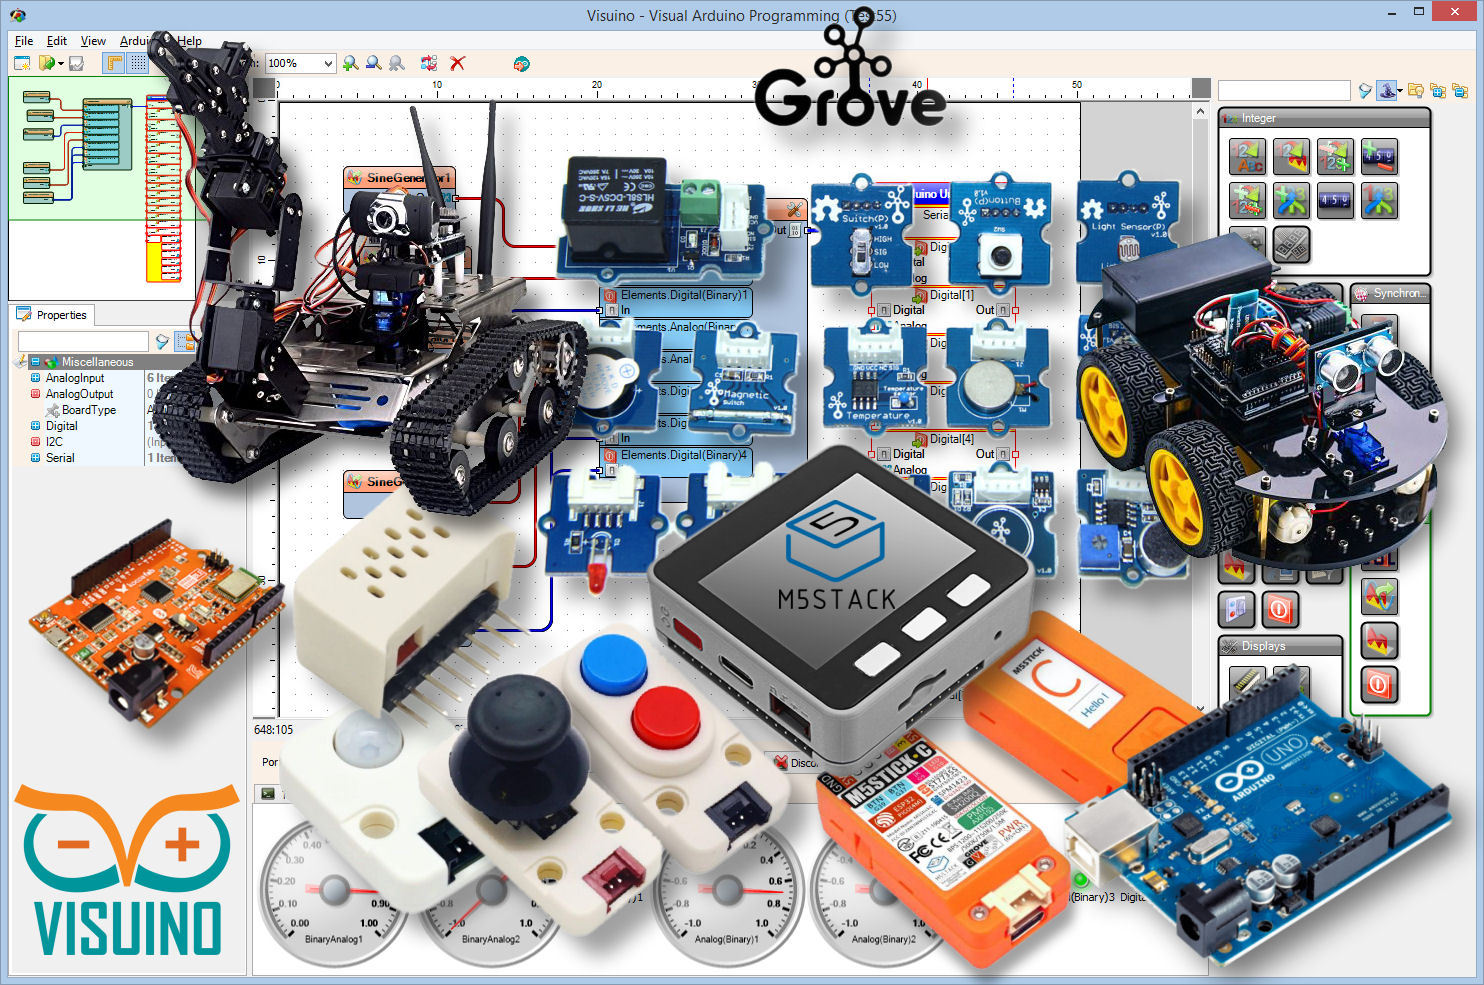
- Visuino program: Download Visuino
Install Arduino IDE
.png)
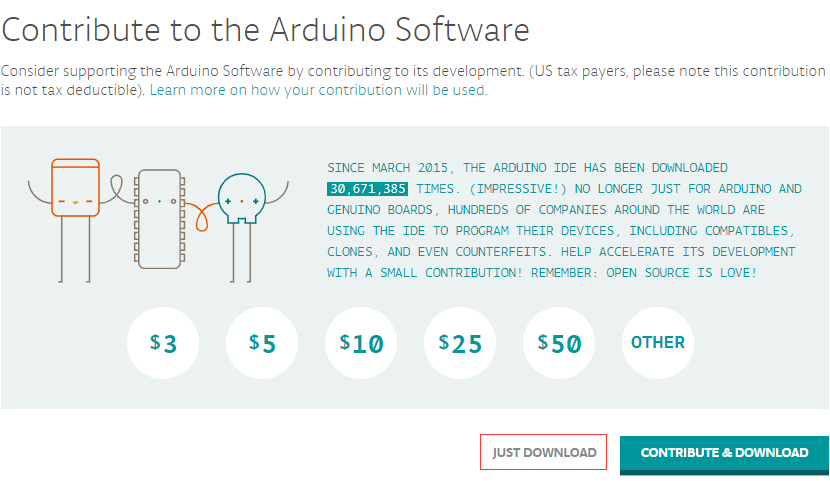
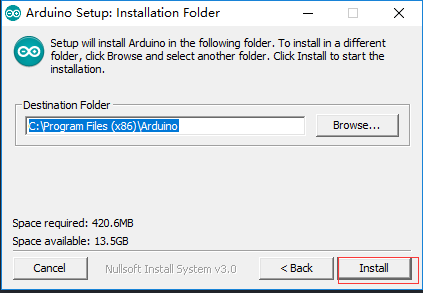
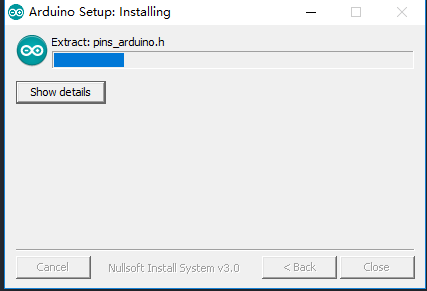
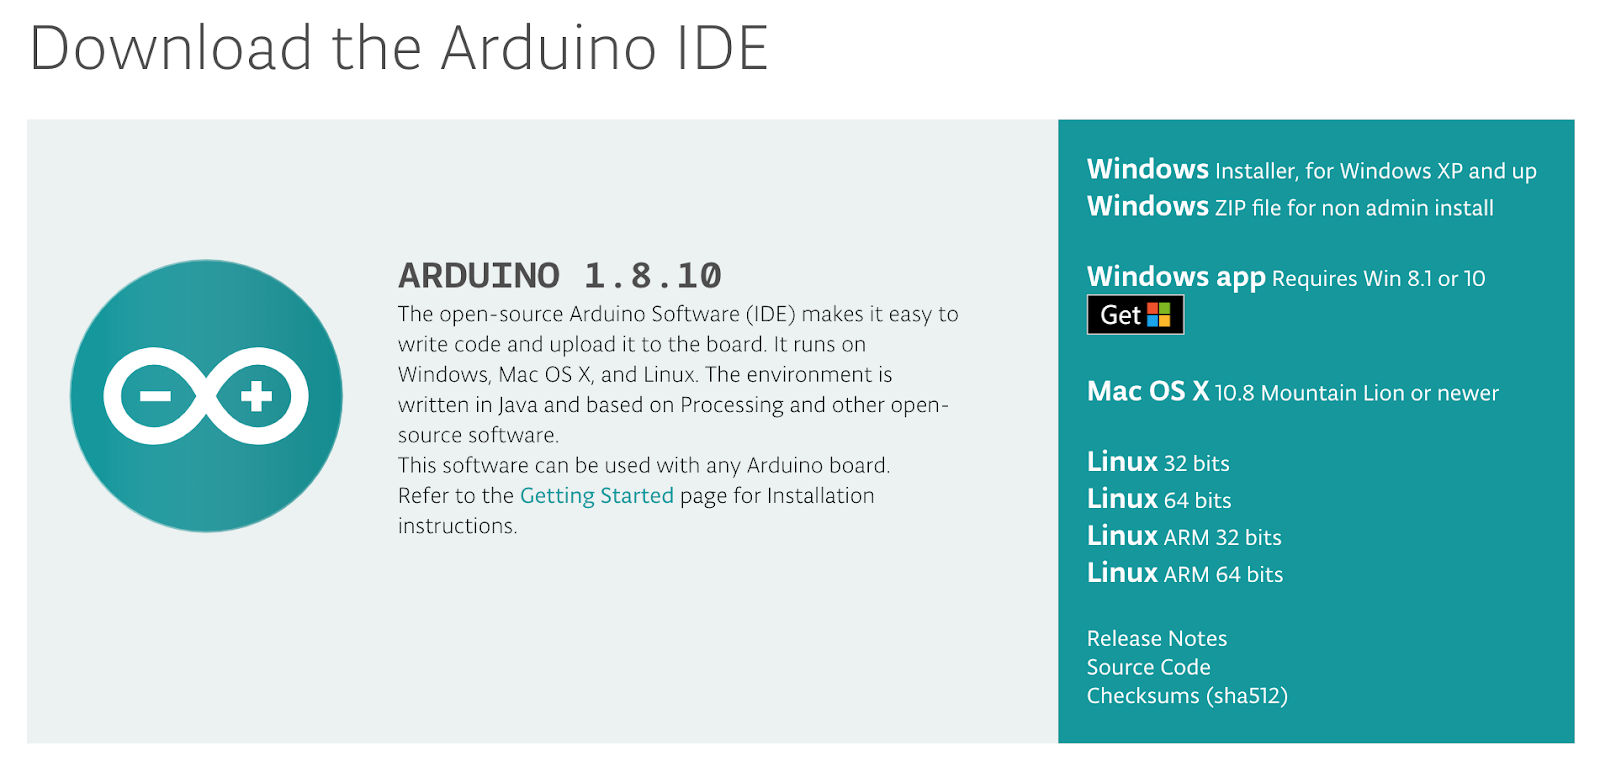
Open up your browser, and visit the official Arduino website https://www.arduino.cc/en/Main/Software
- click “Windows installer, for Windows XP and up” download Arduino IDE
- click JUST DOWNLOAD (or contribute if you like)
- Double click Arduino installer (It is easiest to keep the default selection throughout this process, including the installation path.)
In Arduino IDE: Install ESP32 Boards Manager
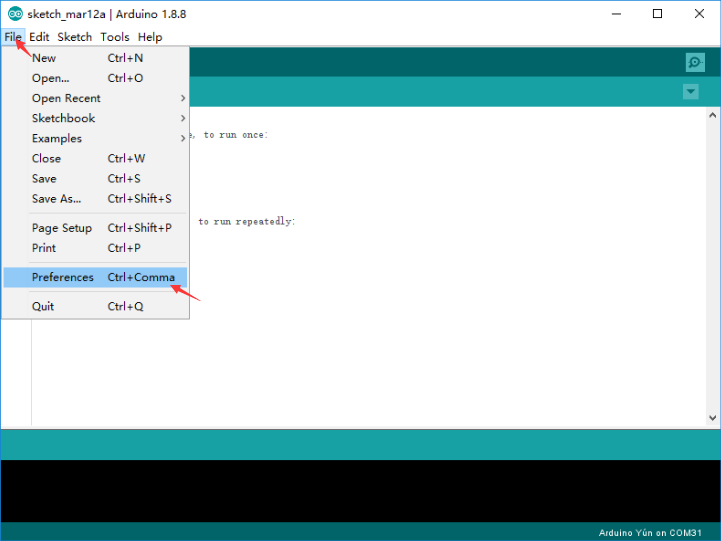
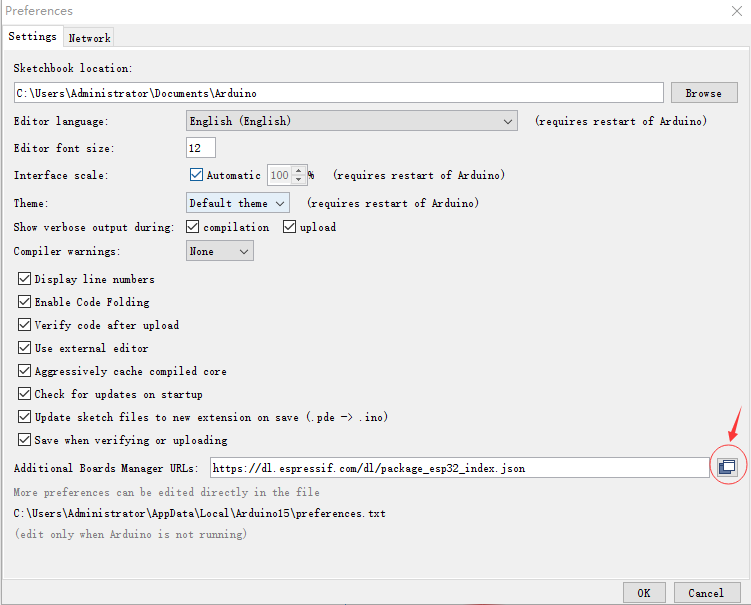

- Open up the Arduino IDE, and navigate to File -> Preferences -> Settings
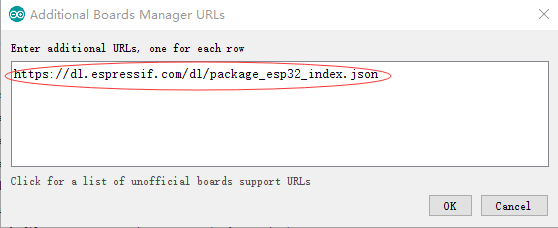
- Add the ESP32 Boards Manager URL
Copy this link for the ESP32 Board Manager URL to Additional Boards Manager URLs ESP32 Boards Manager url: https://dl.espressif.com/dl/package_esp32_index.json
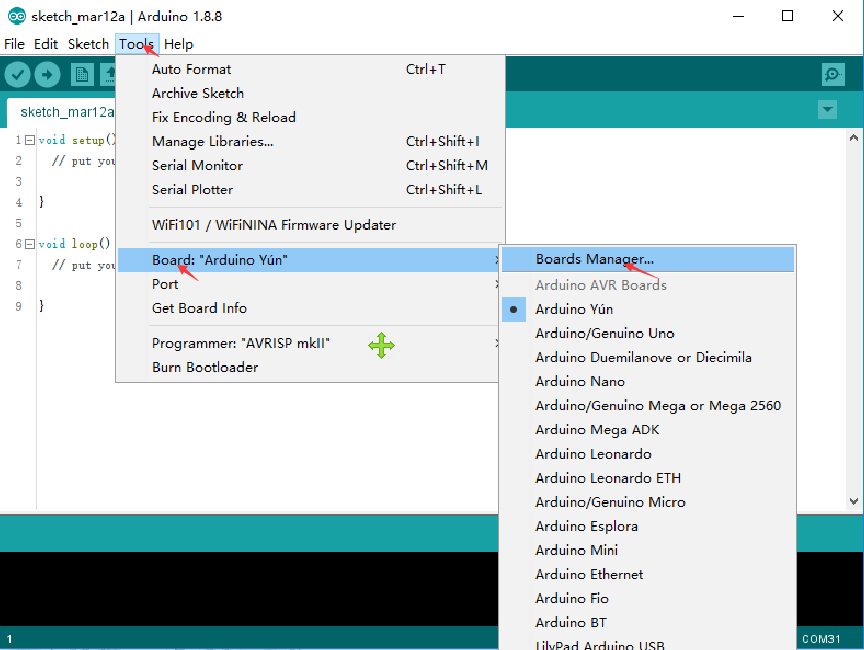
Then hit OK - Navigate to Tools -> Board: -> Boards Manager...
- Search ESP32 in Boards Manager window, find it and click Install
Install Visuino IDE
.png)
.png)
- Visit the download page , and download the latest version
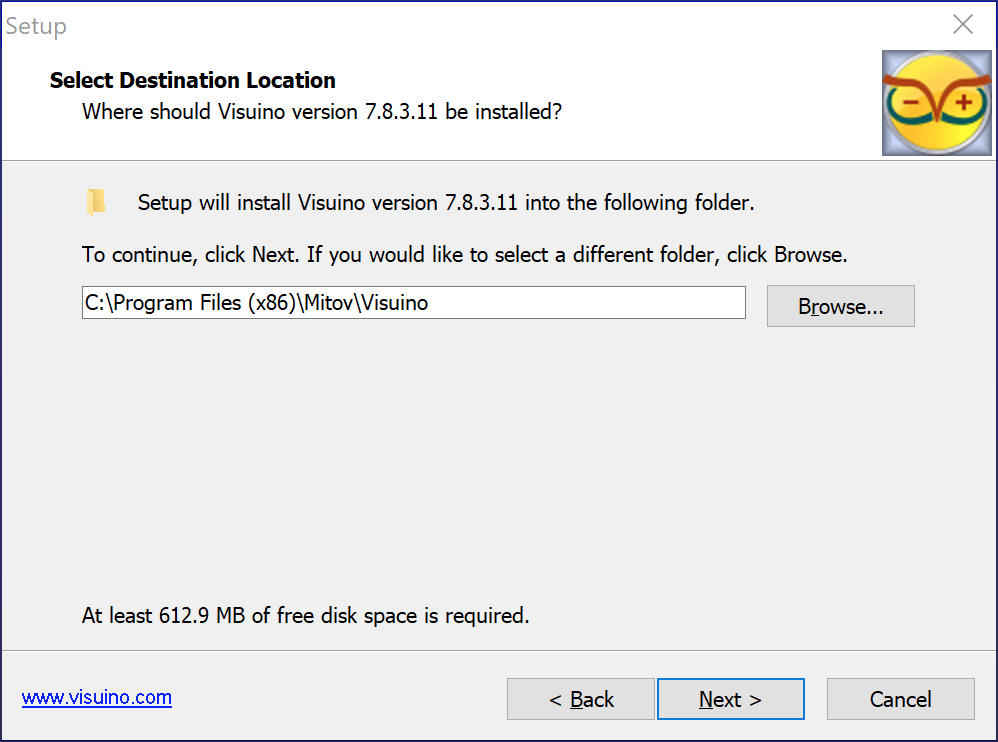
- Extract and run the setup
- The defaults should work fine
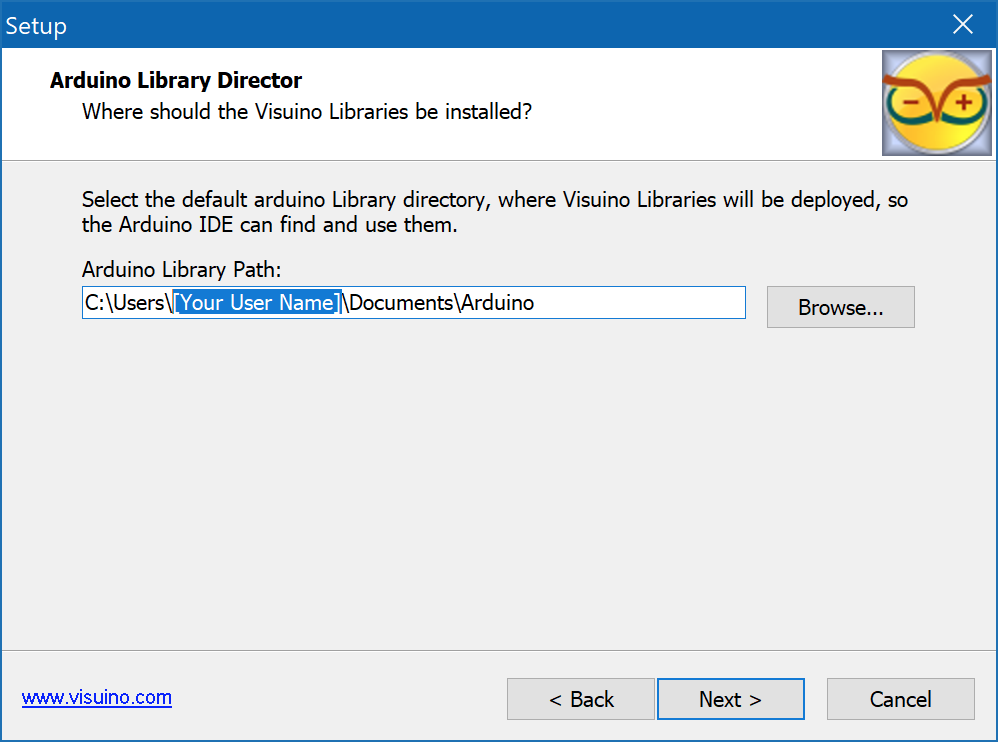
- It will try to detect the location of the Arduino Library Path. Unless you changed it then it should be in C:\Users\[Your User Name]\Documents and the installer will detect it correctly.
-
Launch Visuino!
Connect M5Stick-C to Computer
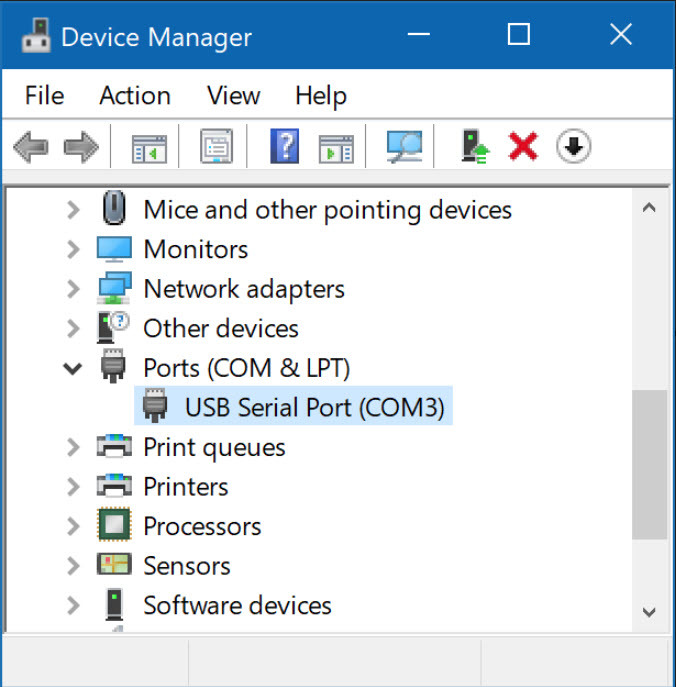
- Connect the M5Stick-C to your Windows computer via the included USB-C cable
Windows should detect it and install the drivers automatically - you might need to reboot. If the driver installs correctly you will see it show up in Device Manager as a USB Serial Port
- Windows should detect it and install the drivers automatically - you might need to reboot. If the driver installs correctly you will see it show up in Device Manager as a USB Serial Port
- If you are on a version of Windows prior to Windows 10 then you may need to install a driver, although I recommend you upgrade! [Legacy Windows driver]
Start Visuino, and Select the M5 Stack Stick C Board Type
.jpg)
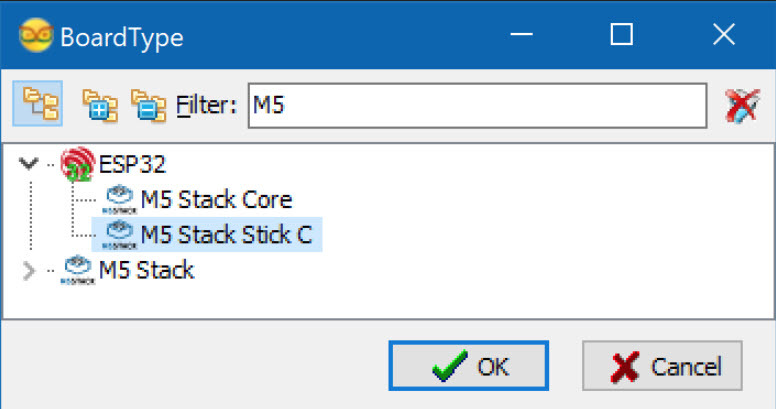
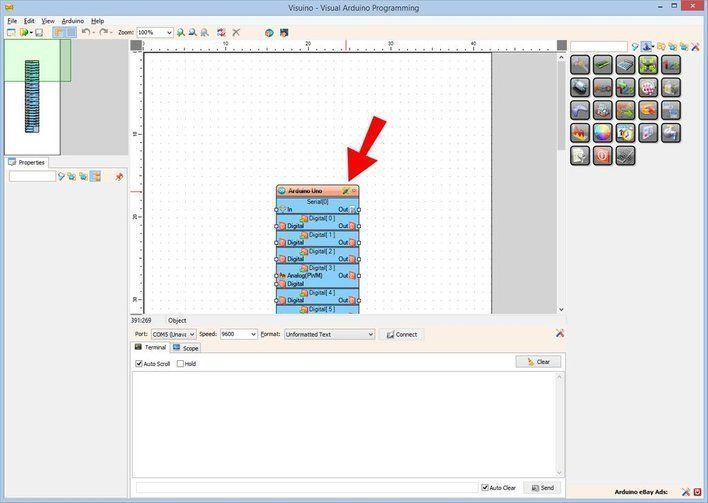
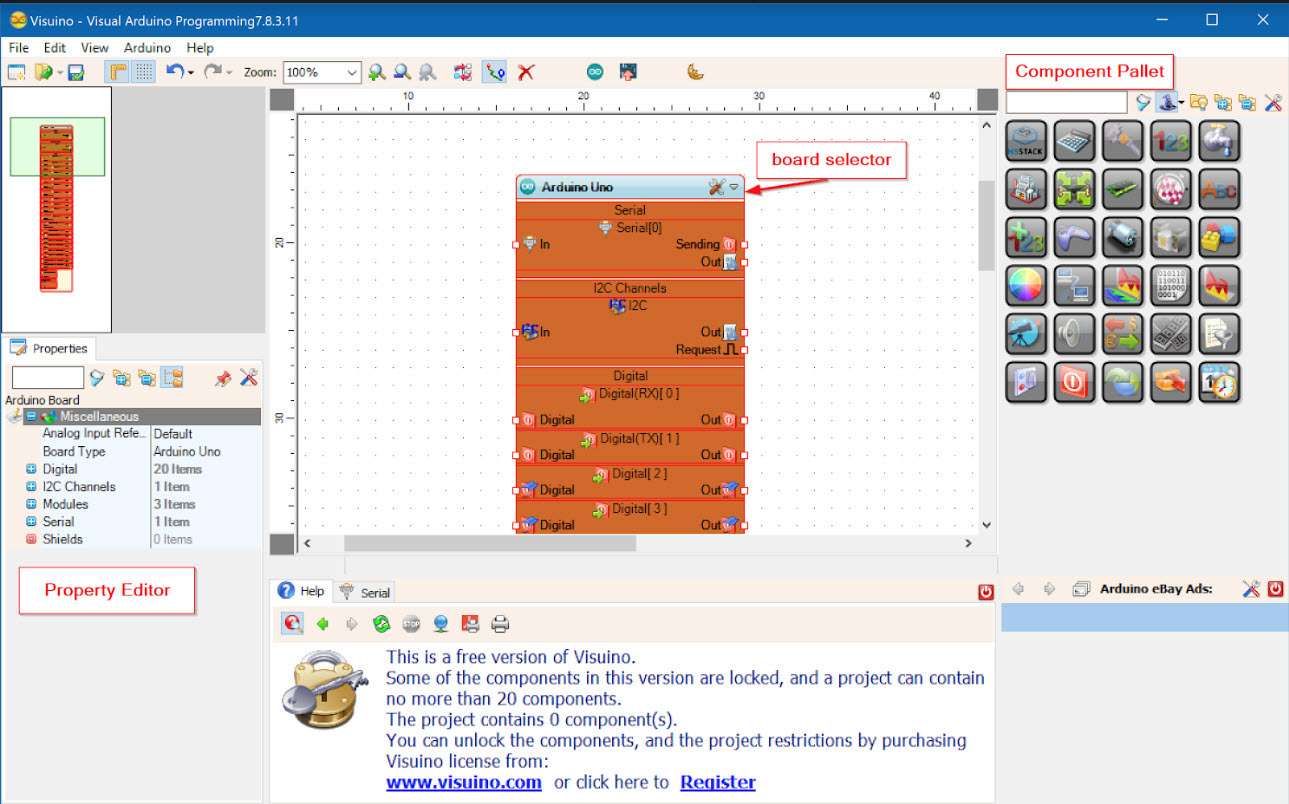
Start Visuino as shown in the first picture Click on the "Tools" button on the Arduino component (Picture 1) in Visuino When the dialog appears, select "M5 Stack Stick C" as shown on Picture 2
In Visuino Add Components and Connect Them
.png)
.png)
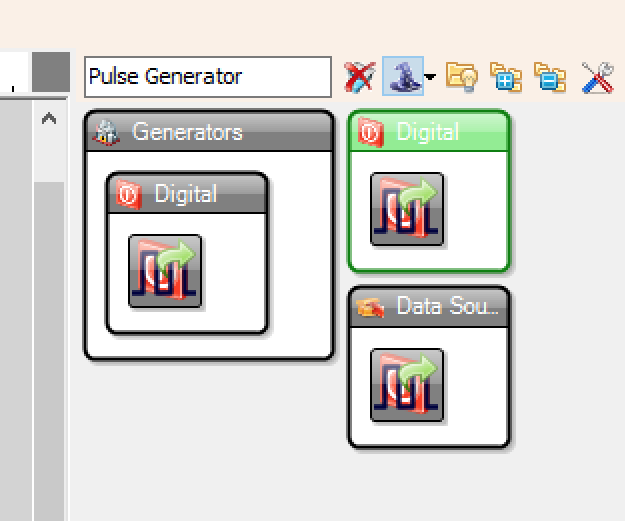
- From the component palette select the Pulse Generator
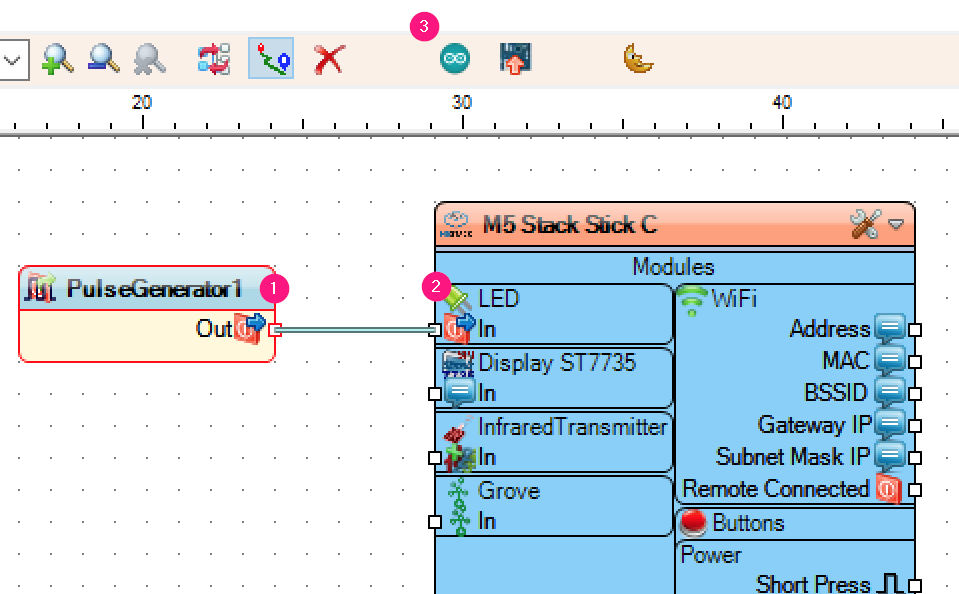
- Connect the Pulse Generator to the LED pin
Generate, Compile, and Upload the Arduino Code
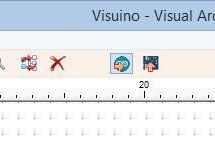
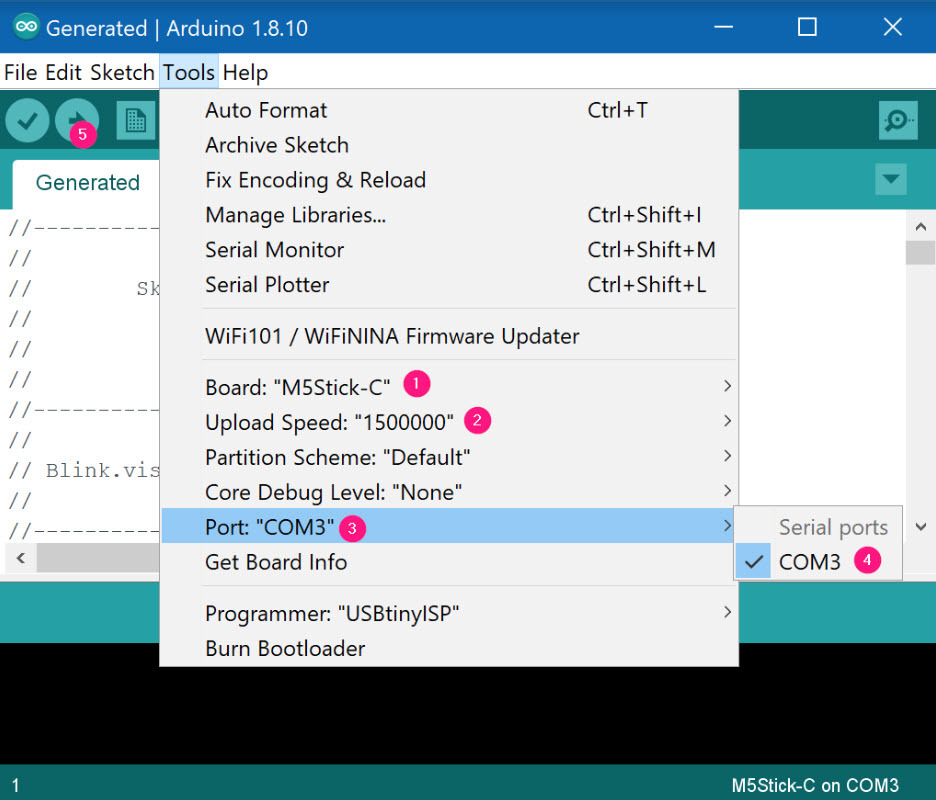
- Click the Arduino icon on the toolbar, this will generate code and open the Arduino IDE. The button next to it will compile and send the code straight to the device. You will want to open the IDE the first time to make sure the COM port is set correctly. After that the Arduino IDE will save your settings.
- Once in the Arduino IDE make sure your Board, Speed, and Port are set correctly. You will most likely need to set the COM port from the sub menu, but the others should be set automatically. If you have more than one COM port try removing your M5Stick, look and see which ports remain, then reattach the M5Stick and see which one returns. That is it’s COM port.
Then click Upload. This will Verify (compile) and Upload.If you check your M5Stick-C you will see the upper left corner blinking.
Play
If you power the M5Sticks module, the LEDs should start to blink.
Congratulations! You have completed your M5Sticks project with Visuino. Also attached is the Visuino project, that I created for this Instructable. You can download and open it in Visuino: https://www.visuino.com
Downloads
Troubleshooting
.png)
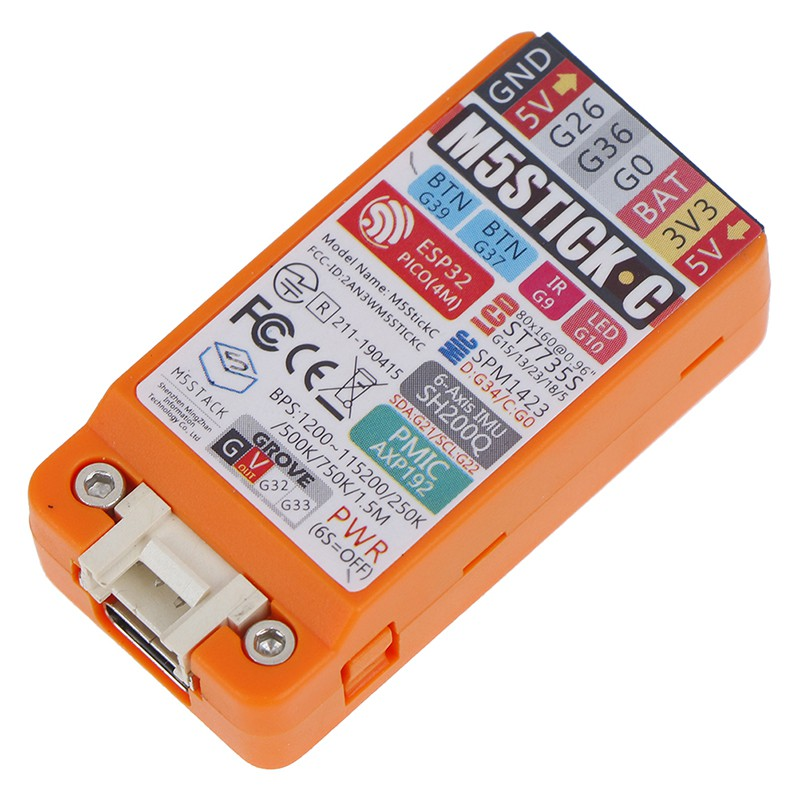
I tested and charged all of the M5Sticks already, but sometimes if the battery drains completely they don’t want to turn on and charge. These steps will restore normal operation (also tested these steps).
- Short the BAT to GND.
- Insert the USB cable.
- After the screen is lit, stop shorting and USB continues to charge the device.
More Information
More than enough information to overwhelm you about M5Stick and Visuino!
Here is the M5Stick-C Quick Start Guide for Windows Arduino development https://docs.m5stack.com/#/en/quick_start/m5stickc/m5stickc_quick_start_with_arduino_Windows
Here is the detailed M5Stick-C documentation https://docs.m5stack.com/#/en/core/m5stickc
7 Part Beginner Visuino series https://www.patreon.com/posts/visuino-beginner-29319821
Visuino Documentation https://www.visuino.com/wiki/index.php?title=Main_Page
Mitov Software and Visuino Blog (news like Updates and new releases) http://labpacks.blogspot.com/
Visuino Examples:
https://www.hackster.io/visuino/projects
https://www.instructables.com/id/Programming-Arduino-With-Visuino/
https://www.youtube.com/playlist?list=PLymDIvwzJQlvPOzc3AdtzO6LXbnk-NFPT
https://hackaday.io/projects?tag=visuino
Visuino MeWe community https://mewe.com/group/5bc7b647058ed309f3286589
https://www.youtube.com/watch?v=ppXkl0046dc
BIG THANK YOU!
All the credit for this tutorial goes to Jim McKeeth (Author of the original tutorial) and Boian Mitov (Developer of the Visuino).