How to Port Forward

Whether you want to host a game server or you're trying to host a webserver port forwarding is a necessary step in order to get your server to communicate with the rest of the internet.
Now some of you may be wondering, "what is port forwarding?". Simply put port forwarding is when you tell your router that any data that comes through a specific port (which is like a virtual path) is to be directed to a specific computer on your network. This way if you are running a server on your computer all the appropriate responses can be received properly.
Navigate to Your Router's Settings Page

The first step to port forwarding is to go to your router's settings page. This is where you can manage and configure settings for your router. Typically this can be done by opening your browser and in the address bar typing in the "192.168.1.1" and then enter. Now what you need to type in the address bar can vary from router to router, most of the time "192.168.1.1" works but consult your router for specifics. For example the router that I will be demonstrating with is a Netgear WNR2000v4 and to access the router settings page for it you can go to either "192.168.1.1" or "routerlogin.net".
Log in When Prompted
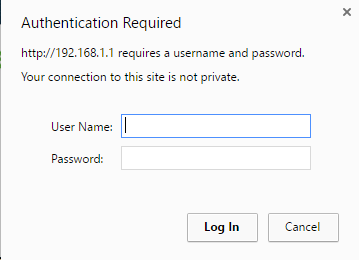
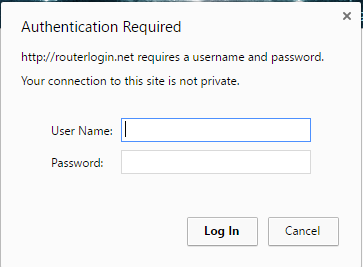
Once the page loads you will most likely be prompted to log in. If you have never set a username or password than the default username for most routers is admin and the default password is password. However this can vary from router to router so if this doesn't work consult your router's documentation.
Navigate to the Port Forwarding Page
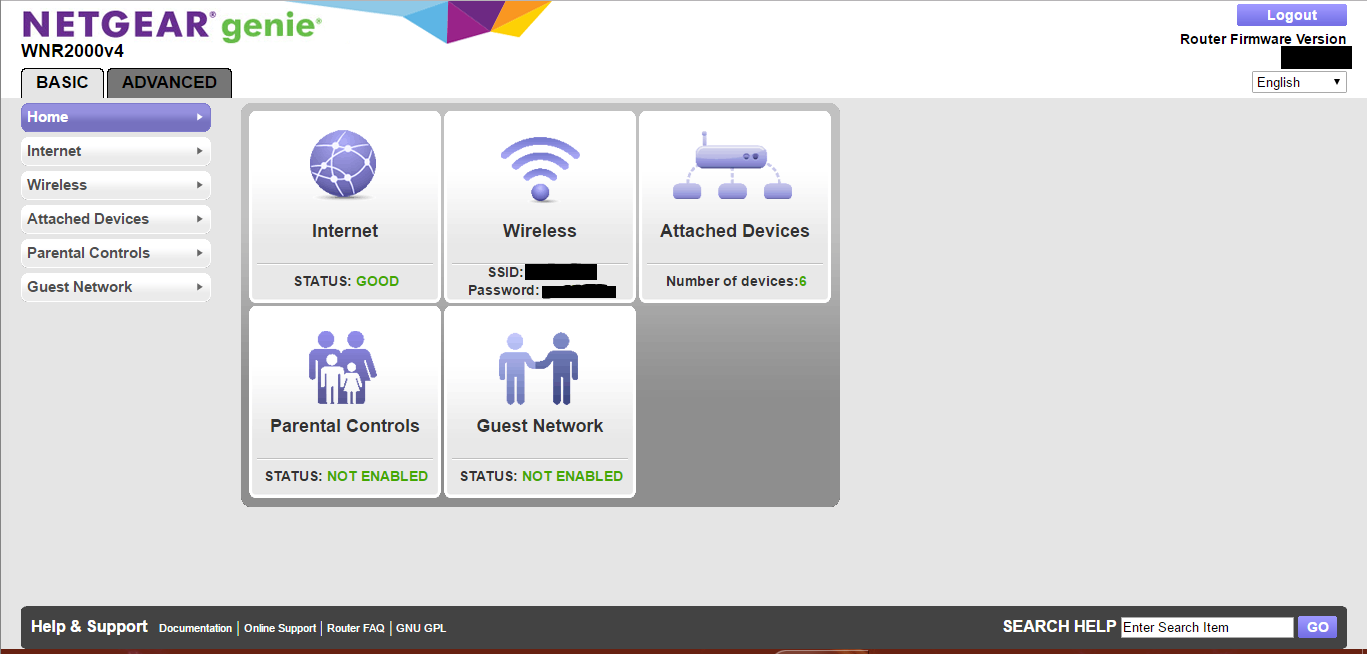
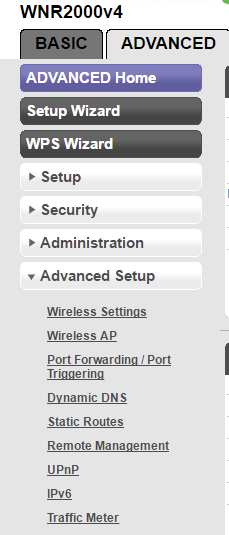
Now once you log in you should see the main page for your router. At this point you are going to want to navigate to the Port Forwarding Tab for your router. If you have a Netgear WNR2000v4 then this is done by clicking on the Advanced tab on the side and then clicking Advanced Settings and under that click Port Forwarding / Port Triggering.
Forwarding the Port
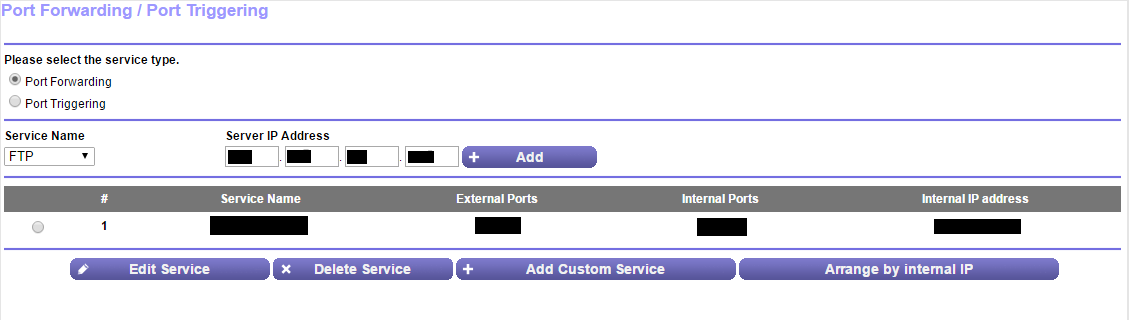
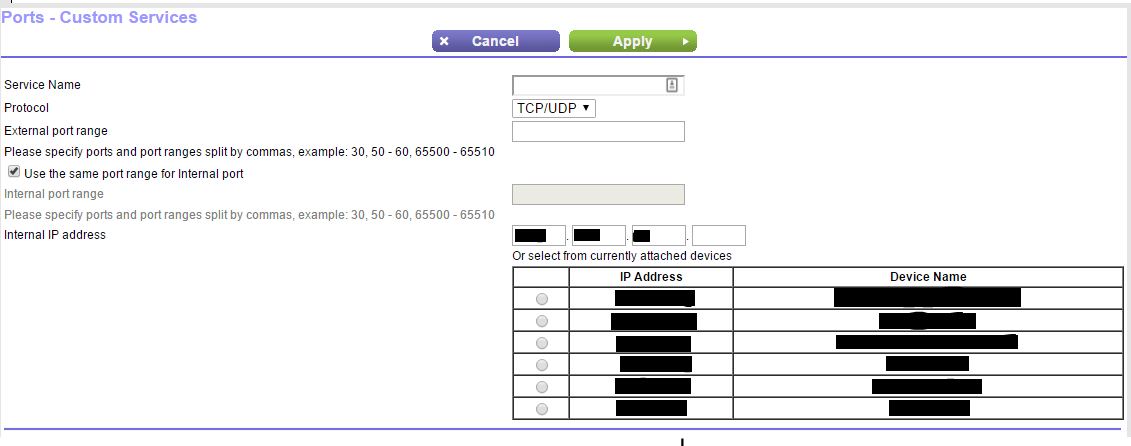
The Port Forwarding page should look similar to the first image above. Now to forward a port what you are going to want to do is click on the button on the bottom that says Add Custom Service which will take you to a page that looks similar to the second image.
Enter Information
Now at this point you will want to enter a name, port number (or port numbers if you need to forward several ports) and the IP address to forwarded to.
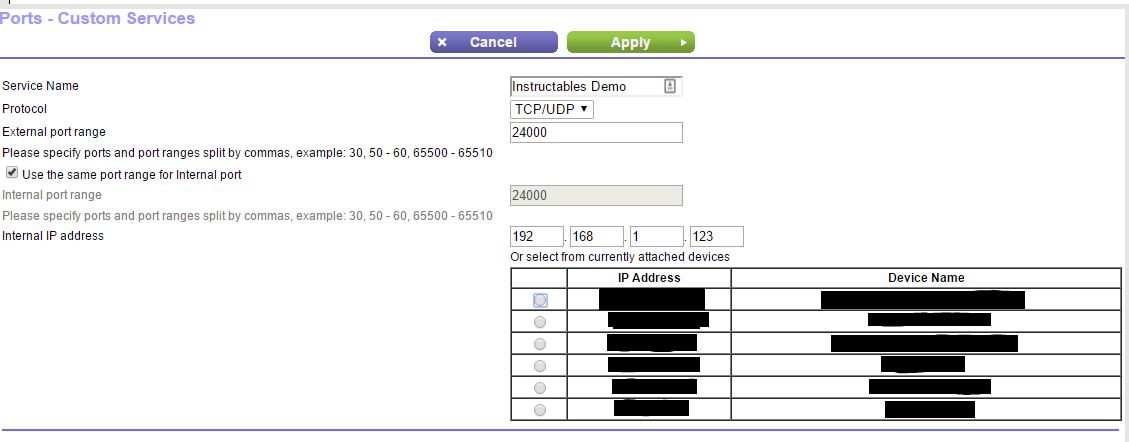
Hit Apply!
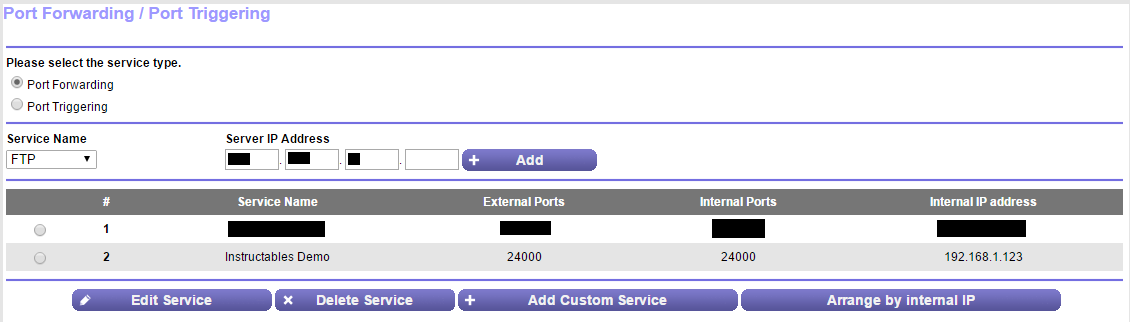
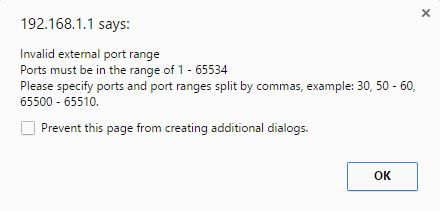
Once you have entered all your information hit apply! If everything is correct you should be back to the previous screen except there will now be a new entry in the table as shown in the first image. However if there were any errors then you may see a message similar to the second image. If this occurs go back and correct the issue.
Verify It Works
Now to make sure that we properly forwarded the port we can do a quick test.
On the device that you forwarded the port to start the application, server, etc that needed the forwarded port.
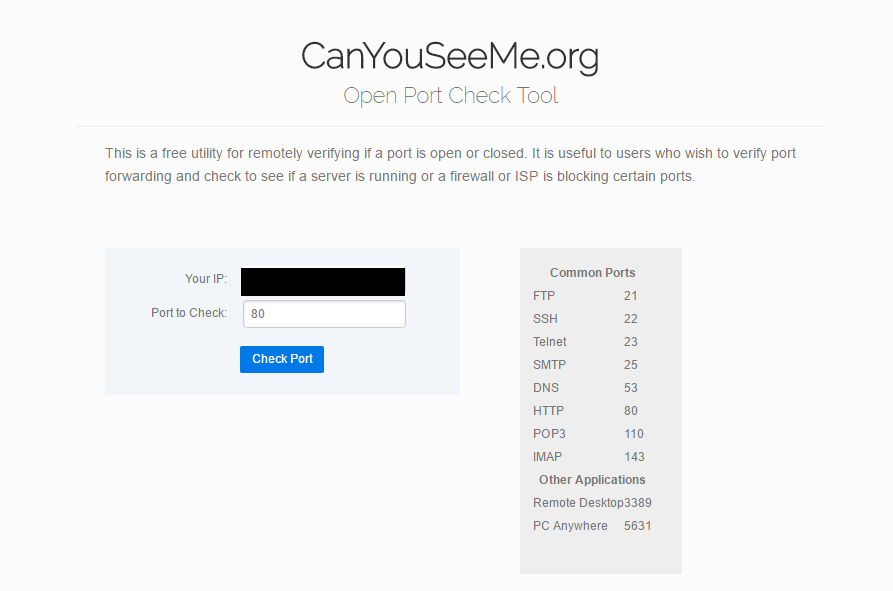
Once this is running on the same device open up a browser window and go to the site canyouseeme.org.
The field "Your IP" should already be pre filled with the external IP address of the device you are accessing the site from.
For the field "Port to check" enter the port you forwarded.
Once this has been entered hit "Check Port". If everything works then you will get a successful message otherwise you will see an error message. If this occurs then you may need to go back and see if you provided the right IP number, port number, or if you started the server or application properly.
Learning More!
If you enjoyed this Instructable and want to learn more about port forwarding I have provided some links below. These are links that I personally found helpful when I was trying to learn port forwarding and contain good depth and are a great way to understand some of the details that were glossed over or briefly touched on in this tutorial.
Suggested links to learn more:
- This is a great site that has a good quick summary and then links to get more detailed information!
- This link points to a post on superuser.com. The answer below is what is really the key information to read. It has good images, gives plenty of background, and is written in such a manner to make the subject not too complicated to understand. Plus there is some extra information on things like NAT and security which I personally found very interesting and helpful!