How to Paint Acrylic

Welcome back to FSLaser Instructables! Today we wanted to give you a step by step tutorial on how you can paint acrylic. We're going to be showing you two different ways that you can create a file depending on the type of work you want to create. Tim wanted to add more detail to his so he created his own vector file. Creating your file gives you total freedom over what you're creating. Walker wanted to go with an idea that would be a bit easier for beginners to follow and tweak themselves.
Starting with Tim's Project:
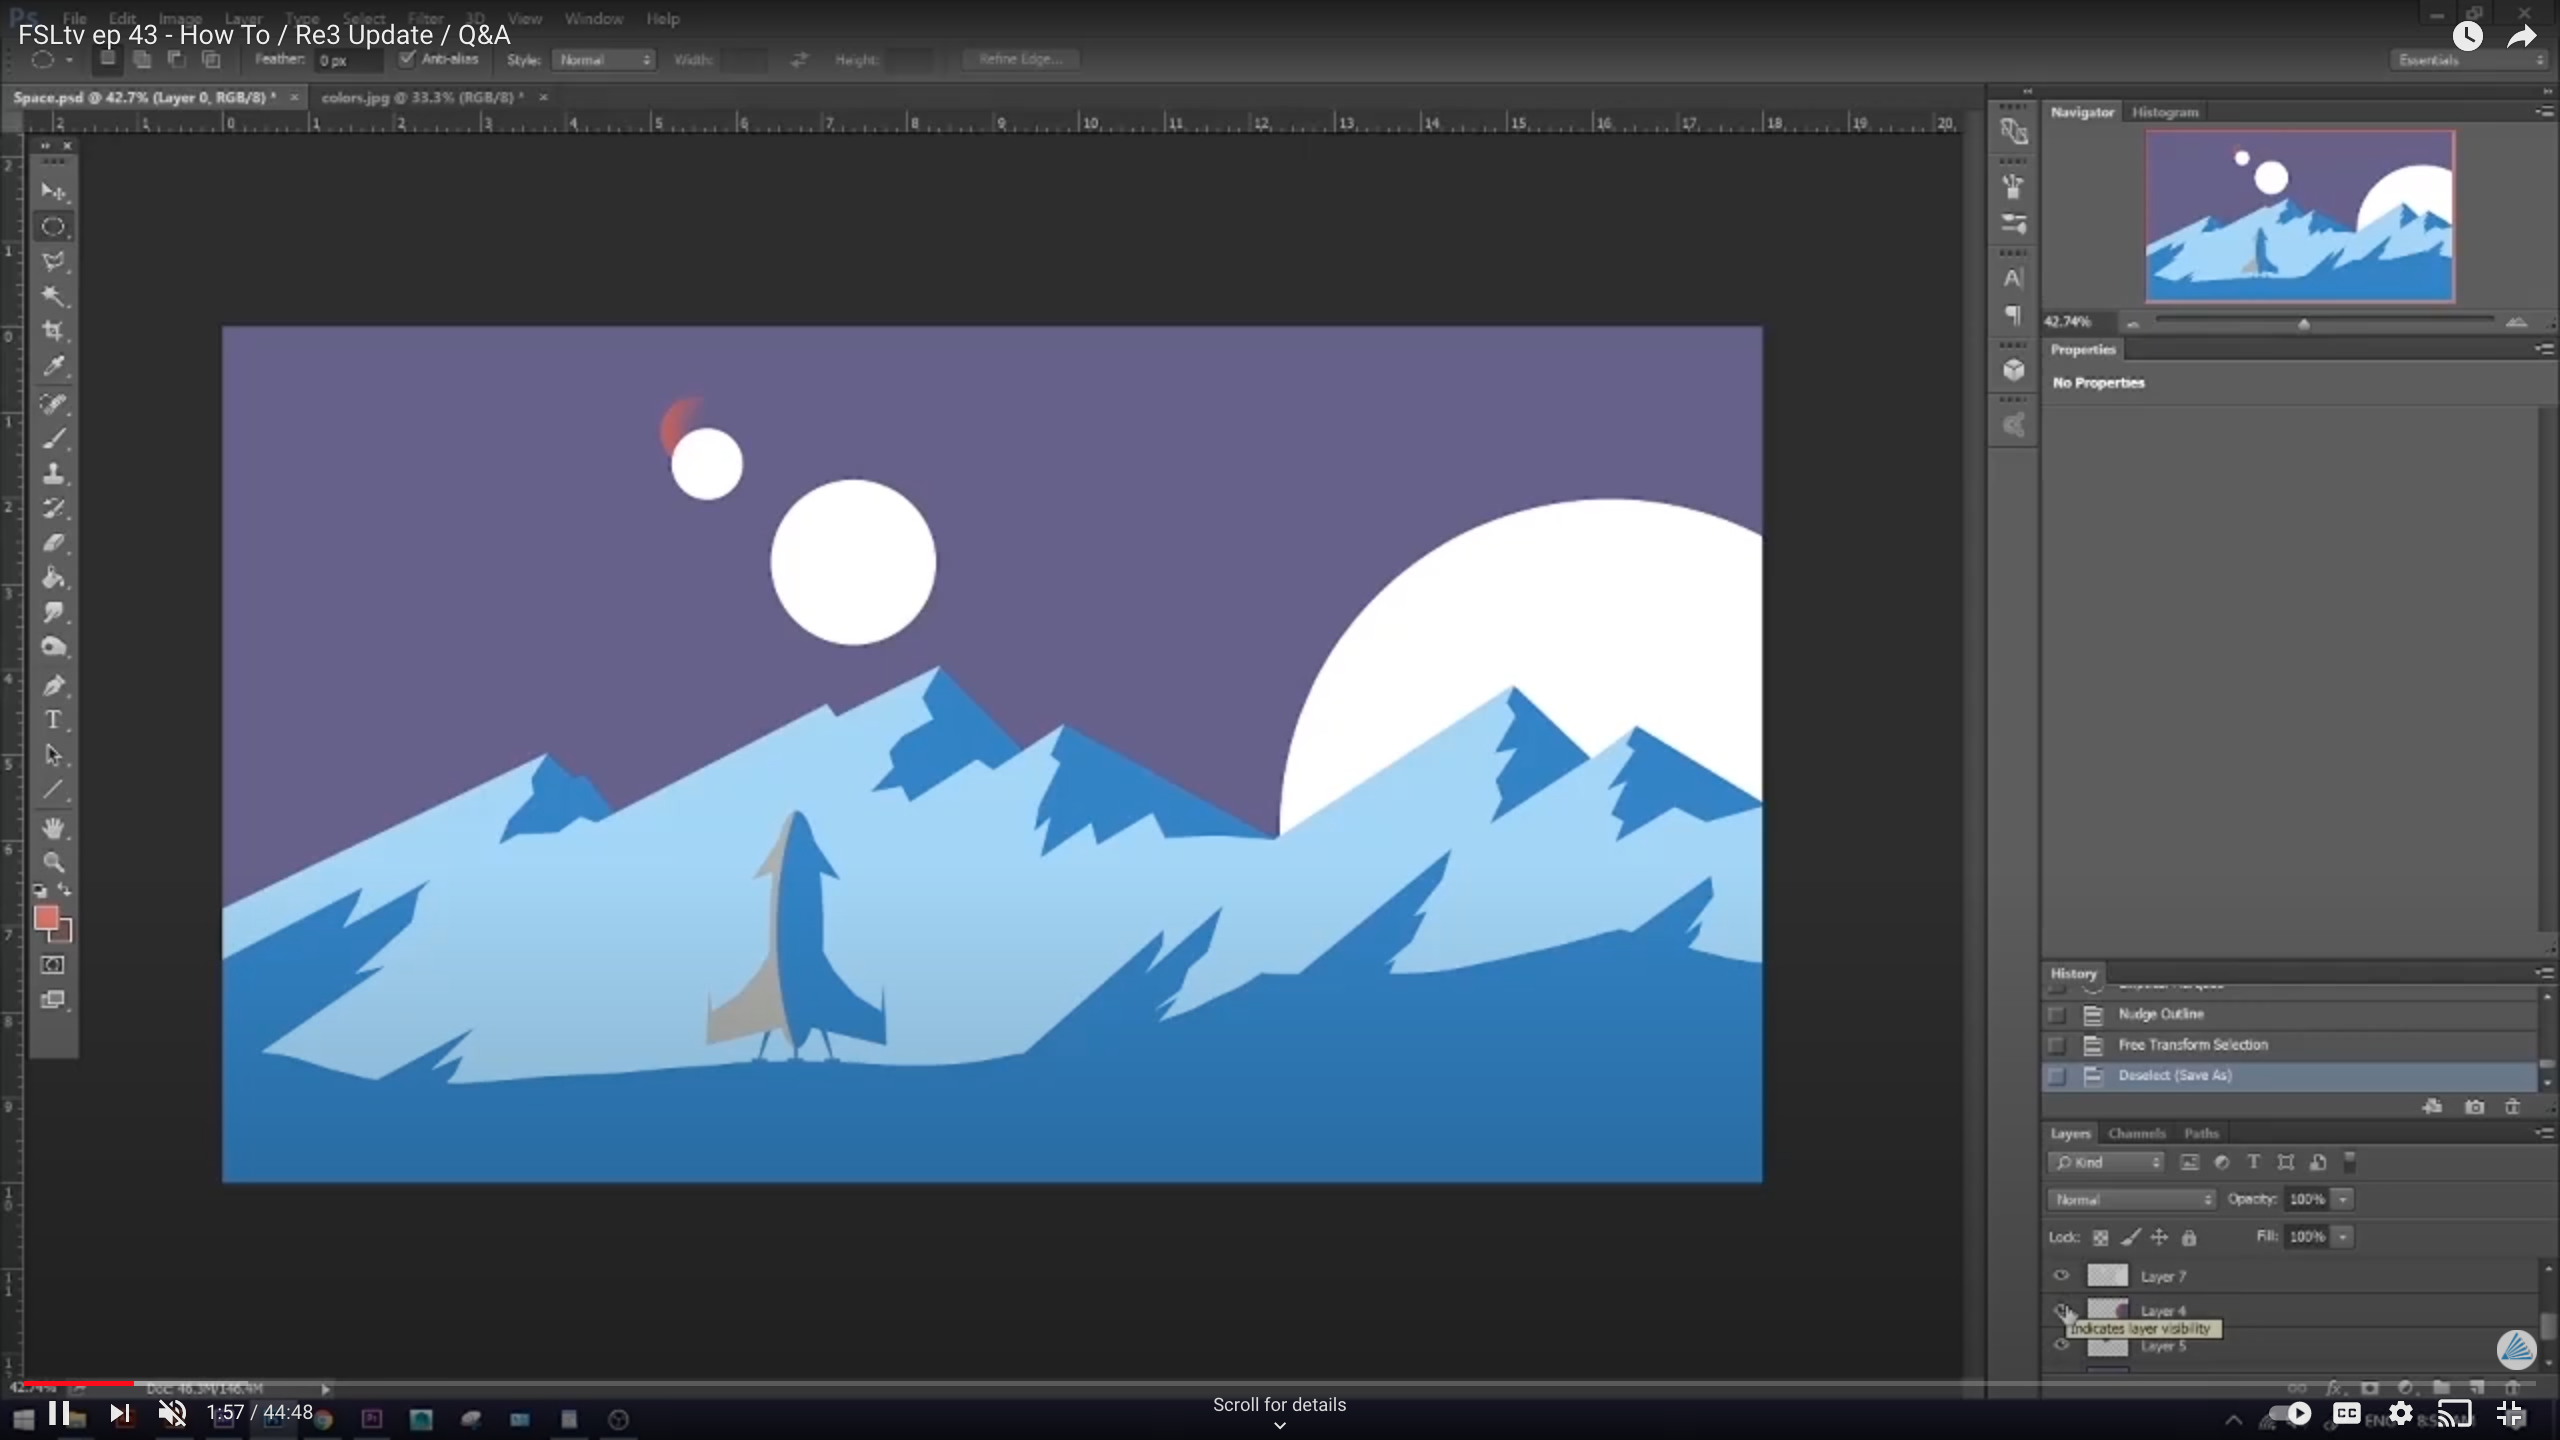
-First, you want to start by creating your vector art in a program like photoshop.
-Next, use your lasso tool to create a background for your landscape.
-Grab your polygonal lasso tool to create some jagged rocks. Continue to do this until you're happy with your desired look. You want about 5-6 colors.
Supplies
- Acrylic
- Exacto Knife
- Laser Cutter
- Spray Paint
- Internet
-Save as jpg.
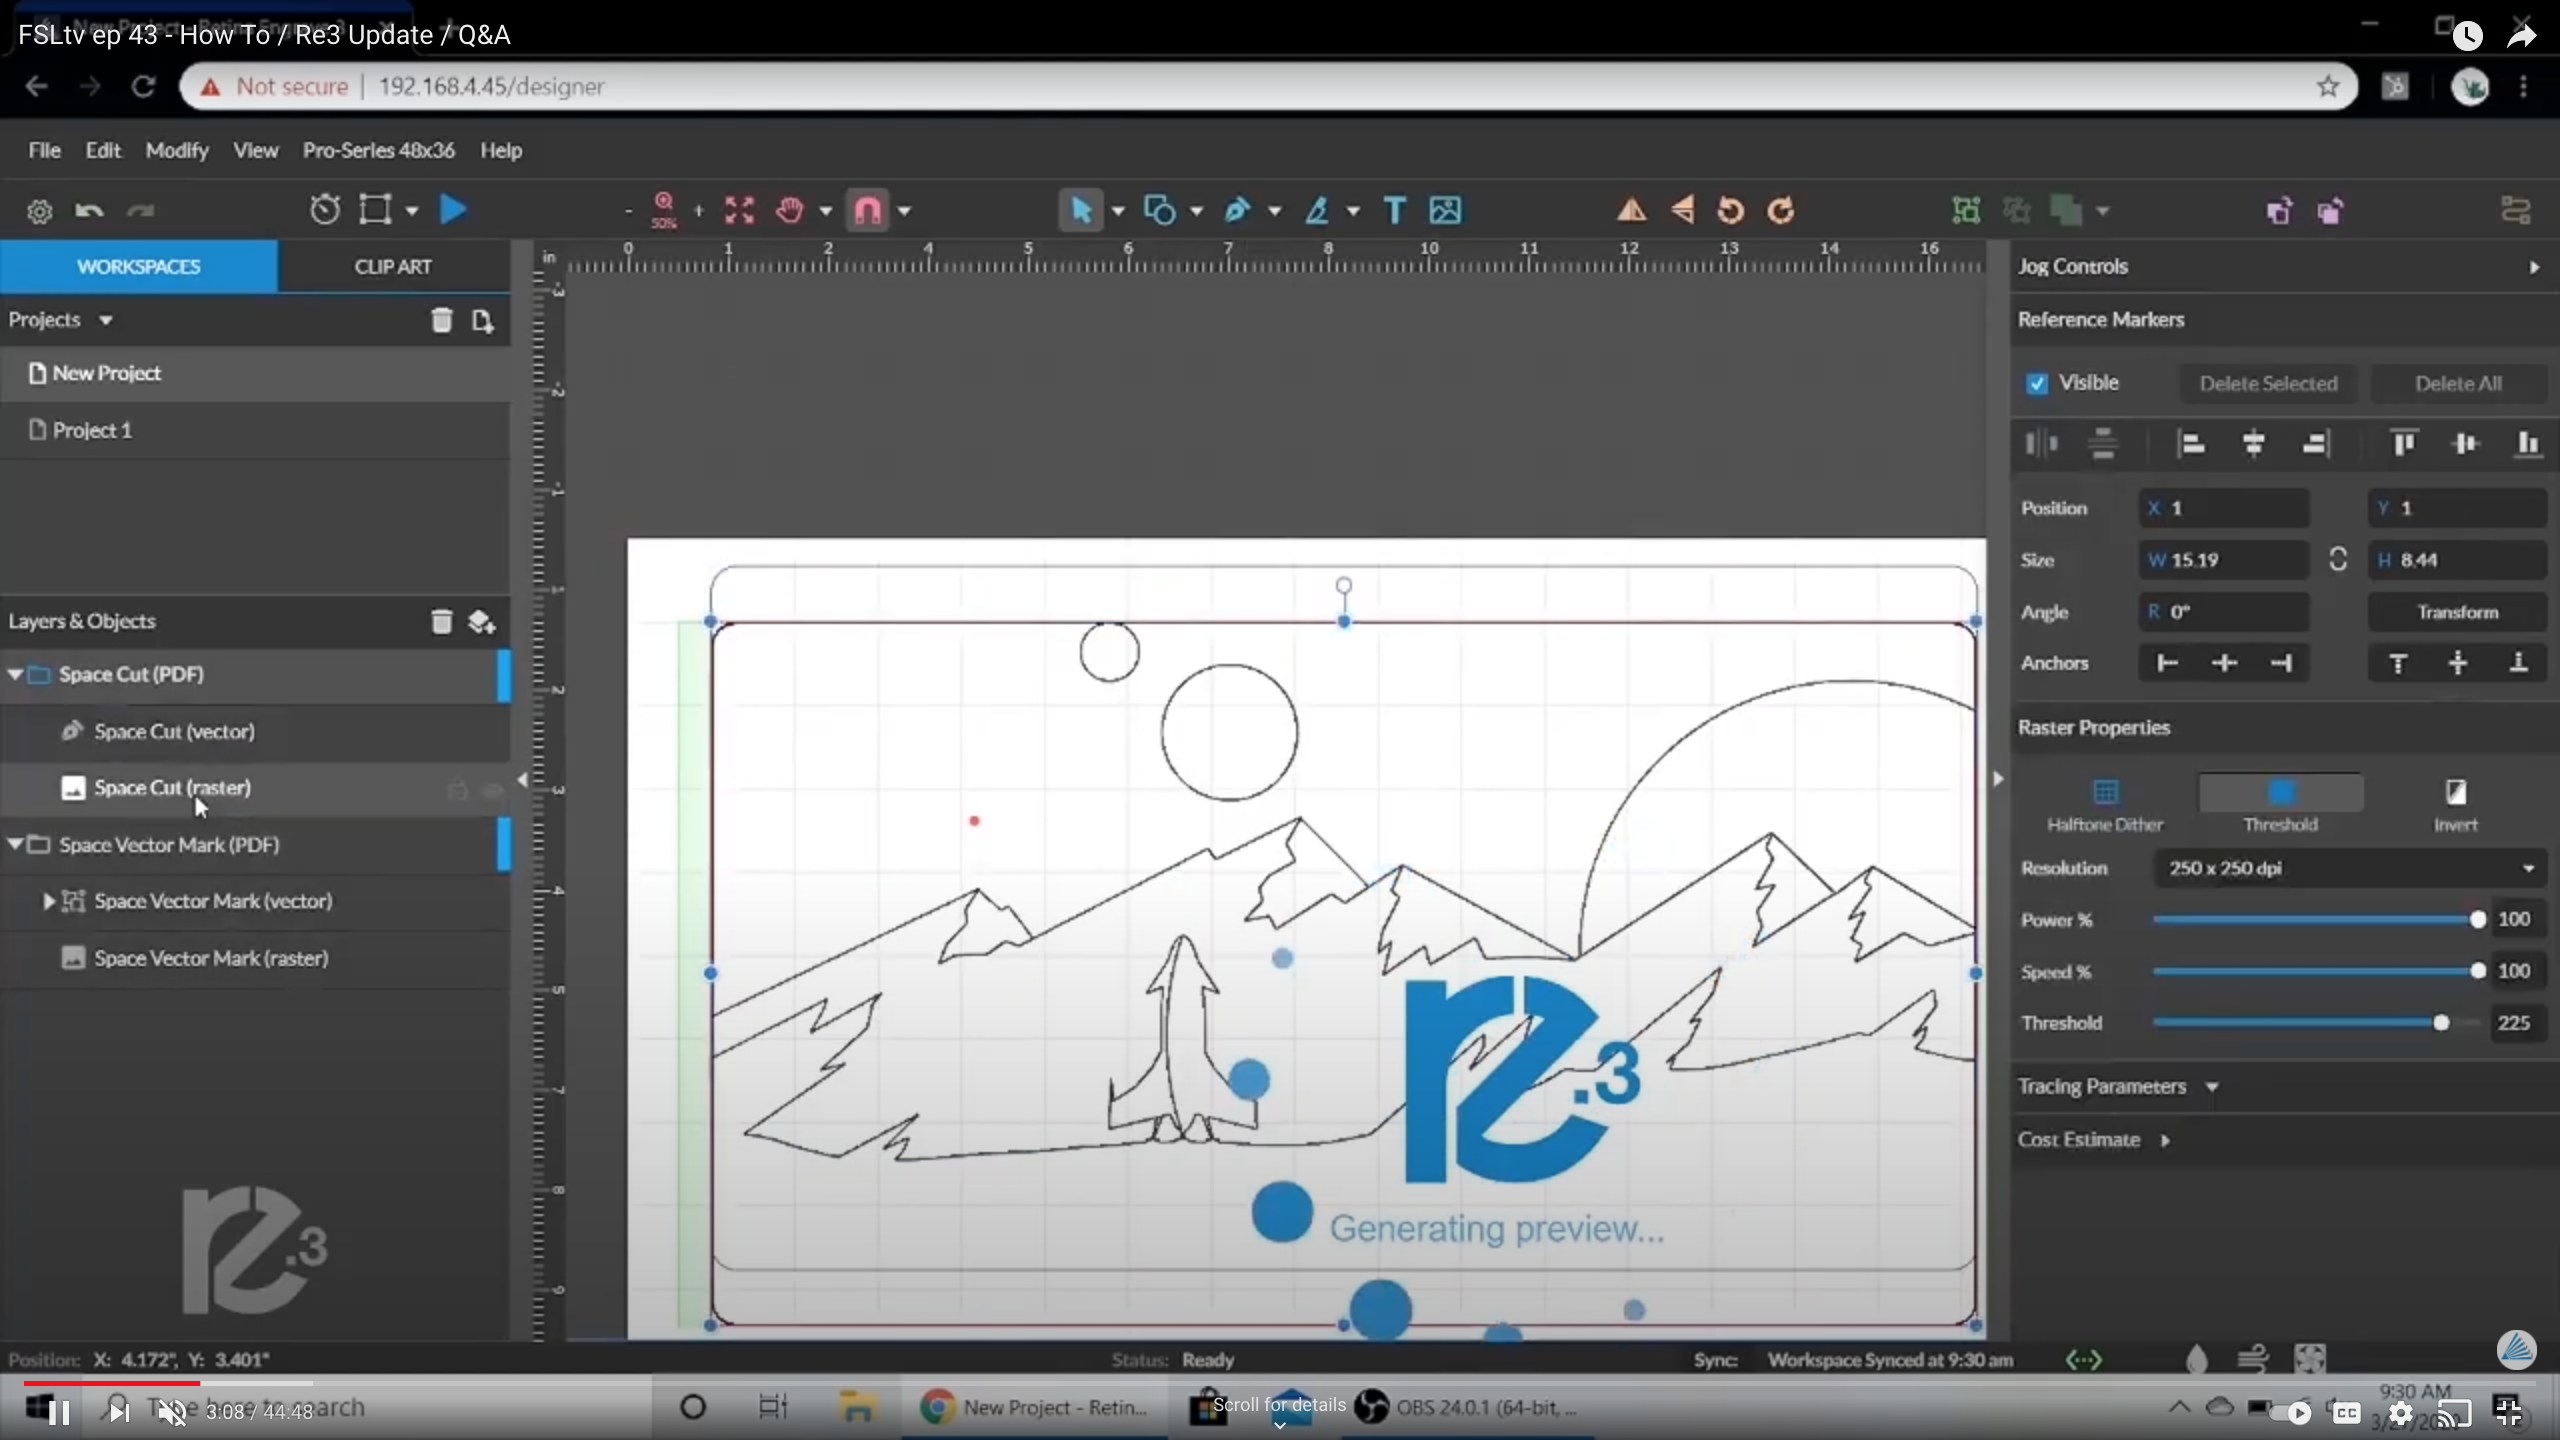
-Next, open illustrator and upload your jpg.
-In Illustrator, use your trace tool to separate the different colors into their shapes.
-Use expand to find the vector lines
-After expanded, remove all the color and add a black stroke
-From Illustrator, open RE3 where you will be uploading two separate PDFs. One is the vector lines we just created and the other is a border that will be cut out.
-Line up images and delete raster data
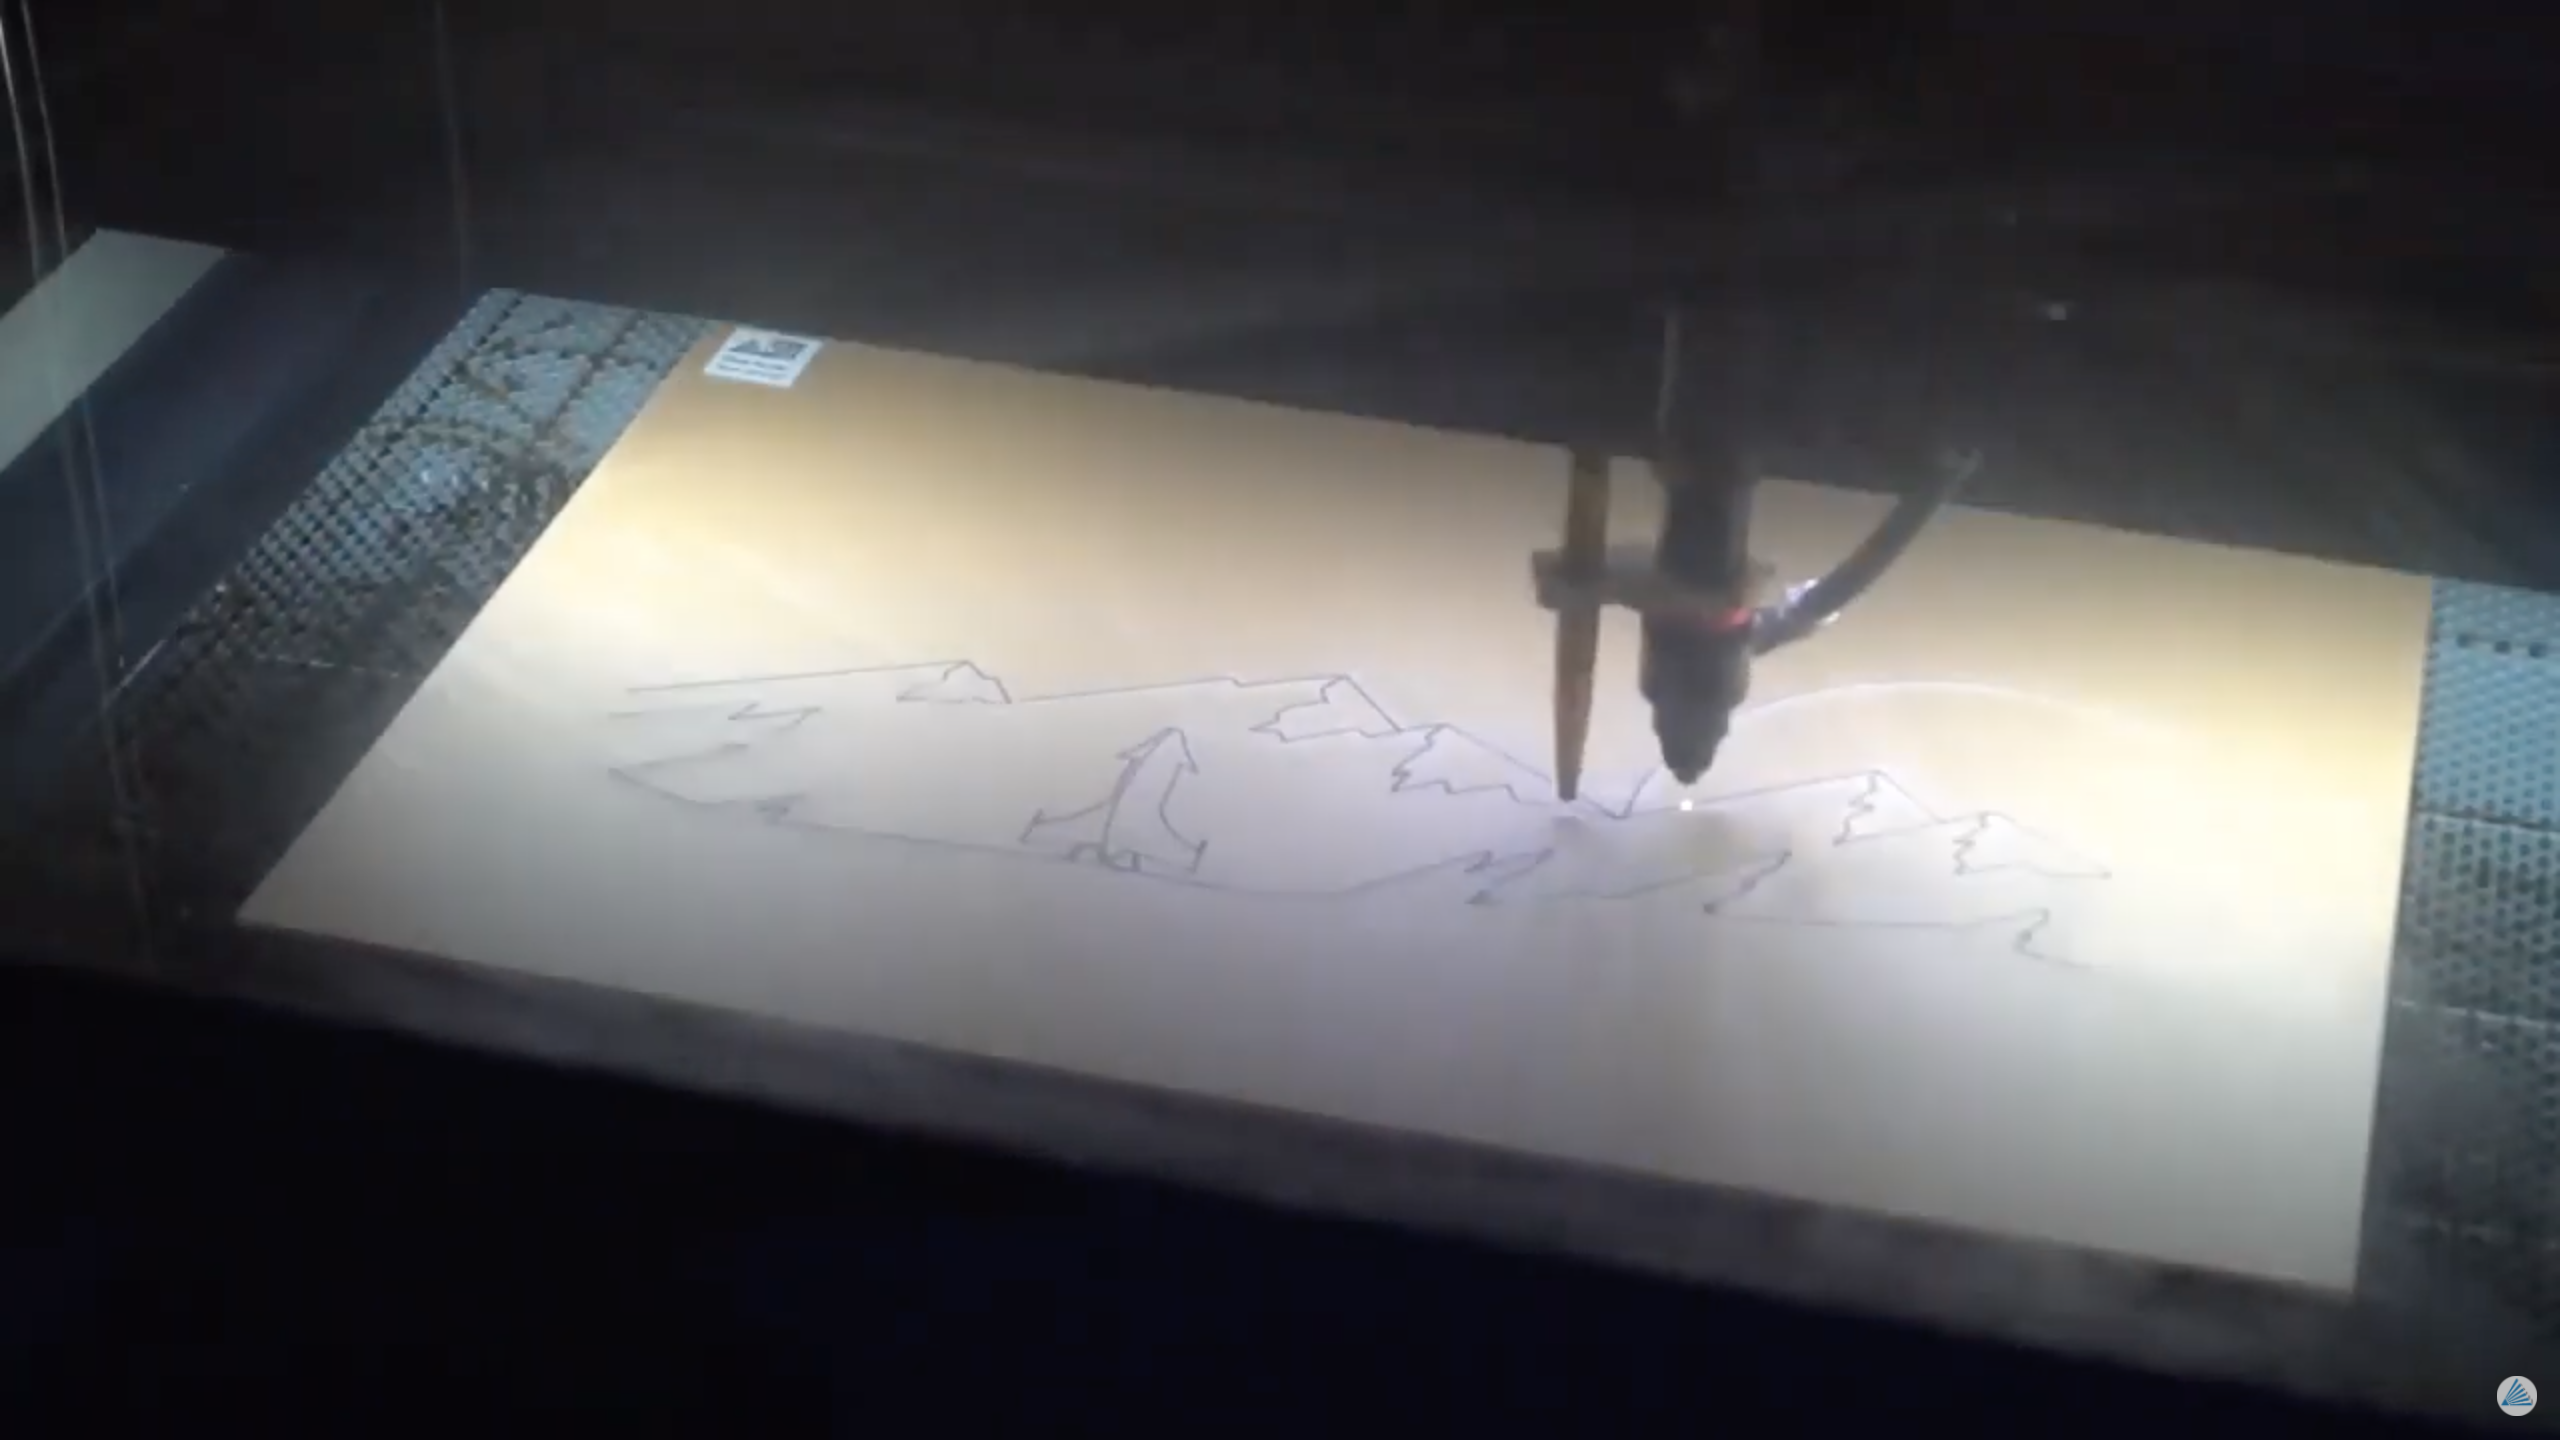
-Next enter power settings. We recommend cutting at low power and high speed on a CO2 Laser.
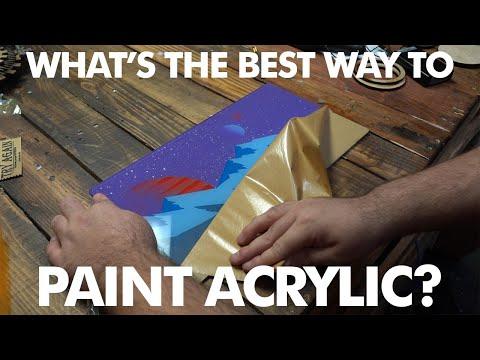
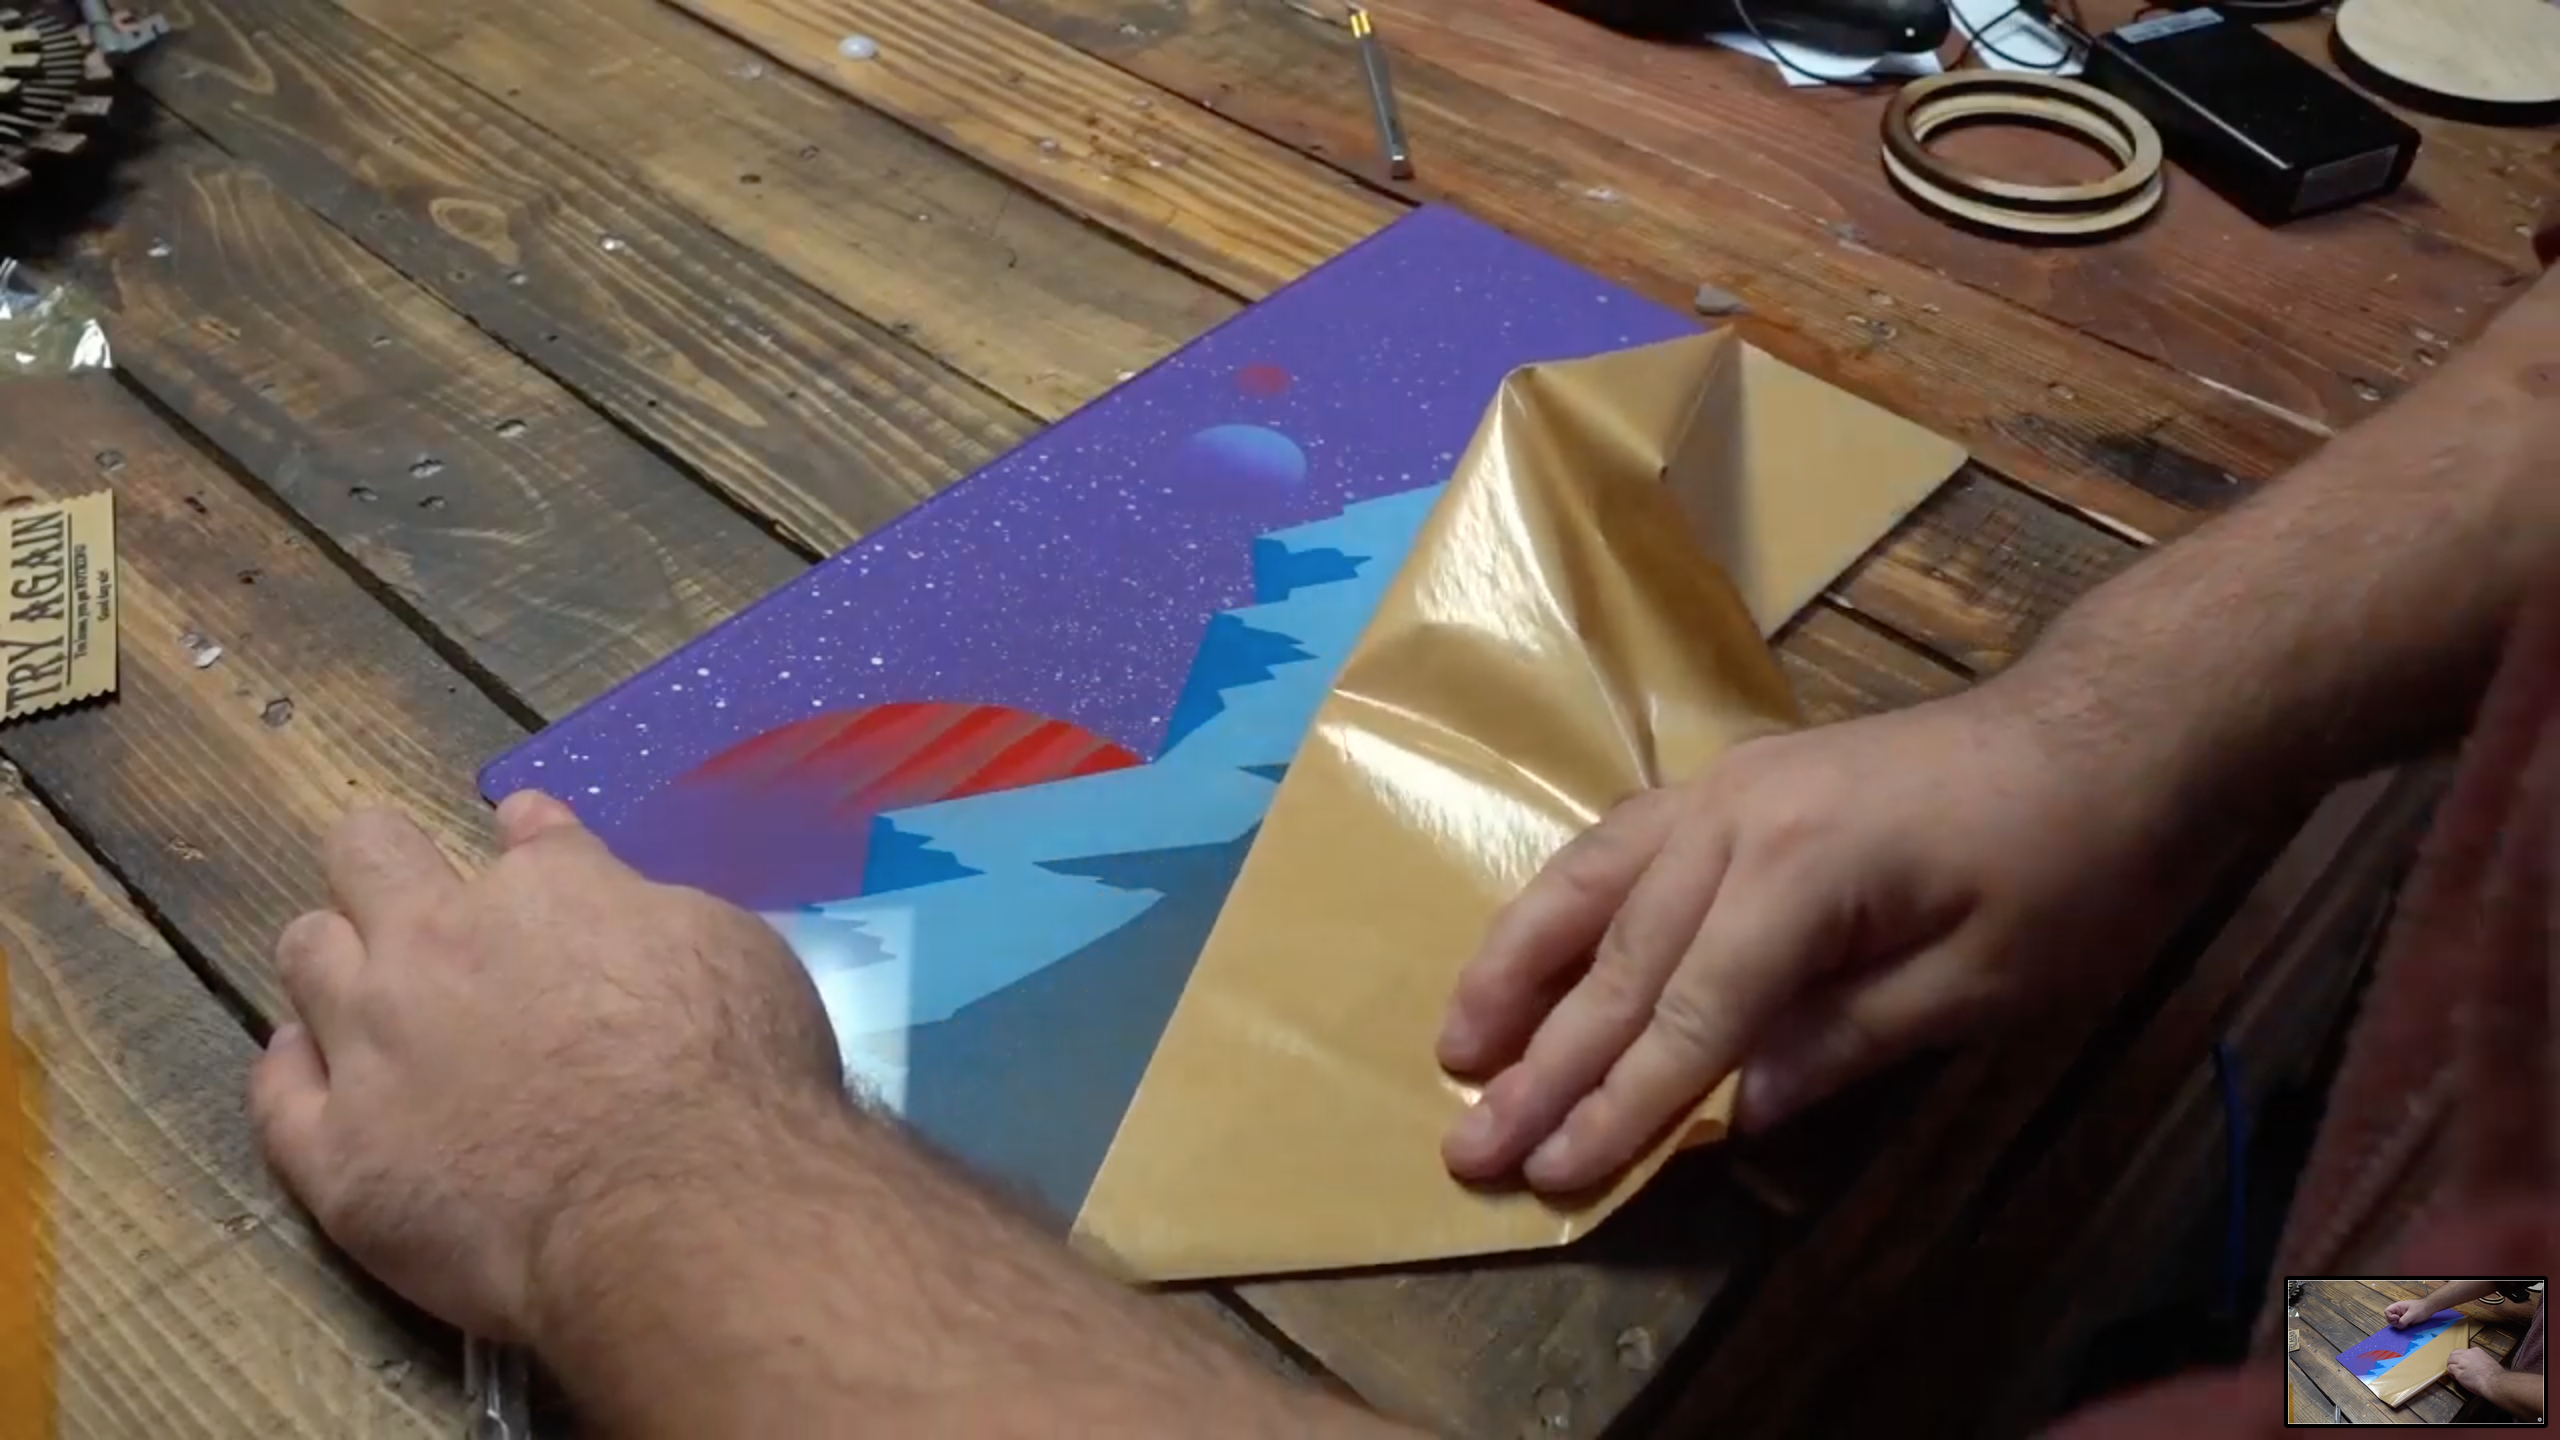
-Time to Paint! You want to work from the foreground to the background.
-Use your Exacto knife to remove the laser cut pieces of masking so that you can spray paint little by little. Think of the process as working backward
-For the planets and shadows you want to work in gradients applying little color at a time and in a layered fashion.
-To get the stripes on the planet, use masking tape to mimic jagged stripes.
-Create stars by holding white spray paint away from the acrylic and lightly sprits to create small white paint splatters that act as stars.
-Lastly, add the purple spraypaint to the sky and let it dry.
-Once dried, carefully remove the masking from the front of the acrylic to reveal your final product.
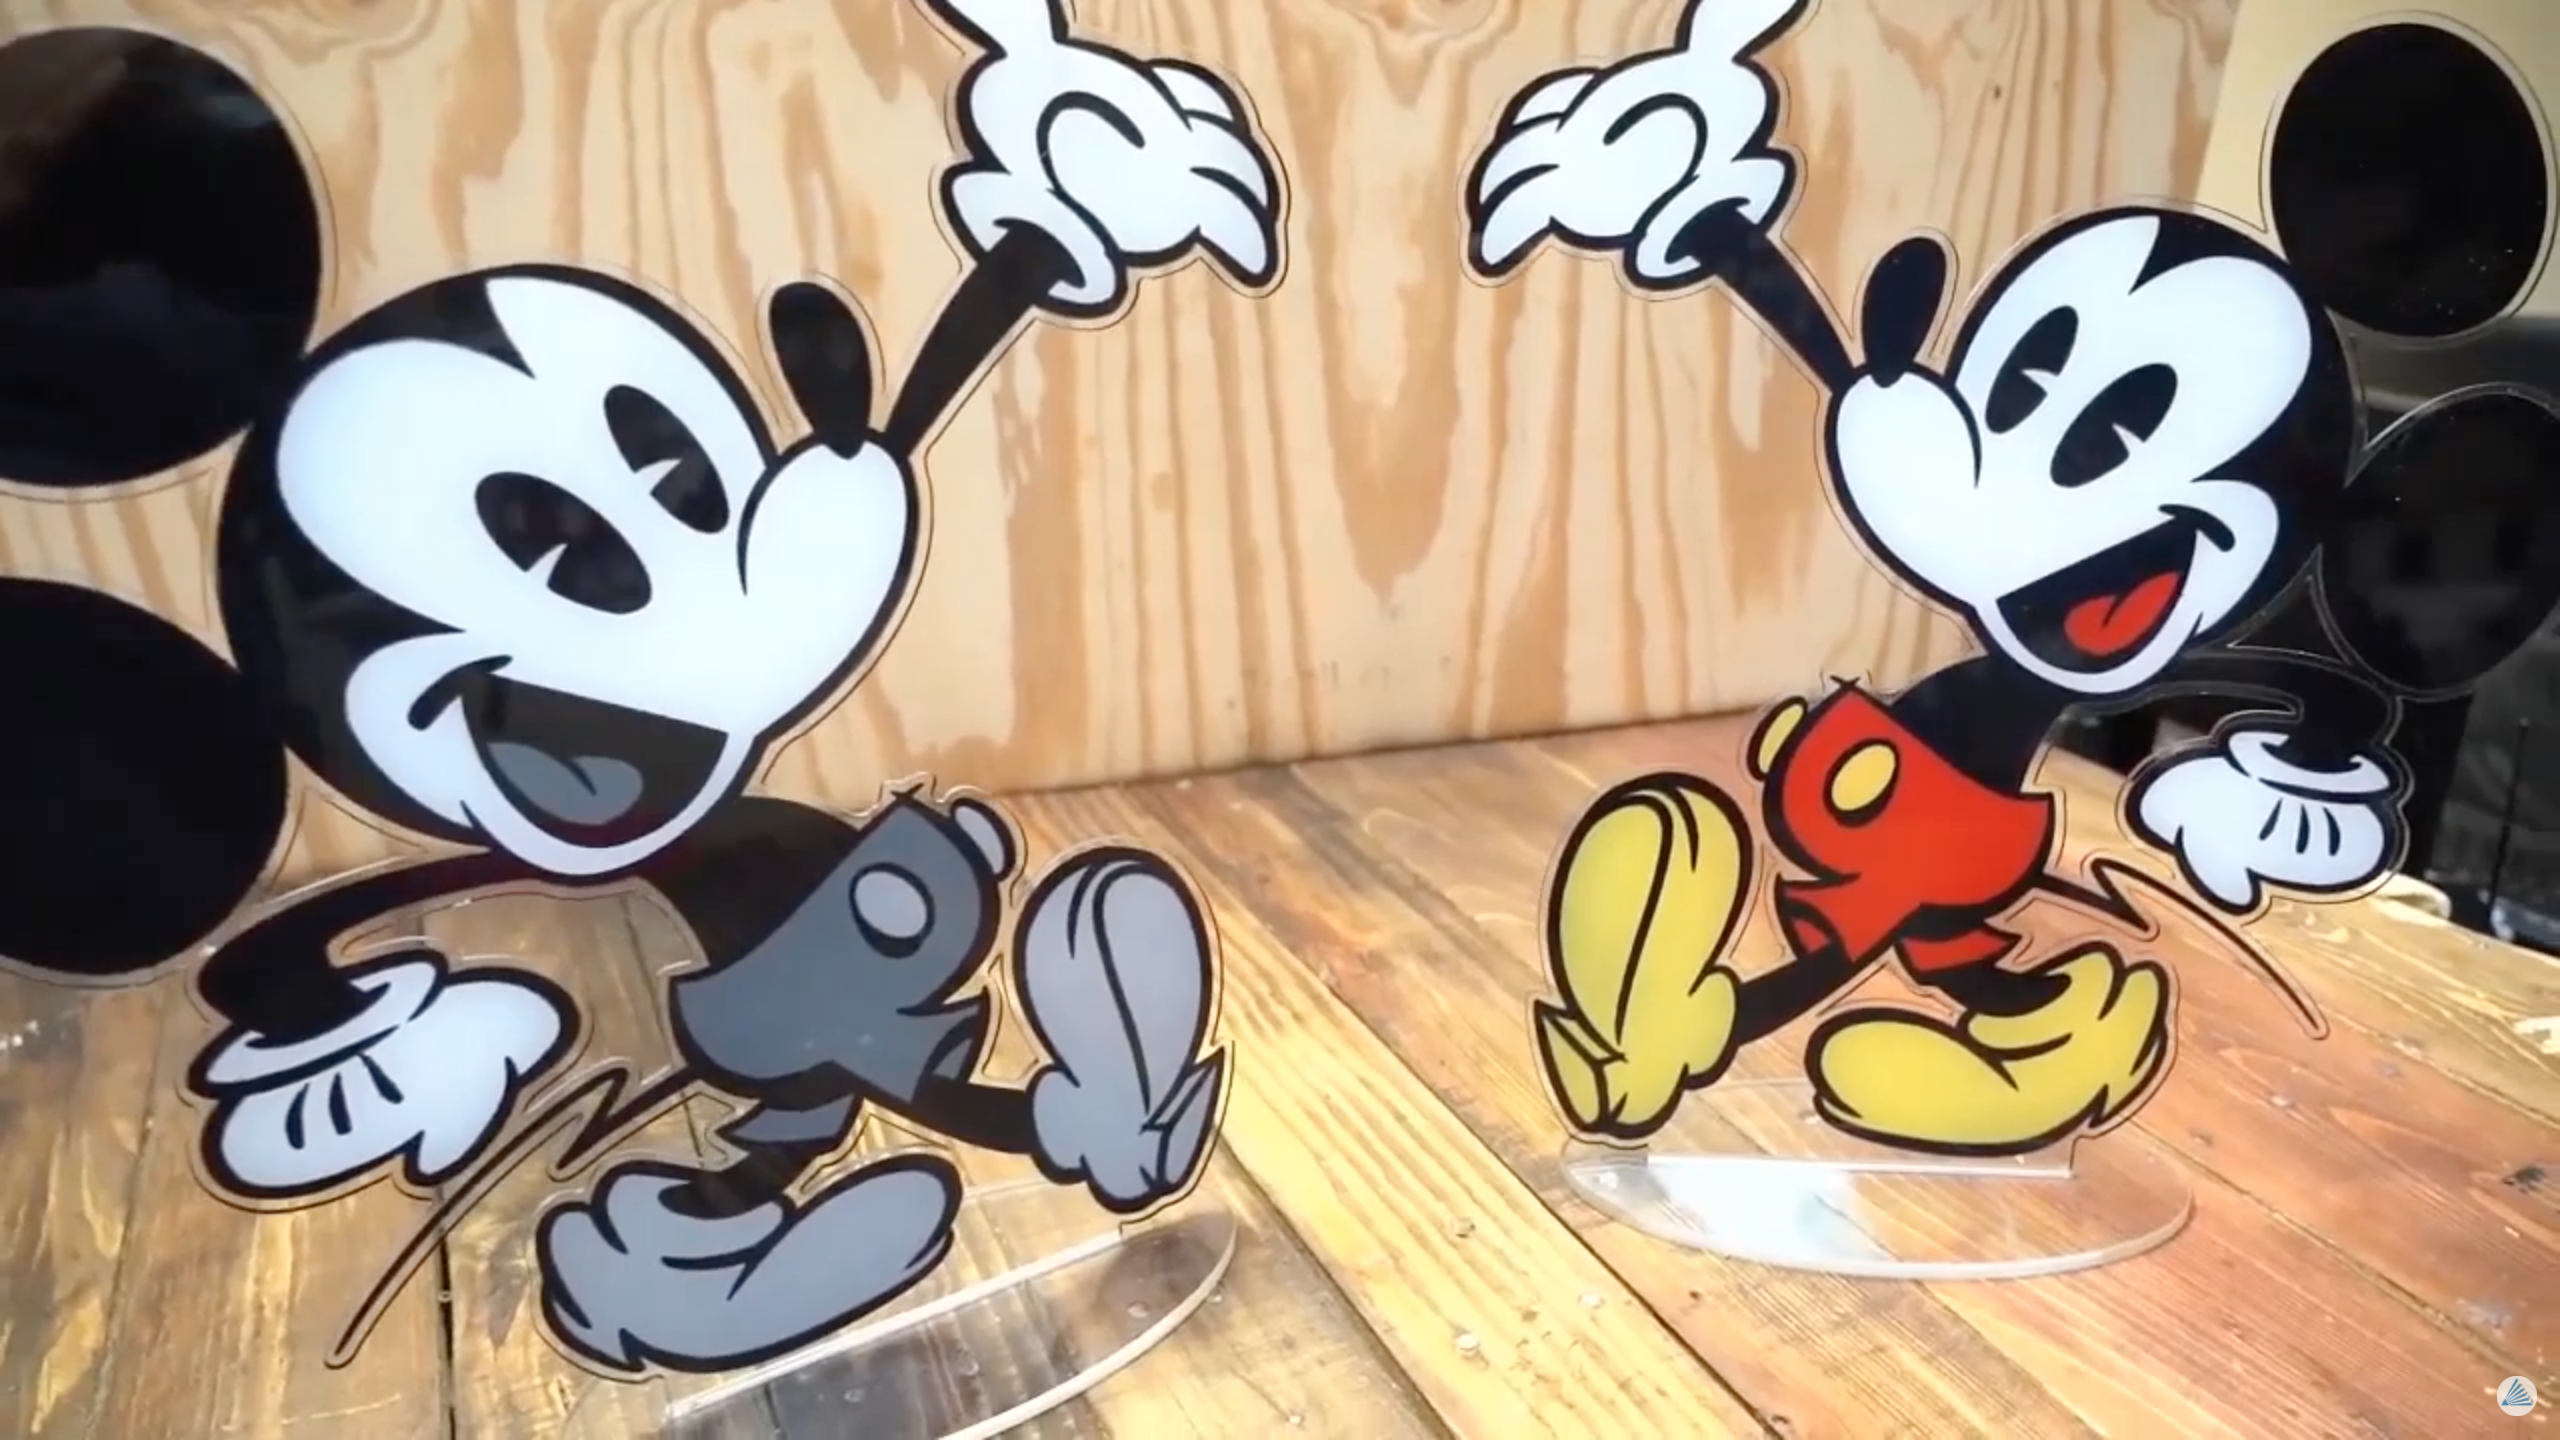
For Walker's project
-Instead of creating his design like Tim, he found his vector image on google.
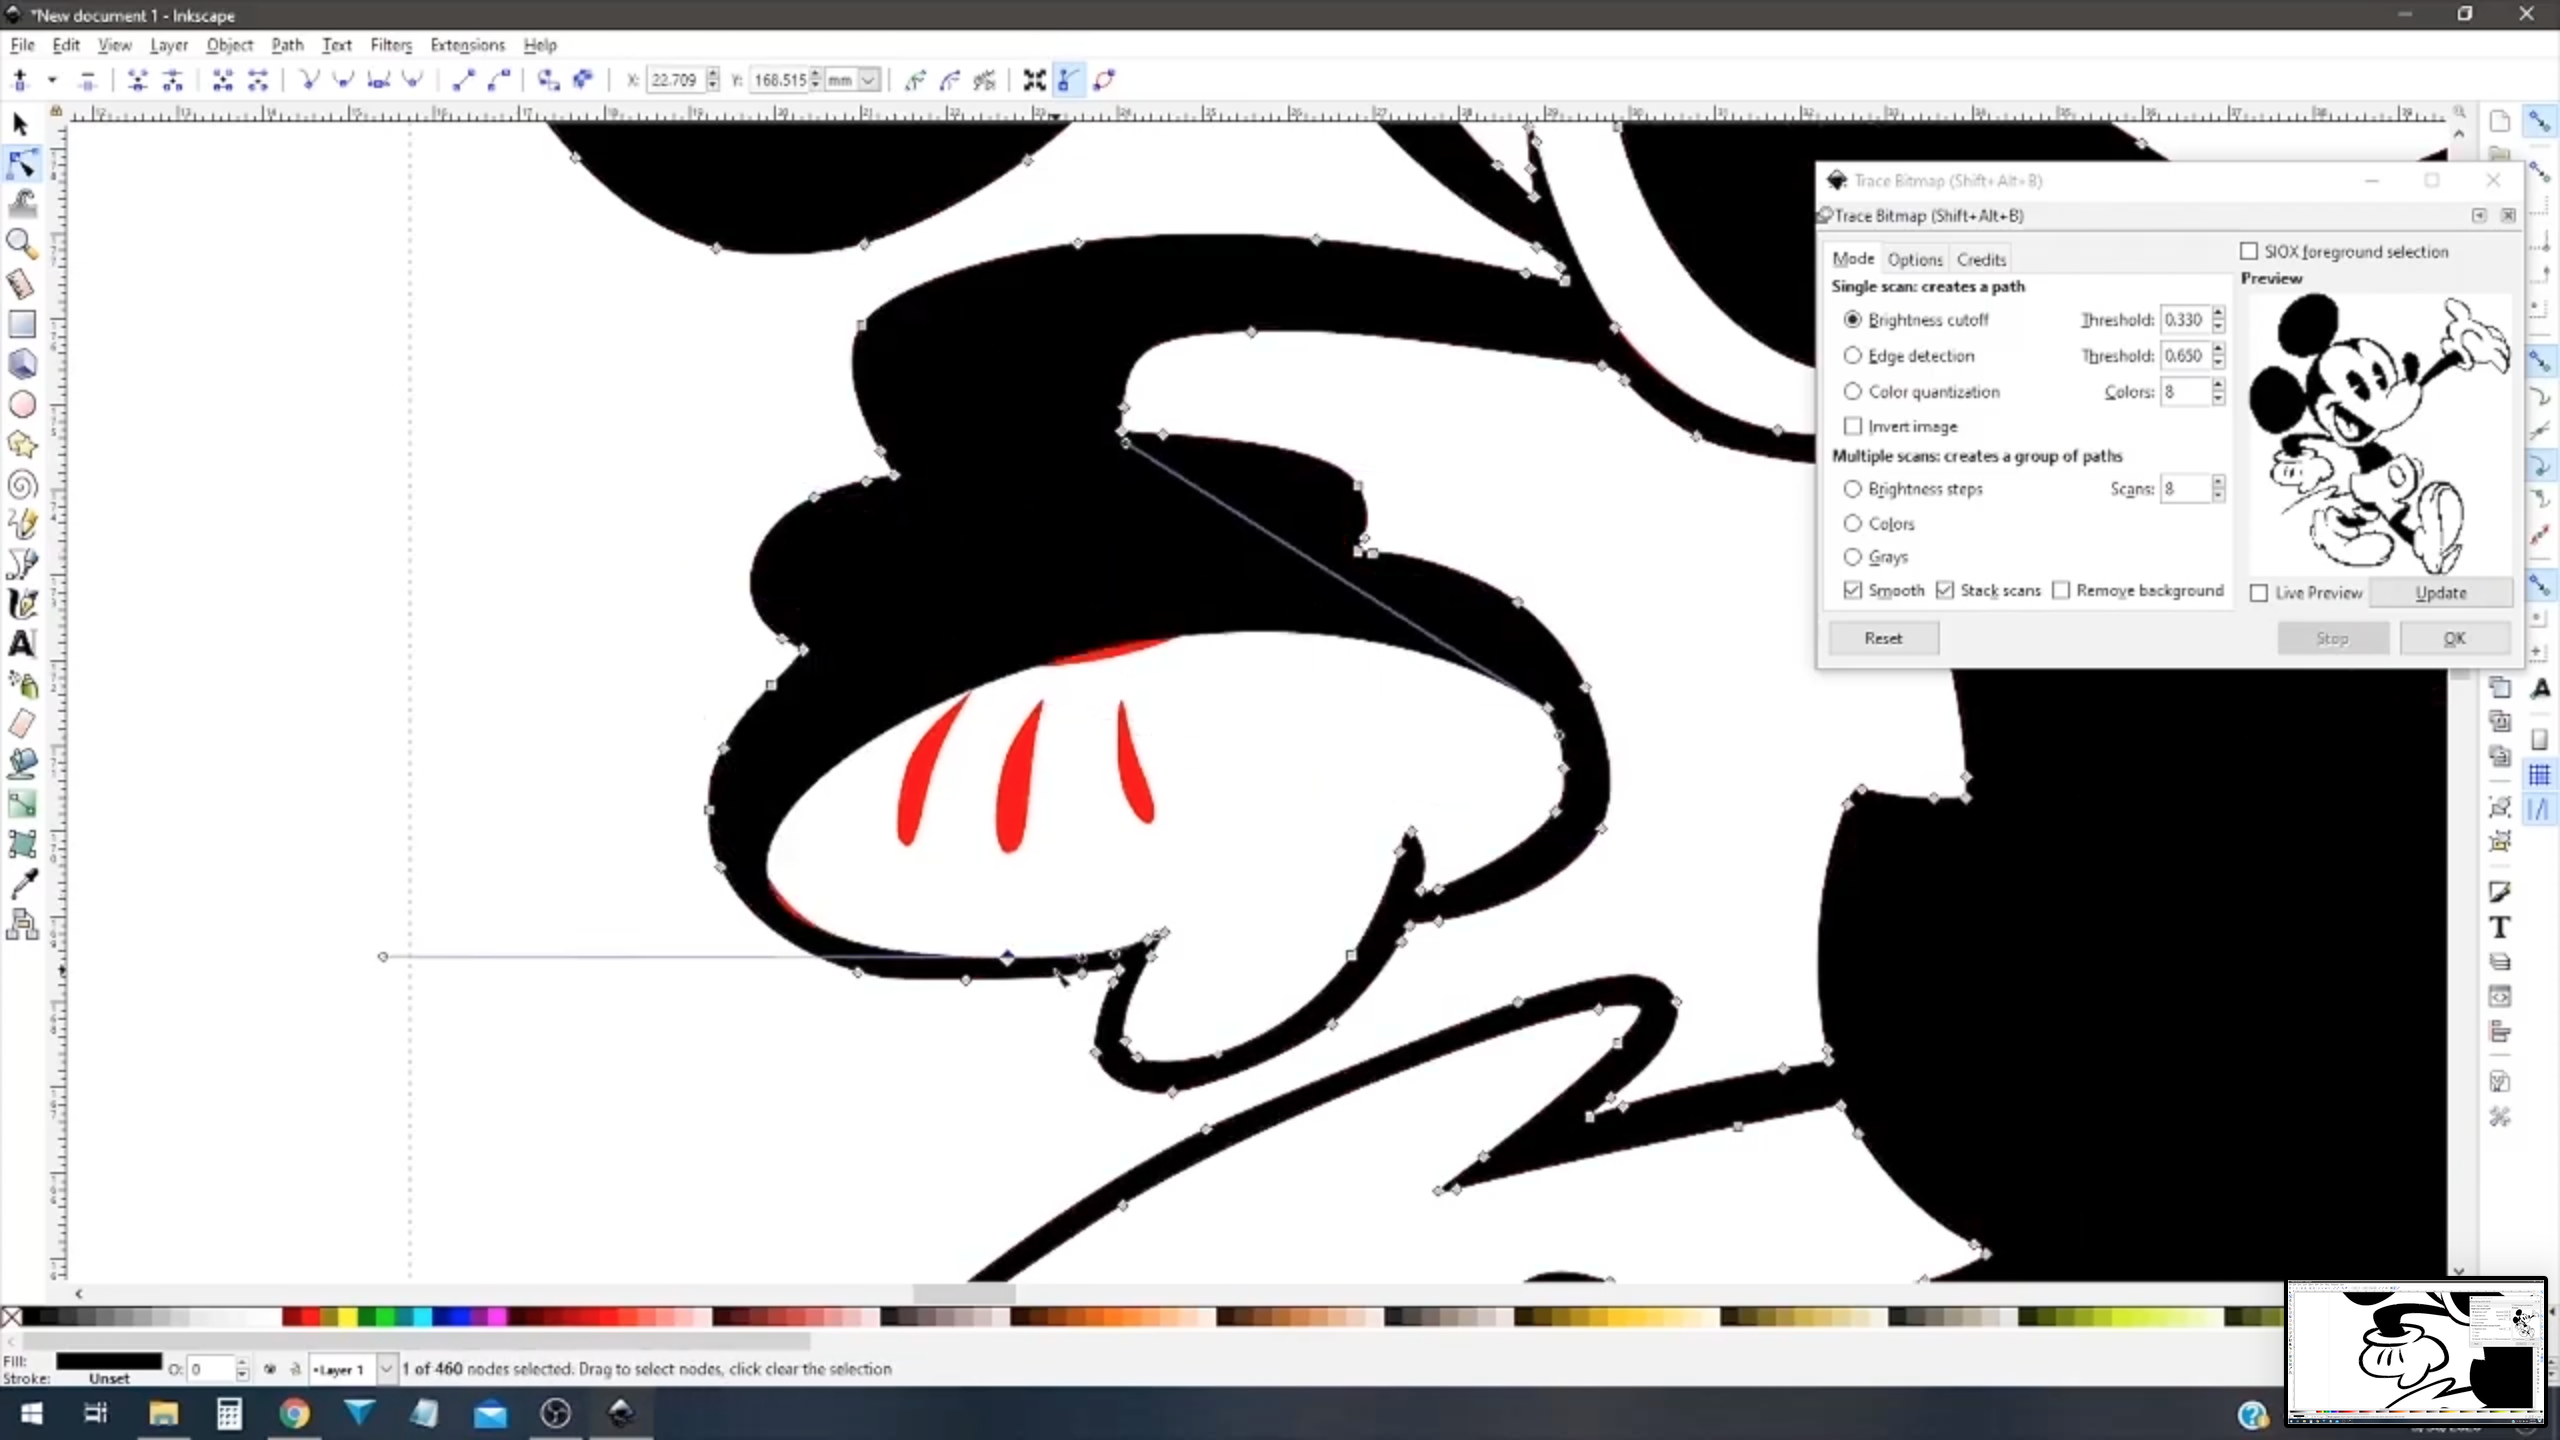
-After you find your image, open Inkscape.org.
-Auto trace to create an outline cut.
-Auto trace to adjust properties to desired detail and vector marks.
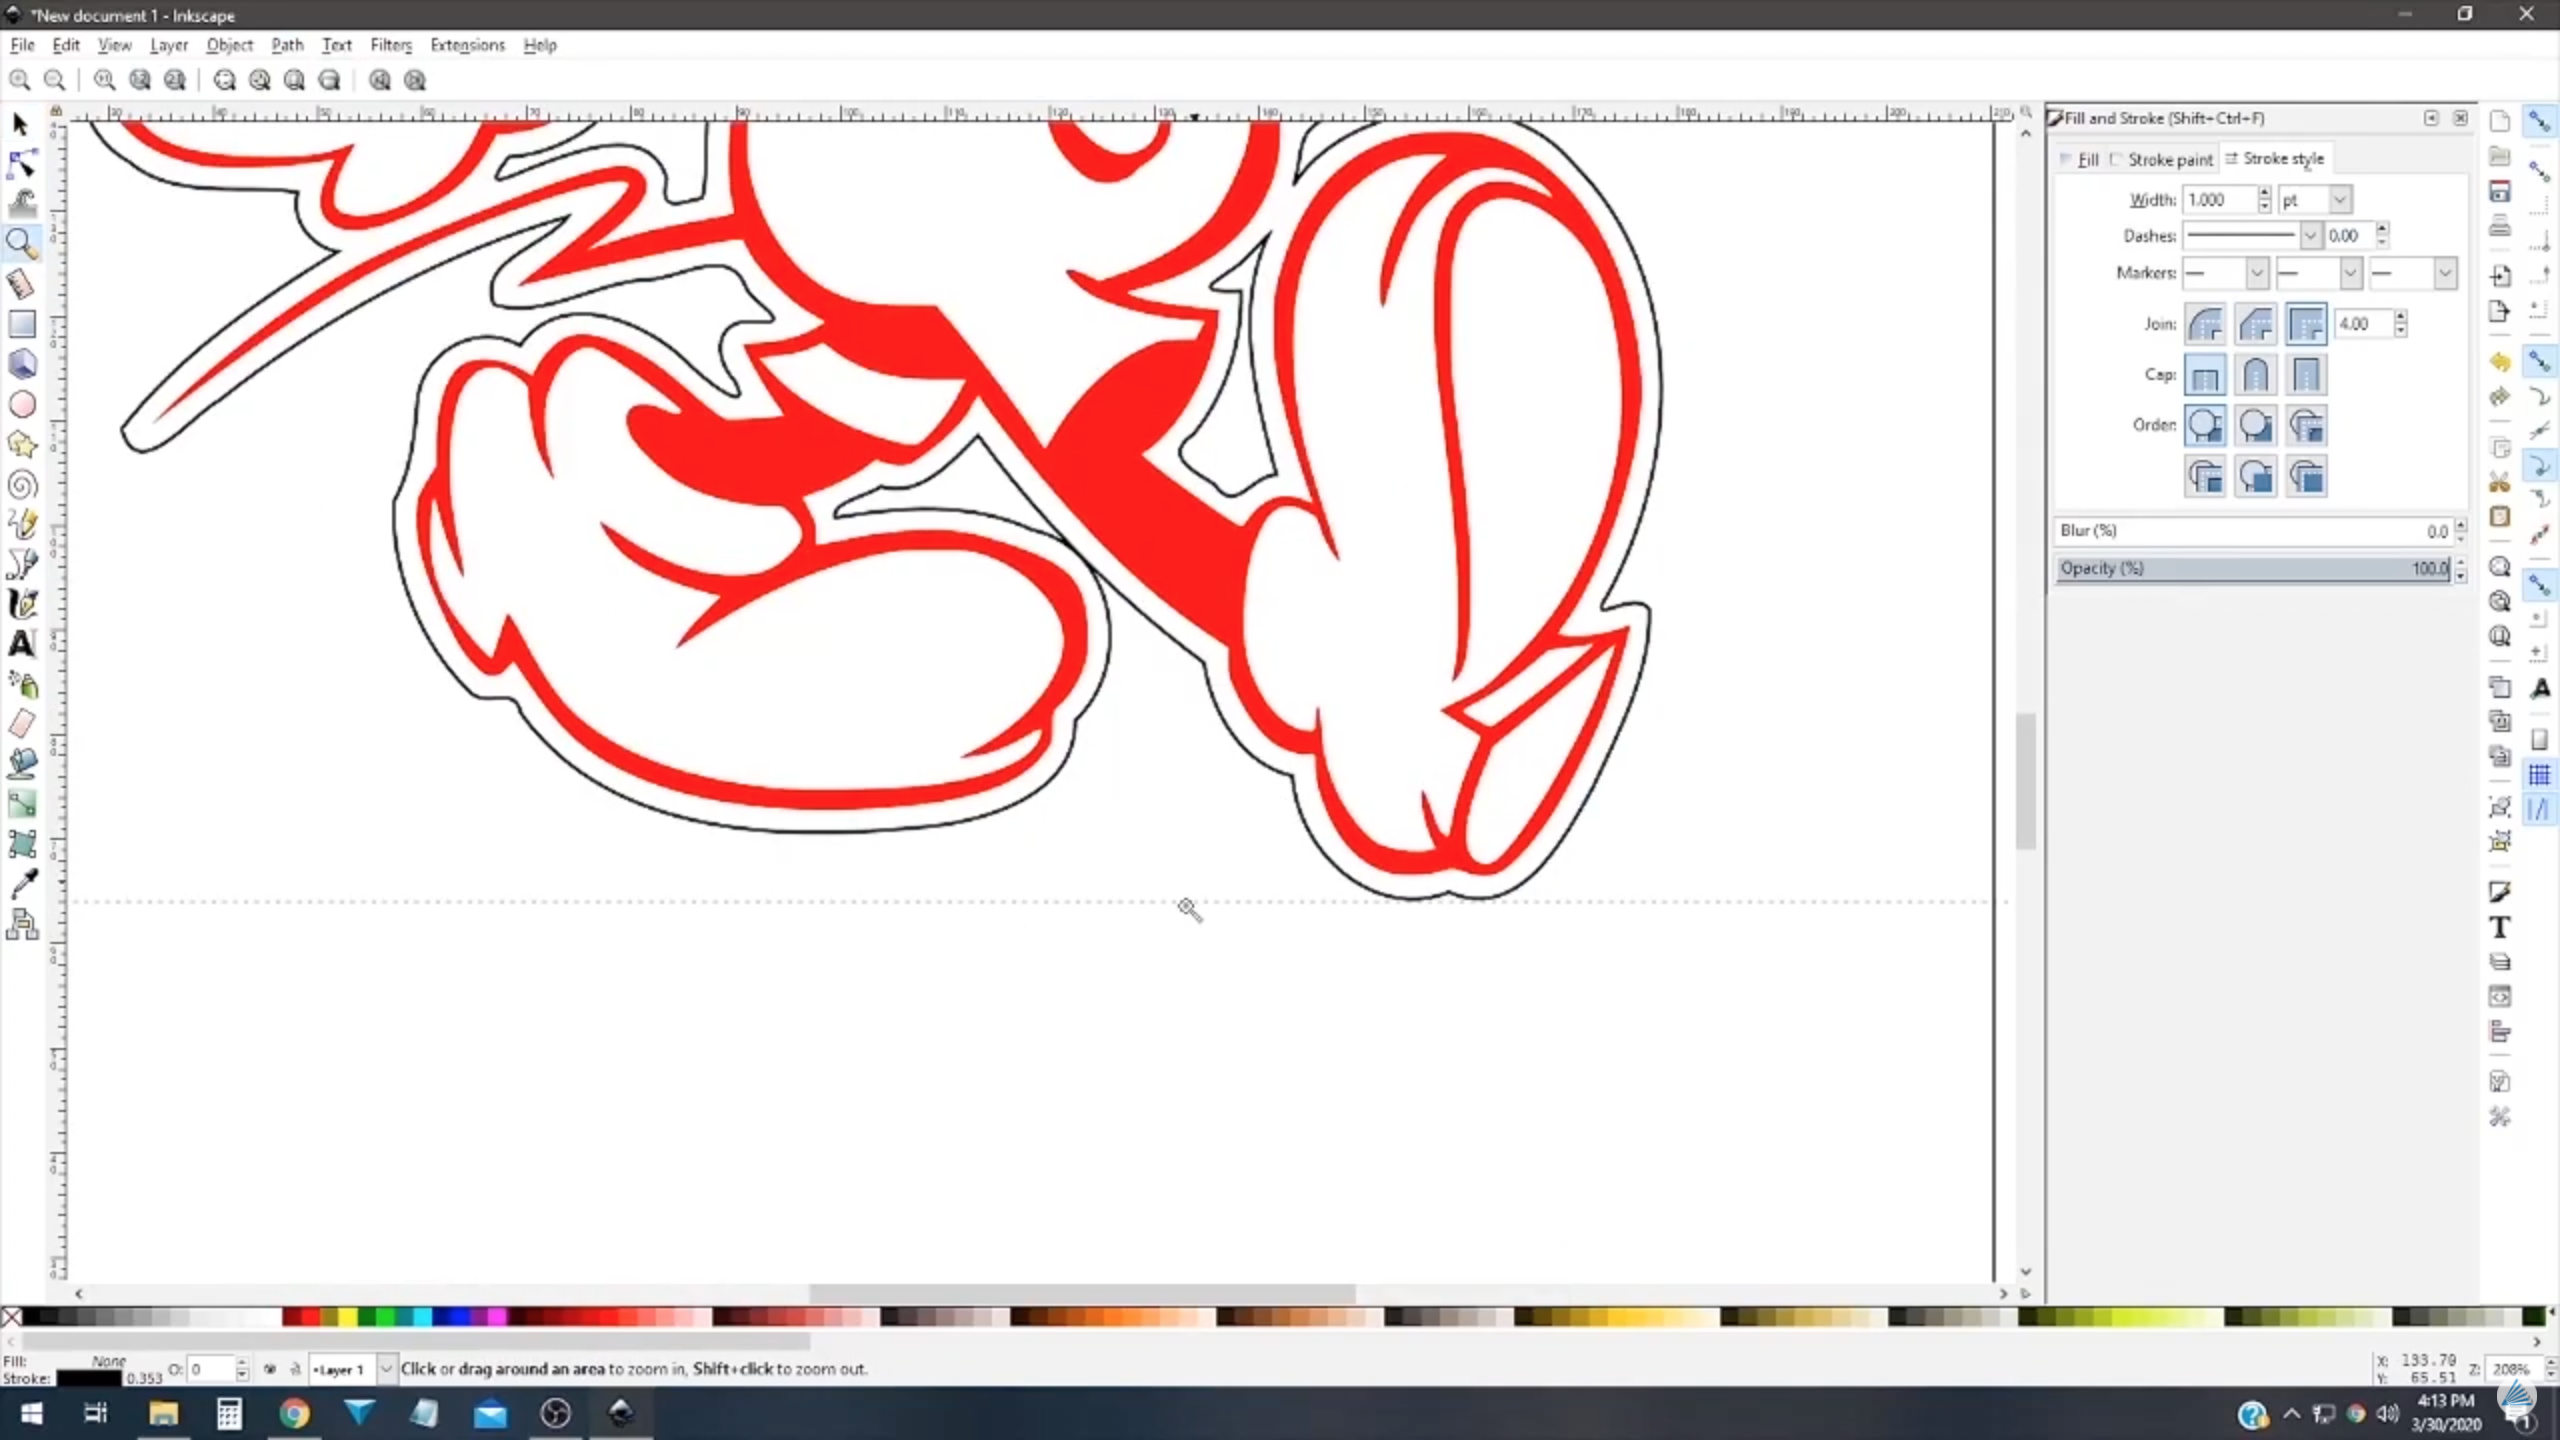
-Clean up outside vector
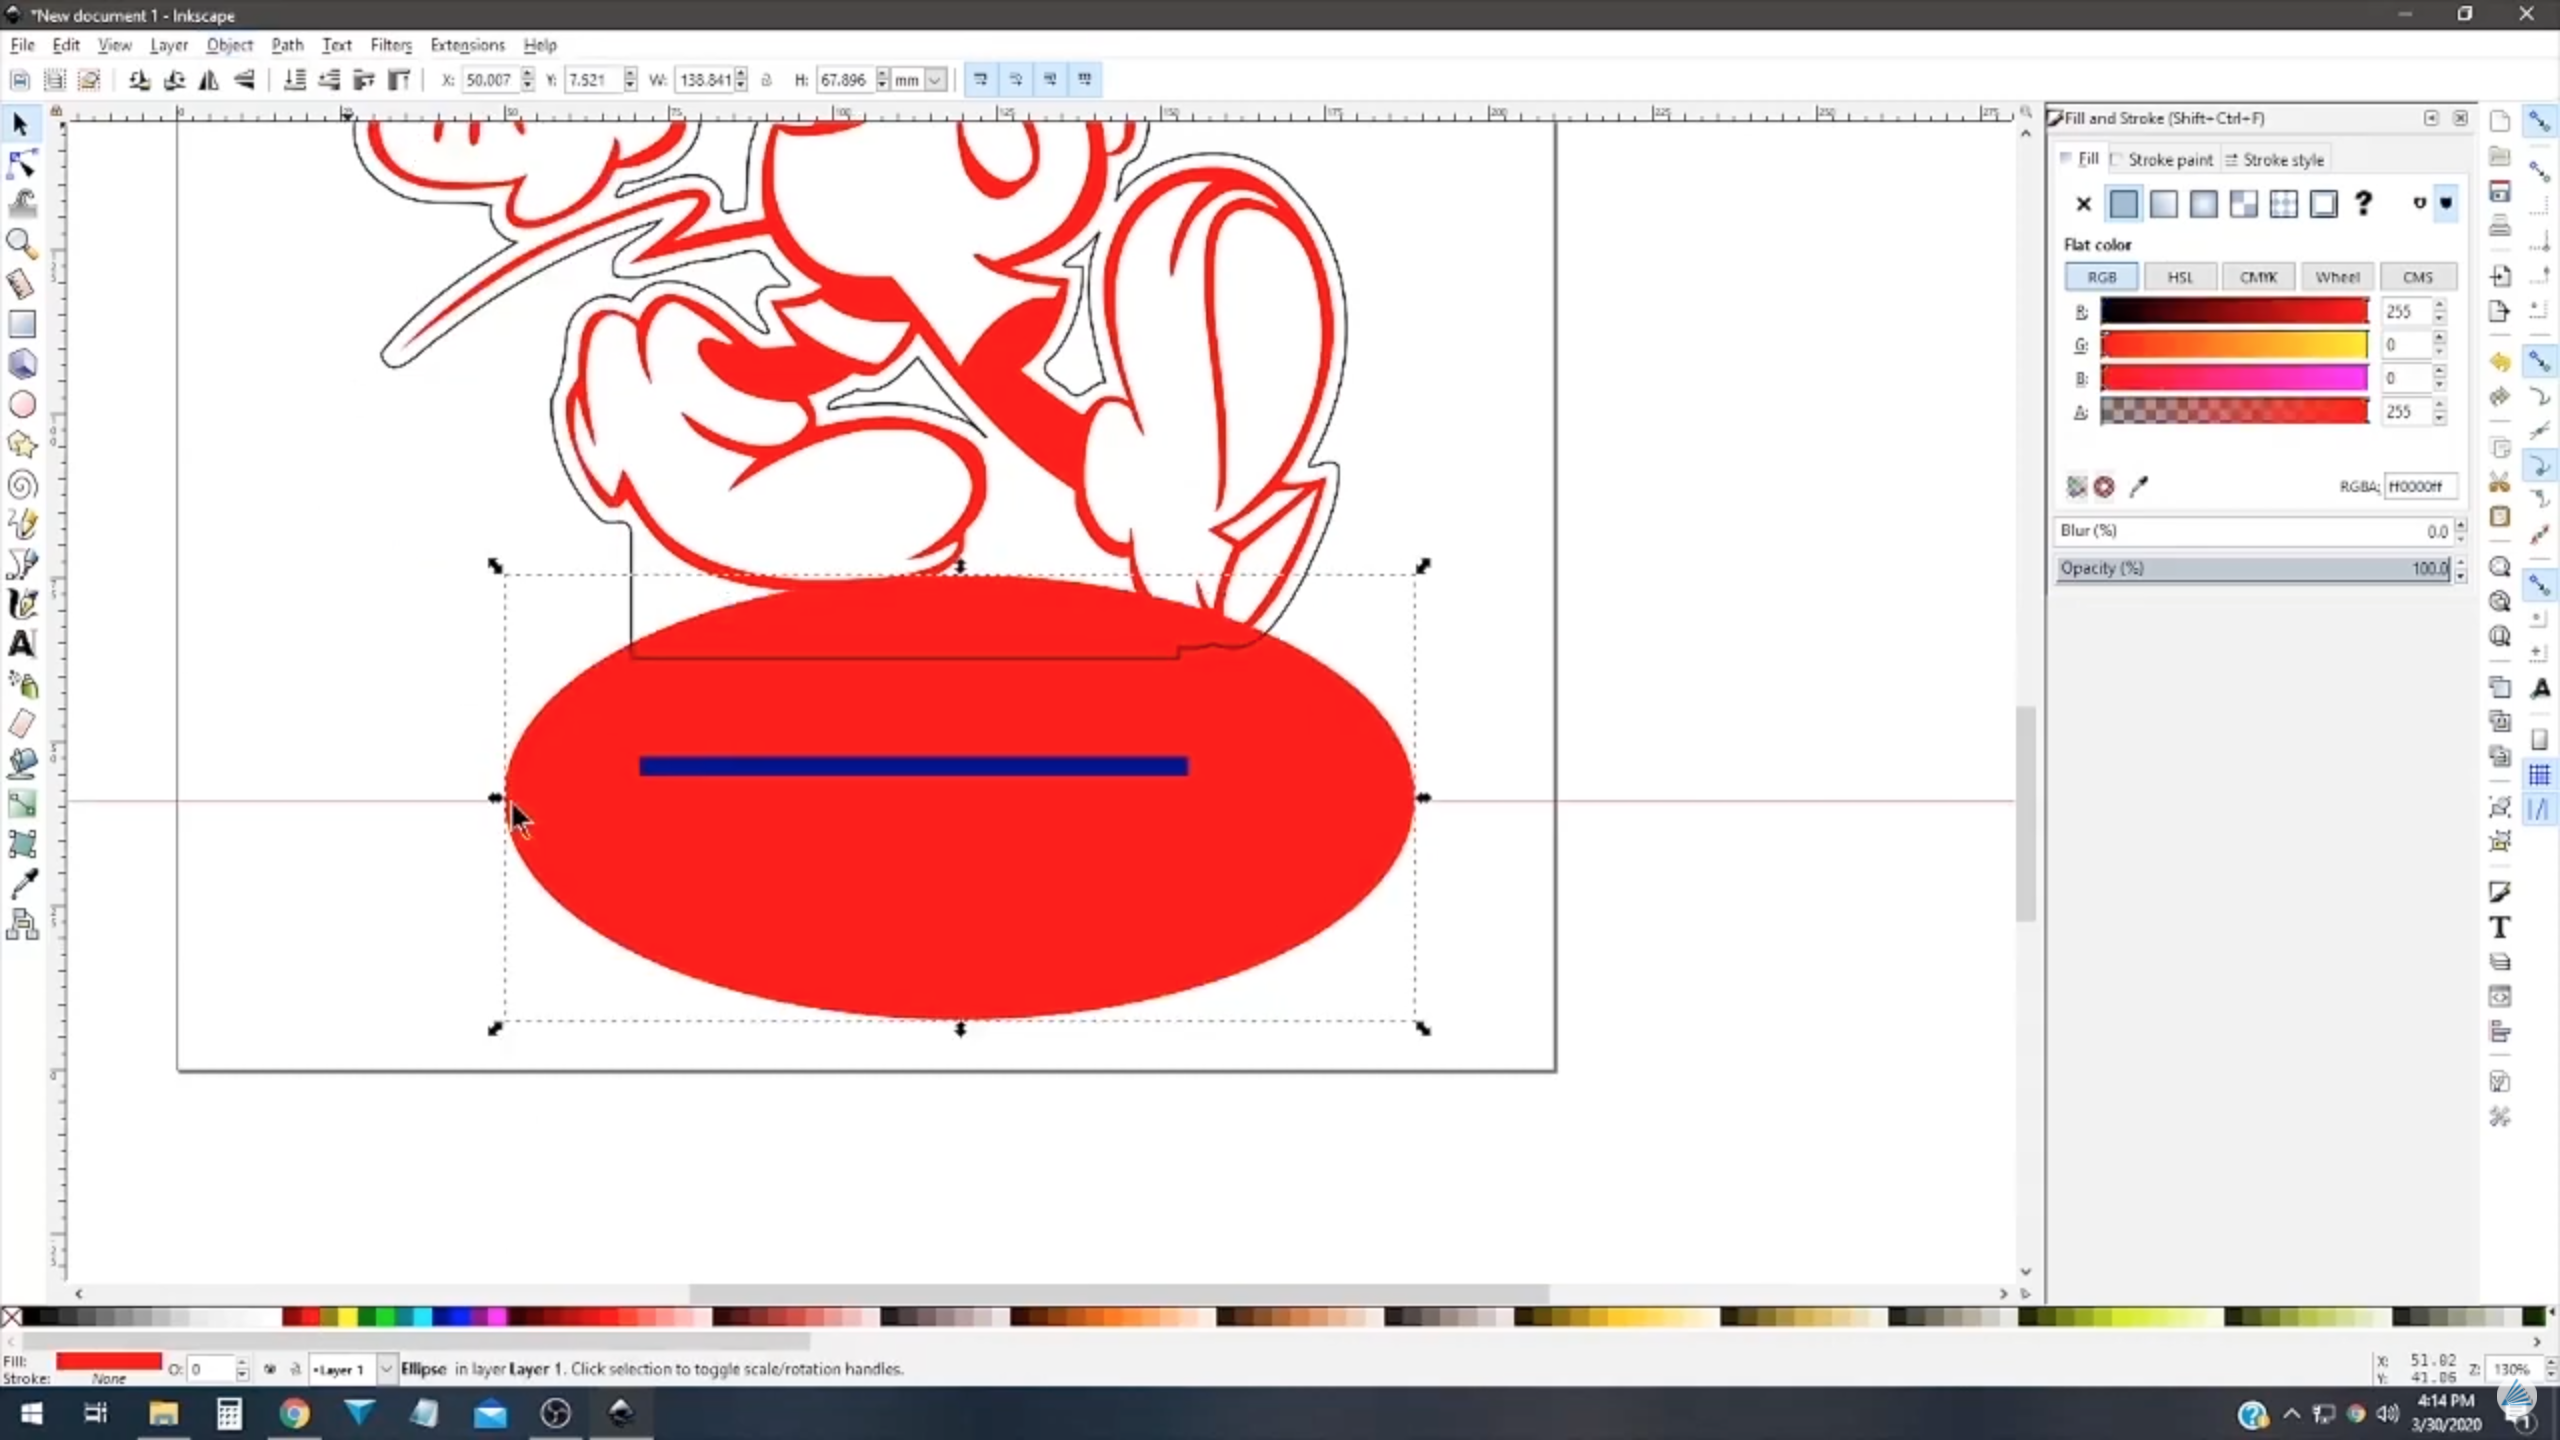
-Select outline and give it outset. This makes it less delicate when cut.
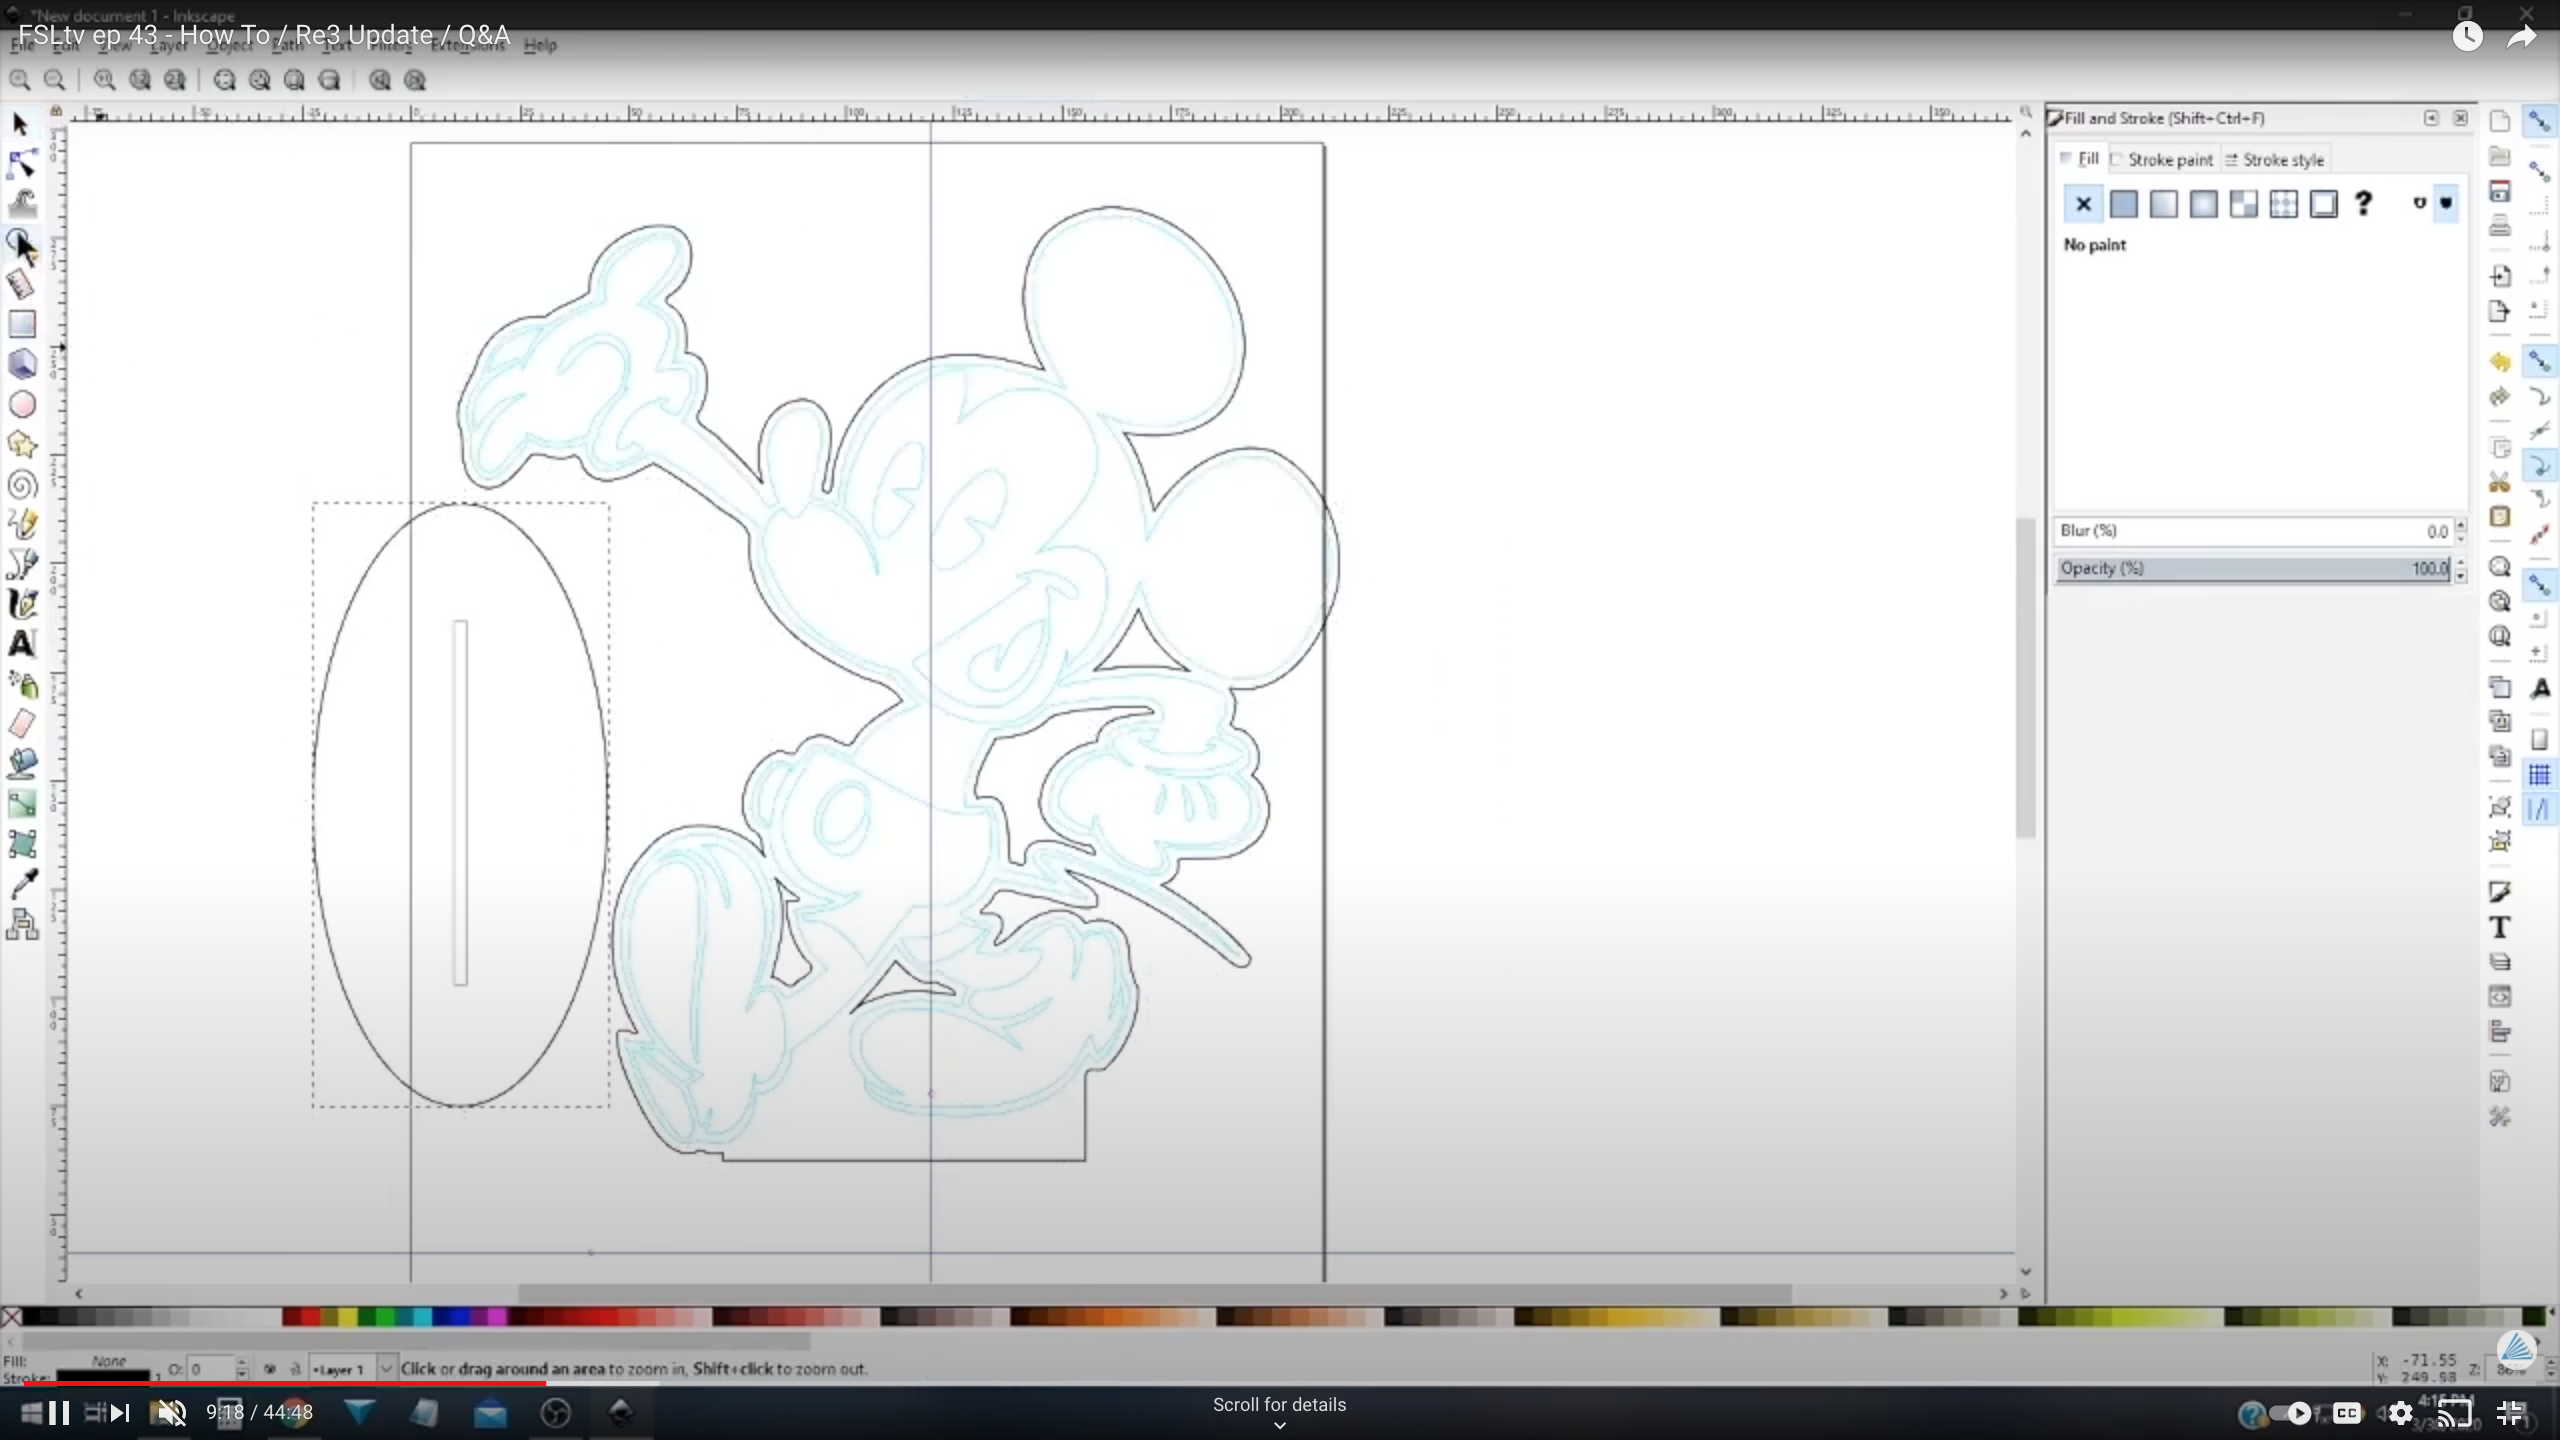
-Rather than hanging, Walker created a base to set the Mickey inside so it can stand up straight.
-While taking the same width dimensions from your material, adjust the stands notch to that thickness. In Walker's case, his acrylic was 1/8 inch thick.
-Next, Set the notch hole to the center of your base.
-Group your designs. Set the vector lines as cyan and the cuts to black.
-Remember to mirror the image vertically as we are painting on the backside. This is super important when it comes to text.
-Go to file - Document Properties - resize content to page.
-Remove the bitmap layer since we're not running any engraving.
-Vector mark the inside of the design
-Start the job!
-The power is low enough to where it's only cutting through the layer of masking on the acrylic.
-Lastly, paint the acrylic layer by layer with your Exacto knife and spray paint!