How to Markerless GPS Based Augmented Reality.
by matthewh8 in Workshop > Science
37810 Views, 73 Favorites, 0 Comments
How to Markerless GPS Based Augmented Reality.
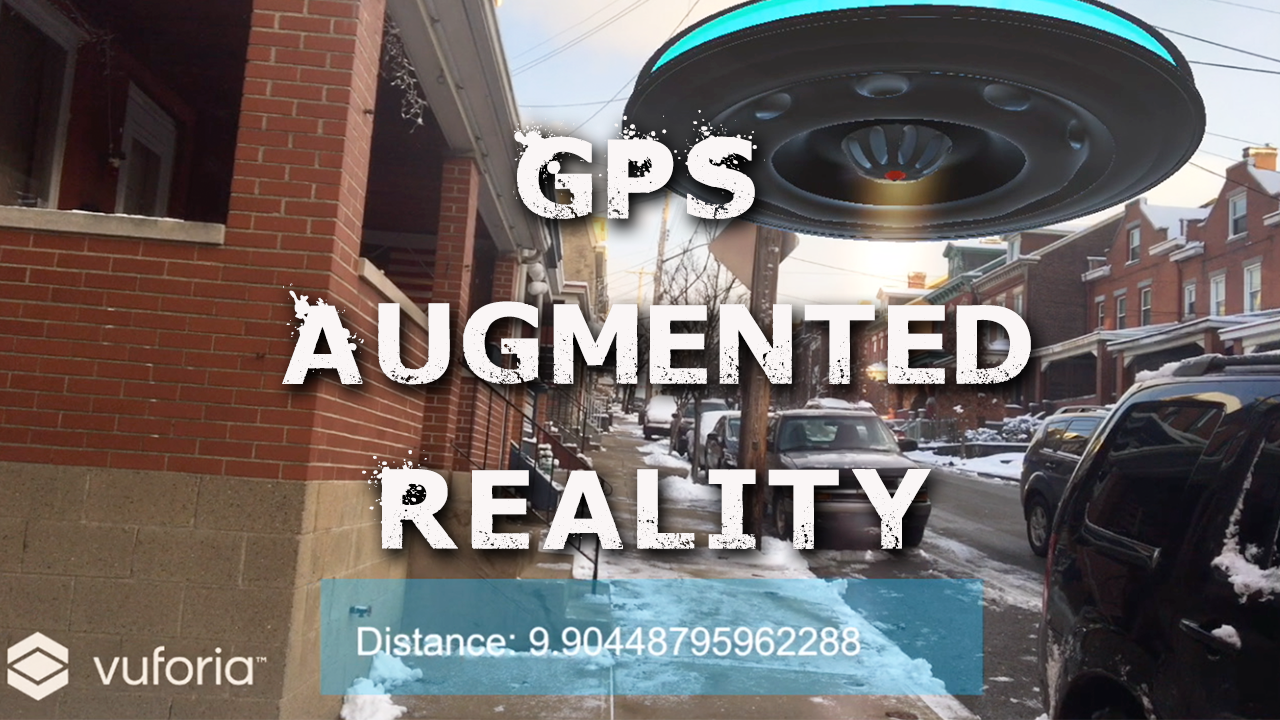
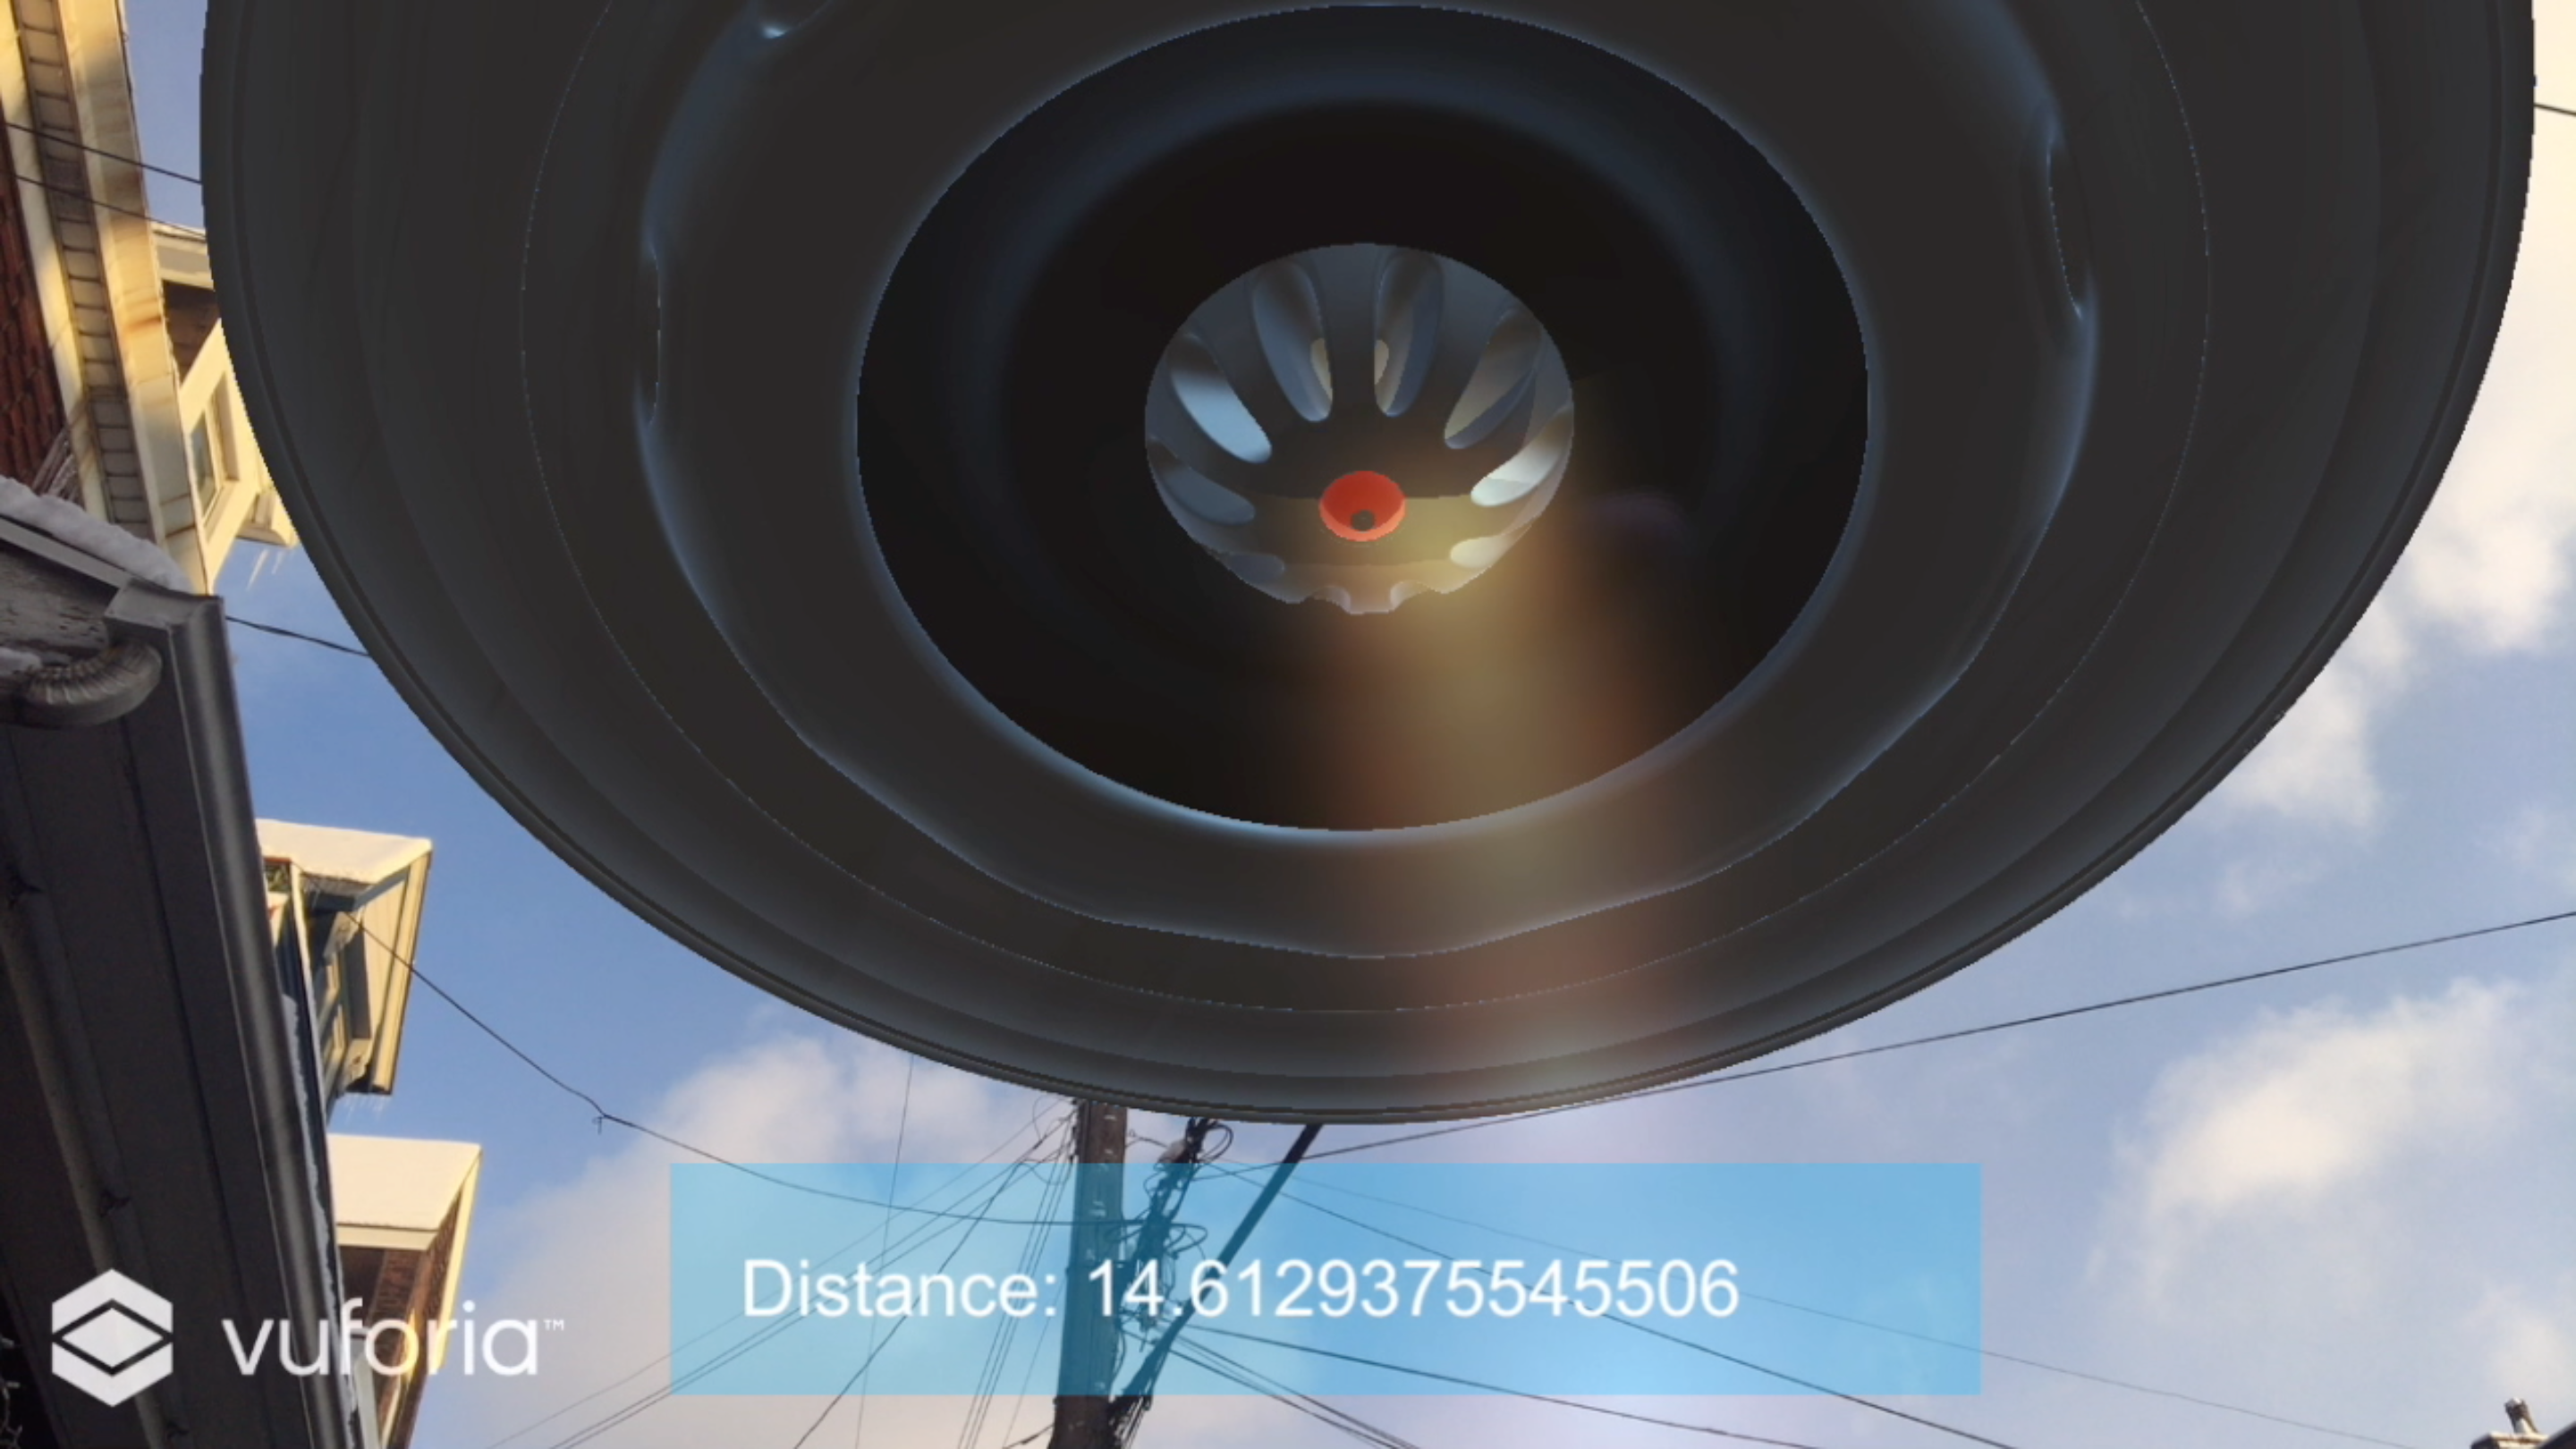
This Tutorial will walk you through making a markerless augmented reality app with Vuforia and Unity 3D. The app will work for Android or IOS as long as your phone has a compass and Gyro. This tutorial is geared towards beginners so anyone should be able to follow along. This is not what Vuforia is intended for so its kind of a hack but it does offer a free alternative to getting the raw camera input in Unity, for which you would typically have to pay for a plugin (or struggle with cross platform issues yourself). The main problem with this type of AR is the 3D model is stuck in space and we can not get closer to it. We are going to try to get around this by using our GPS coordinates. We will find the latitude/longitude delta from where we were when the app started to our current position and use that distance to move the spaceship closer as we walk forward. This will give us the illusion that we are walking closer to the spaceship.
All you need to follow along is a computer with a webcam.
As far as software you will need Unity 3D: https://store.unity.com/?_ga=1.97655965.303547796...
and the Vuforia SDK: https://store.unity.com/?_ga=1.97655965.303547796... Thanks for watching!
Start a New Unity Project.
Open up Unity and click start a new project, call it whatever you want.
Go to the Vuforia website and create a free account if you don't already have one.
Create a new app in the developer section and copy your license key to the clipboard.
Download the Unity SDK from here: https://developer.vuforia.com/downloads/sdk
Drag the Vuforia Unity package into Unity and hit import all.
Remove the main camera from the scene.
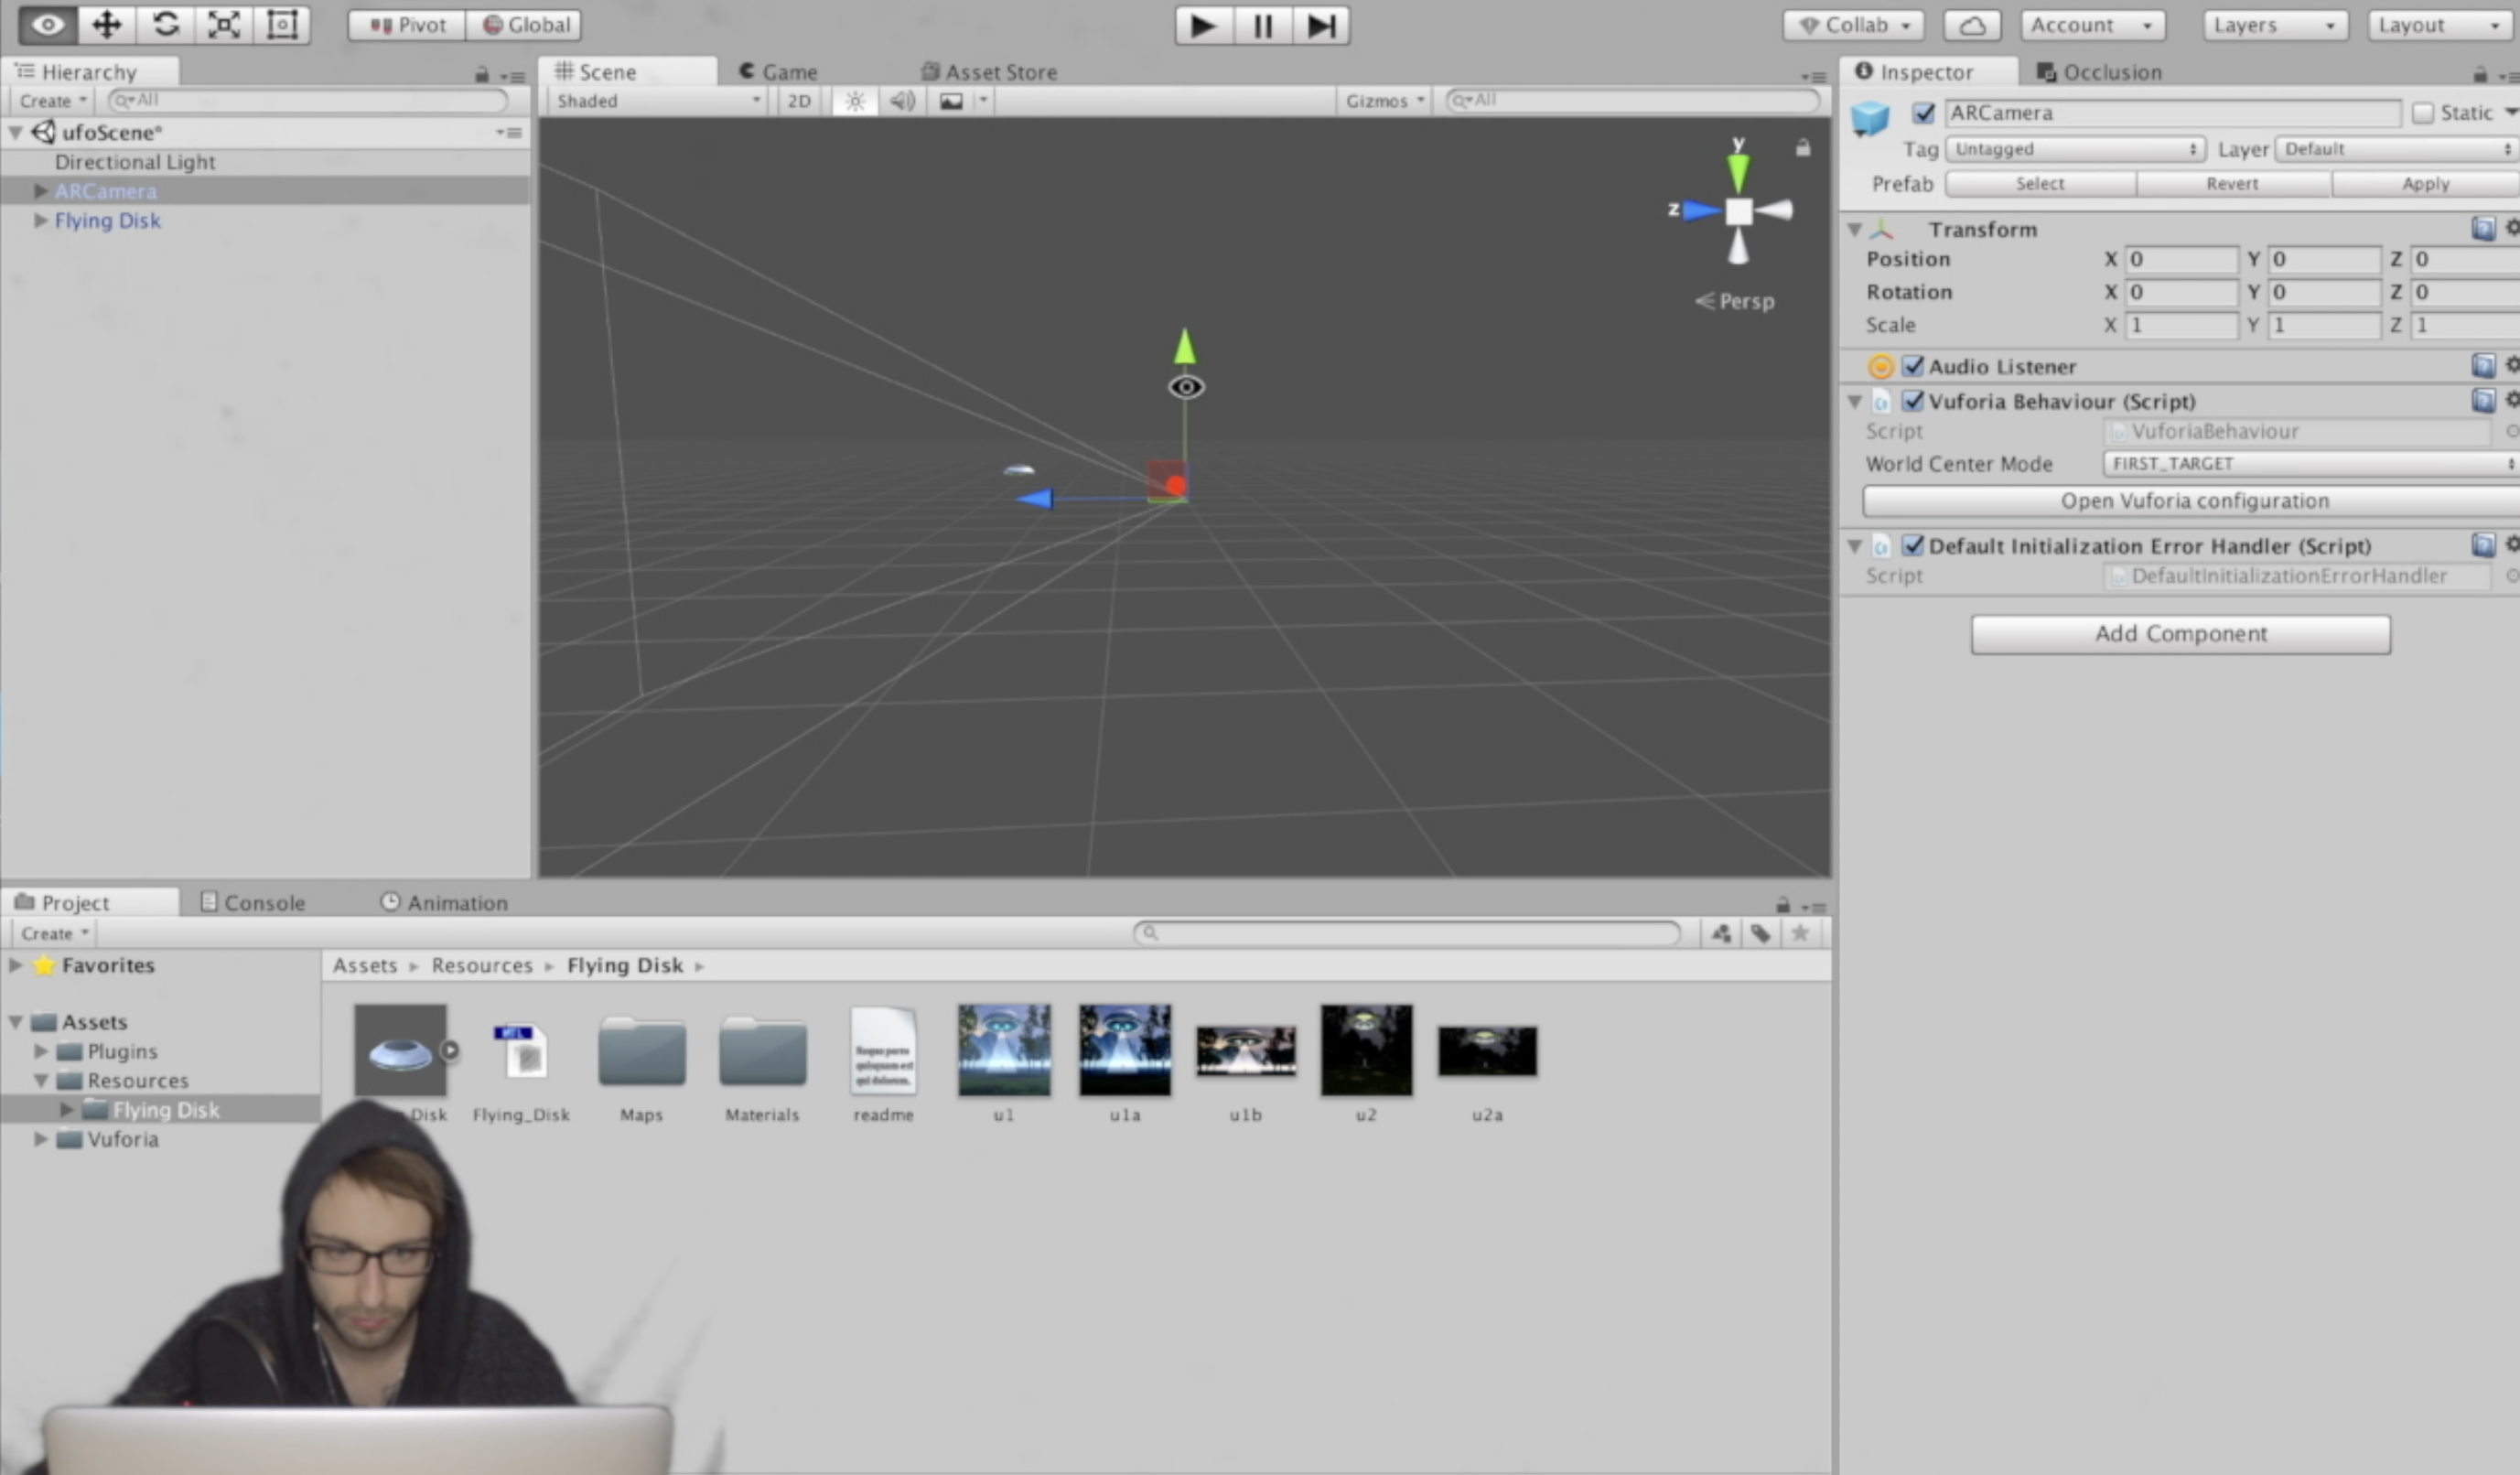
Back in Unity go to the Vuforia folder, prefabs, and drag in the ARCamera prefab into the scene view.
Click on the ARCamera and off to the right there will be button to open Vuforia configuartion. Click that button.
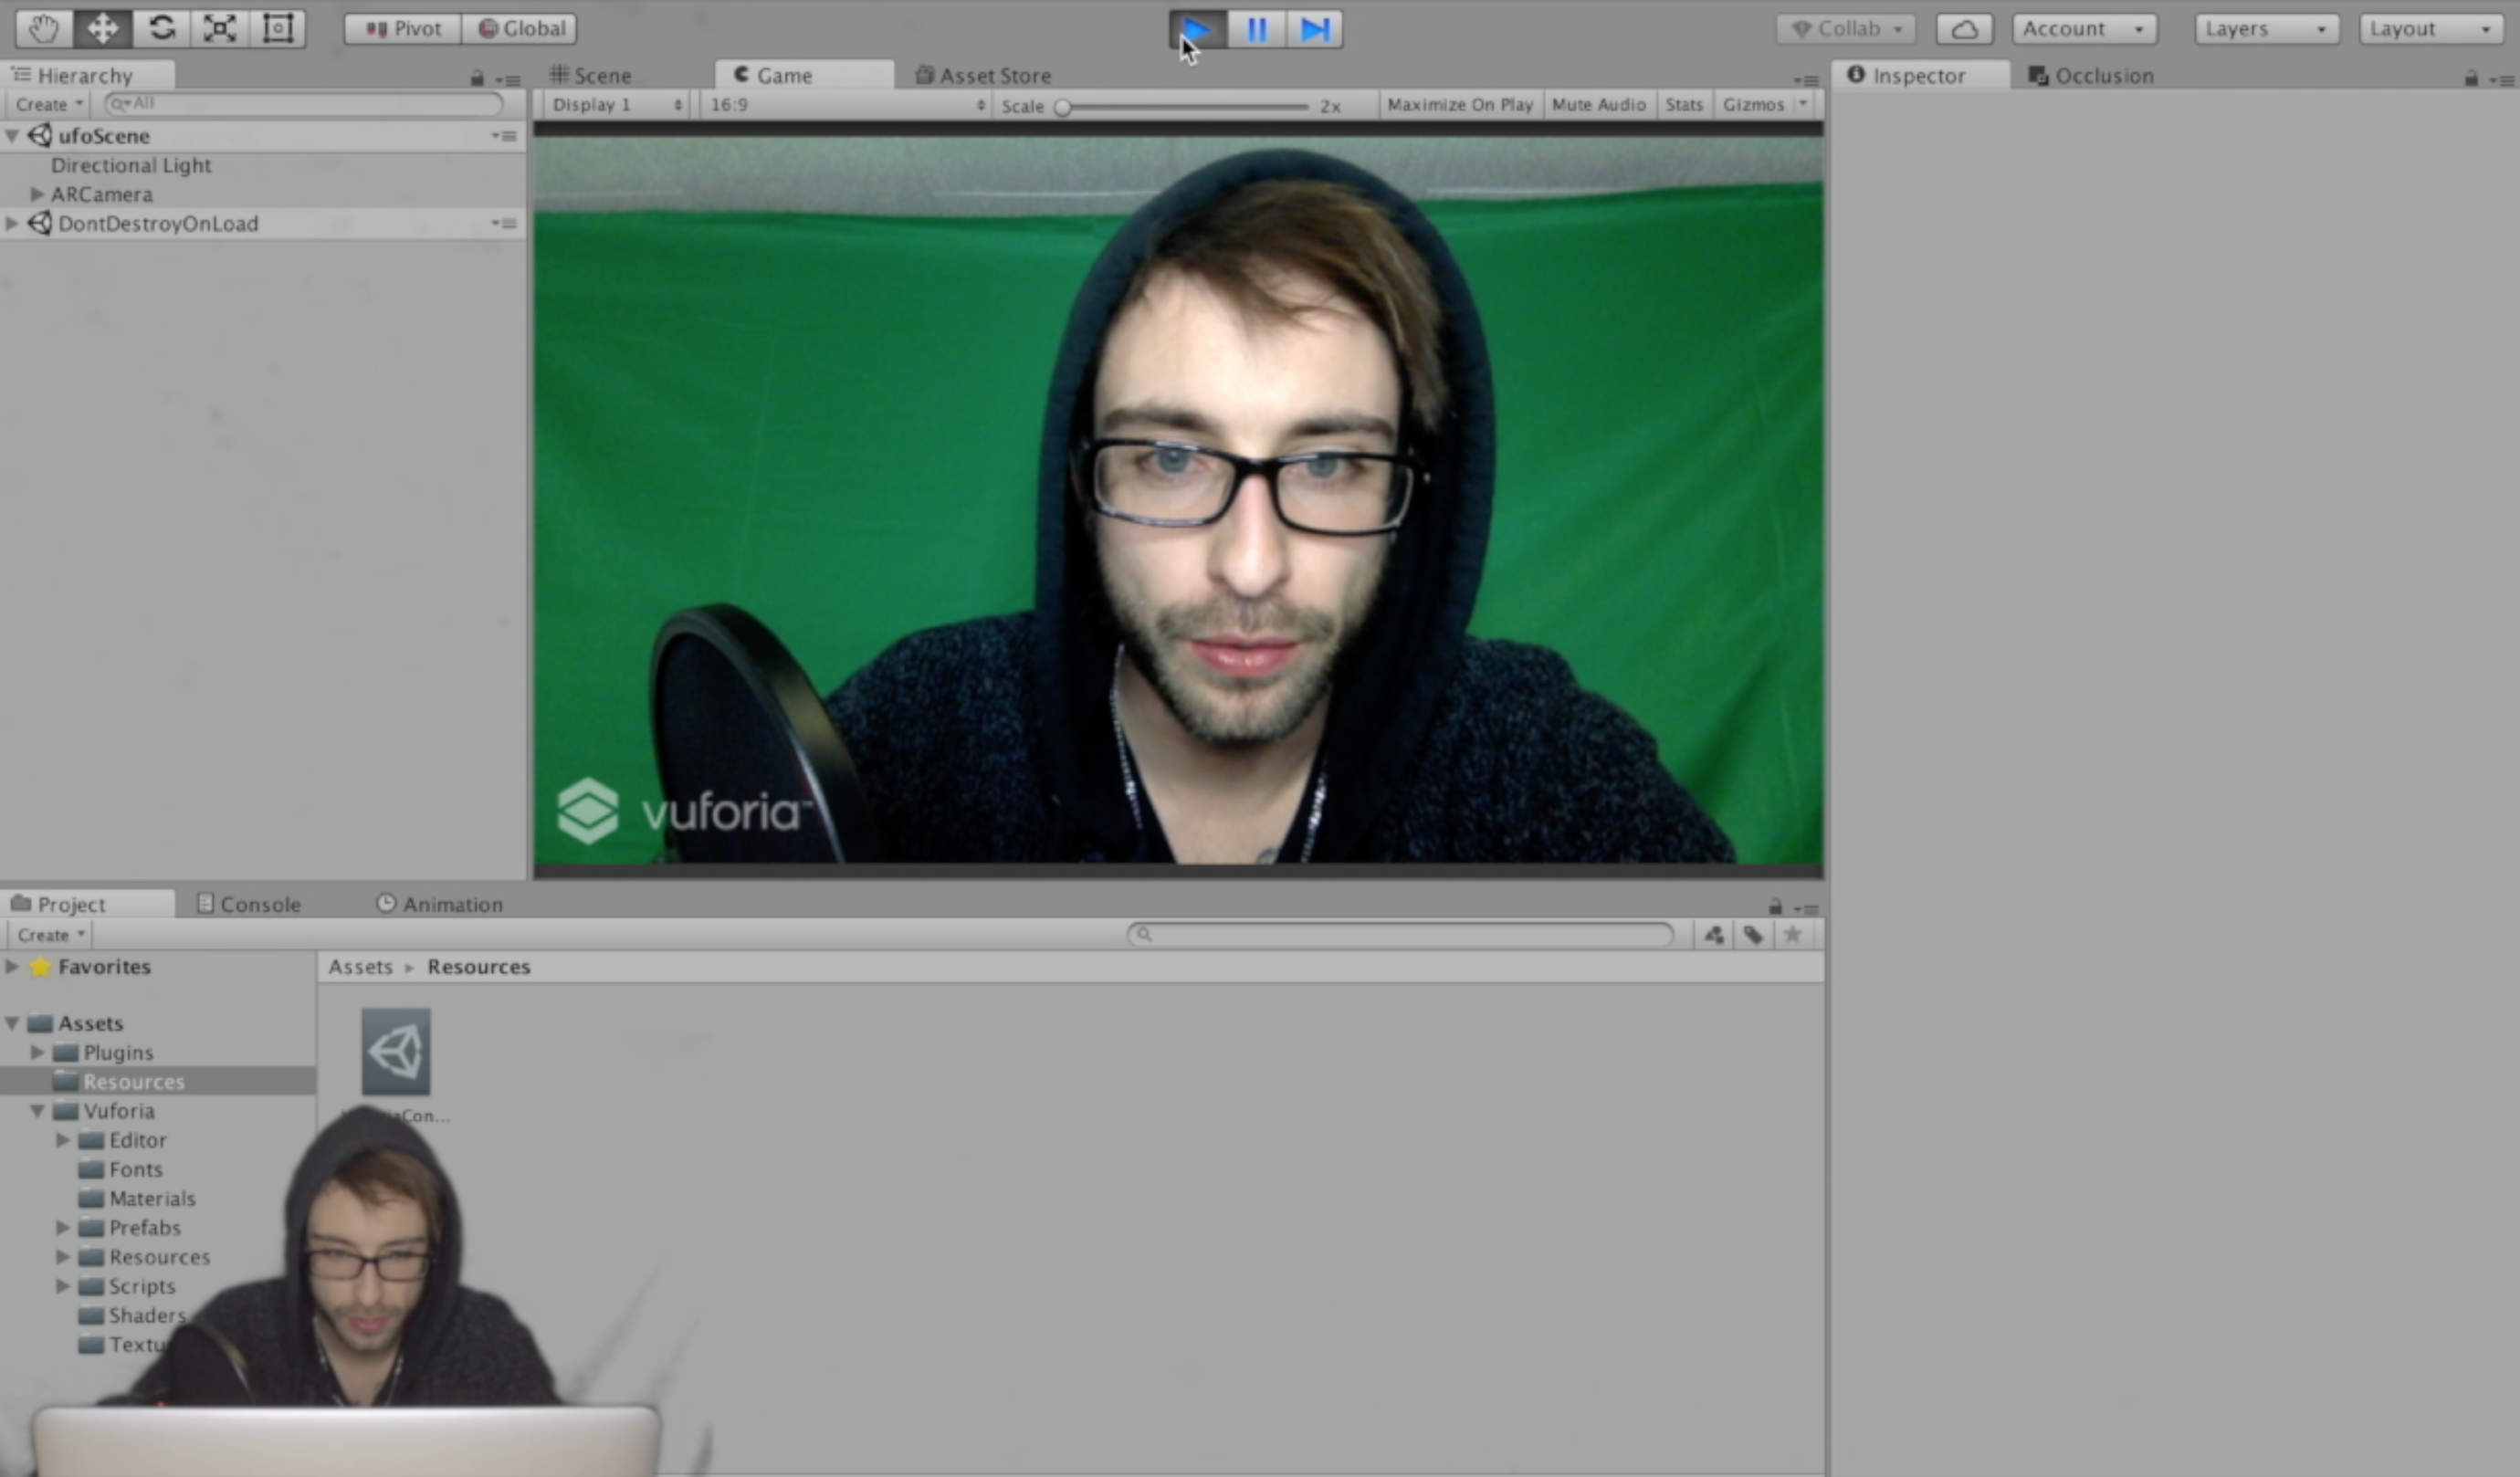
Paste in your Vuforia license key. Now when you click play you should see yourself in your webcam!
It's That Easy!
Before we forget go to file at the top and save scene. Call it whatever you want.
Download this free UFO model: http://tf3dm.com/3d-model/flying-disk-2014-53368.h...
Extract that folder and drag the whole thing into Unity.
Find the .obj file and drag that into the scene.
Click on the UFO and change the scale to .1 across the board (x,y,z).
Click on the ARCamera in the hierarchy and you will notice a bunch of white lines come up. These lines represent the field of view of the camera.
Drag the UFO inside this field of view and you have Markerless AR!
Click play and you will see the UFO in front of your face.
Lets Make It a Little Smarter.
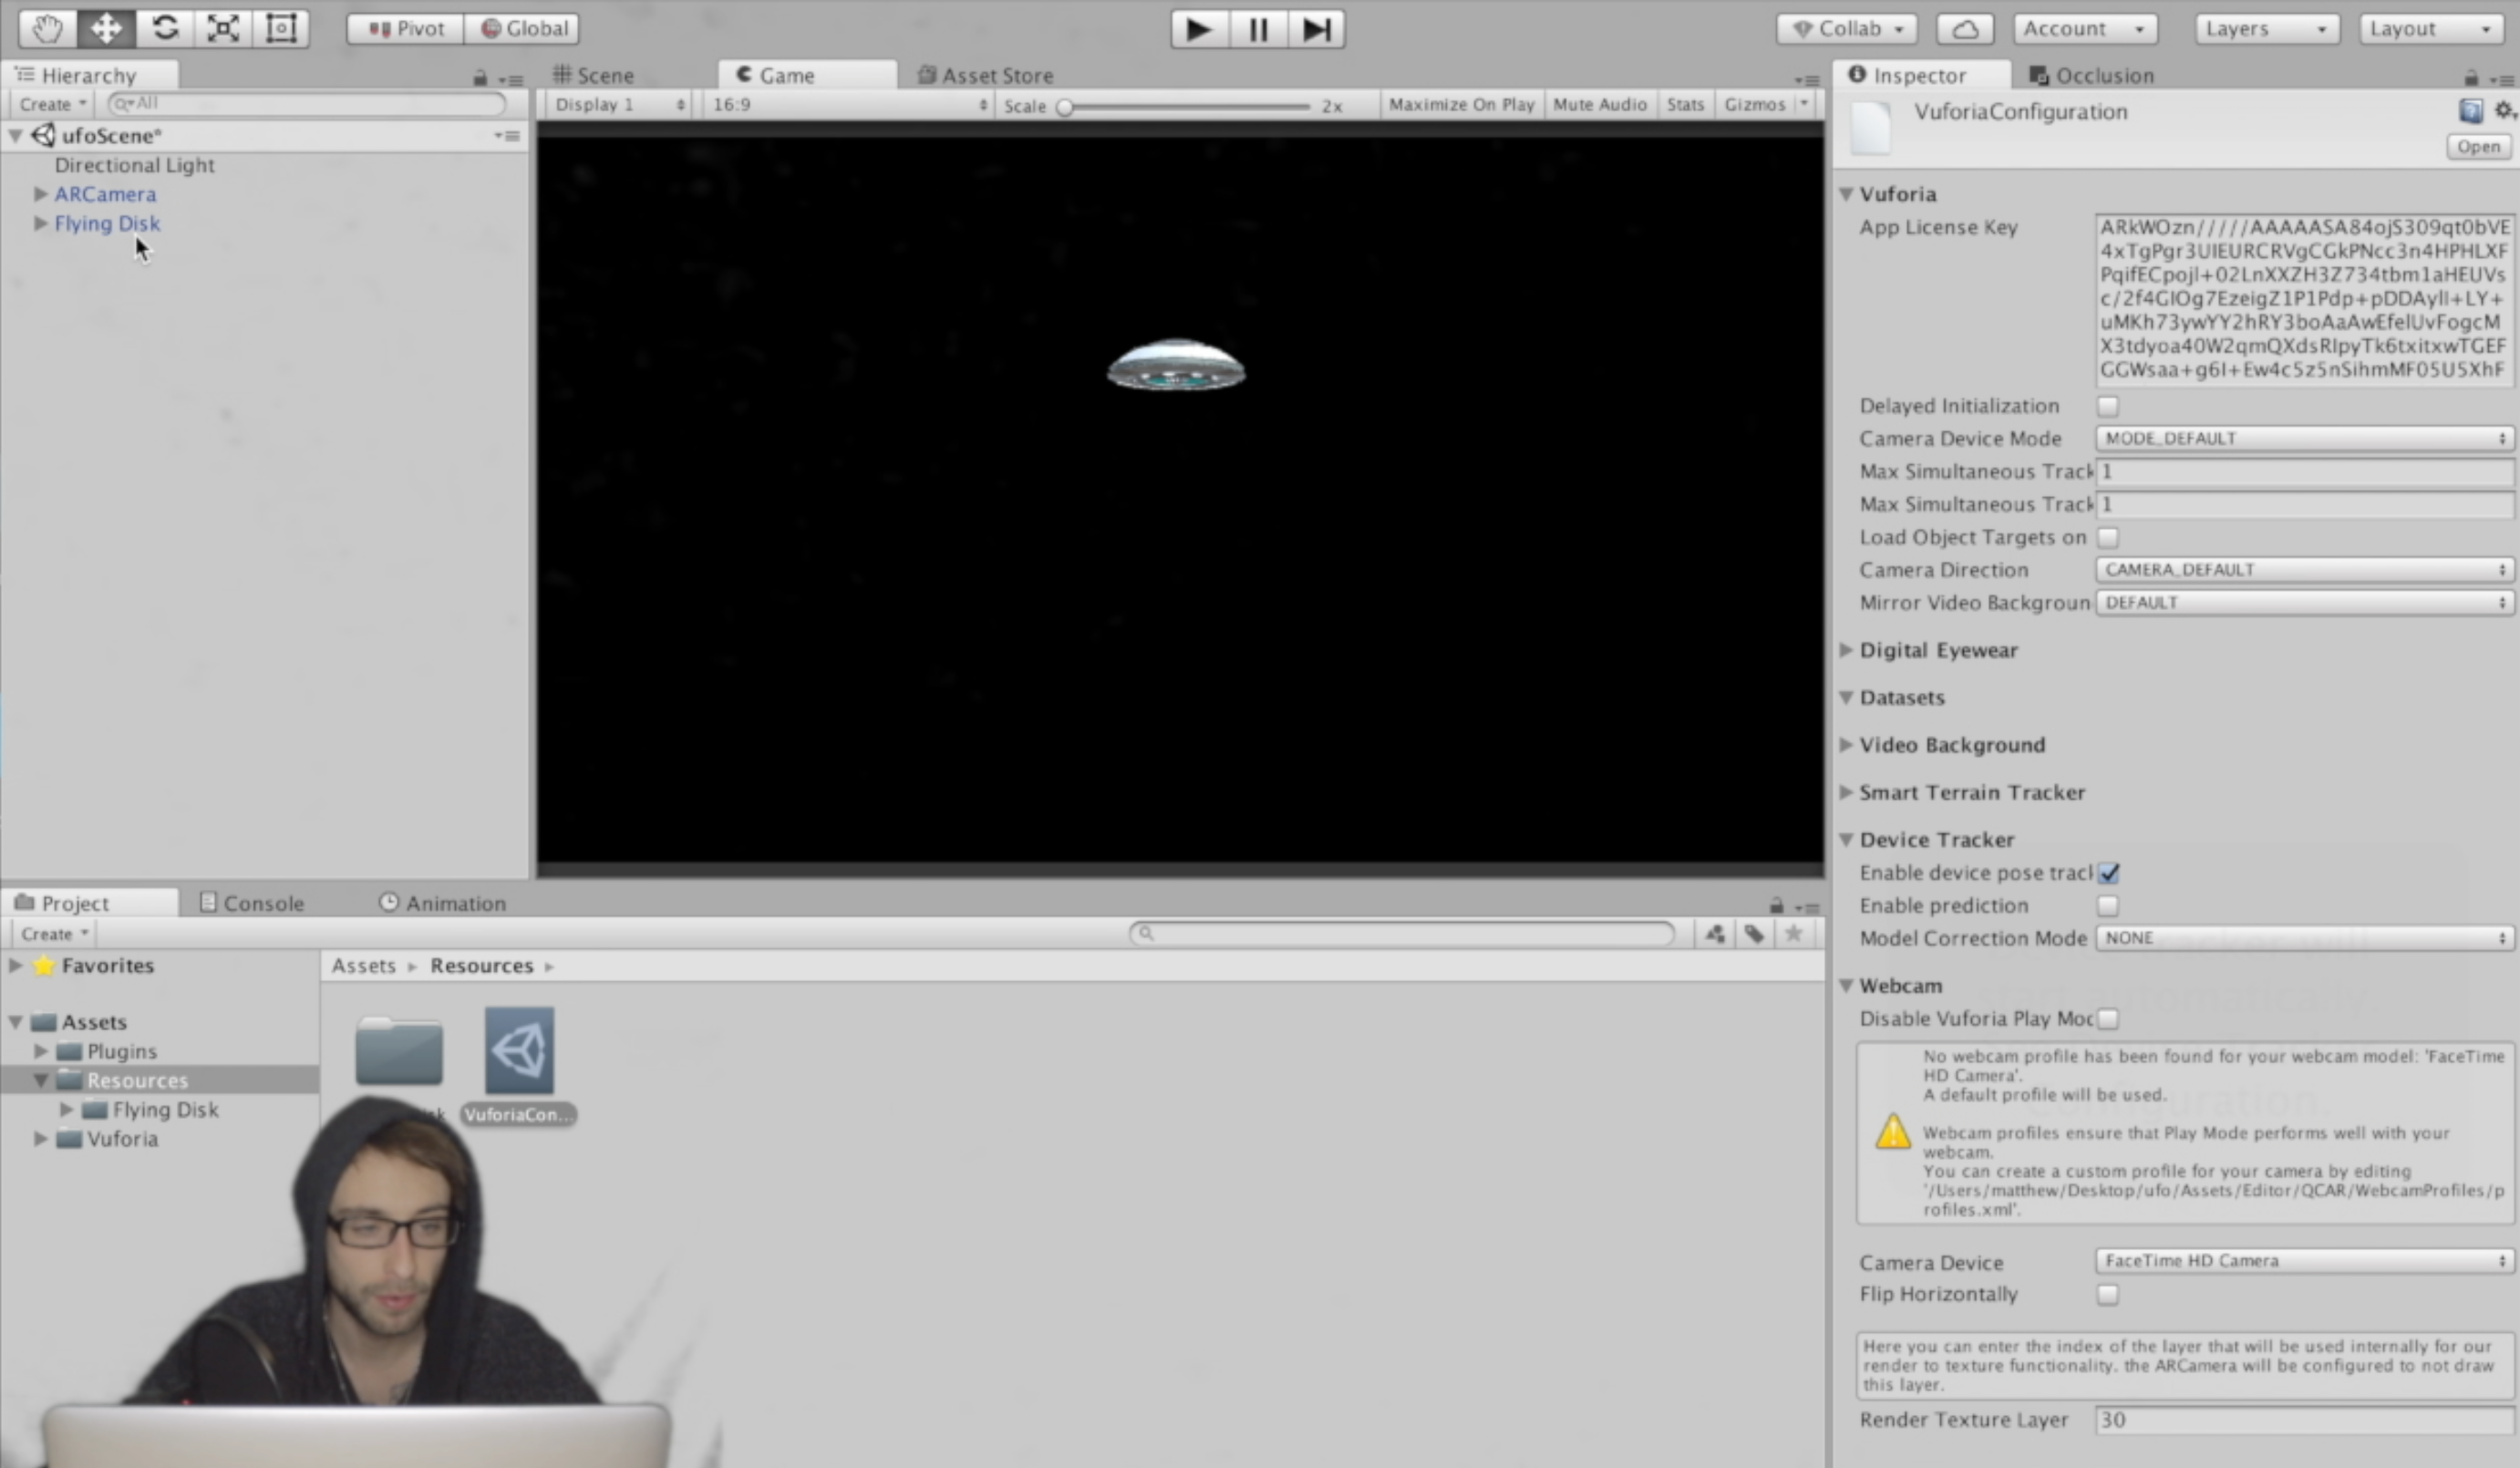
The problem with what we have so far is that the UFO is stuck to the camera and will never leave are field of view.
As long as your phone has a gyro we can click on ARCamera and change world center mode to device tracking.
Open Vuforia configuration again and make sure enable device pose tracking is checked on and change world correction mode to handheld.
Now it will look the same in Unity but when we build out to our mobile phone the UFO will stay in one place when we look around so it will go in and out of view.
The next problem is that we can never get closer to the object. No matter how much we walk the UFO will always stay a fixed distance away from our camera.
Next we will try to use the GPS location of the phone and as the user walks forward we will move the UFO closer to the Unity camera, creating the effect that we are walking closer to the UFO.
Lets Add a Display for Text.
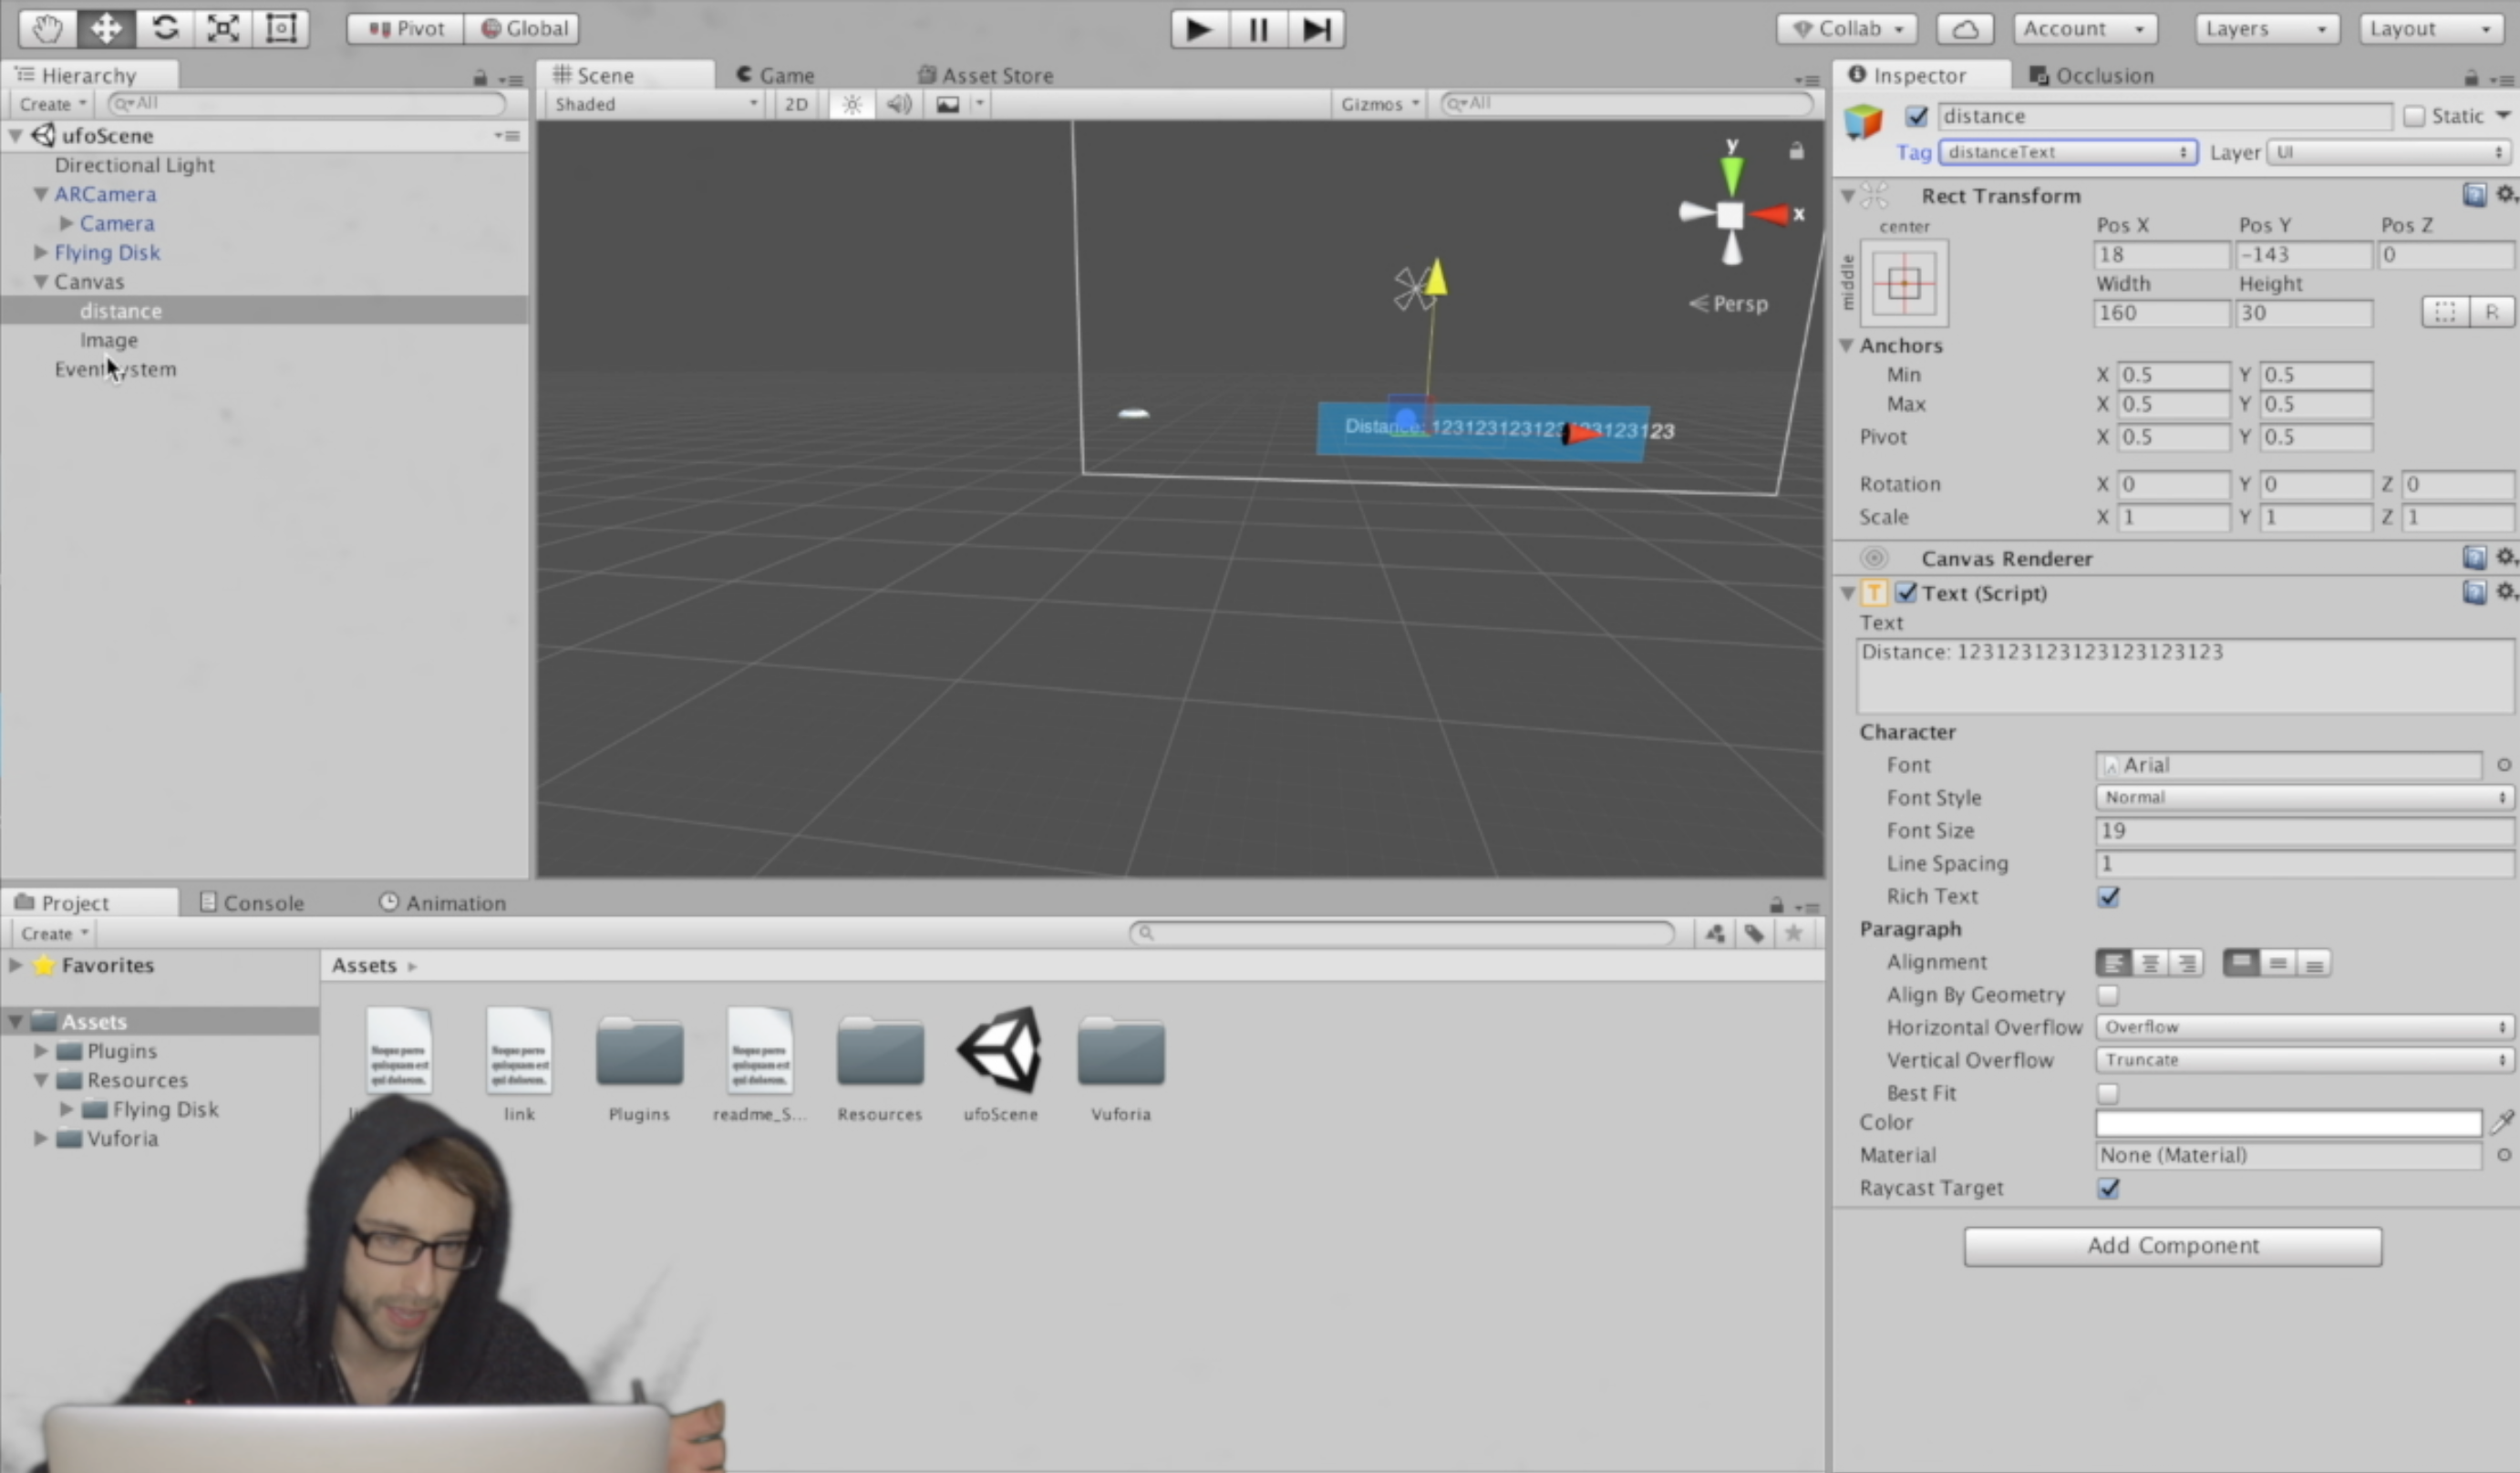
Before we add any code we need to create a UI t ext element for displaying the distance between where the user started the app and where they are currently. This is nice because it allows us to see how often the distance is getting updated for debugging purposes.
First right click in the hierarchy and create a new UI, text element.
Change the font color to white and resize it however you want.
Create a UI, image in the same fashion and color it however you want. Move it above the text in the hierarchy so it appears behind the text. You may want to modify its width and height so it looks a little better.
Click on the canvas object that was created and change the UI scale mode from constant pixel size to scale with screen size.
Click on the text object again and change horizontal overflow from wrap to overflow.
Finally, (with the text still selected) click on the drop down on the top right to change the tag. Add a tag and call it "distanceText" Now go back to the dropdown menu and distanceText should be there, make sure to select that.
Save the scene and lets add some code.
Lets Add Some C#.
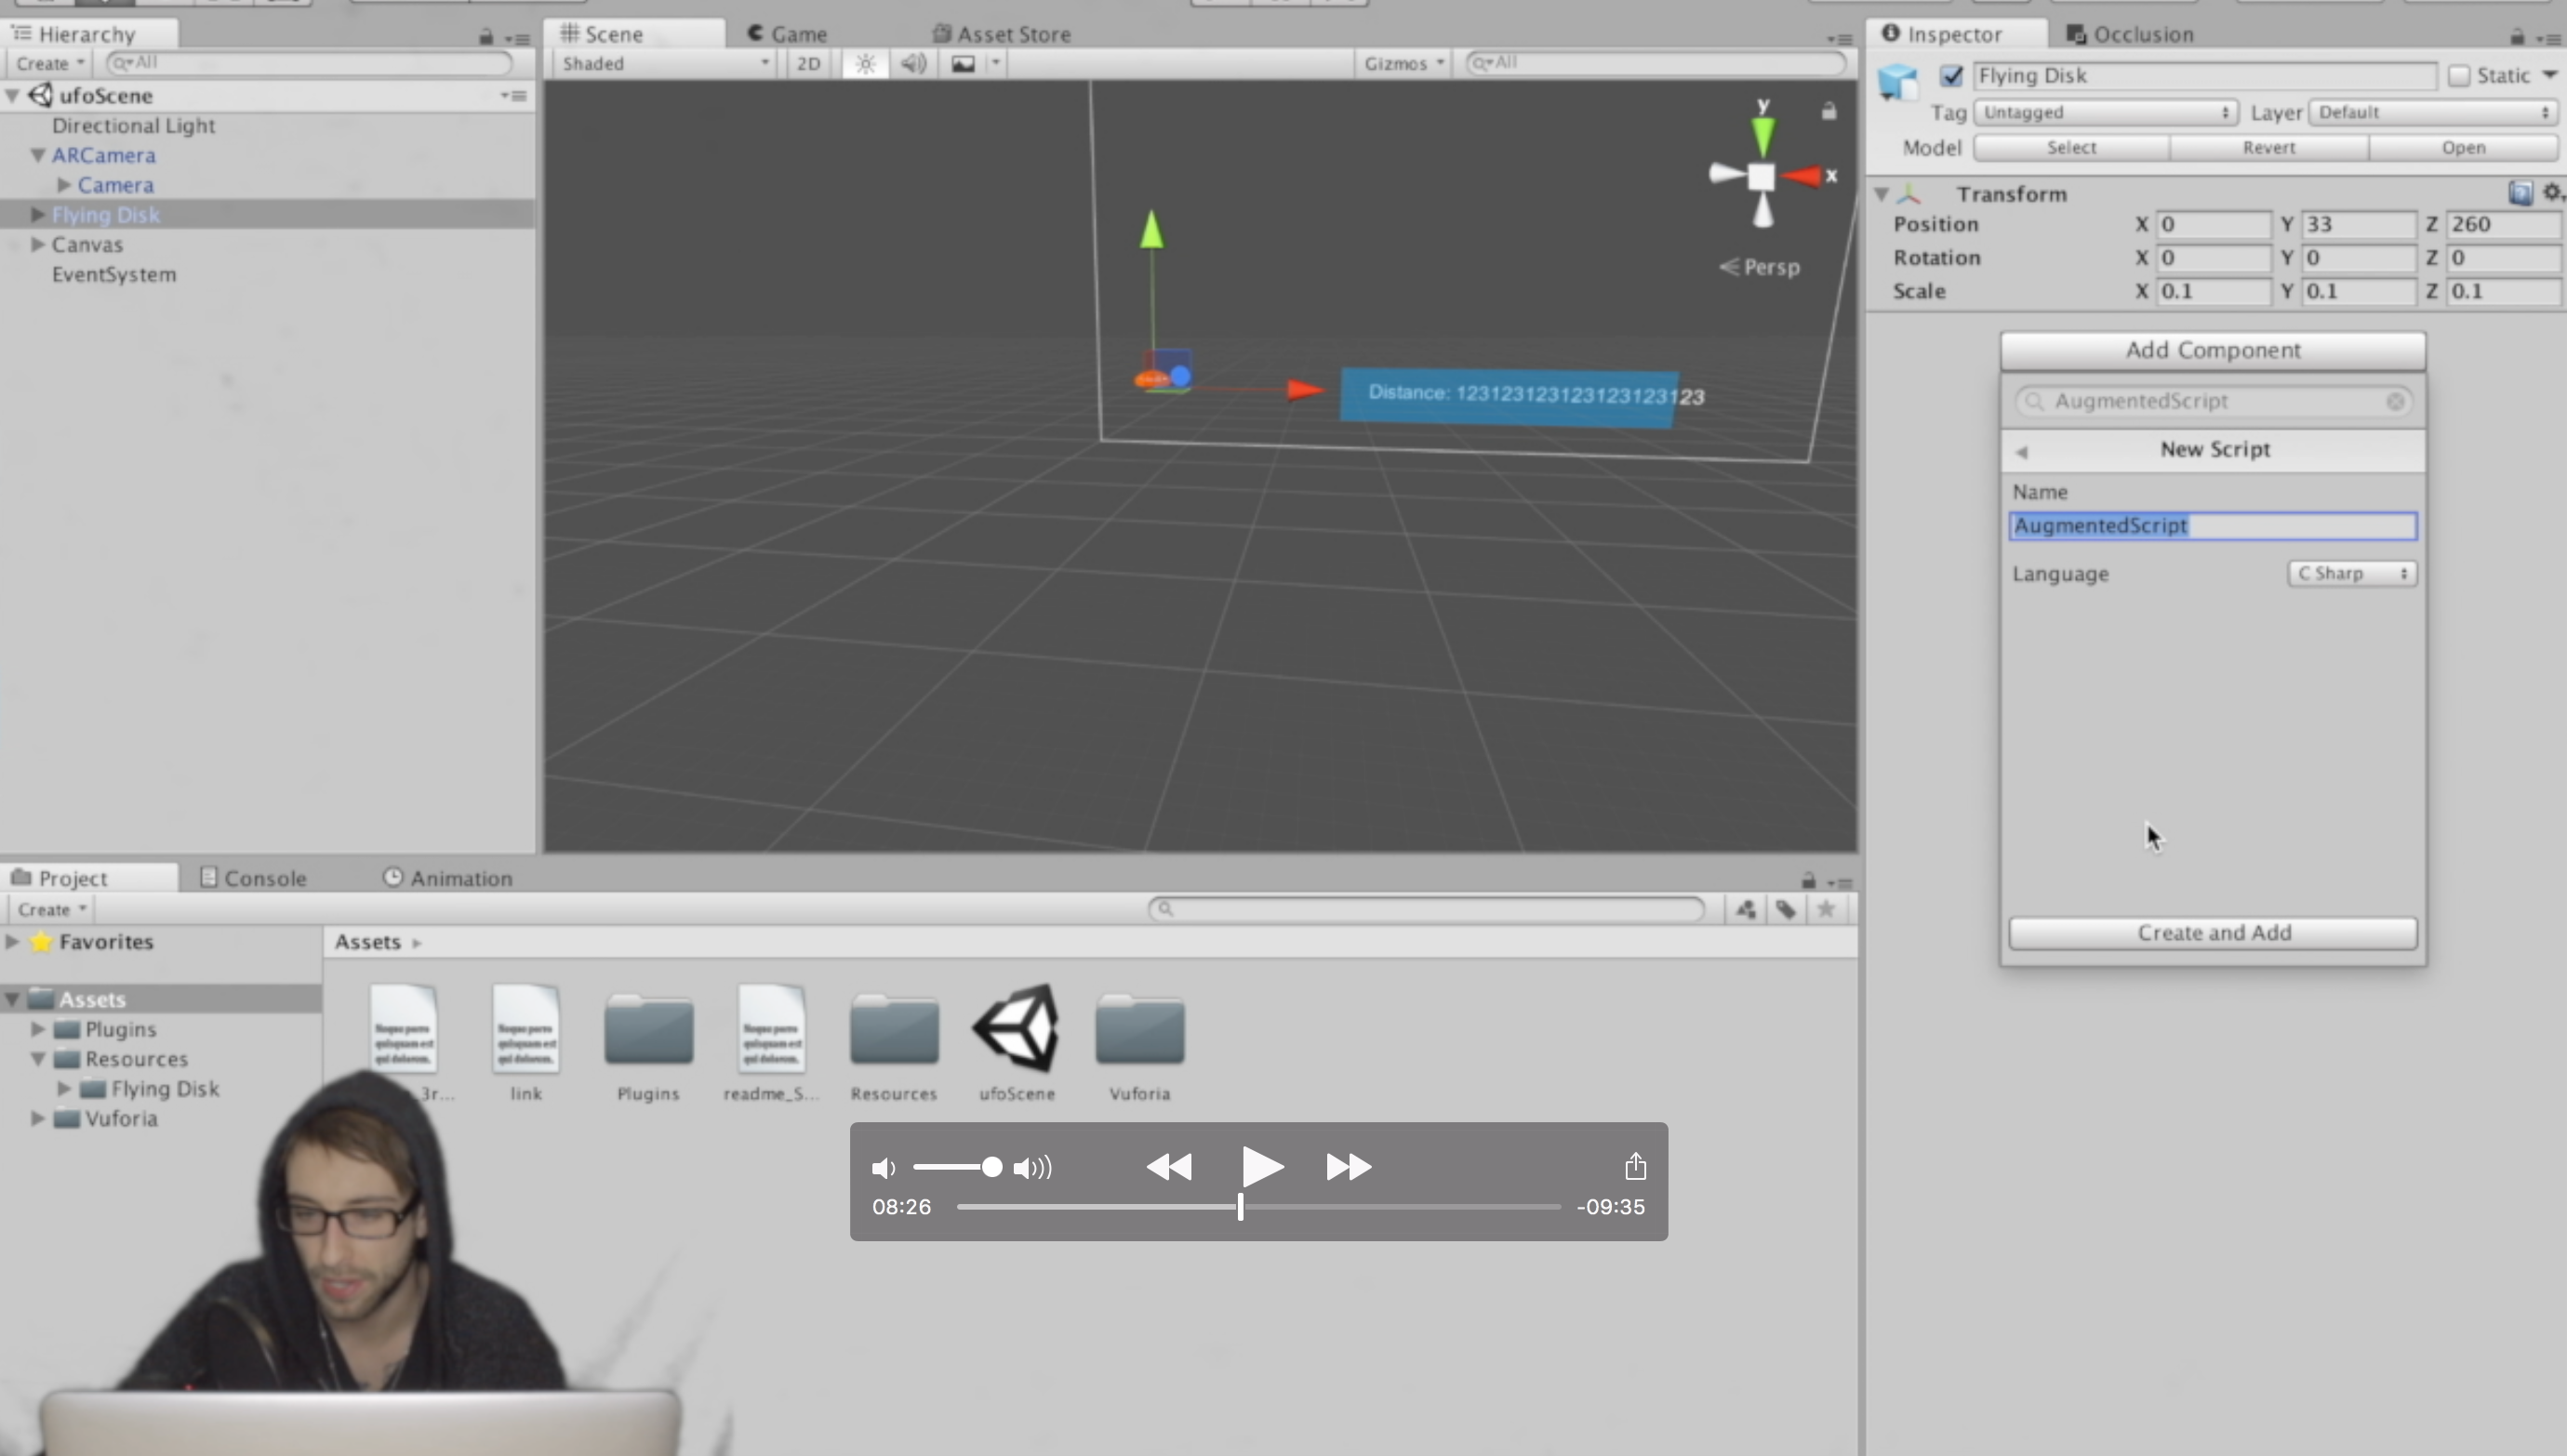
Select the UFO game object in the hierarchy and click add component off to the right. Add a new C# script and call it "AugmentedScript" just like in the picture above. Double click that new component and it will open up MonoDevelop. Delete everything in there and paste in the following:
using UnityEngine;
using System.Collections;
using UnityEngine.UI;public class AugmentedScript : MonoBehaviour
{  private float originalLatitude;
  private float originalLongitude;
  private float currentLongitude;
  private float currentLatitude;  private GameObject distanceTextObject;
  private double distance;  private bool setOriginalValues = true;  private Vector3 targetPosition;
  private Vector3 originalPosition;  private float speed = .1f;  IEnumerator GetCoordinates()
  {
    //while true so this function keeps running once started.
    while (true) {
      // check if user has location service enabled
      if (!Input.location.isEnabledByUser)
        yield break;      // Start service before querying location
      Input.location.Start (1f,.1f);      // Wait until service initializes
      int maxWait = 20;
      while (Input.location.status == LocationServiceStatus.Initializing && maxWait > 0) {
        yield return new WaitForSeconds (1);
        maxWait--;
      }      // Service didn't initialize in 20 seconds
      if (maxWait < 1) {
        print ("Timed out");
        yield break;
      }      // Connection has failed
      if (Input.location.status == LocationServiceStatus.Failed) {
        print ("Unable to determine device location");
        yield break;
      } else {
        // Access granted and location value could be retrieved
        print ("Location: " + Input.location.lastData.latitude + " " + Input.location.lastData.longitude + " " + Input.location.lastData.altitude + " " + Input.location.lastData.horizontalAccuracy + " " + Input.location.lastData.timestamp);        //if original value has not yet been set save coordinates of player on app start
        if (setOriginalValues) {
          originalLatitude = Input.location.lastData.latitude;
          originalLongitude = Input.location.lastData.longitude;
          setOriginalValues = false;
        }        //overwrite current lat and lon everytime
        currentLatitude = Input.location.lastData.latitude;
        currentLongitude = Input.location.lastData.longitude;        //calculate the distance between where the player was when the app started and where they are now.
        Calc (originalLatitude, originalLongitude, currentLatitude, currentLongitude);      }
      Input.location.Stop();
    }
  }  //calculates distance between two sets of coordinates, taking into account the curvature of the earth.
  public void Calc(float lat1, float lon1, float lat2, float lon2)
  {    var R = 6378.137; // Radius of earth in KM
    var dLat = lat2 * Mathf.PI / 180 - lat1 * Mathf.PI / 180;
    var dLon = lon2 * Mathf.PI / 180 - lon1 * Mathf.PI / 180;
    float a = Mathf.Sin(dLat / 2) * Mathf.Sin(dLat / 2) +
      Mathf.Cos(lat1 * Mathf.PI / 180) * Mathf.Cos(lat2 * Mathf.PI / 180) *
      Mathf.Sin(dLon / 2) * Mathf.Sin(dLon / 2);
    var c = 2 * Mathf.Atan2(Mathf.Sqrt(a), Mathf.Sqrt(1 - a));
    distance = R * c;
    distance = distance * 1000f; // meters
    //set the distance text on the canvas
    distanceTextObject.GetComponent ().text = "Distance: " + distance;
    //convert distance from double to float
    float distanceFloat = (float)distance;
    //set the target position of the ufo, this is where we lerp to in the update function
    targetPosition = originalPosition - new Vector3 (0, 0, distanceFloat * 12);
    //distance was multiplied by 12 so I didn't have to walk that far to get the UFO to show up closer  }  void Start(){
    //get distance text reference
    distanceTextObject = GameObject.FindGameObjectWithTag ("distanceText");
    //start GetCoordinate() function
    StartCoroutine ("GetCoordinates");
    //initialize target and original position
    targetPosition = transform.position;
    originalPosition = transform.position;  }  void Update(){
    //linearly interpolate from current position to target position
    transform.position = Vector3.Lerp(transform.position, targetPosition, speed);
    //rotate by 1 degree about the y axis every frame
    transform.eulerAngles += new Vector3 (0, 1f, 0);  }
}
Let Me Explain:

In the start function we start a coroutine called GetCoordinates(). This will continue to execute because everything inside GetCoordinates() is wrapped inside a while(true) block. Everything inside there will continue to get the users current latitude and longitude and compare it to the original latitude and longitude of the user when the app started.
There is a Calc() function that will take both sets of coordinates and give us back the user's distance in meters from the original location.
Now that we have the distance the user has walked we can move the UFO closer to the Unity camera by this same distance factor.
There is typically about a half a second delay between distance updates so that leaves a ton of room for improvement here. With this delay the UFO is only moving after the user has already moved. You could make some attempts to predict the next move of the user based on their previous move or even take it further by using accelerometer values to test if this user is actually moving before predicting their next move.
We're Done!

Now we are ready to build this out to a mobile device and take it outside!
Go to file, build settings, and switch the platform to IOS or Android.
A couple notes before we do this:
-If you are building out for IOS you need to go to file, build settings, player settings and add a bundle identifier (com.YourCompanyName.YourAppName), and also add a GPS usage description.
-Also, if you are building out for IOS you will need to download Xcode and set up a free apple developer account.
-If you are going to build out to Android you need to go into the developer options on your phone and enable USB debugging.
-Make sure you have location services turned on!
Let me know if you have any questions in the comments and thanks for looking!!