How to Make: the Magical Kitchen Mate
by tortorlim in Design > 3D Design
100 Views, 1 Favorites, 0 Comments
How to Make: the Magical Kitchen Mate
I hate spoons.
I despise the way measuring spoons and cups are designed. They're annoying to wash and make a mess of the kitchen. The separated design means I have to wash multiple tools. Certain spoons and cups that are made to be connected are worse because you have to wash several utensils even if you just use a couple (because they're connected and they get other spoons dirty). On those days that I want to eat some cookies, I have no motivation to bake them fresh because all the dishes are a pain to wash. I'd also be lying if I said they weren't difficult to grip for some people. They're small and thin, making it hard for those with lower mobility in their hands.
So in retaliation against loose grips, dishes, and a messy kitchen, I designed an alternative to those annoying little utensils. Take that spoons!
Presenting...
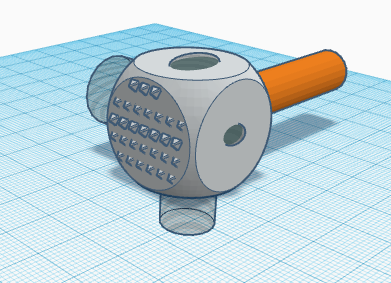
The Magical Kitchen Mate!
A multi-use tool that you can use for measuring all the flour, oil, and sugar your heart desires! Having a rough day? Use the tenderizer surface to make some pork chops and let out your anger. Make the most tender pork while relieving stress!
The 5 surface design with a large handle allows for easy grip, a tenderizer, a 1/2 cup measure, a 1/4 cup measure, a tablespoon measure, and a teaspoon measure!
Supplies

This project doesn't have much to it, which makes it much simpler to make. These are the basic materials needed for this design:
- Computer or Laptop
- Mouse
- Keyboard
- USB Stick
- Browser (for Tinkercad software)
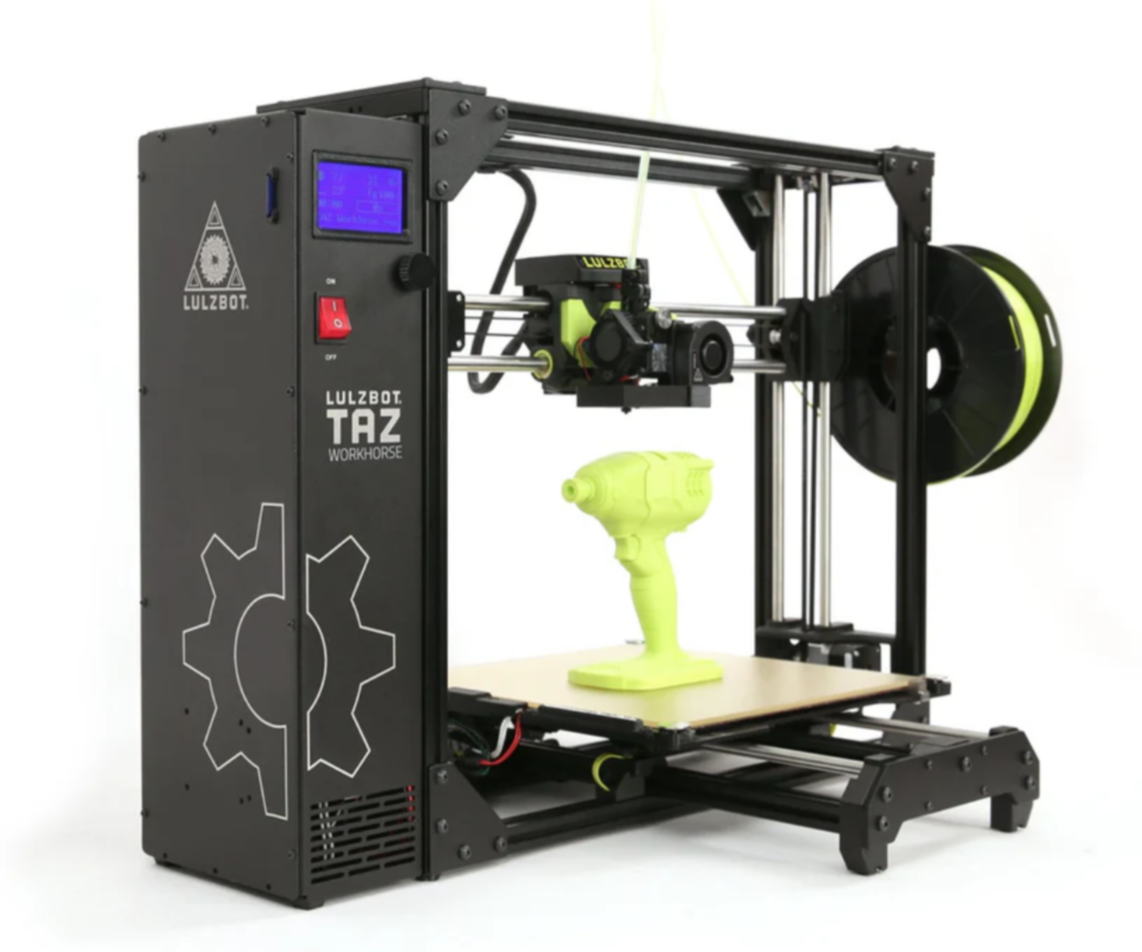
- 3D Printer with Slicer
- Food Grade Filament (PLA)
- Food Grade Epoxy Resin (optional)
The Basics of Tinkercad Mouse Functions
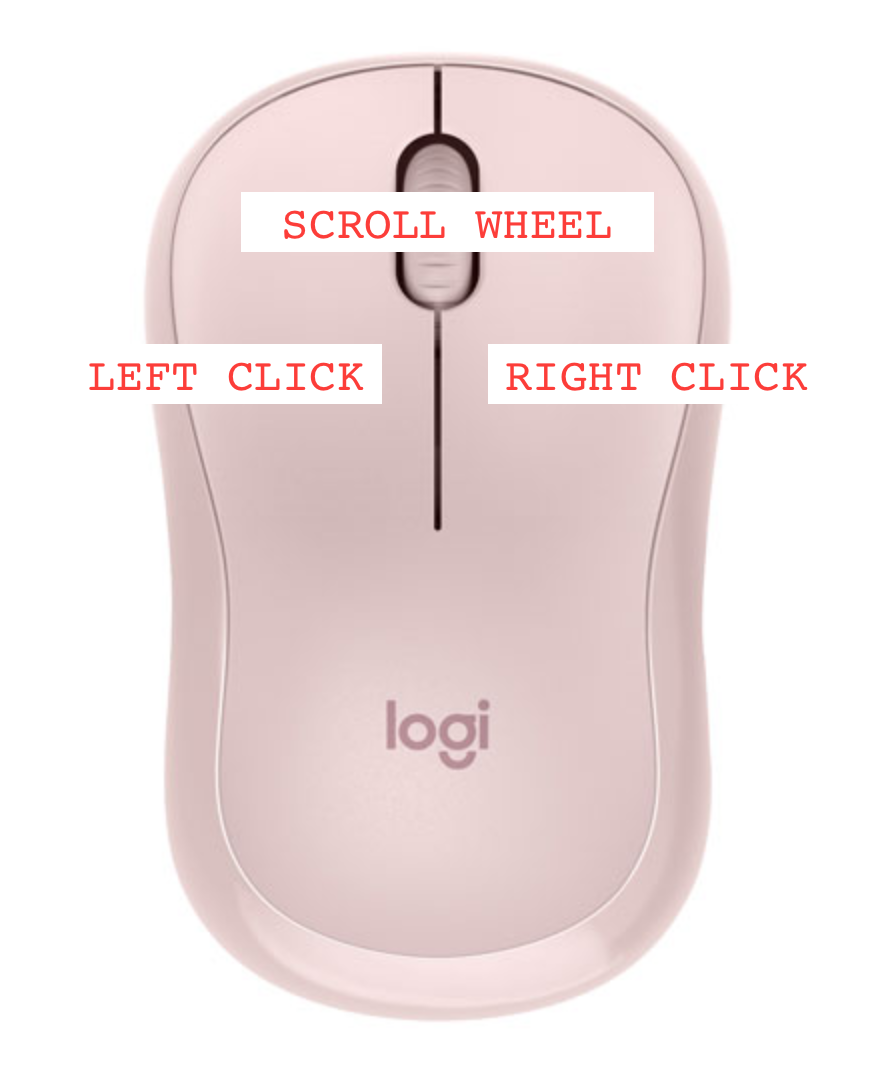

Here are some basic features to learn with your mouse to make this project easier!
Left Click: Clicking the left button on your mouse allows you to select shapes and components of your design.
Shift + Left Click: This function allows you to select multiple components at the same time. This is useful if you want to move multiple parts at once or group them together.
Right Click: Holding down the right button and moving the mouse allows you to rotate the view in your project. This will help you see your project from different angles.
Holding Down The Scroll Wheel: Holding down the scroll wheel and moving the mouse allows you to shift the view of your screen to see your project from a different view (note: this is not the same as right clicking to see different ANGLES). Try it to see the difference!
Scroll Wheel: Scrolling the middle wheel of the mouse allows you to zoom in or out on your project. This will help you in case you want to see something up close.
Access the Tinkercad Software
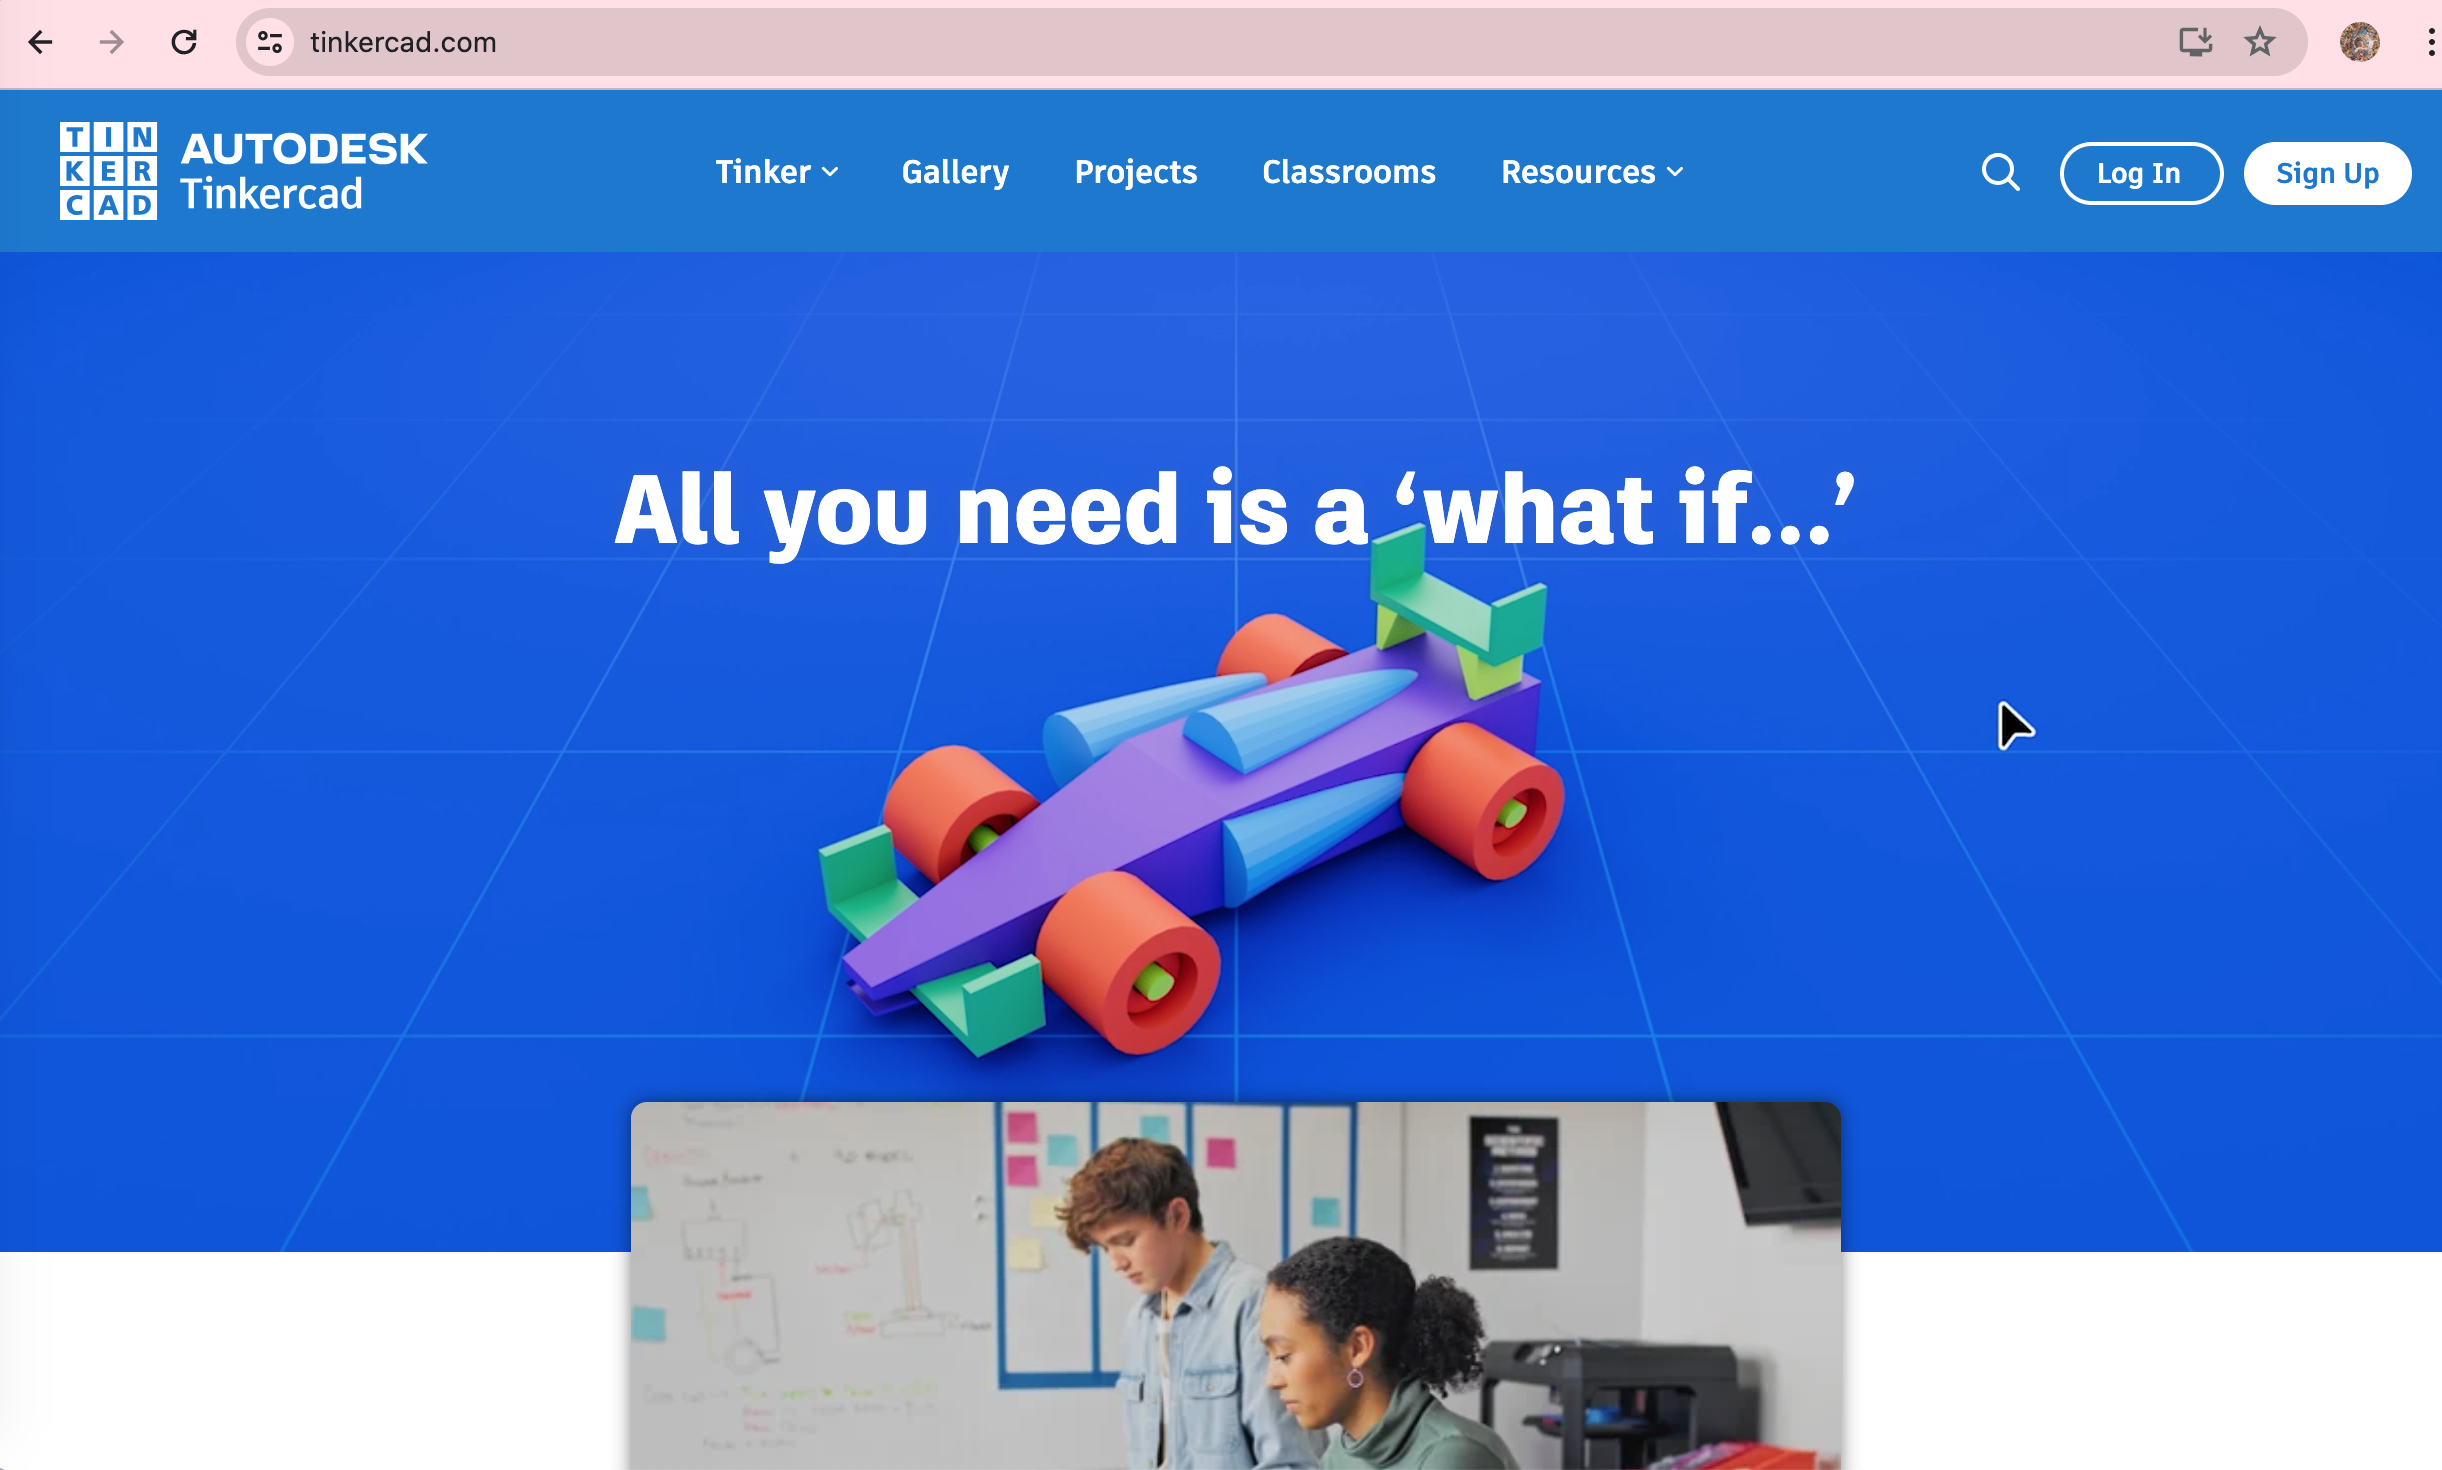

Part of what makes this project desirable, is the use of Tinkercad! It's a free software (unlike the hefty price of typical CAD programs) that's part of the AutoCAD family and it's available to anyone with access to a laptop or computer. Tinkercad is typically used for younger students that are starting to learn how to use computer design programs.
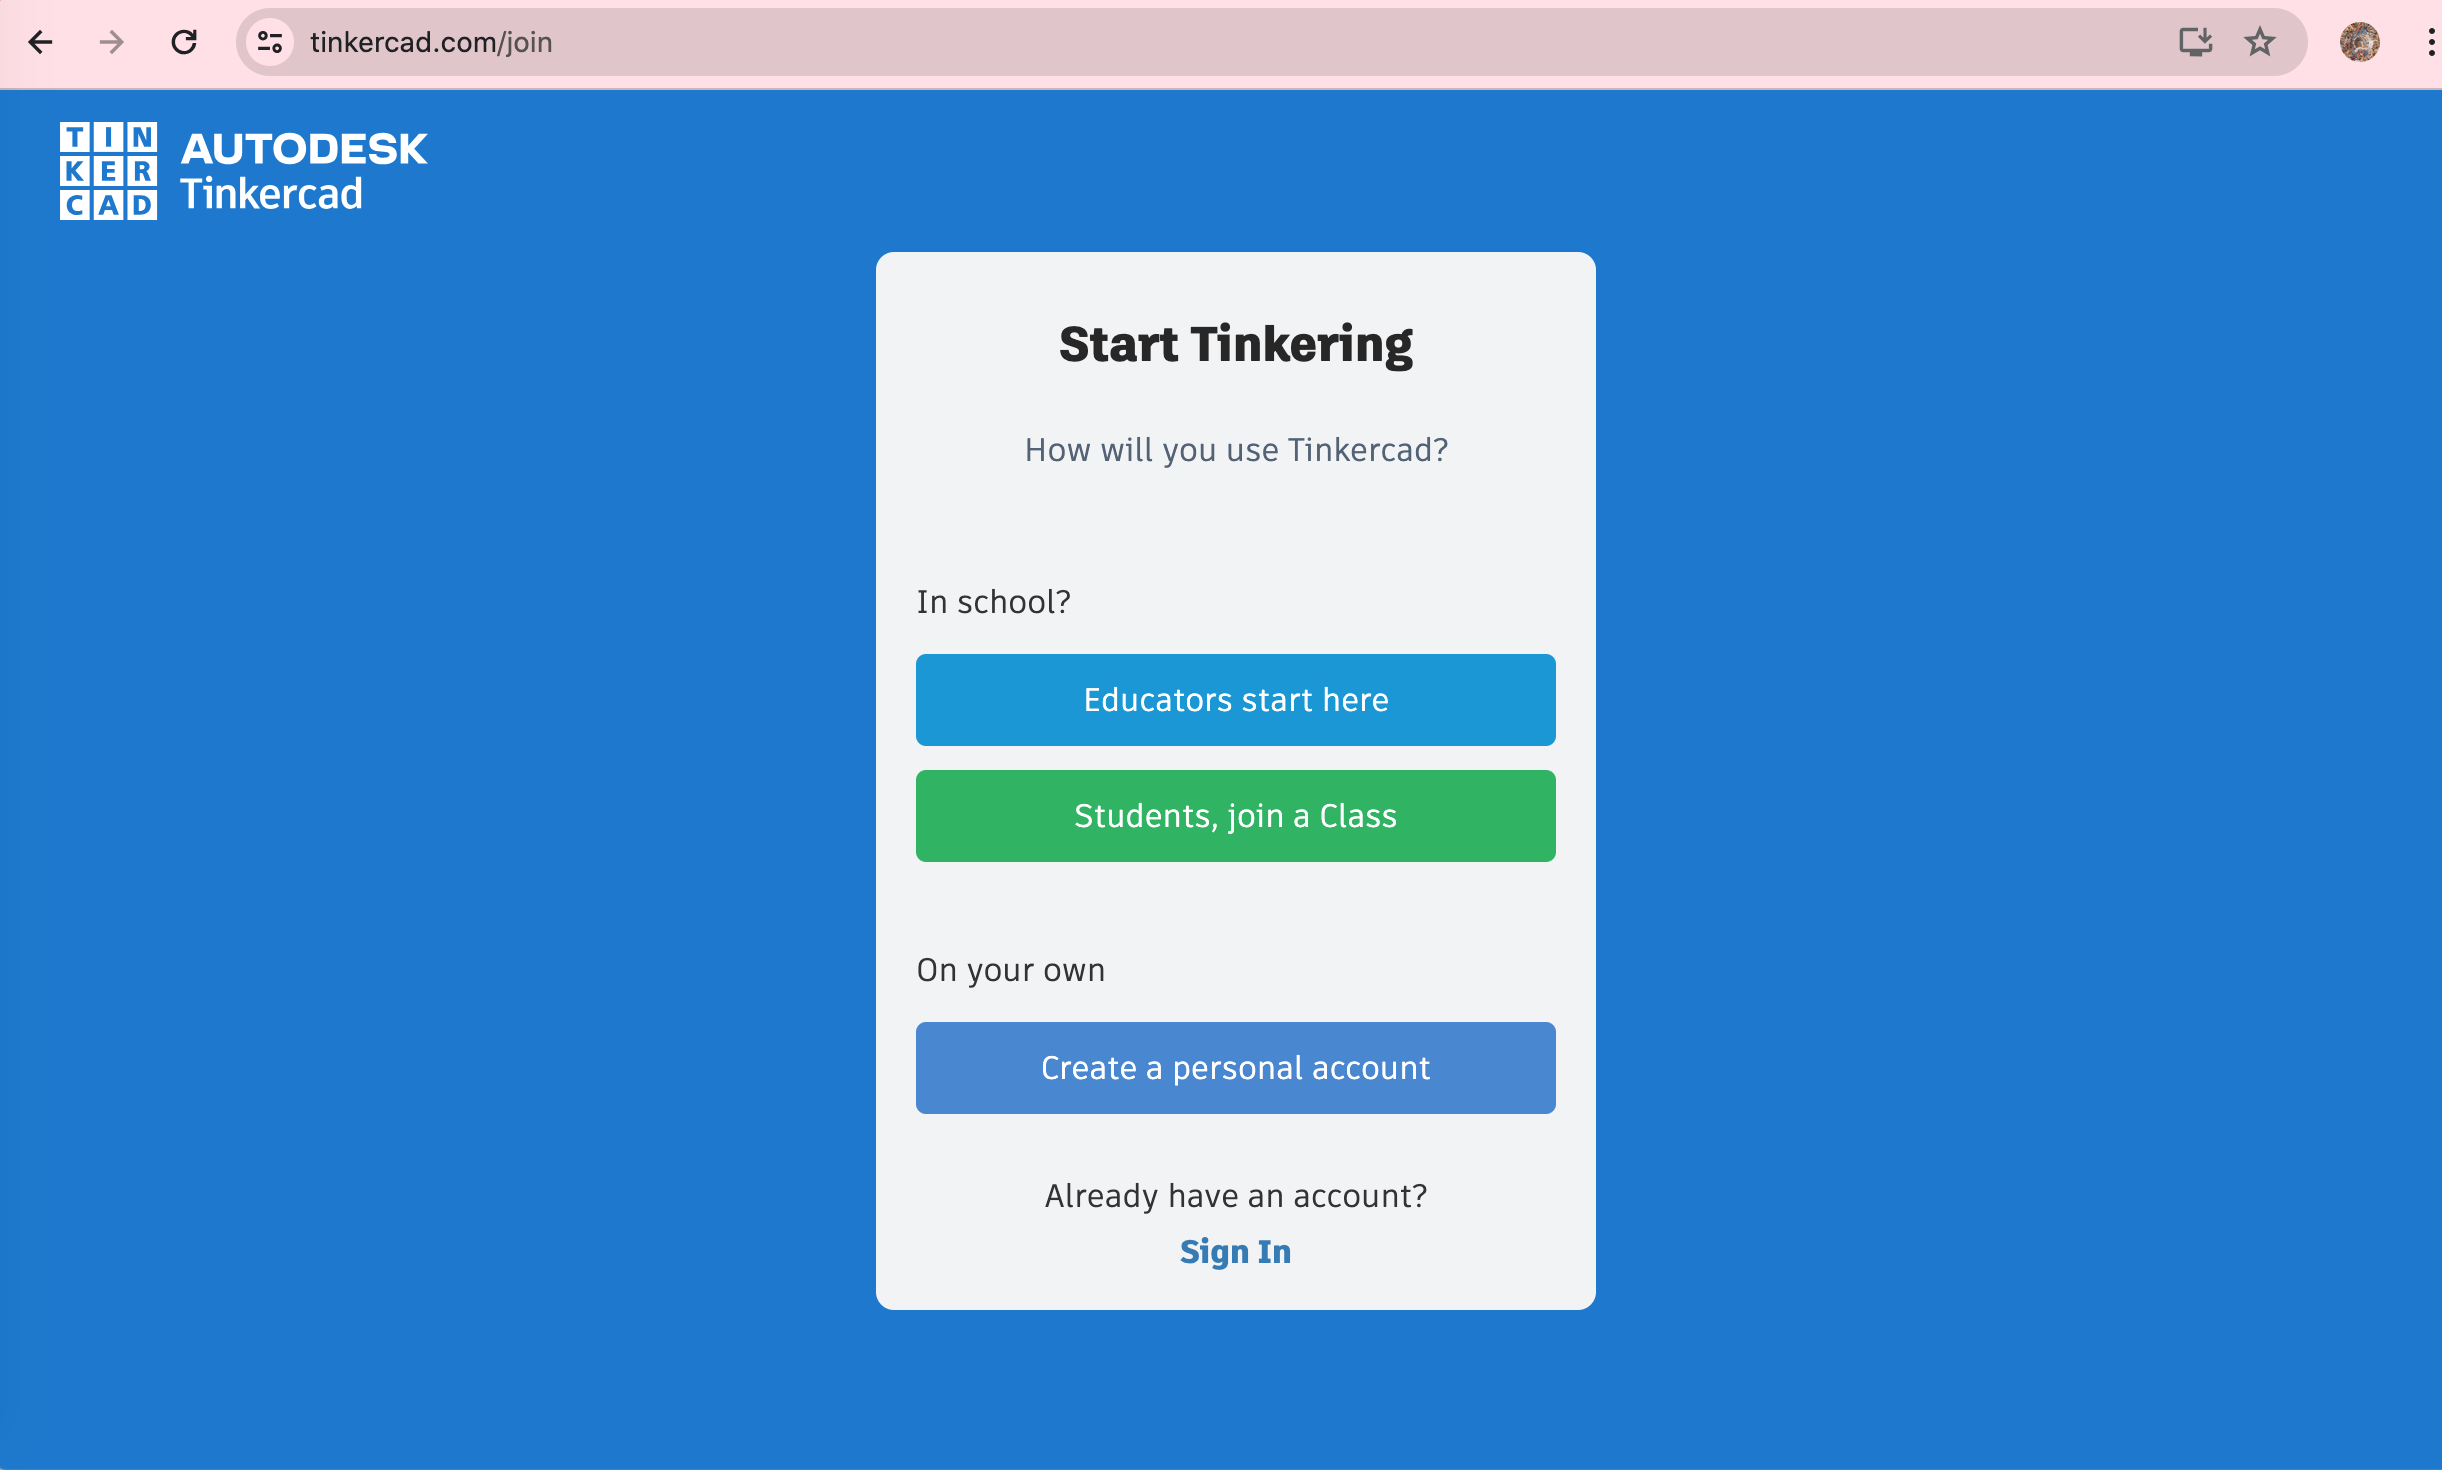
- Open your browser on a computer
- Search up tinkercad.com (or click this link)
- Create an account (if you don't have one already)
- Start a new project
Note: The Tinkercad software automatically creates your file in millimetres. Keep it in that measurement and do not change it.
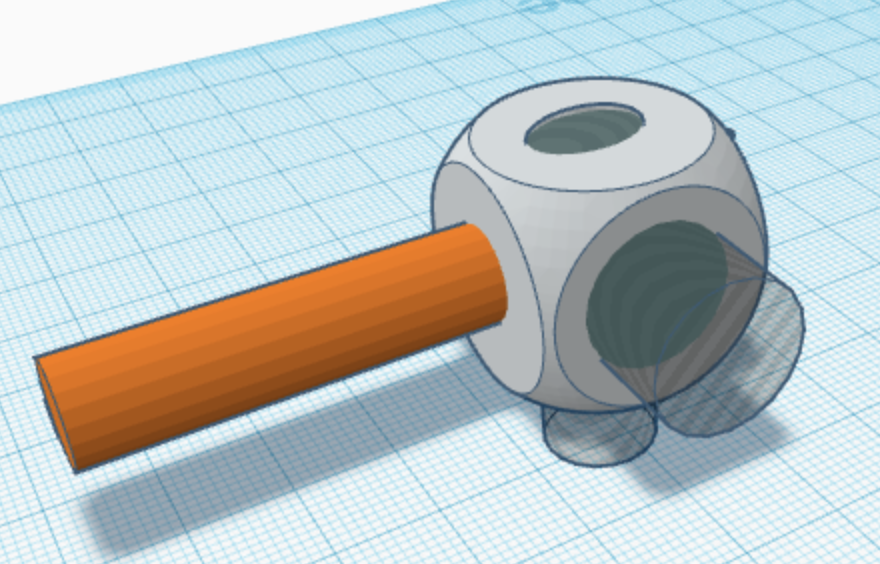
Create the Base of the Design
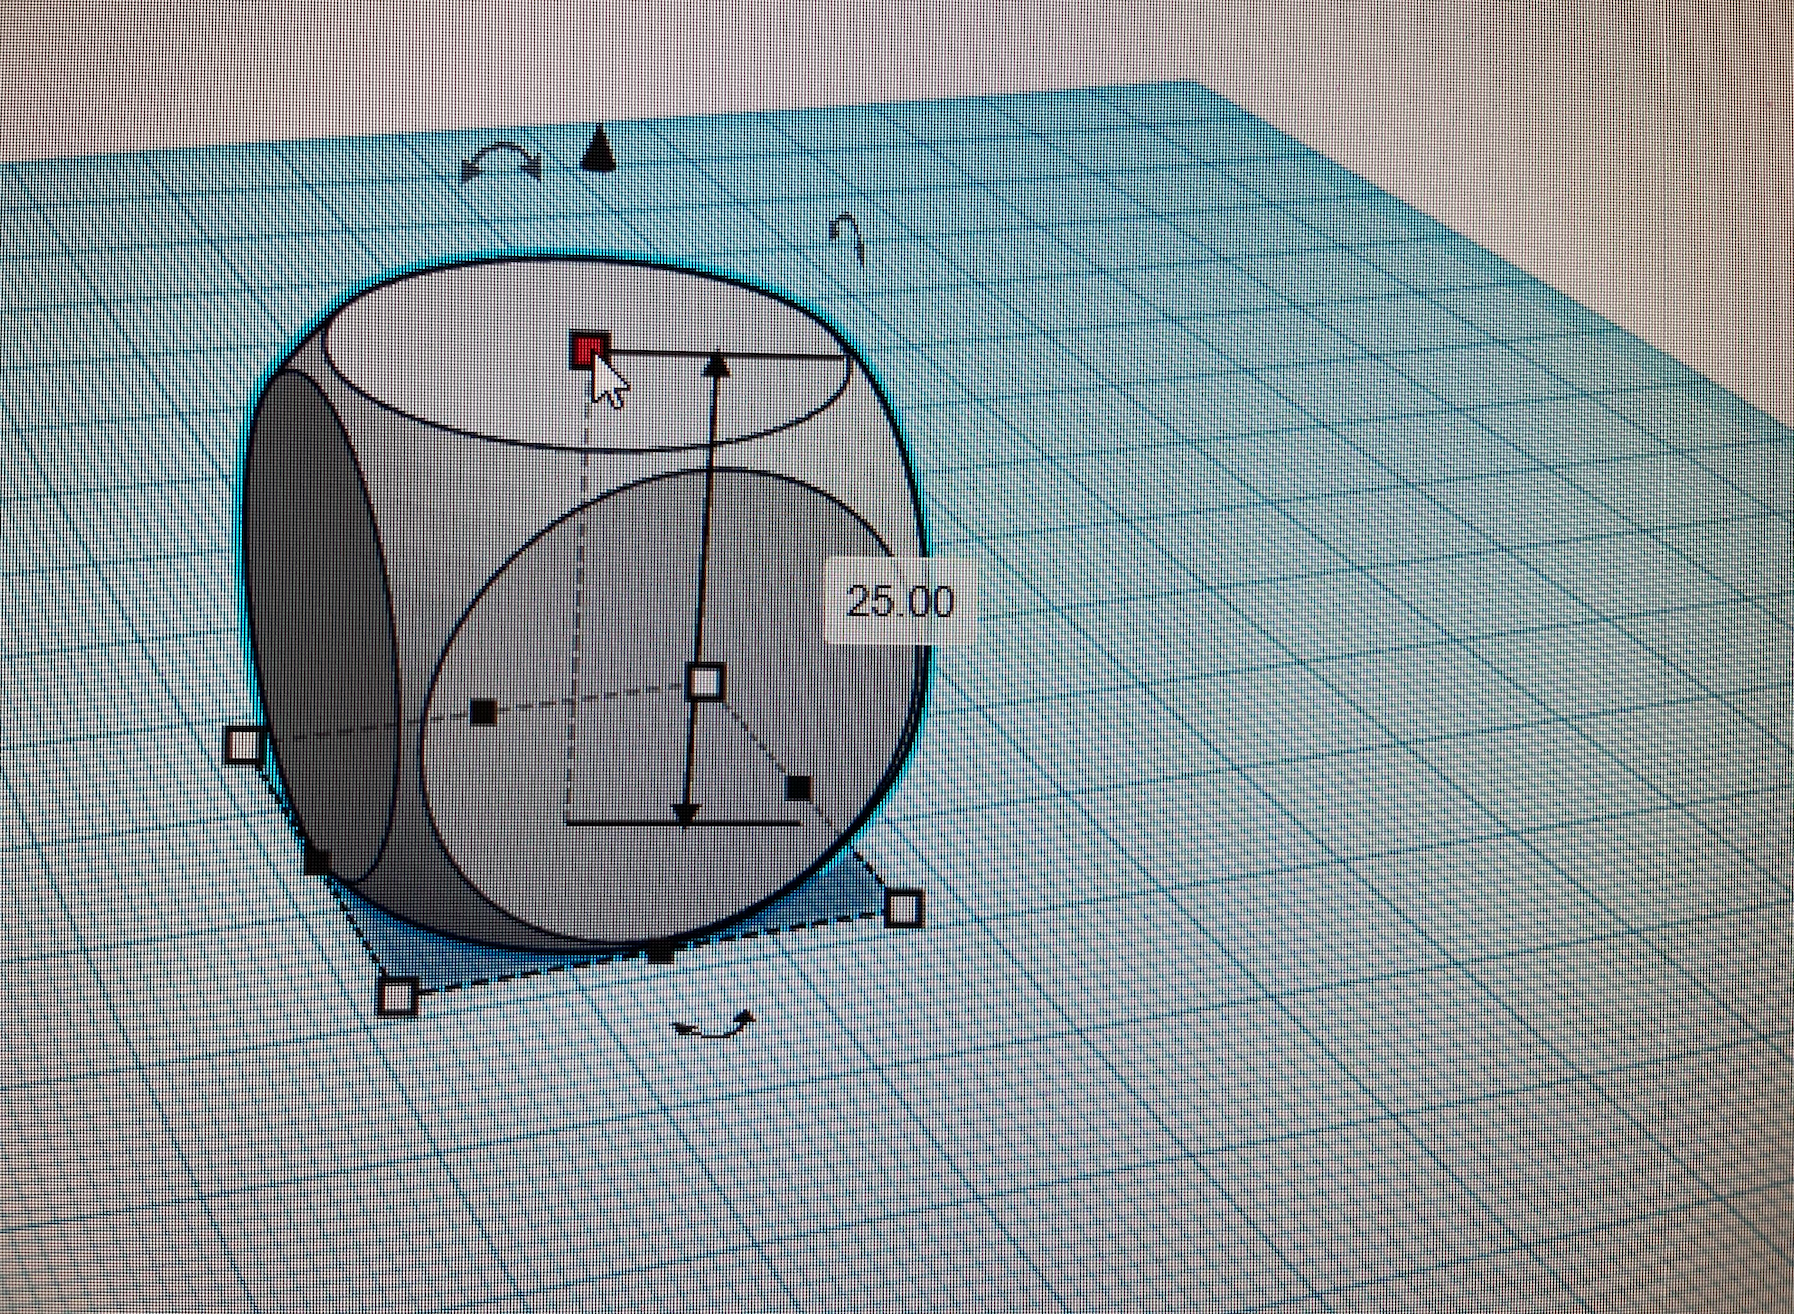

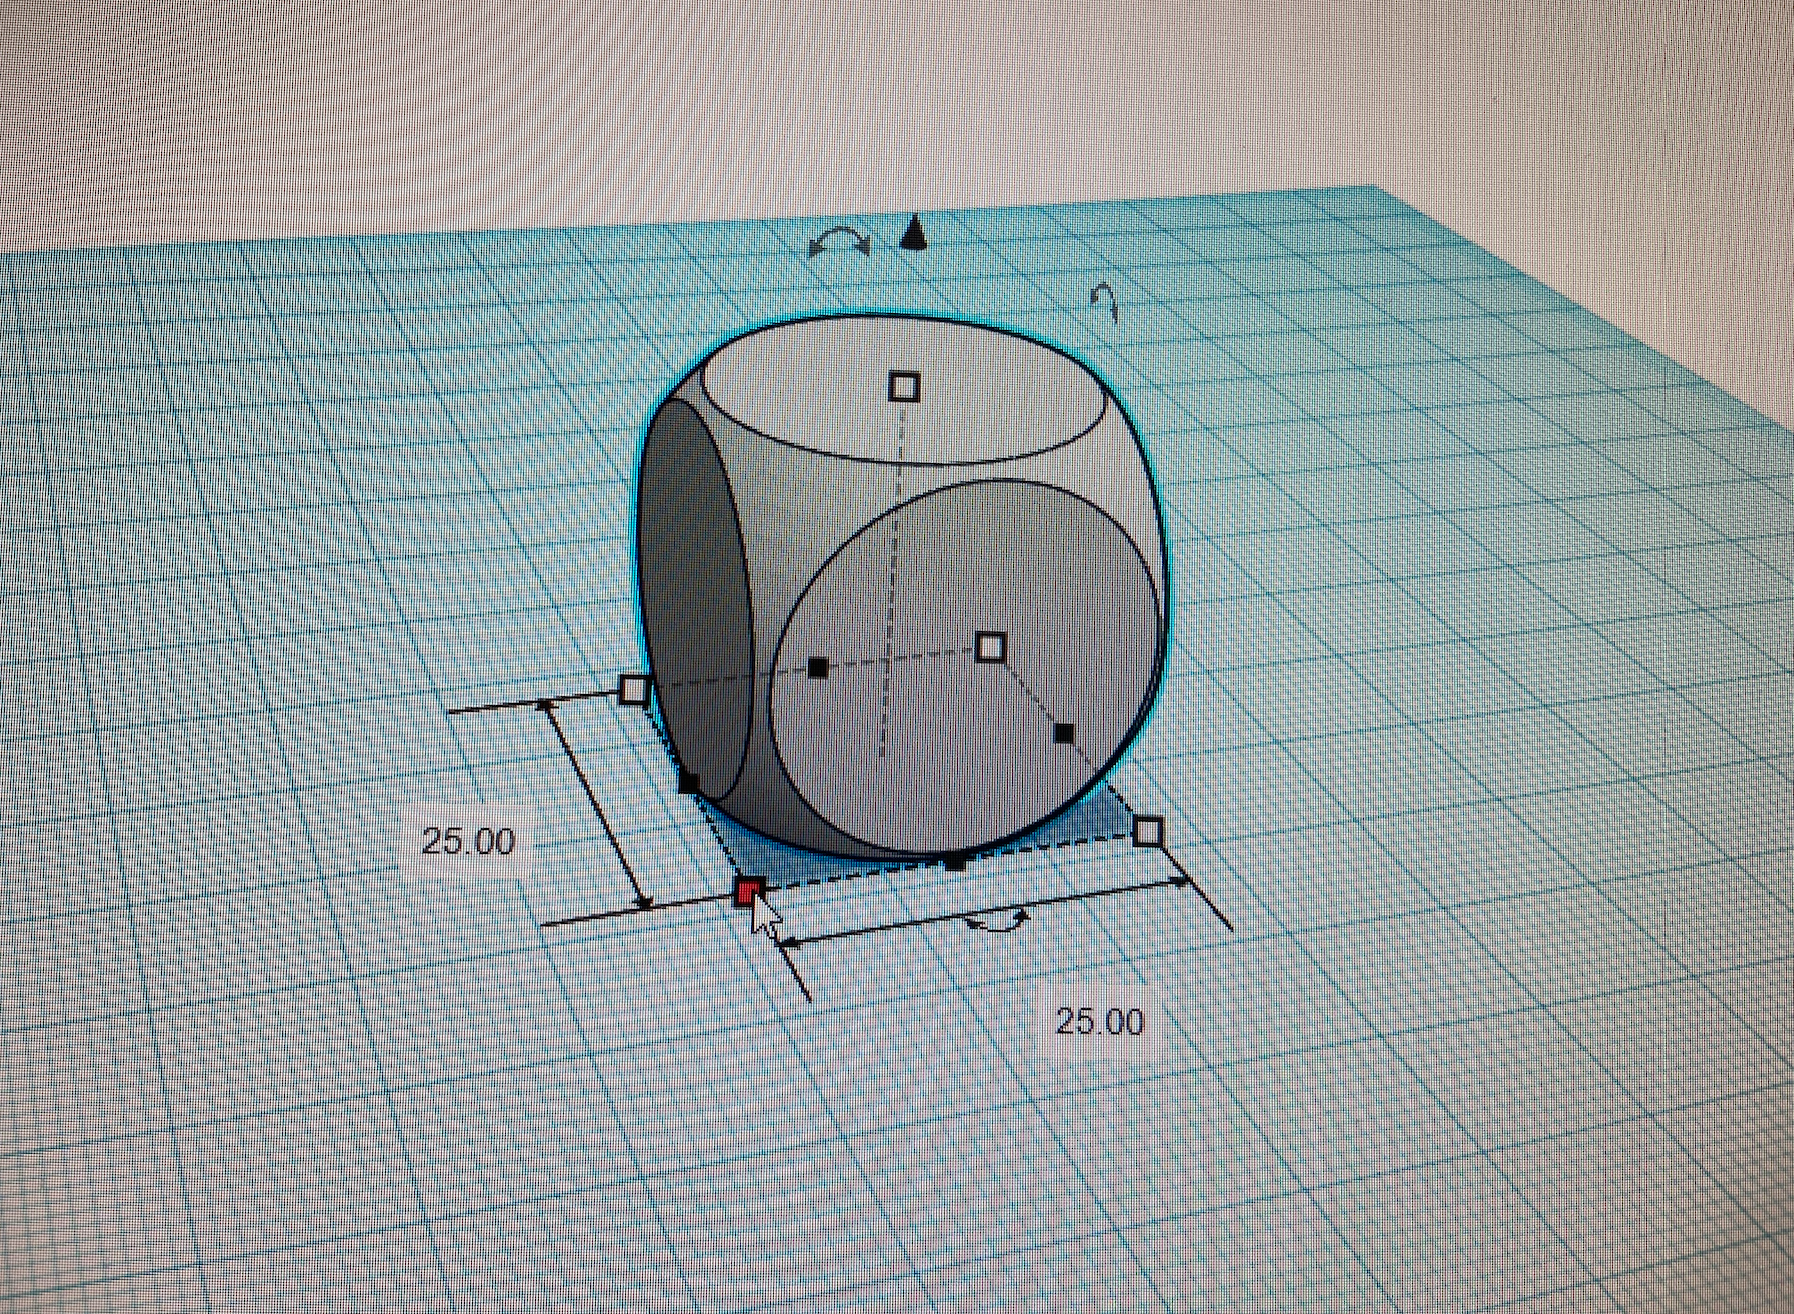
The main components of the design are comprised of a large die and a cylinder for the handle. We need to create this base to add the details (spoons, cups, and tenderizer) that we want.
- Find the die solid on the right side materials library
- Add it to the plane
- Click on the die
- Select the white dots that appear
- Select the numbers and change each one to a value of 25.00mm
Ensure that the die is equally sized (all sides of a cube are the same length and width).
Add the Handle
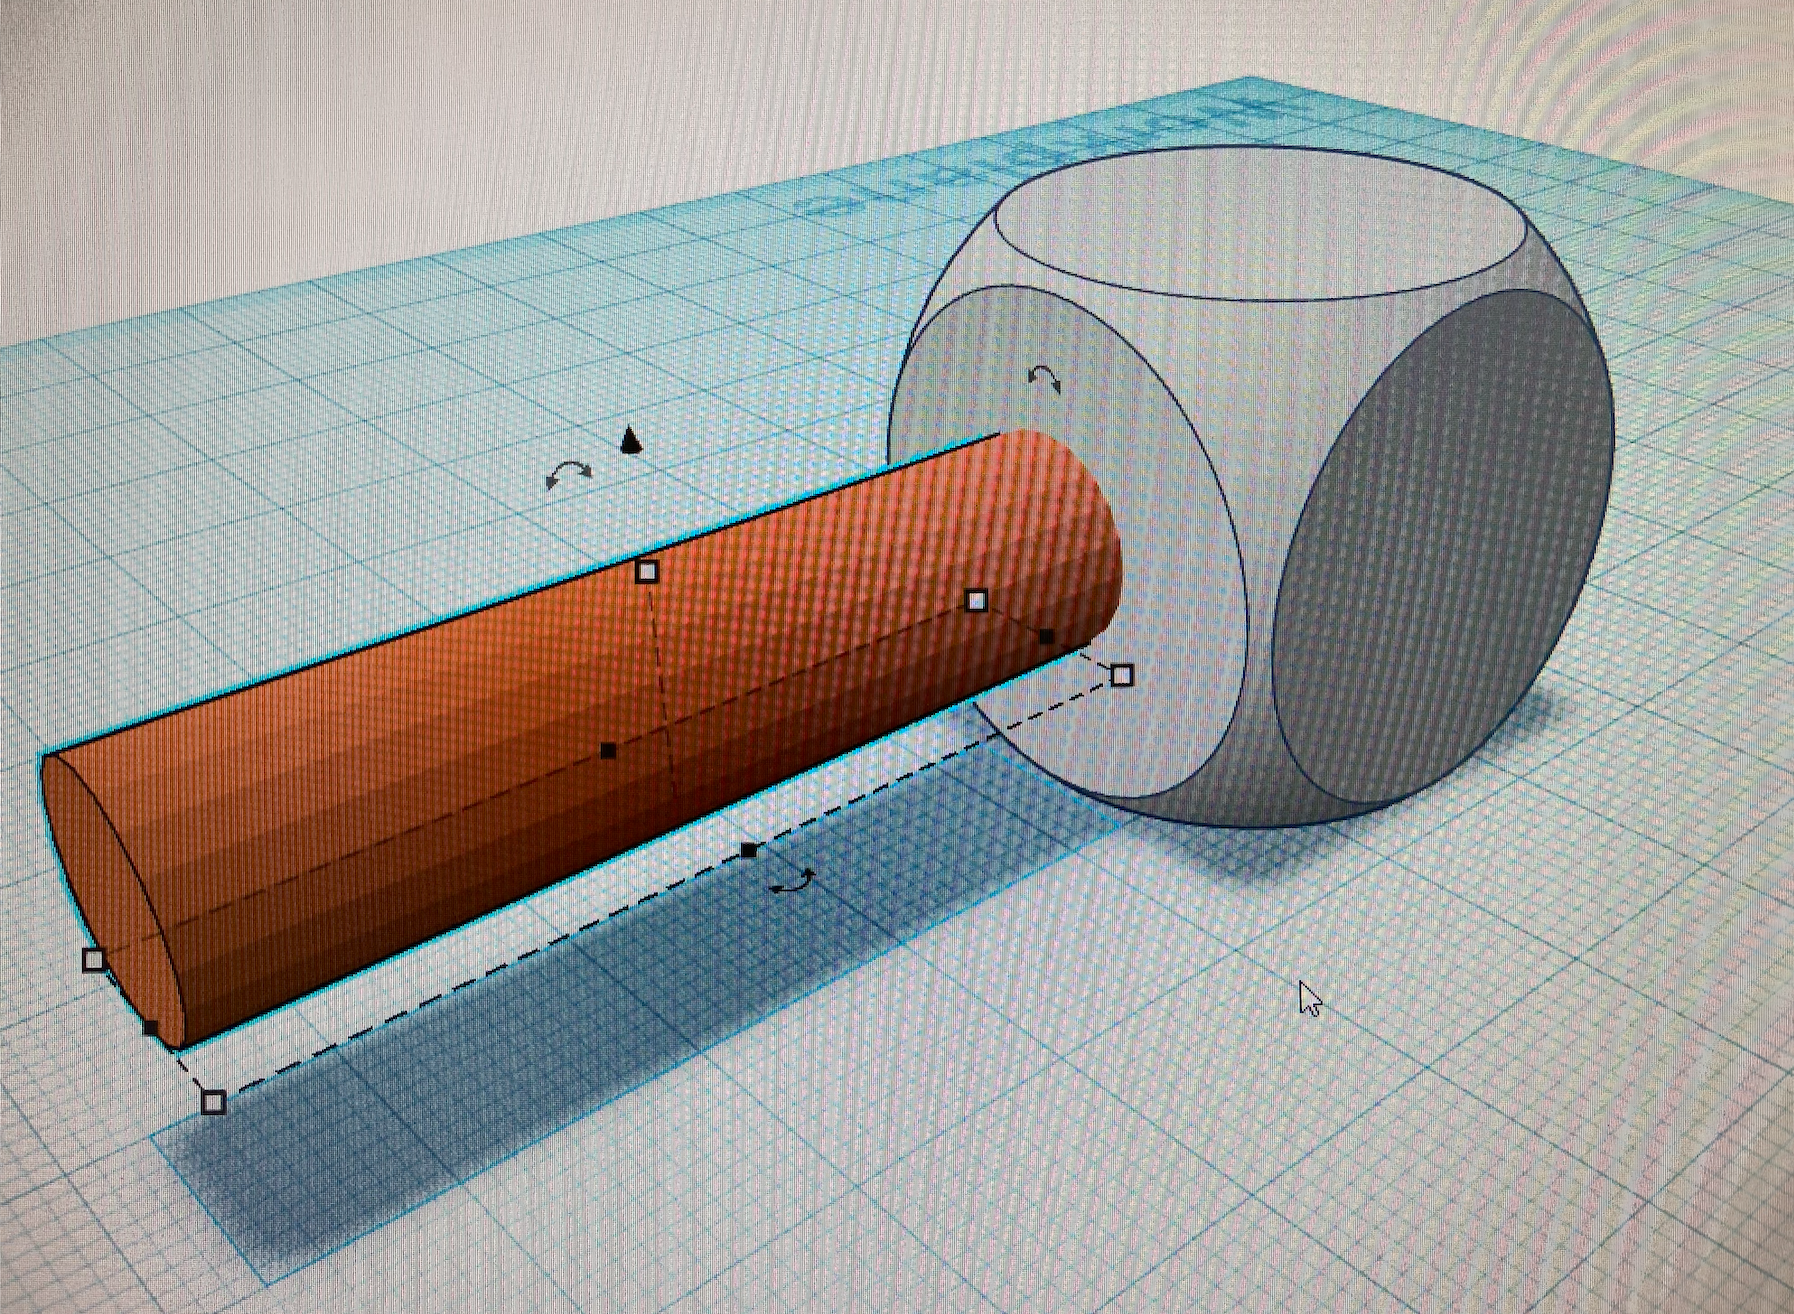
Now we need to add the handle. Personally, I have larger hands so I made mine bigger. It is up to you how large you want your handle to be, but ensure that your hand can still hold it!
- Find the cylinder shape in the right side materials library
- Bring it to the die and attach it to the centre of one side (what you visually see as the centre)
- Click on the cylinder and the white dots
- Adjust the length and diameter to your liking (my handle is 40.00mm long and 10.00mm in diameter)
Make sure that the cylinder is attached to the die!
Creating the Tenderizer
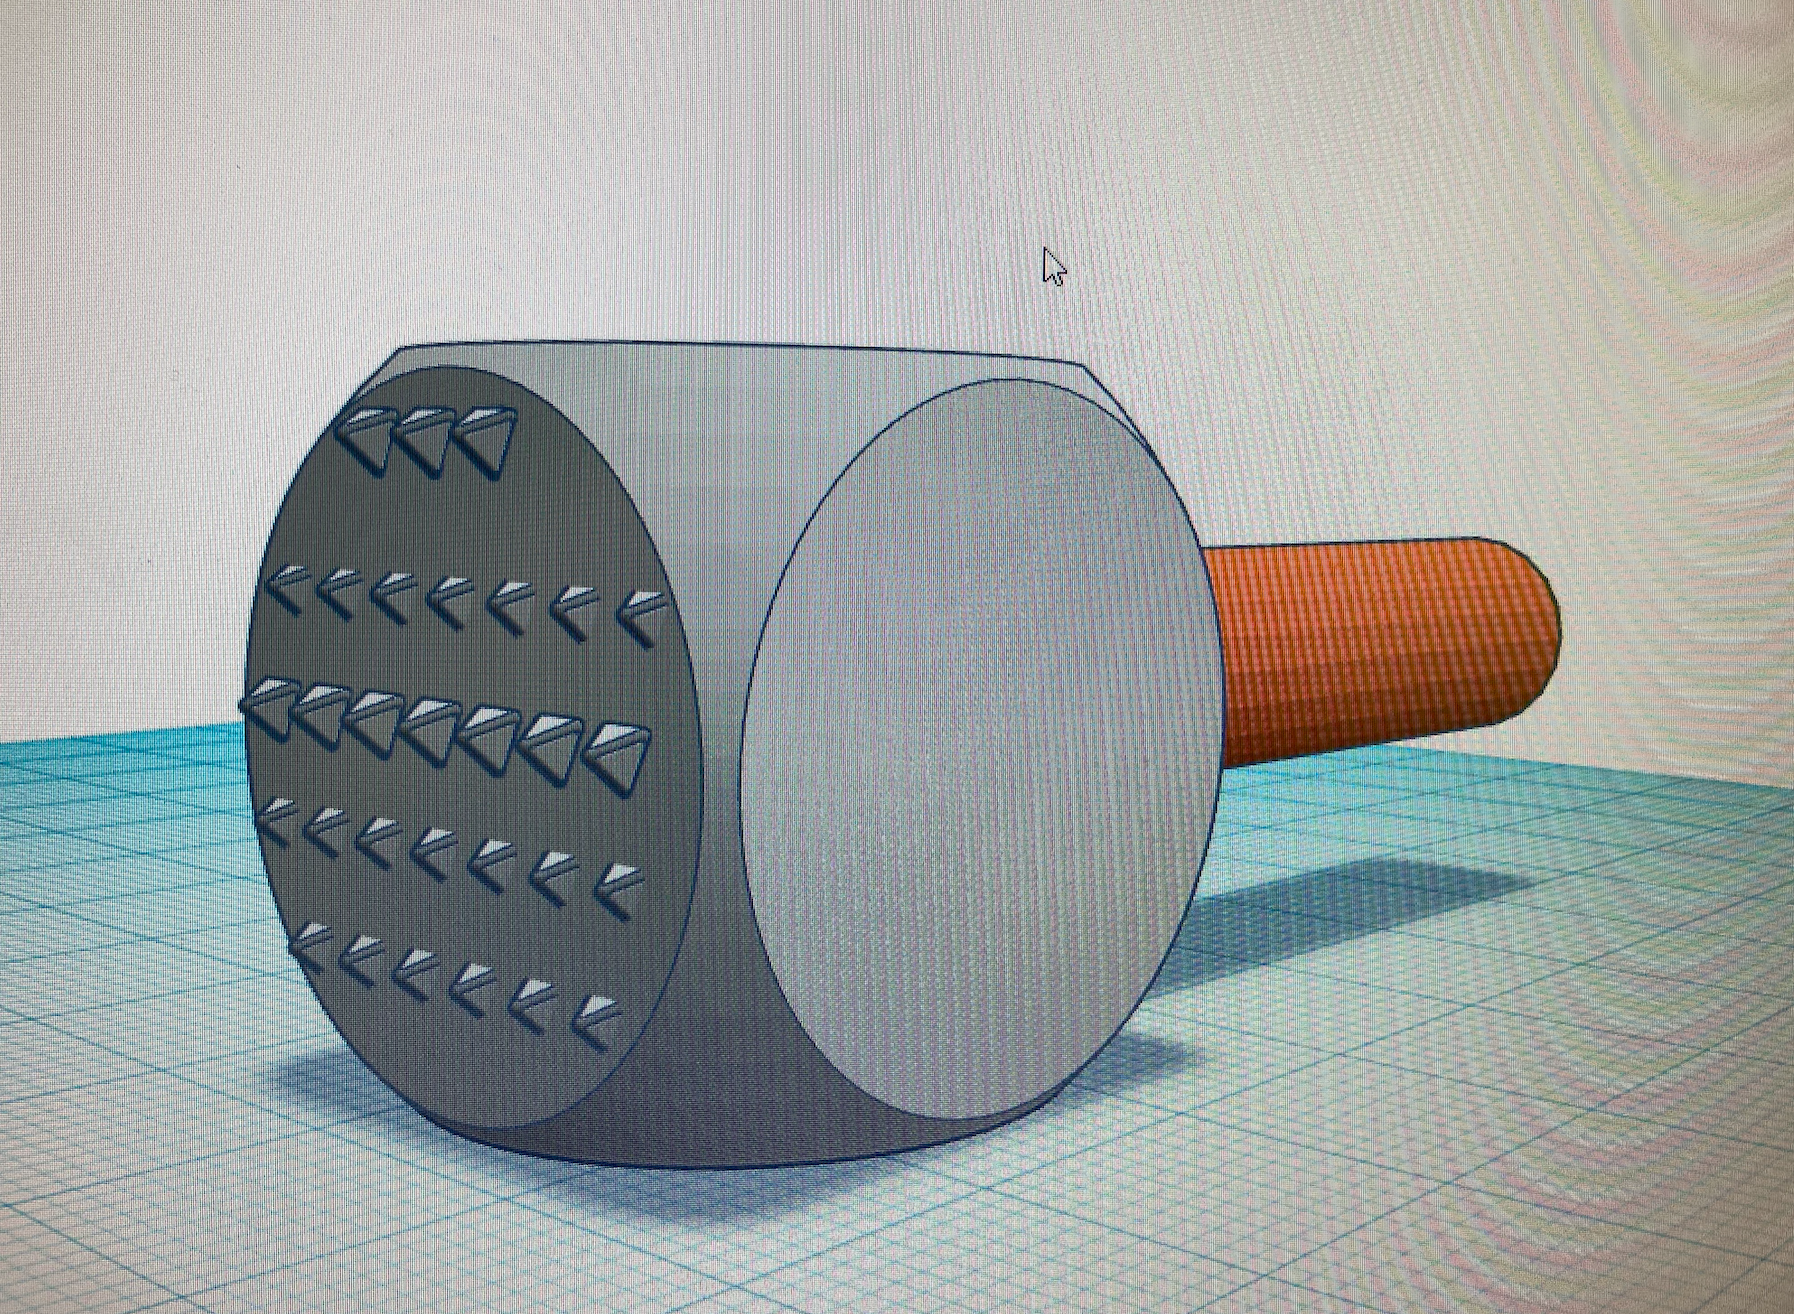

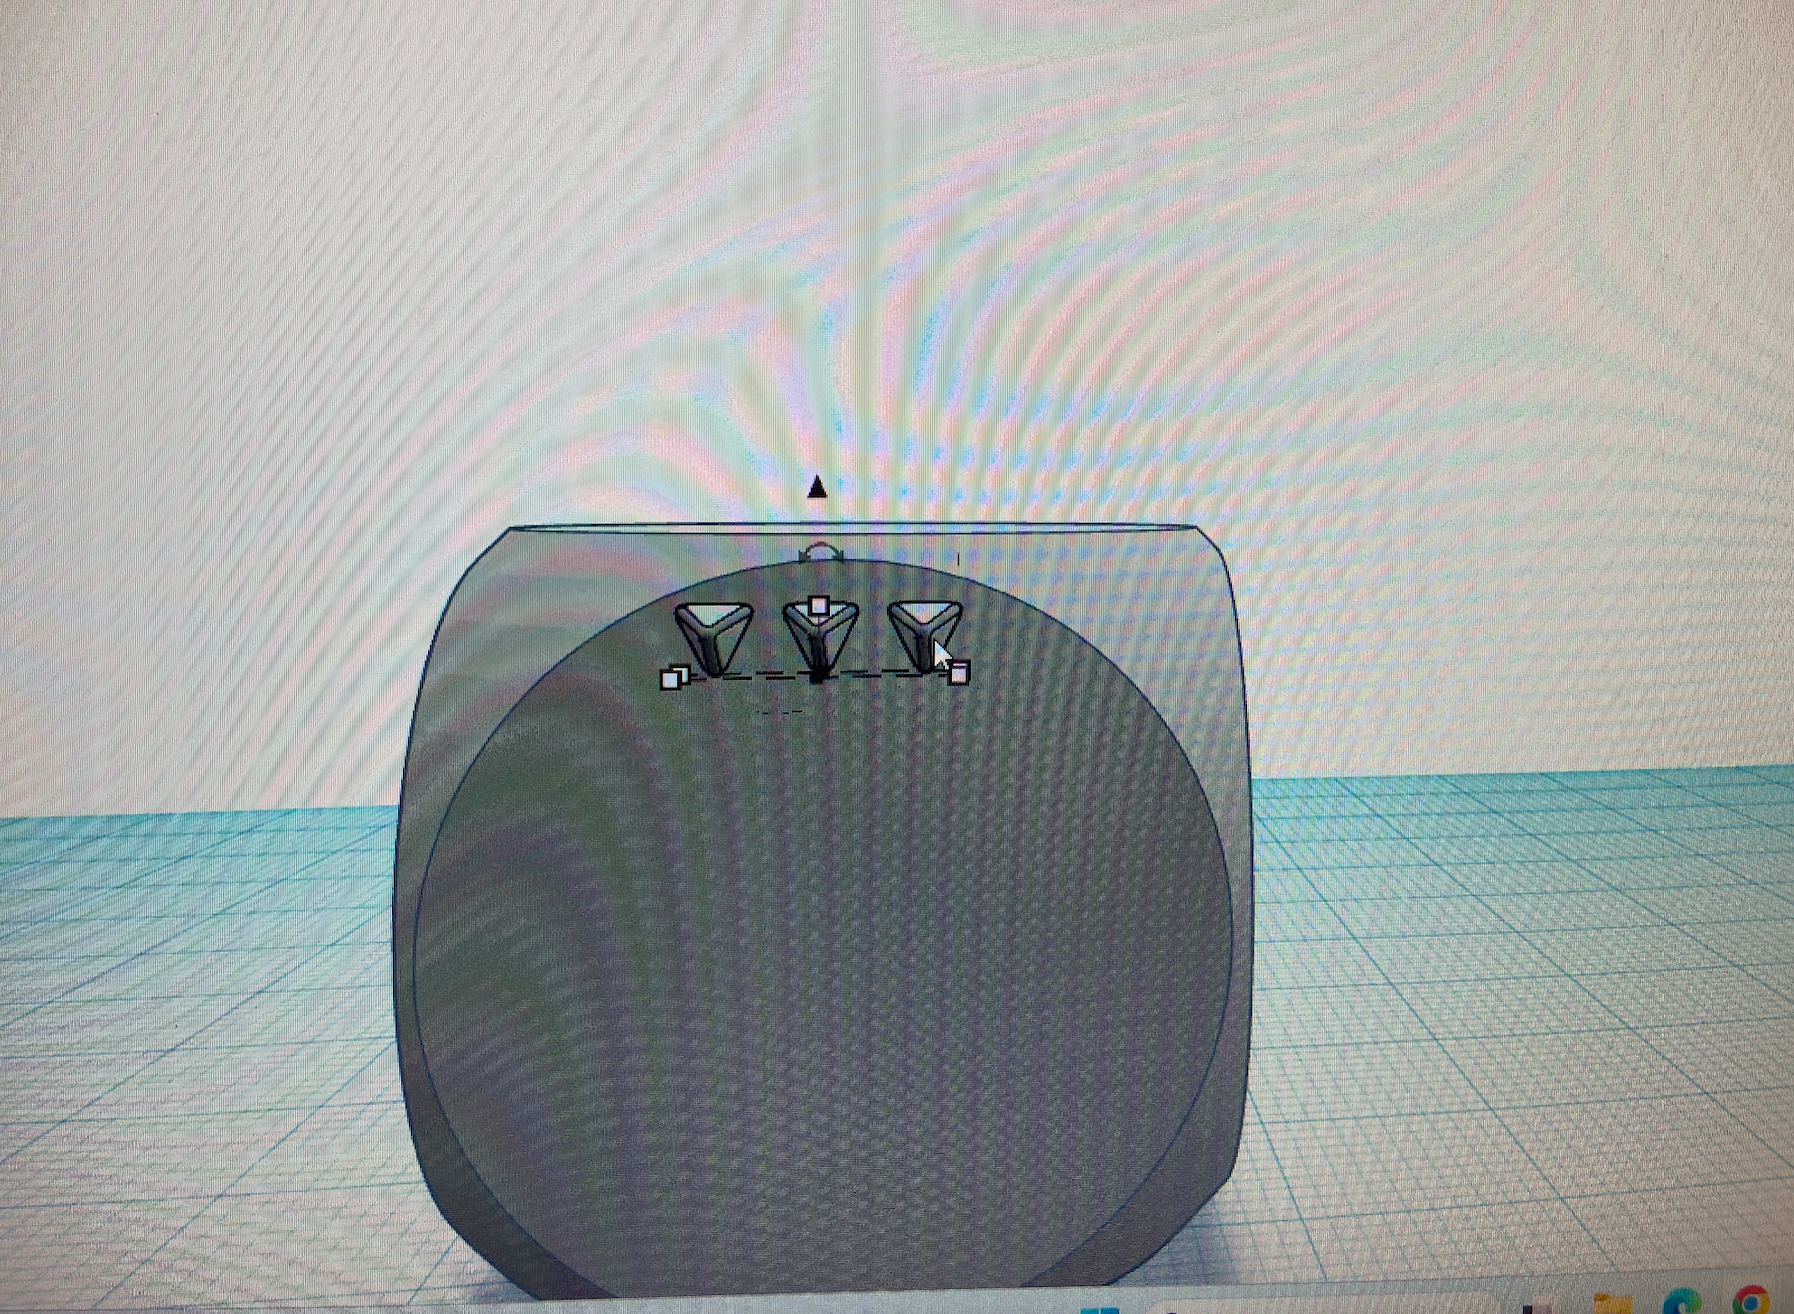
Now for our first component, what I like to call: The Star Of The Show. The tenderizer!
- Search for pyramid in the materials library and find the one with white faces and grey rounded edges
- Bring it to the die and attach it anywhere on the top face of the die (as long as it's not on the very edge)
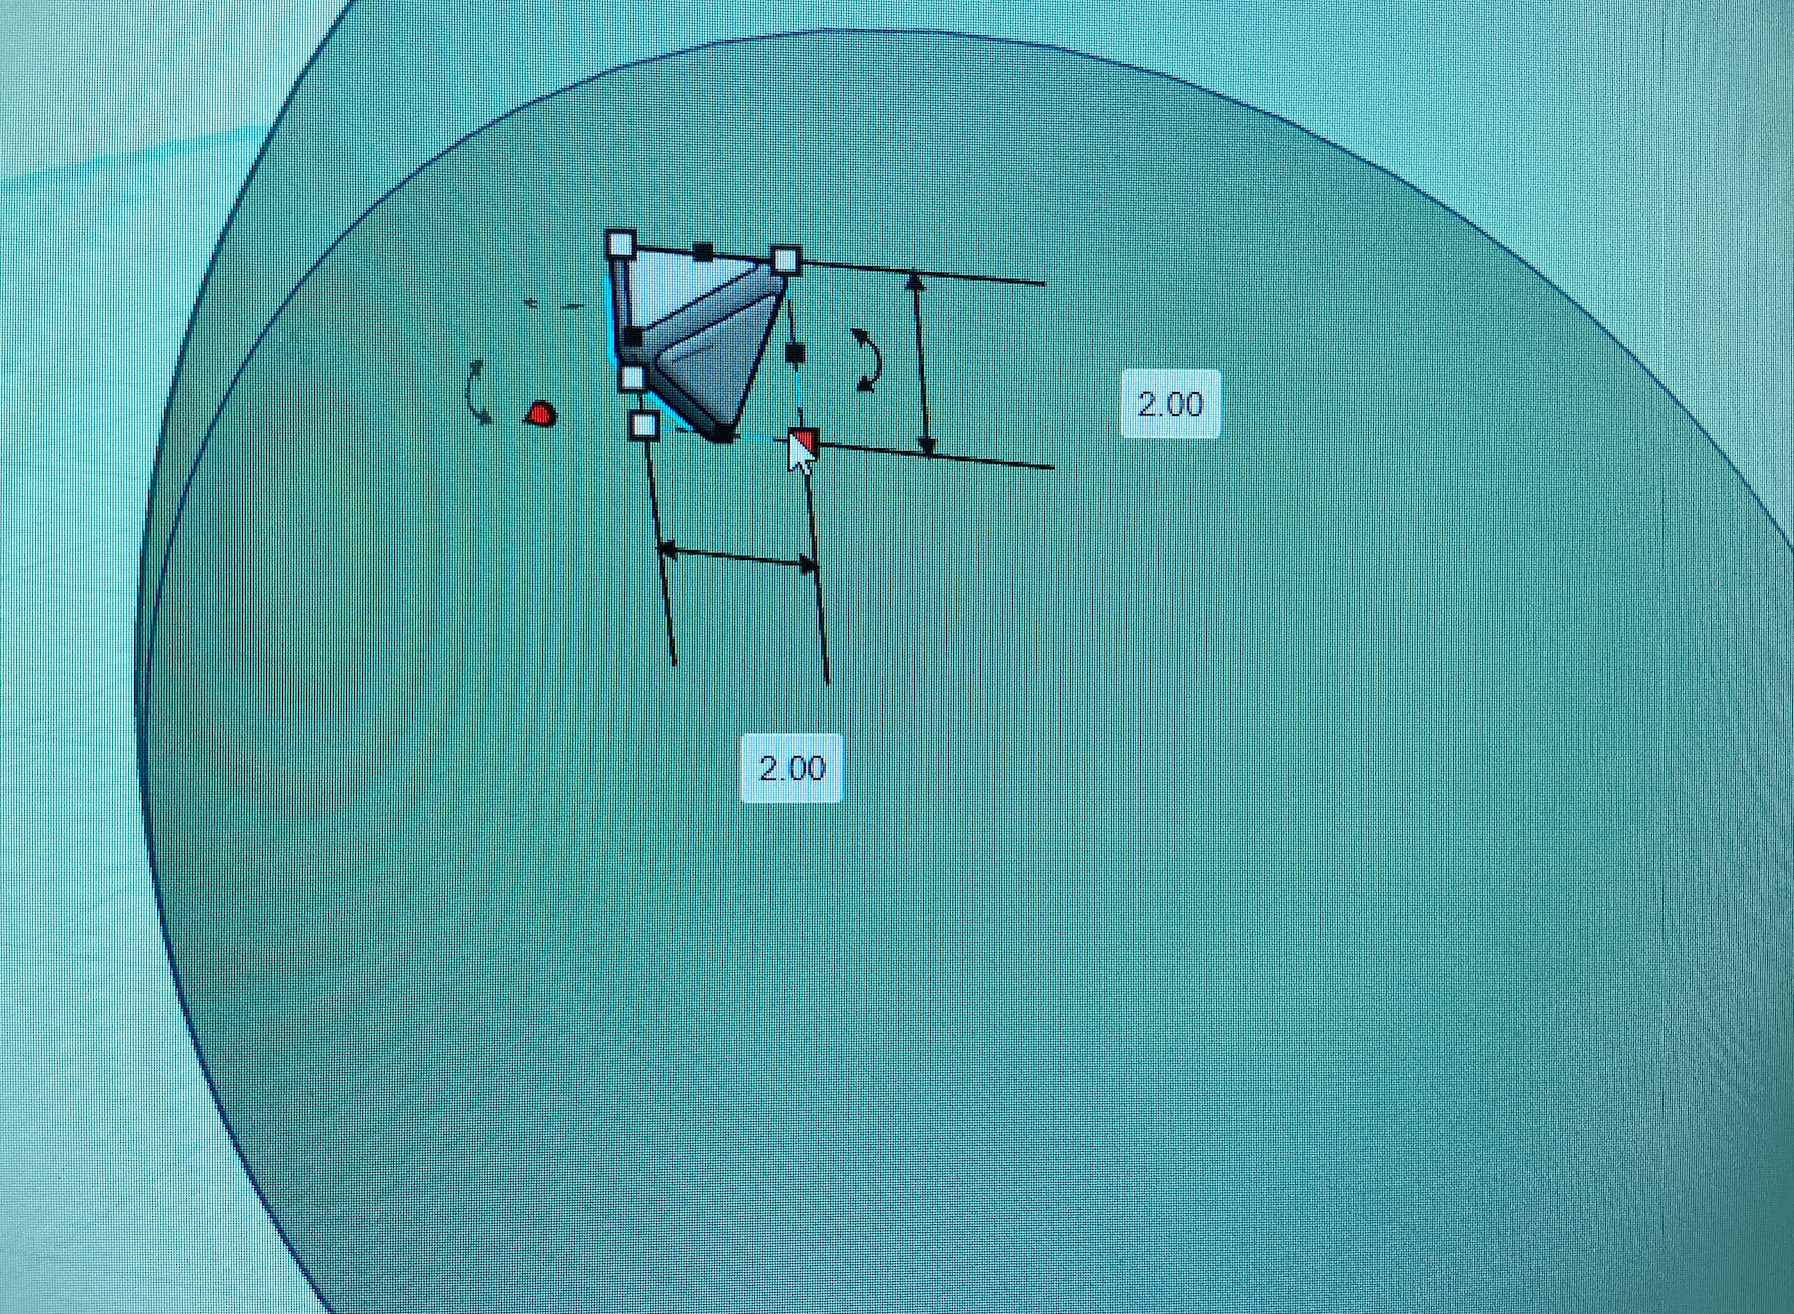
- Click on the pyramid and the white dots
- Adjust the length to be 2.00mm by 2.00mm
- Select the pyramid and press Ctrl + C on your keyboard; then press Ctrl + V
- Once you have your new pyramid, place it anywhere on the face
- Repeat steps 5 & 6 until the top face of the die is covered in pyramids
Note: If you'd like a more efficient way to create the tenderizer, you can use Shift + Left Click on your mouse to select multiple. Then press the group function on the top right corner (an icon of a circle and a square merged together).
Now you have multiple and you can keep doing this until your face is full! You can oppositely ungroup the components and regroup them to select more at once (ungroup is next to the group button as a SEPARATED circle and square).
Adding the Tablespoon and Teaspoon
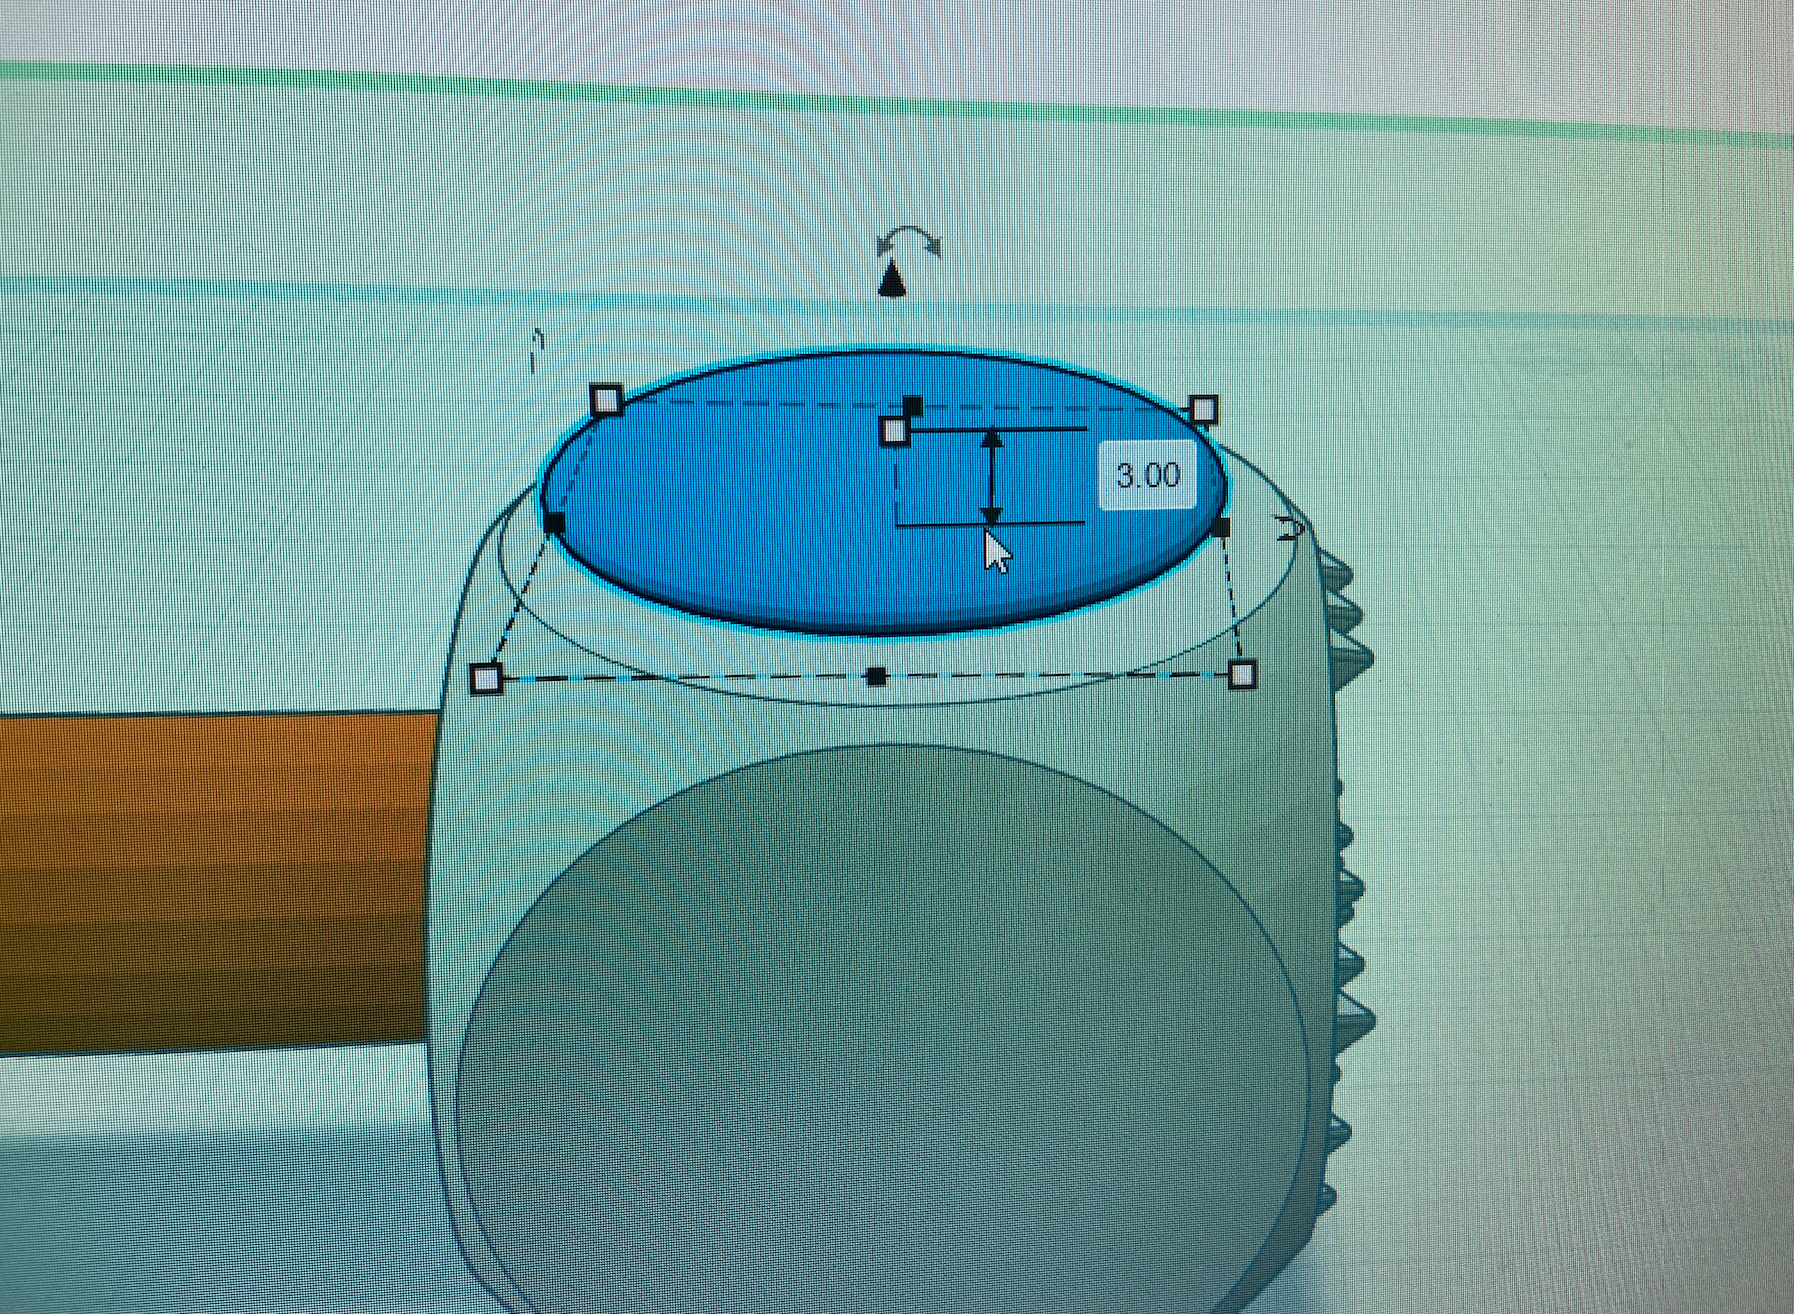
Now it's time for our measuring spoons. Let's add a tablespoon and a teaspoon!
The Tablespoon:
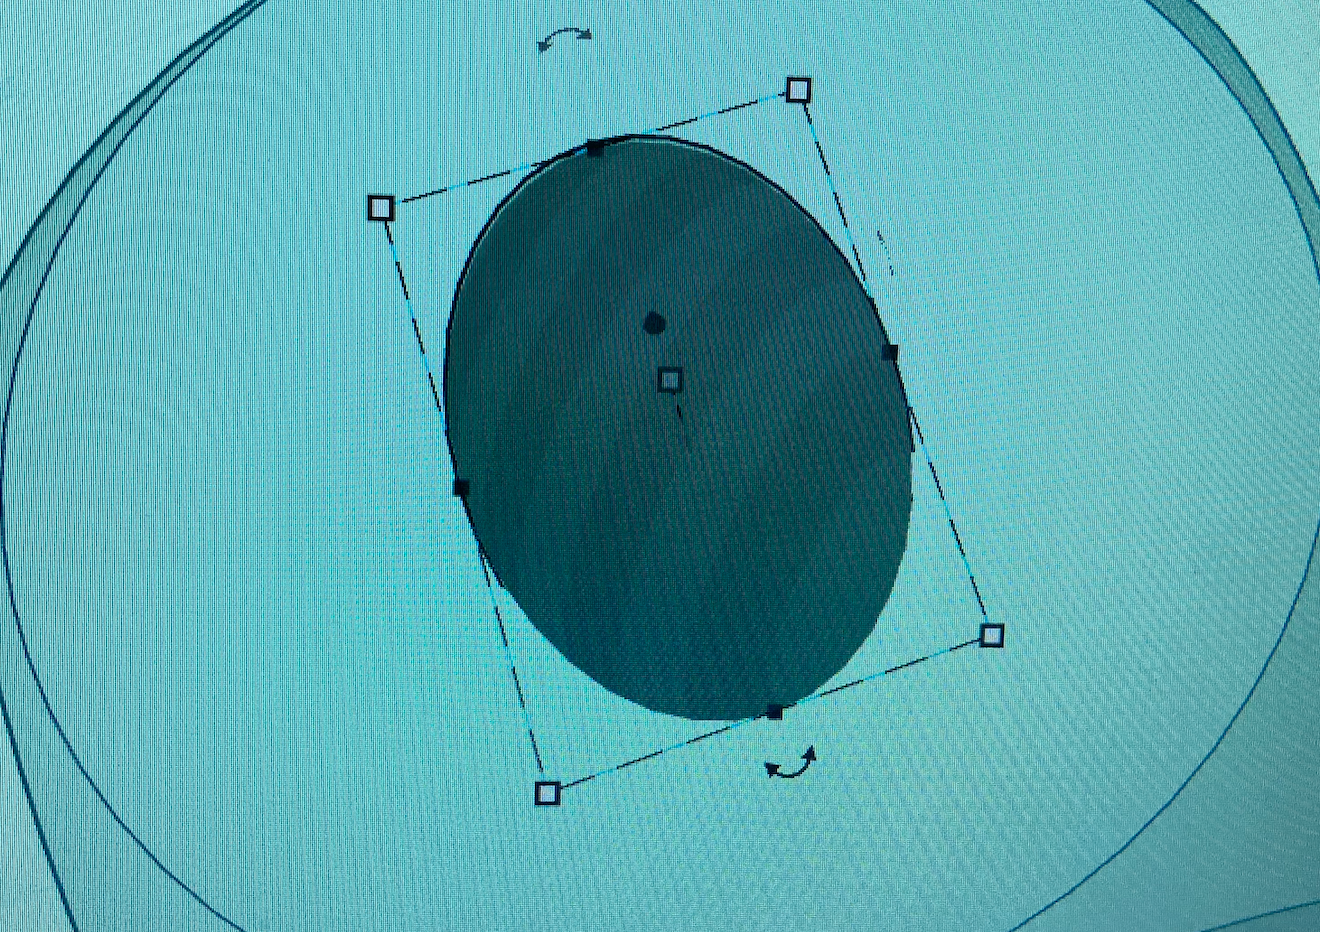
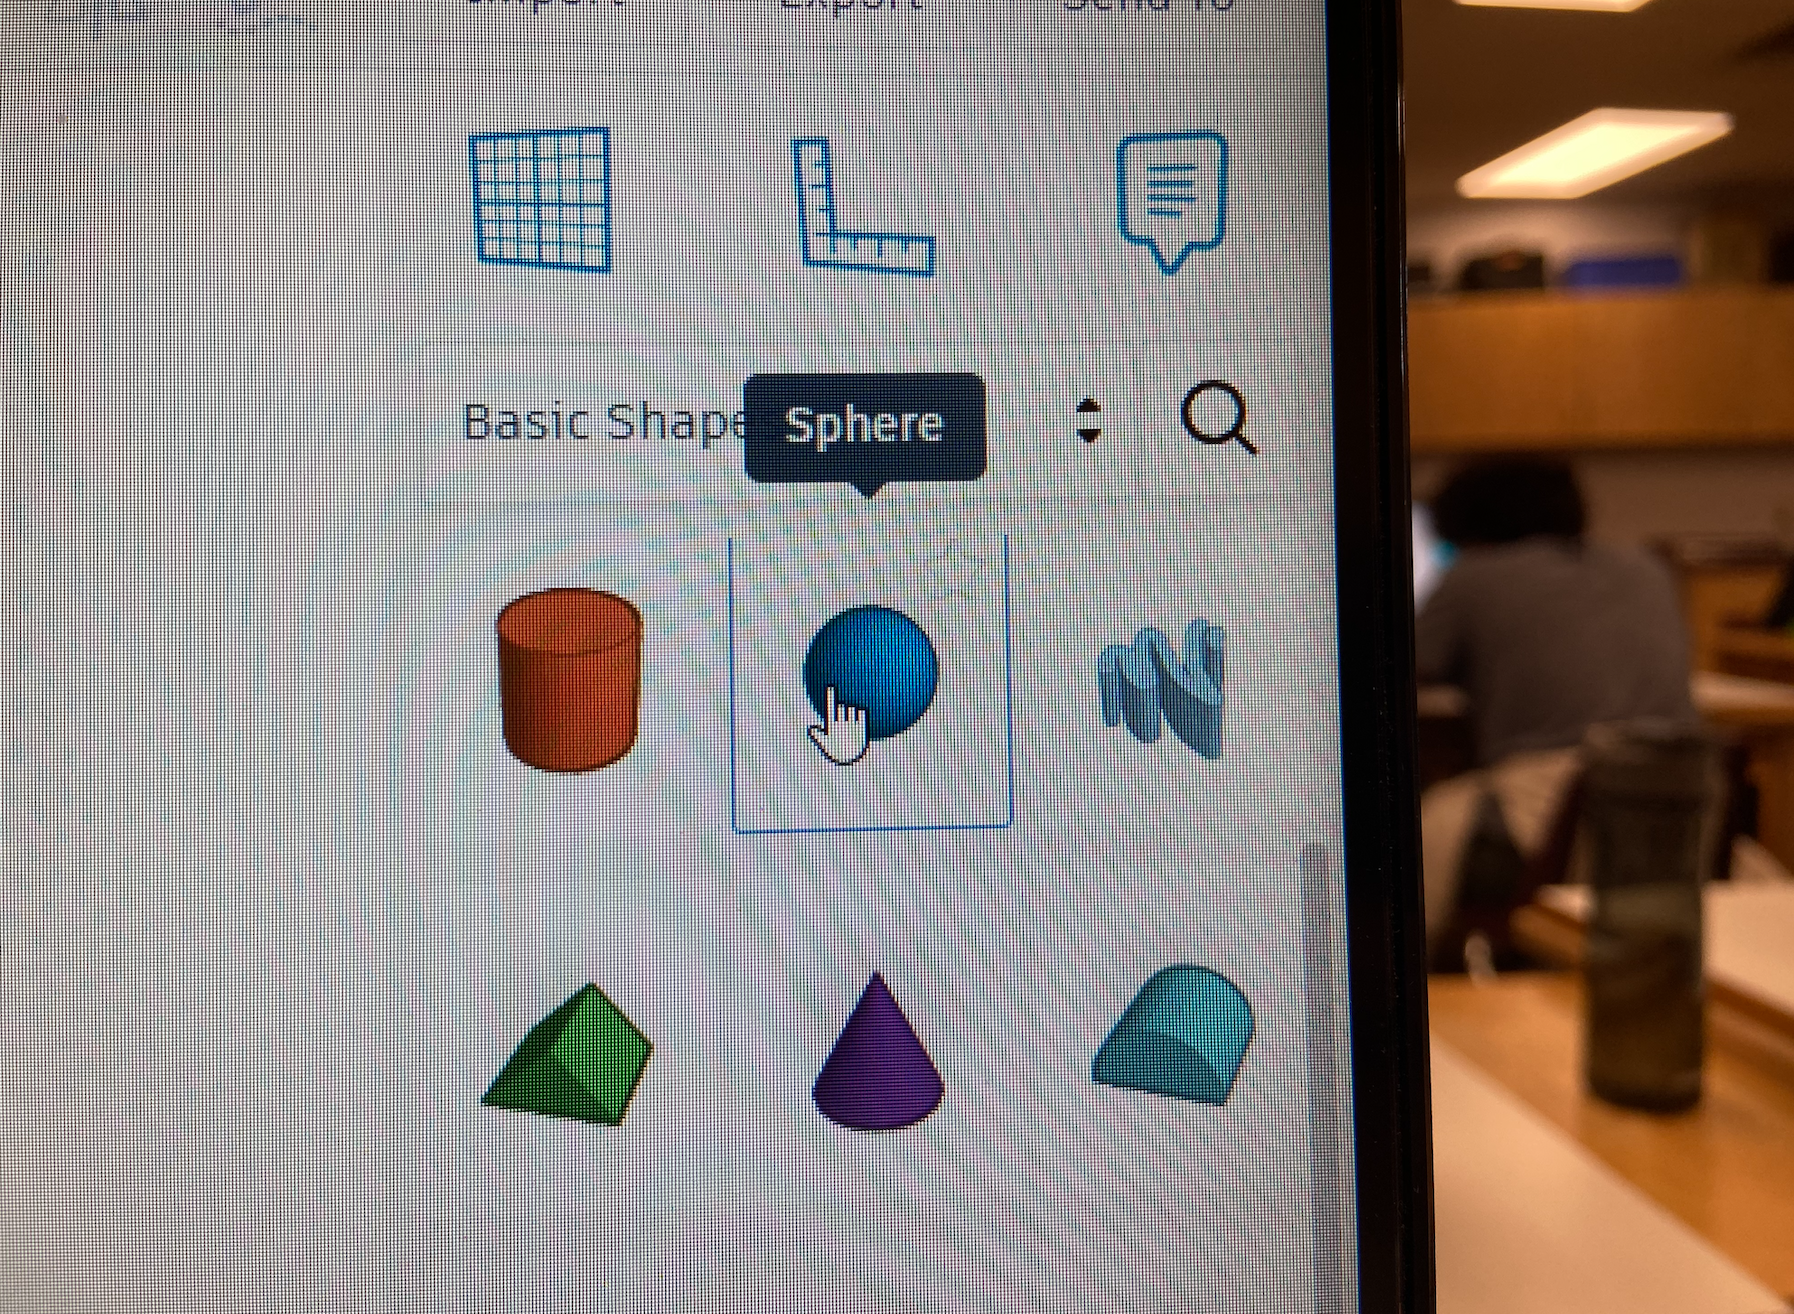
- Find the sphere shape in the right side materials library
- Bring it to the die and attach it to the centre of an empty face of the die (what you visually see as the centre)
- Click on the sphere and the white dots
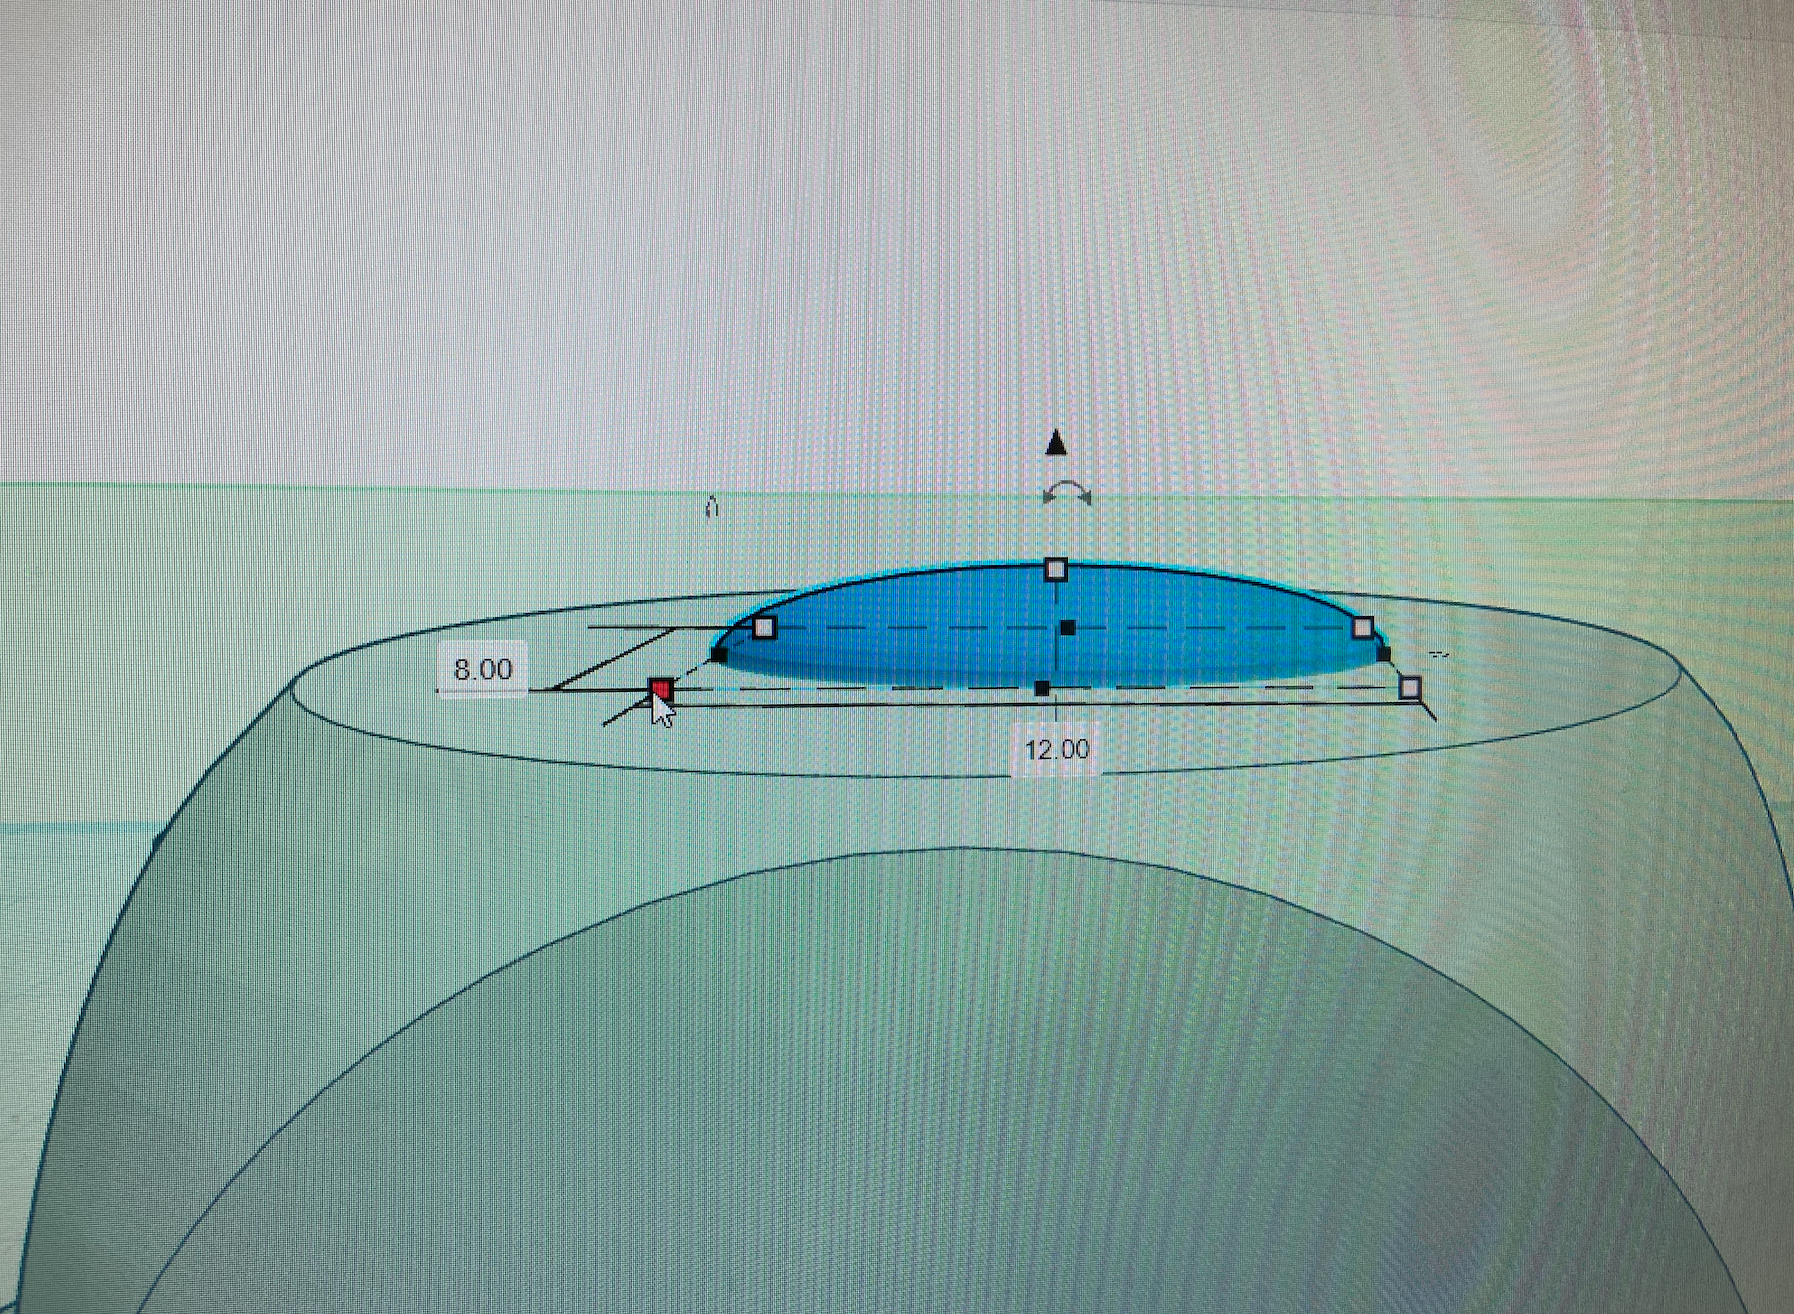
- Adjust the height to be 3.00mm
- Adjust the length and width to be 12.00mm x 8.00mm
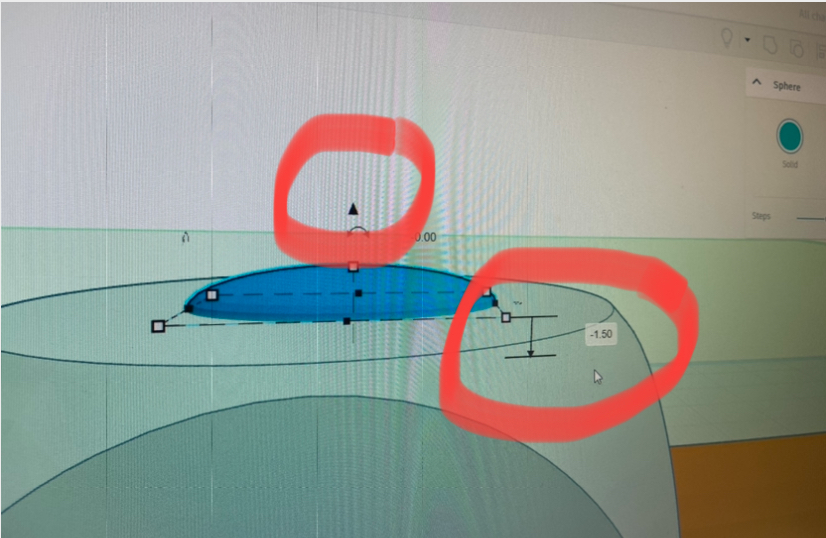
- Recenter the shape
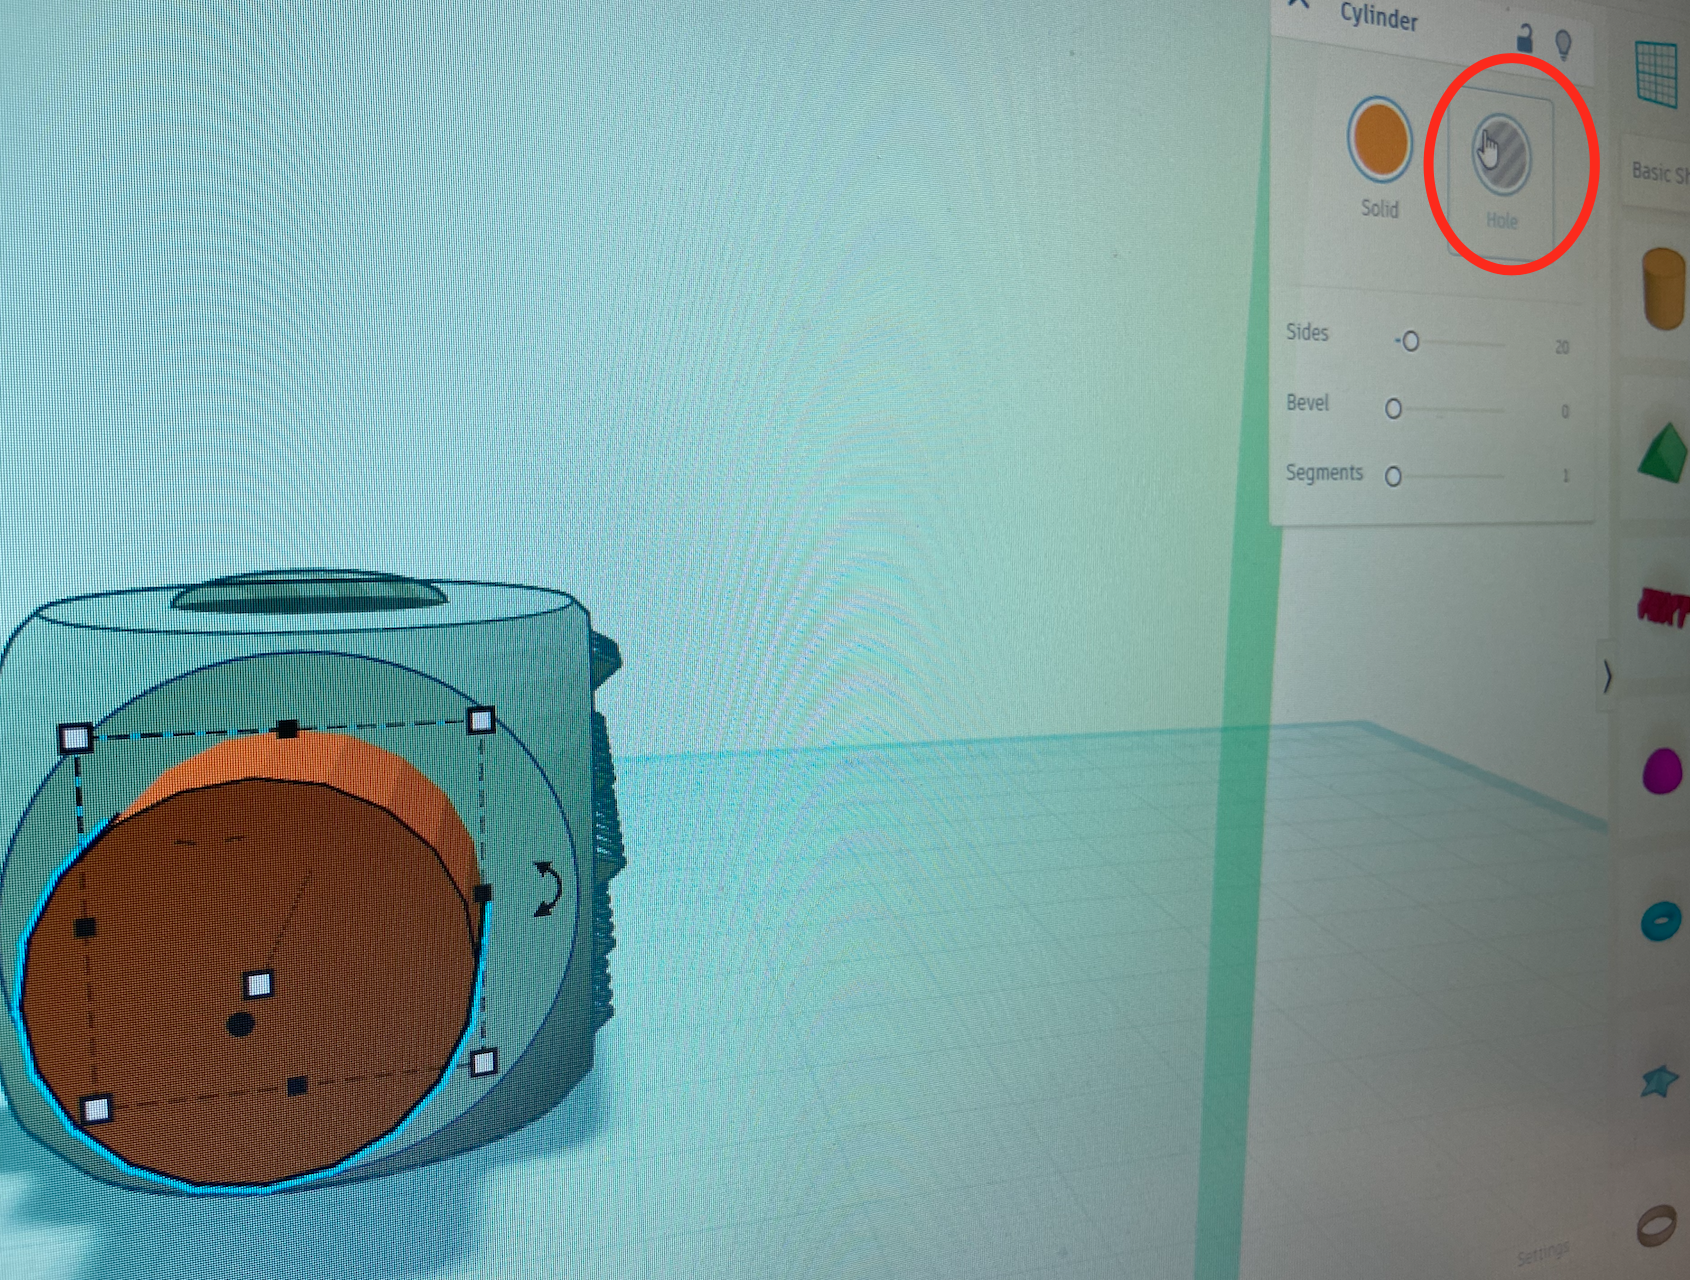
- Press the triangle adjuster at the top of the sphere and push it -1.50mm into the die
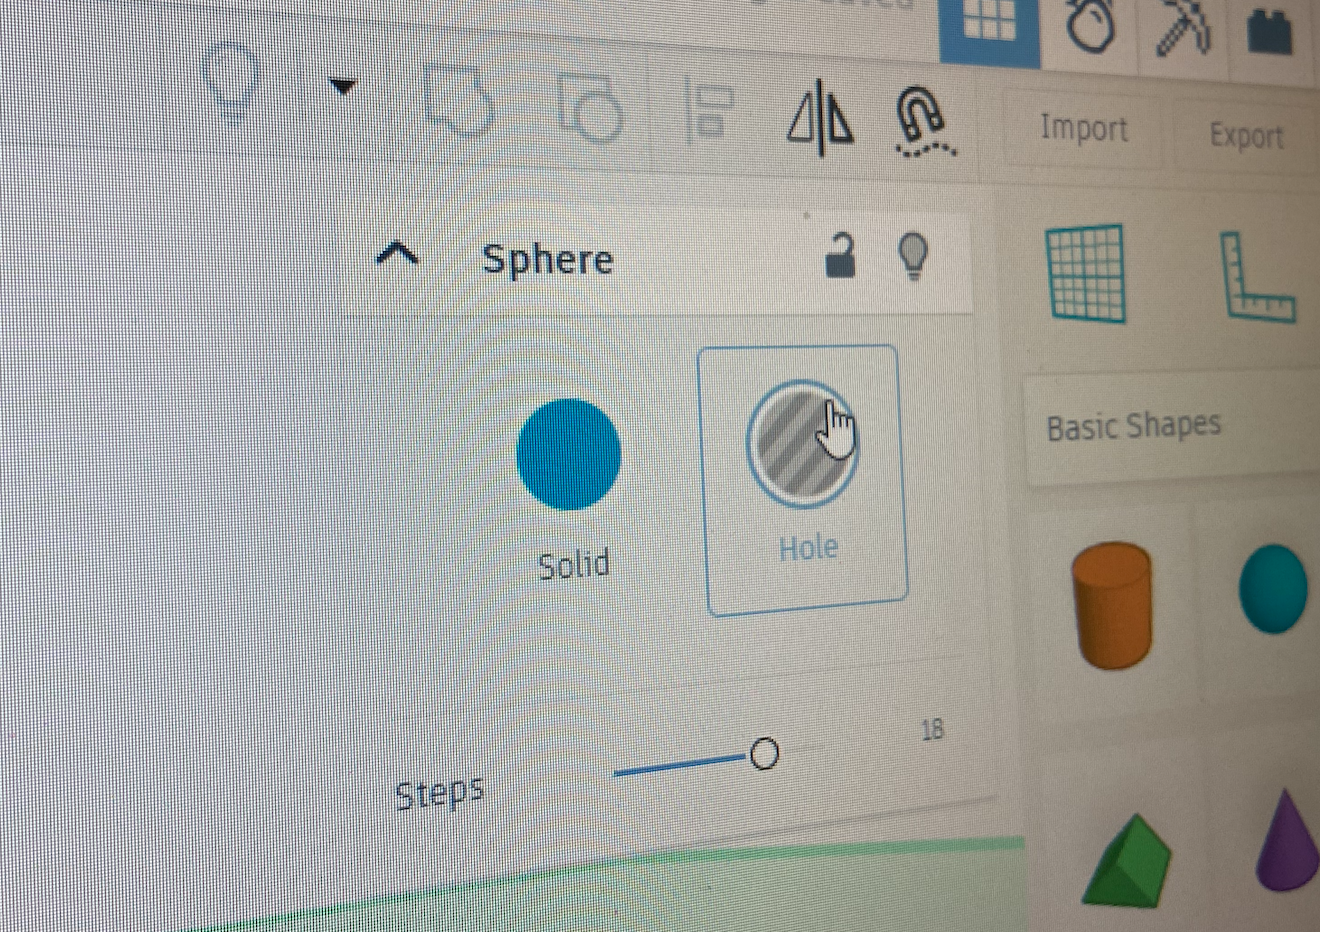
- Click the hole button at the top right corner
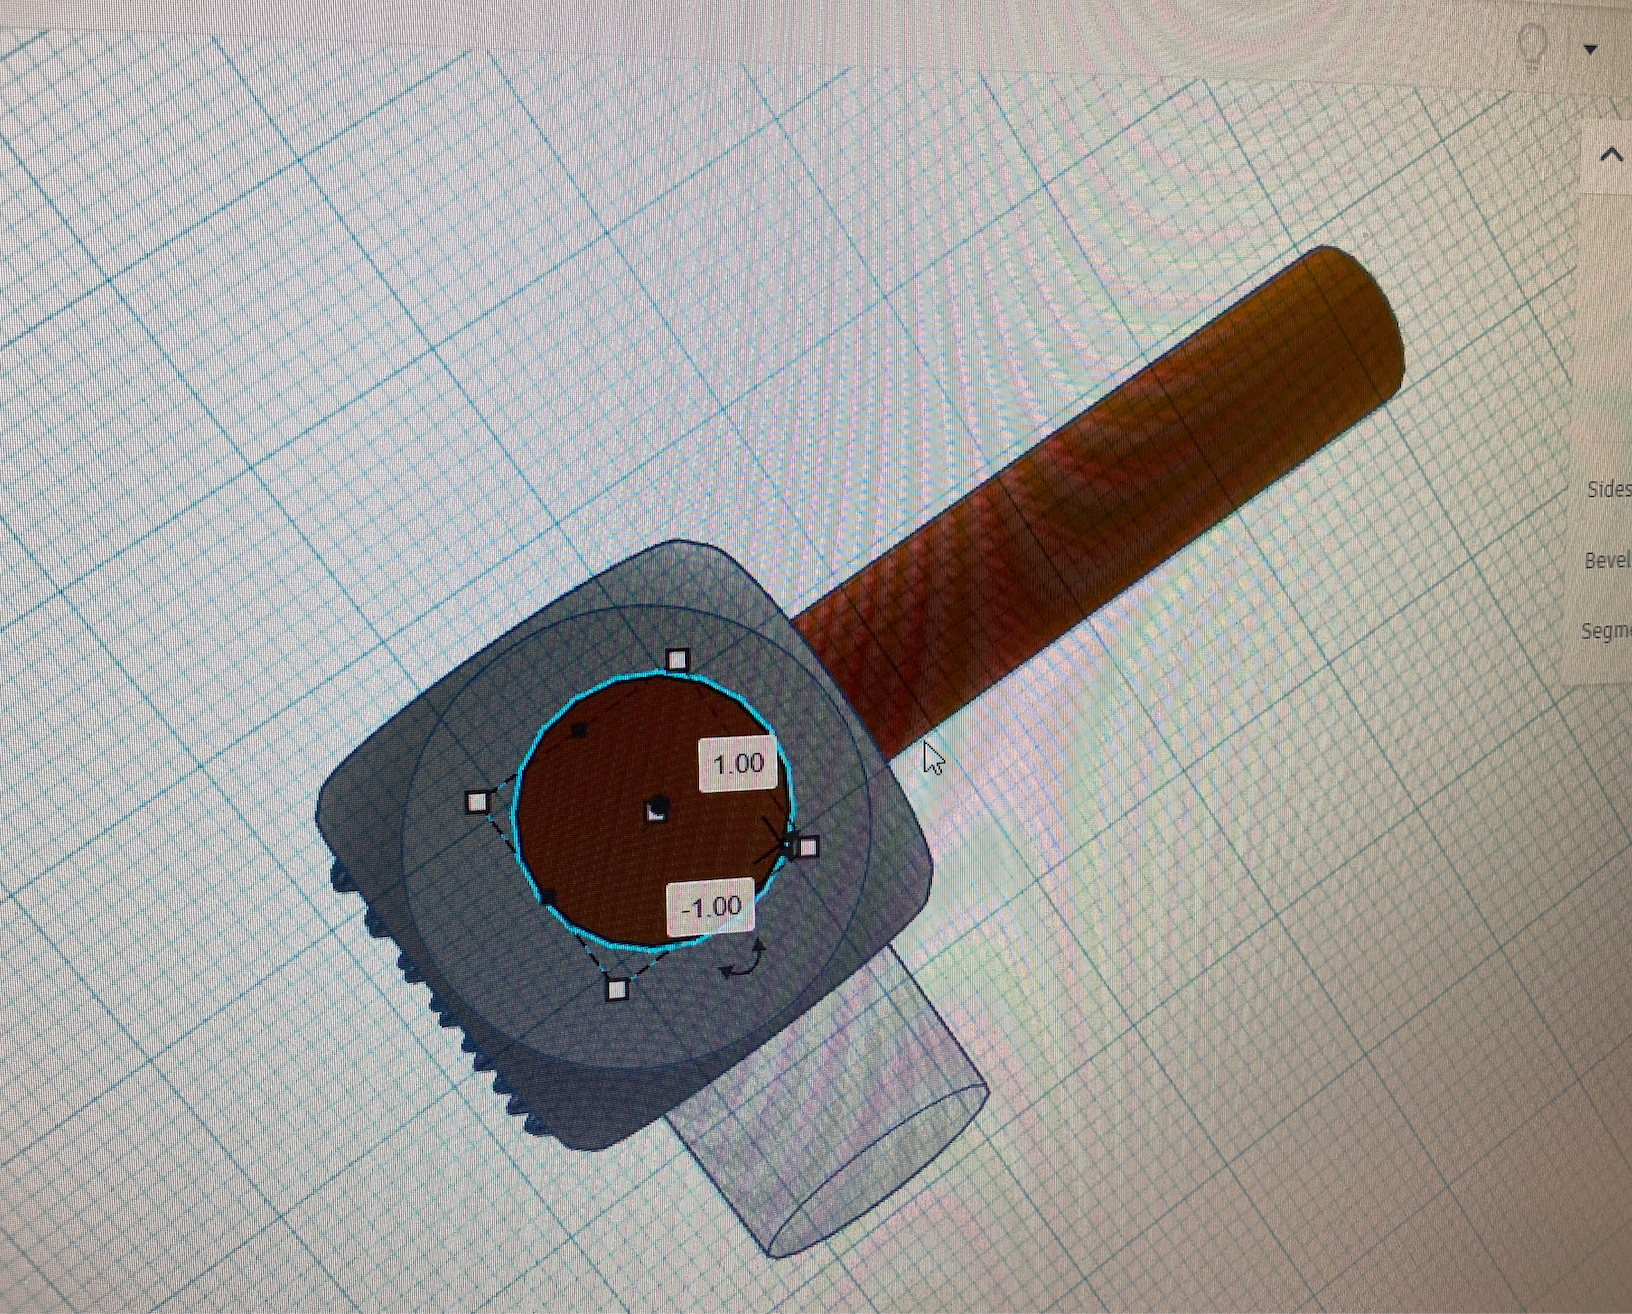
The Teaspoon:
- Repeat STEP 1-3 on a free face of the die
- Adjust the measurements to be 6.00mm for the length; 3.00mm for the width
- Adjust the height to be 4.00mm
- Recenter the shape
- Press the triangle adjuster at the top of the cylinder to push it -1.00mm into the die
- Click the hole button at the top right corner
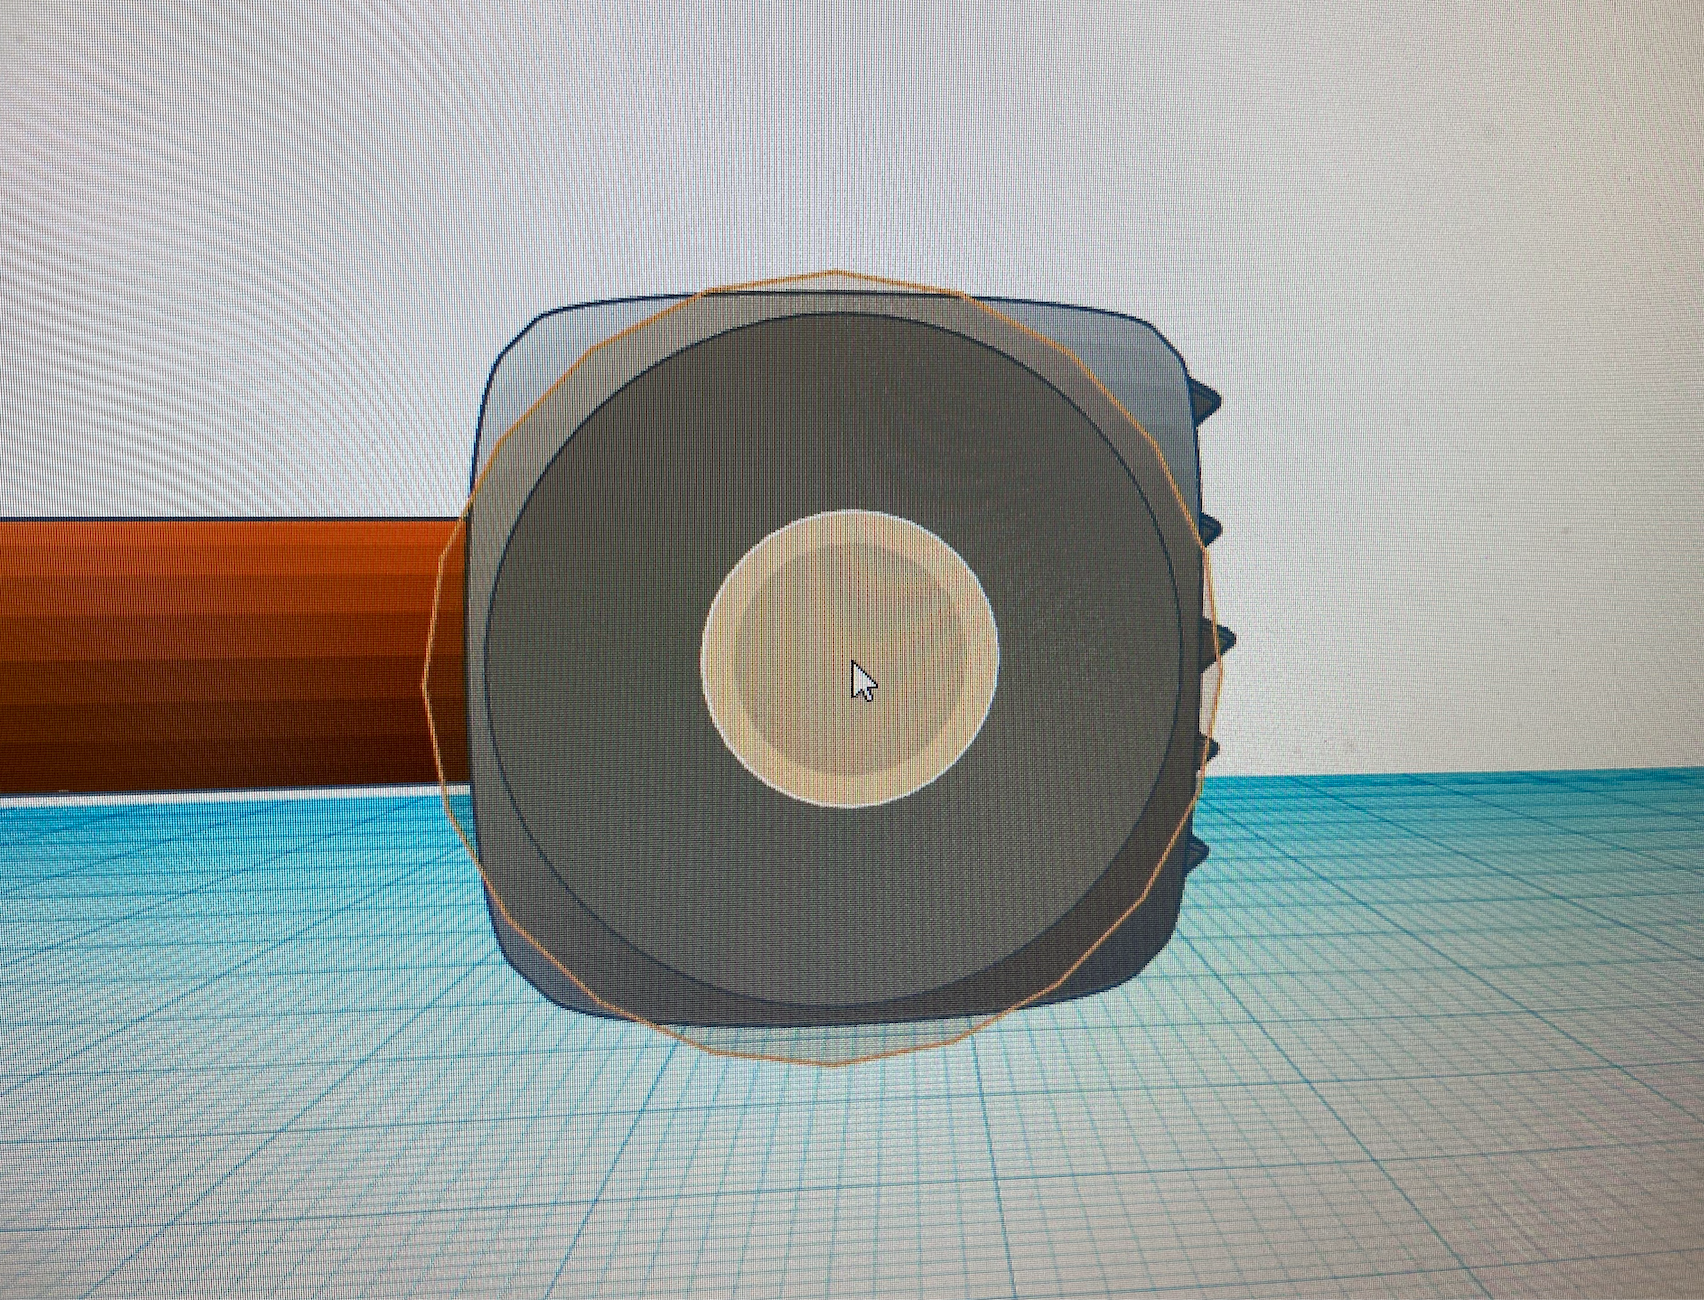
Add the 1/2 Measuring Cup and the 1/4 Measuring Cup

Now it's time to add our measuring cups!
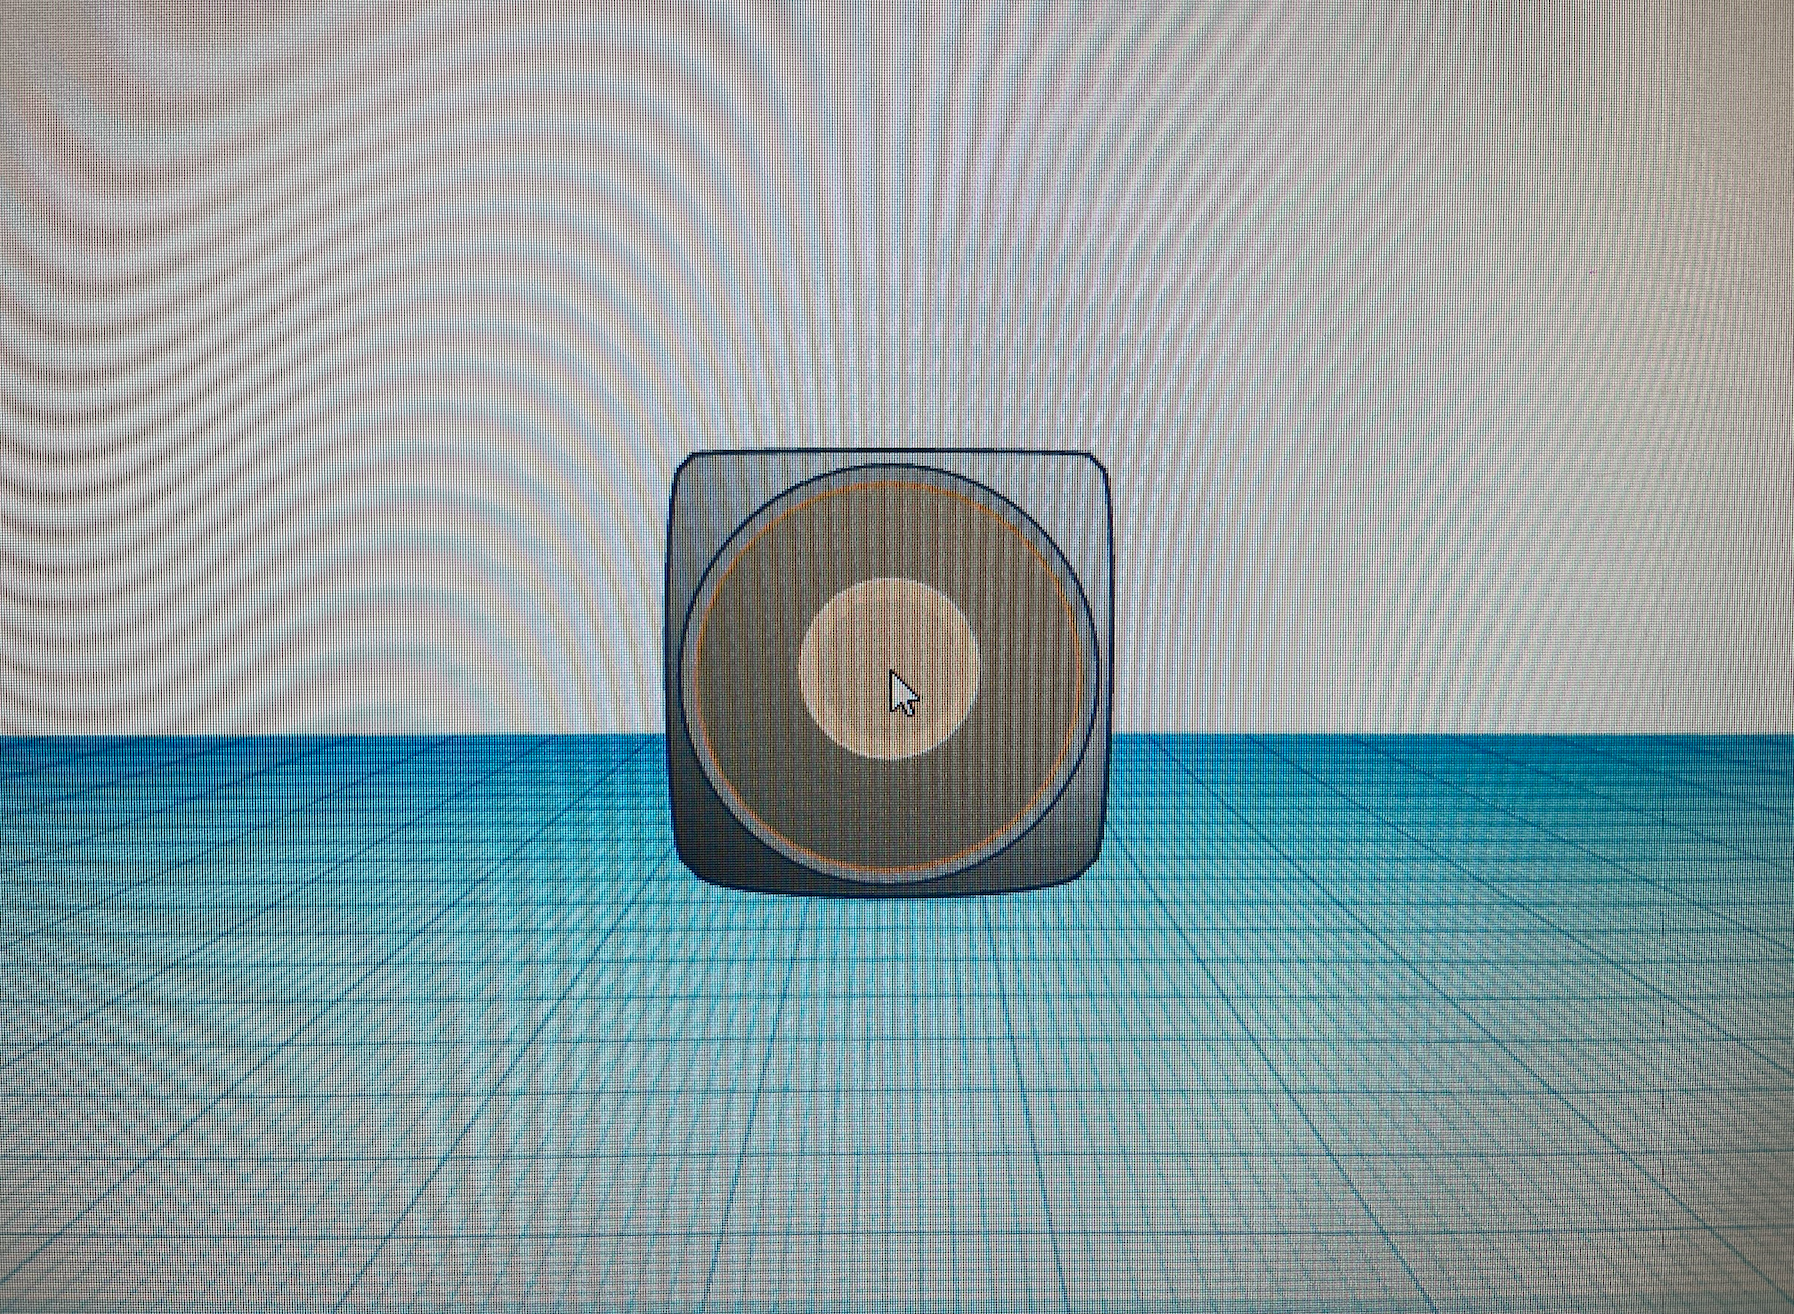
The 1/2 Cup:
- Find the cylinder shape in the right side materials library
- Bring it to the die and attach it to the centre of one side (what you visually see as the centre)
- Click on the cylinder and the white dots
- Adjust the diameter to be 16.00mm and the length to be 20.00mm
- Recenter the shape
- Press the triangle adjuster at the top of the cylinder to push it -10.00mm into the die
- Click the hole button at the top right corner
The 1/4 Cup:
- Repeat STEP 1-3 on the opposite side of the 1/2 cup
- Adjust the diameter to be 12.00mm and the length to be 20.00mm
- Press the triangle adjuster at the top of the cylinder to push it -10.00mm into the die
- Click the hole button at the top right corner
3D Printing Our Creation!
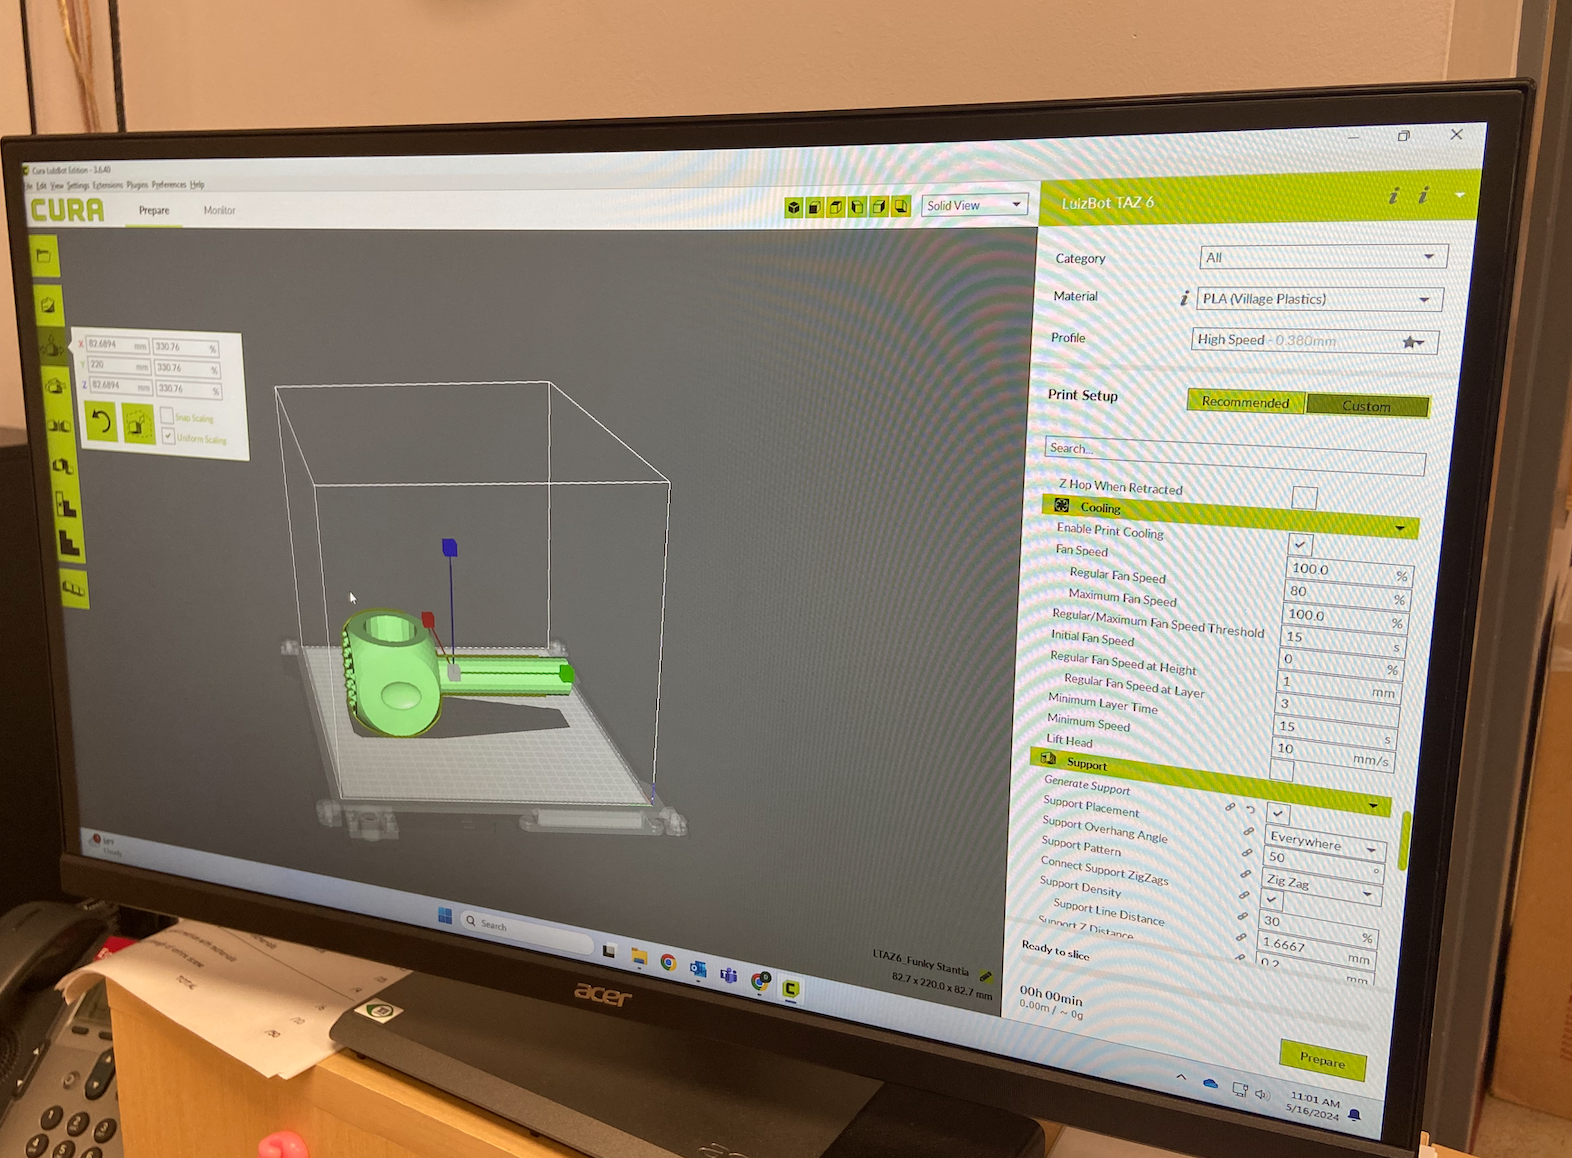
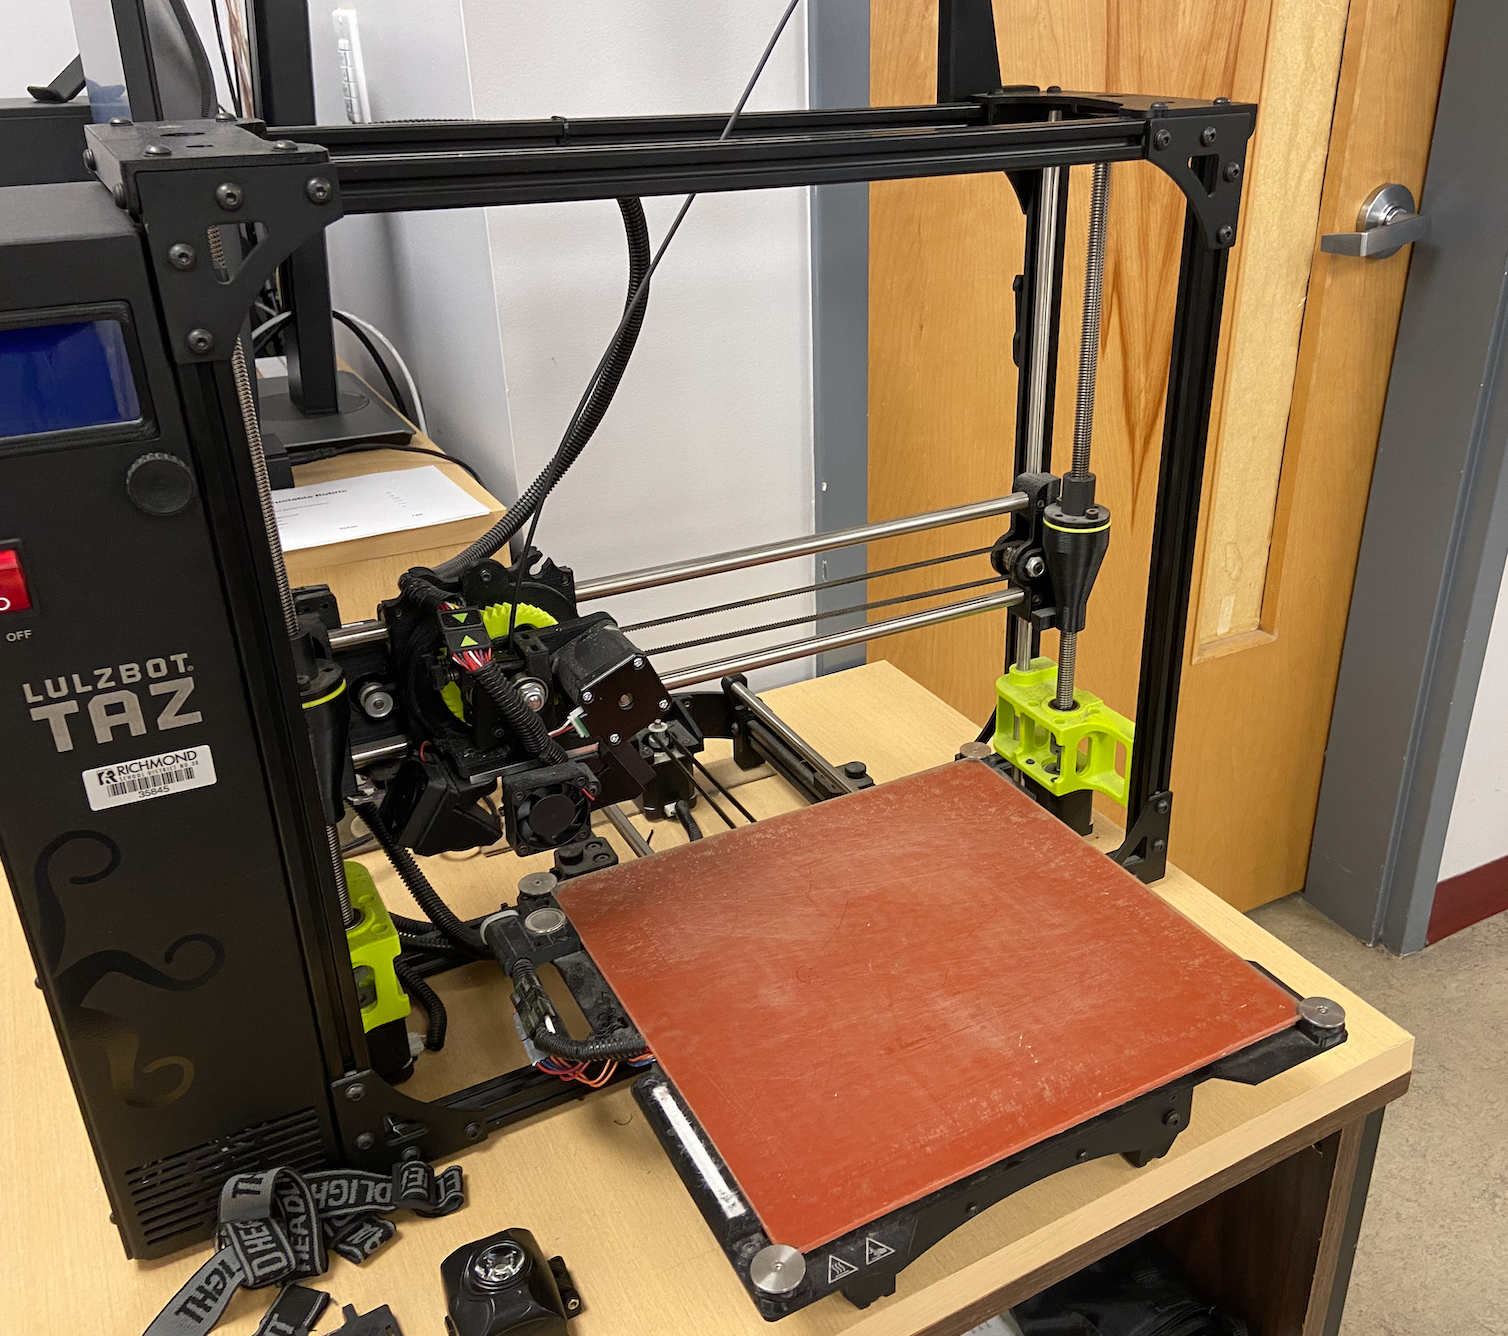
Unfortunately, I was unable to actually print this myself due to budgeting and time constraints. However, here are the steps that will help you print the project if you would like!
- Export the file as an .stl file
- Launch your splicer software to your 3D printer
- Import the project file into your splicer
- Adjust the measurements to make the length of the entire design 220.00mm
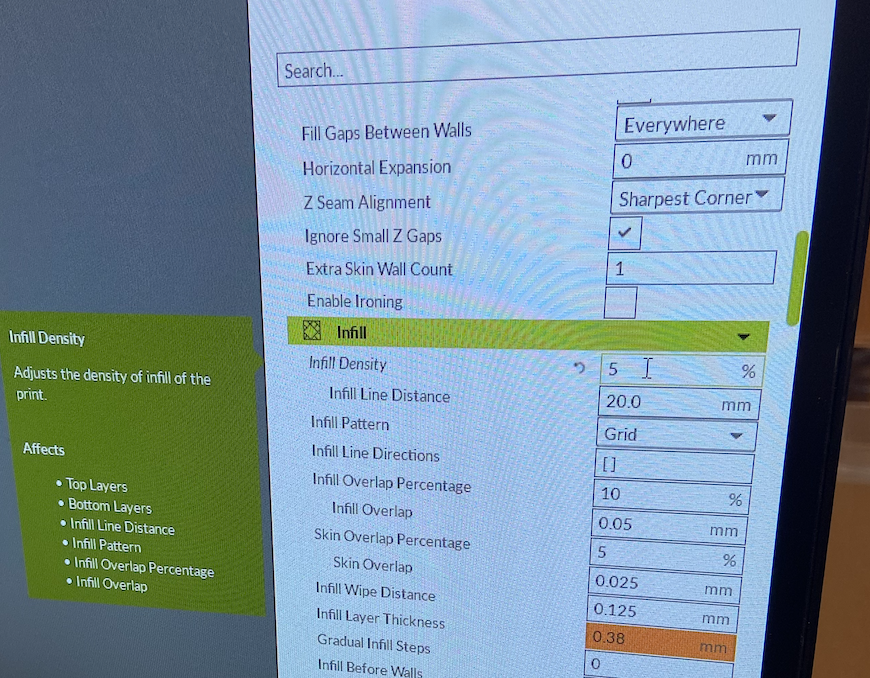
- Adjust the infill to ensure that the tenderizer is heavy enough to use; adjust it to make the density 5%
- Attach your USB stick to the port
- Export the file then transfer into the USB; once completed, eject the USB stick
- Ensure that your food safe filament is loaded into the printer
- Attach your USB stick into your 3D printer
- Let it print!
Cover It in Food Safe Epoxy Resin (optional)
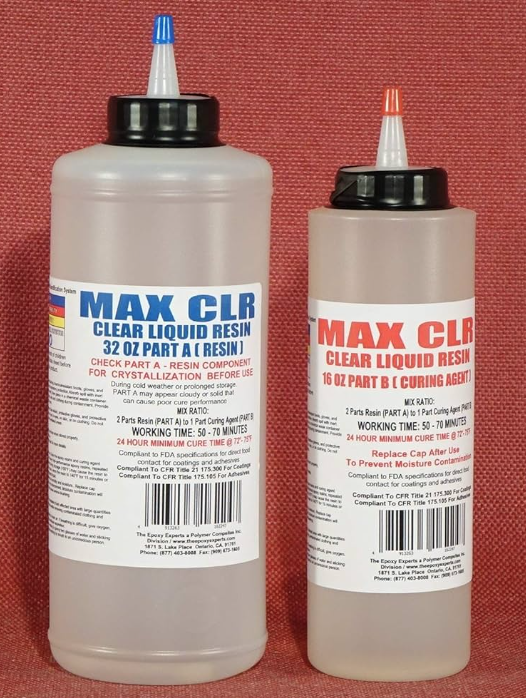
Once again, due to budgeting and time constraints, I was unable to do this step. However, using food safe epoxy for your print would be a good choice if you want it to last longer. Using epoxy will help keep bacteria from the cracks and crevices in the print. This will elongate the lifespan of the print and ensure that you are safe from bacteria. Make sure to find an epoxy resin that is designed for 3D printed designs and ensure that it is food grade! Follow all the safety measures when handling epoxy resin and coat the print.
Time to Cook!

Thank you so much for reading through this Instructable! Even if you didn't try it out for yourself, I'm glad you took the time to take a look. If you did try it out, let me know at the end of this step!
Now that we're done, it's time to use it! Go bake yourself some cookies or give it to a friend that would find it easier to use than regular spoons!
Have fun :)