How to Make an Stitch-Style Written Logo With Software
by CraftingSaturn in Design > Digital Graphics
293 Views, 4 Favorites, 0 Comments
How to Make an Stitch-Style Written Logo With Software
Hello.
I hope everyone watching this instructable is doing well.
Since I registered on this website, I have not put a logo or a custom image.
A logo, an avatar, a profile or any image that identifies you as a user, becomes relevant in many aspects; since you can know other users, you can be recognized just by seeing the image or identify you as a brand, etc.
After thinking about what would be my nickname and so on, I didn't think about what I wanted as a logo, until I read a book about how to embroider on hemp and I was making figures with a sewing machine as a hobby, and I came up with an embroidery or sewing style logo.
I thought it was better to do it digitally, since a logo is usually a smaller and more detailed figure, and doing it on a sewing machine with my novice level of free stitching... is a bit scary.
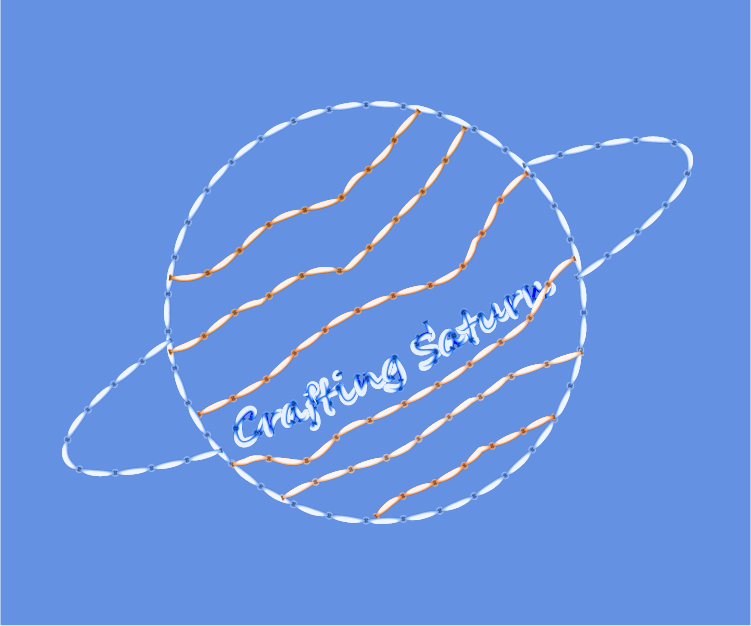
For the logo design, it occurred to me that since my nickname has the word Saturn in it, because I like the shape of that planet (it's the rings, it makes it visually striking), I came up with a logo that has the planet and the name written: both in stitched style.
Thinking of a way to make a logo and make it easy, I ended up making this project, and then writing the instructions for it.
I hope you find the project useful or that it inspires you to create other projects.
Supplies
- Pencil
- Paper
- Vector graphics software (Adobe Illustrator)
- PC, notebook or tablet.
Designing the Logo on Paper
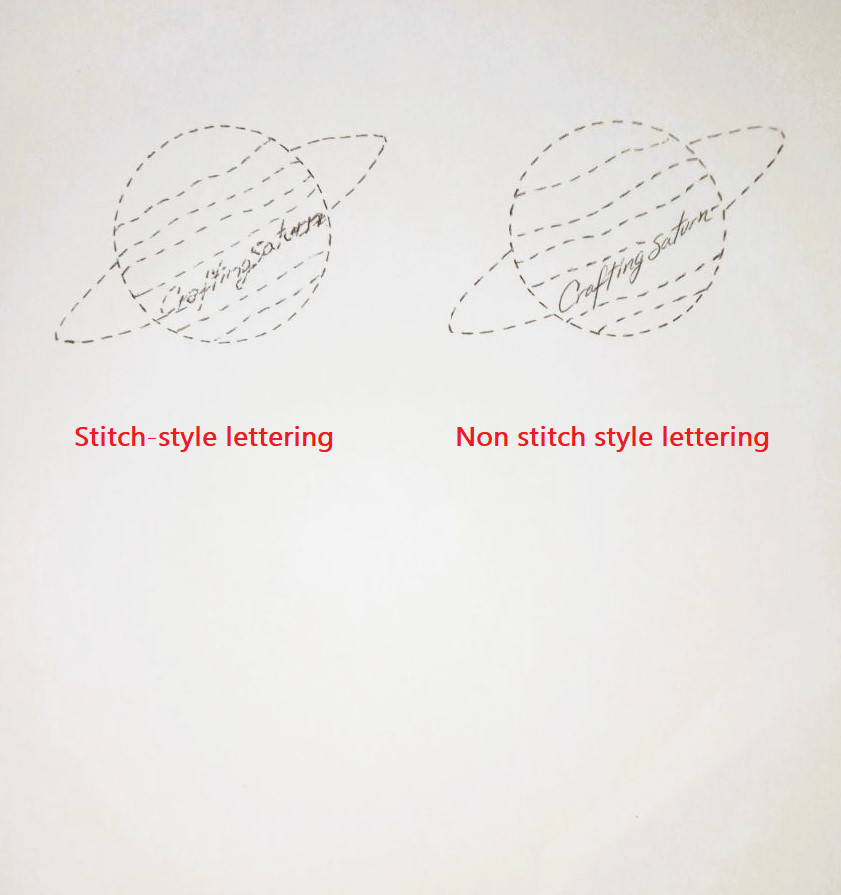
We took paper and pencil, and we started to make different logo prototypes.
We will decide on the design we want to digitalize.
In my case I want to make a logo of the planet Saturn, made as in sewing stitches, and with my nickname written in the middle. So I had to:
- Make a circle, and a curved line representing the ring of Saturn; the idea is not to over saturate either, but to make a simplified idea of the planet.
- In the middle of the planet, the nickname written in a curved form as if it were a continuation of the rings passing through Saturn. The choices were between two base options, one with the title written as stitches, and one without.
- And make several lines that cross the planet.
Creating a New Document in Software
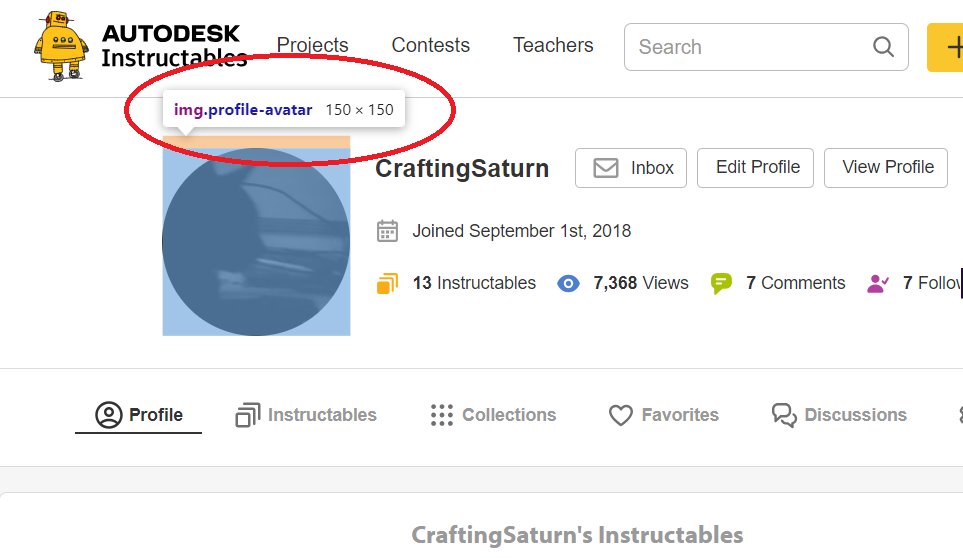
First, we see what file characteristics Instructables supports as a profile picture; that it is 150x150px. (Using "Inspect web element" on profile image).
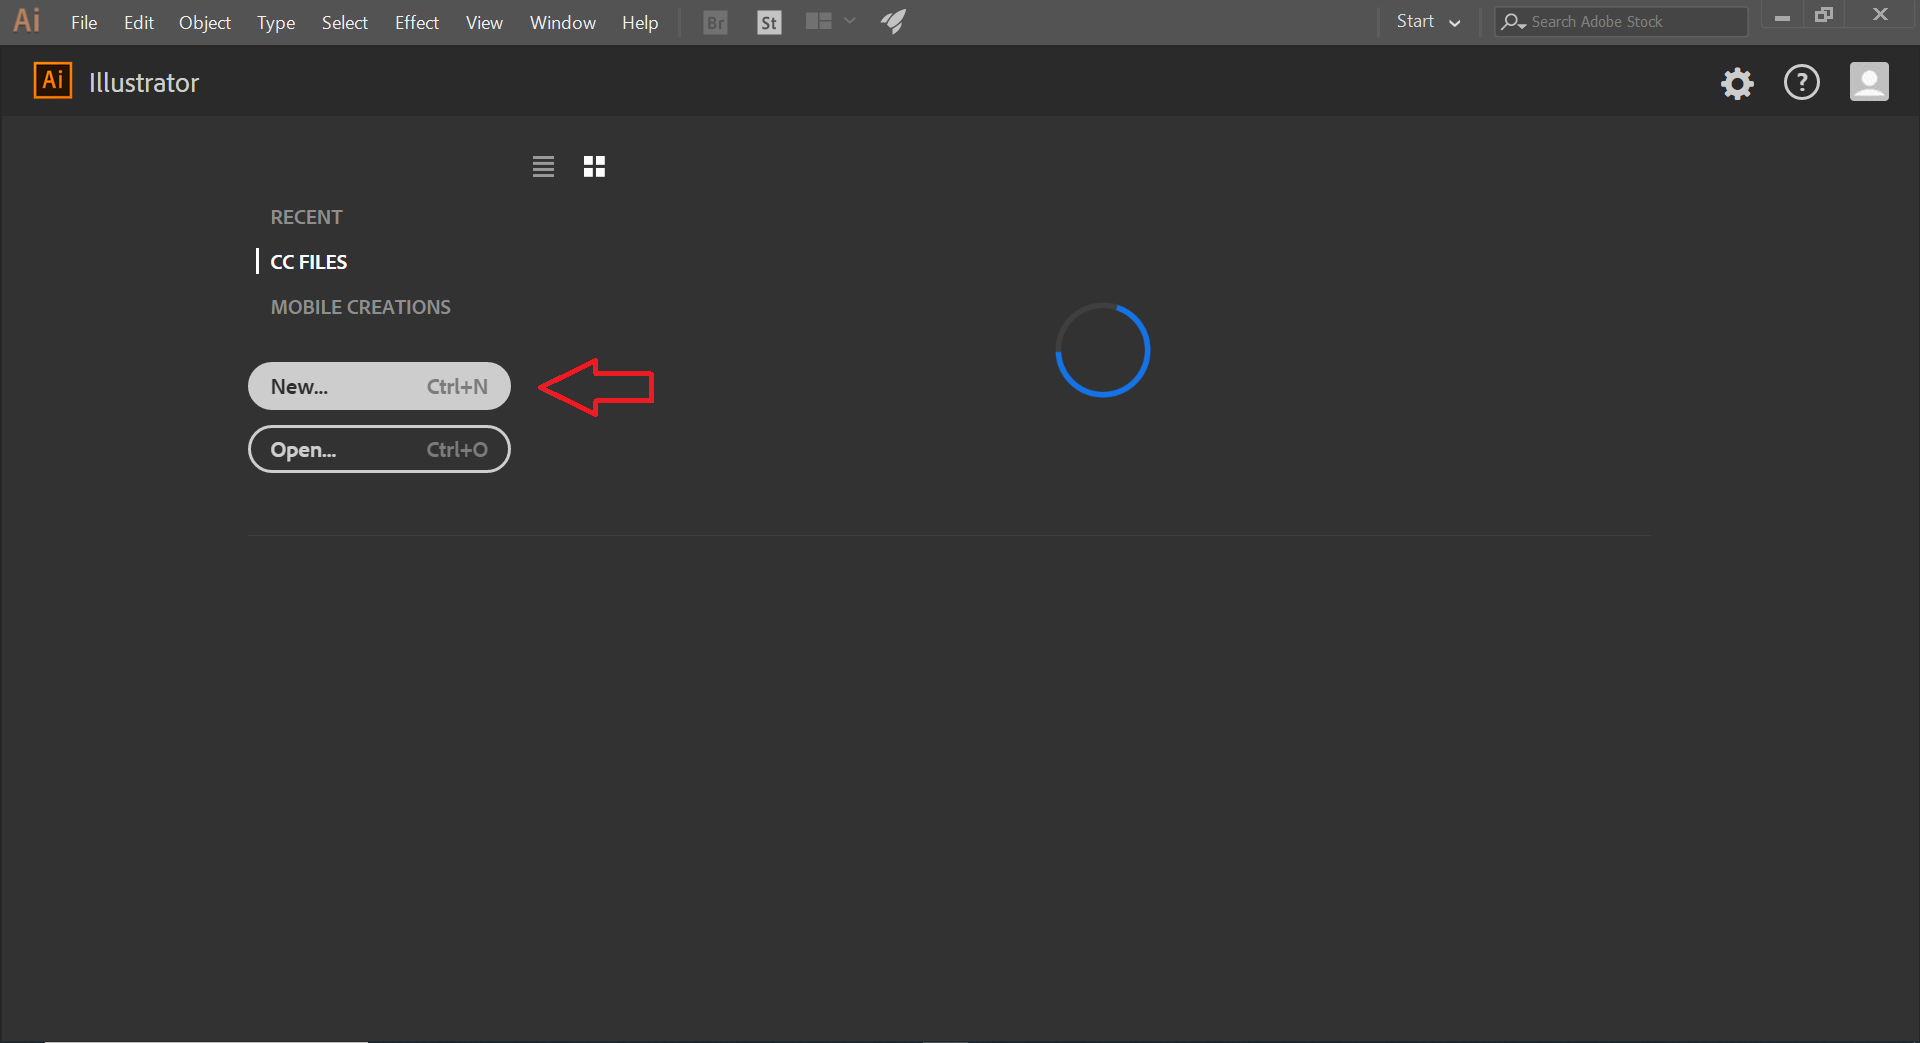
Open the software (Adobe Illustrator), and an interface appears, click on the "New..." button.
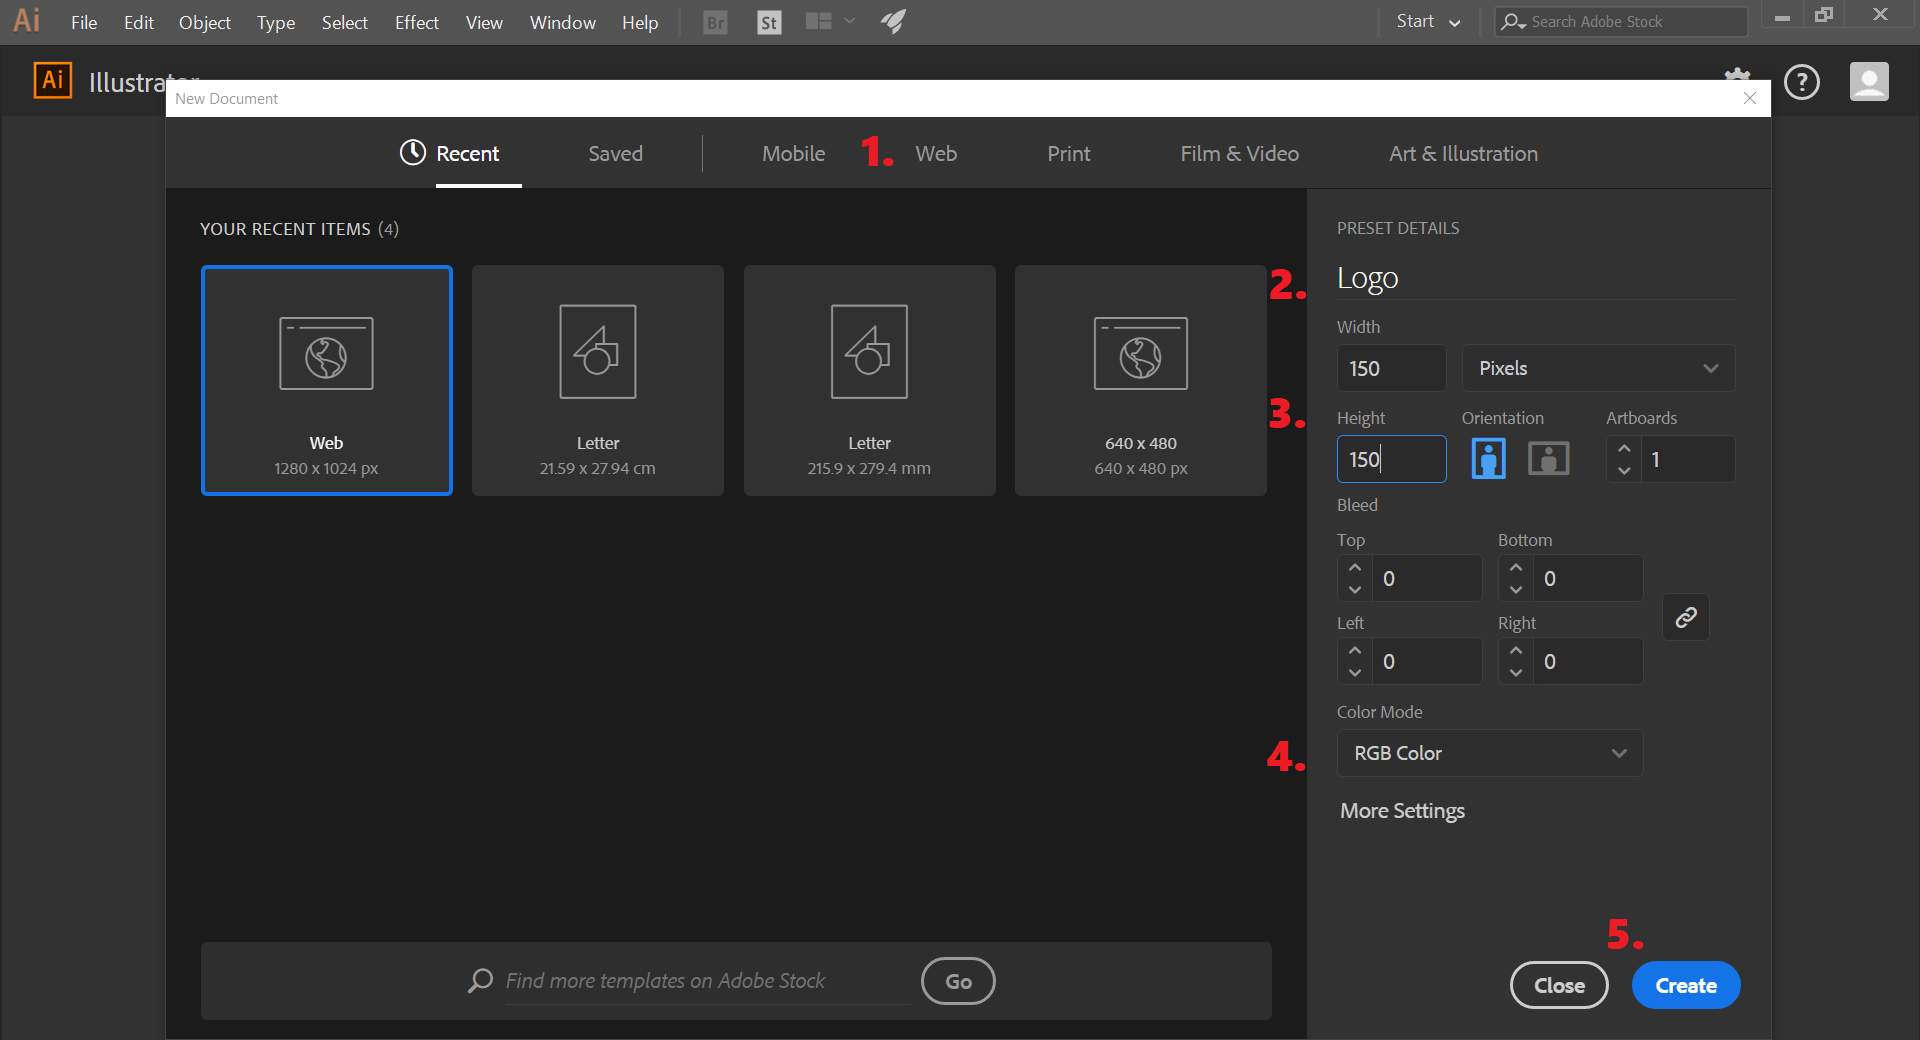
A floating window will appear, in it we will do:
- Click on the "Web" tab.
- We write the name with which we will save the document.
- We introduce the measure of height and width of 150x150px.
- Select the RGB color mode.
- Click on the "Create" button.
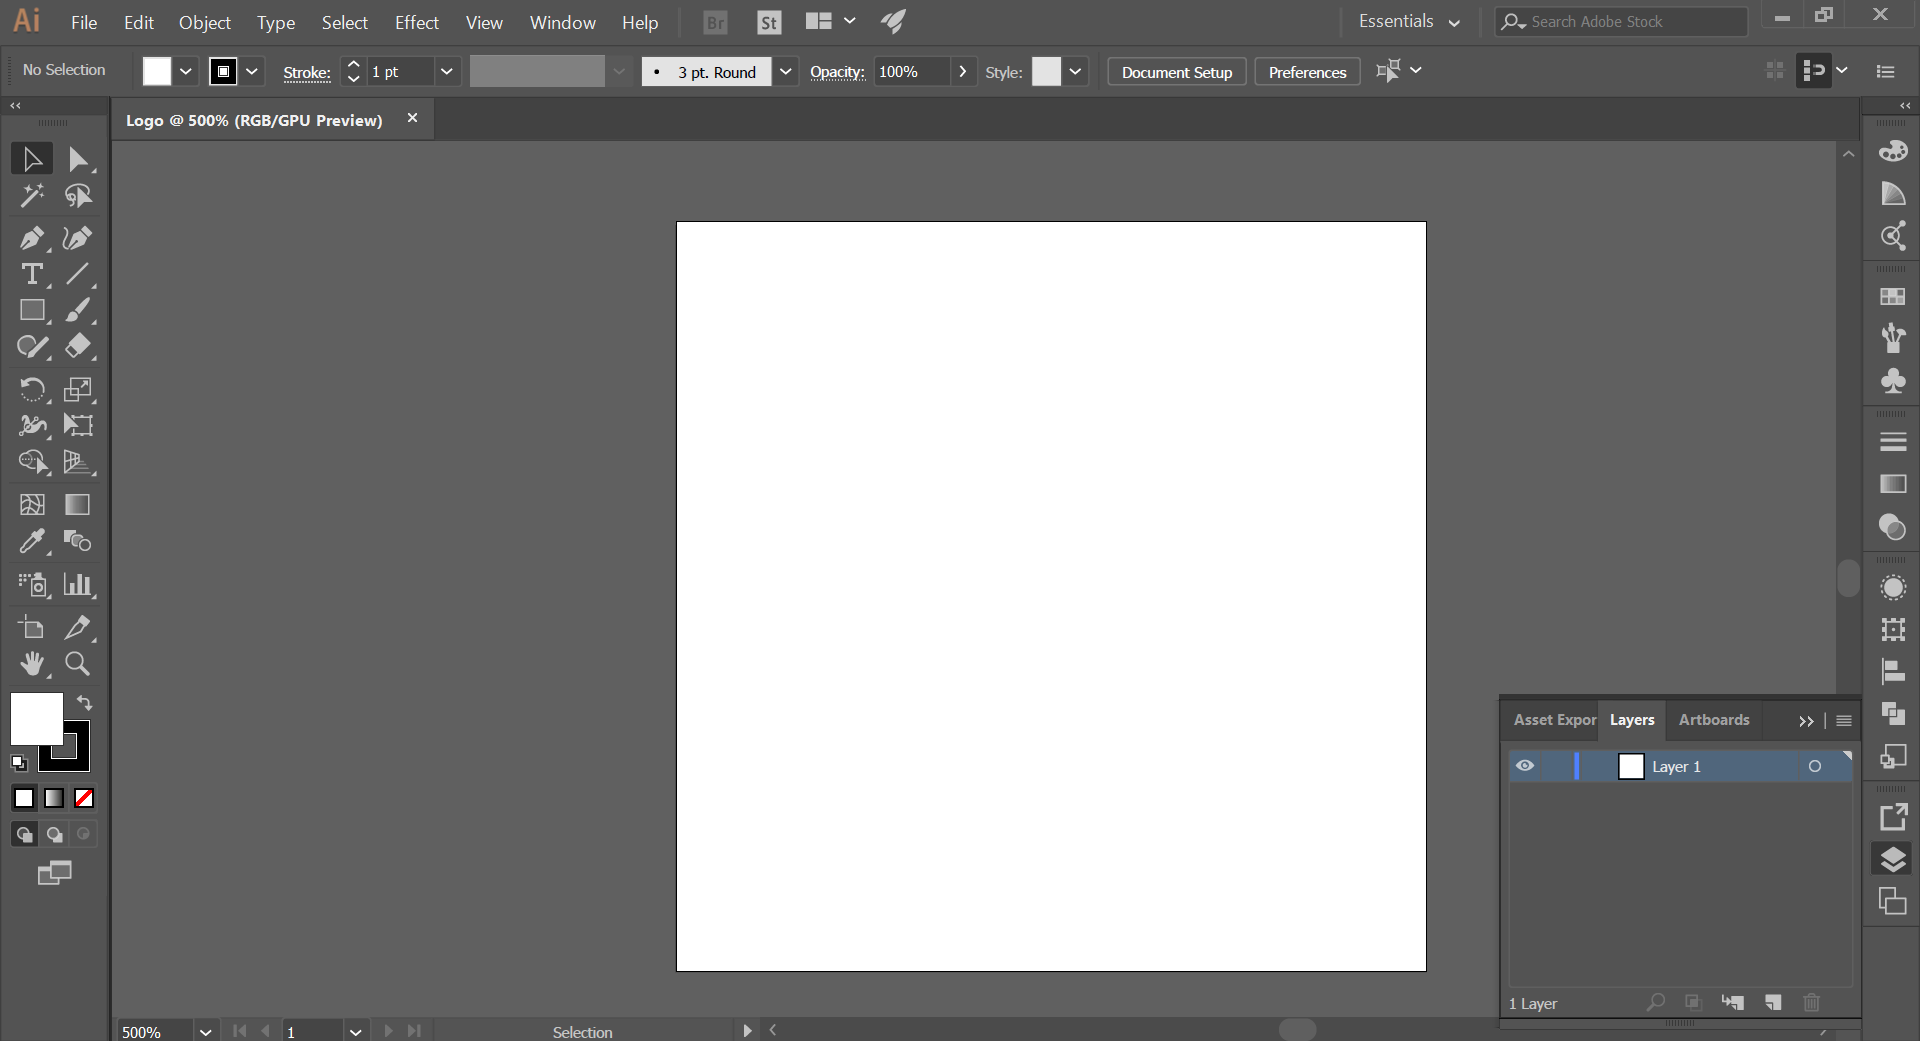
- And the Adobe Illustrator work interface will appear with a blank artboard with the settings we have just entered.
Creating a Sewing Stitch Brush
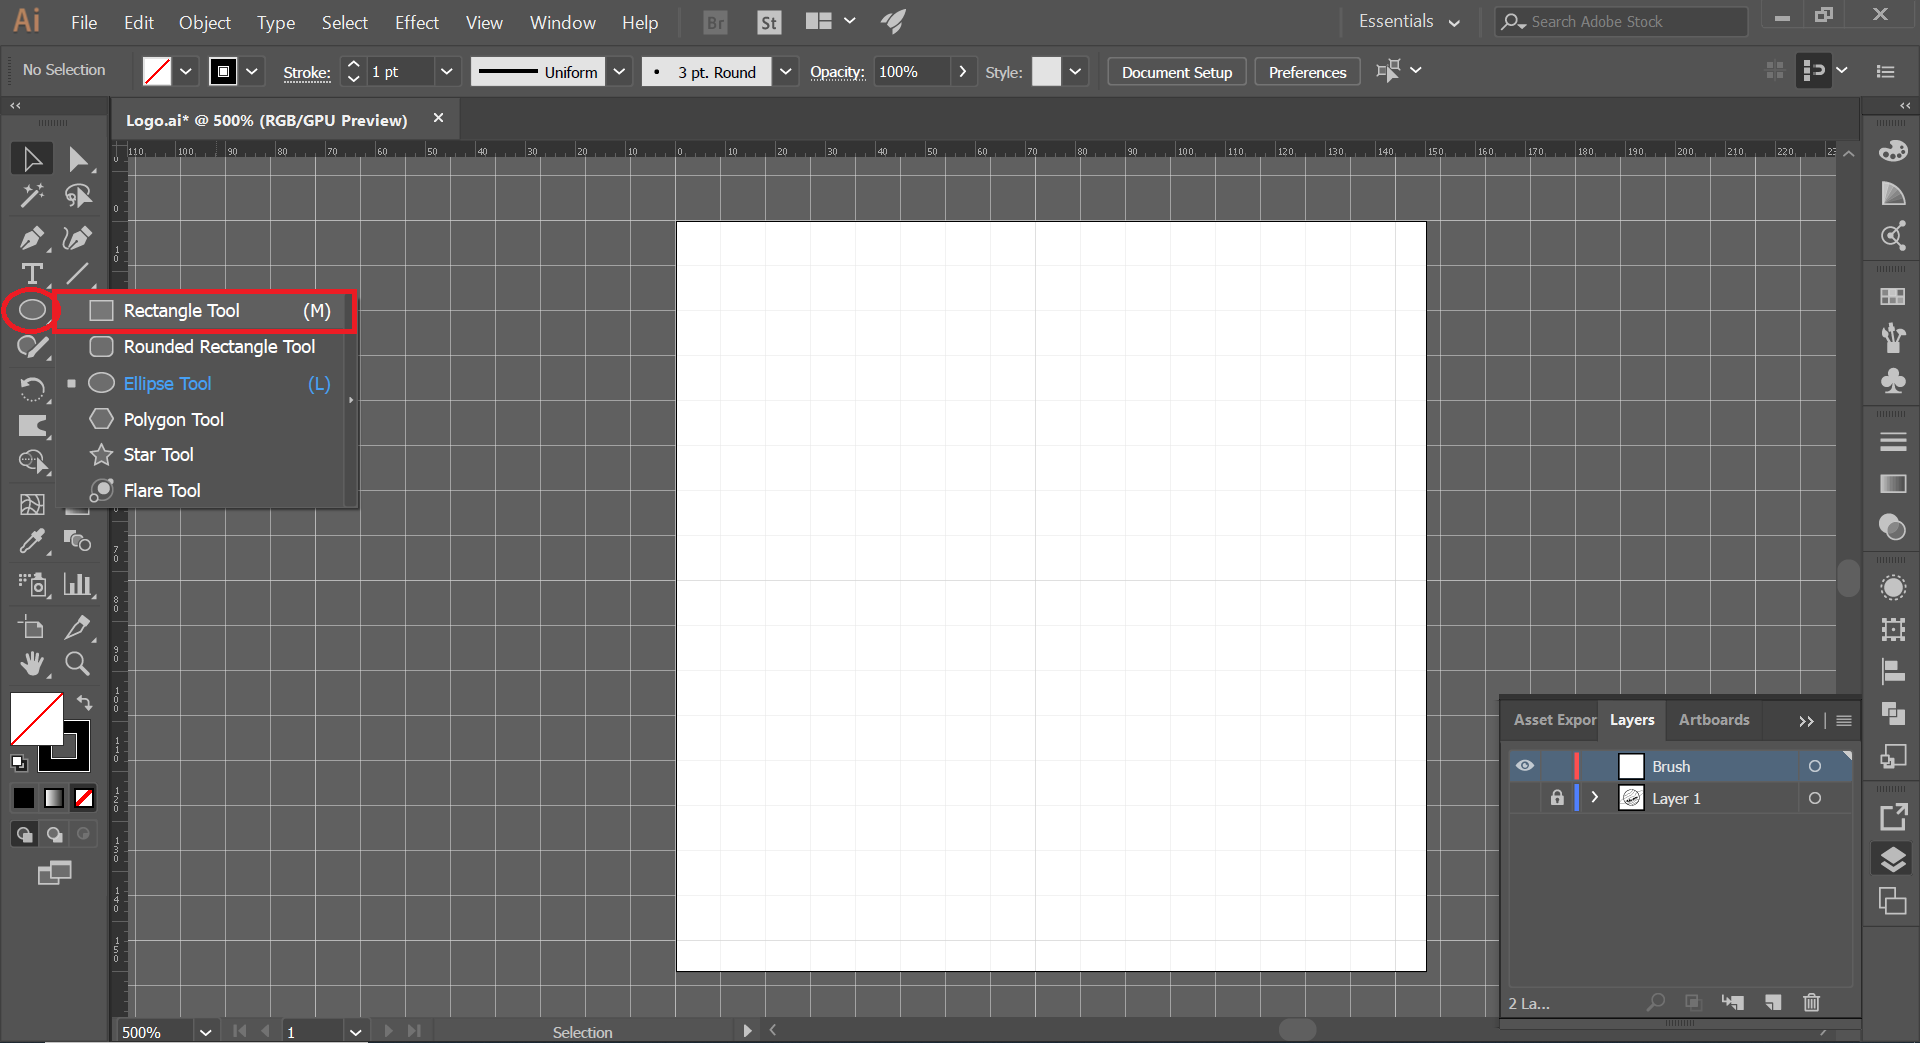
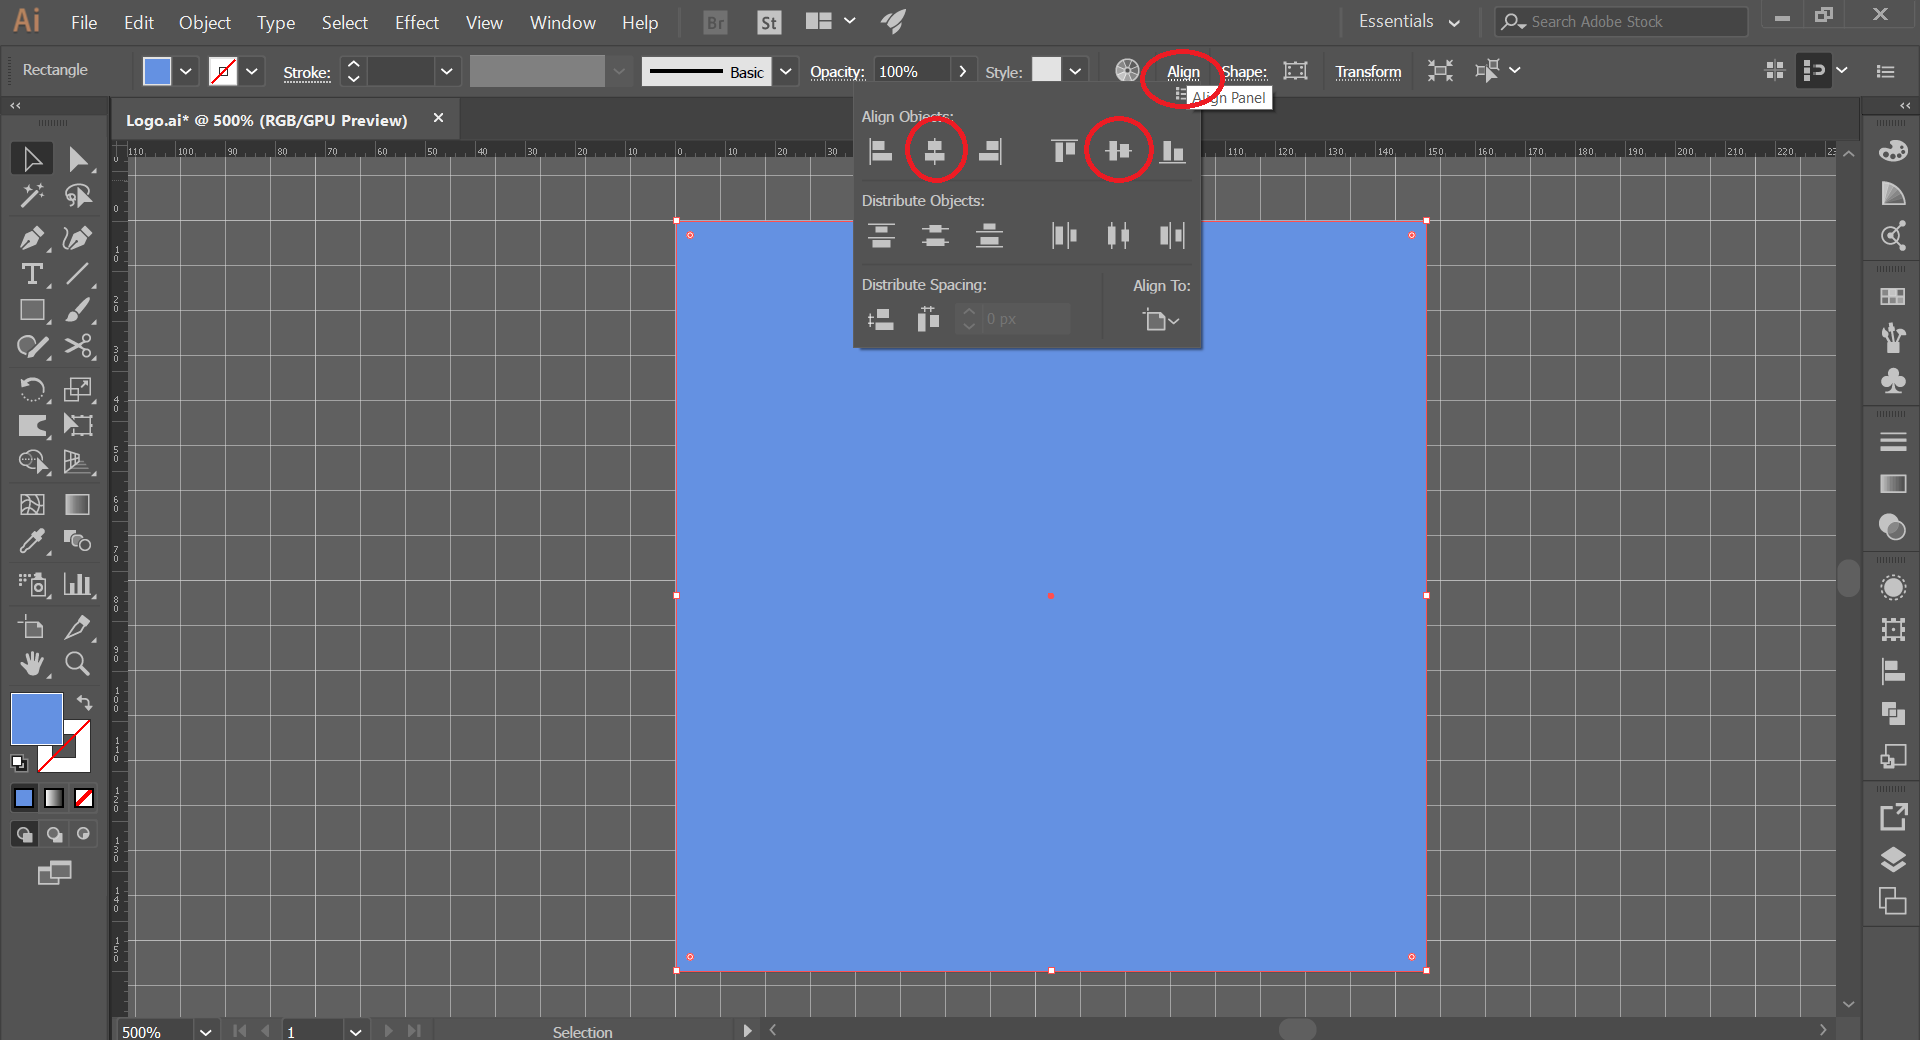
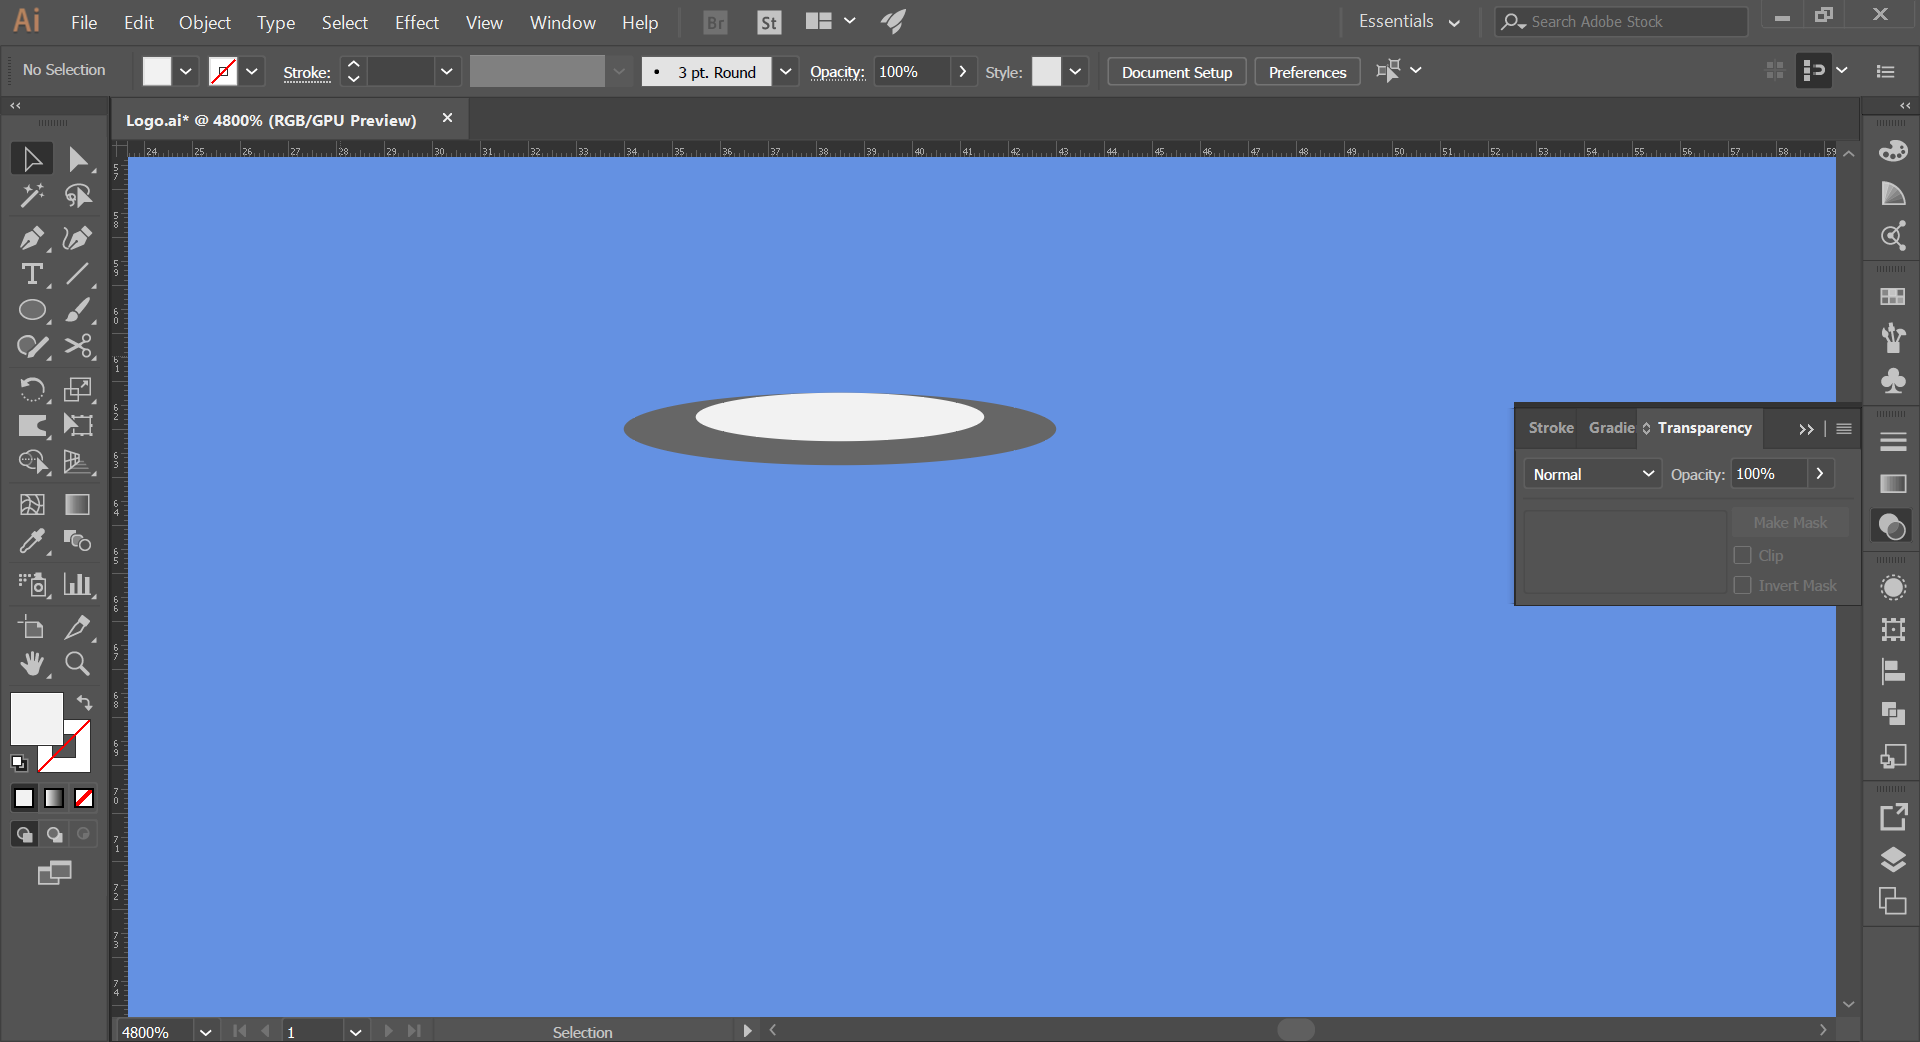
- First, let's make a 150x150px square of dark color. I'm going to choose, opaque blue.
- Then, we align the square.
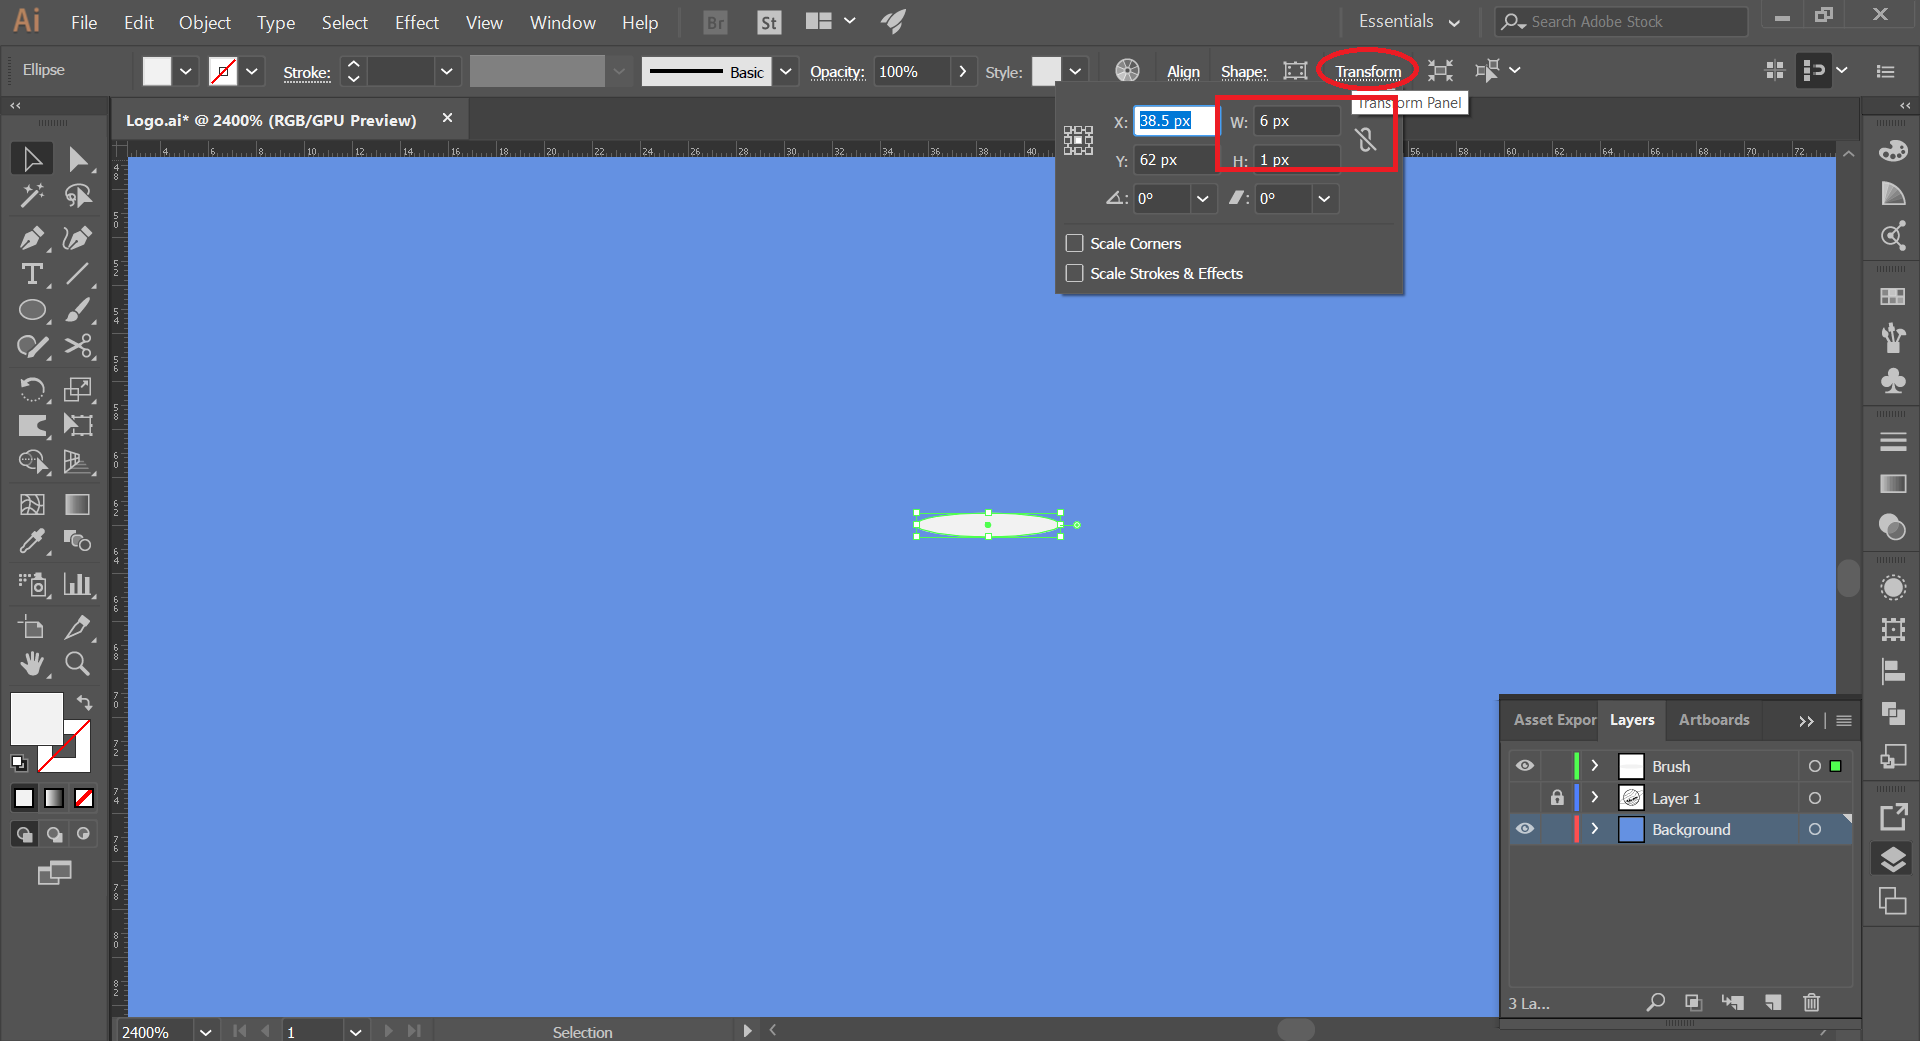
- Create an ellipse of size: W: 6px, H: 1px.
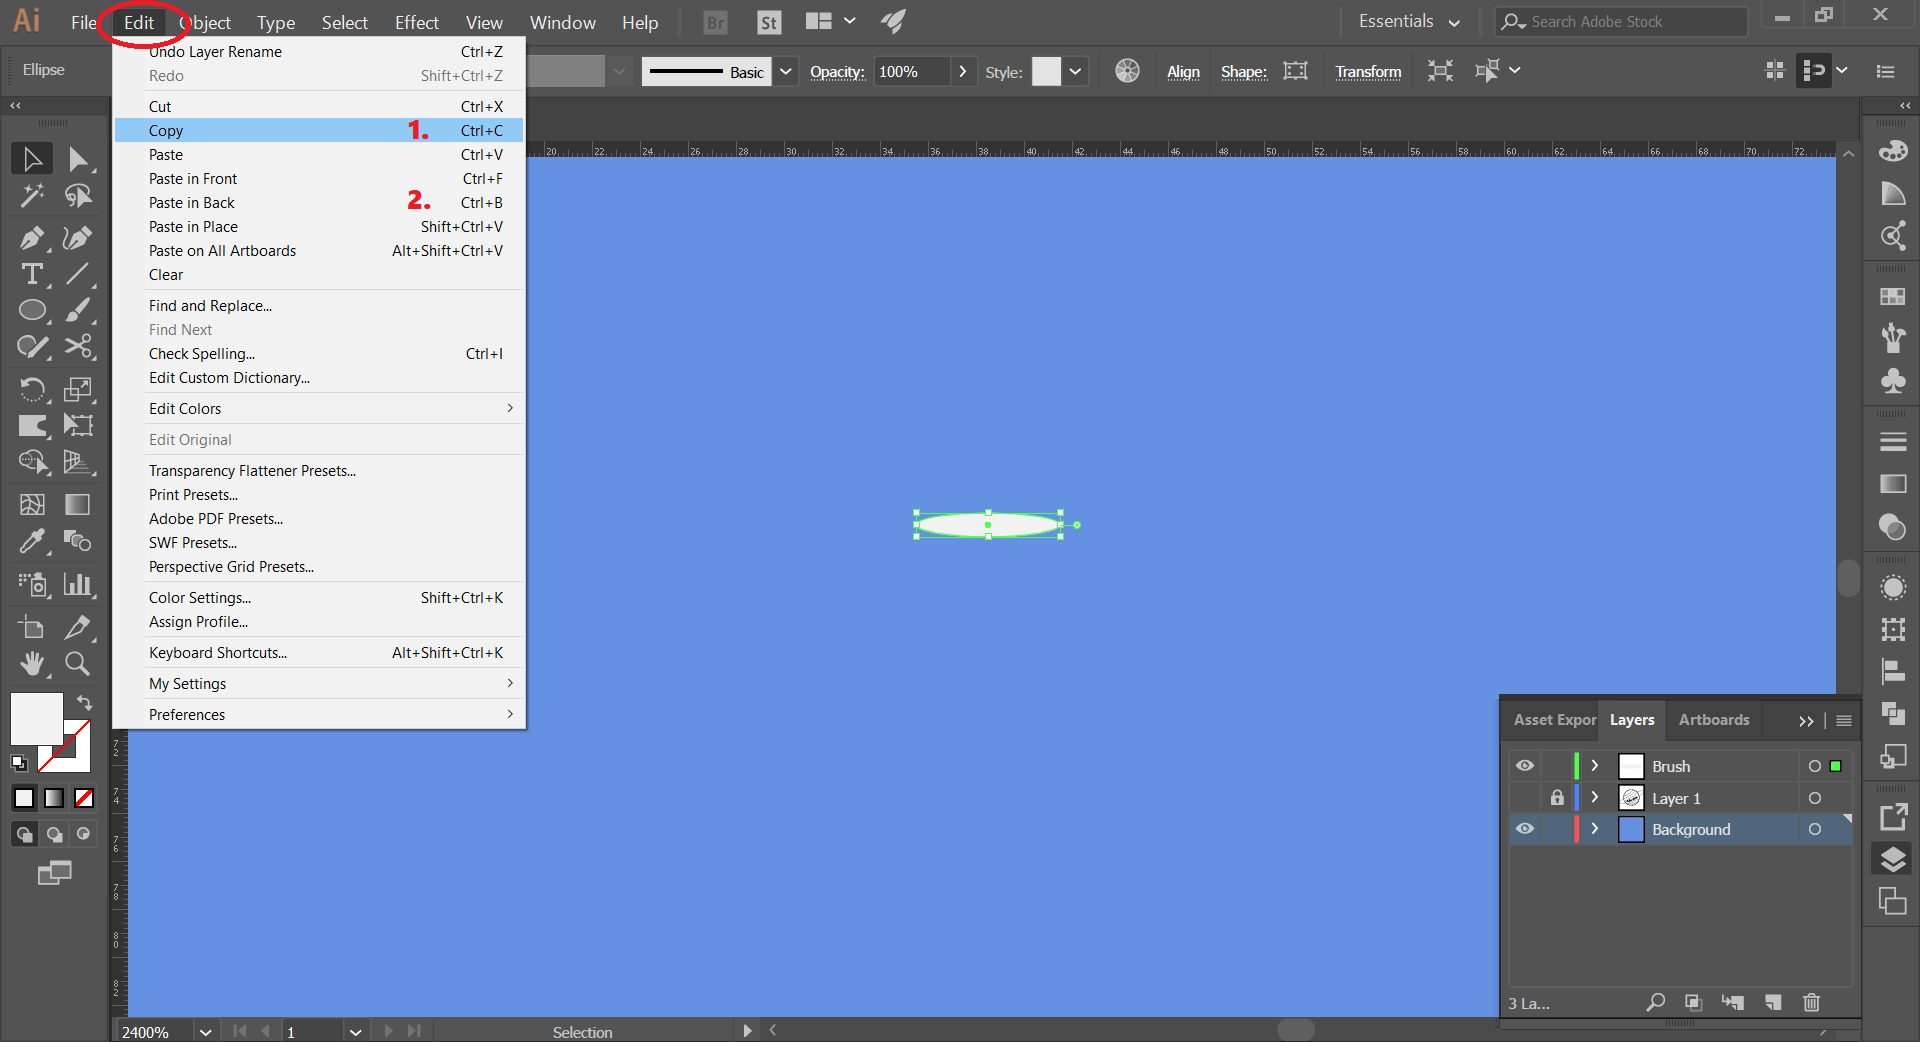
- Selecting this ellipse, copy and then paste in back.
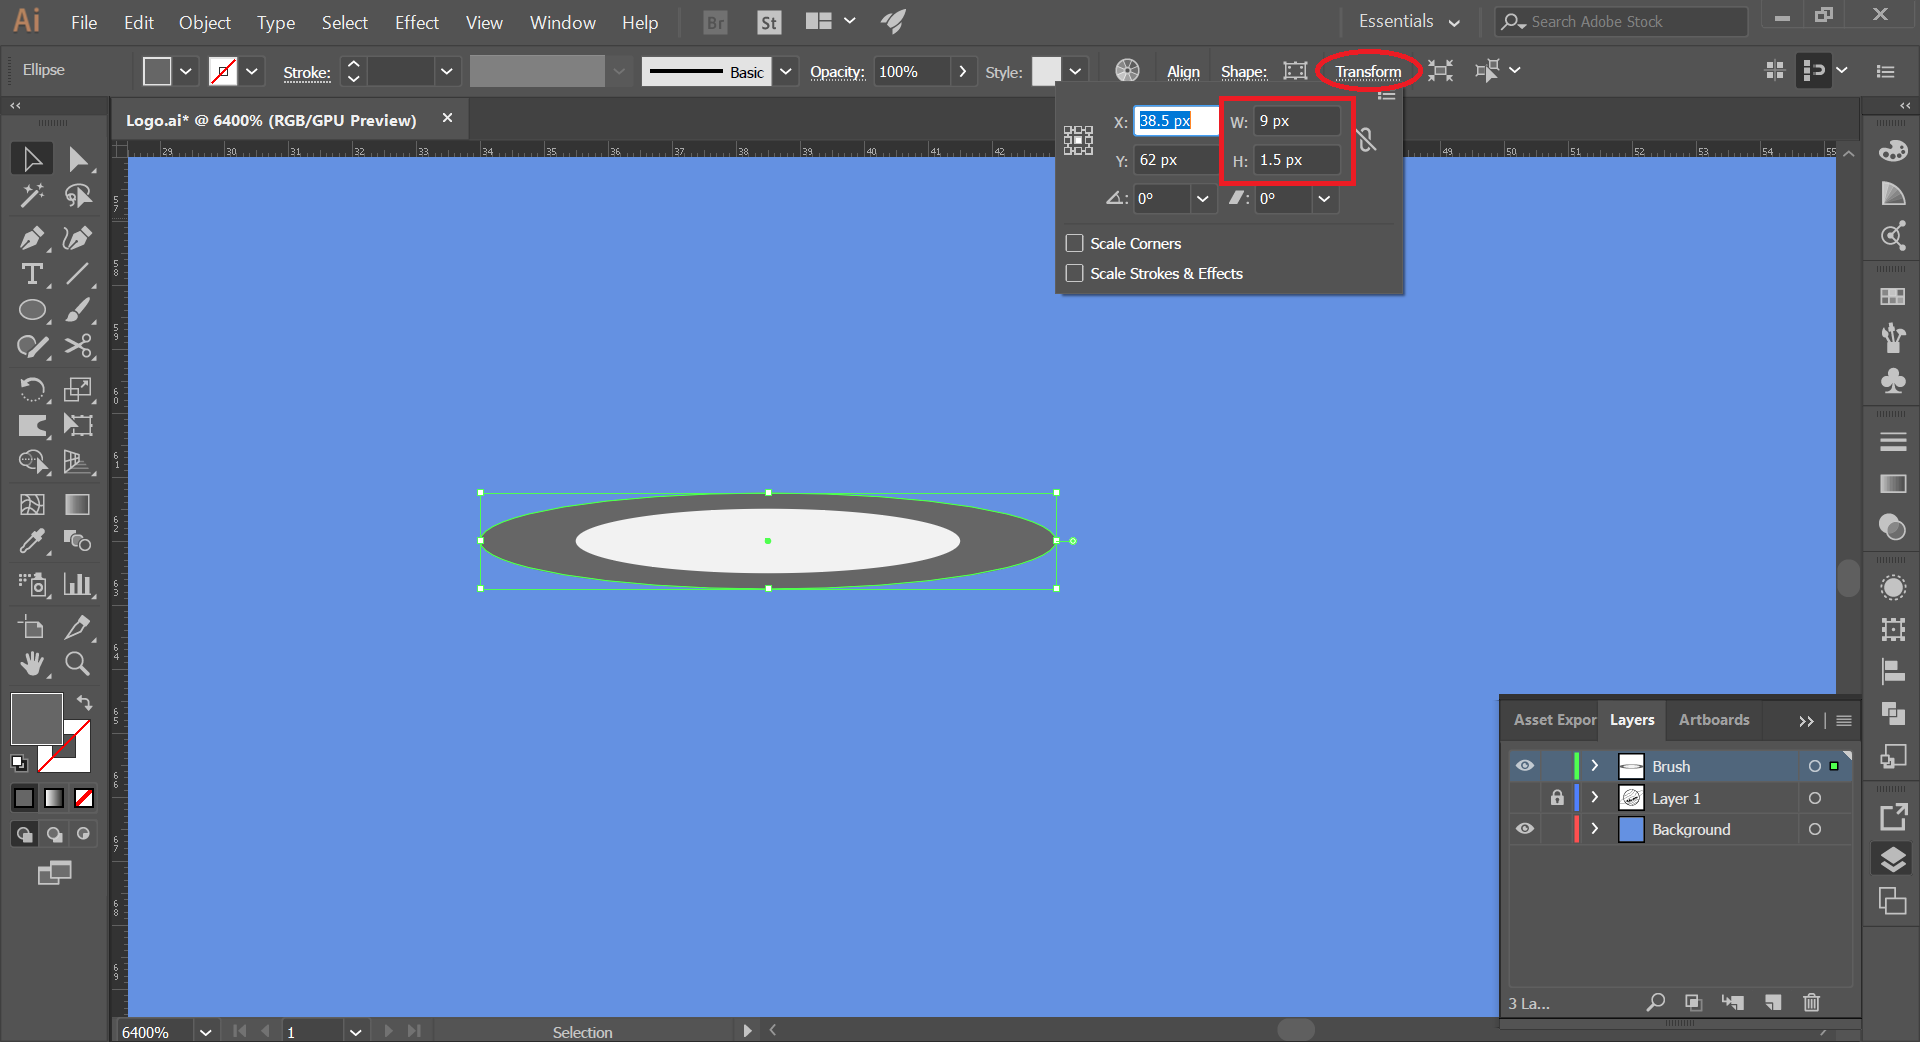
- We increase the size of the background ellipse and darken it.
- Selecting the front ellipse, we move it up a little.
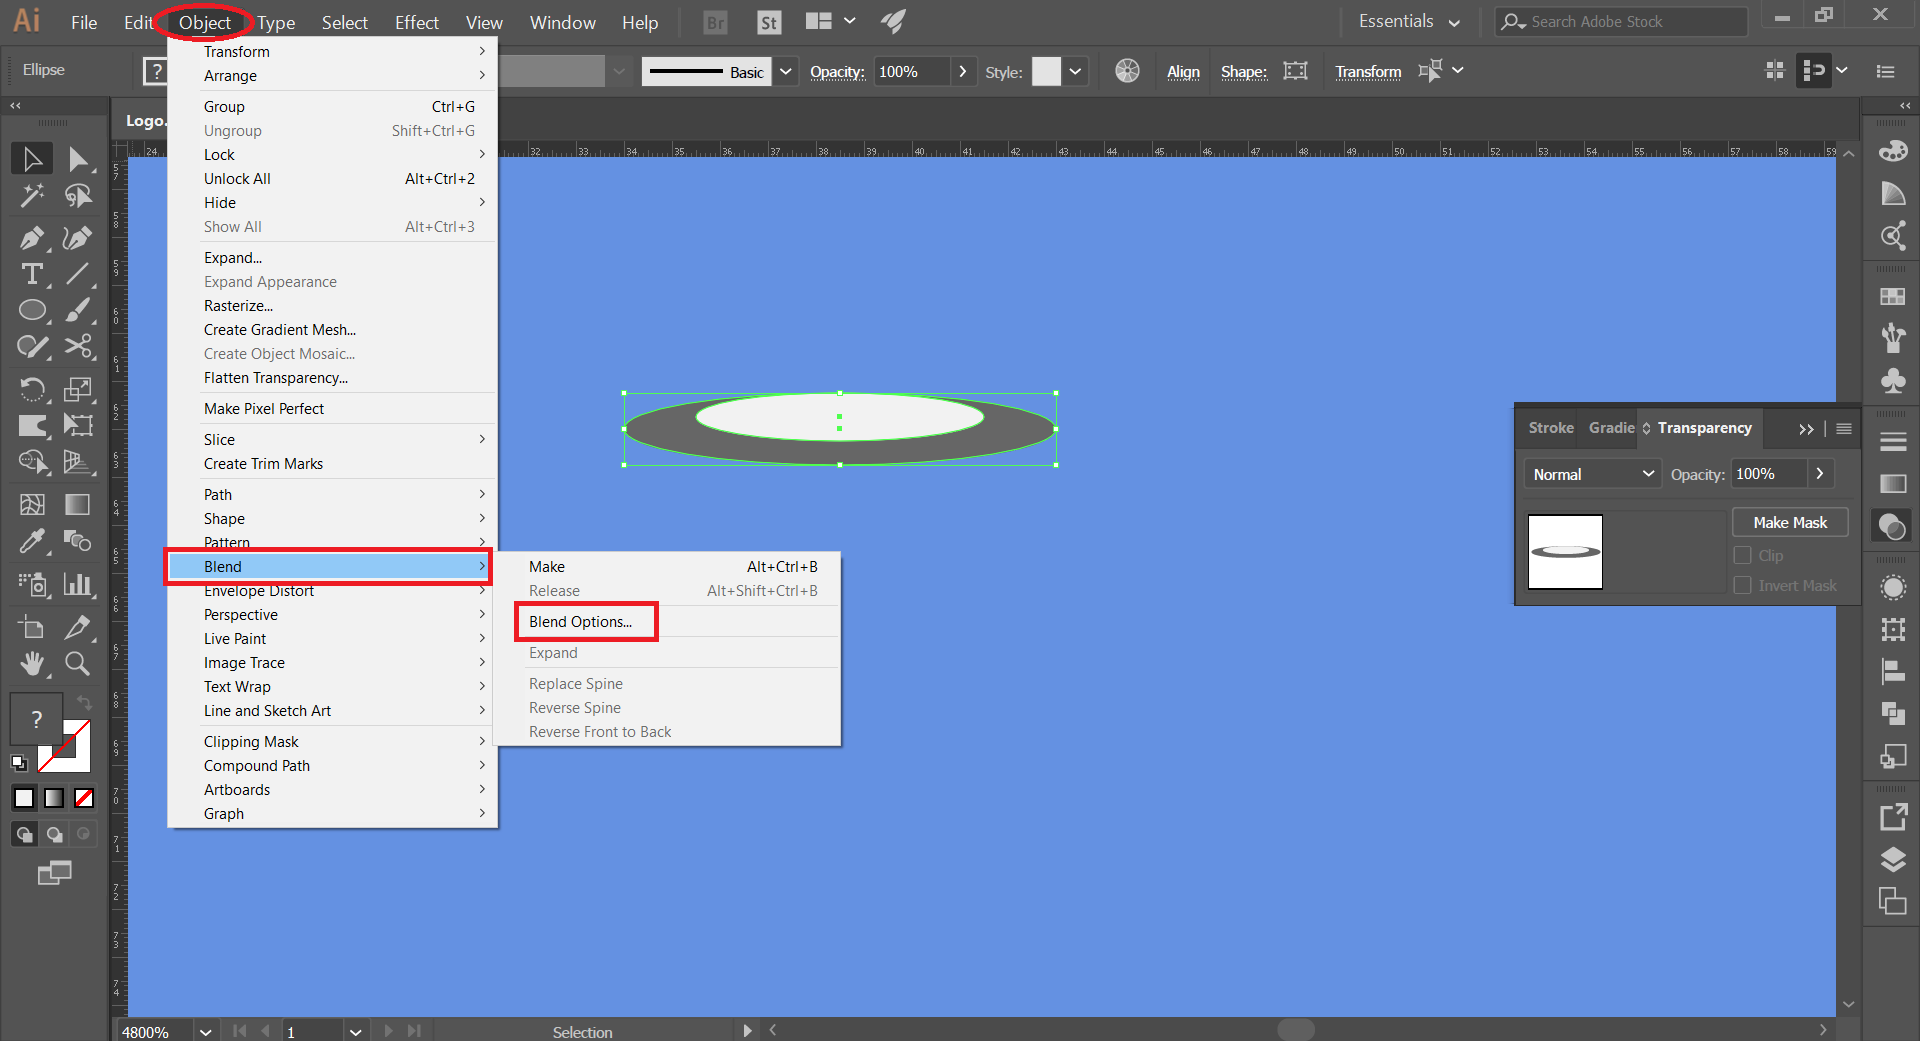
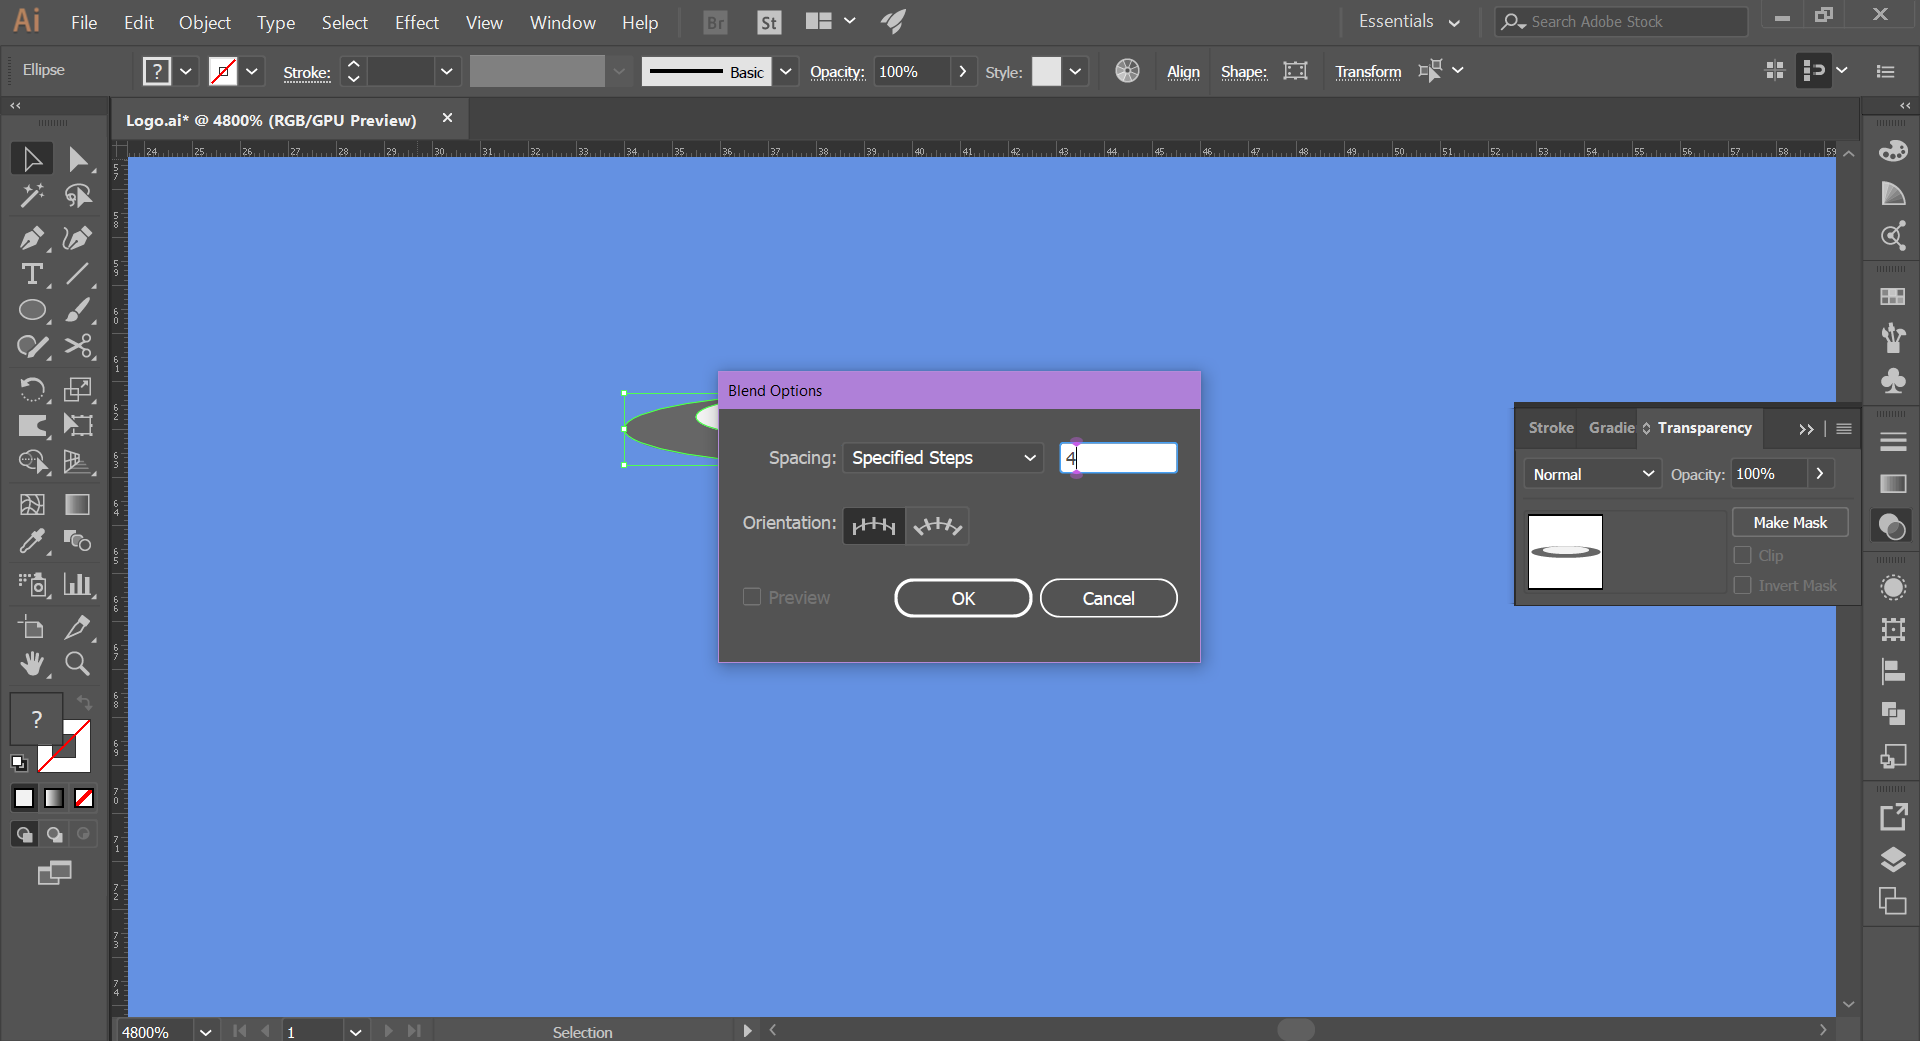
- Selecting both ellipses, we click on the Object tab, then on the option Blend; in Blend options, we configure: Specified steps, 4.
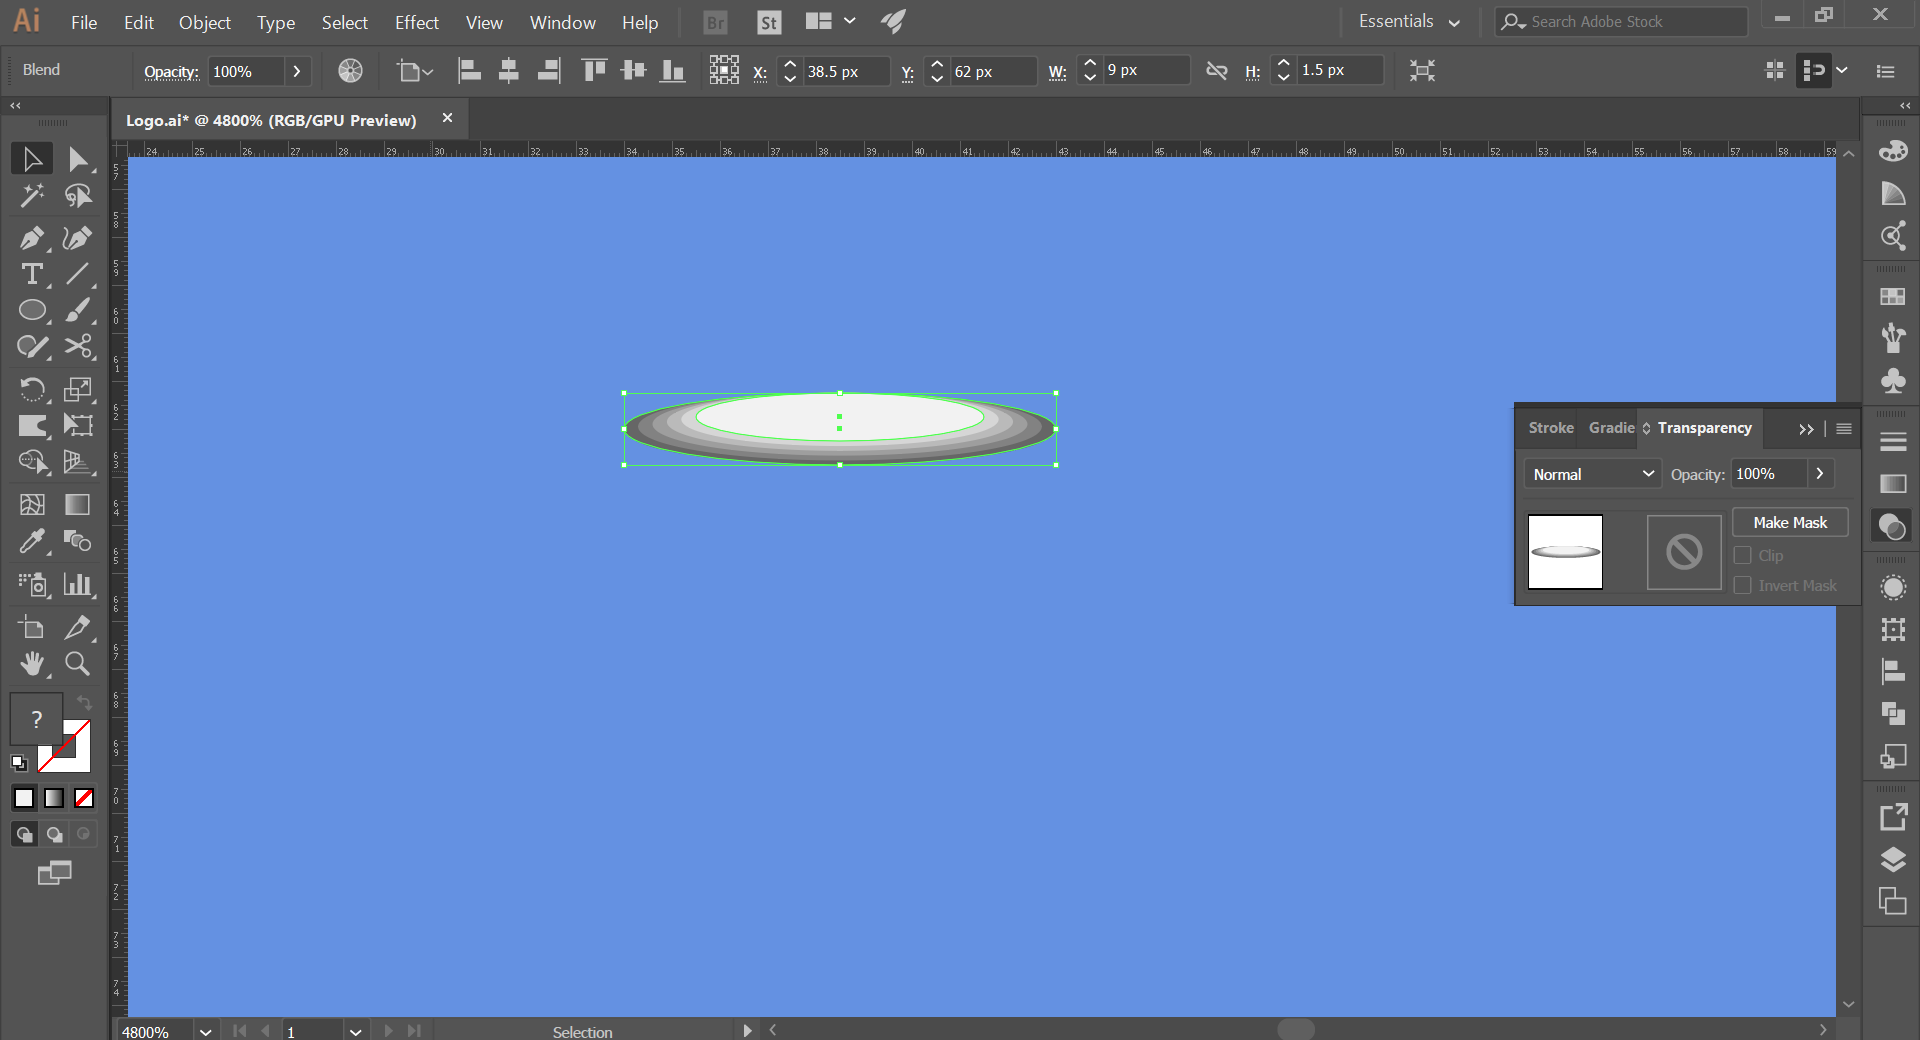
- Then, click on the Object tab, then on the option Blend and click on Make.
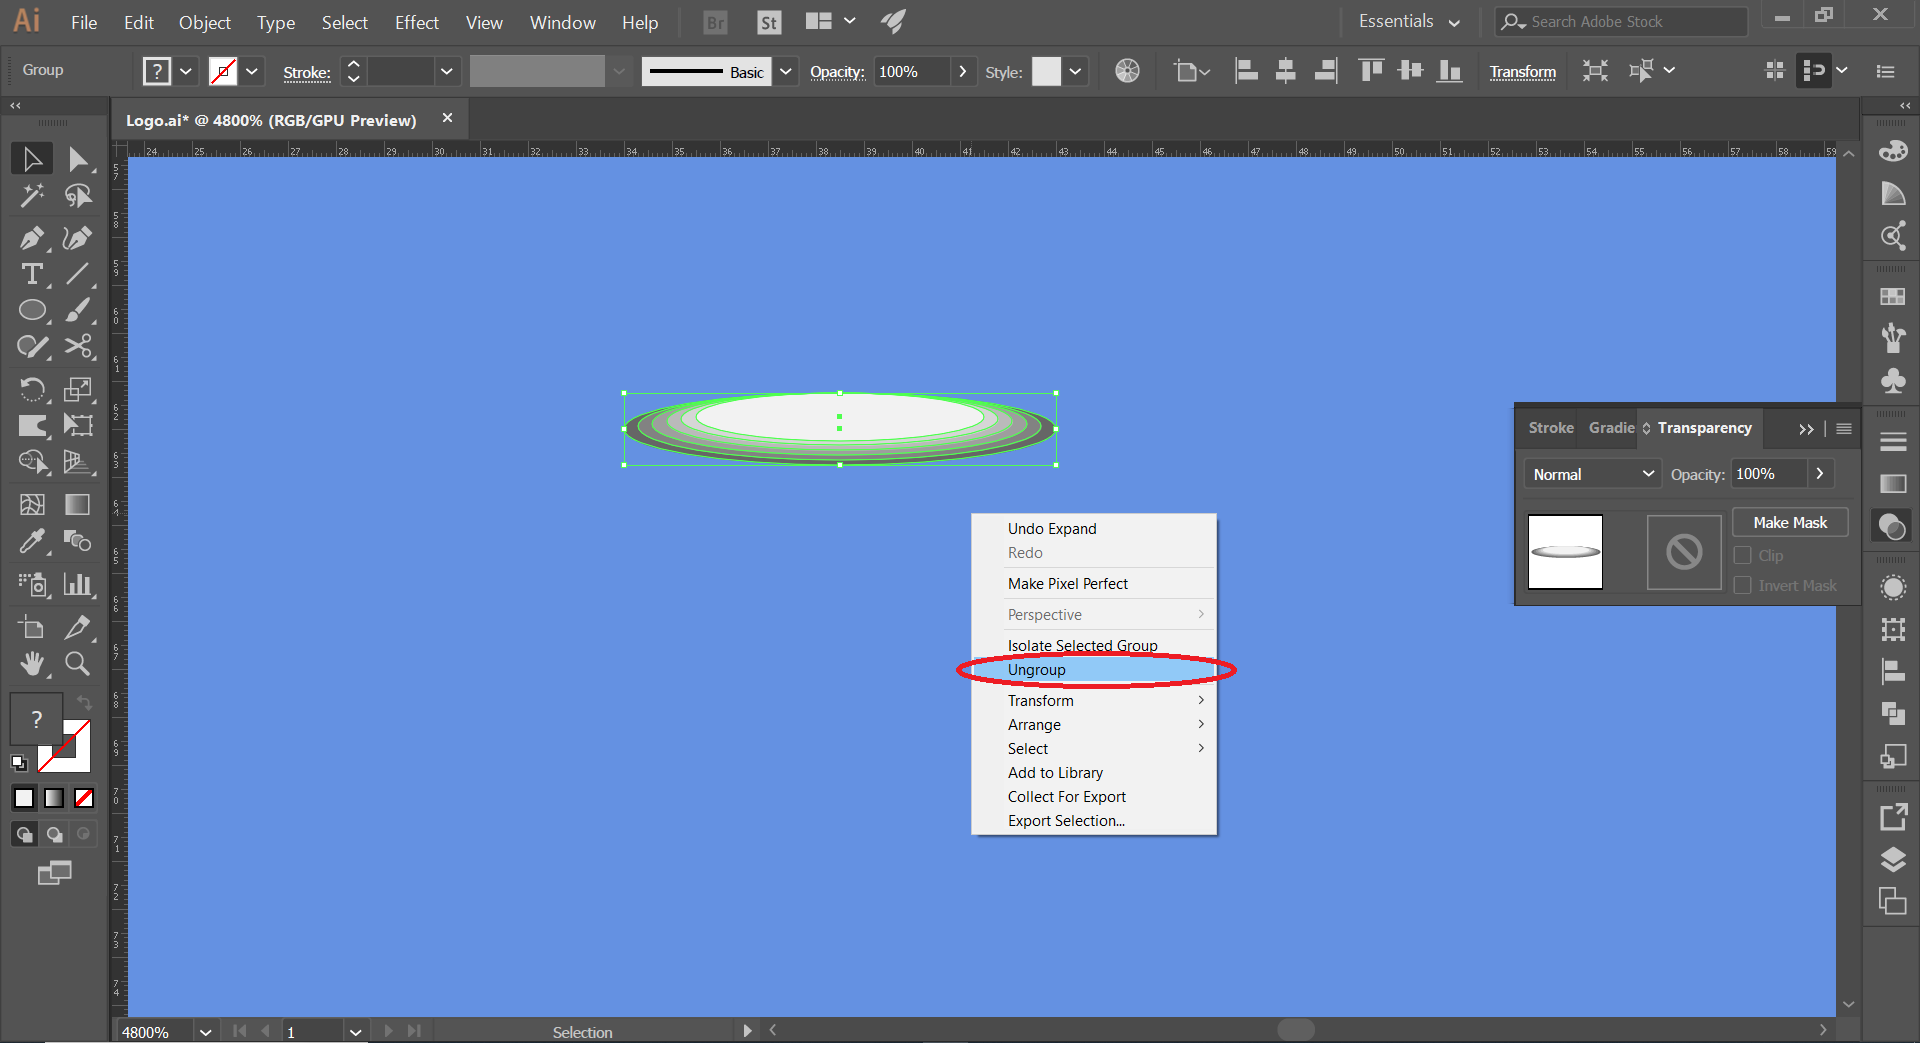
- Then, in the Object tab, click on Expand (check Object and Fill).
- We ungroup the objects.
We make holes where the stitches come out and go in:
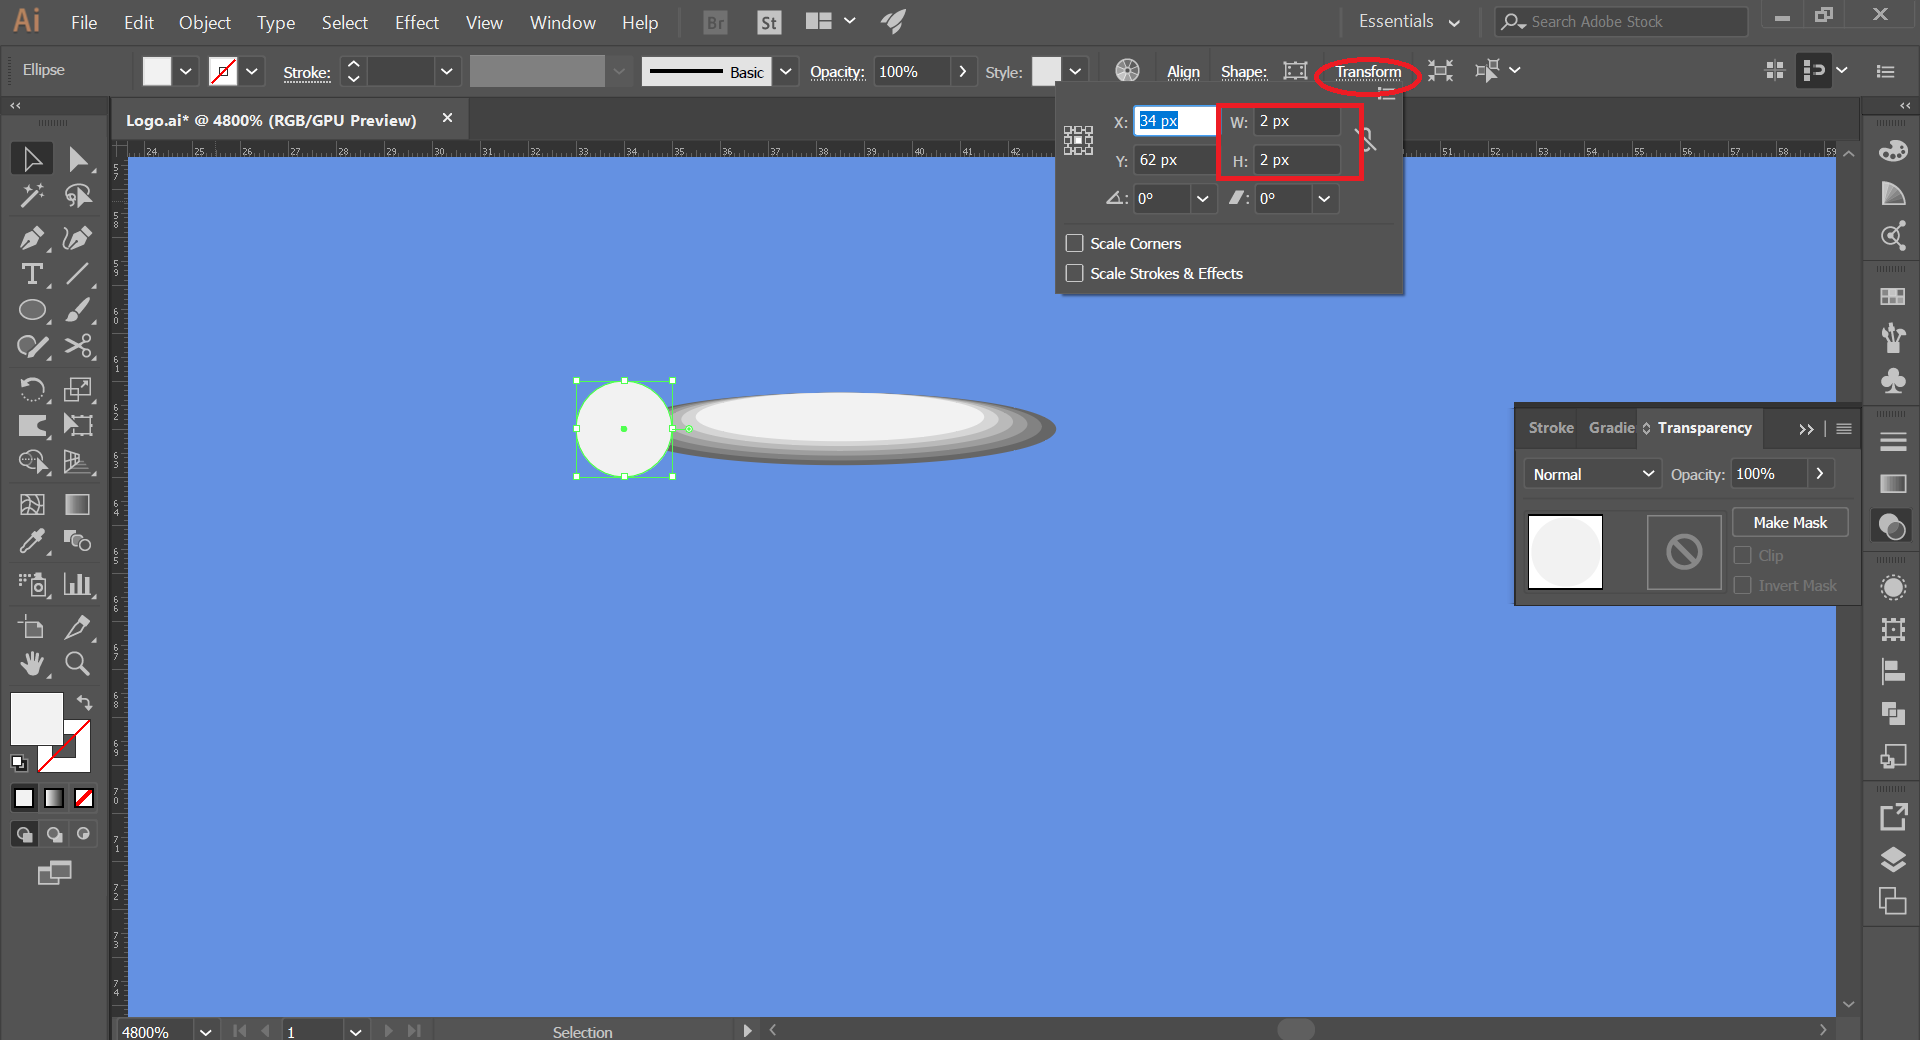
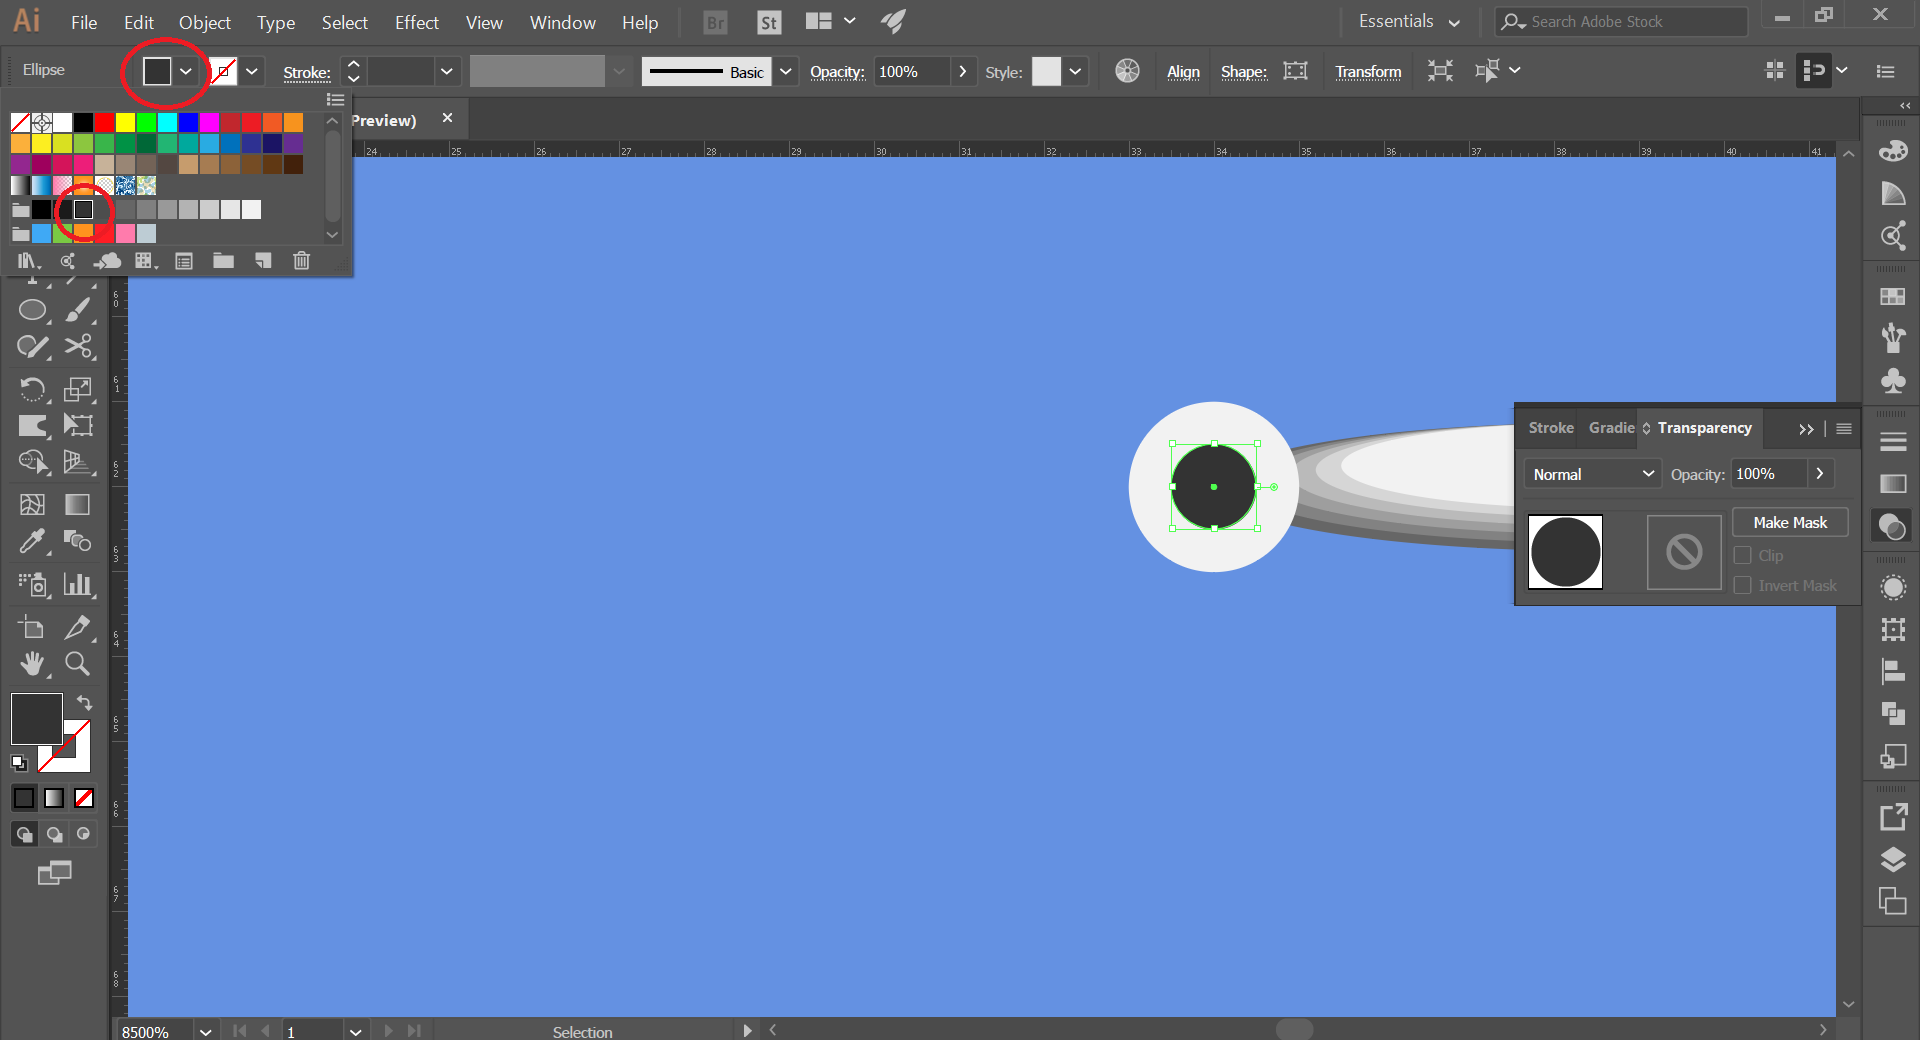
- We create a circle on one of the edges of the ellipse. Size: W: 2px, H: 2px.
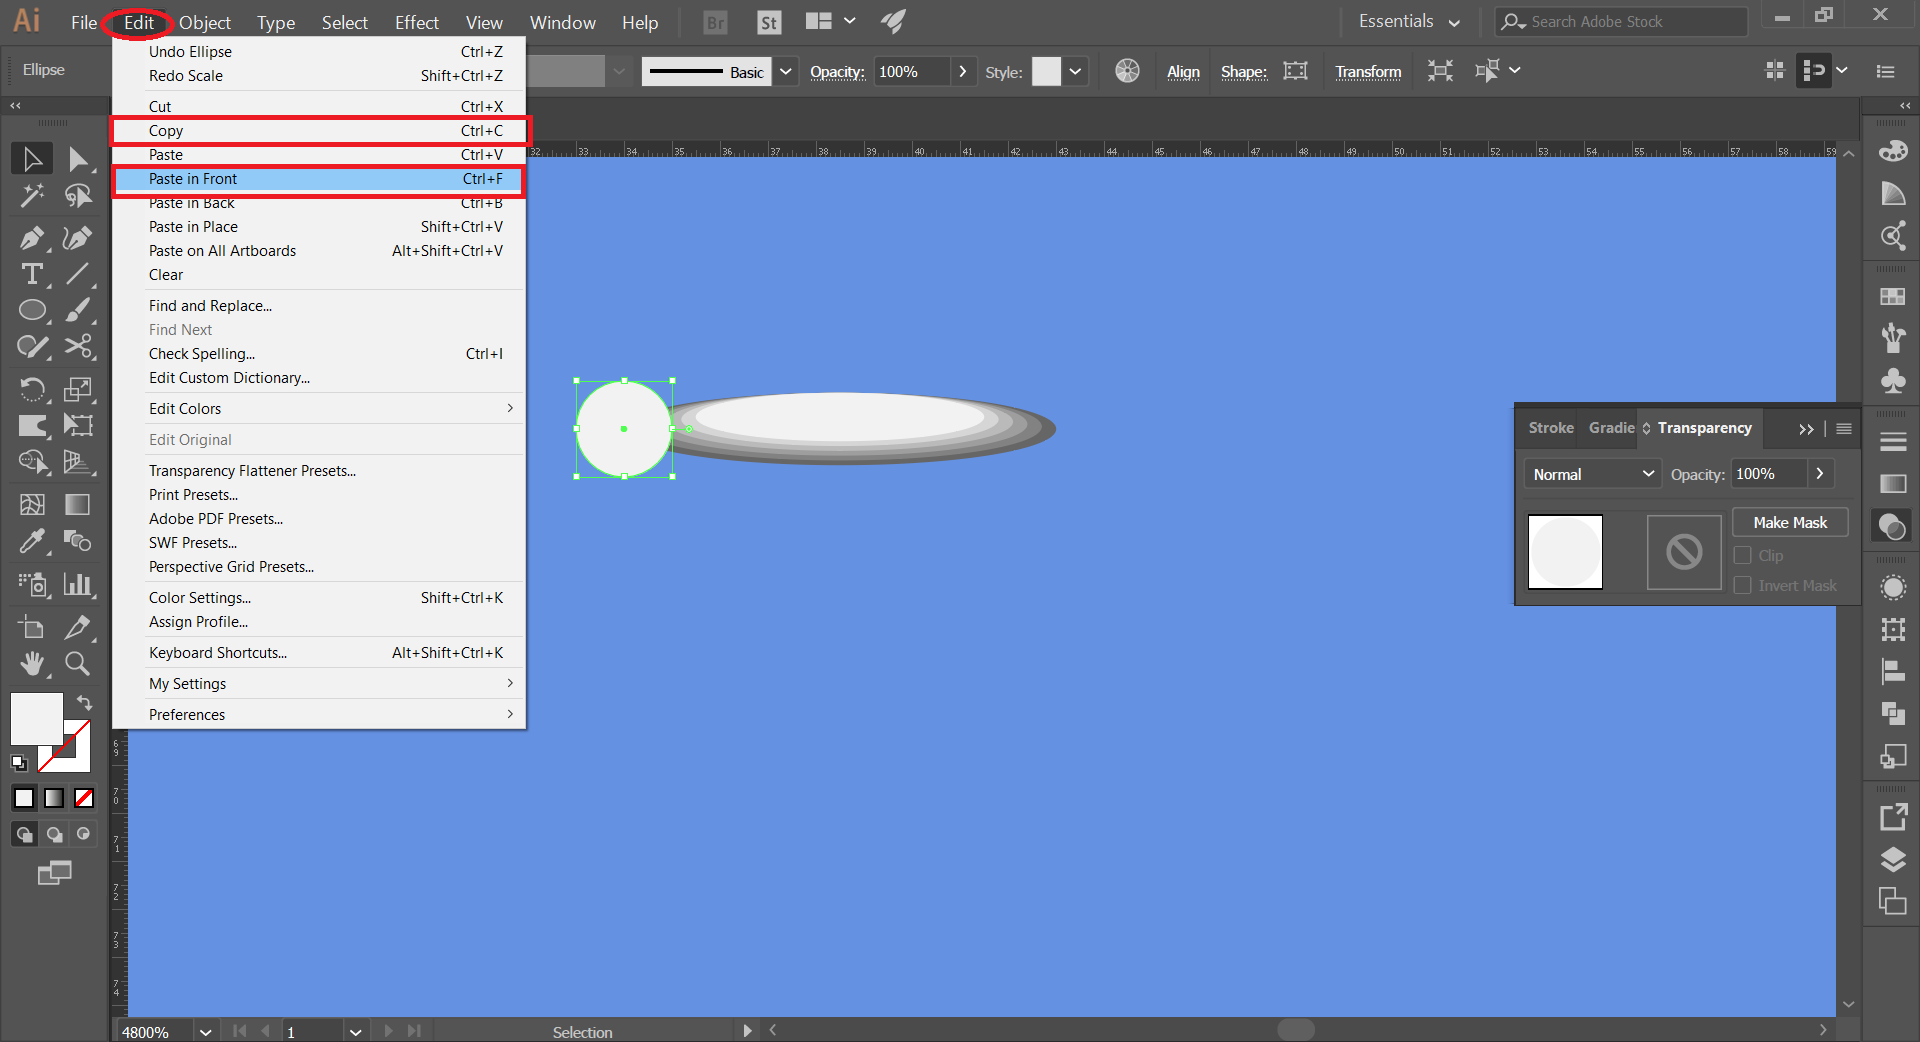
- Select this circle, copy it and paste it to the front.
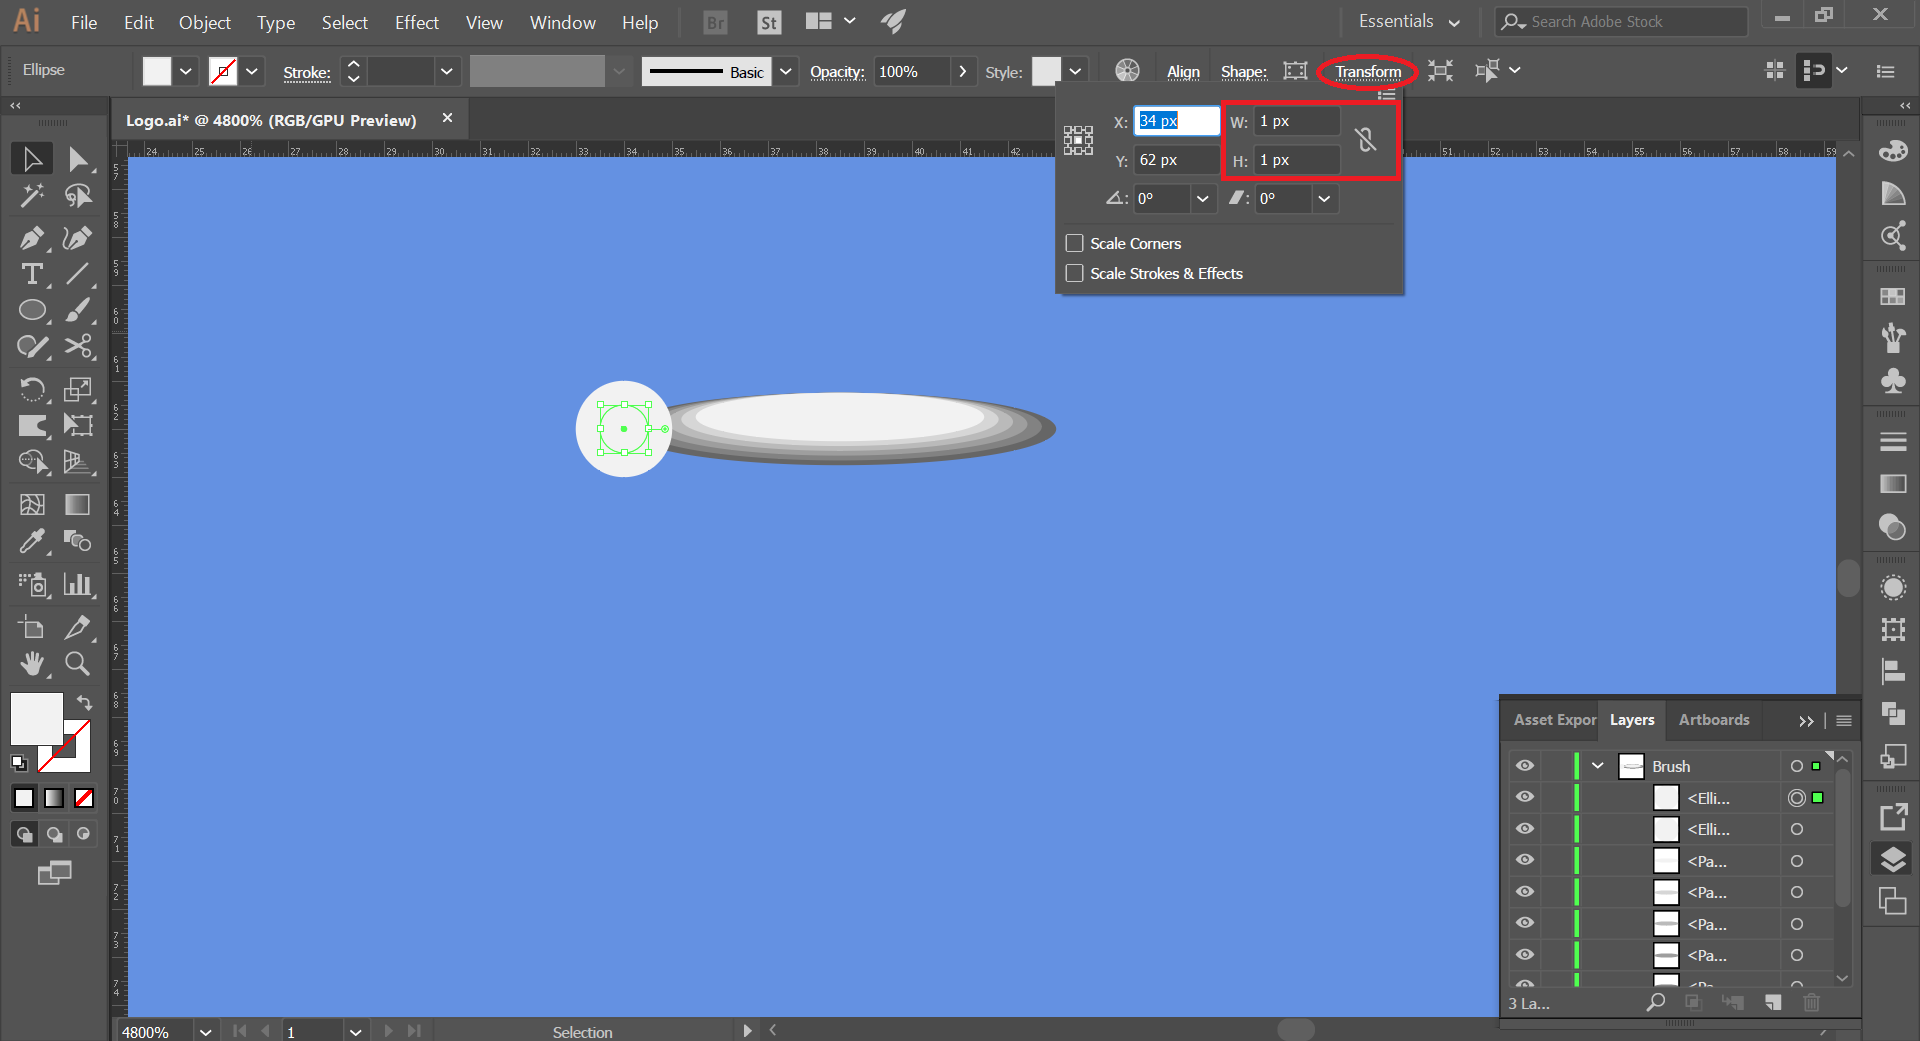
- Reduce the size of the circle by holding shift and scroll.
- Change to a dark color, like almost black.
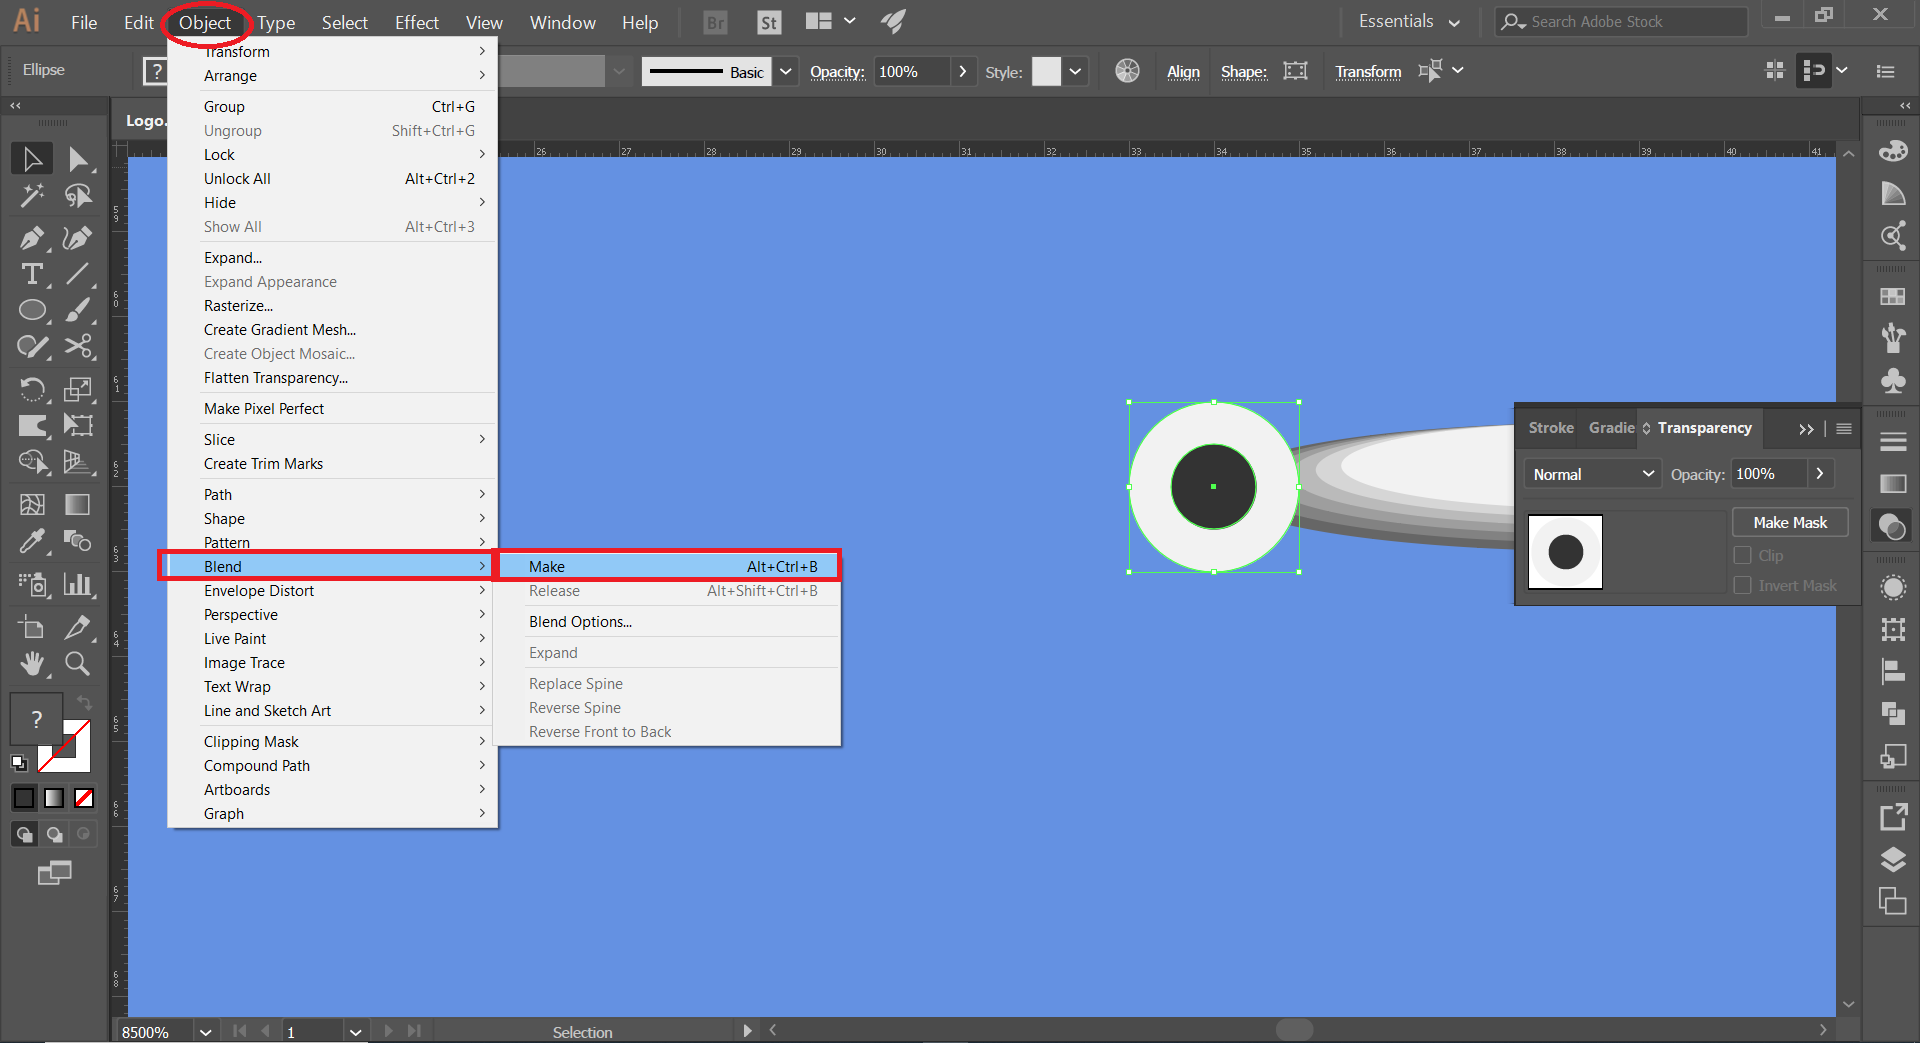
- Having both objects selected, make them Blend.
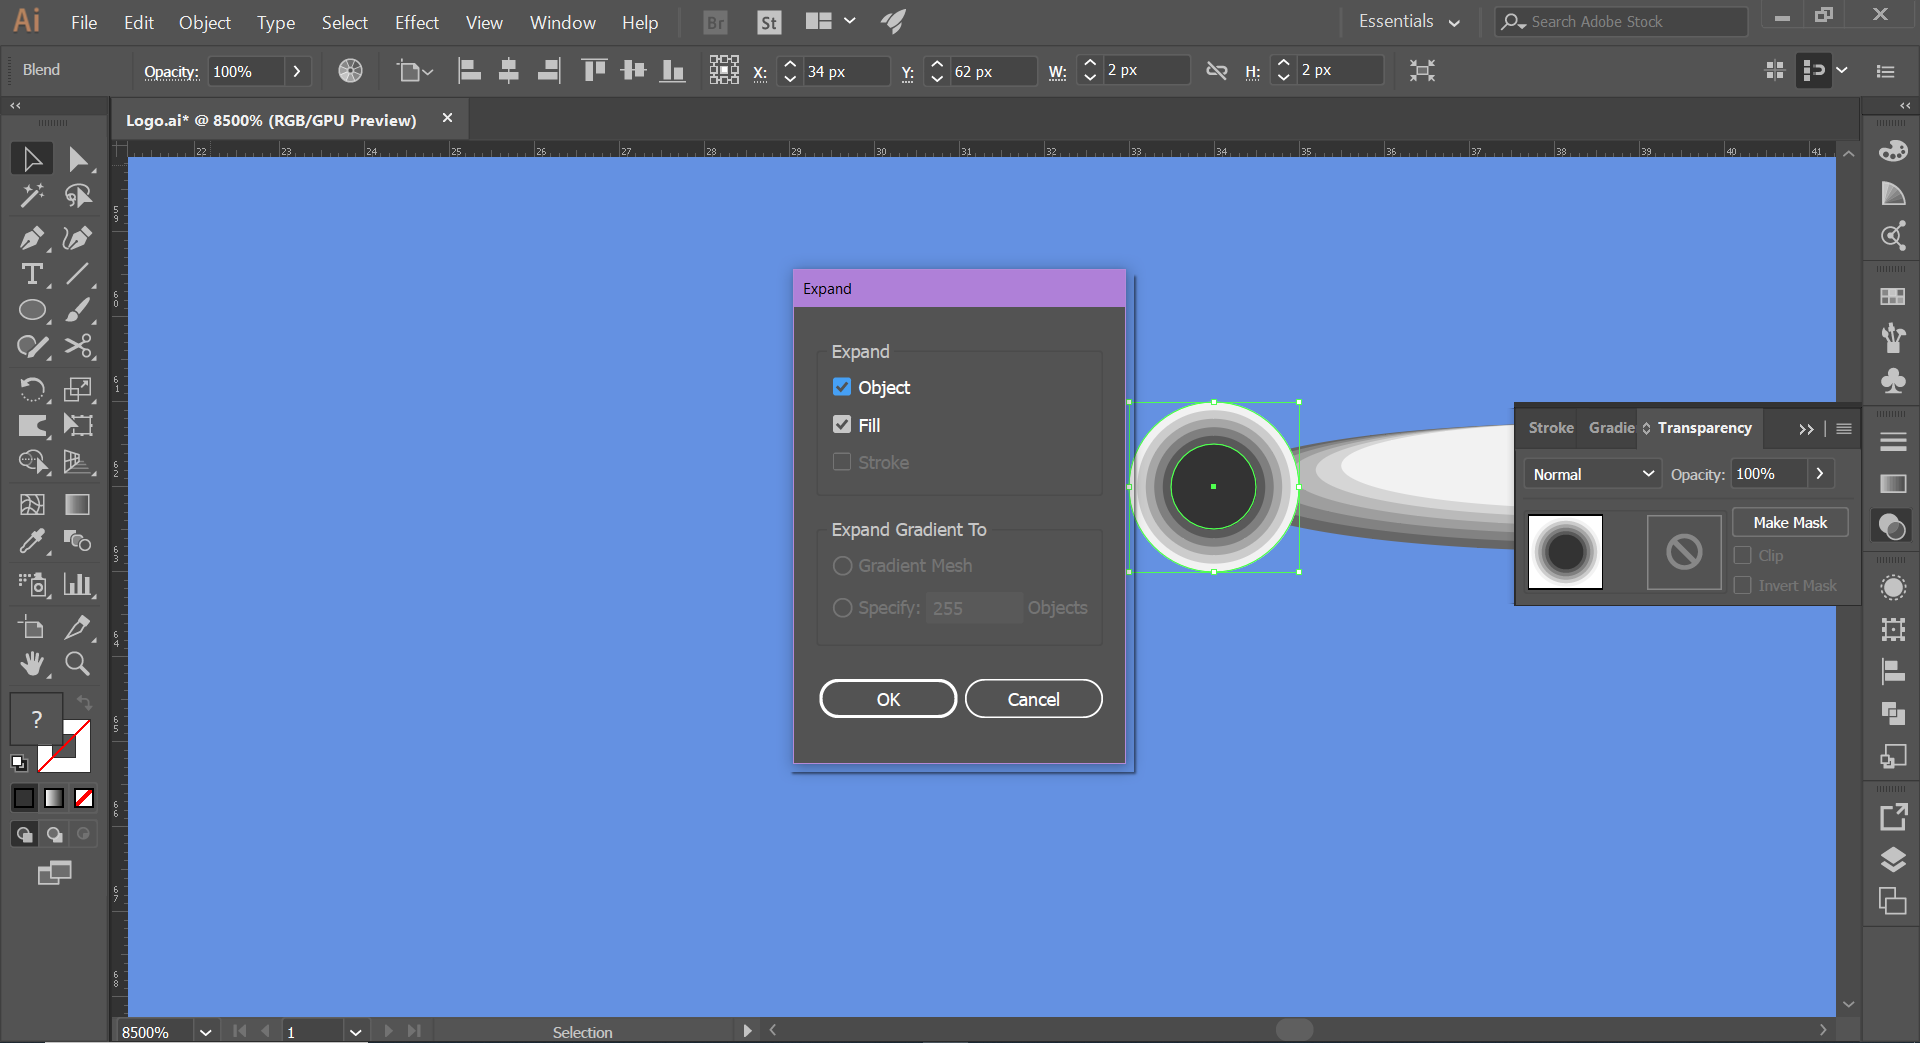
- Click on the Object tab and then click on Expand.
- Ungroup.
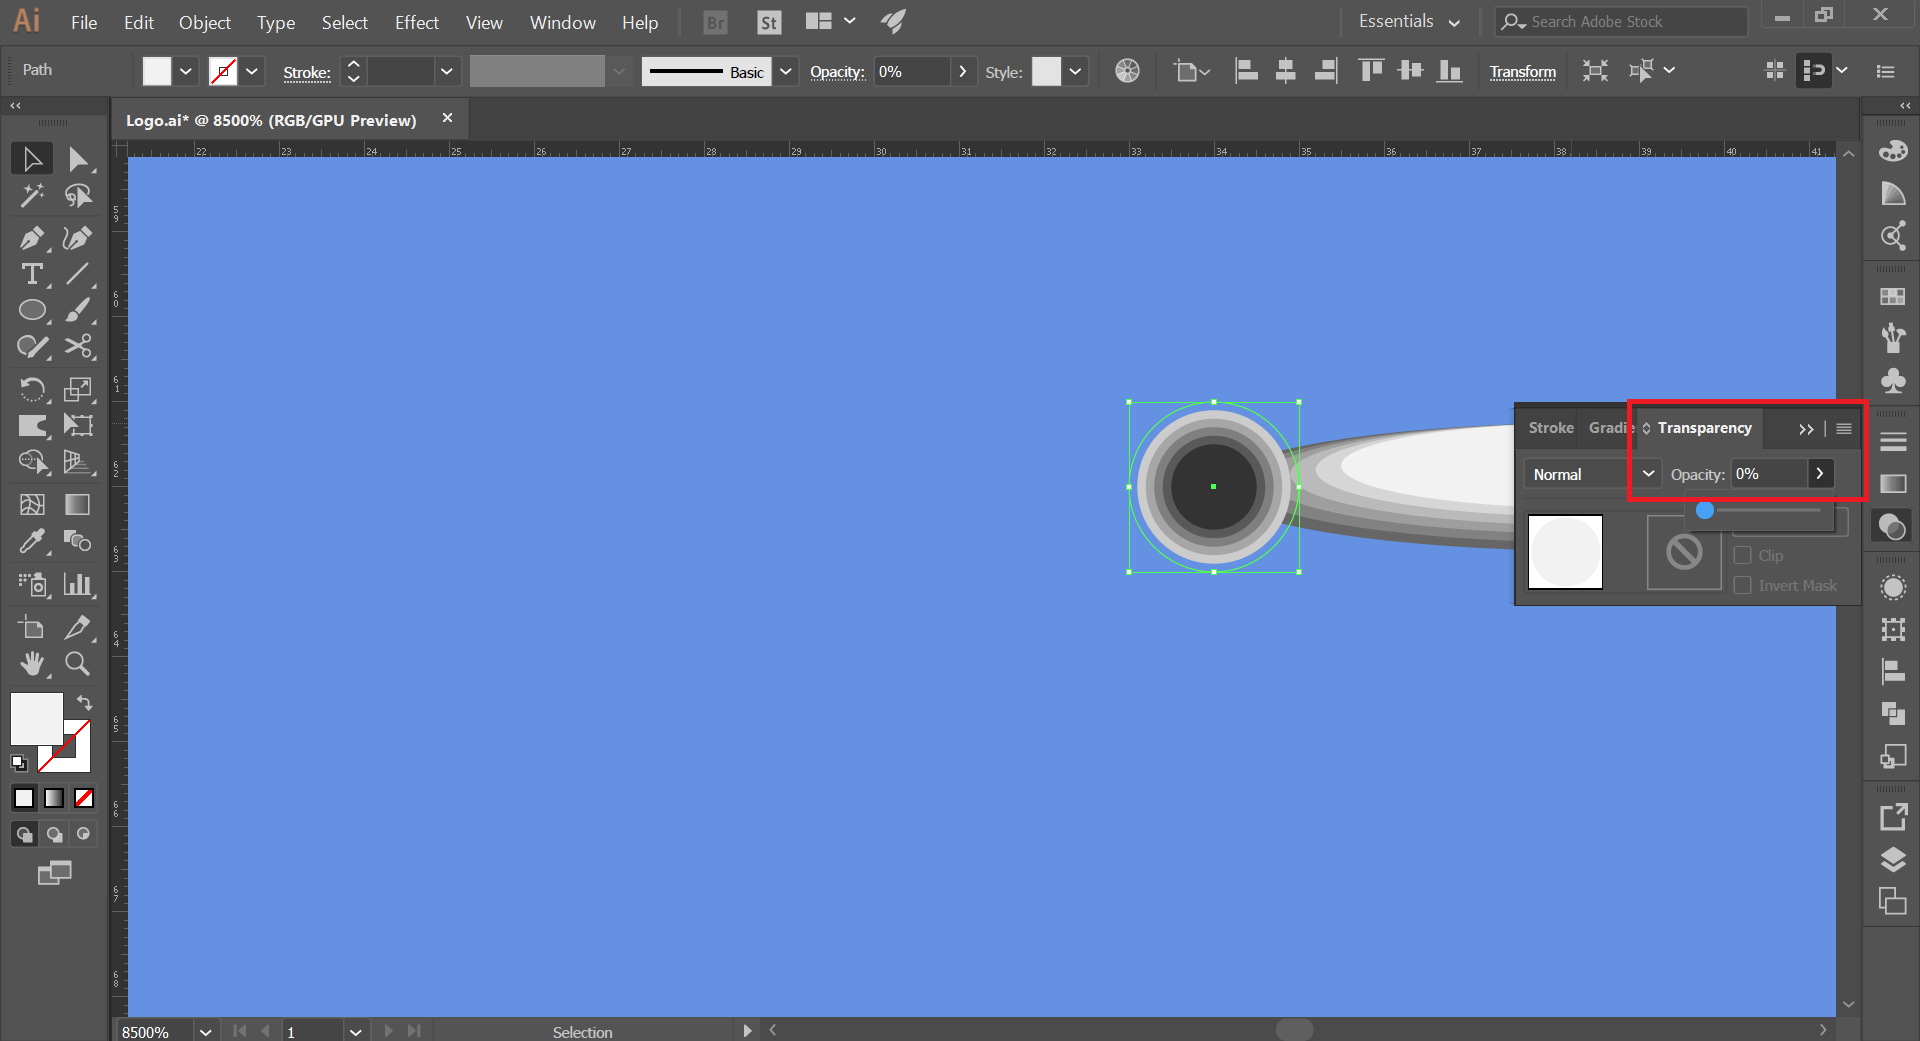
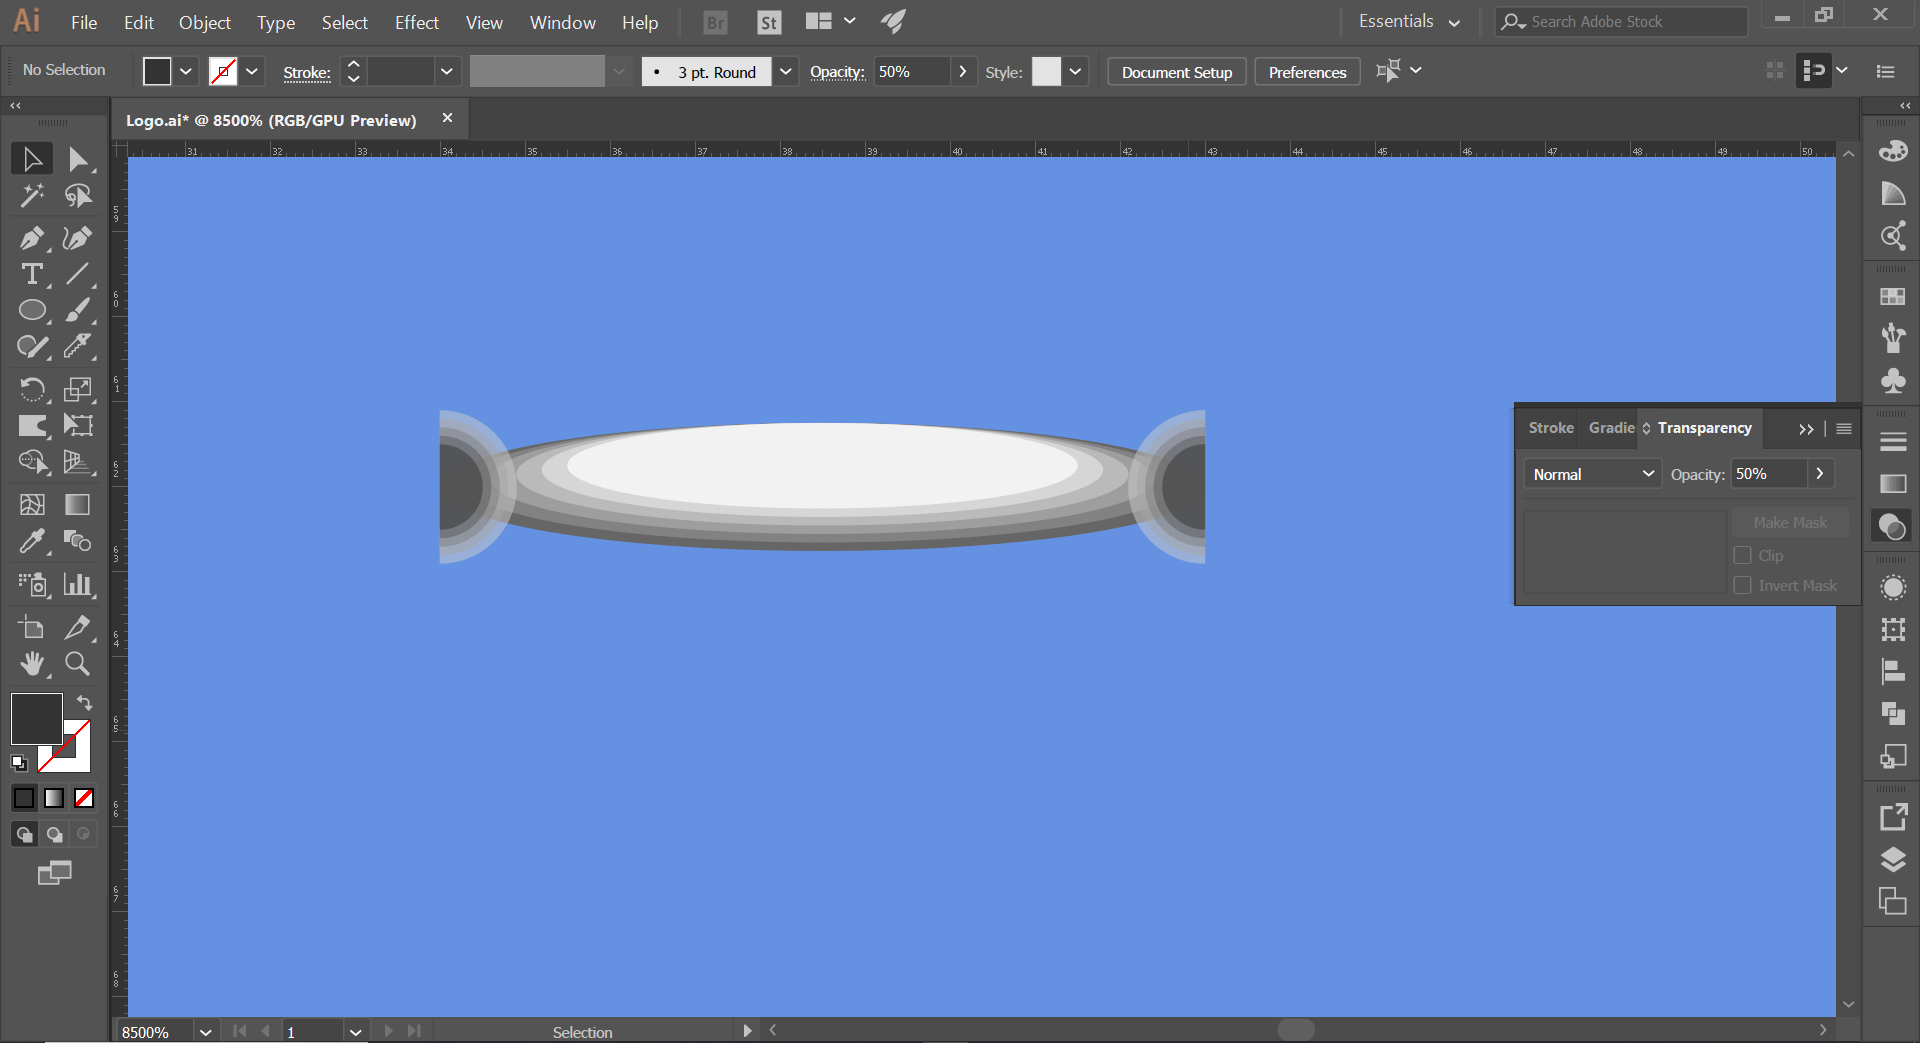
- Select the background circle, and change its opacity to 0%. And the rest, an opacity to 50%.
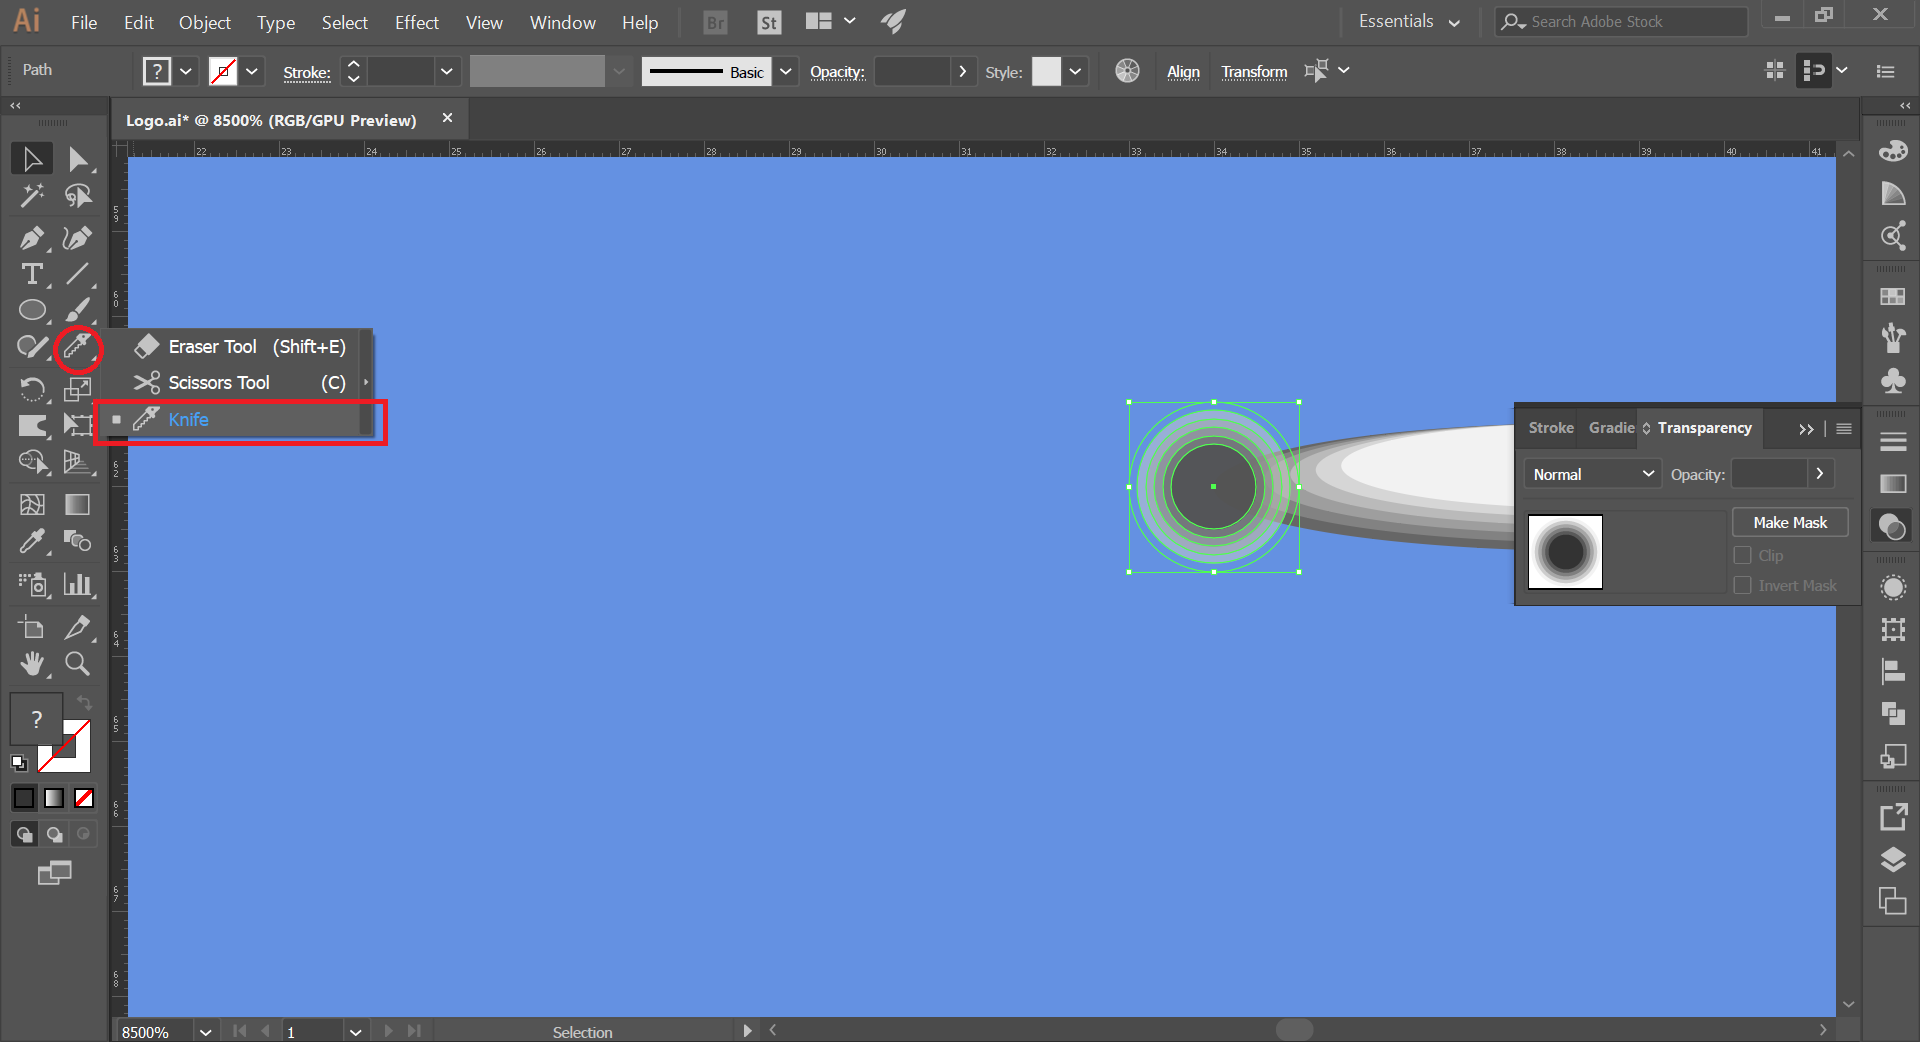
- Cut group of circles in half with the knife tool. Once all the circles are selected, pass the knife tool through the middle of the co-centric circles.
- Once the circles are cut in half, move one of the halves to the other end of the group of ellipses.
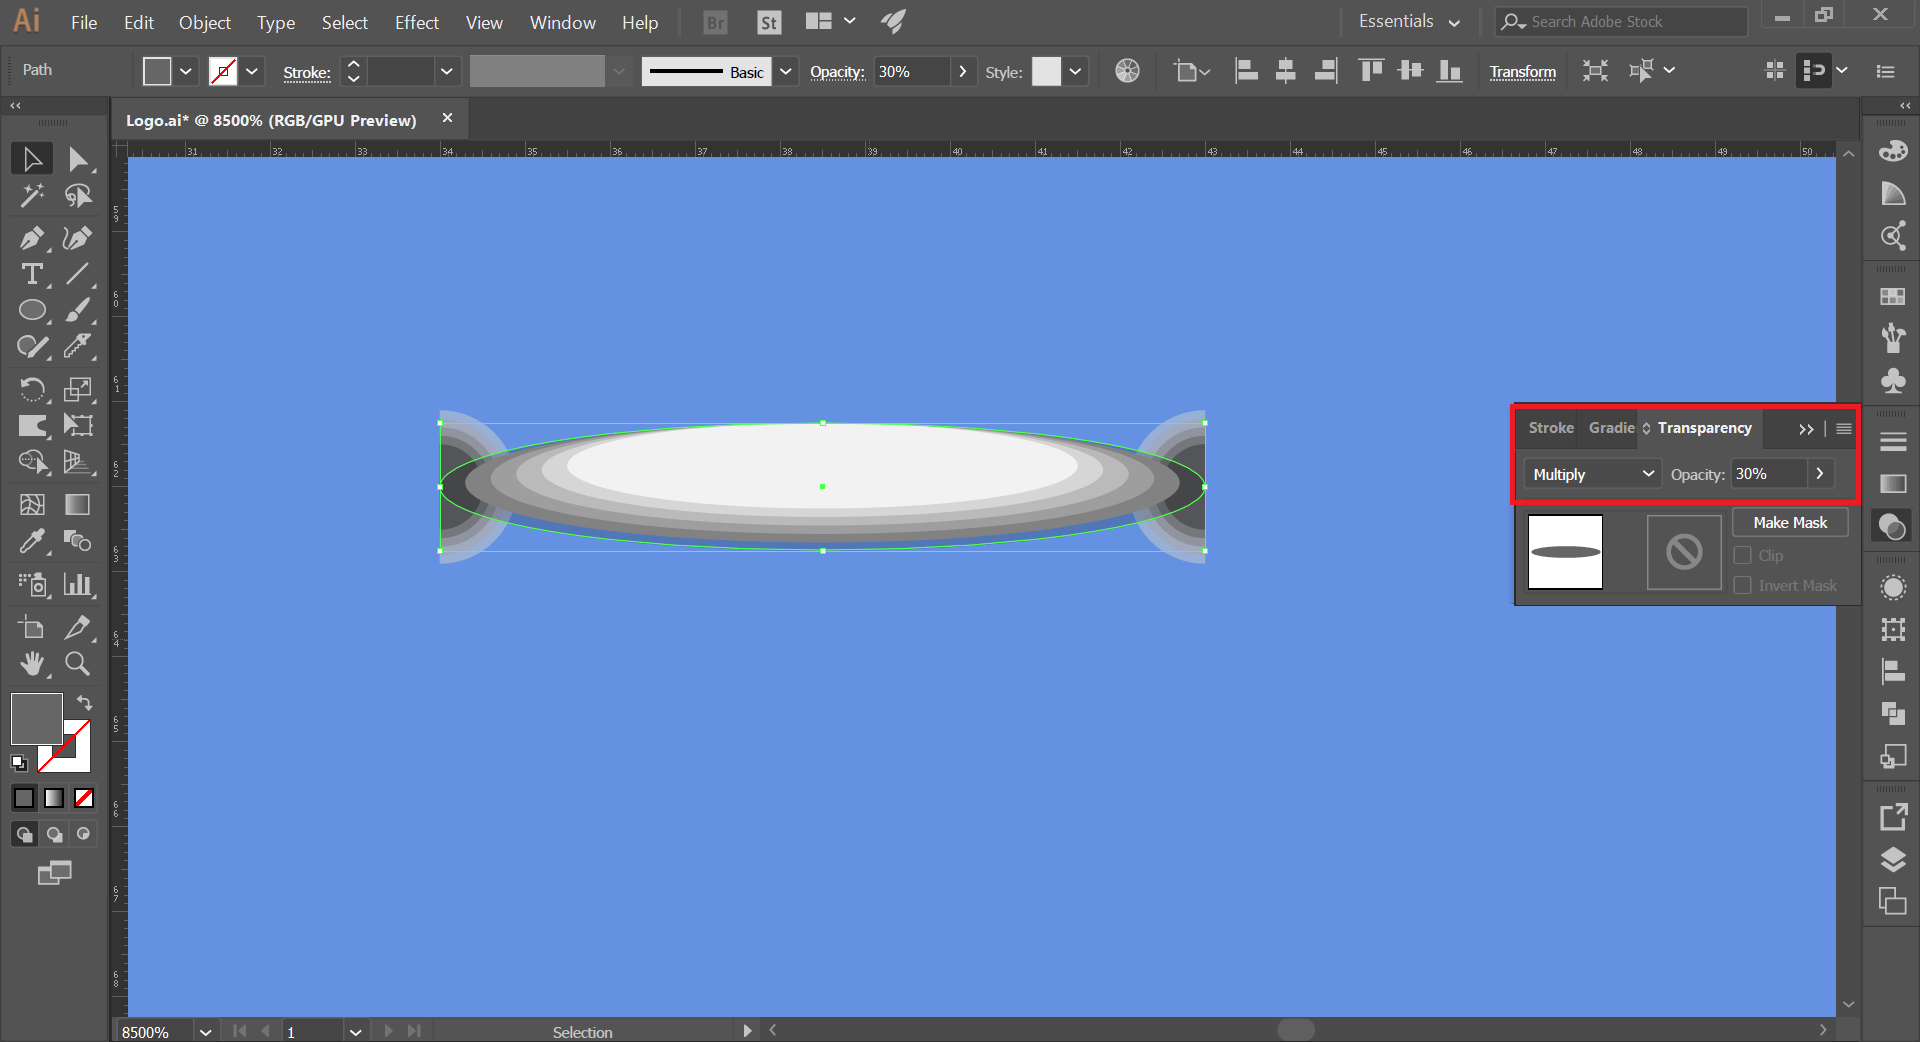
- The ellipse in the background, lower its opacity and check the Multiply selection to make it look like a shadow.
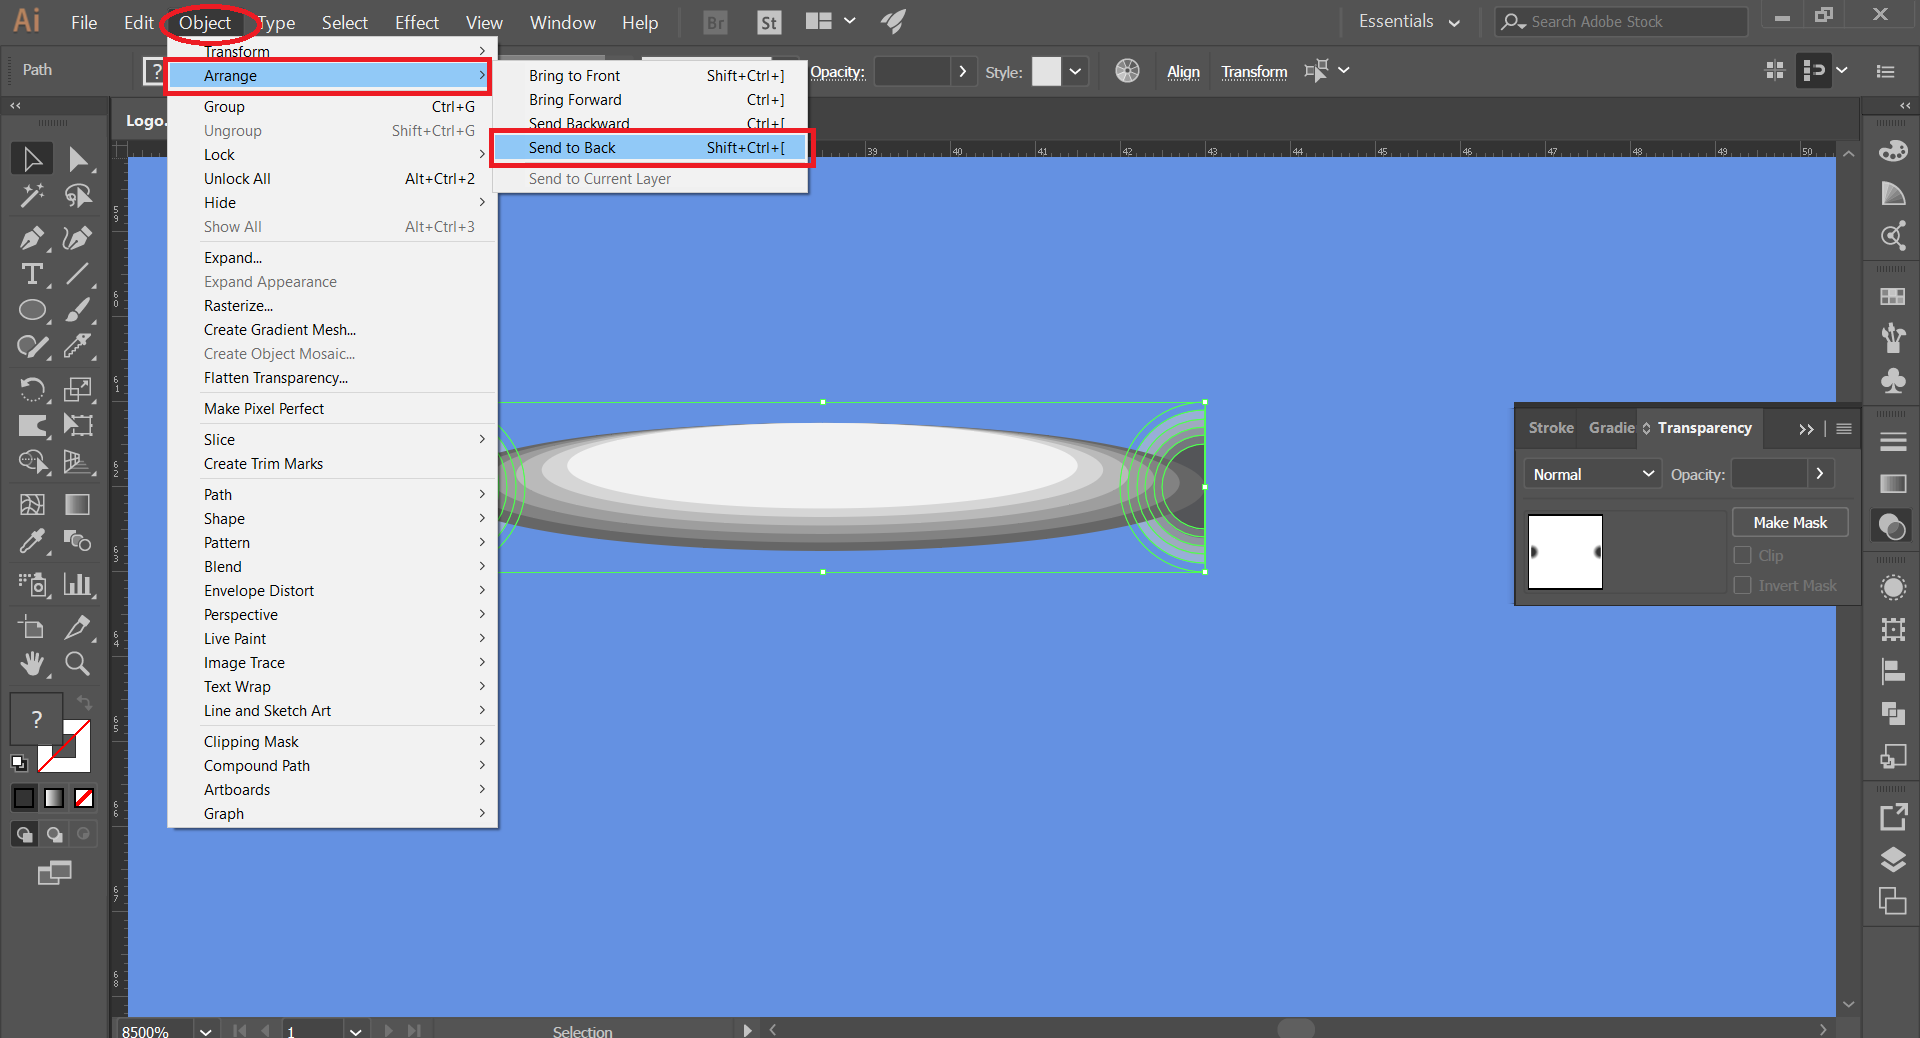
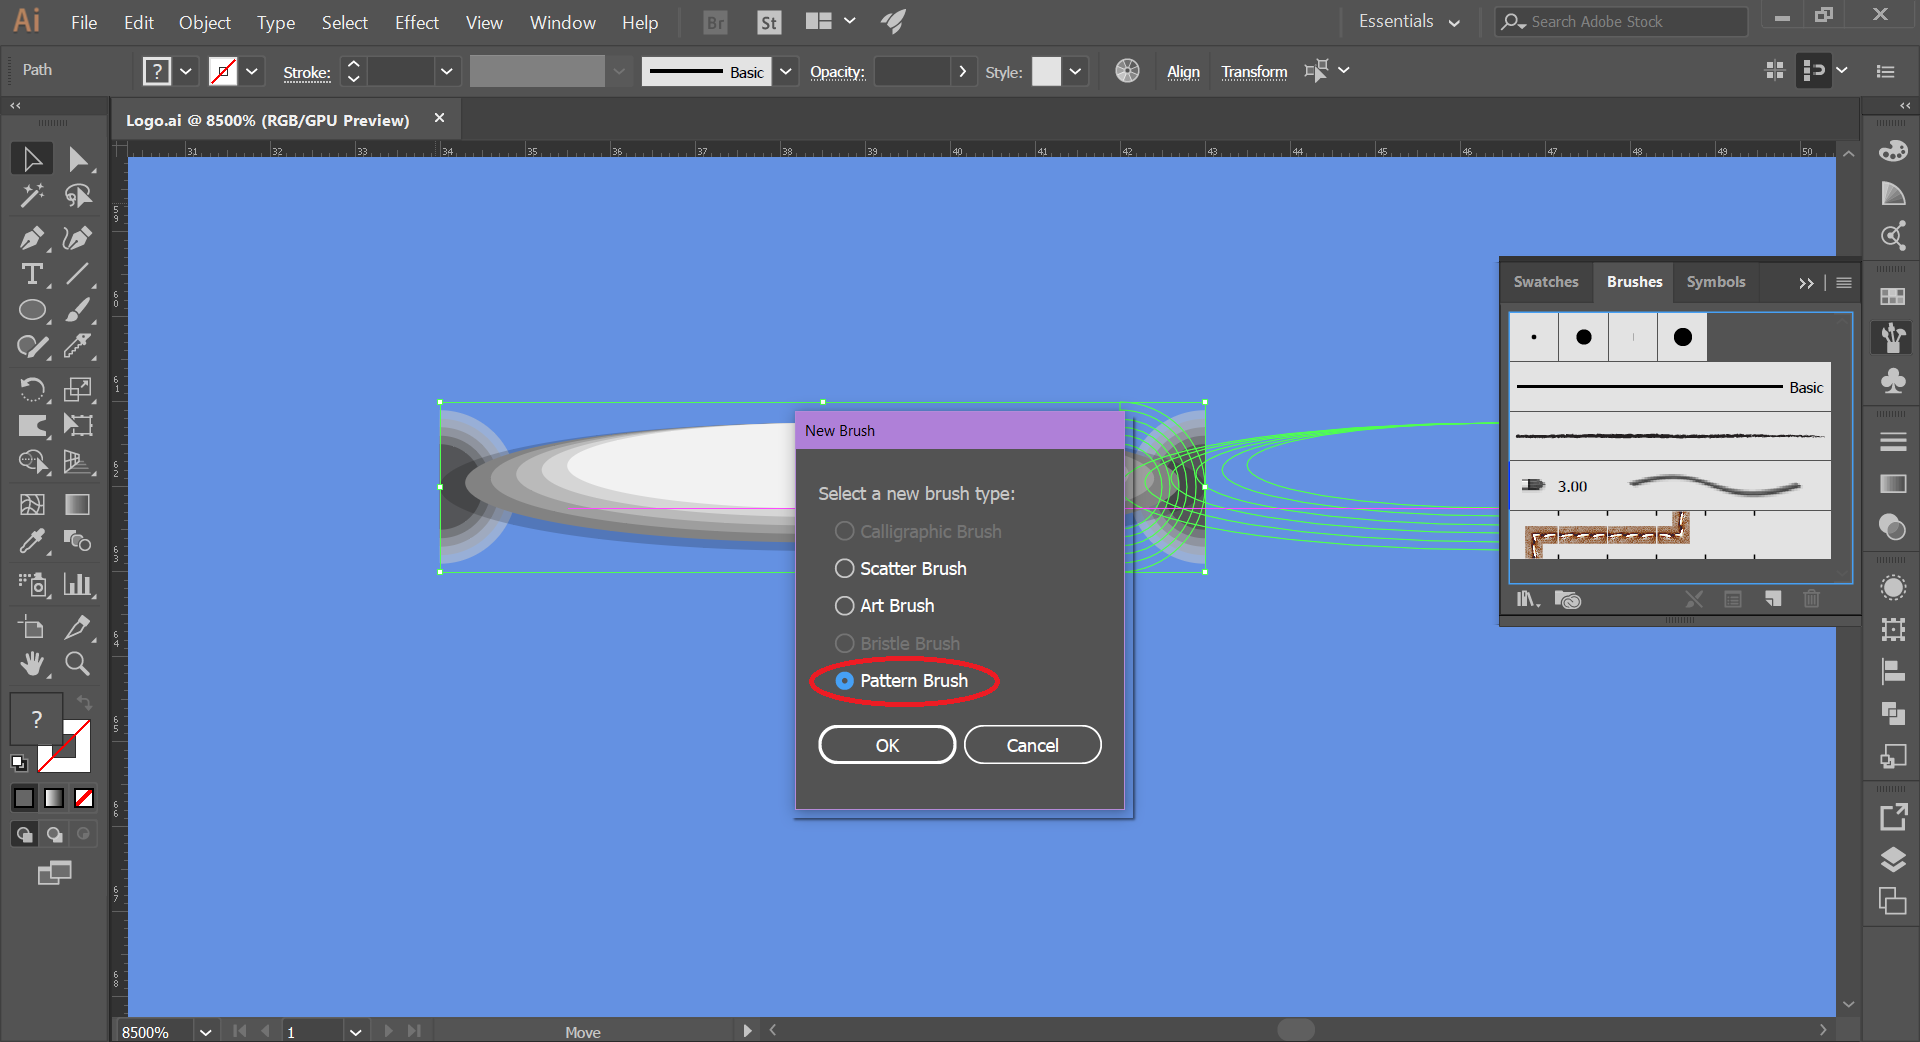
- Select all and drag all selected objects to the brush window.
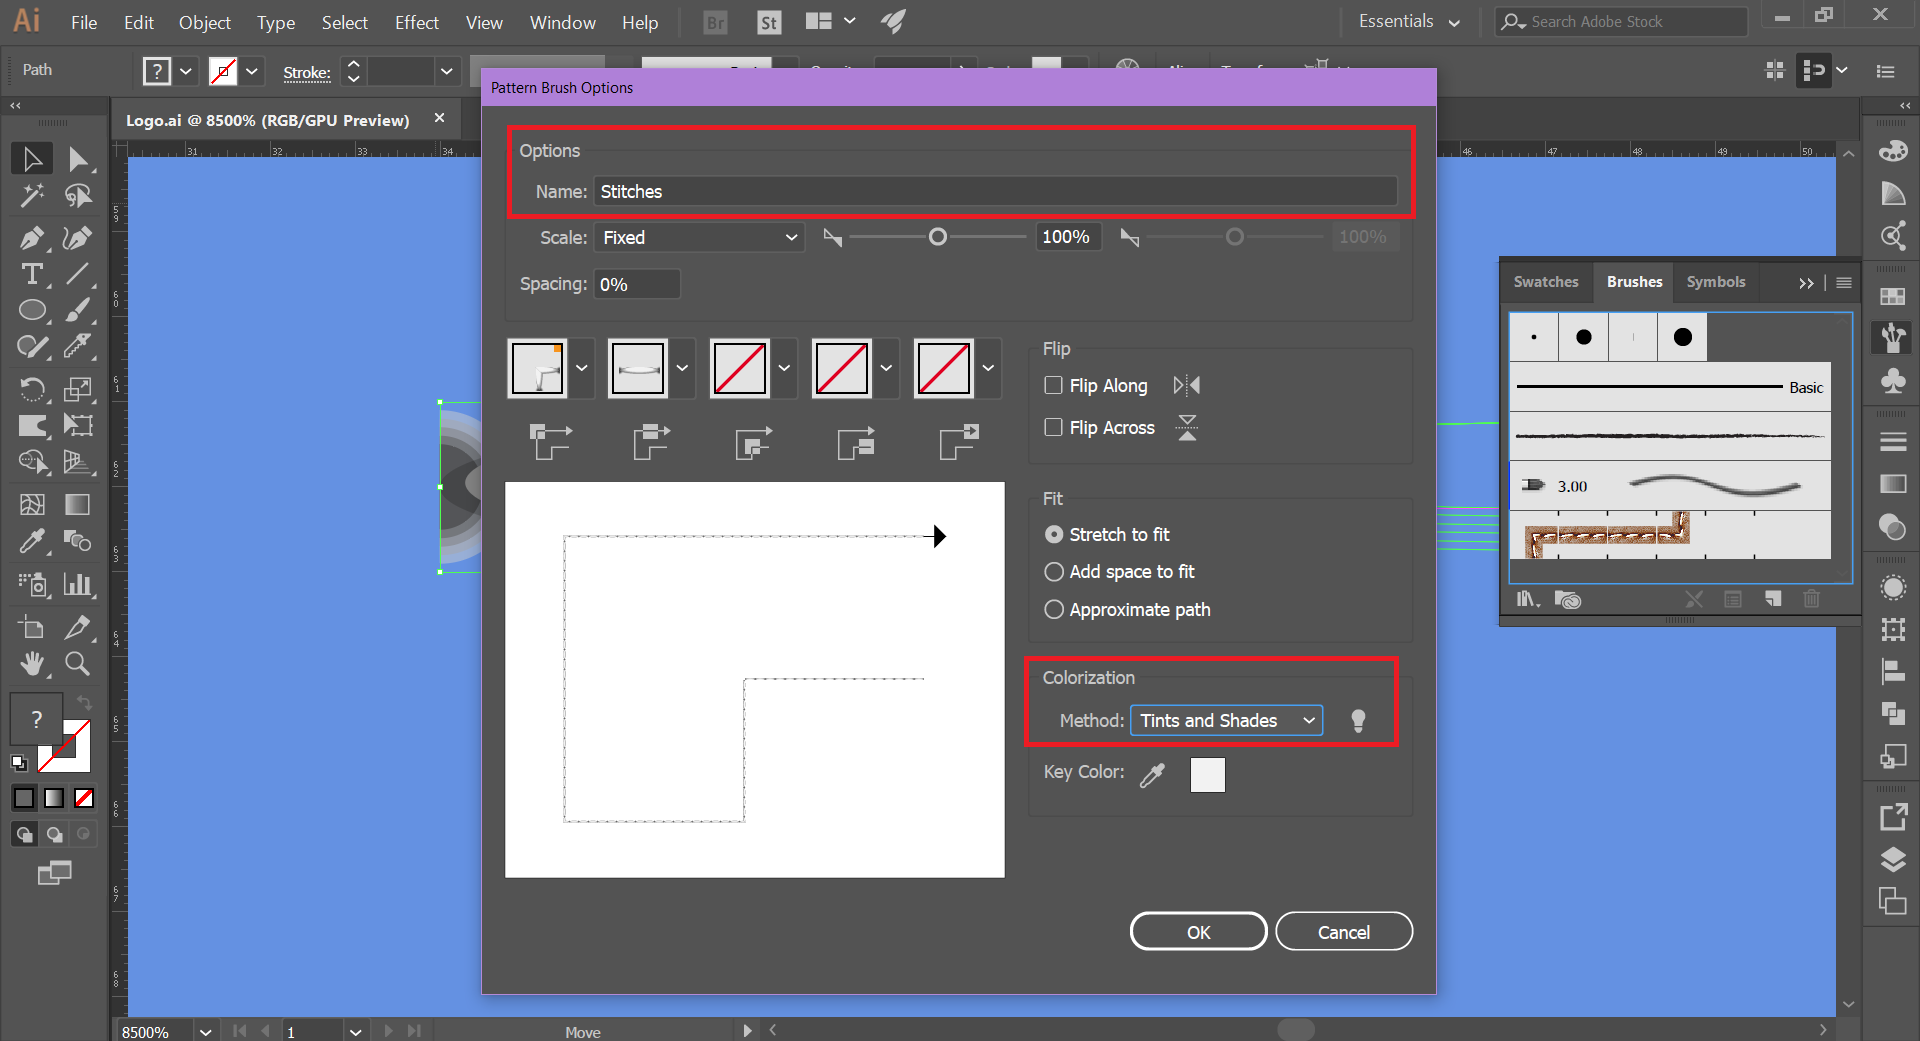
- Check the Pattern brush option.
- Rename and check the option Tints and Shades.
Choosing a Color Palette
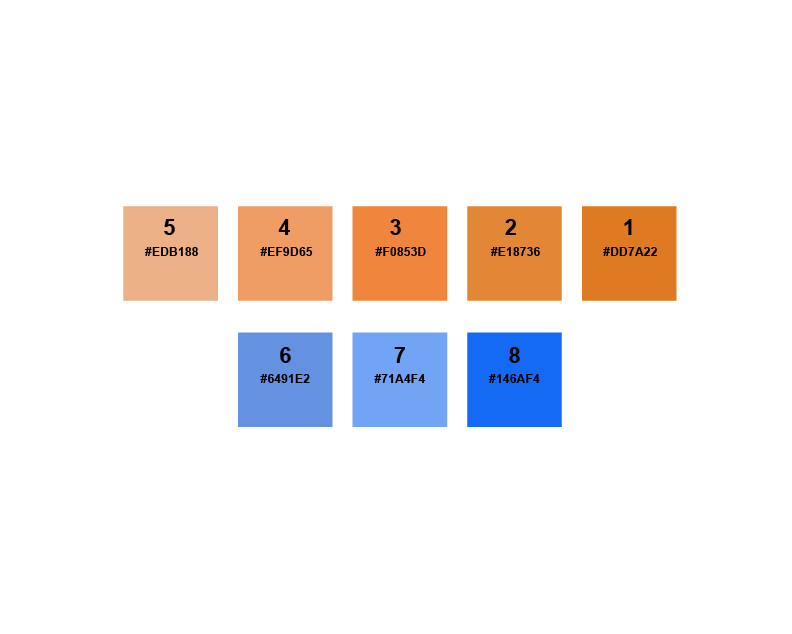
On the Internet you can find different color palettes with which the planet Saturn is identified.
You can take these free color palettes as a reference or you can take a different color variant yourself.
I will take 5 colors within the orange shades, since the palette of colors that can be obtained from images provided by NASA of the planet saturn, are within the pale green and earth shades, but for my logo I want more vivid colors.
For the lettering, I will take shades of blue, as it contrasts with the orange tones.
These shades of colors in web colors code, are:
- Orange tones:
#DD7A22, #E18736, #F0853D, #EF9D65, #EDB188
- Blue shades:
#146AF4, #71A4F4, #6491E2
Making the Logo Design Base
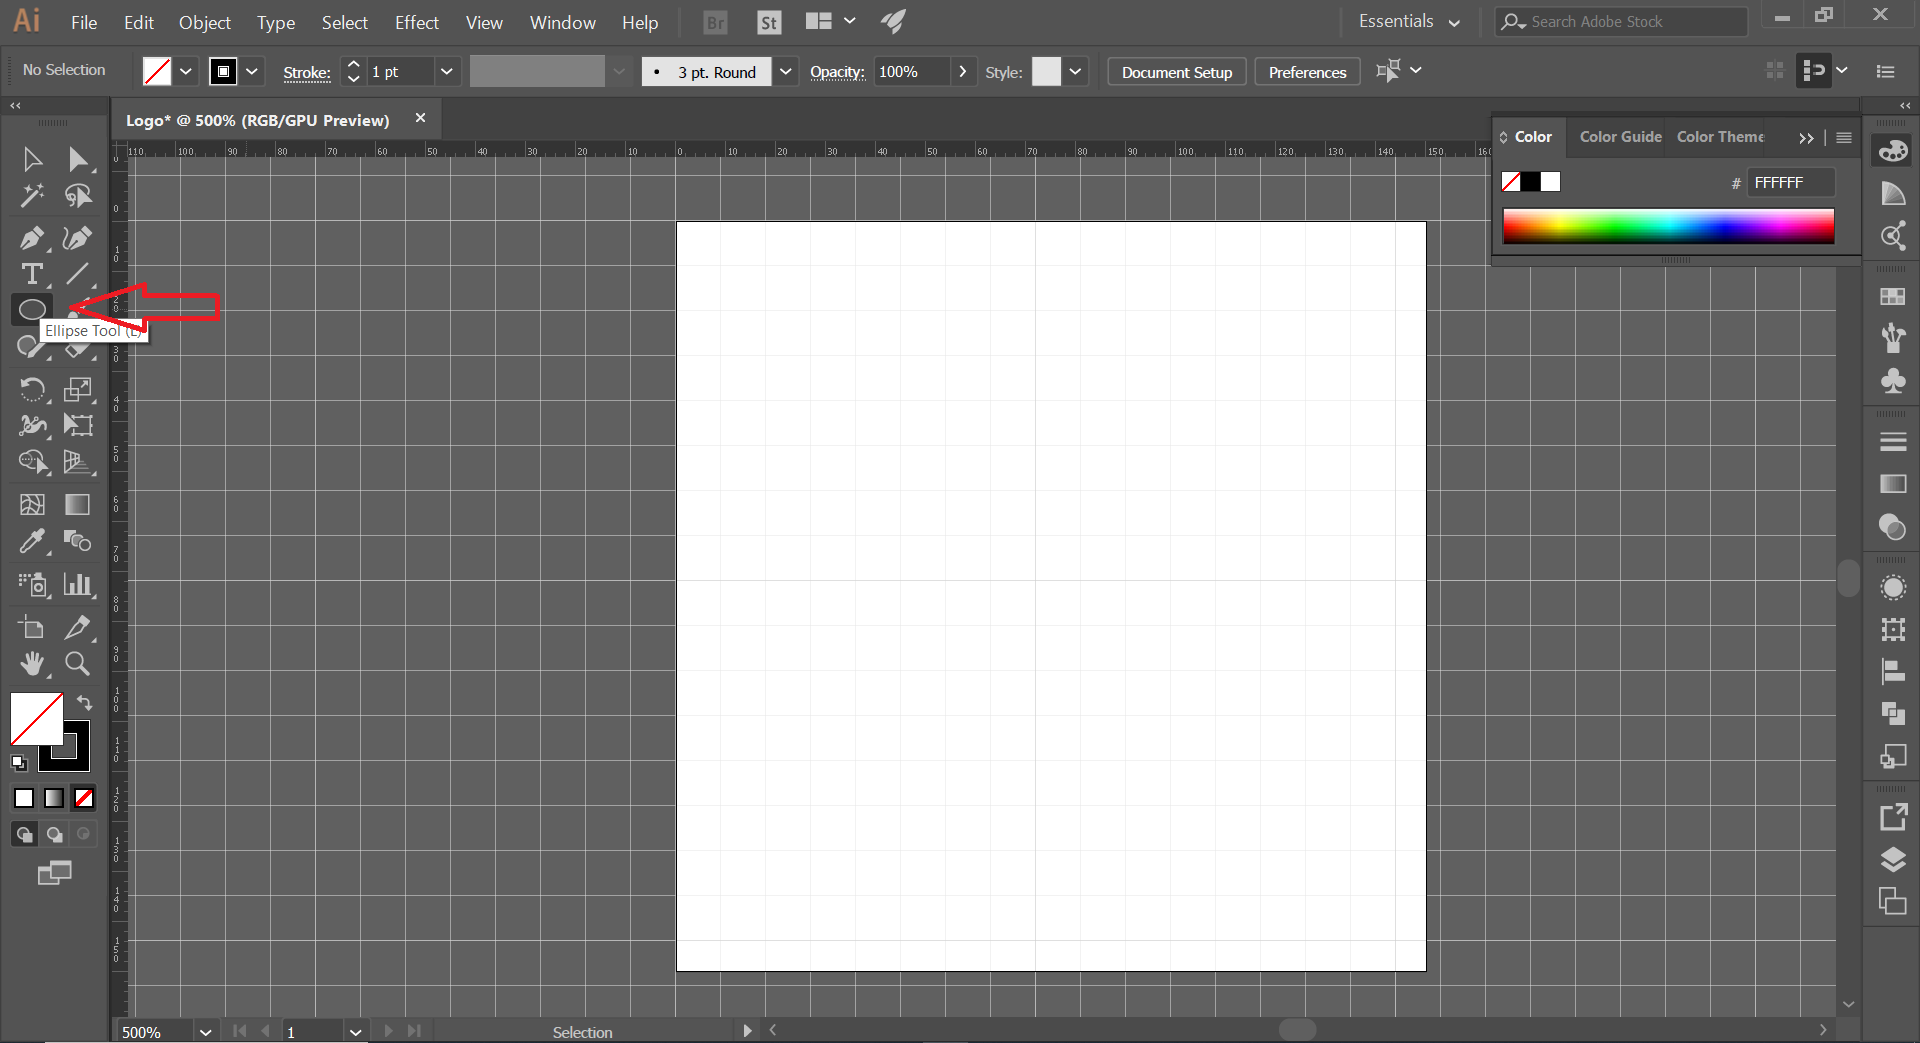
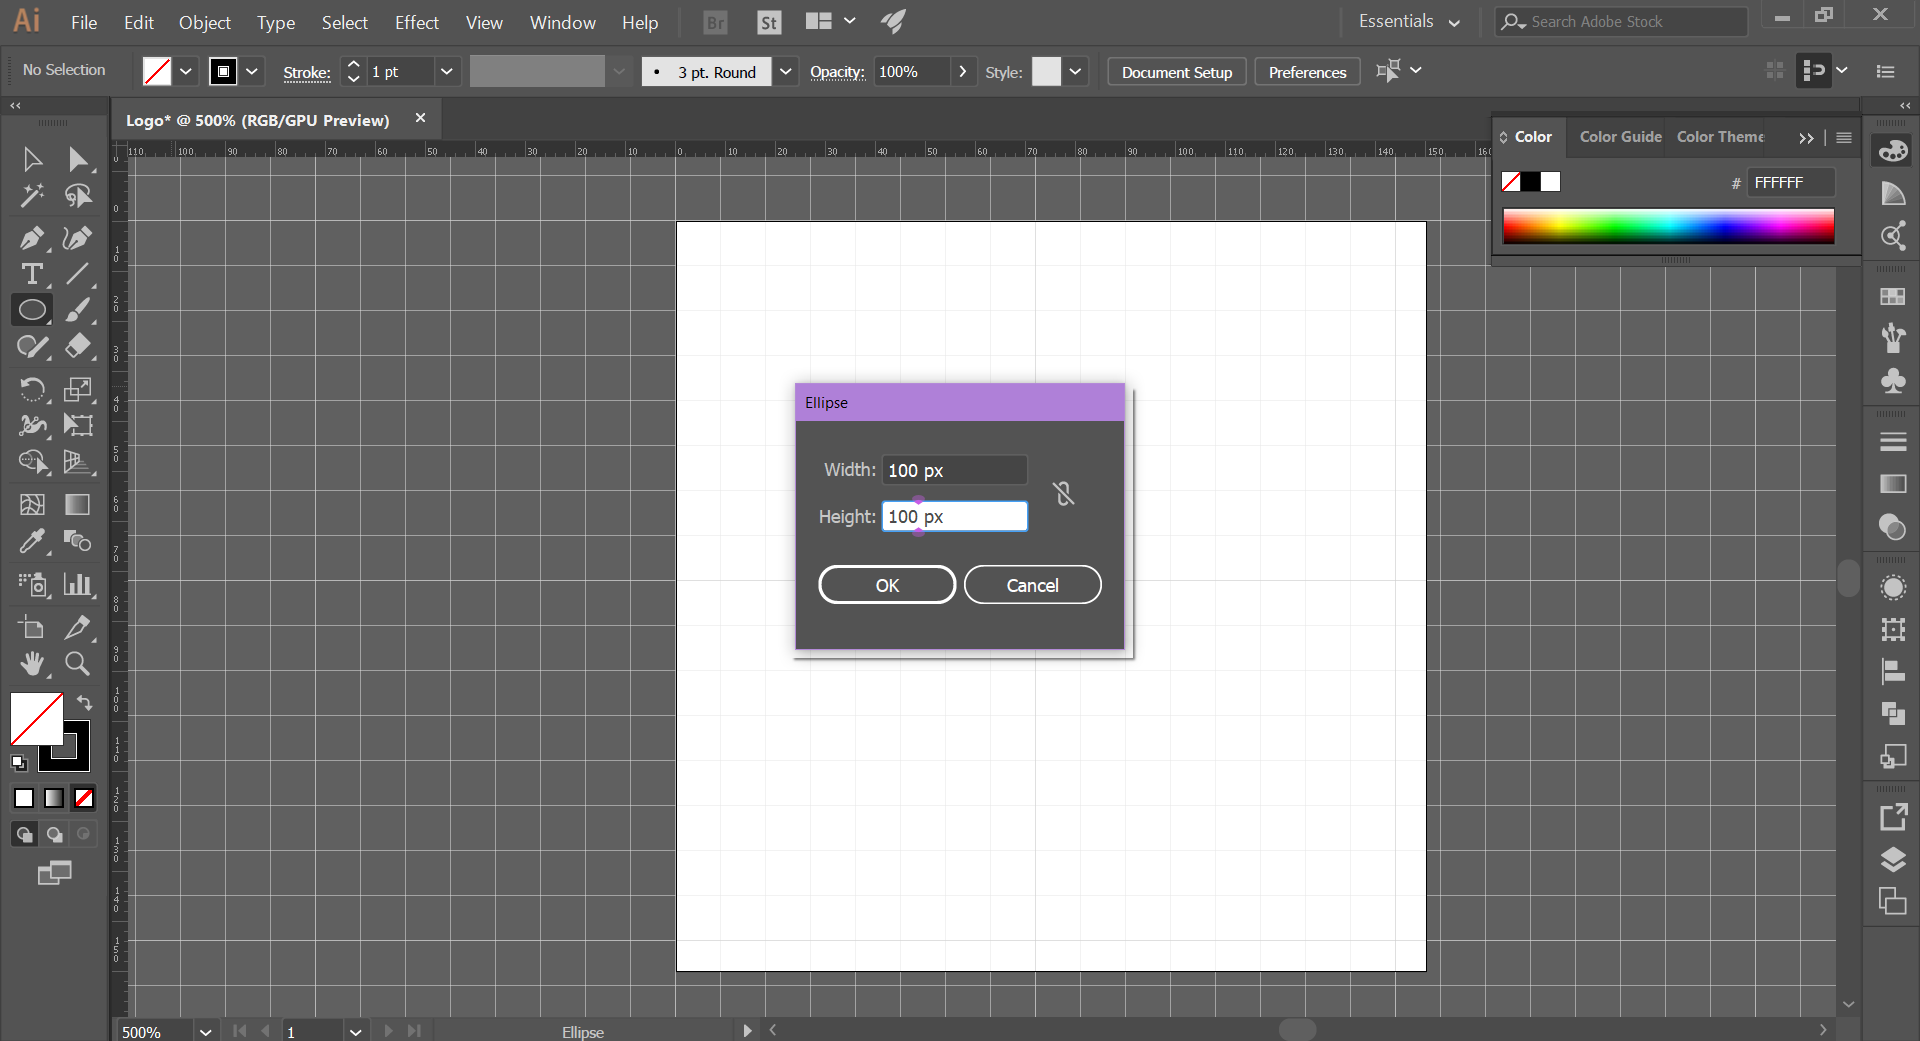
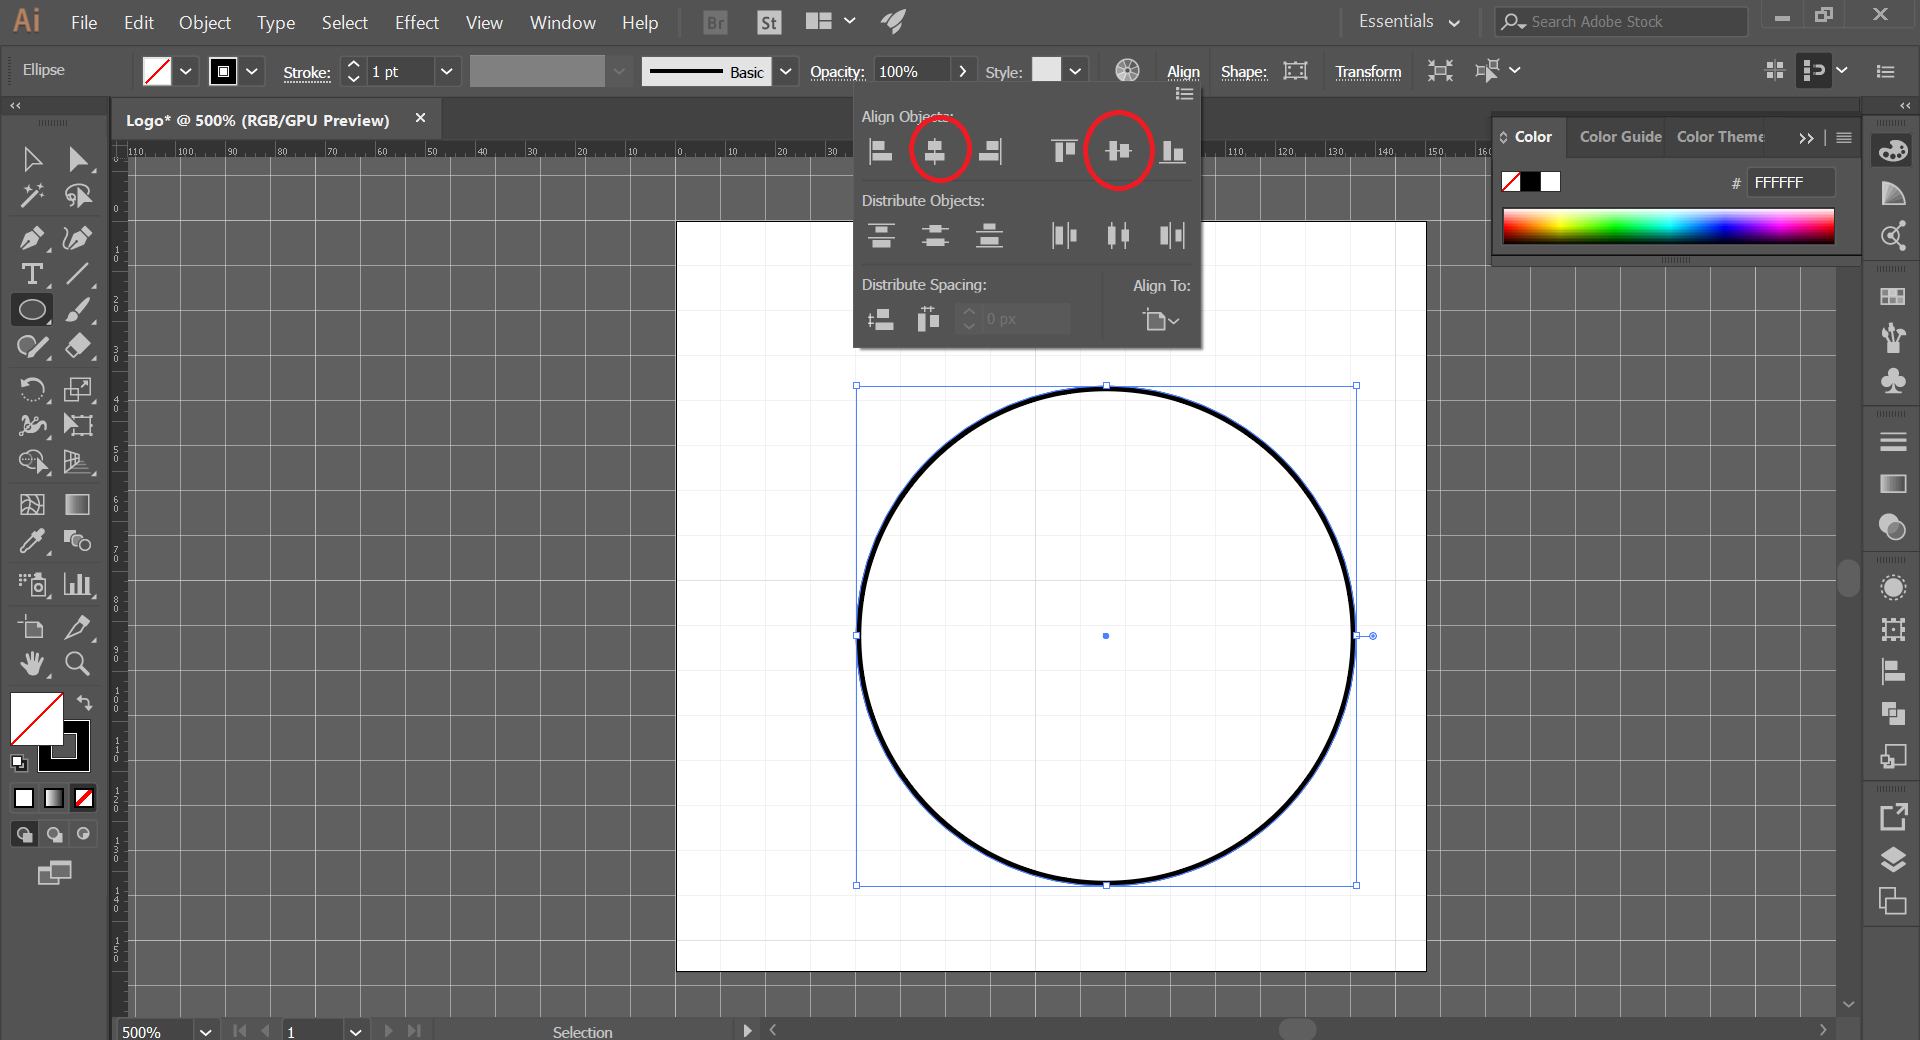
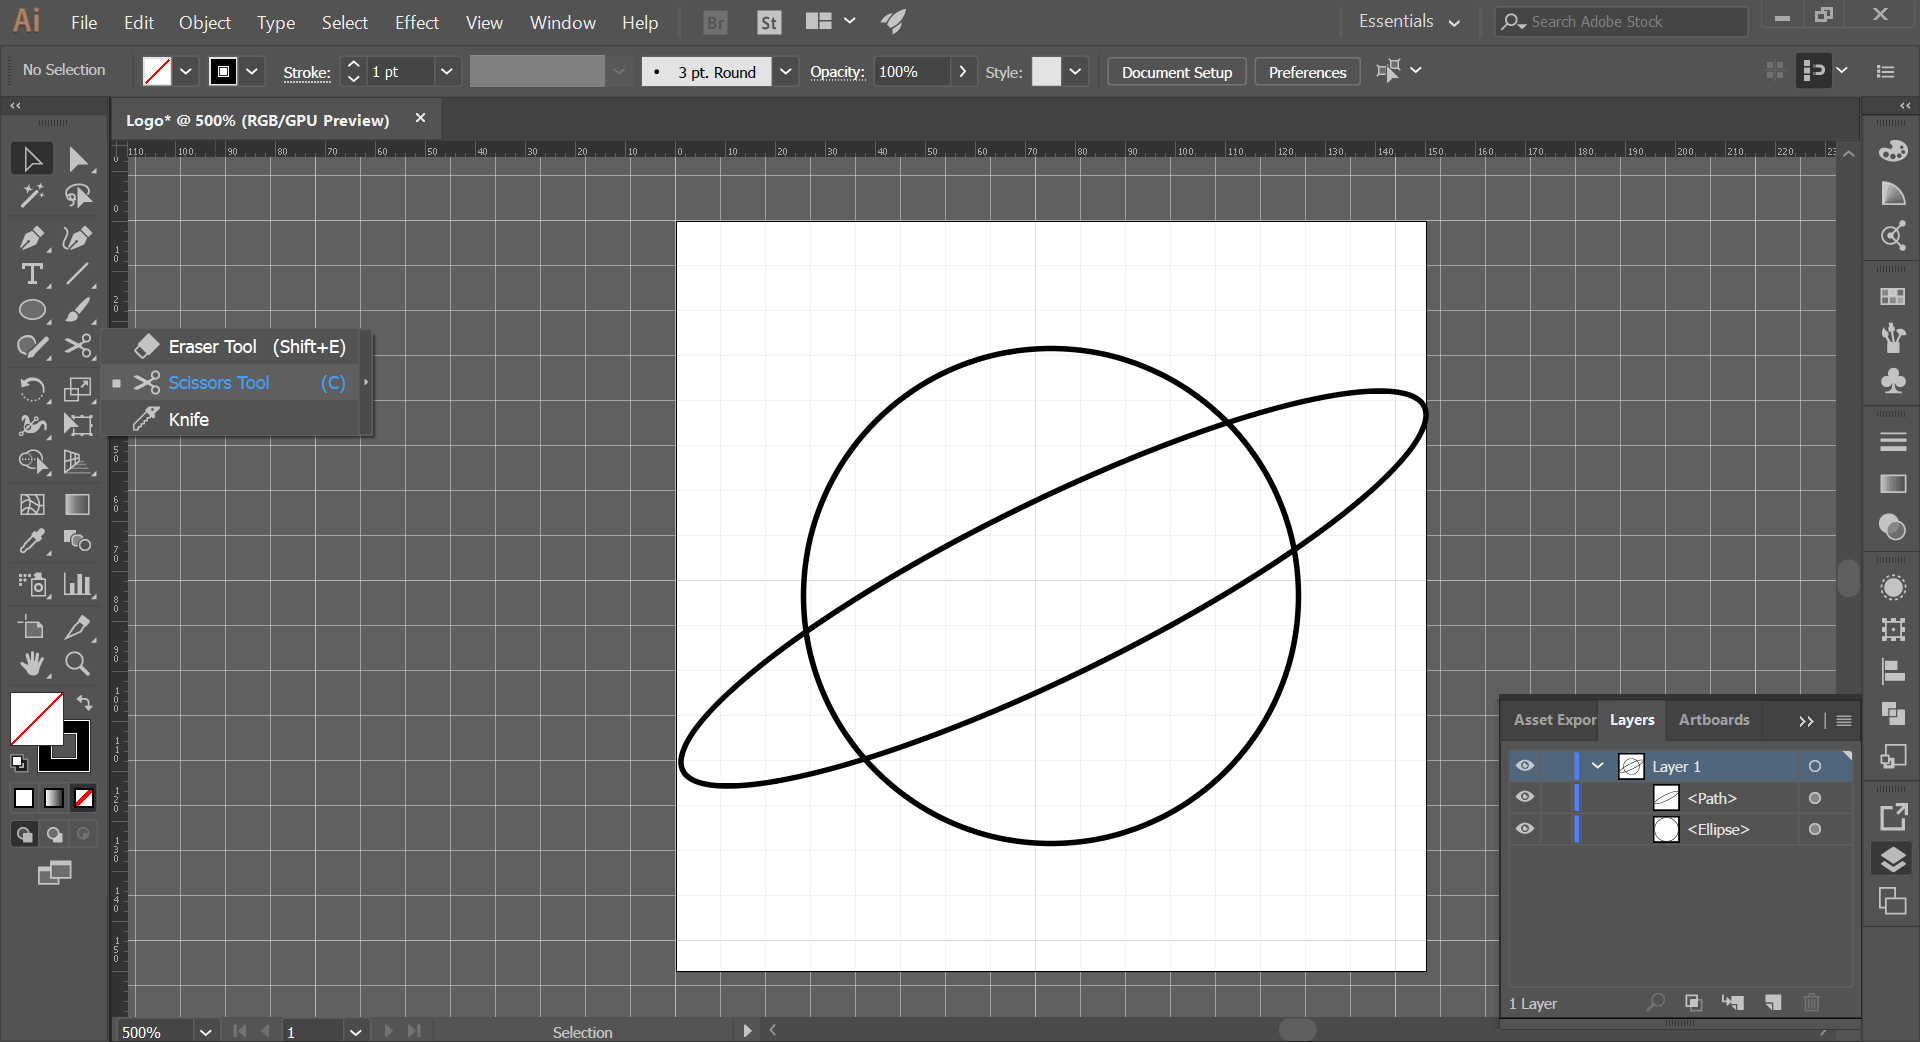
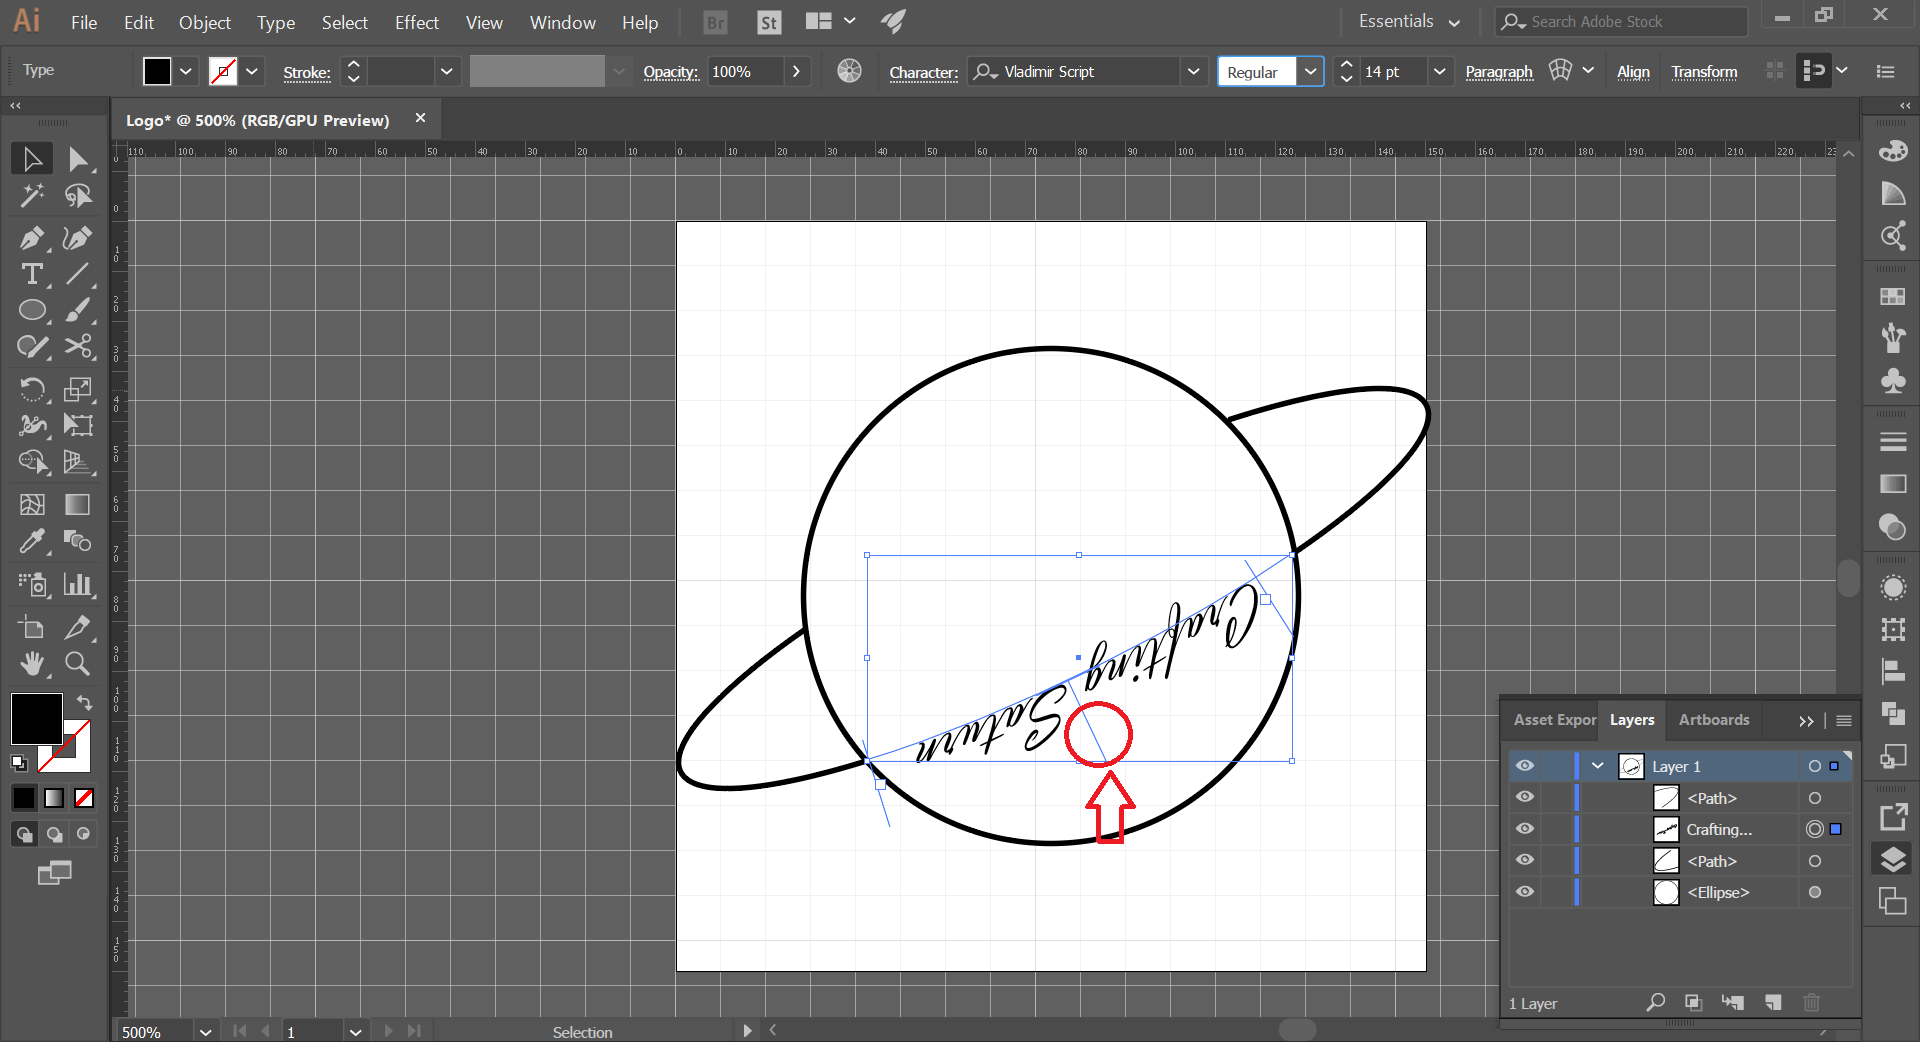
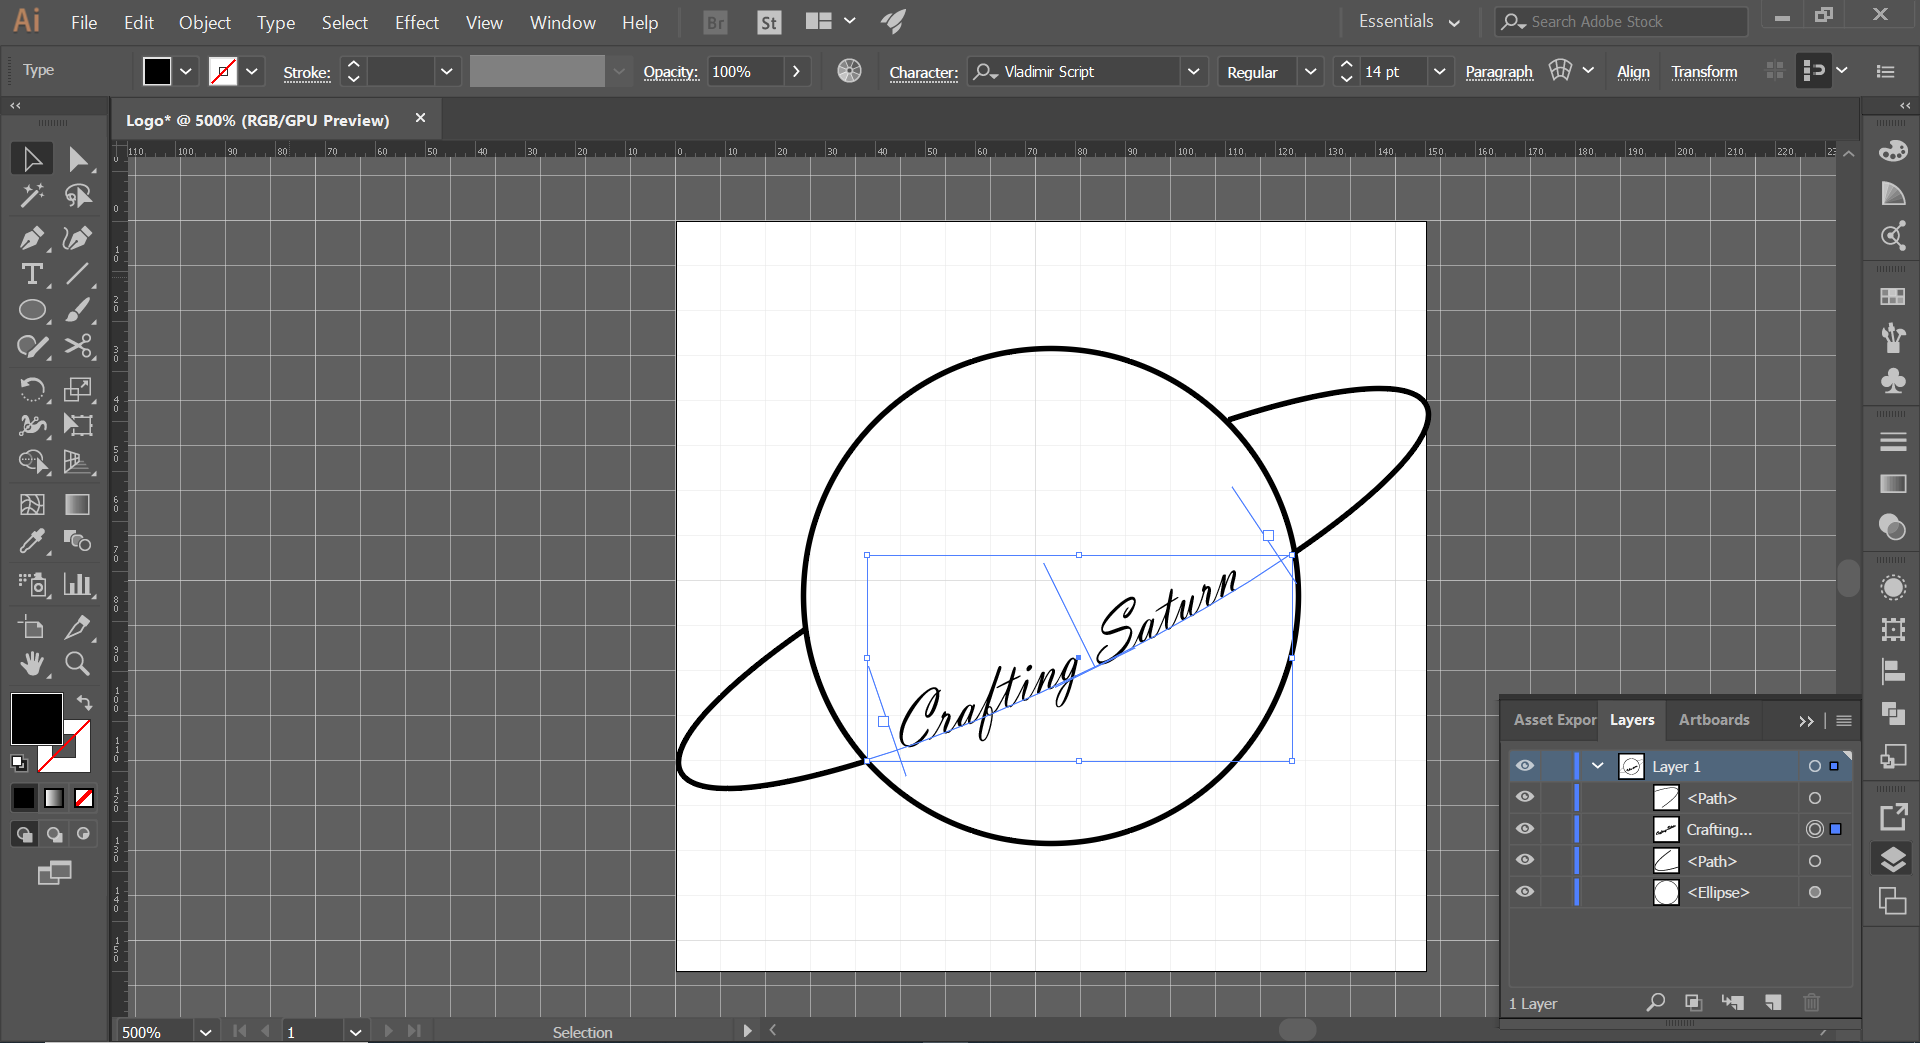
- We make a 100 px circle with the Ellipse tool and align the circle.
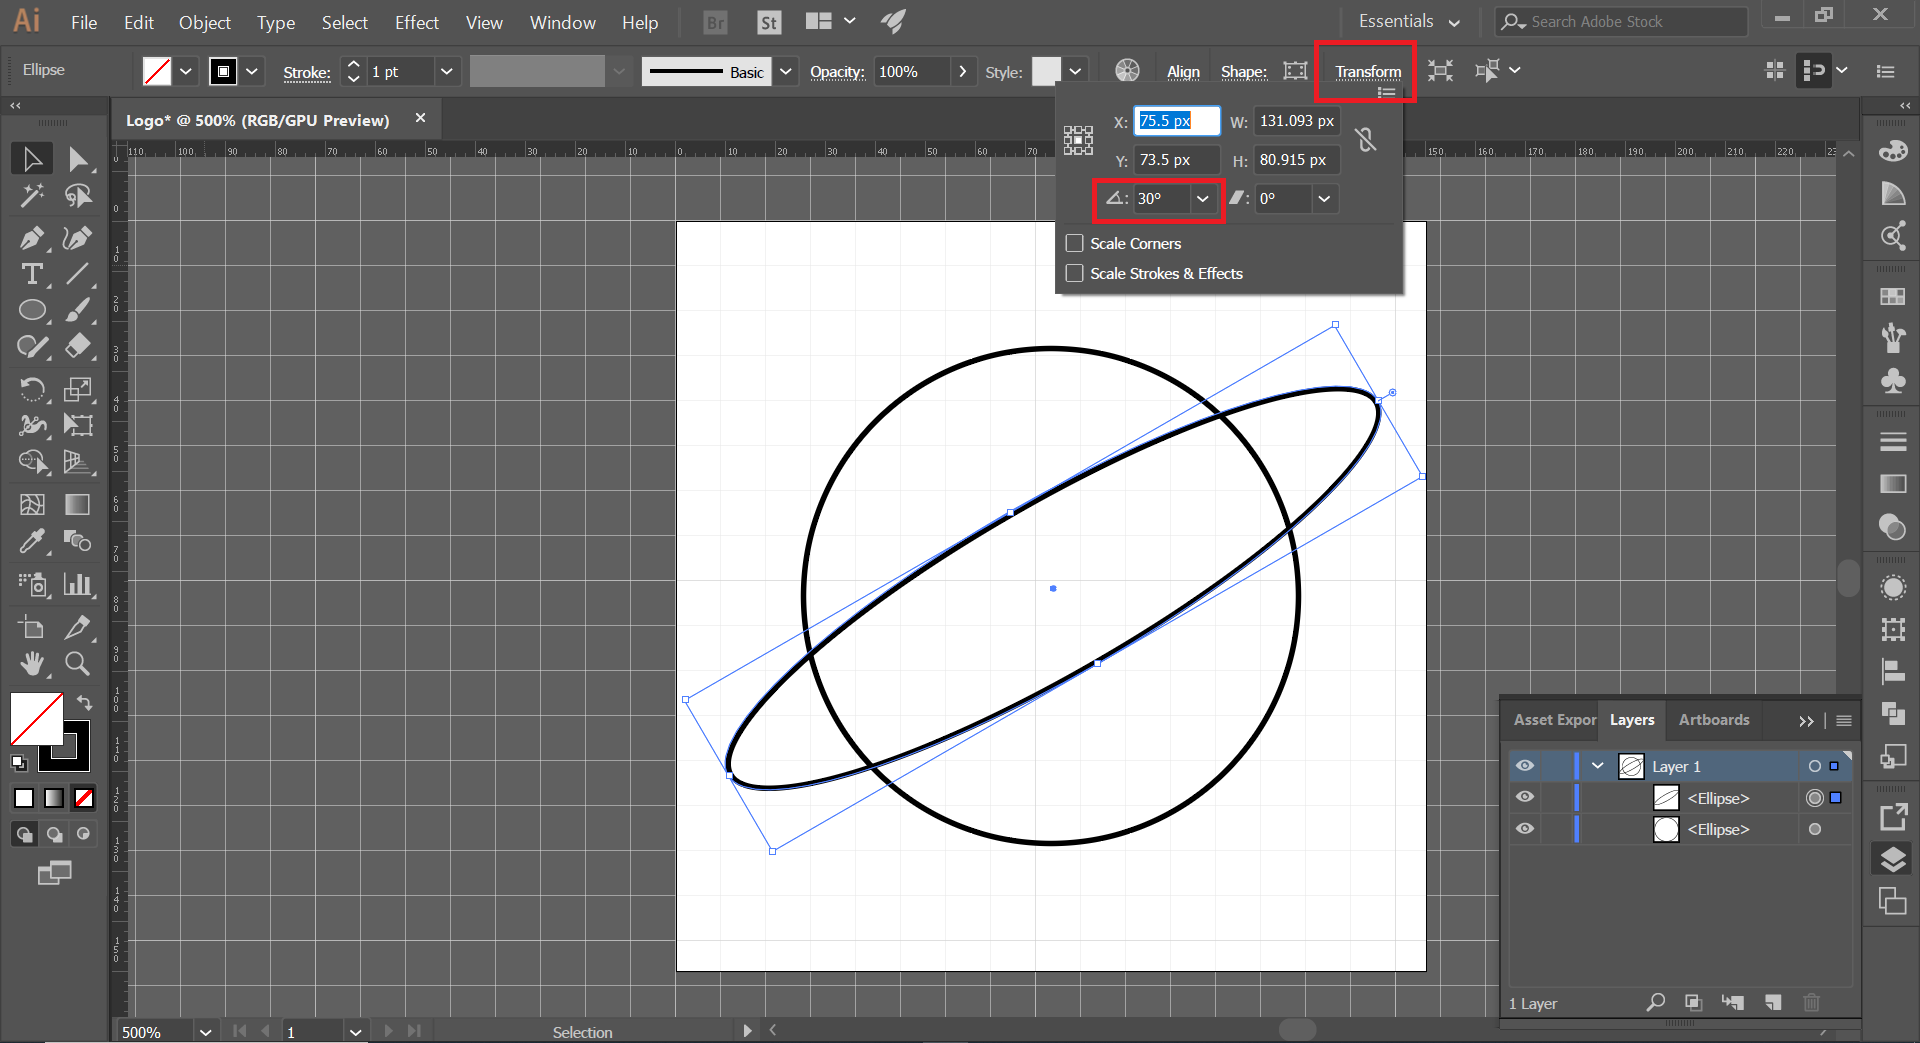
- We make an ellipse of any size with the ellipse tool.
- Then, with the ellipse selected, click on Transform and change its angle to 30 degrees. Hit enter.
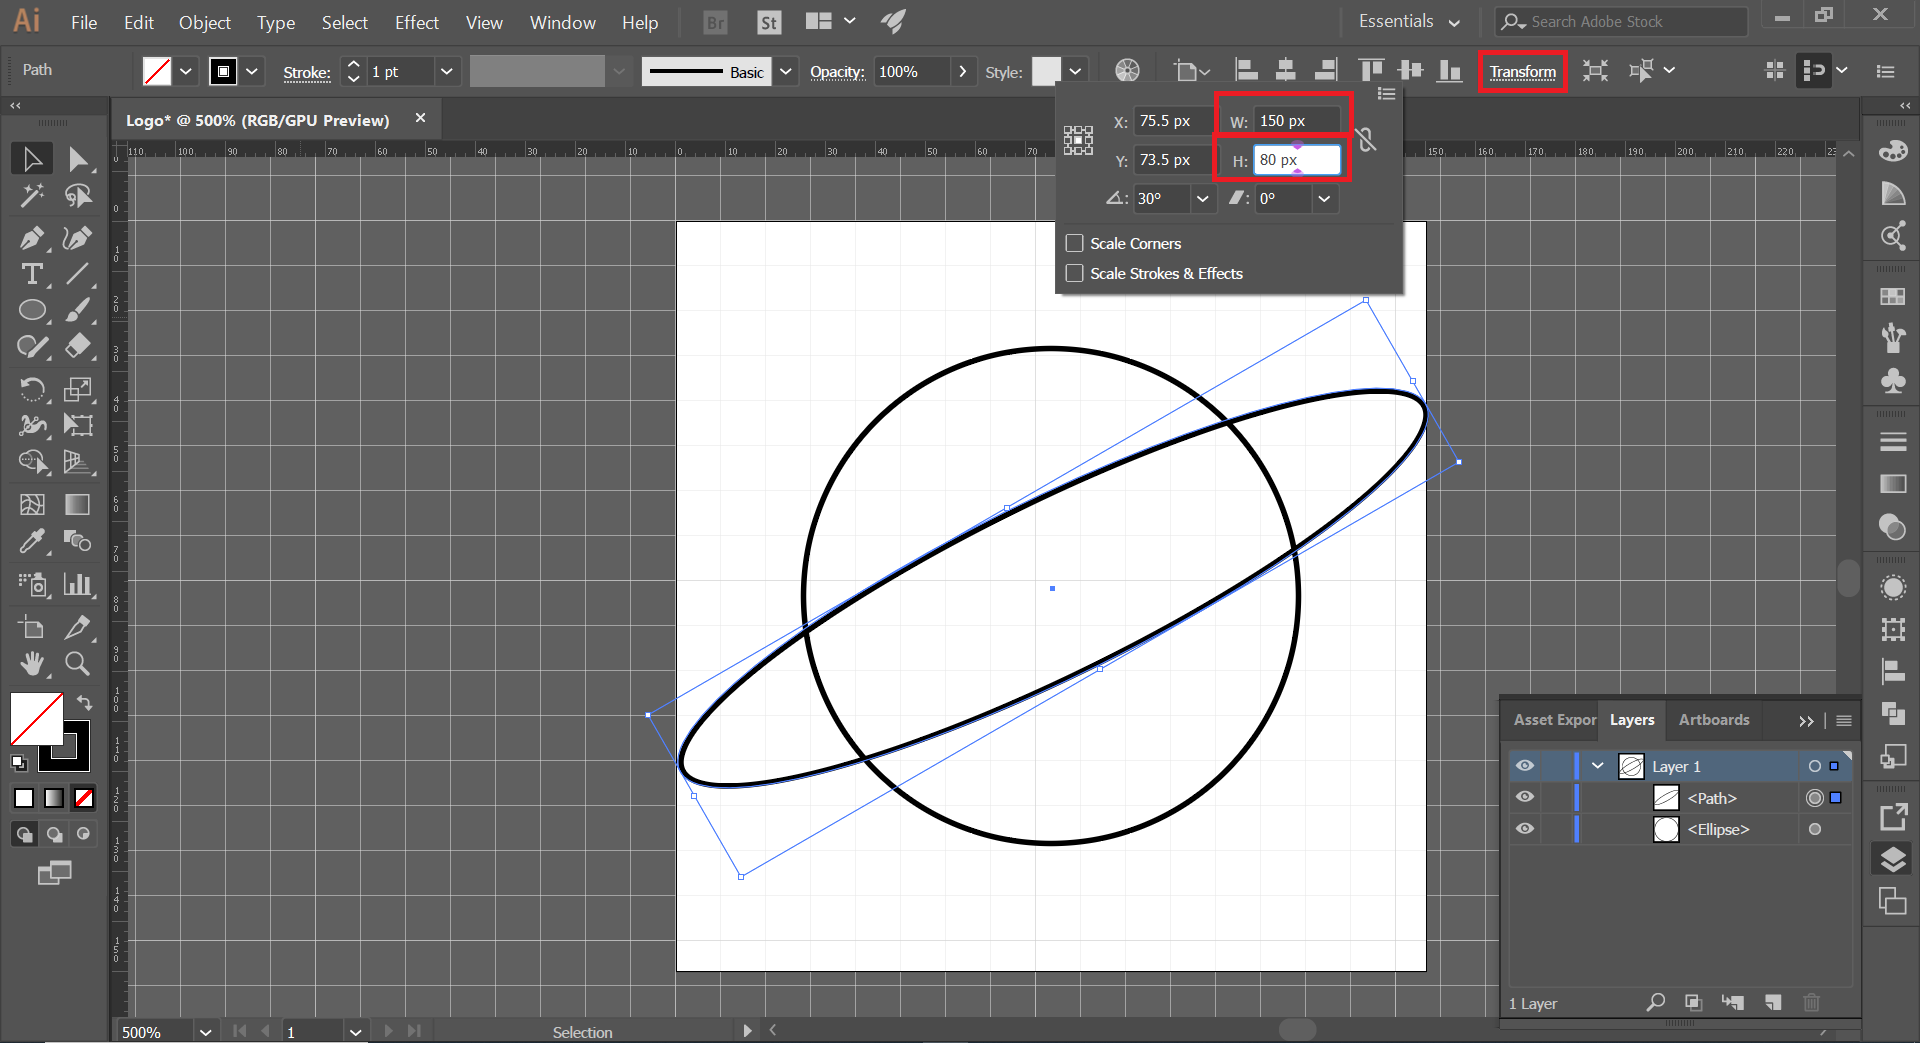
- Click on Transform again, this time we change the size of the ellipse to W: 150px, and H: 80 px.
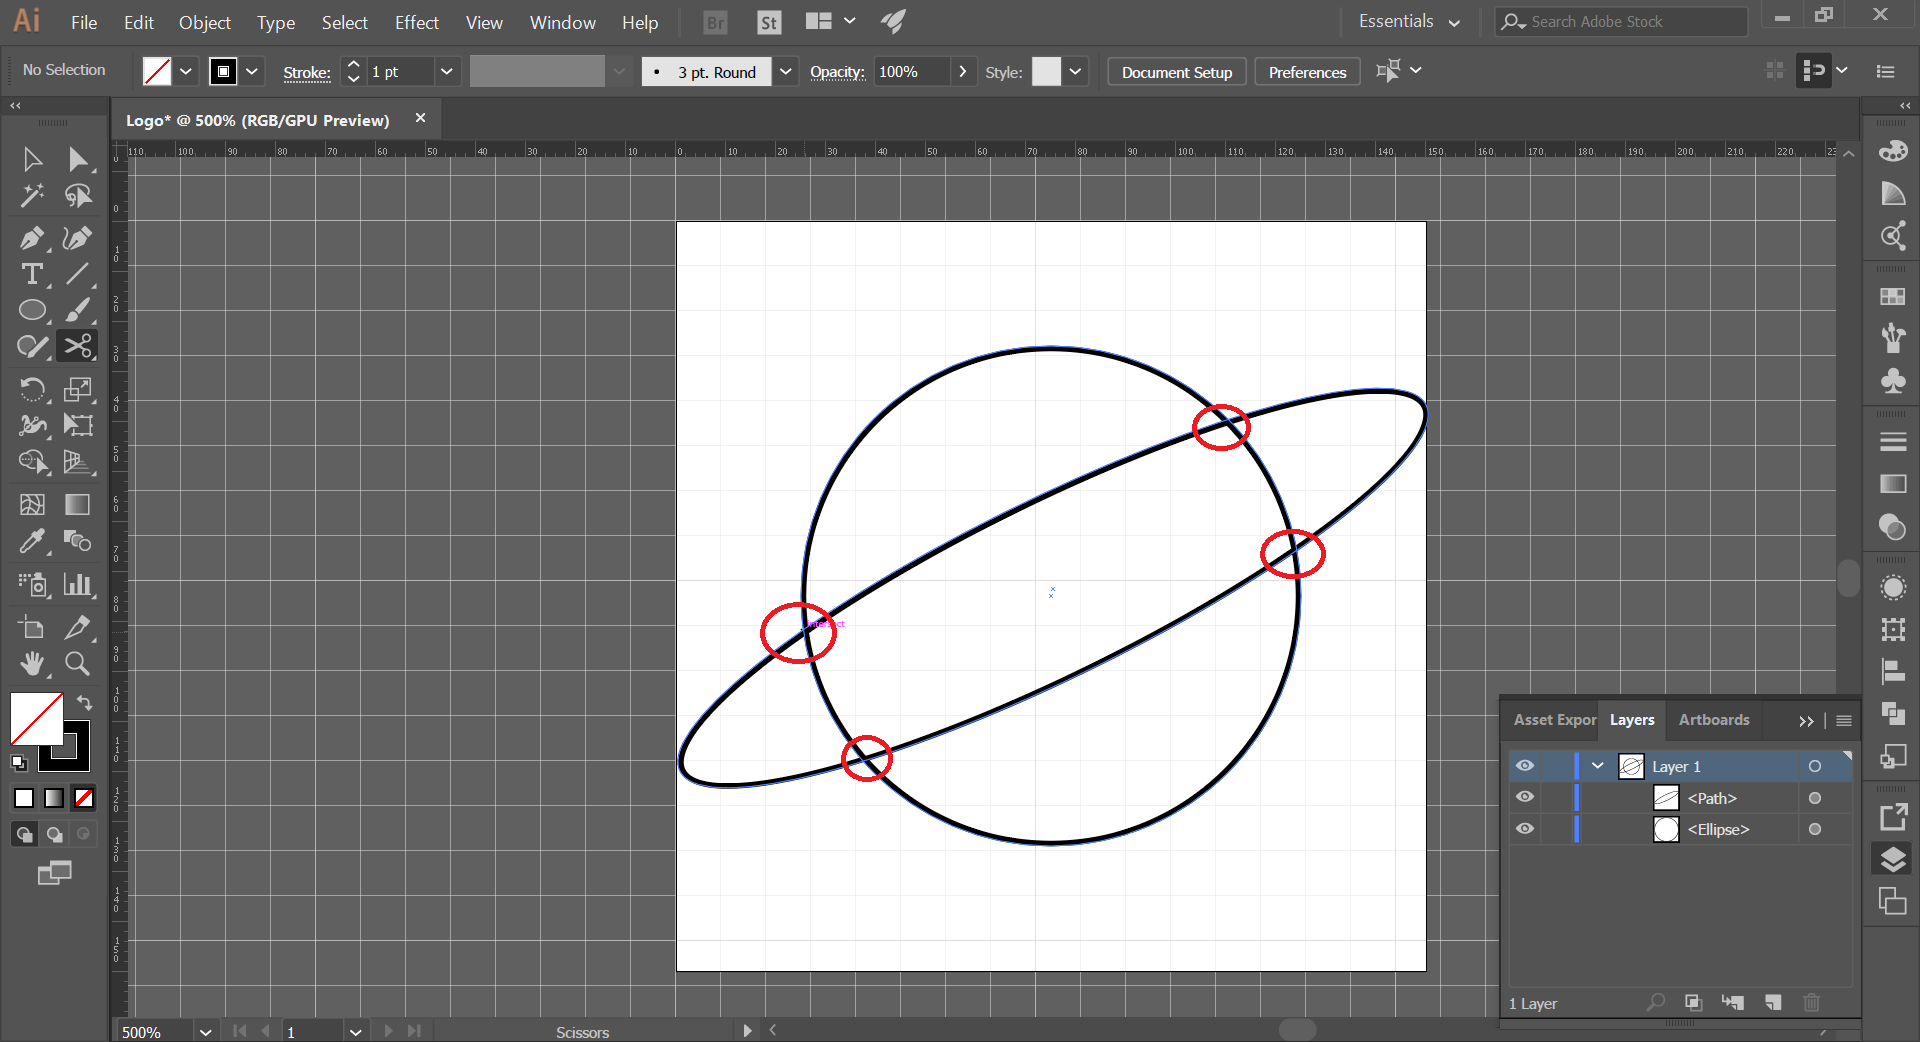
- Cut segments that cross between the ellipse and the circle. Use the Scissors tool
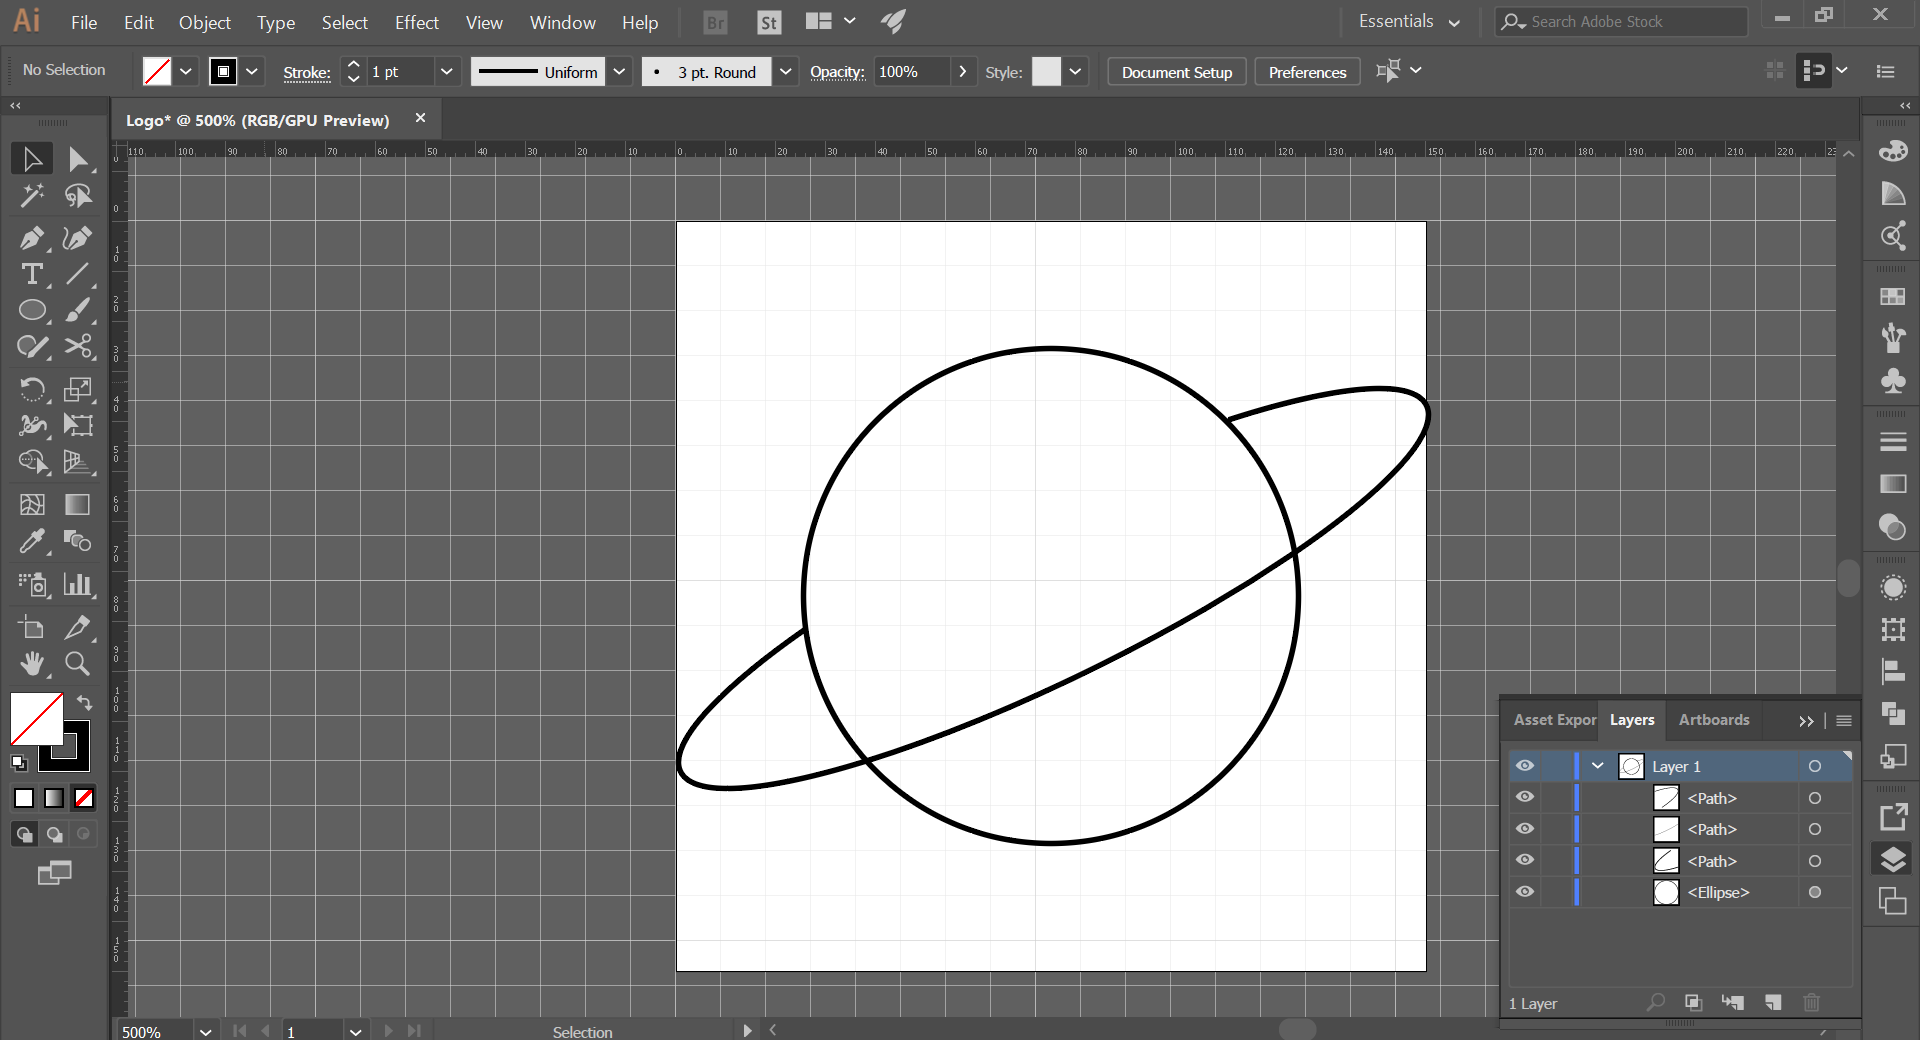
- Delete one of the lines we just cut, the one behind the planet.
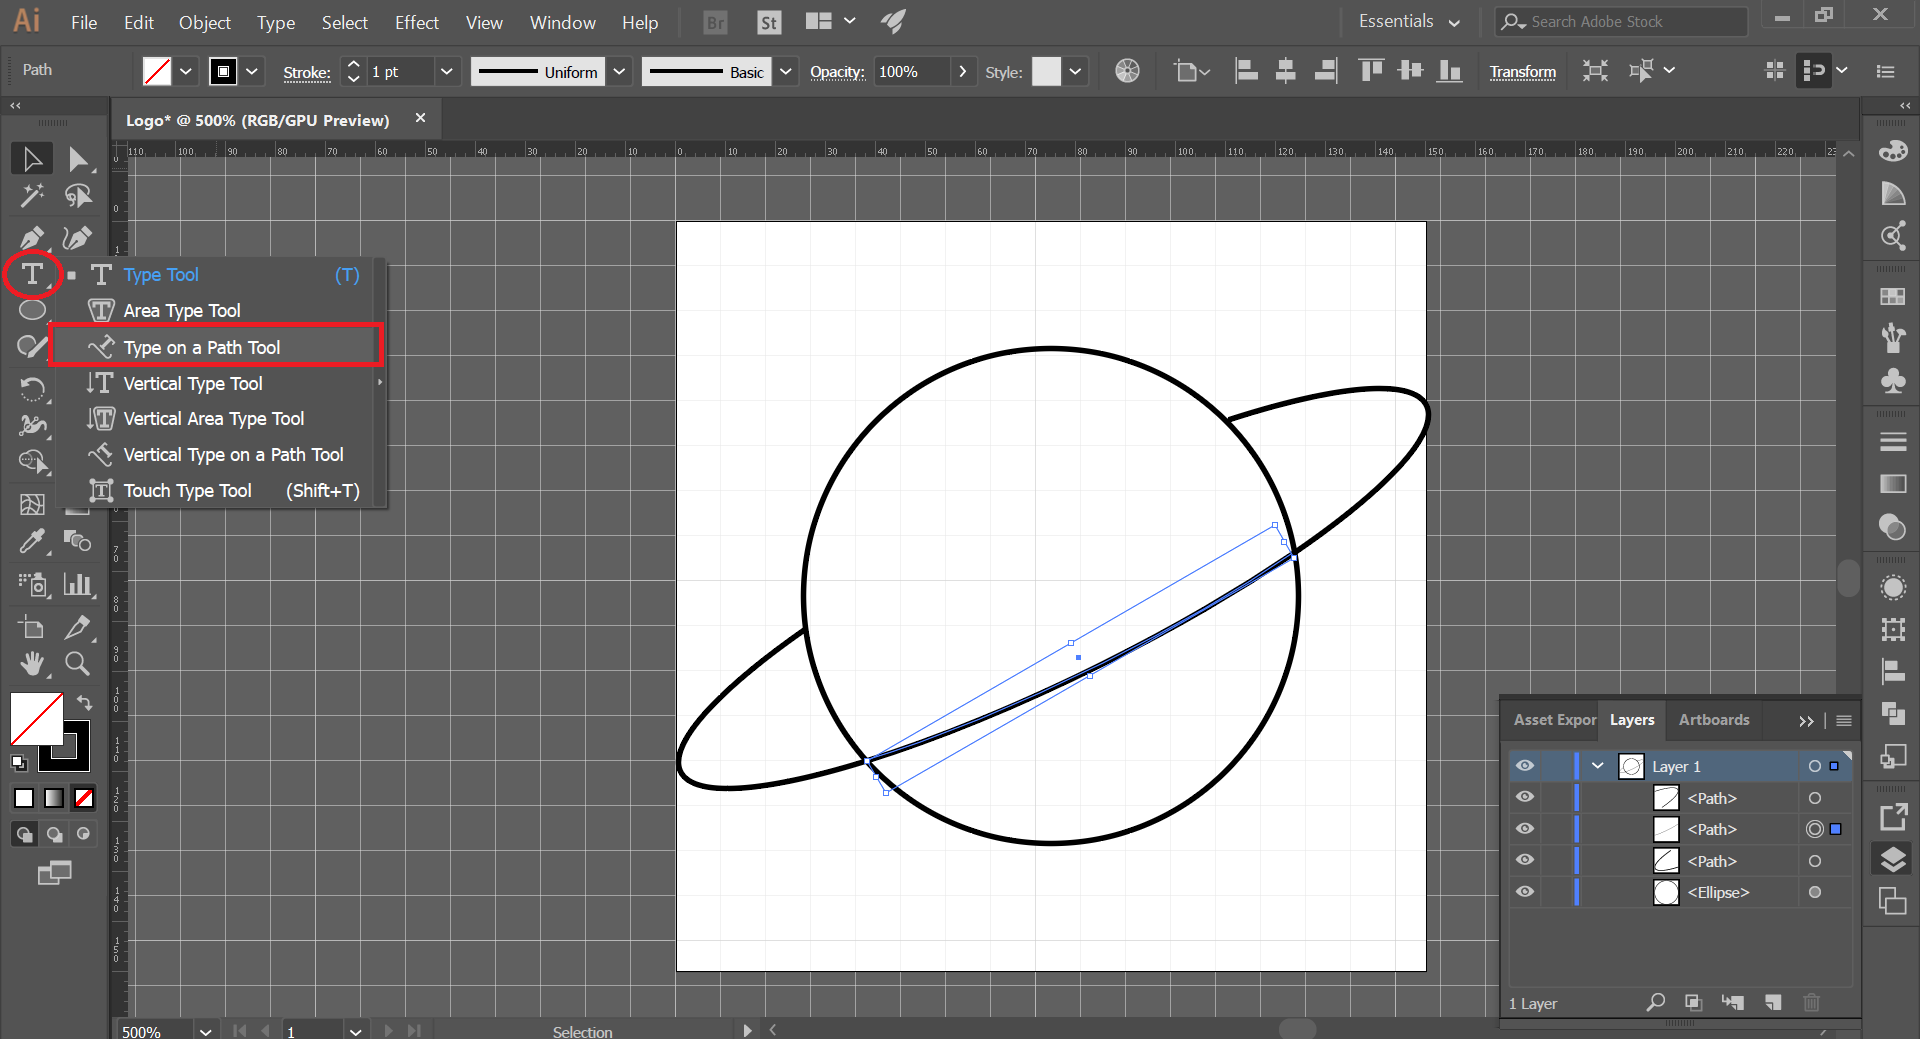
- Use type on a path tool on the other available segmented line.
- Type user name or logo text.
- Drag text position line on the center to flip text.
Making Detail Lines of the Logo (planet)
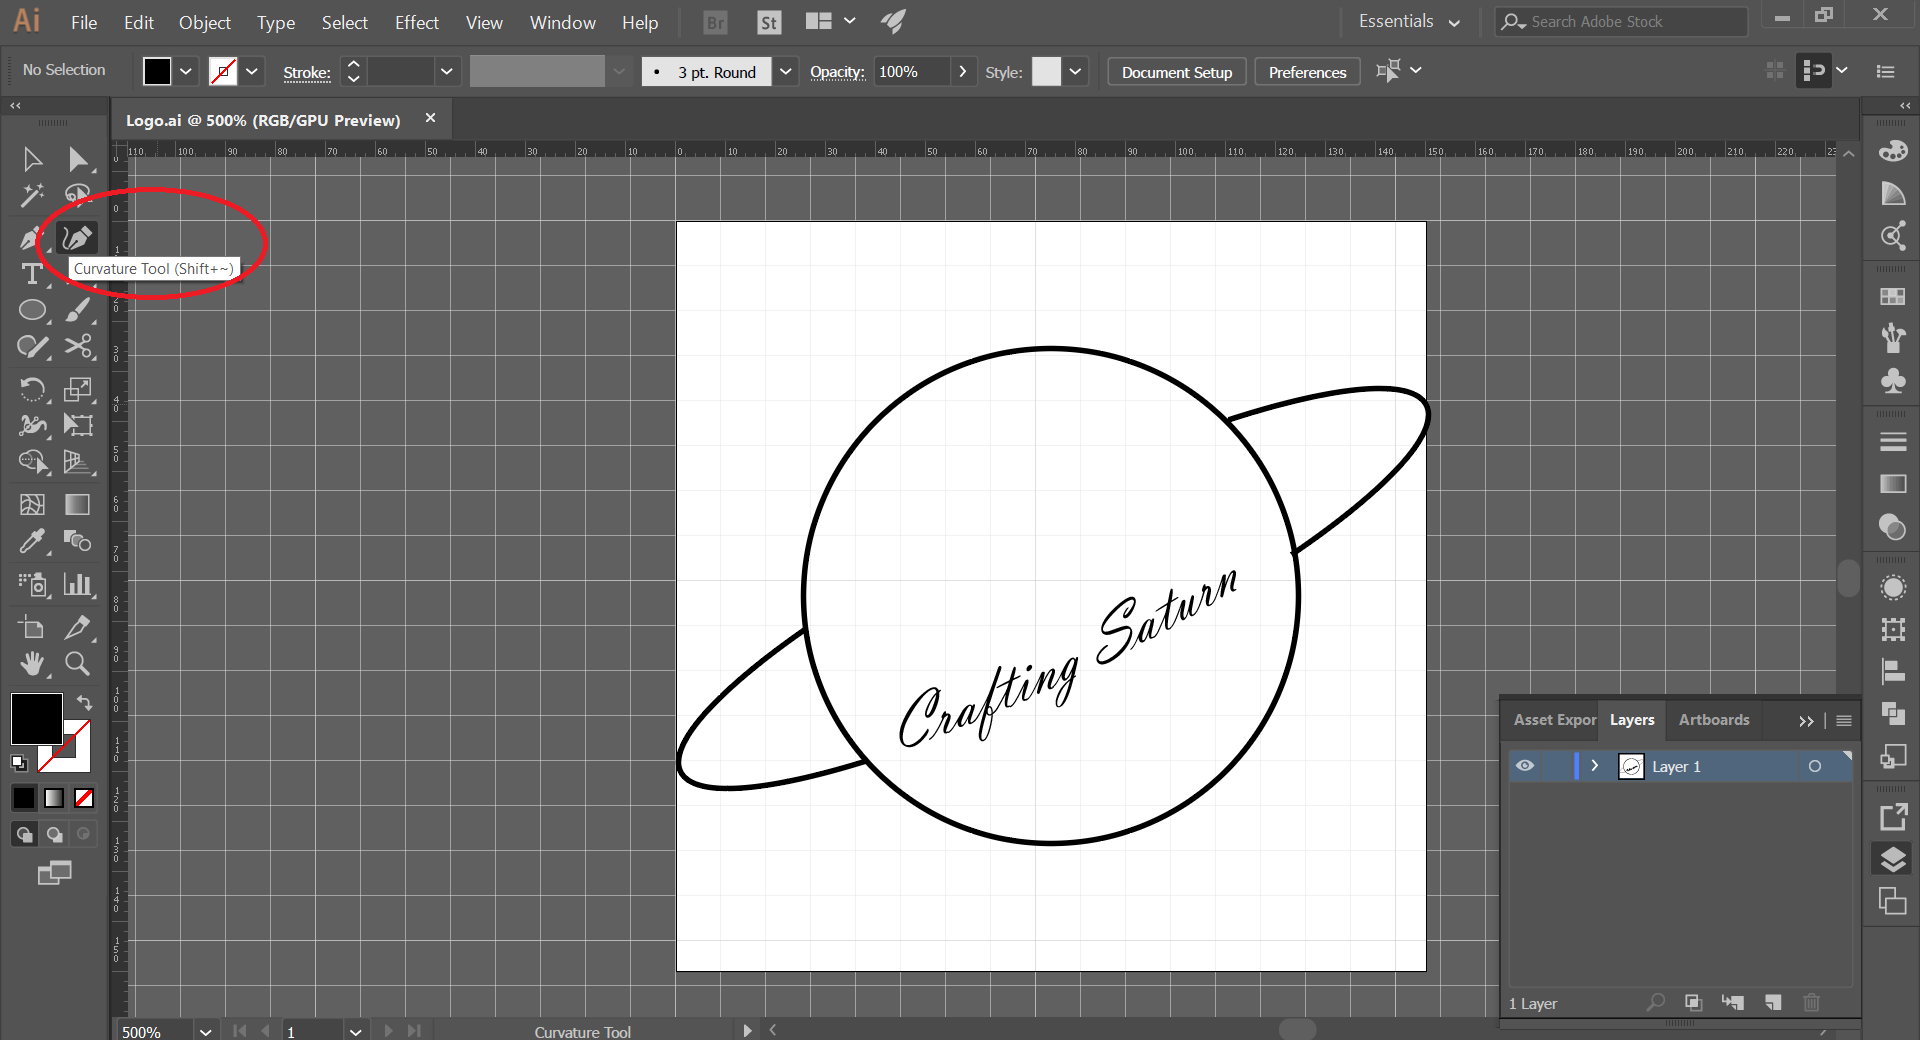
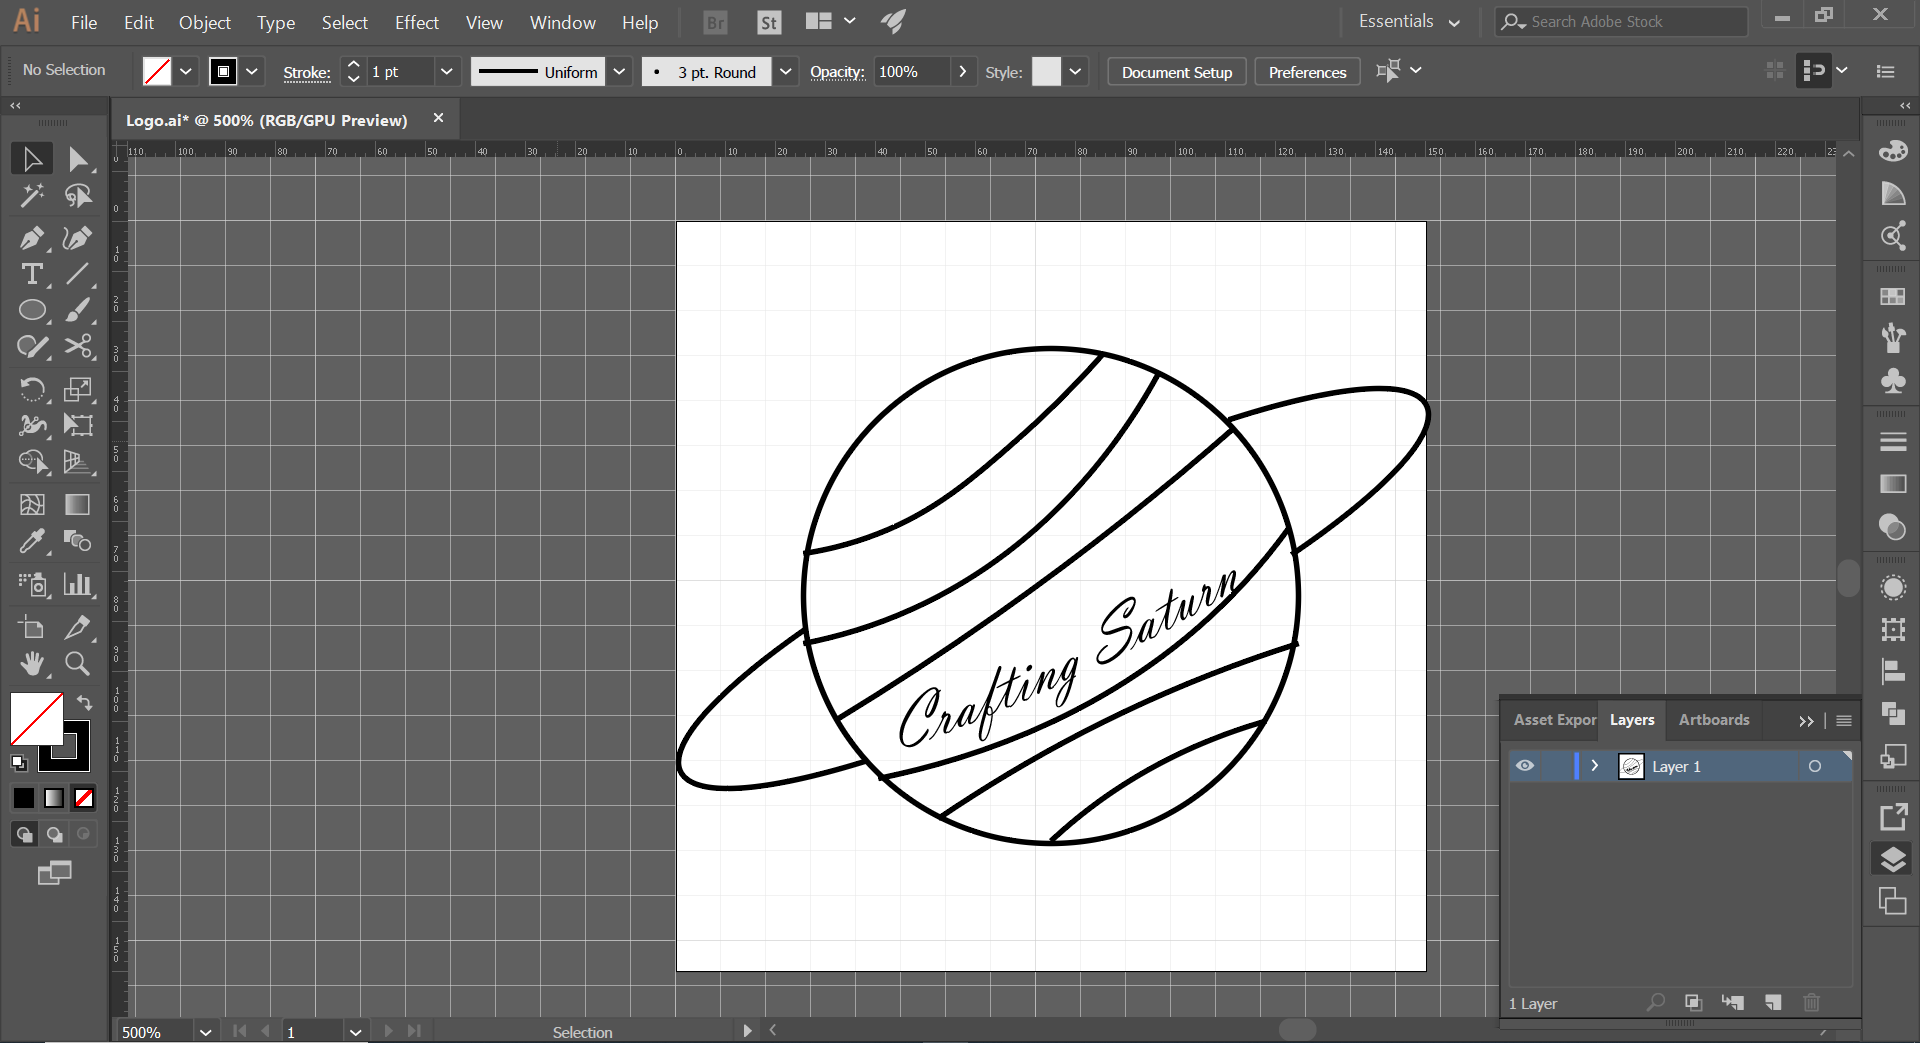
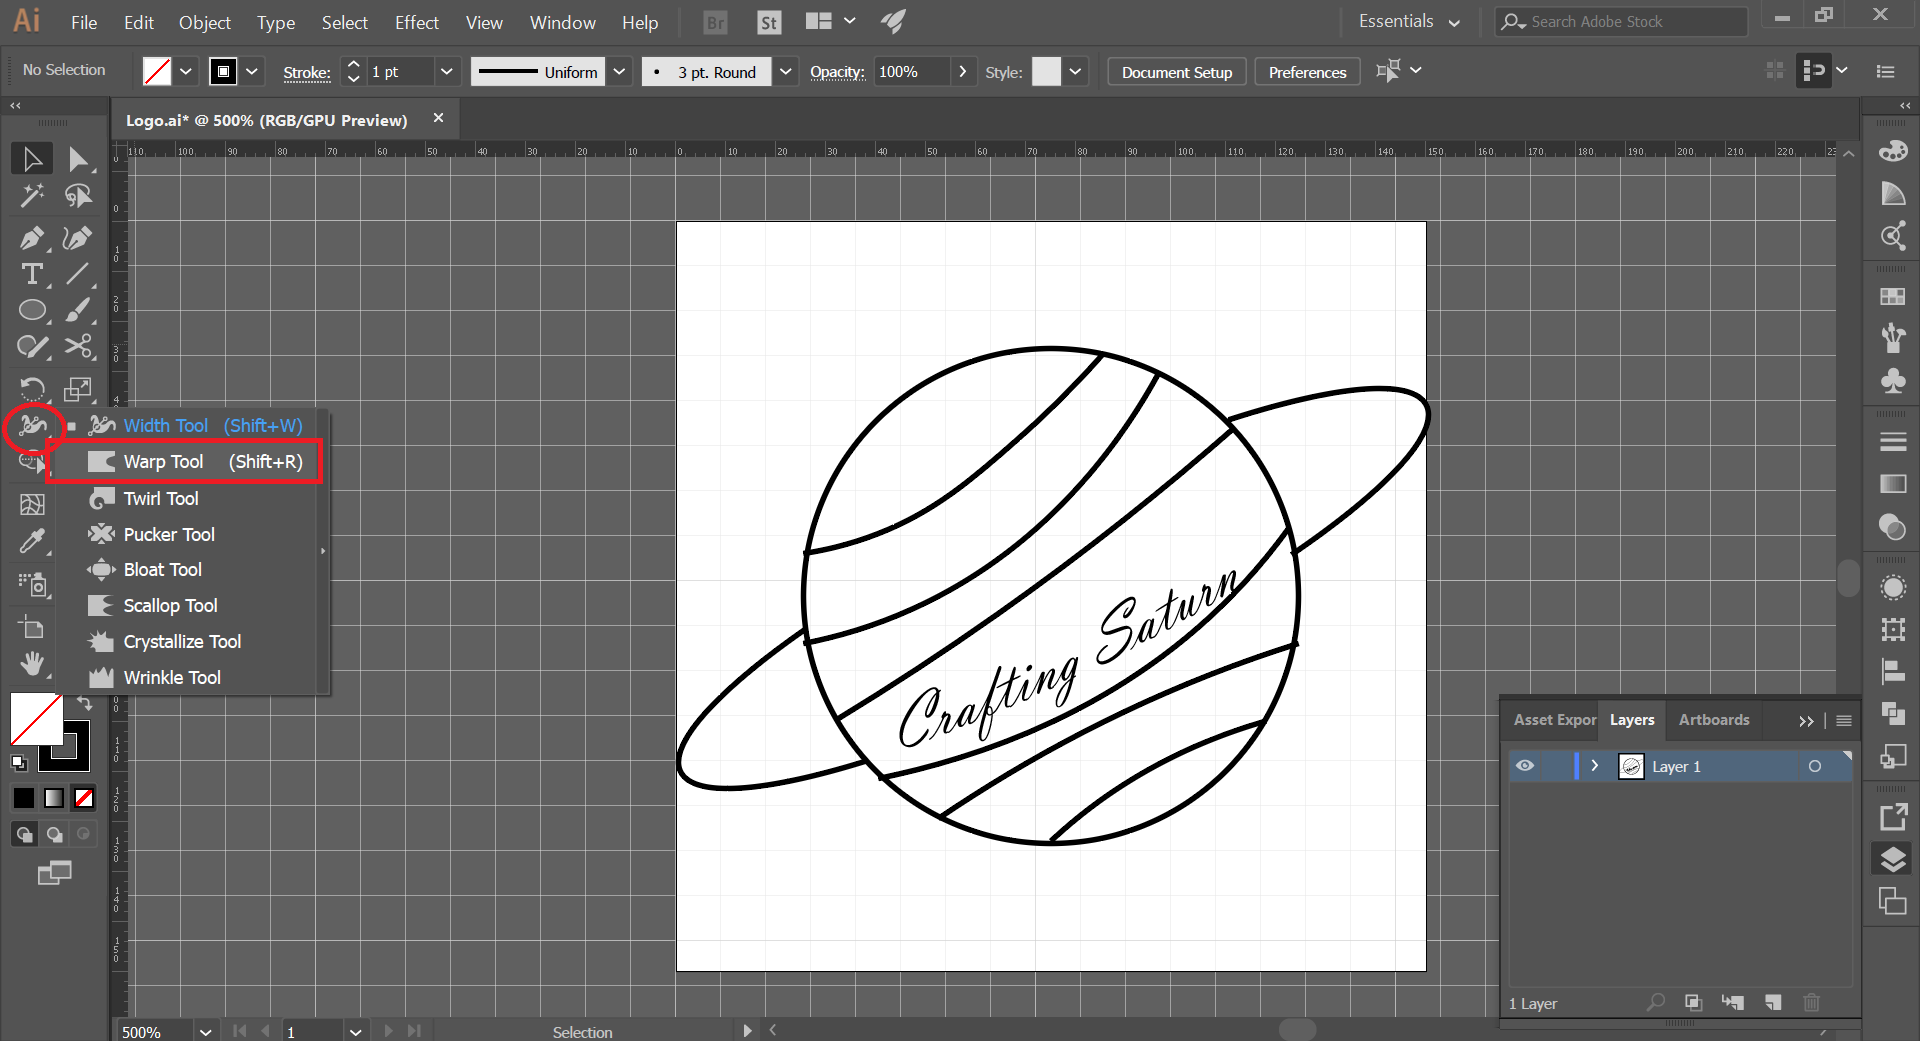
- With Curvature tool, make freehand lines that simulate the shades of the planet.
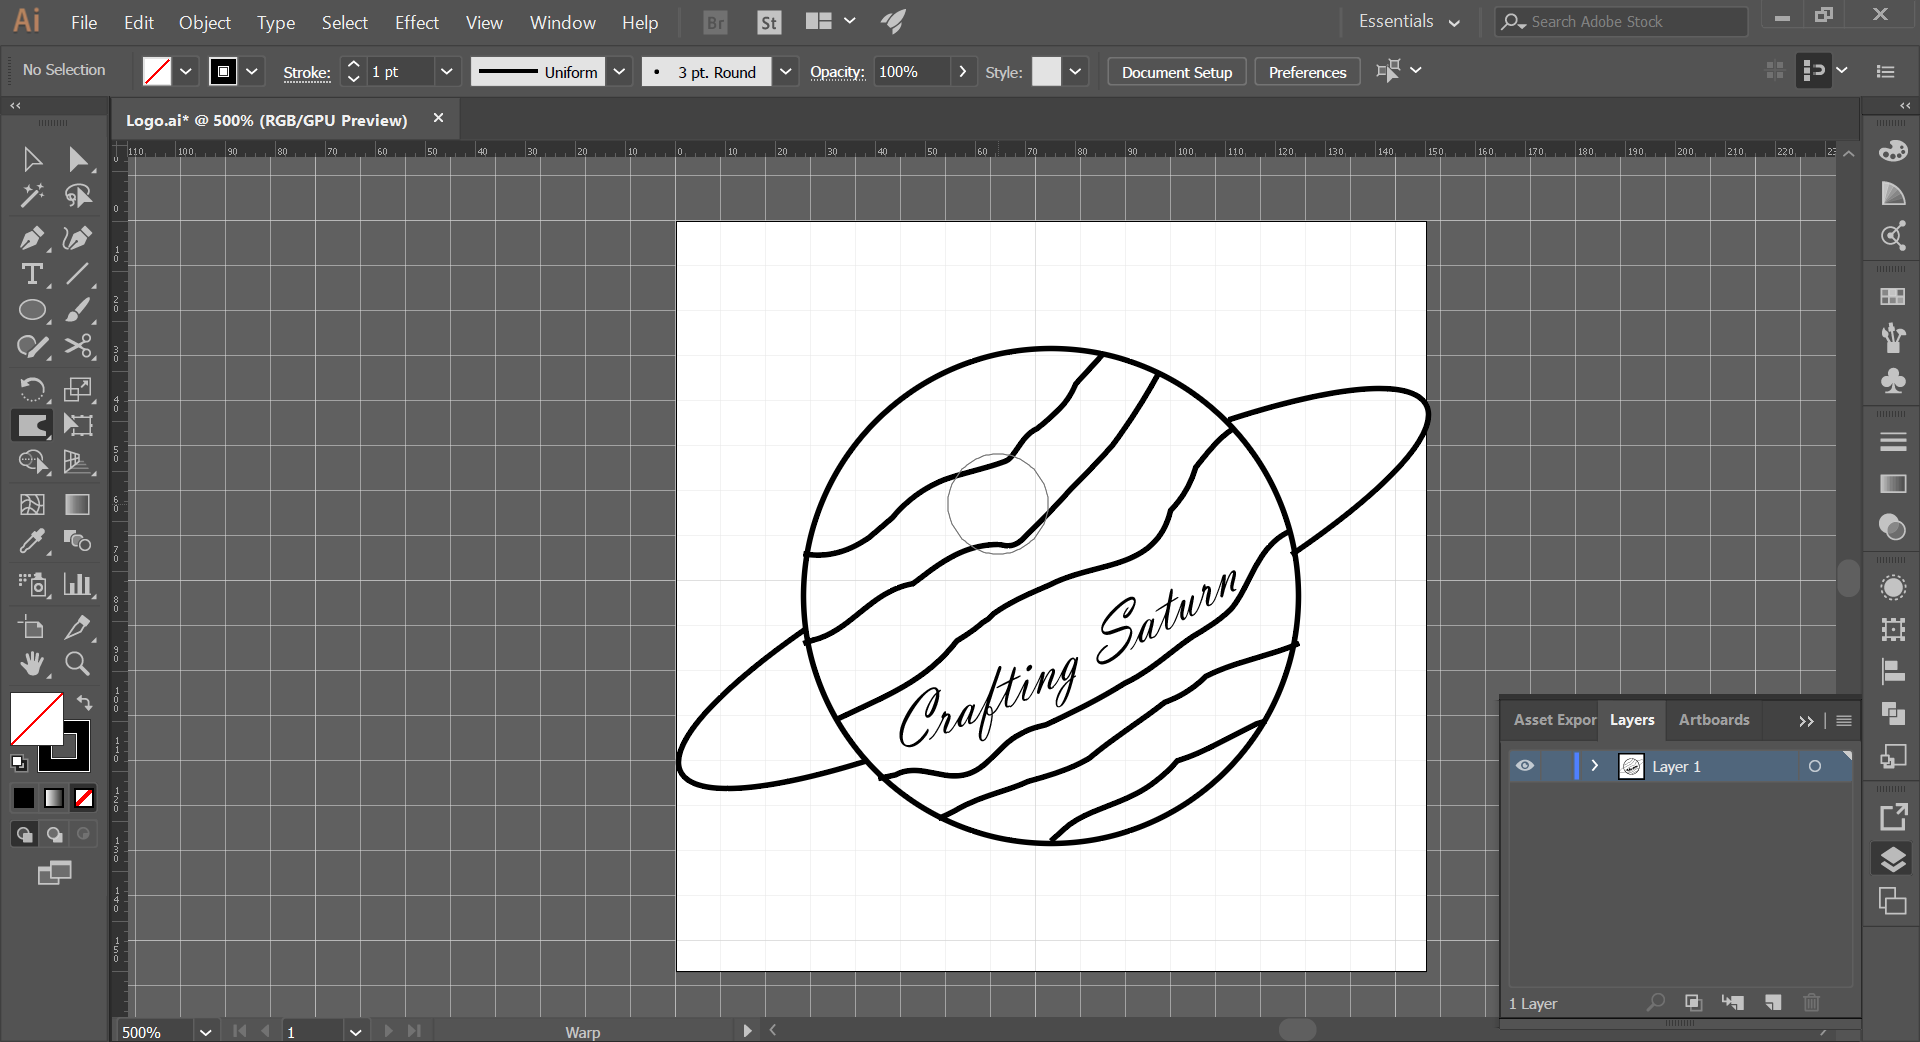
- Then, use the warp tool to make the lines not so clean. This will help the stitch brush look more natural.
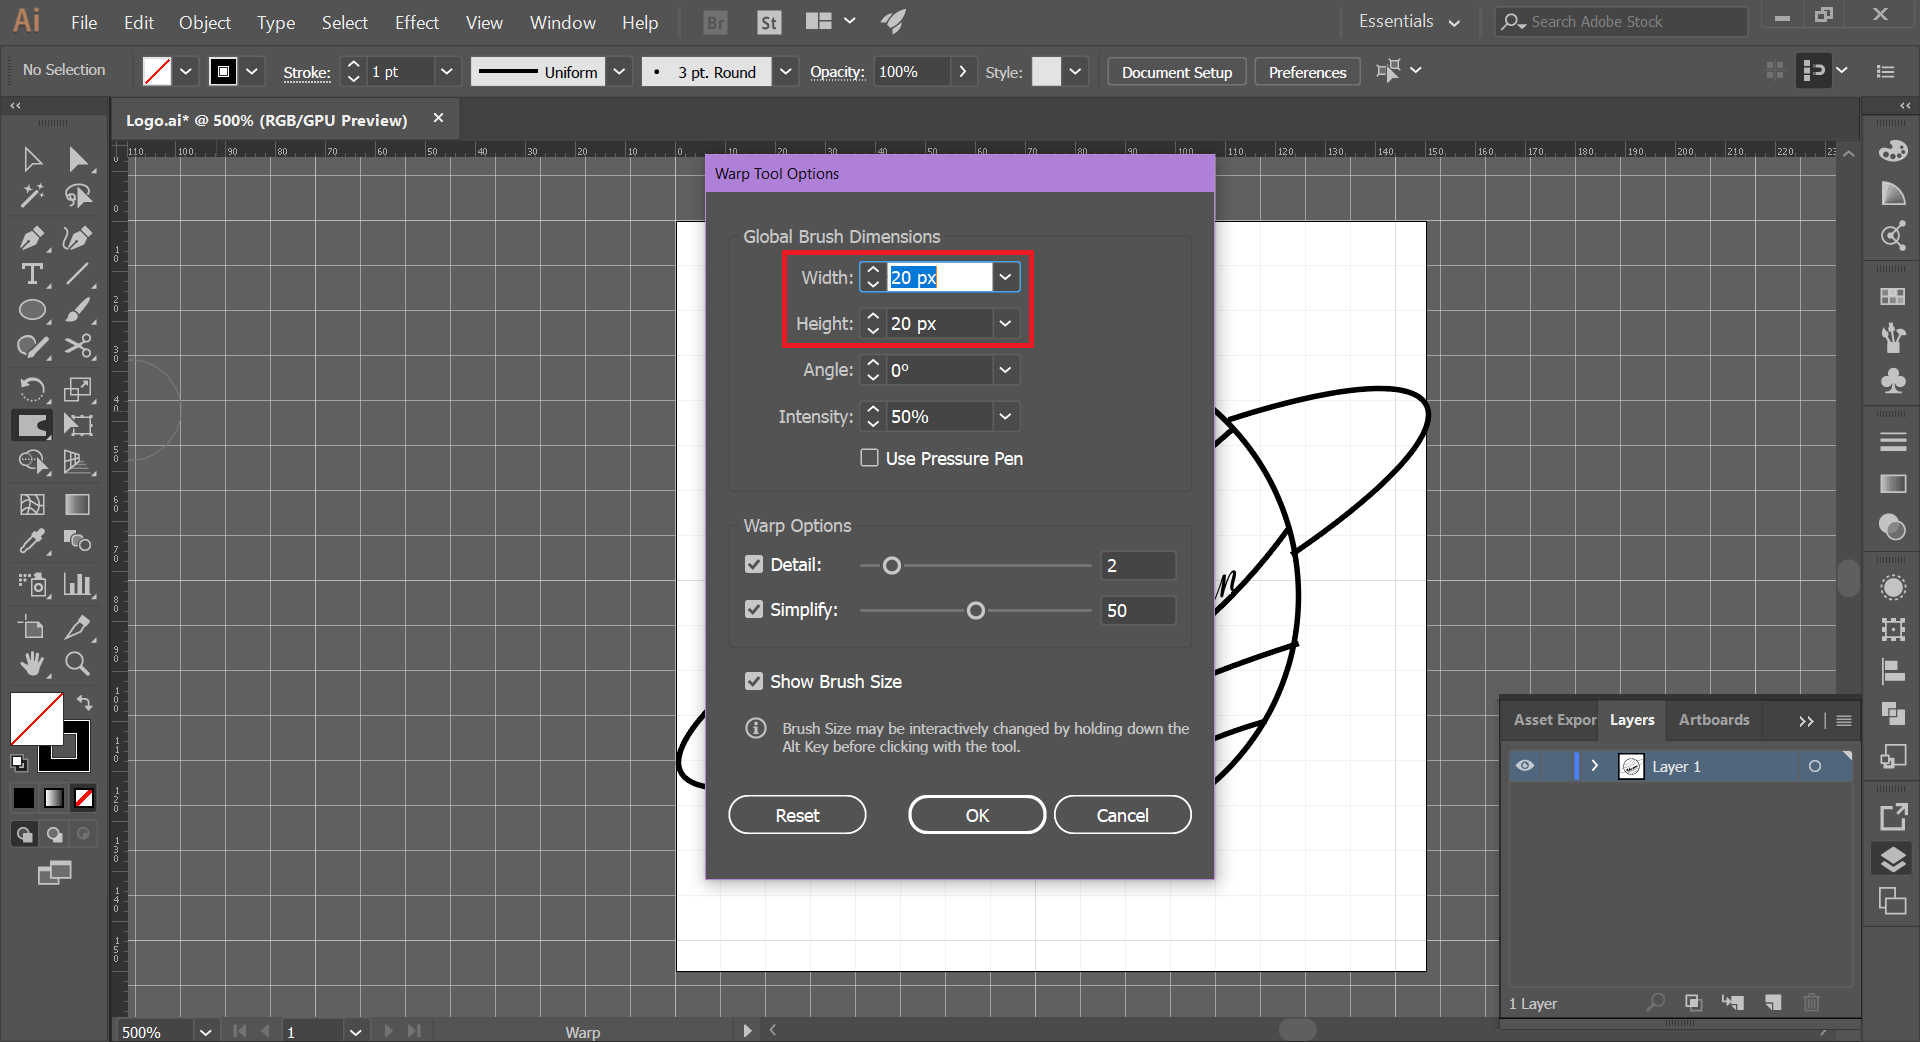
- Double click on warp tool, and give the following settings to the warp brush circle: W: 20px, H: 20px.
- Hold down the right click while passing the circle through the inner curved lines of the planet.
Applying Brush Patterns to Lines
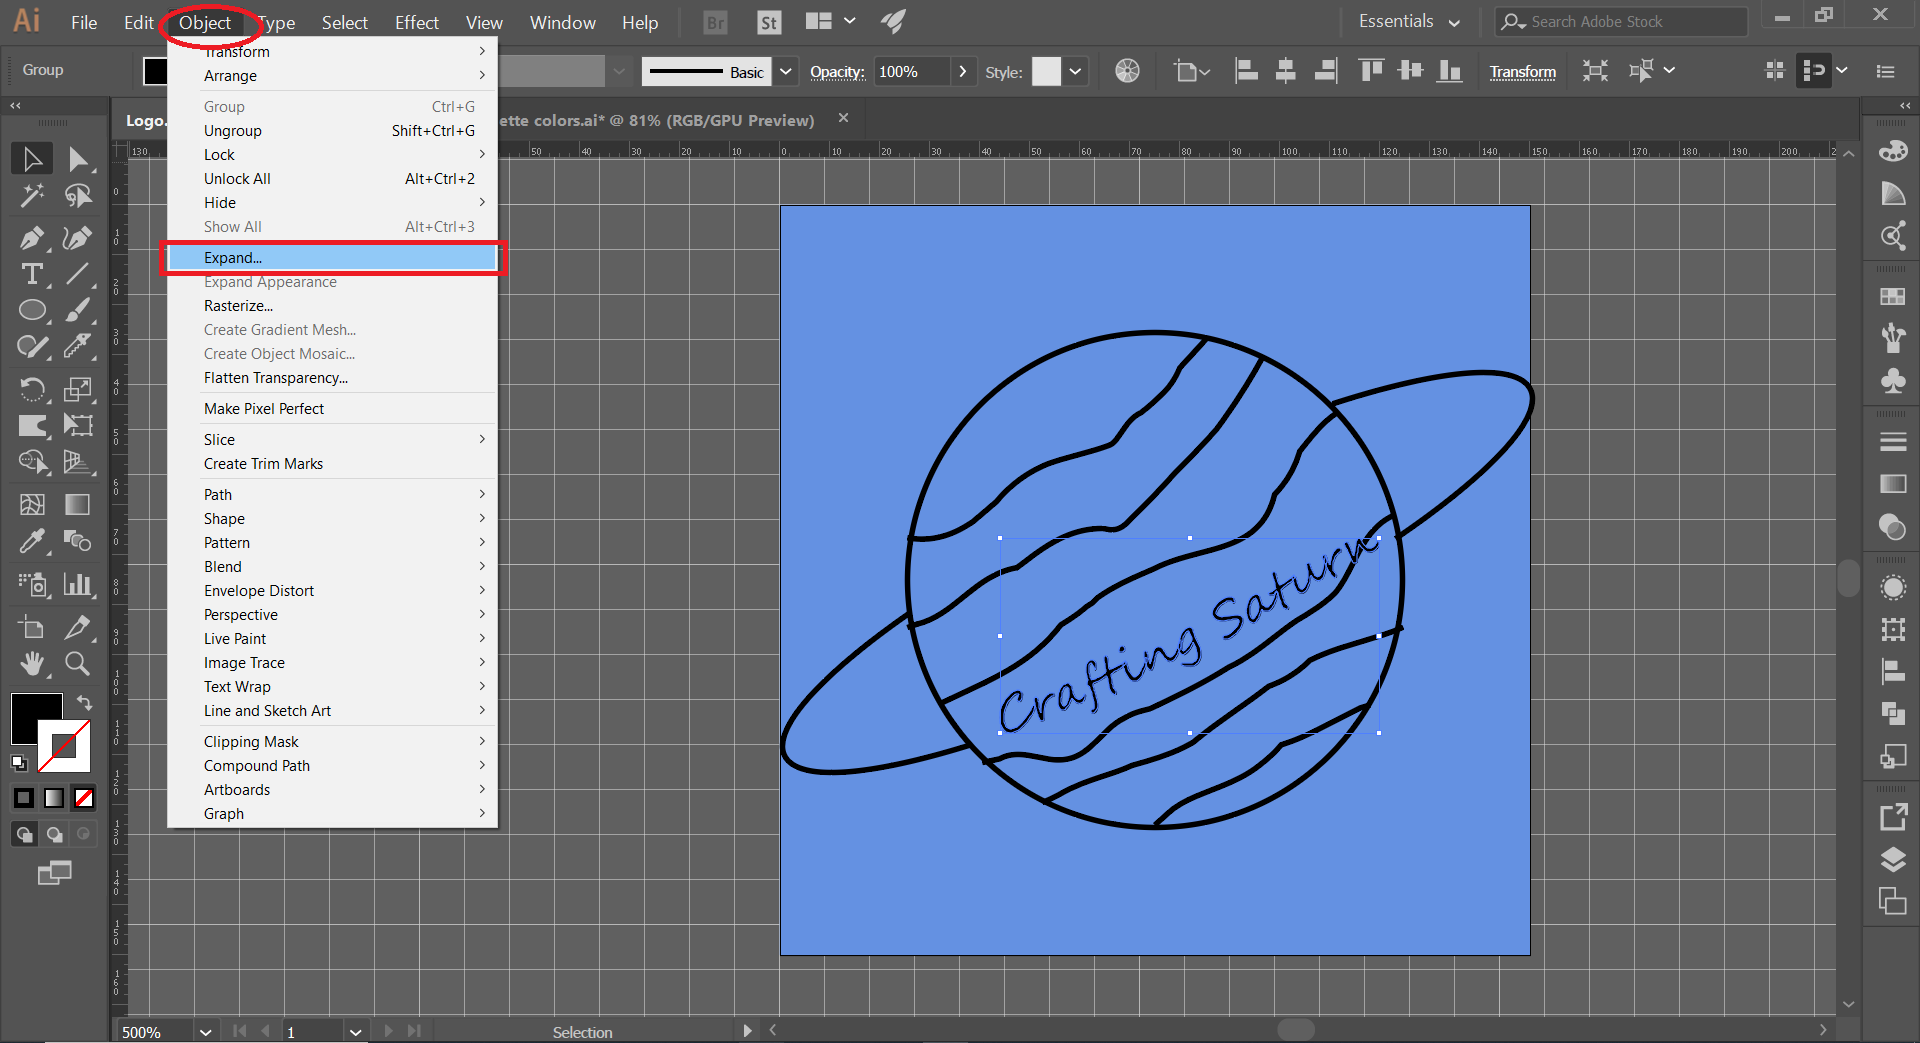
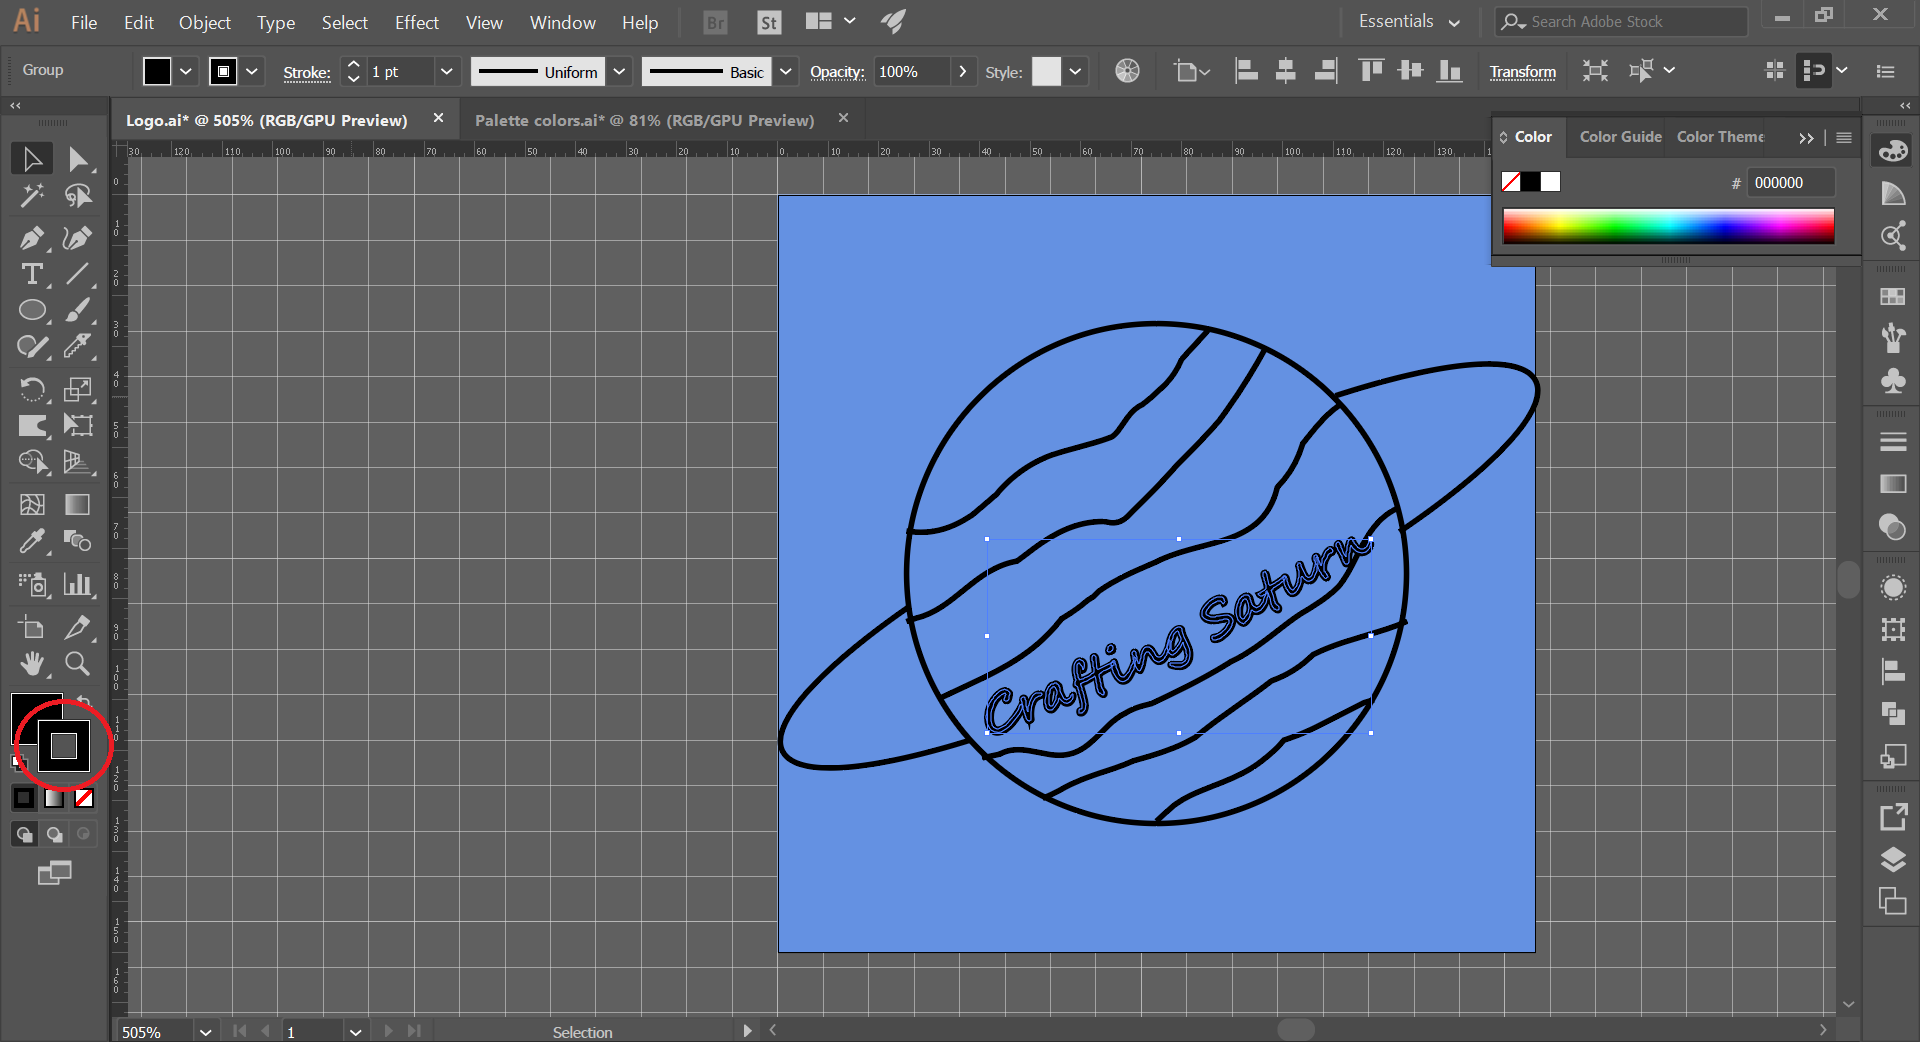
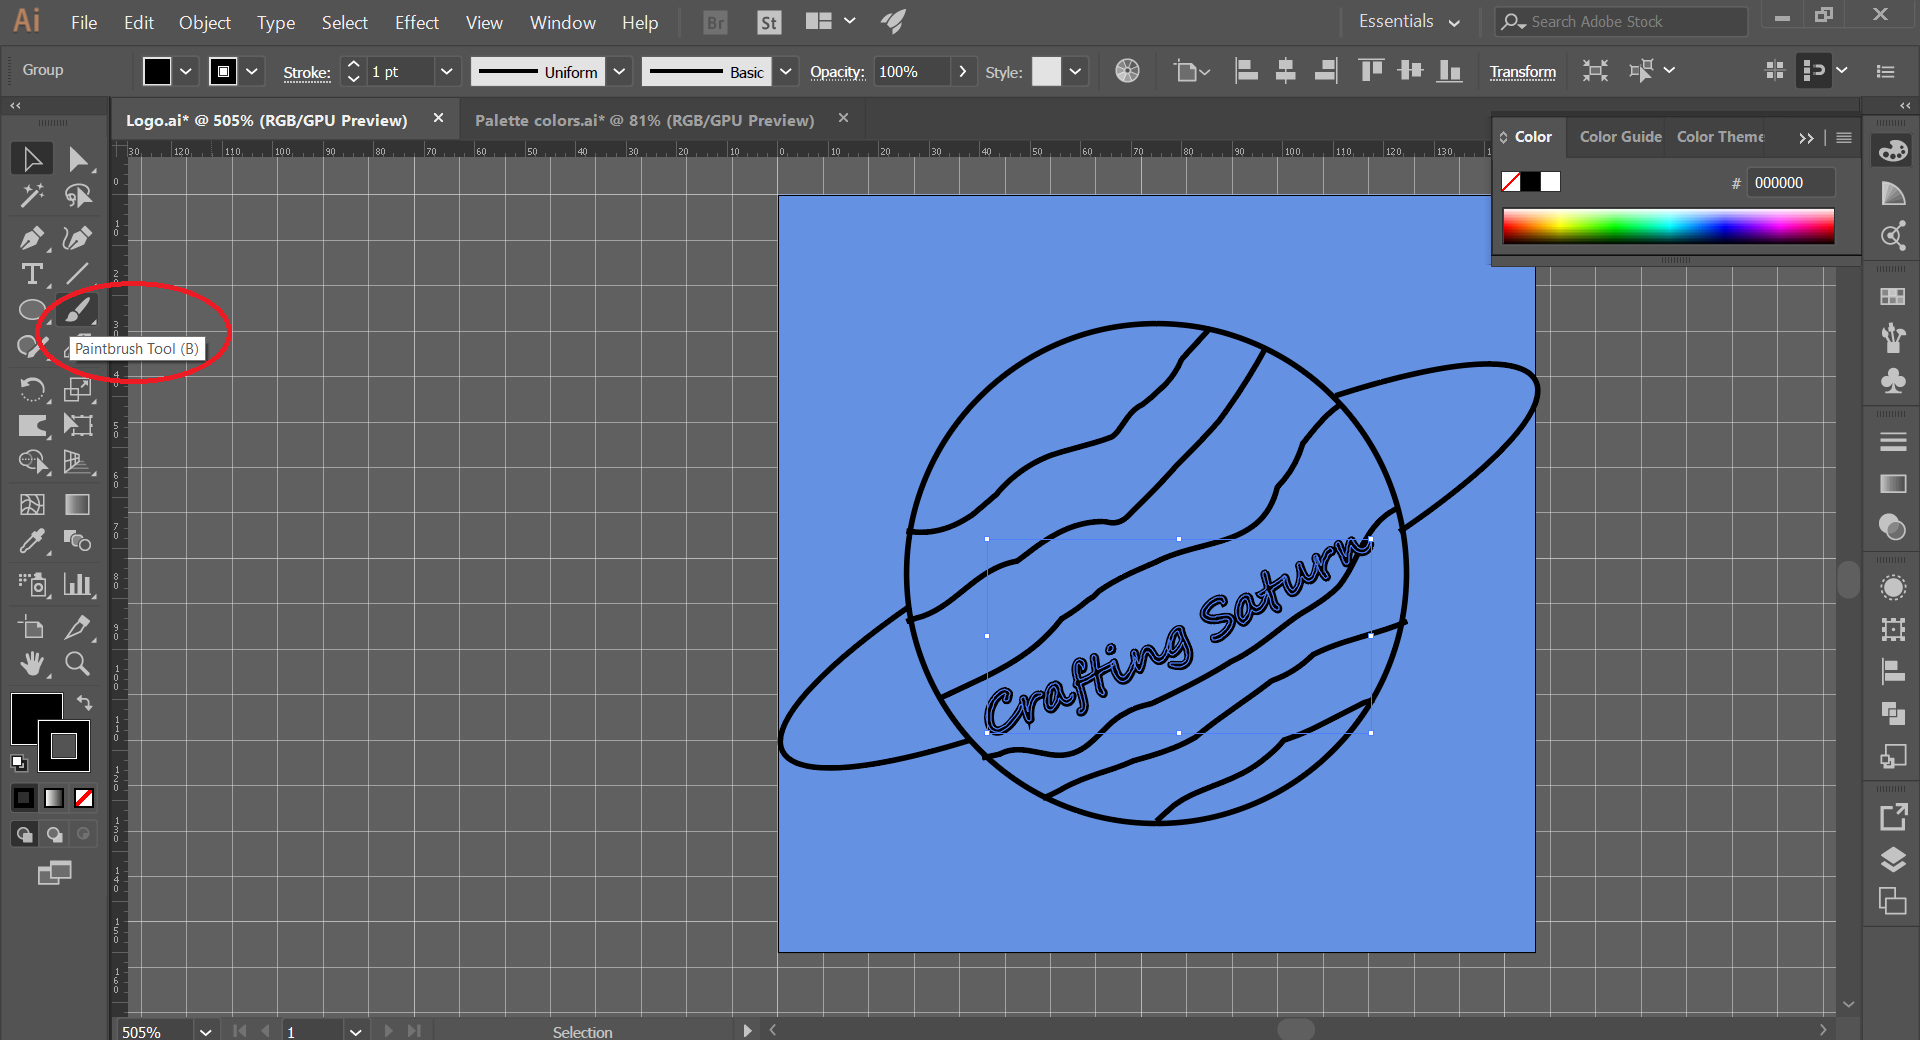
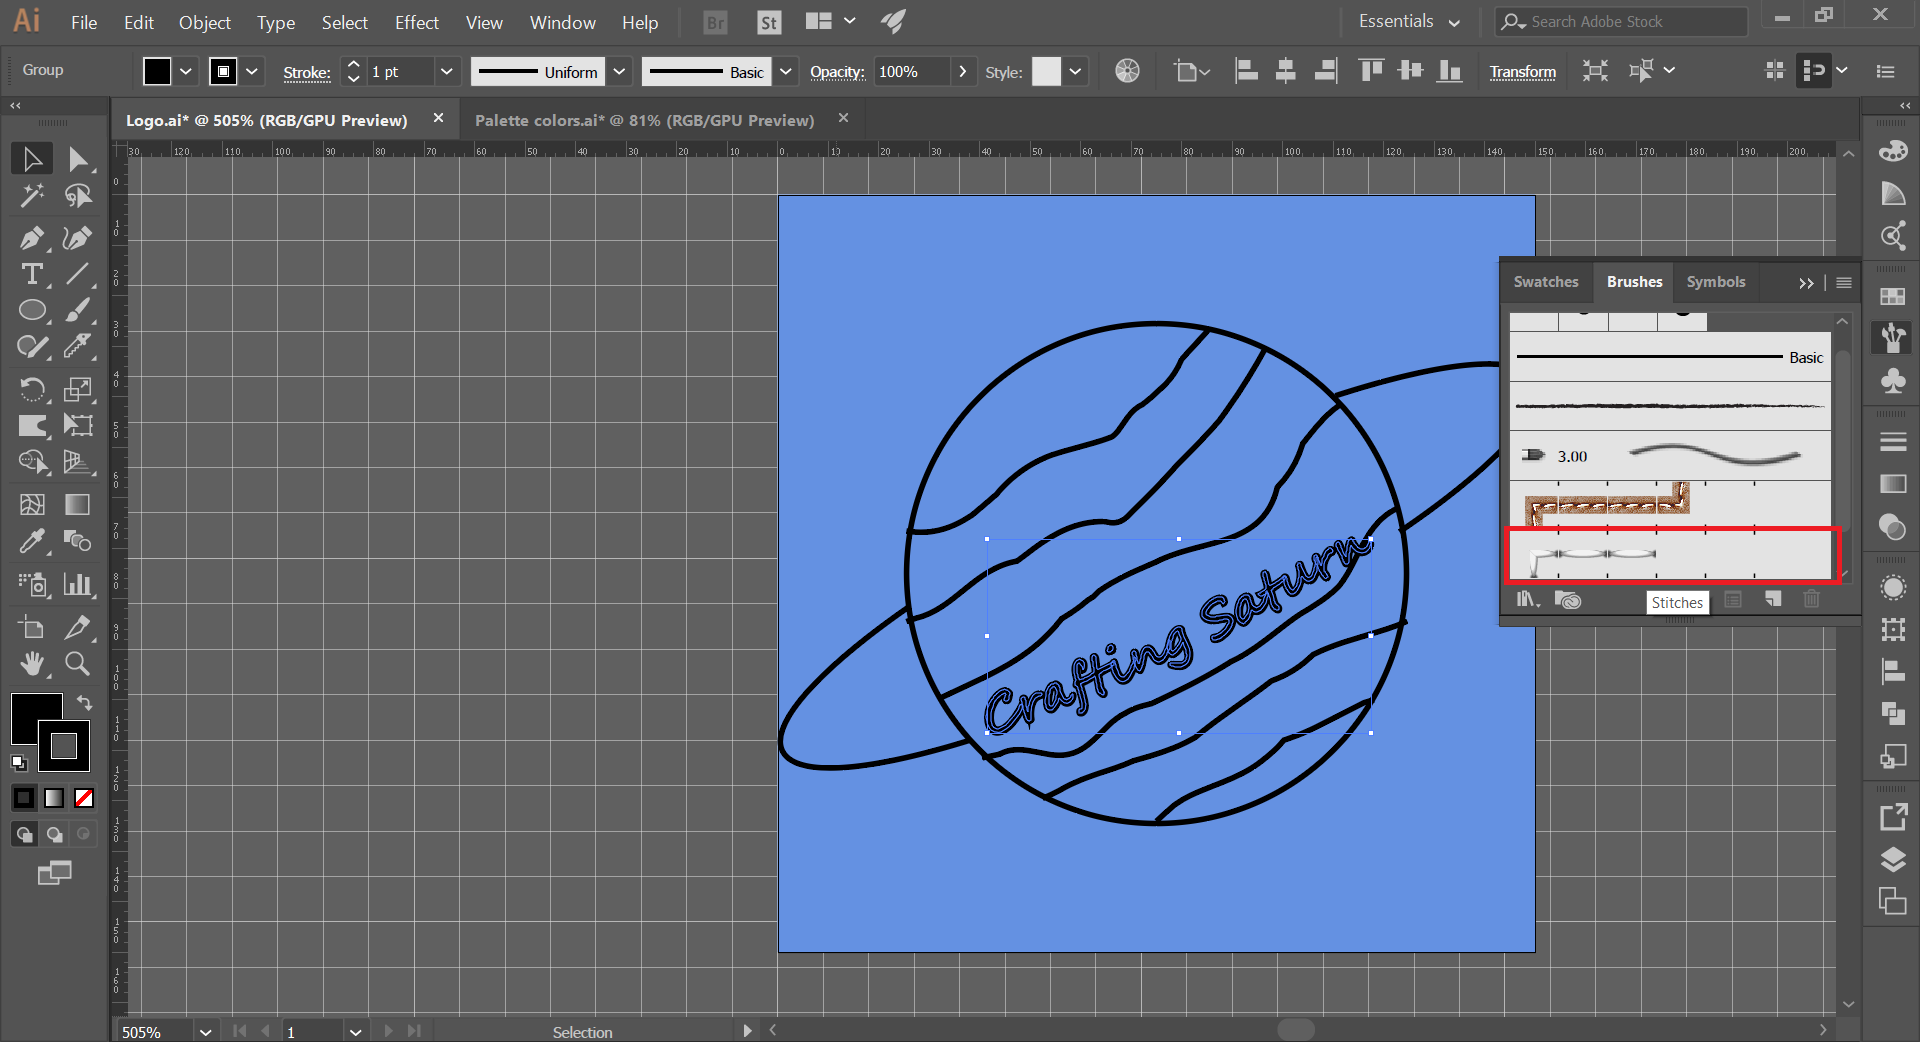
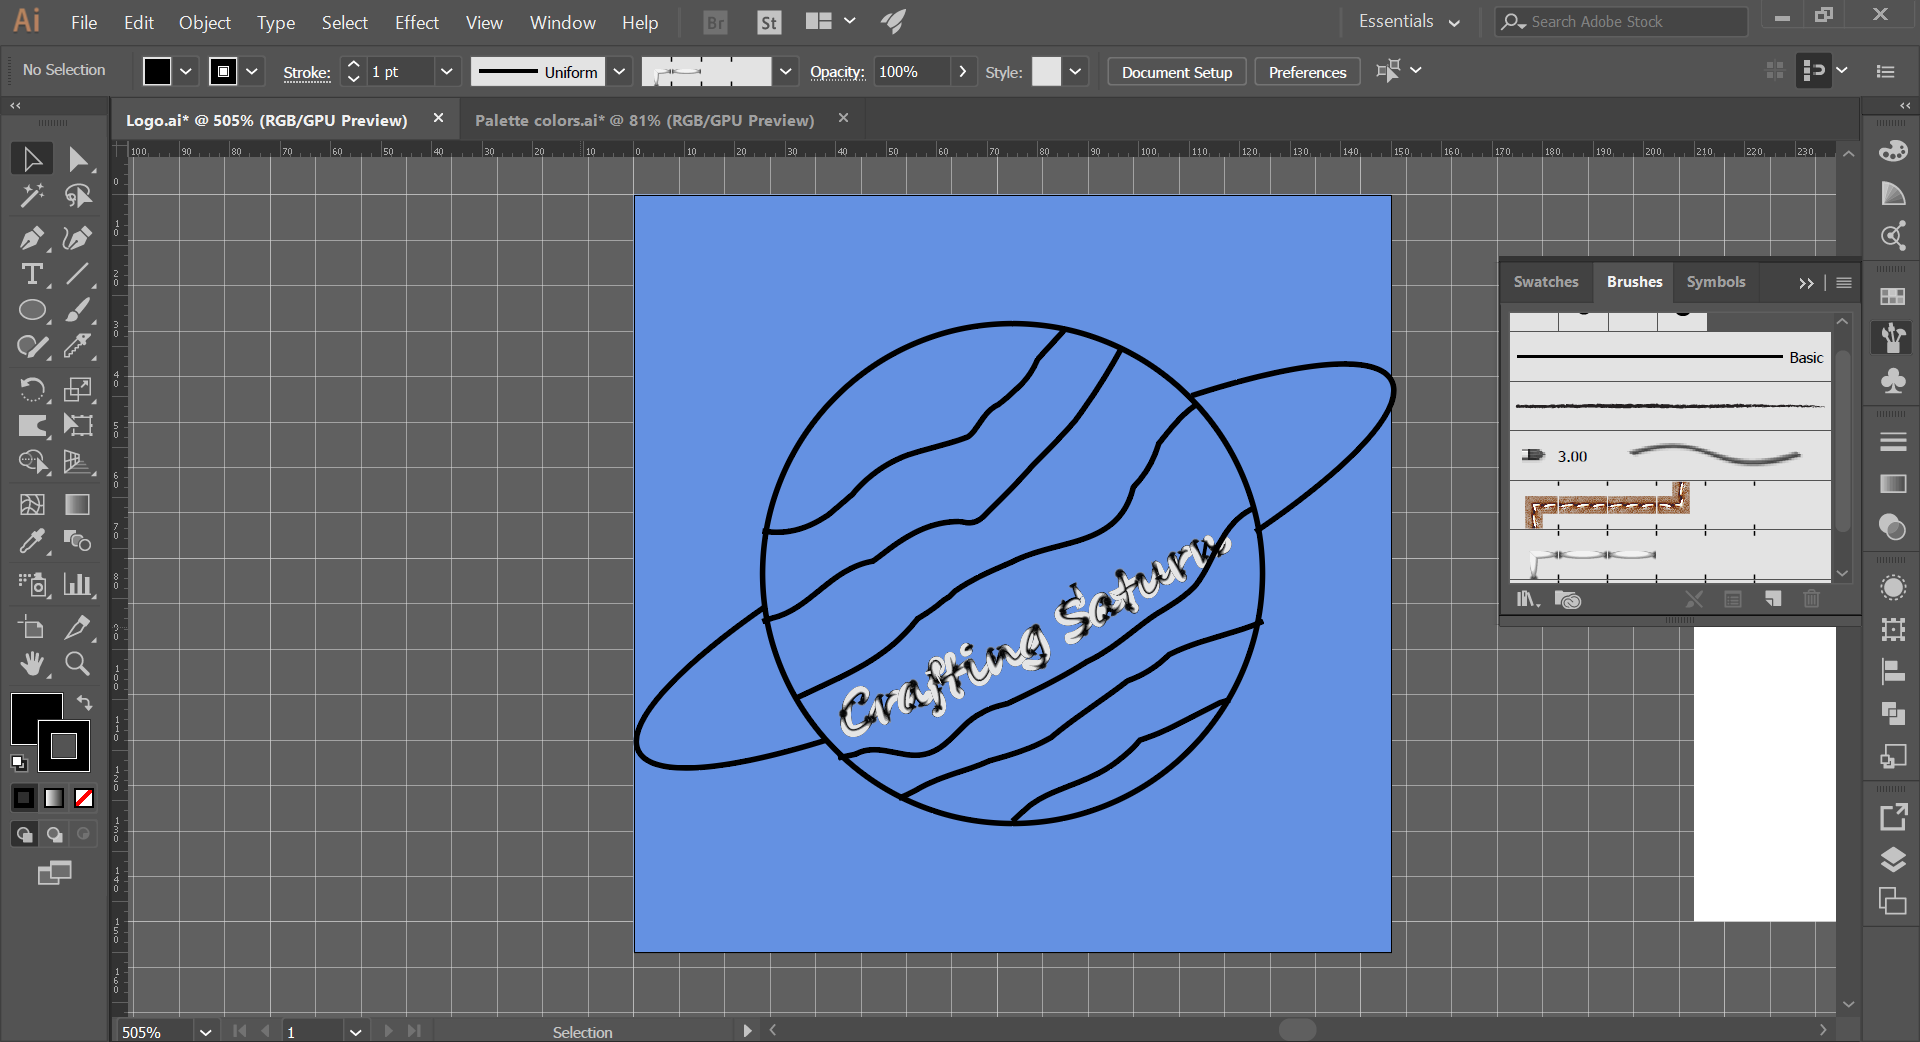
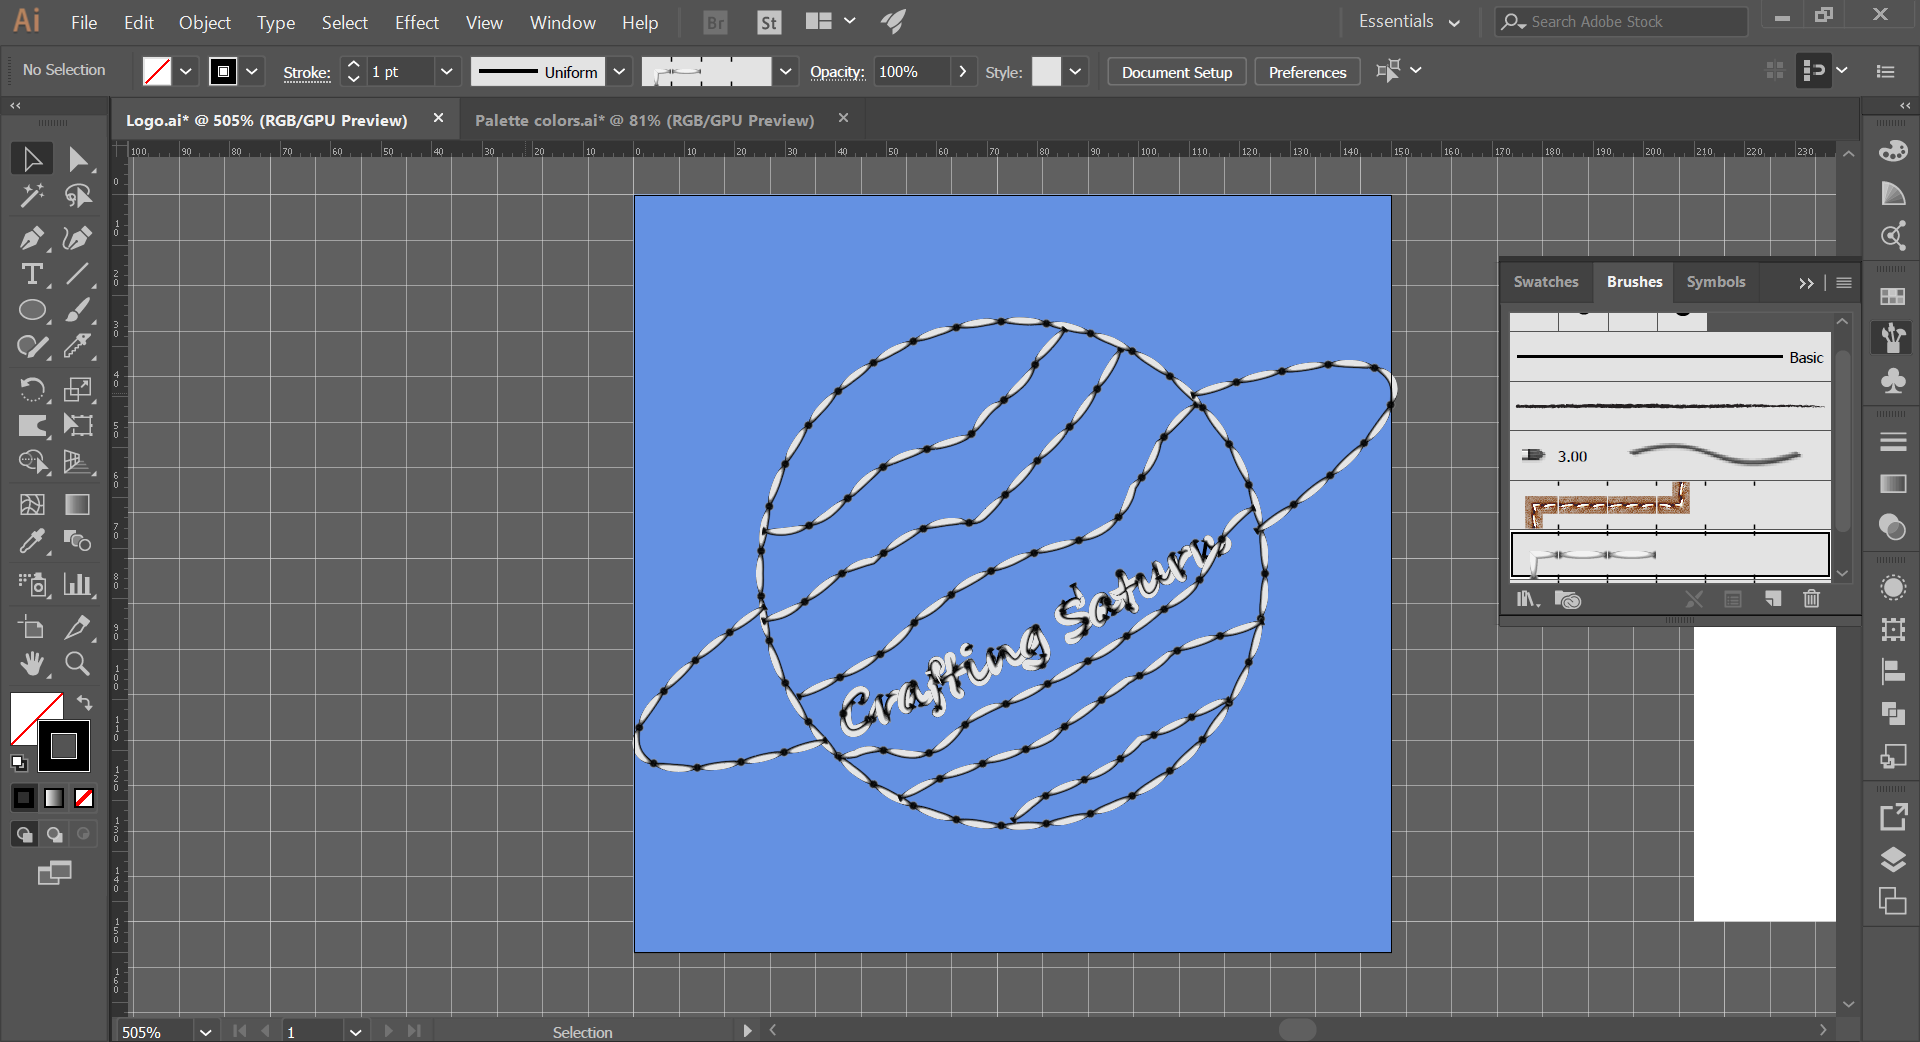
Change logo text settings to be able to apply the brush style:
- We can change the font before doing this step.
- Select the text and click on Expand.
- Select a stroke color.
- With the text selected, click on Paintbrush tool.
- Go to the brushes tab and select the stitching brush we made in step 3.
- We apply the brush as a contour of the letters.
- Now we proceed to apply the brush to the rest of the lines of the planet.
Applying Color to the Lines
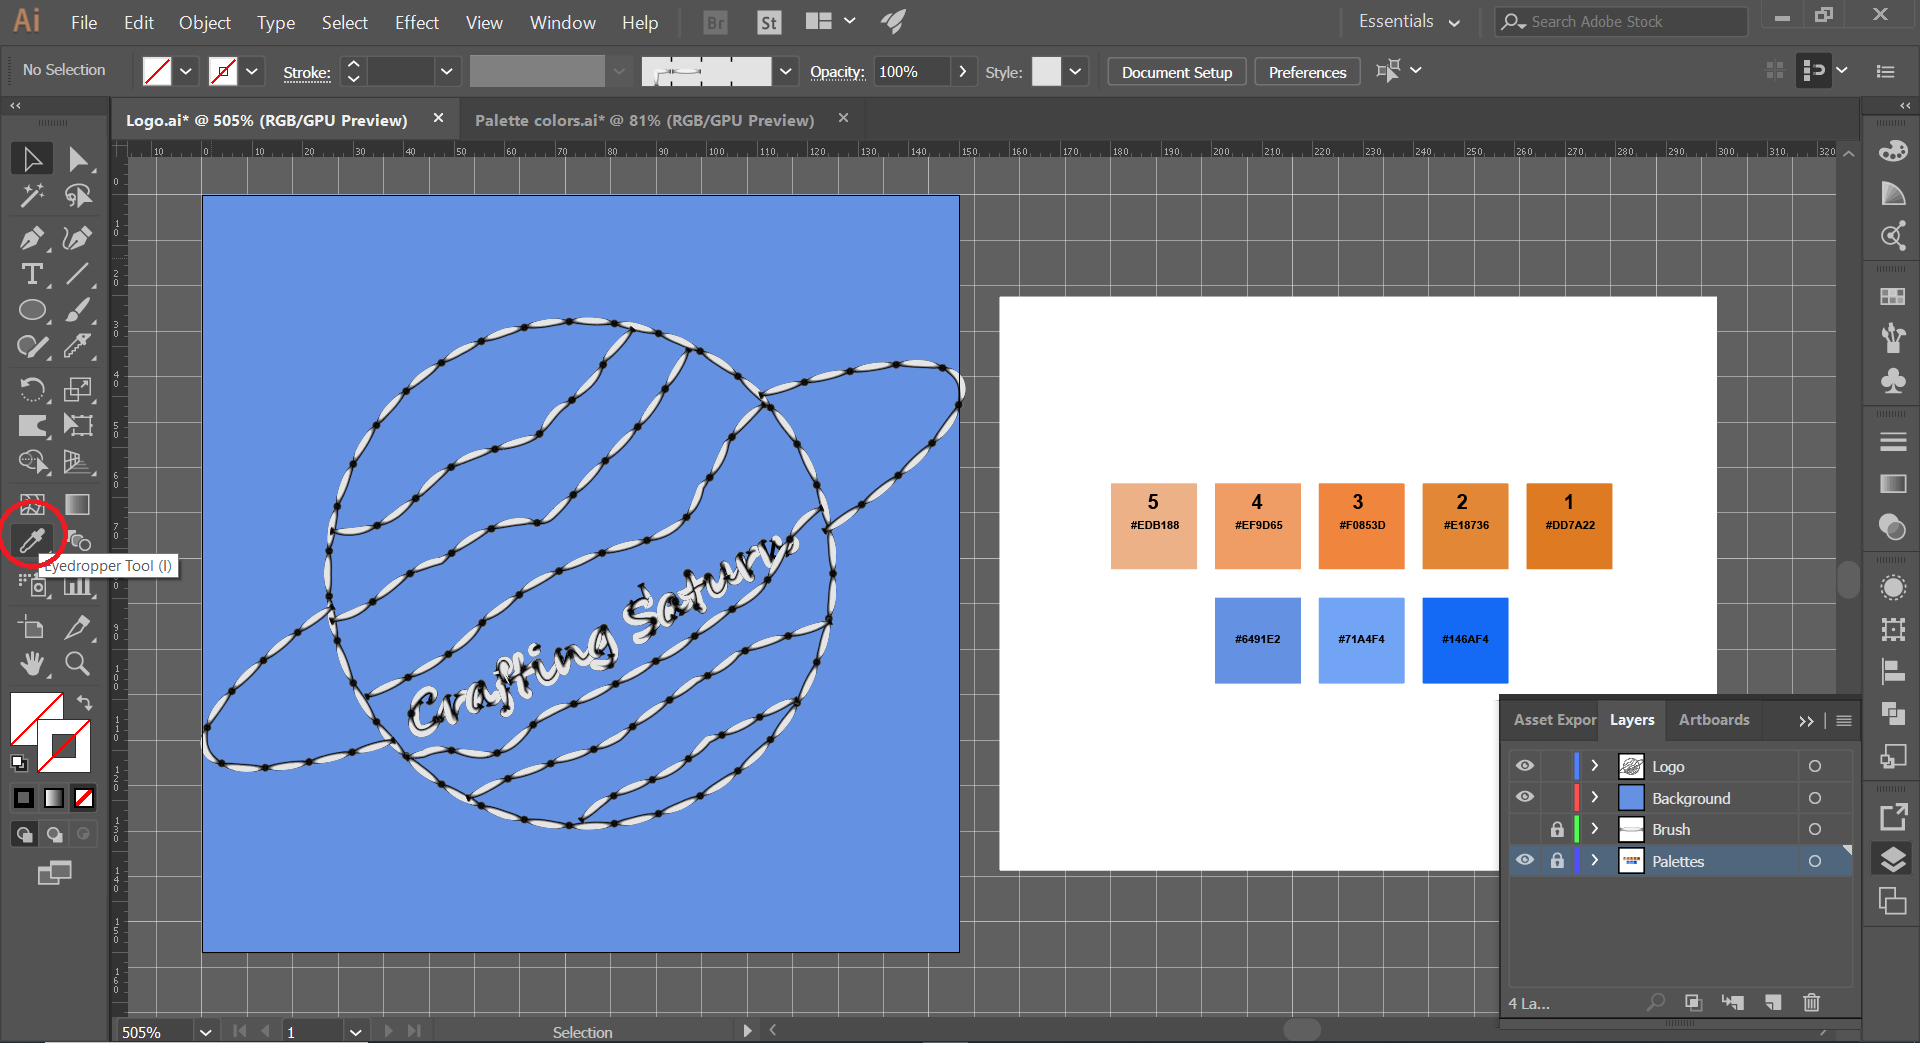
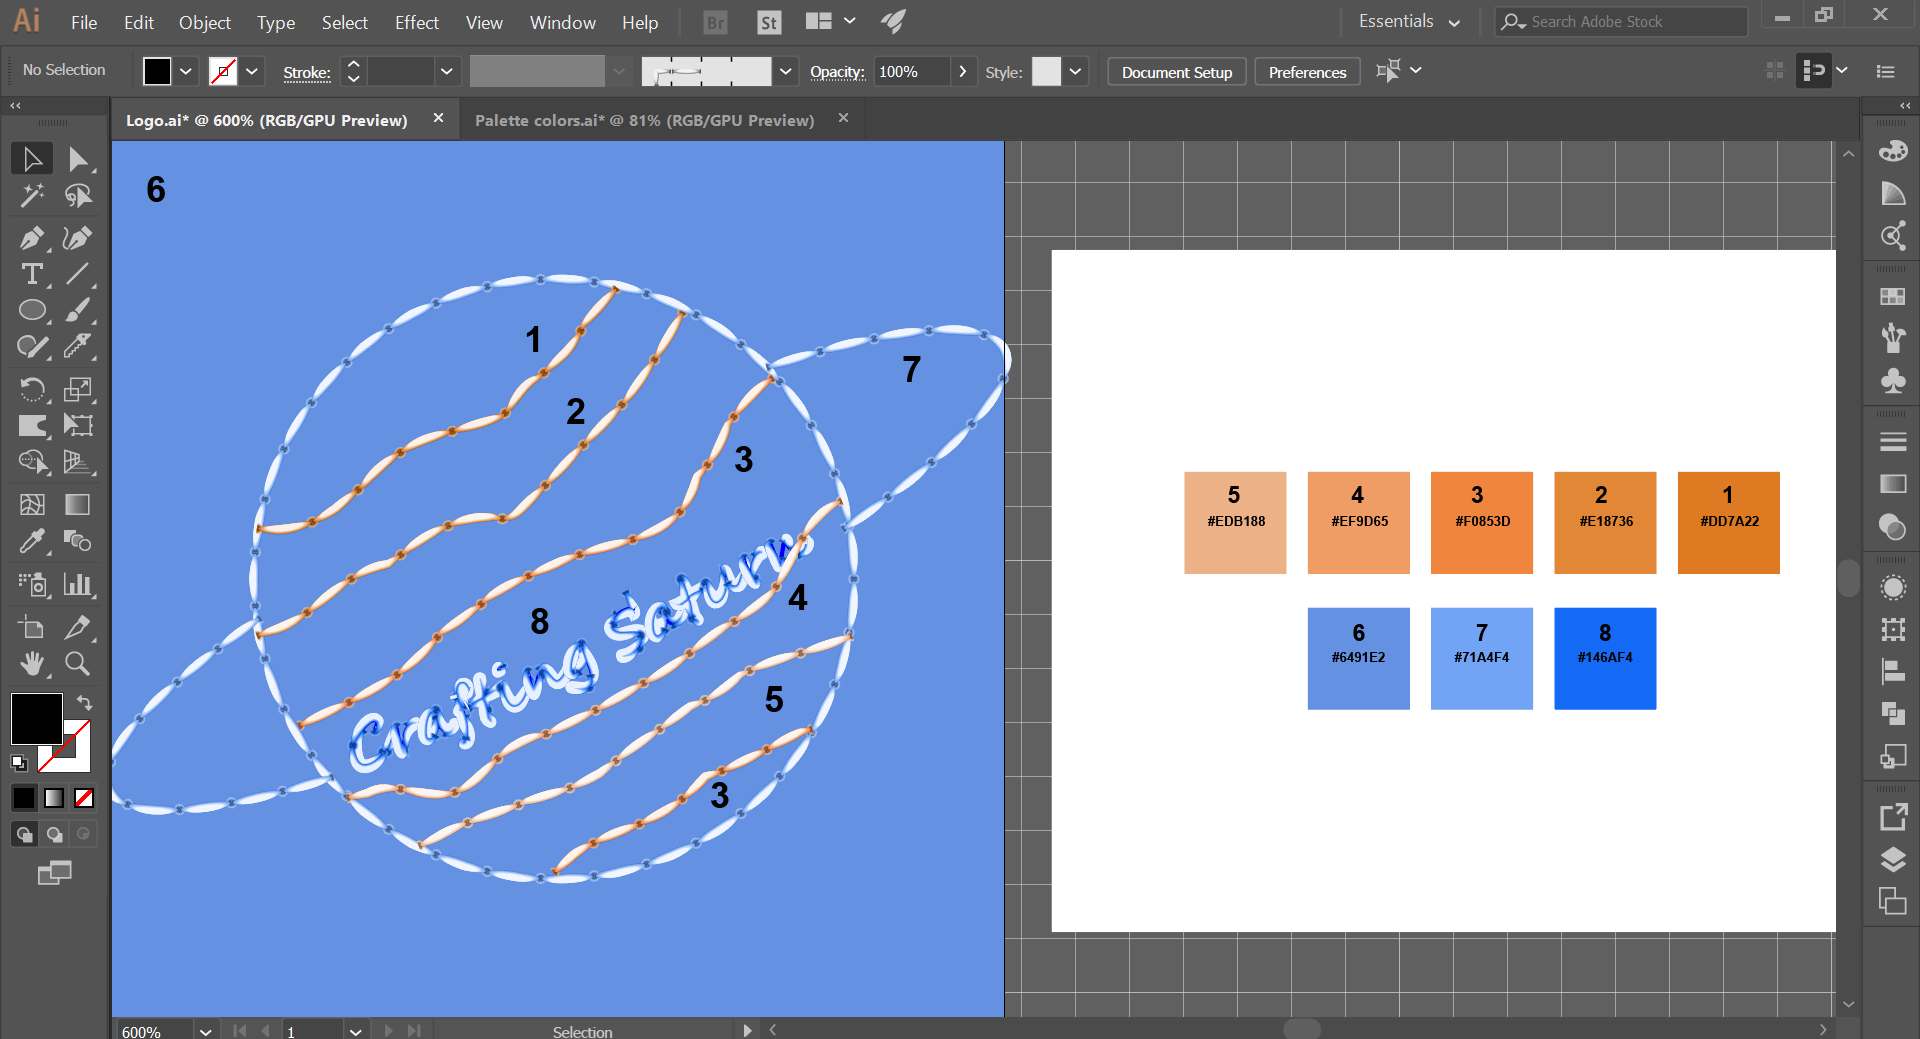
Select the lines made in the previous step and with the Eyedropper tool, select the stitching color with the color of your choice.
- First we select a stroke
- Then the Eyedropper tool,
- Finally we select the color.
Remember to change from fill to stroke, after selecting the color.
Saving Logo
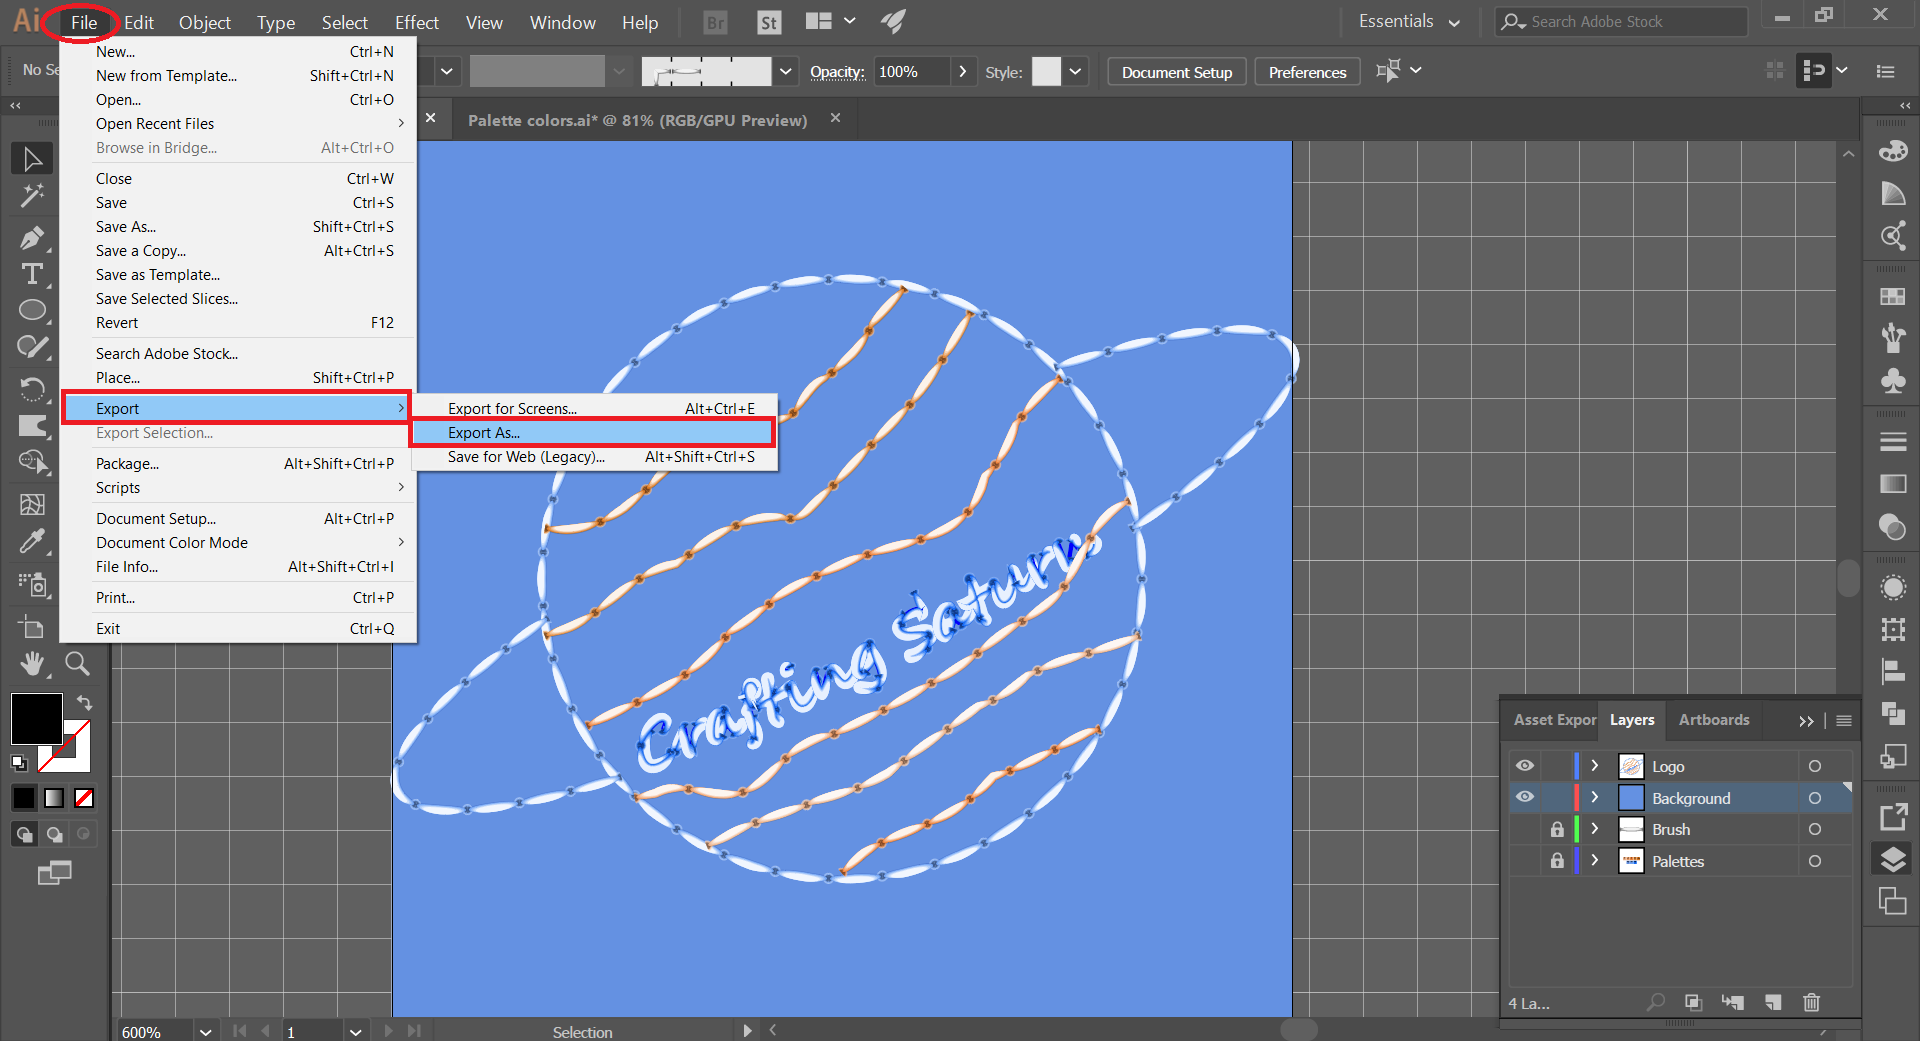
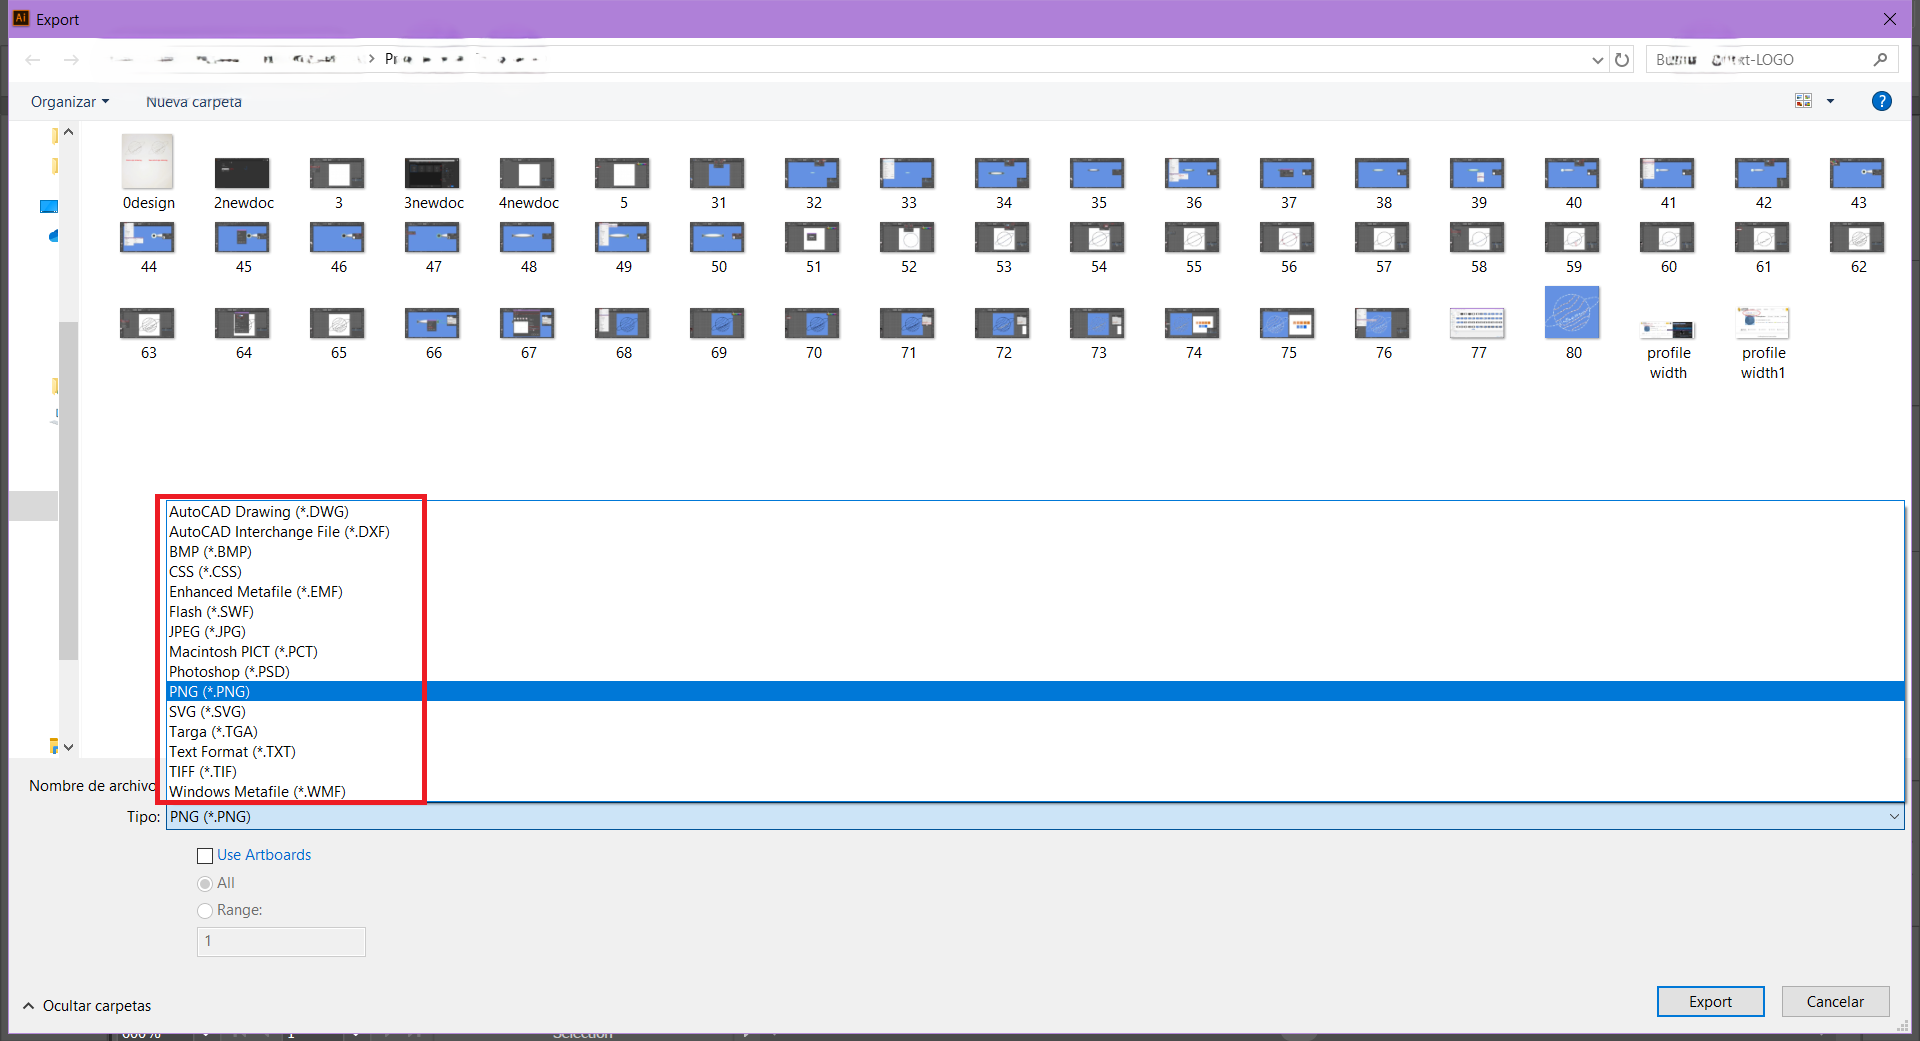
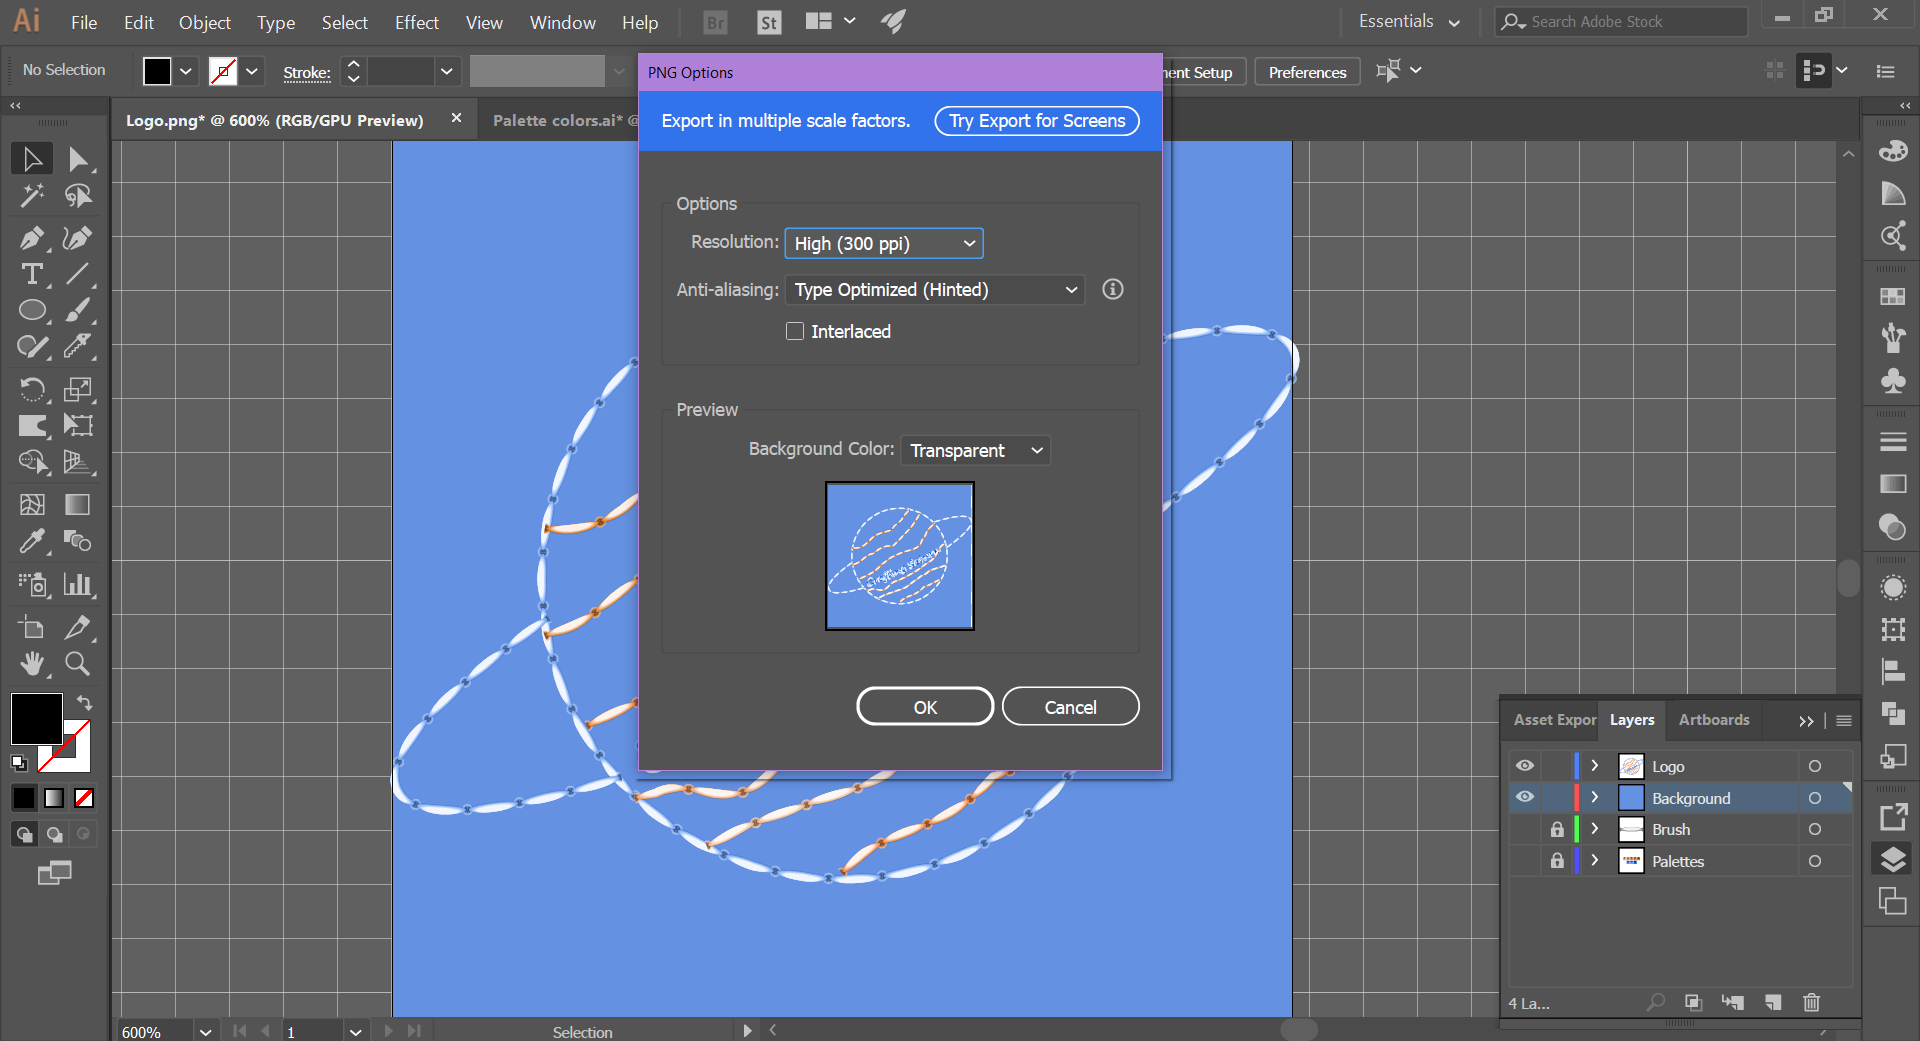
To export the logo
- Go to the File tab, then Export, and Export As.
- A file folder opens.
- We can export our logo here, or select any other folder and we can export them to different formats too.
- Once the folder is selected, we get a floating Adobe Illustrator window where it shows us the option to save the logo in different resolutions.
- We click on OK and that's it; our logo will be saved in the folder we selected, in the format we indicated and the resolution we chose.