How to Make an Axe Model (and Then Turn It Into a Video Game)
by ilikebattlecats in Design > Digital Graphics
318 Views, 1 Favorites, 0 Comments
How to Make an Axe Model (and Then Turn It Into a Video Game)
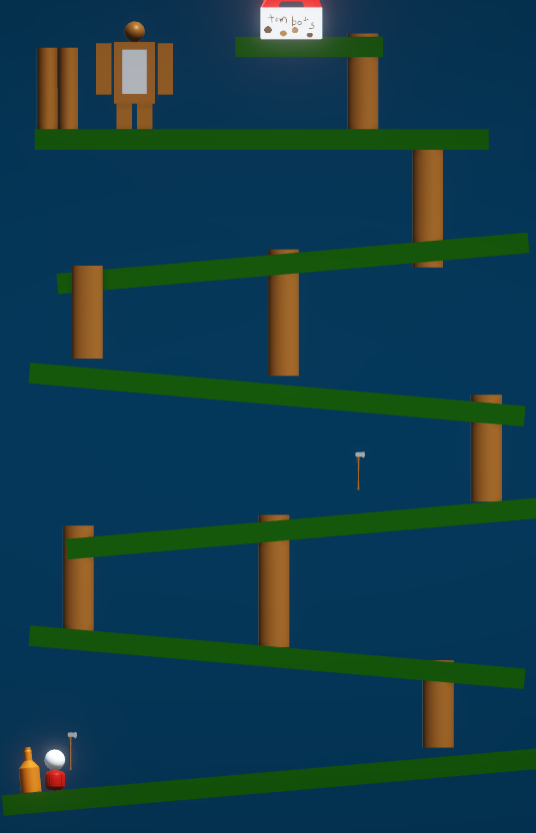
Hello, my name is Marcus Li from Dublin Jerome High School. I had an idea for a video game when I heard of this contest: Donkey Kong. However, I needed to put a spin on it somehow. Eventually, I decided to make it about Canadians for no particular reason. Anyway, what is the first Canadian stereotype you think of? Lumberjacks came to mind for me. So, the plan was to replace Mario with a lumberjack and replace Donkey Kong with a sasquatch/Bigfoot and recreate the mechanics of the game in Unity.
Play the game at Canadian Donkey Kong by BattleCatPerson (itch.io)
Supplies
- Fusion 360
- Unity Game Engine v2021.3.11f1
- Unity Hub
Create the Axe Model
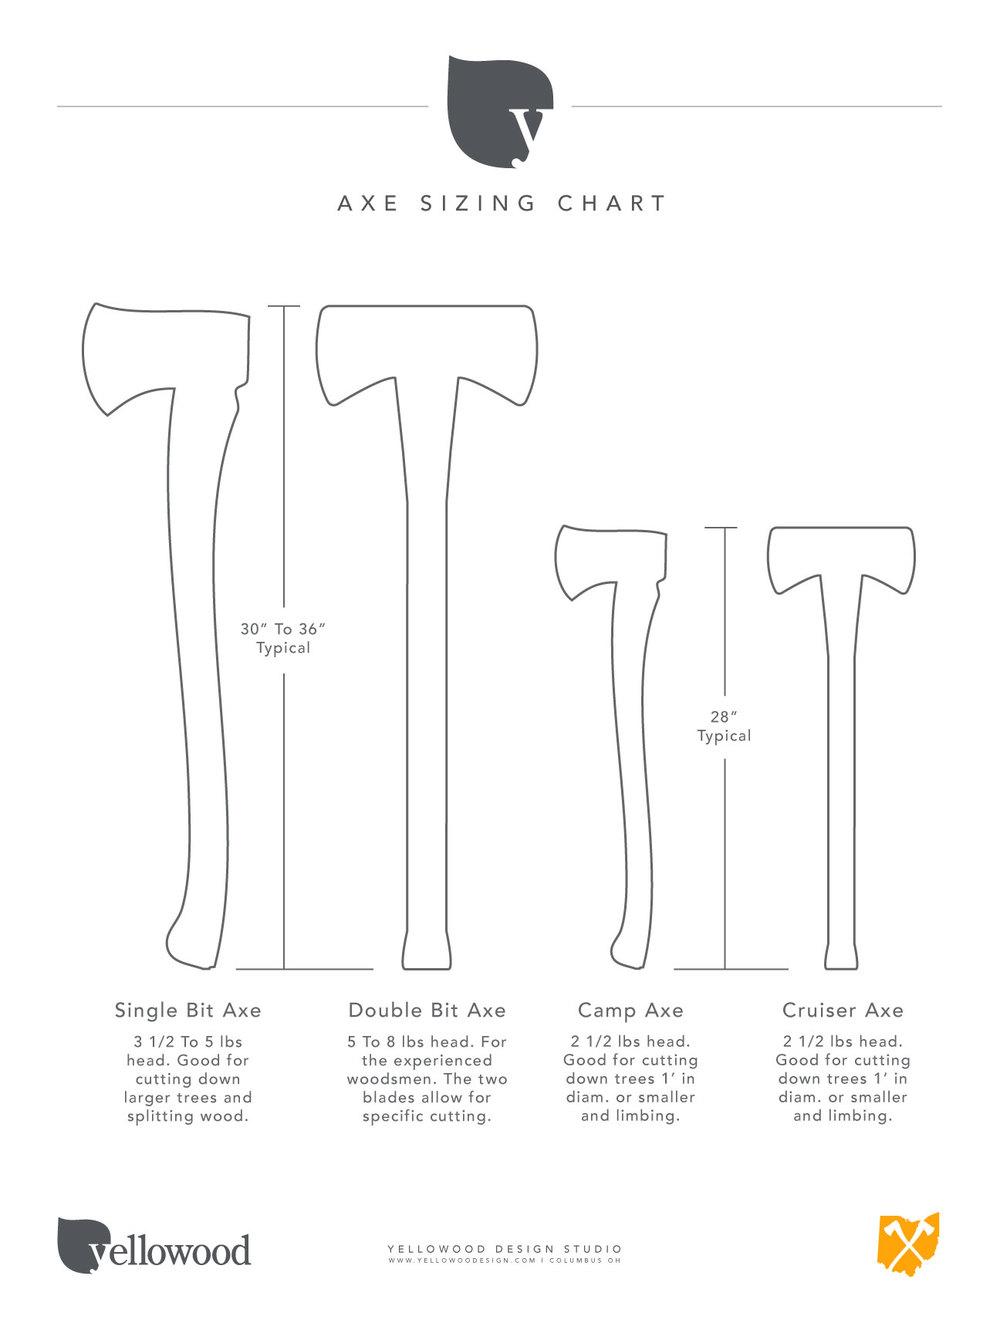
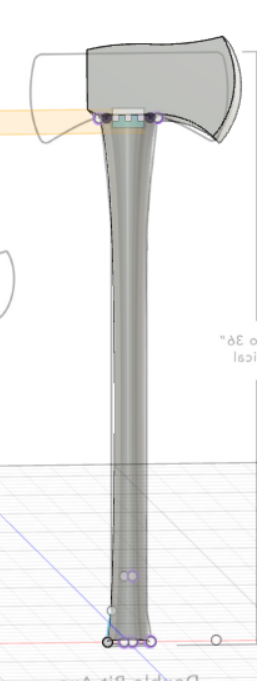
Create an axe model using a reference image and Fusion 360's tools.
The Axe Handle
- Find a reference image for the blueprint of an axe (scale does not matter for the video game, you can easily rescale)
- Use the insert tool in Fusion 360 to insert the reference image as a canvas
- Create a circular sketch on the x-z plane to serve as the axe's base
- Create another circular sketch on the x-z plane at the top of the handle of the reference image to serve as the top of the axe's handle
- On each of the circular sketches, add two points the left and right side of the circle
- Start a sketch on the x-y plane and hit the "p" key to select all of the points you made in the previous step and project their geometry
- Starting from the bottom point and ending at the top point, use the 3-point arc and line sketch tools to trace the outlines of the axe handle, this makes sure that the outlines are connected to the circular faces
- Use the loft tool. For faces, select your two circular bases. For rails, select the two lines you just sketched. After confirming the loft, you should have an axe handle create
The Axe Head
- Using one of the axe heads in the reference image, create a sketch on the x-y plane
- Using a combination of the line tool and the 3-point arc tool, trace the outline of the axe head
- Use the extrude tool to extrude the sketch
- Turn both the axe head and the axe handle in components (Bodies folder, right click on each and select create component from bodies)
- Use the joint tool to select the bottom edge of the axe head and connect it to the top of the axe handle
Creating the Game

- Open Unity Hub
- Click Create a Project
- Select 3D project
- Select Unity version 2021.3.11f1
- Hit Create
Coding Movement
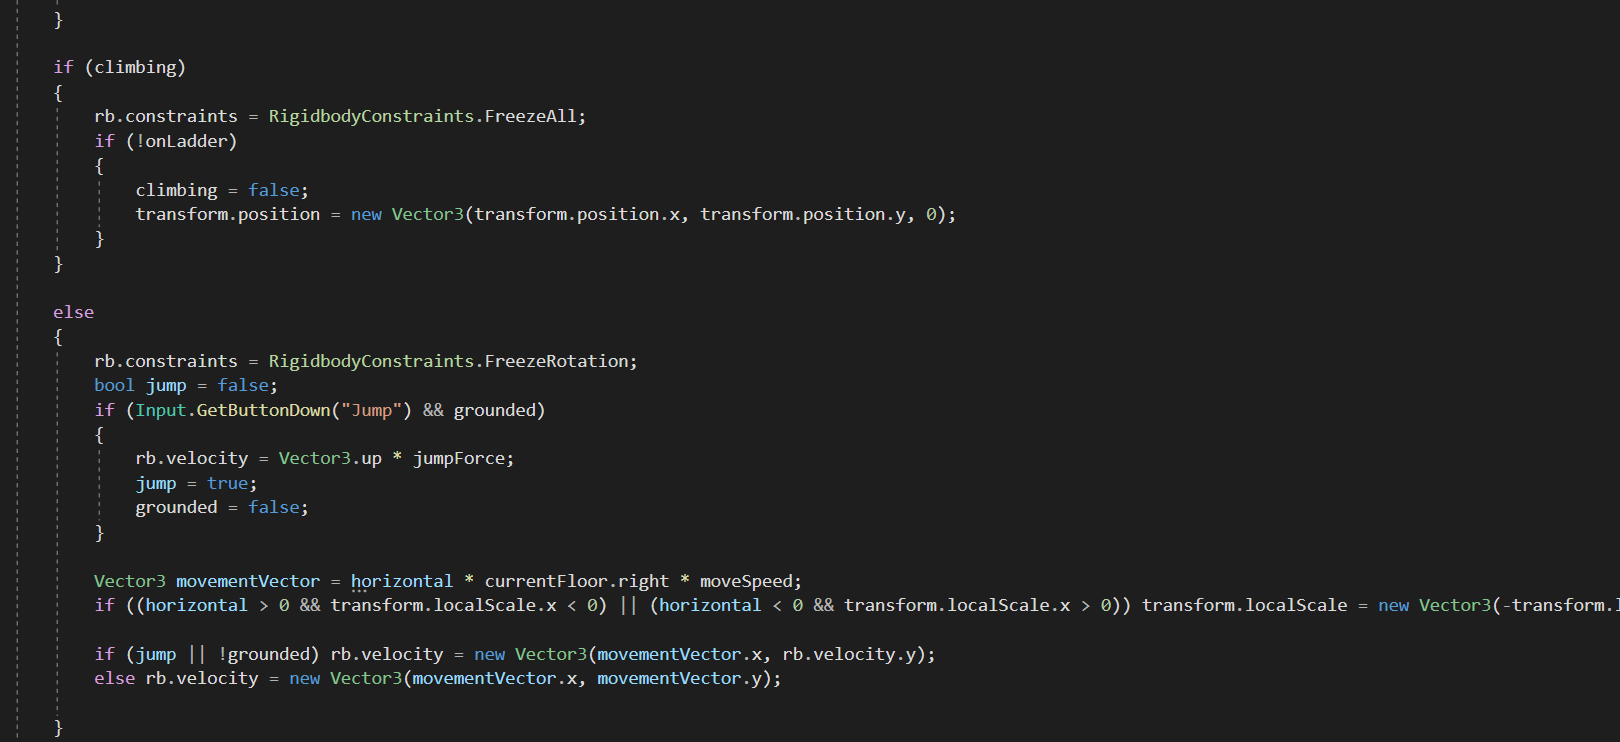
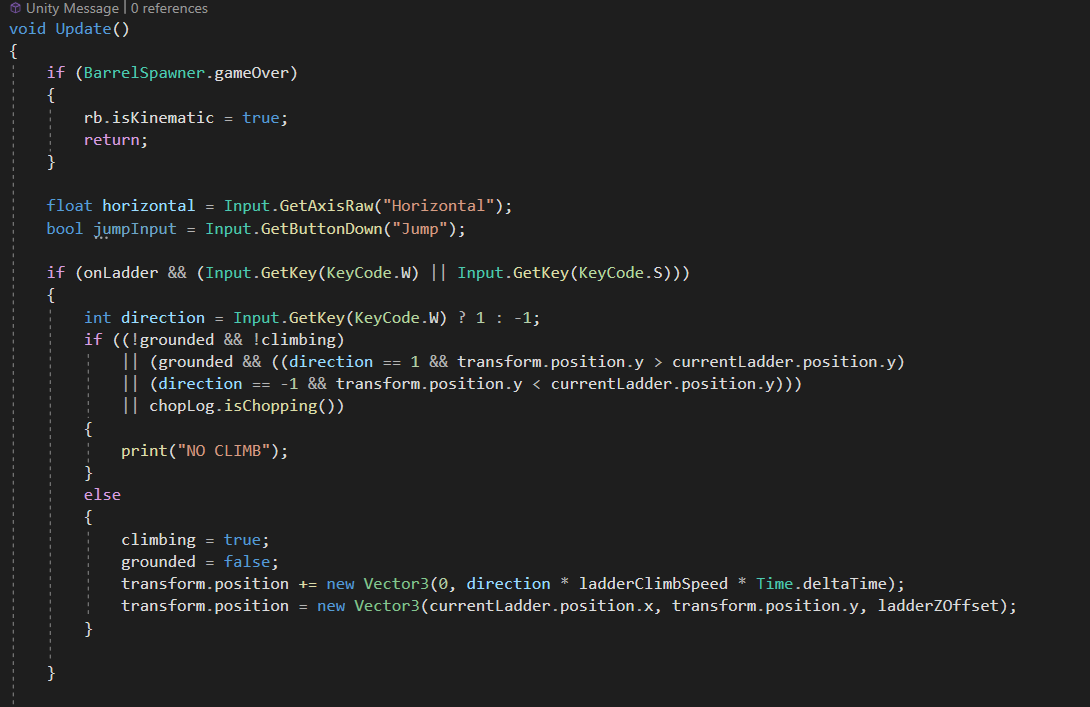
After setting up your Unity scene with an environment, the first step I took was programming the player's movement. The main issue with movement in this game is the nature of the floors: they are sloped. Keeping that in mind, I had to make sure to change the direction of our inputted movement to the direction the floor pointed to in order to make sure that the player moved at the same speed on all terrain (horizontal * currentFloor.right * moveSpeed).
Jumping was more simple. On a detected button press, we would set our vertical velocity to a variable (jumpForce).
Ladders were an issue. To create the ladders, I used Unity's collision system to detect when the player was touching a ladder. If they were, they could press the "W" or "S" key to move up or down the ladder. I had to make the player move on the z-axis to avoid simply hitting their head on the next floor. When the player did reach the next floor, their z-position was reset. However, I later needed to add a check to make sure that the player was below the ladder's center when they were trying to move up and above the ladder's center when they were trying to move down to prevent the player from continually moving in a set direction despite the fact they were already off the ladder.
The Barrels (or Logs, in This Case)
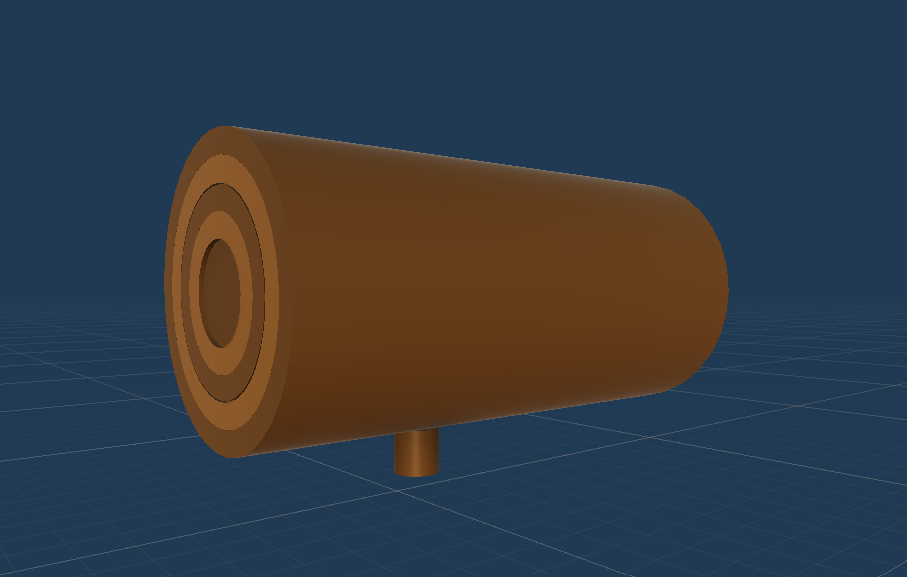
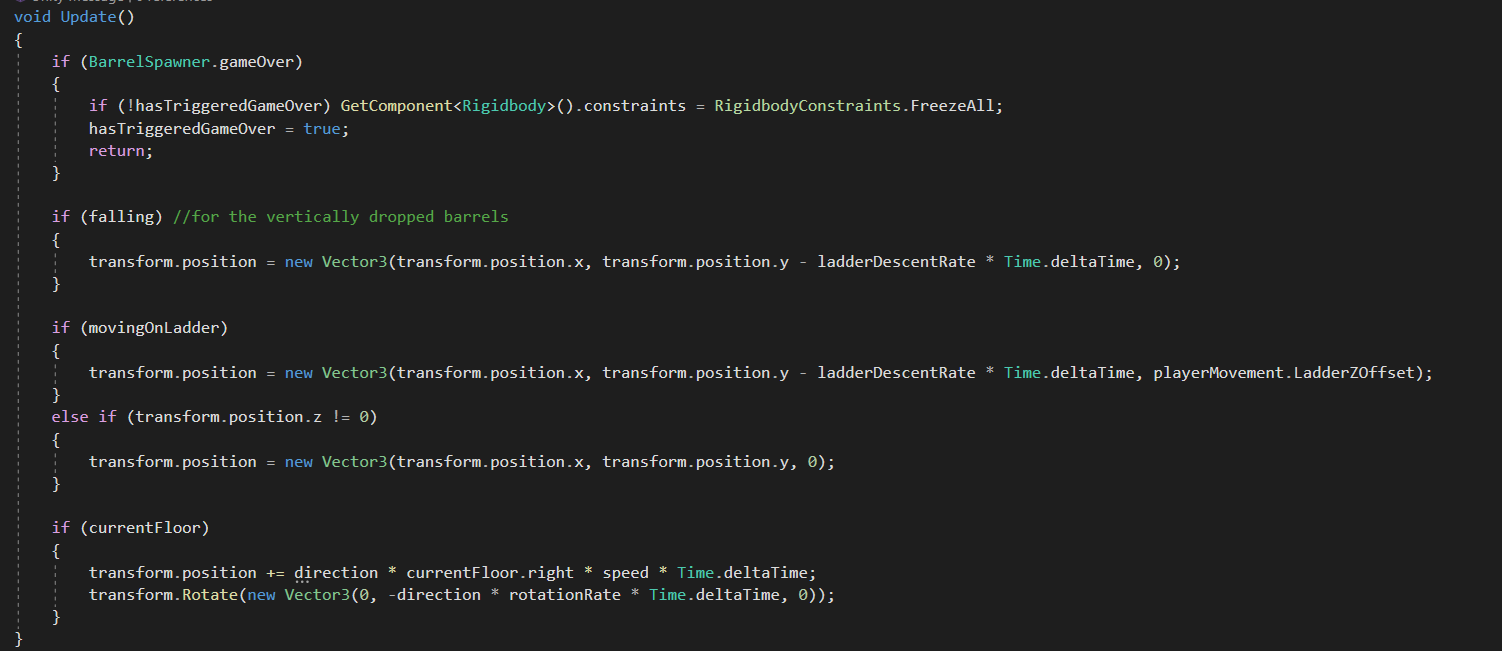
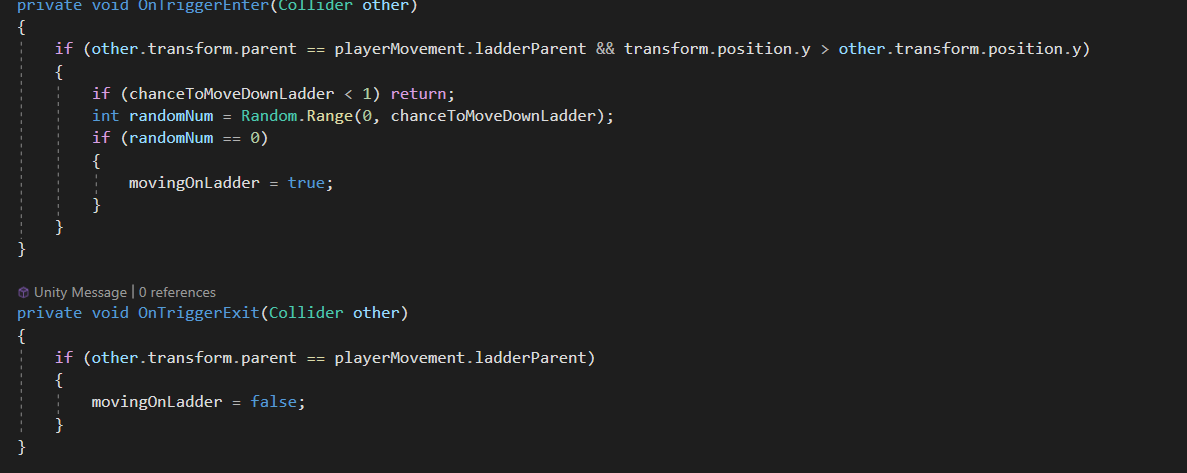
A highlight of the Donkey Kong arcade game was the barrel: something Donkey Kong would throw at the player endlessly. Because of this game's theming, however, I decided to replace the barrels with logs.
To Make the Model:
- Create a circular base sketch on the x-z plane
- Extrude the circular base to around double the diameter of your circle
- Create several sketches and extrusions on top of your cylinder to create that each contains a large circle on the outside and a small one on the inside (these are the rings)
- After creating enough rings to get to the center, go through each body, right-click, and hit "Convert to component"
- Export your model into Unity, and create a Material (Plus symbol under project folder -> Material (under Rendering)
- Because you made each ring a separate component, you are able to individually assign a material to them by dragging the material from your project tab onto the desired ring (this is how I made the rings have alternating colors)
Coding the Log's AI:
The next step was to code how the log moved. In Donkey Kong, barrels either roll down ladders or fall off the edge of the platform. To recreate this, I coded my log to essentially move in a certain direction until it left the platform. Once it did, it would fall until it hit another platform. This caused it to switch directions and continue moving that way.
For it to fall down ladders, I used a similar system that I used when coding Player Movement. When it touches a ladder, it will randomly generate a number. If this number is under 1, it will roll down the ladder. Also, like the player, the barrel was also on the same z-level the player is when moving on ladders, which allows for them to collide.
Bigfoot
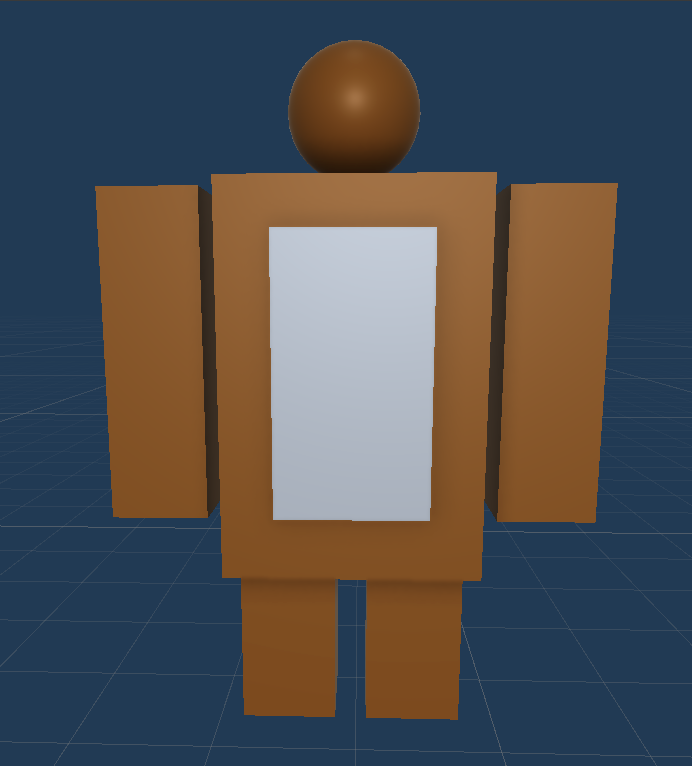
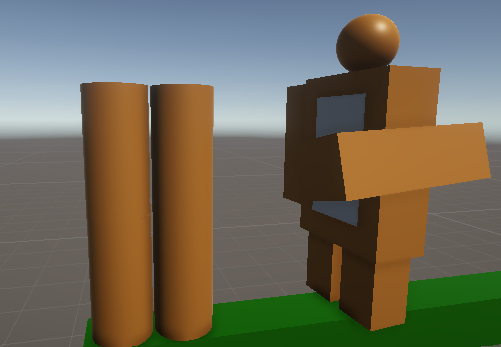
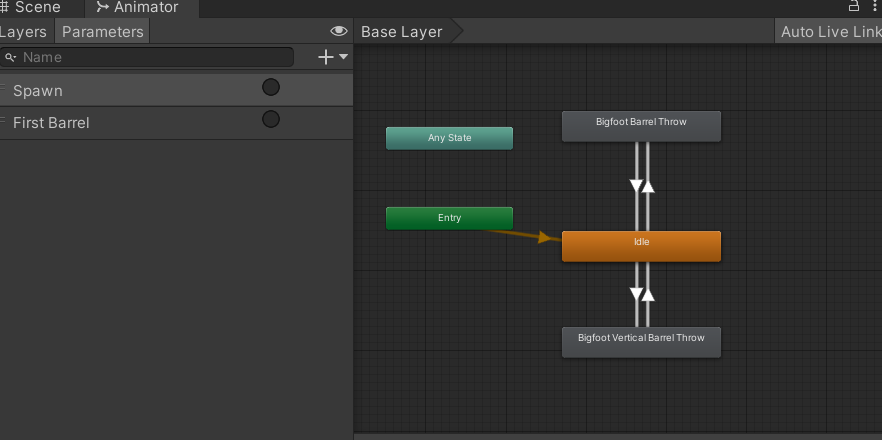
Bigfoot serves as a Donkey Kong replacement in this game. Its role is to throw logs (barrels) at the player to hopefully prevent them from reaching the top of the tower.
The Model:
This model was not actually created within Fusion 360; it was instead created using Unity's available primitive models. It is 5 scaled cube and a sphere. It is not the main focus of this section.
Animation:
A little more interesting is the animation. Unity has a built-in animation system. Here is a short guide on how I used it.
- Select Bigfoot
- On any of your windows (Game, Scene, Hierarchy, Project), hit the 3 dots in the top right corner. Click "Add Tab" -> "Animation"
- Click "Add Animation" and name it in the file explorer
- Hit the red circle to record keyframes (click on the timeline) that Unity will automatically transition between. Essentially, all you need to do is manipulate your model to be in a certain position/direction at a certain time.
- Hit the red circle again the stop recording.
- Create another animation with no keyframes to serve as an idle state
- Go to your project and select the Animator object (the icon looks like 2 gray filled boxes and a green unfilled one), and open it
- You will see small tiles each with the name of the animations created in the last step. Right-click on your idle animation and click "Set as Layer Default State"
- Right-click on your idle animation and select "Make Transition". Click on your other animation and make sure to make another transition from that animation to your idle one
- On the left, hit the parameters tab, then the plus sign on that tab -> "Trigger". Name it anything you want for now
- In the transition from Idle to your animation, hit the plus sign under conditions and select your trigger. This makes it so that the animation will only transition if that trigger is activated
Coding
After all of those steps for animation, it is now time to code it (I won't be giving complete lines of code, just the general idea of the script).
The code essentially works like this: It keeps track of a timer, and when it hits zero, it will release a log. Make sure to make a function for spawning the log and add an animation event to your log throwing animation from the previous steps for this to work. In the code, the trigger we made will be activated when the timer hits zero, before it reset back to the initial value.
Adding Axe Functionality
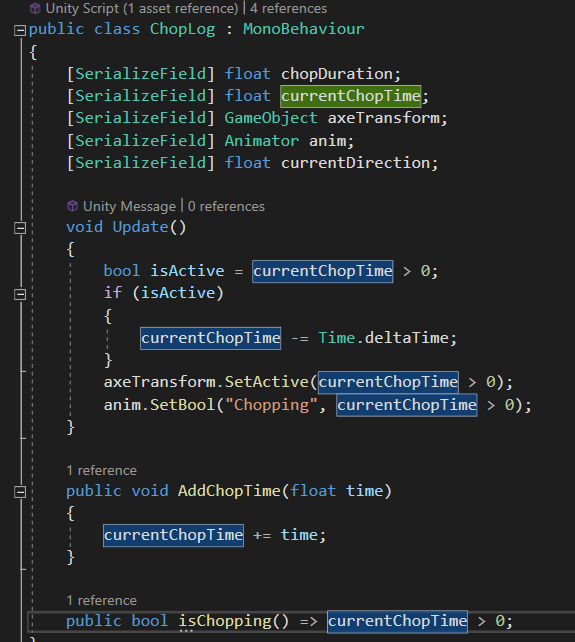
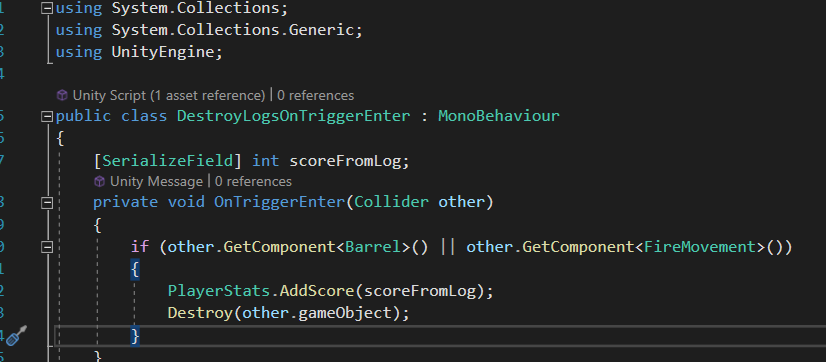
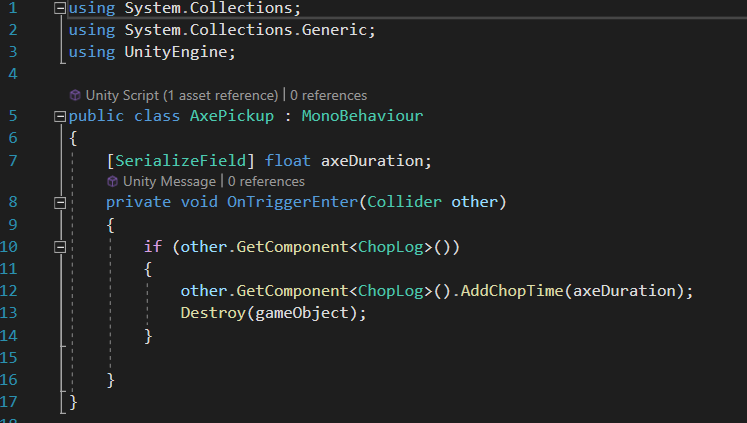
We have created the axe model, now it is time to put it into use. In the original arcade game, the player can pick up a hammer to smash barrels. Here, the axe will be used to cut logs.
Coding
The idea is simple: when the axe is active, any log that touches it will be destroyed. This can simply be done with a boolean value and a check to see if a barrel is touching it. The first script enables the second script when a timer variable is above zero. The second script is the script that destroys the logs.
The third script is for the axe's pickup item on the map. You don't get to use the axe by default, you only have it for a limited time after touching the pickup. Essentially, the pickup script adds time to the axe's chop timer and destroys itself.
Oil Barrels and Receivers (Maple Syrup)
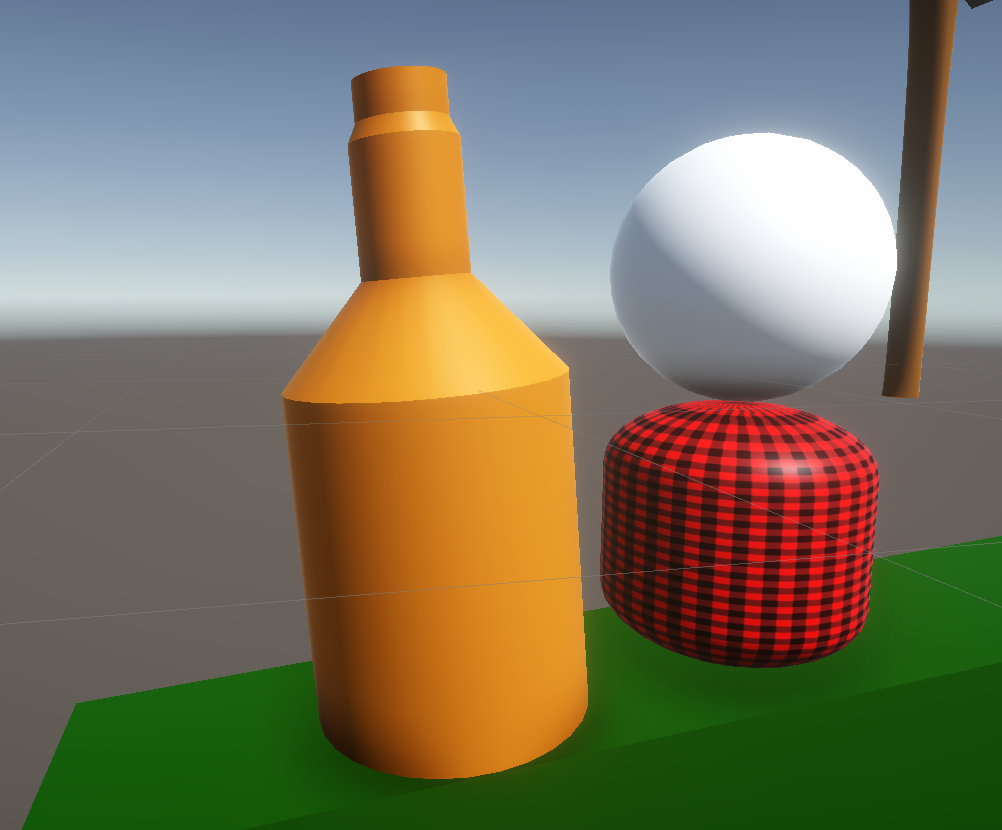
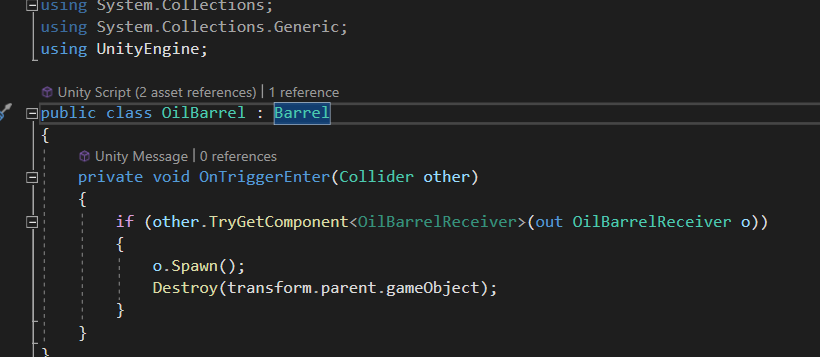

Another facet of Donkey Kong is the fire that spawns after Donkey Kong throws a barrel there. He proceeds to throw oil barrels every few regular barrels to add more fire. In this game, it will be maple syrup instead of oil. For now, we will cover the action of throwing an oil barrel every few regular barrels.
Creating the Model
- Find a reference image for a maple syrup bottle online
- Import that image using the Canvas tool like the axe model from Step 1
- Trace half of the outline before closing it off with a vertical line in the center
- Use Fusion 360's revolve tool: select your outline, then select the y-axis and continue
- The maple syrup logs are simply the same model with different textures on the log's rings
Code
The maple syrup log's code is simple: it inherits from the Log class (it gets all of its public variables) and only adds one new functionality: it detects when it hits the receiver and spawns a maple syrup enemy, then destroys itself.
The receiver script only has one function: it spawns a maple syrup enemy when it is run.
Now, the much larger chunk of coding: the maple syrup enemies themselves
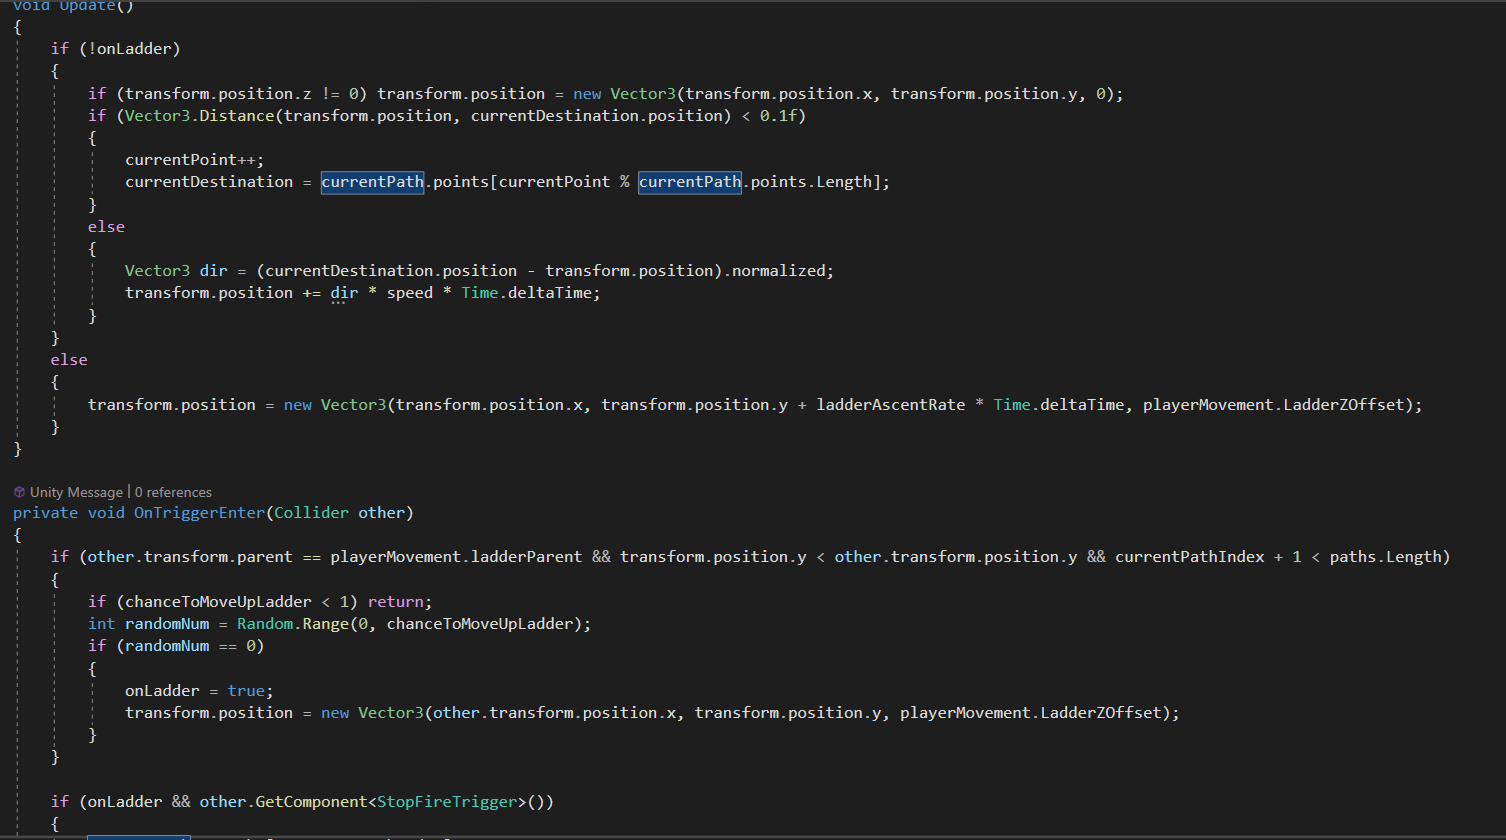
They are not programmed in the same way as players or logs but rather using sets of predetermined paths.
Each maple syrup enemy has a list of path objects (they just contain points). Their behavior is initially simple: they just go between each point of the current path. However, when the enemy touches a ladder, they will have a random chance to move up the ladder. When this happens, it will move up until it hits an object designated (at the end of script 3, you can see "FireStopTrigger", which is the script that stops the maple syrup after it reaches the end of the ladder) for it to stop at, and switch to moving between the points of the next path in its list of paths. This continues until it has reached its last assigned path, where it will no longer move up ladders.
An interesting issue I had was actually trying to make the maple syrup enemy climb up ladders. The way I set it up, the ladder's collision did not go all the way to the ground to make sure logs would not go under the platform (logs stop falling after they exit the ladder's collision). To fix this, I created a separate collision on the maple syrup enemy purely for hitting ladders. This allowed the maple syrup enemy to hit ladders when it is physically below the ladder's collision.
Dropping the Initial Barrel

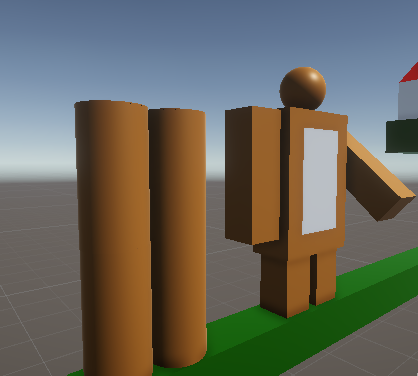
This was a step I forgot about until I neared the end of the project. In the arcade game, Donkey Kong drops a barrel full of oil at the start of the game straight down toward the player.
Animation
Select your Bigfoot object and create another animation. In the Animator, create another trigger for this animation (called FirstBarrel in the Animator picture from Step 5). Connect it to the idle animation using transitions to make it so the animation plays when the trigger is activated, just like in Step 5.
Code
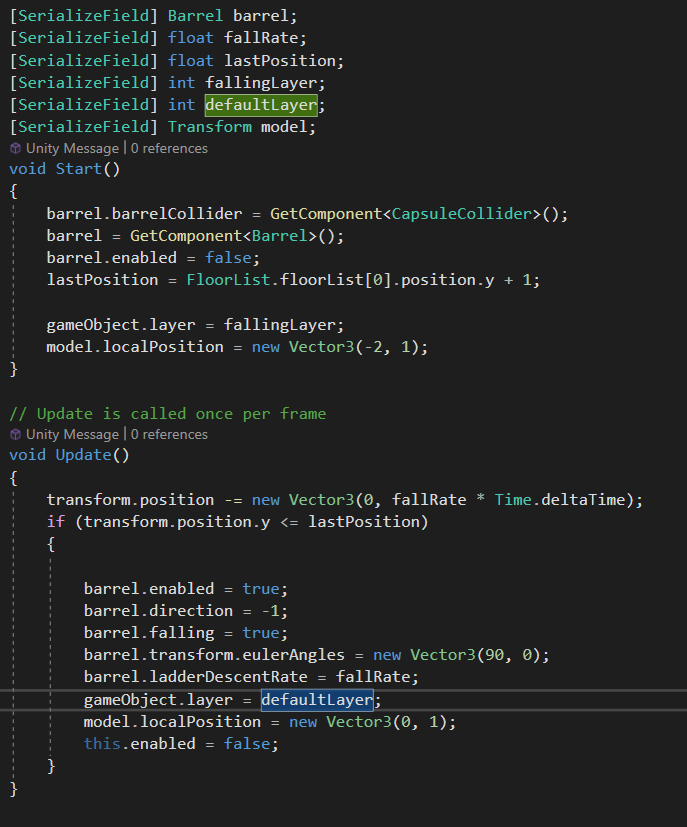
The BarrelDrop script is on a separate barrel object. It is reliant on the original barrel script, which it disables initially to prevent it from controlling movement. Afterward, it gets the position of the last platform and drops the barrel vertically. The barrel travels at a set speed, and while it looks like it is going in front of the platform, the true collider is still at a z-position of 0. The script offsets the model to create a visual effect while creating a Physics layer to make the barrel only collide with the player. This allows for the barrel to still hit the player and cause a loss while it is falling. If I offset the whole barrel's z-position, it would not touch the player.
After reaching the lowest point, the script reactivates the Barrel script and deactivates itself. The barrel will proceed to roll toward the maple syrup receiver and spawn an enemy.
TomBot Box (please Don't Sue, Also This Step Is Optional)
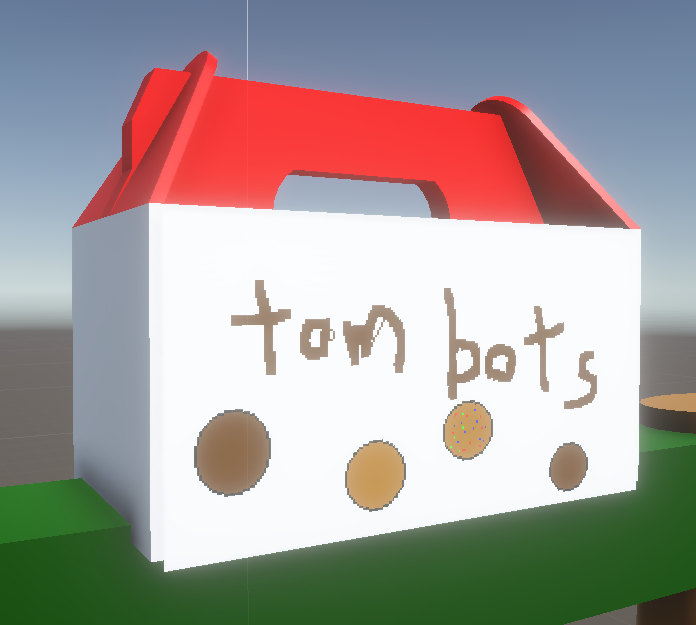
To fit the theme, I decided to recreate an item from a famous Canadian restaurant. This is purely a modeling step.
Instructions:
- Create a rectangular prism as the base of the box
- Create another prism on top of the box to be carved out later
- Create 2 angled planes for the box 2 flaps by selecting Fusion 360's offset-plane tool and clicking the left and right edges of the box
- Set the plane's angle to 60 degrees each
- Start a sketch on each plane, making sure that they are close to identical as possible. These will be the flaps of the box
- Extrude both sketches
- On the top extrusion, start a sketch on the side of it. Sketch out a hole and extrude it with the hole option selected
- Make sure that the flaps, box, and handle are all components so you can apply different materials to them in Unity!
Scoring, Victory, and Game Over

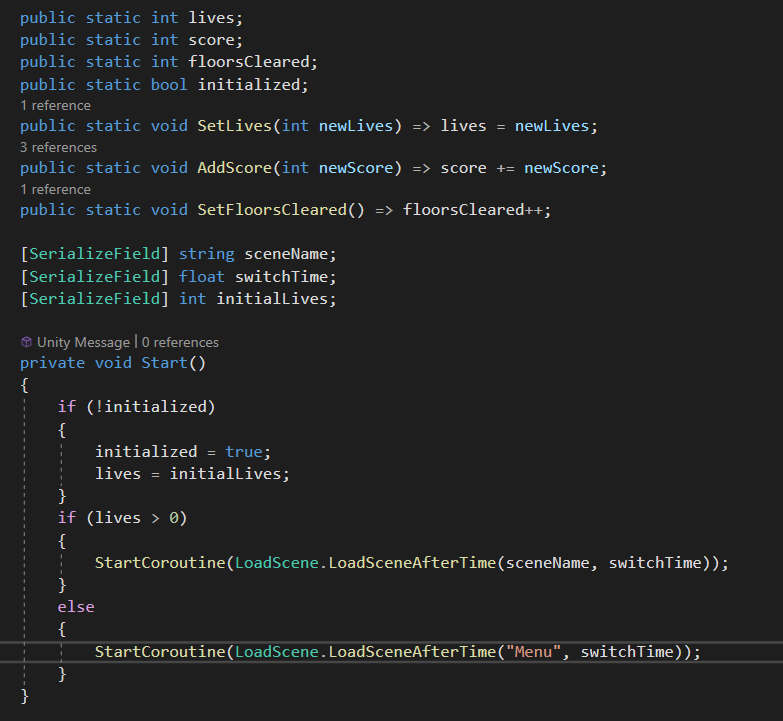

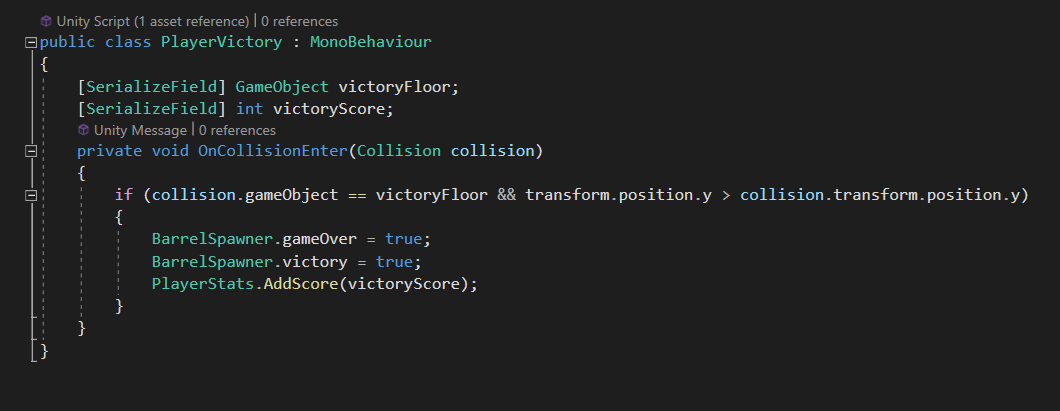
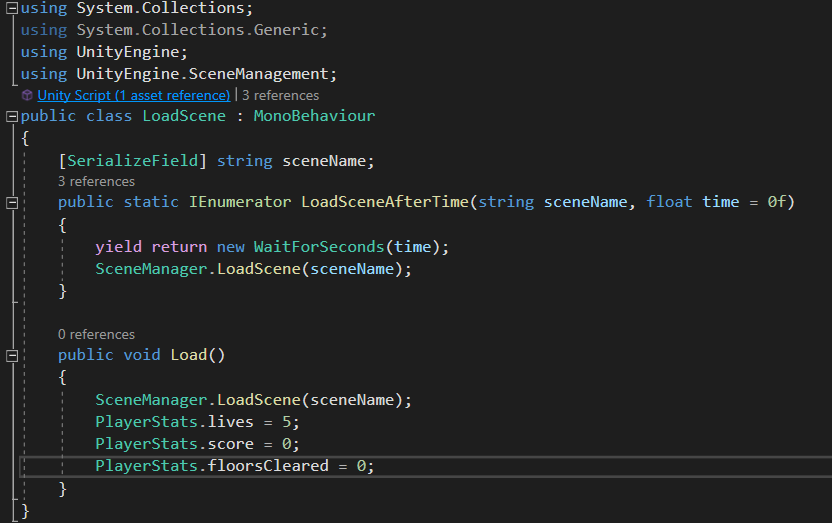

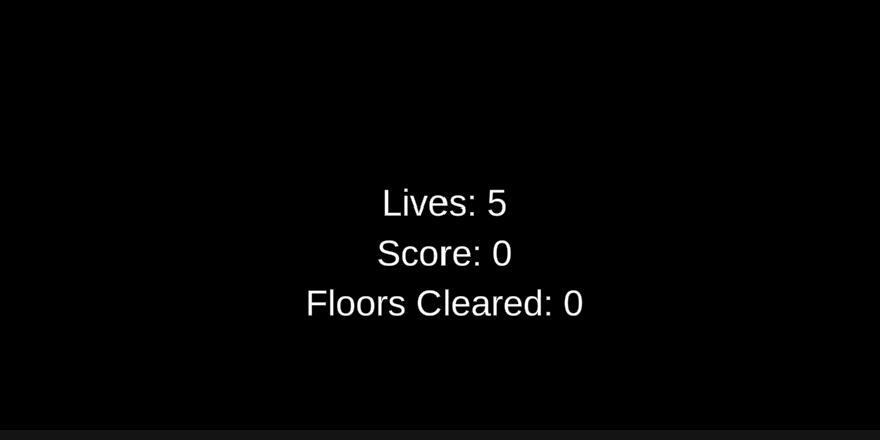
Most old arcade games have a score, and Donkey Kong is no different. So, we need to implement a way to gain points and a script to keep track of points.
- Add a collision on top of the log to detect when a player jumps over it
- Add 1 to a static integer every time it is touched
- When the player hits the ground, add a certain amount of points * the static integer to your score, then reset the static integer to 0
- Also, add to the score each time you destroy a barrel with an axe
For the script that keeps track of points (as well as lives and levels cleared):
- Create a script with 3 static variables representing lives, points, and levels the player has cleared
- Other scripts will access these variables and change them
Another thing the game is currently missing: How do you win?
To solve this issue, we designate the top platform as the objective. When the player hits it, we add a certain amount to the score. After this, we must transition to a different scene and reload the game.
- Create 2 other scenes, one is a menu and the other is a transition scene between each round of gameplay
- On the menu, we create a button that loads the transition scene
- The transition scene starts with a certain amount of lives that are altering while playing the game. If the scene is loaded with zero lives, it returns the player to the menu
- When the player wins/loses, the return to the transition scene with different results. If you win, you get a score bonus and add to the floorsCleared variable. If you lose, you subtract from the lives variable.
- With all 3 of these scenes and the LoadScene script, you are able to create functioning transitions between menus and gameplay.
Export Your Game
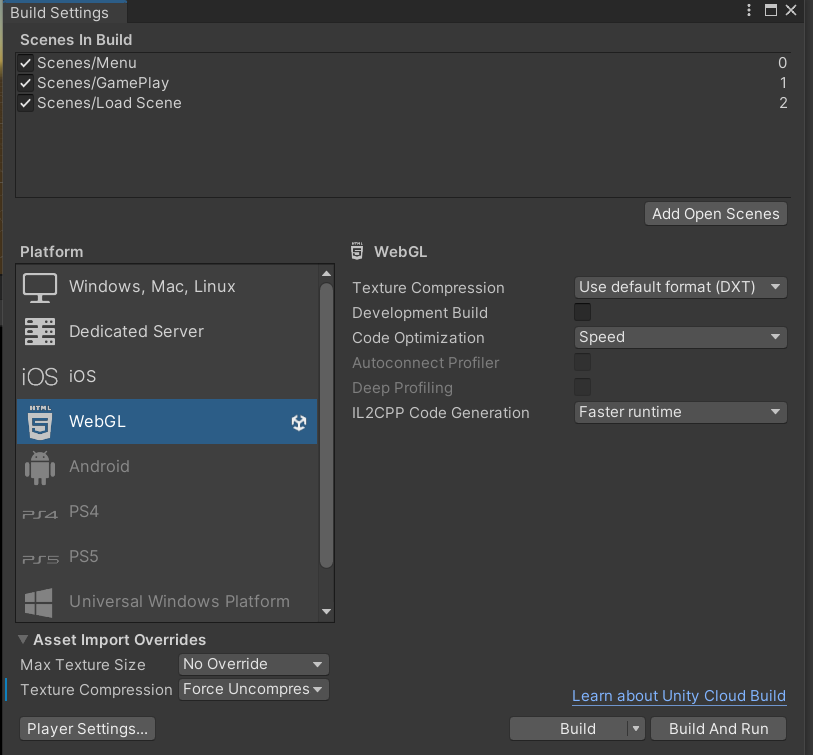
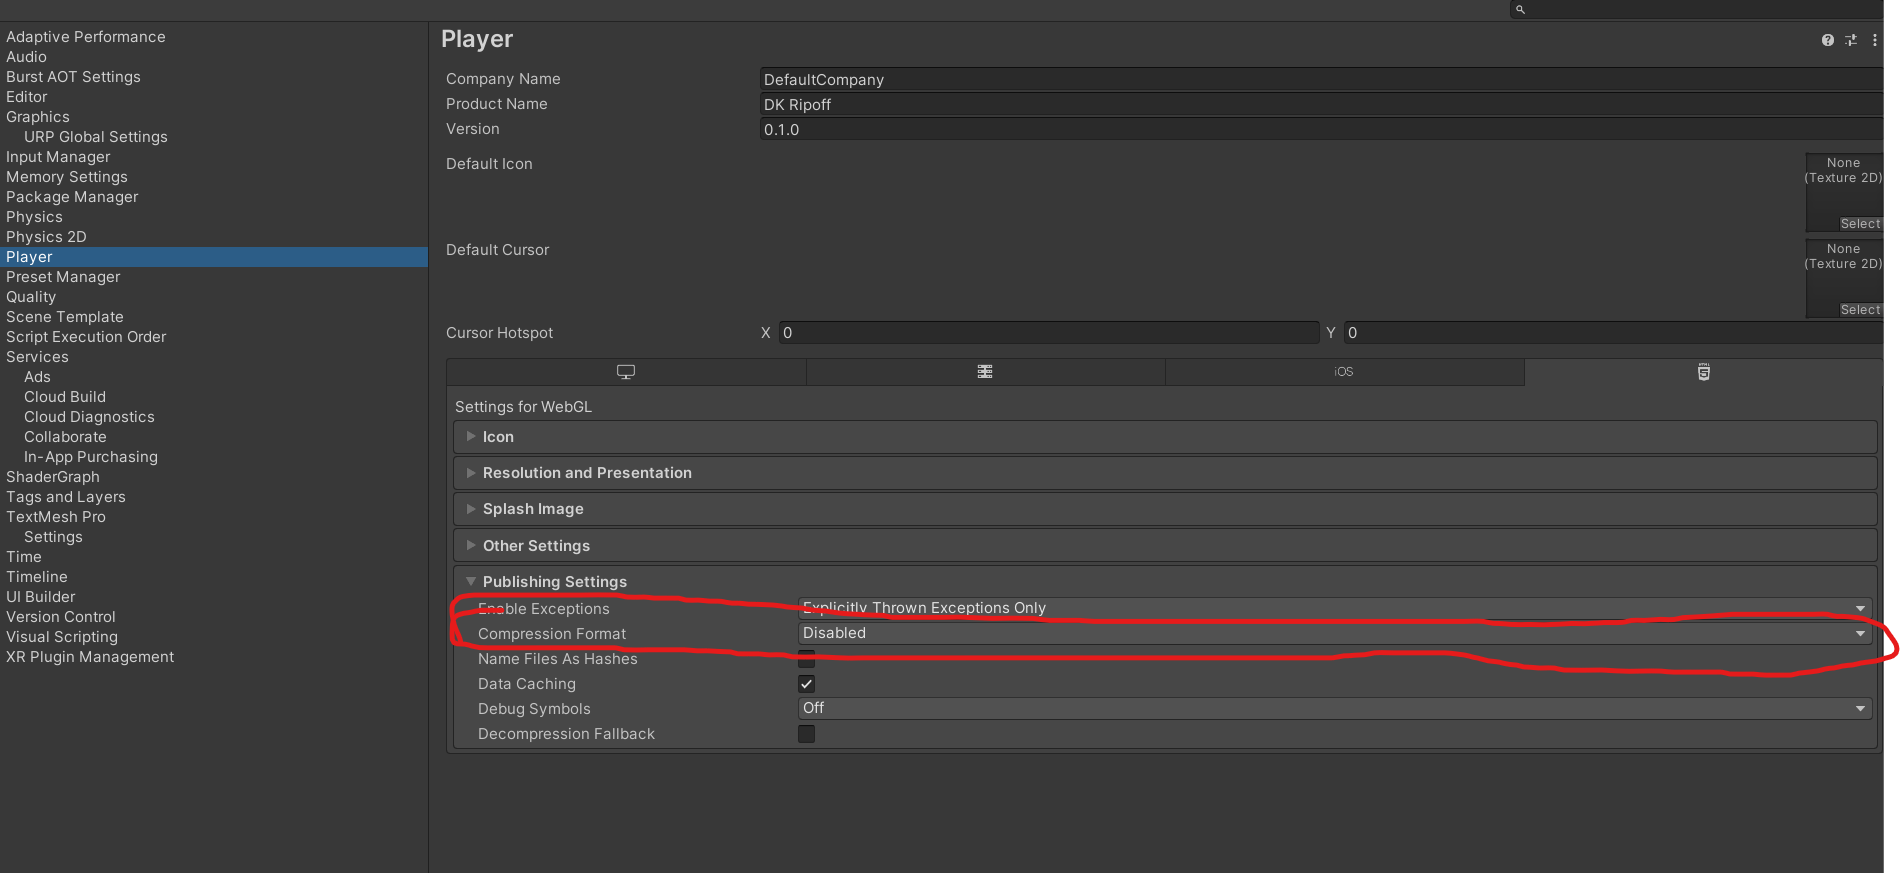
I exported my game to itch.io, a game distribution service. To make it playable in the website, I needed to create a web build of my game.
To do this, hit ctrl + shift + b to open up your build settings, and select WebGL as your build option (you may need to download it through Unity Hub). Before building, make sure to go to Edit -> Project Settings -> Player and set "Compression Format" to disabled.
Go back to your build settings and add each of your scenes to the build (make sure the menu is at the top, it will be the default scene when the game is opened). After getting the build and putting it in an empty folder, go to itch.io and upload your project!
Revel in Your Success
Thank you for reading this whole guide. Hopefully, you were able to learn something from my experience making a video game for this contest, and I appreciate you for sitting through the whole thing.