How to Make a Wrench on Auto Desk Inventor
by IDeasAv in Design > 3D Design
329 Views, 0 Favorites, 0 Comments
How to Make a Wrench on Auto Desk Inventor
.png)
A complete wrench made in Auto Desk Inventor. It represents the abilities one may need in their future and the possibilities of 3D printing.
Supplies
Auto Desk Inventor
A PC
Create a Baseline
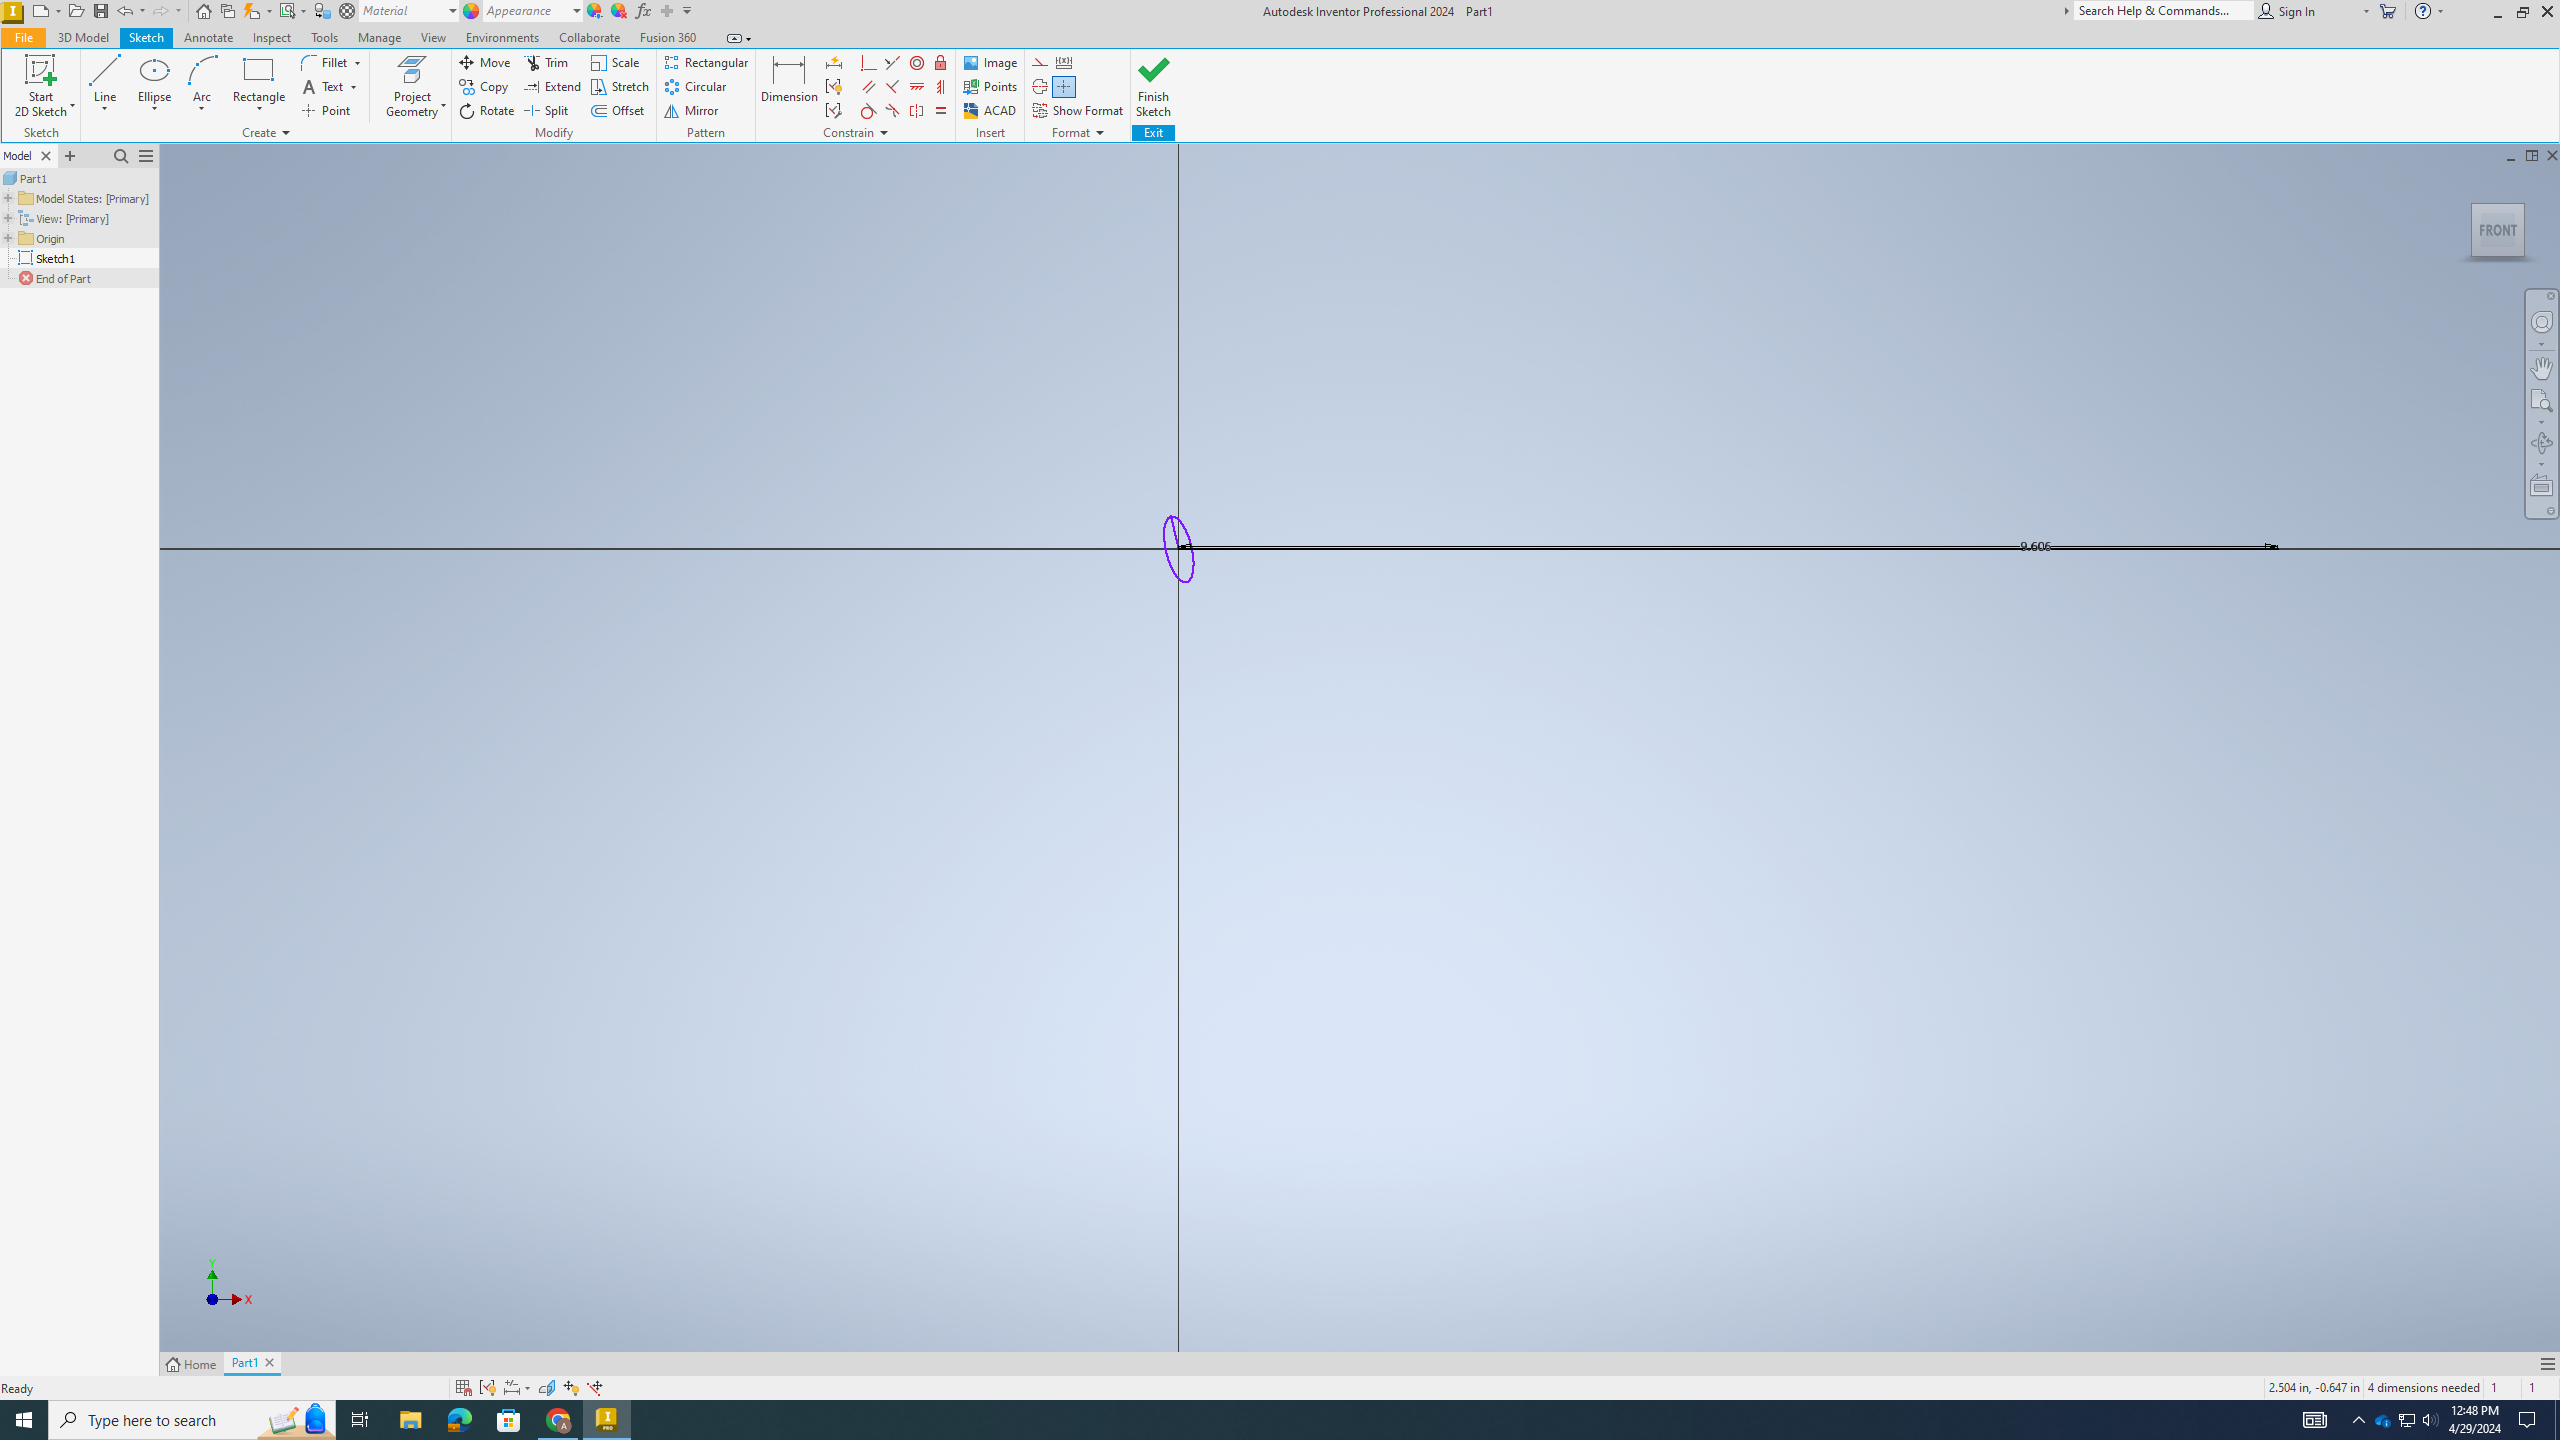.png)
Step 1) Set up a straight line from the origin and make it 240 mm. From there make circle and the circle at the origin.
Create the Top of the Wrench
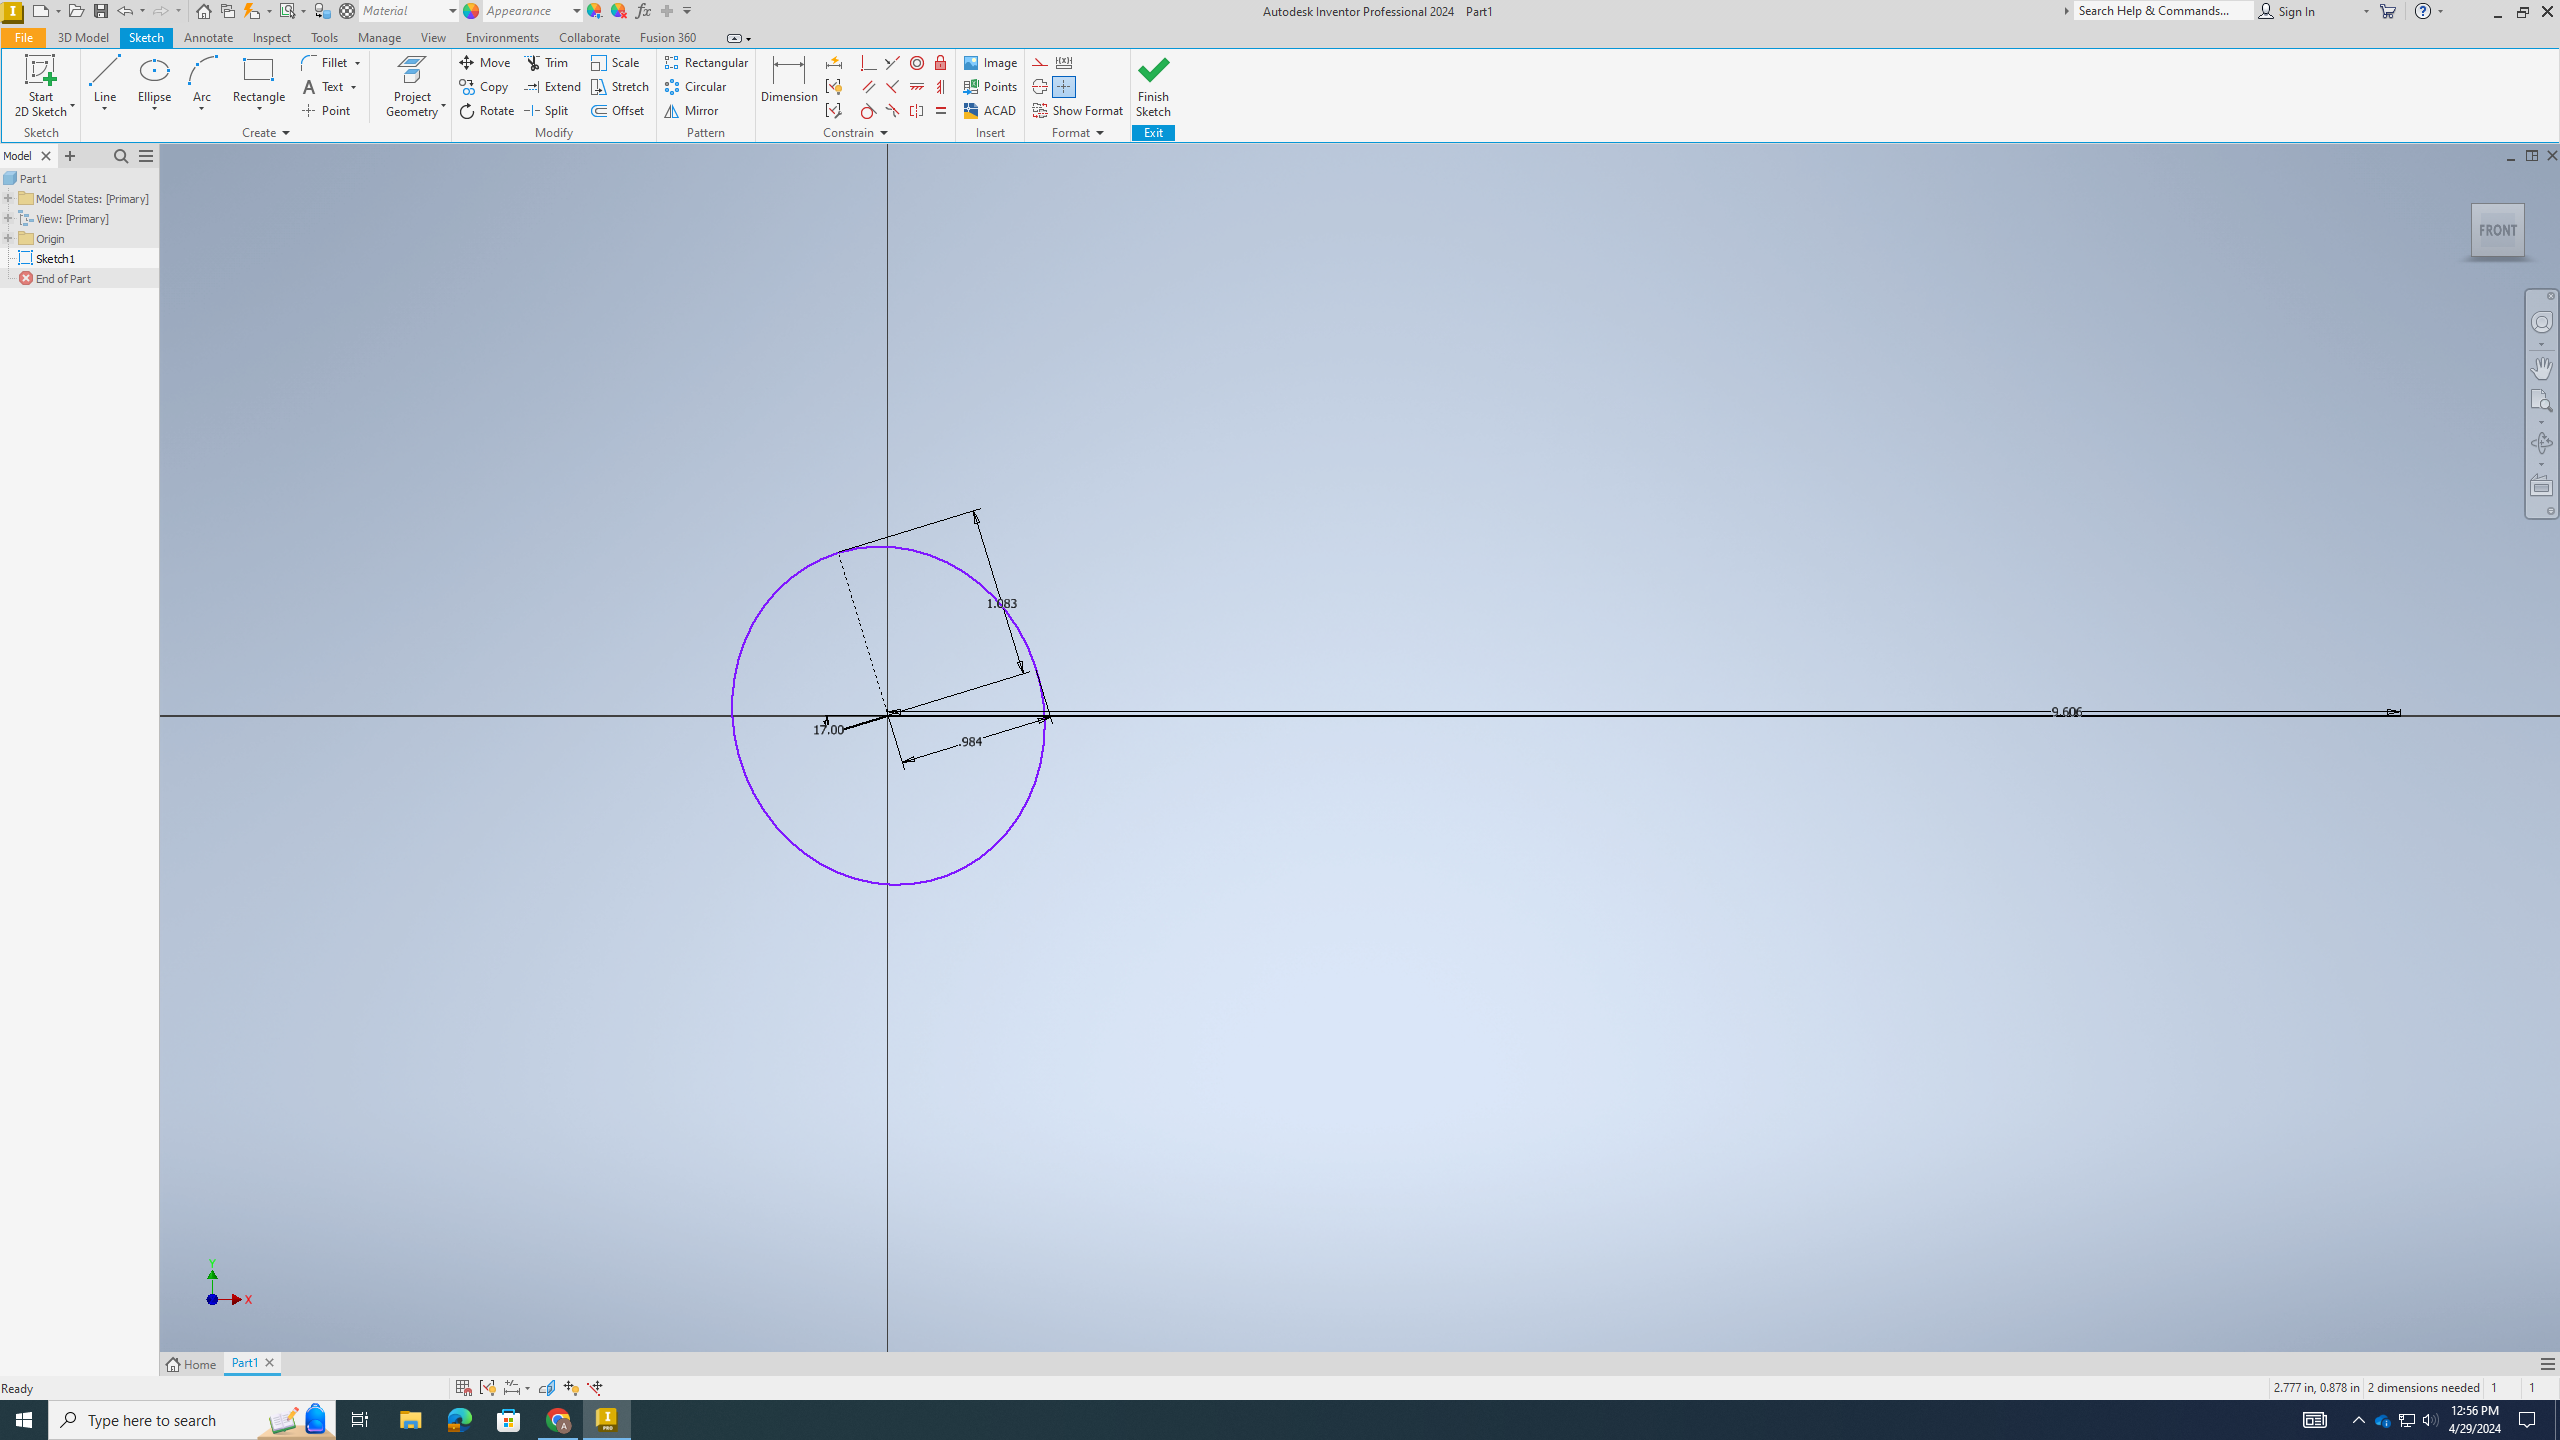.png)
Step 2) Change the width (using dimension) and make it 25 mm, make the height 27.5mm.
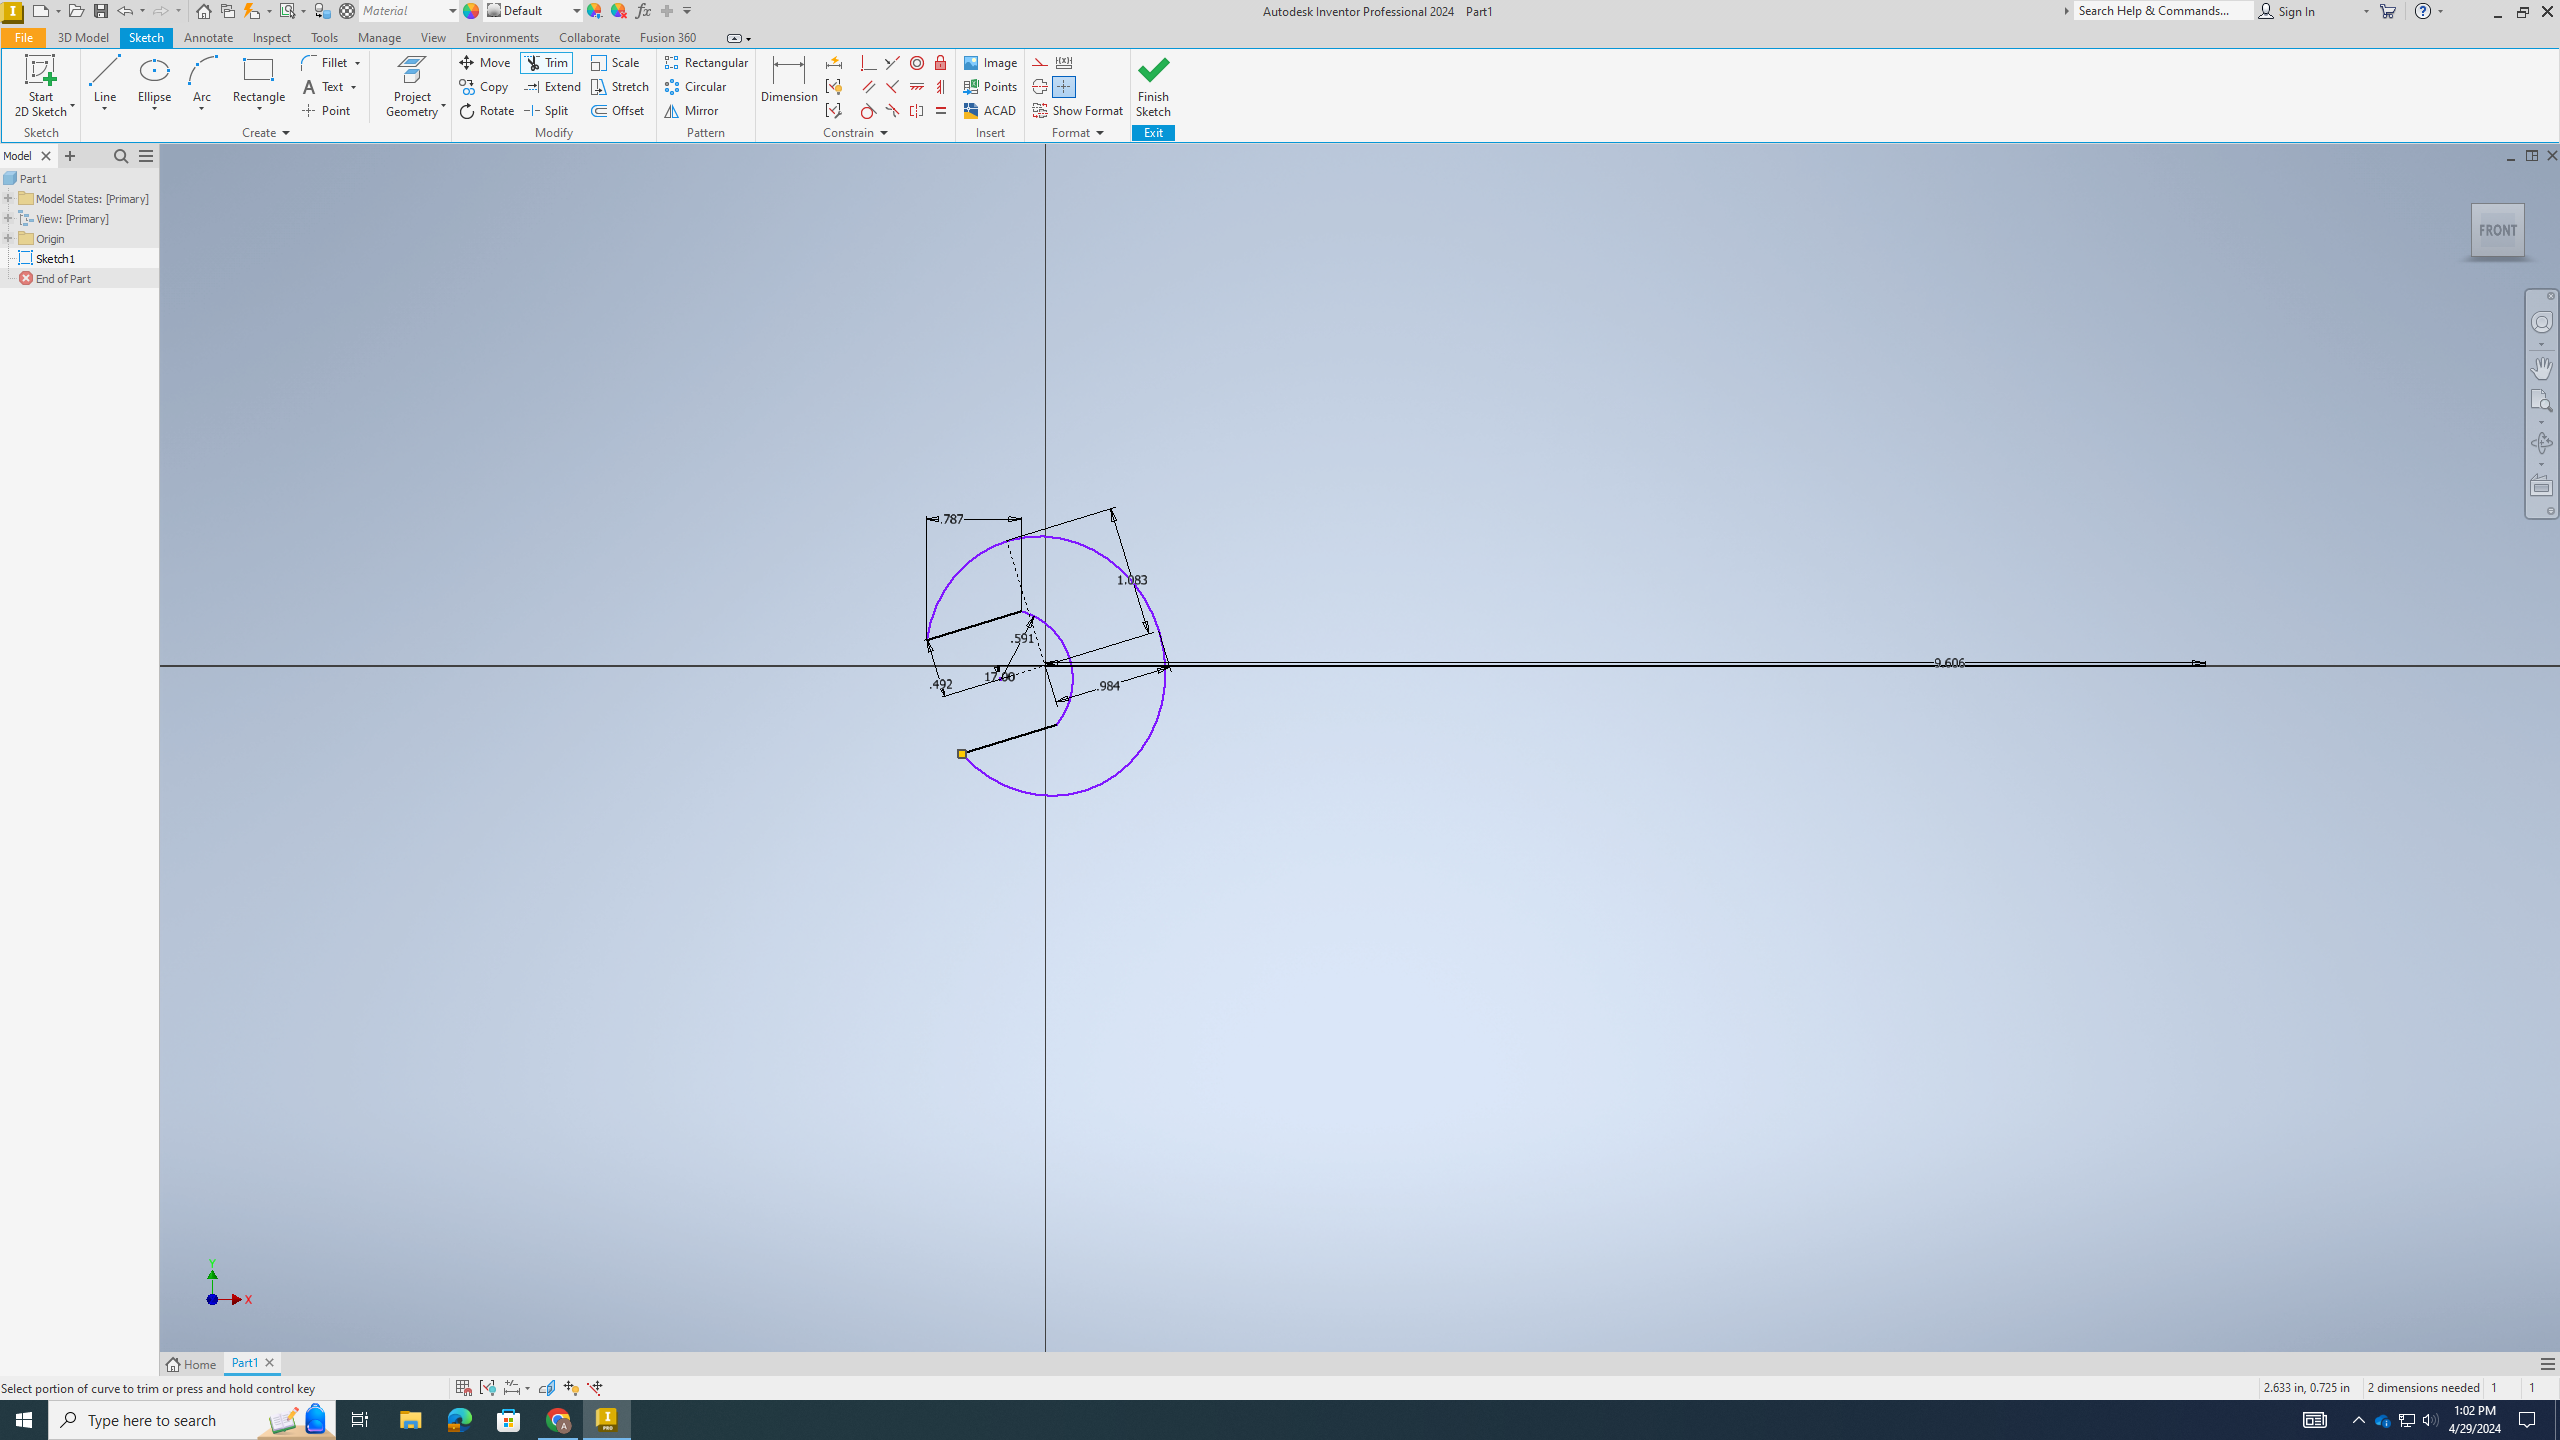
Create the Jaw of the Wrench
.png)
Step 3) Make a line in cutting through the top portion of the circle and mirror. Secondly, create an arc which connects the two lines. Lastly, use the trim option to cut off top of the circle to make the front of the wrench.
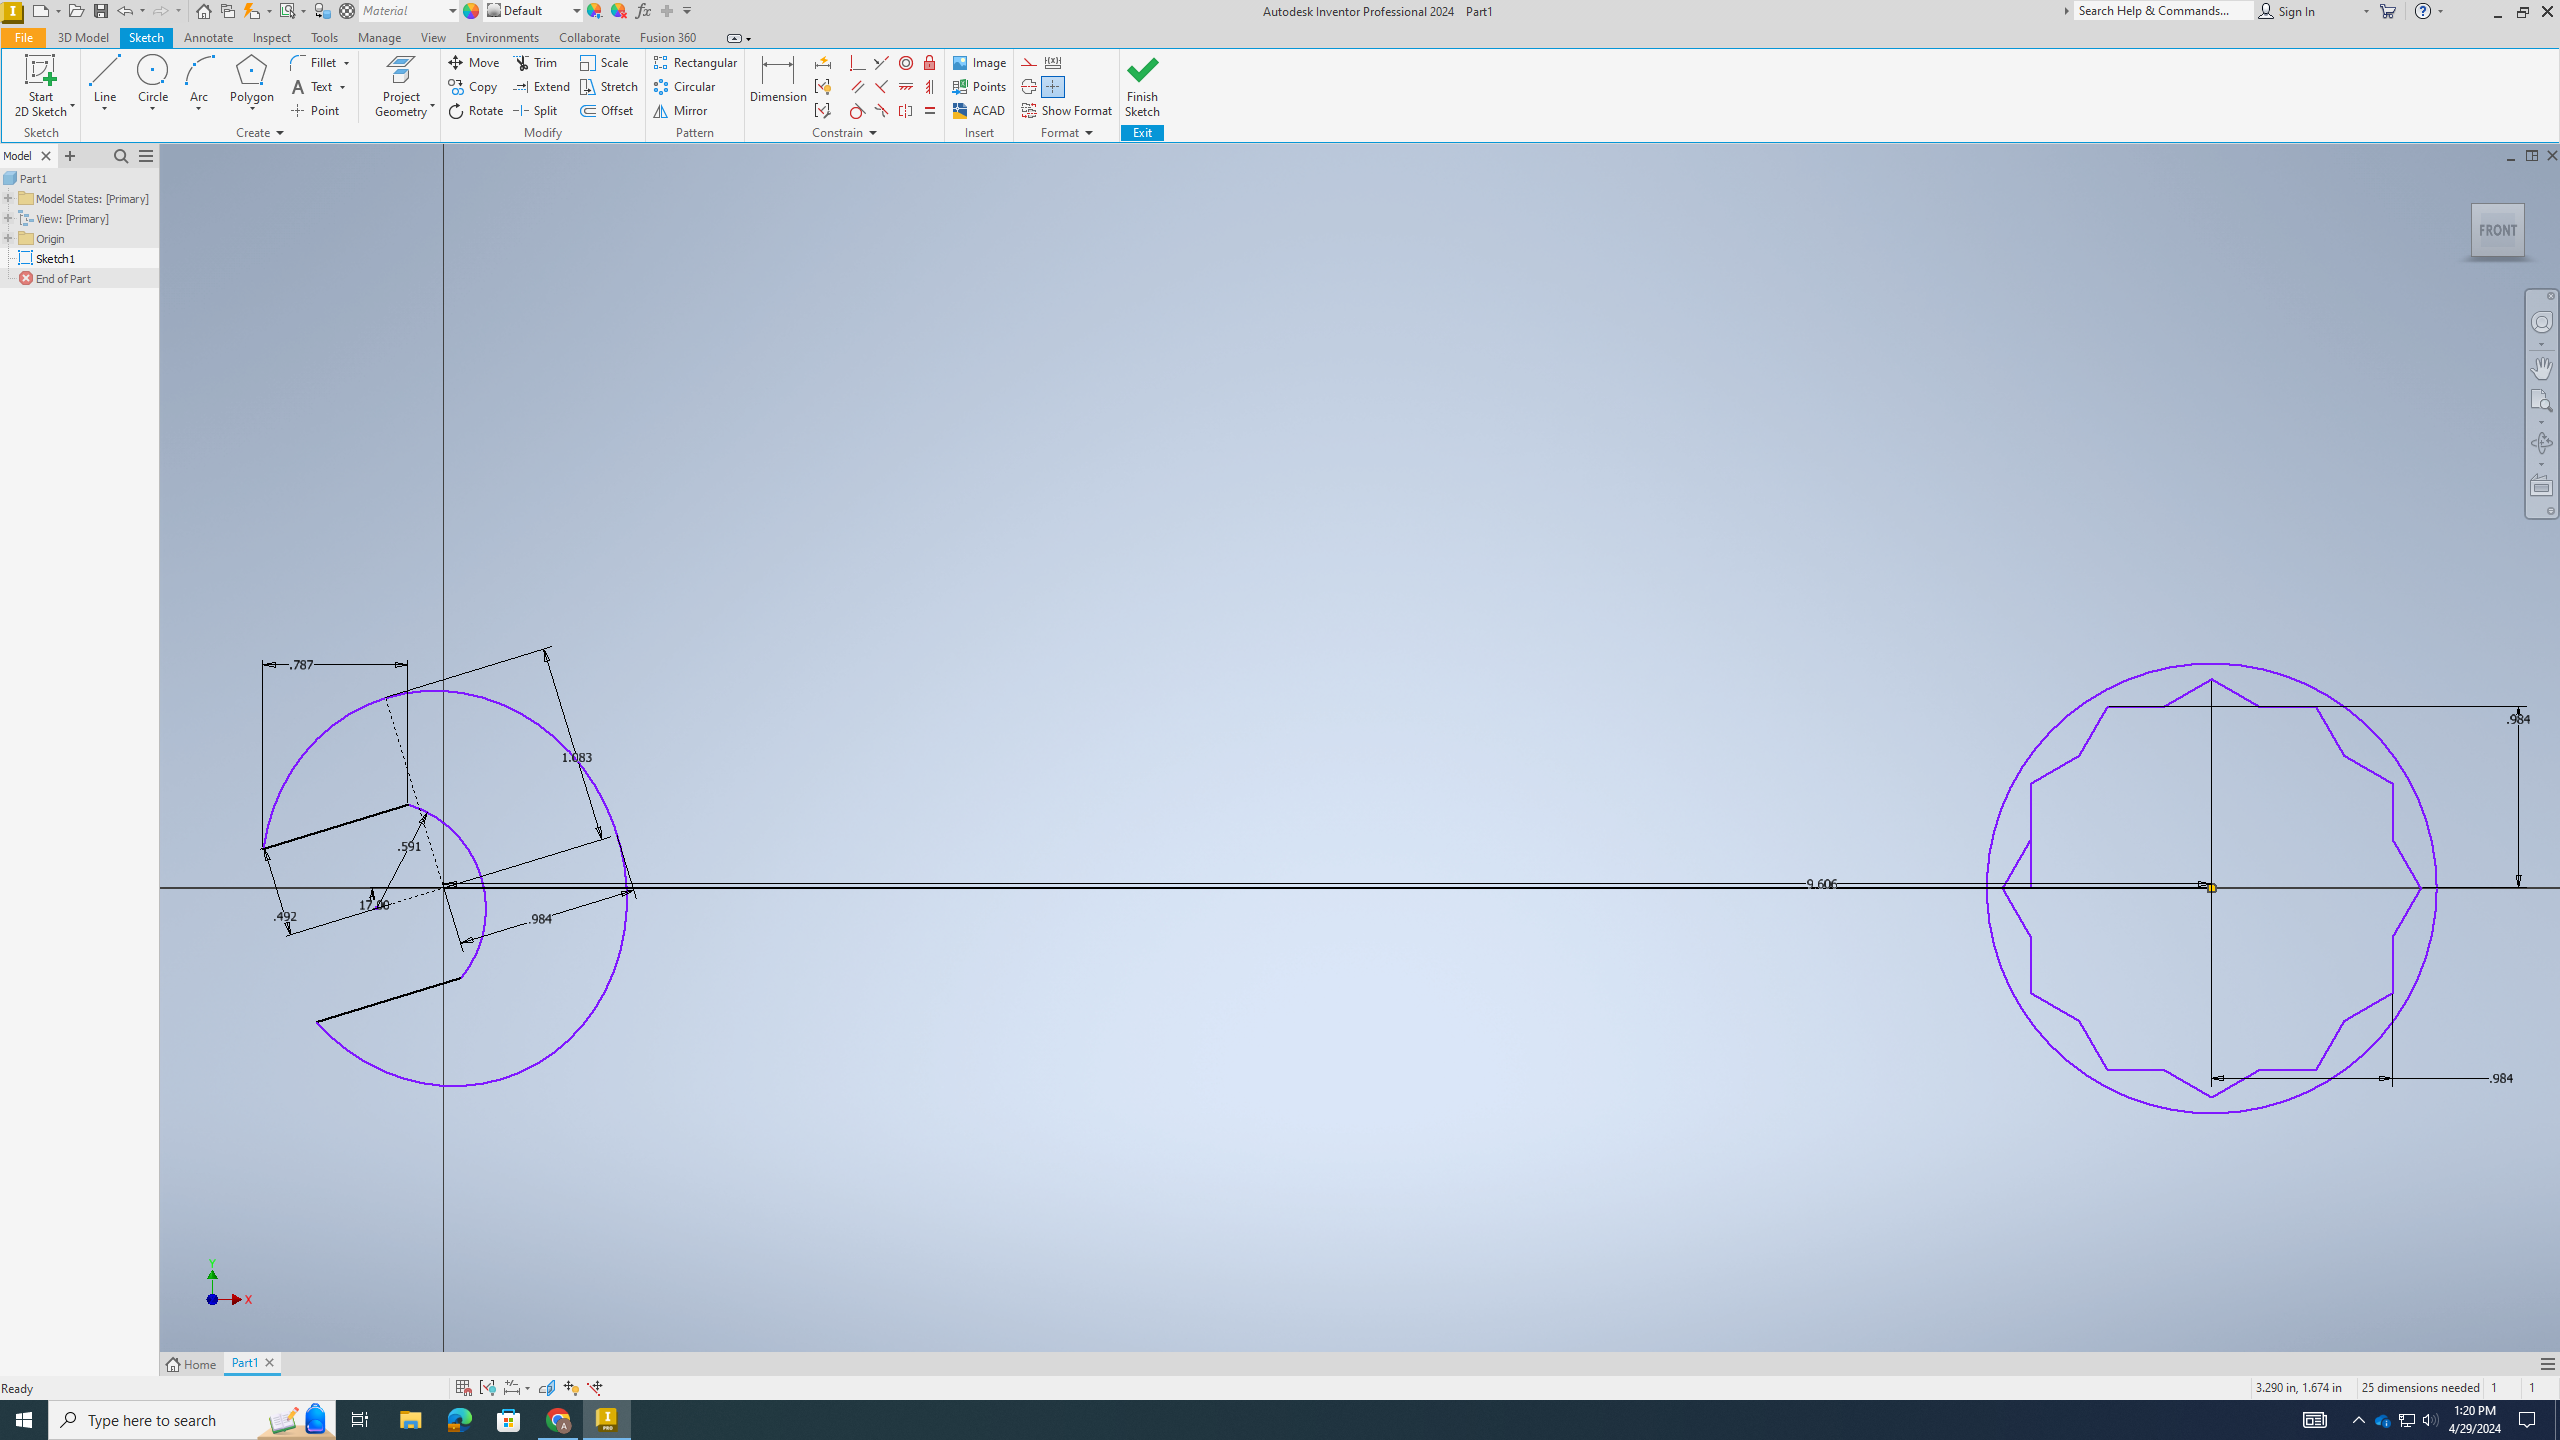
Create the Profile for the Wrench
.png)
Step 4) Using the circle button create a circle around 250mm away. Next, go to circle and in the middle, create 2 six sided polygon and make them opposite to each other. Make the circle 33mm and make the polygons both 25mm. Lastly, use the mirror option to make the line connecting the side to match and use the trim option to cut off all necessary parts.
Make the Wrench 3D
.png)
Step 5) Use the Extrude option make both sides 10mm and the shaft 6mm (use the center option to even everything).
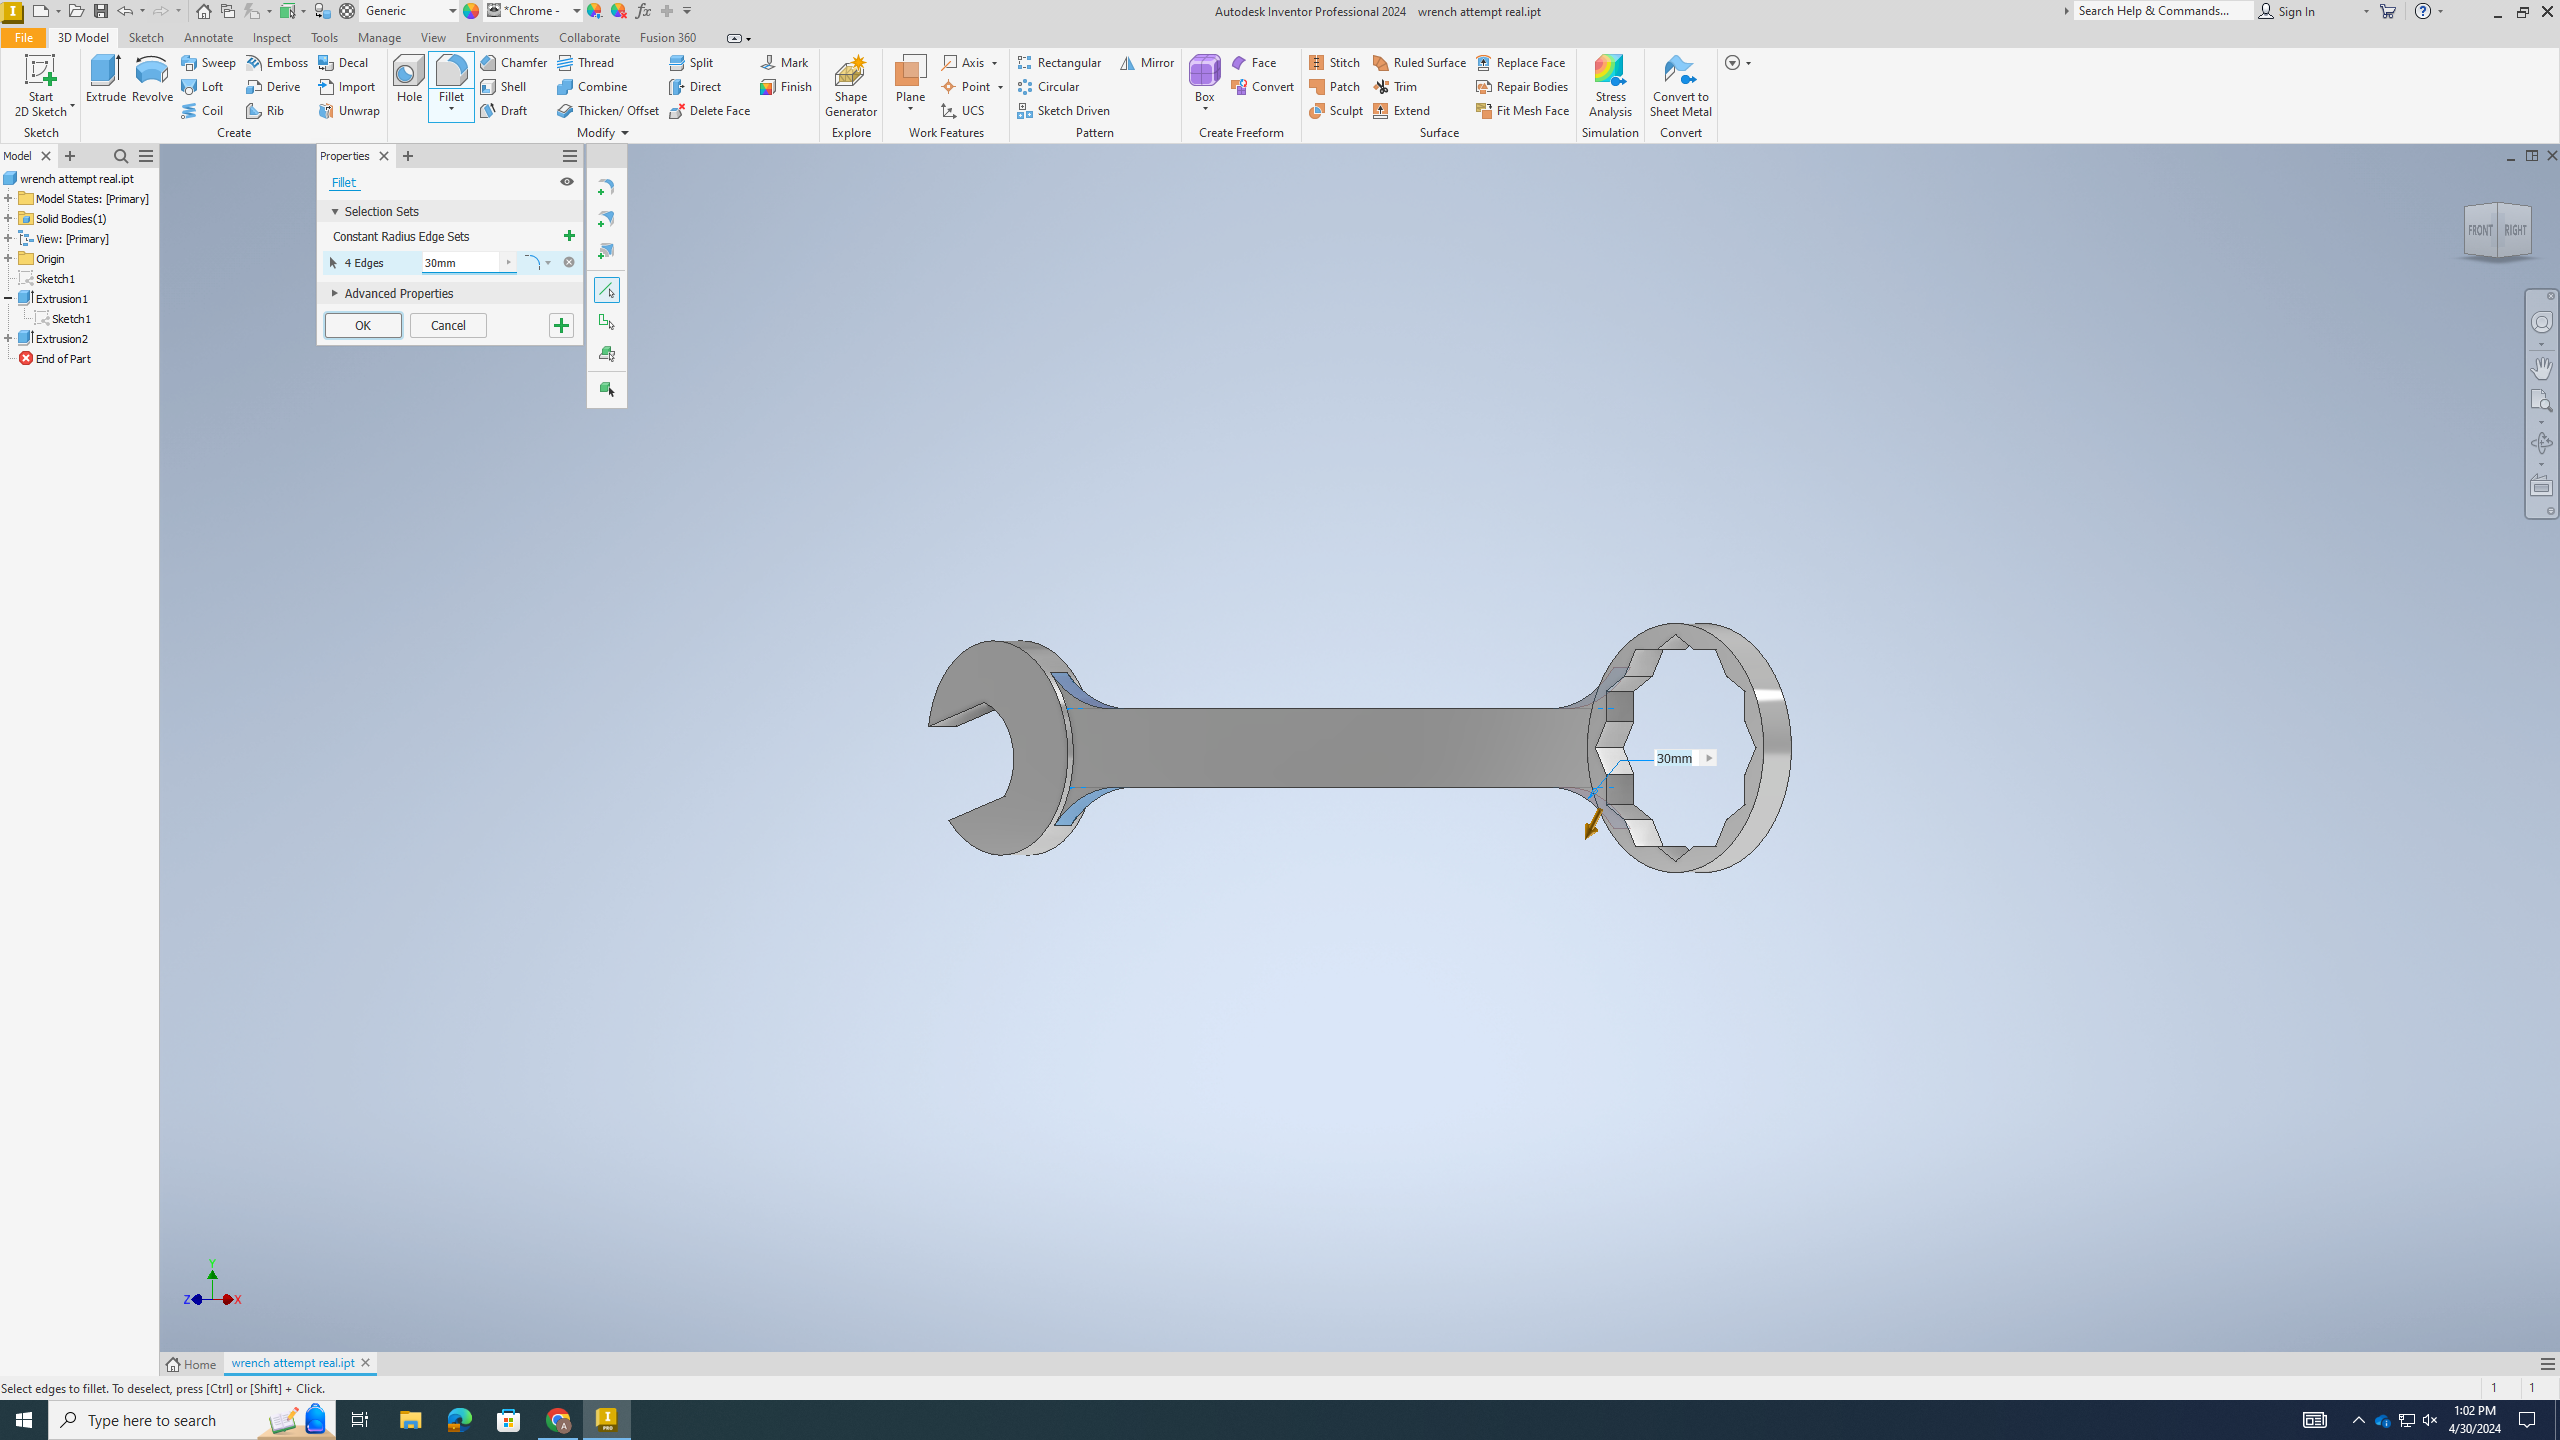
Fillet the Incepting Parts of the Wrench
.png)
Step 6) Use the Fillet option to fillet the sections which connect to each other with and make the connection 30mm.
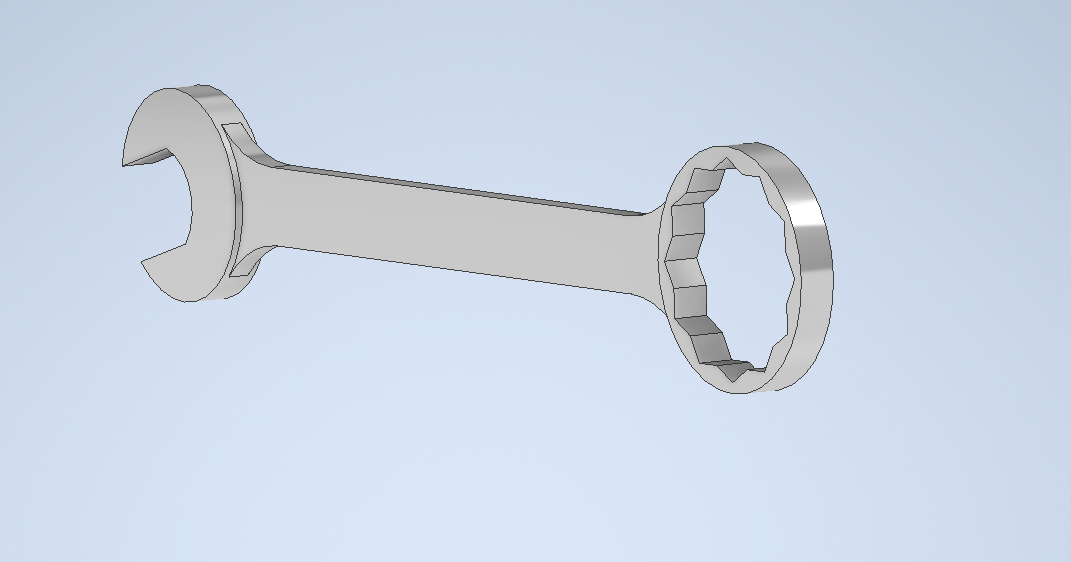
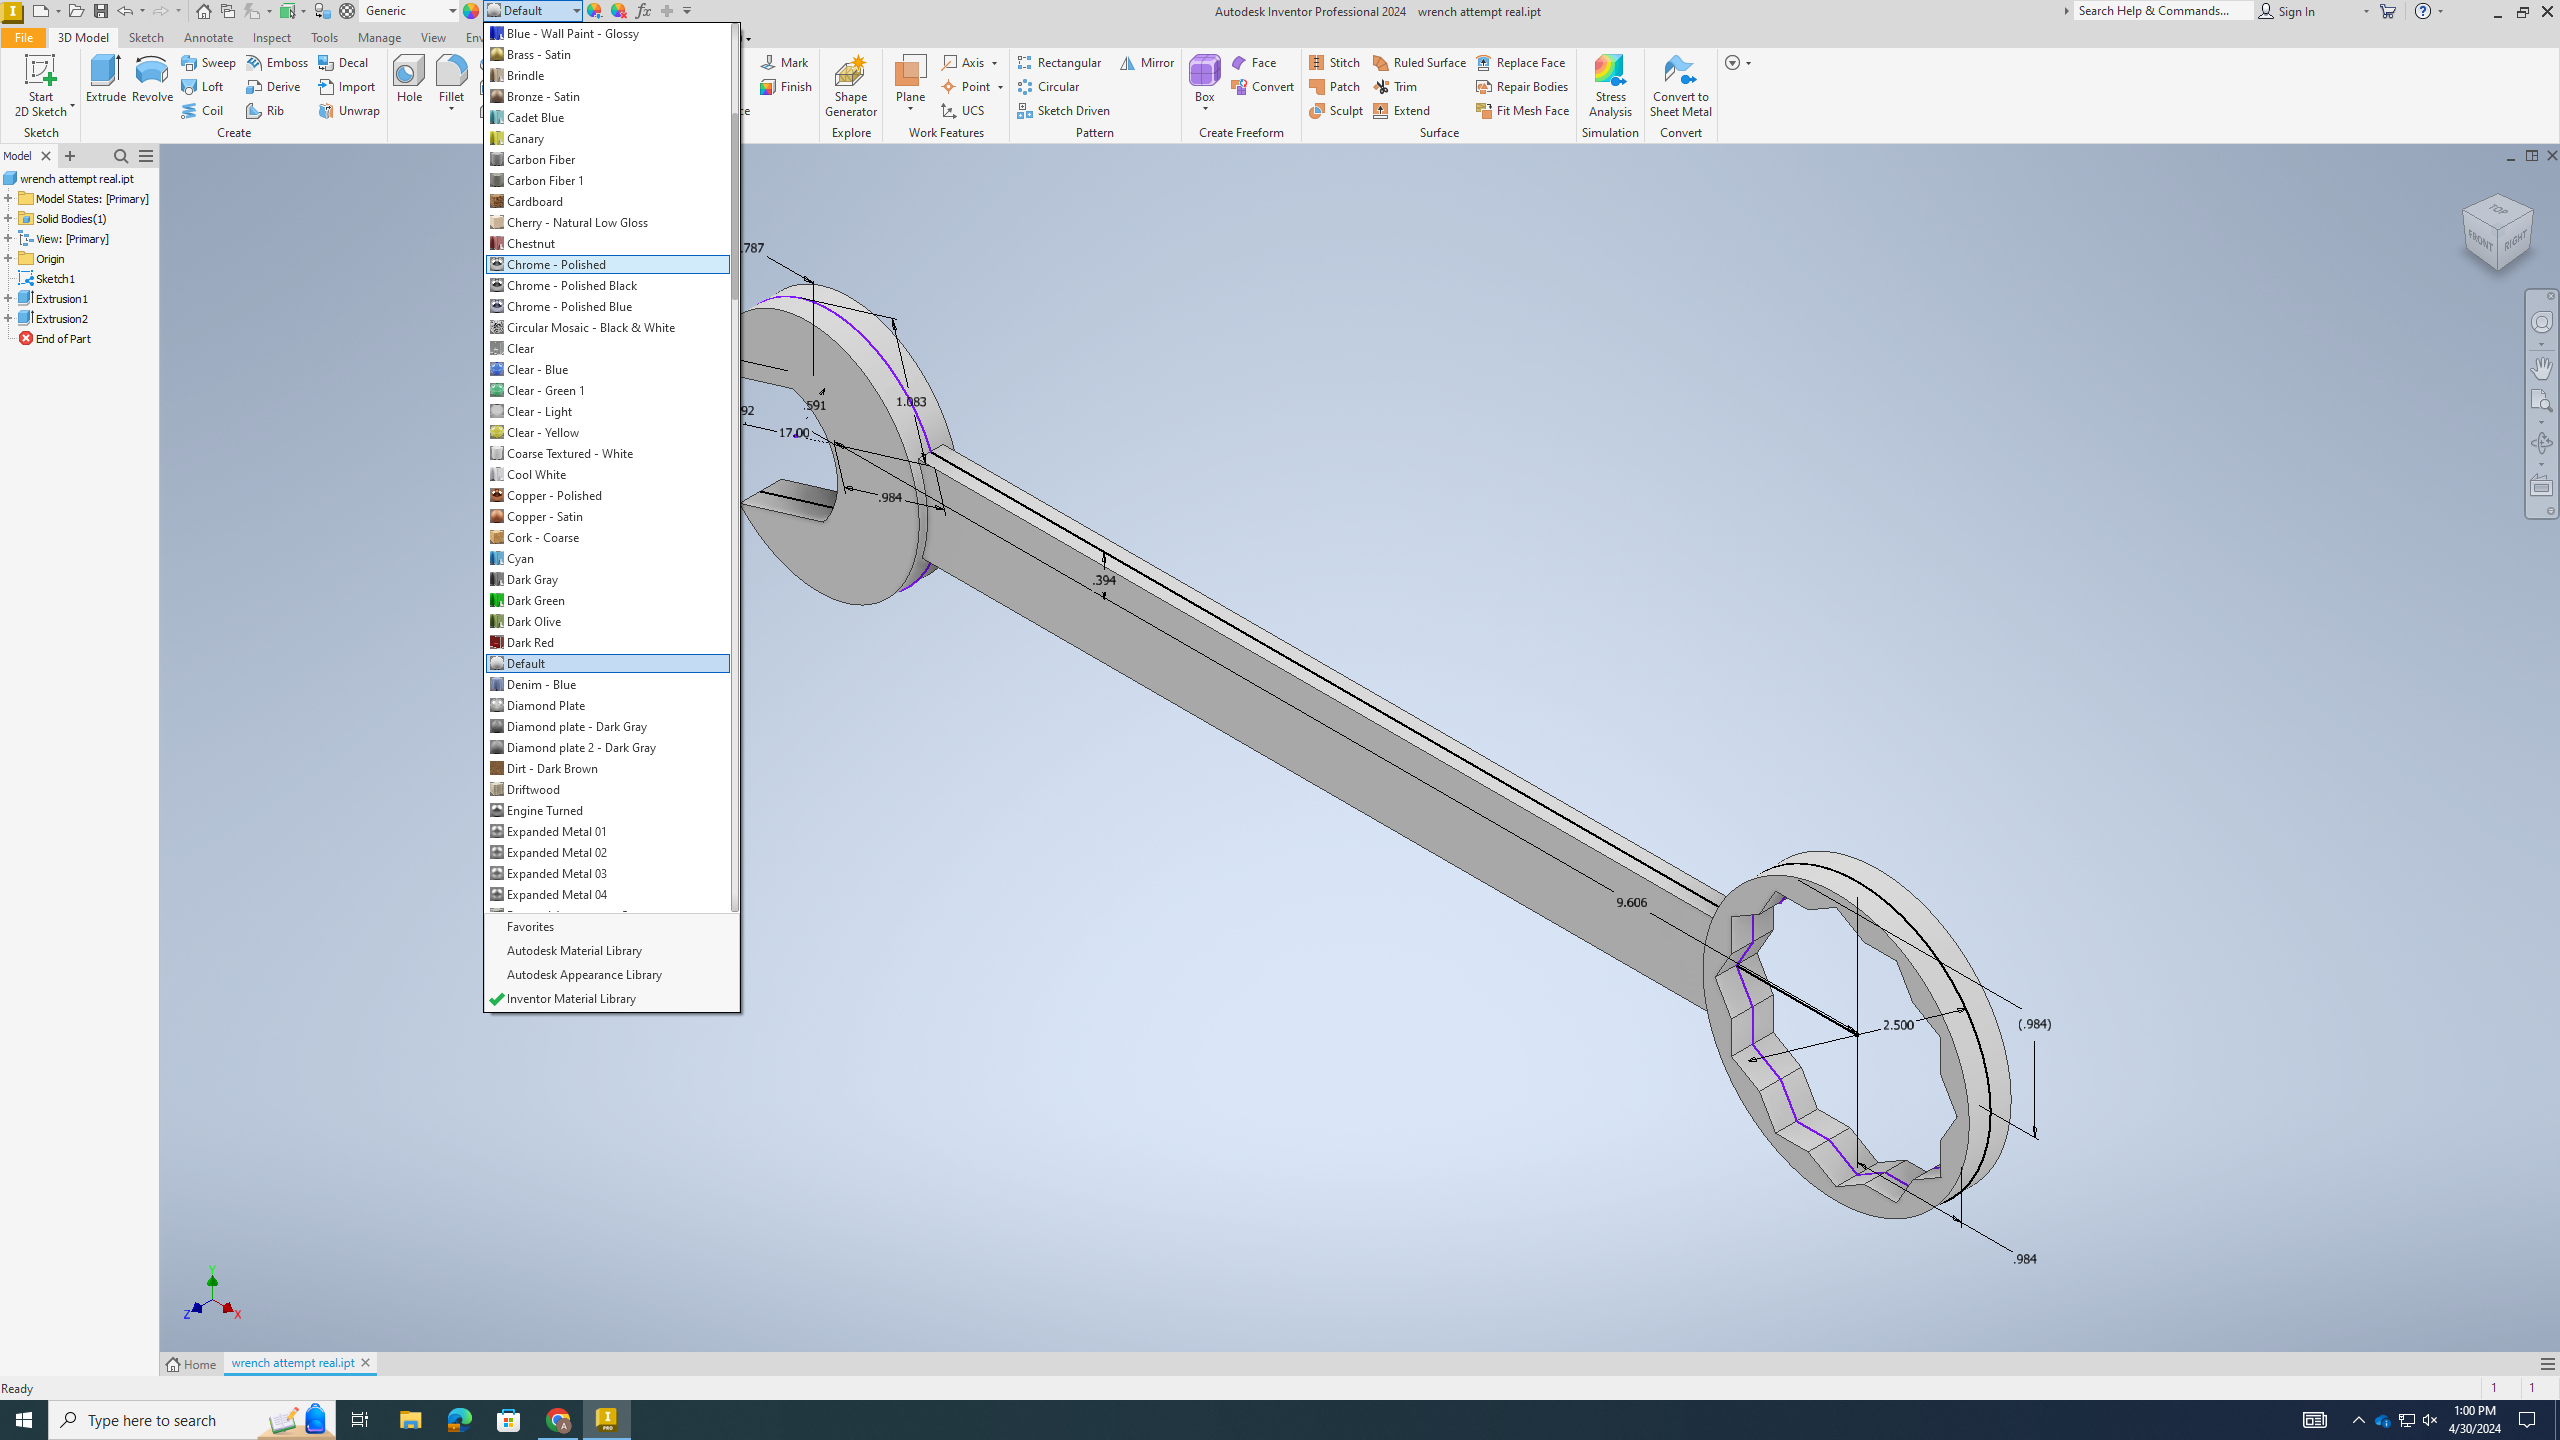
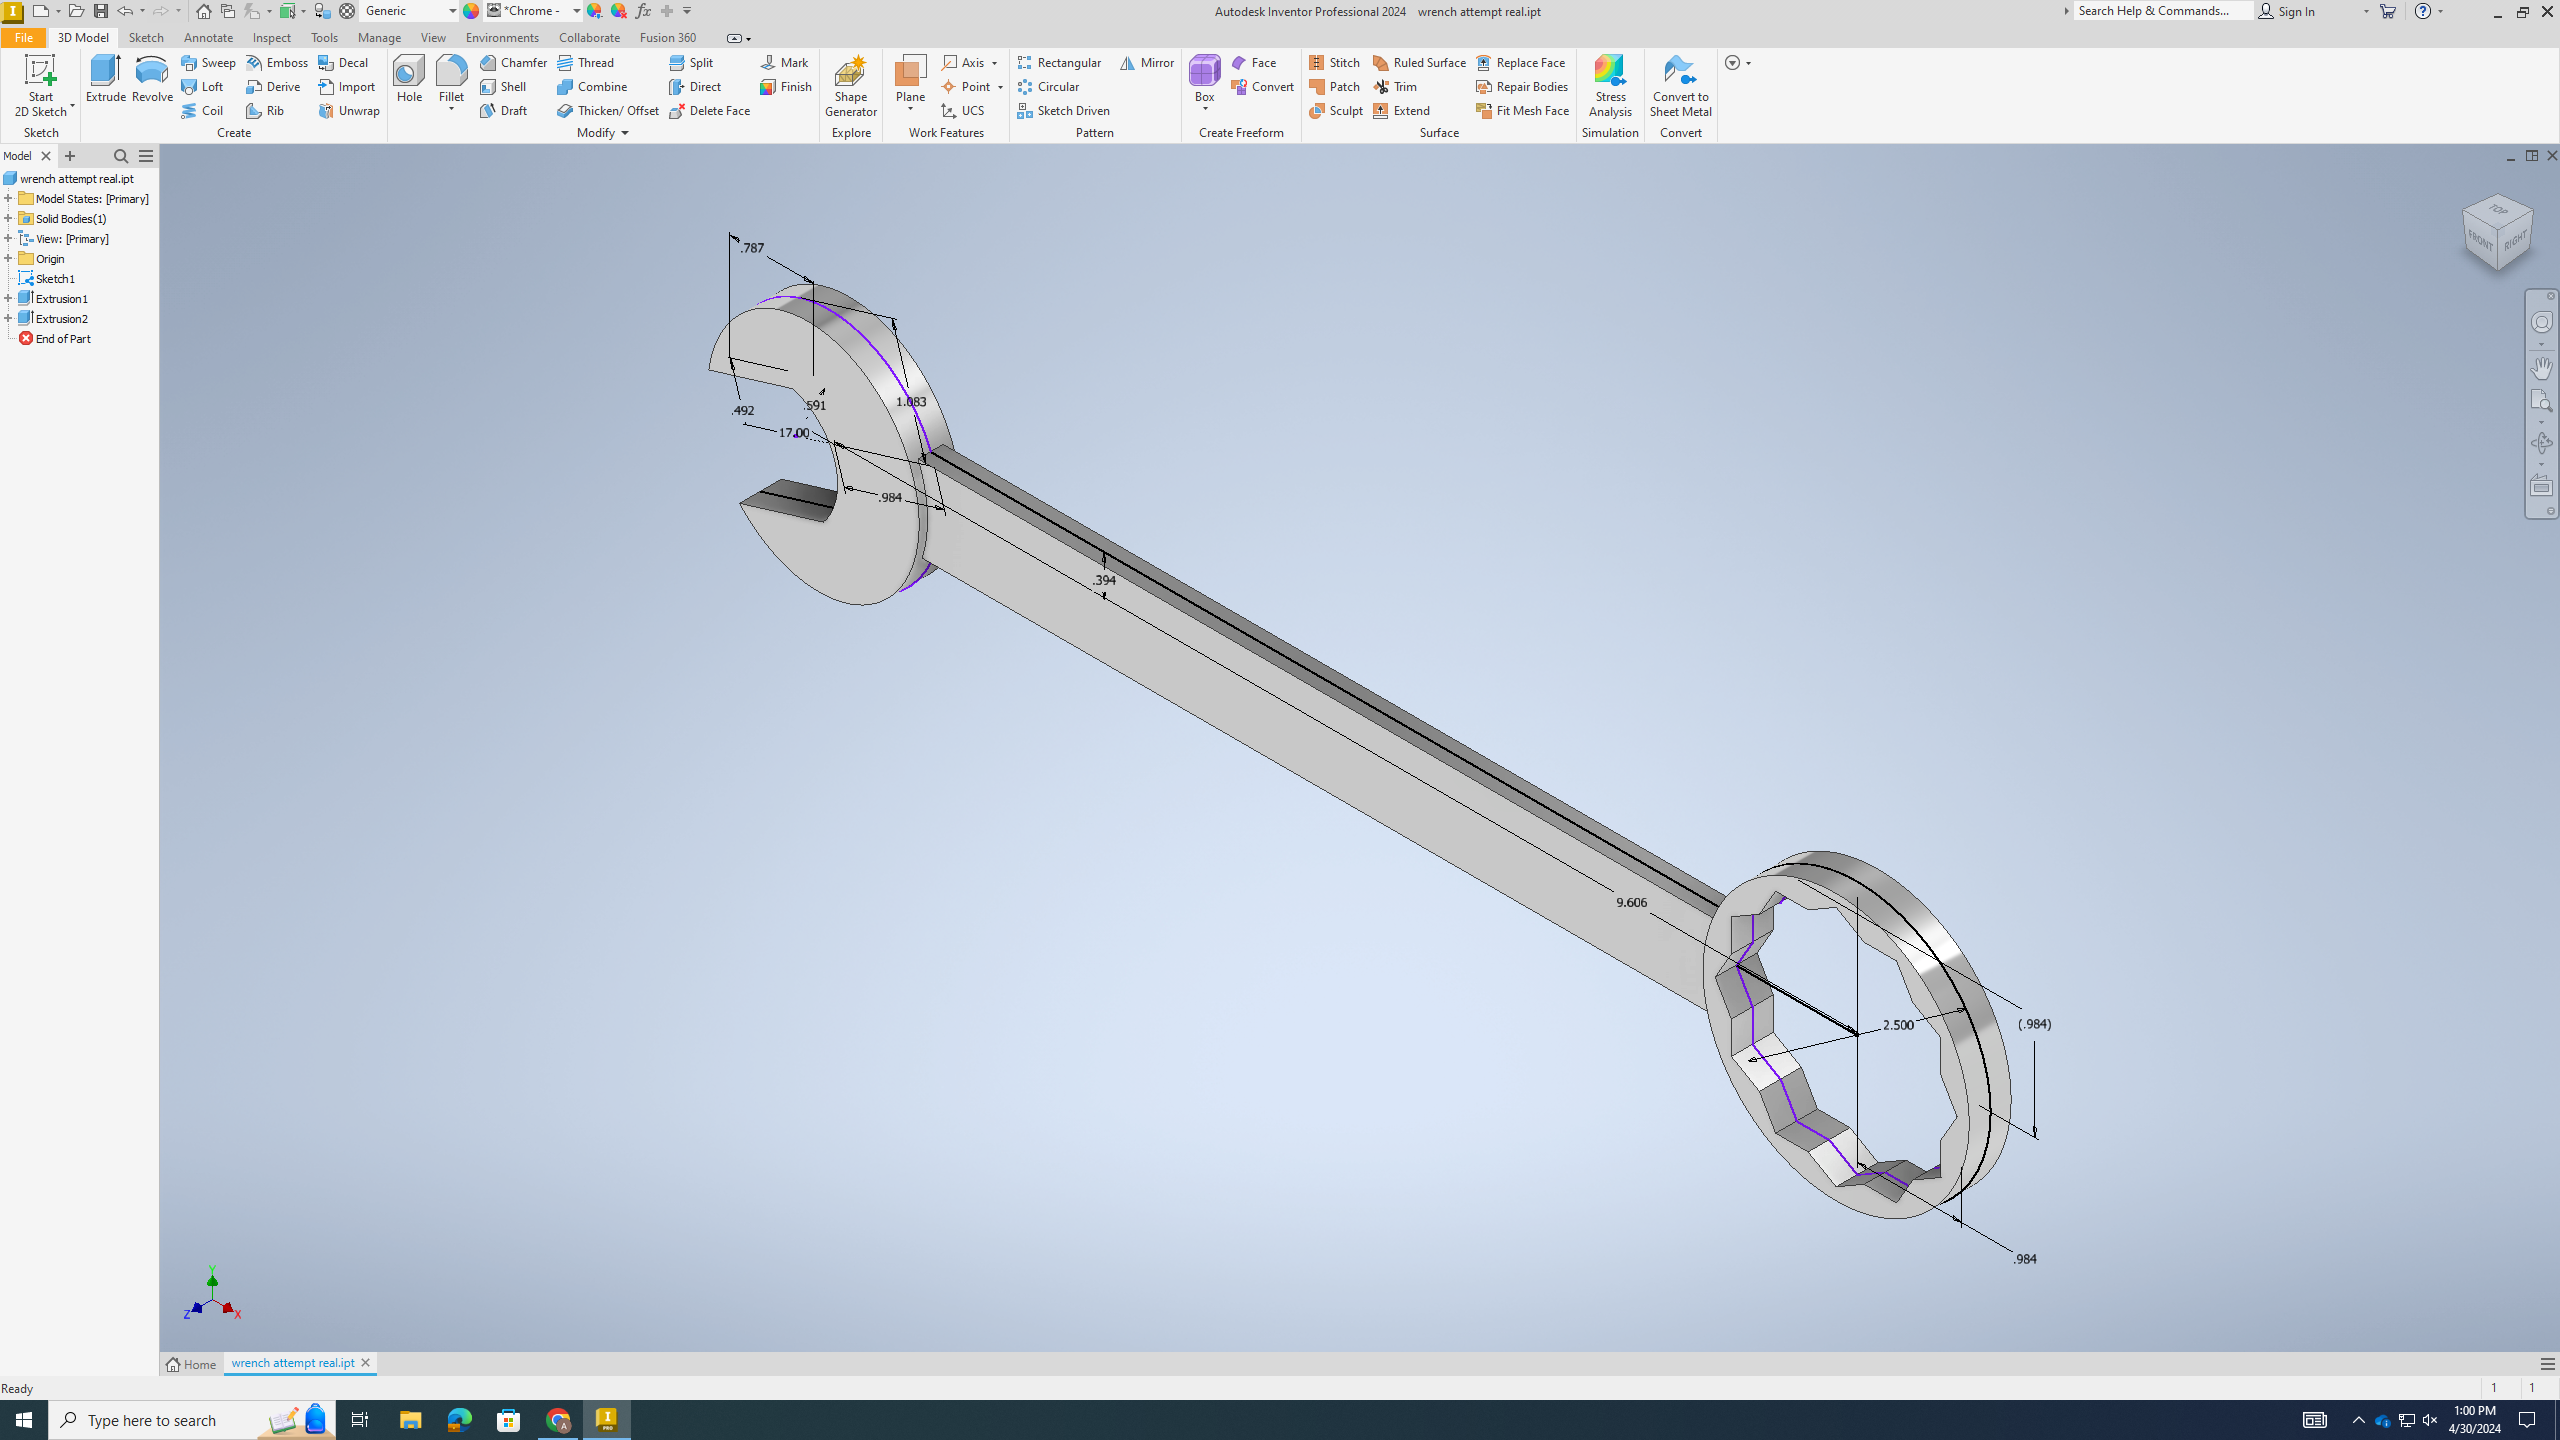
Change the Materials
.png)
Step 7) Go to the materials buttons and click the chrome polished option, and there, you have a wrench.