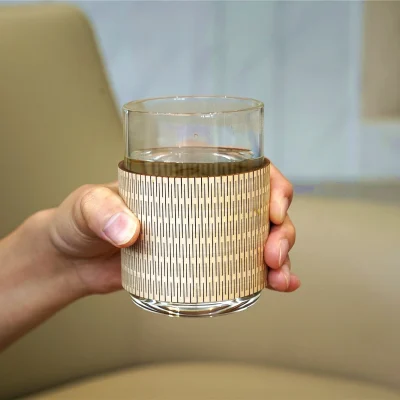
How to Make a Wooden Cup Sleeve With Laser Cutter
by thunderlaser-nolan in Workshop > Laser Cutting
47 Views, 0 Favorites, 0 Comments
How to Make a Wooden Cup Sleeve With Laser Cutter

Ever poured hot tea or coffee into a glass cup, only to find it too hot to hold? A wooden cup sleeve solves the problem in style—offering both heat protection and a personal touch. With laser cutting, you can design a sleeve that perfectly fits your cup, features your favorite patterns, and reflects your personality. From custom gifts to coffee shop accessories and stylish homeware, this simple project turns everyday drinks into something special.
Ready to roll into your next creative idea with style and precision? Hold on and keep reading!
Supplies
Machine Used
Thunder Nova 51 60W
Material Needed
3mm Basswood
Software Needed
LaserMaker
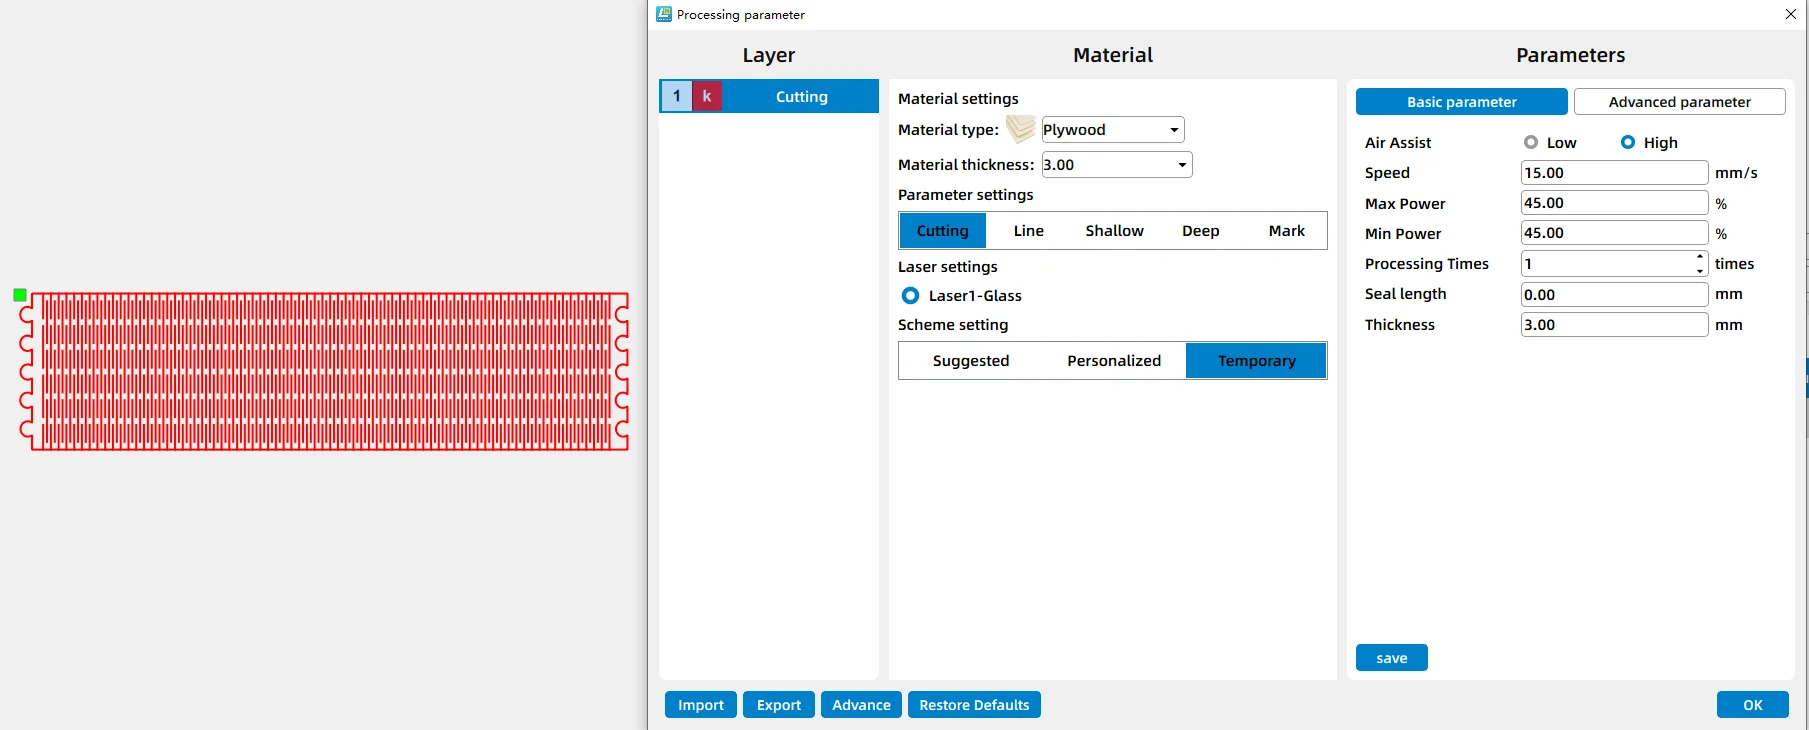
Settings
Cutting
- Speed:15mm/s
- Max Power:45%
- Min Power:45%
- Number of Passes:1
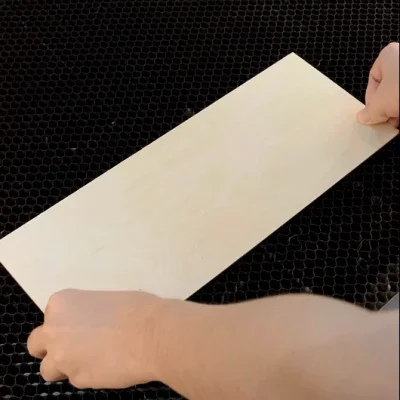
Prepare and Place the Wood on the Laser Bed
Choose a flat, clean wooden sheet suitable for laser cutting. Place it firmly on the laser bed, and amke sure that it won’t move during cutting to maintain precision.
There are several ways to level basswood. Using magnets or pins is the most common method for flattening during laser cutting.
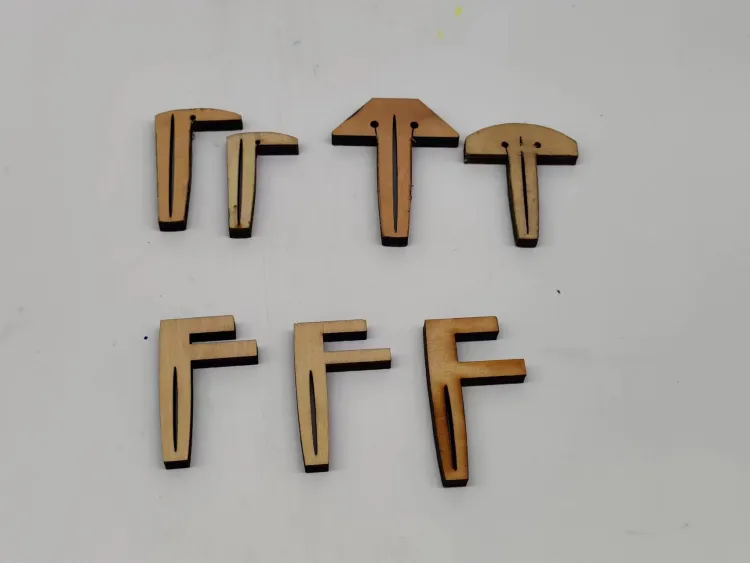
Tips:
There are three common types of pins: T-shaped, L-shaped, and F-shaped. A special use for F-shaped pins is clamping up the plywood to prevent burn marks.
Be mindful of the height of the magnets and pins. If they are too tall, the sensor might hit them and become damaged during processing.
Open the File and Check the Settings
Import the wooden cup sleeve design in Lasermaker and check if your basswood size is large enough. Double-check everything, and decide if you want to add or subtract elements according to your preferences.
For the laser cutting layers, pay extra attention to the minimum power setting. If the min power is too low, it will cause the cutting corners will not cut through; if the min power is too high, the laser cutting will be bad at the corners.
Focus Your Laser Machine
Proper focusing is essential for achieving crisp engravings and smooth cuts. If your machine supports auto focus, a single click will set the correct distance for flat wooden boards. If you prefer manual focus, use the focus stick to adjust the laser head until it just touches the surface of the wood at a perfect vertical angle. Spending an extra moment on accurate focusing will pay off with professional-looking results.
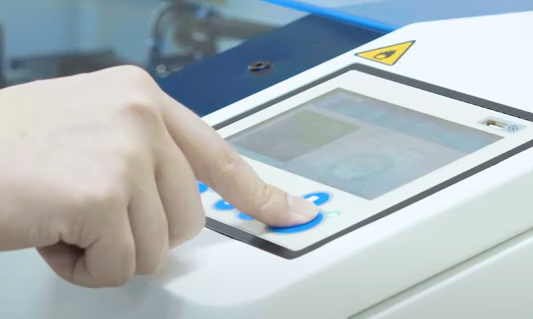
Frame the Design and Start Laser Cutting
When you click “Frame”, the red light will display the laser cutting area. This is a safe process, and the frame will align with the wood material. Once aligned, simply press “Start” to begin the laser cutting with the Thunder Nova 51!
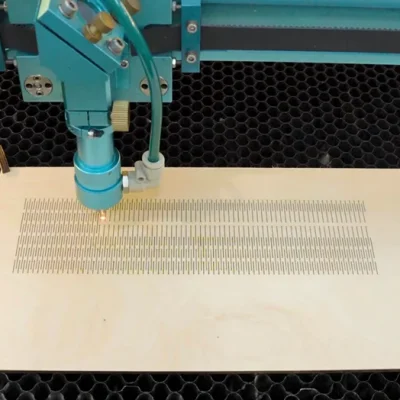
Monitor the Laser Cutting Process
Stay close to the machine while it’s running and watch the cutting and engraving progress. Keep an eye out for excessive smoke, small flame-ups, or any movement of the material that could affect the outcome. Make sure your workspace is well-ventilated, and rely on air assist if available to achieve cleaner edges on the wood.
Complete the Plinko Game Toy Cutting
After cutting finishes, carefully remove the wooden cup sleeve pieces from the laser bed. Use fine-grit sandpaper or sanding tools to smooth out any burnt edges or rough spots. This step is key to giving your sleeve a polished, professional appearance.
You can also apply a wood finish, oil, or sealant to protect the surface and enhance its natural beauty. Let any finishes dry completely before use.