How to Make a (WORKING) Speaker for Smartphone in Tinkercad
by pauldobrowski in Design > Digital Graphics
1028 Views, 6 Favorites, 0 Comments
How to Make a (WORKING) Speaker for Smartphone in Tinkercad
In this instructable, you will learn how to make a 3D printed smartphone speaker.
Supplies
Prep Time: 15 - 45 mins
3D Printing Time: ~1 - 2 hours (unless you have a super-speedy printer)
Supplies:
- Tinkercad account
- Smartphone
- 3D Printer
- 3D Printer food
- Patience
Welcome to Tinkercad!
(If you have used Tinkercad before, you can skip right on to Step 2.)
As soon as you open up a new project, you will see a screen that looks something like this. (See above) On the left, is the workplace (where you build the model), and on the right is the menu, (where you get the basic shapes from). The little cube in the top left of the screen is how to look around your workplace, to use it, you can tap and drag it in different directions, or use a trackpad or mouse to drag it around.
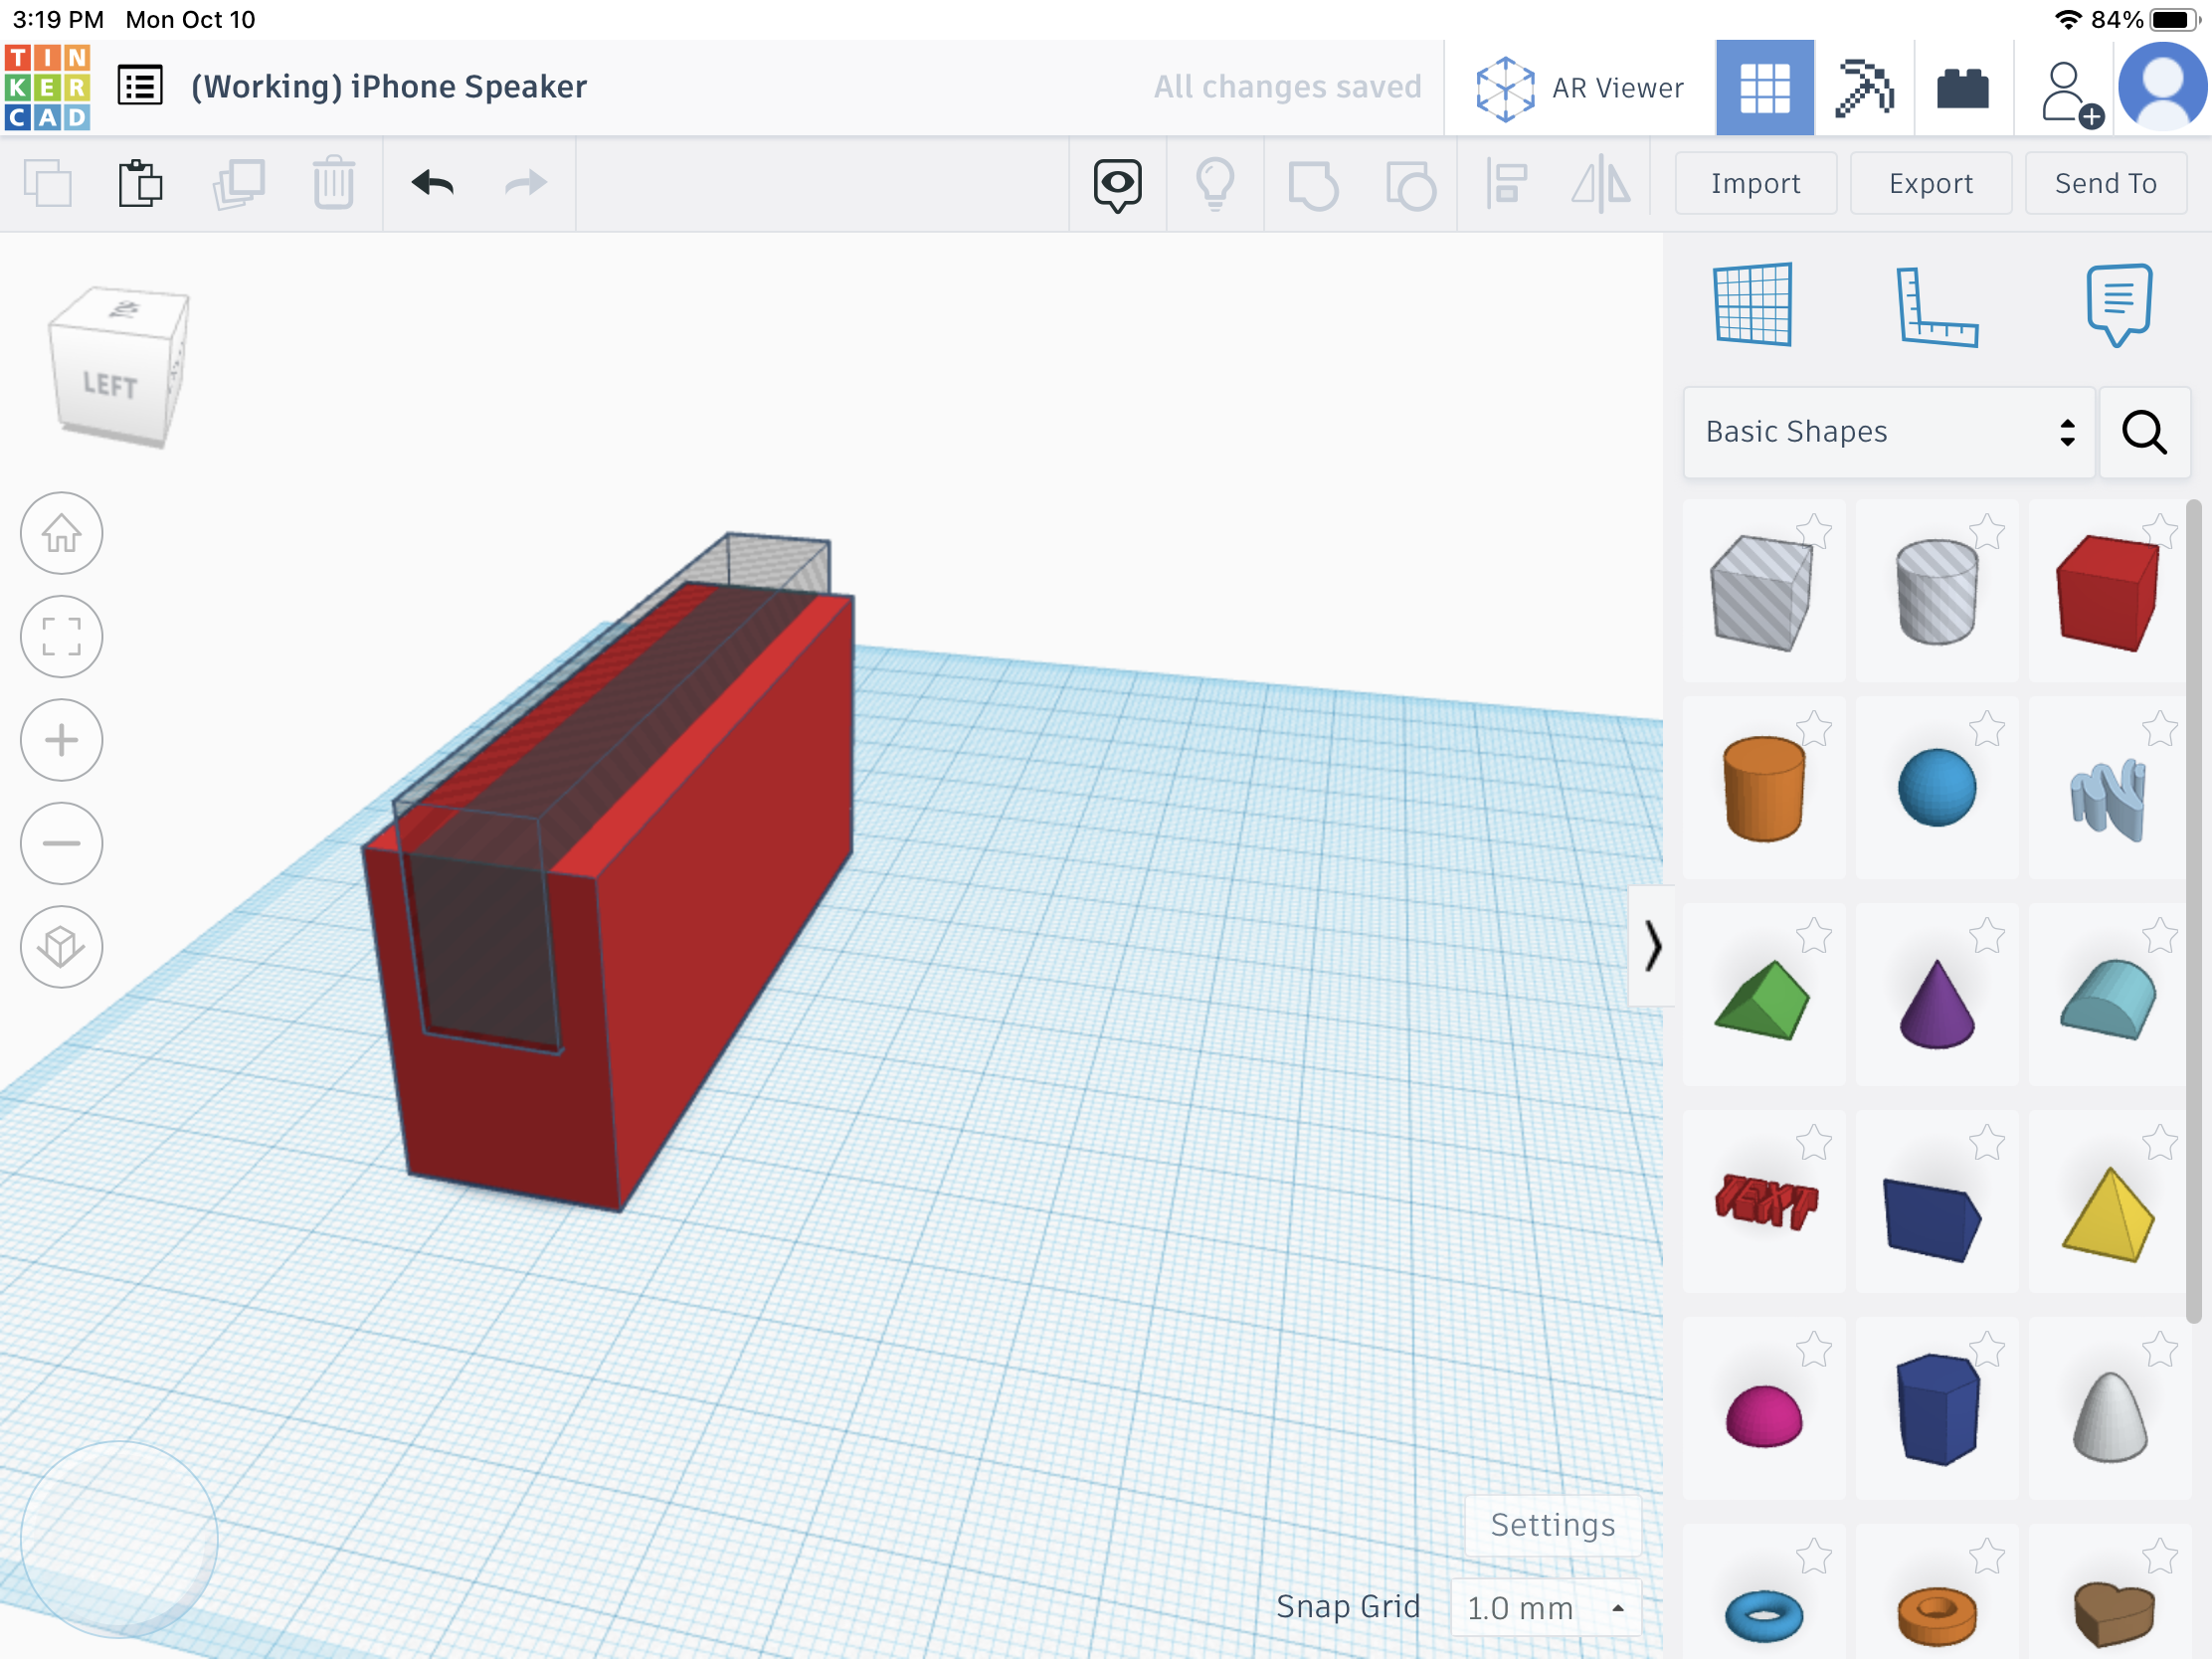
The Stand
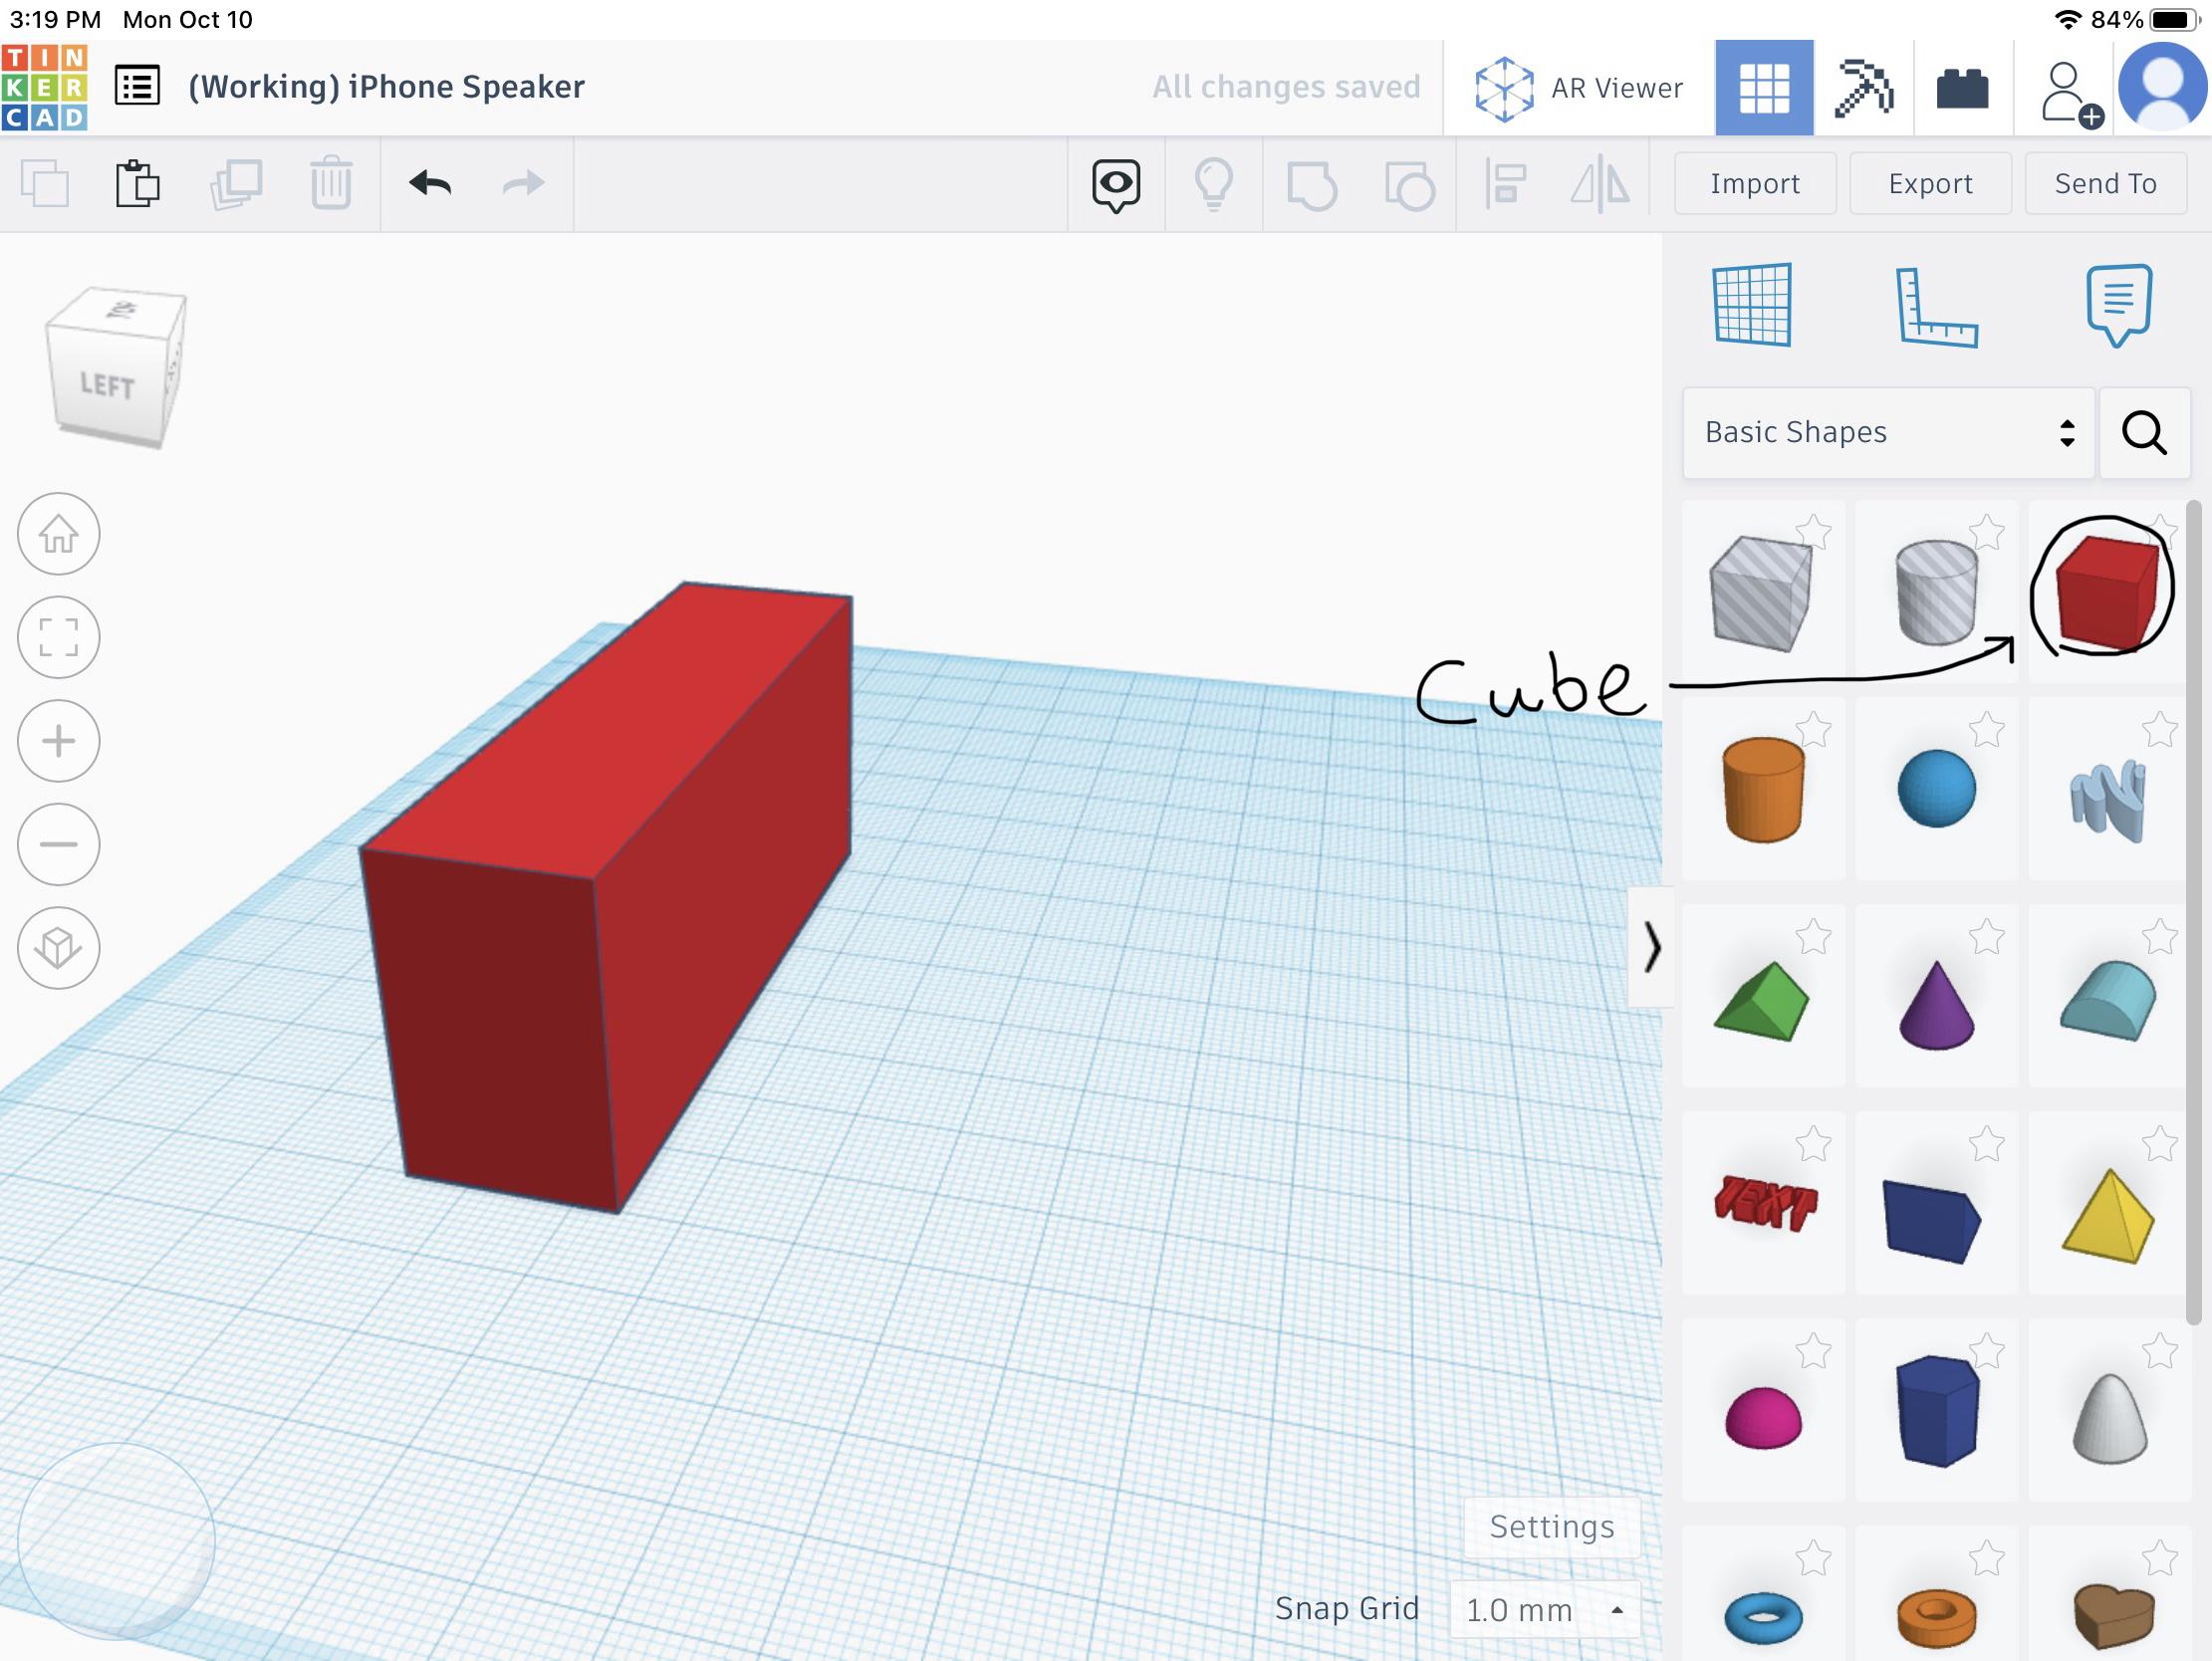
Click down or tap on the red cube icon on the right side of the screen and drag it onto the workplace. Now, use the little black squares that appear on the sides of the square to stretch the shape out into a rectangular prism, you should see a box with numbers appear on the side being stretched, and if you do, click it and change it to 75.00 (the length). Using the same stretching method, set the width to 20.00 and the height to 32.00. Once you have done this, you should have a shape that looks like the one above.
The Part Where the Phone Goes In
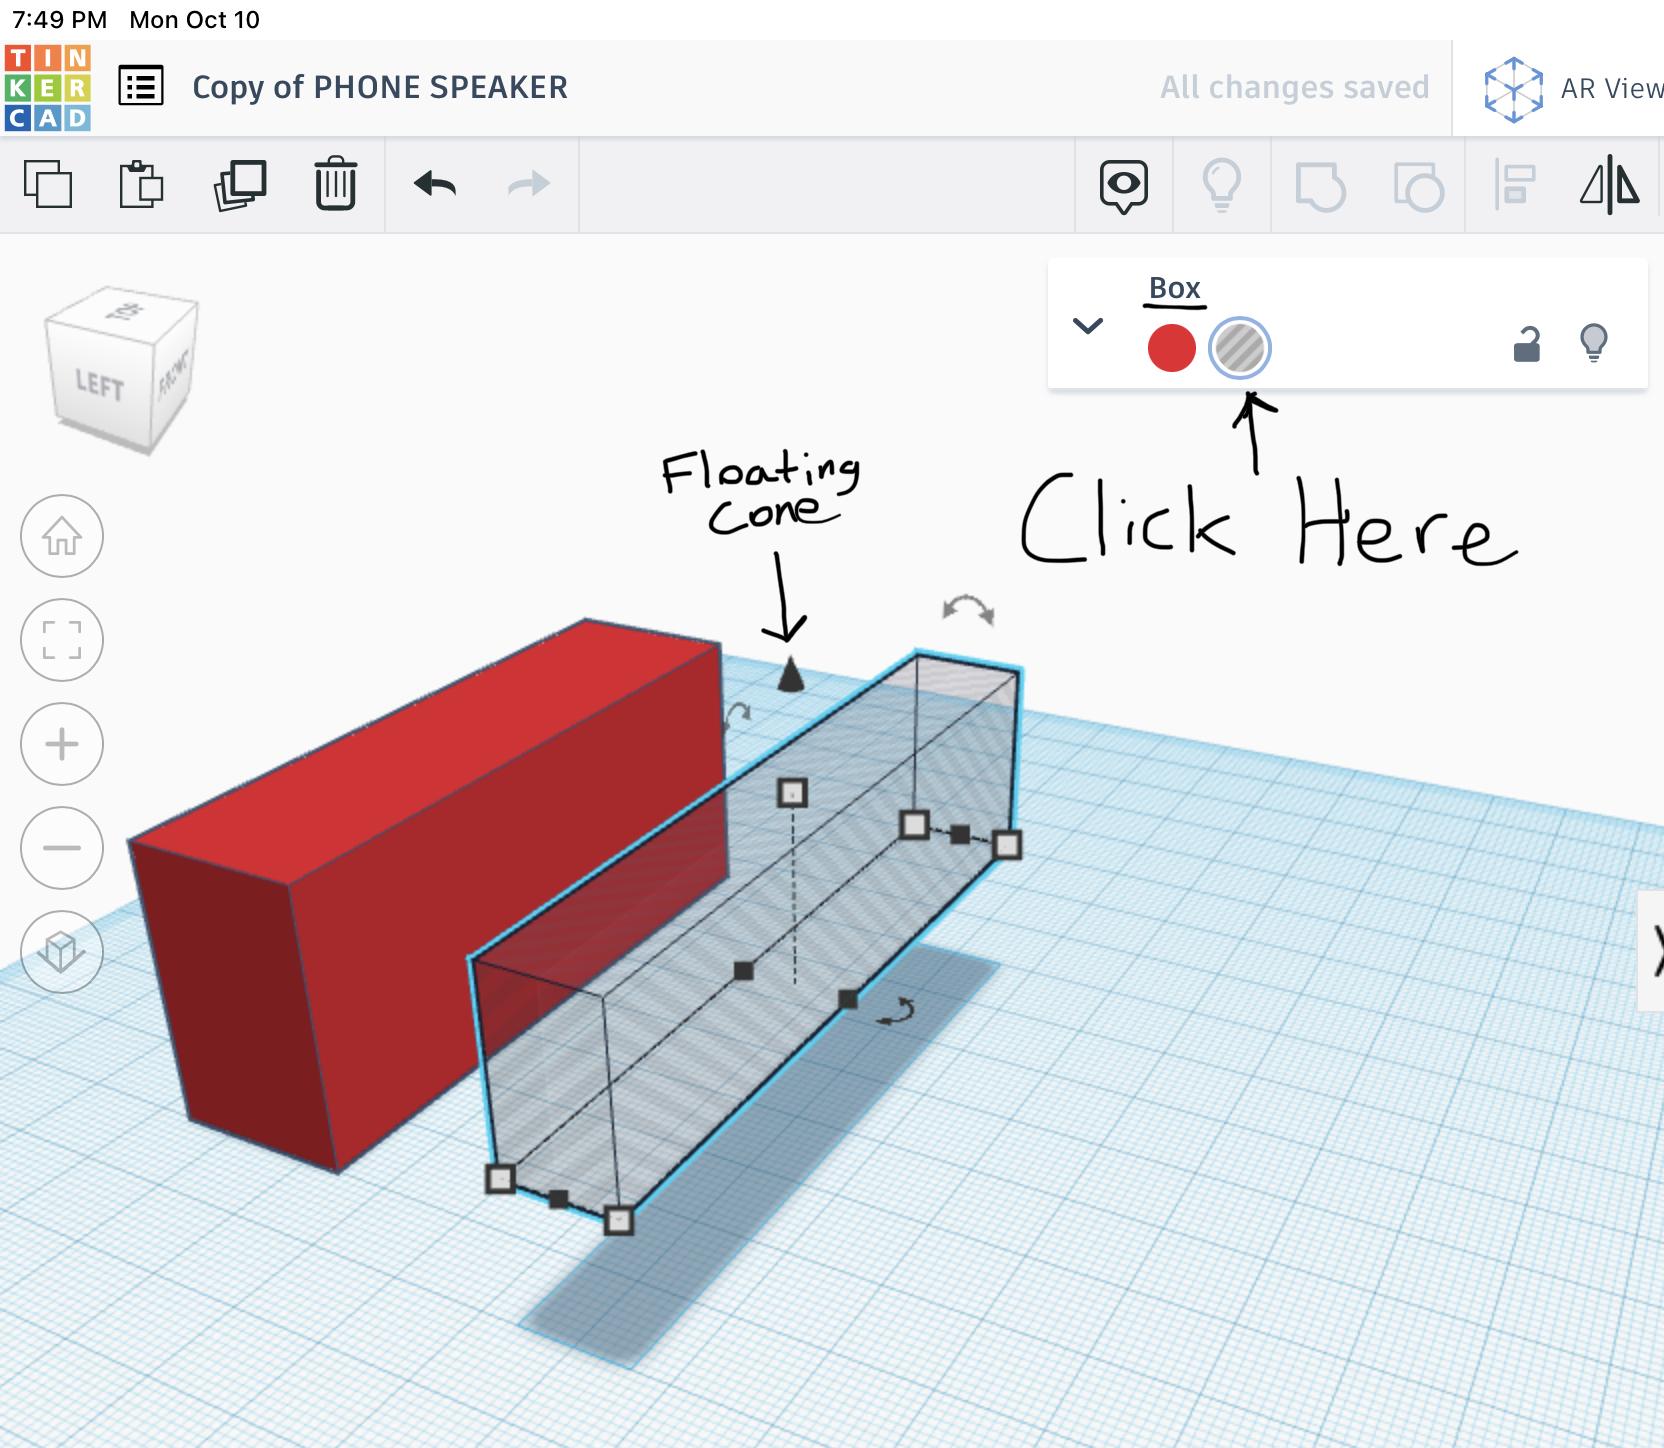
The shape you have now is great and all, but there isn’t really a spot where your smartphone can fit into. To fix that, we need to make a hole in the rectangular prism you just made.
To do this, you need to drag another cube onto the workplace, and set the length to 80.00, width to 12.00, and height to 21.00. Now for the hard part, making it take away from the original shape instead of adding to it. To do this, select the shape you just made, and when you do, a box in the top right of the screen will come down and show the following: Box and then a red circle 🔴 and a stripy gray circle ⚪️. Click on the stripy gray circle and your shape will look like a stripy gray rectangular prism.
Then, you have to select the shape, and locate a flying black cone above the shape. This tool makes the shape go up, so use this to lift the shape up and place it in the middle of the red rectangular prism.
The Part Where the Sound Goes In
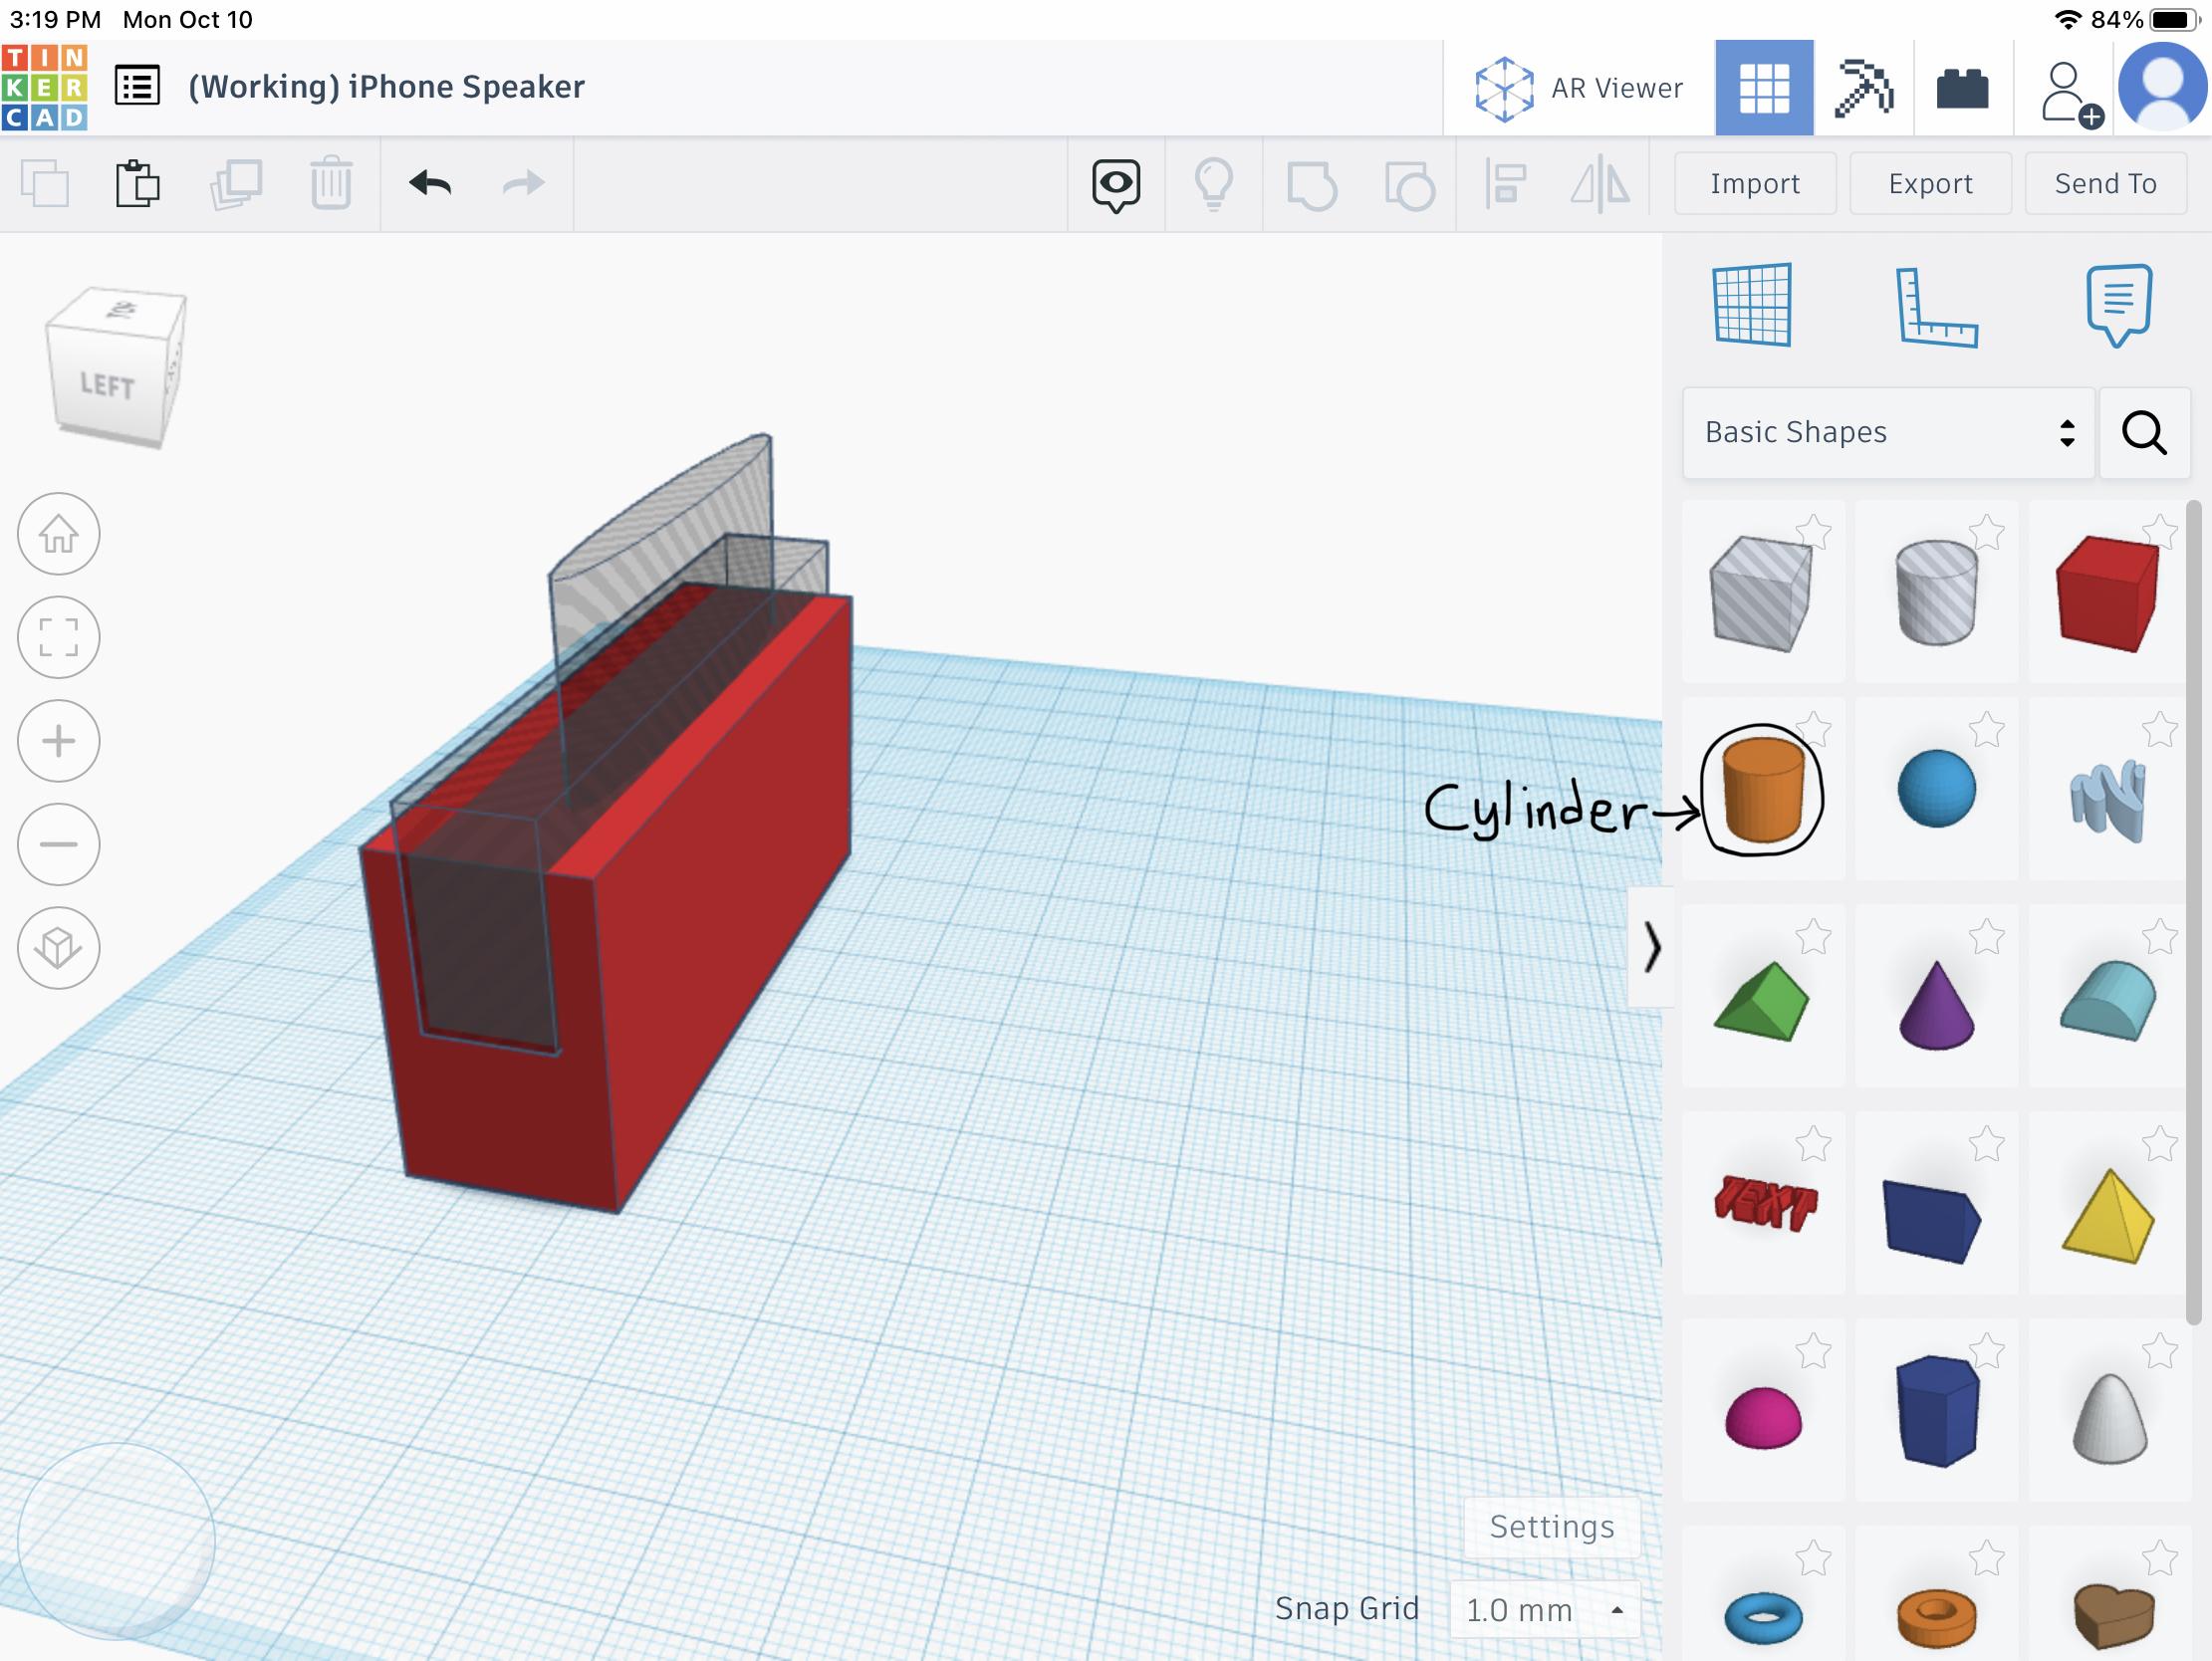
Now, we have to use a different shape… the cylinder. Drag the cylinder onto the workspace and set its length to 55.00, width to 5.00 and height to 48.00 (so that it is easier to select). Make it transparent by selecting it and clicking the stripy gray circle. !DO NOT FORGET TO RAISE IT SLIGHTLY SO THERE IS NO HOLE IN THE BOTTOM! Drag it to the front end of the gap, like in the image. This will allow the sound to be picked up even when your smartphone is at an angle.
The Speaker Support
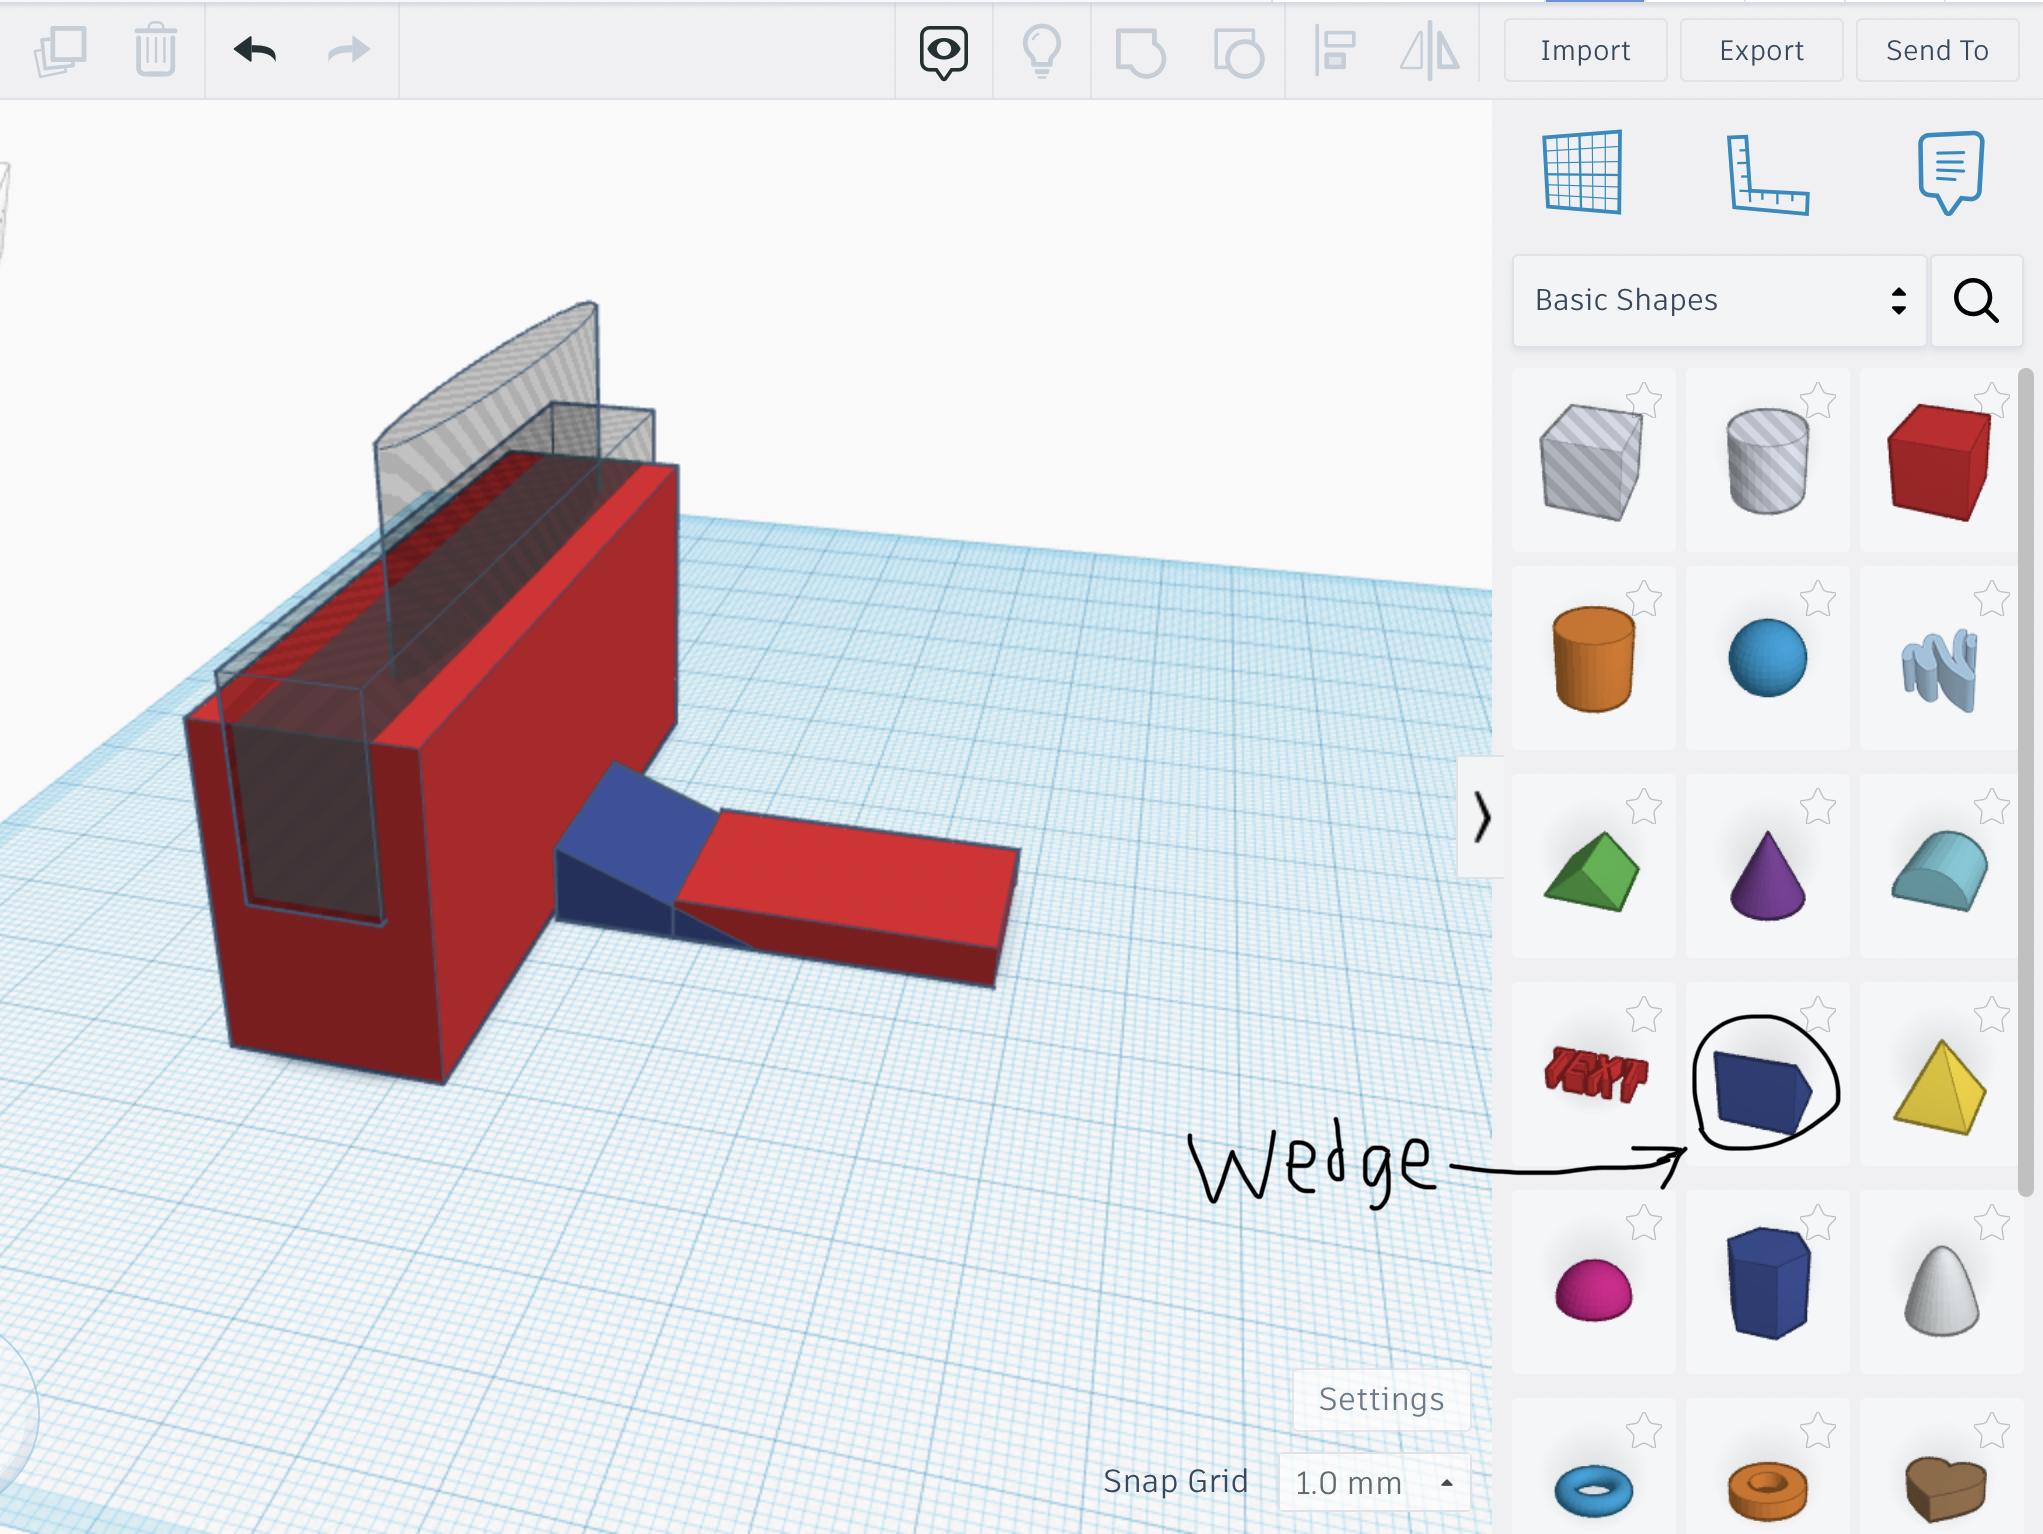
This support helps the printer print the speaker more easily.
You will need to add a new piece called a wedge, which is shown in the picture above, the length should be set to 20.00, the width should be set to 19.00, and the height should be set to 8.00, then, drag it to the front of the phone stand and center it.
Next, you have to add another square, and set the length to 31.00, the width to 19.00 as well, and the height to 4.00, then attach the square to the wedge and overlap the two shapes slightly.
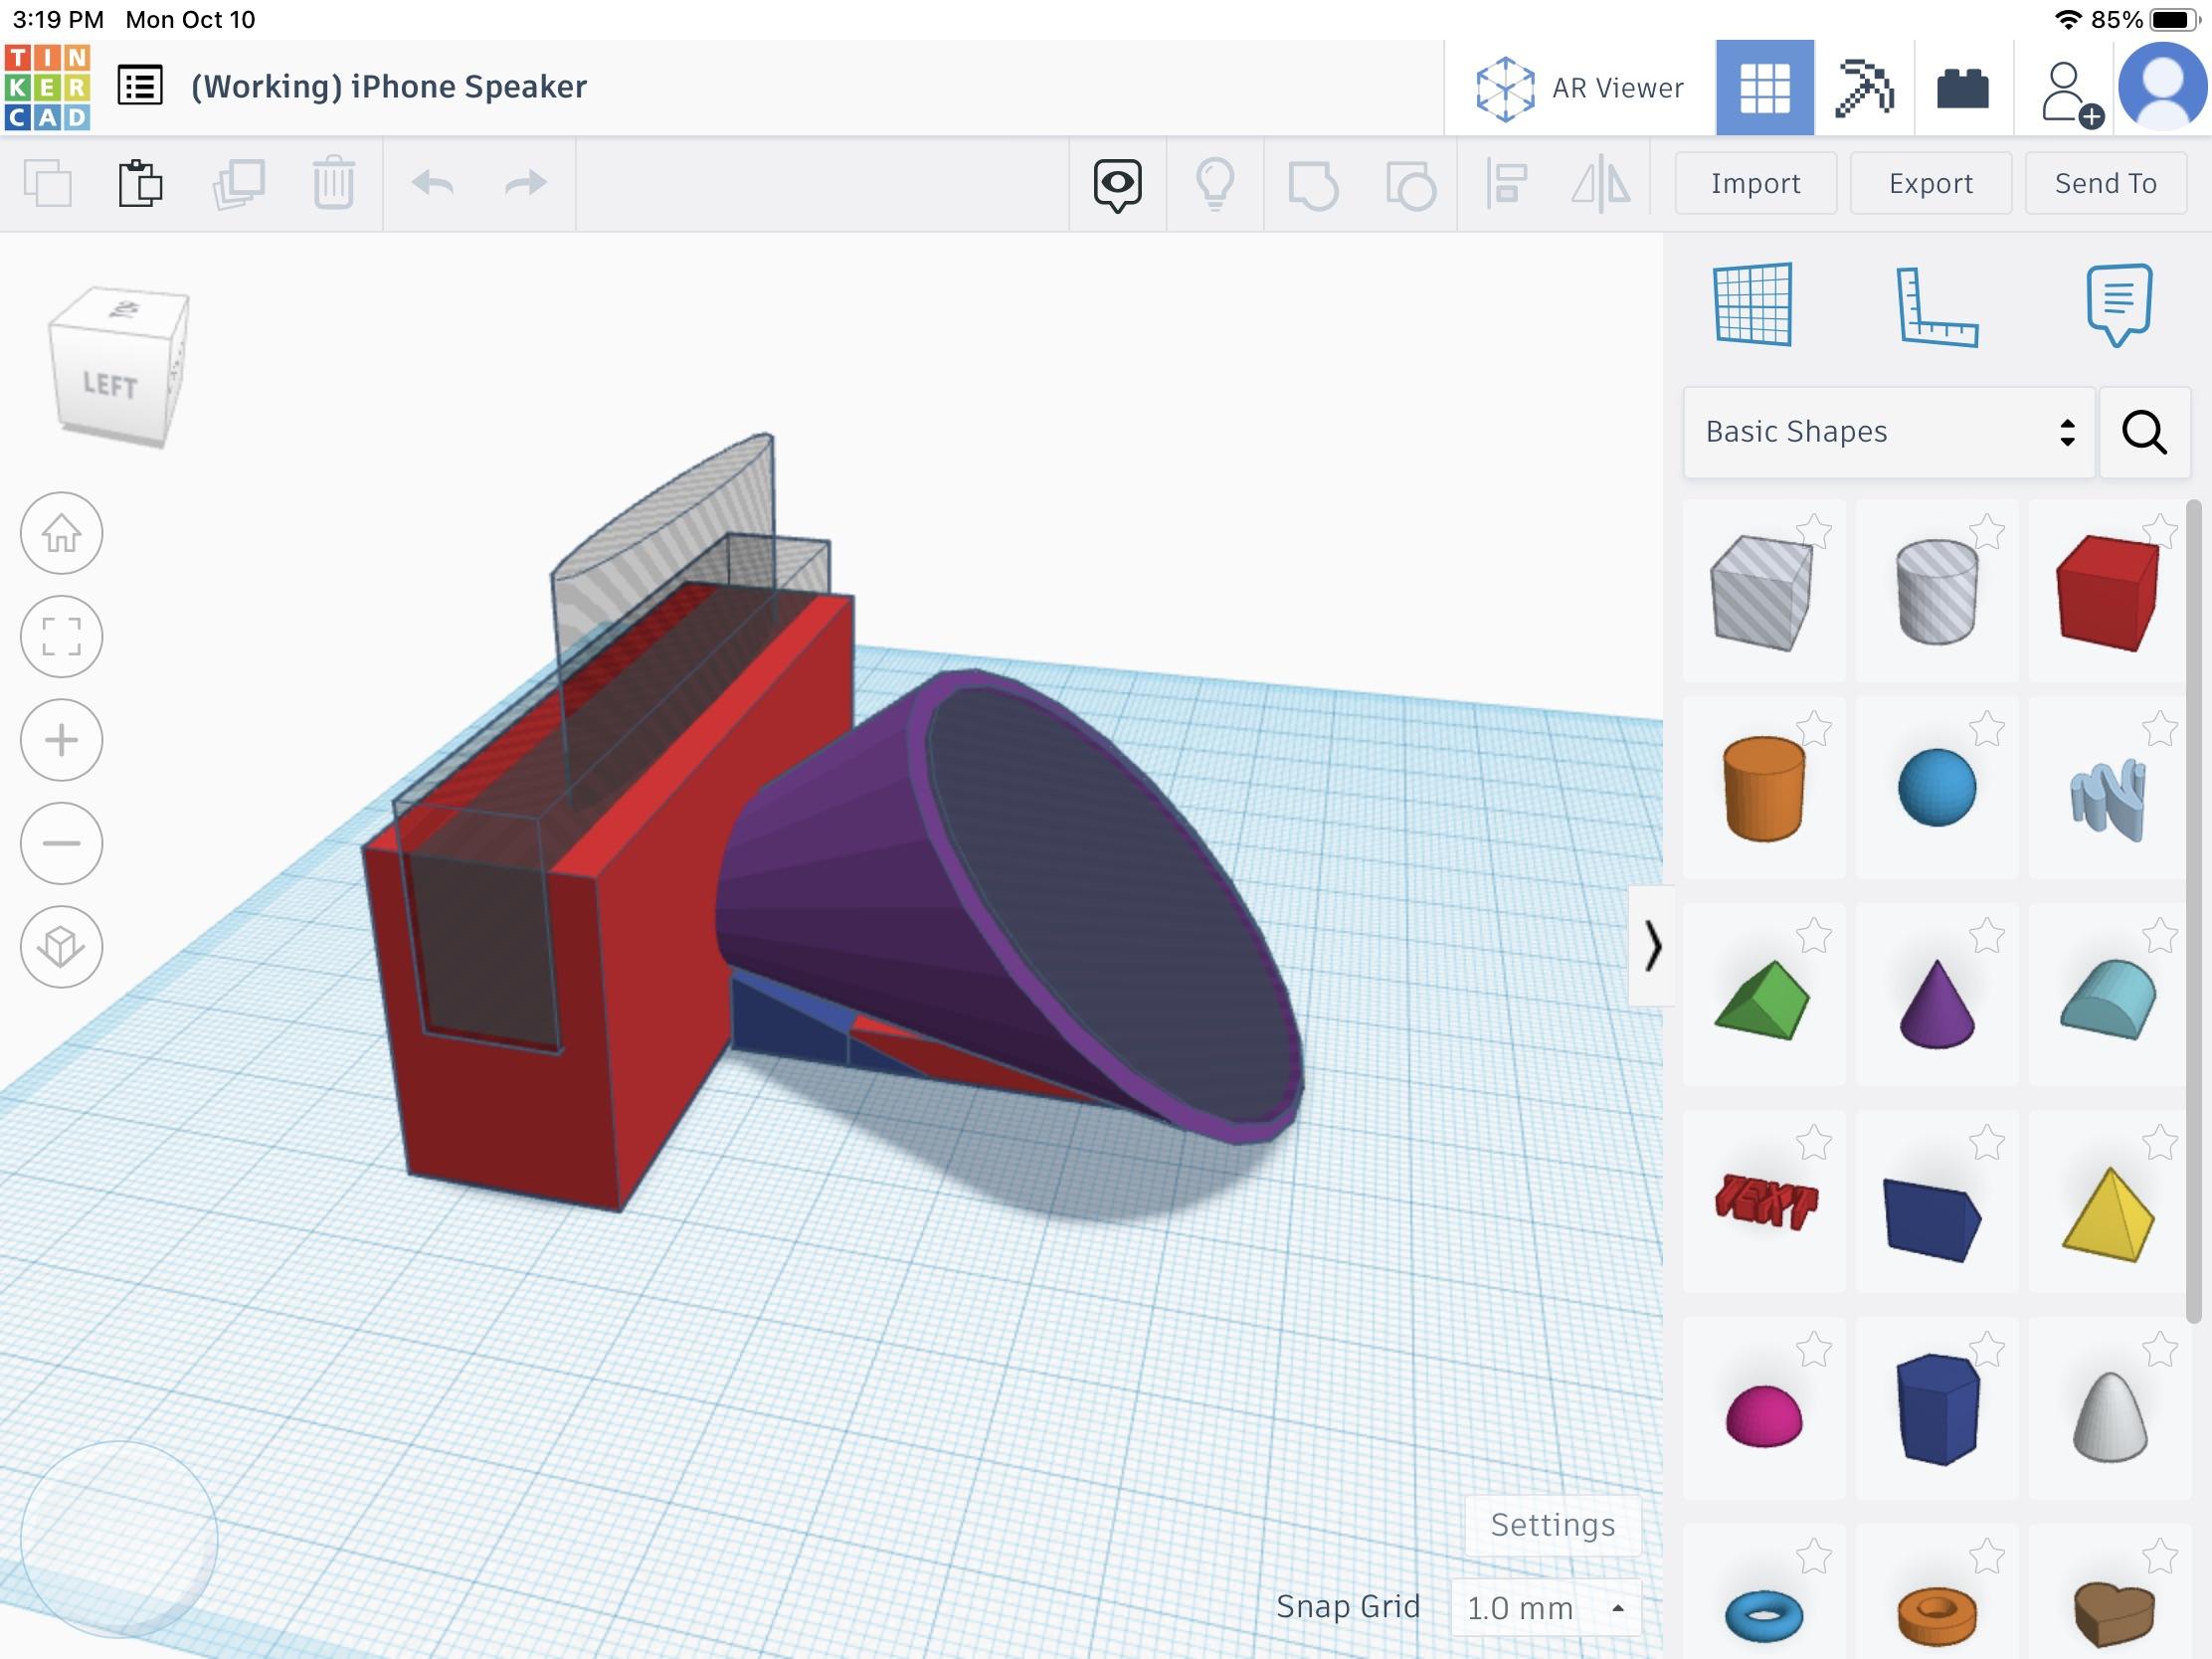
The Speaker
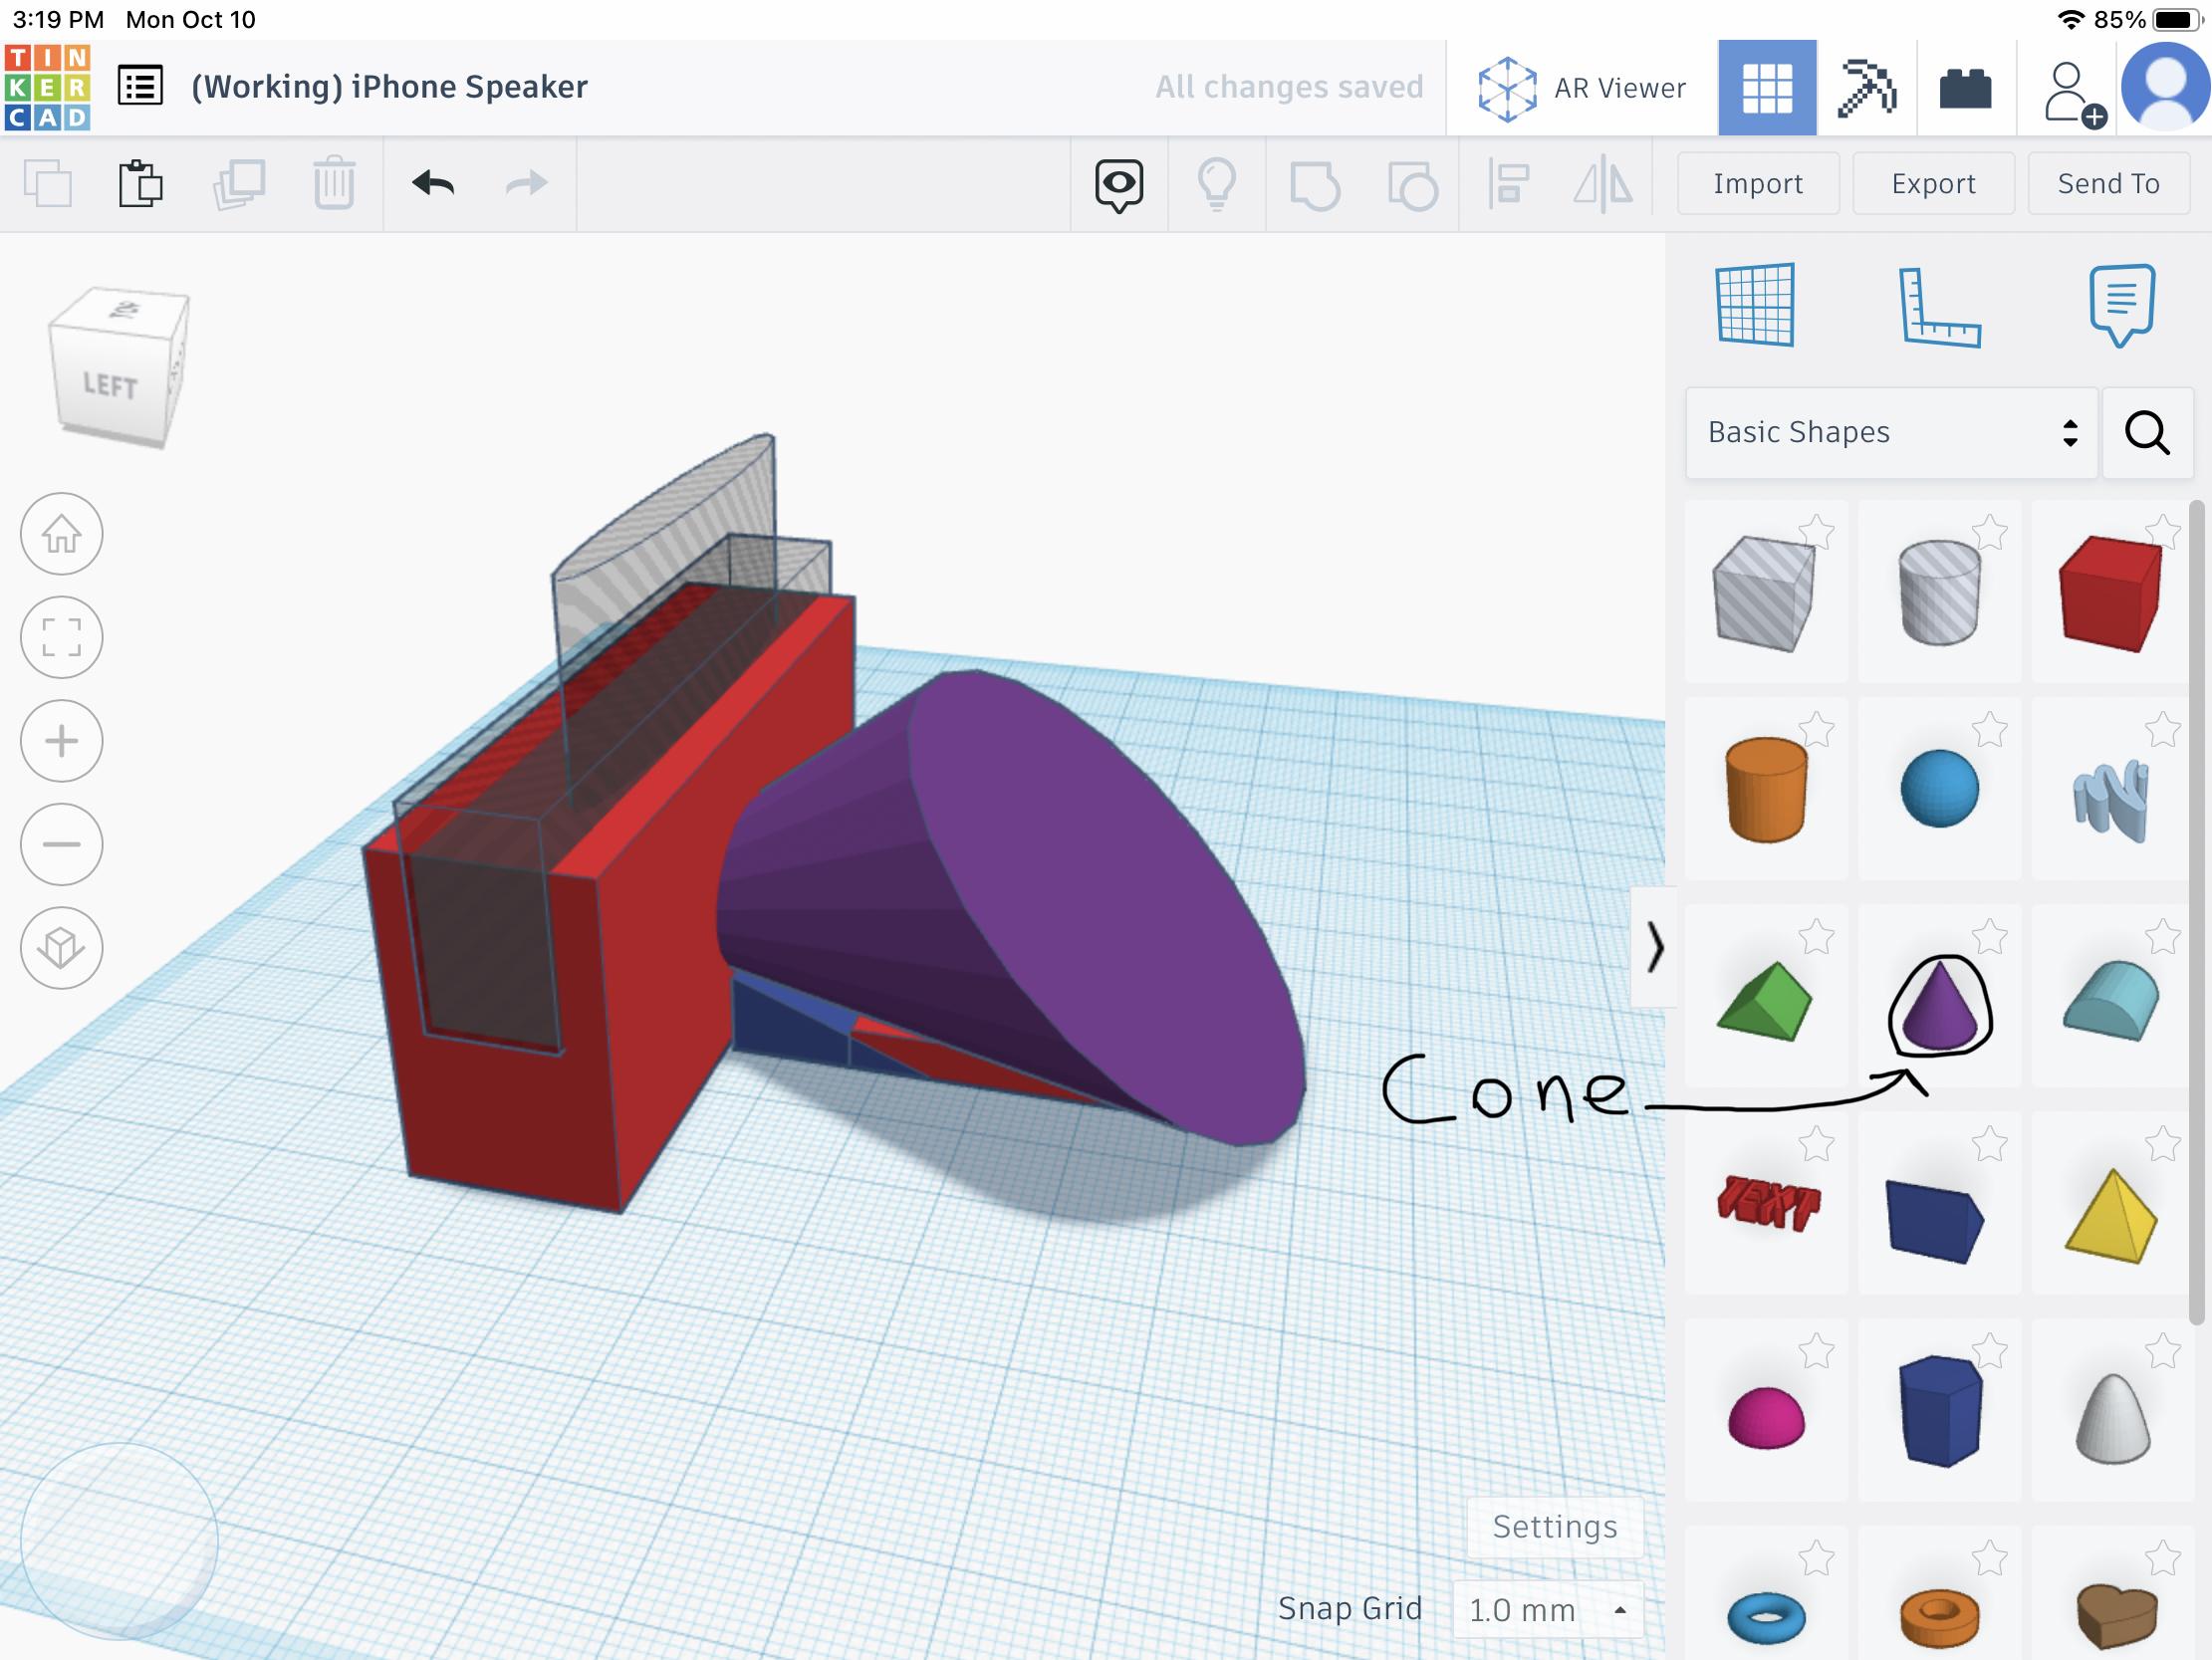
Once again, you have to add new shape, this time it is the cone. Drag it onto the workplace, and set the length to 75.00, the width to 55.00, and the height to 36.00, once you have done this, try to align it up with the supports and try NOT to make a little bit poke through the back. (You can check this by using the cube in the top left.)
The Hole in the Speaker
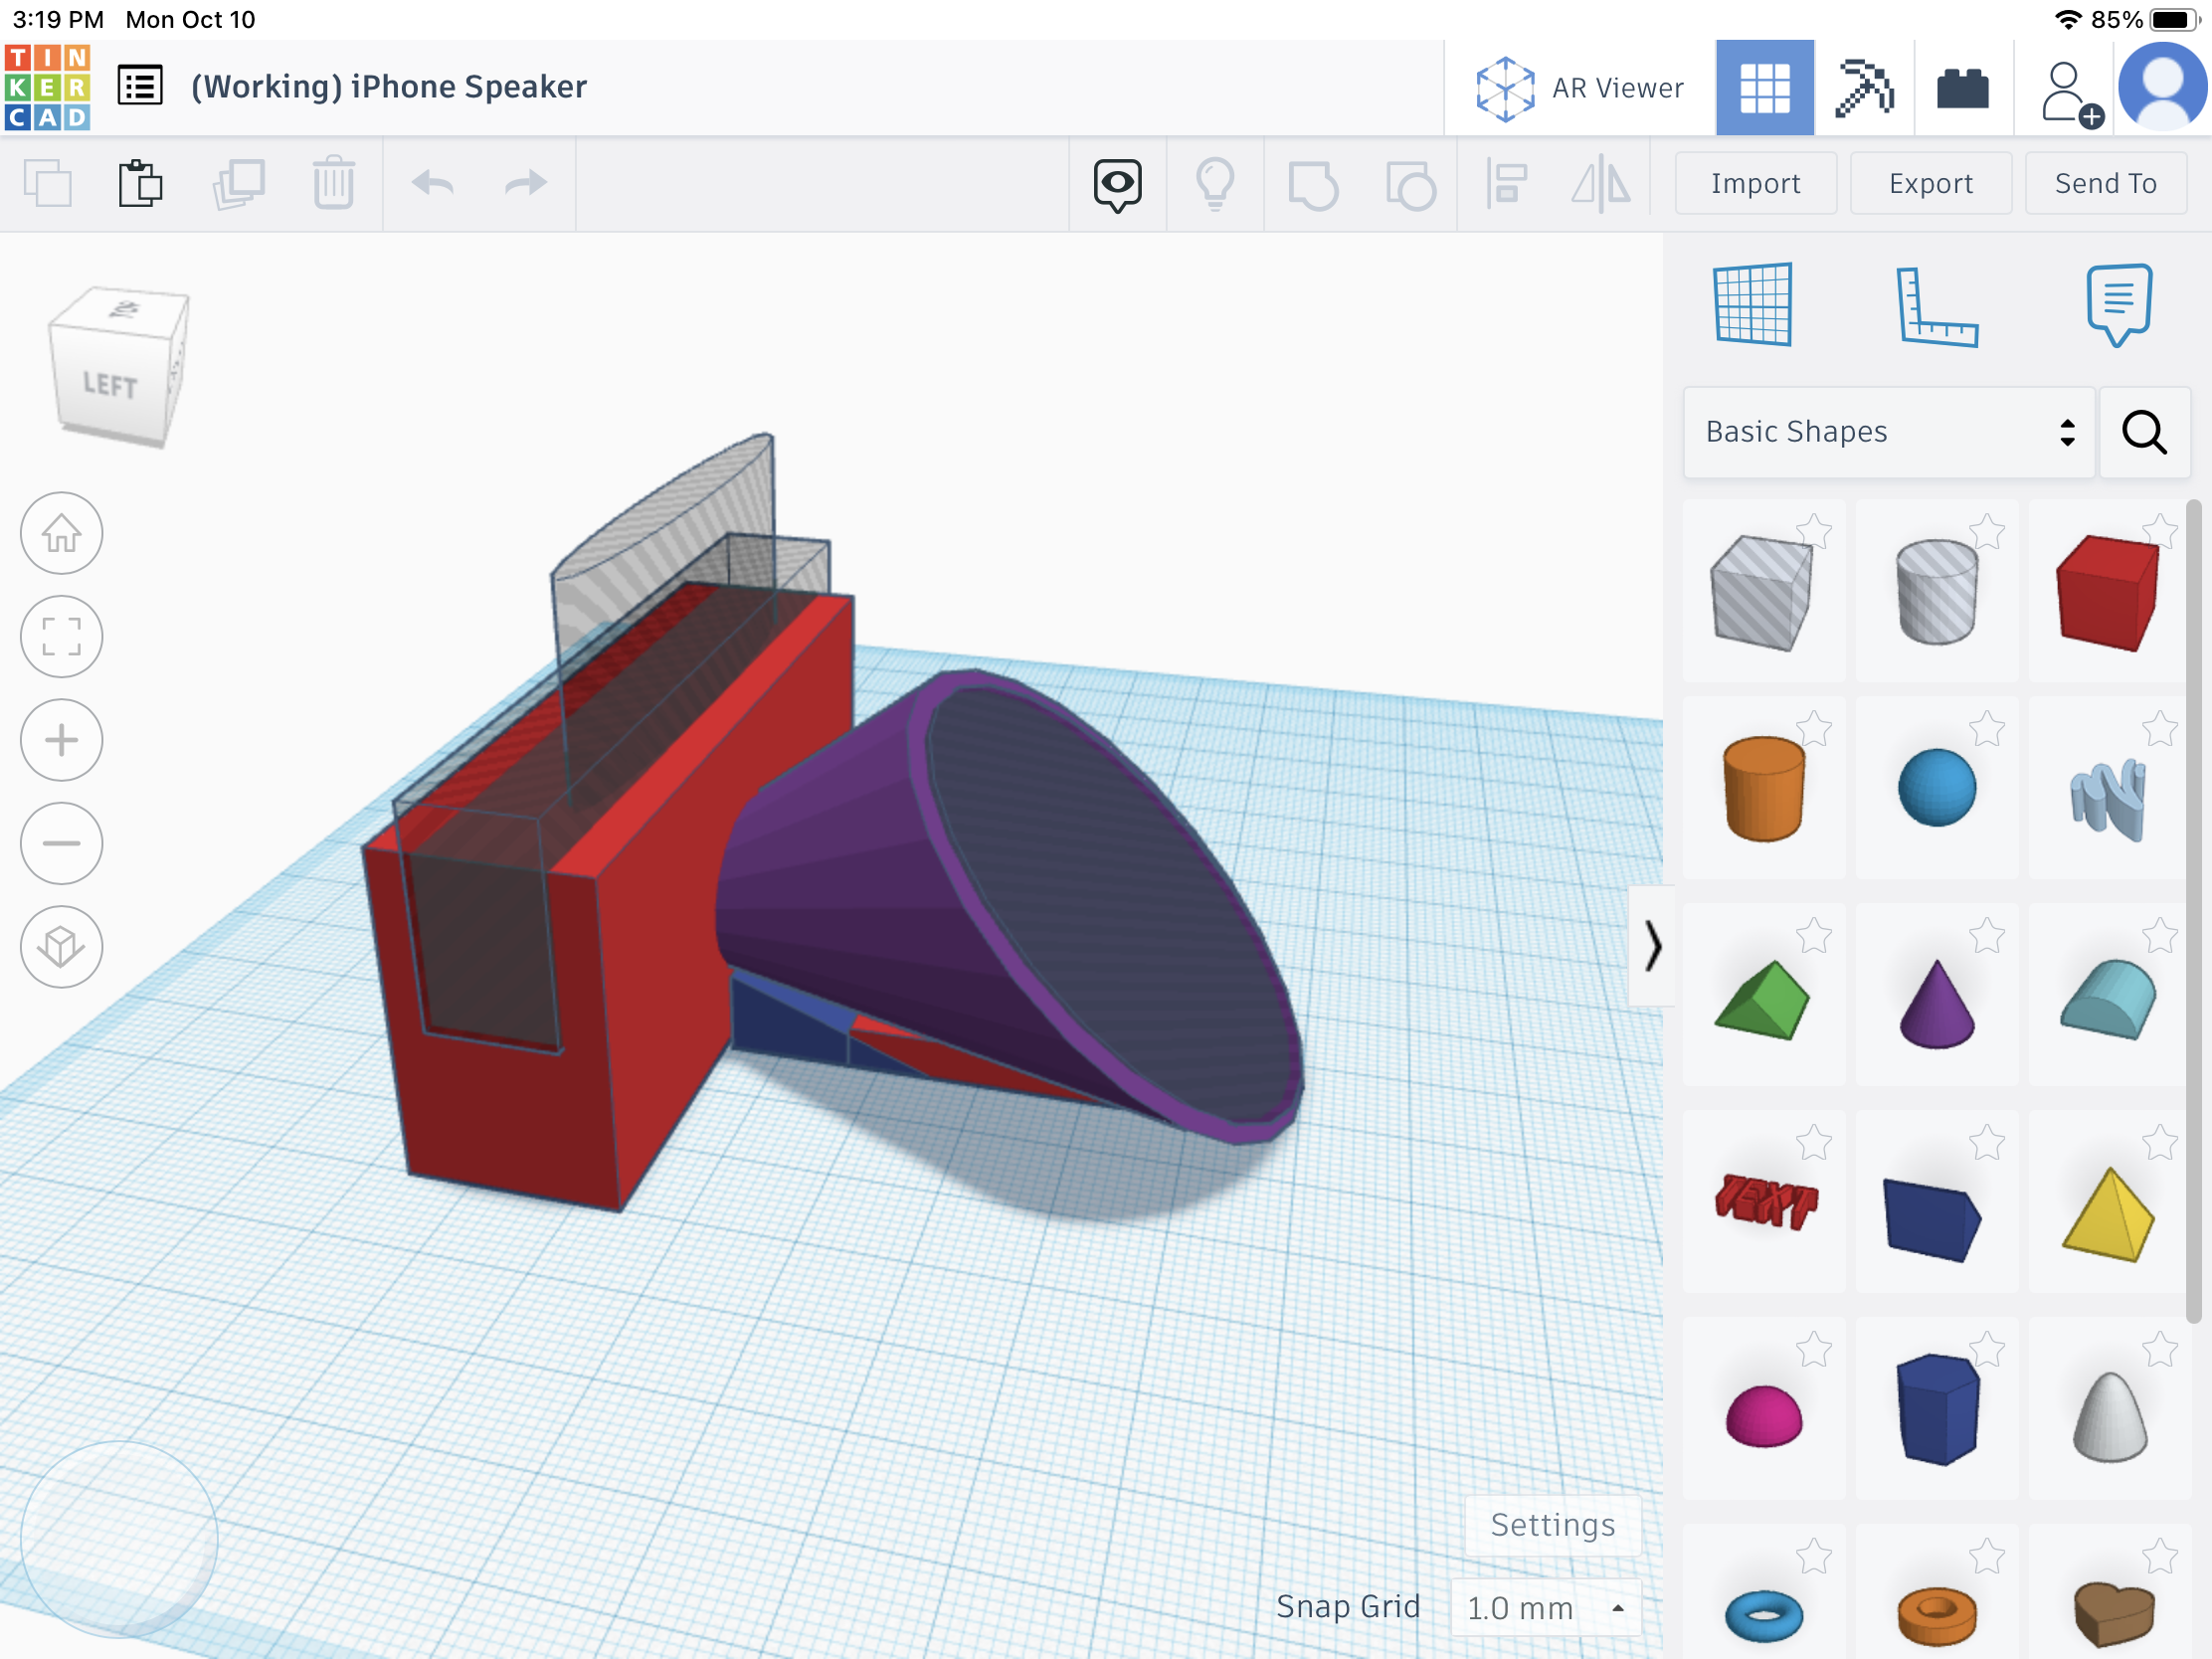
Now ⌘C and ⌘V (or copy and paste) the cone and change the length to 70.00, width to 49.00 and height to 34.00, after doing this, select the shape and chose the stripy gray circle in the top right of the screen and move the hole into the middle of the speaker, making sure you can see the hole only on the flat side of the cone (not the other sides).
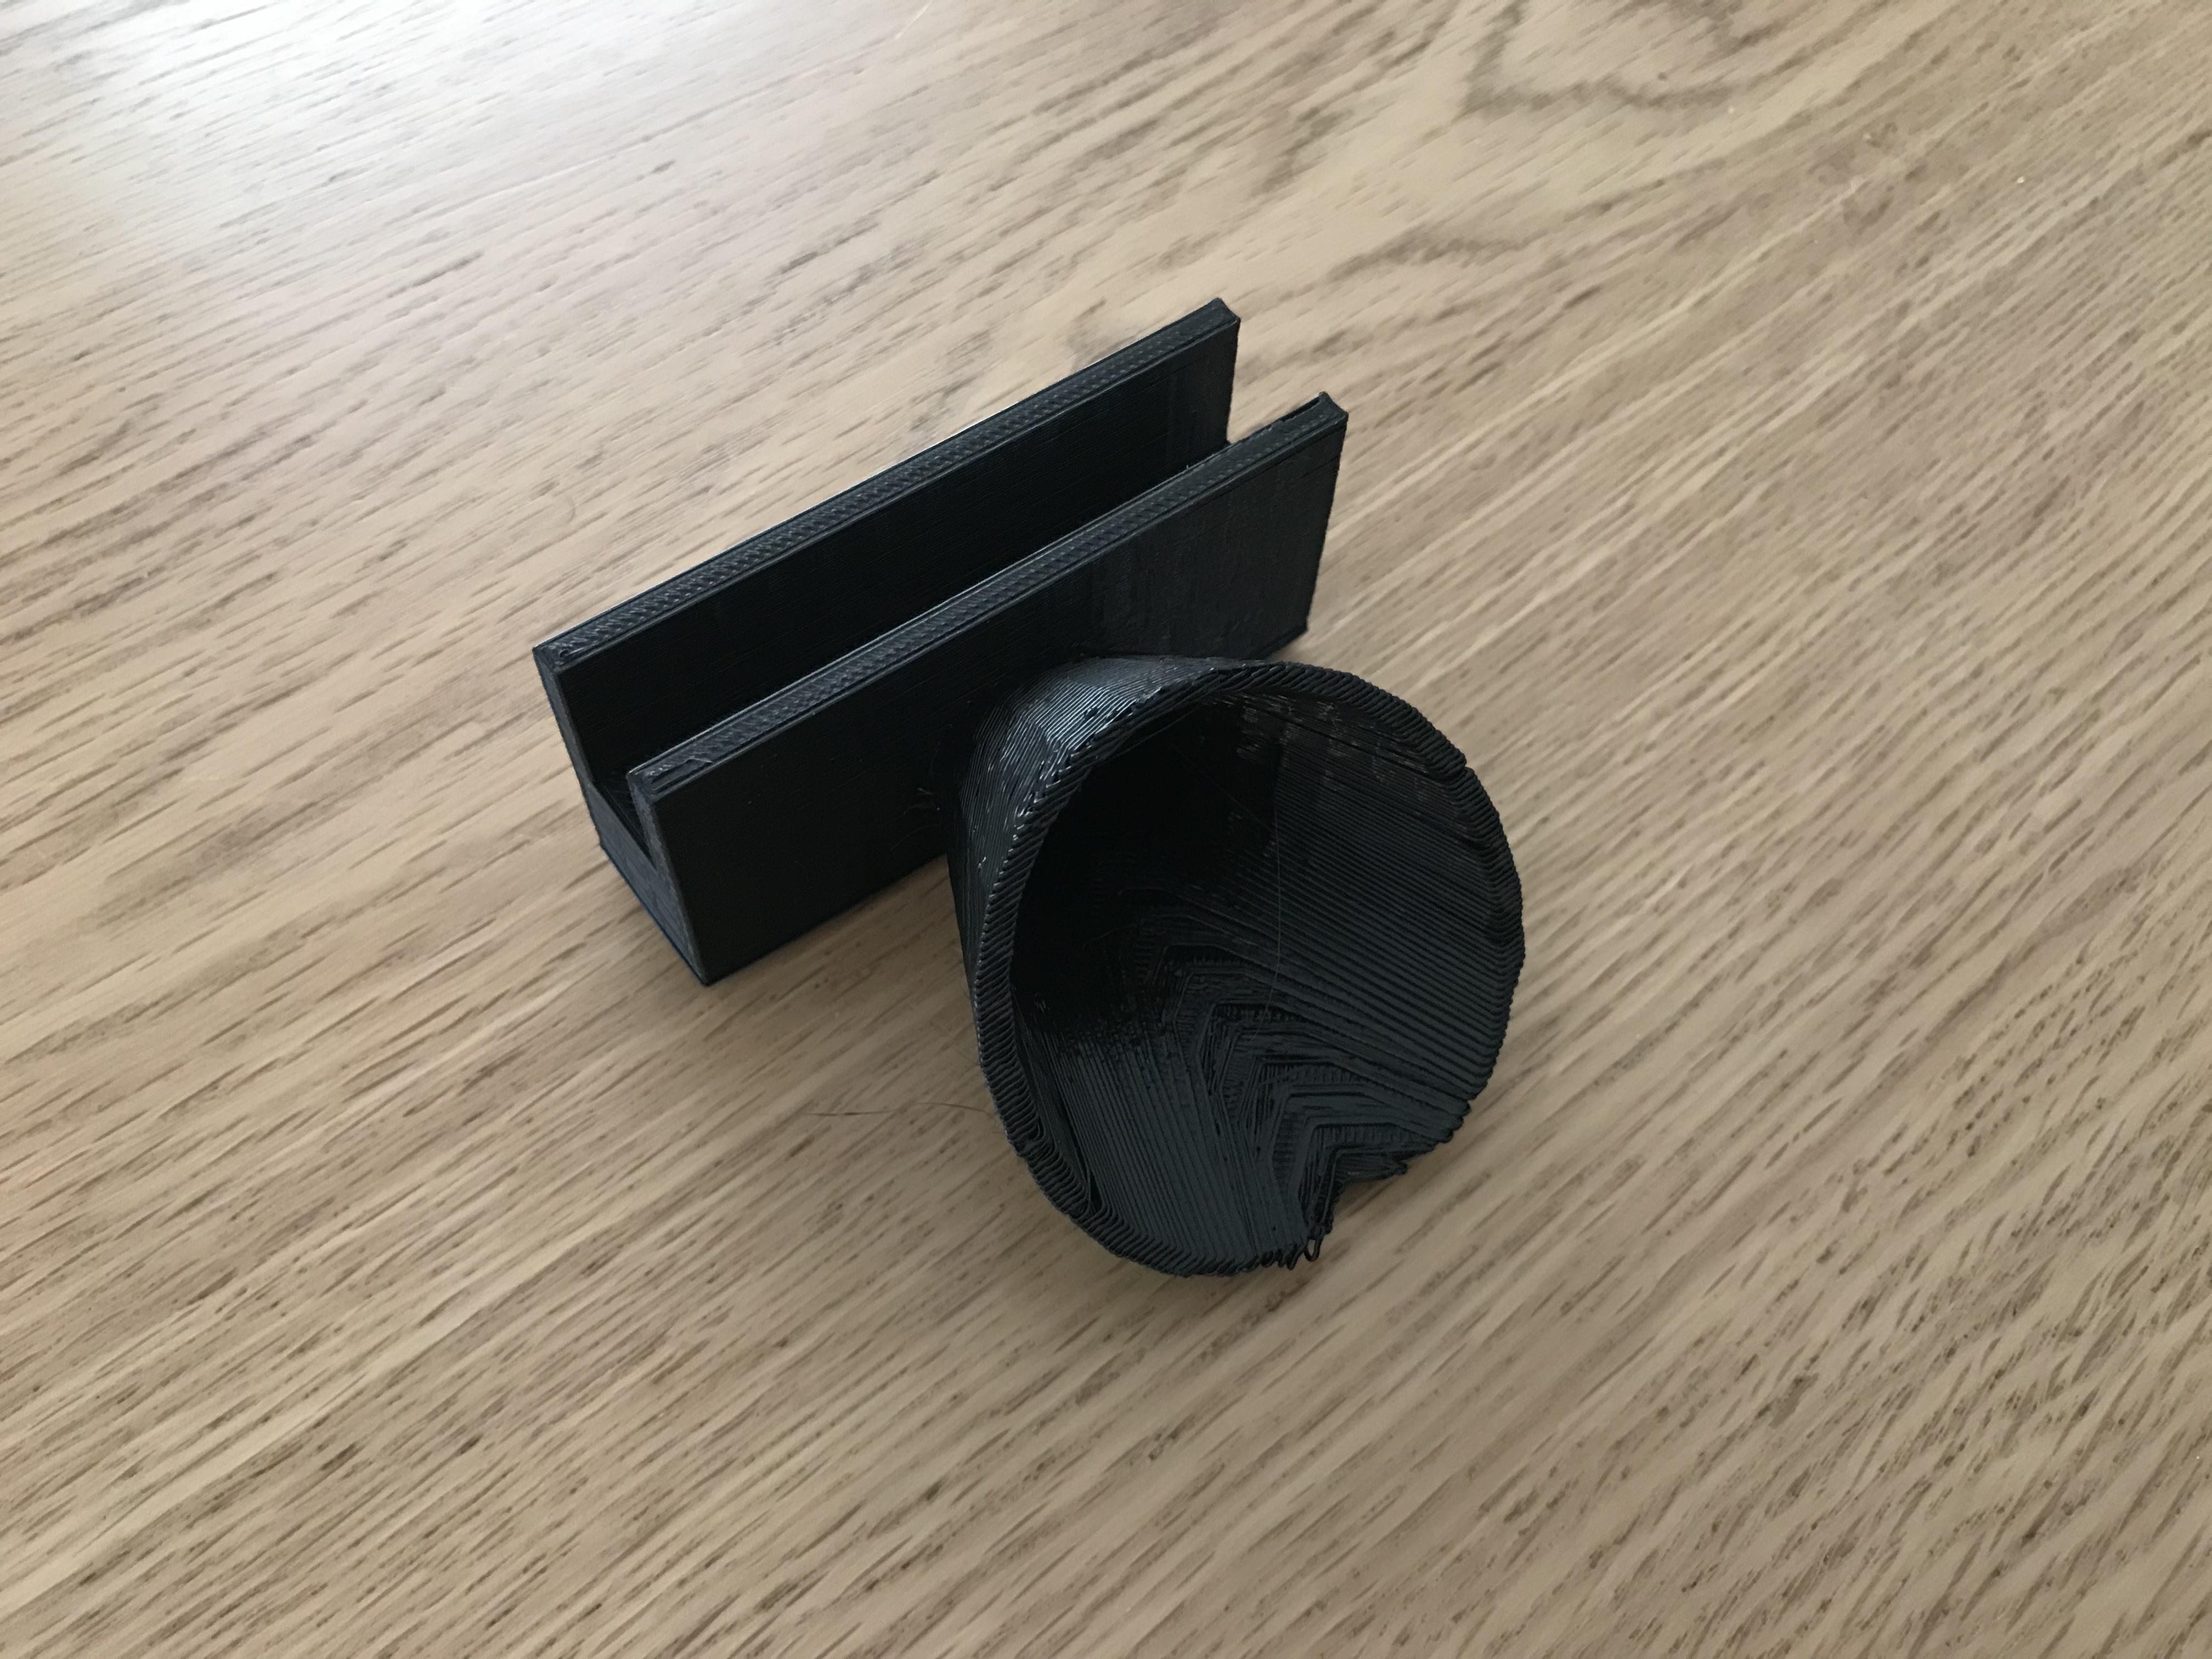
Export and 3D Print
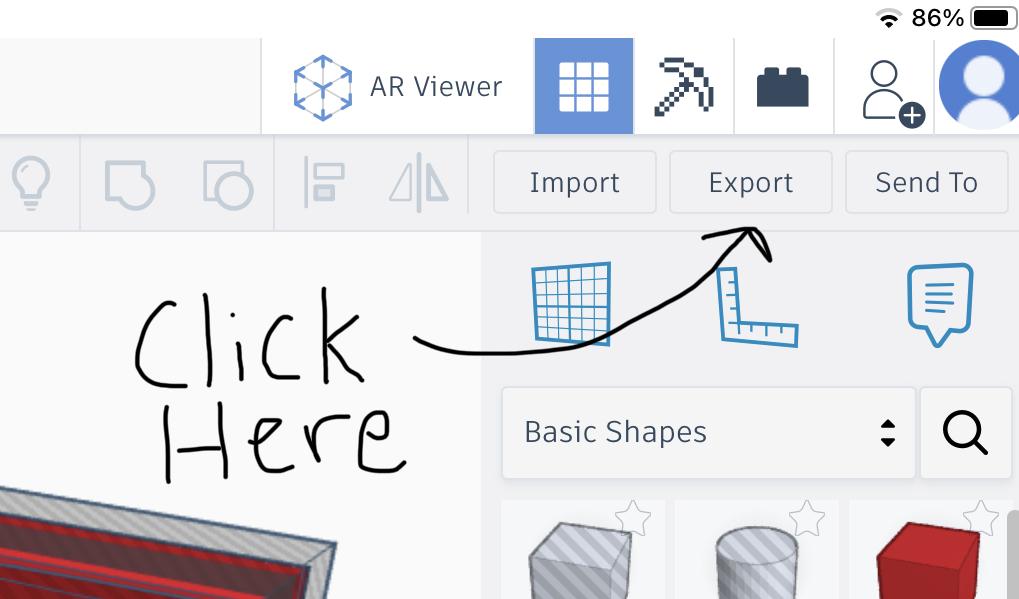
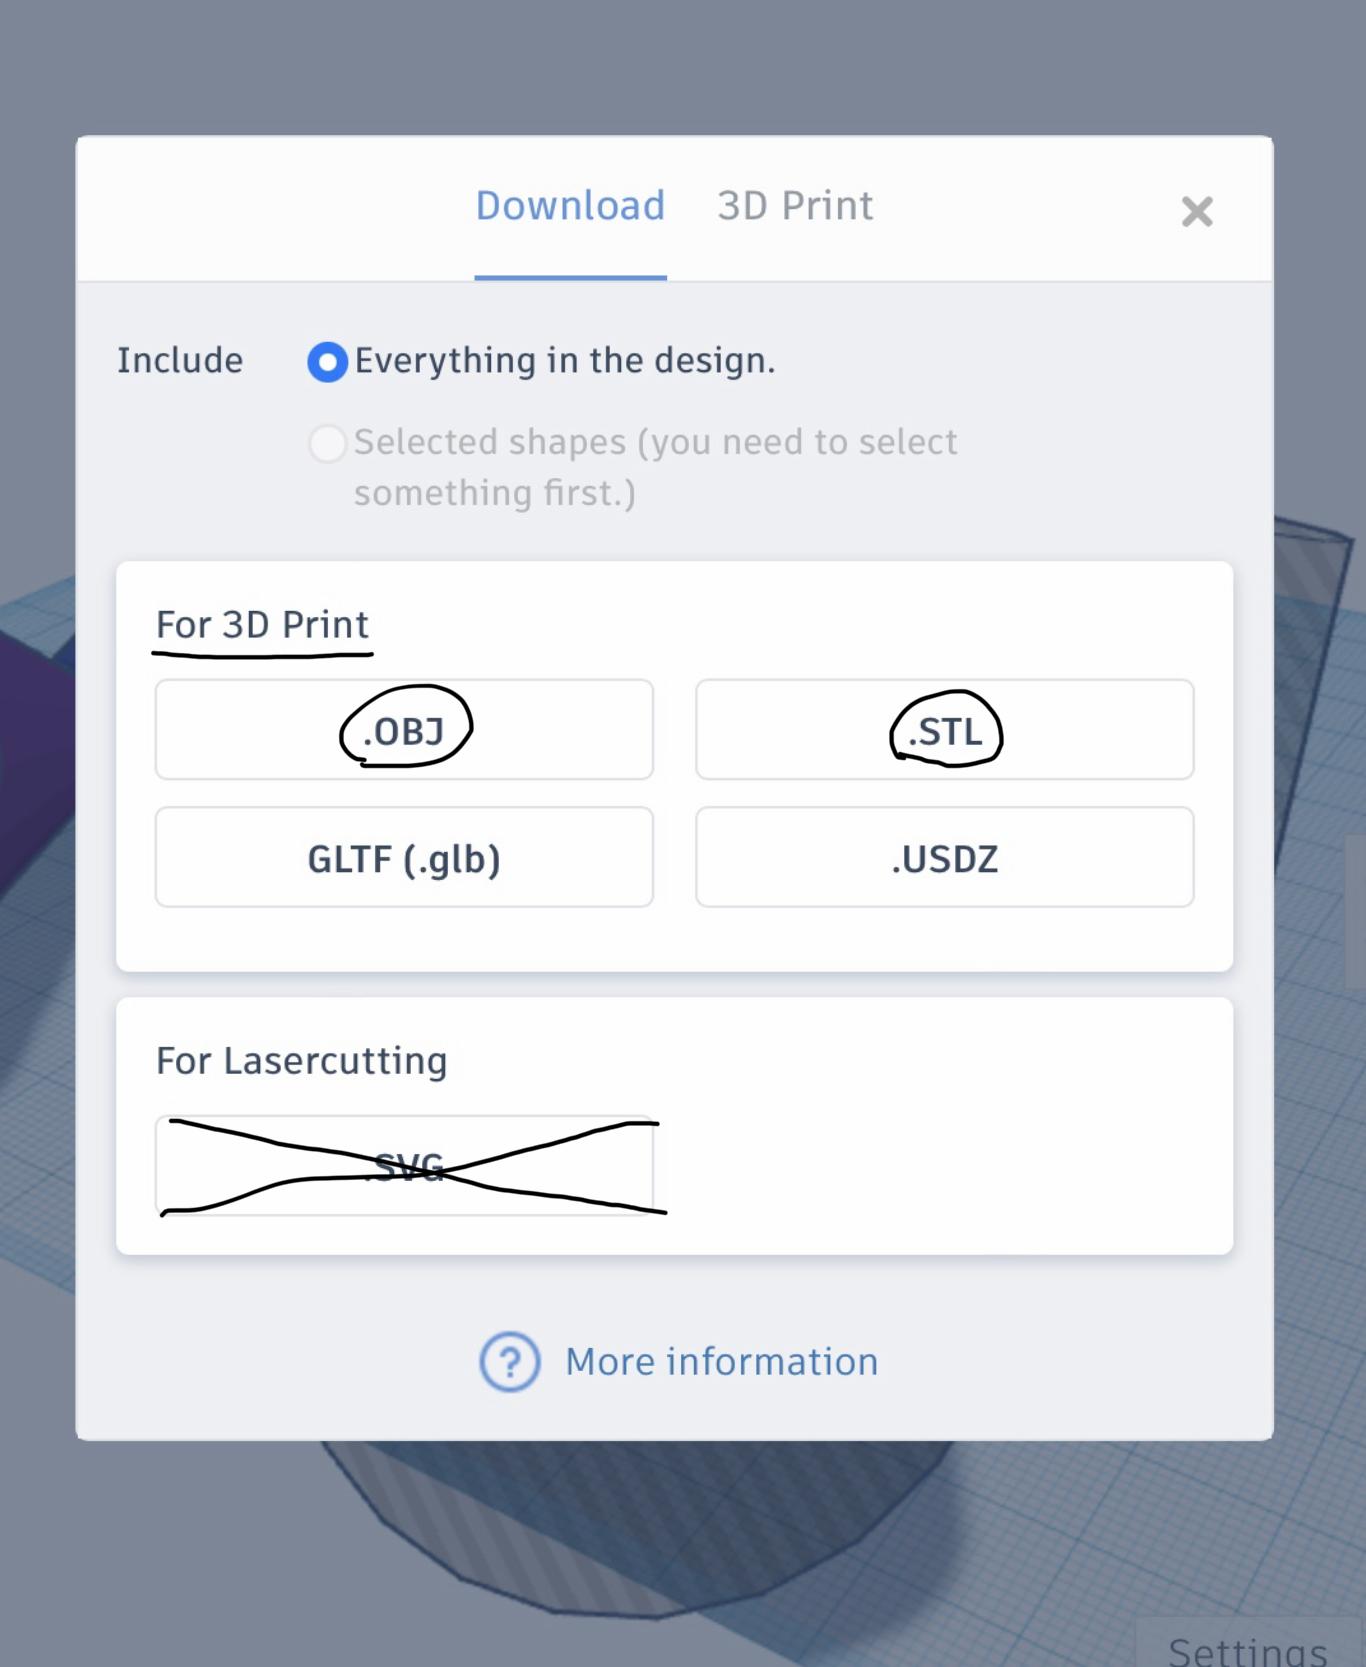
On the very top right, there is an export button. When you click it, you will see a screen that looks somewhat like the picture above. Choose the type of file that your 3D printer accepts (most likely .STL or .OBJ) and import it to your 3D printing software.
Enjoy!
While you wait for the speaker to print, create a playlist to enjoy with your new 3D printed smartphone speaker.