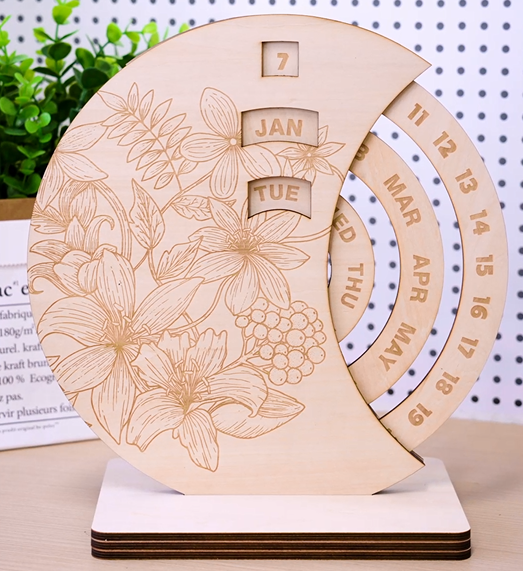
How to Make a Special Wood Calender With Laser Machine
by thunderlaser-nolan in Workshop > Laser Cutting
1777 Views, 17 Favorites, 0 Comments
How to Make a Special Wood Calender With Laser Machine

There’s something special about holding time in your hands.
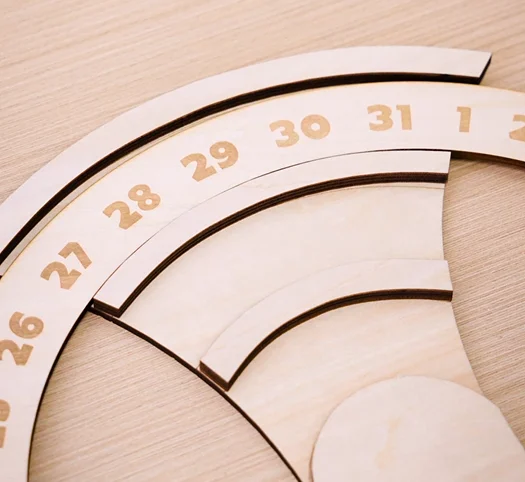
With a laser-engraved wooden calendar, every date feels a little more meaningful. The soft scent of wood, the smooth engraved numbers, and the satisfying click as pieces fit together turn this project into more than just a calendar—it’s a keepsake for your desk or home.
In this step-by-step guide, you’ll learn how to turn a simple wooden board into a functional piece of art. From engraving the dates to cutting and assembling the pieces, we’ll show you how to create a wooden calendar that’s as practical as it is personal.
Supplies
Machine Used
- Thunder Bolt 30W
Material Needed
- 3mm Birch Ply
- 5mm Birch Ply
Settings
Engraving
- Speed:1000mm/s
- Max Power:45%
- Min Power:45%
- DPI:350
Cutting-1
- Speed:15mm/s
- Max Power:45%
- Min Power:45%
Cutting-2
- Speed:10mm/s
- Max Power:50%
- Min Power:50%
Downloads
Place Your Birch Ply for Laser Engraving
Place the wooden sheet flat on the laser bed and ensure it’s stable. If your board is slightly warped, use magnets or pins to hold it flat.

Open the Calender Design and Check the Settings
Open your preferred laser software and import your design file (SVG, DXF, or image). Adjust the size and position of the design to match the exact area you want to engrave on the sheet. Then make sure the laser engraving and cutting parameters are set correctly.
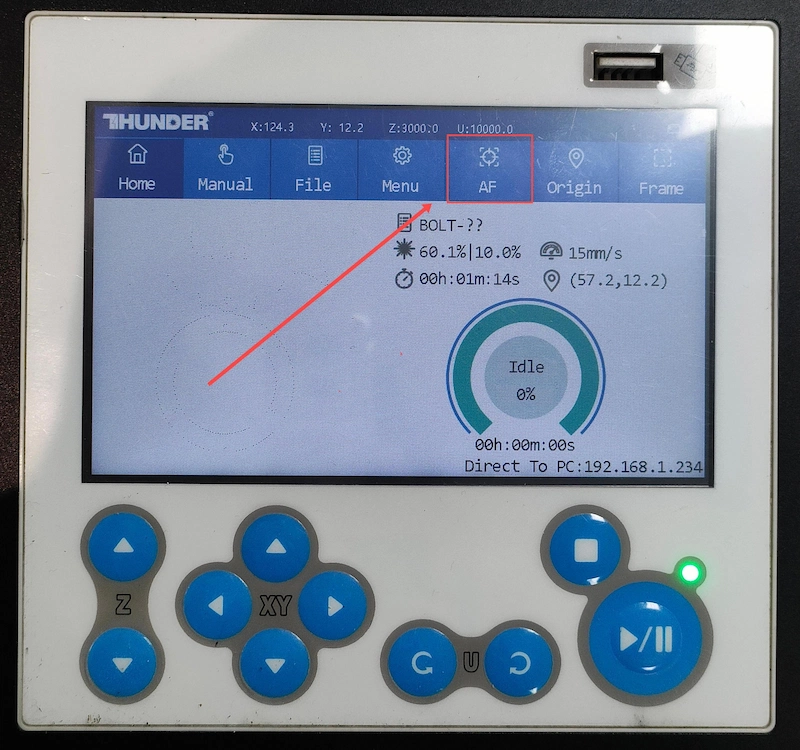
Focus Your Laser Machine
Proper focusing is essential for achieving crisp engravings and smooth cuts. If your machine supports auto focus, a single click will set the correct distance for flat wooden boards. If you prefer manual focus, use the focus stick to adjust the laser head until it just touches the surface of the wood at a perfect vertical angle. Spending an extra moment on accurate focusing will pay off with professional-looking results.
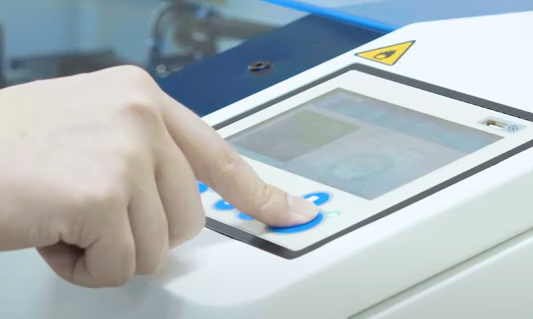
Frame the Design and Start Laser Engraving
When you click “Frame”, the red light will display the laser engraving area. This is a safe process, and the frame will align with the wood material. Once aligned, simply press “Start” to begin the laser engraving with the Thunder Bolt!
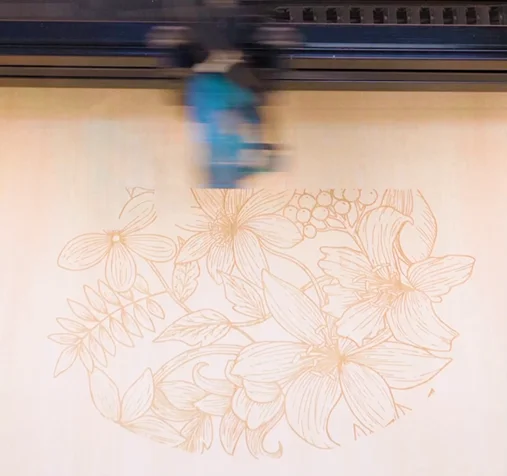
Monitor the Laser Engraving Process
Stay near the machine while it’s running and watch the cutting and engraving progress. Keep an eye out for excessive smoke, small flame-ups, or any movement of the material that could affect the outcome. Make sure your workspace is well-ventilated, and rely on air assist if available to achieve cleaner edges on the wood.
Assemble the Wooden Calendar
Arrange the cut pieces according to the design and fit them together one by one. Make sure the structural parts are firmly seated, and check that the date blocks and any rotating parts move freely. A drop of wood glue can help stabilize the frame, but avoid gluing any parts that need to remain movable.
Complete the Laser Task
Your laser-engraved wooden calendar is now complete and ready to display. Place it on your desk, use it as a personalized gift, or enjoy it as a piece of handmade décor. Every time you flip the date, you’ll be reminded of the craftsmanship and creativity that went into making it.