How to Make a Silver Birch Leaf Leather Mask
5674 Views, 152 Favorites, 0 Comments
How to Make a Silver Birch Leaf Leather Mask
A friend of mine recently asked me to design her a "leafy half mask or forest crown." I asked about any specific details, such as preferred trees, and she replied that she wanted to leave it up to my creativity. So here is what I came up with and the process I used to come up with it.
This project takes advantage of the special properties of vegetable tanned leather. There are different ways to tan leather, and each method produces different characteristics. Vegetable tanned leather is the thicker, stiffer leather that you often see in men's belts. When it is dry, it is stiff, but when it gets wet, it becomes soft an malleable. If shaped and allowed to dry, it will hold its shape. This project will take advantage of this characteristic in 2 ways, both through the process of "wet molding," in which the leather is sculpted, and through the process of leather carving, in which shallow cuts are made into the leather, and the leather is pressed to bring out a desired design.
Materials
For this Instructable, you will need:
A face mold
I have found that masks made from idealized mannequin faces don't fit as well as masks made with real faces. You can learn how to make your own face mold in the following Instructables that were produced by other members of the Instructables community:
https://www.instructables.com/id/How-To-Cast-a-Face...
https://www.instructables.com/id/Plaster-Face-Cast/
Next you will need:
5-6 ounce leather (leather that is 5/64" to 3/32" thick)
good leather shears
An x-acto knife
a cutting surface
a metal ruler
a swivel knife
a modeling spoon
an edge beveler
2 pieces of leather lace, 15" long each
Hole punch
1 strap cutter
2x 8" lengths of waxed thread
Binder clips
leather dye (I used Tandy Eco-Flo Forest Green and the Tandy eco-flo professional black dye)
acrylic pain (I used the Ivory white and gold)
Glue (I used Tandy's Eco-flo leatherweld, but Elmer's Glue-all will work just as well)
Leather Sealant (I used Tandy Eco-Flo Super Shene)
Gold Pearl Ex powder (optional)
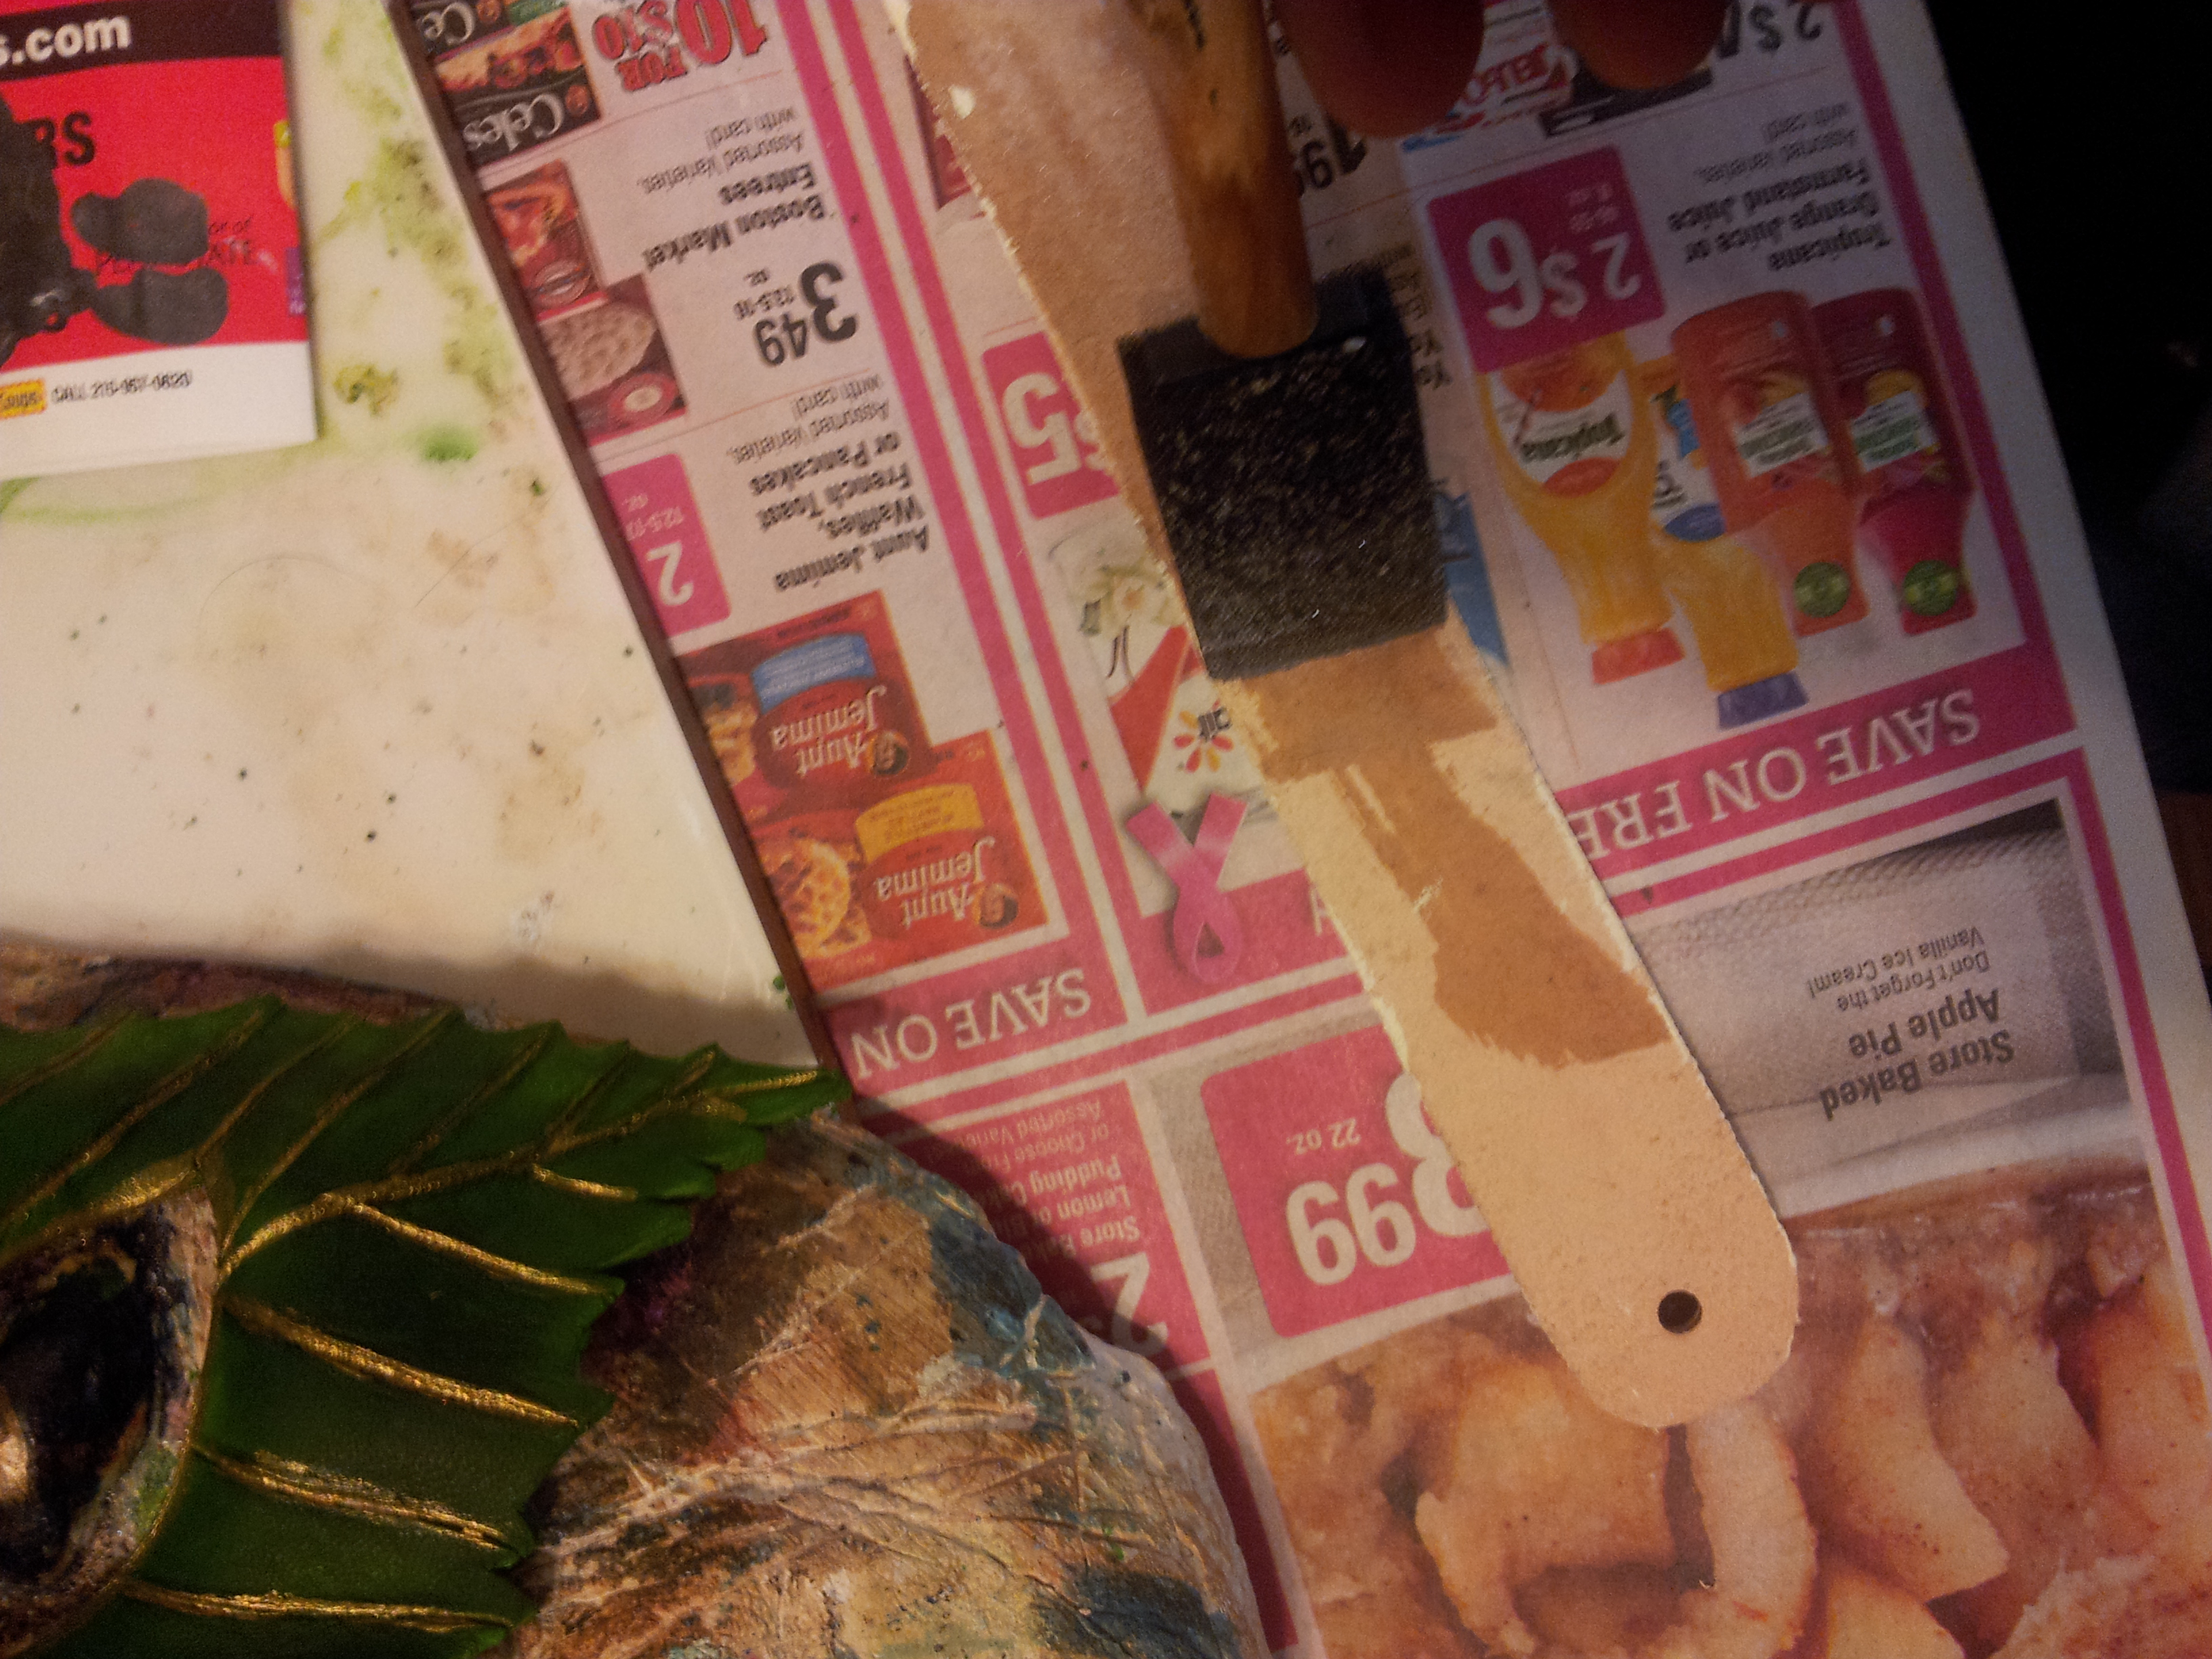
Paint brushes, applicator sponges, and paper towels
Pencil, marker, and card stock
Design Your Templates

Because she asked for a "leafy half mask or crown," My first step was to choose the type of leaf to use. Flipping through my various leaf books, I found a description of the silver birch as being known as "The Lady of the Woods" in Sherwood Forest. That seemed appropriate for what I was trying to produce. I then looked up pictures of silver birch leaves and bark for use in the mask's design. Since I don't own the rights to those pictures, I cannot post them here, but you can find them in a simple Google search.
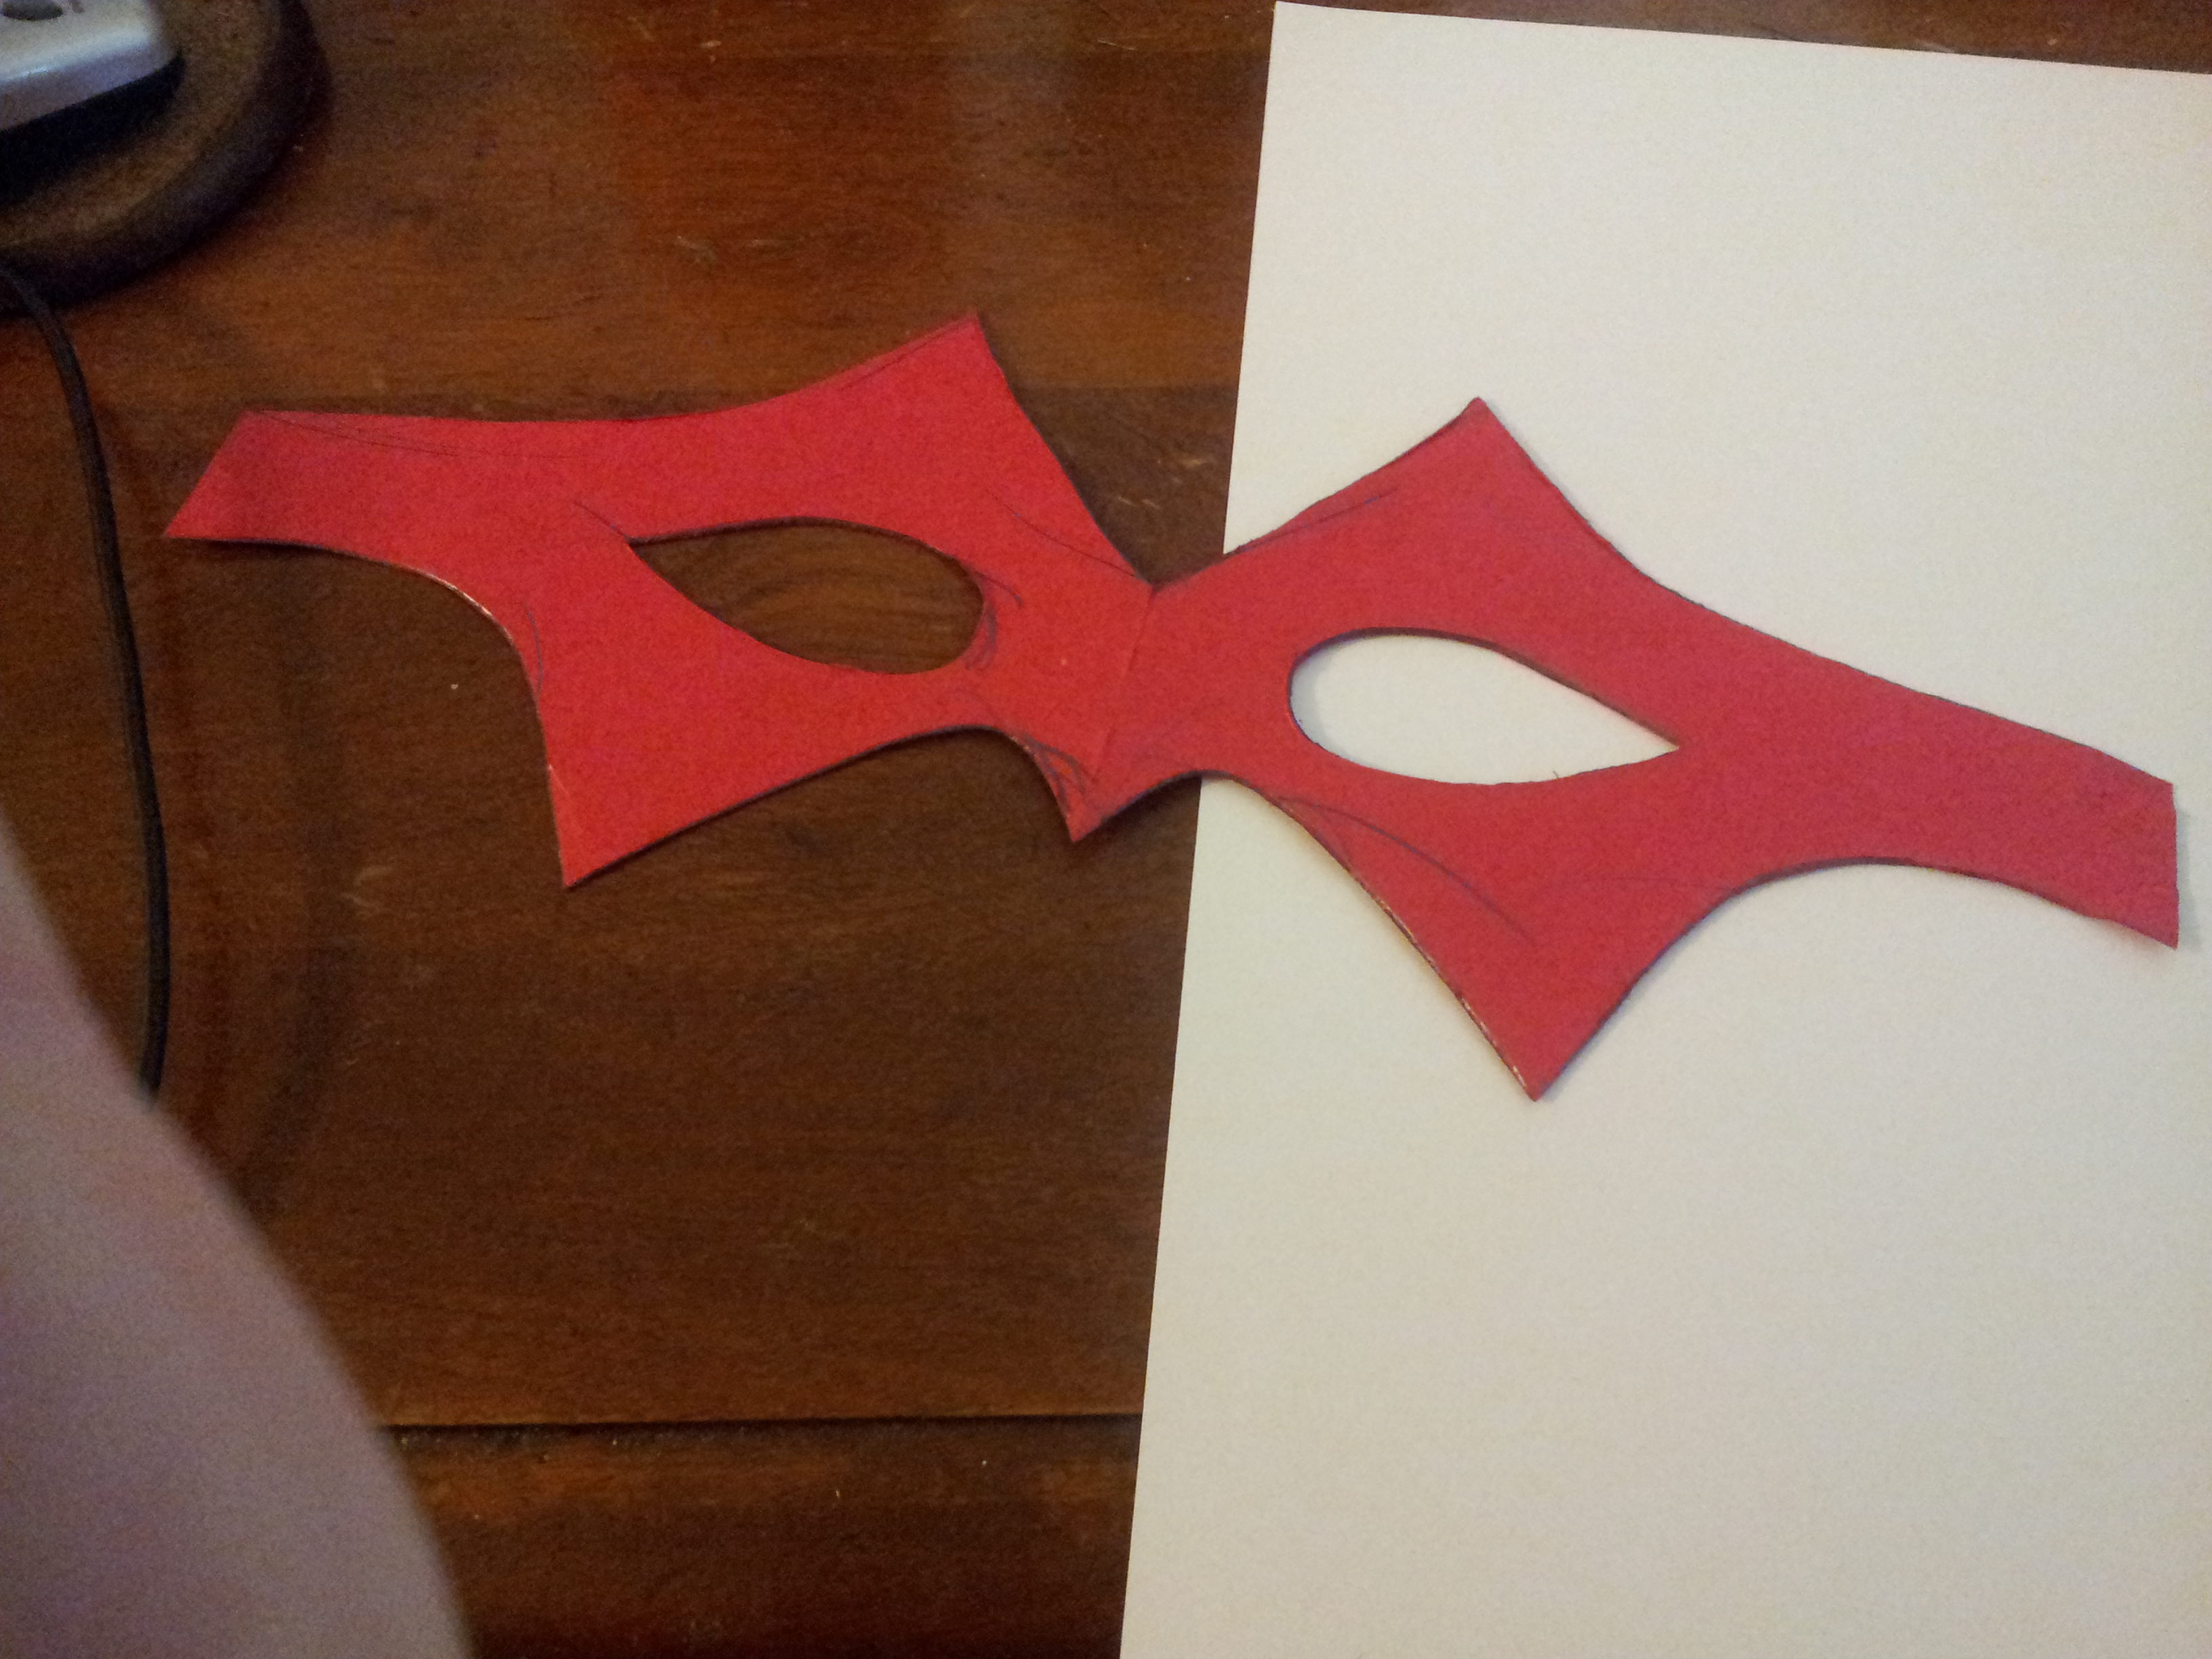
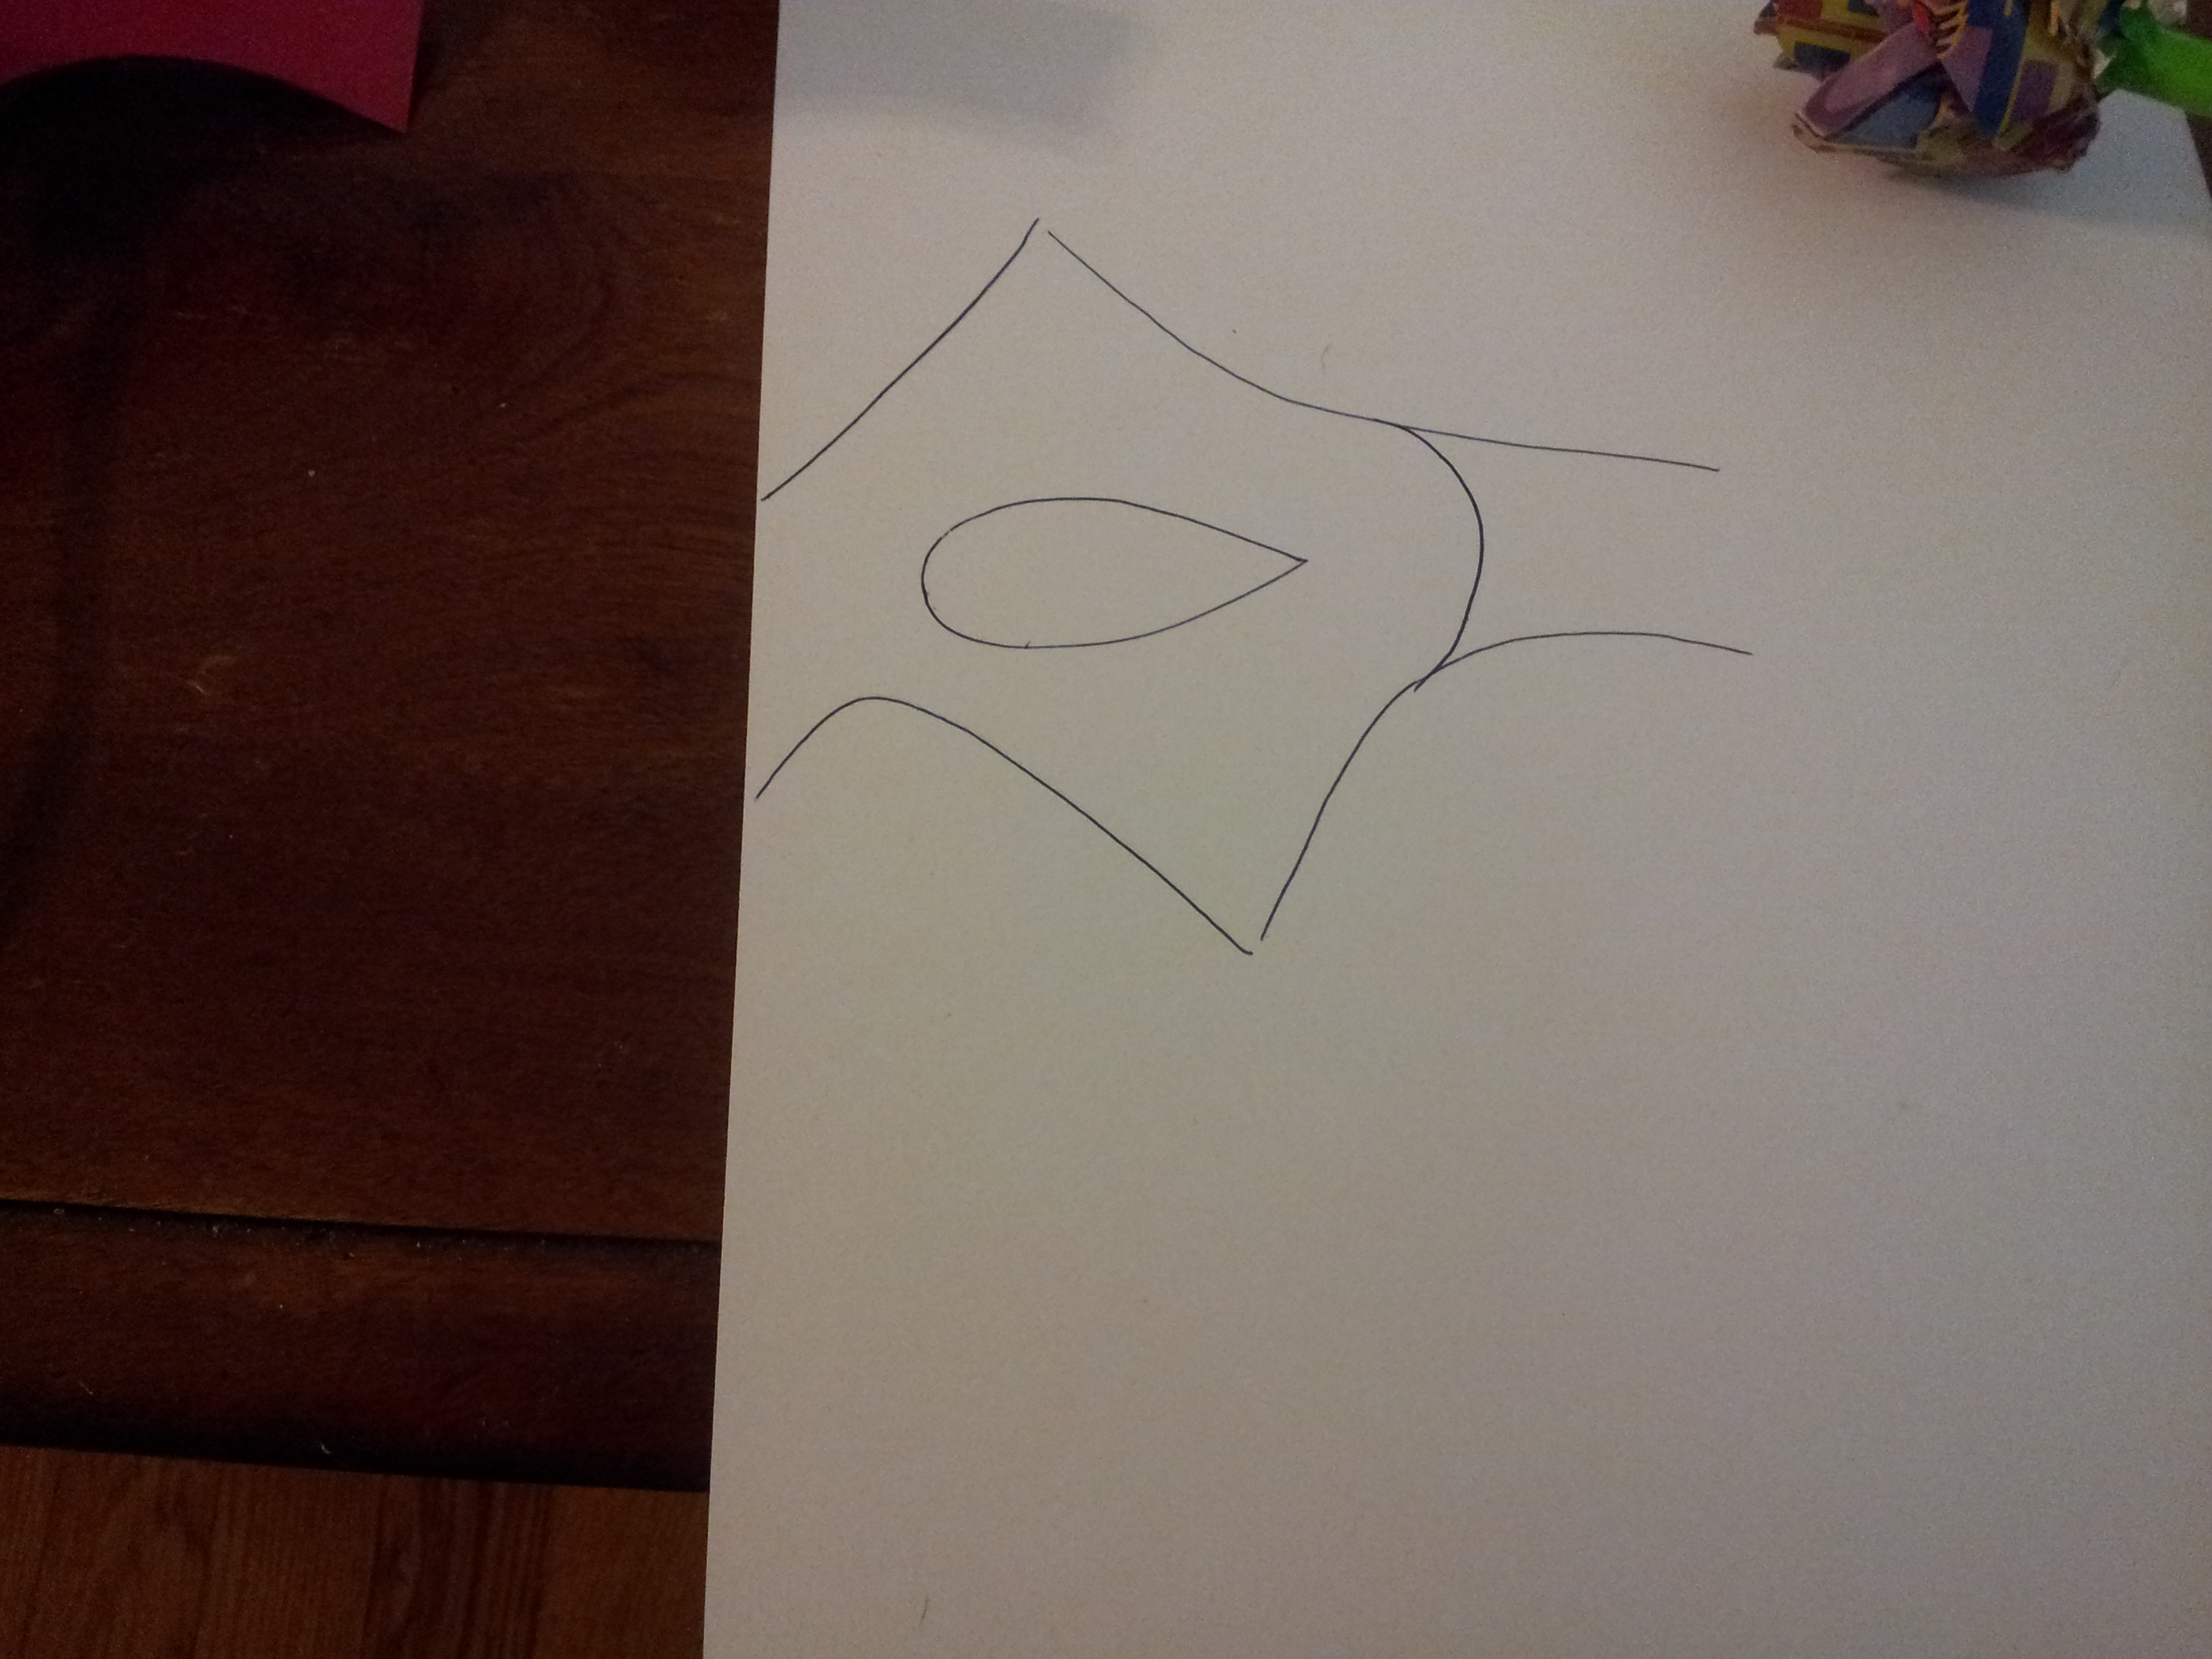
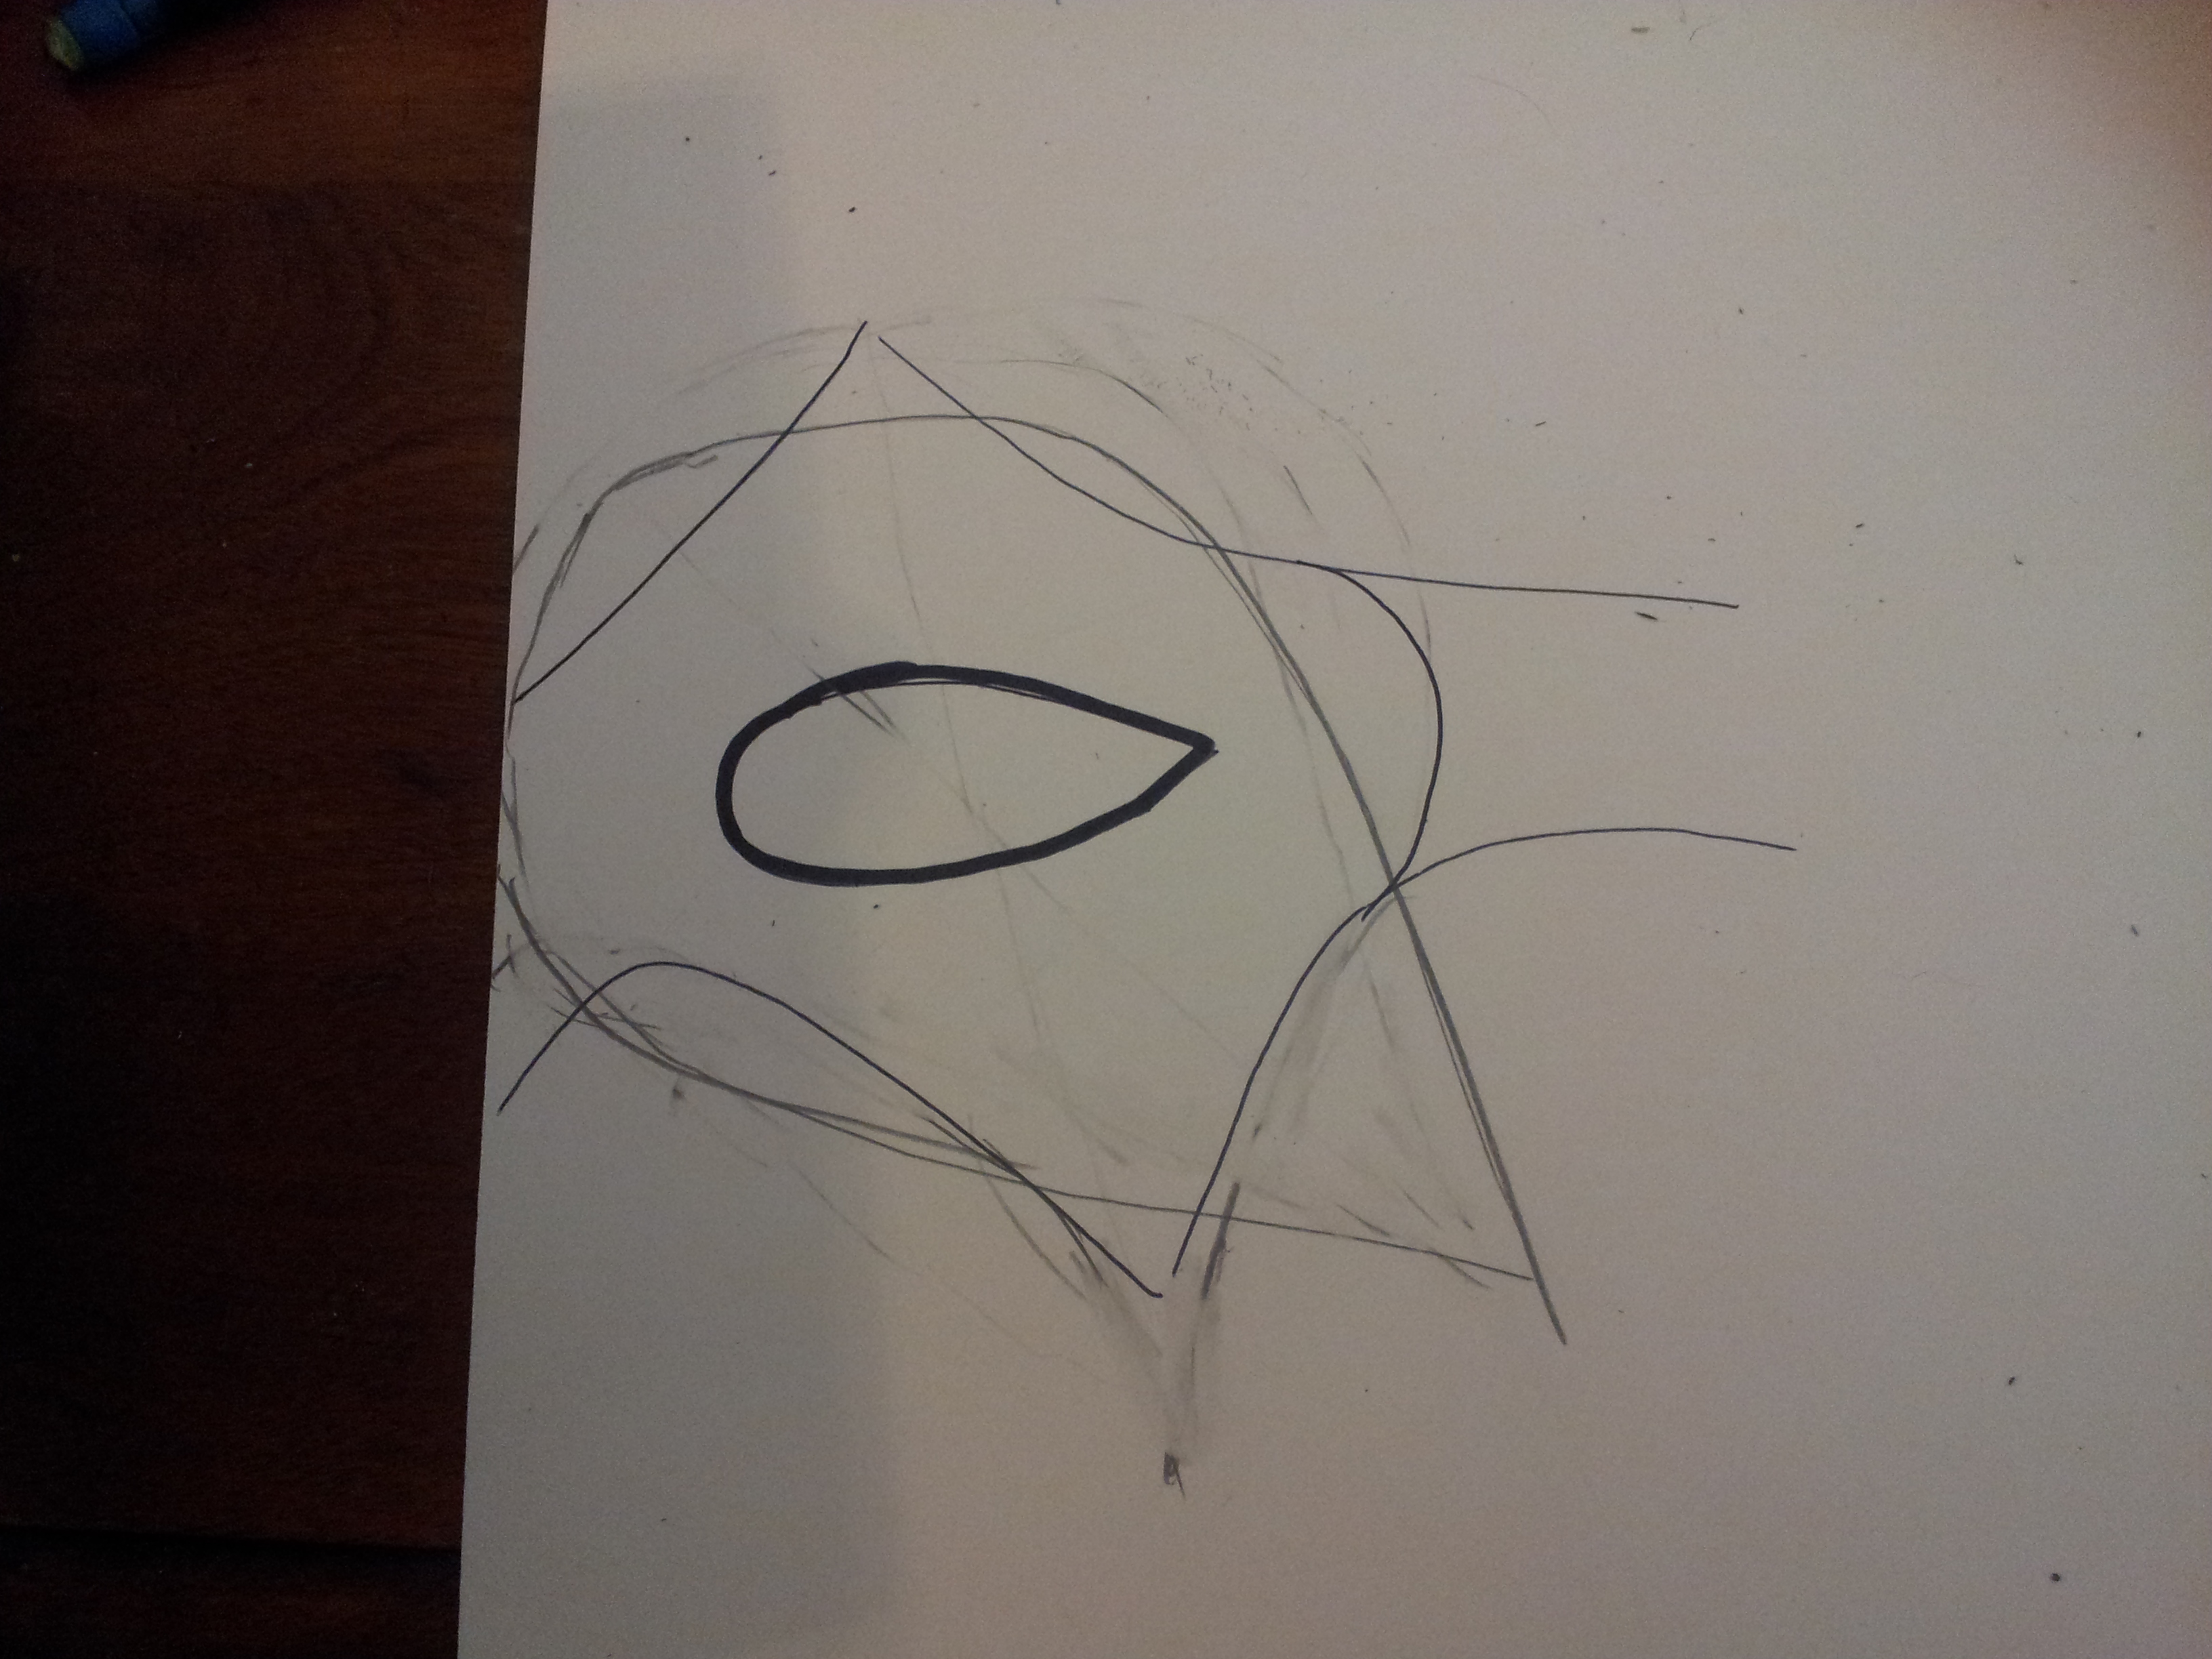
When I start with a new face mold, I will create a scratch copy mask with scrap leather so that I can get all of the features lined up properly. I've used this face mold enough that I already have some basic mask templates which will show me where the mask's features are. I took one of those templates and copied half if it on the card stock.
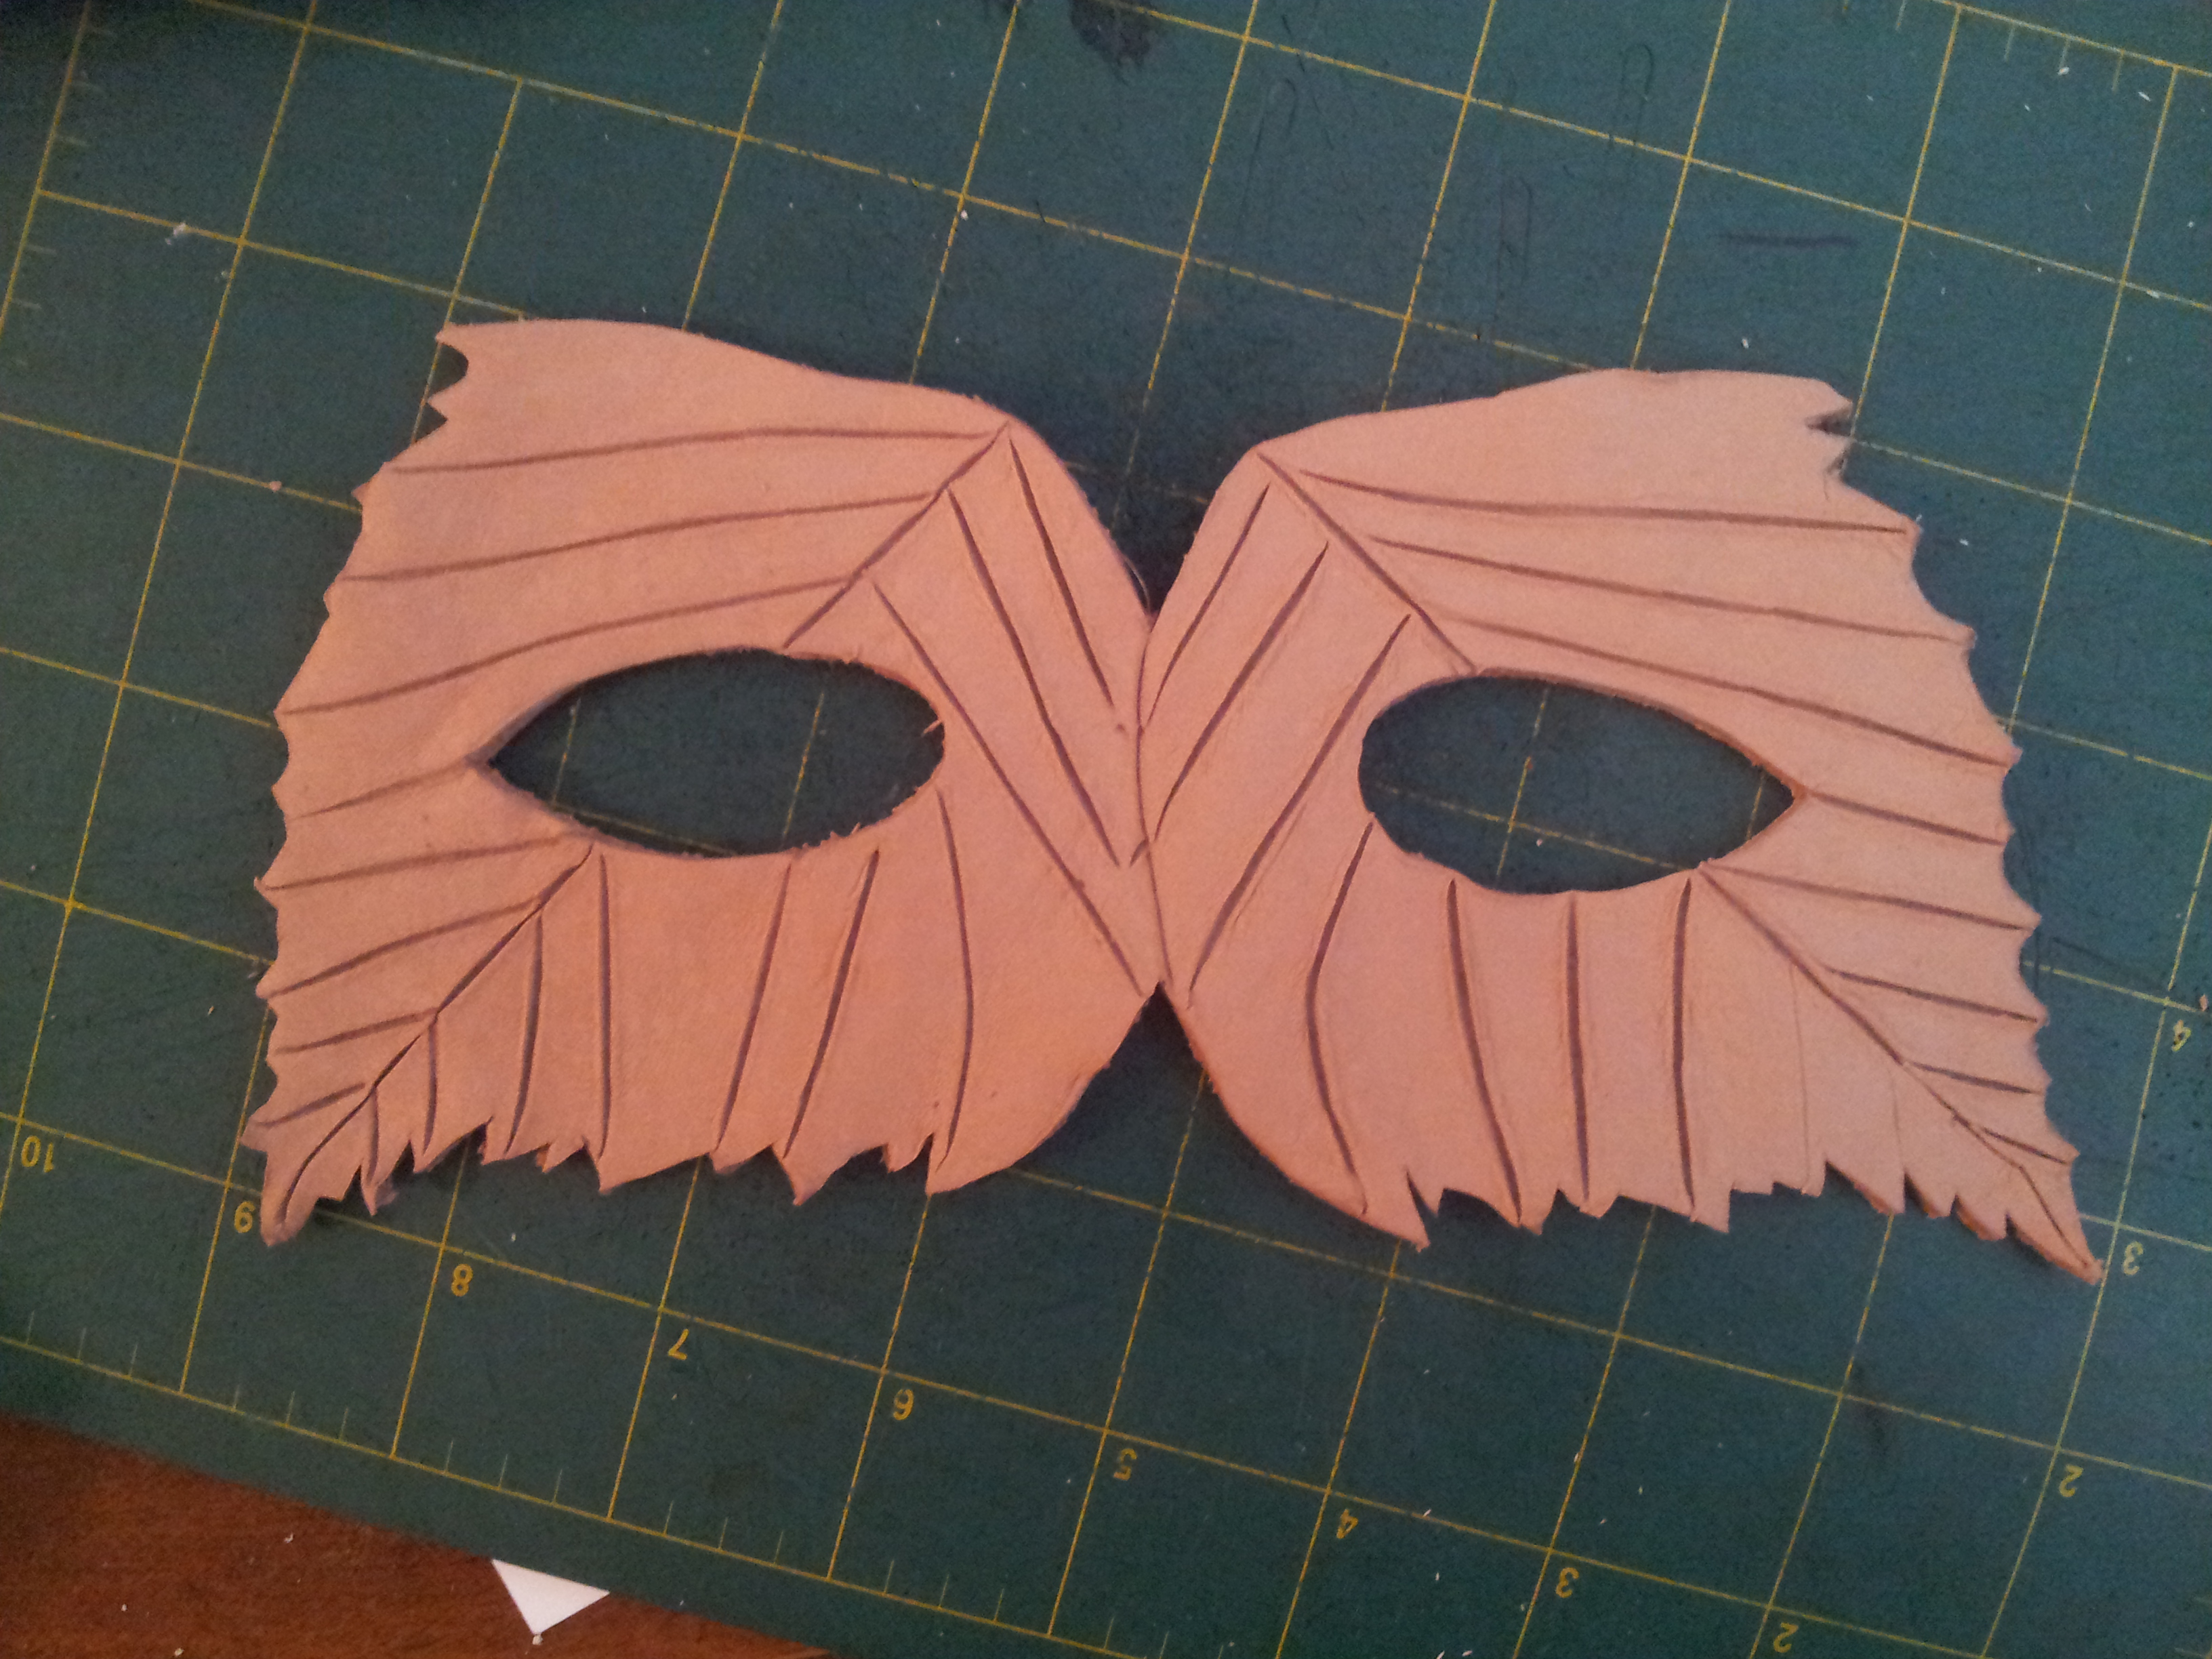
At this point, you will draw a silver birch leaf on top of the area where you copied the template, lining everything up to create half of the face portion of the mask. Making only half a template will make it easier to have a symmetrical mask.
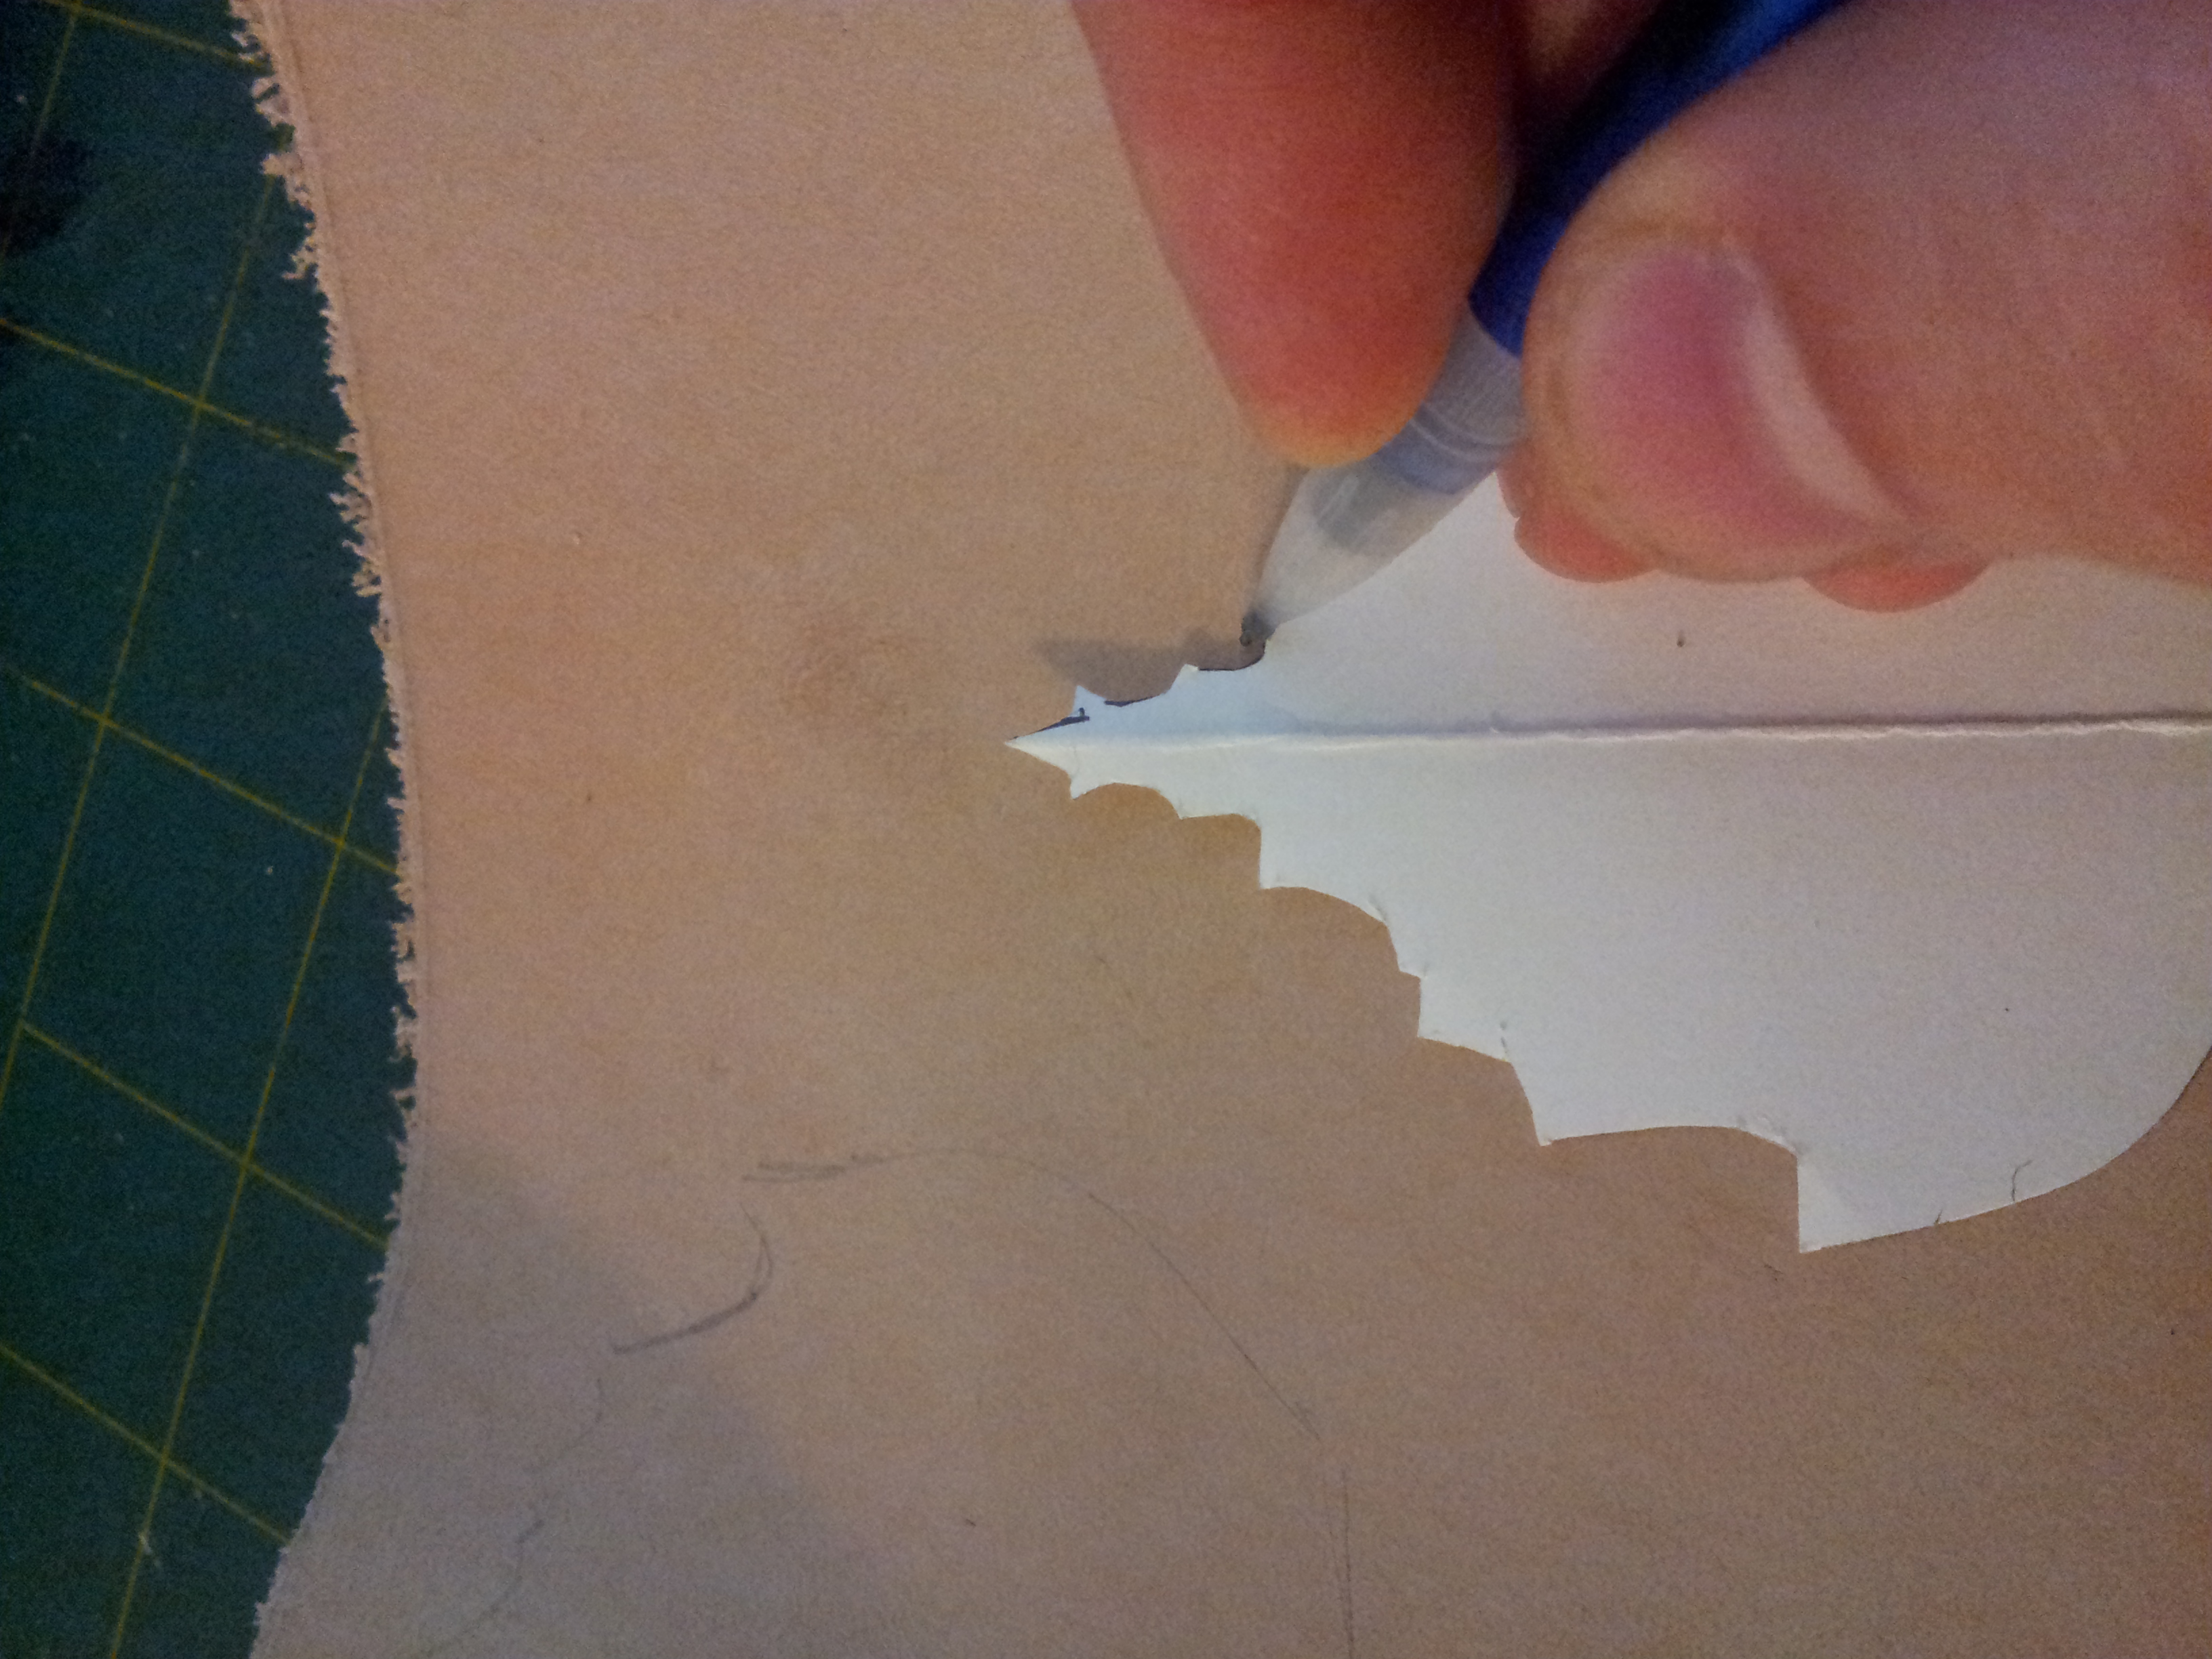
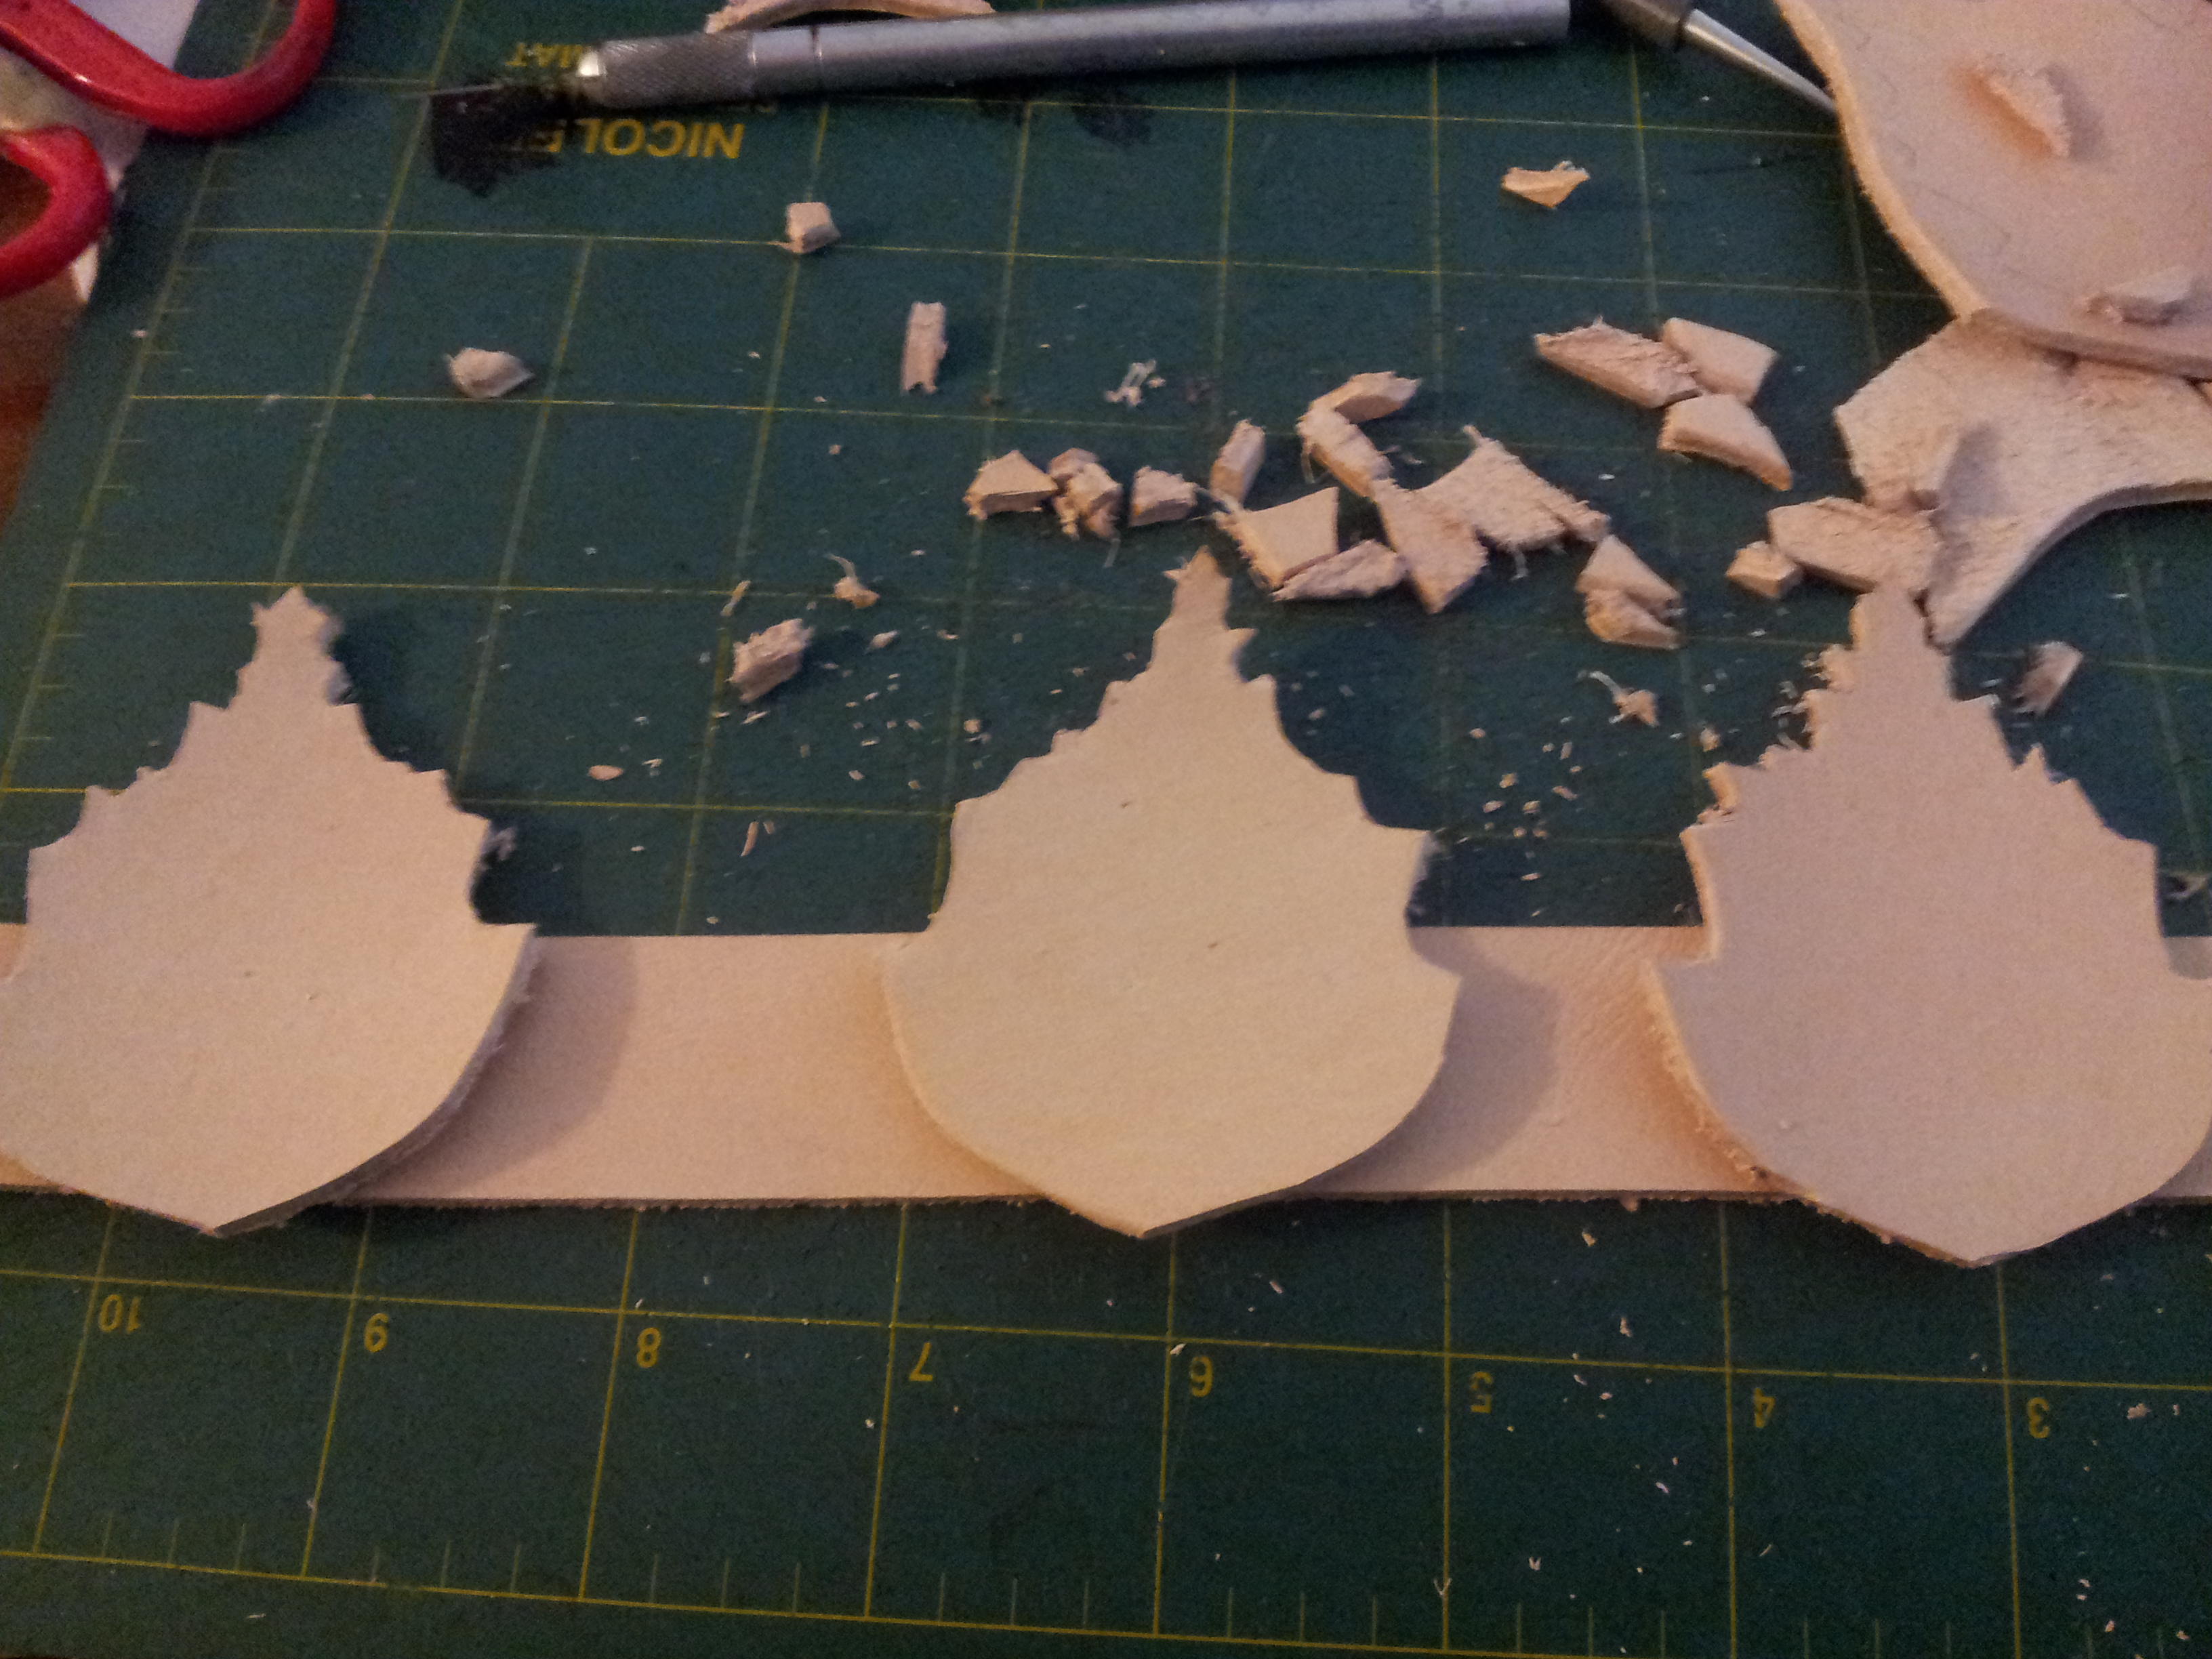
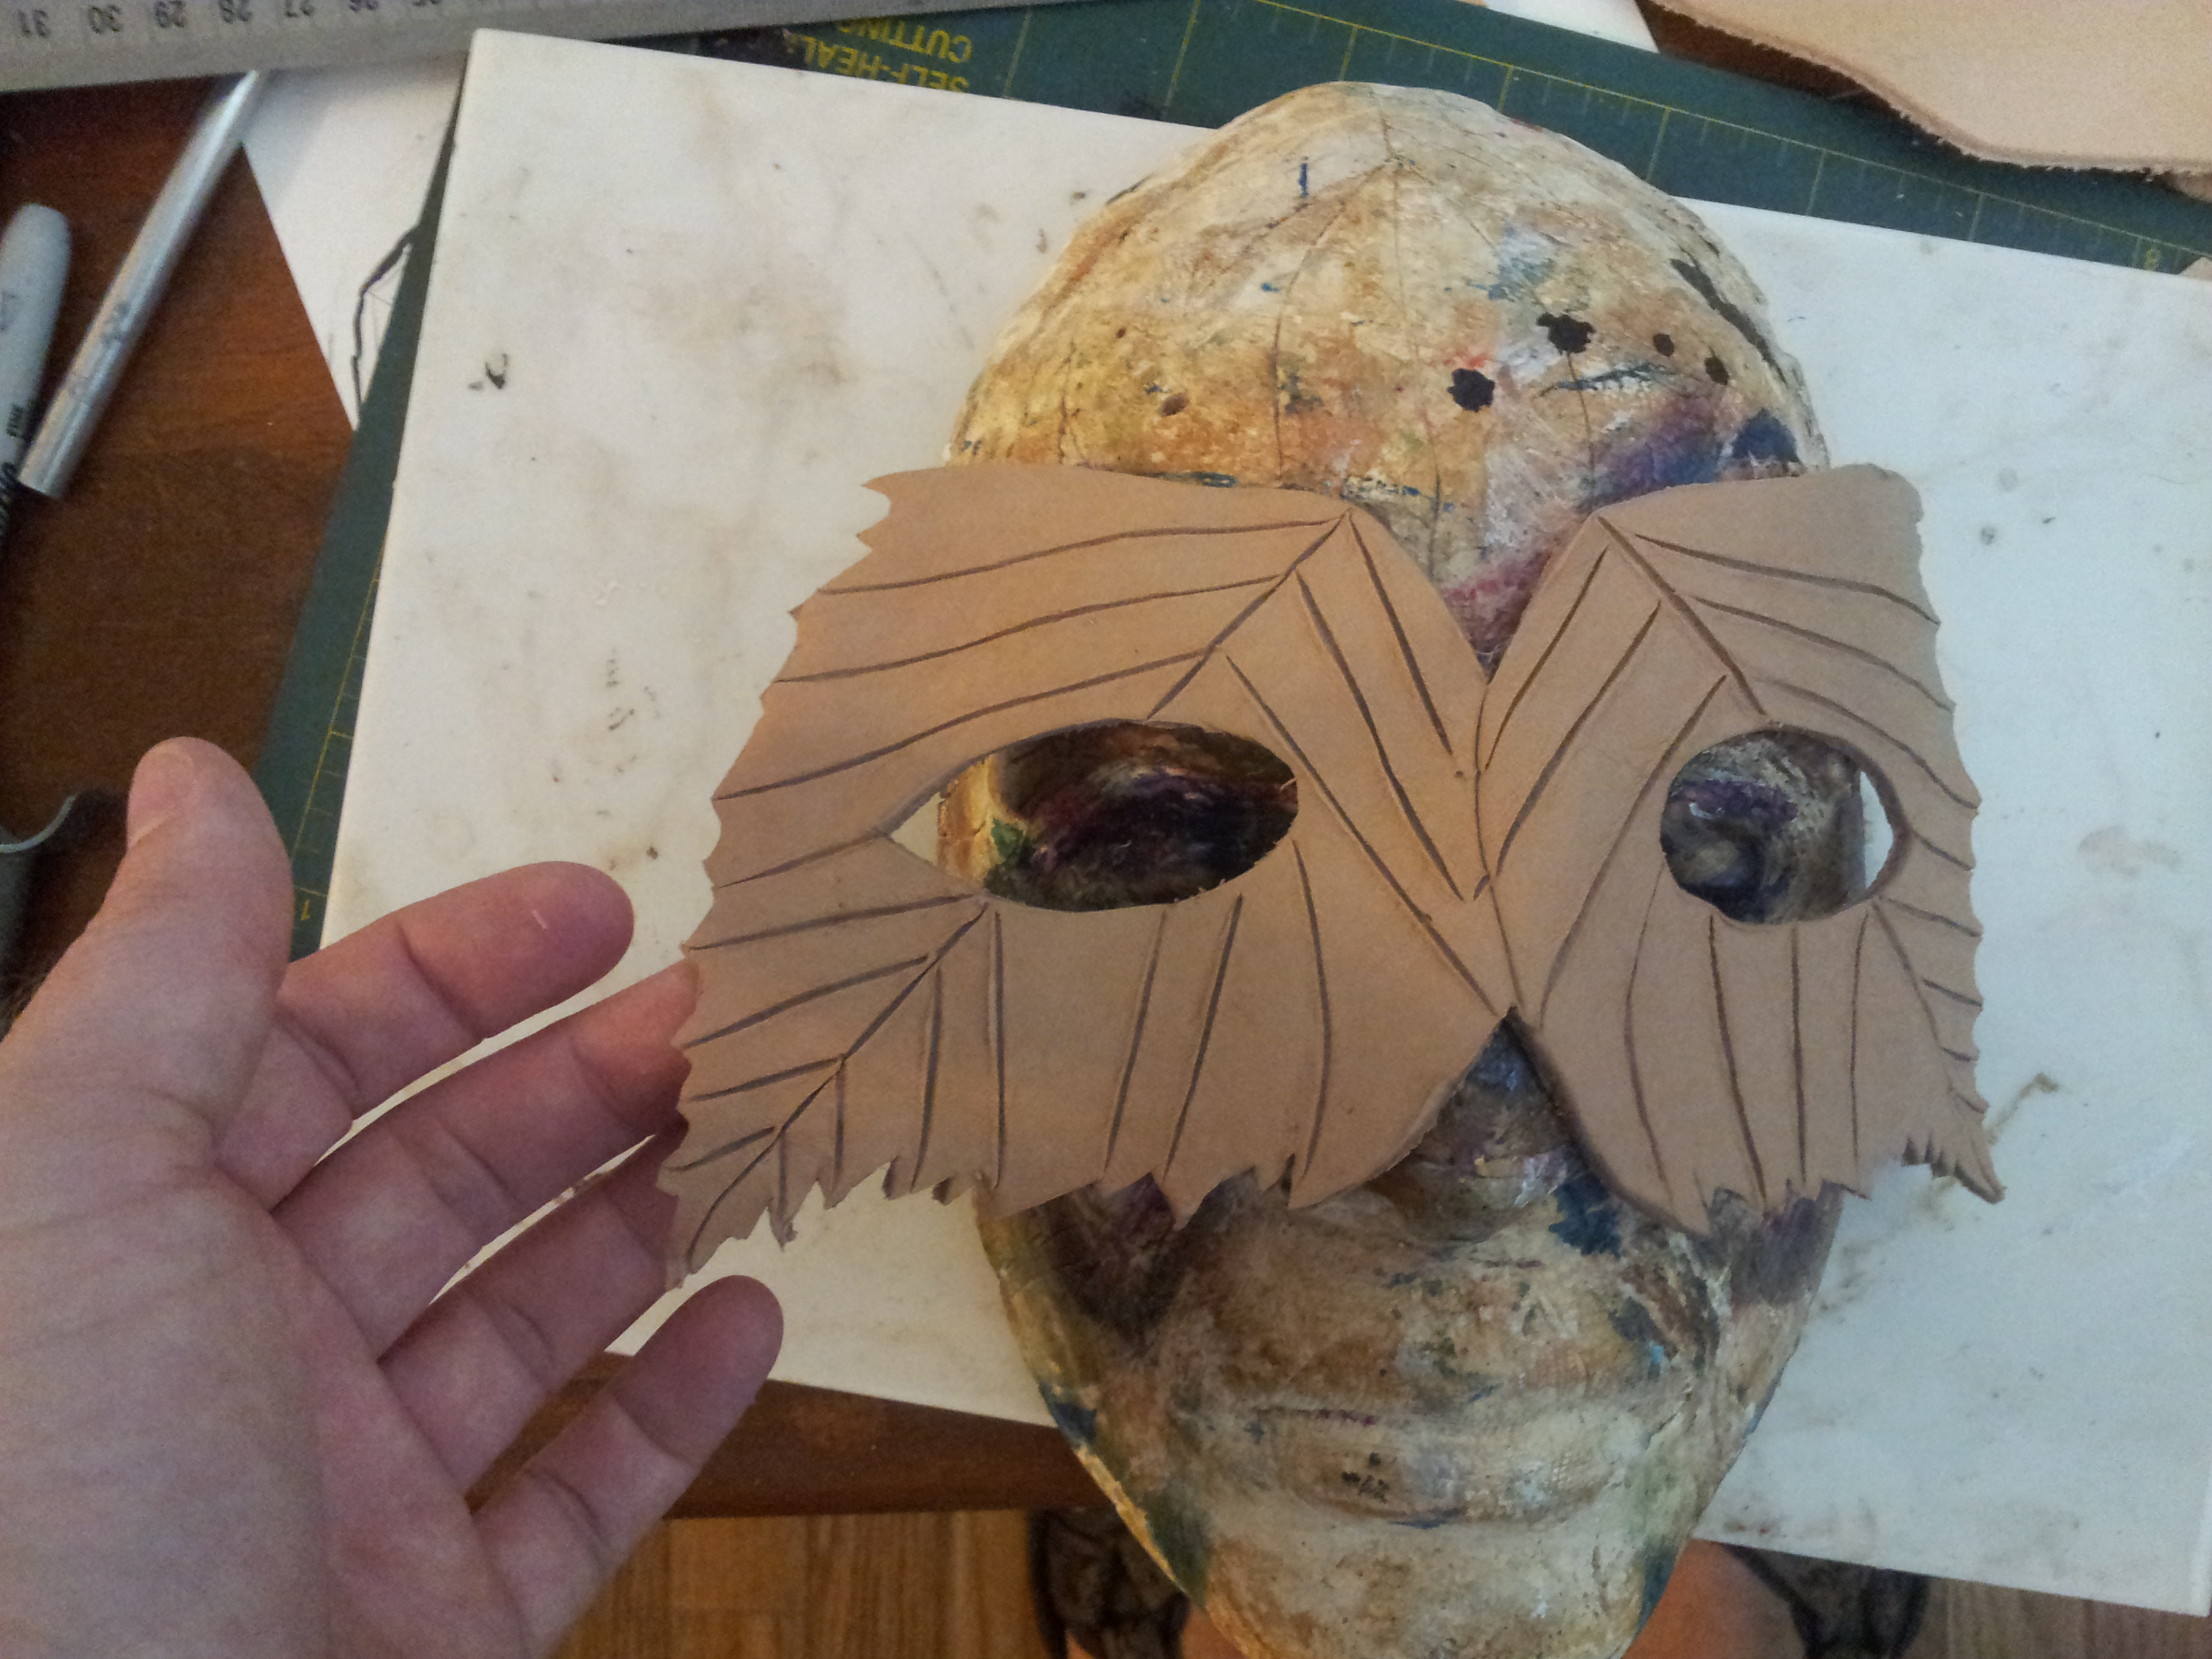
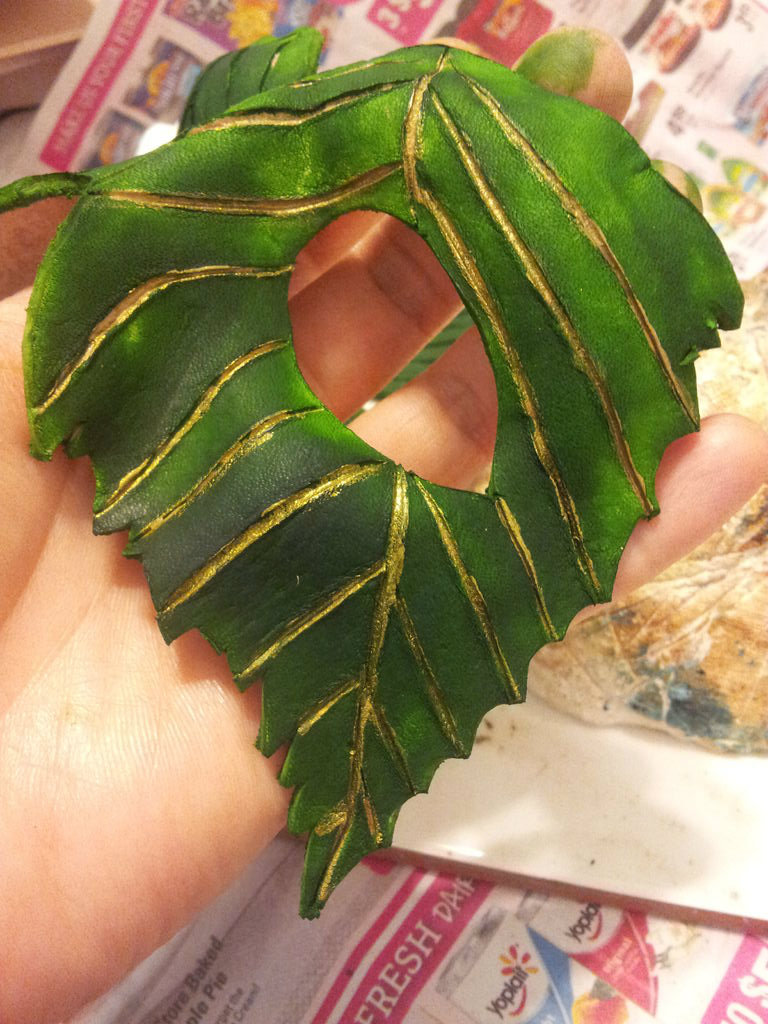
In addition to the mask, you will need to draw another leaf template to create the leaves that will serve as the points of the crown that will be attached to the mask. These smaller leaves are 2 3/4" long and 2 1/4" wide.
Trace Your Templates and Cut Out Your Leather Pieces
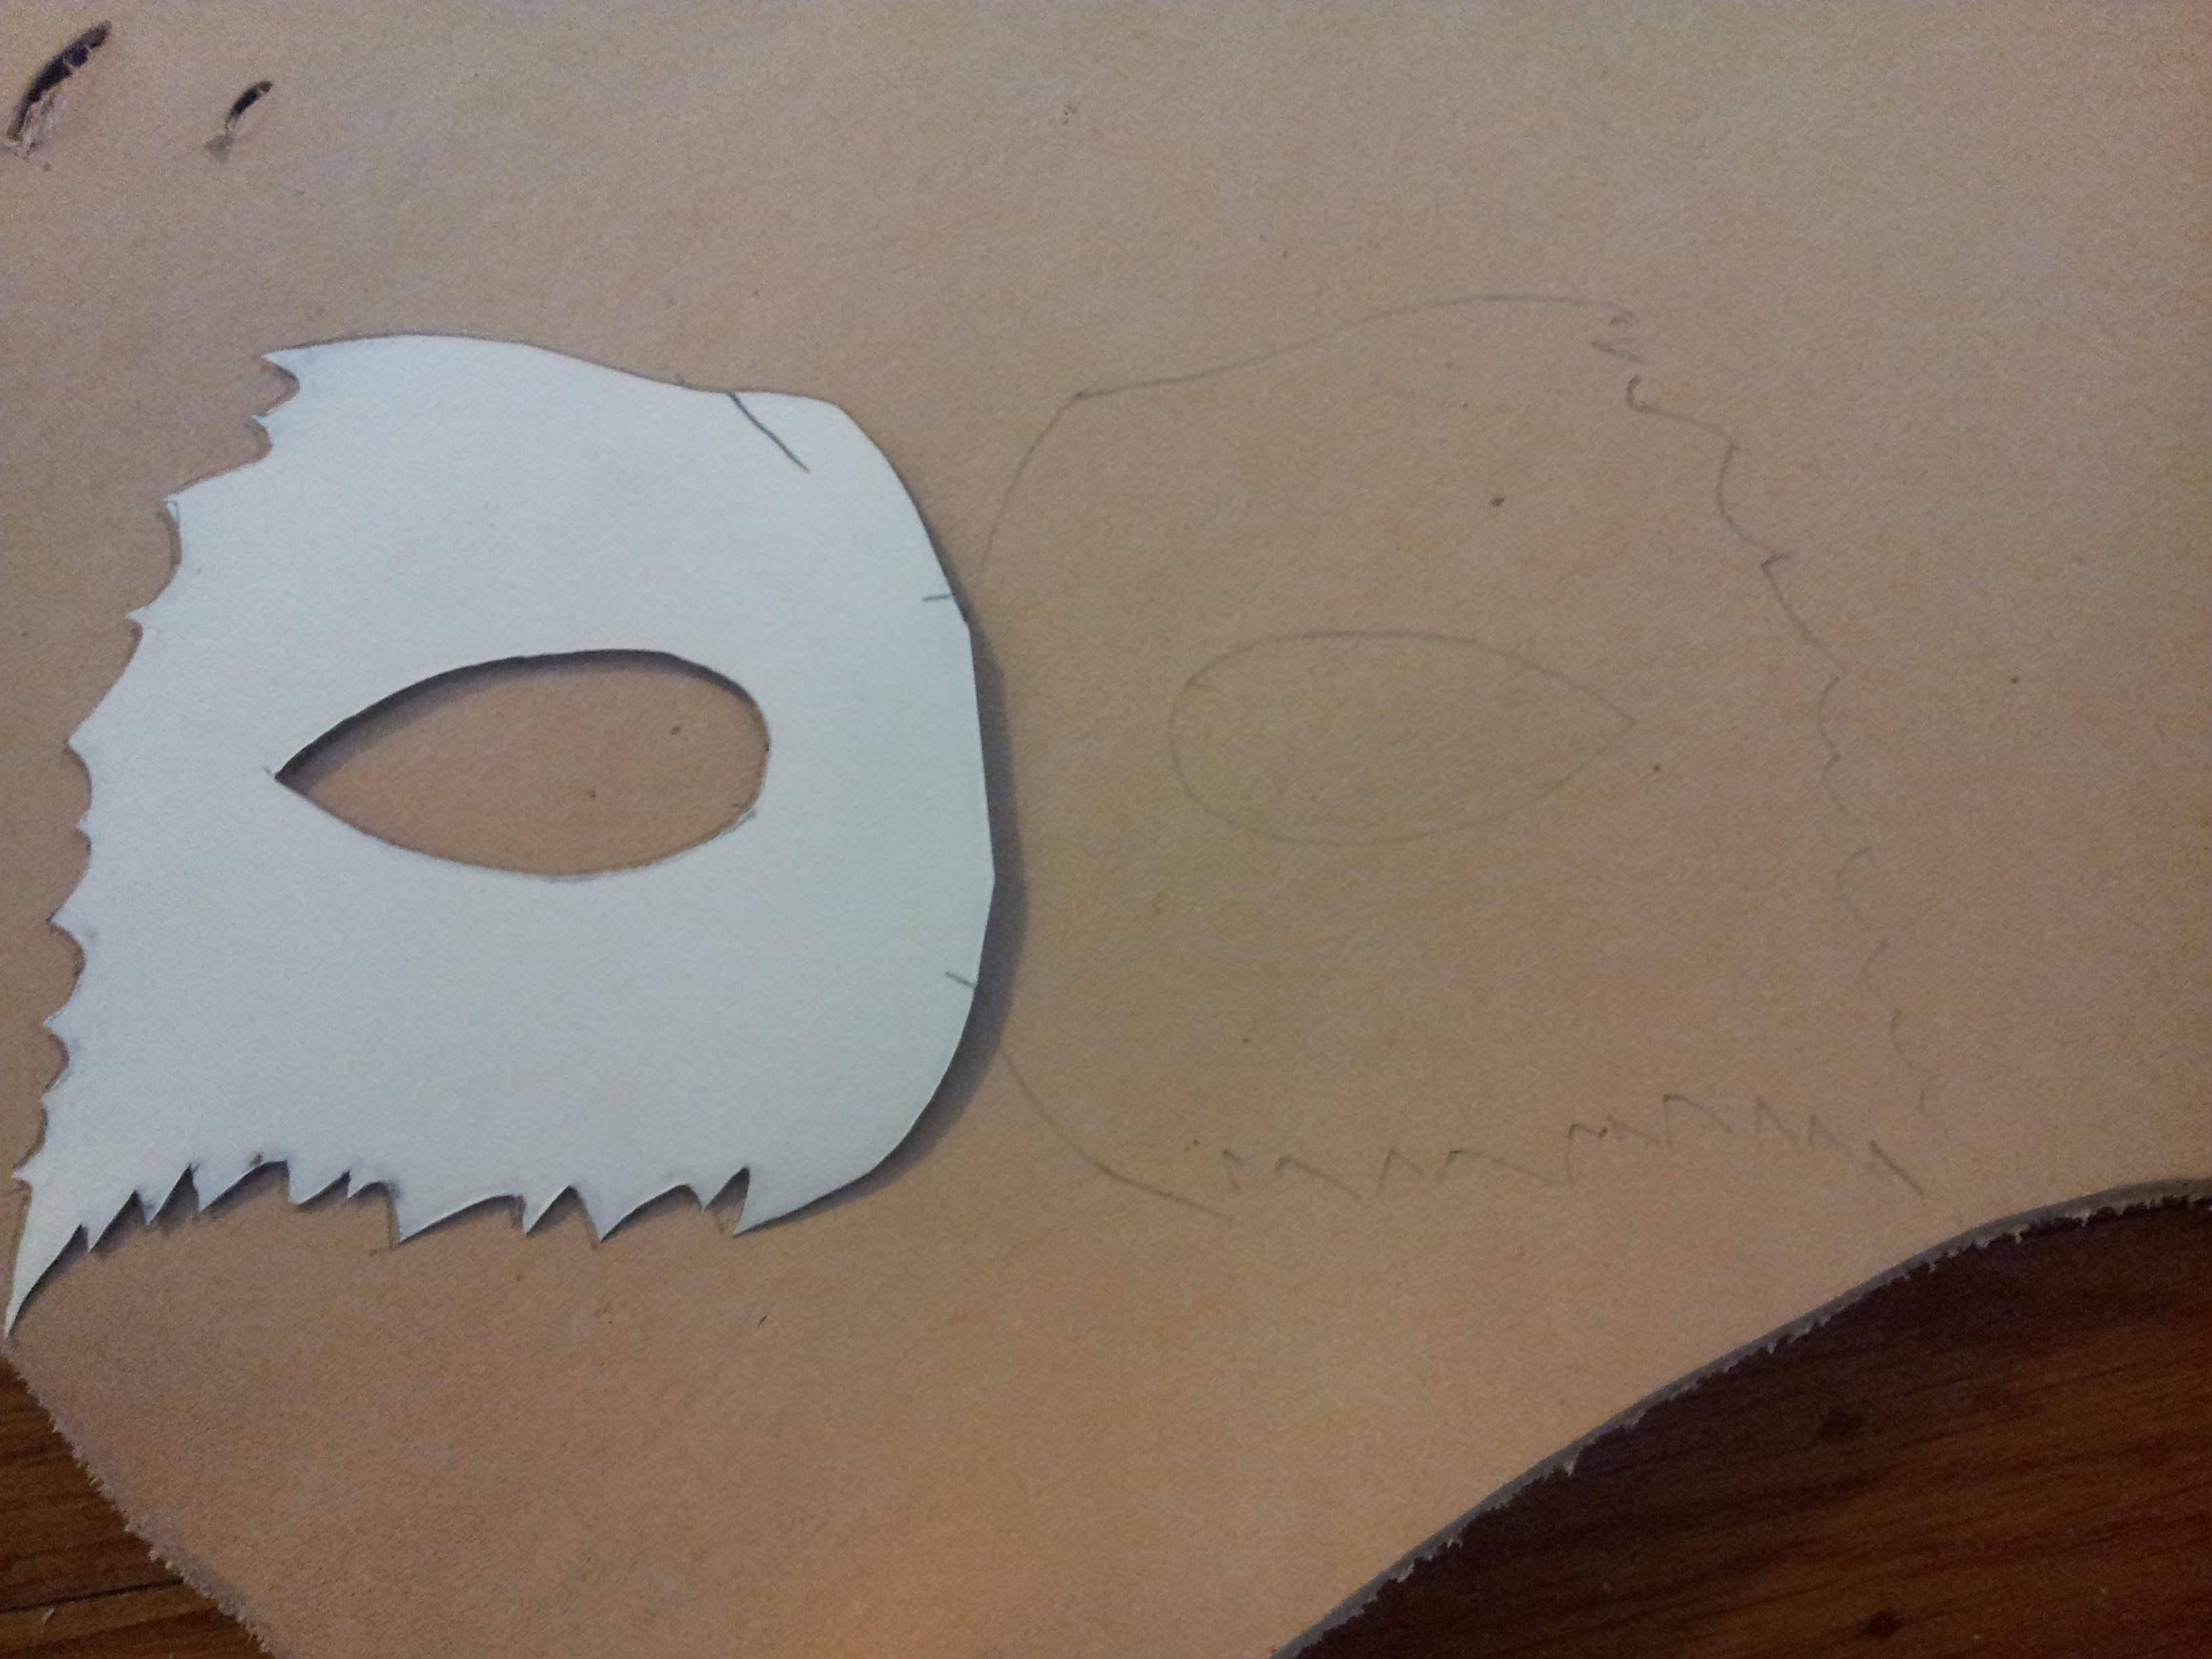
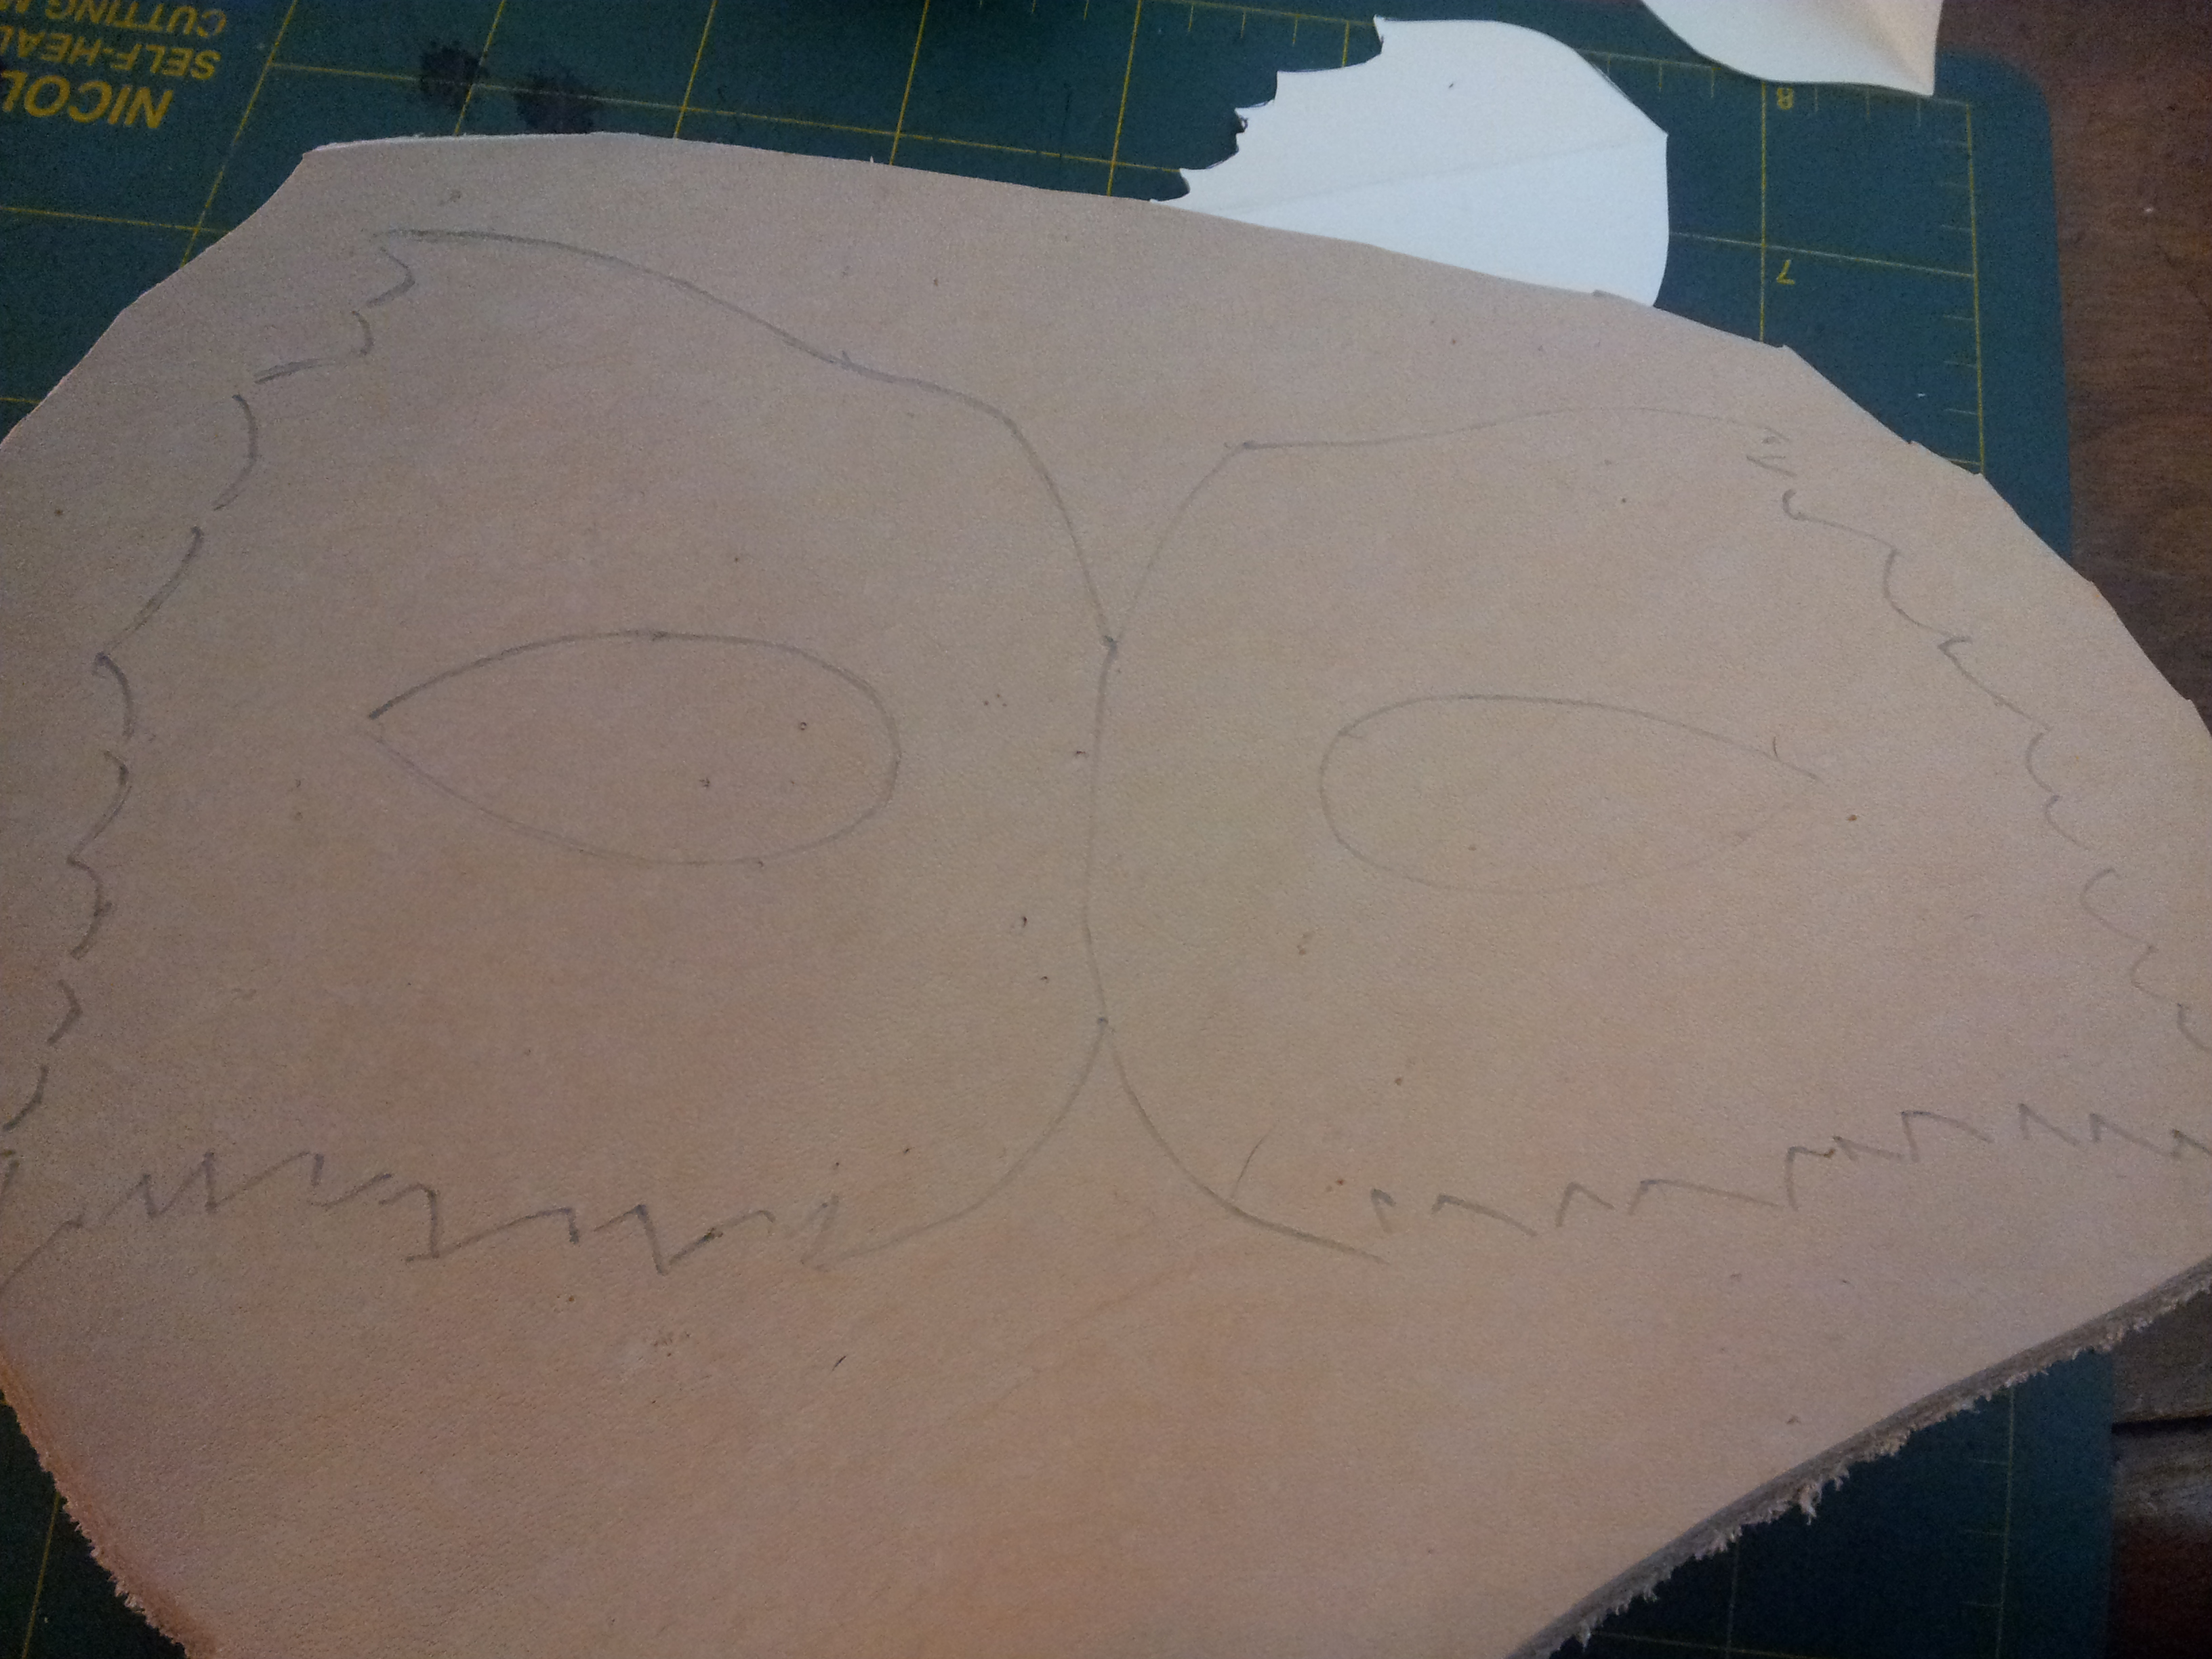
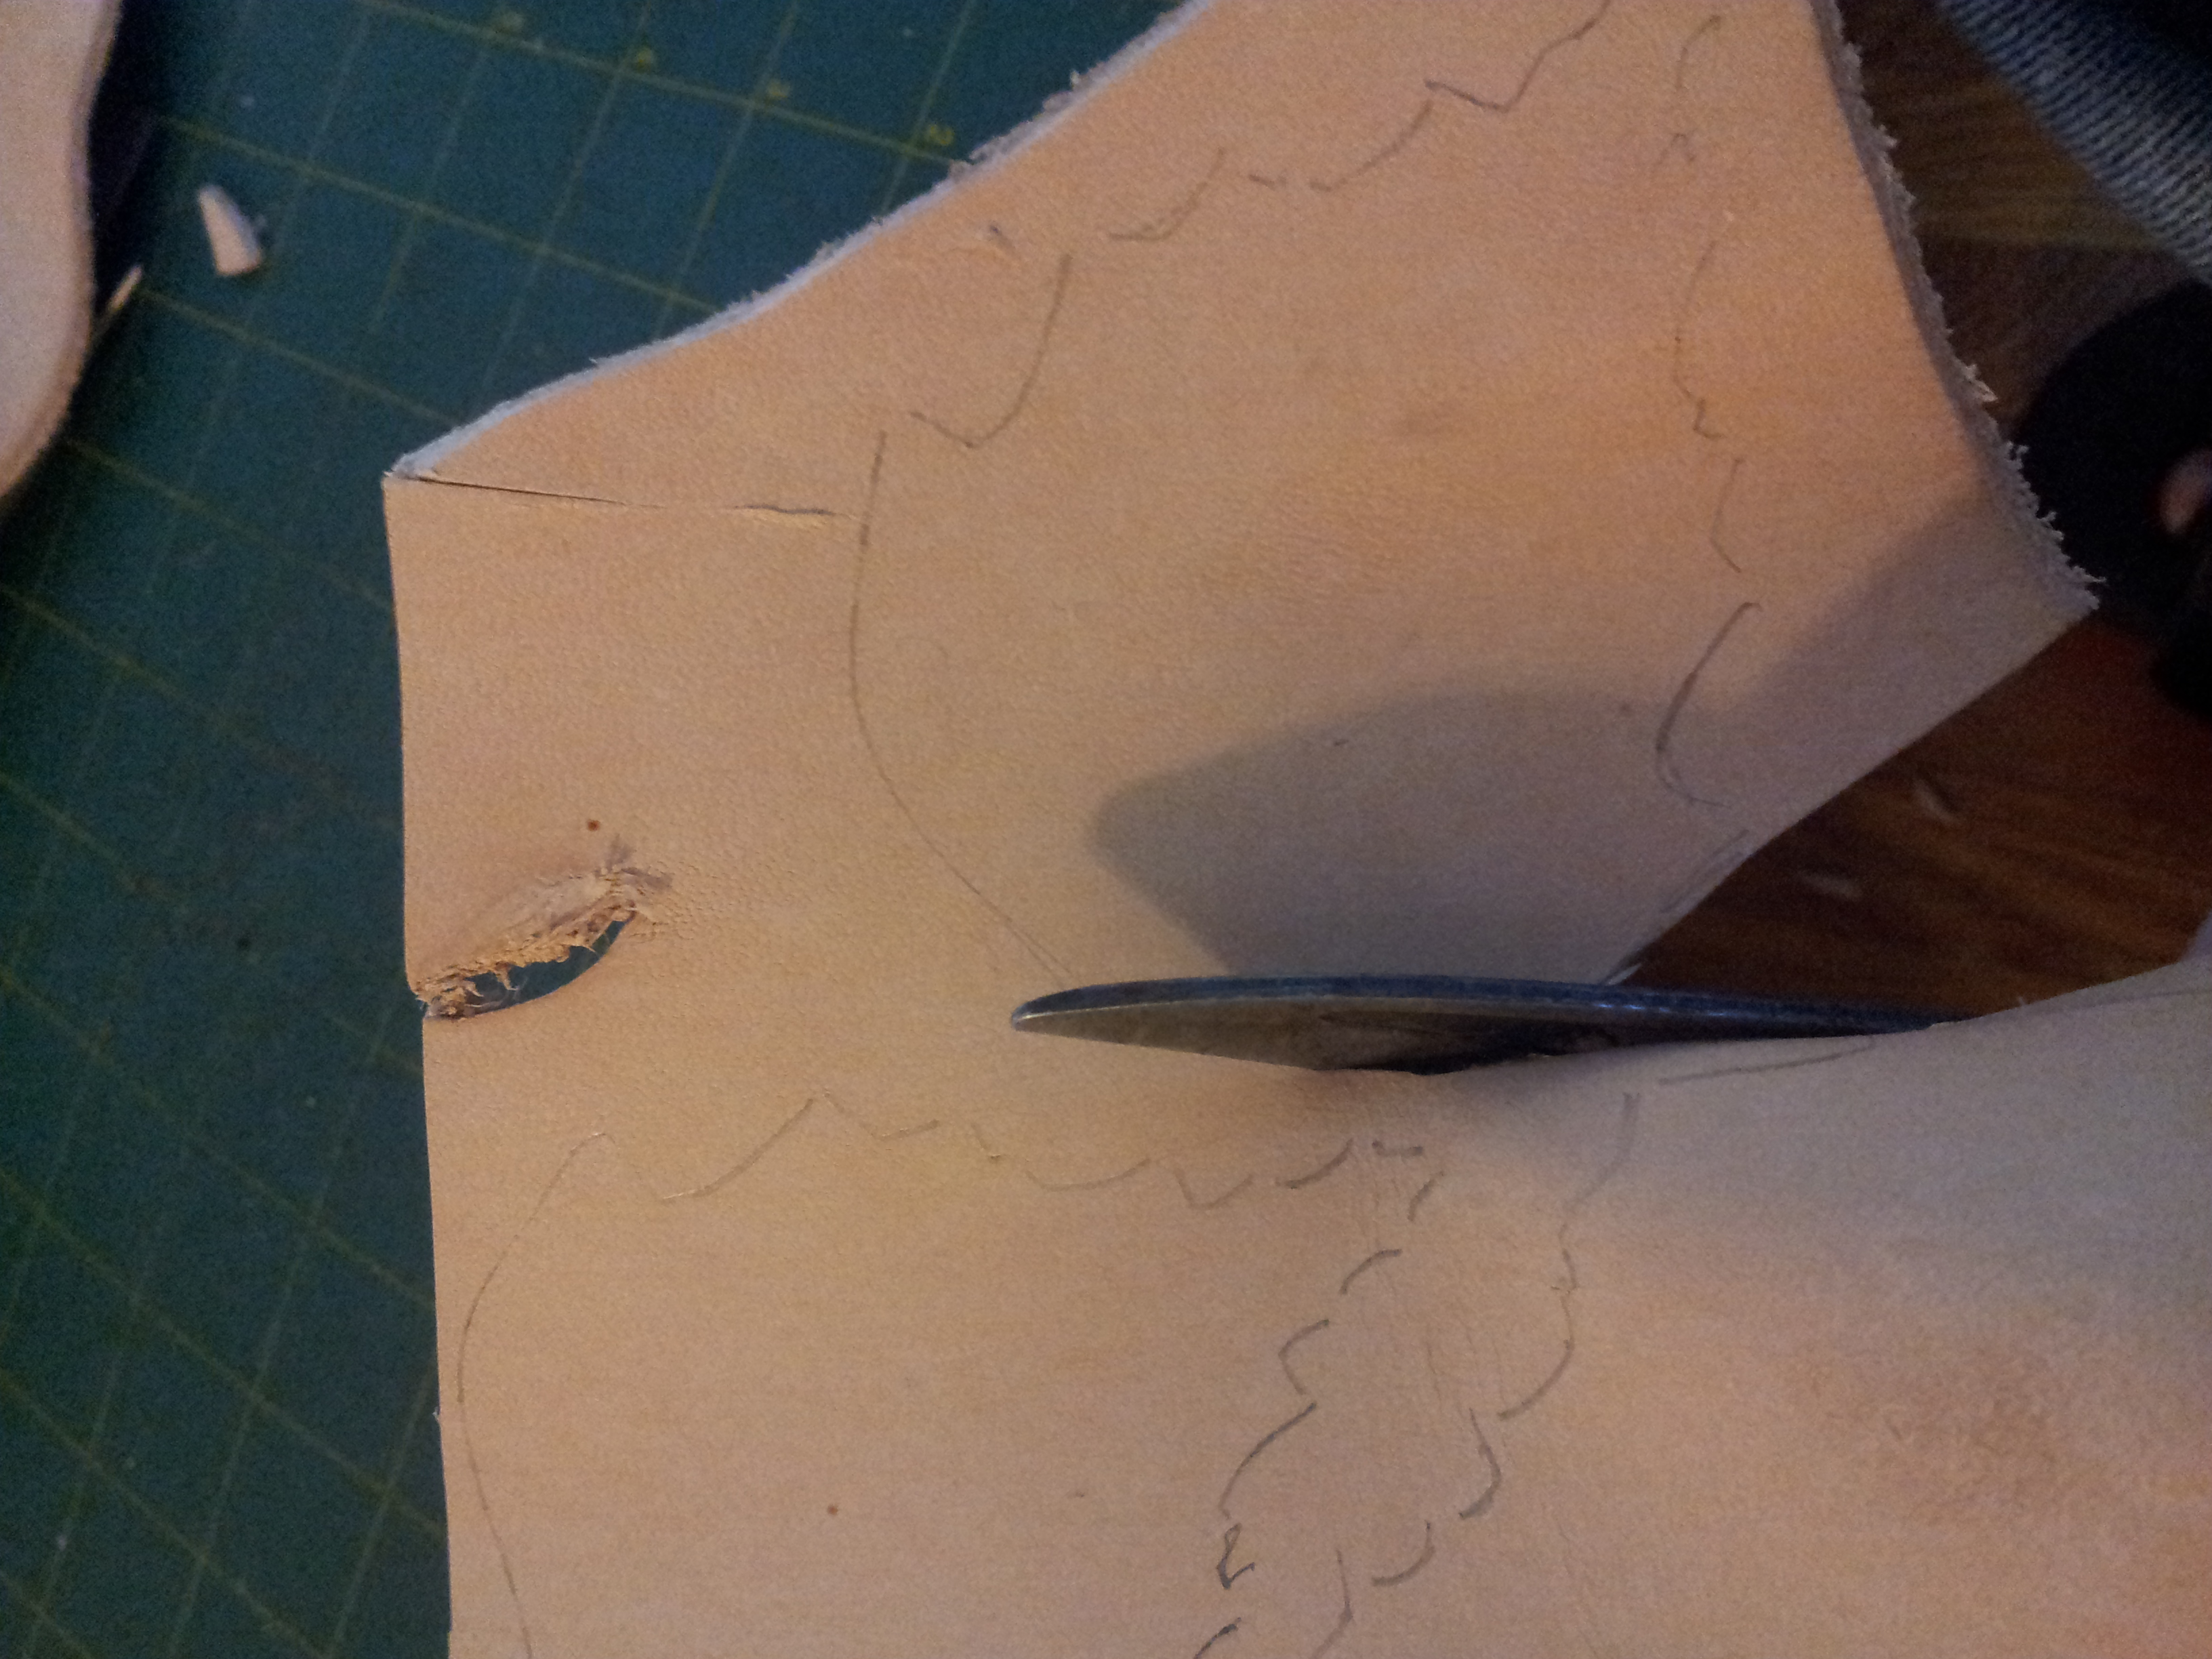

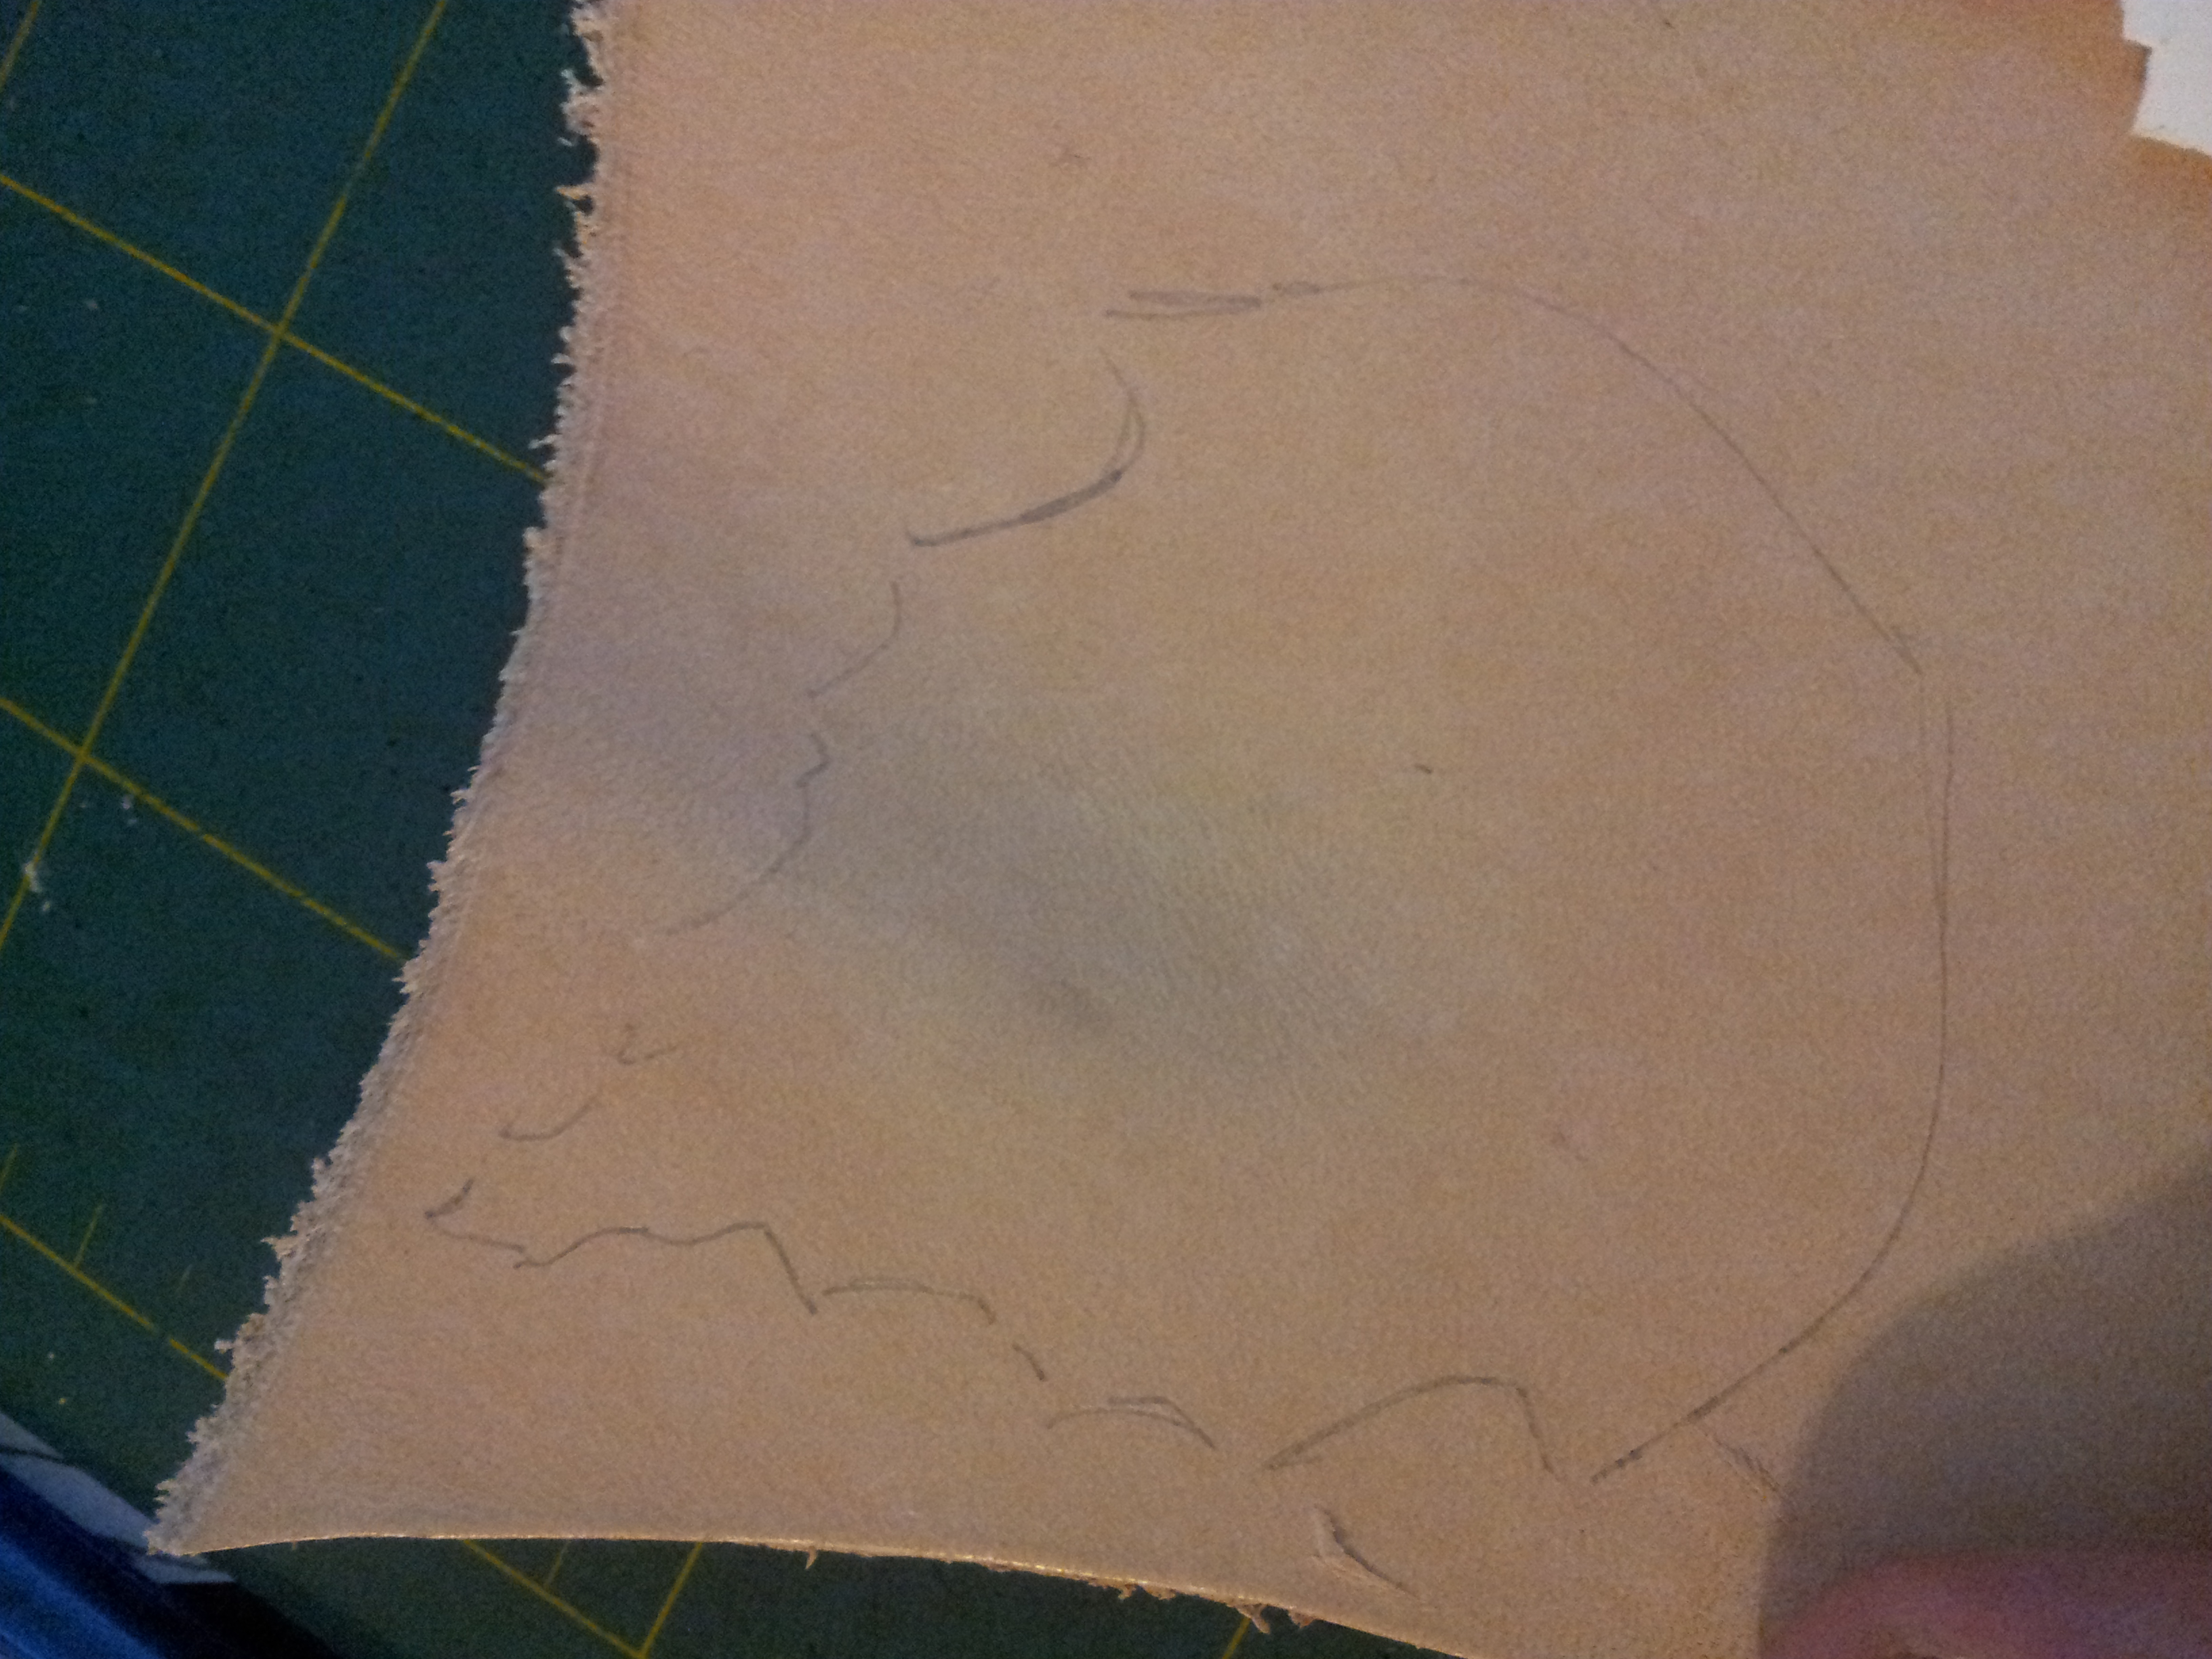
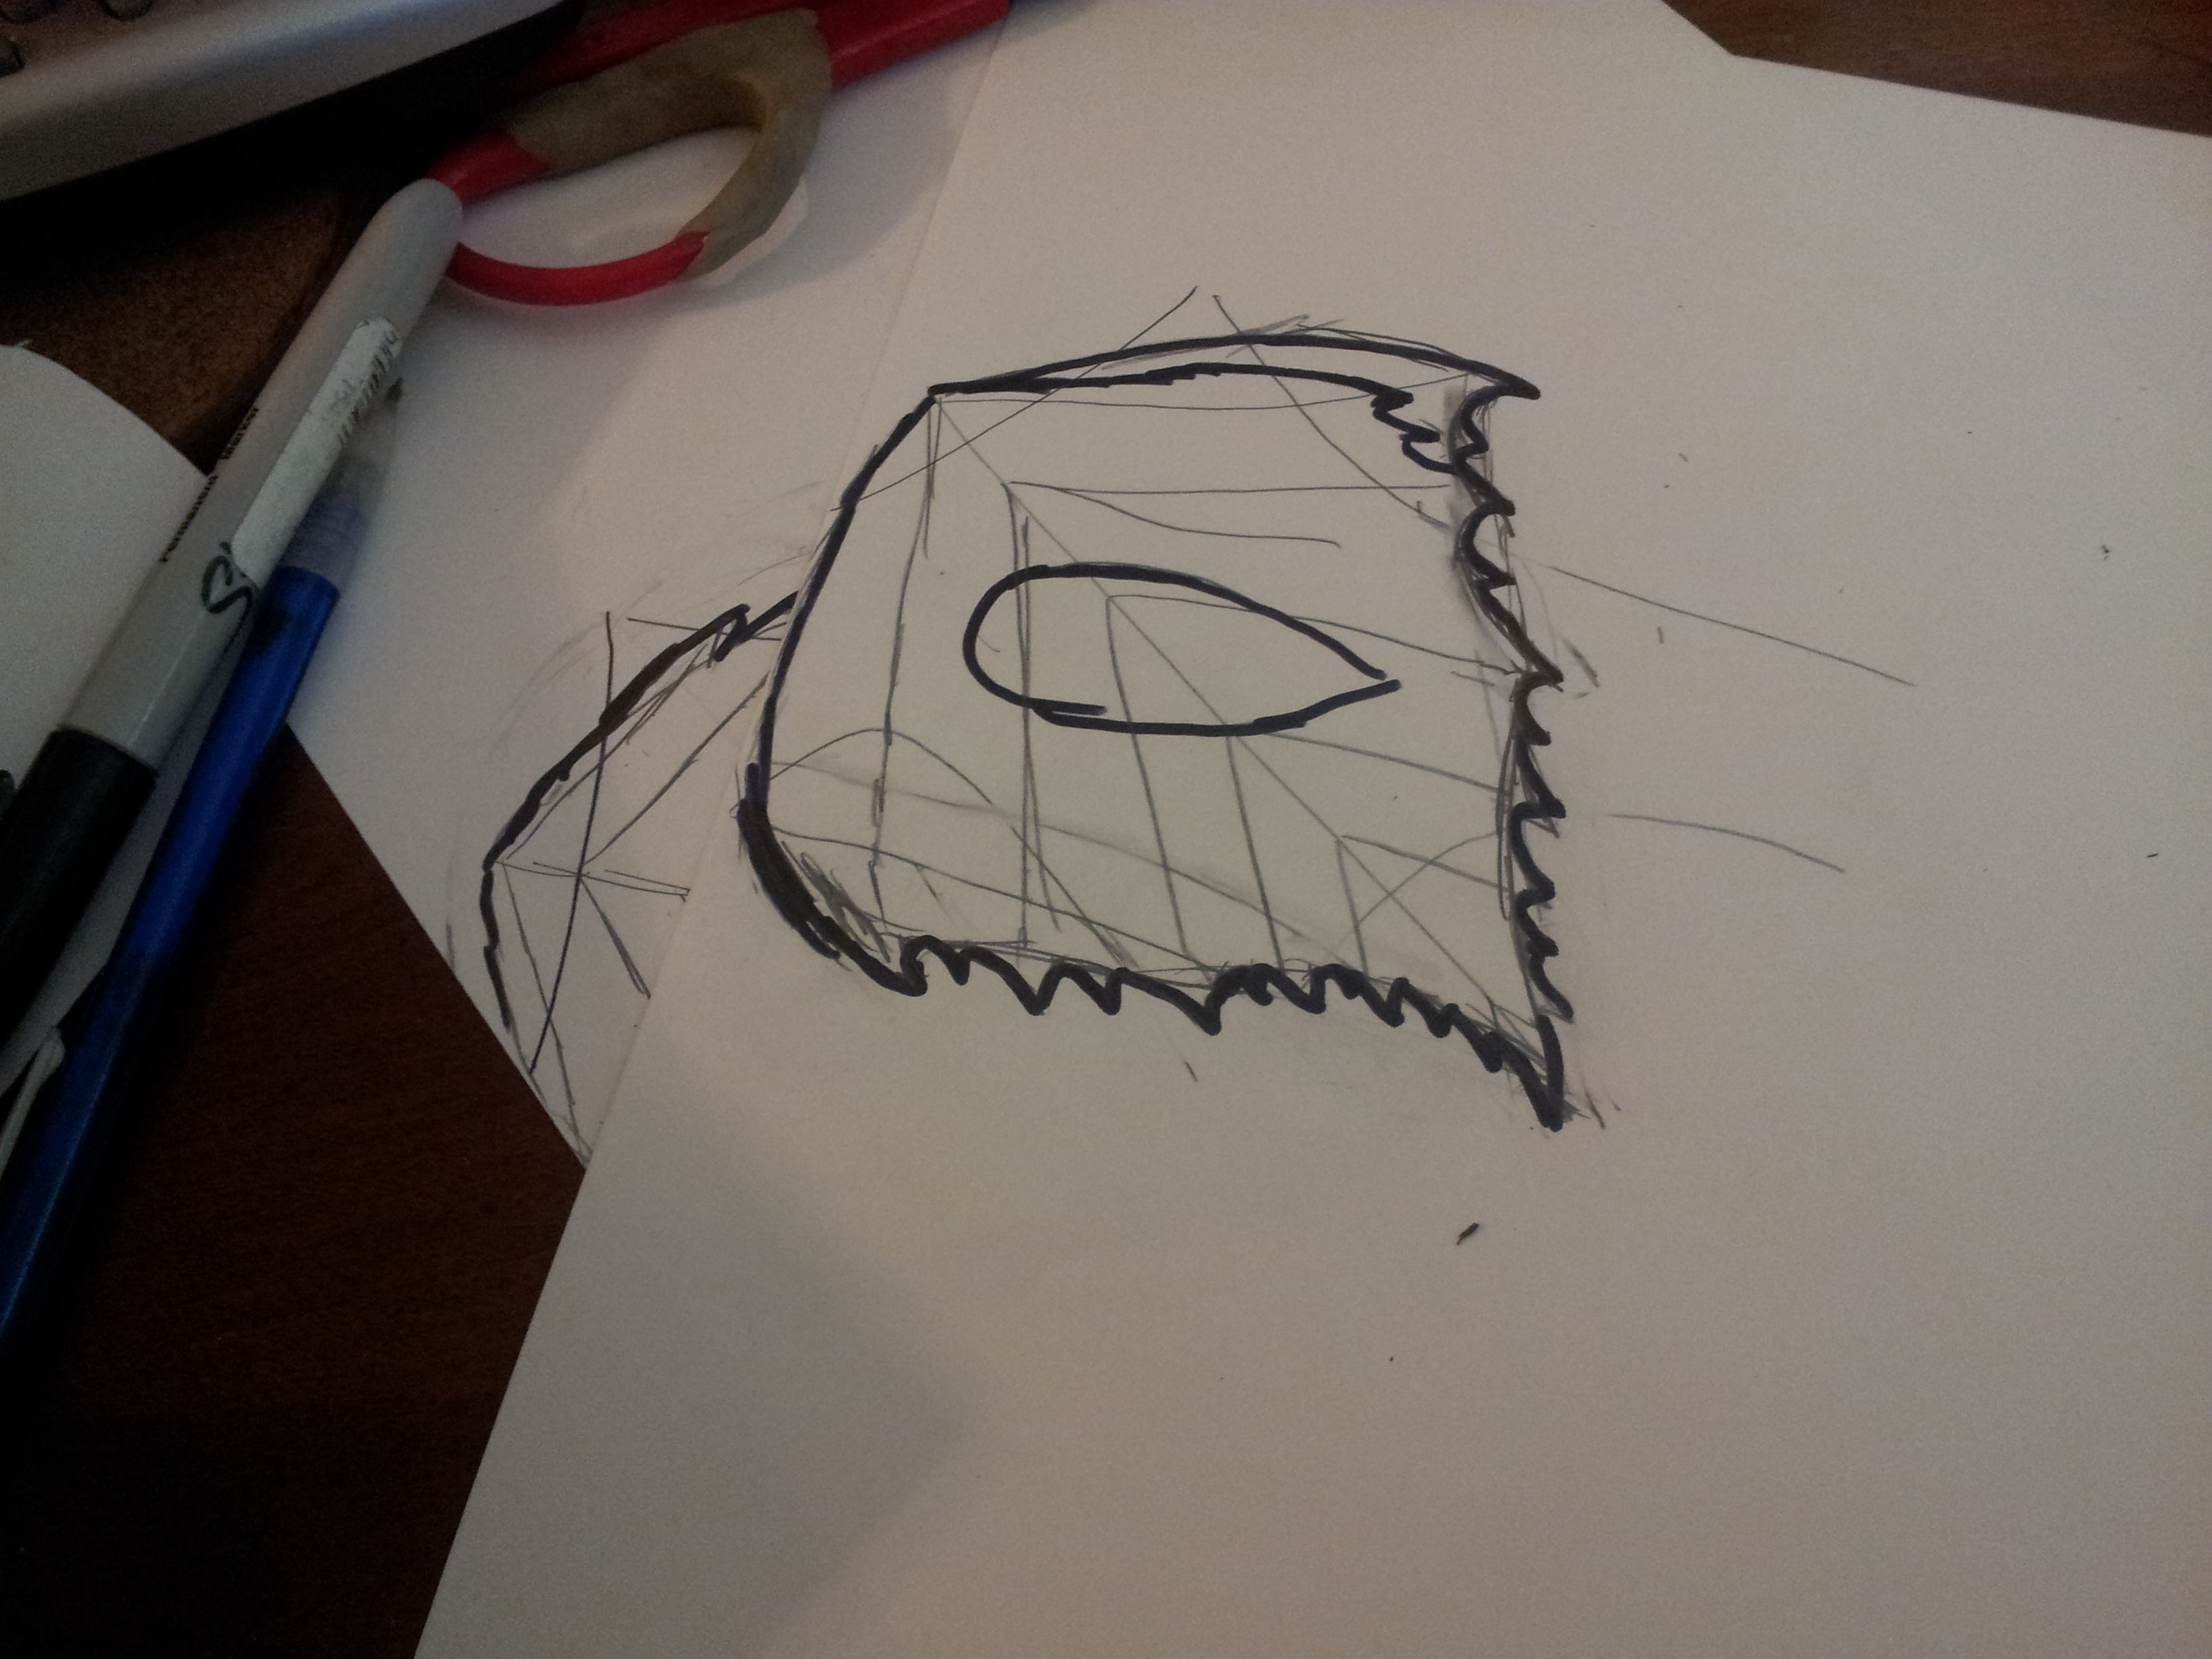
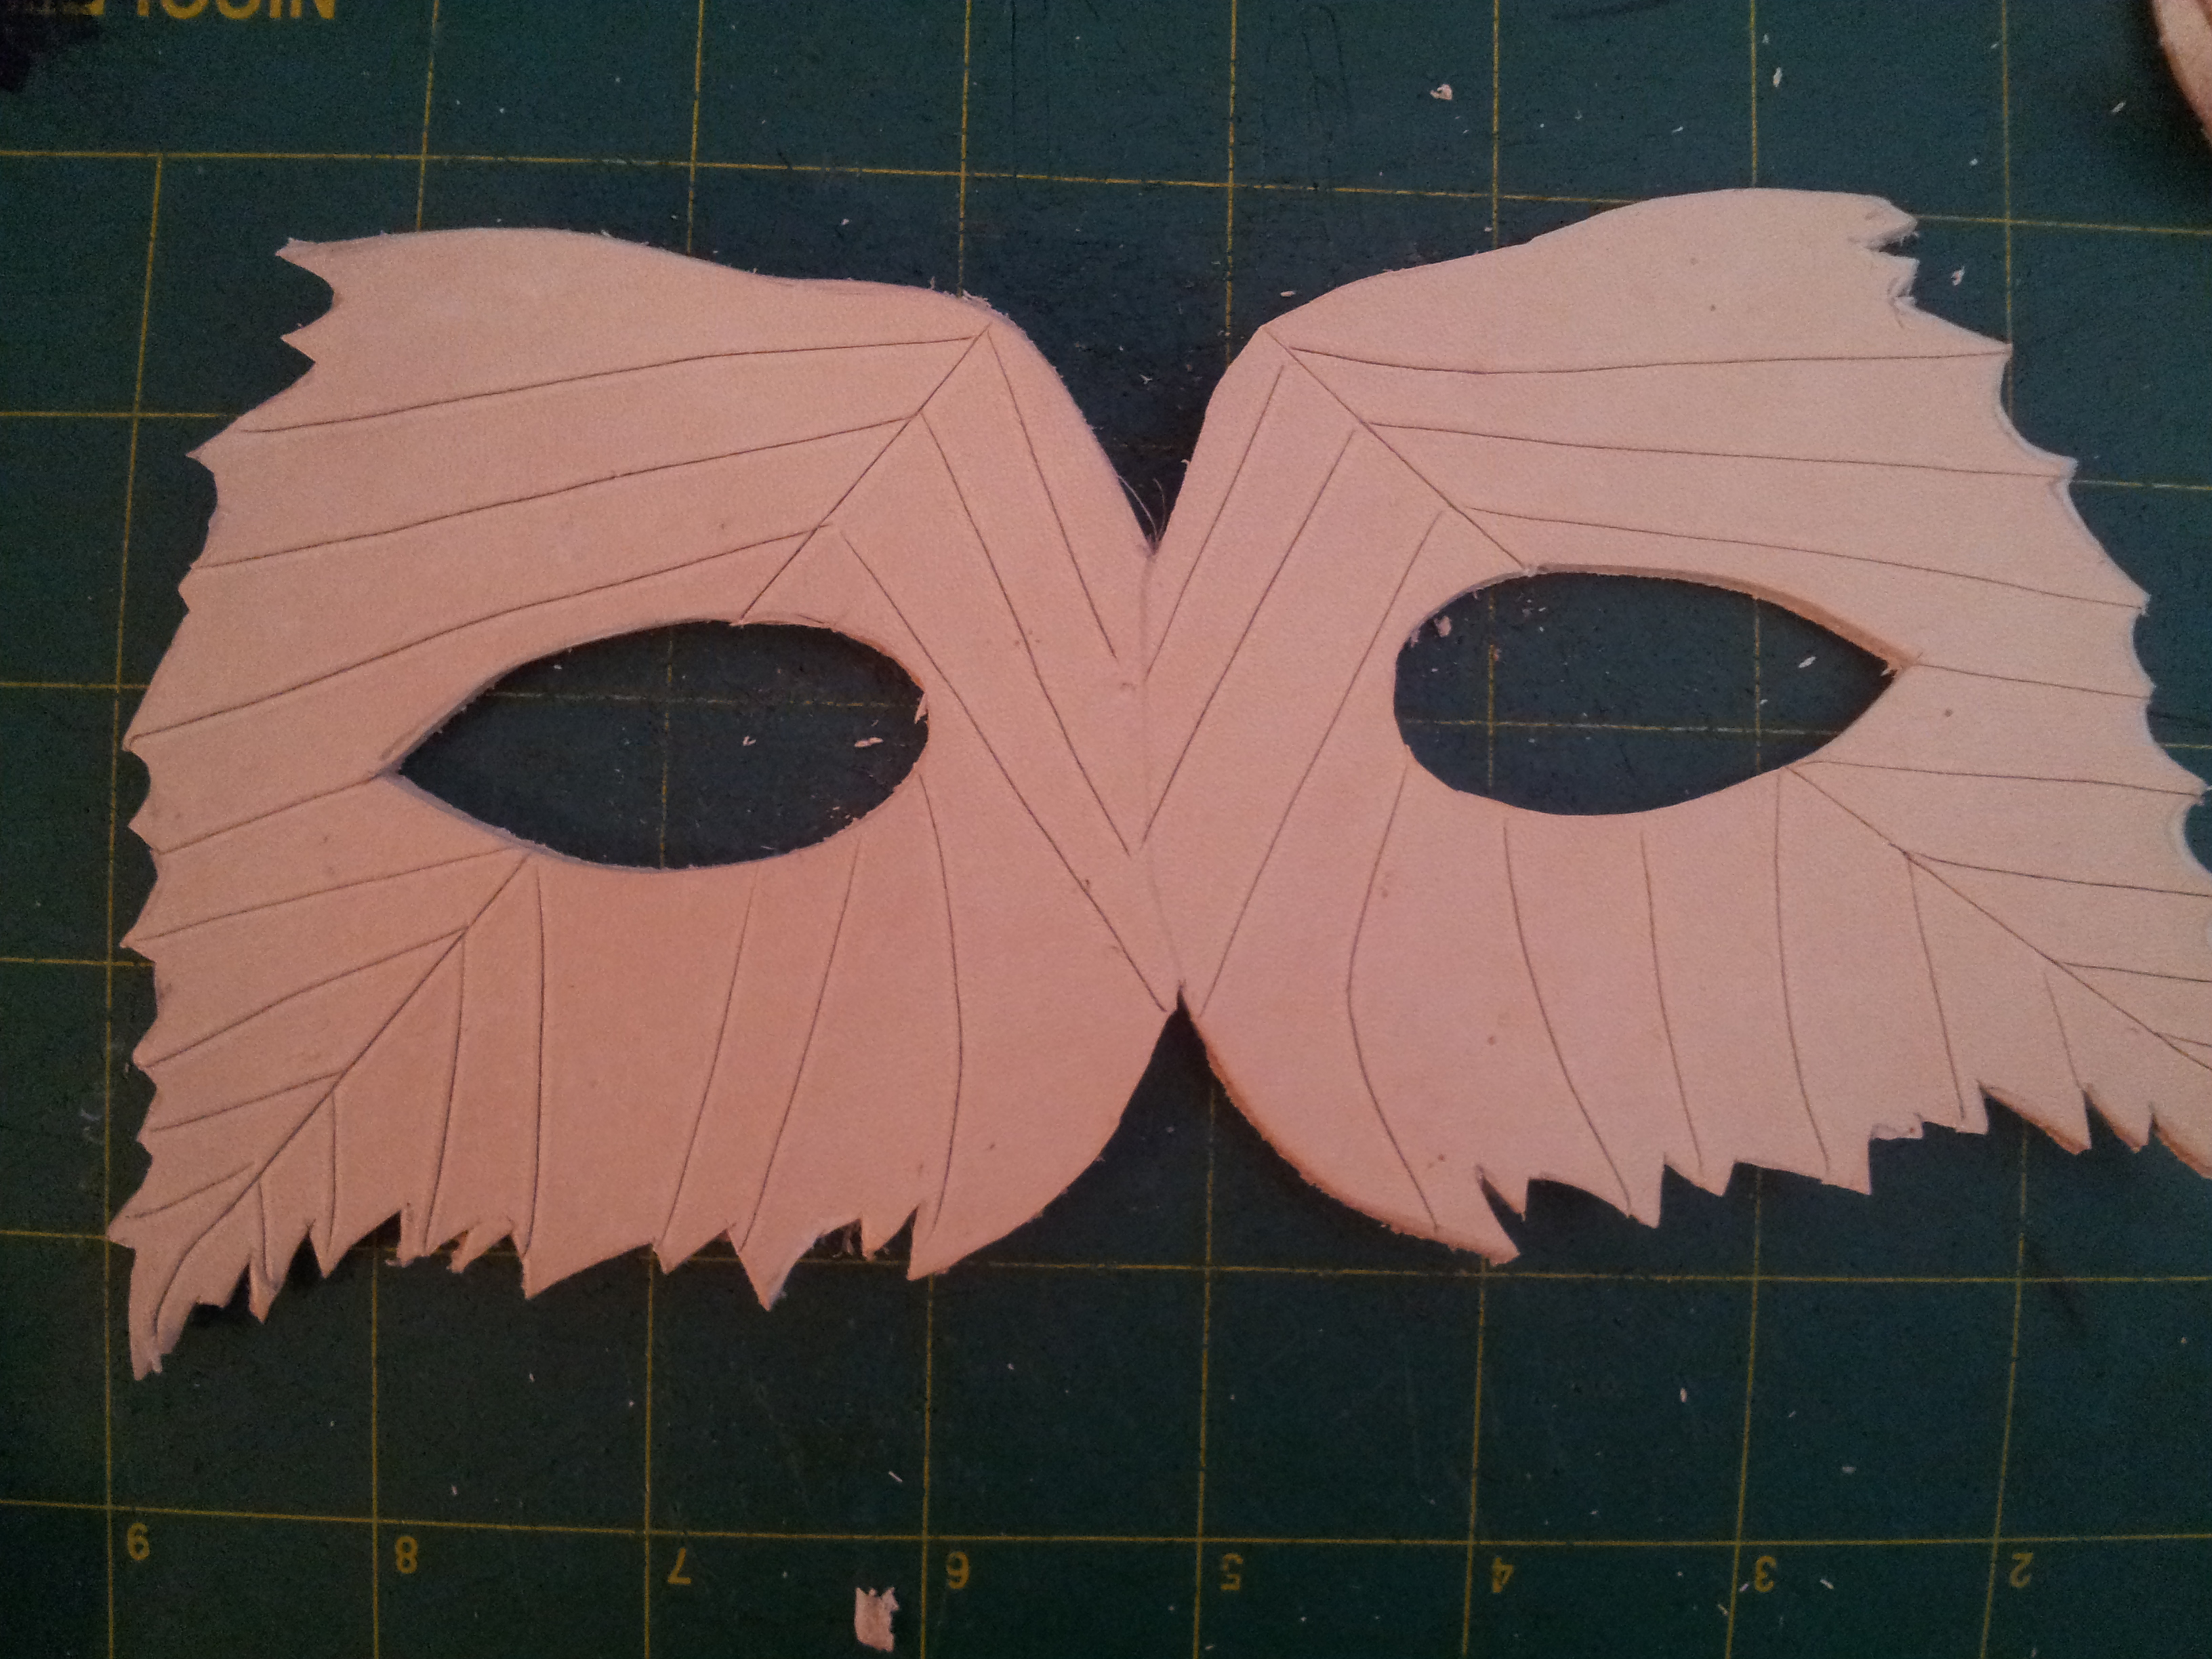
Trace your mask half template onto the leather, and then flip the template on the center line and trace again. this will give you a symmetrical mask.
Next trace 3 leaves onto the leather.
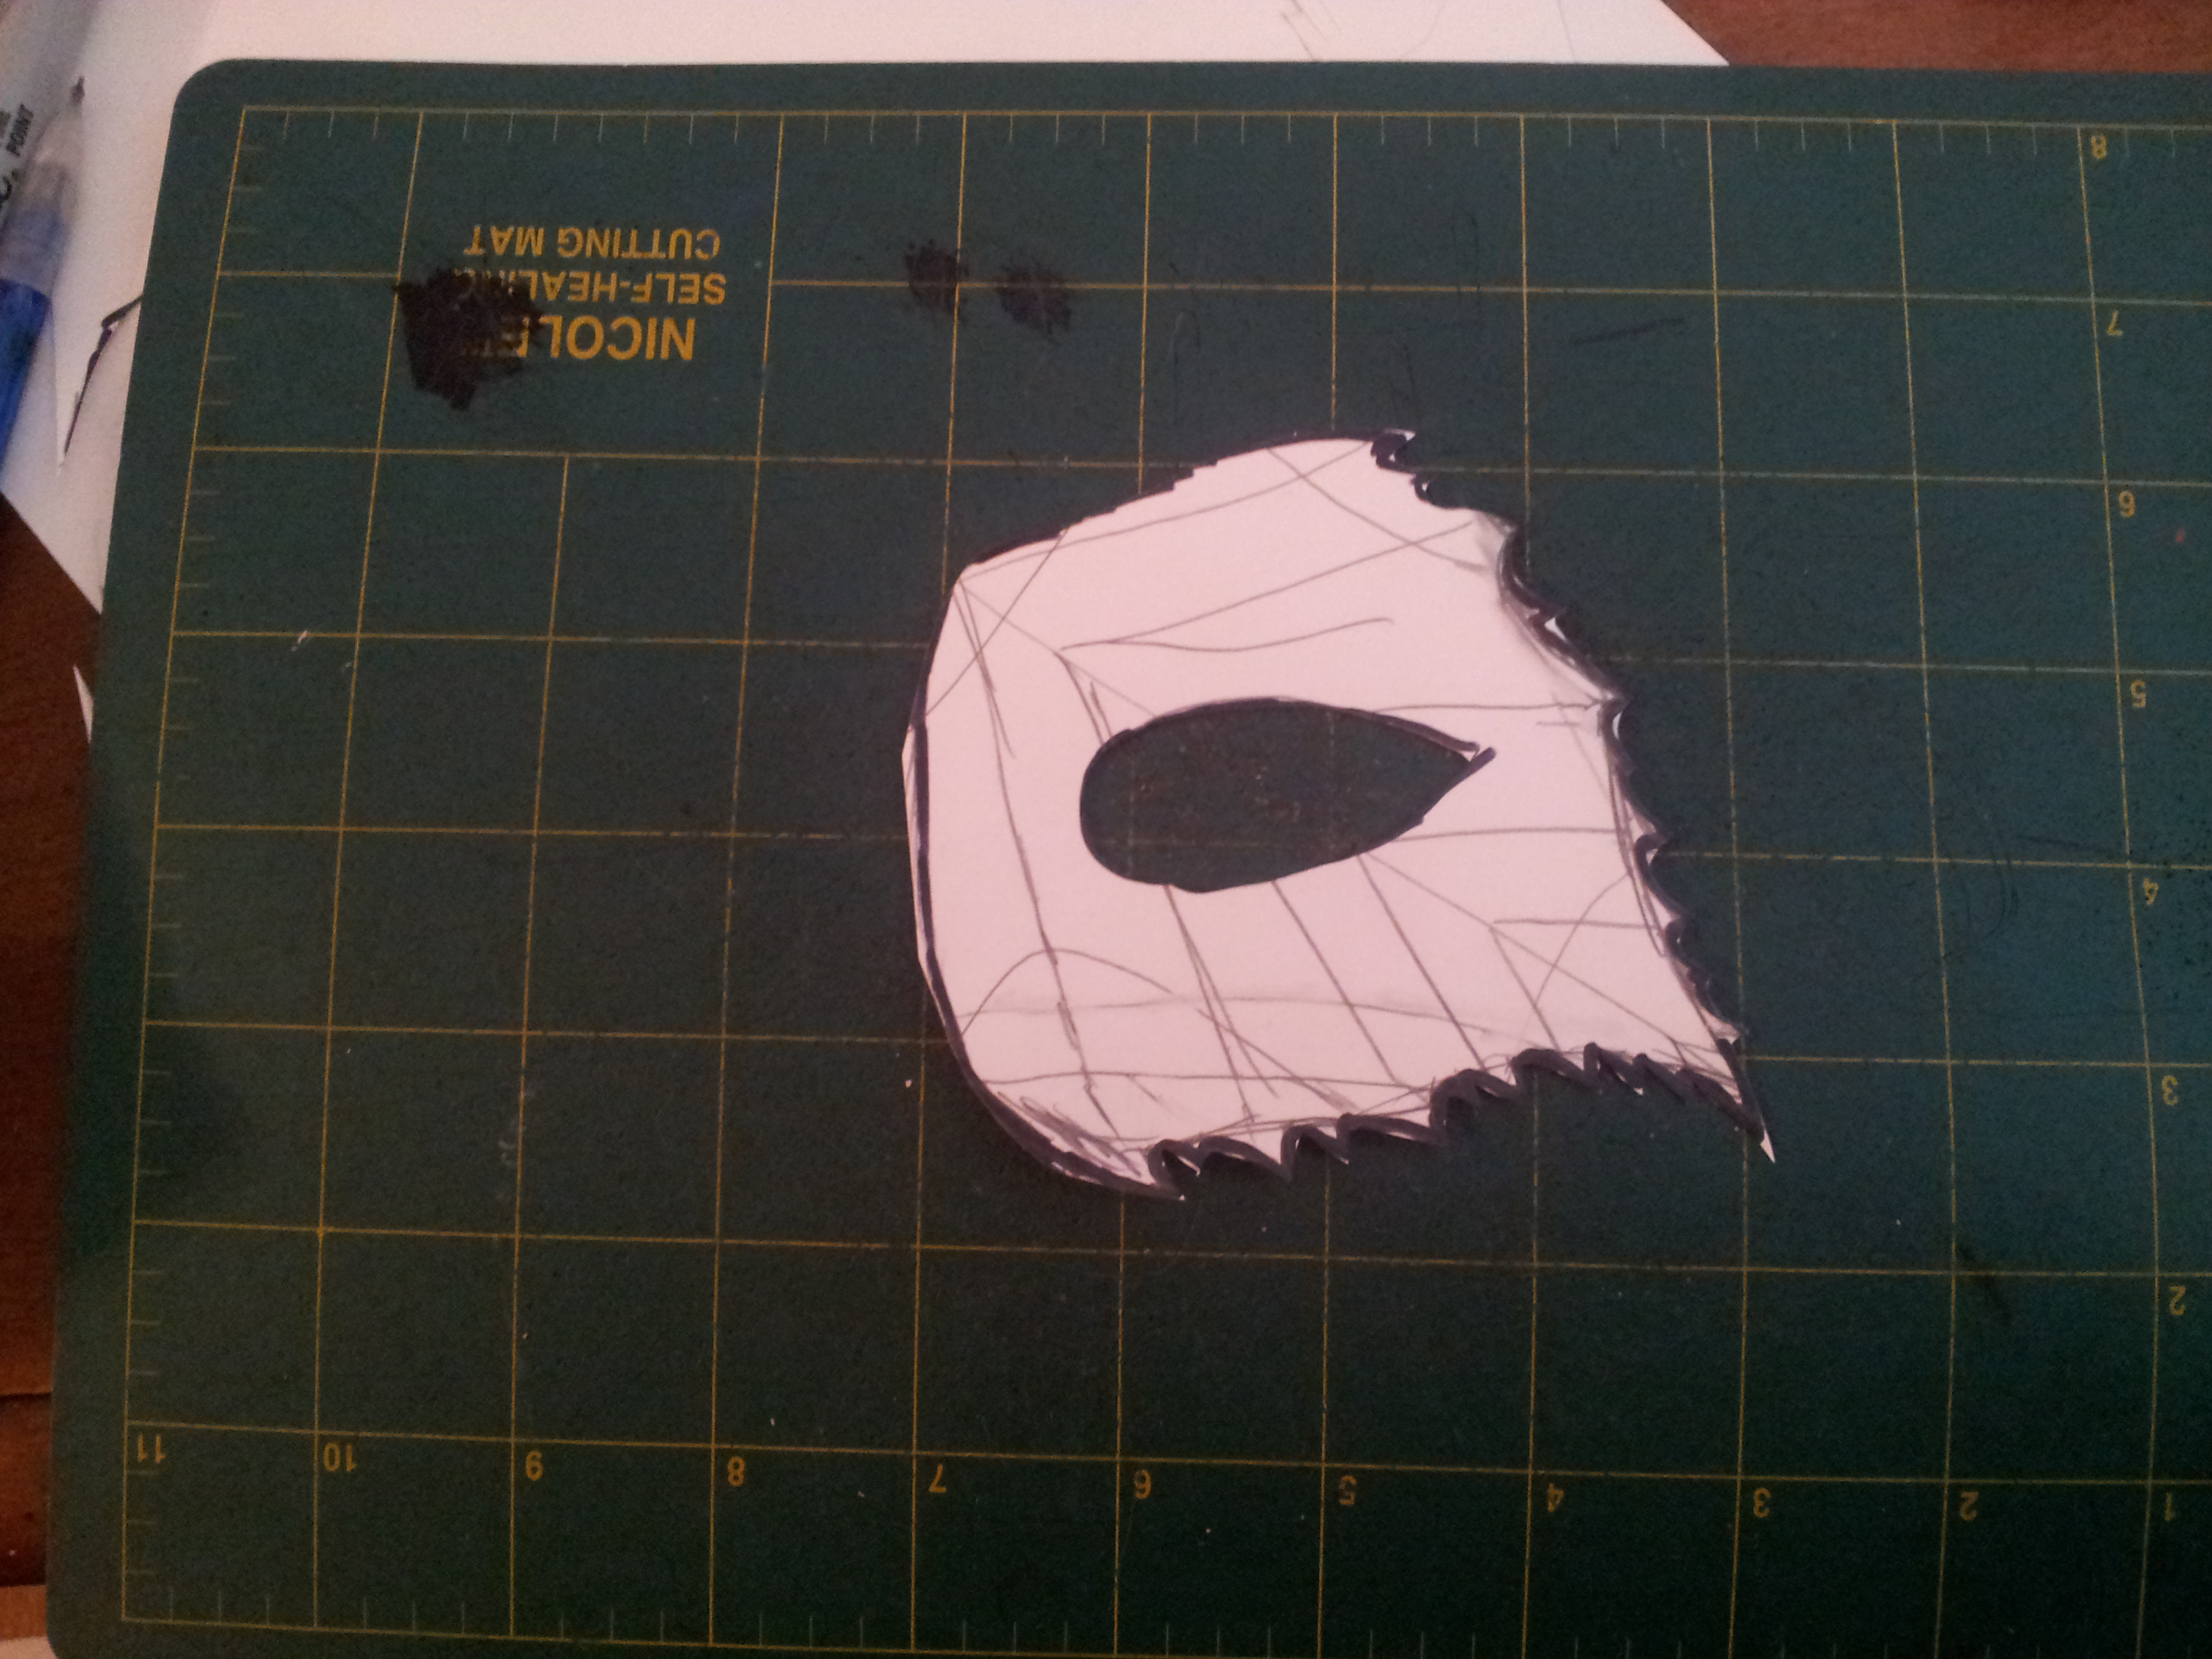
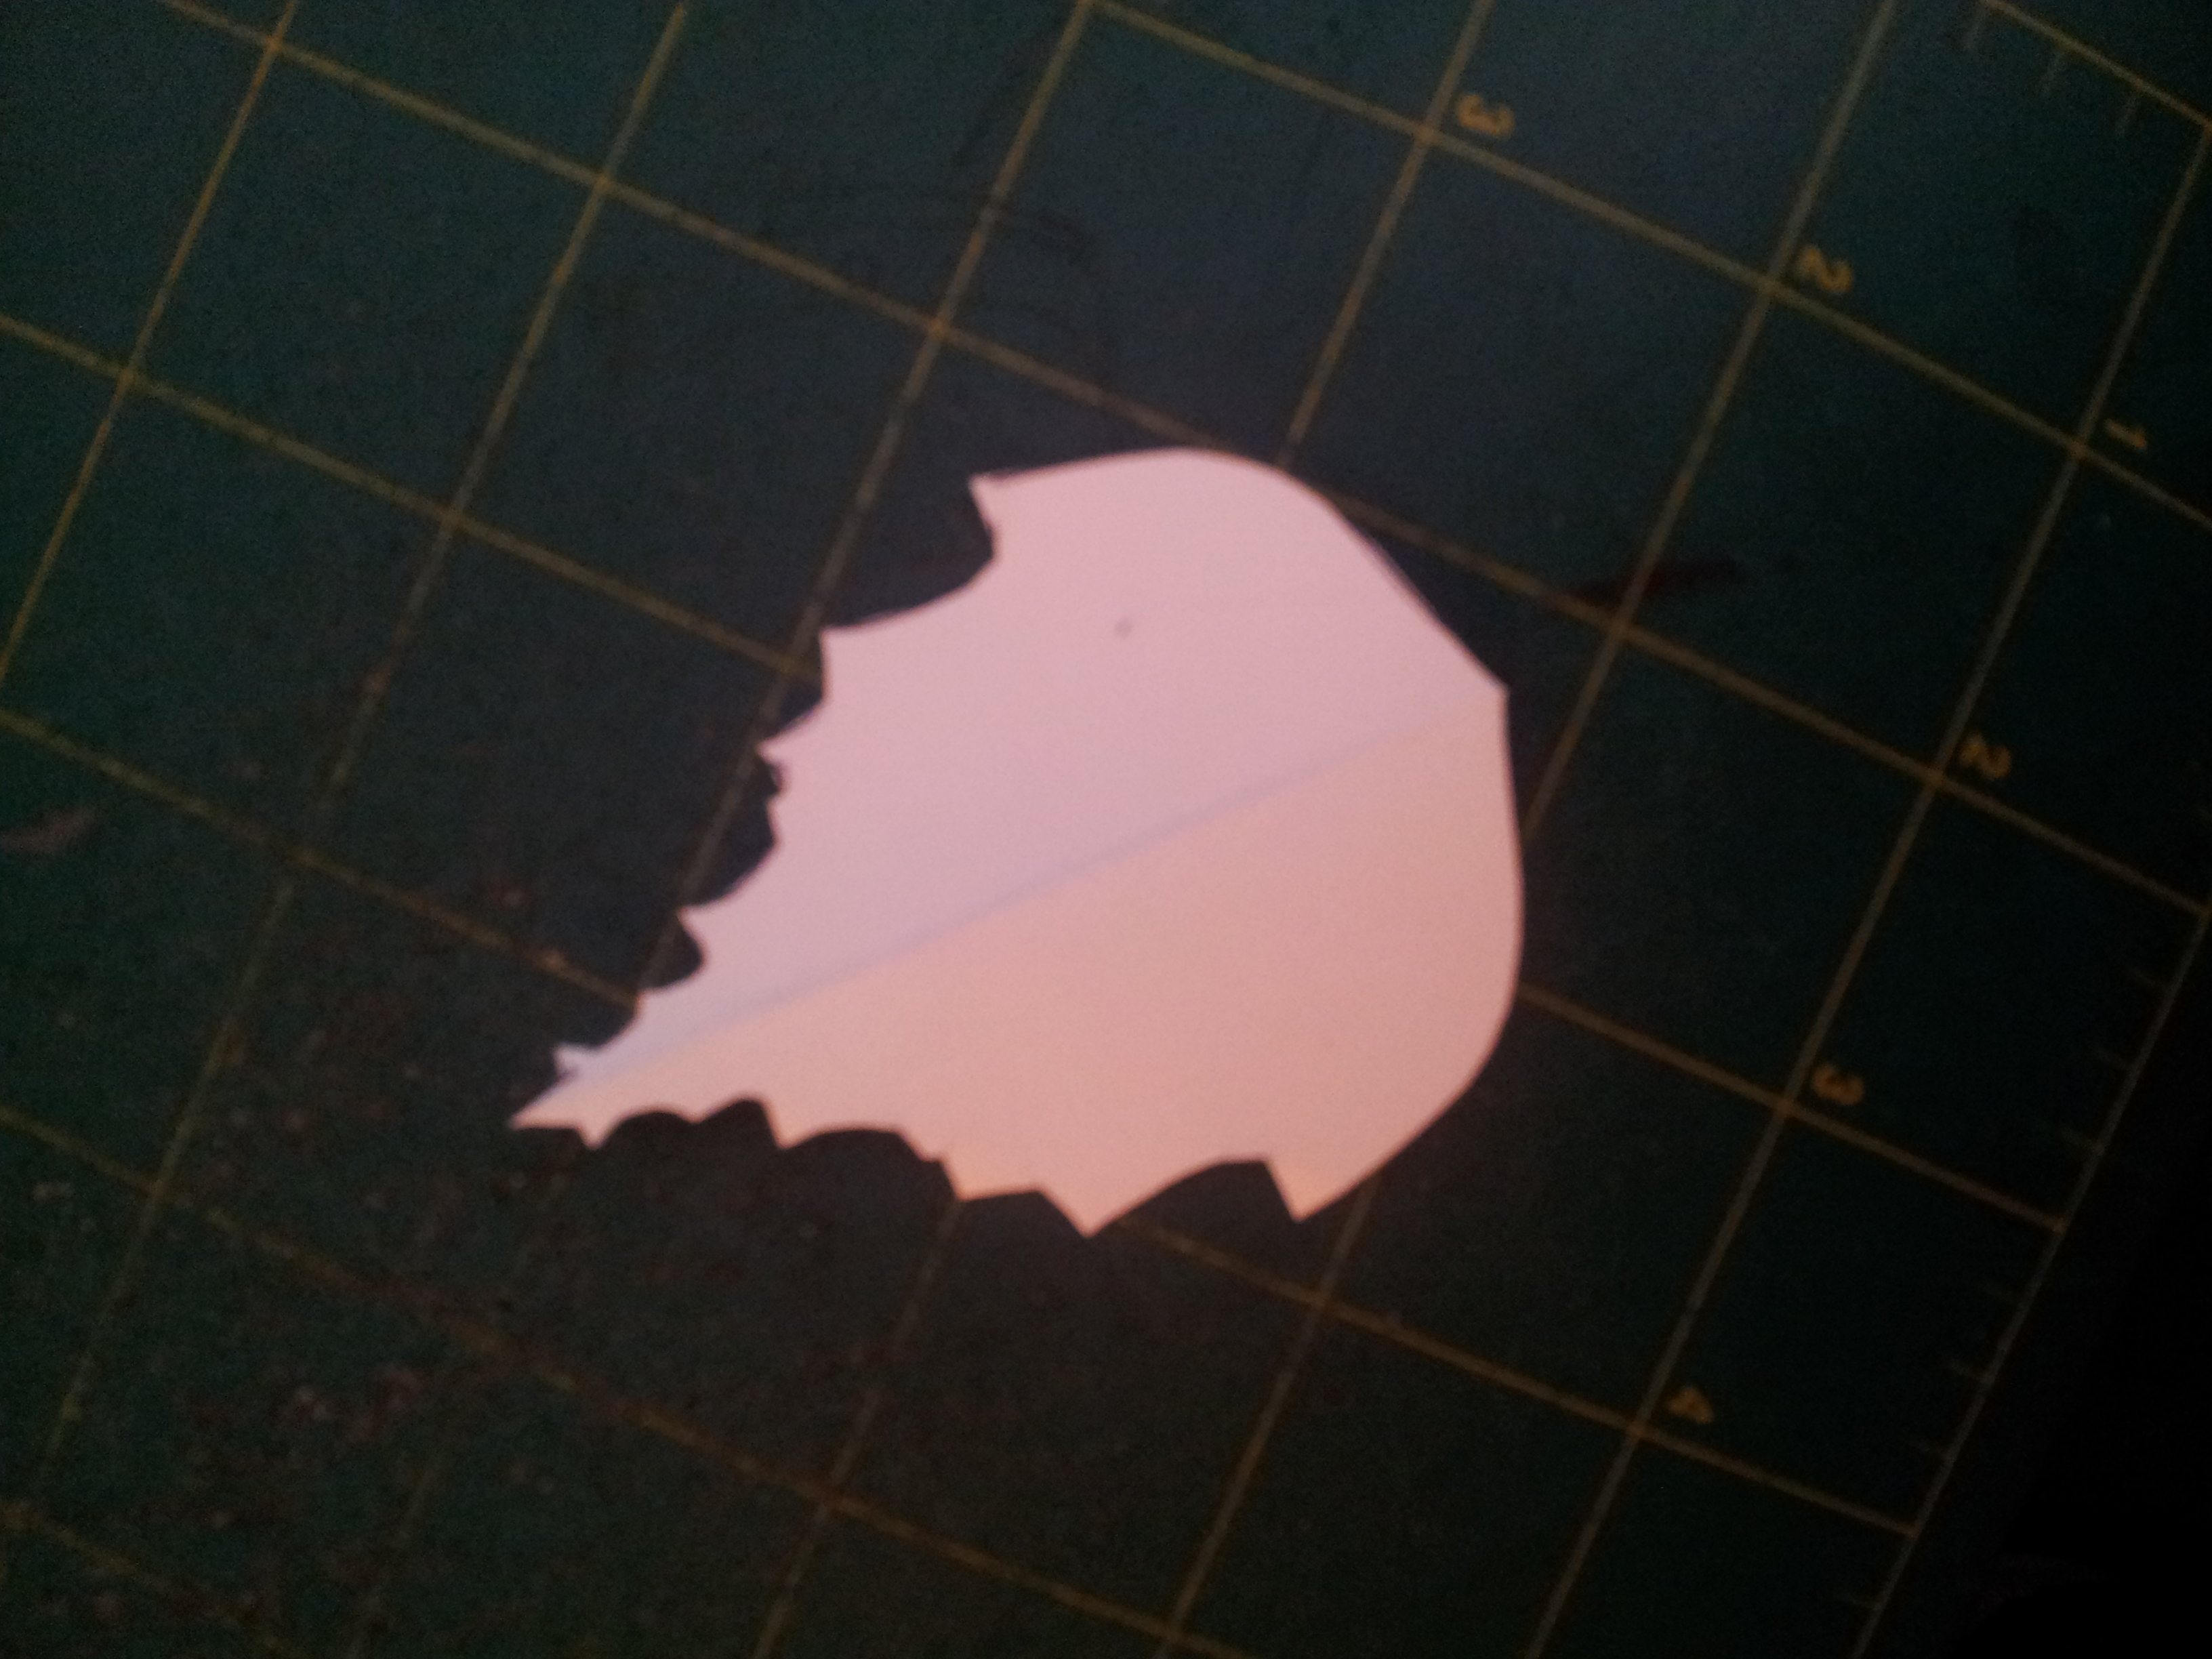
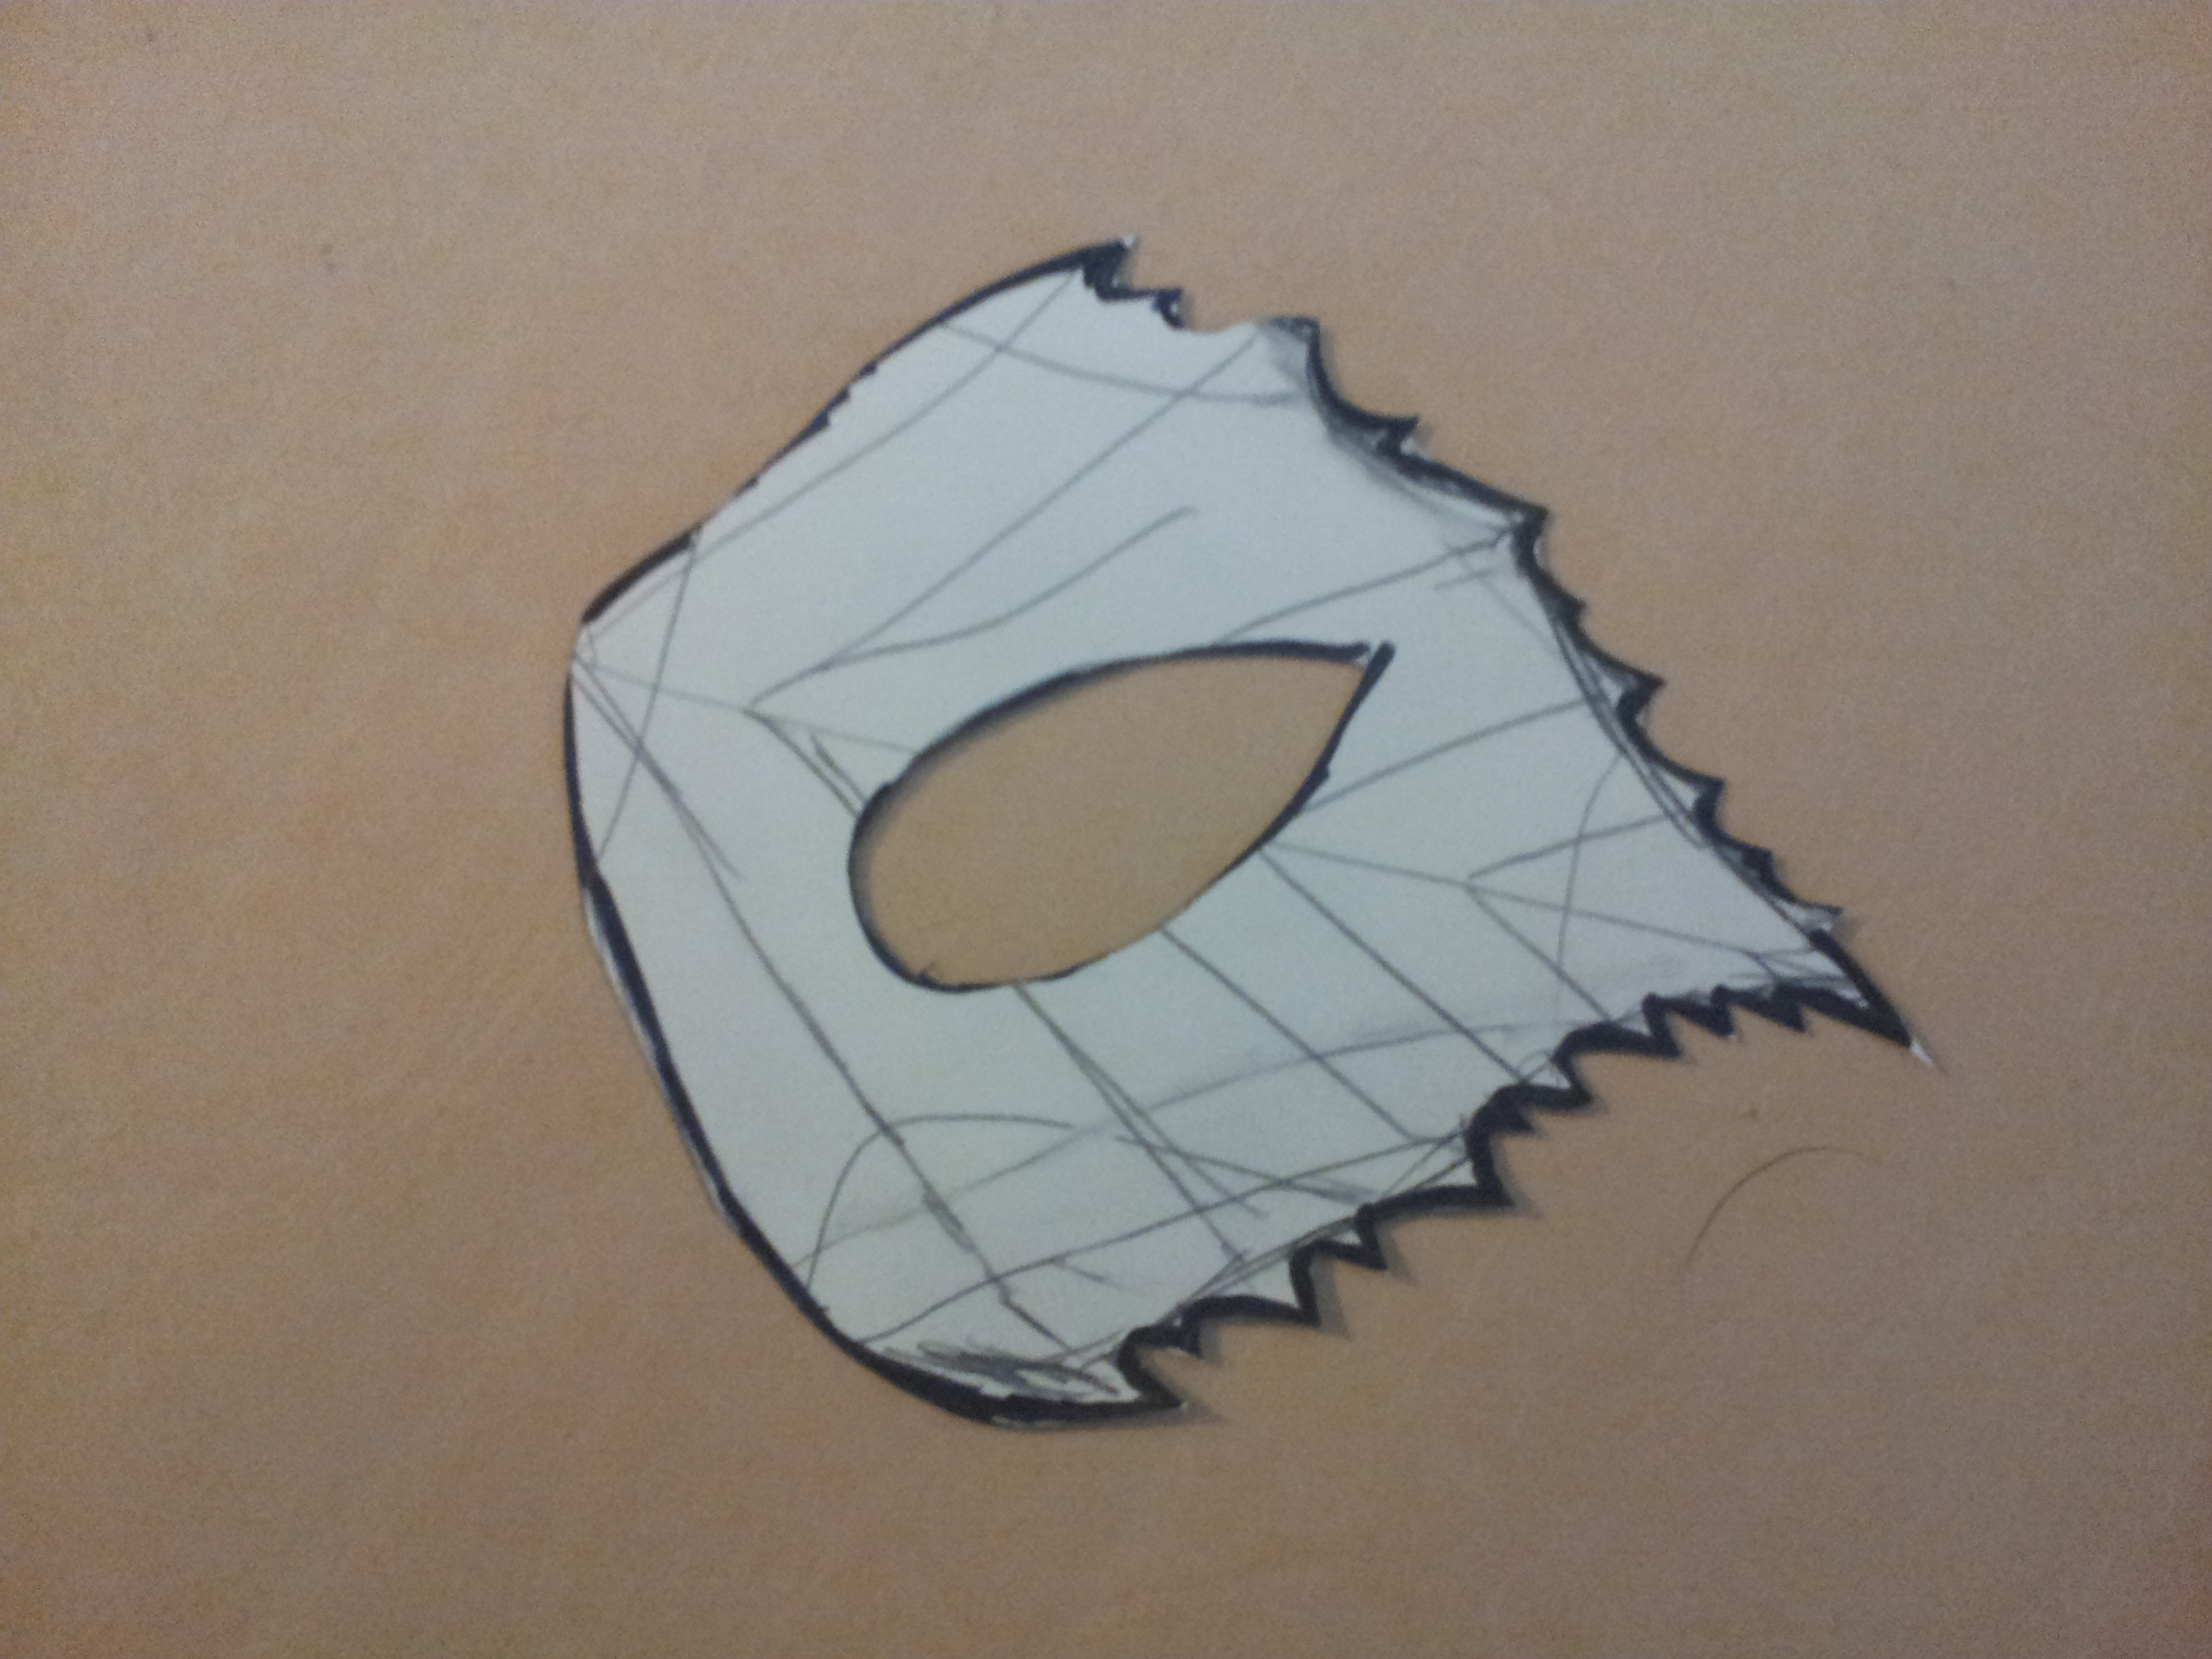
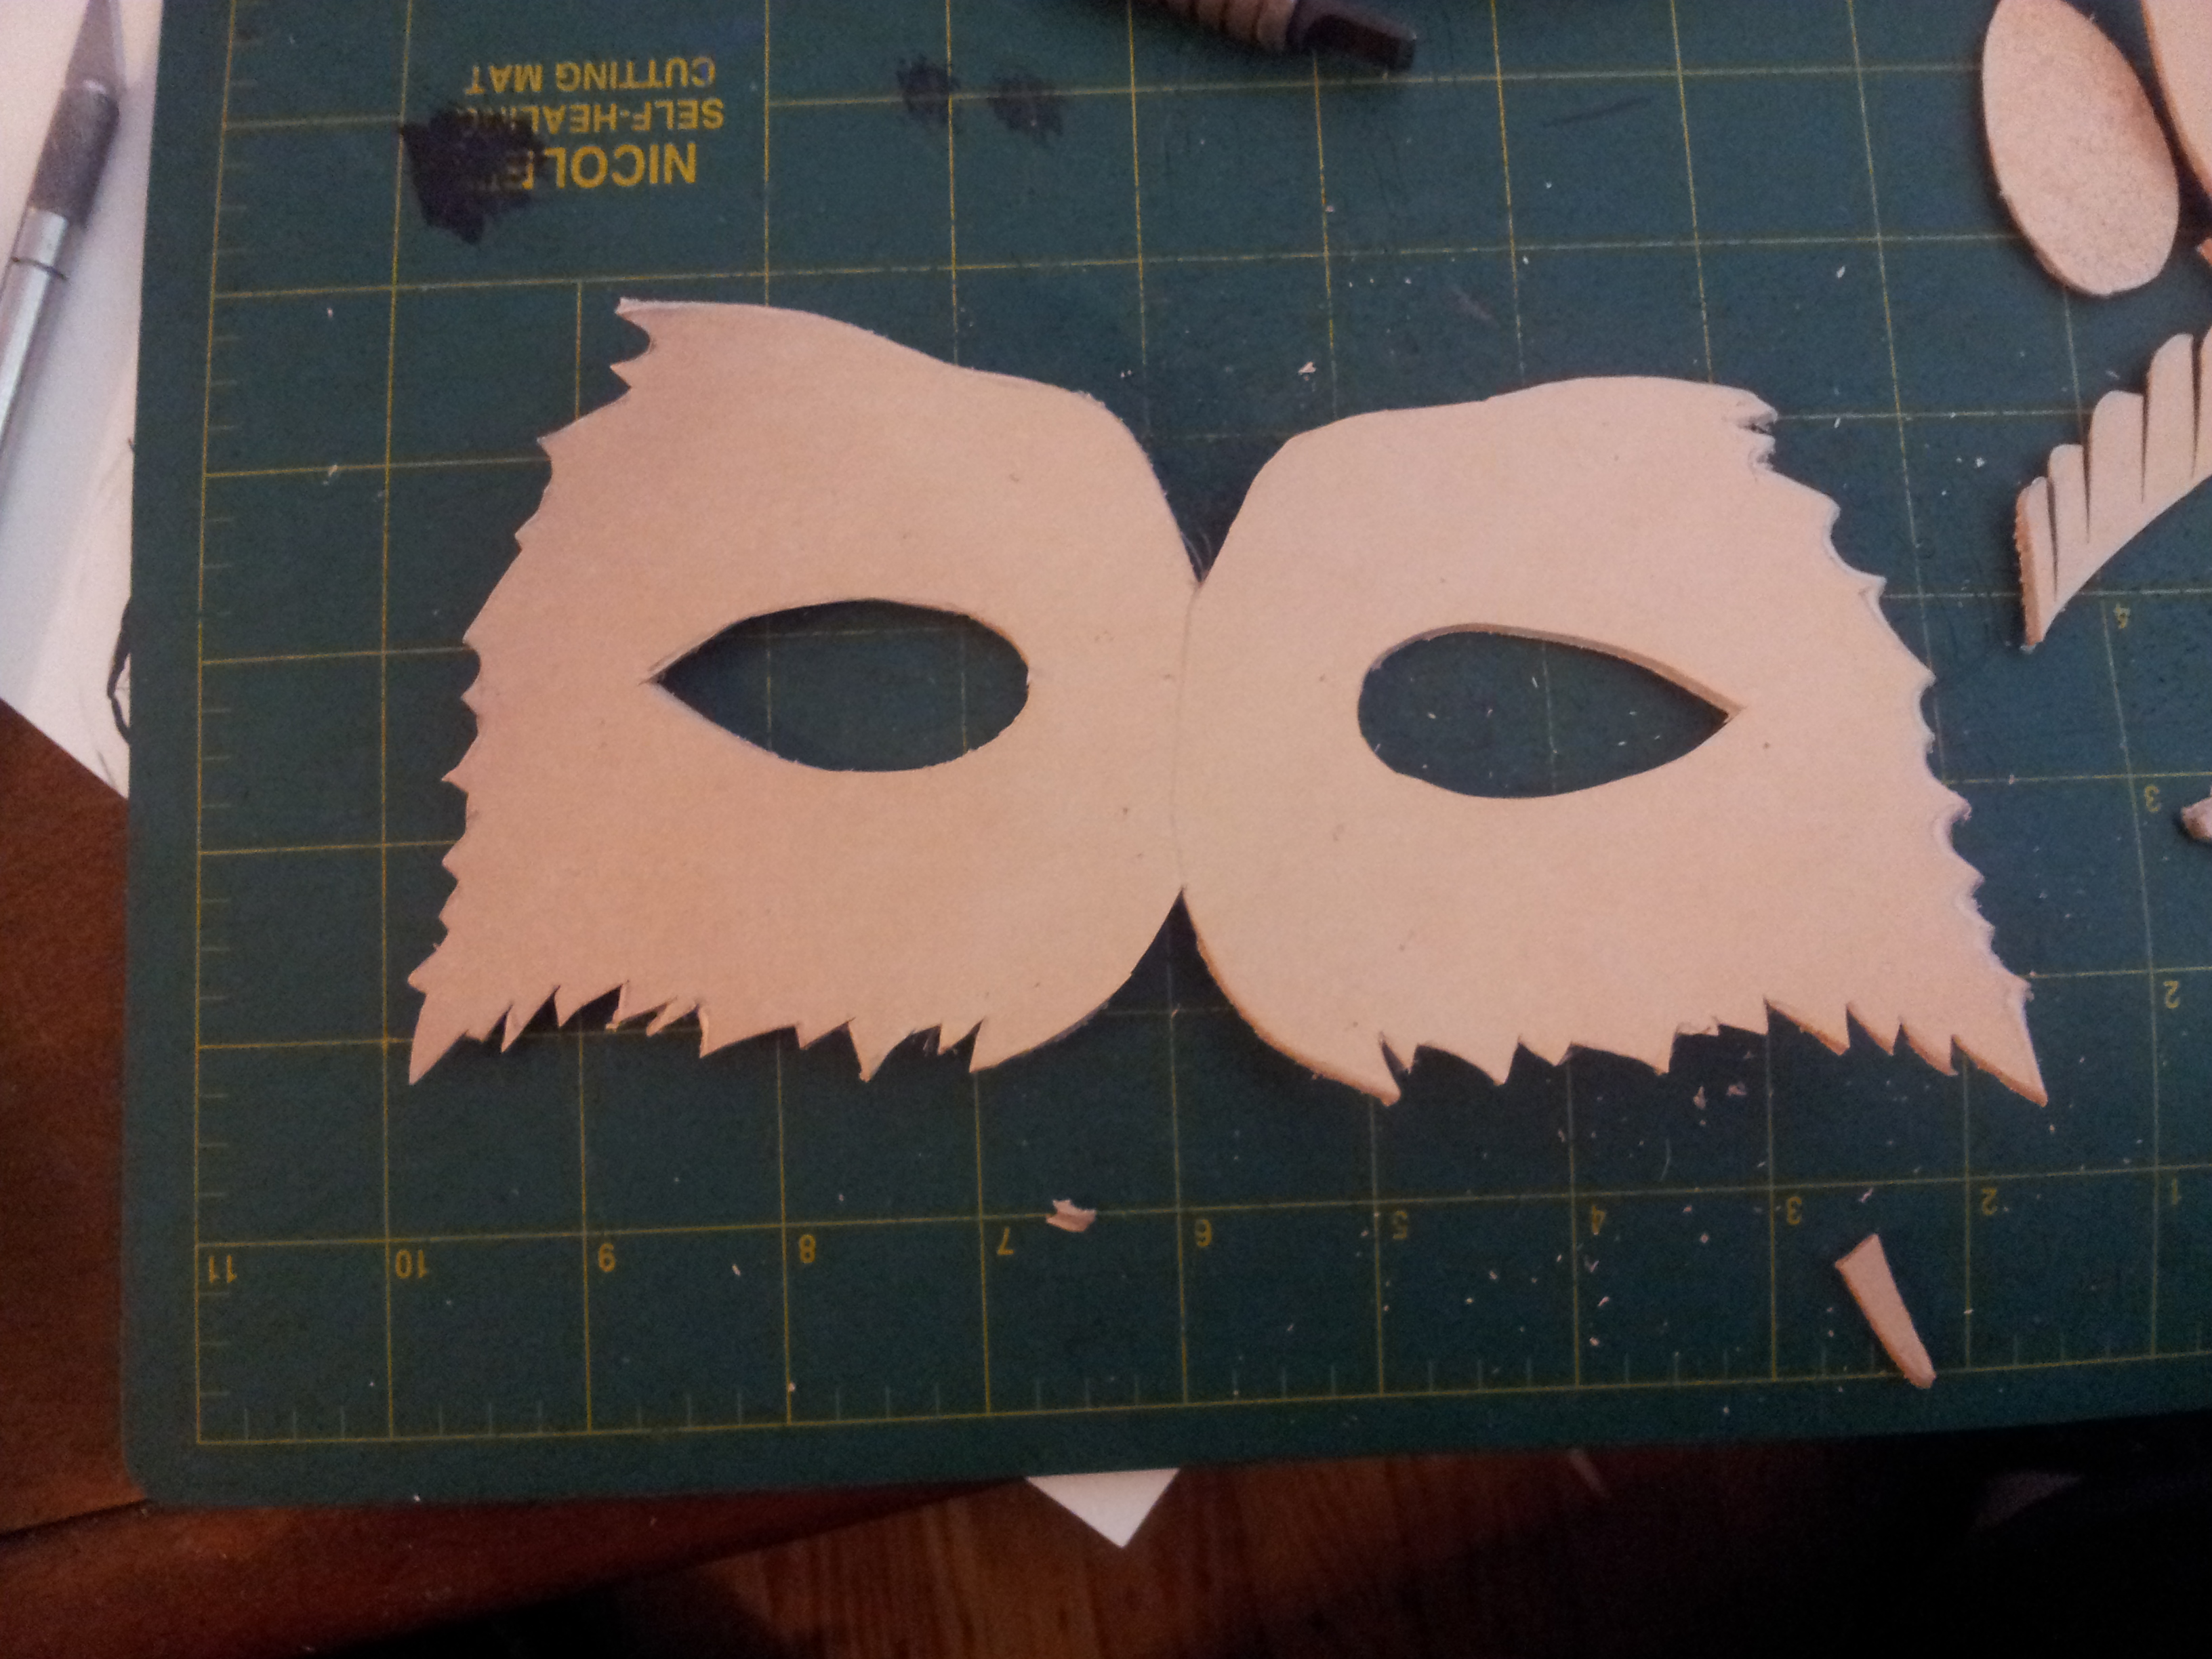
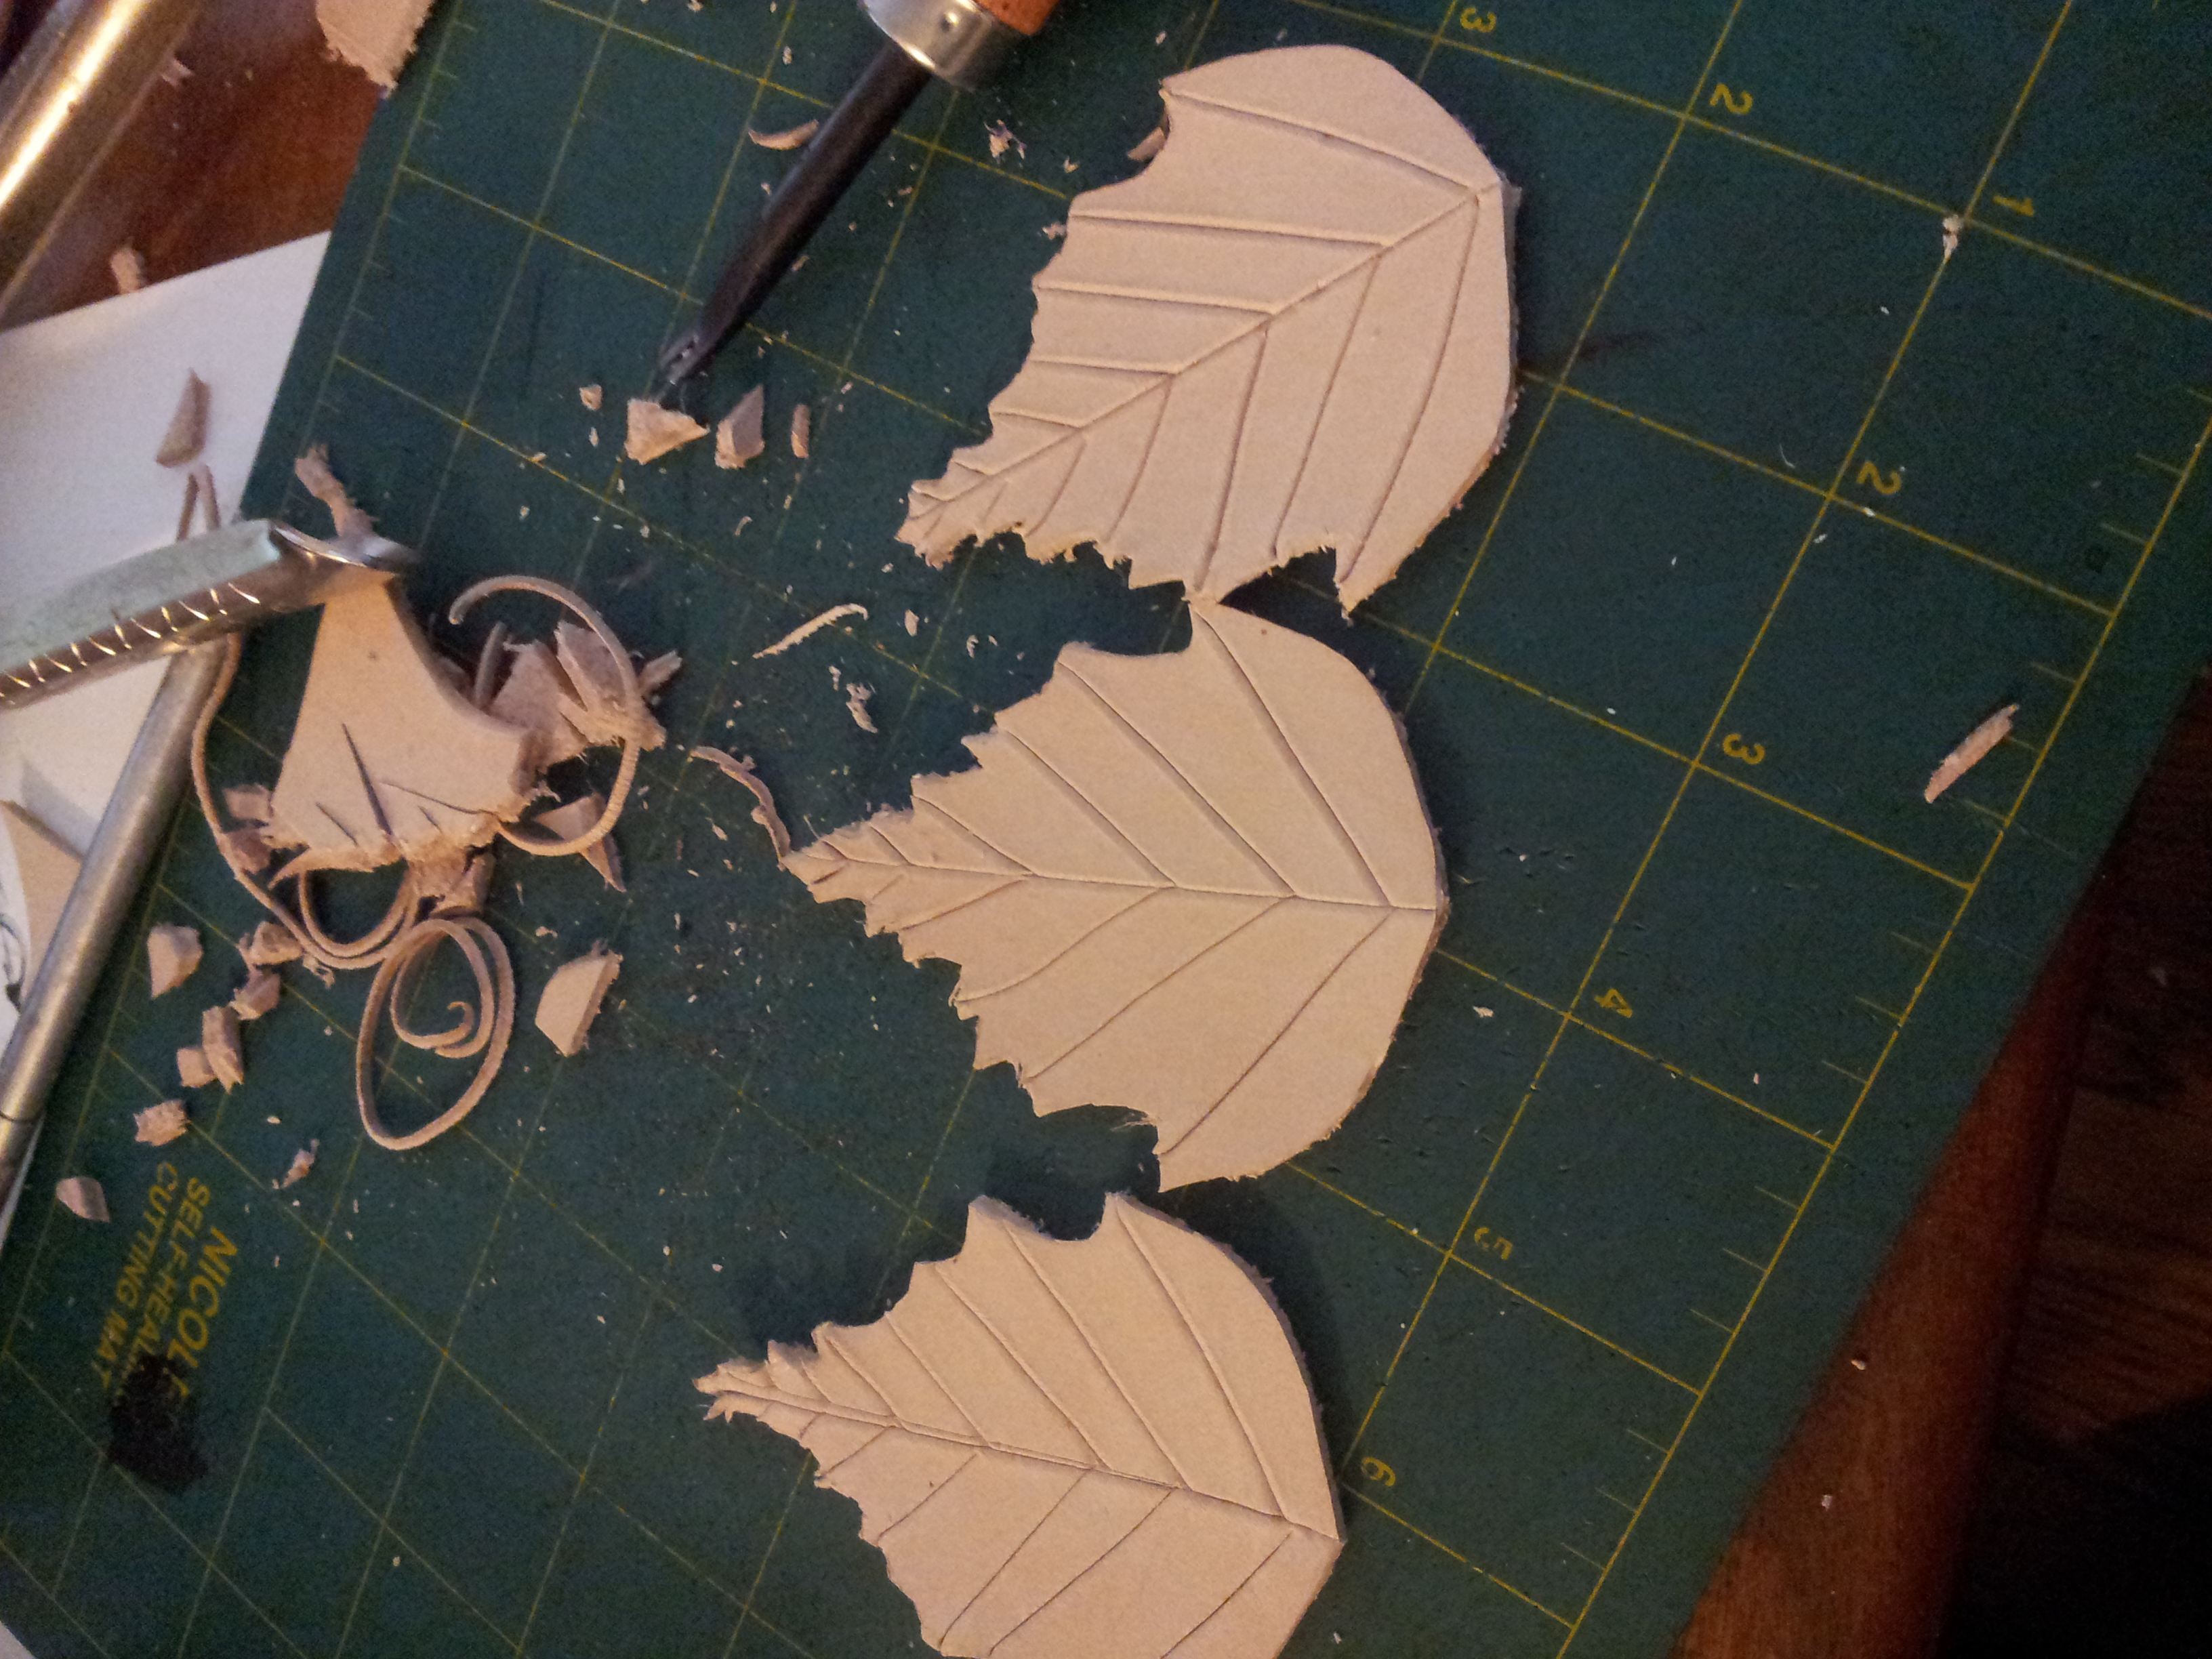
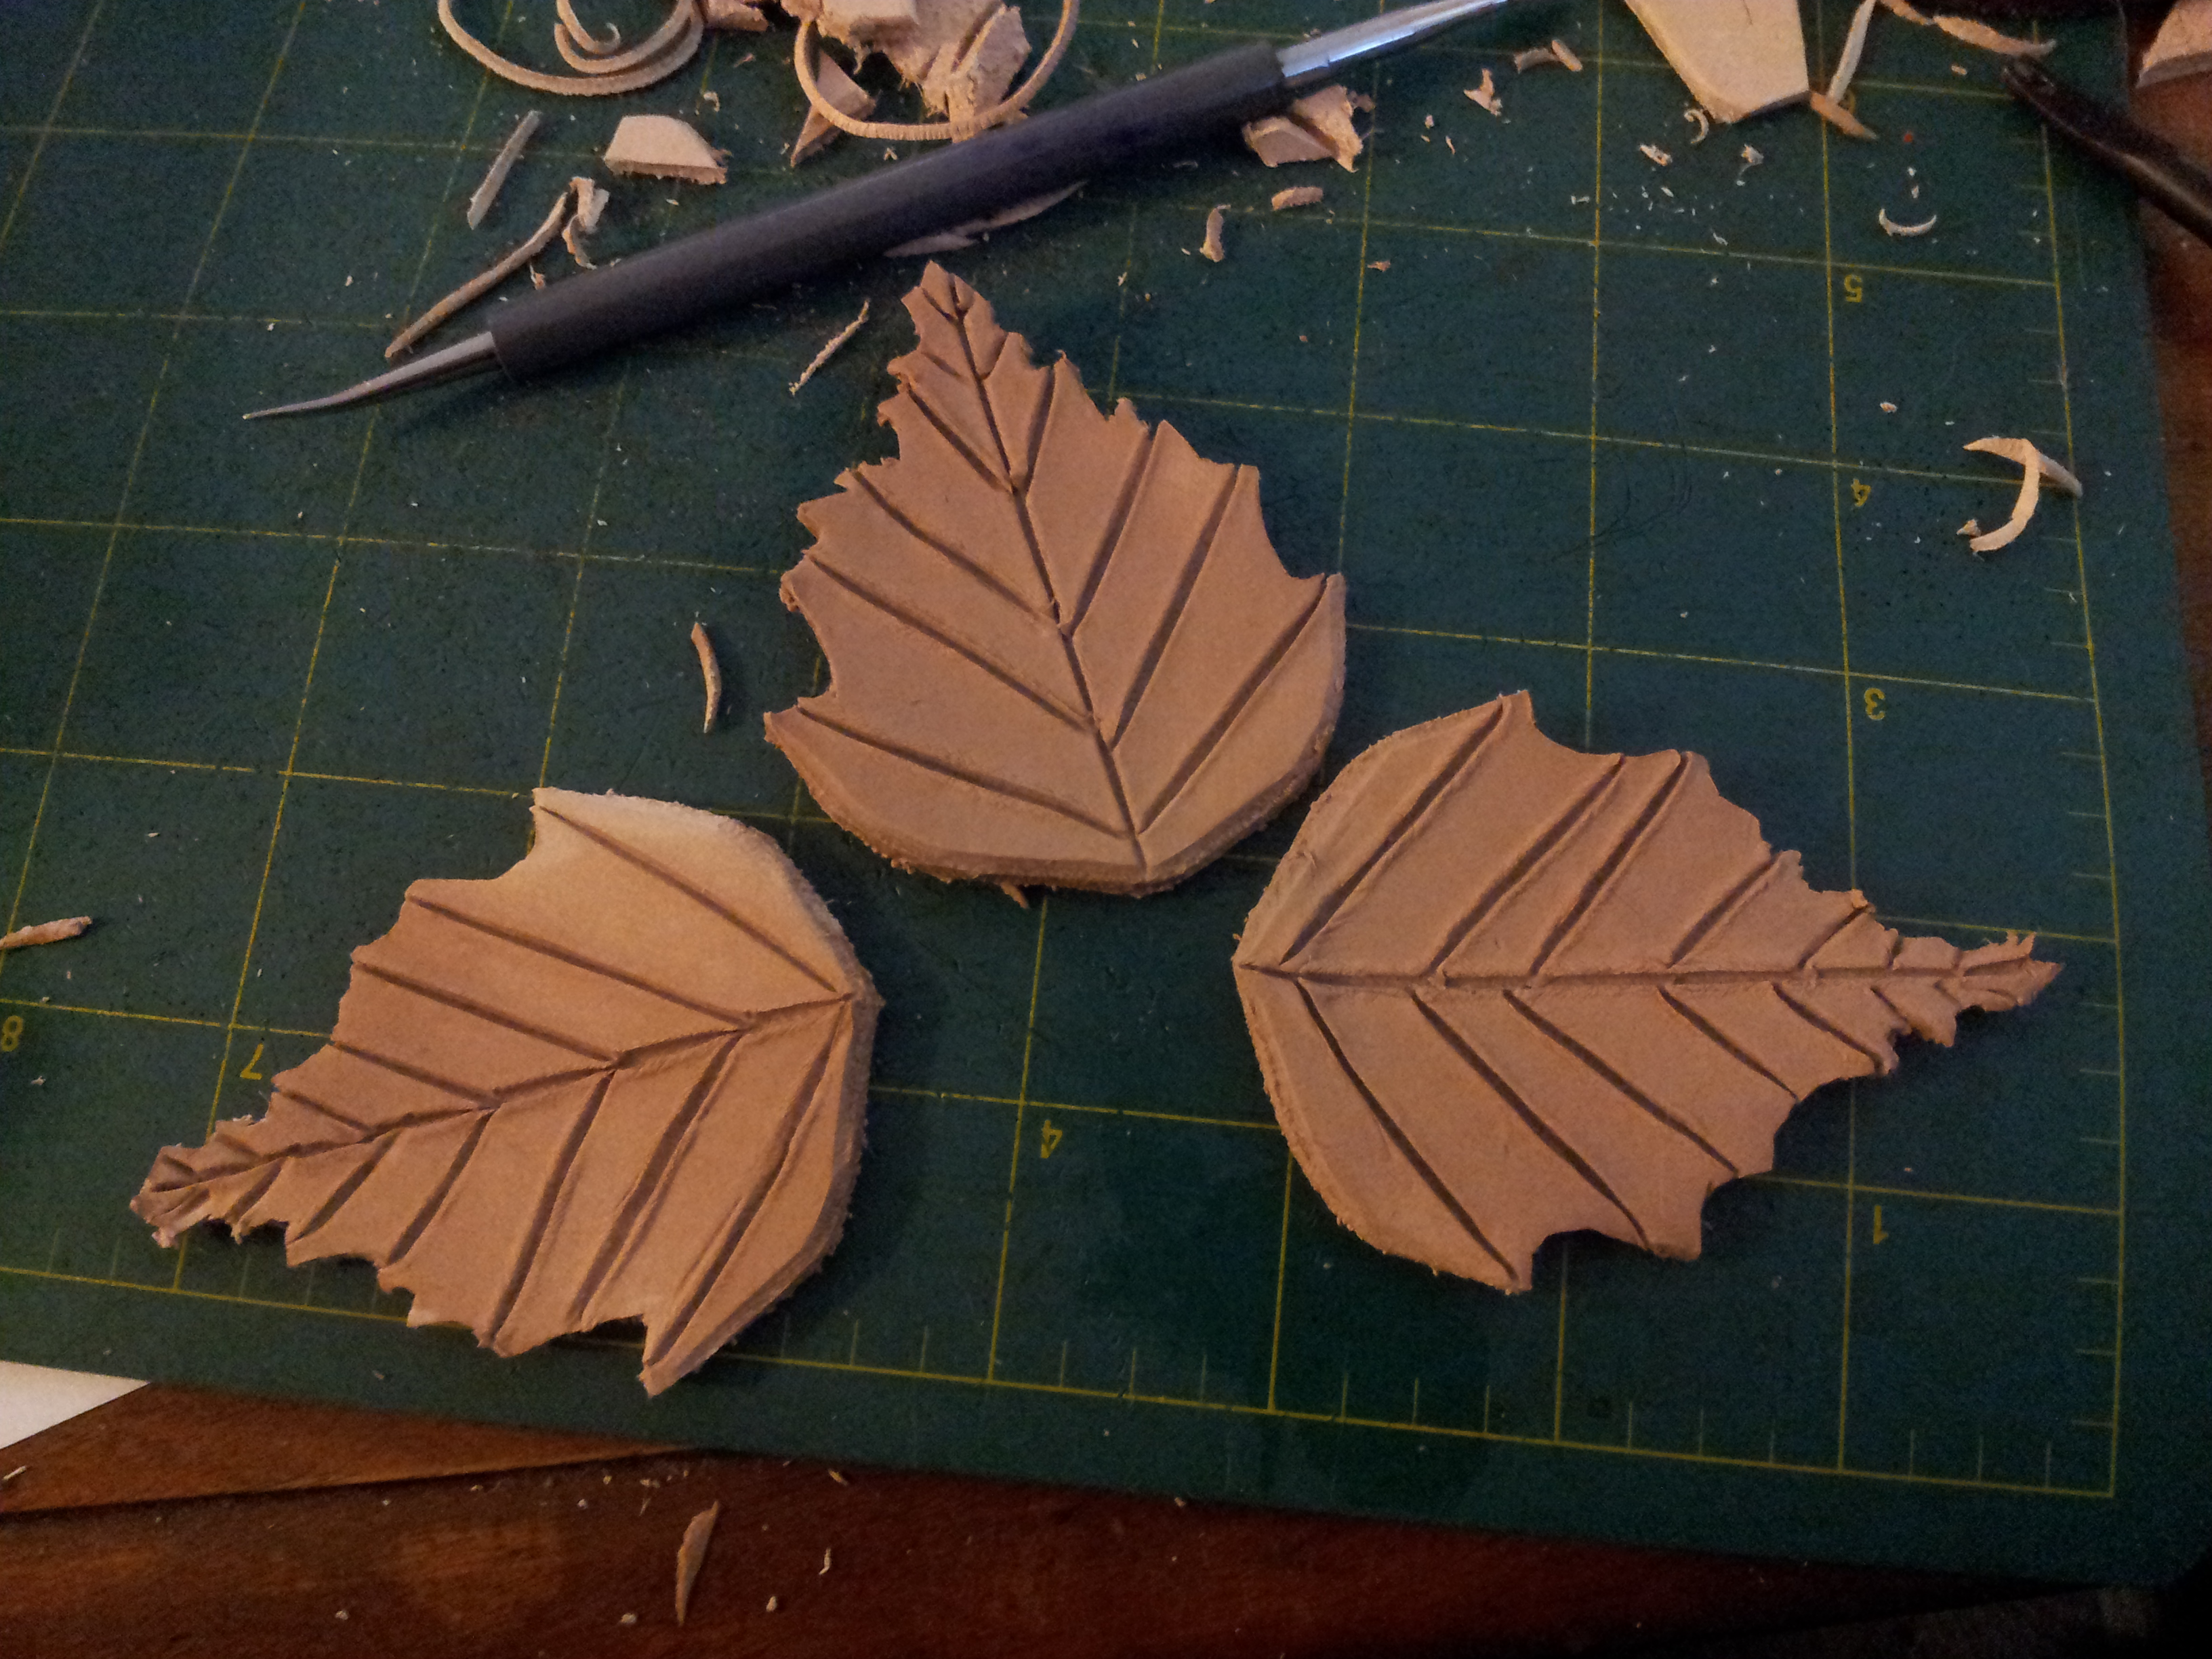
Cut out the mask and the leaves using your shears and x-acto knife
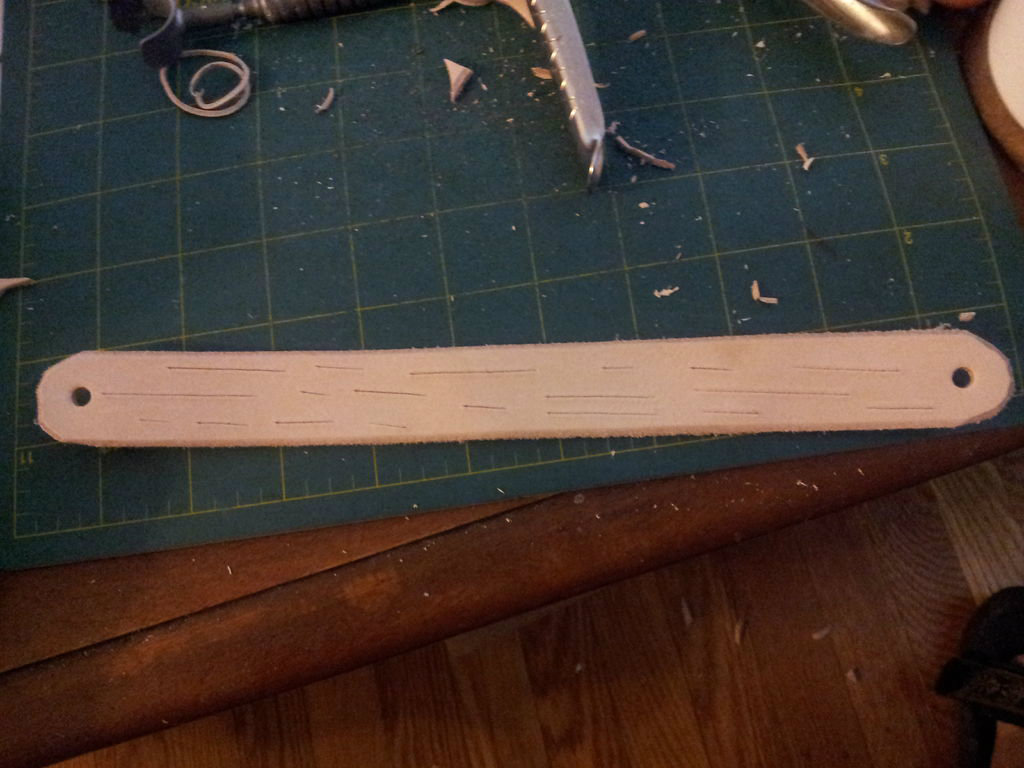
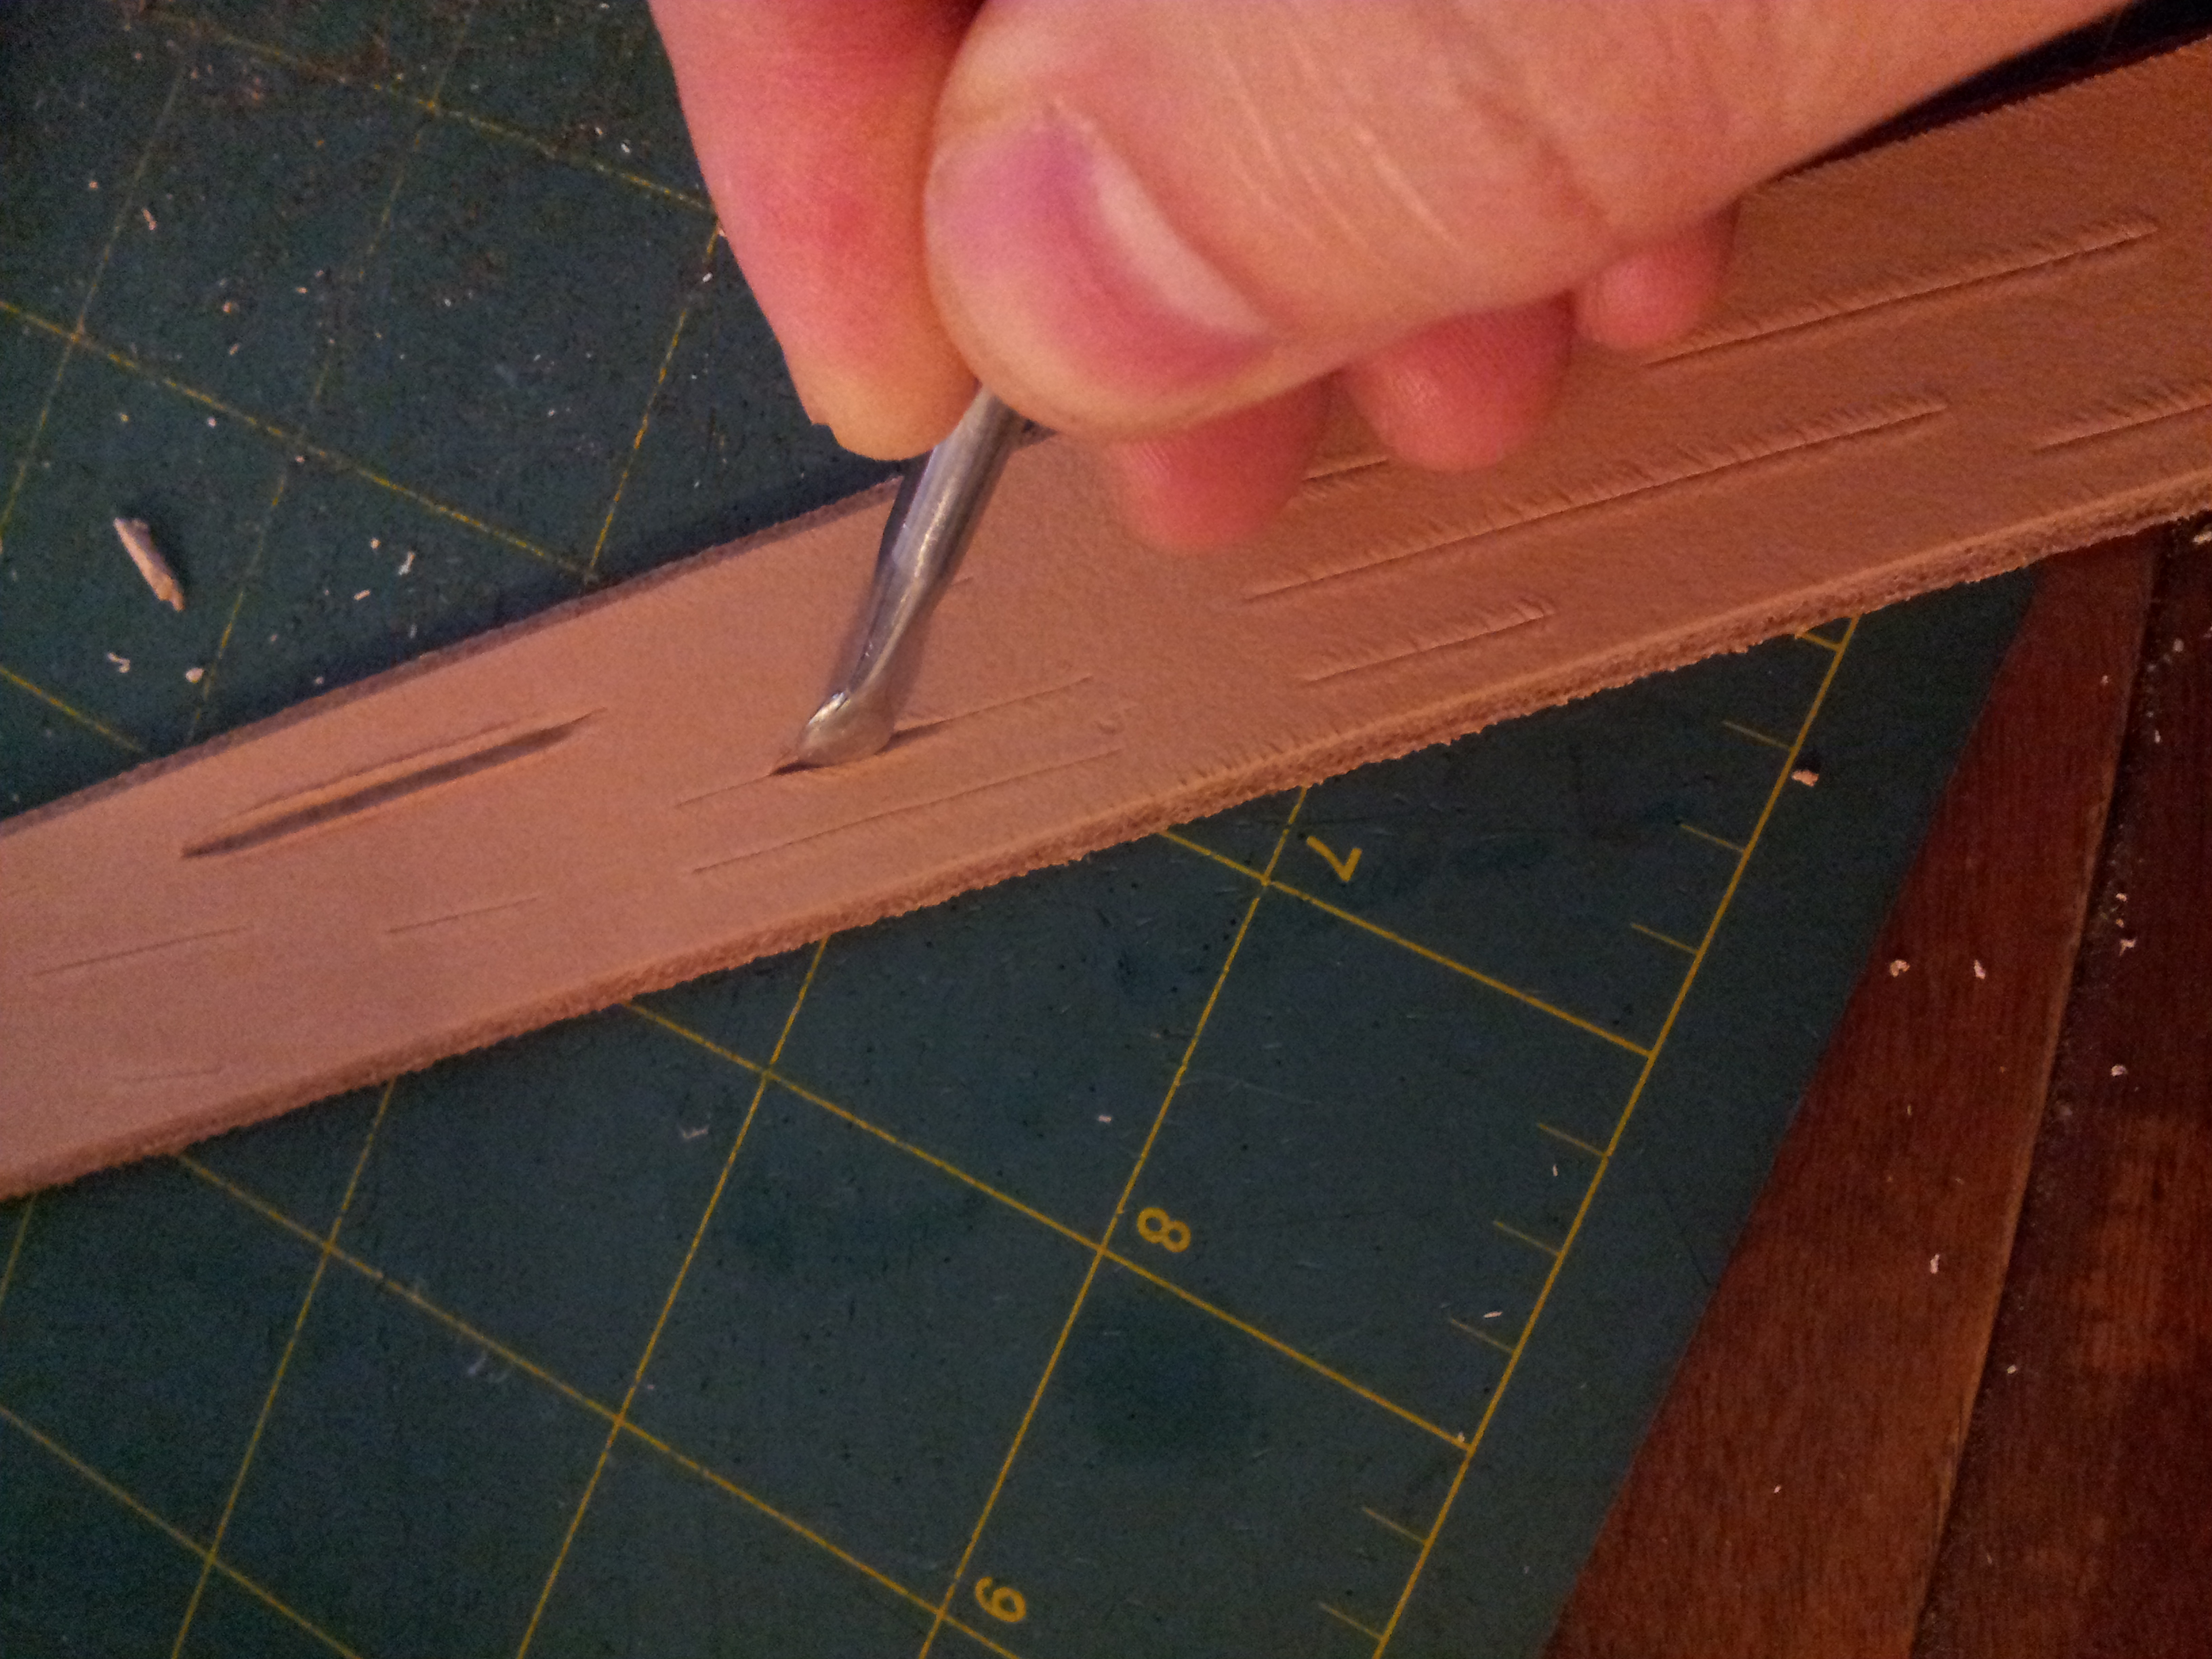
Finally cut a 1" wide by 10" long strip of leather either using your ruler and x-acto knife, or using a strap cutter if you have one. Round off the edges with your shears, and punch holes about 1/2" from the end on both sides
Carve and Edge Your Leather
We are going to keep the carving simple for this Instructable.With masks, less often means more.
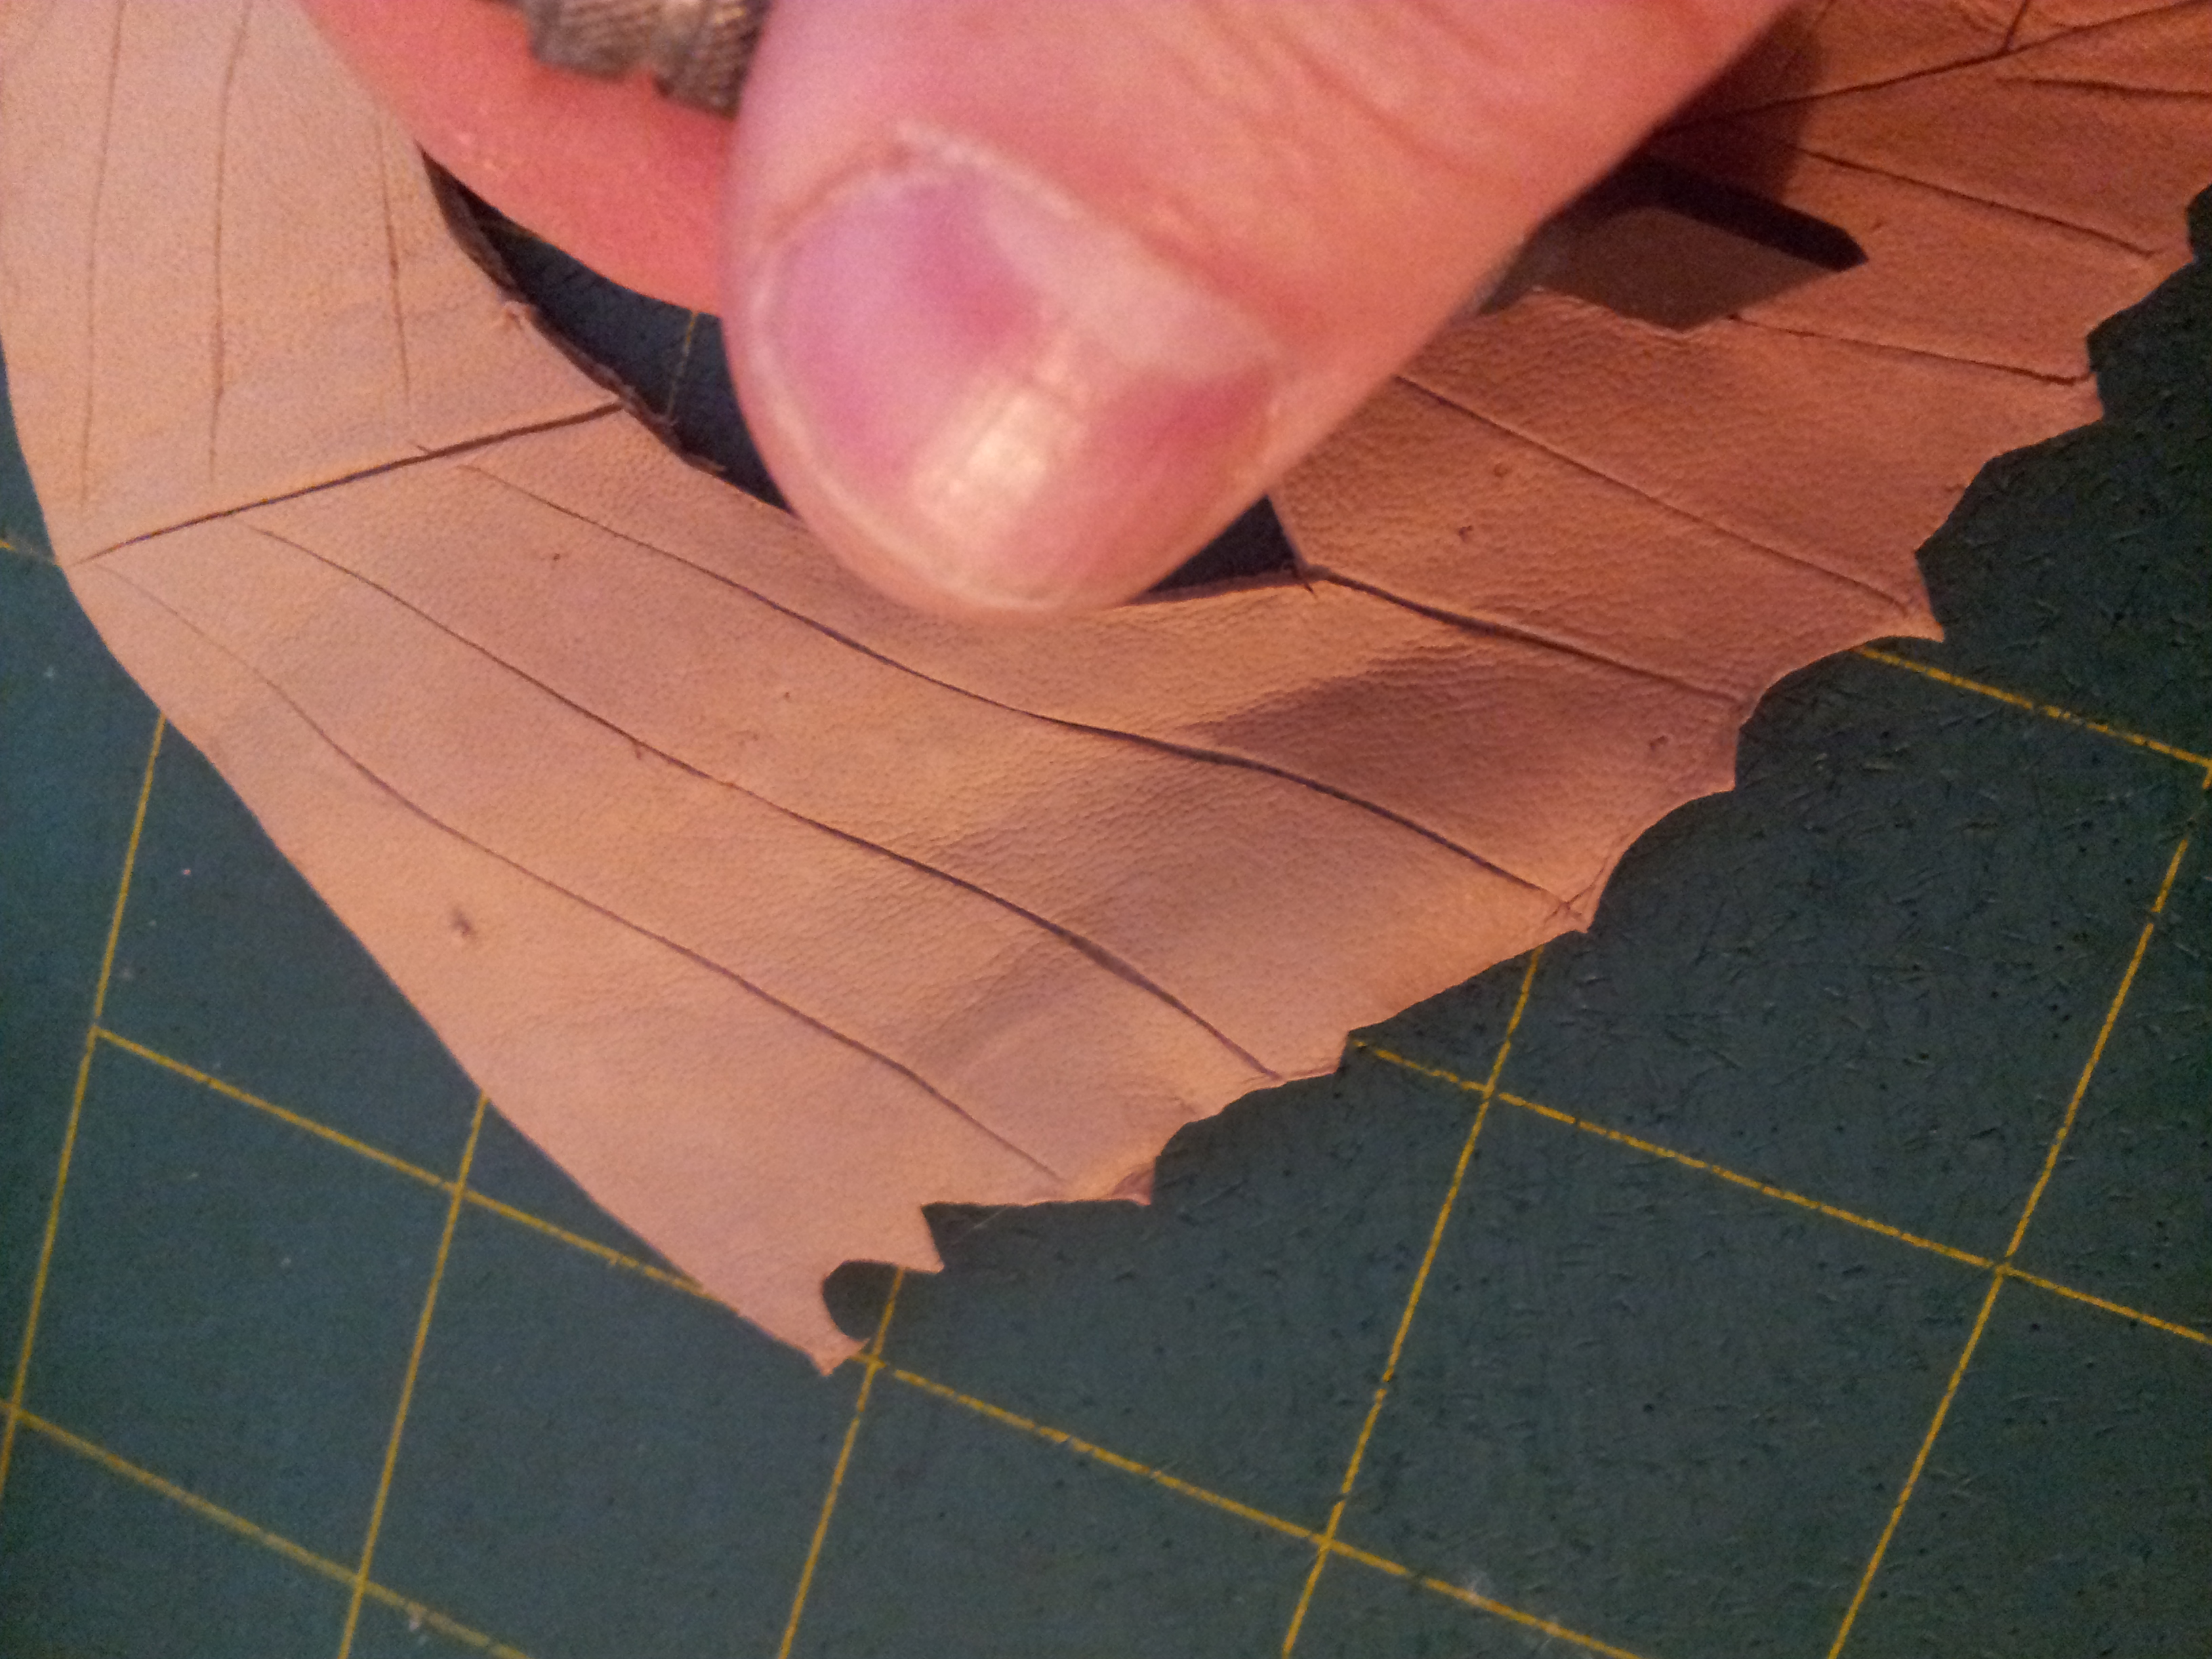
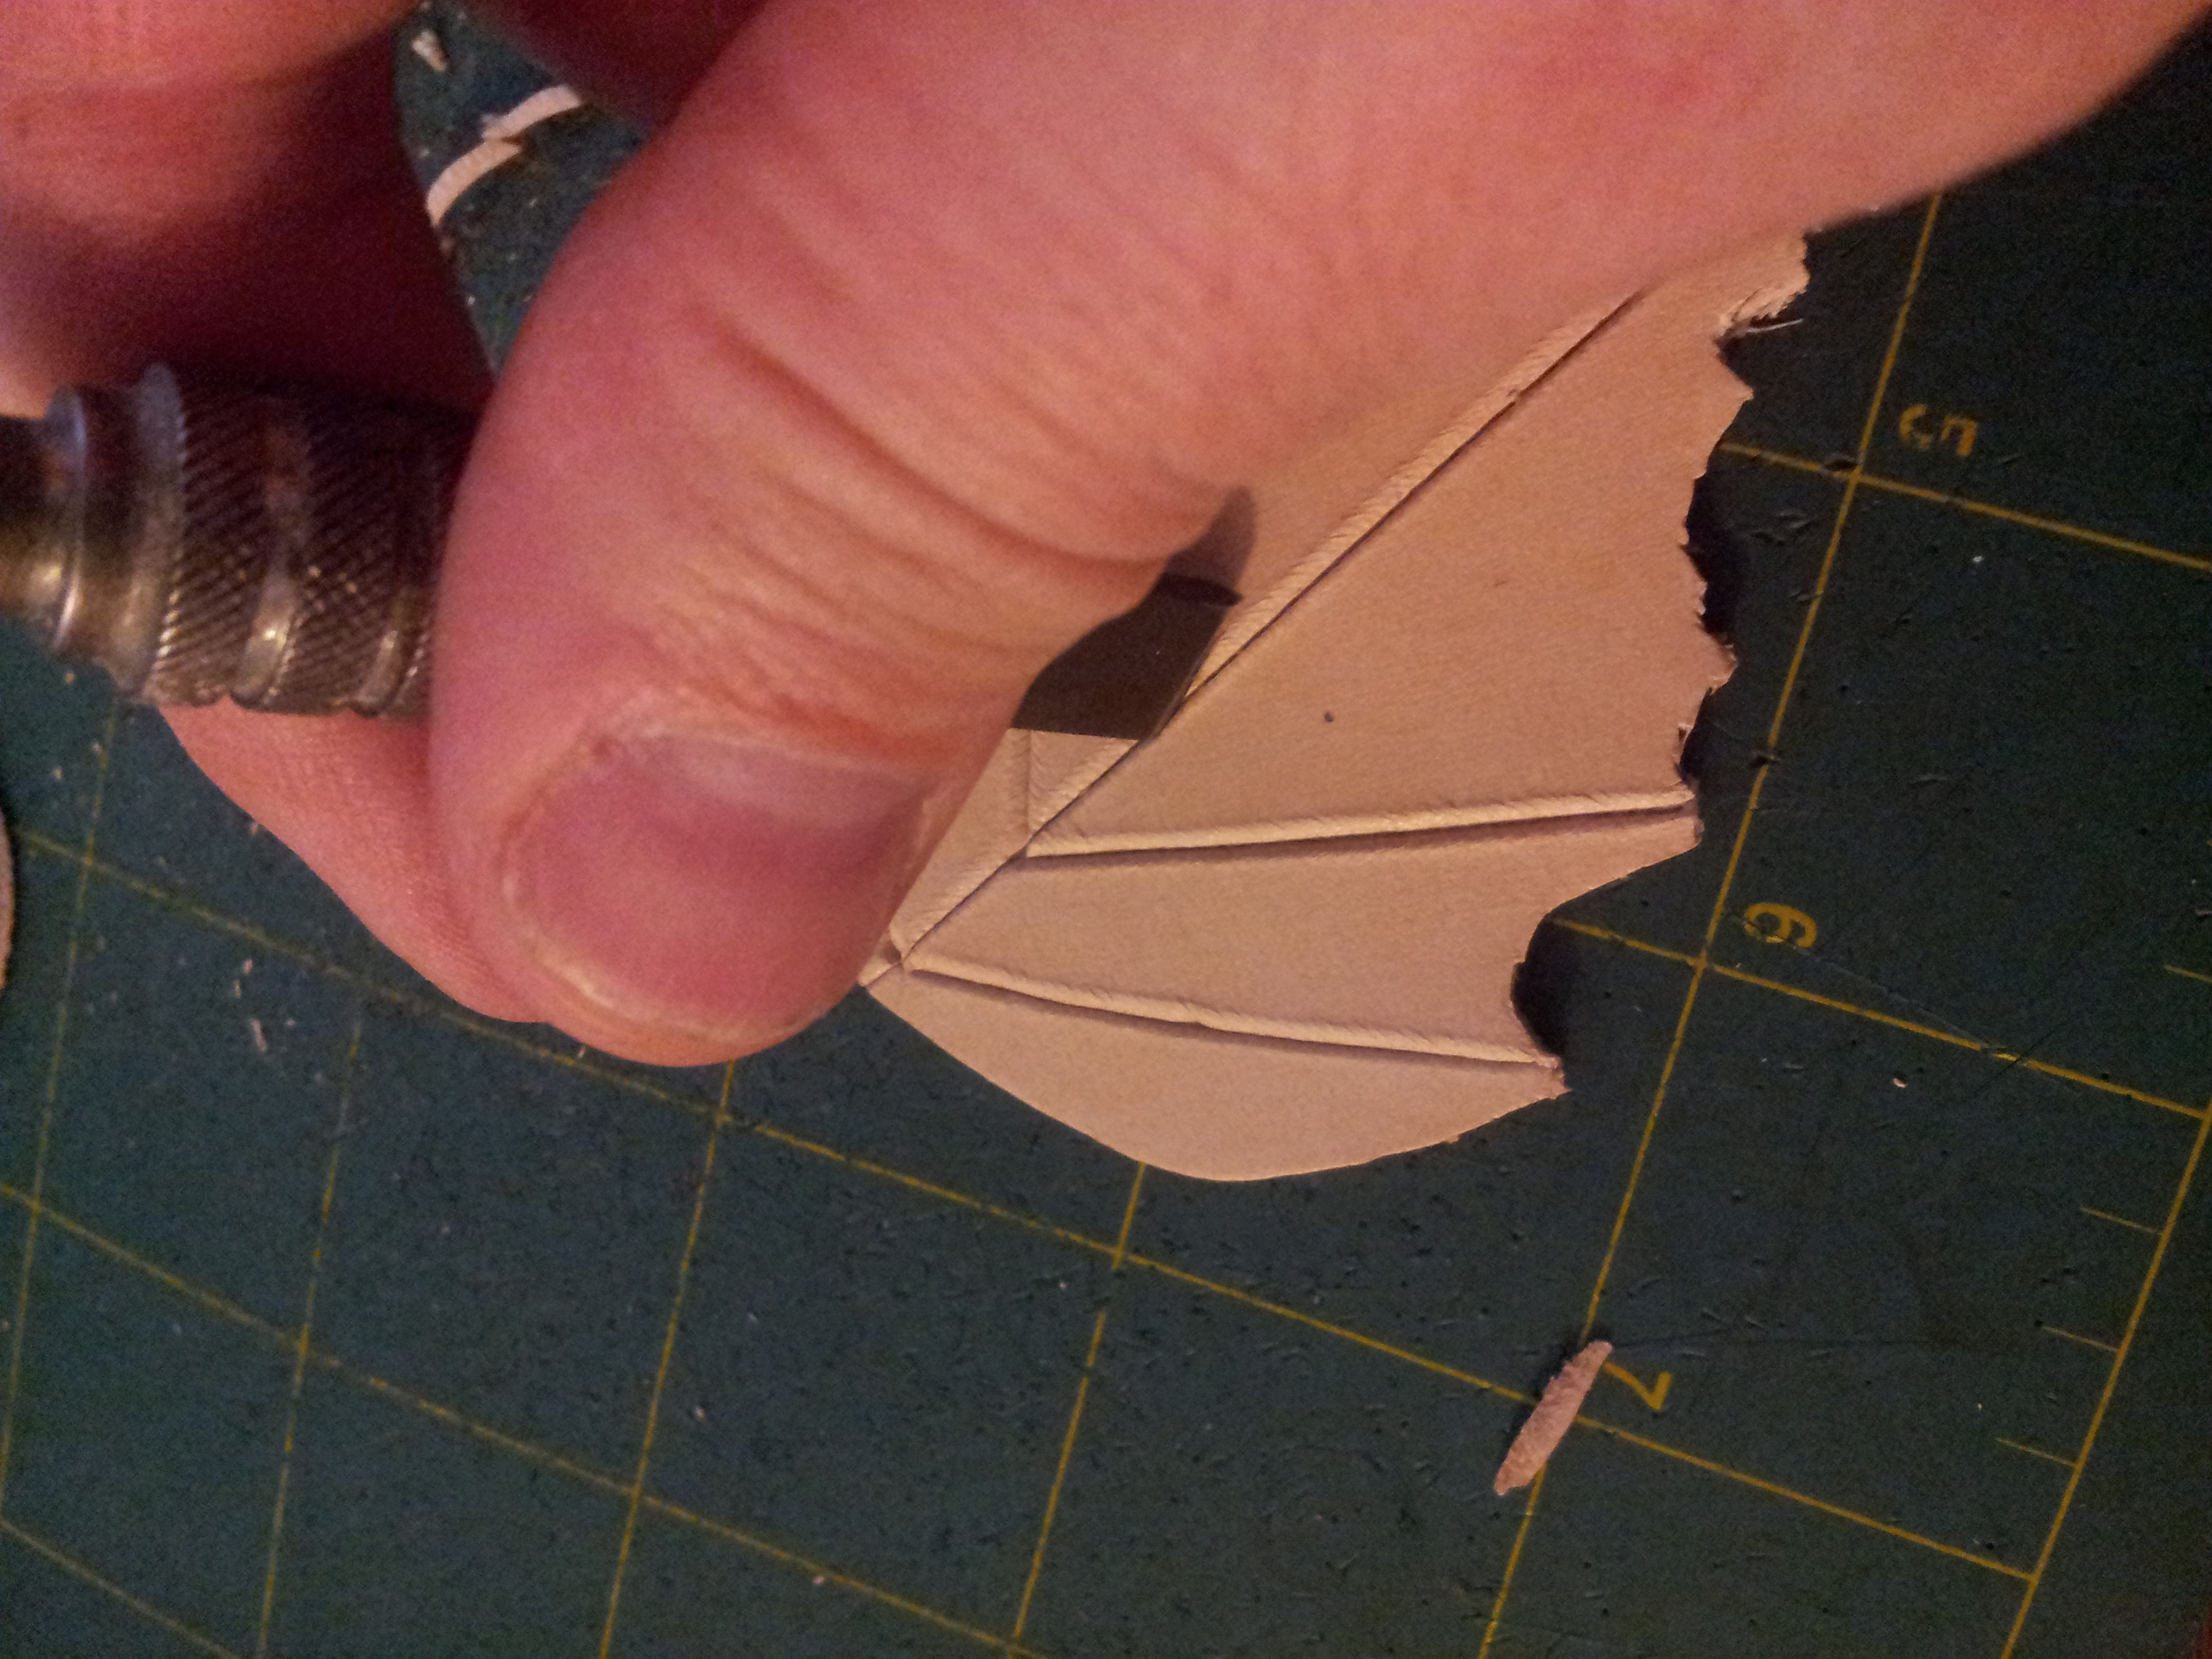
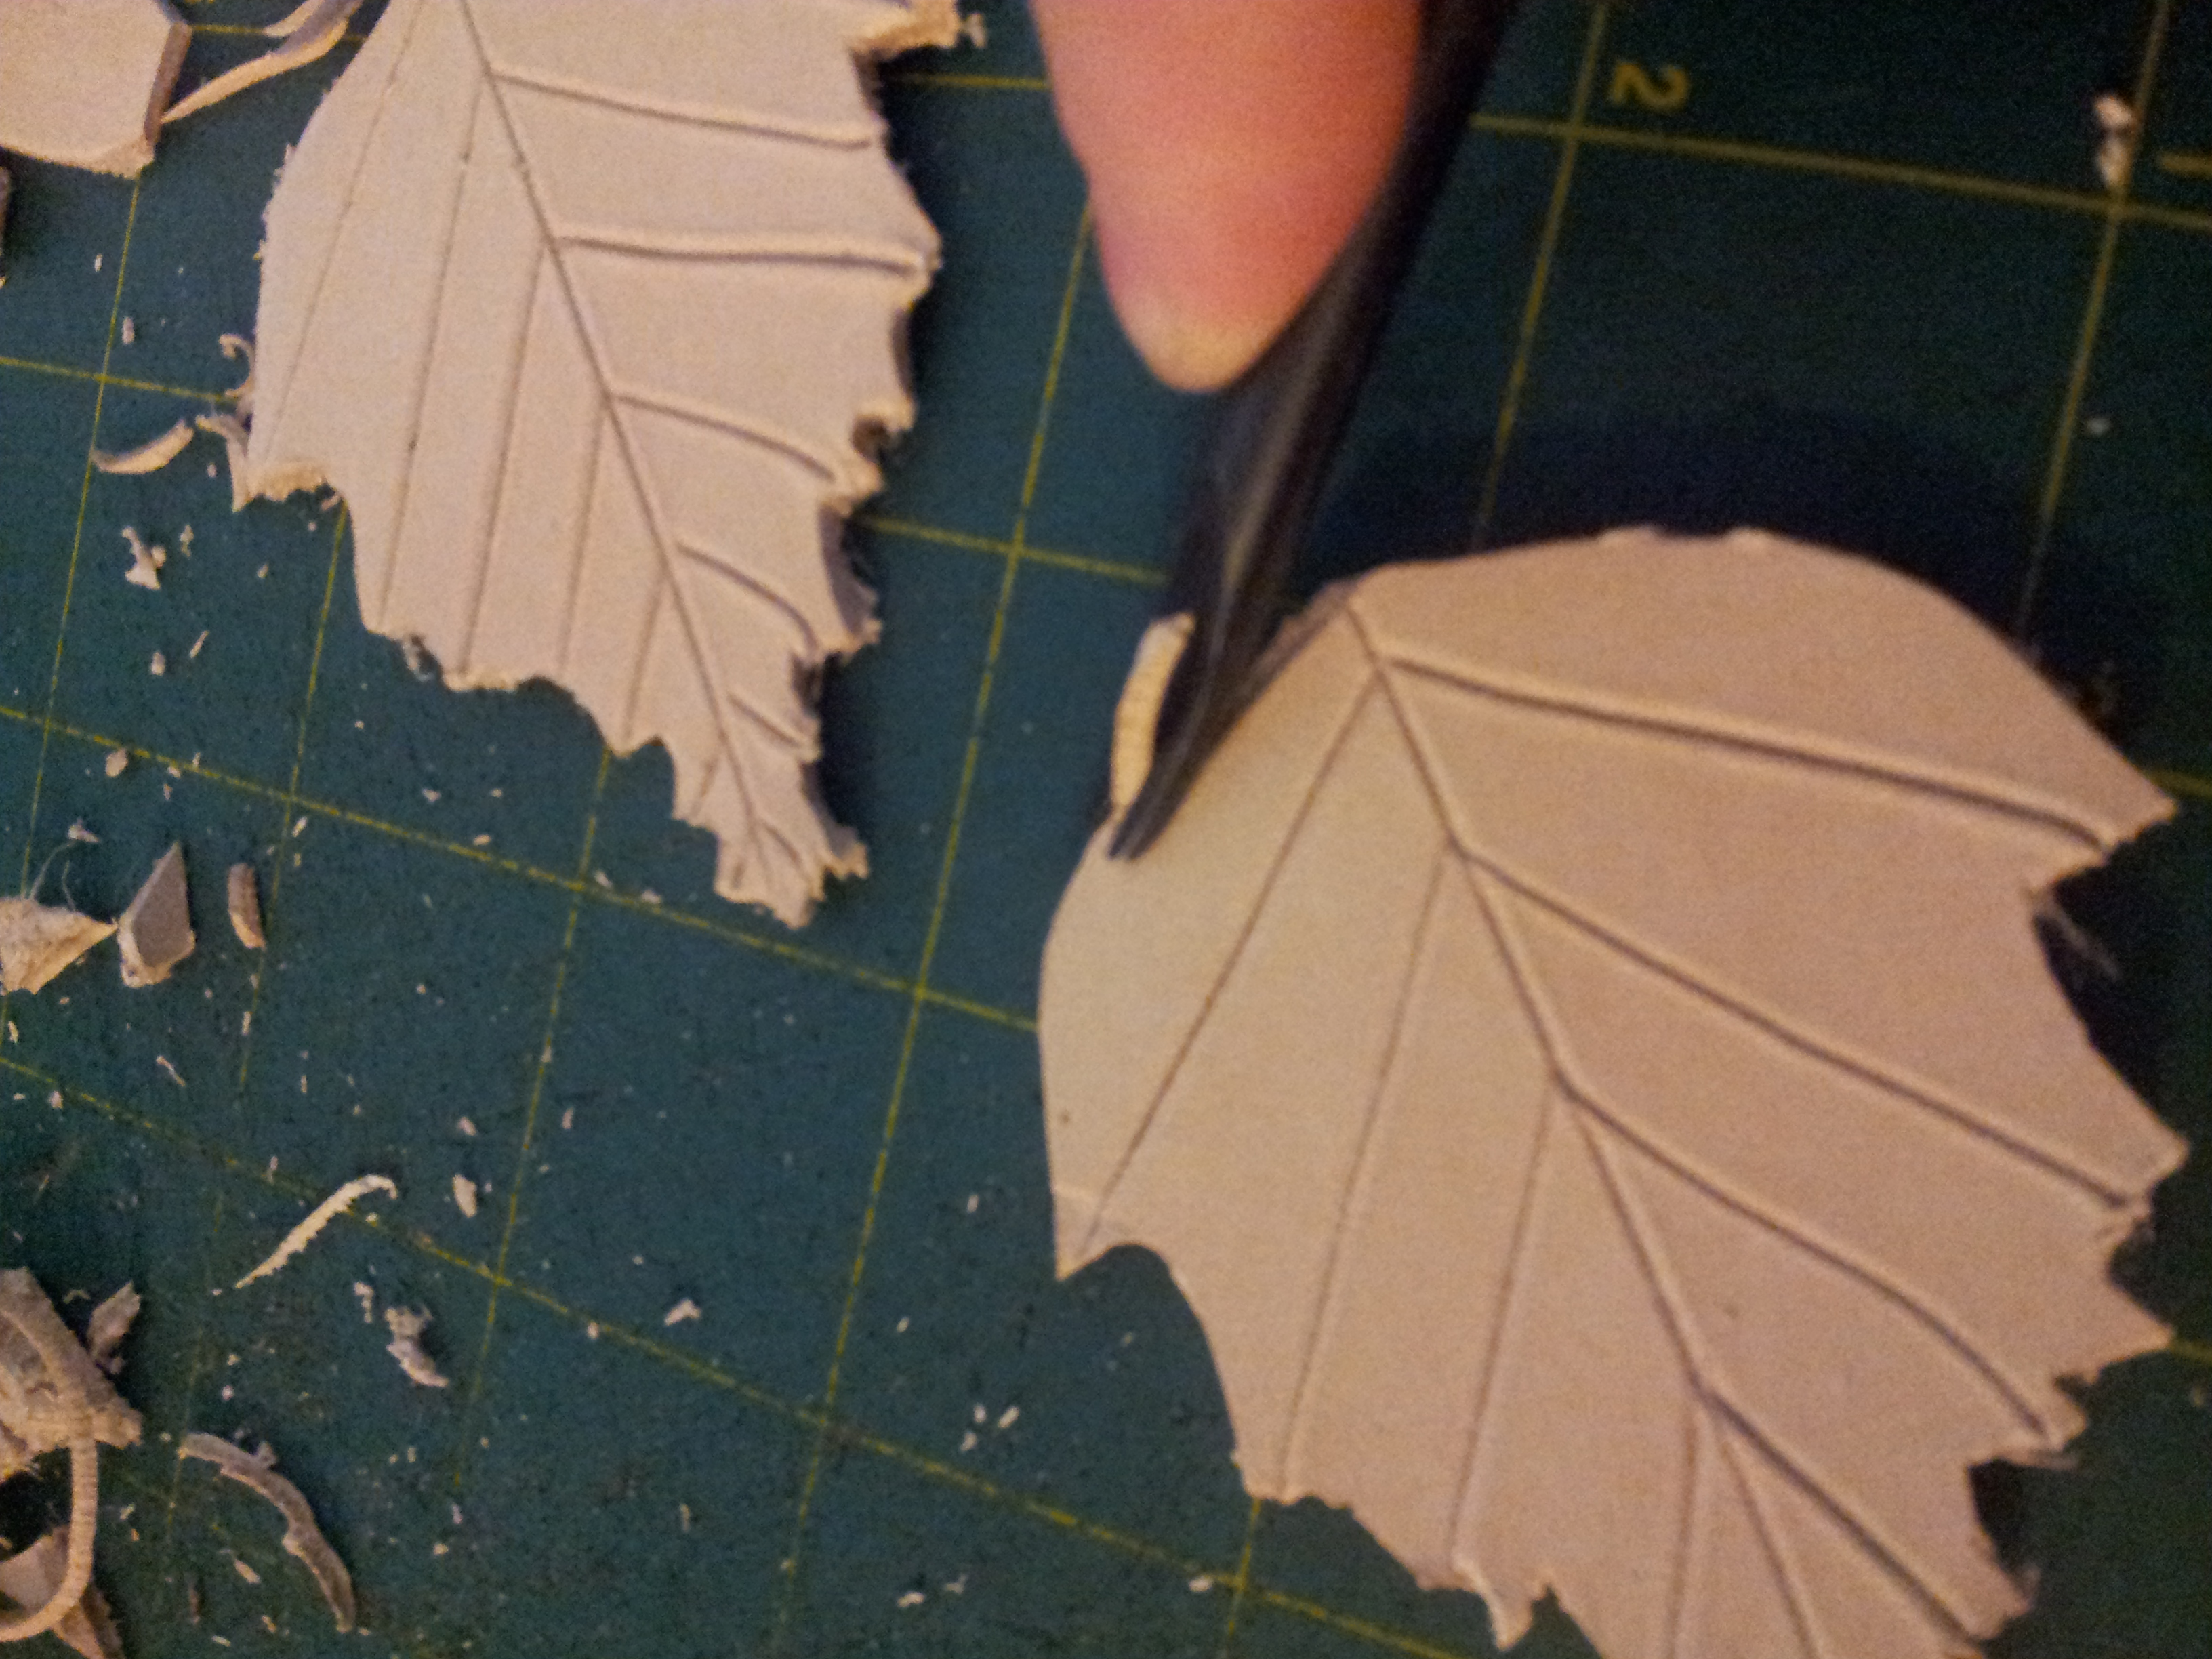
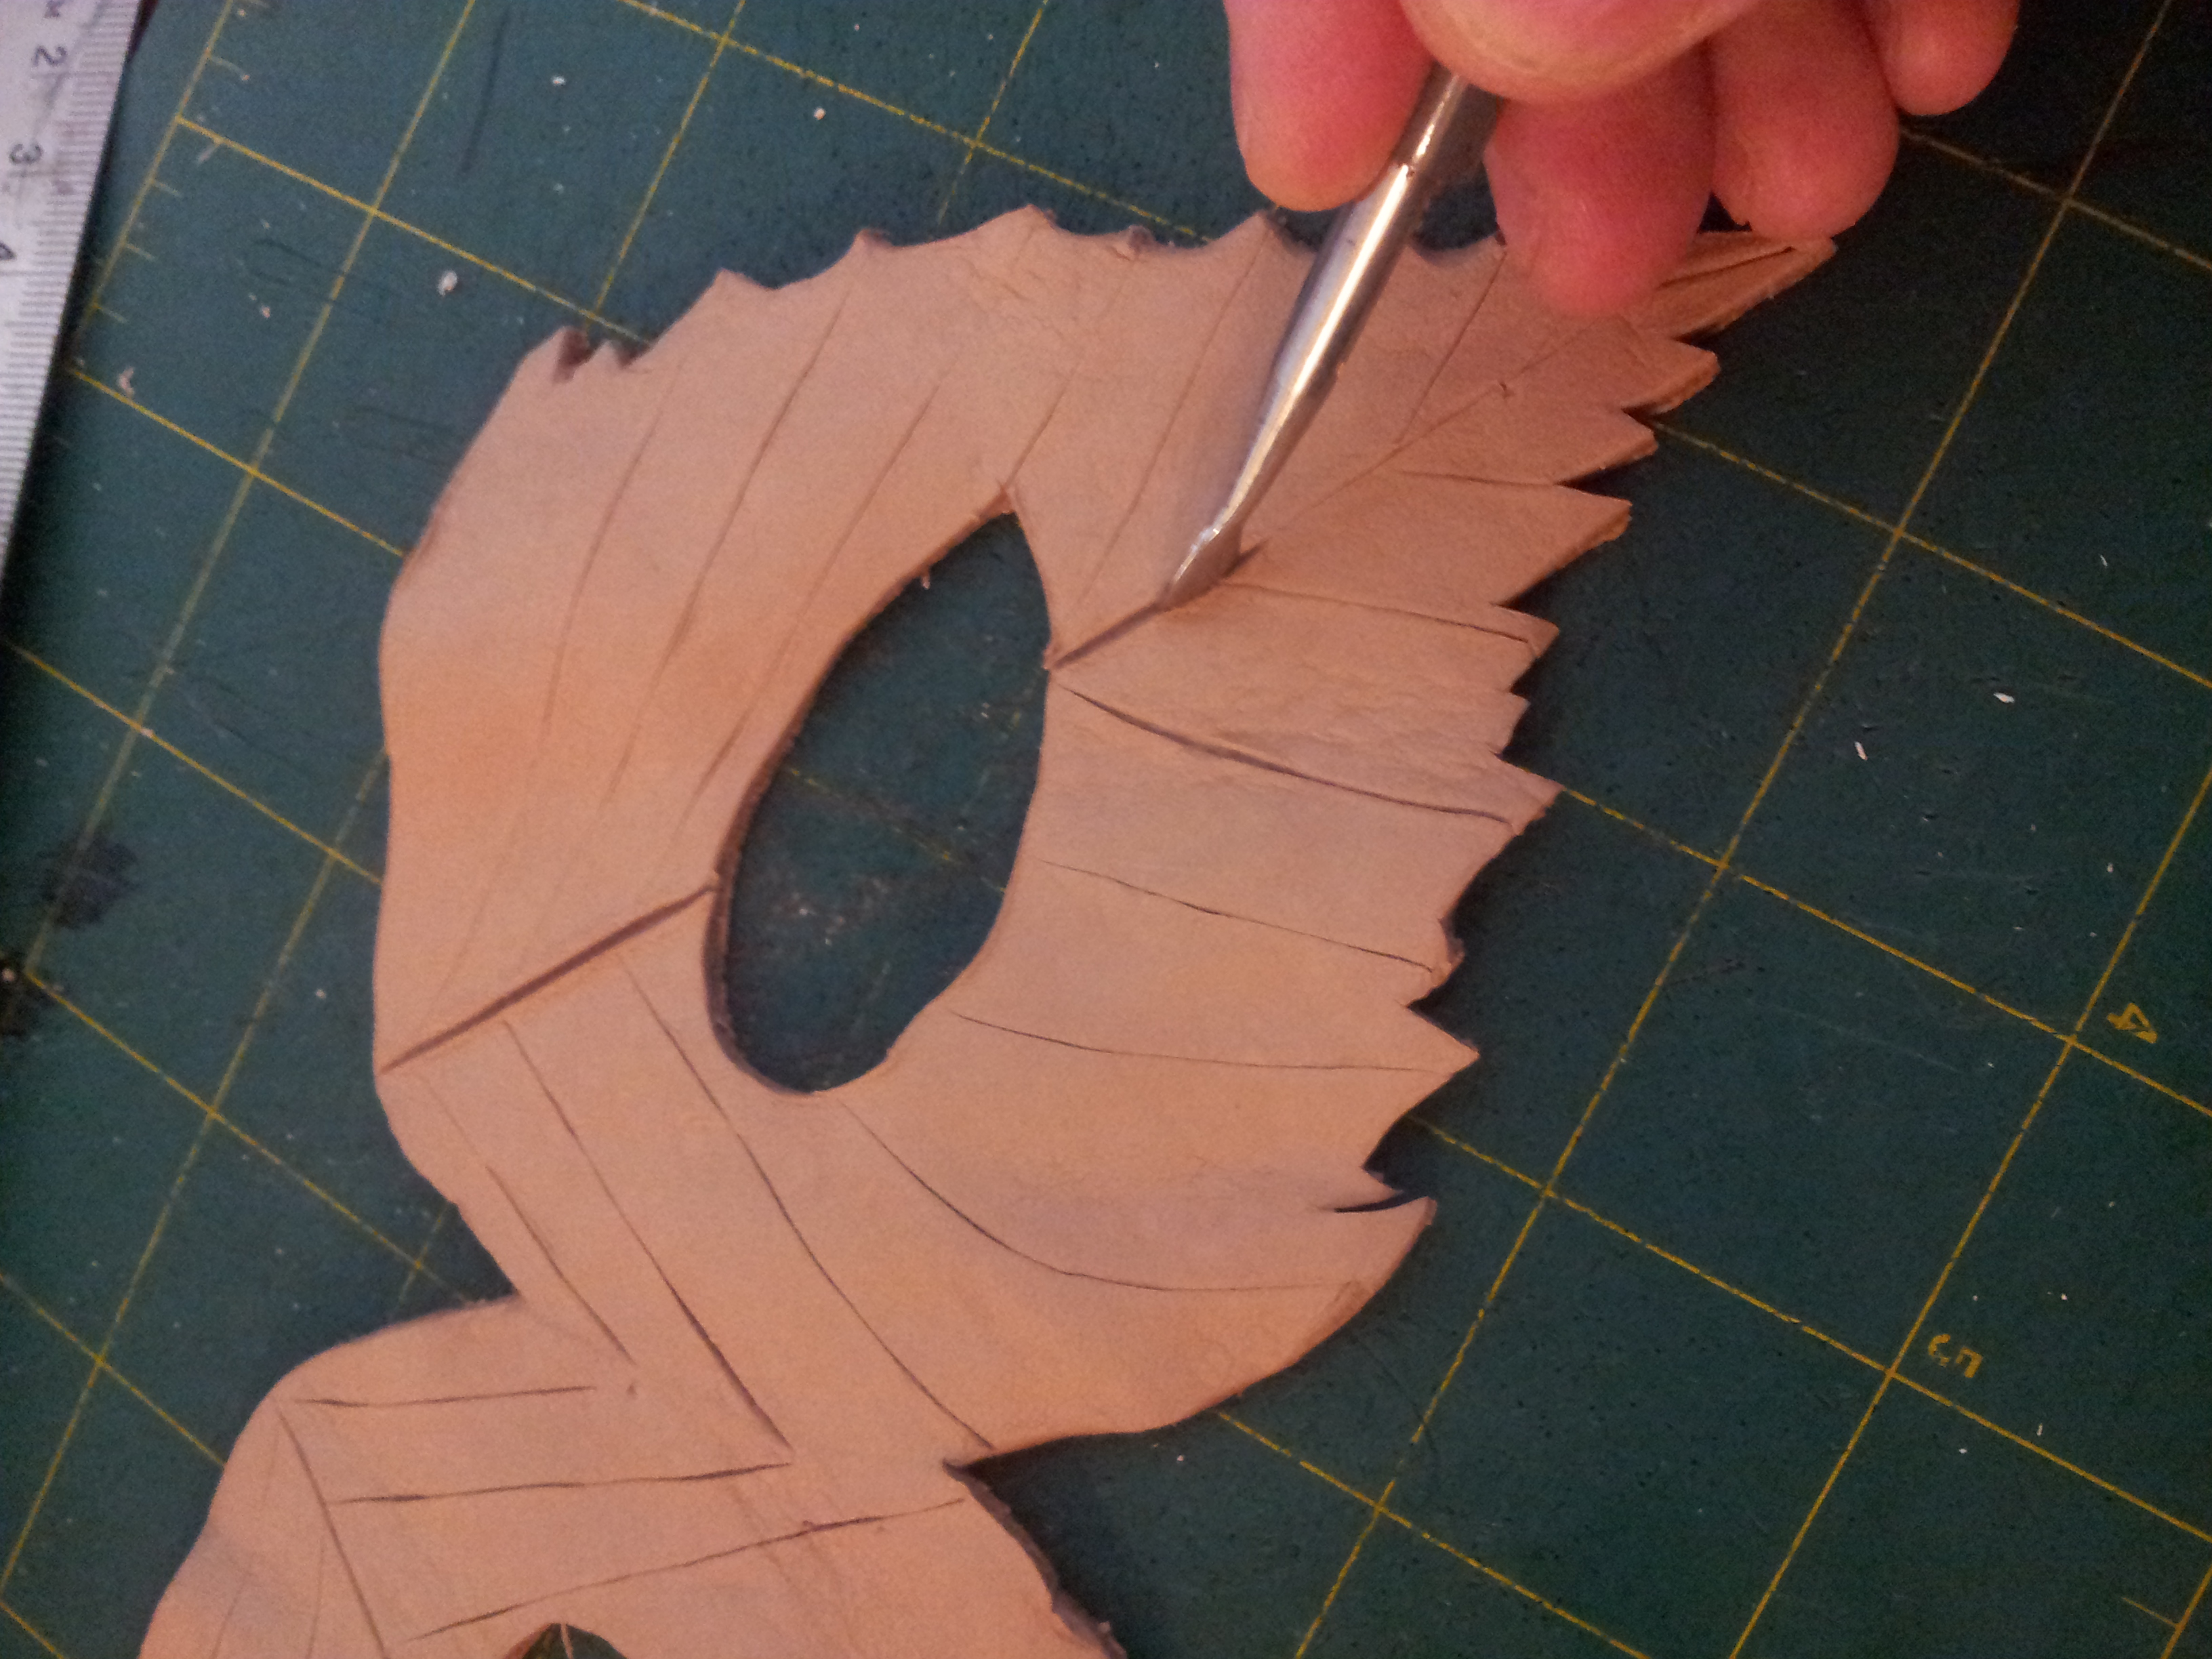
Use the swivel knife to draw a center line on each leaf/side of the mask. Next, starting from that center line, draw slanted veins to the edge of the leaf. The pattern should be symmetrical on each side of the leaf. Do the same on the other leaf/half of the face part of the mask.
Use the same method as above to cut the veins in the 3 smaller leaves as well.
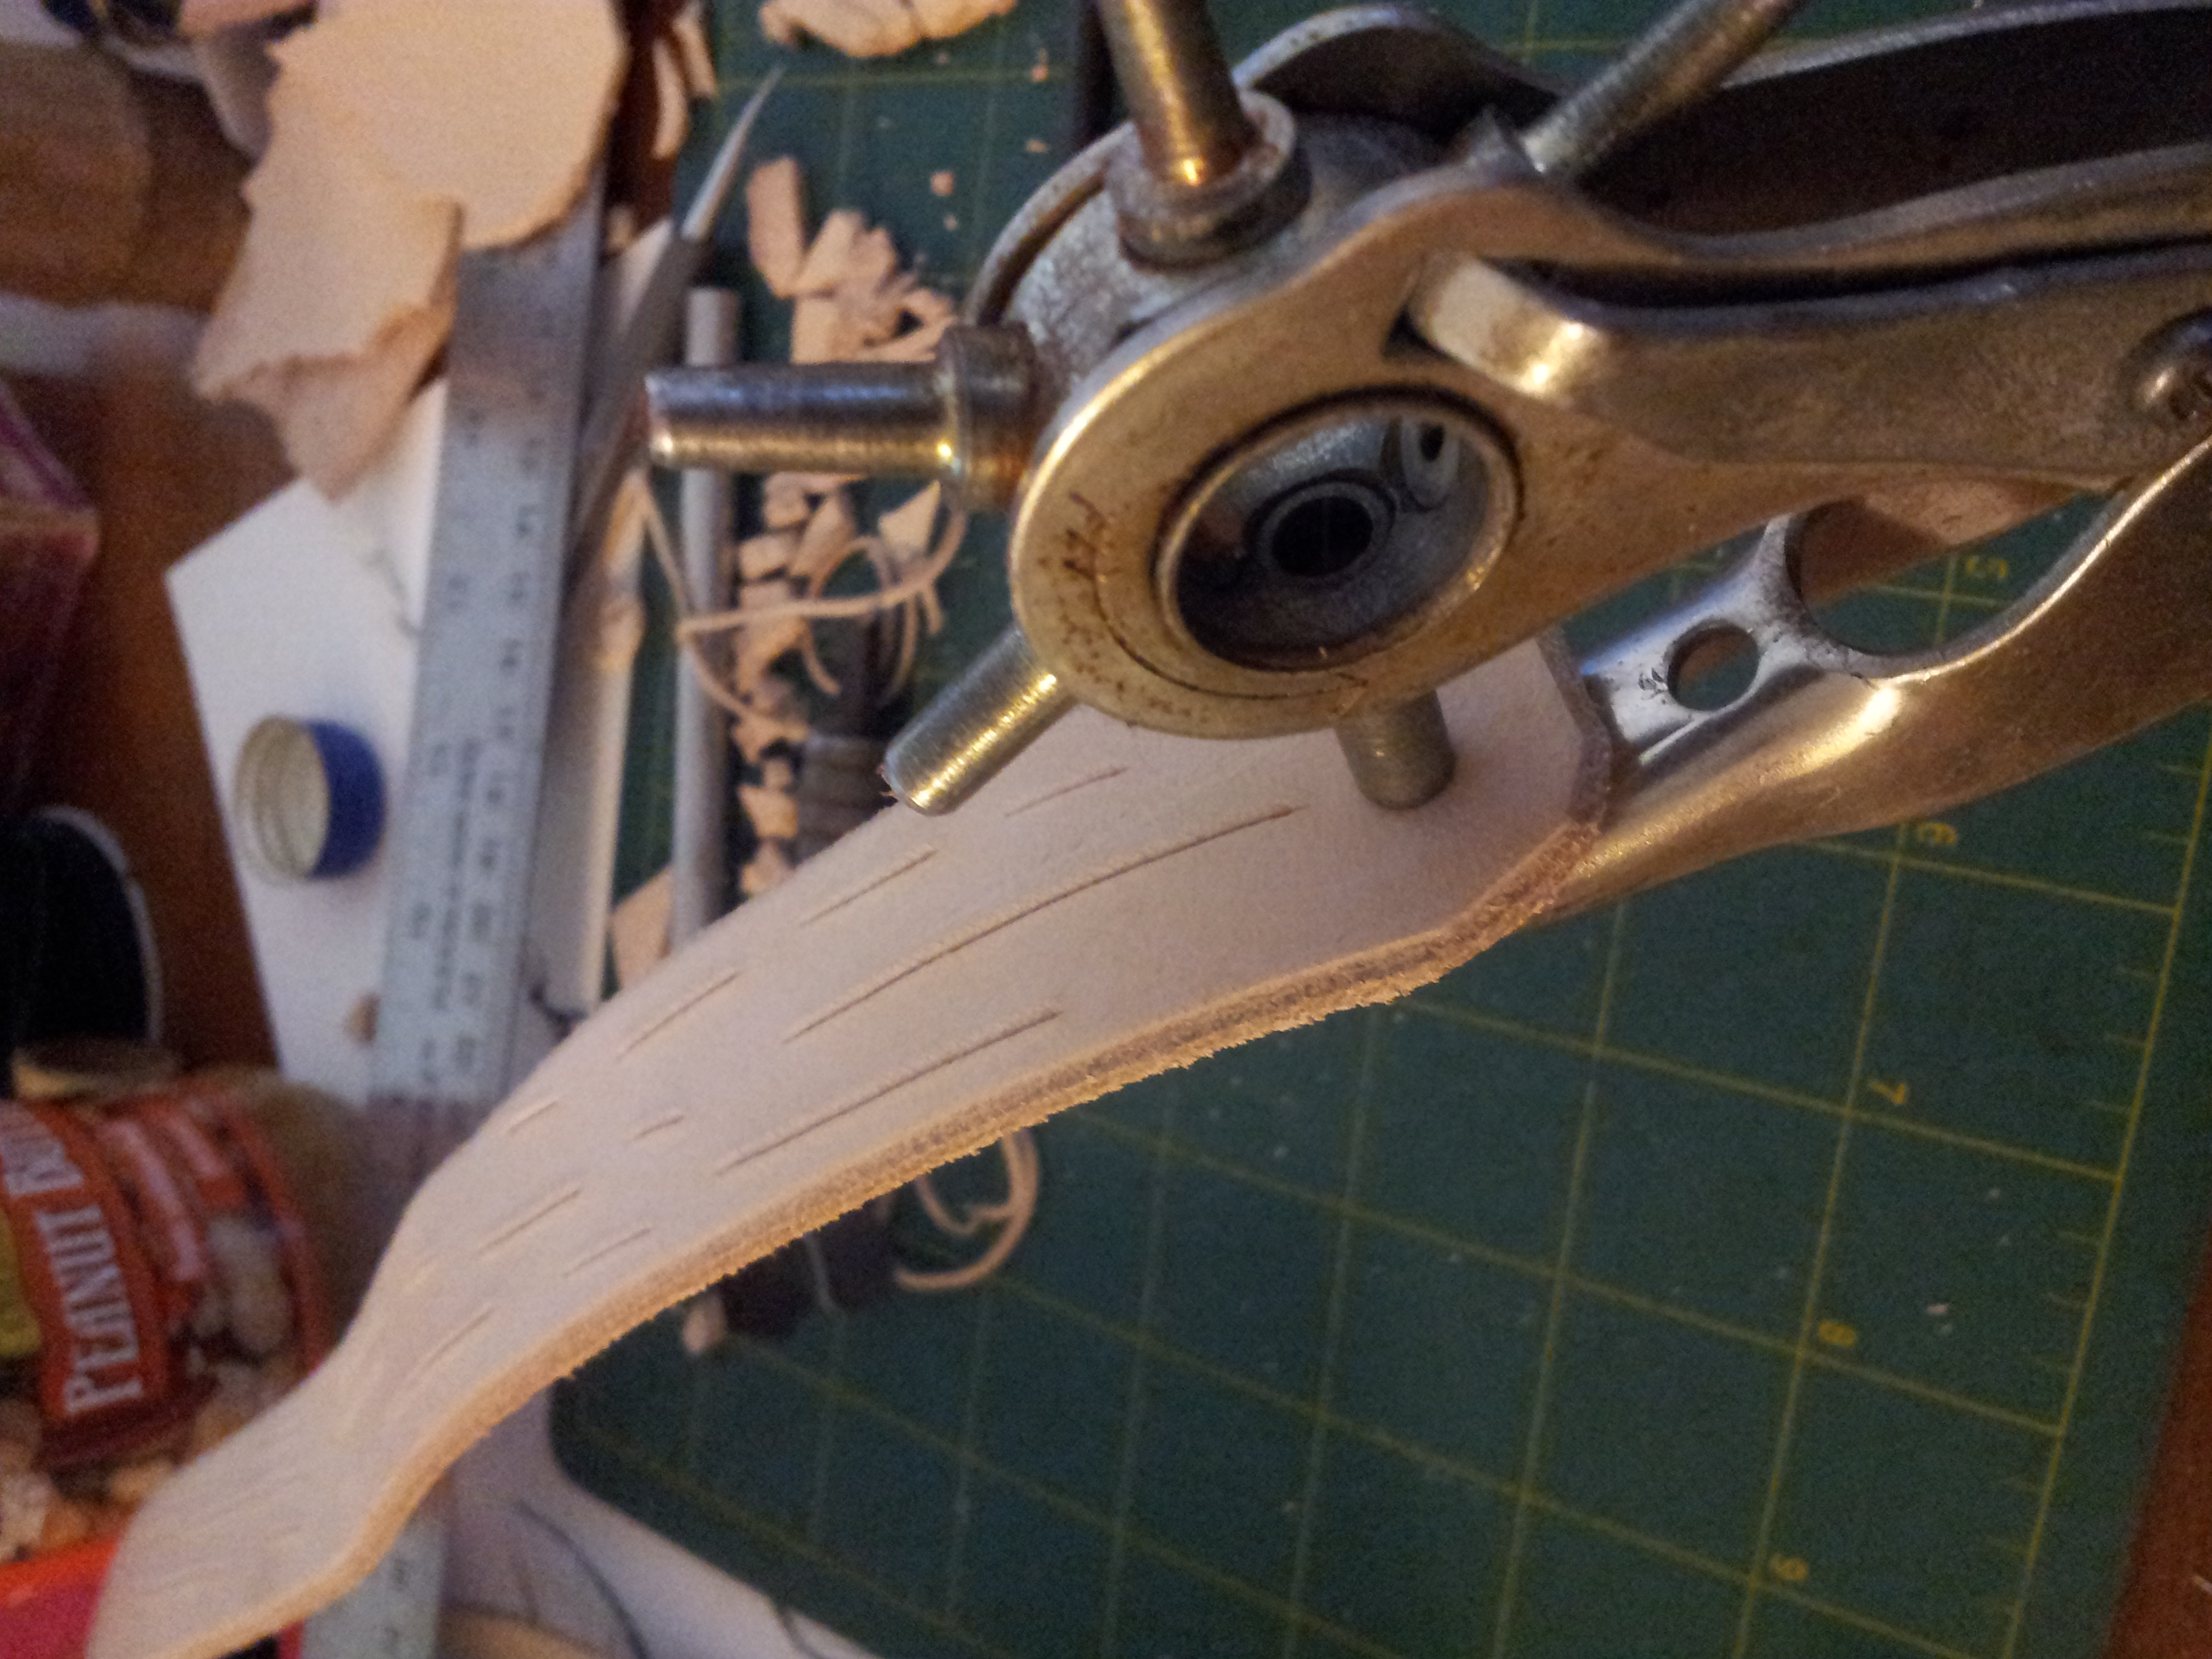
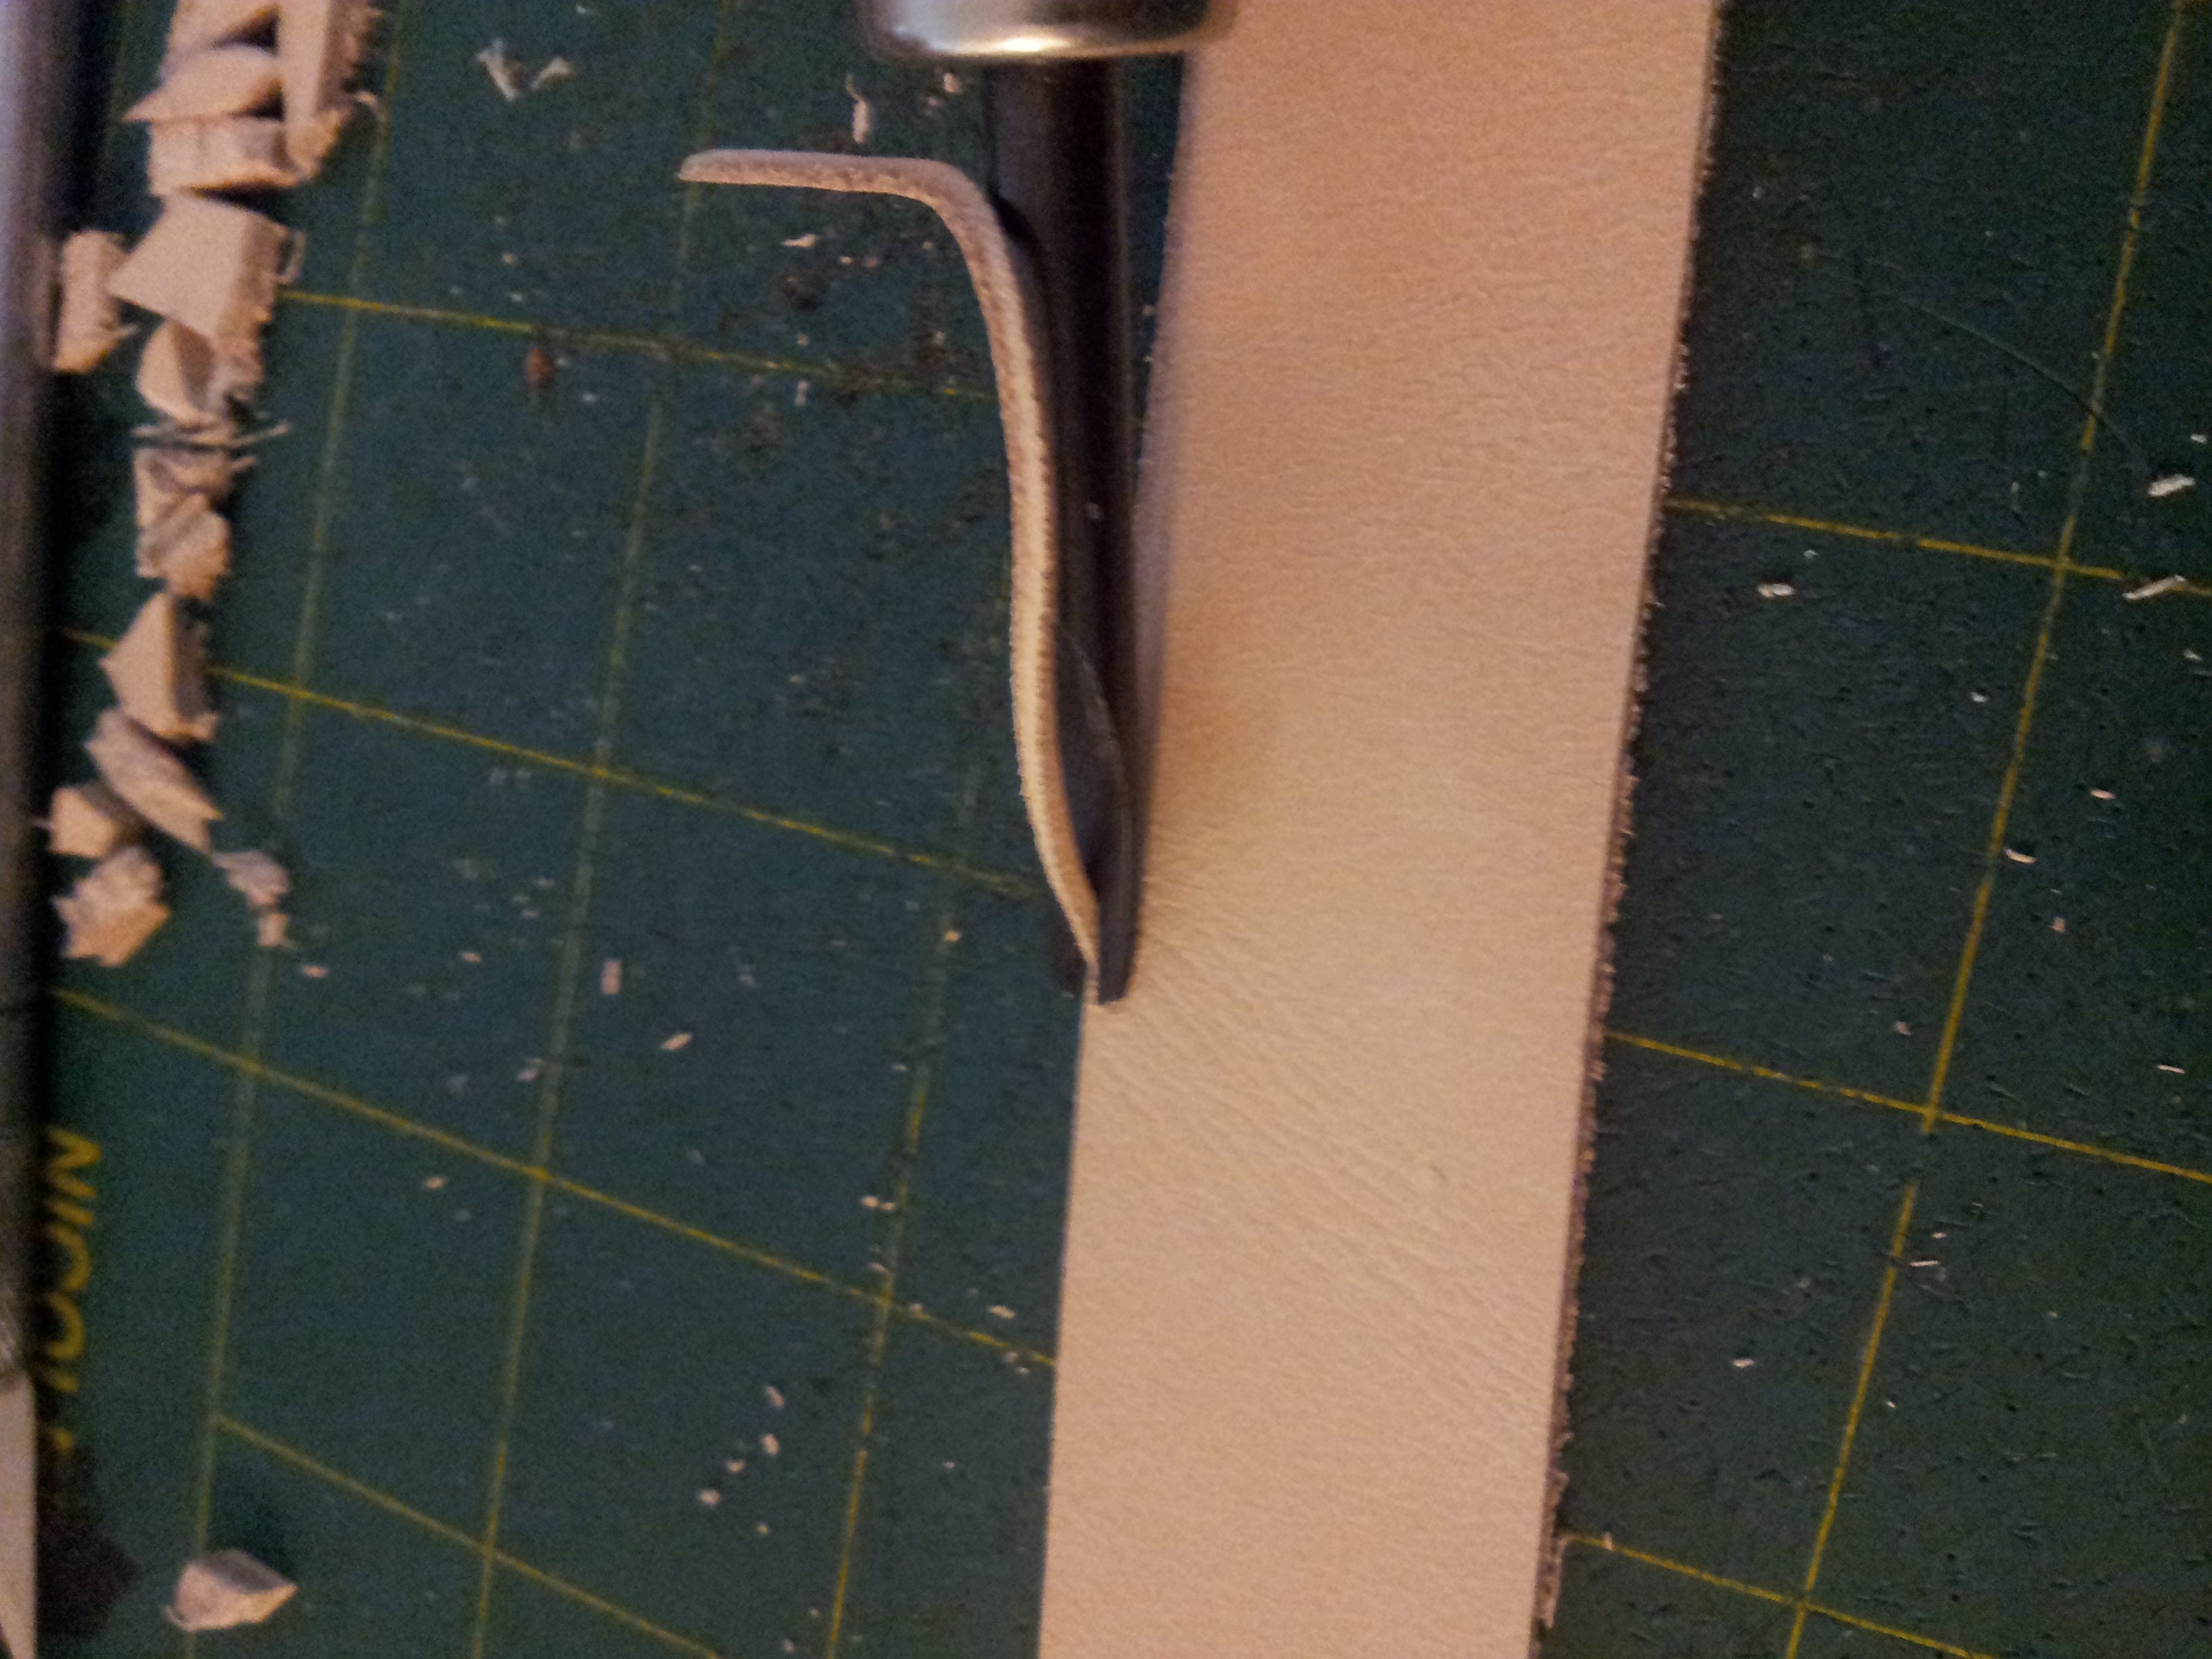
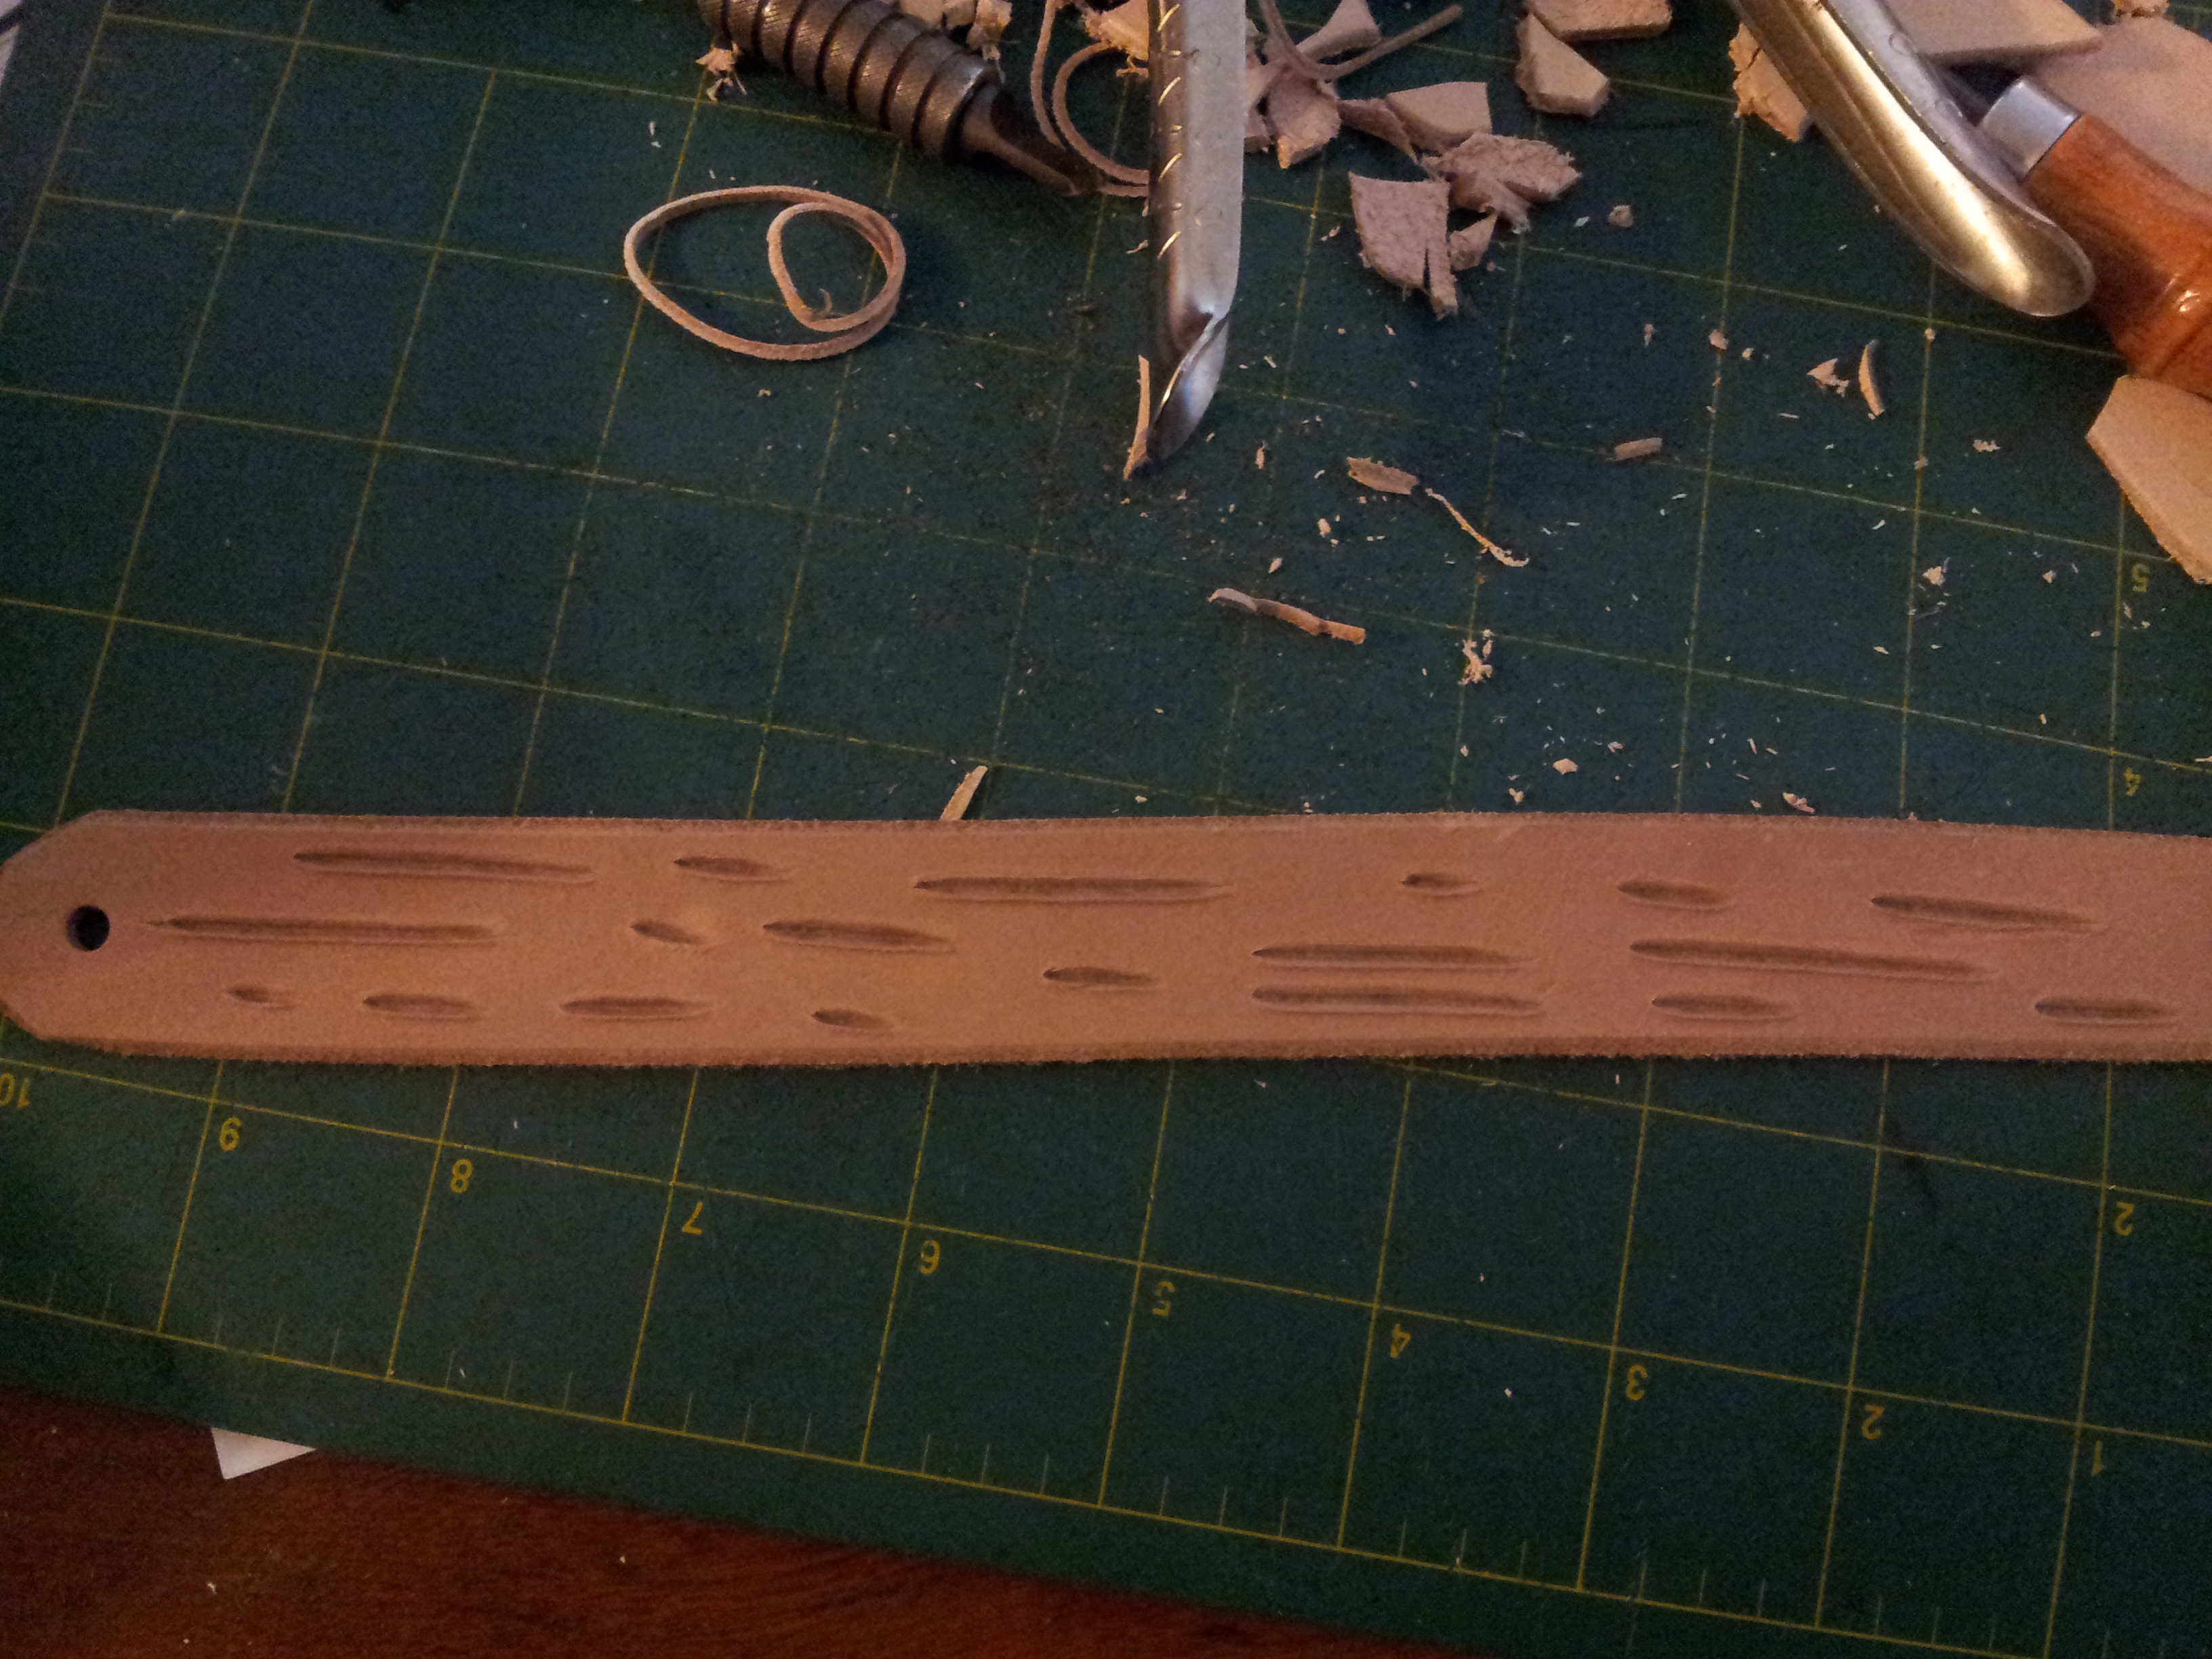
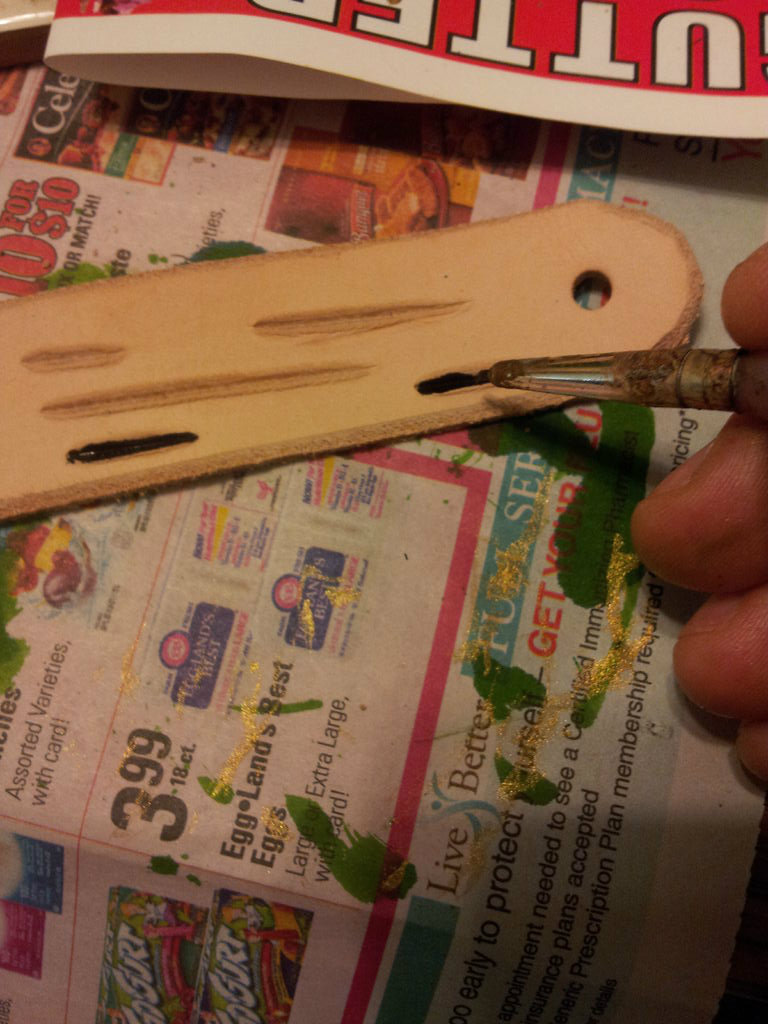
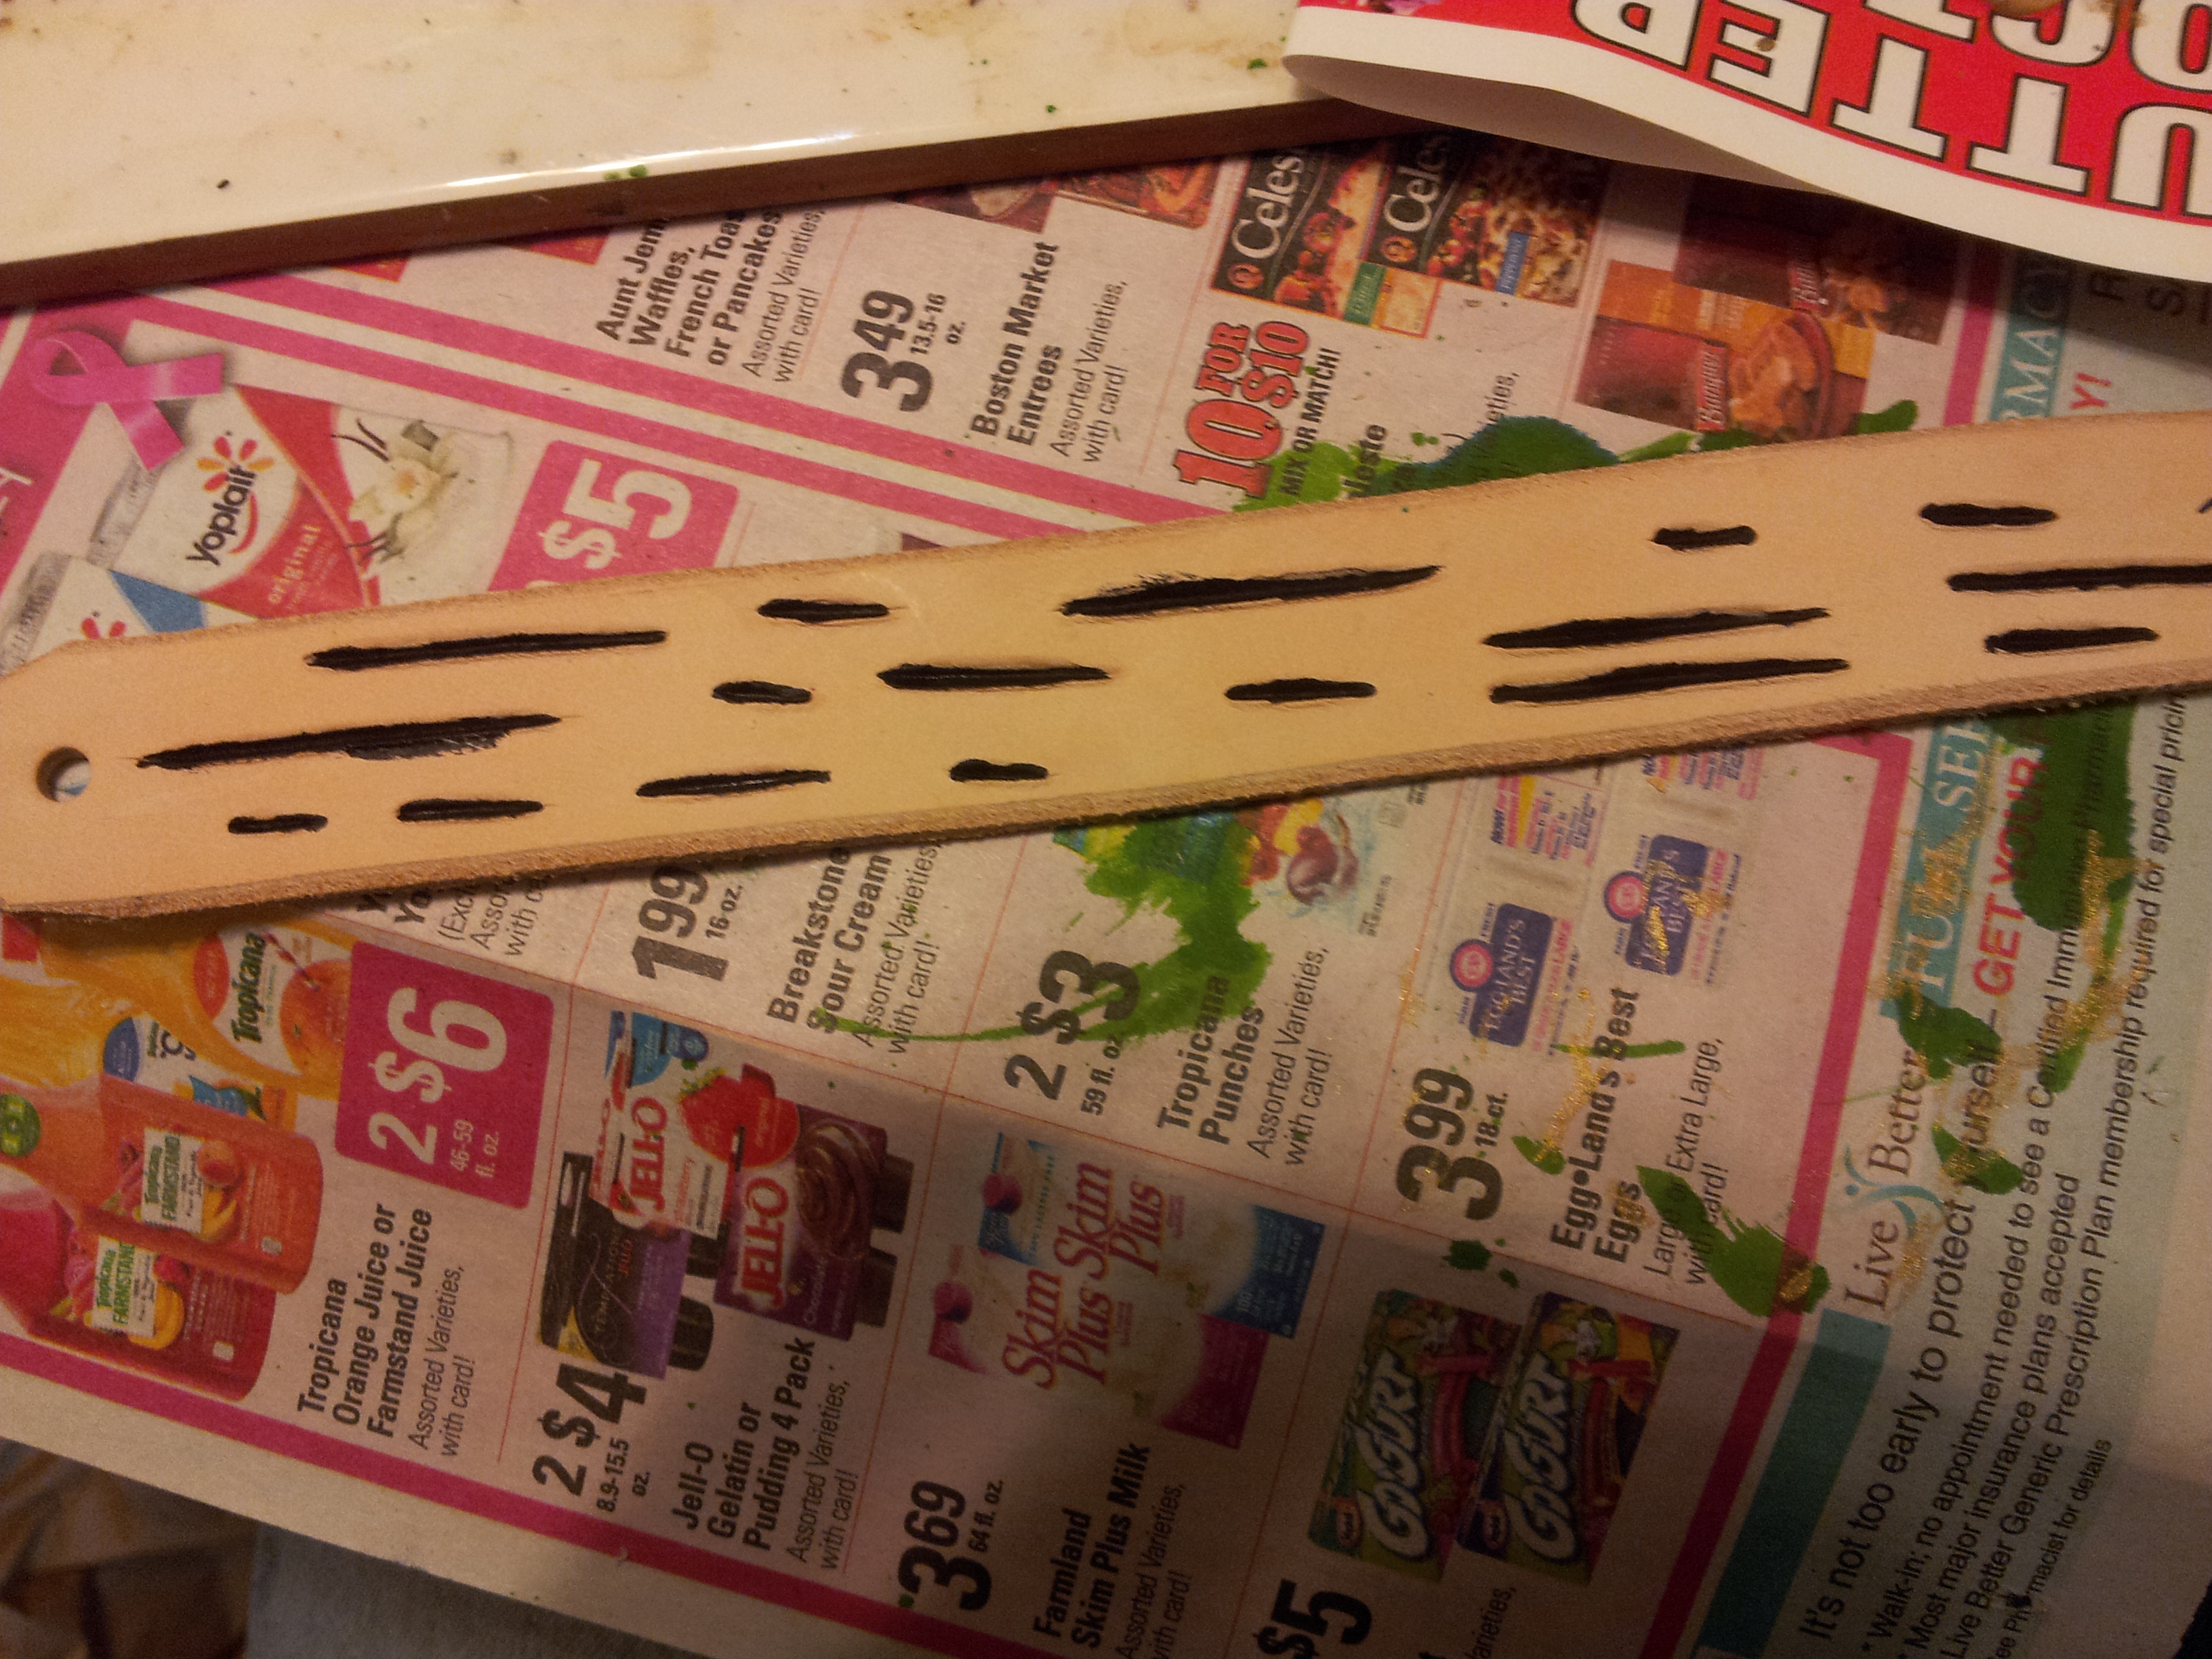
For the leather strip, the goal is to make it look like birch bark. This is done by cutting a series of parallel straight cuts into the leather. These cuts need to vary in length and be arranged an a random pattern.
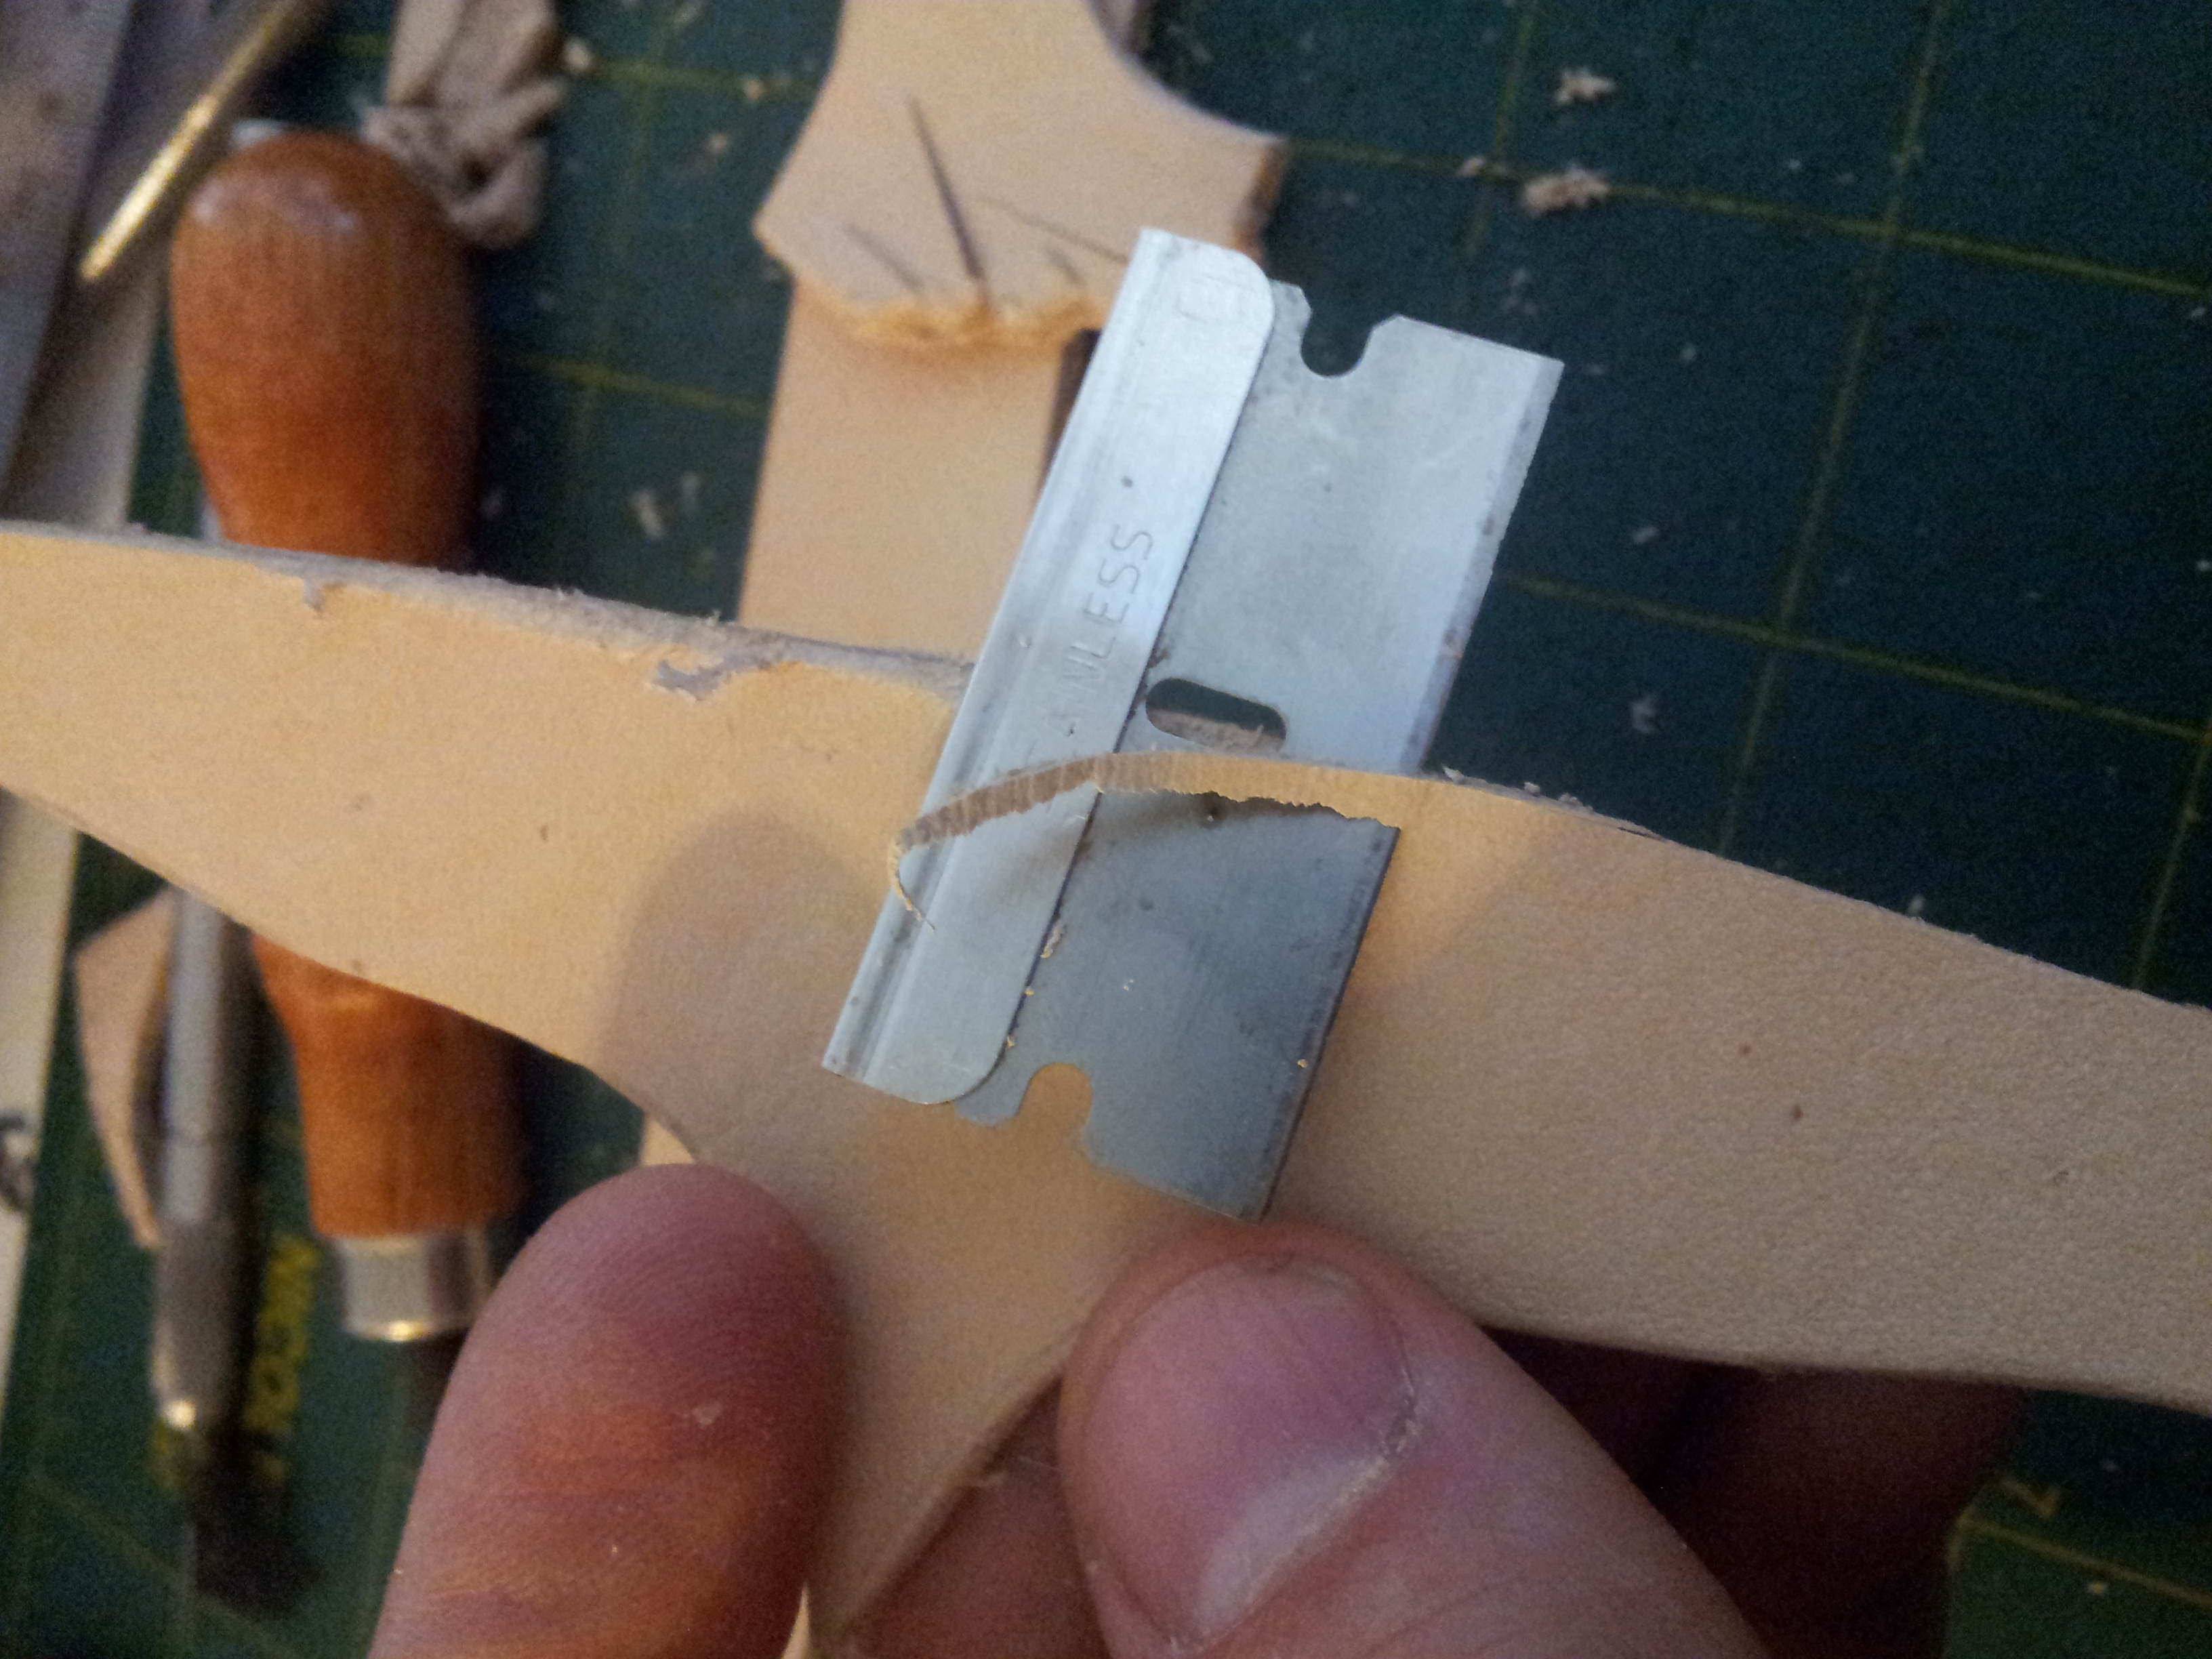
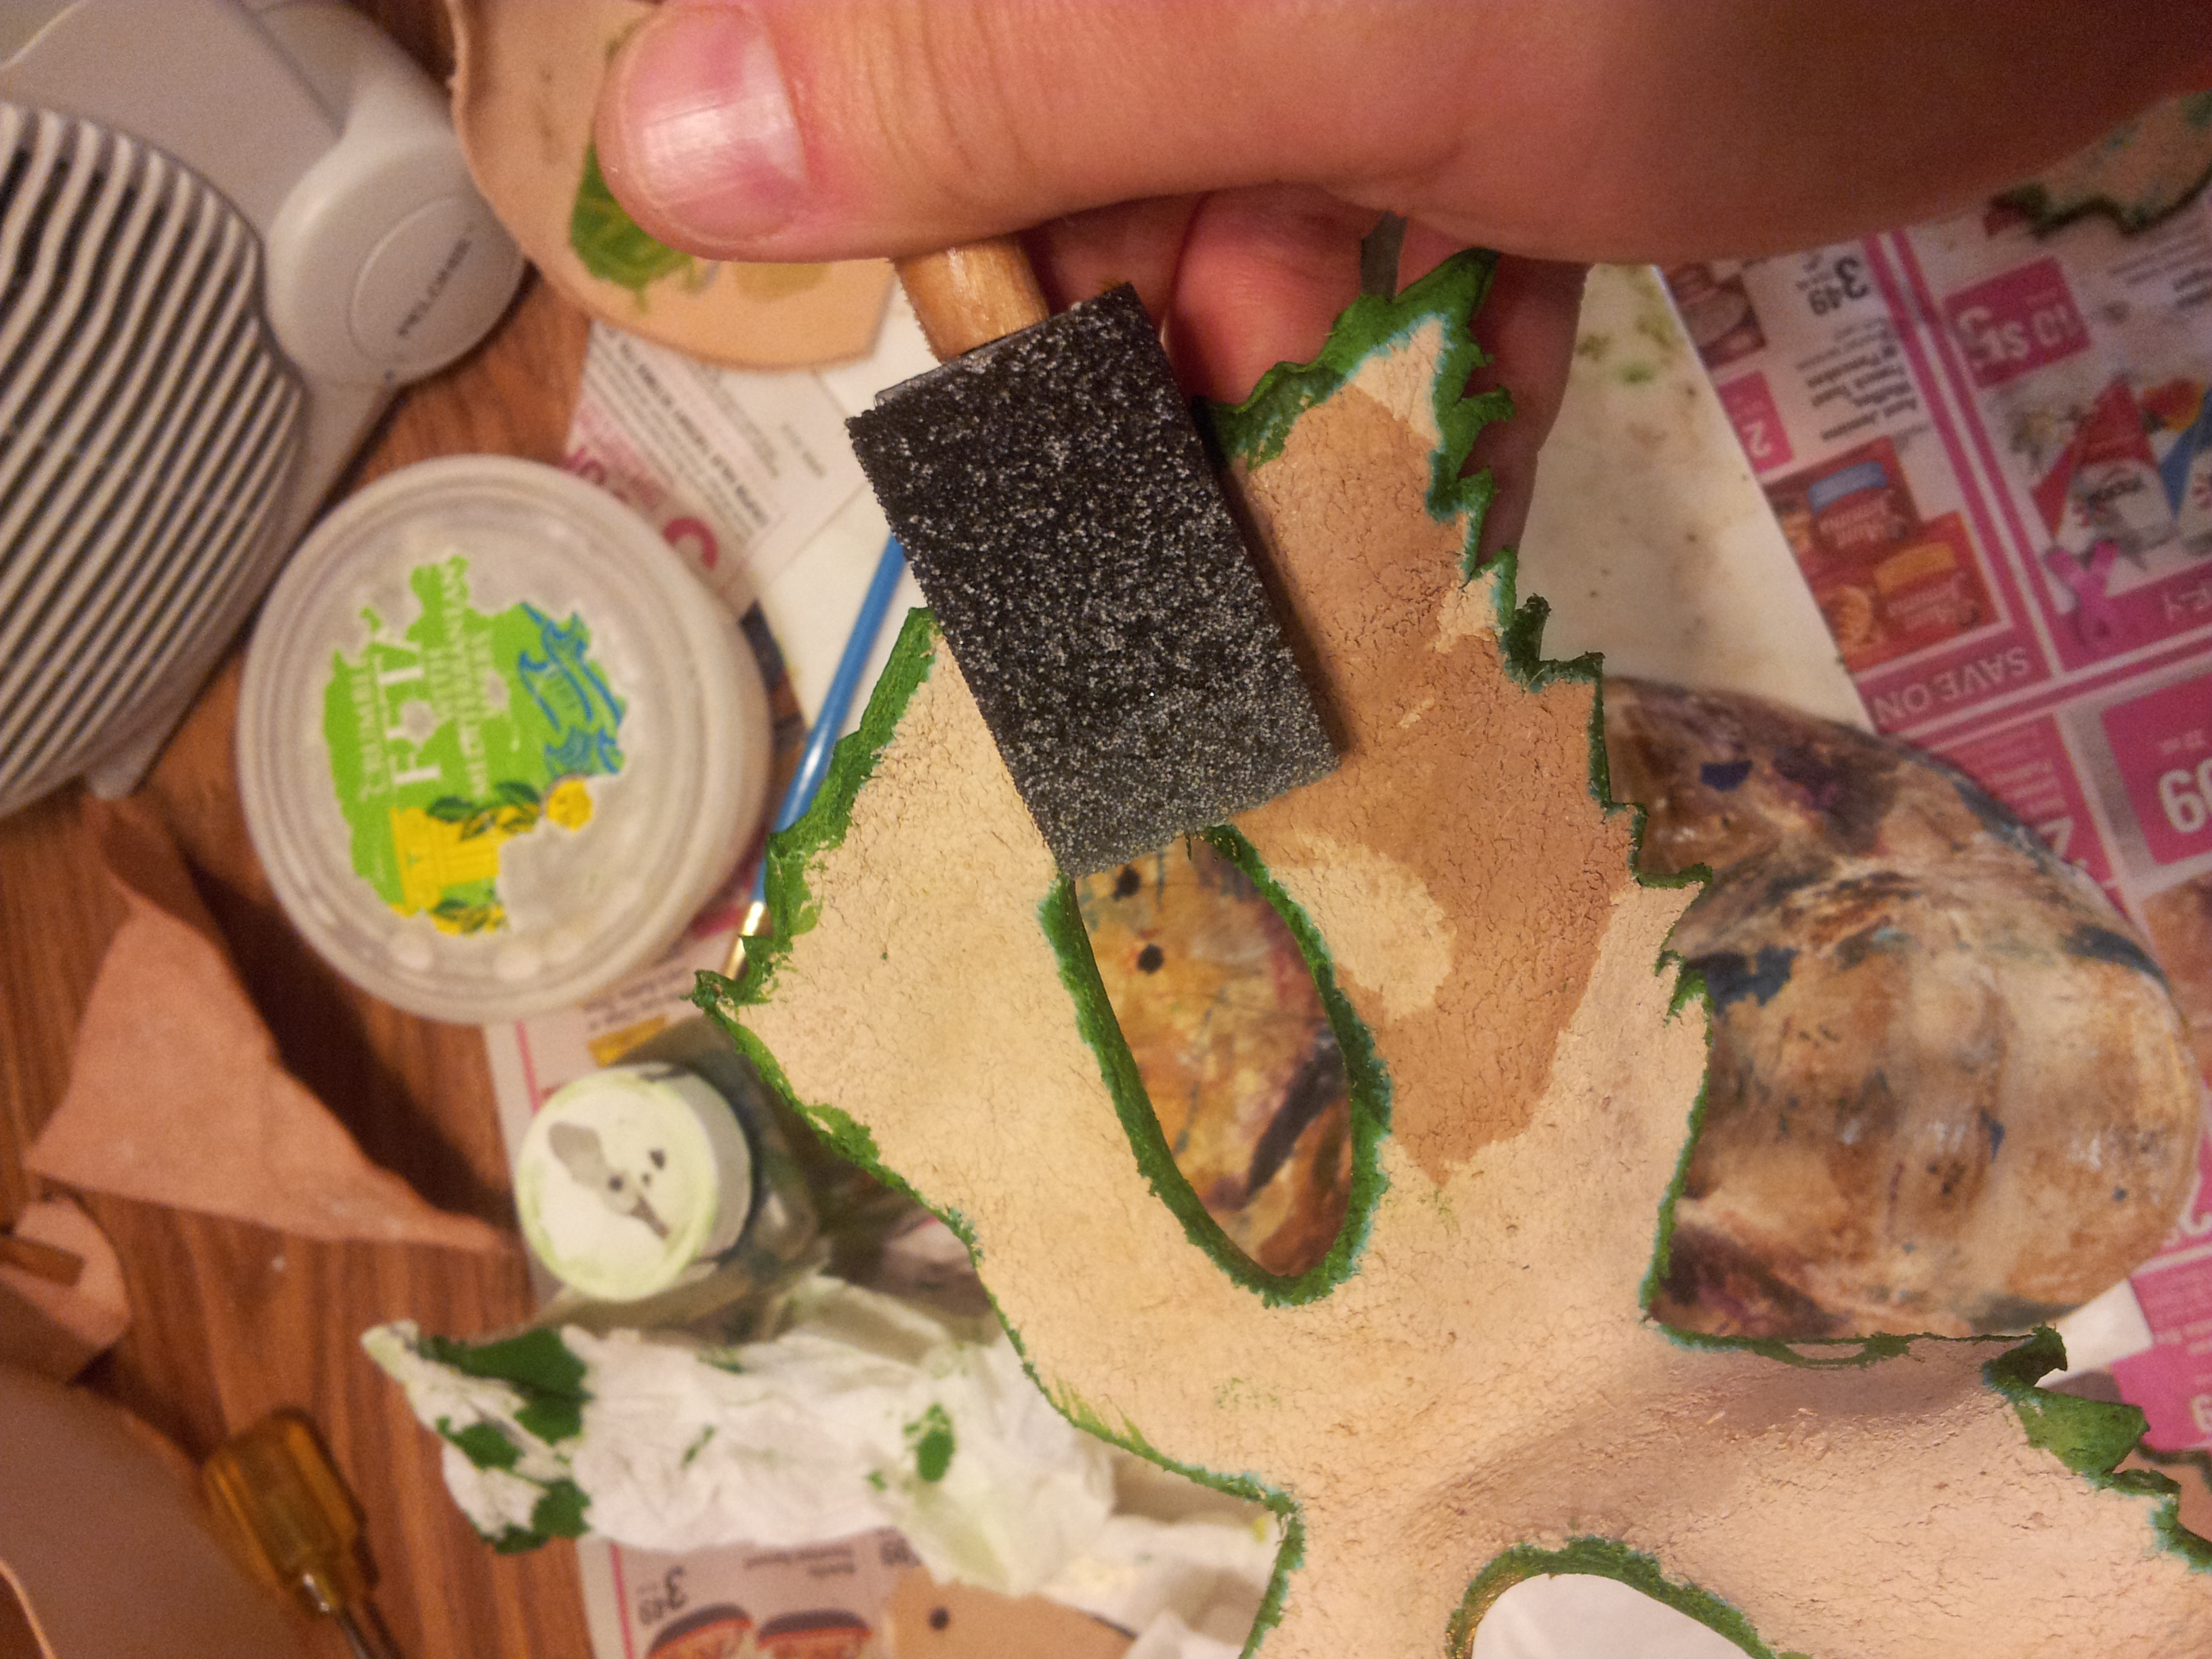
At this point, it is also necessary to bevel the edges of the leather strip and the bottom of the 3 little leaves. If you have an edge beveler, that is the easier tool for the job and gives a nice uniform cut. If you don't have a beveler, you can use a razor blade, but the edge will not be as uniform.
Add Definition to the Cuts

Soak the face part in lukewarm water for about 20 minutes. Wring it out and place it on a hard waterproof surface.
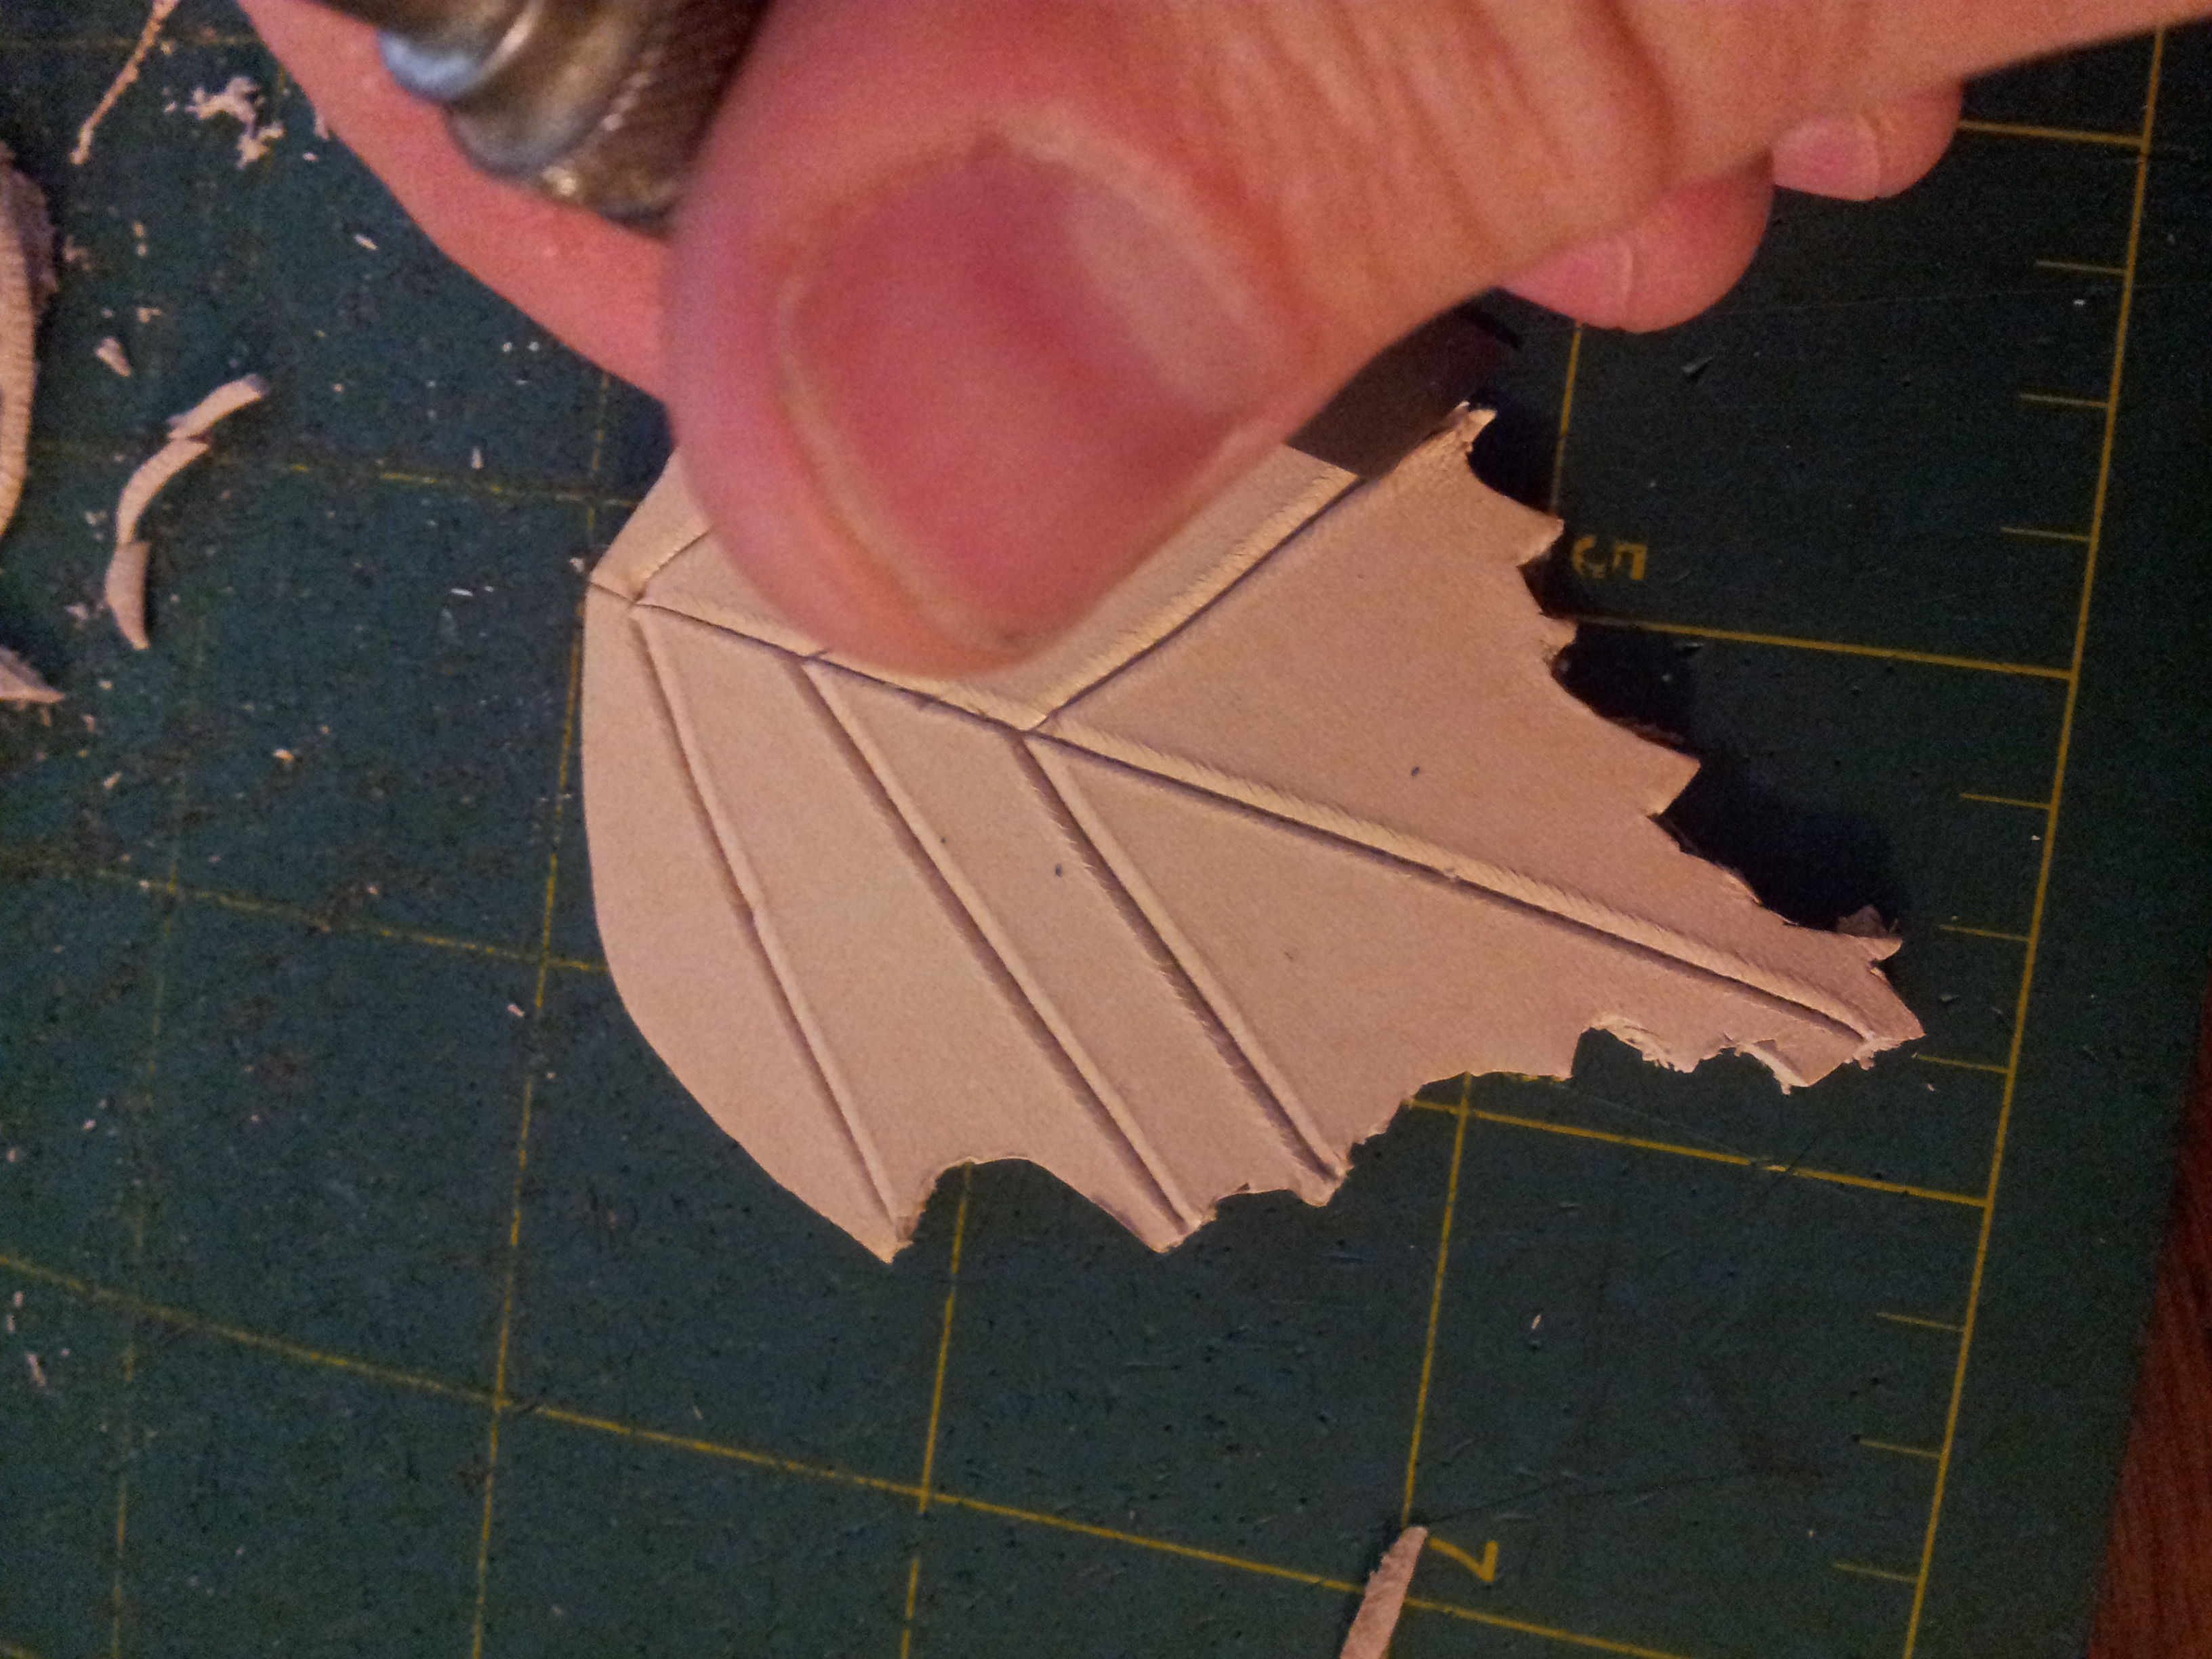
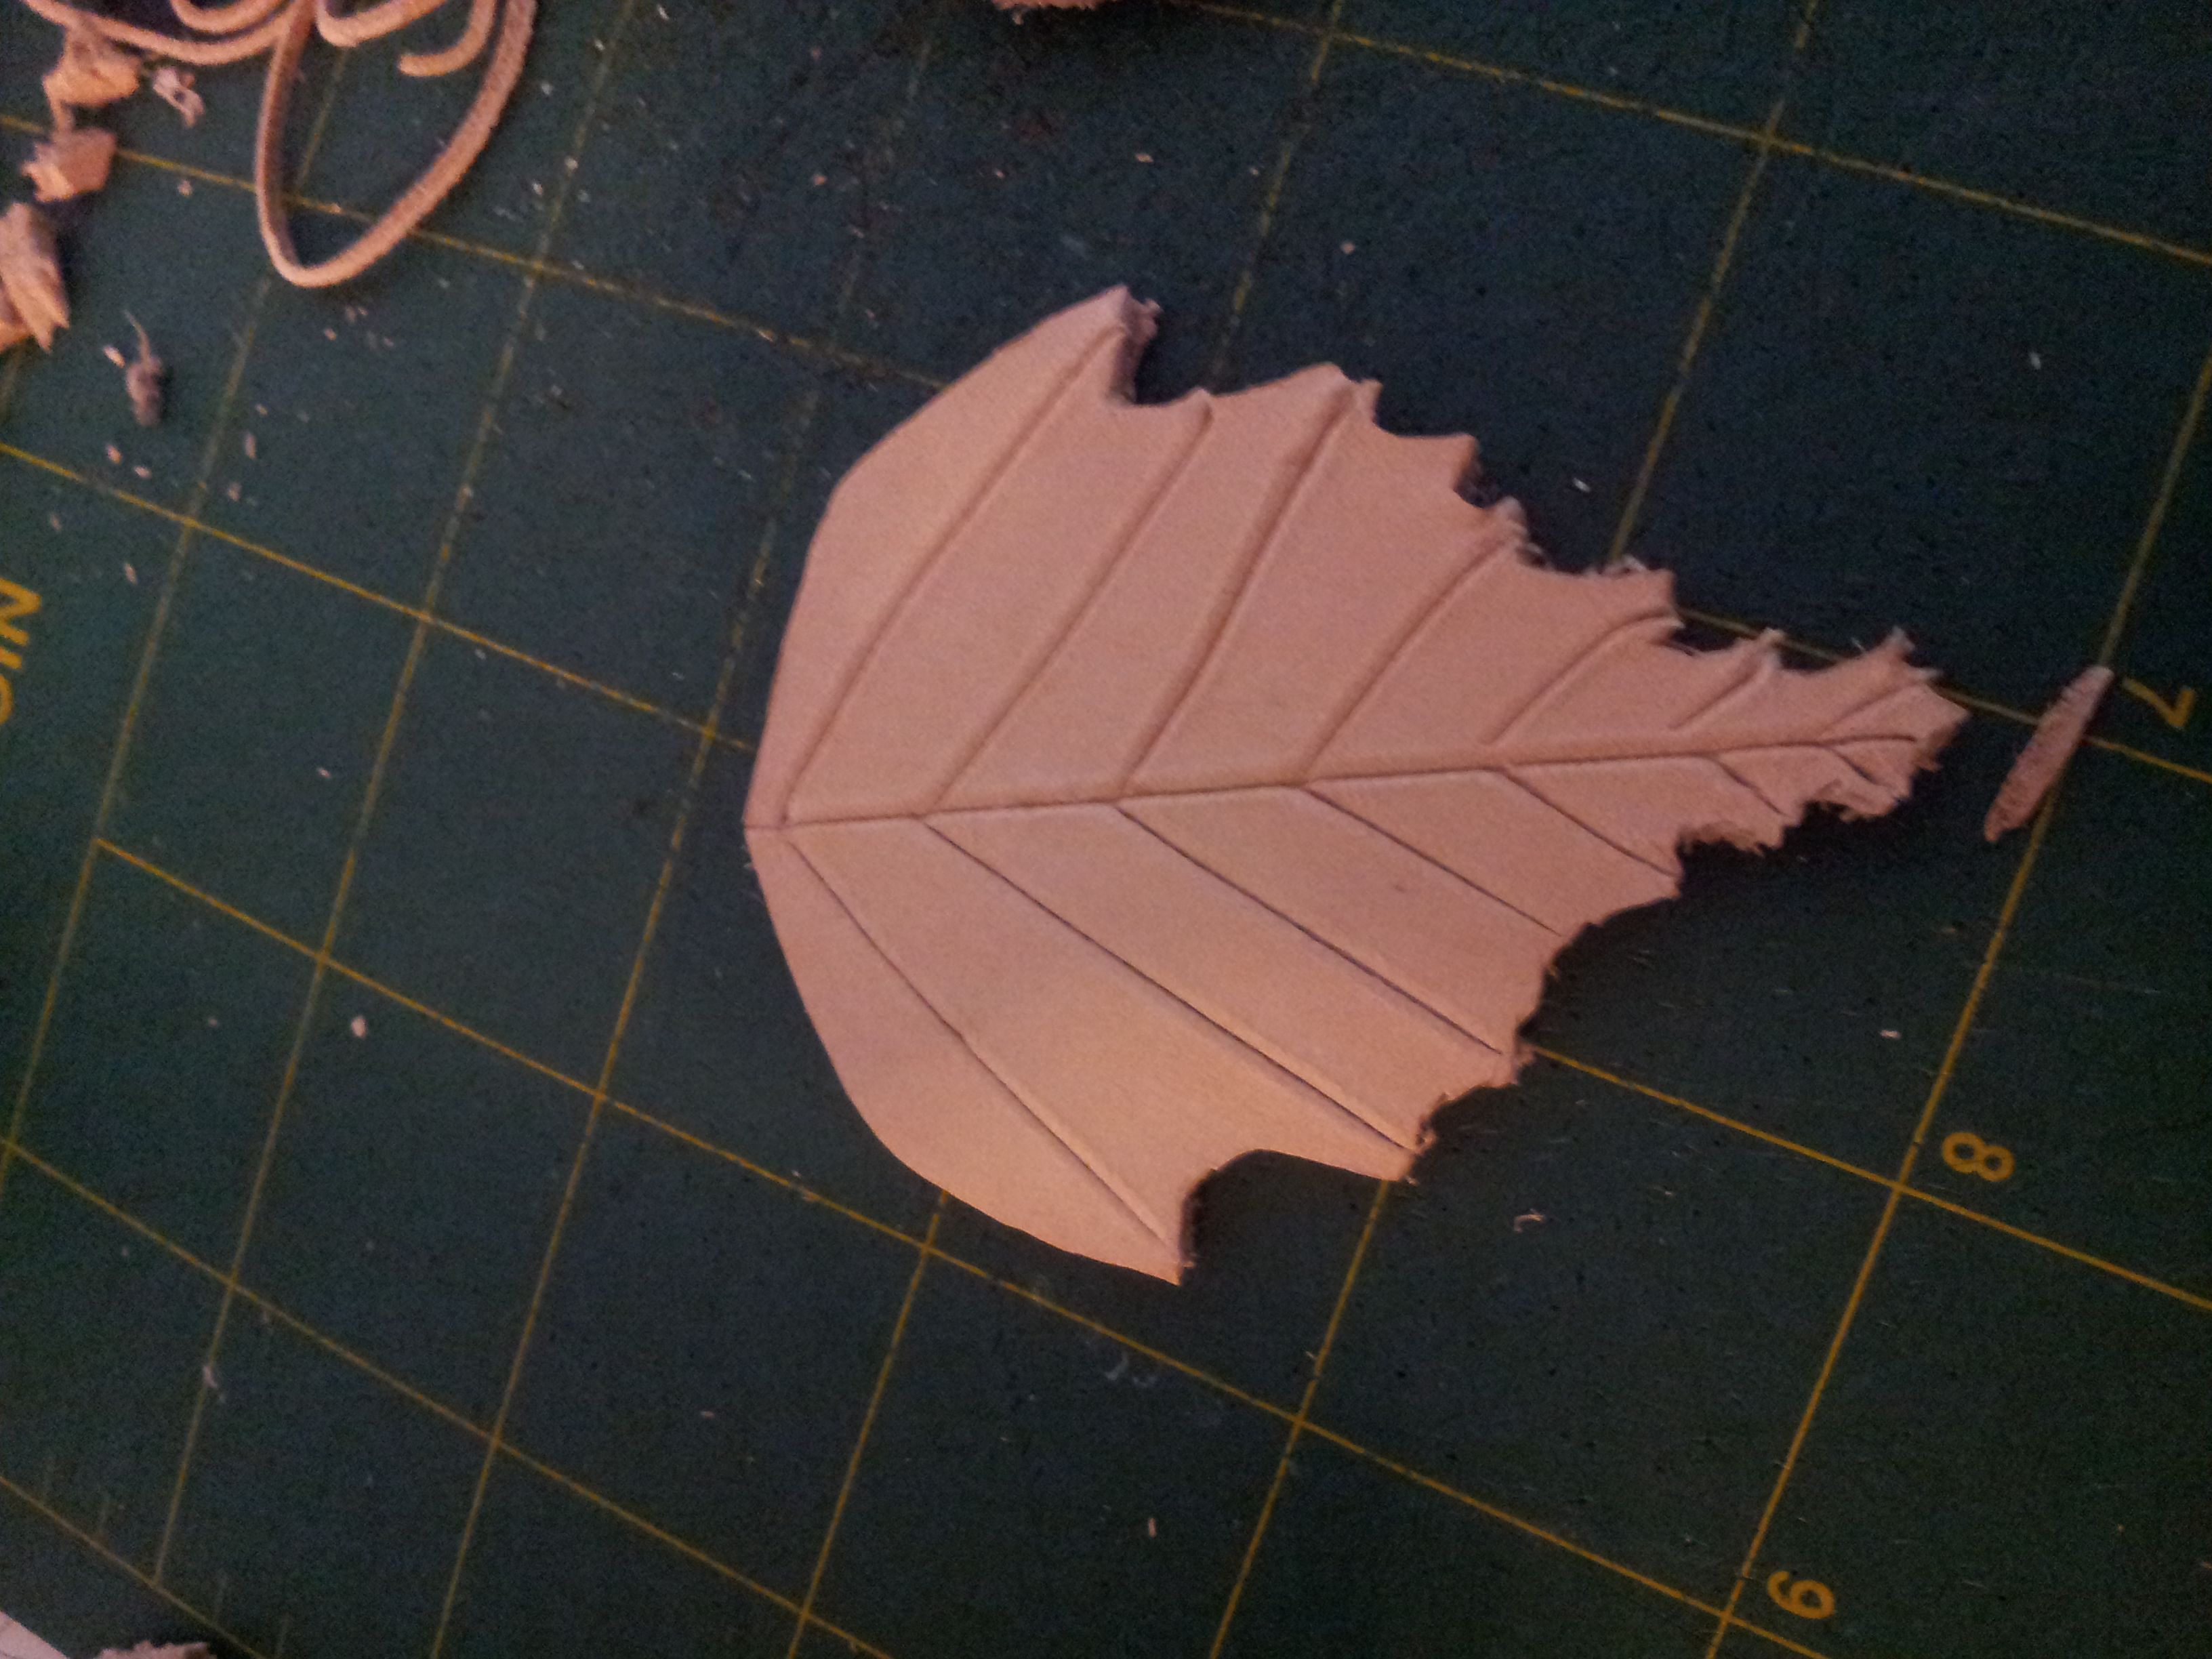
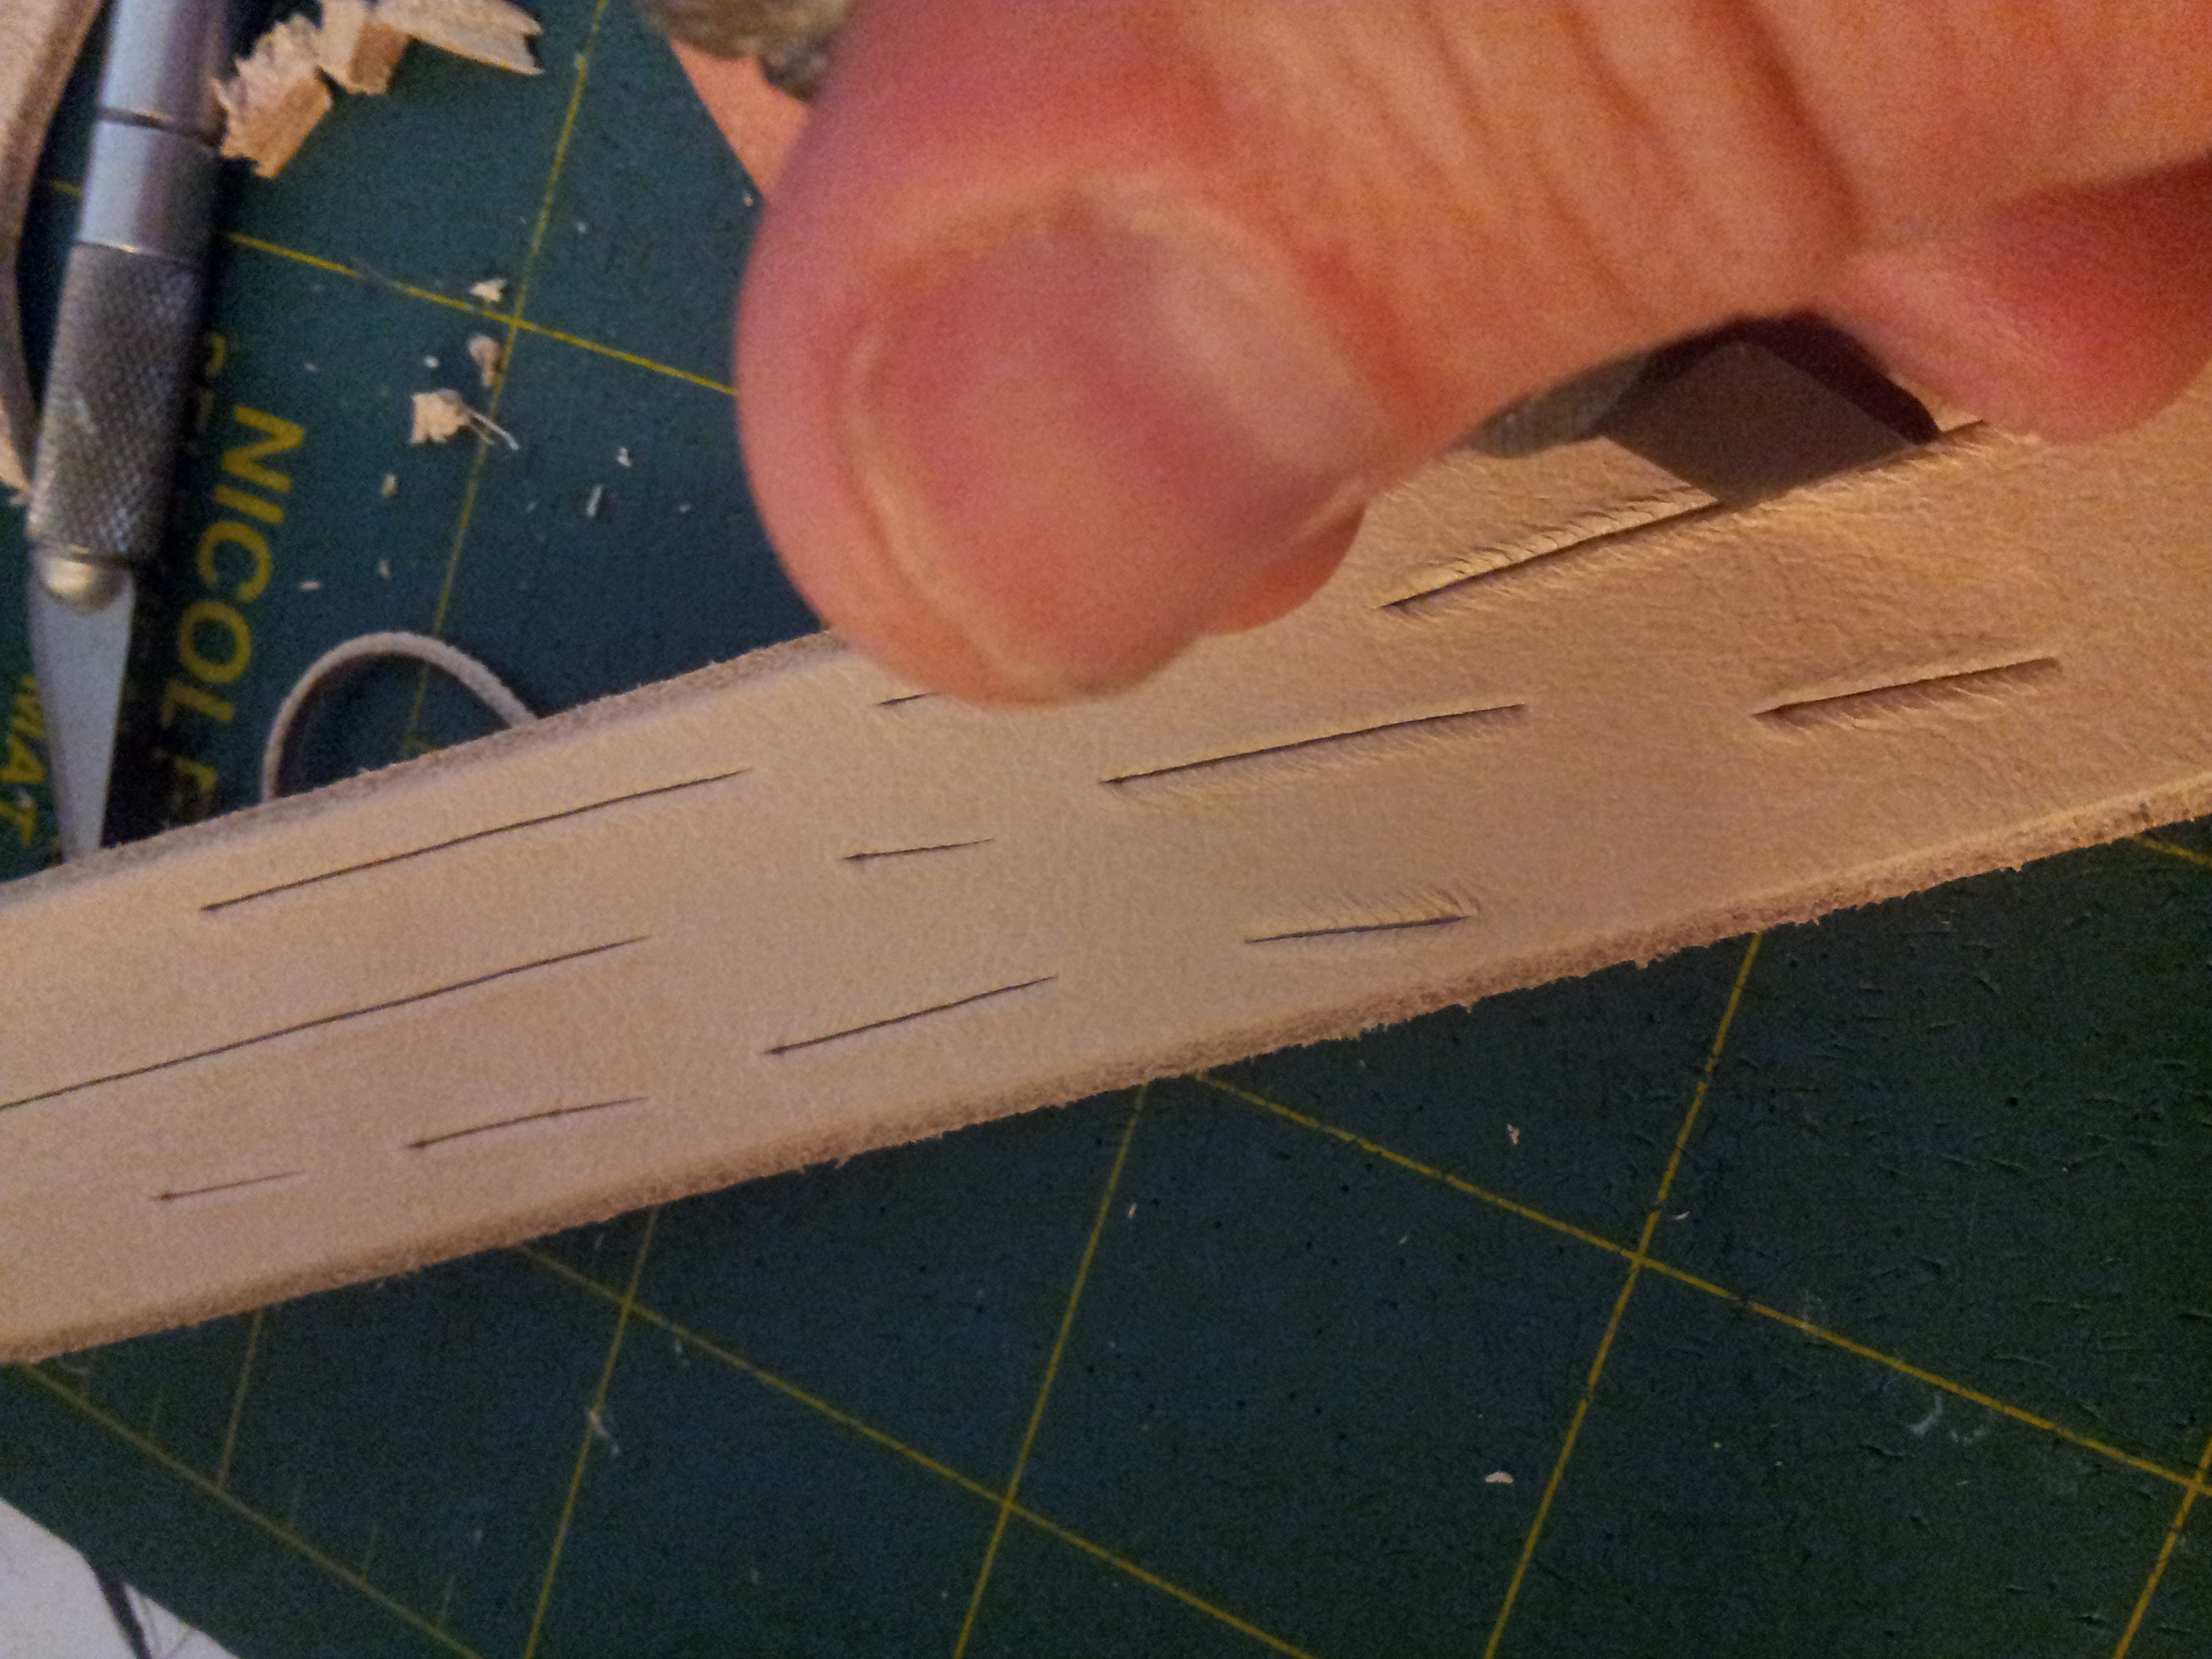
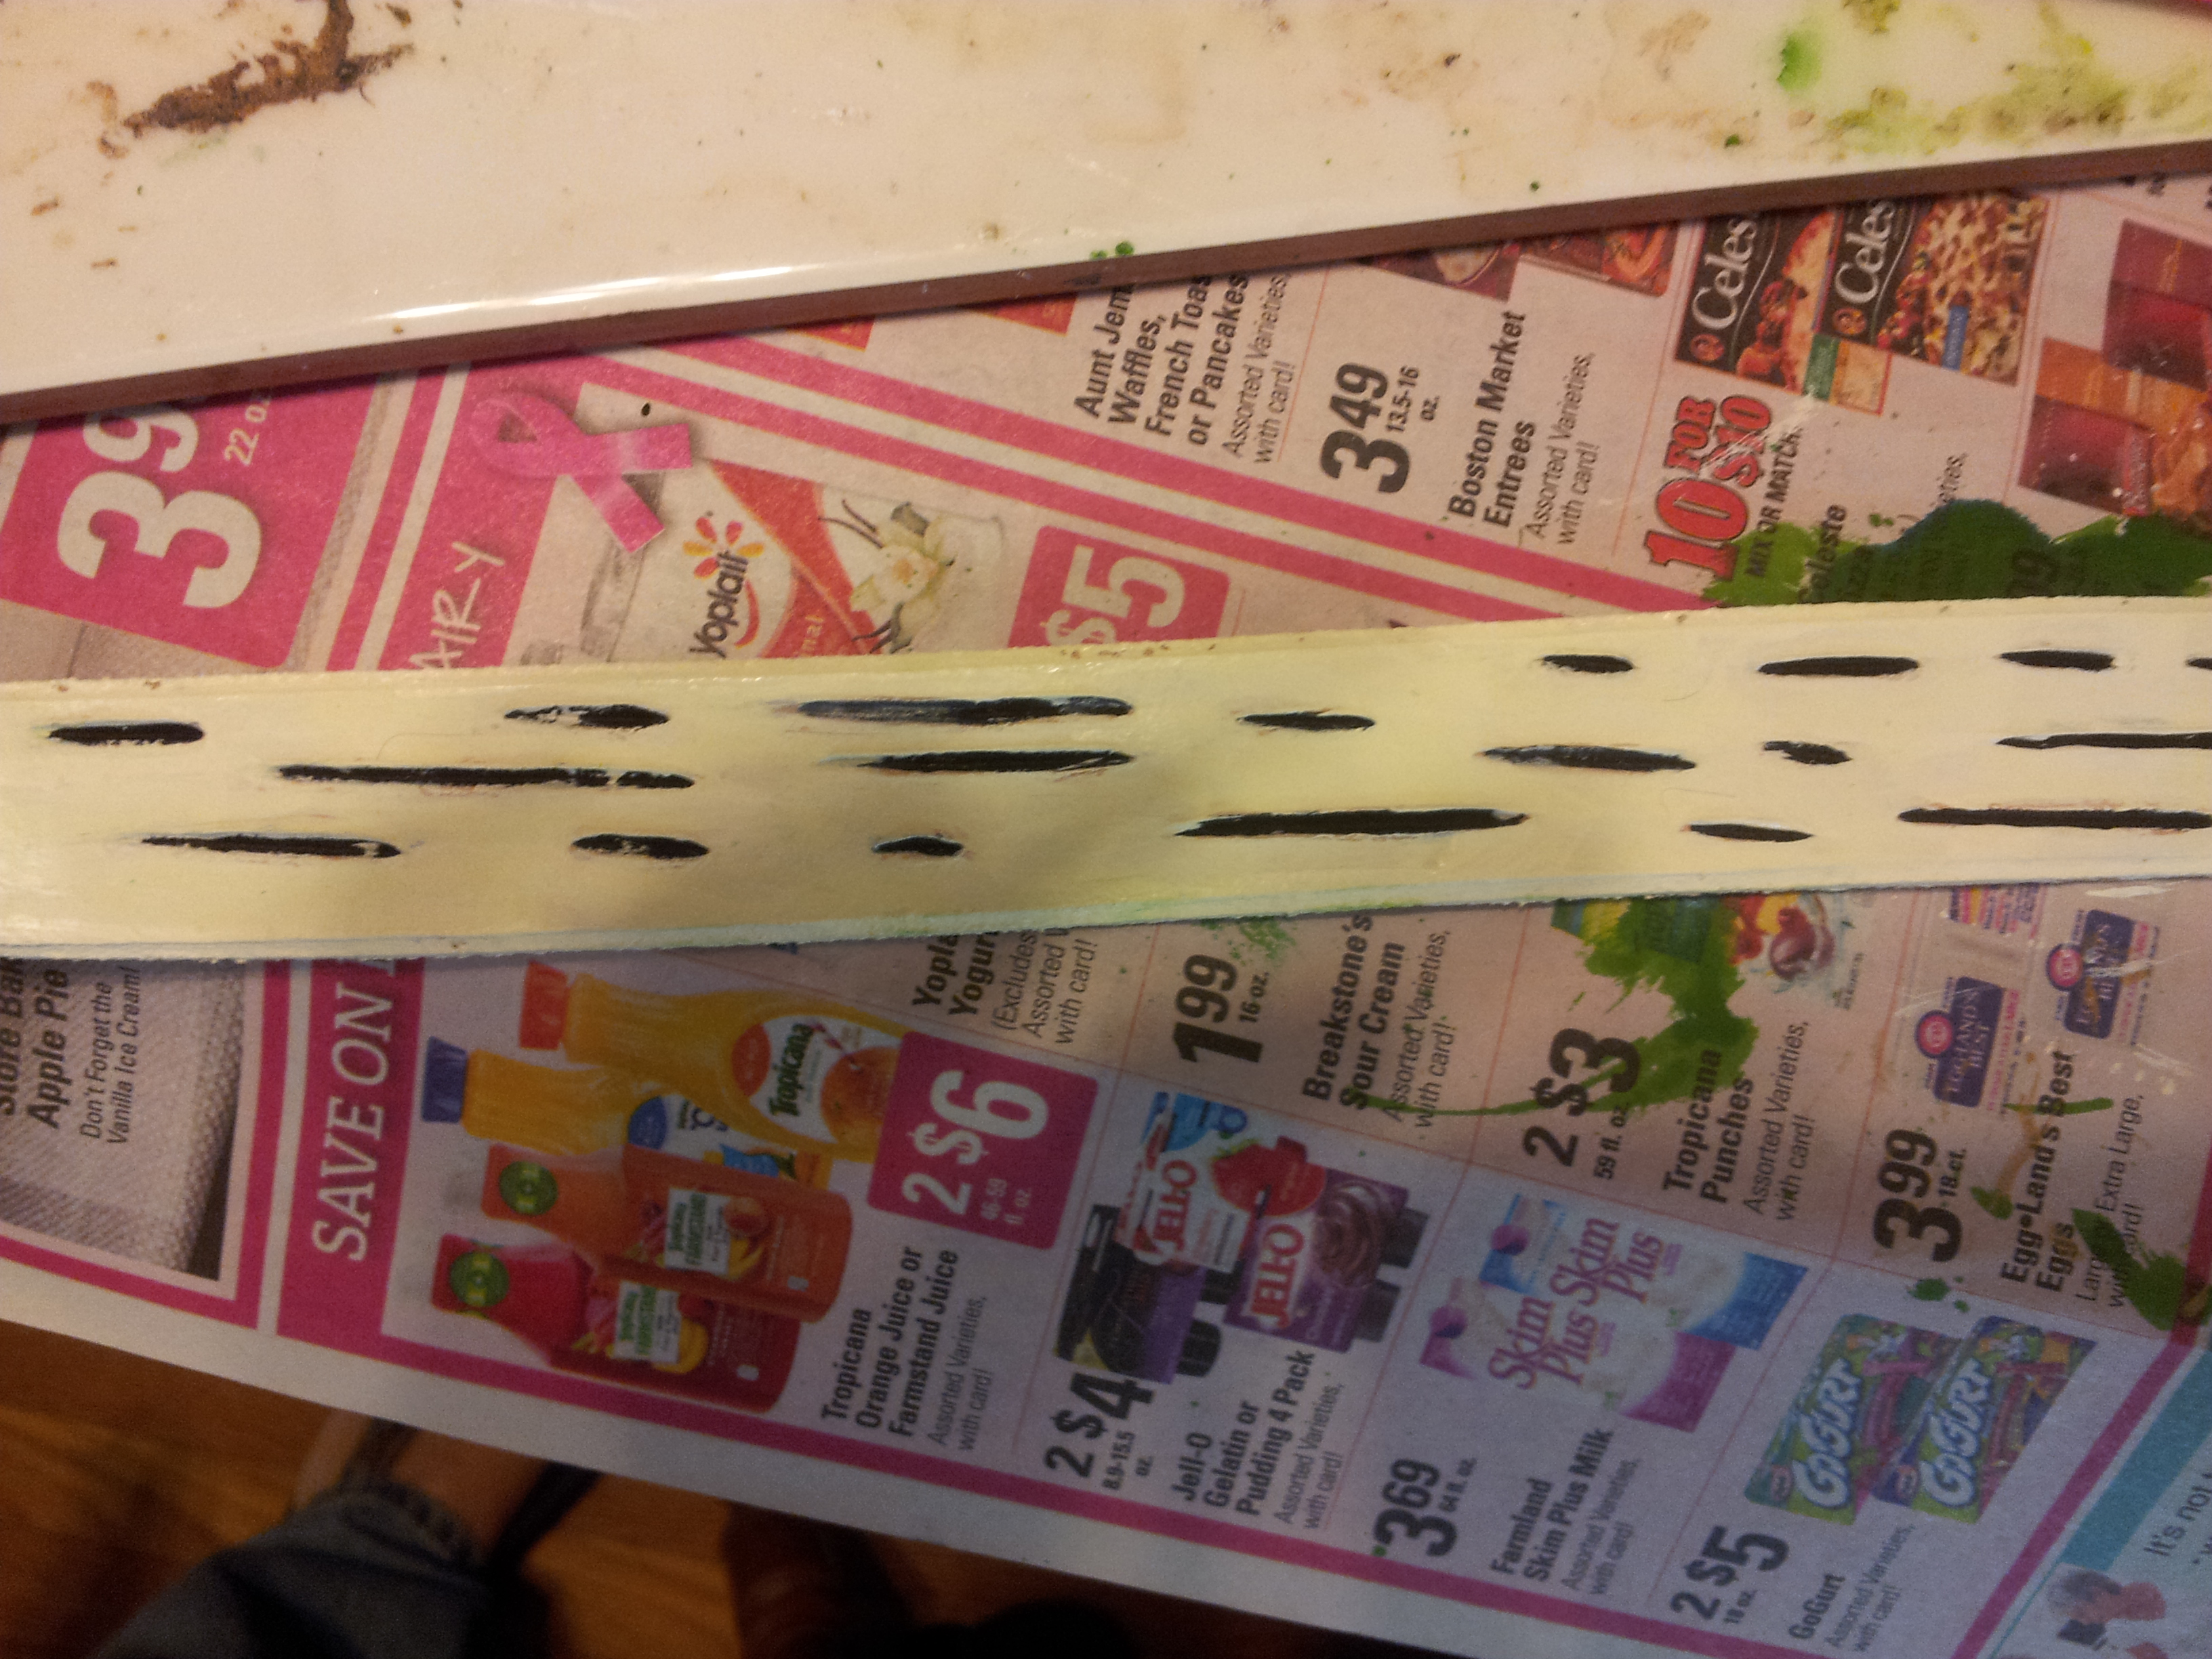
Use the spoon end of your modeling spoon to spread open the cuts you had made in the leather in the last step. If you run the point of the spoon along the cut, it will slip into the cut. Pull the spoon through the cut, and the leather will separate. Use the spoon to then push on the sides of the cuts. This will bring out the cuts you made.
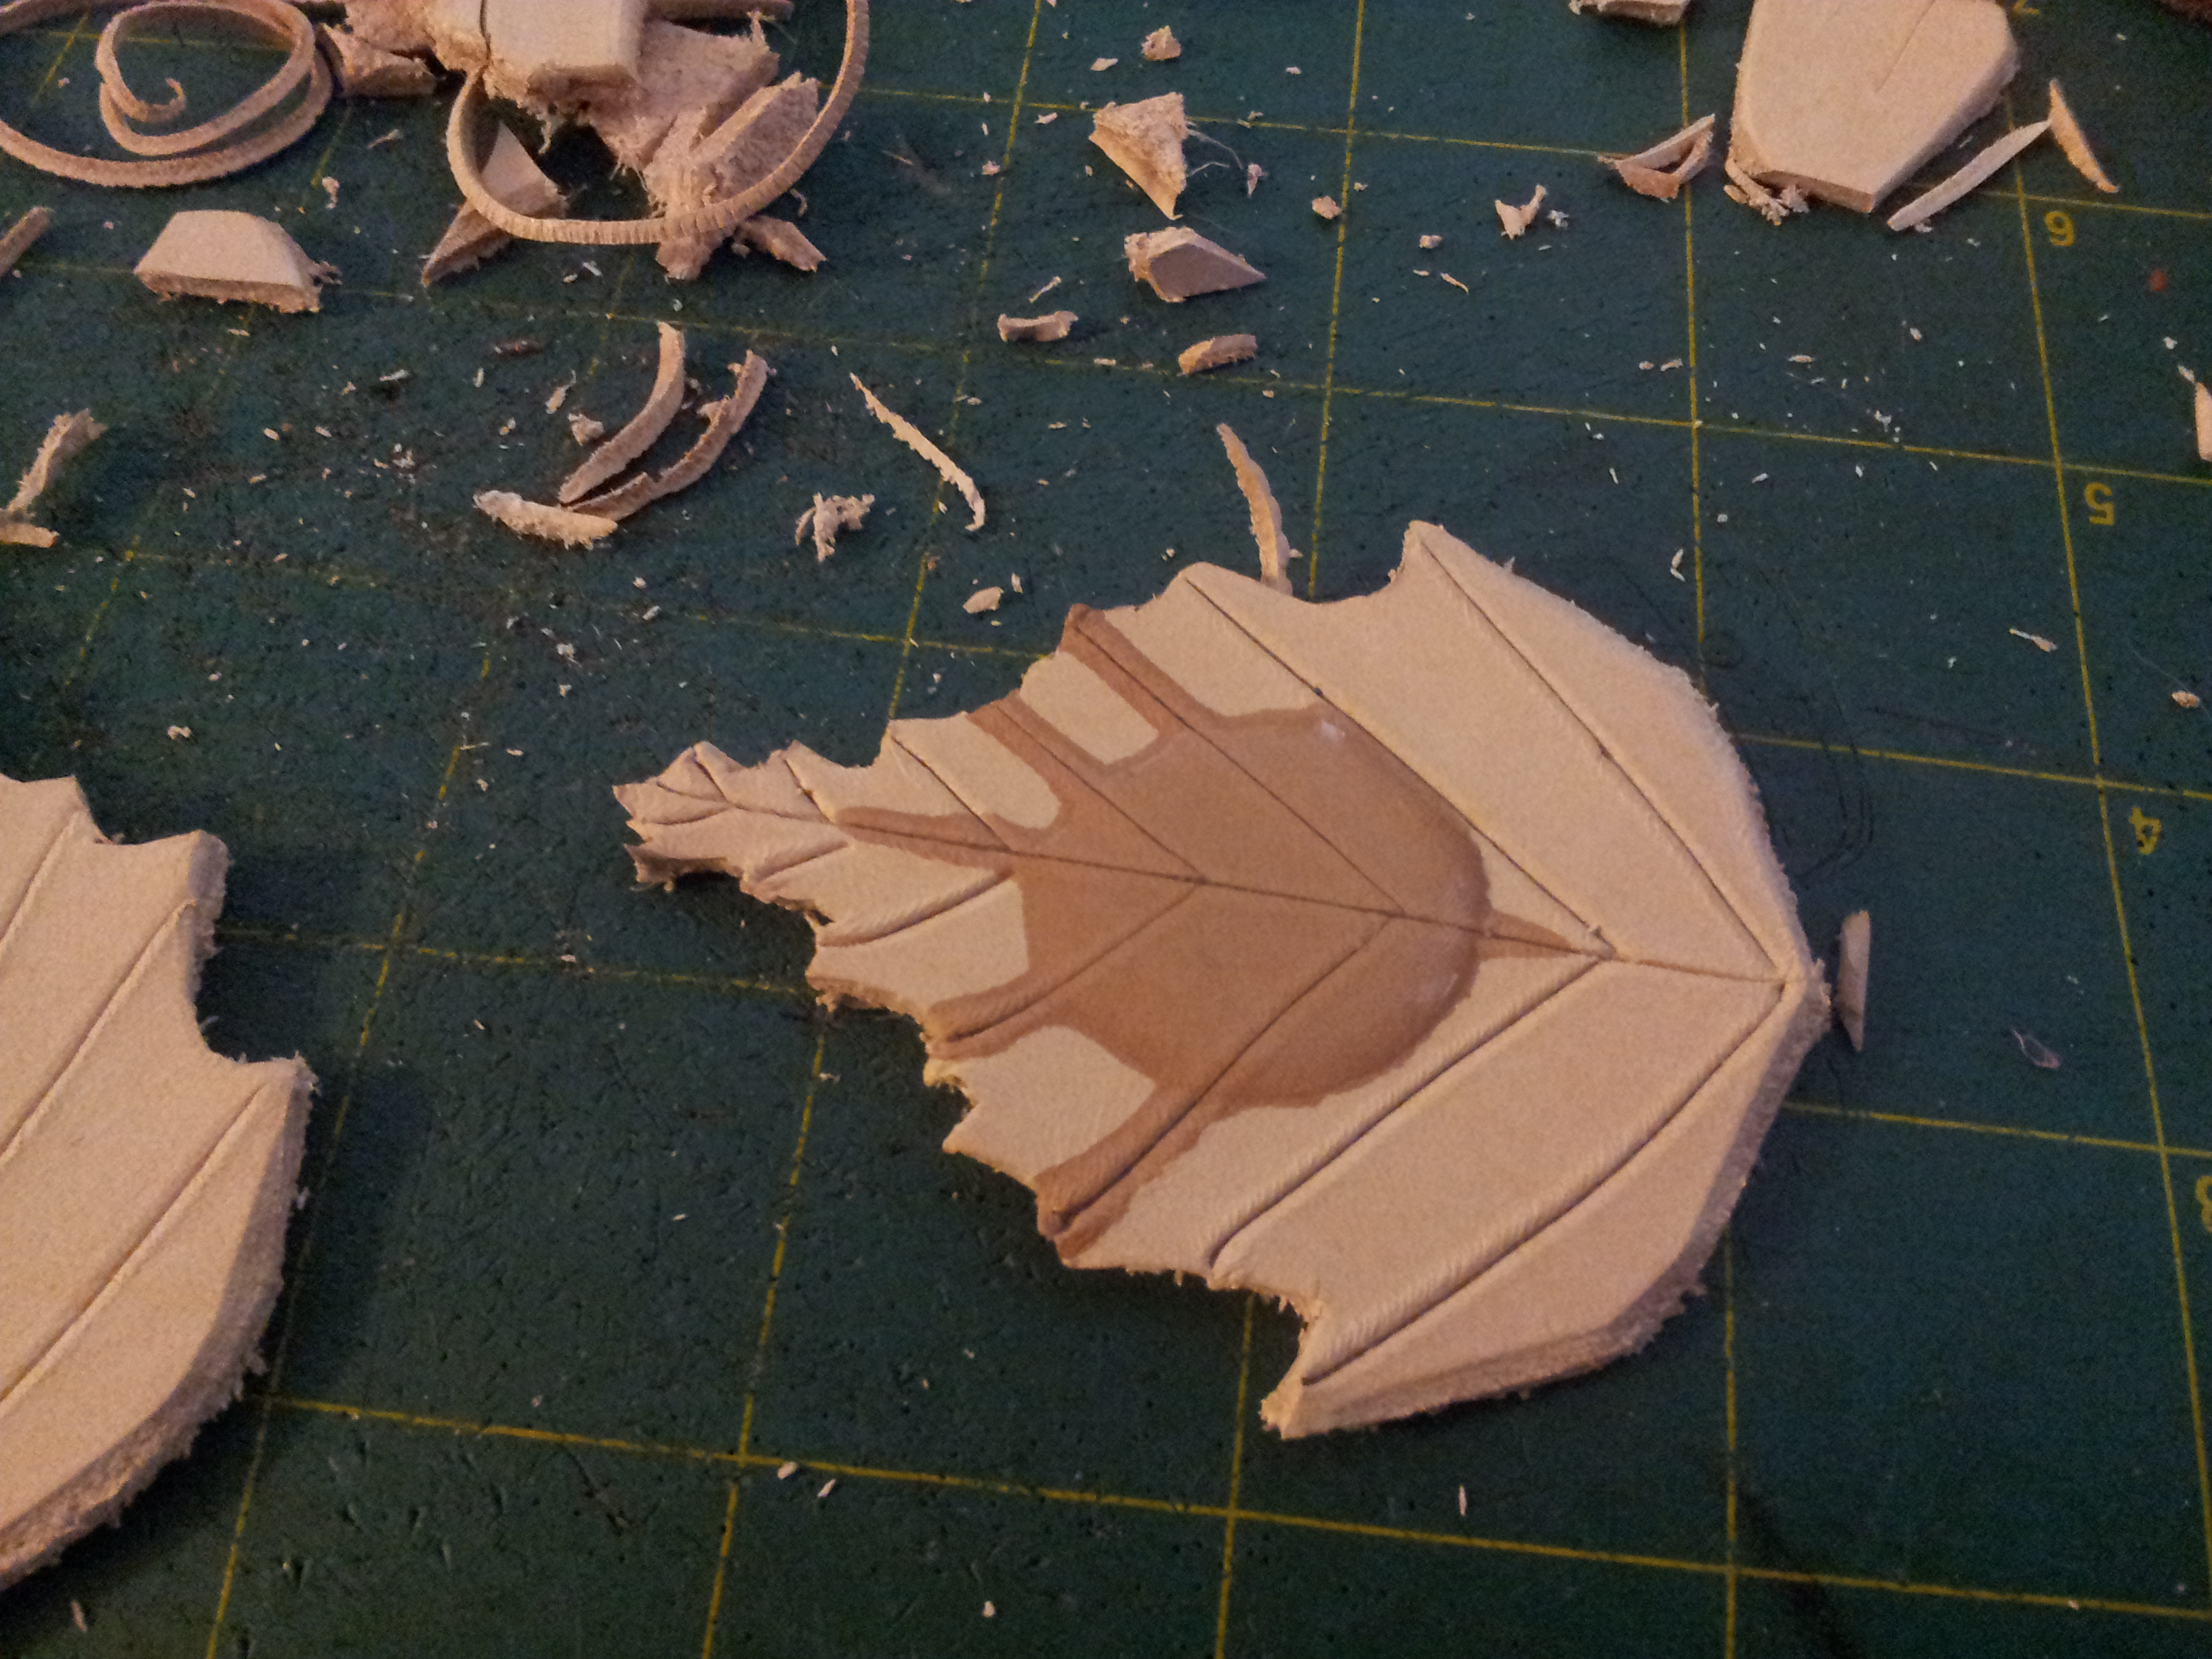
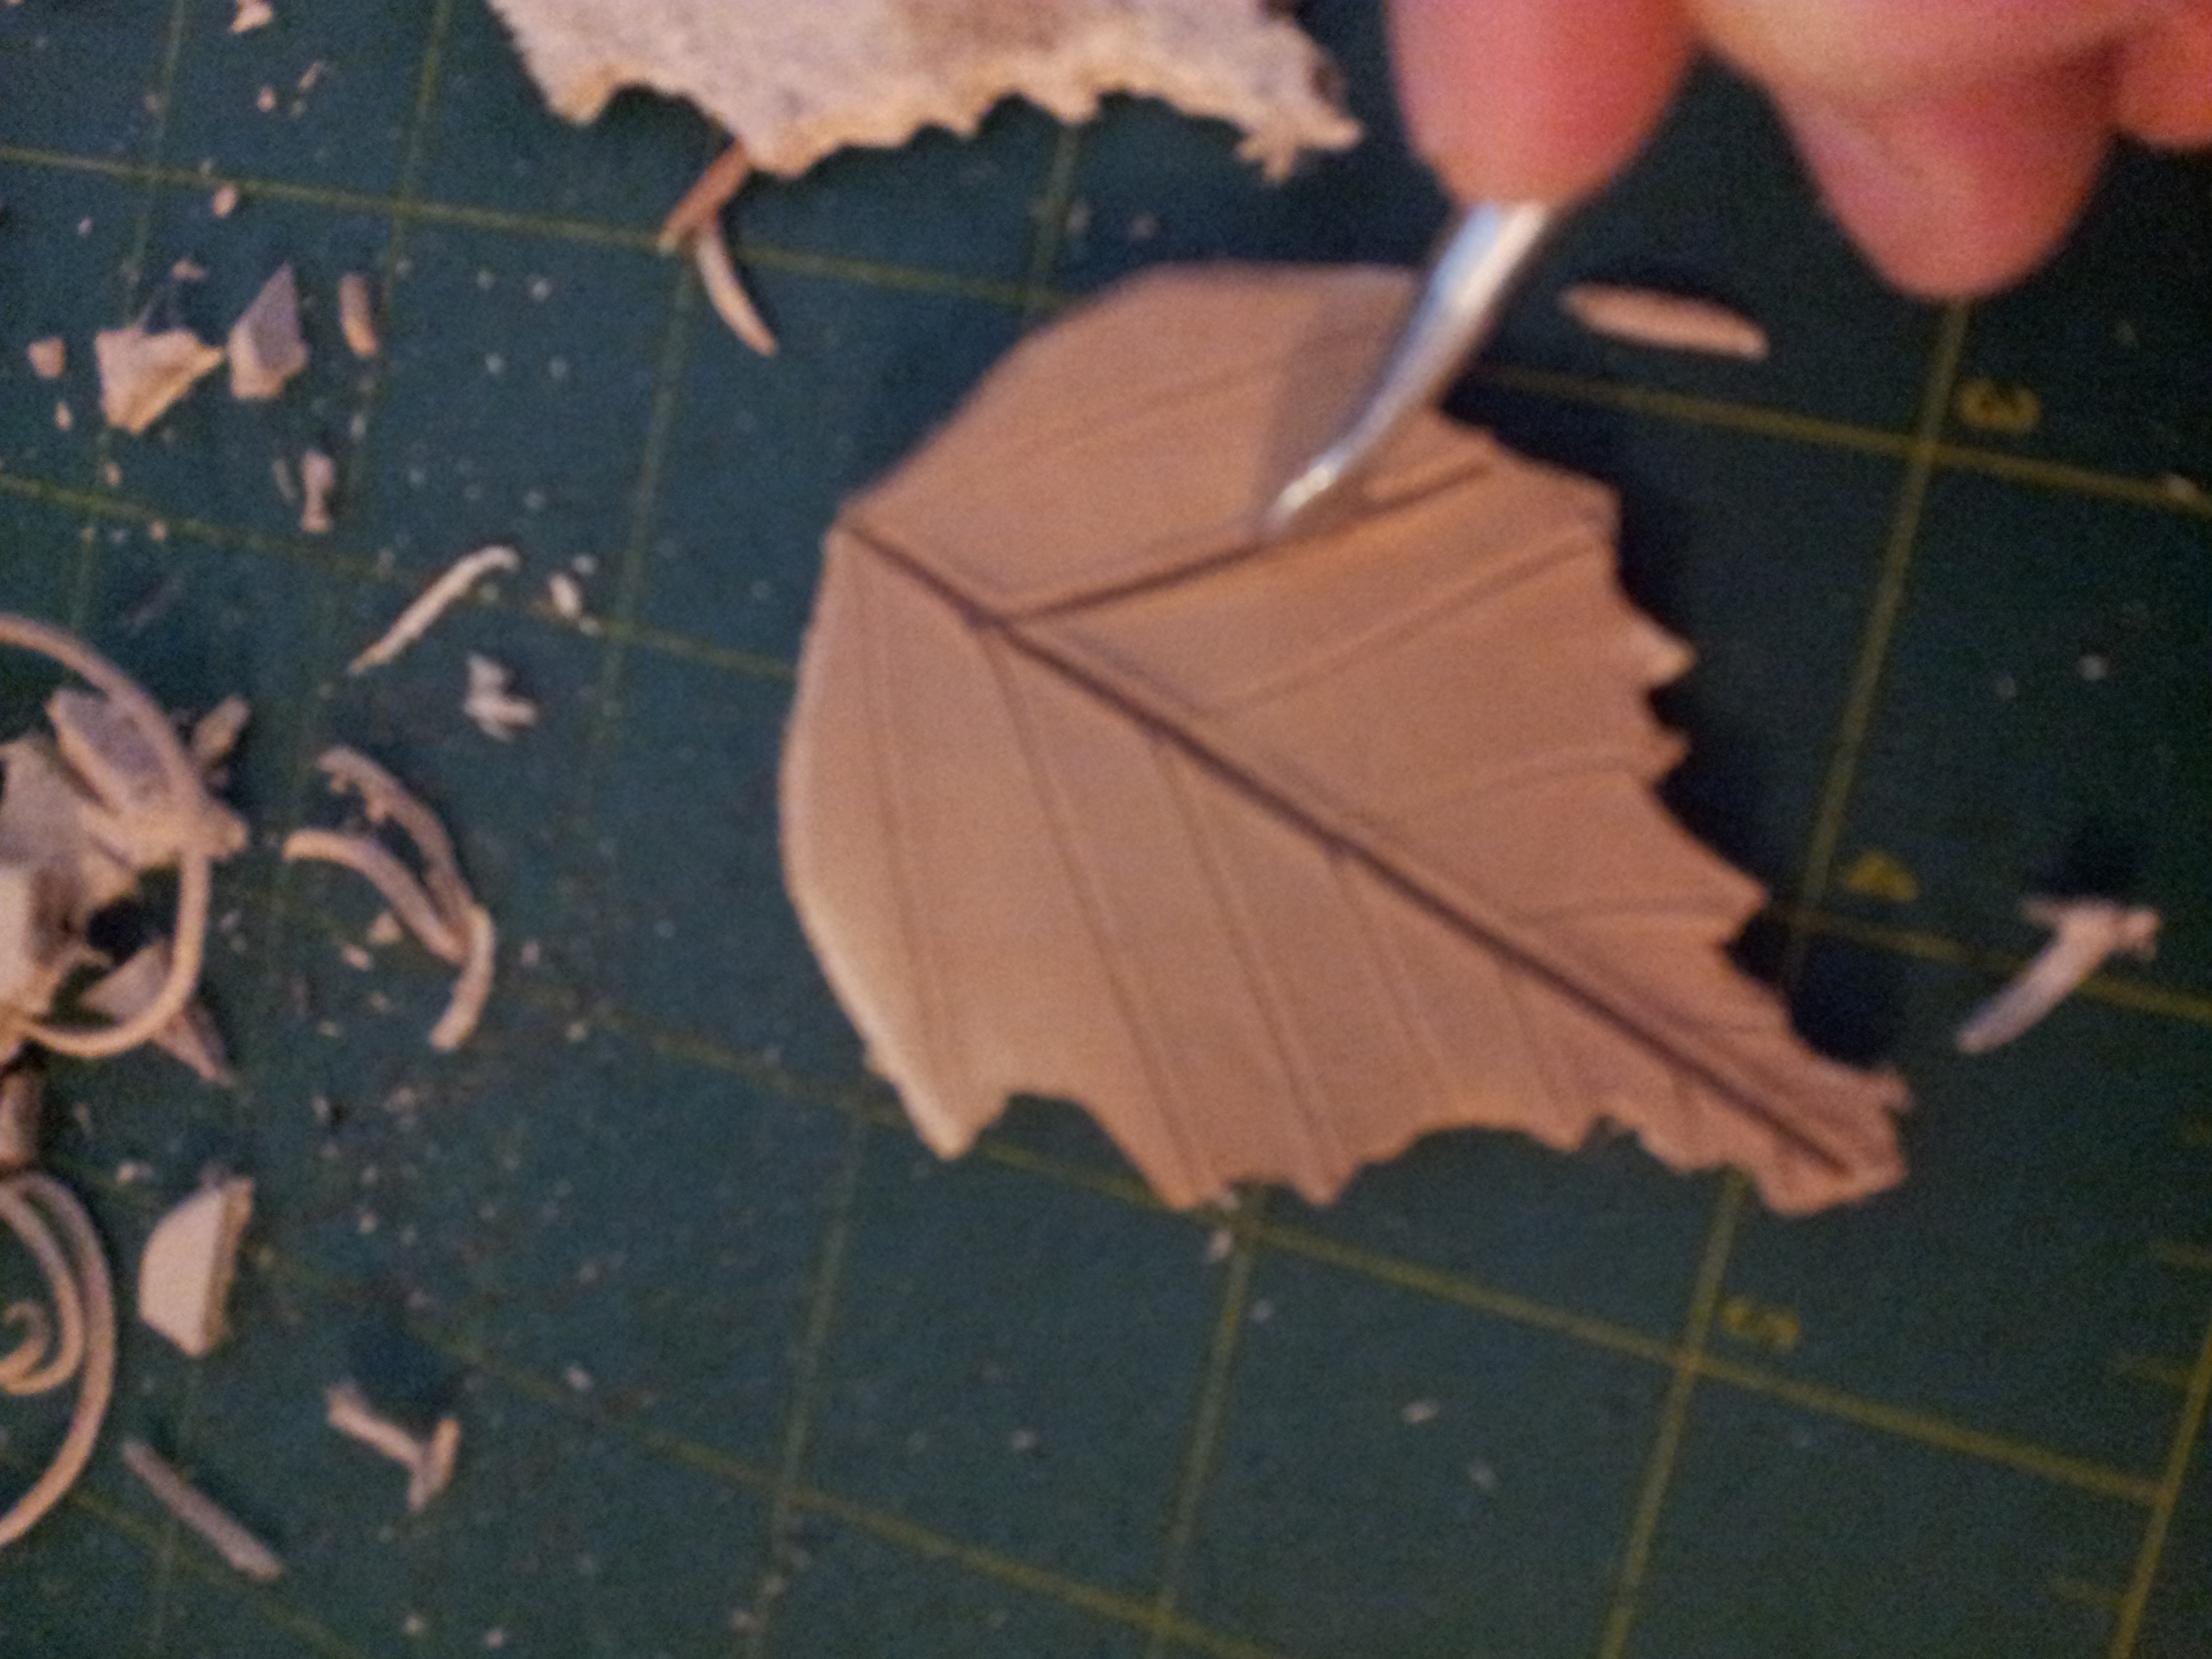
For the leaves and the strap of bark, you do not need to soak the leather. You only need enough water to dampen the leather so that the color changes. Open up the lines you cut the same way you did above, running the modeling spoon through the cuts.
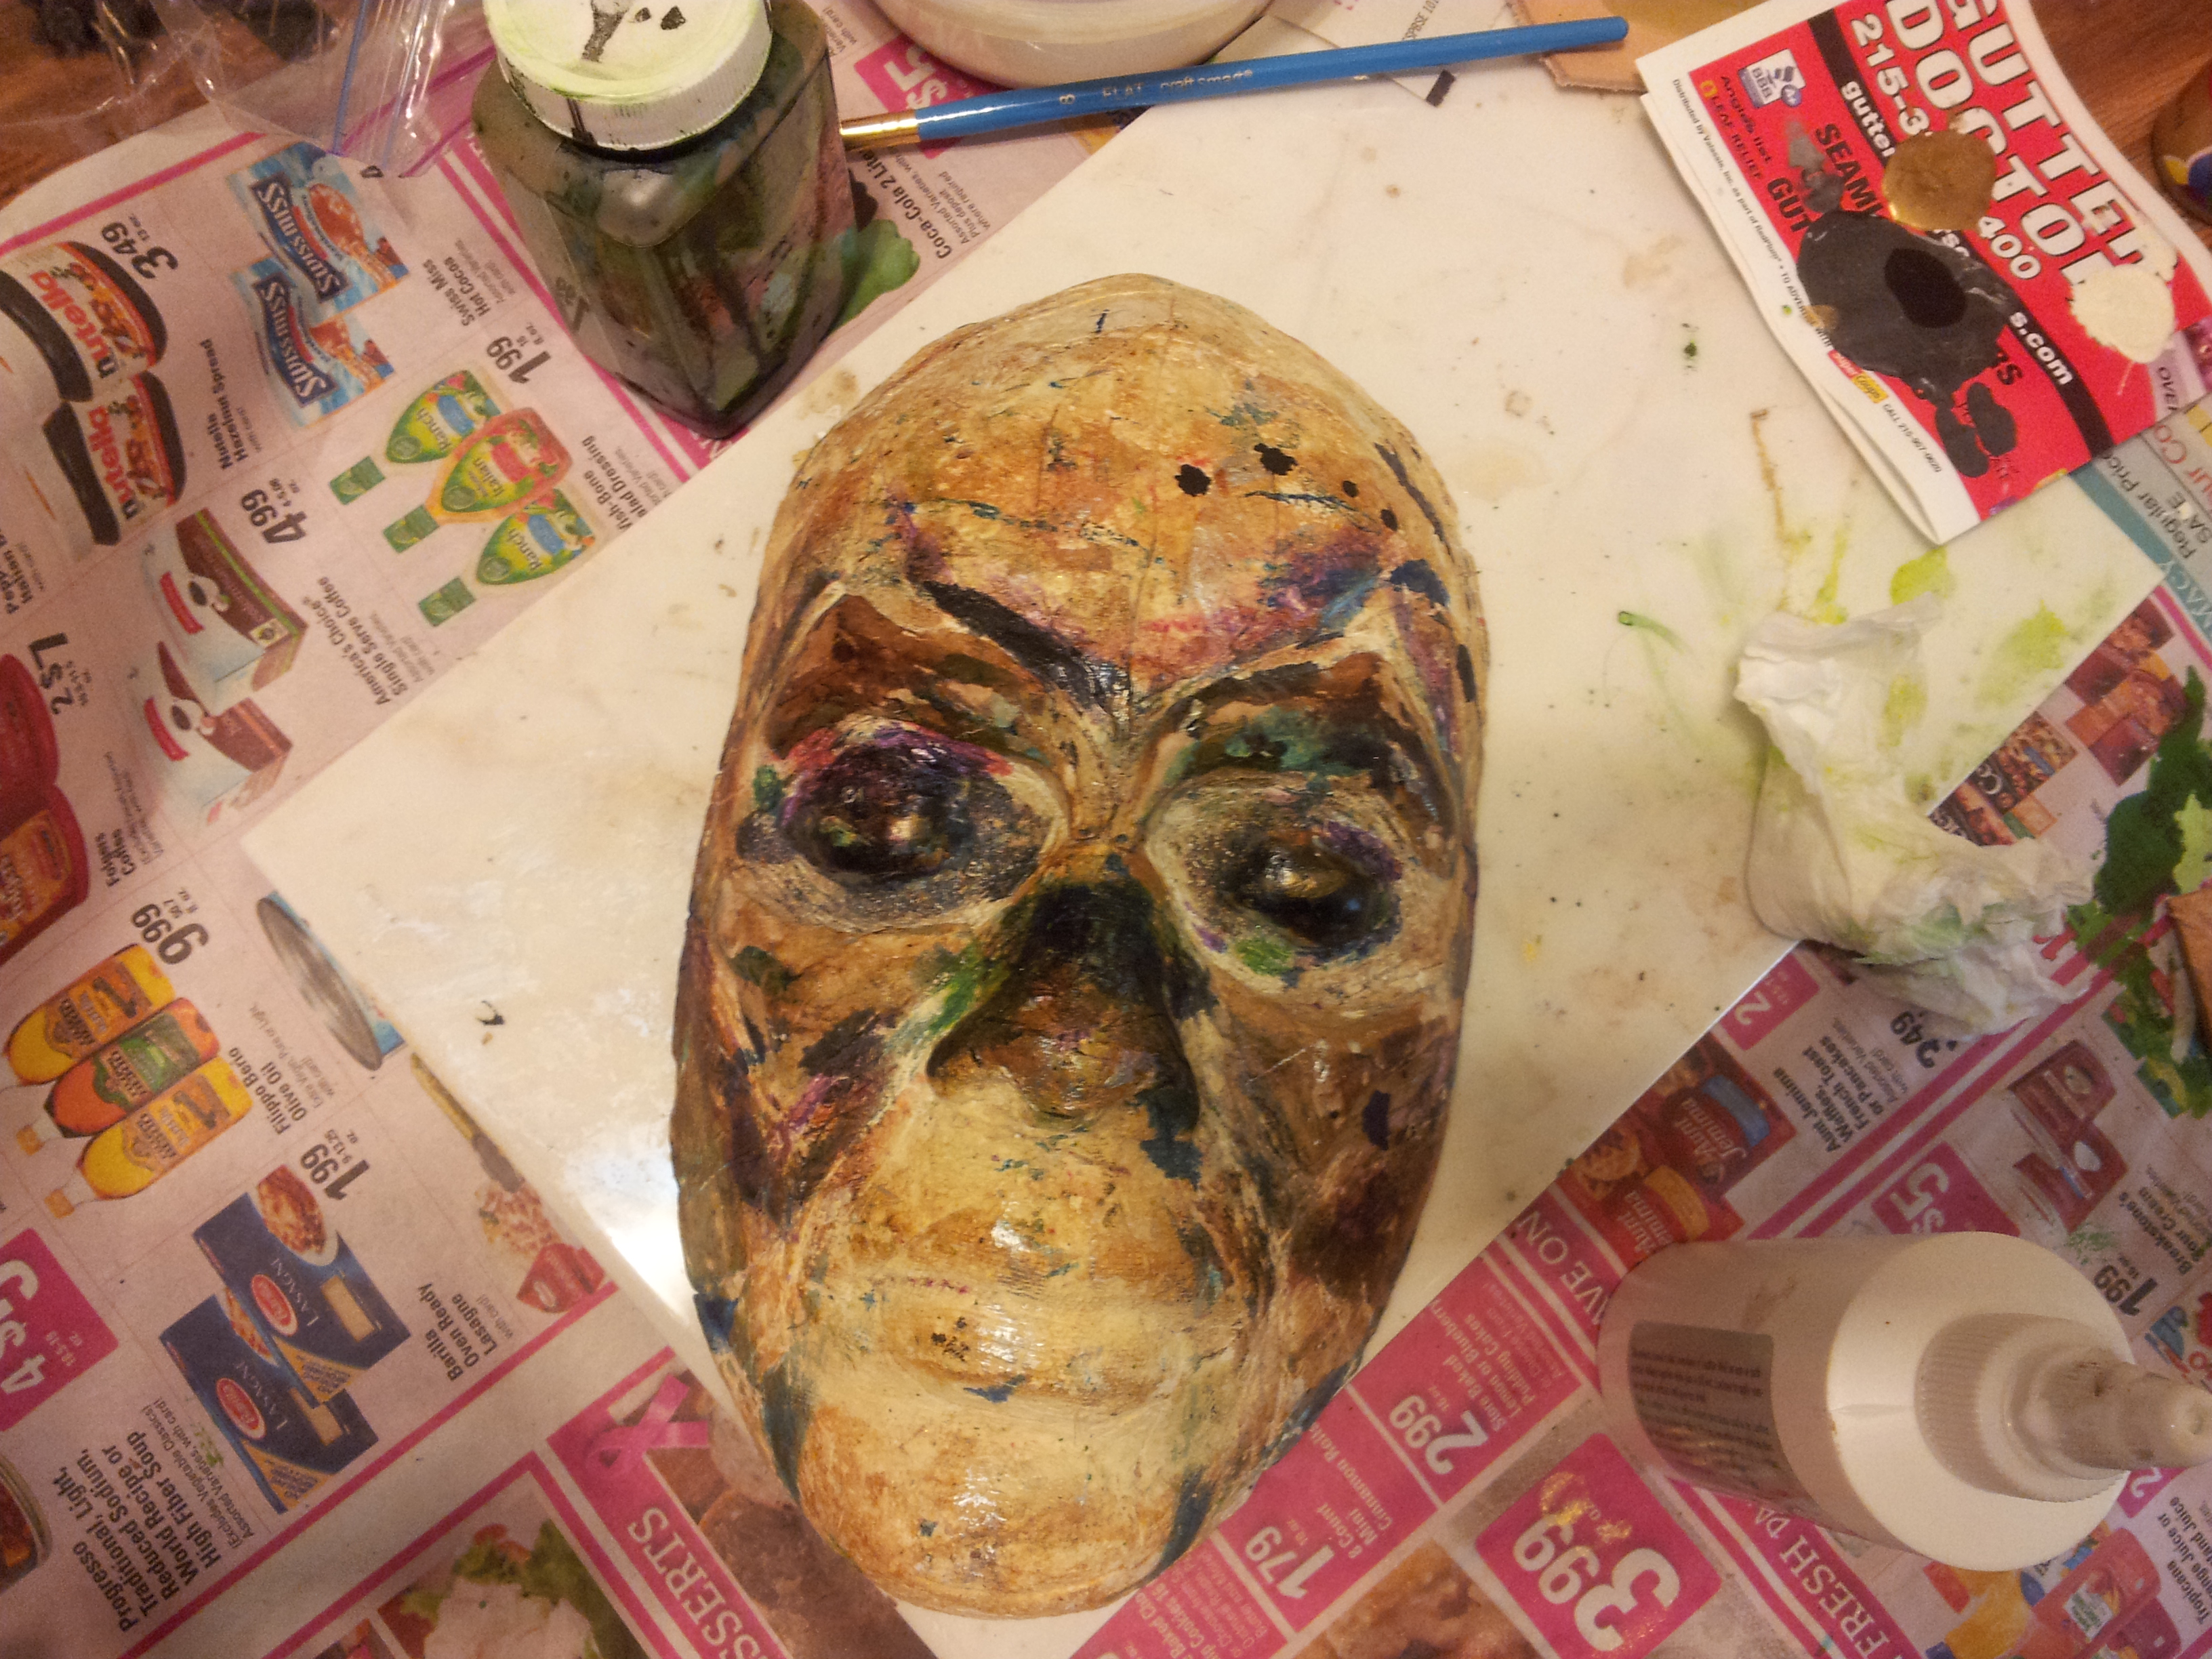
Sculpt the Mask
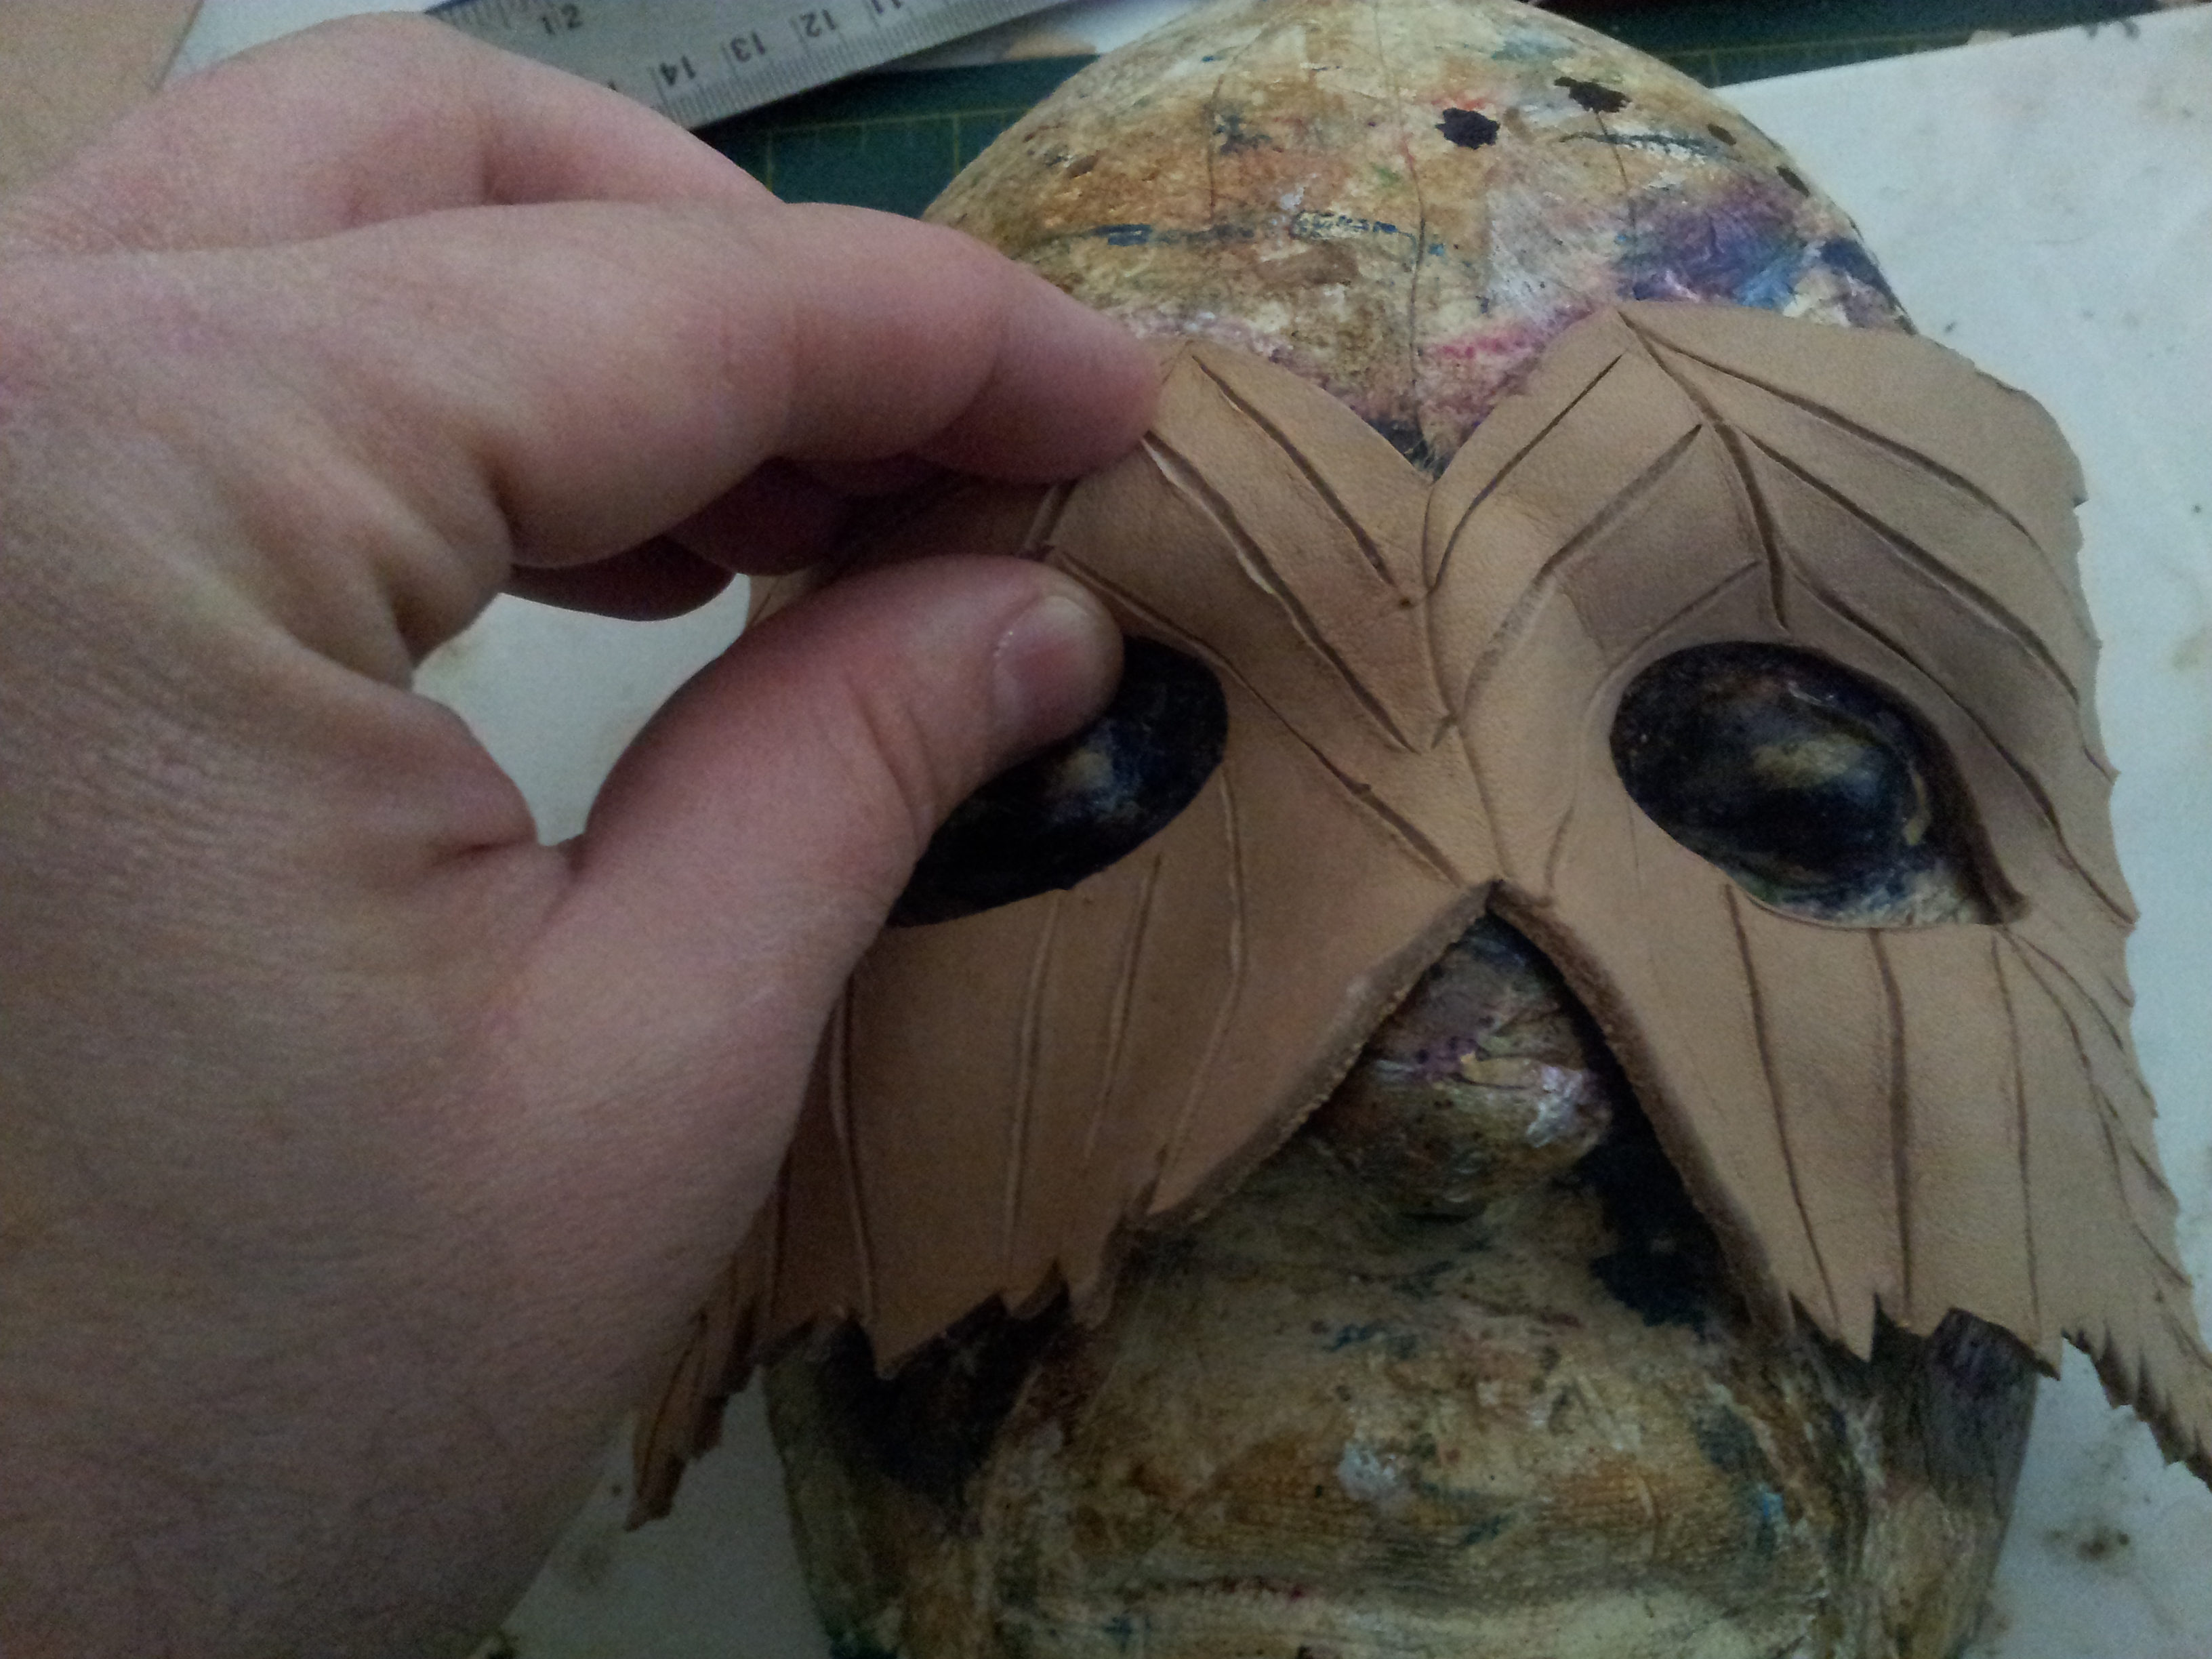

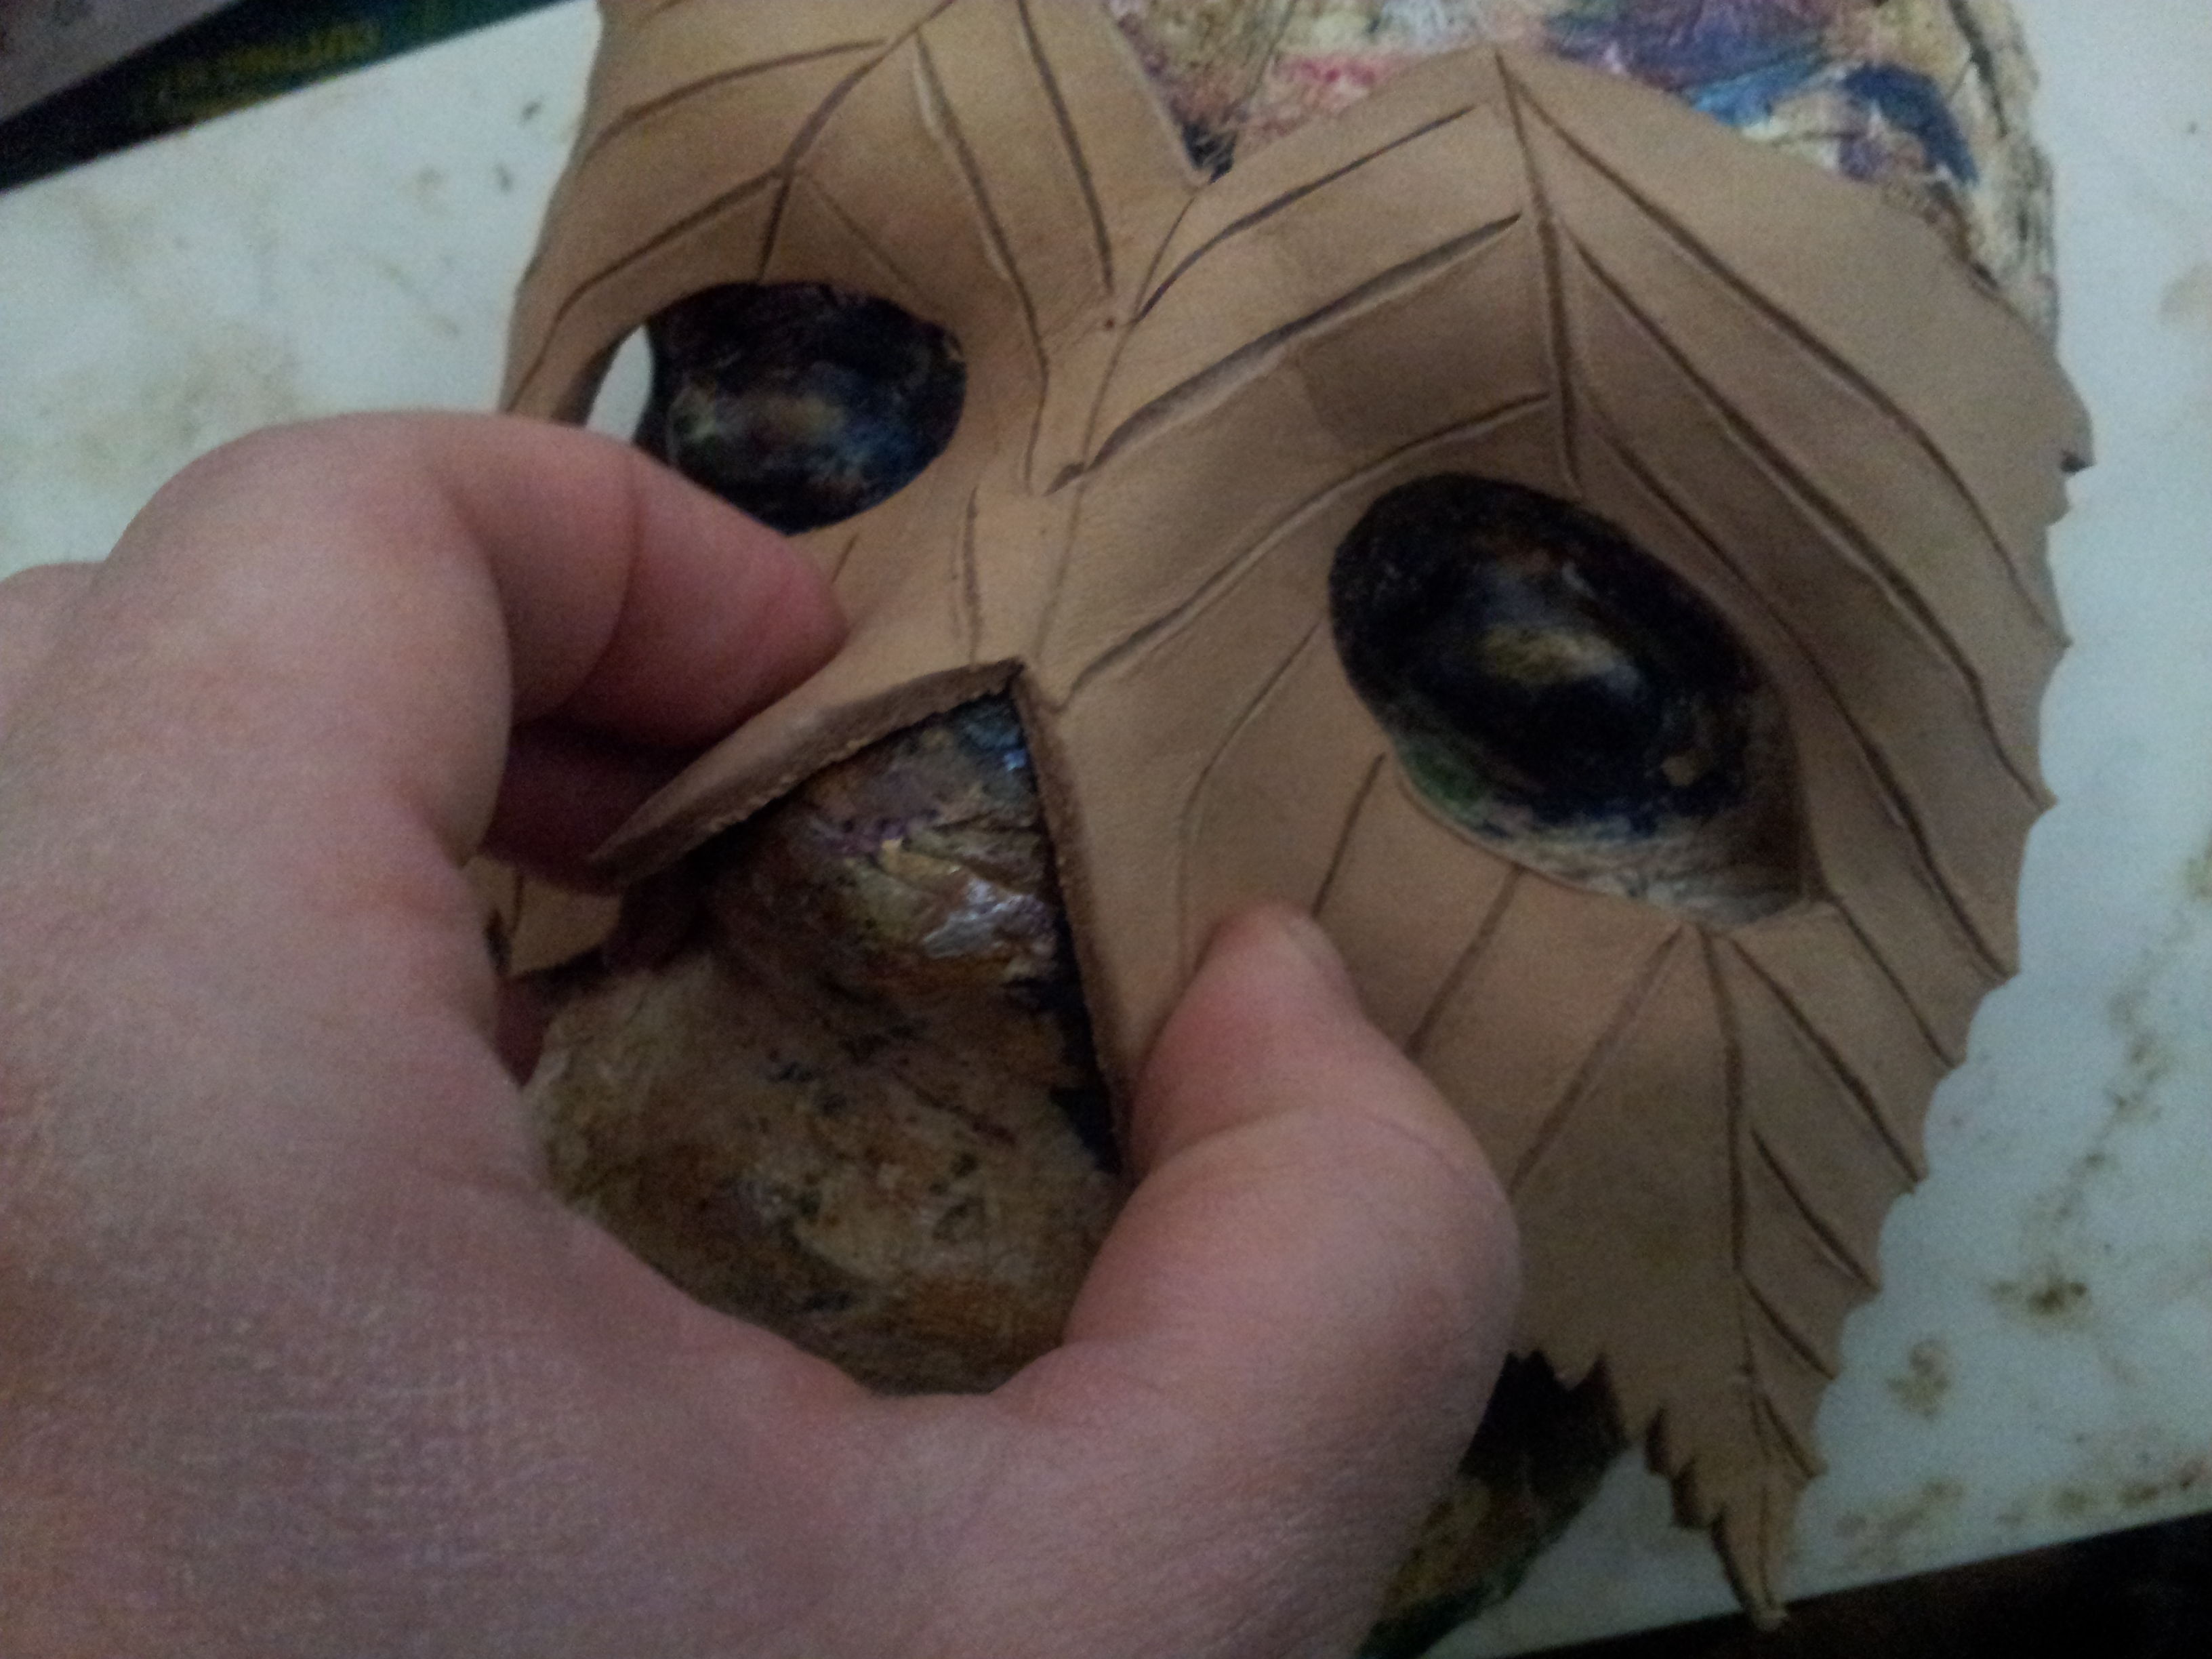
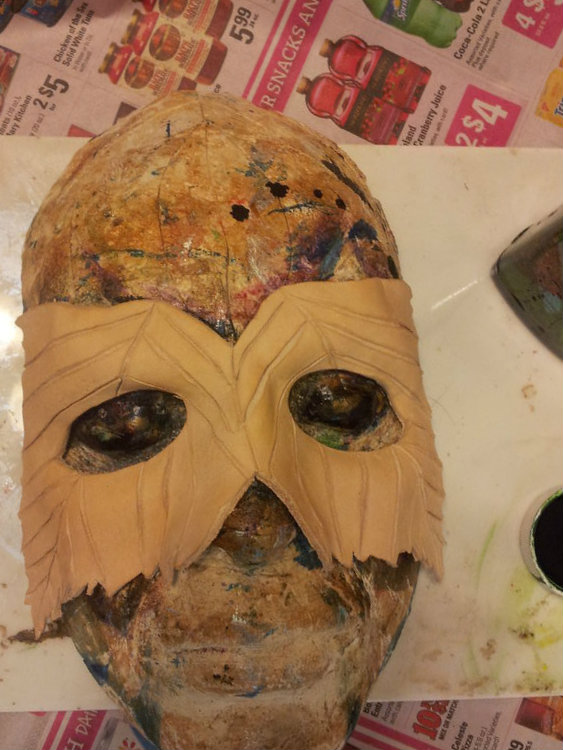
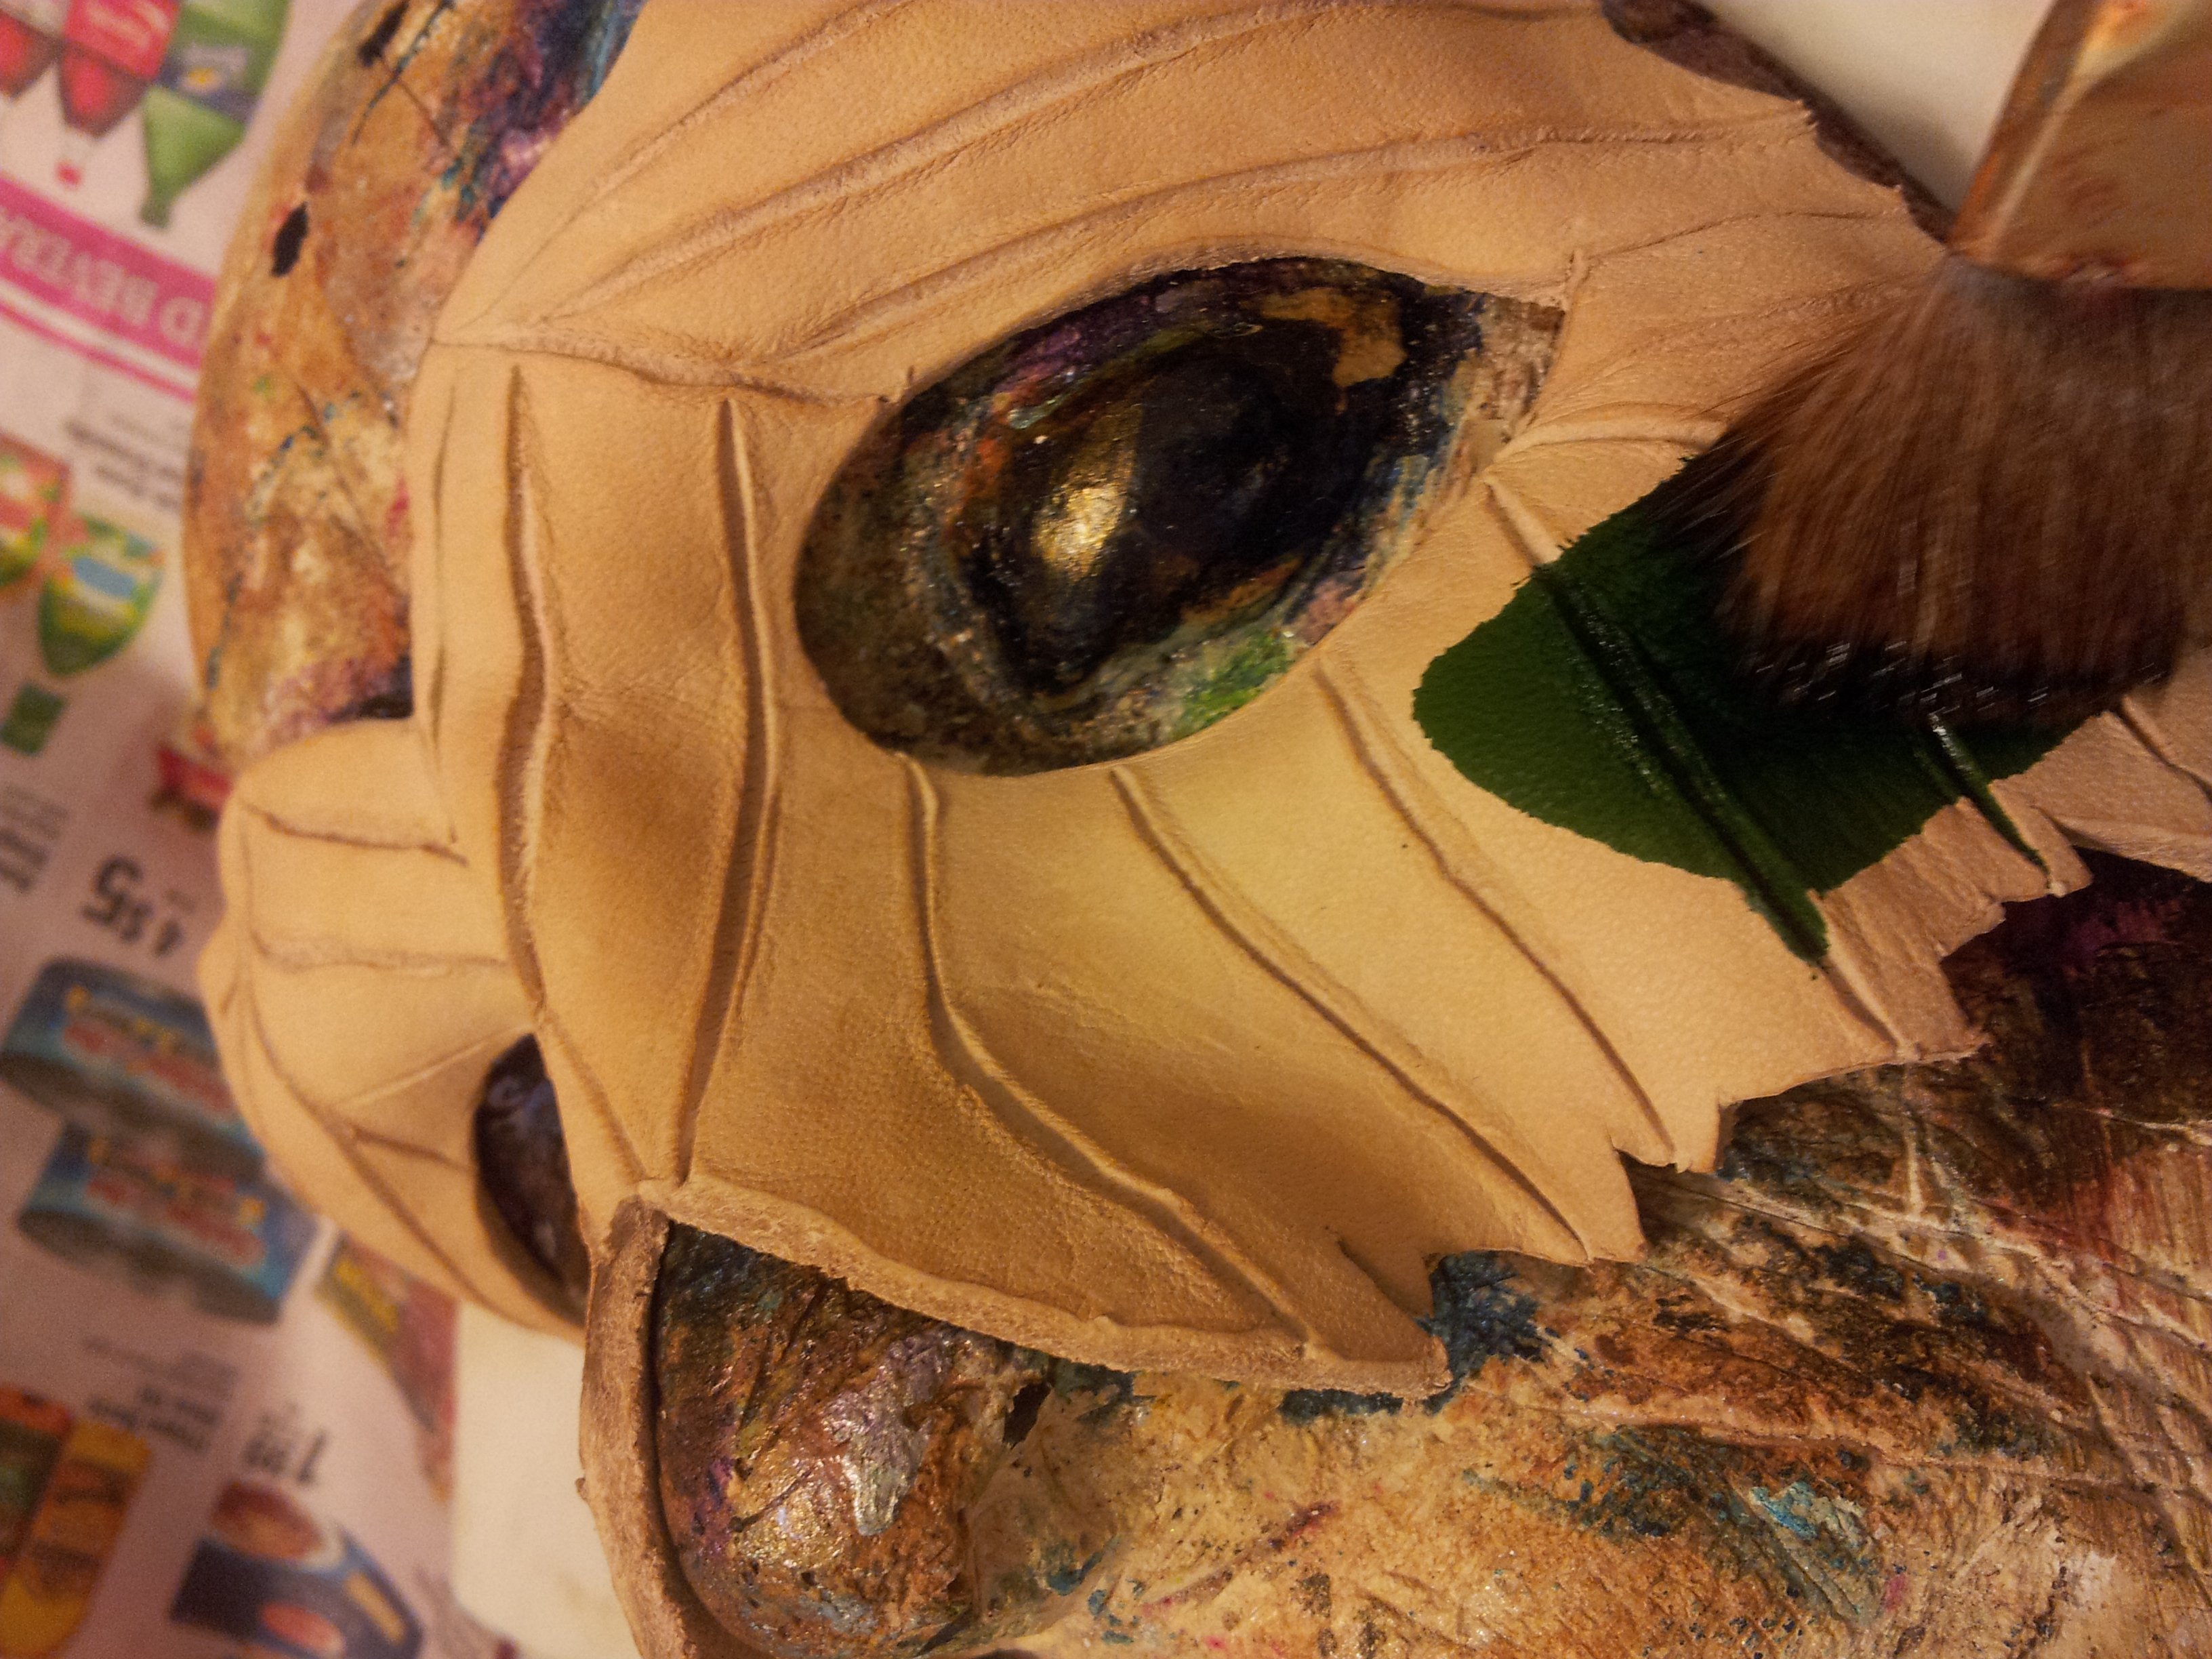
Place the still soaked face portion over the face mold. Make sure the eyes line up with the cut holes.
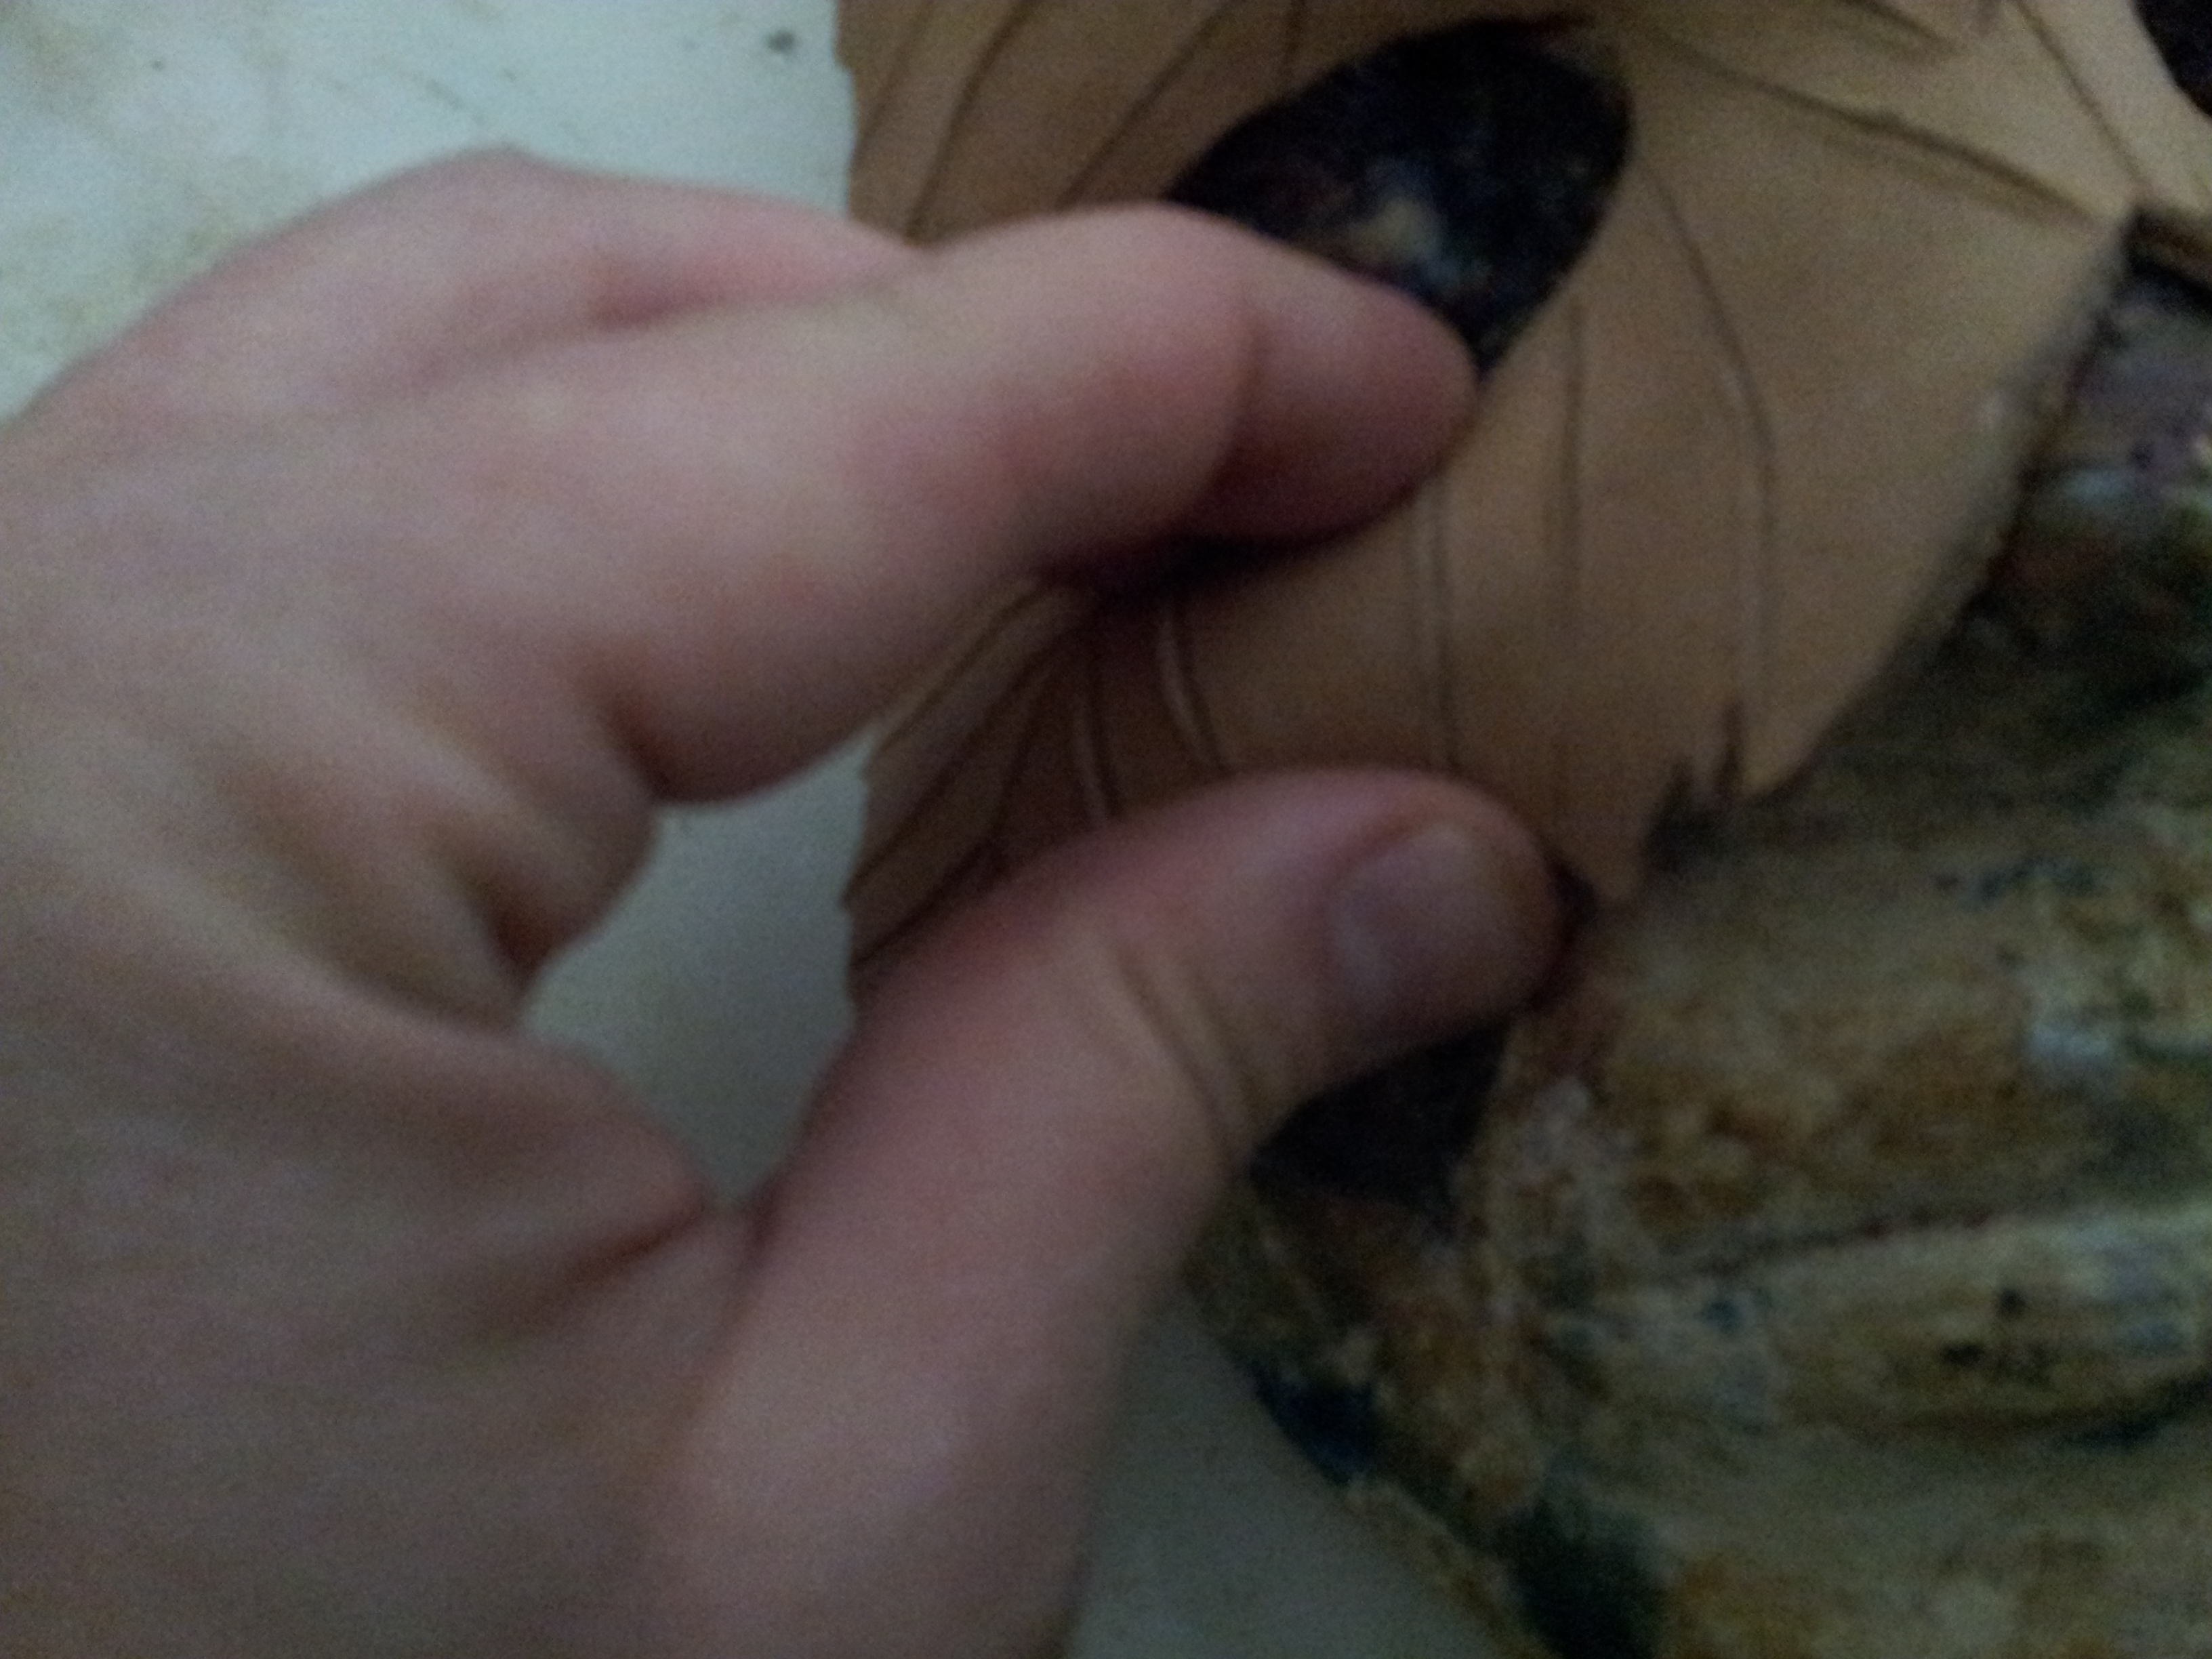
Sculpt the leather by pinching and pressing it onto the face mold. The leather will hold its shape better the more it dries. Because of this, you will sculpt a little, let it dry and then sculpt some more. You can speed up the drying process with a hair dryer or a portable heated with a fan.
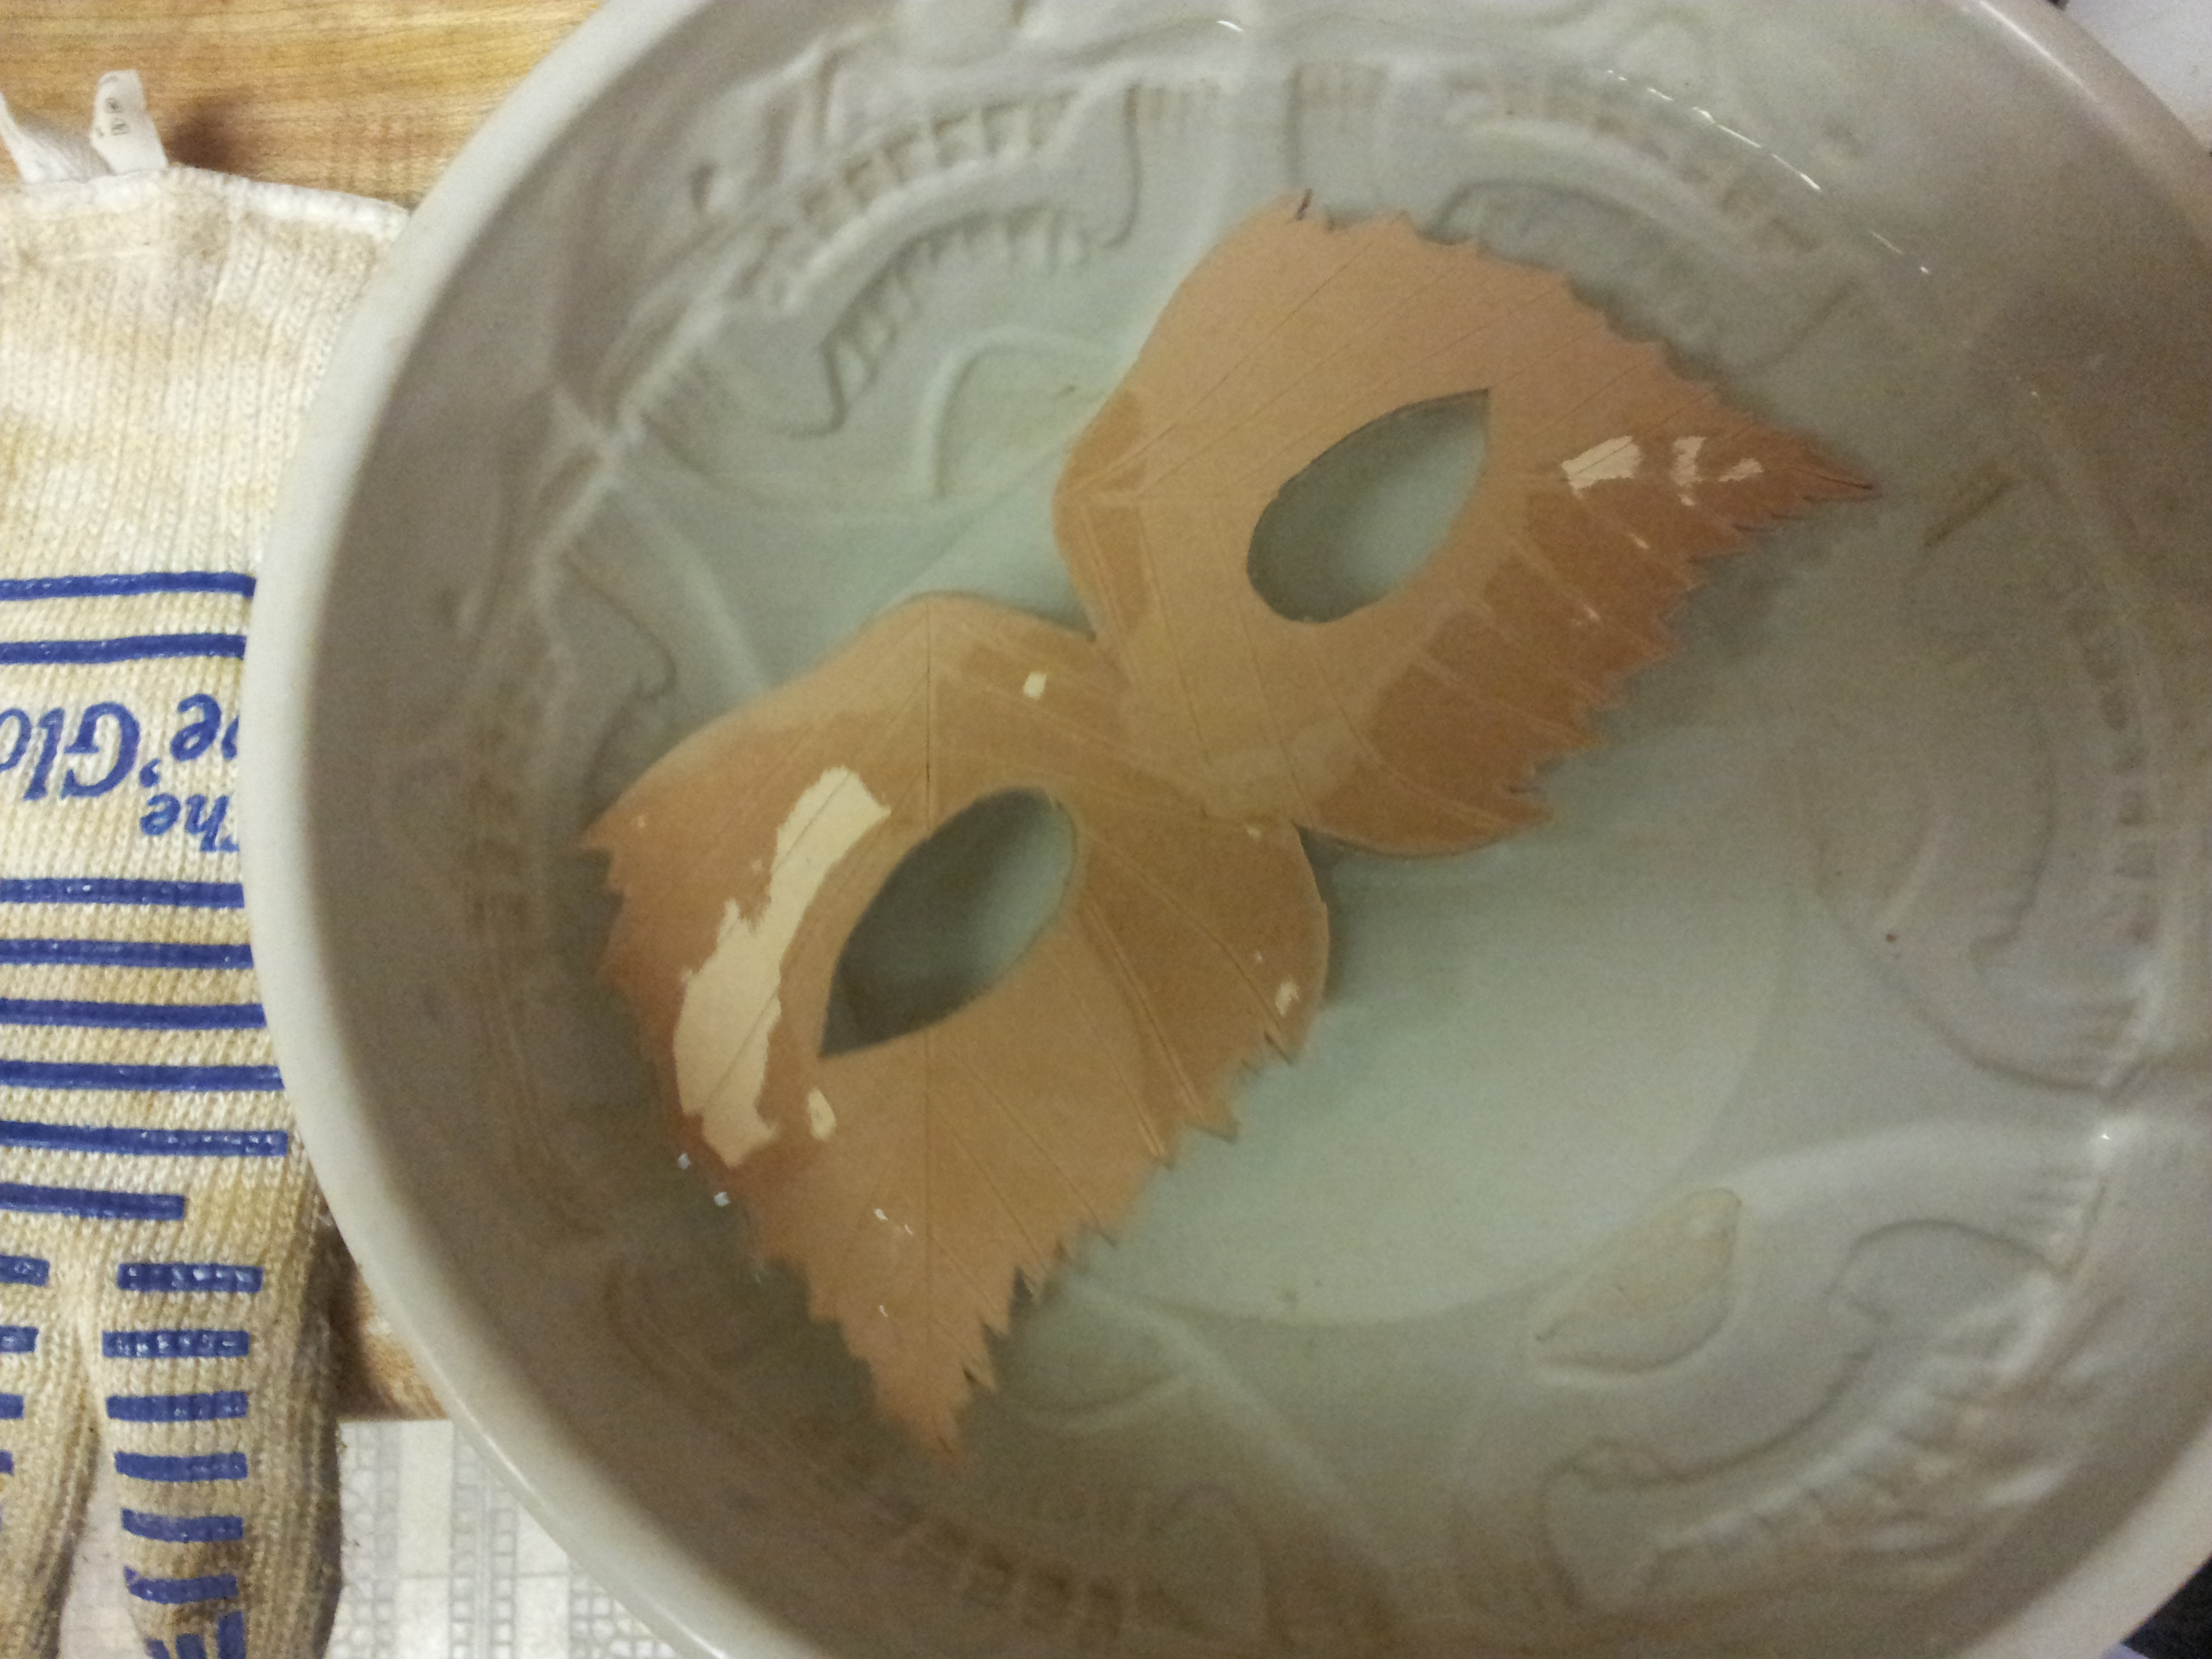
Dye and Paint the Leather
I typically prefer to use dye when possible and only resort to paint when I cannot get a desired color or effect from the pain. Dyes soak in and bring out the grain of the leather, and if you are making a mask from leather, its best to show off that leather.
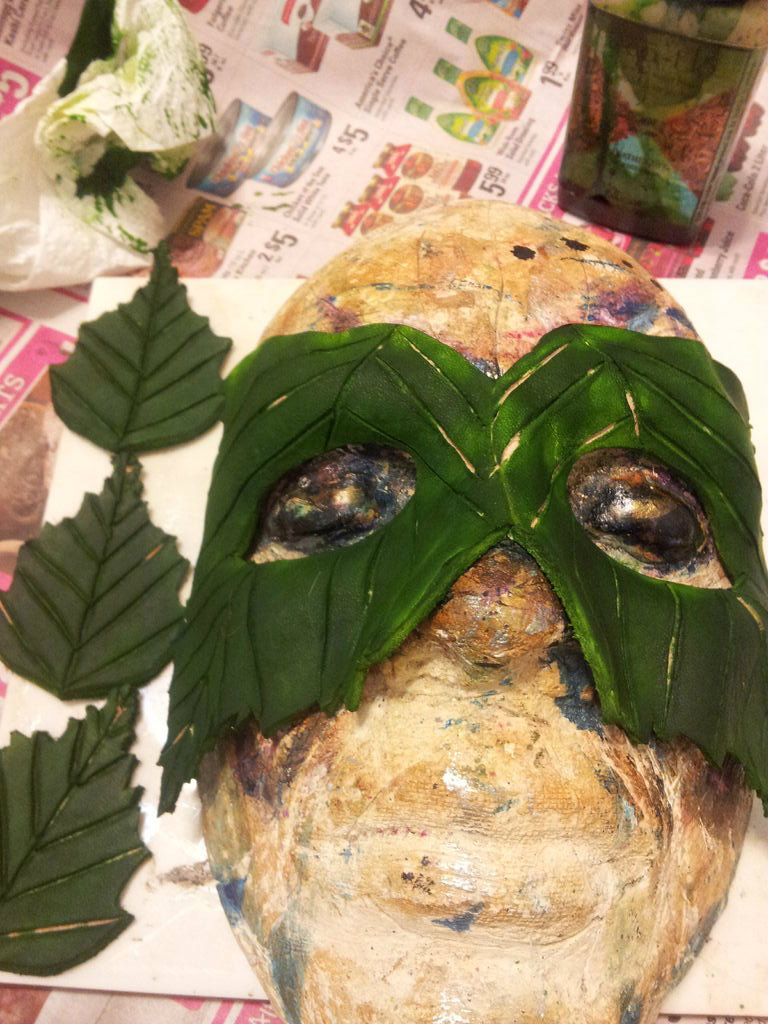
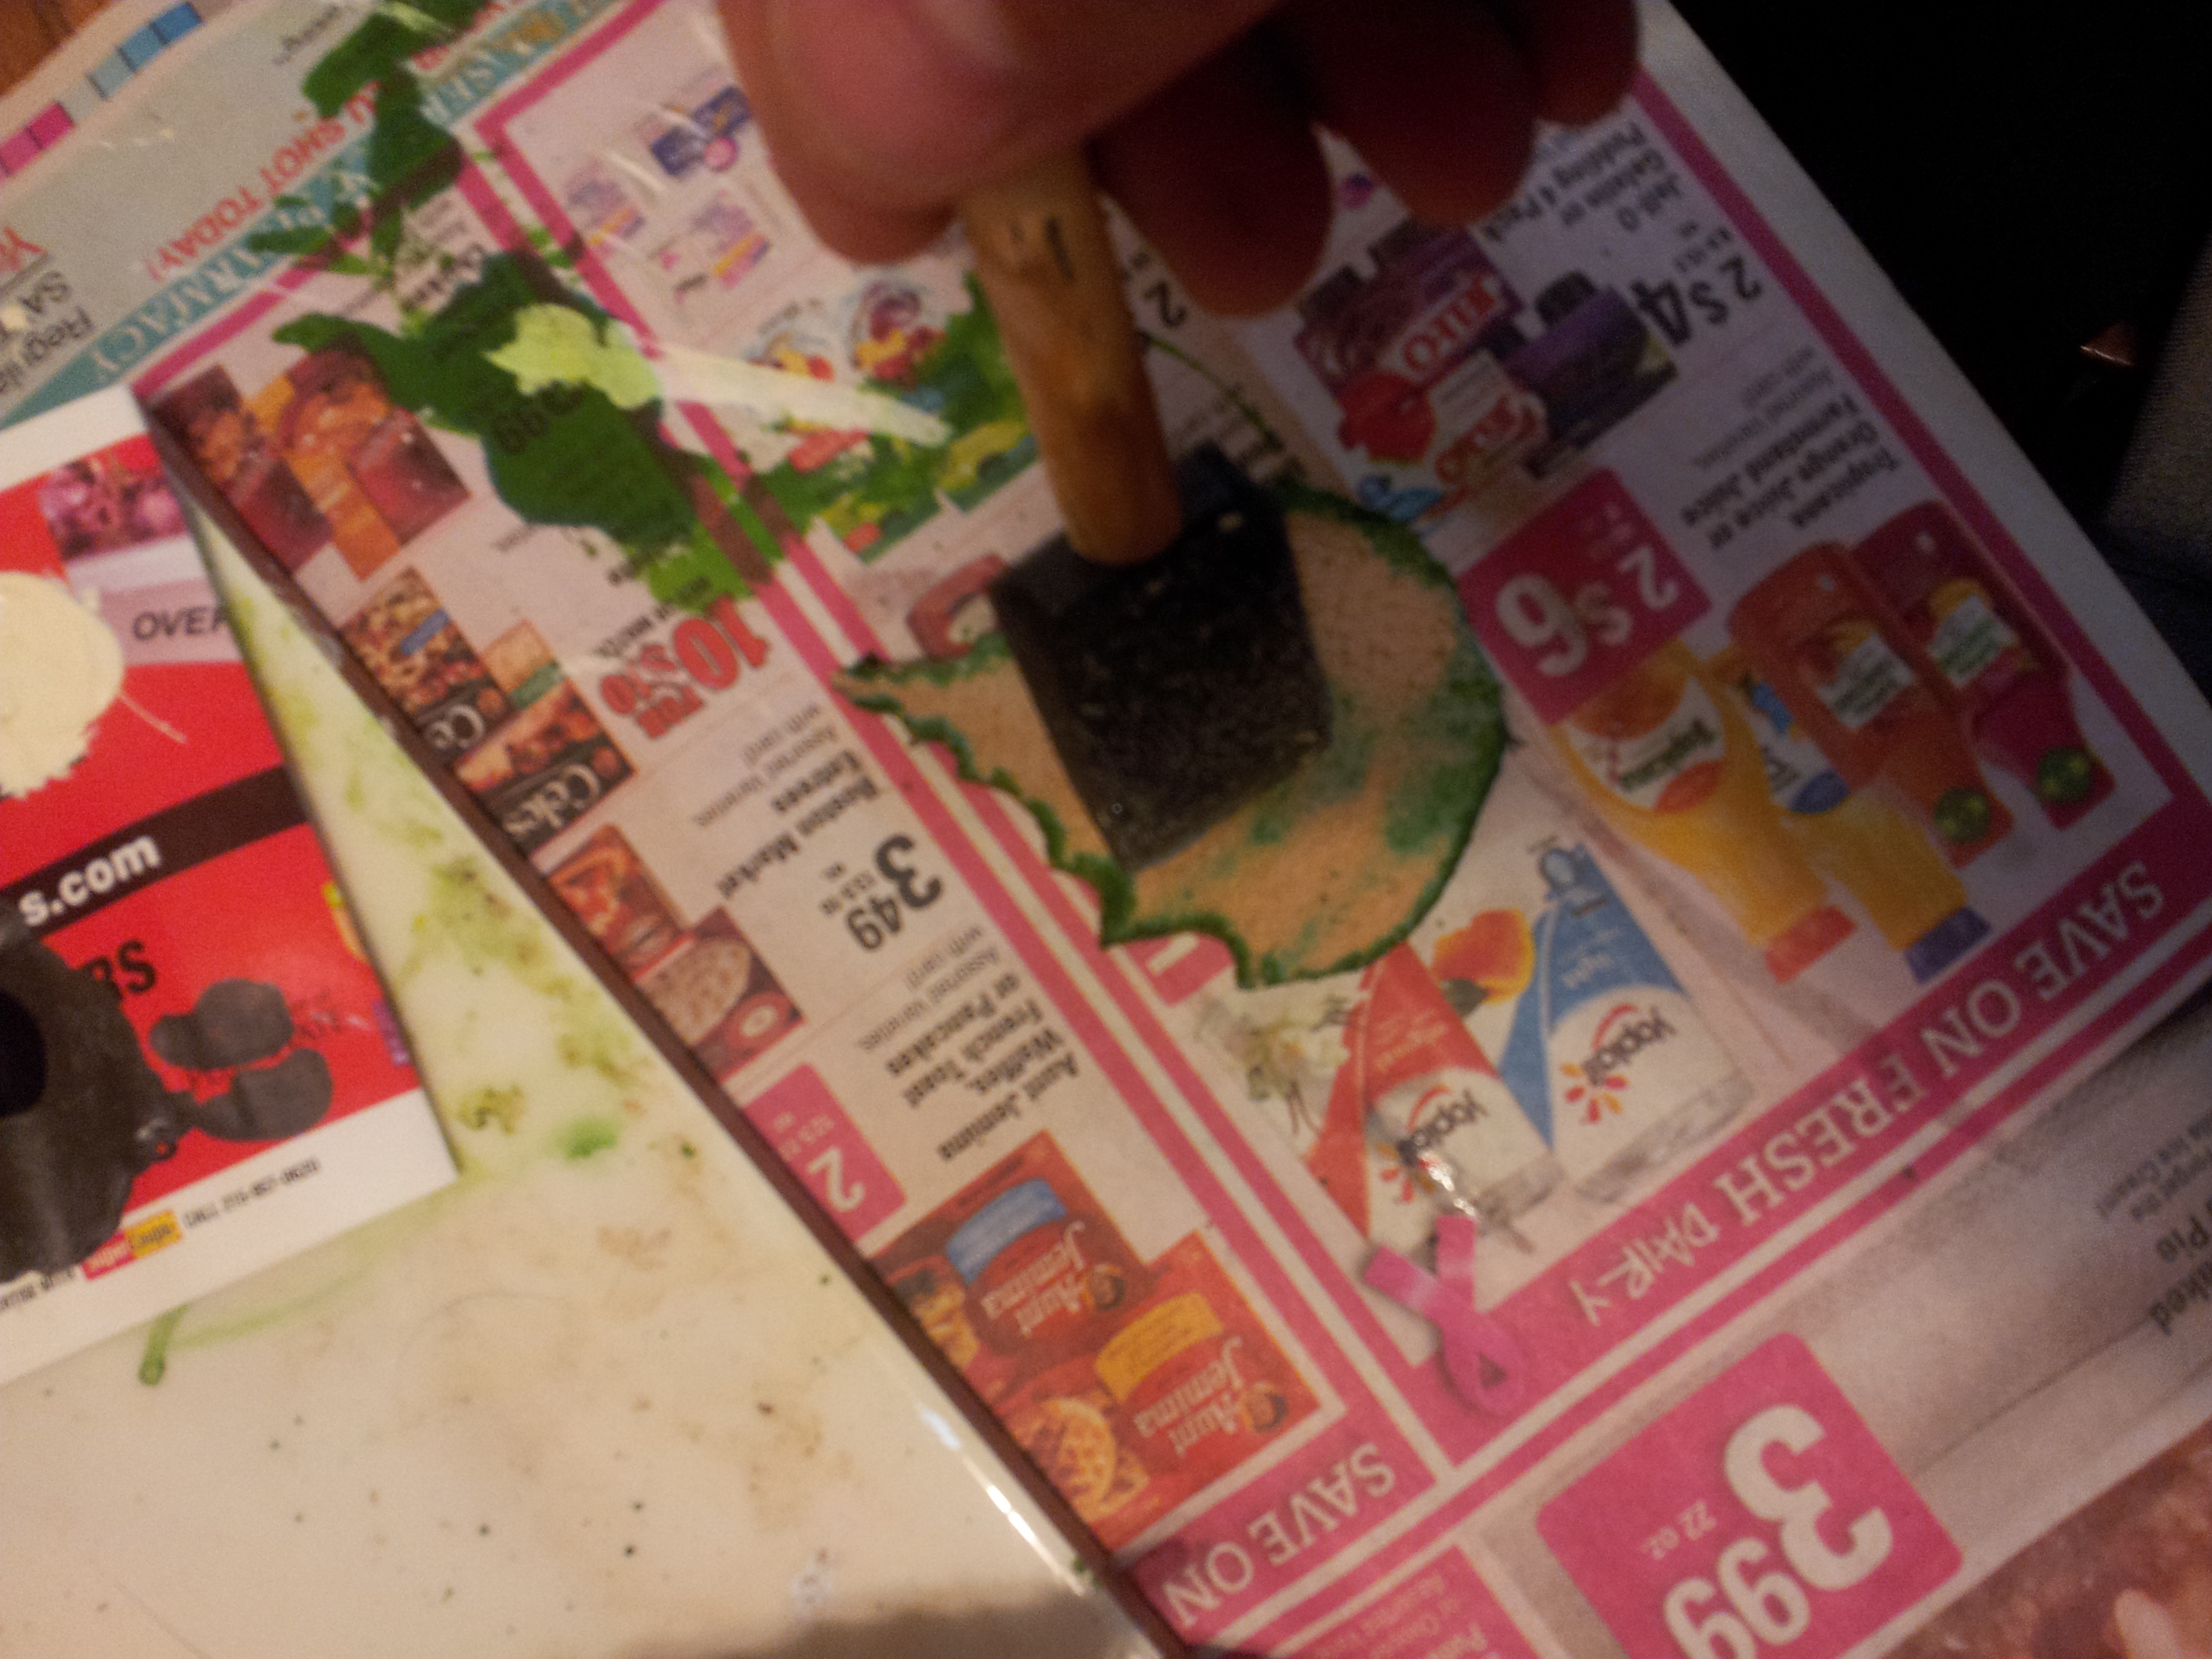
Begin by applying the forest green leather dye to the mask. Use a large brush or applicator sponge to make sure the dye is evenly distributed.
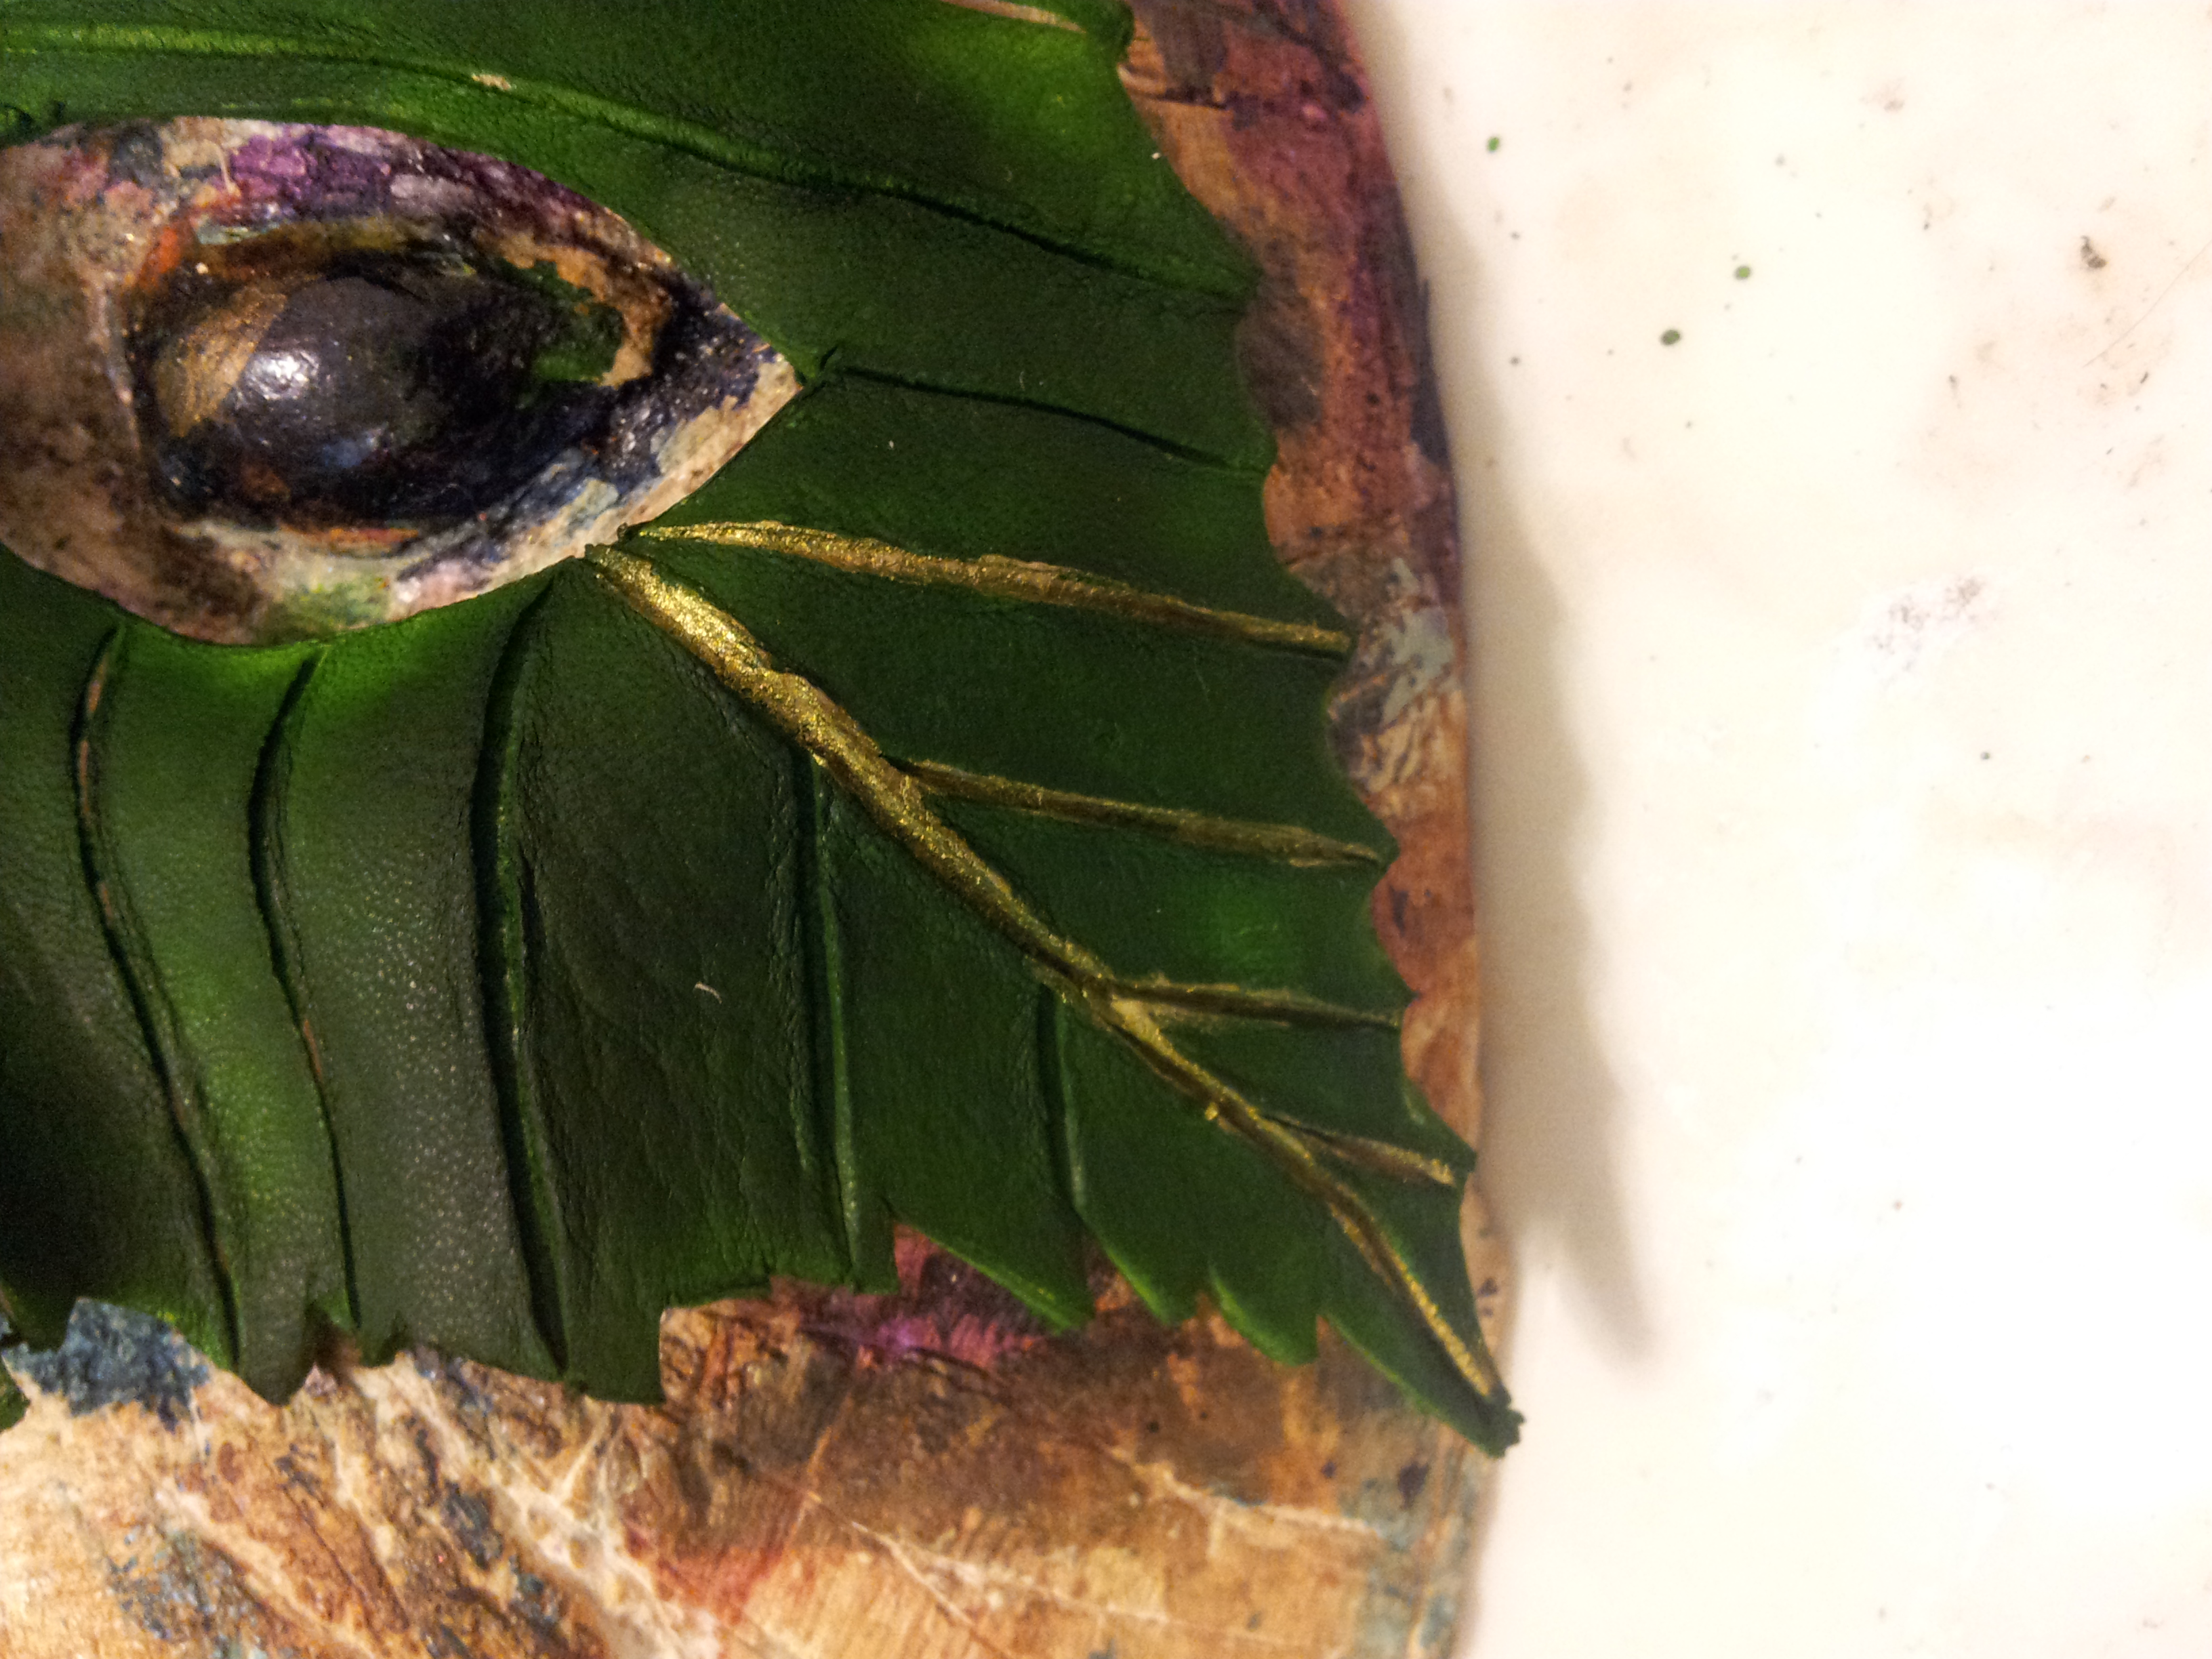
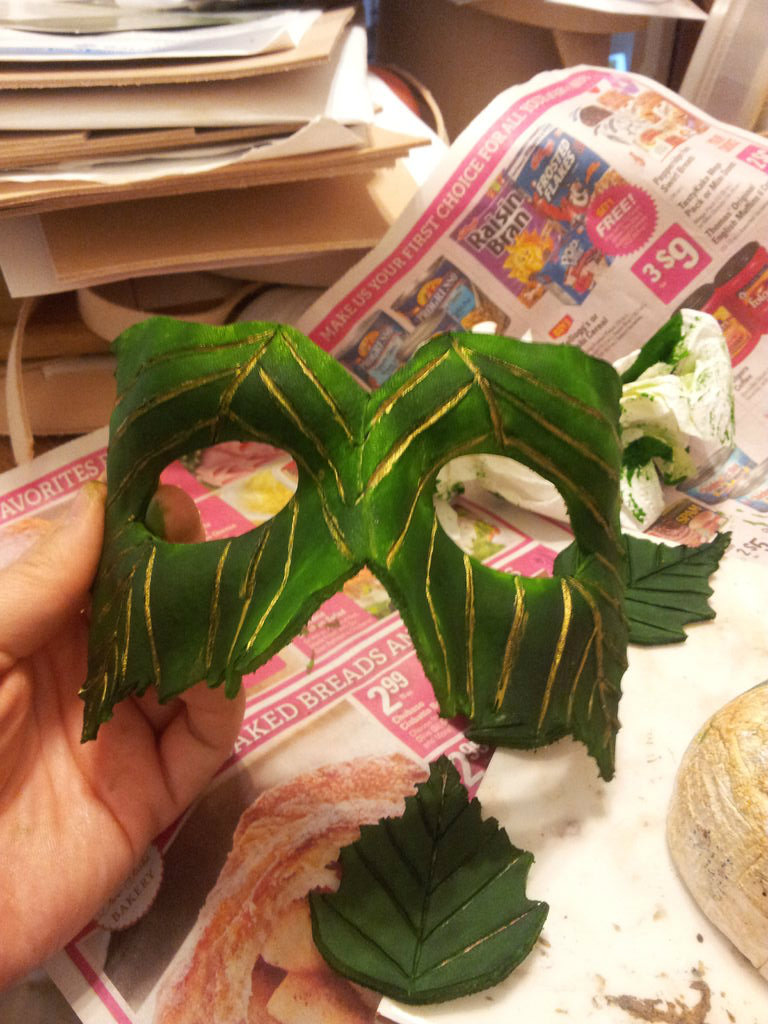
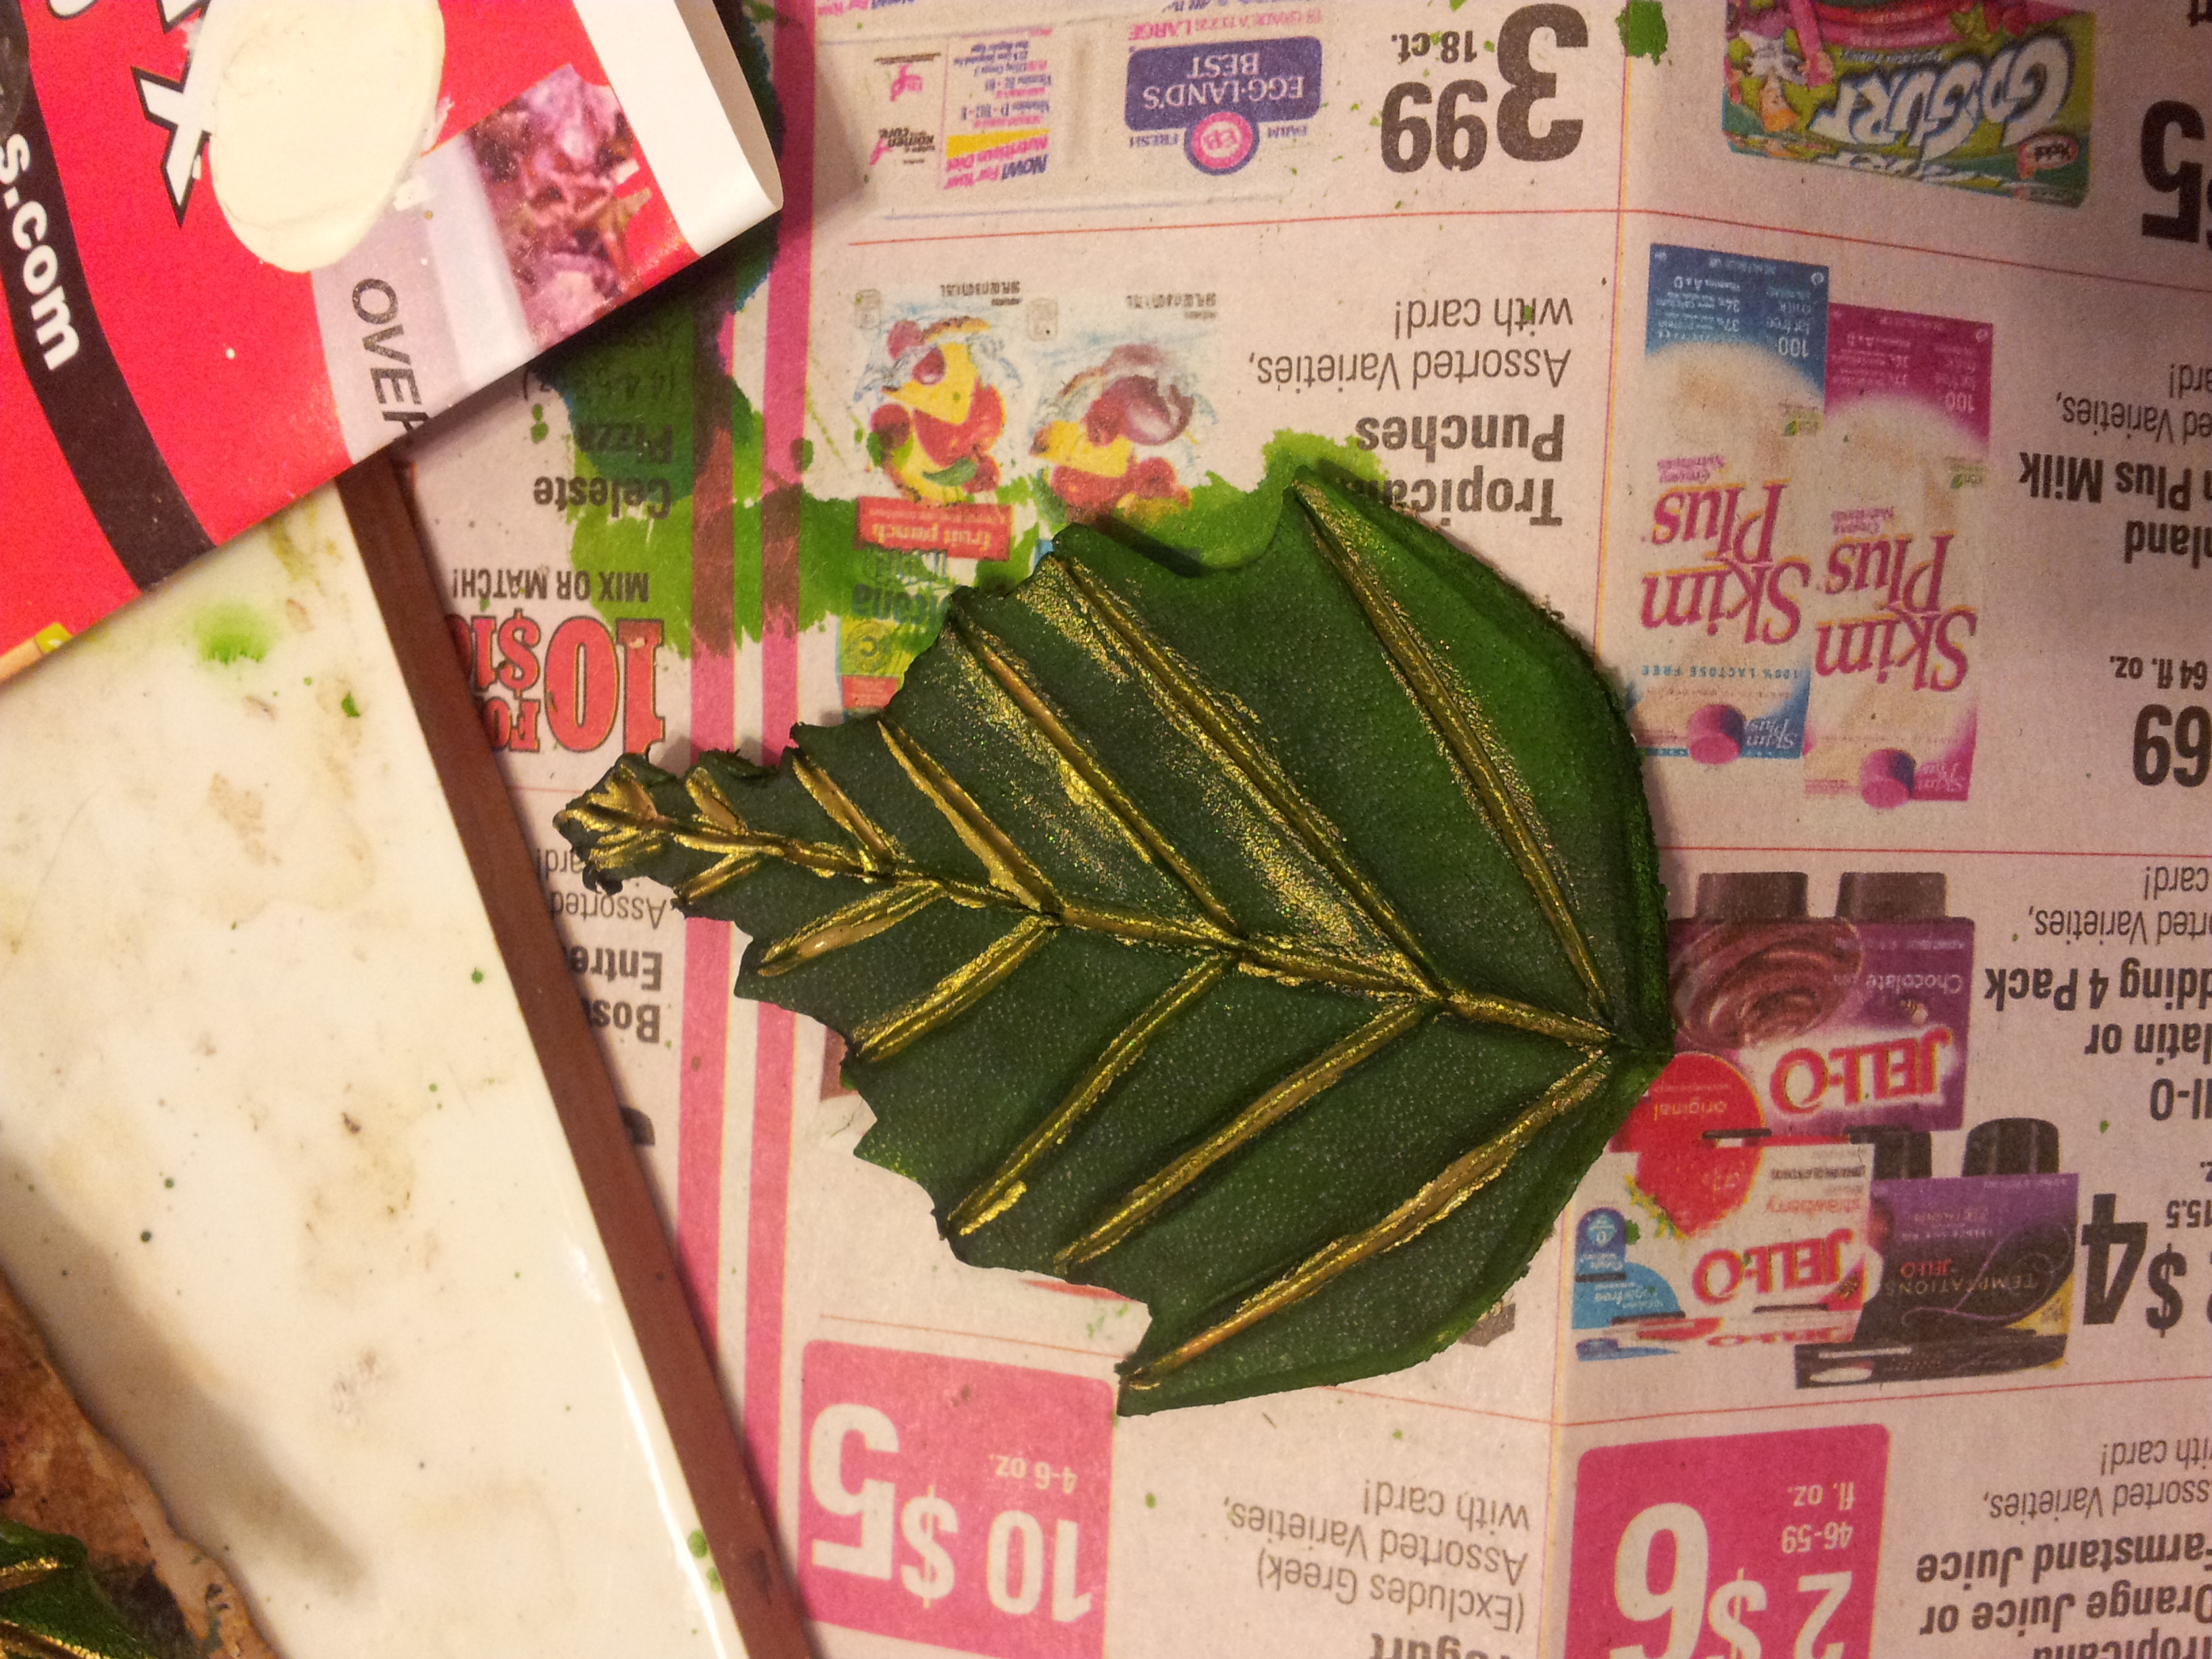
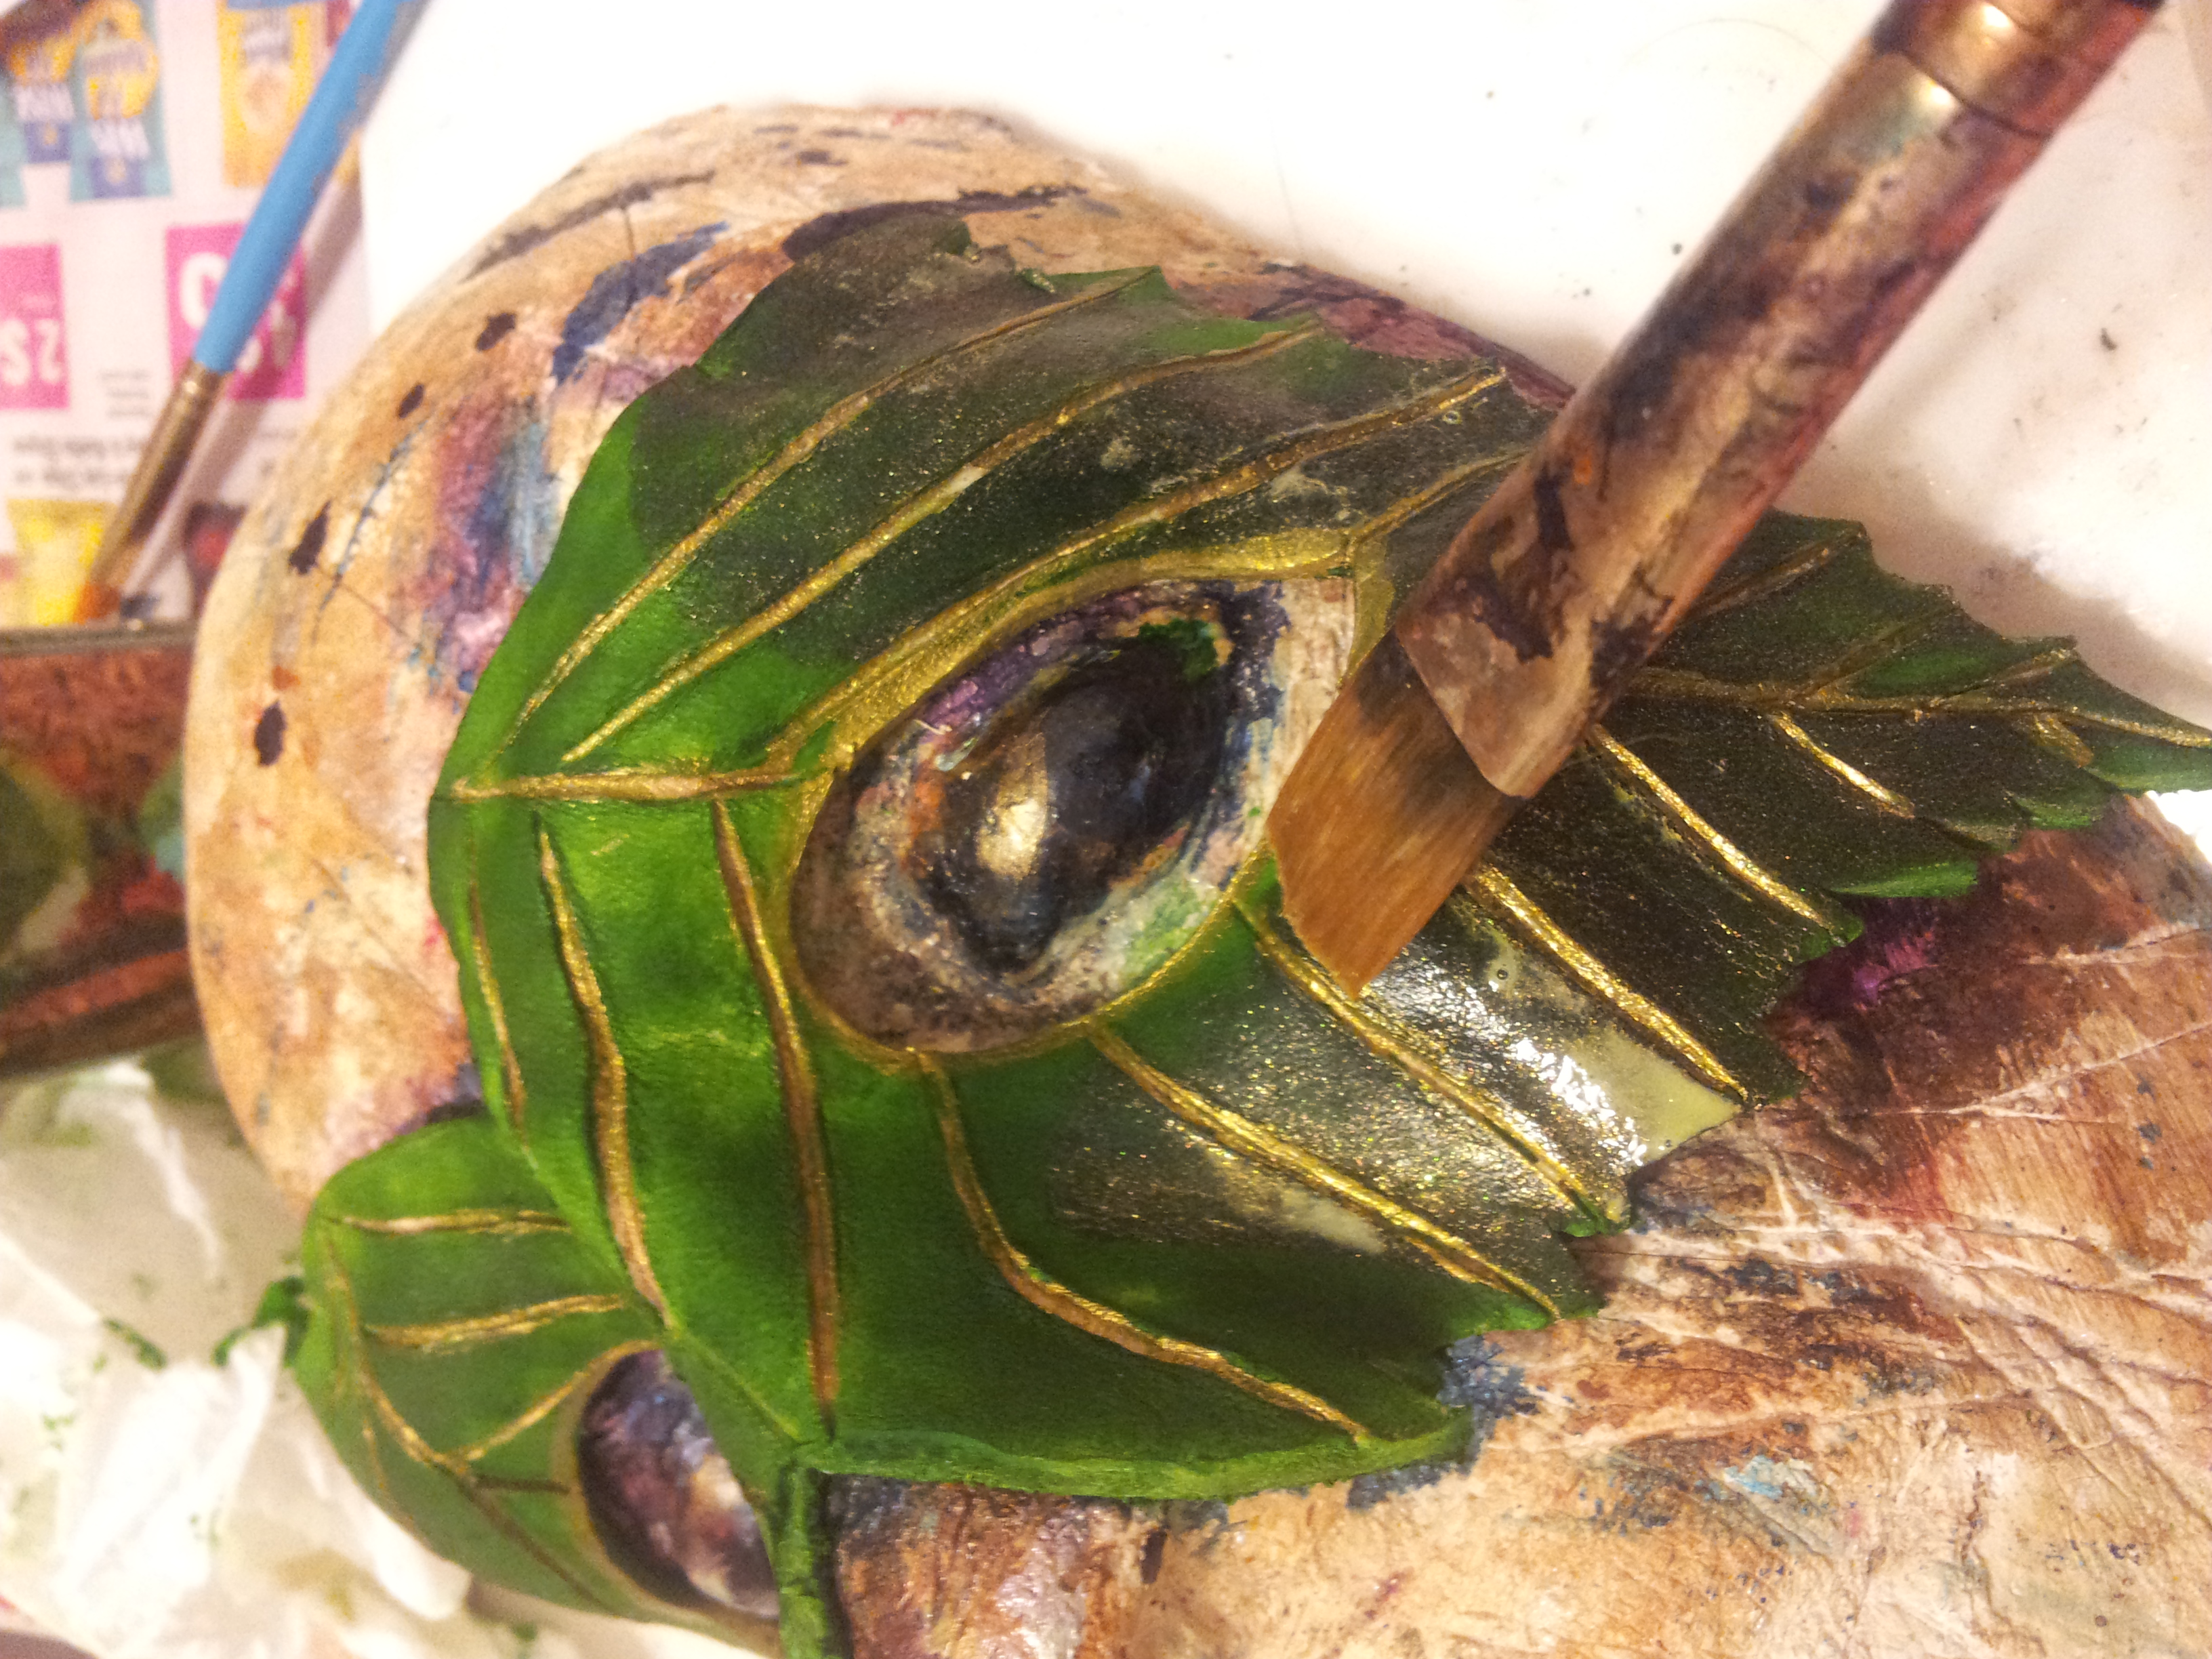
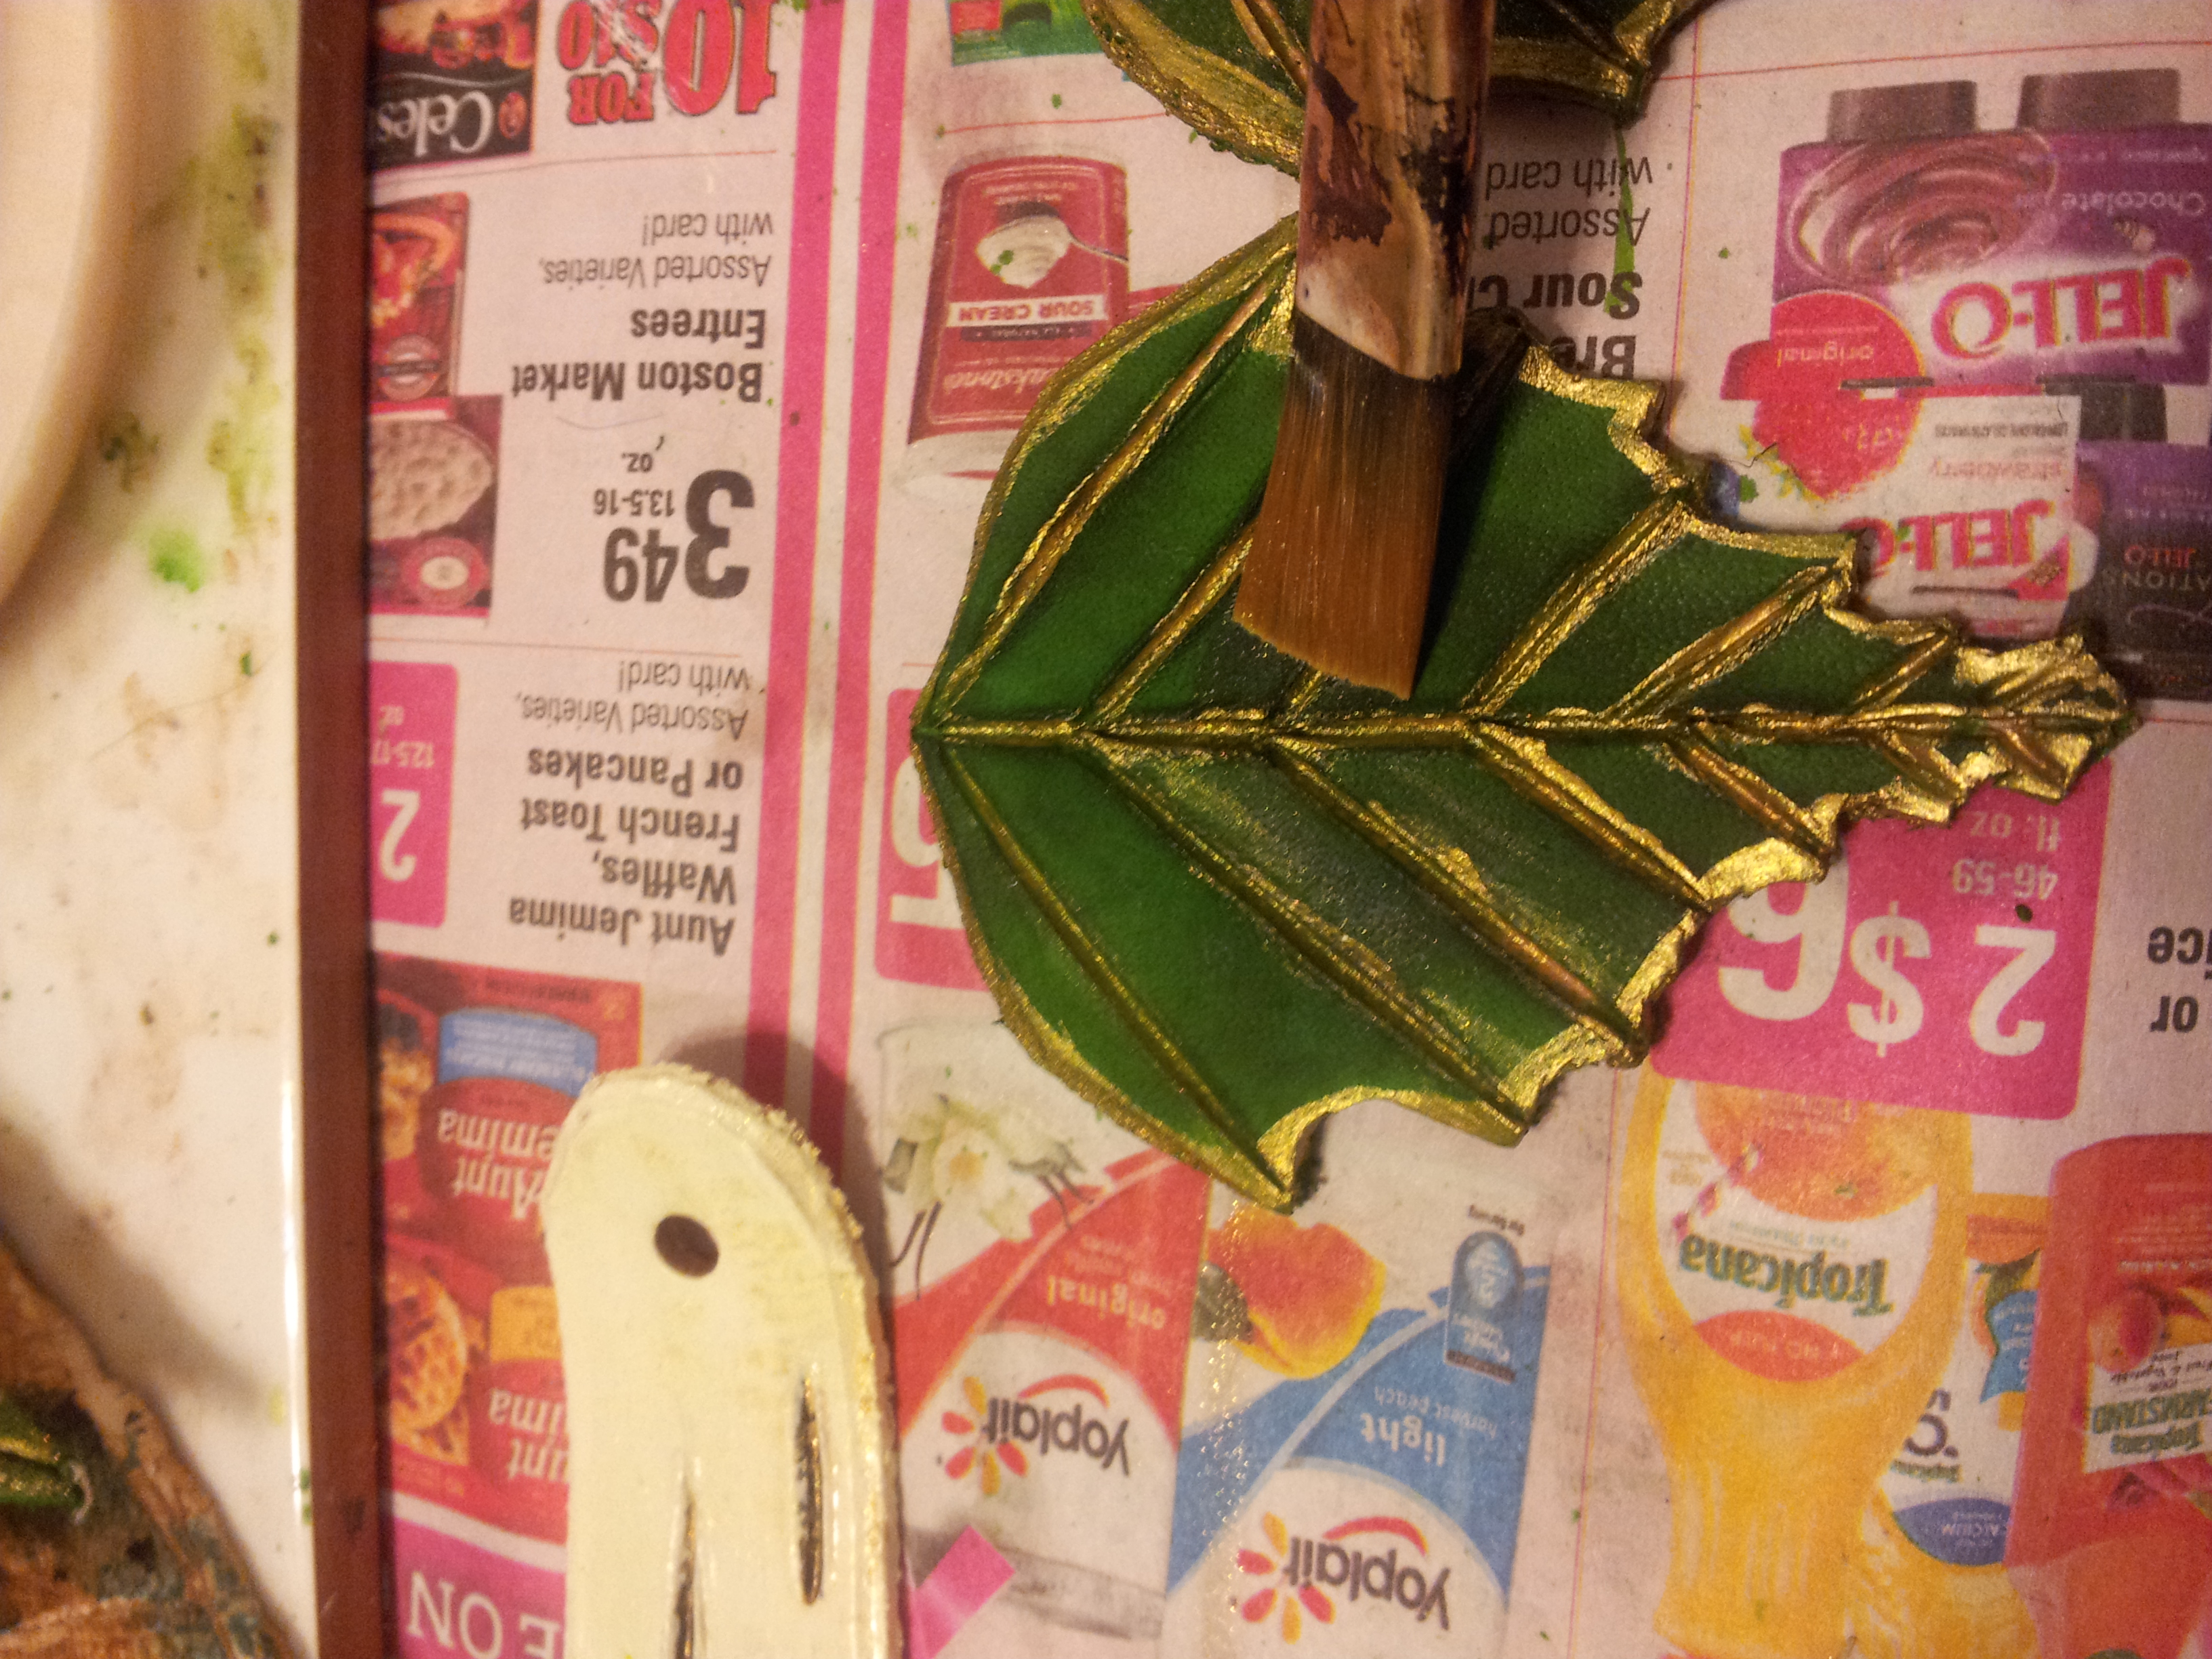
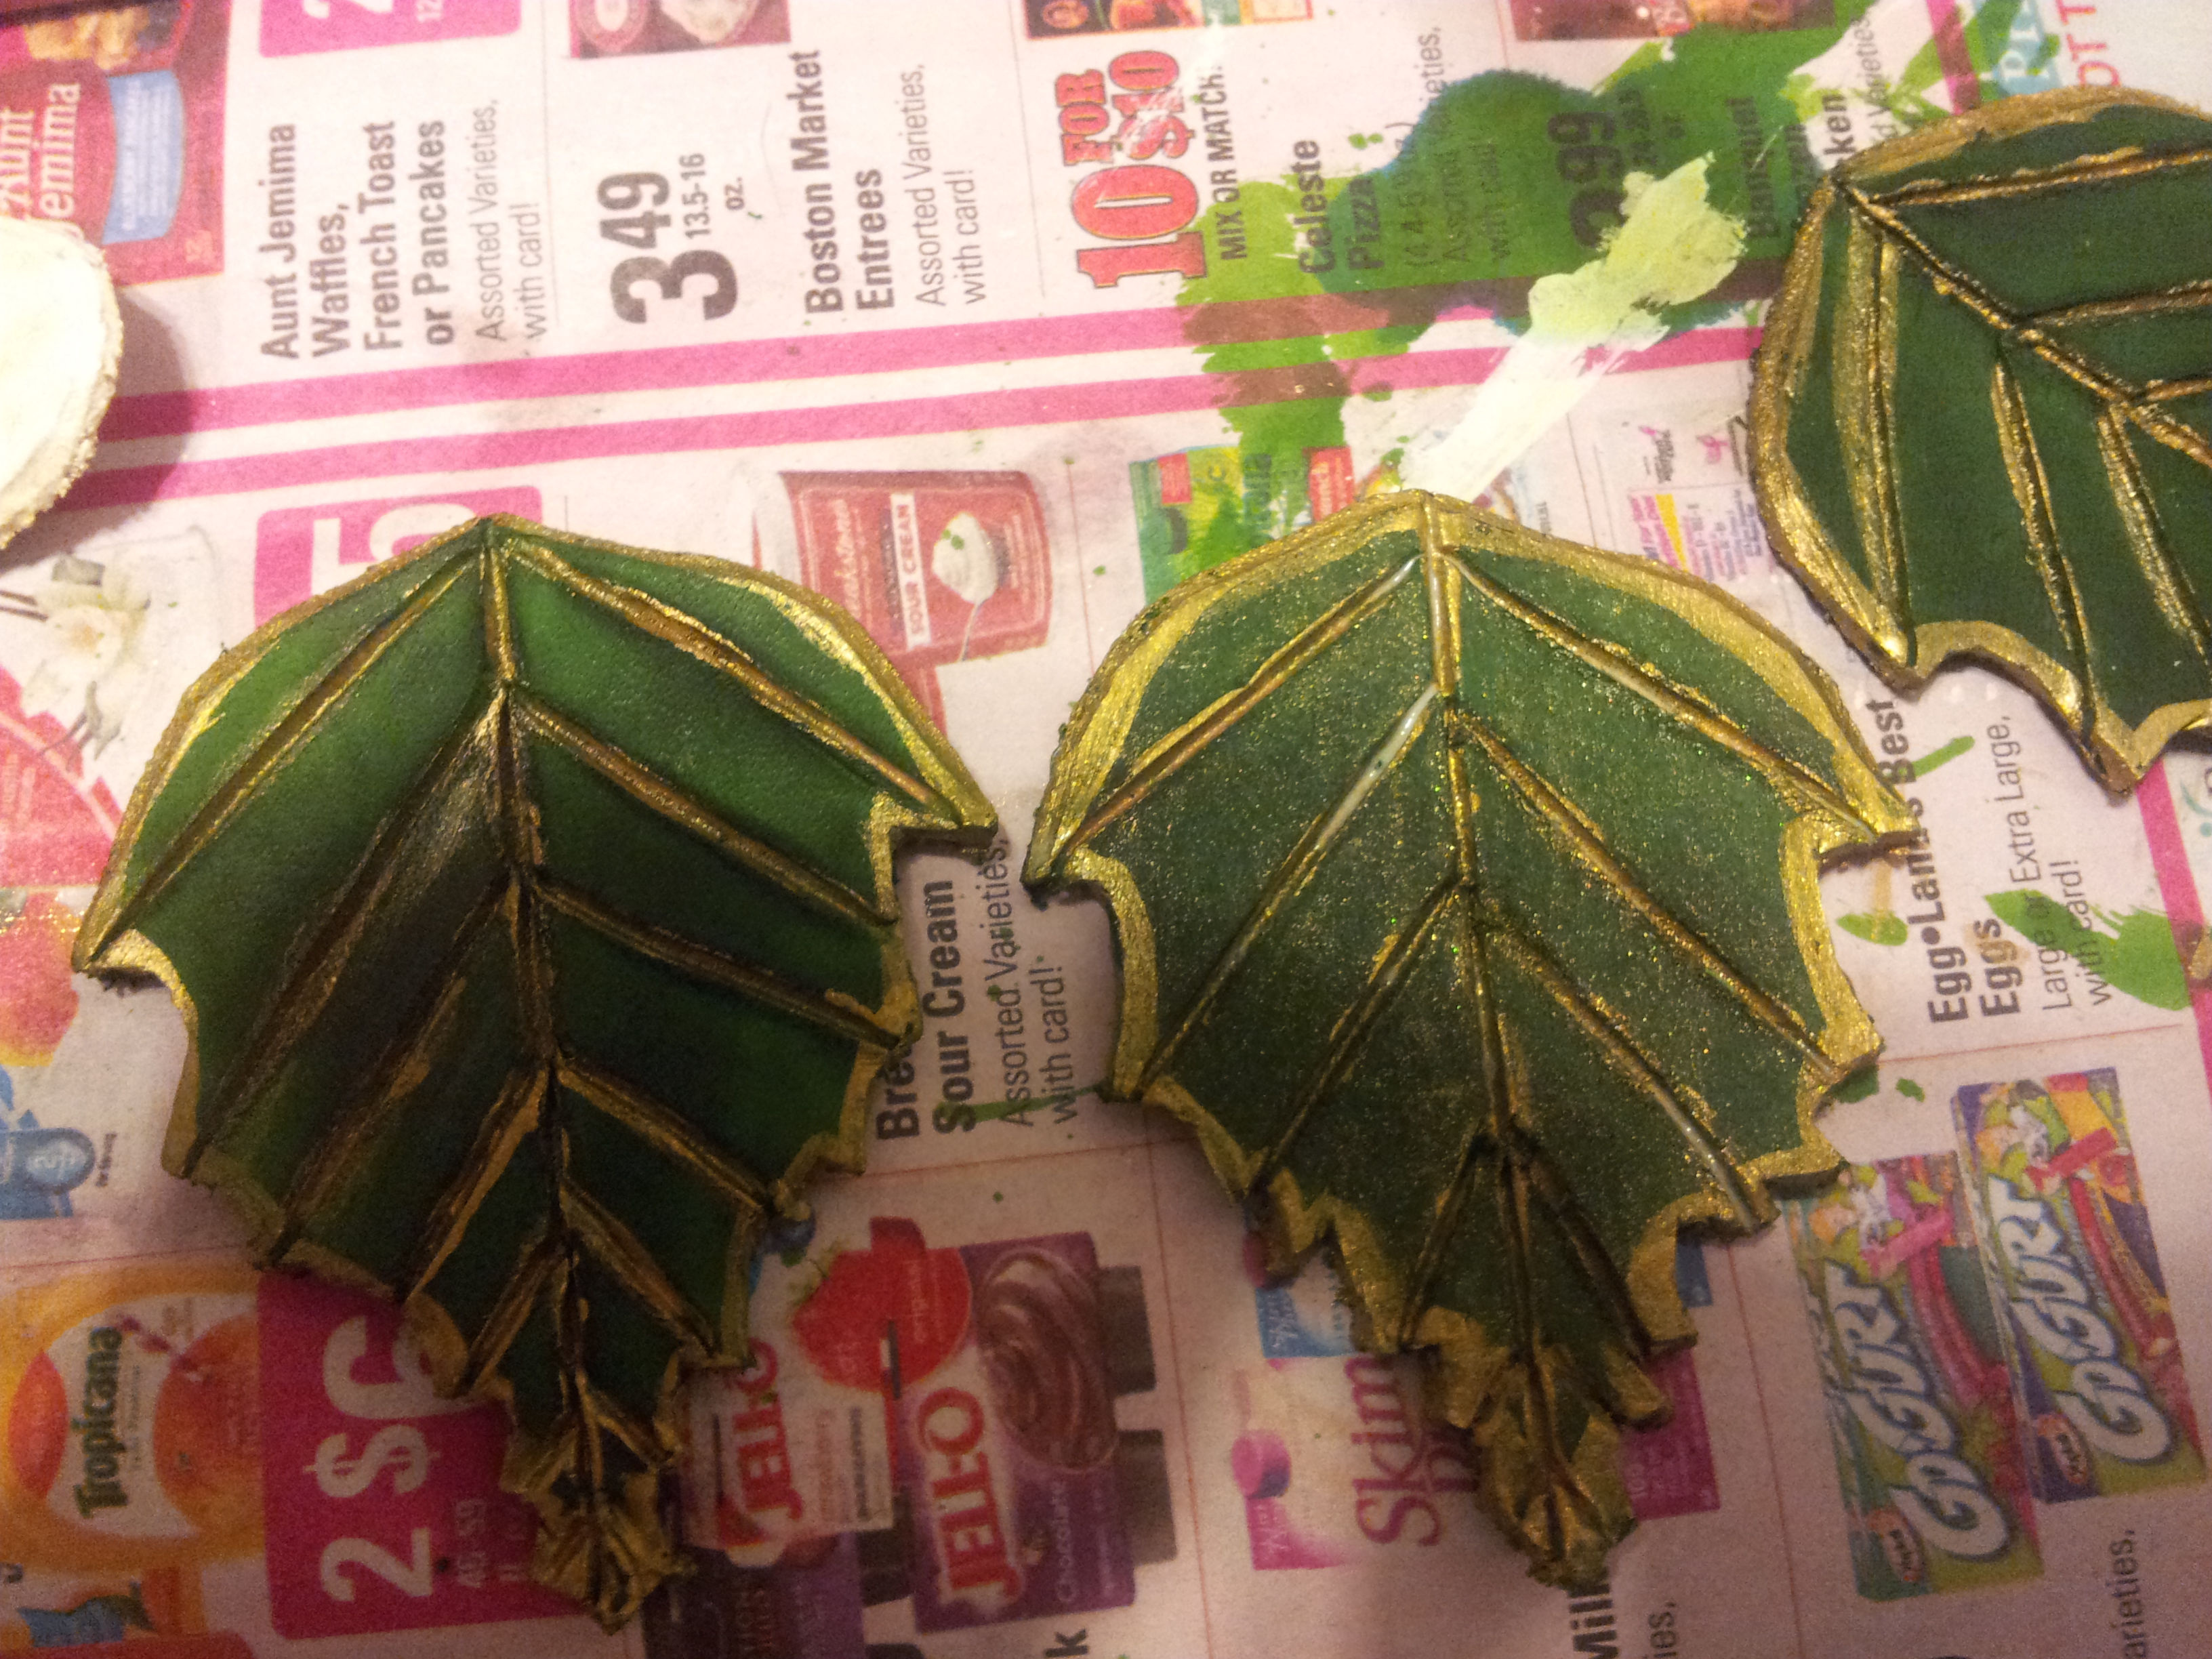
Next, take the finest brush you have and apply the acrylic gold paint in the veins to bring out the veins of the leaves.
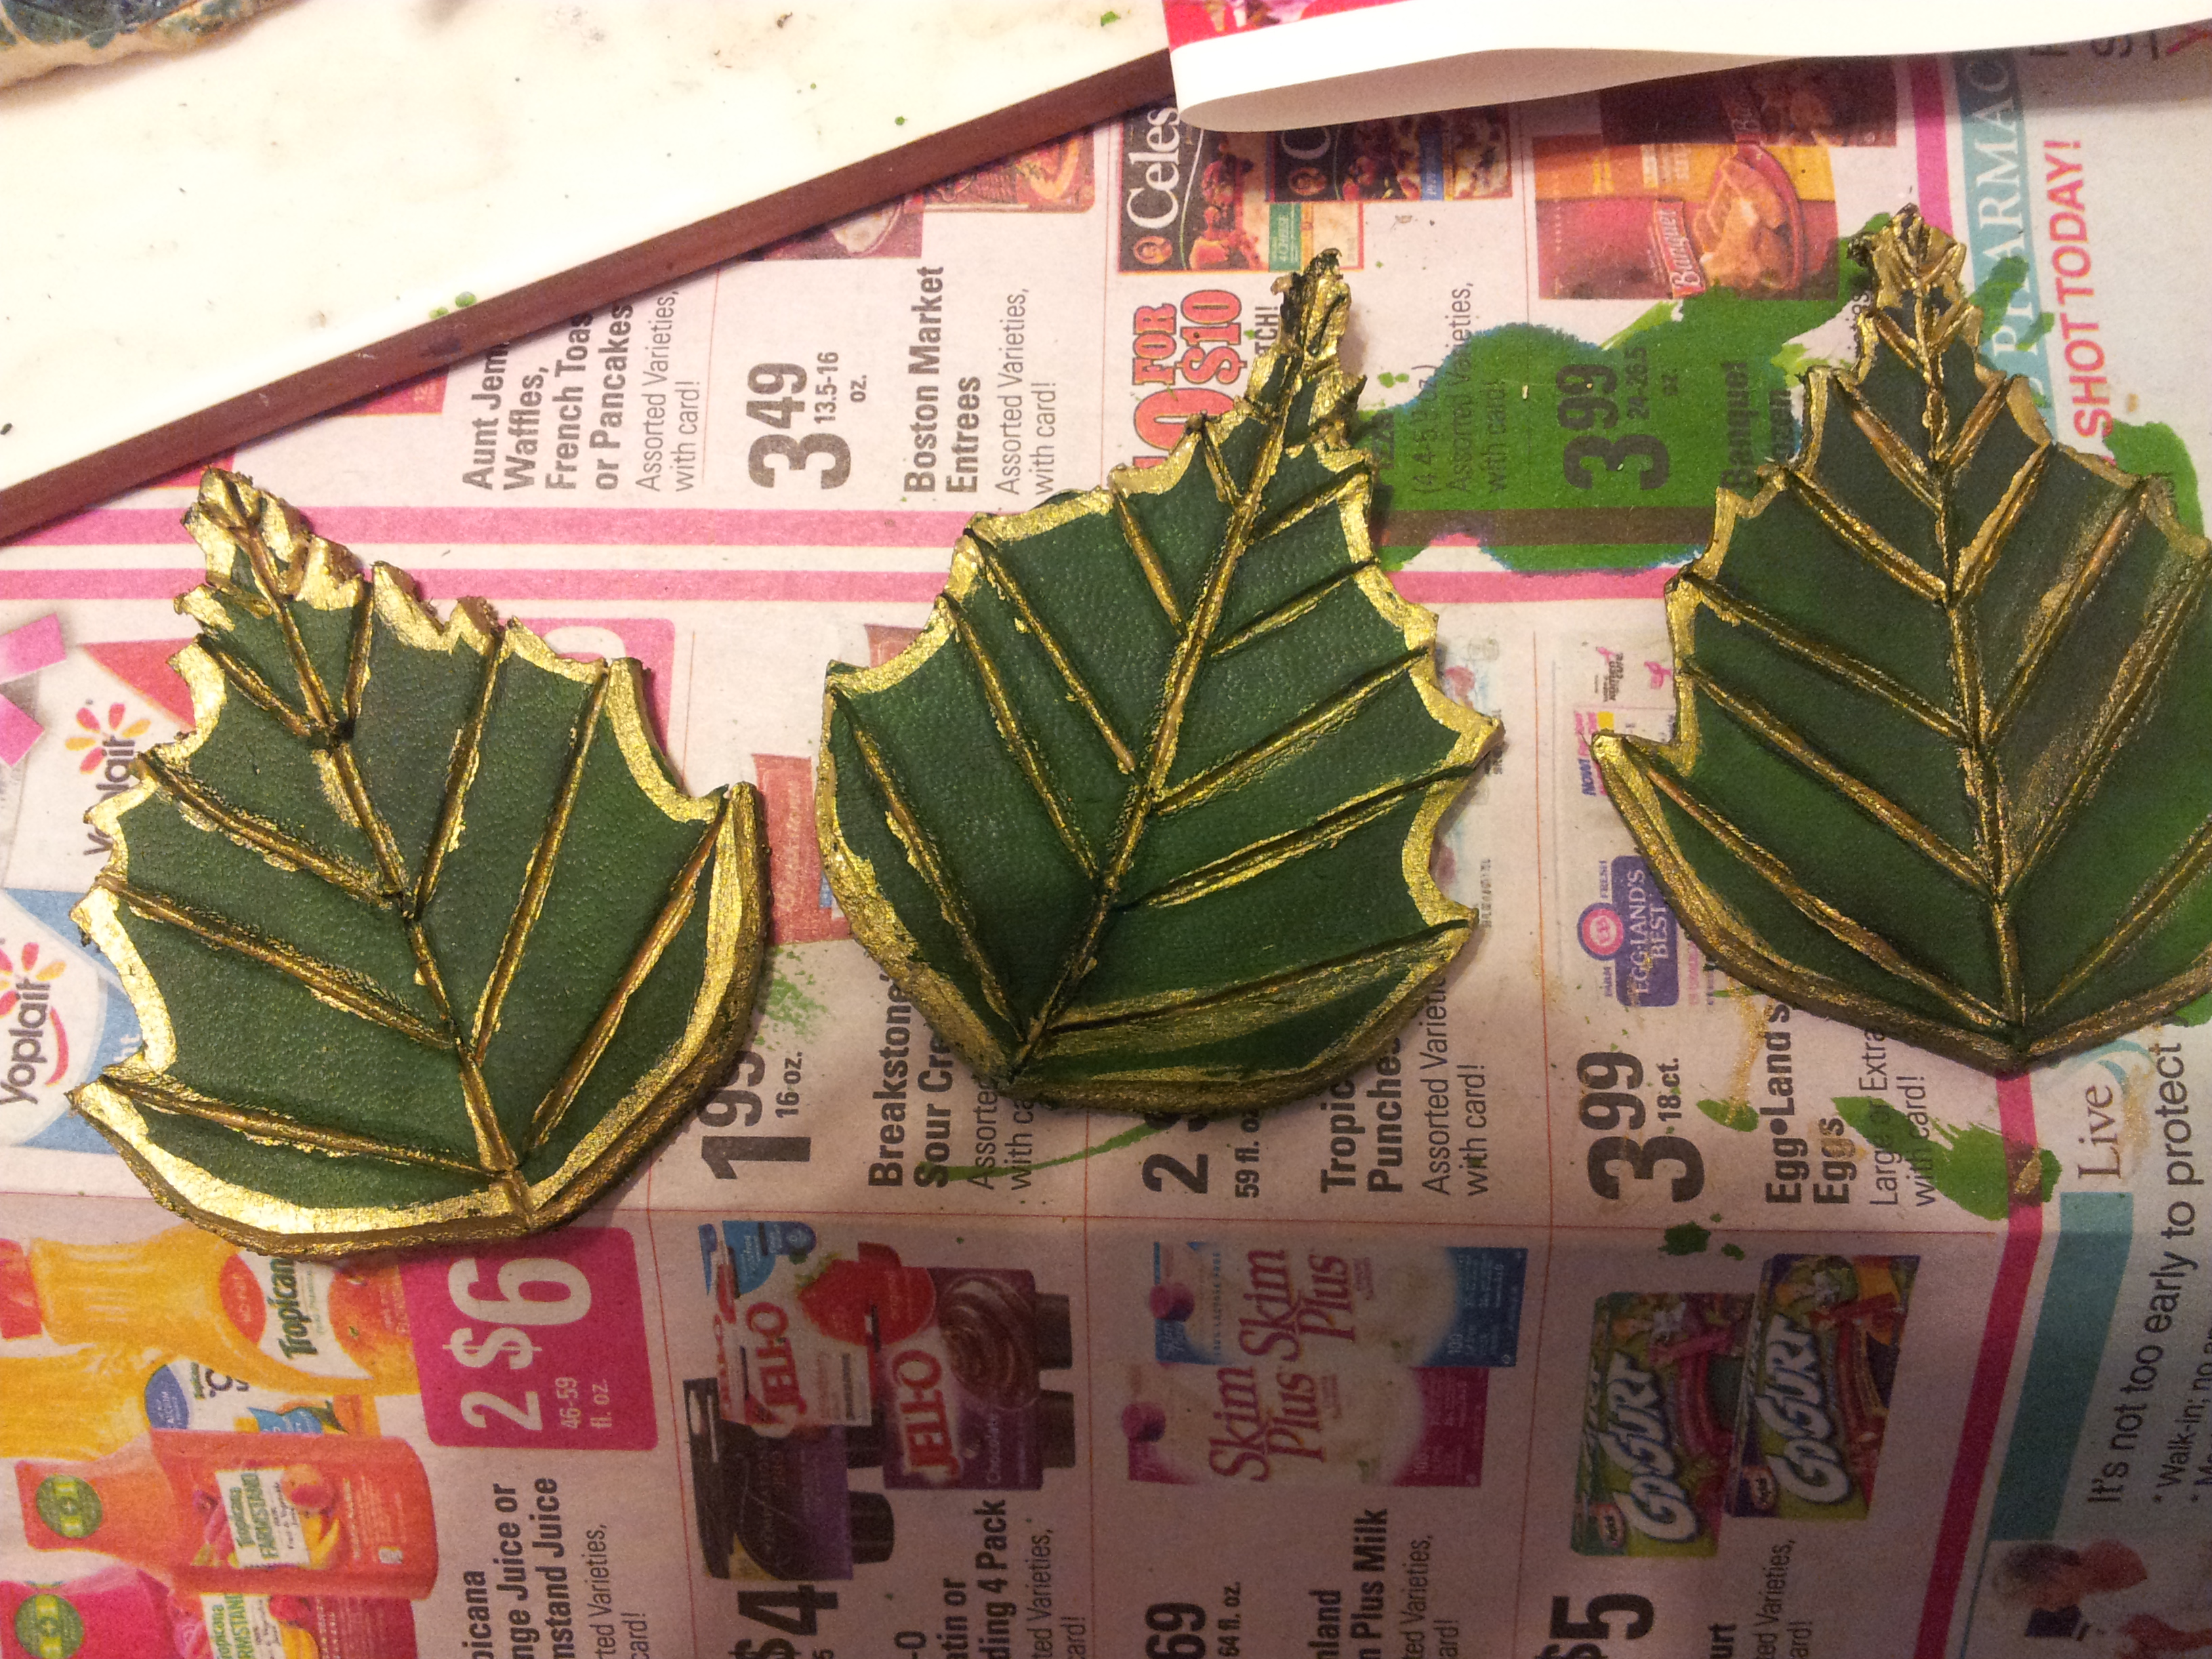
Repeat this with the 3 smaller leaves. Also outline the eyes of the mask in gold and outlined the edges of the smaller leaves.
For the strap of bark, use the fine brush to paint the cut and separated lines black. Paint the rest of the strap ivory, taking care not to get the ivory paint into the leather cuts.
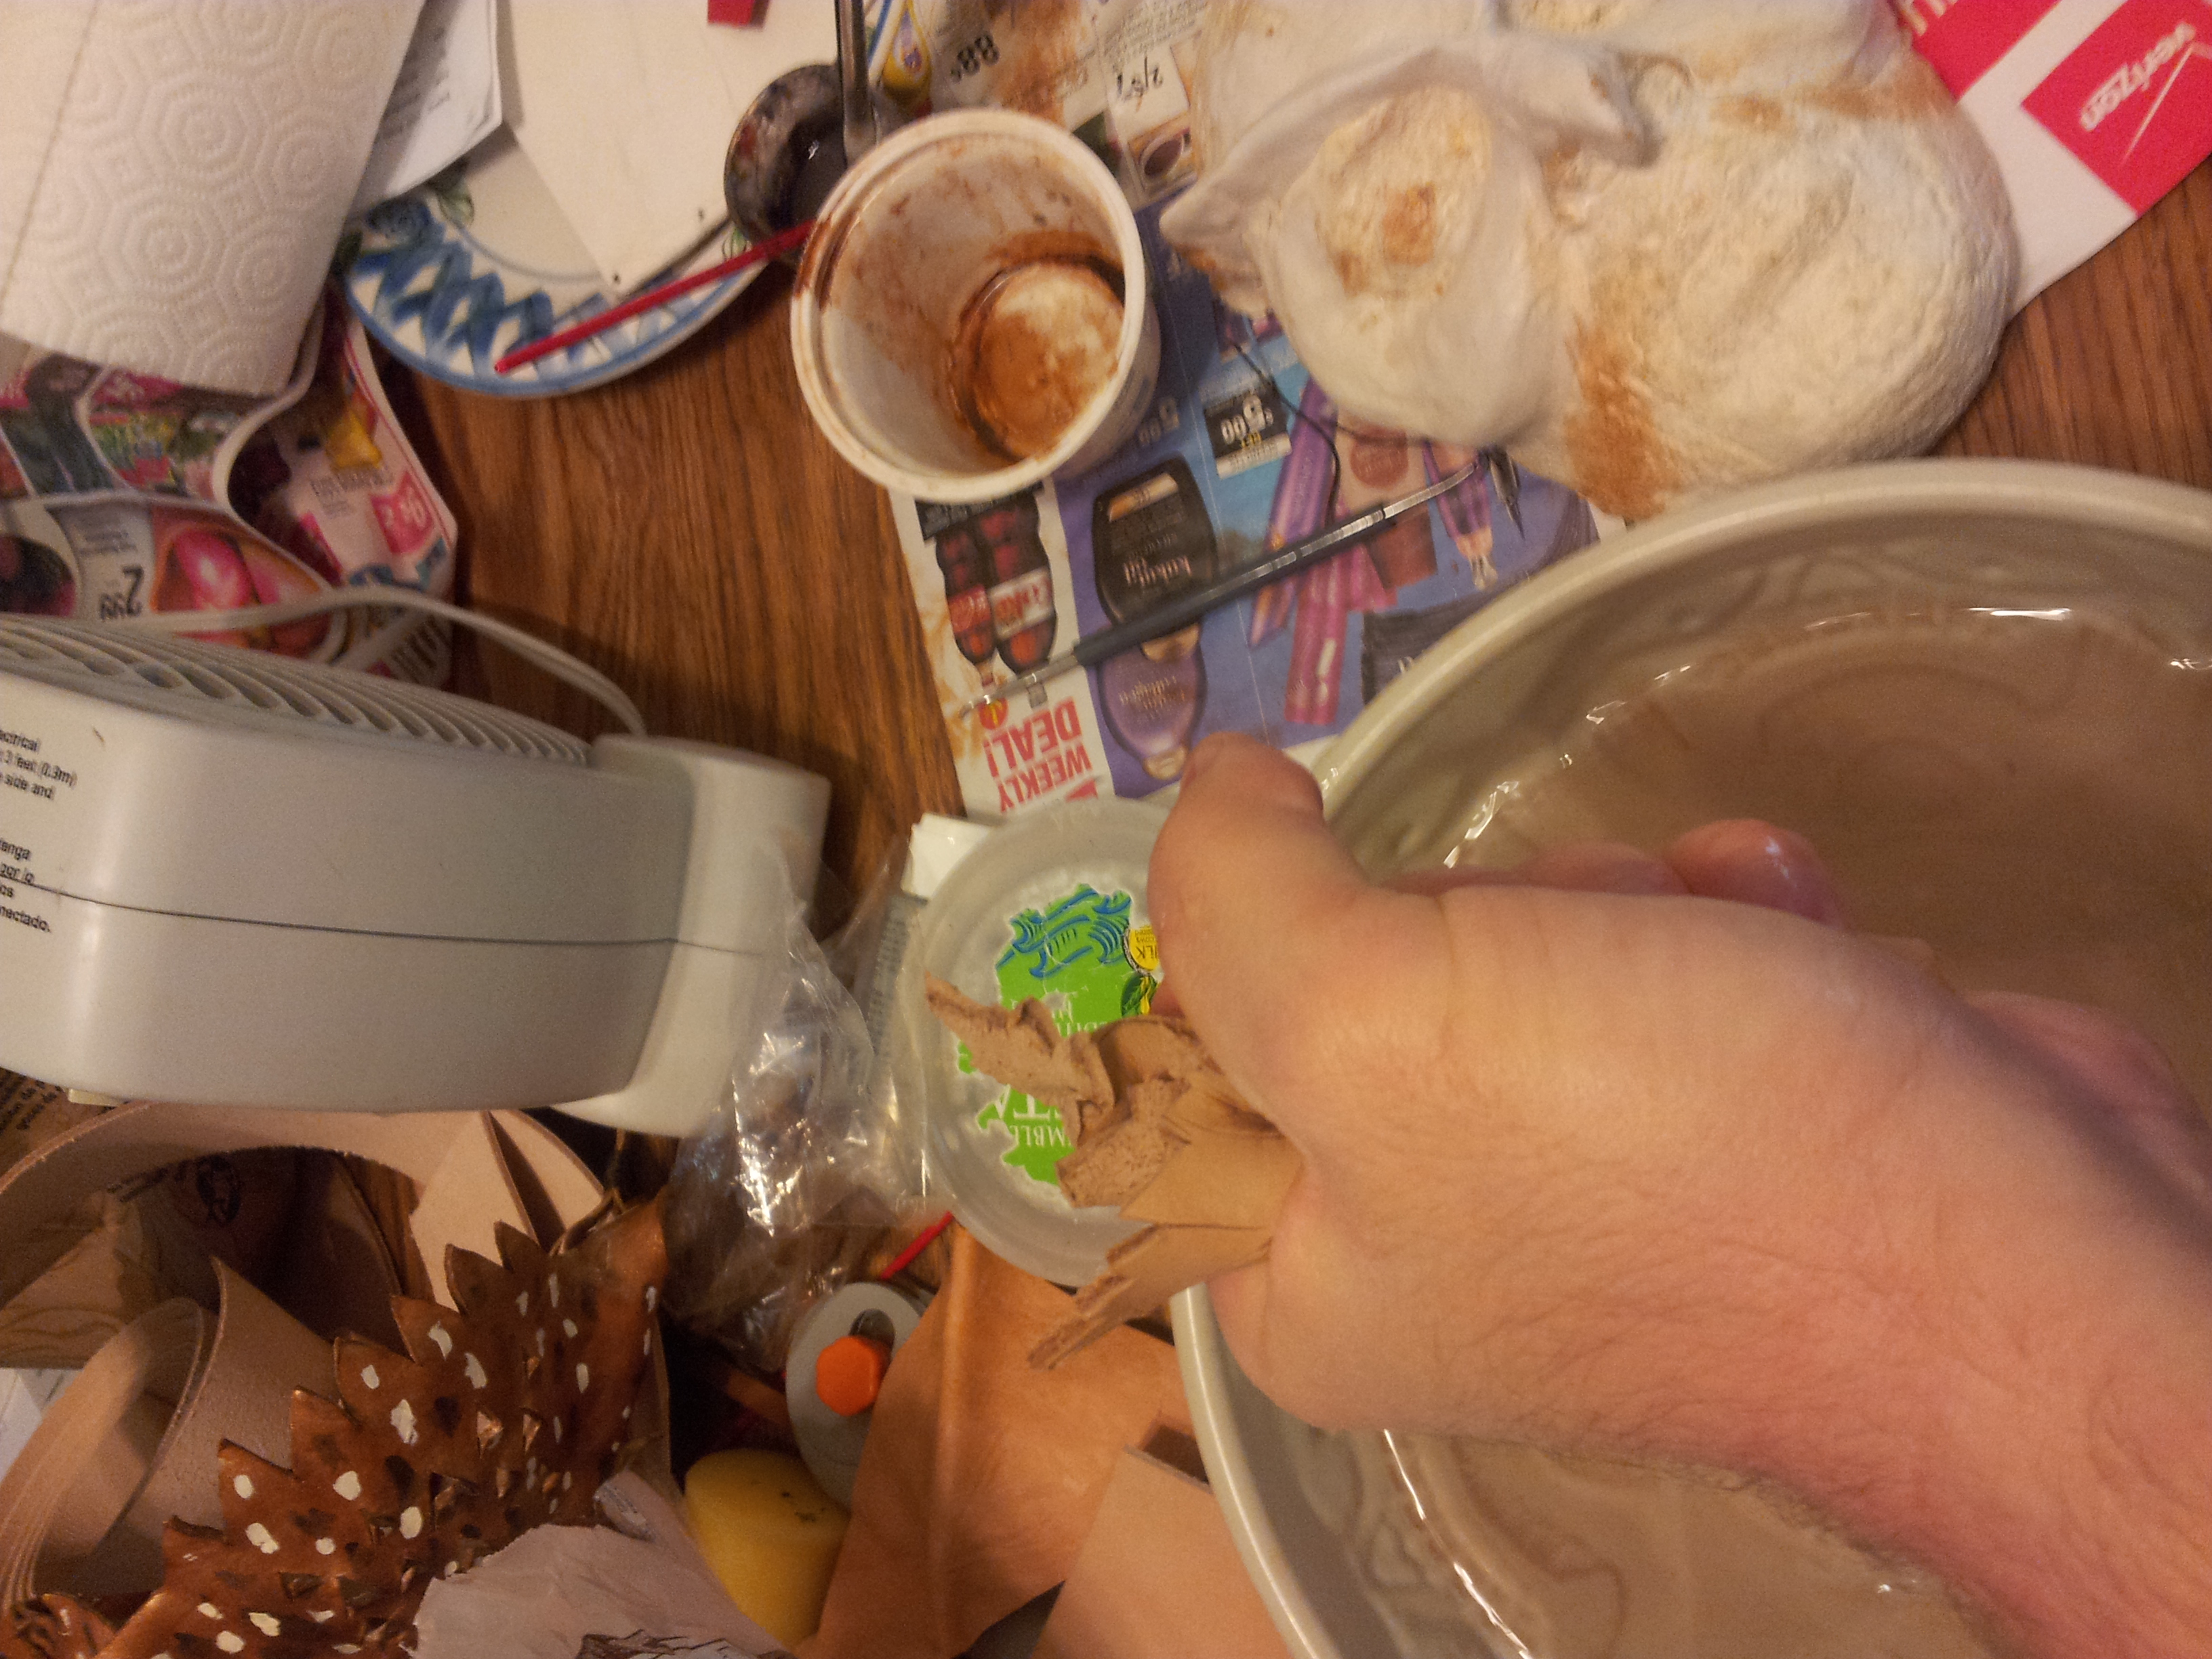
Seal the Leather
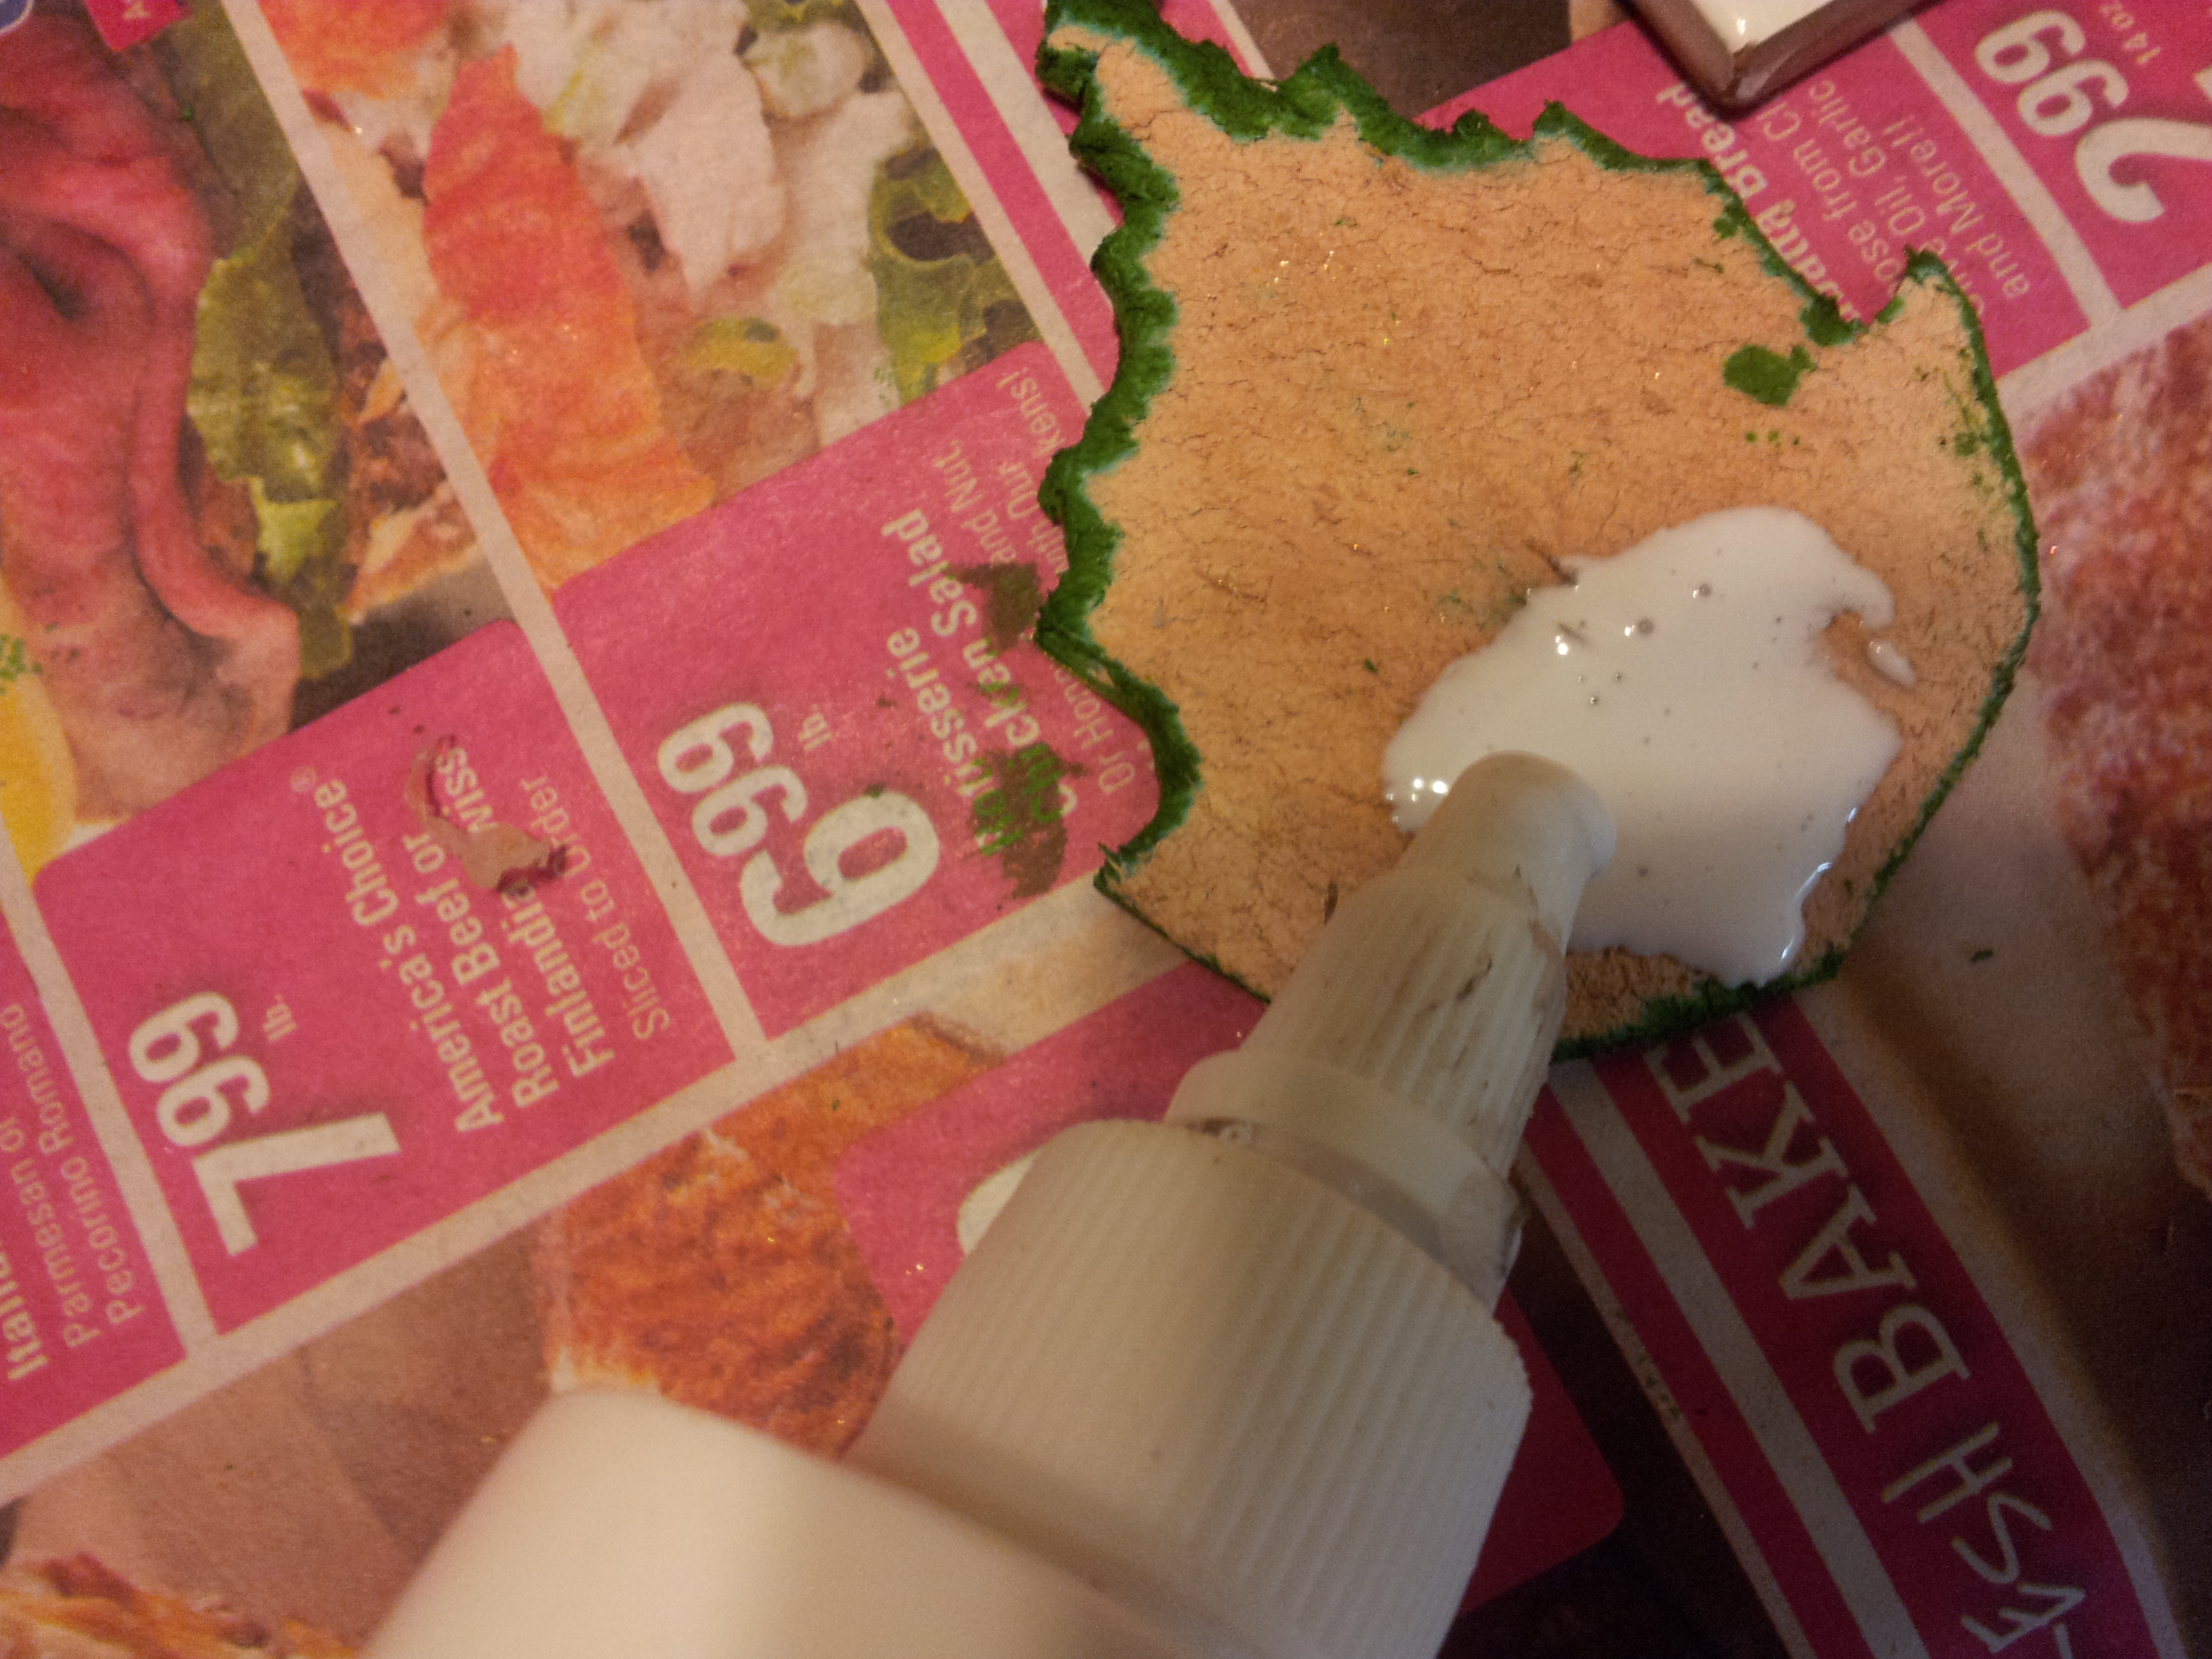
Seal the inside of the mask and the back of the leaves and leather strap by applying the Super Shene with the sponge applicator.
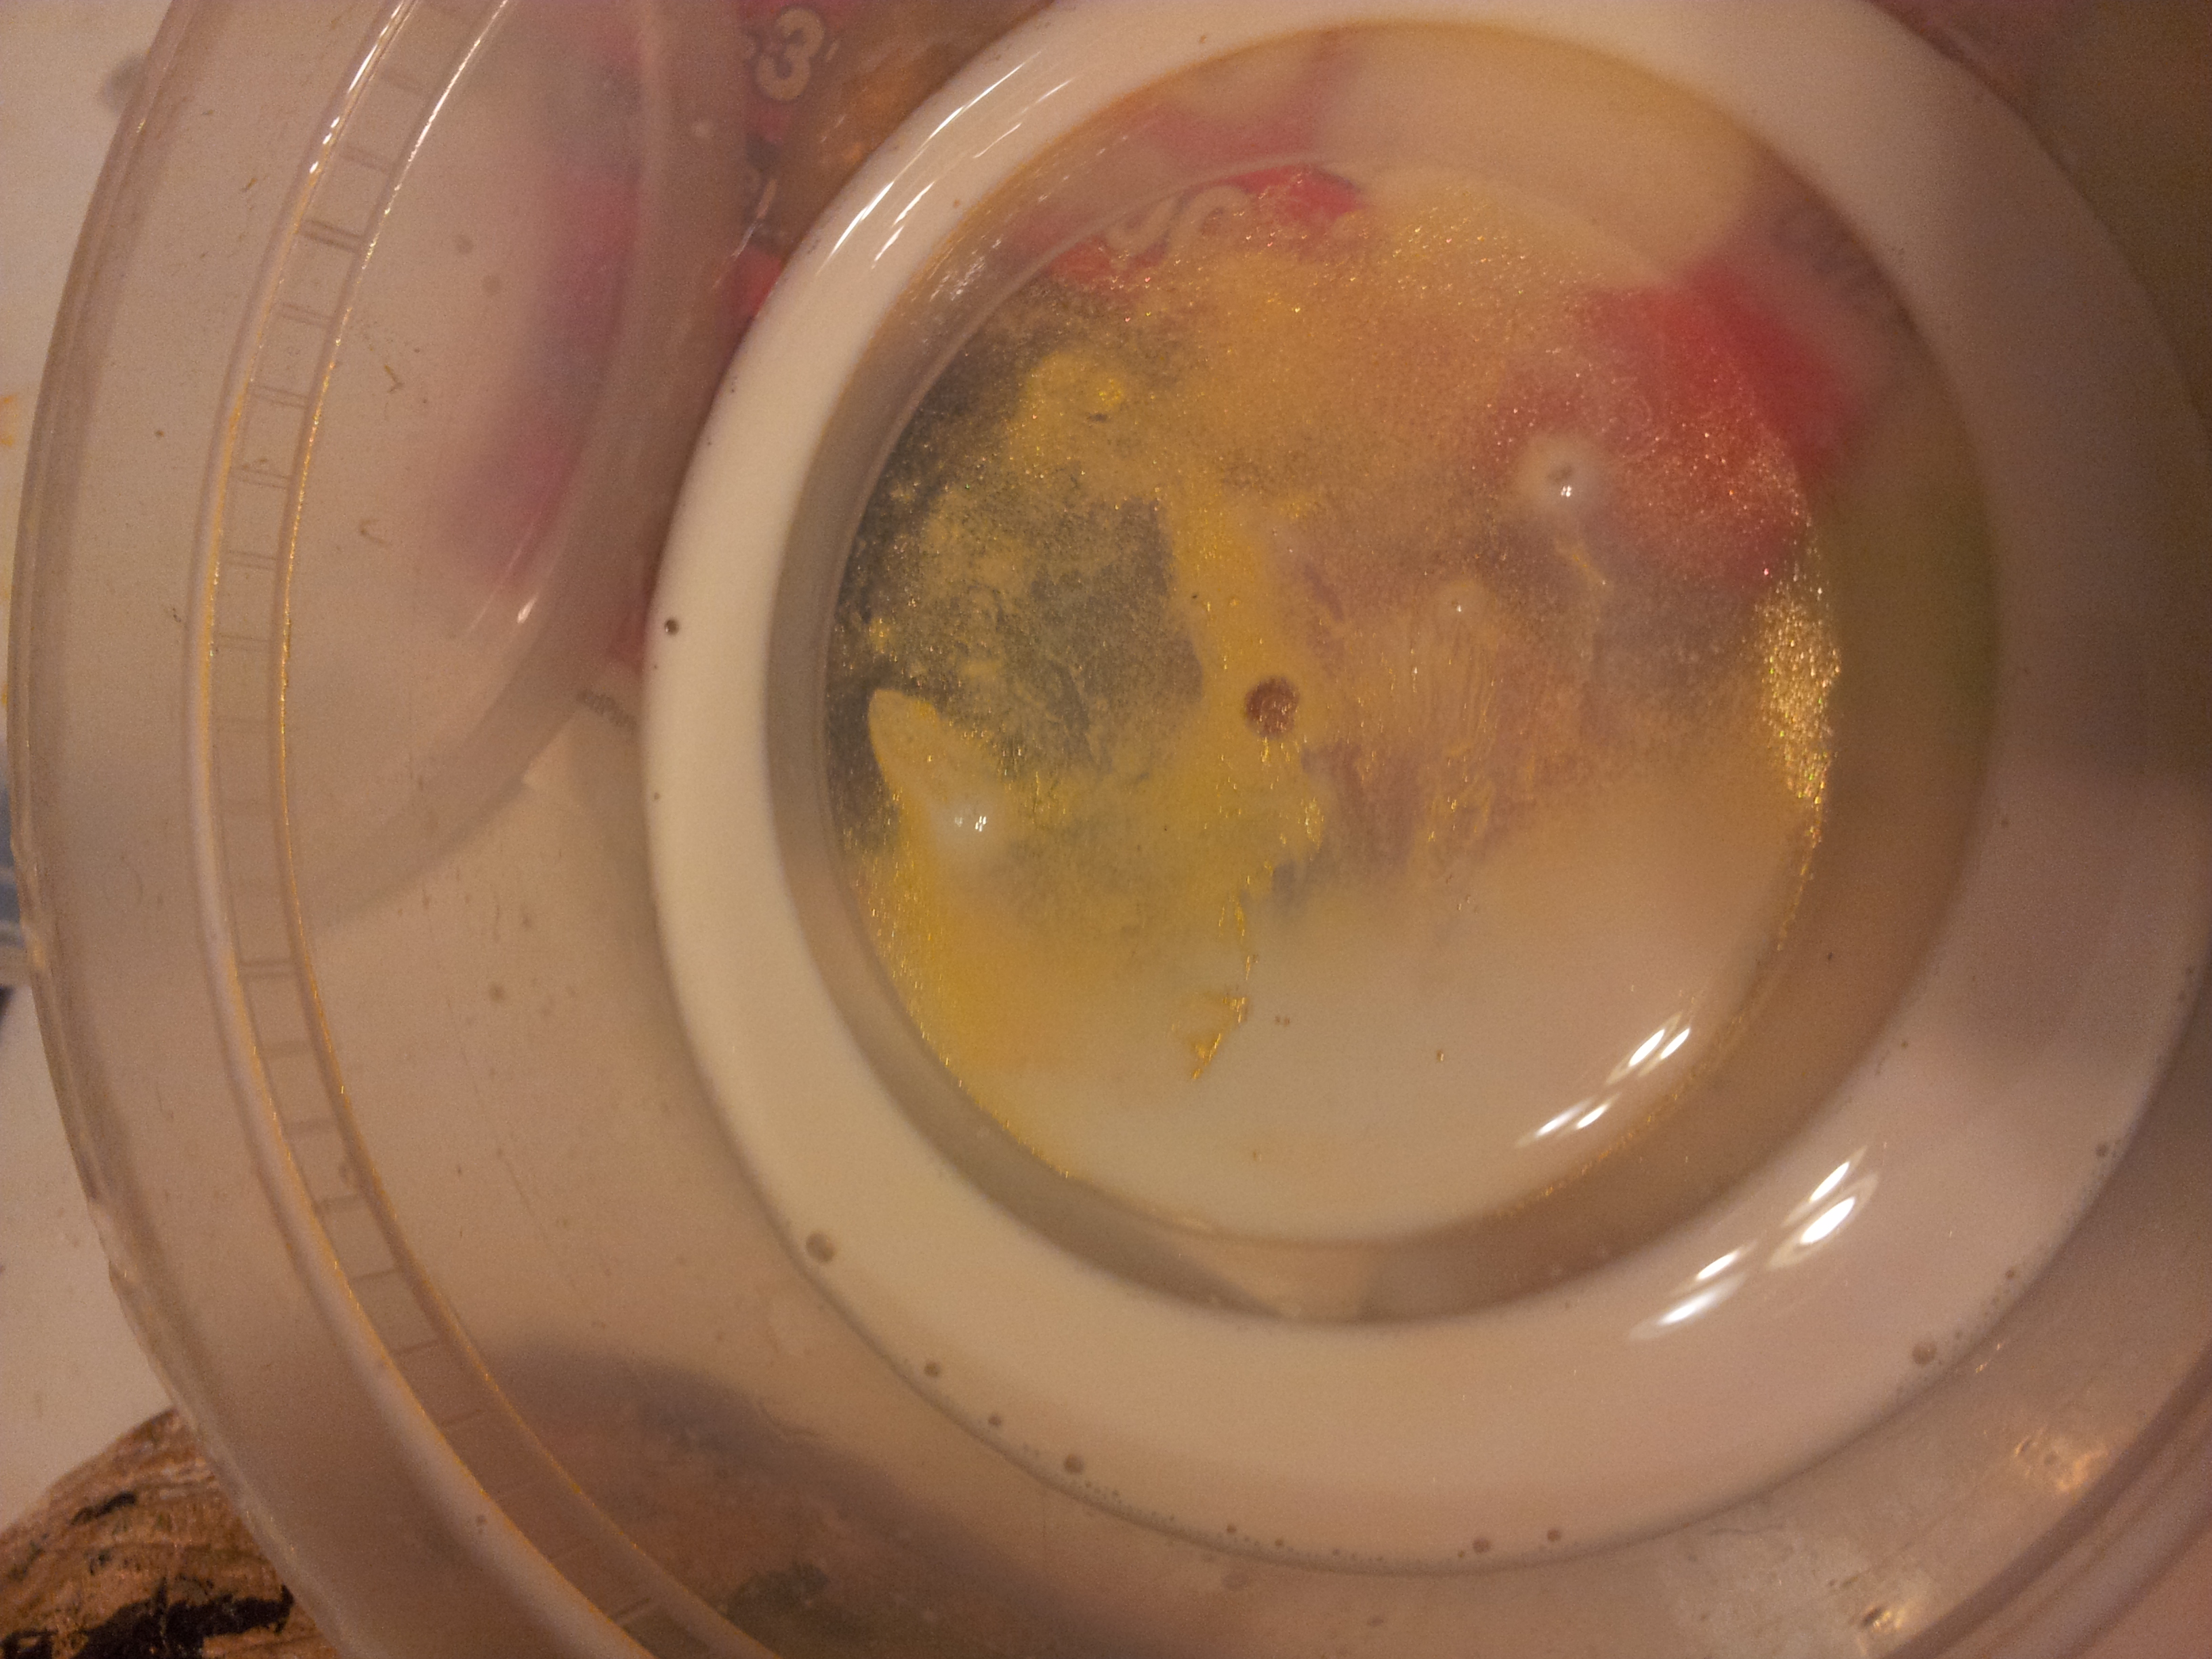
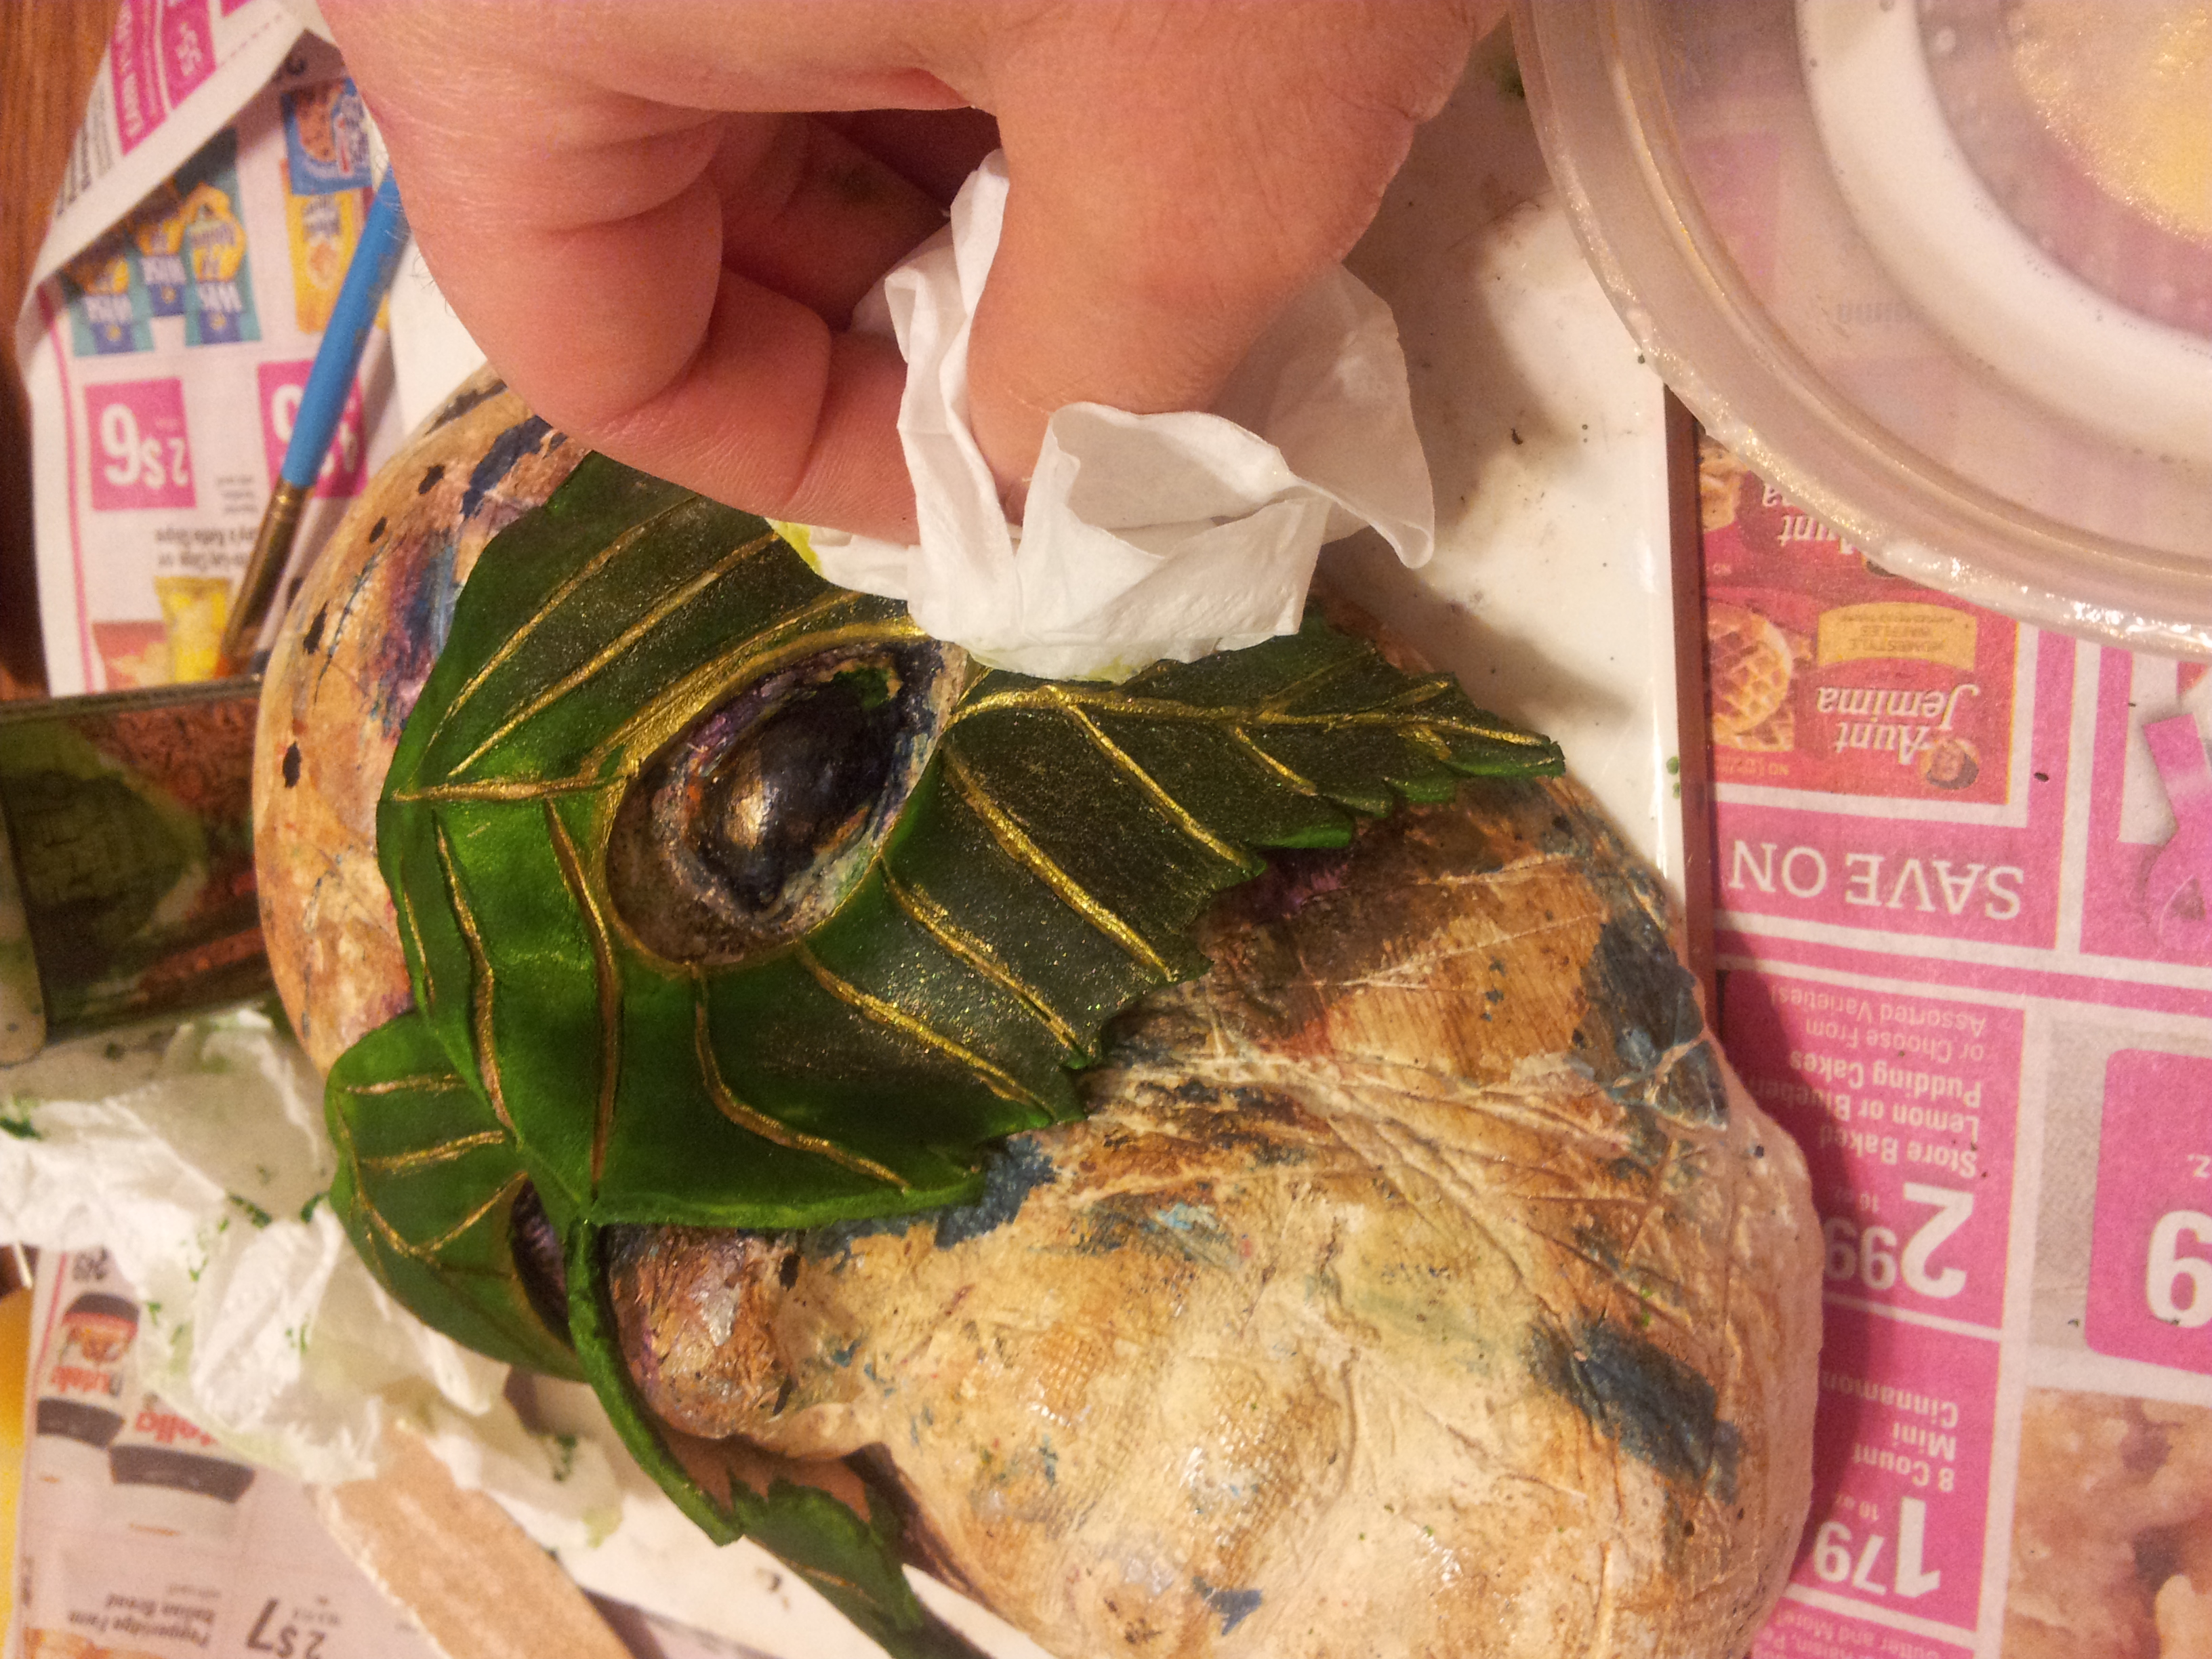
For the front of the mask, pour some Super Shene into a dish and add a little of the Pearl ex gold powder. Add a little powder at a time, mix it into the Super Shene and test the mix on a scrap piece of leather. If the seal gives the leather enough of a golden sheen, use that mix. If you need more gold, add more Pearl Ex. If the gold is too strong, dilute the mix by adding more Super Shene.
Apply the Pearl Ex and Super Shene mix. Wait a few seconds, and then wipe off the excess. Seal front of the leaves and the front of the leather strip this way.
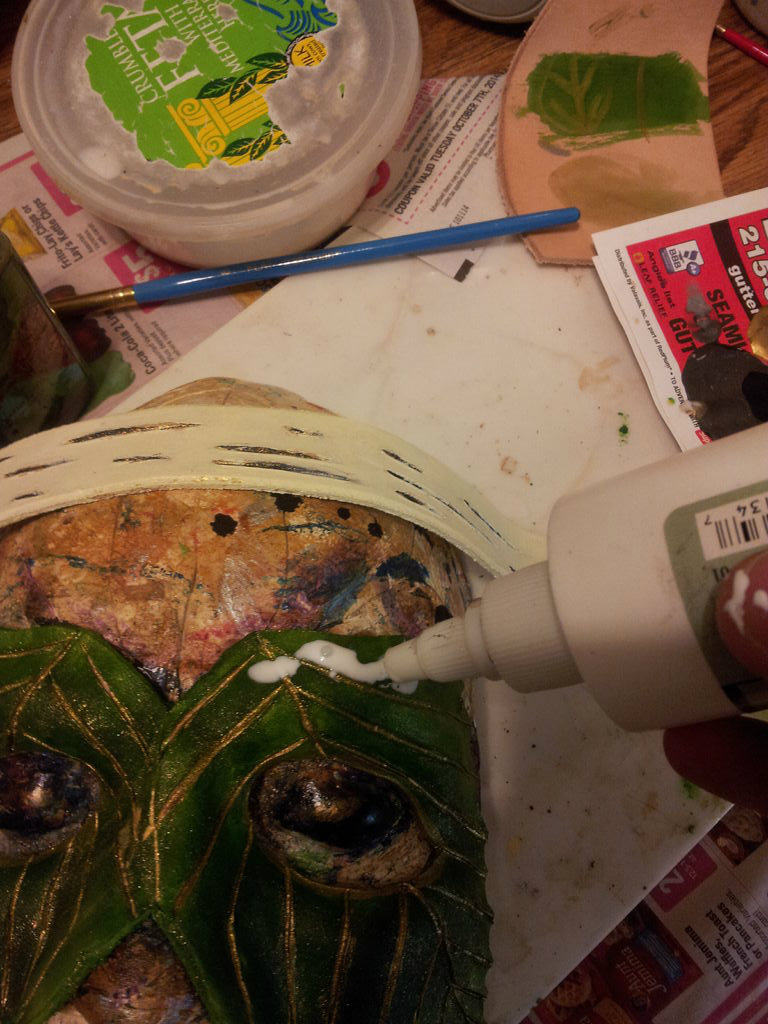
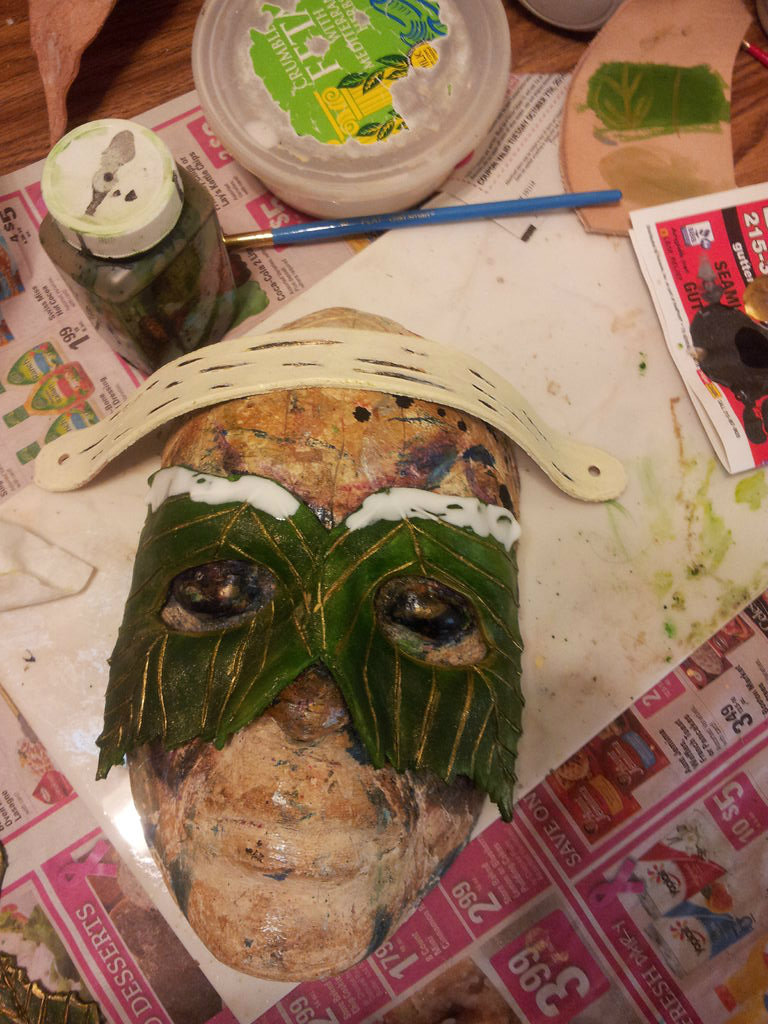
Assemble the Mask
Leather Weld is strong enough for basic masks. I made a multi-piece mask for a friend, and he wore it to a LARP. It took 3 direct shots to the face with a boffer sword before parts started to come off. So unless you are wearing masks into combat situations, the Leather Weld will meet your needs for attaching leather to leather.
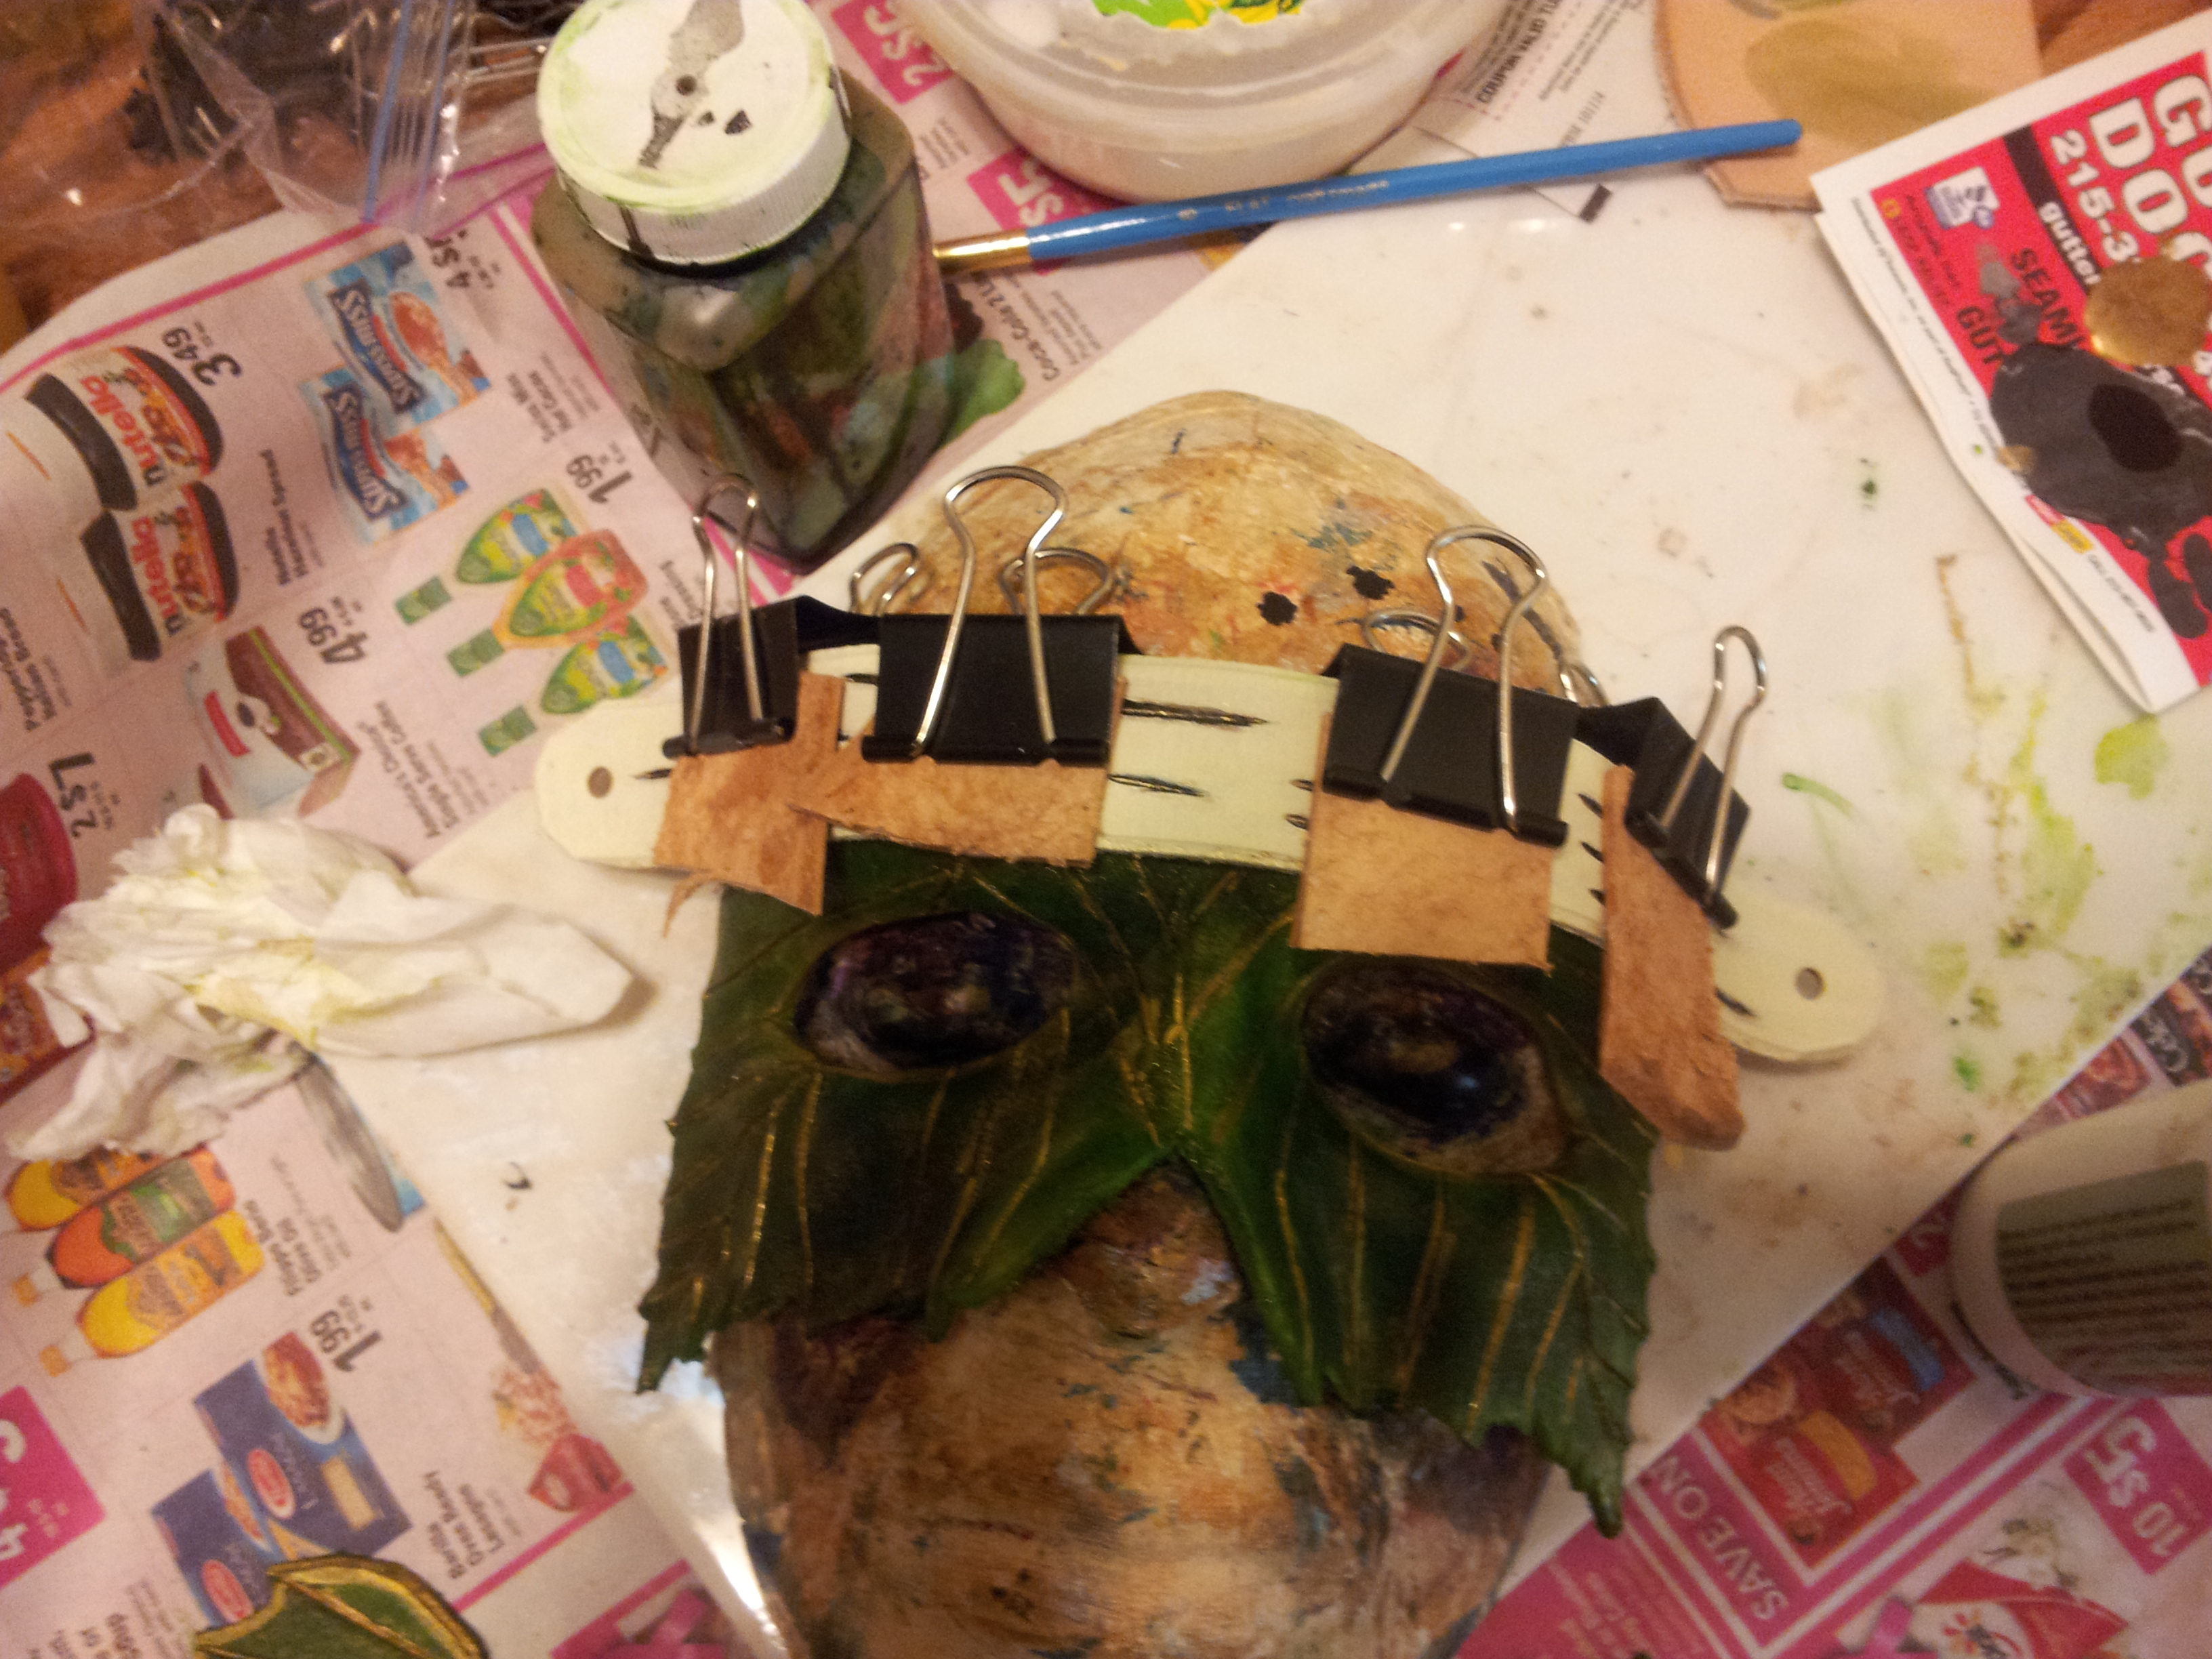
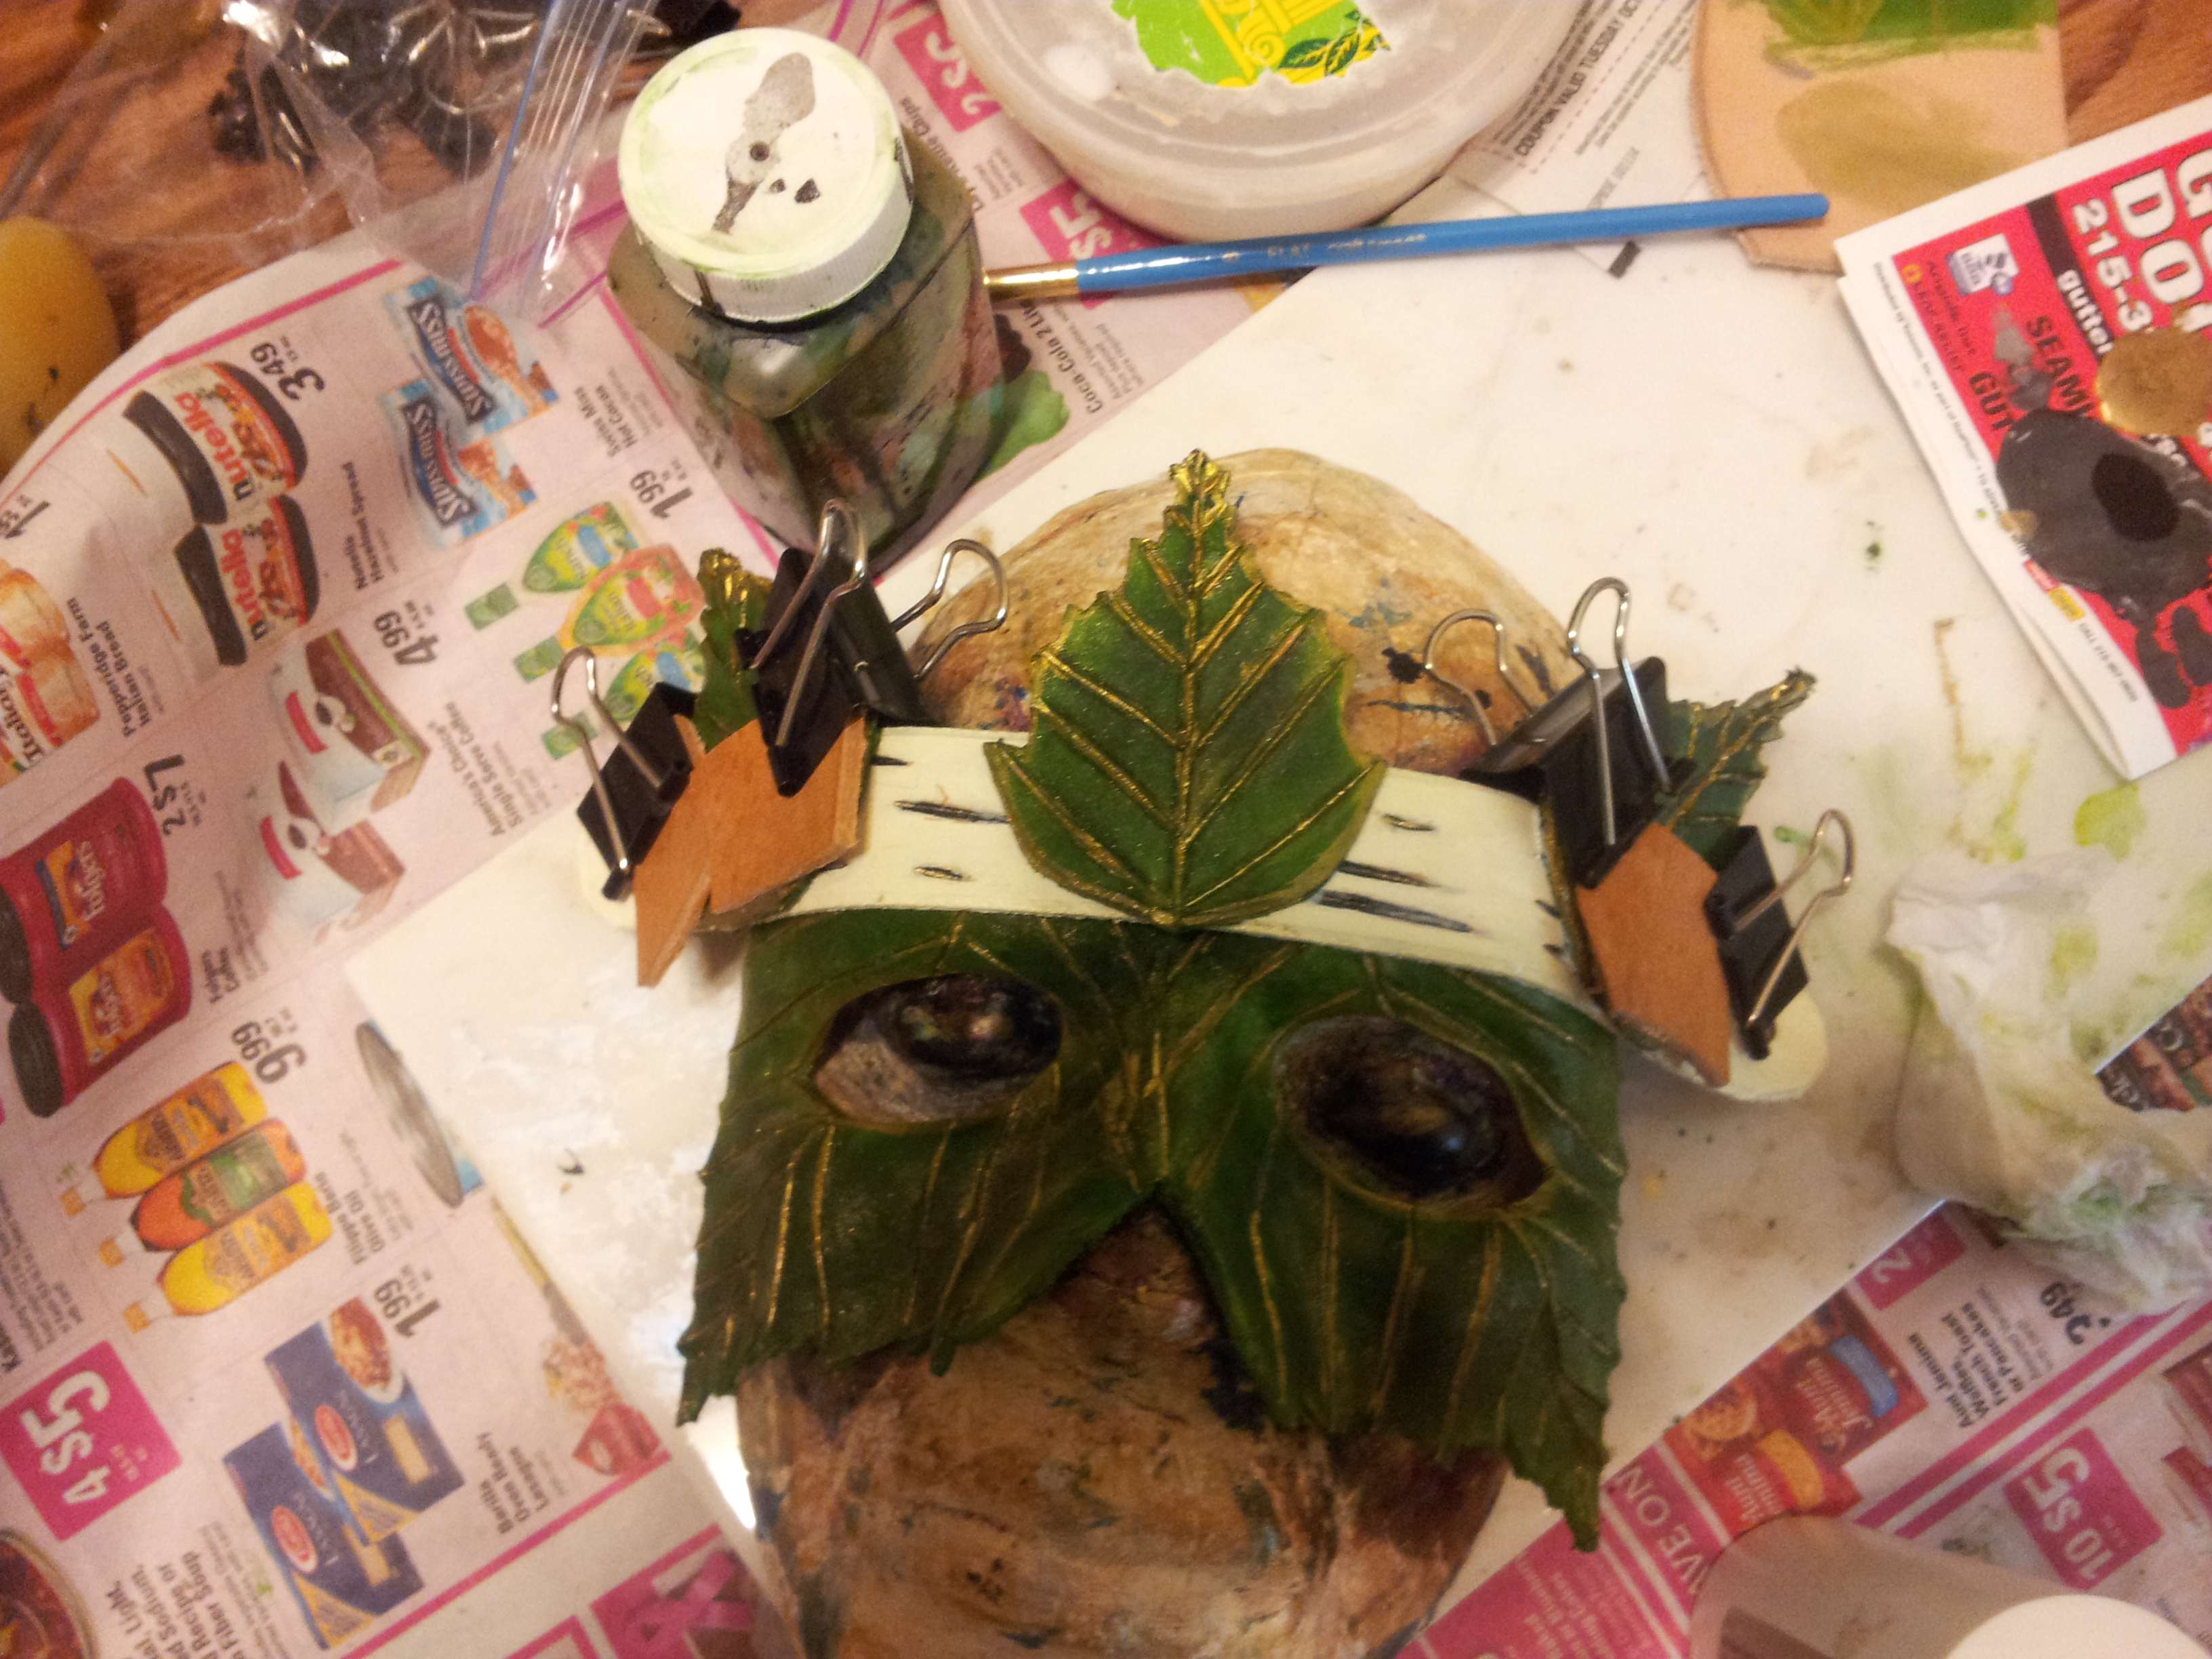
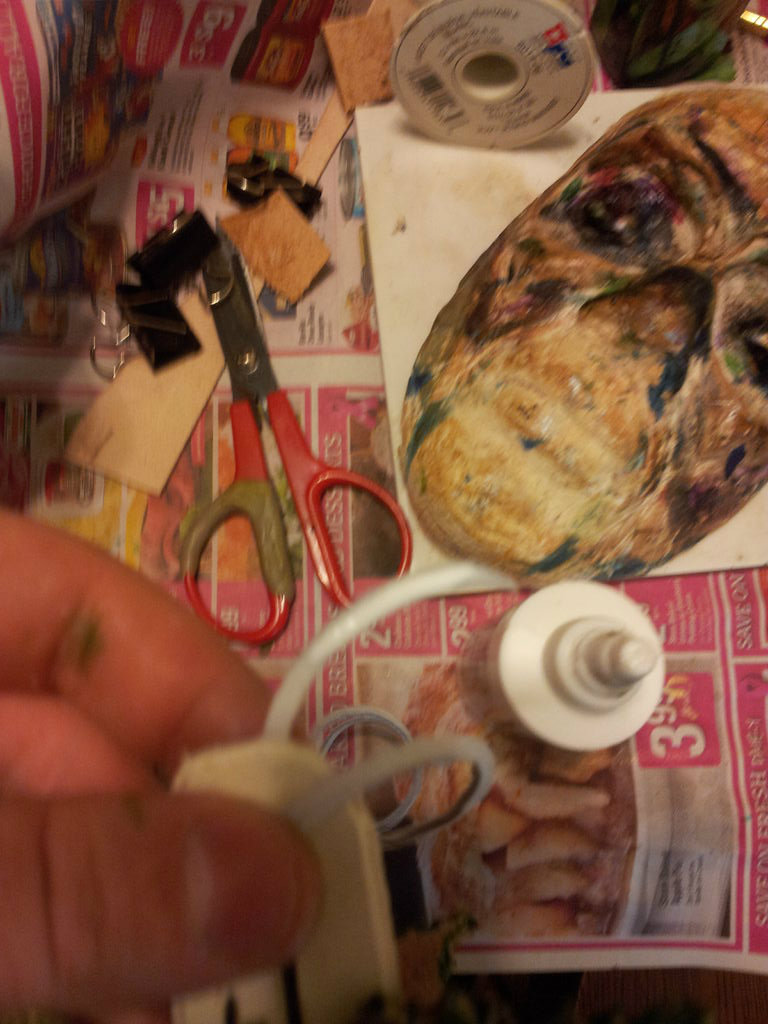
Apply the Leather Weld to the top of the mask above the eyes. Center the leather strip on top area the glue was applied. Use the binder clips to secure the leather strap in place while it dries. Place small pieces of scrap leather under the clips as you do this, because the clips could otherwise leave indentations in the leather.
Next attach the smaller leaves to the leather strap. Apply the leather weld to the back of the leaves and clamp them on. One leaf is secured in the center of the forehead. The other two are pointed back on either side.
Attach the Ties
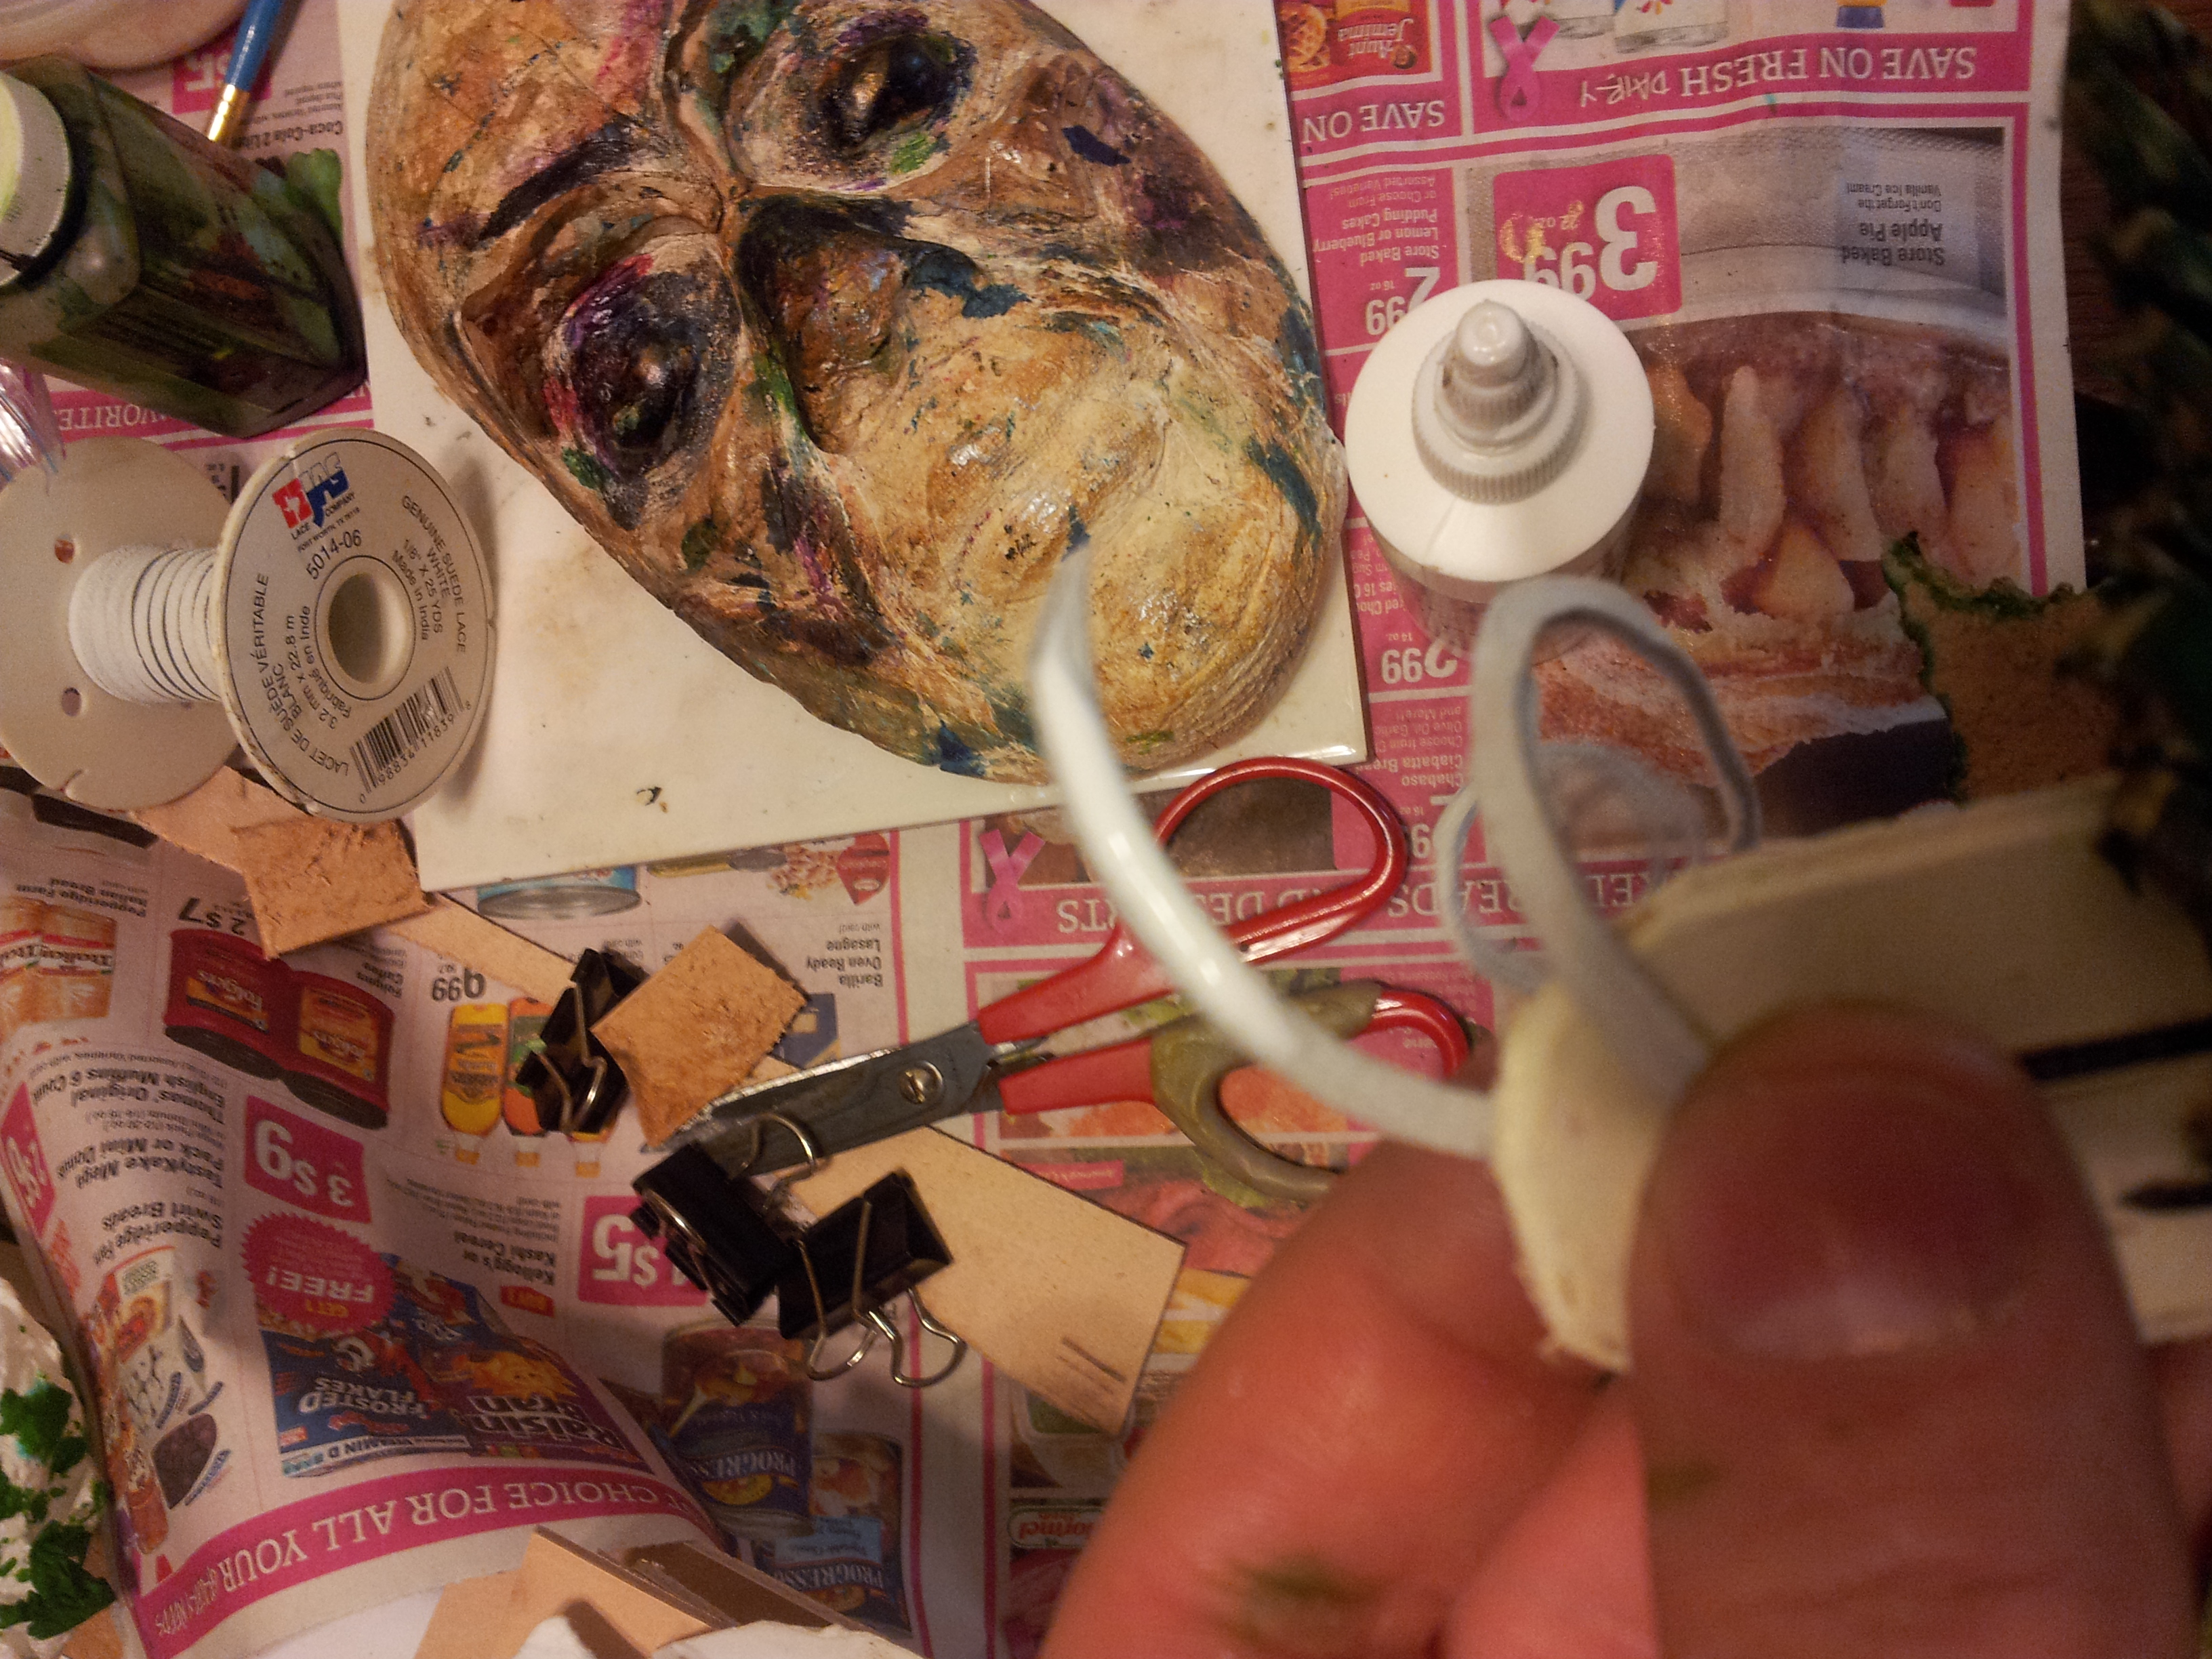
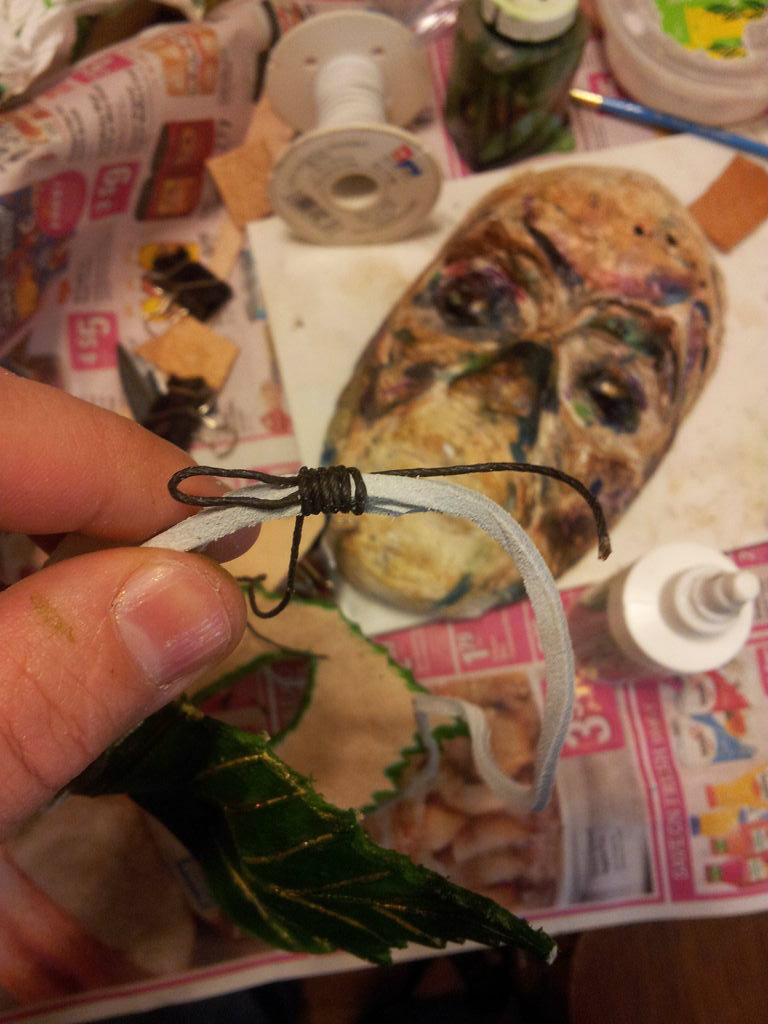
Run the lace through the holes punched in the strip of leather.
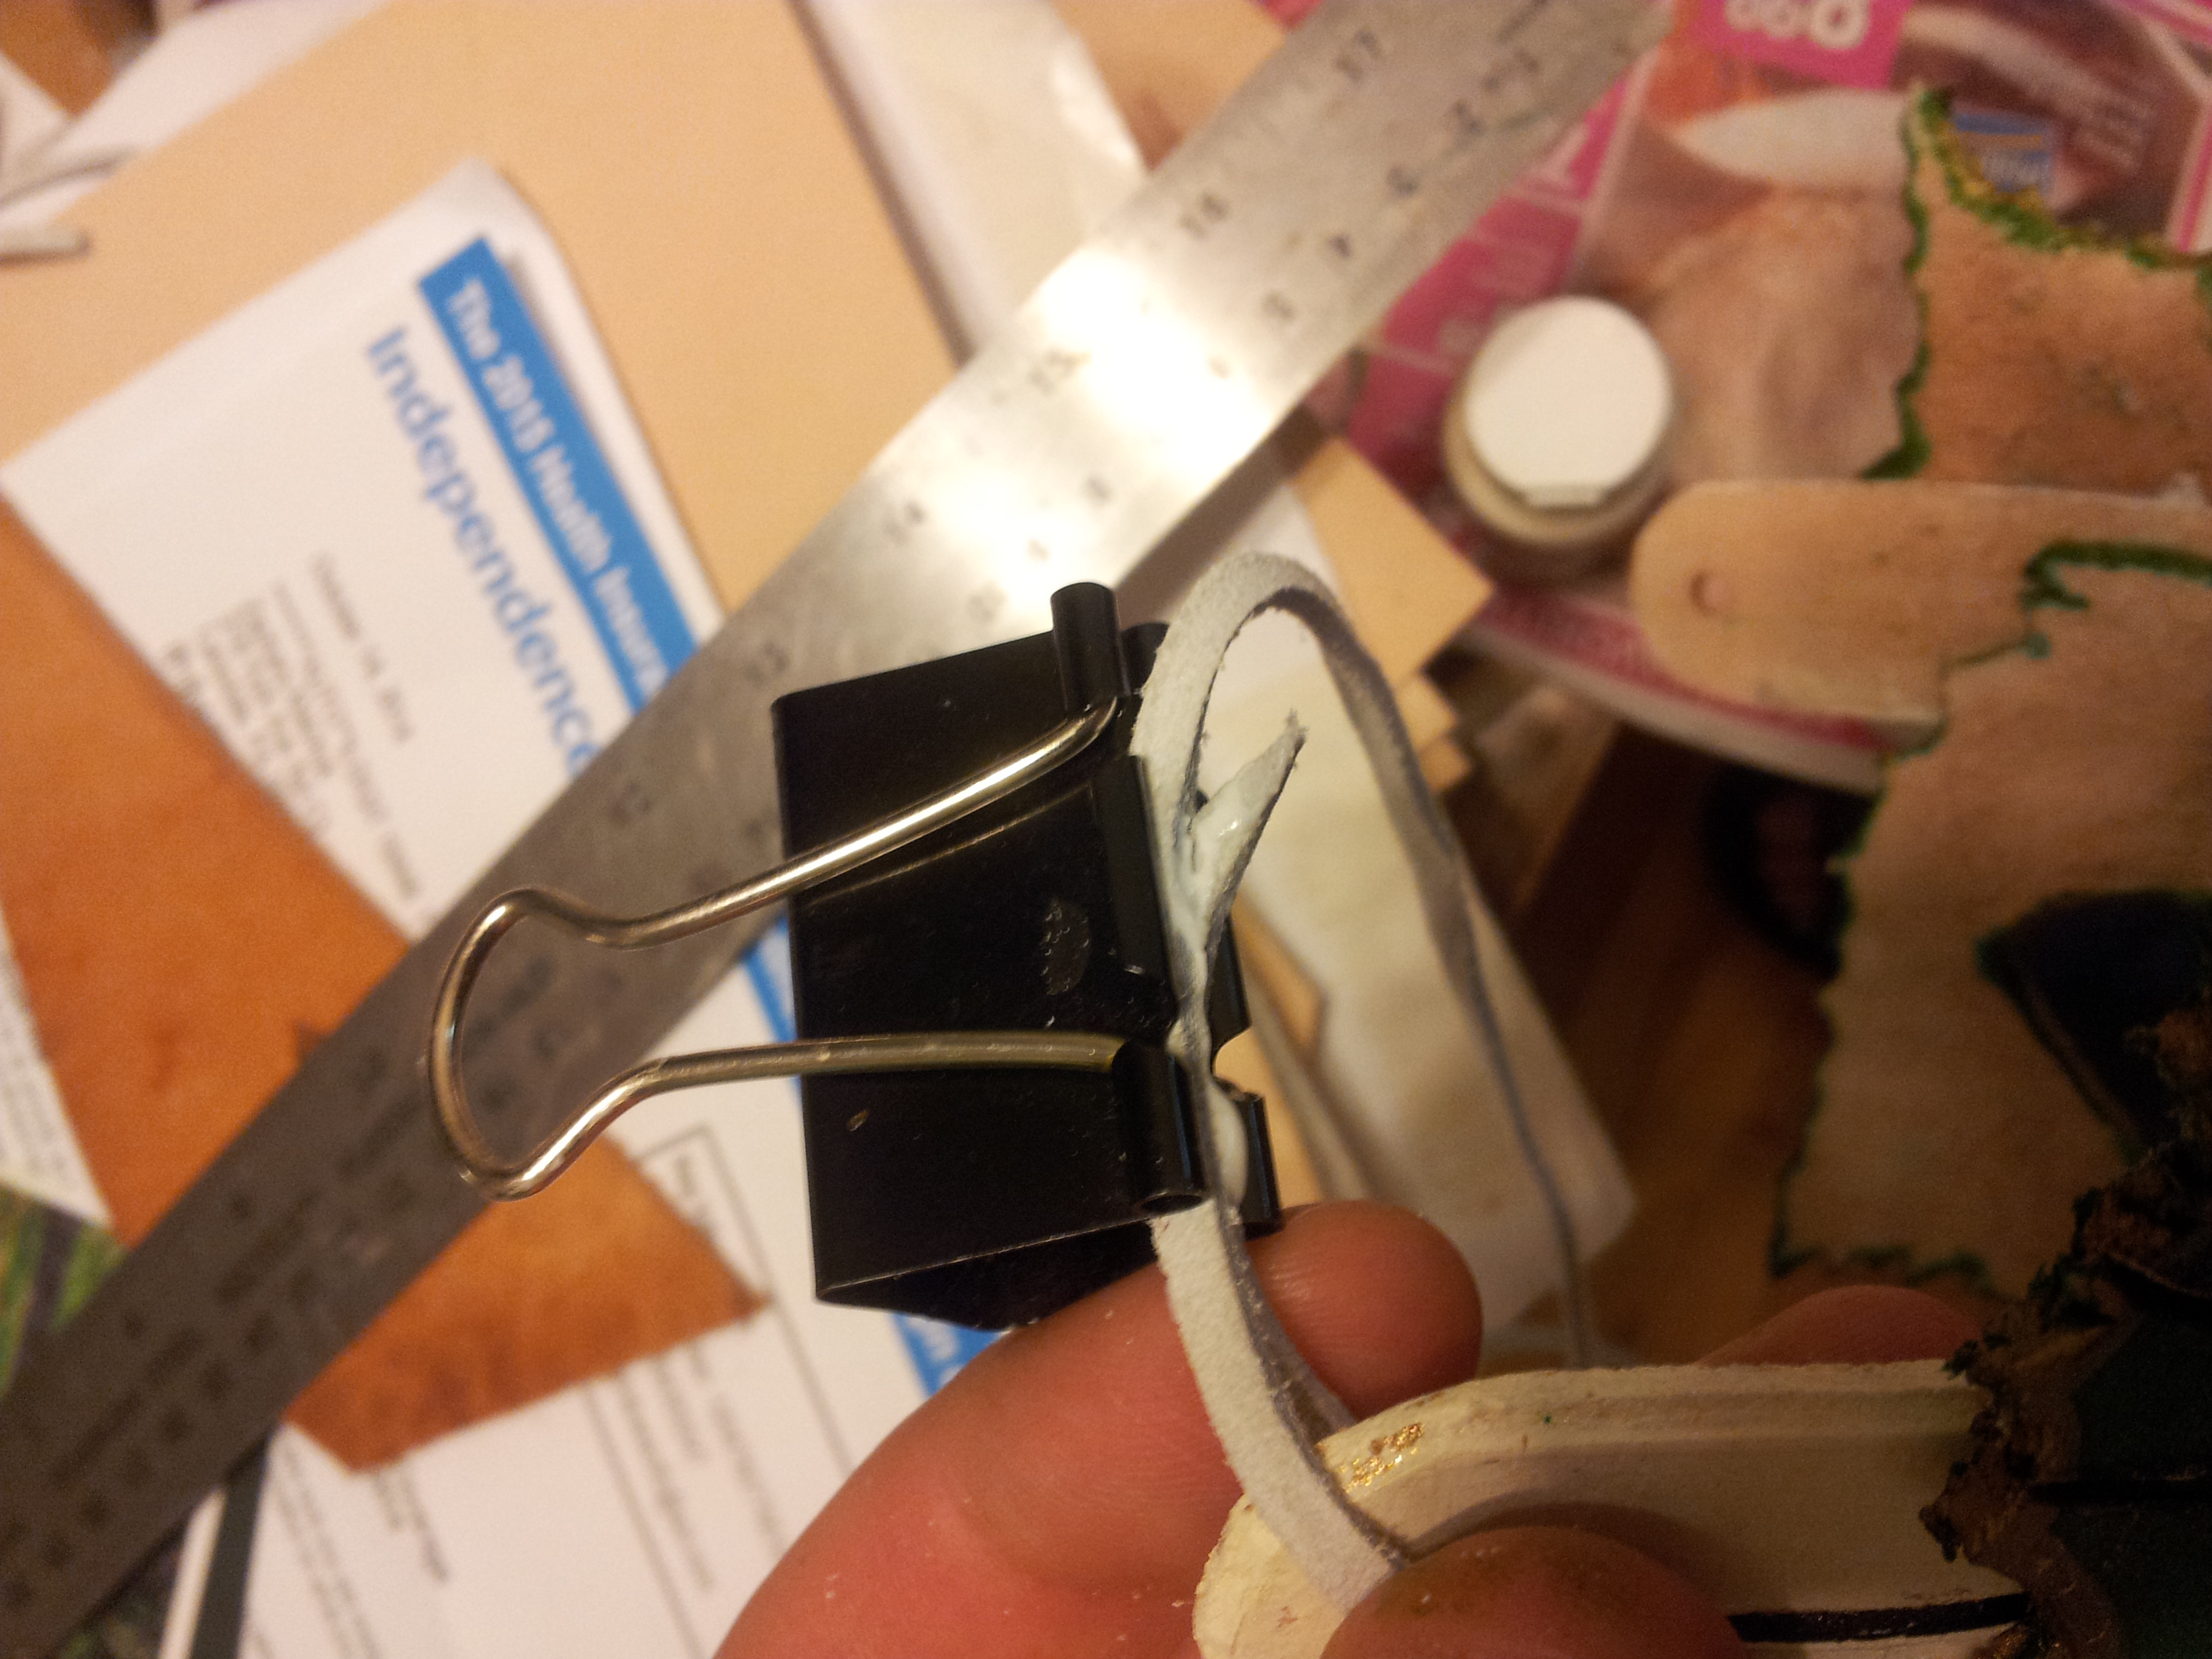
Put some glue on the short end and clamp it with the binder clip so that you form loop that runs through the holes.
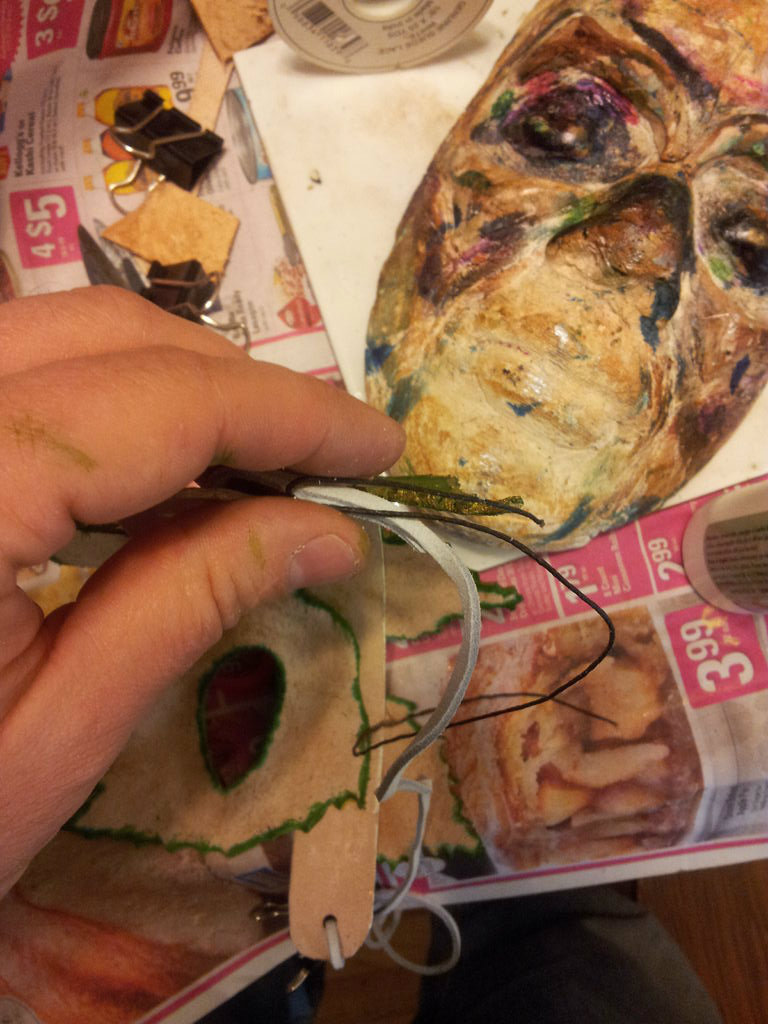
Take a piece of waxed threat and form a loop that you lie on top of where the pieces of lace are joined. Allow the tail of the loop to extend past.
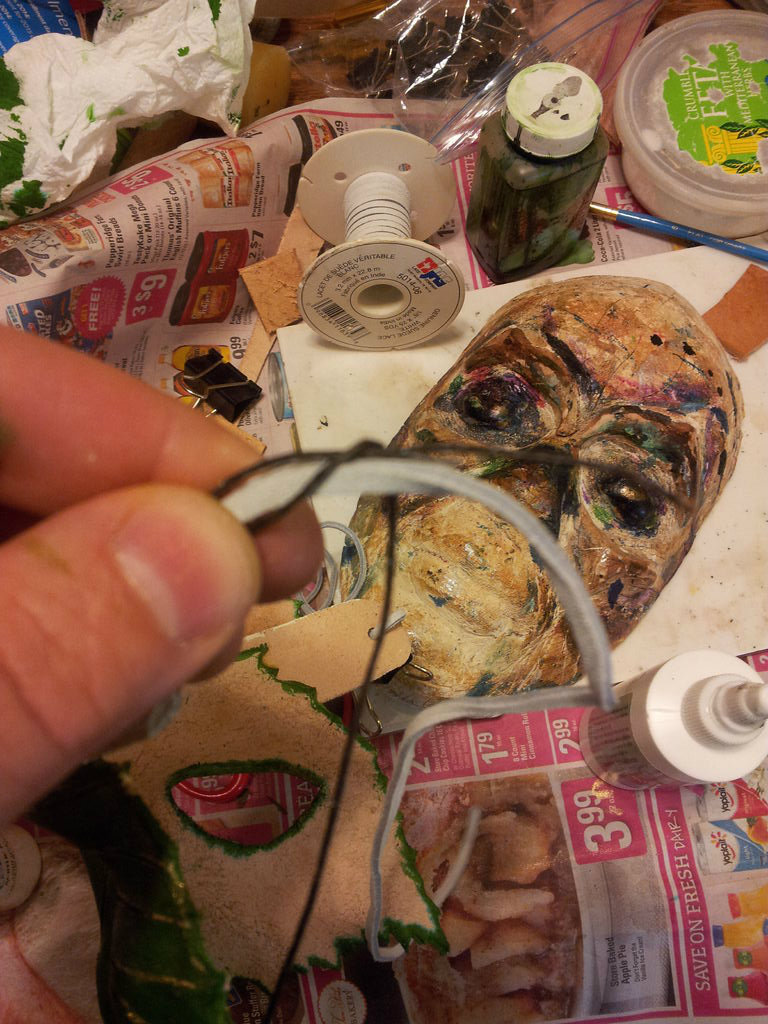
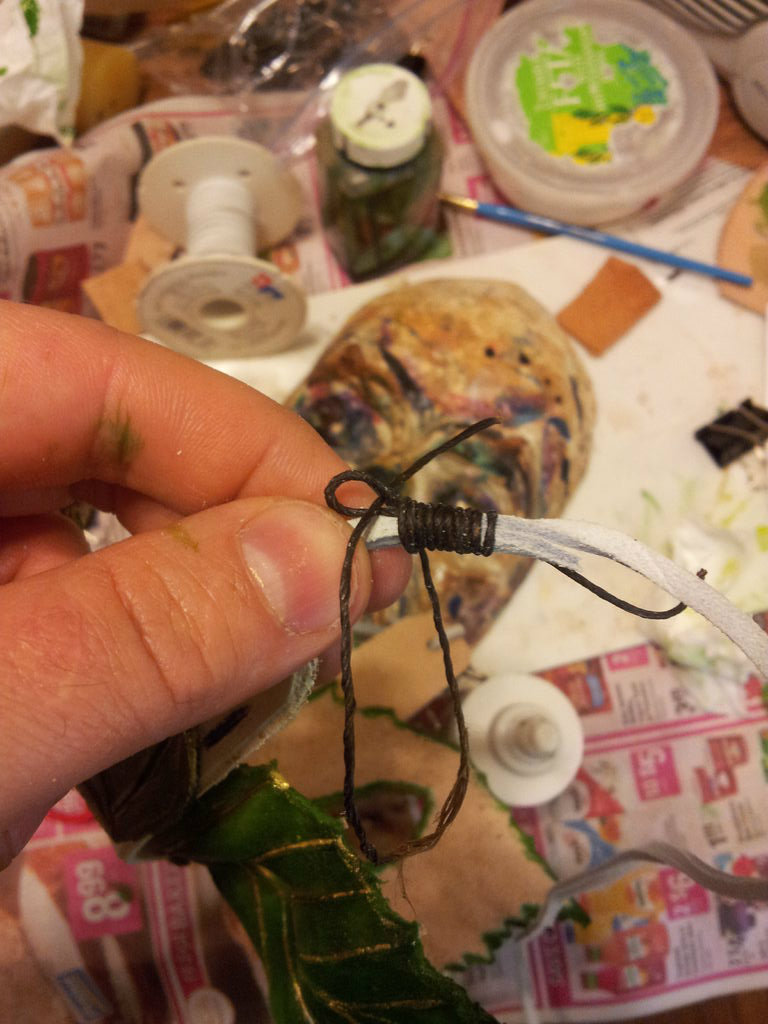
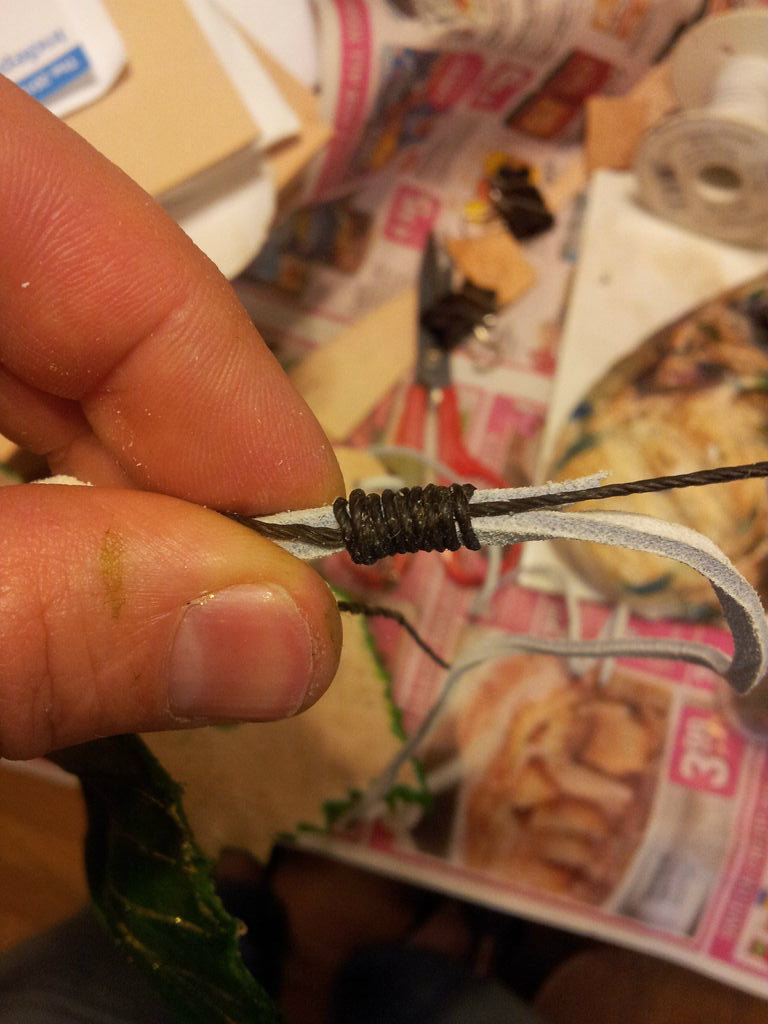
Take the other end of the thread and wrap it around both the loop of thread and the joined pieces of leather. Start at the bottom of the loop and wrap towards the top. Wrap it tightly.
When you get the top of the loop, run the wrapping end through the loop. Pull the tail of the loop so that the loop is pulled under the wrapped thread, which will secure the tread in place.
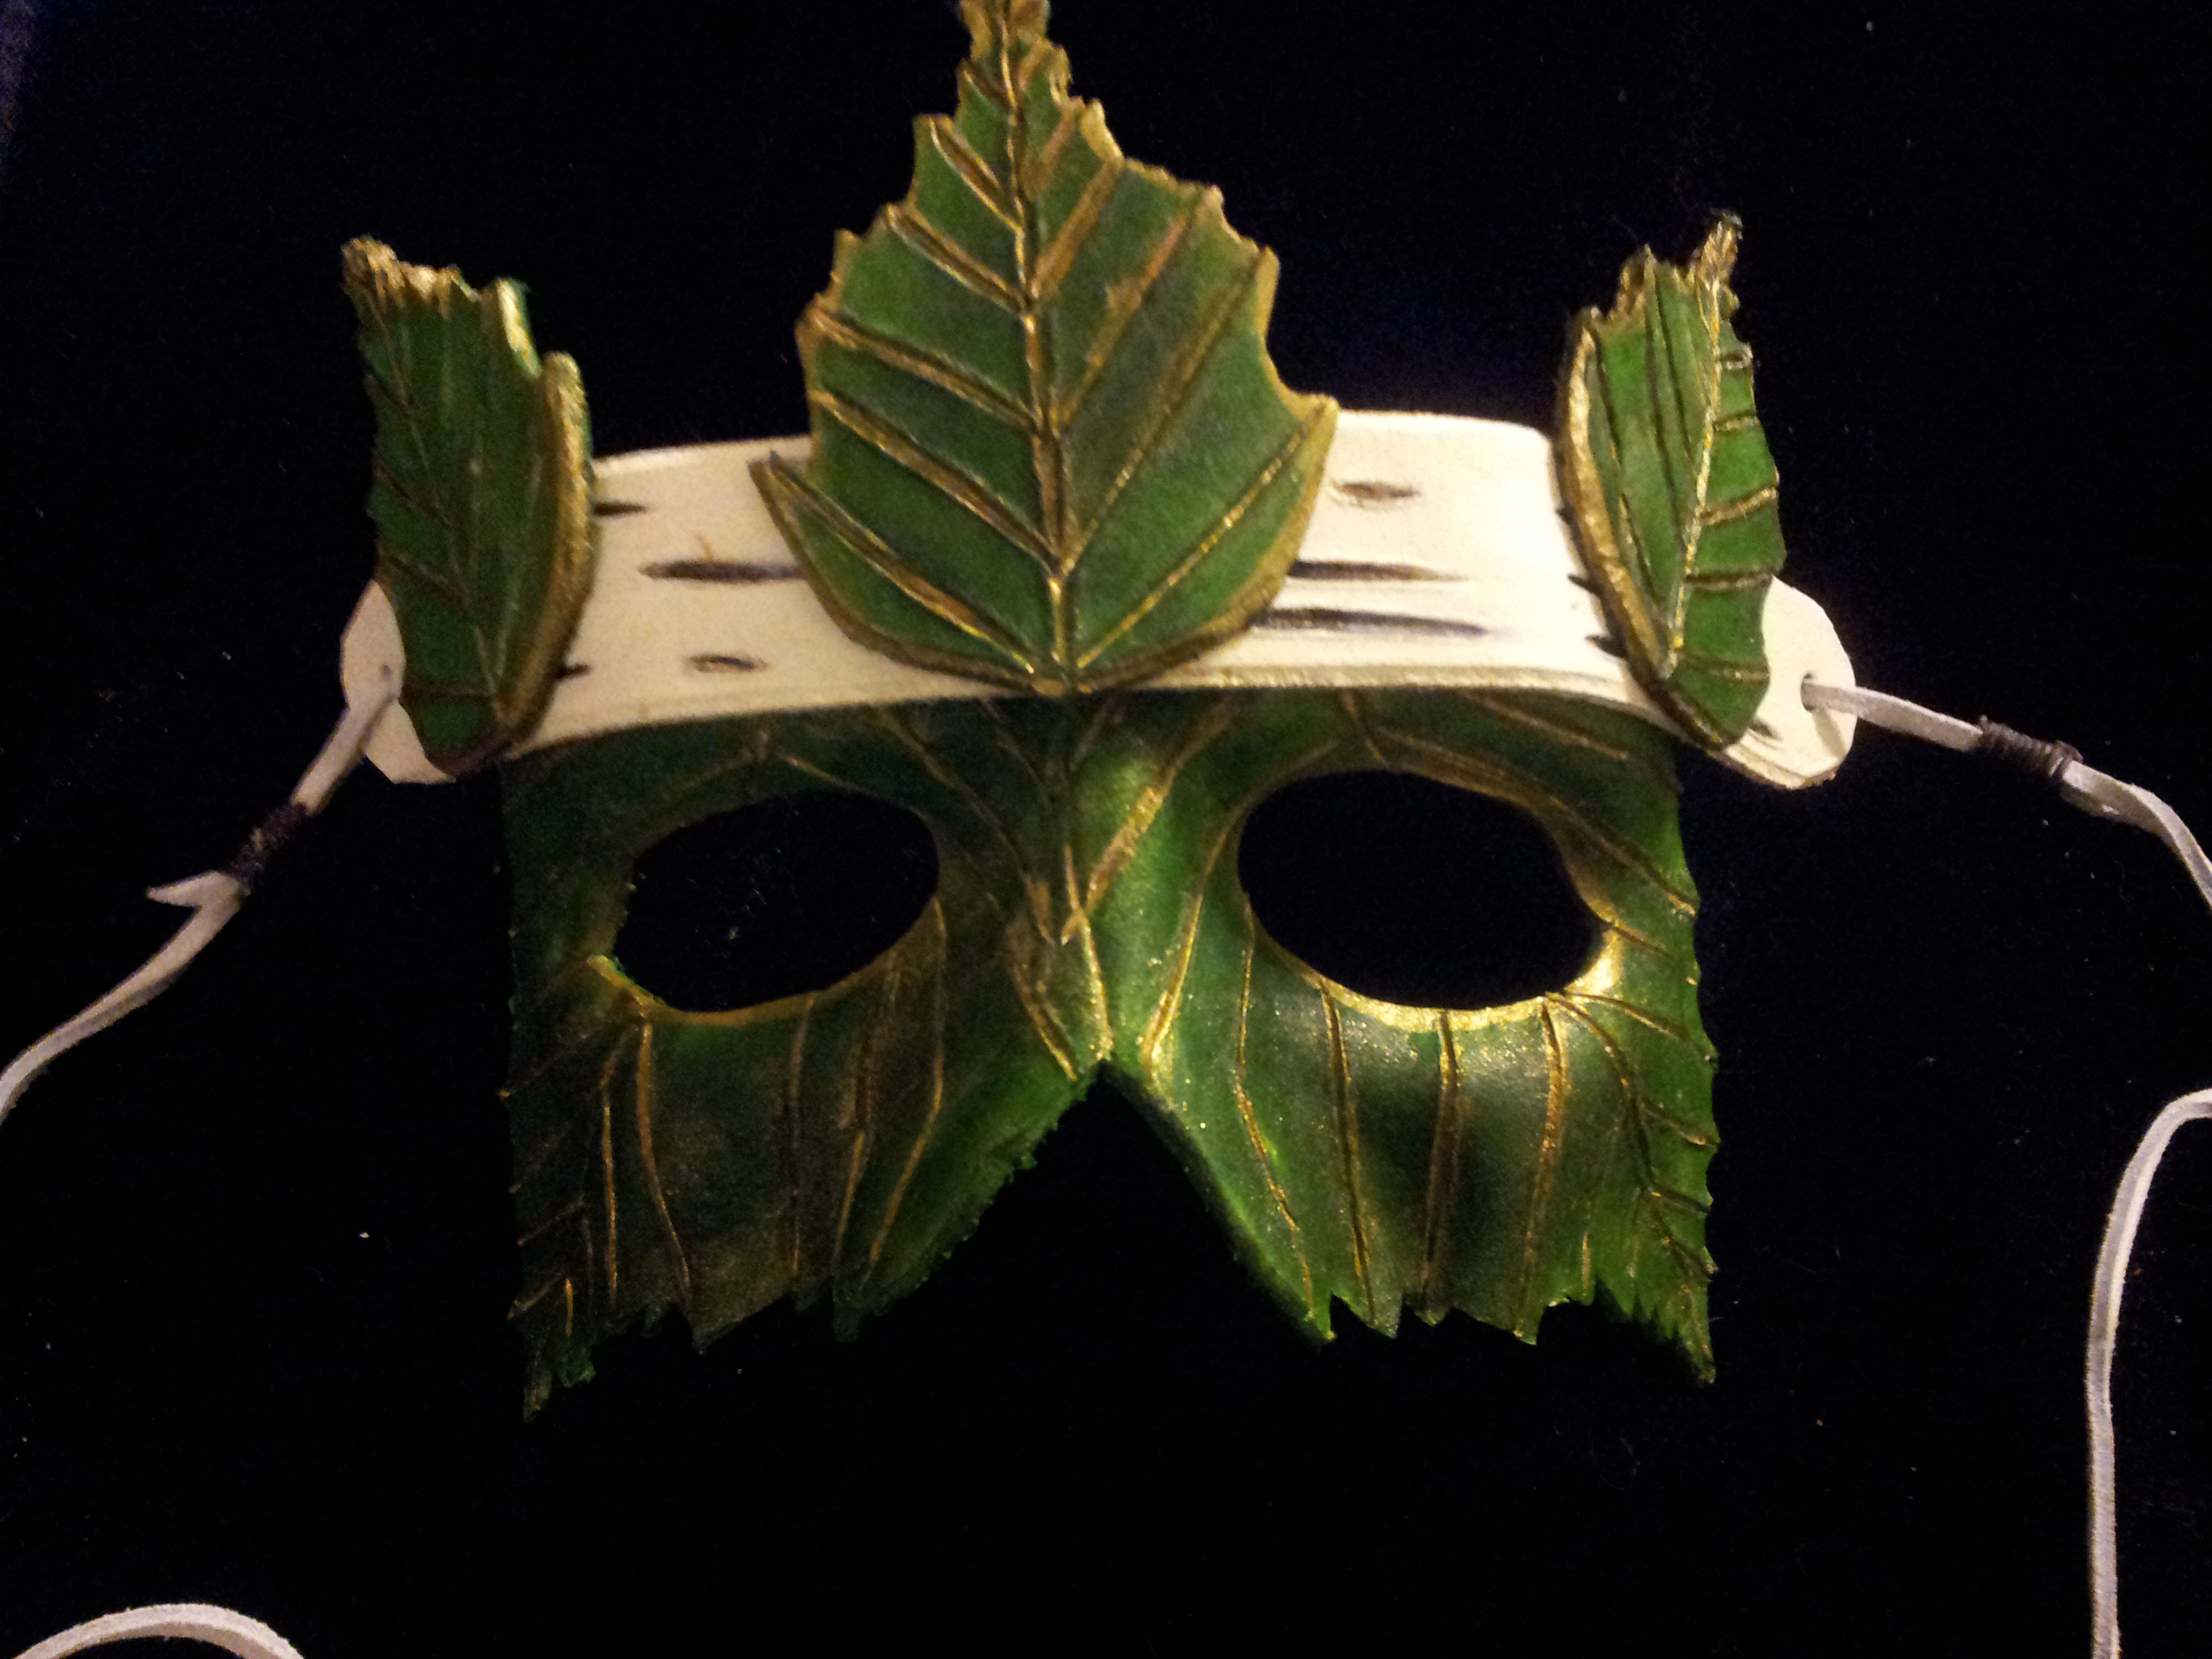
Take Pride in Your Work

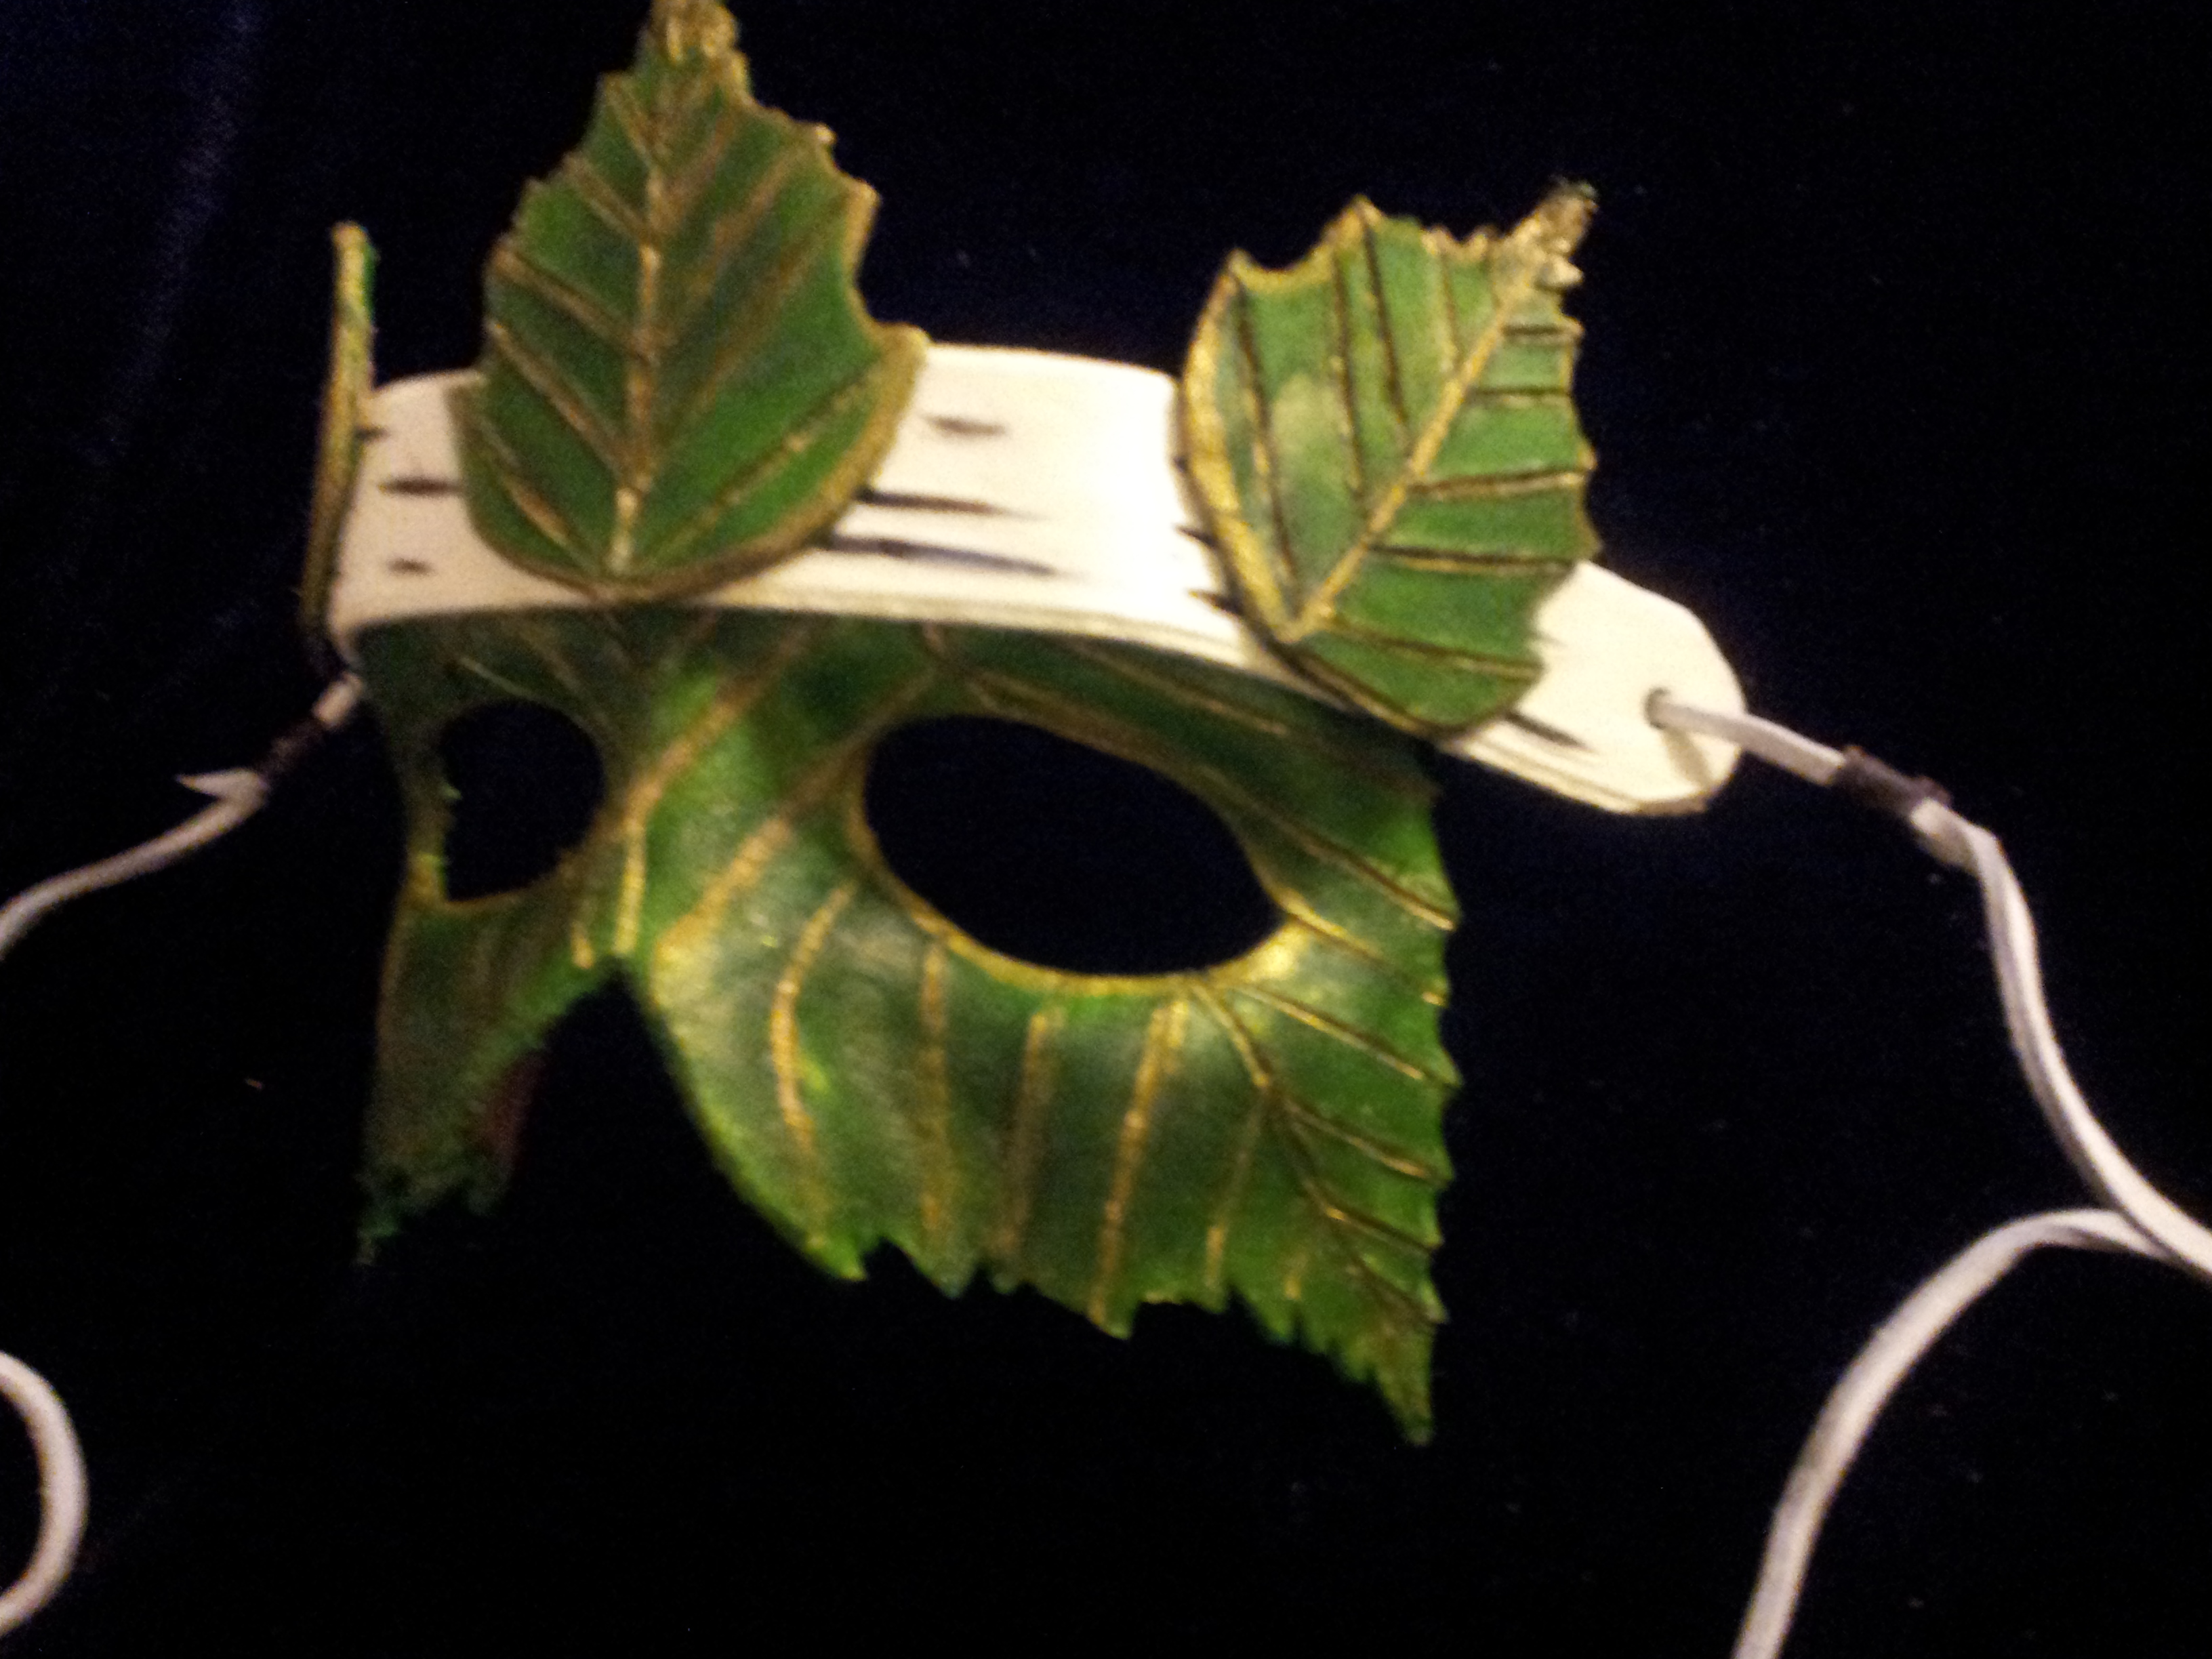
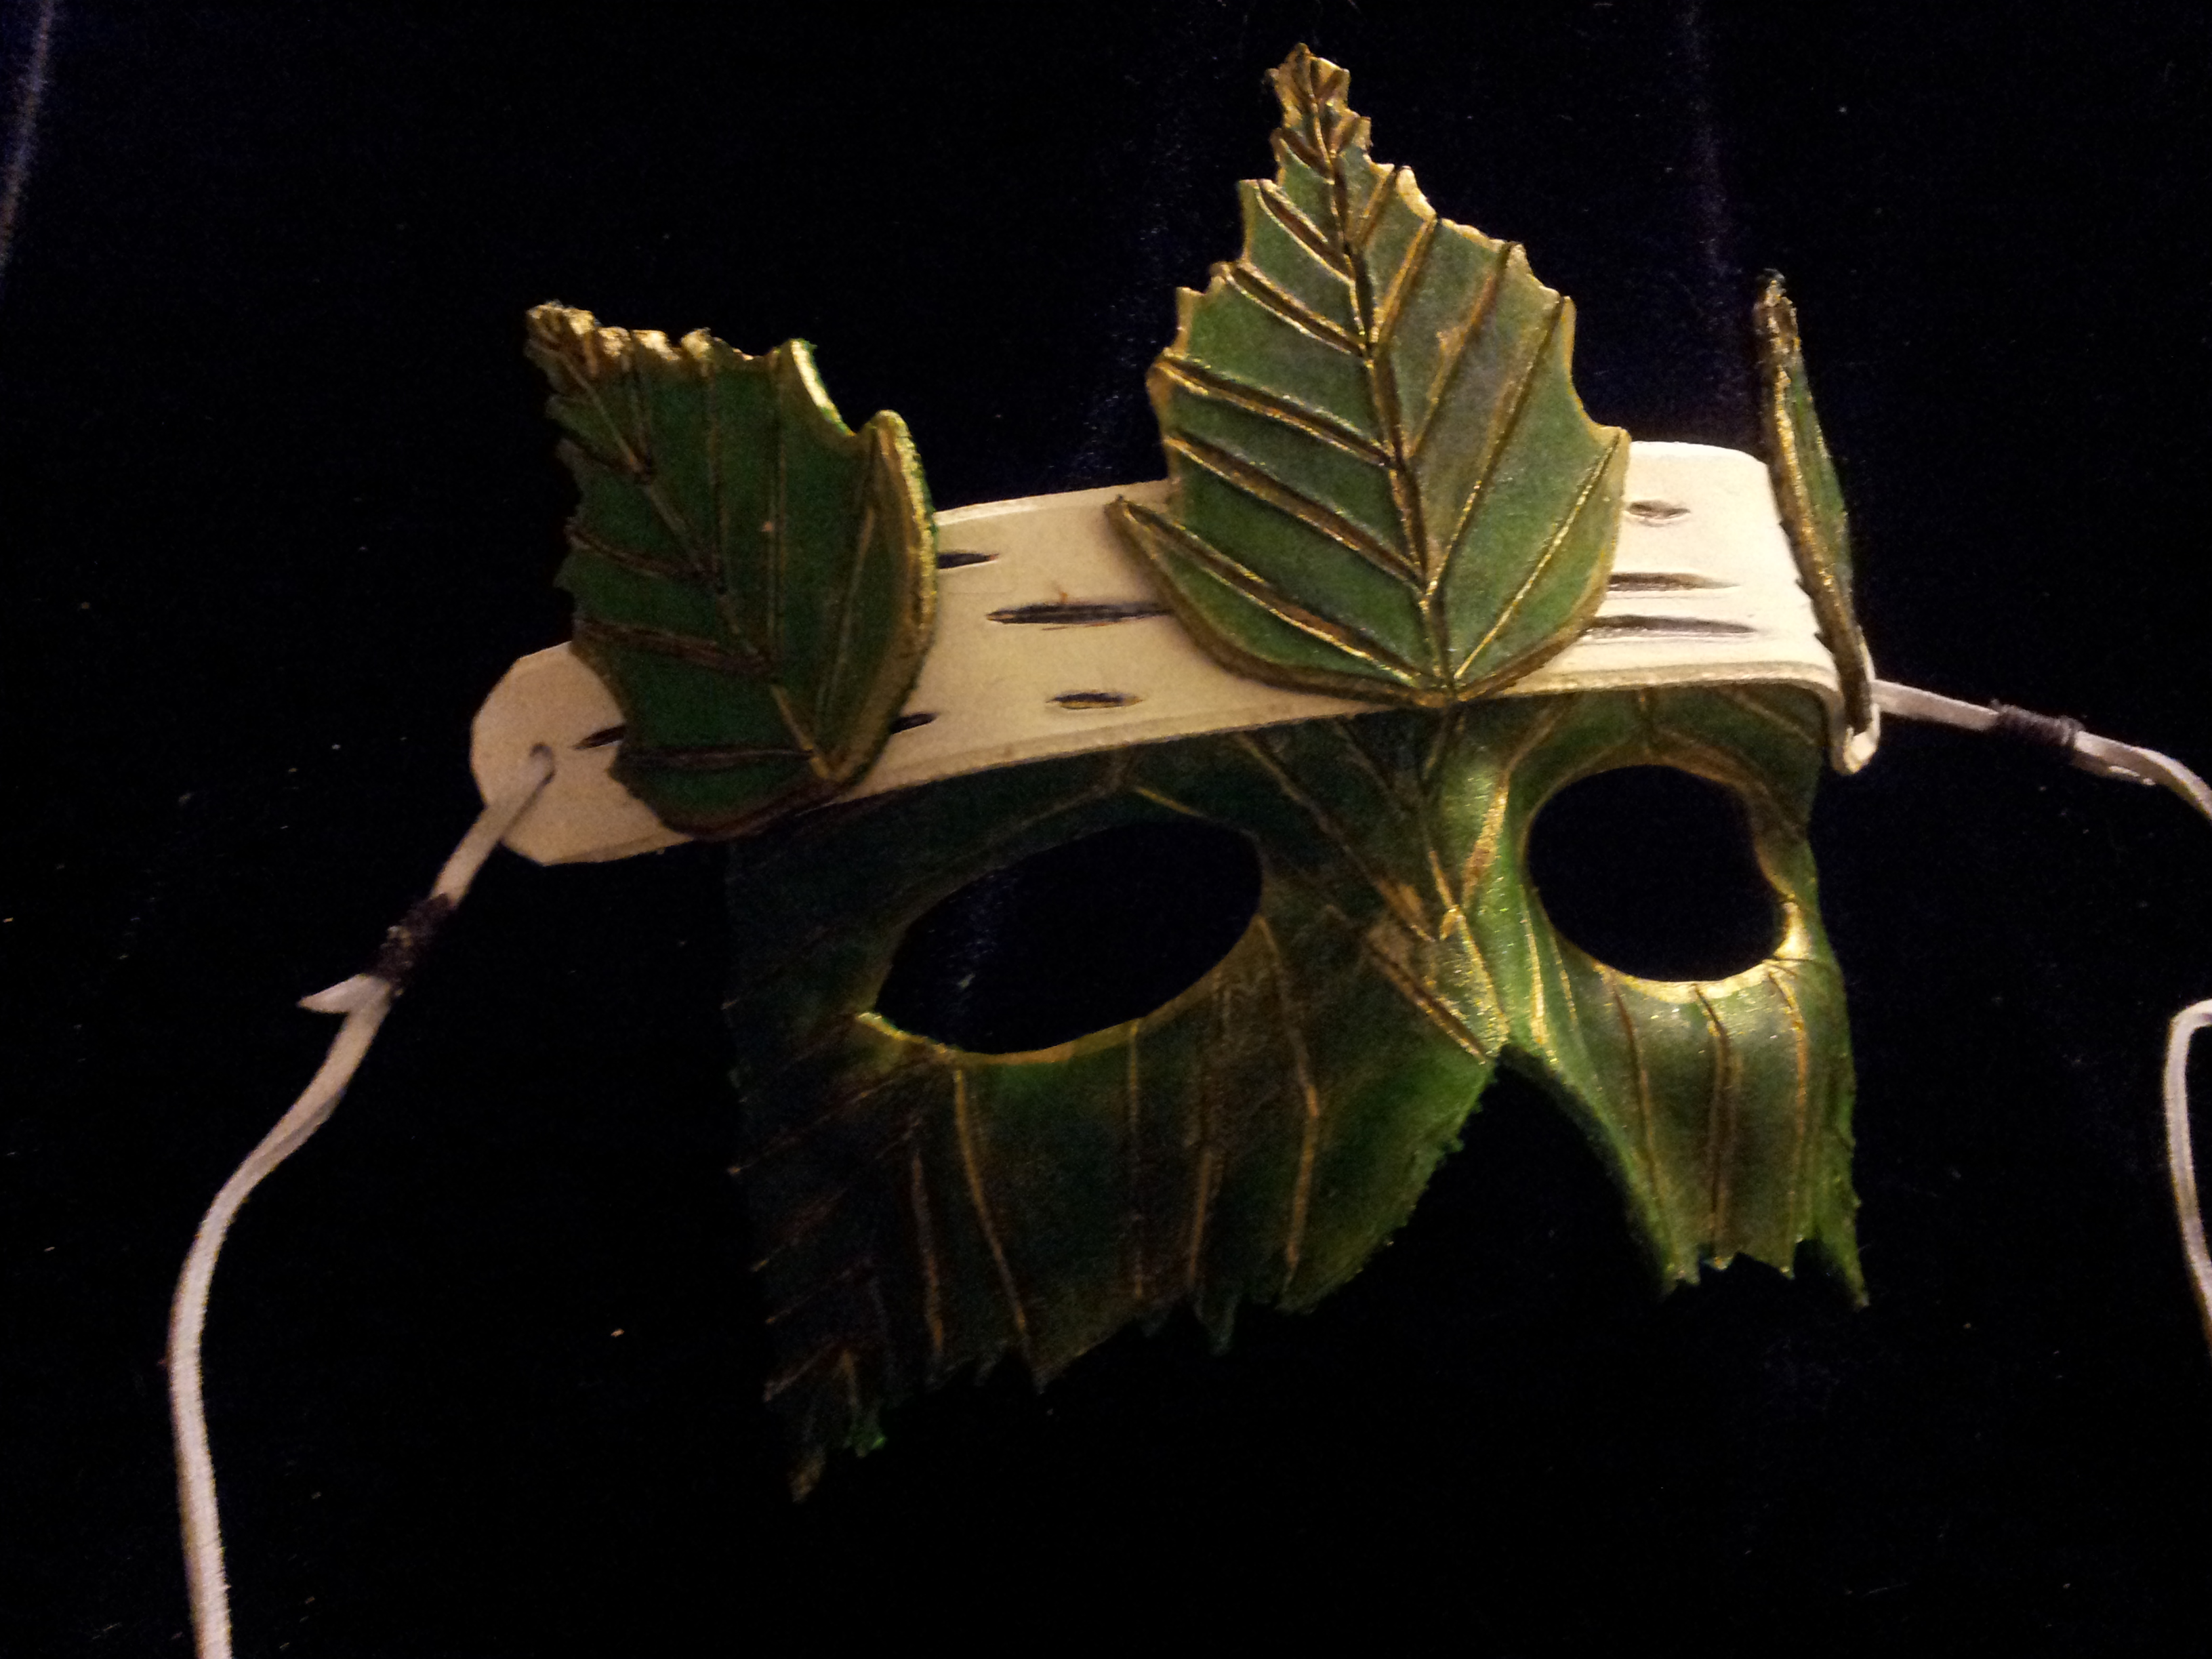
The mask is now completed.
The techniques used in this instructable can be used not just for this mask, but can be applied to design other masks that involve multiple layers and and carved details such as other tree barks, animal hair, scales, etc. What's great about this is it shows how even the simplest of carvings can create striking effects. Future Instructables will include more advanced carving techniques.