How to Make a Portable Version of Windows 11
by Arduino009 in Circuits > Computers
106 Views, 0 Favorites, 0 Comments
How to Make a Portable Version of Windows 11
Windows 11 has been anounced just over 10 days ago. I am going to show you how to make a bootable USB drive with Windows 11 on it. This should not destroy any of your data on your computer, but your USB will be wiped so make sure that you back up what you need to keep.
Supplies
- A USB Stick. - Minimum 16gb, preferably USB 3.0 if your computer supports it.
- A Computer
- Reasonable Internet
- Time and Patience
Getting Ready
There are to main files that we will need to create a bootable Windows 11 drive:
- Rufus
- Windows 11 ISO
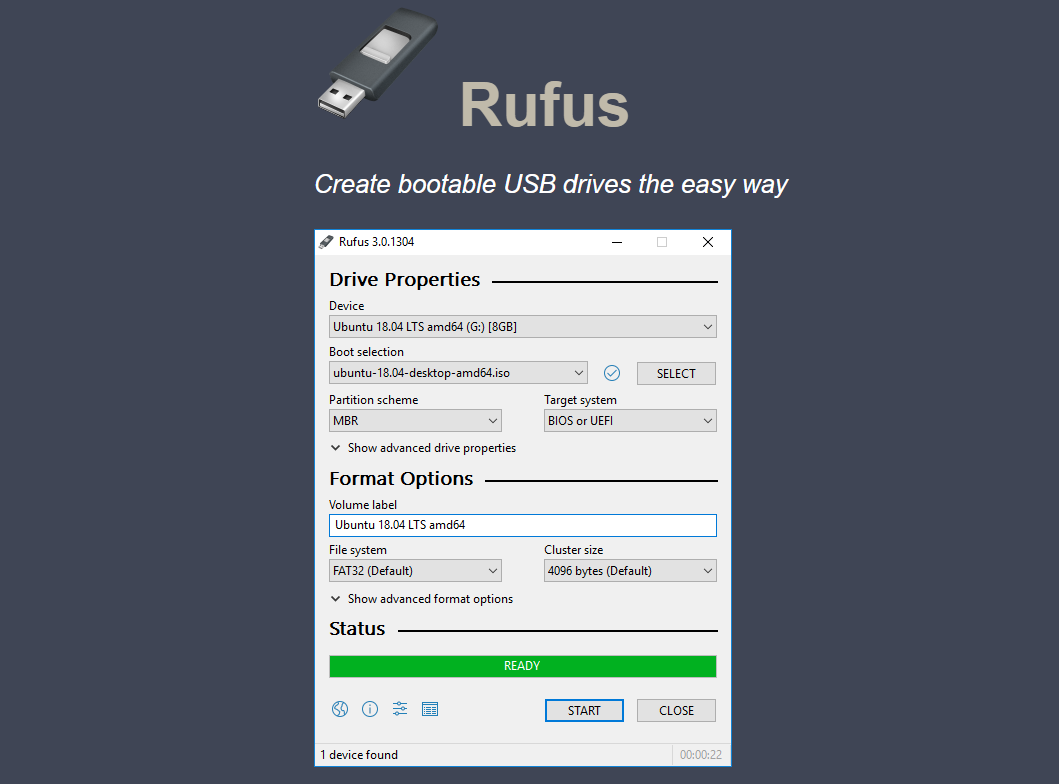
Rufus is a tool that makes the USB bootable and can write operating system images to it.The Windows 11 ISO are the installation files of Windows 11.
You can download the official Rufus program from here. Rufus doesn't need to be installed and is a very small file which is what makes it my go to image writer.
You can download the Windows 11 ISO from here. This is the same version that I used. You can also find more download links here.
Creating the Bootable USB
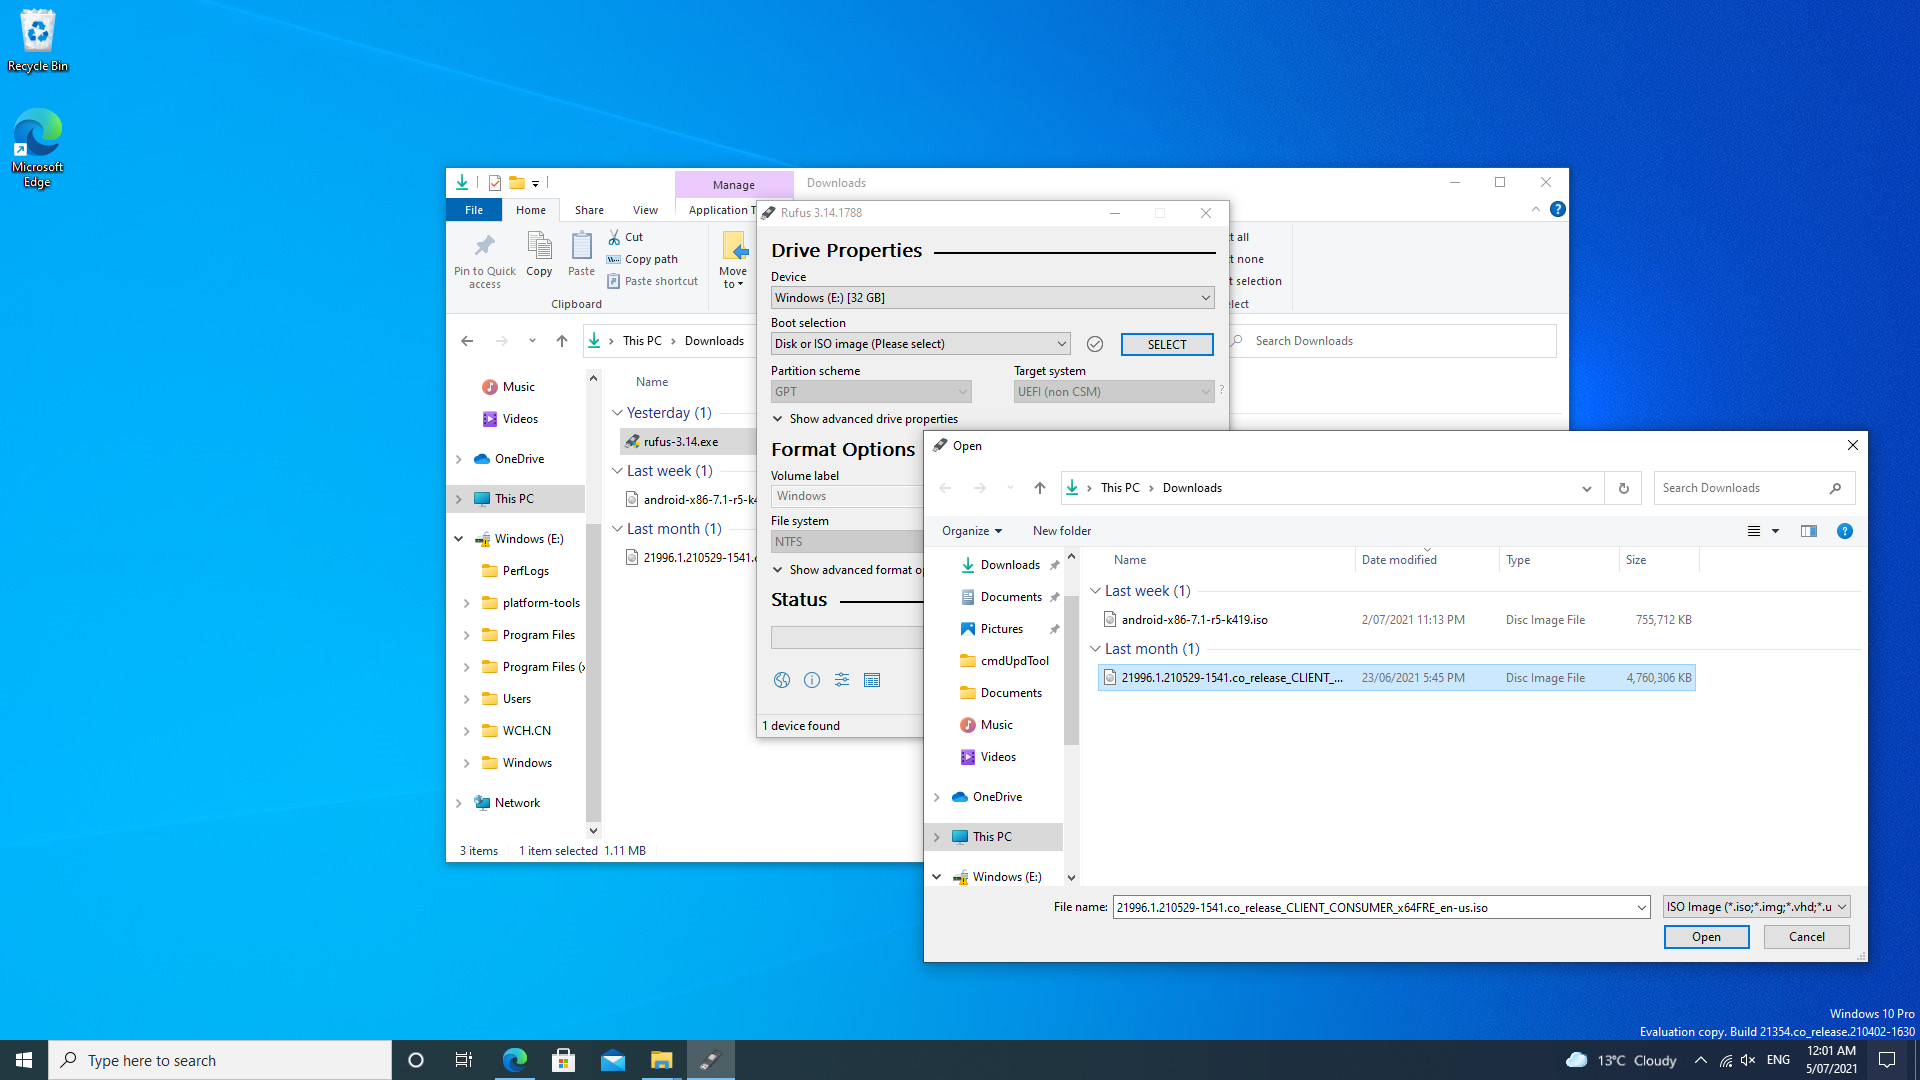

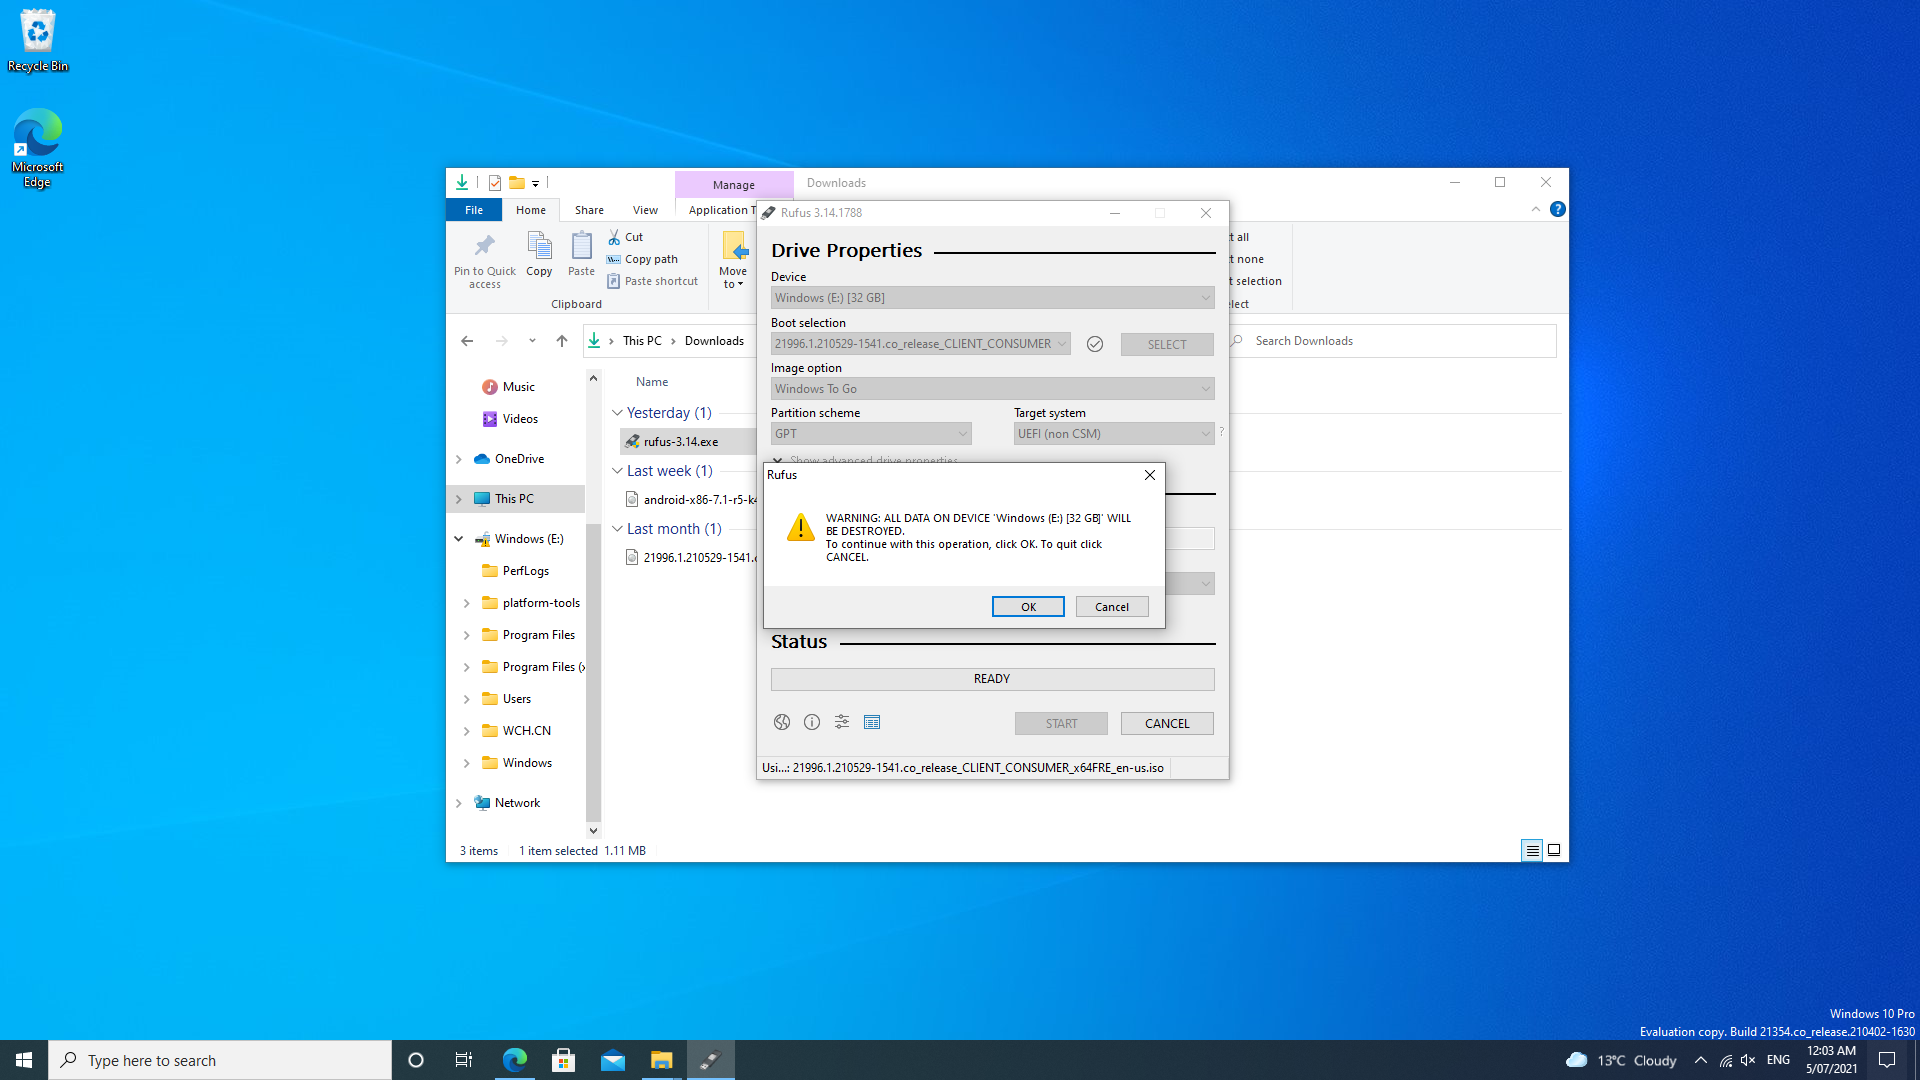

First you will have to open the Rufus program that we have just downloaded. This should be in your downloads folder. (It may not be there depending on your browser settings.) Next you will have to select the ISO file by clicking on the "Select" button and navigating to the .ISO file. The you will need to click "Open."
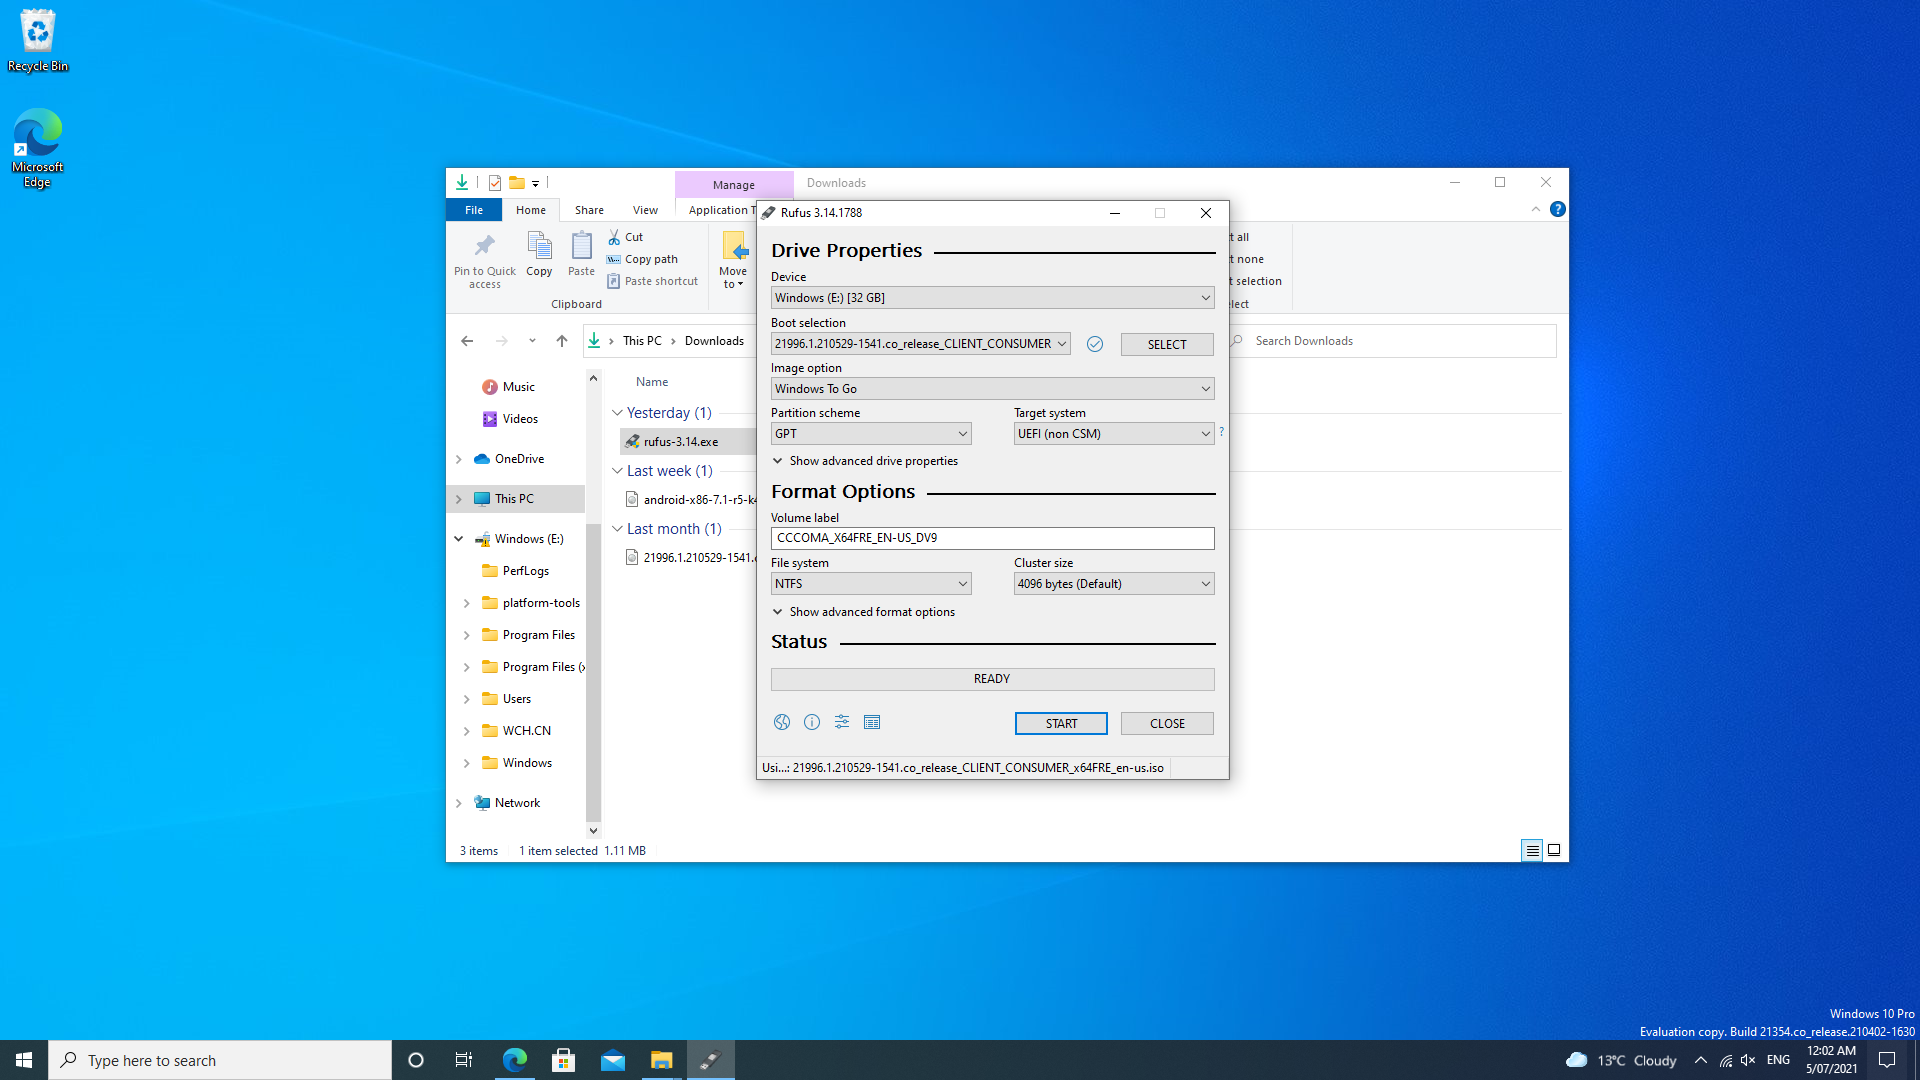
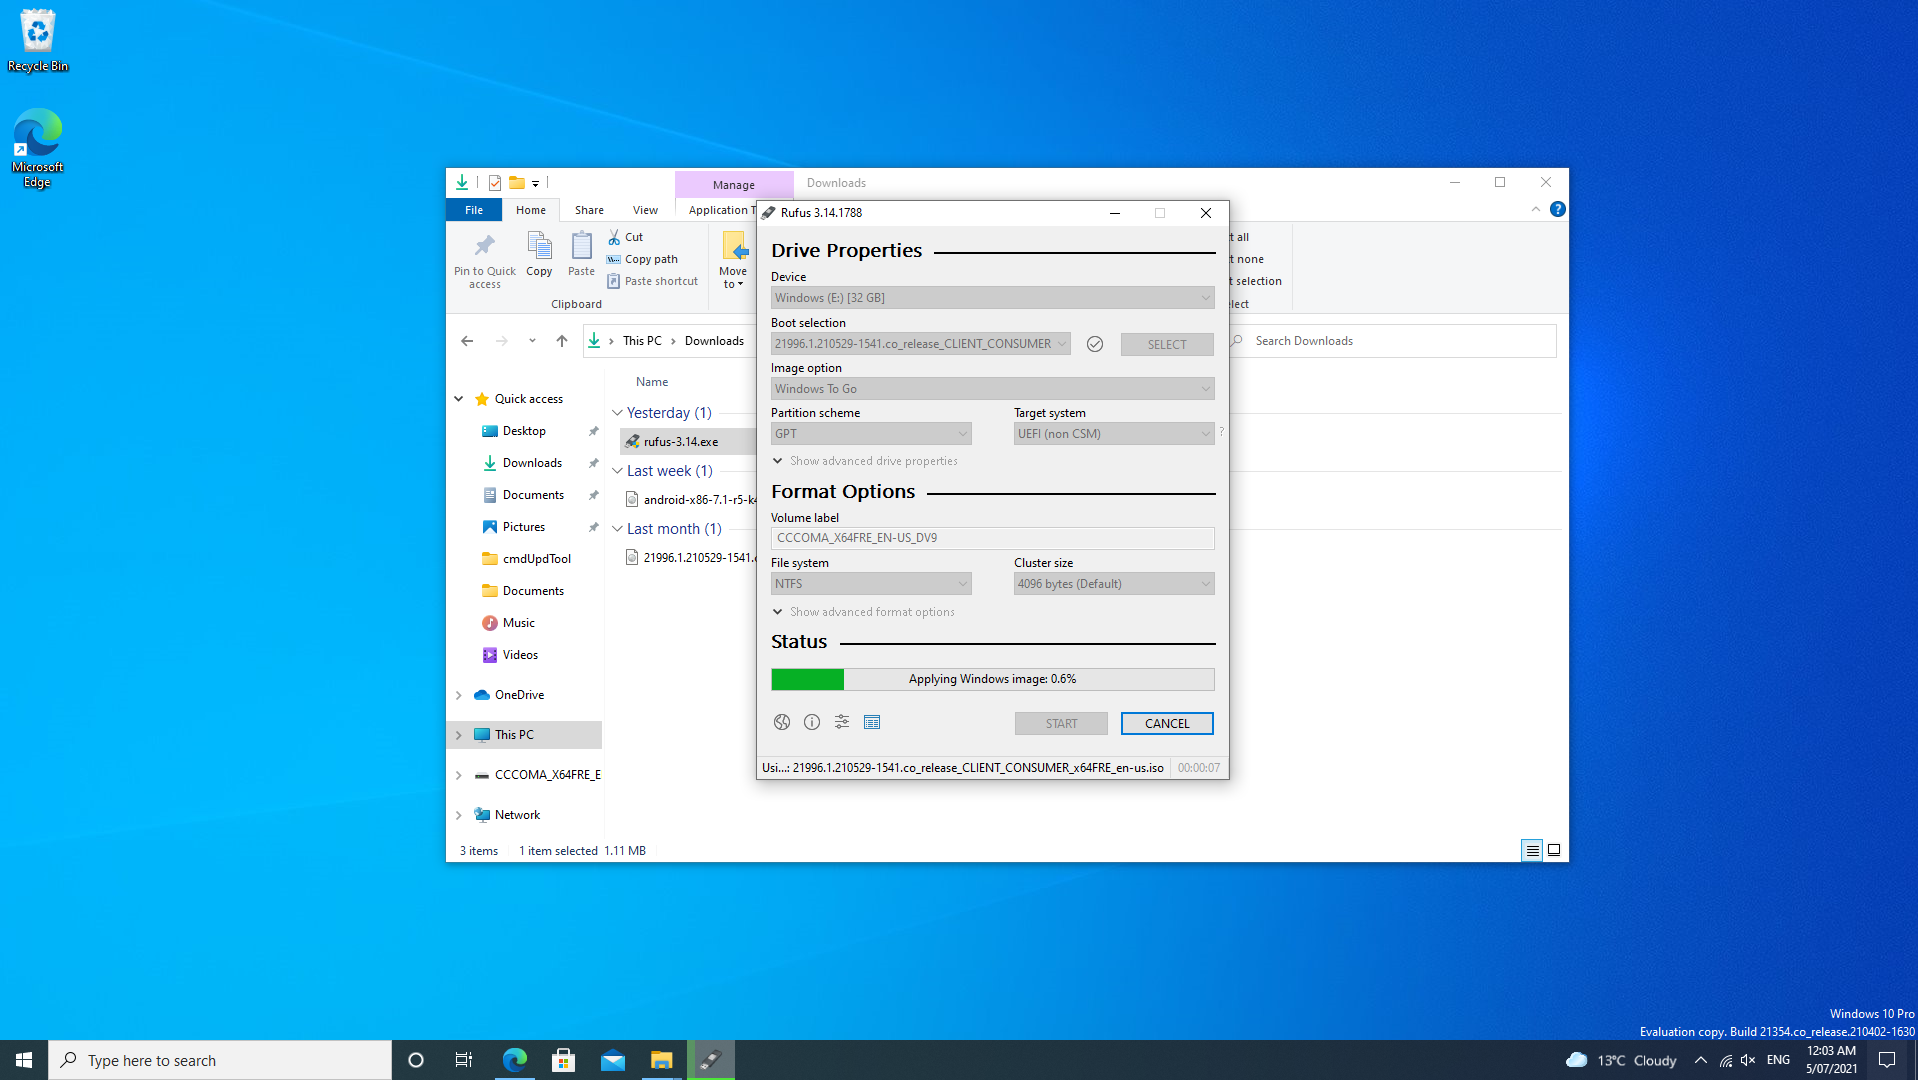
Now you will need to change "Standard Windows Installation" To "Windows To Go." The last thing that you might need to change is the "Partition Scheme." If your computer is newer then you will need to select "GPT" if your computer is older then you will need to select "MBR." If the computer doesn't recognise it or it doesn't boot then you will need to change it to the other "Partition Scheme." Now you can click the "Start button." This could take a while, even over an hour. Mine only took about 30 minutes.
Booting From the USB
Once it has finished writing the image to the USB you will need to shut down your computer. Now you will need to boot into the boot menu. You will need to research this for your computer. It is different for every computer. Some of the most common key presses to get to the boot menu are F12, F10, F2 or DELETE. Once you are in the boot menu you will need to select "USB STORAGE DEVICE" or what ever the name of your USB is. (It could be different to the name you see when you plug it in.)
Finish Setting Up and Enjoy Windows 11
Once you have booted into Windows 11 you will need to do abit of setting up. This might take a little while but not too long. Once this is done you should be in Windows 11!
If you want to donate, you can donate Duino-Coin to the address "JordanJ".