How to Make a Polygon Style Illustration
by karla.flemming in Circuits > Art
5362 Views, 44 Favorites, 0 Comments
How to Make a Polygon Style Illustration


Throughout this process, you will need to utilize both Adobe Photoshop and Adobe Illustrator. We will start with editing a photo to achieve a high quality image that will work well for this type of illustration. Illustrator is then used to trace the image with various polygons, which are then made into paths in Photoshop. These paths are then used as the grid for assigning average colors to each polygon to create the geometric appearance. This process is somewhat time consuming but very rewarding in the end!
Preparation
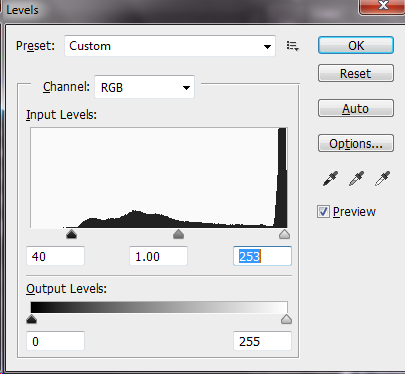
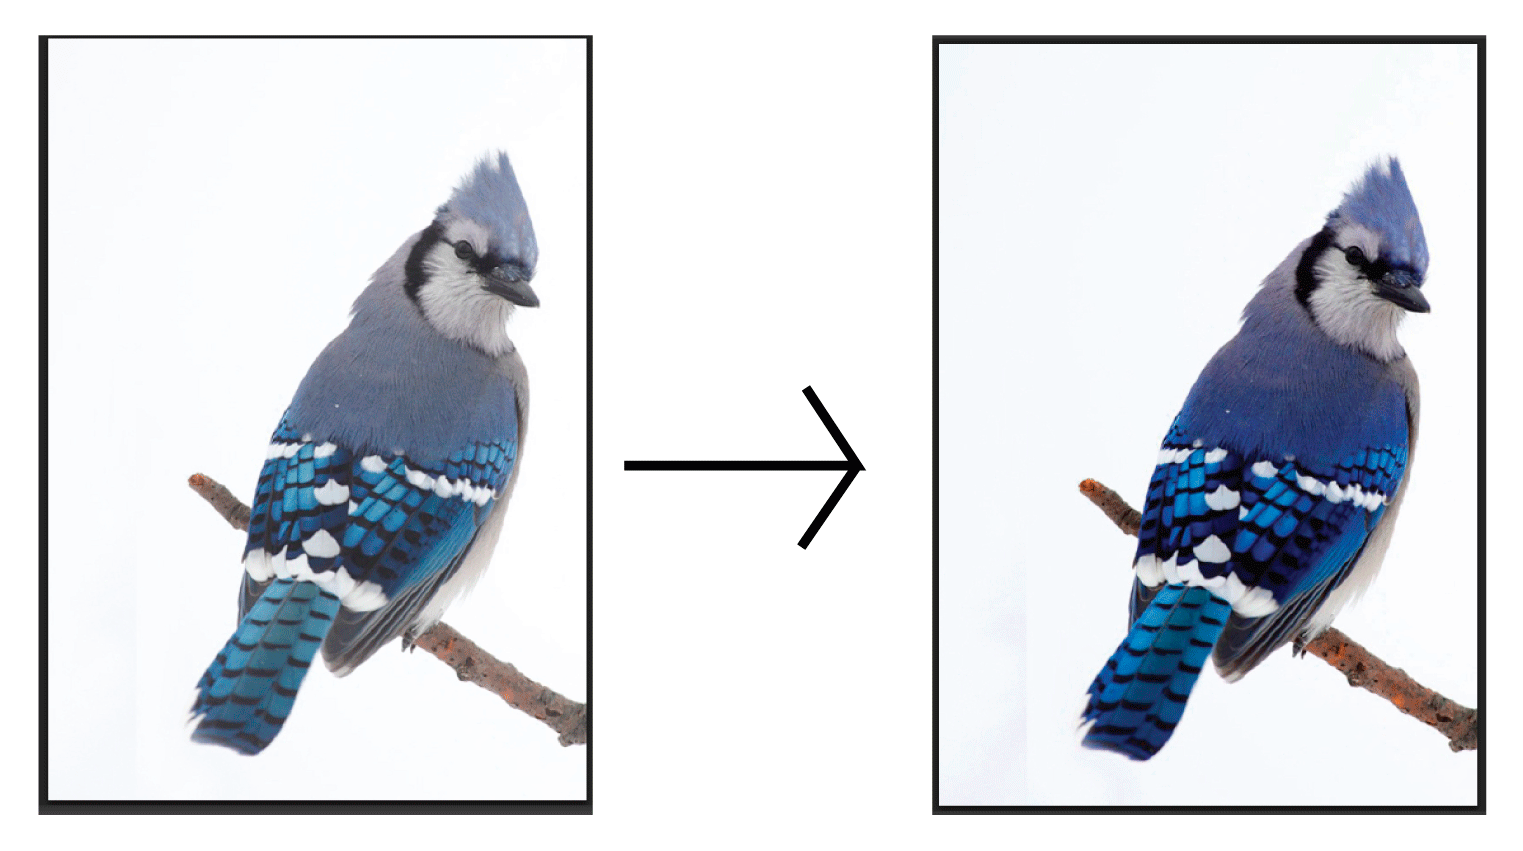
We are first going to use Adobe Photoshop to make any necessary adjustments to the initial photograph. It is important that your base photo has good colors and contrast as this will ultimately translate into your final product. If you are already satisfied with the appearance of your photo, you can skip this step and go directly to Step 2.
1) Open Photoshop and place the photograph that you want to work with. (File > Open > Select your Jpeg).
2) Adjust the contrast in your photograph by selecting Image > Adjustments > Levels. Play with the arrows on either end of the Input Levels box until you are happy with the amount of contrast in the photo. It is usually helpful to bring both the right and left arrows in slightly closer to the center to achieve an even amount of contrast. This step can also be done through Image > Adjustments > Brightness and Contrast, but I feel that playing with Levels gives you the most control of the outcome. See Image 1.
3) Next, you may want to adjust the color of your photo to make them vibrant and appealing. Go to either Image > Adjustments > Hue and Saturation or Image > Adjustments > Color Balance to manipulate the color levels until you are happy with the image. See Image 2.
4) When you are happy with your photo, save the image as a jpeg and re-open the image in Adobe Illustrator.
Tracing
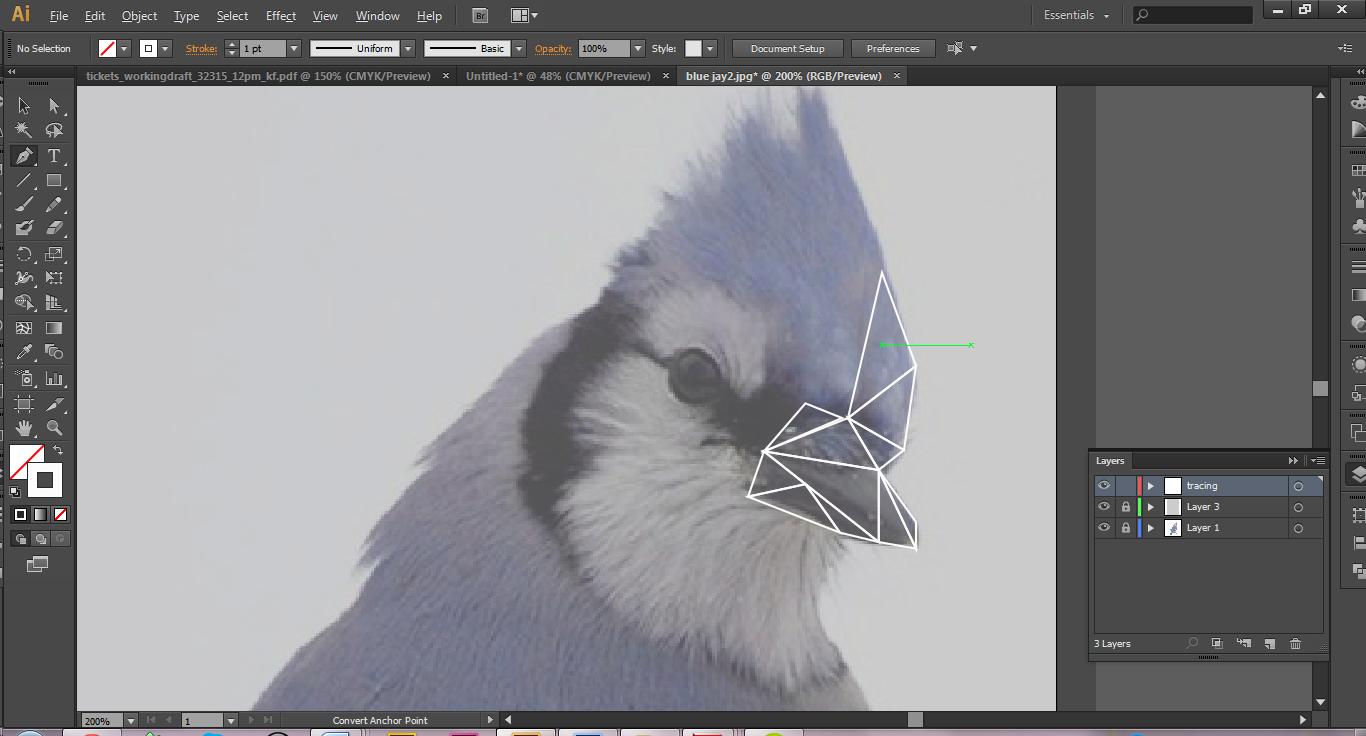
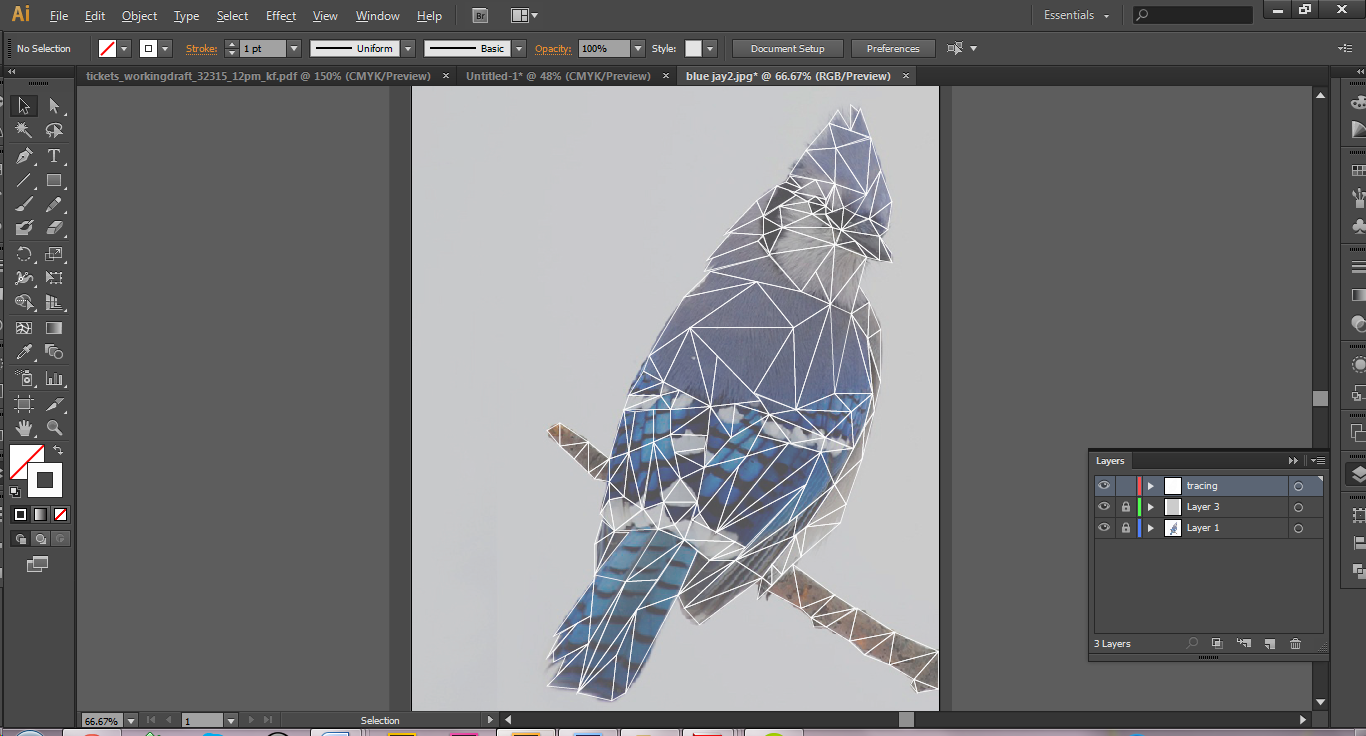
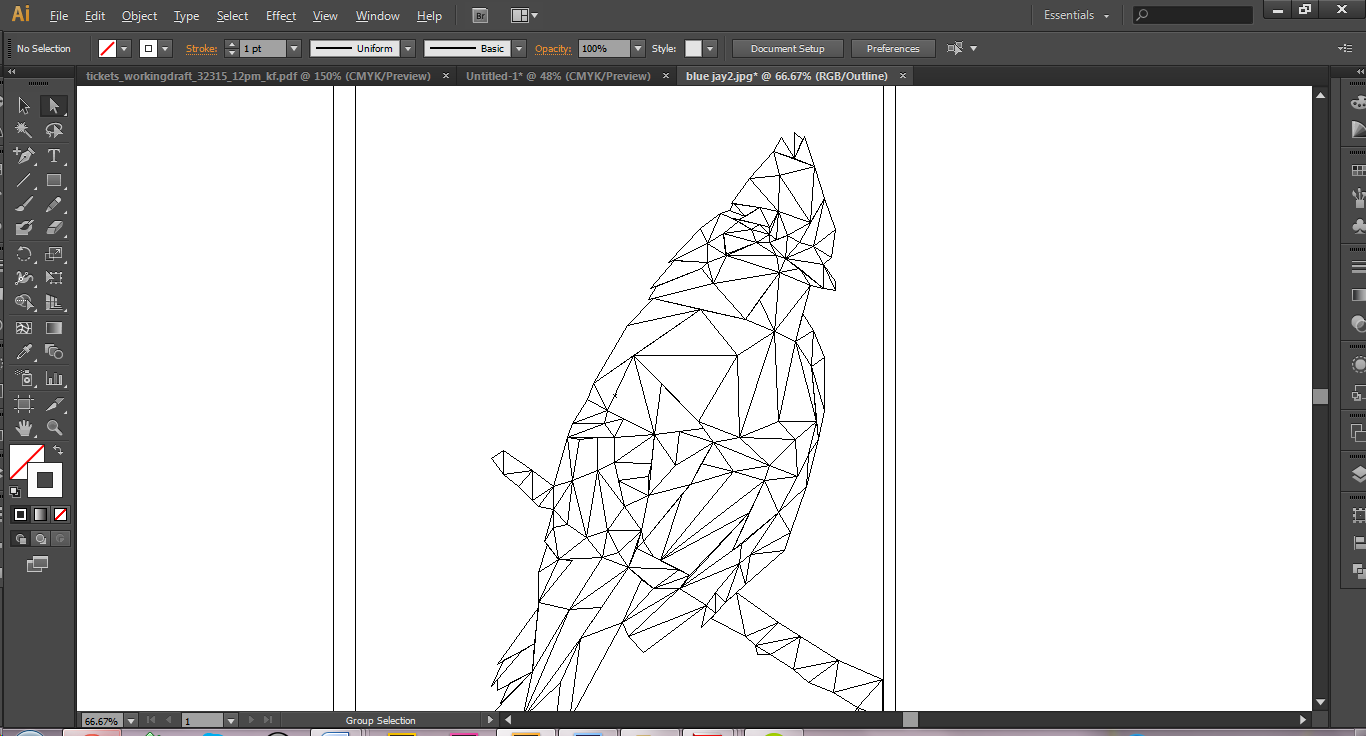
Tracing the photo in Adobe Illustrator with various polygons is crucial to creating this kind of illustration. This will be accomplished by creating vectors using the Pen Tool. These vector shapes will then be converted into paths to be used in Adobe Photoshop.
1) Begin by reducing the transparency of your photo to 60% (Windows > Transparency) and then locking this layer by clicking in the box directly next to the eye icon in your layers panel (Windows > Layers > Lock Layer). This will allow you to trace the image without making any direct changes to the photo itself.
2) Create a new layer on top of your base layer and label it Tracing. Select the Pen Tool by pressing P on your keyboard, and set the fill to none and the stroke to white.
3) Start tracing your image by creating closed polygons around logical sections in your photograph. Make sure you are closing the polygons by hovering the pen tool over the original anchor point until you see an open dot; this will ensure that your start point is the same as your end point. See Images 3 and 4.
Note: It is easiest to begin drawing polygons in a well-defined area of the photo and moving outward. As you can see, I started with the beak of the blue jay because I felt like those shapes were easiest to define. Continue adding polygons until the whole image is completely outlined.
4) It is likely that throughout the tracing process, not all of your anchor points were perfectly aligned and therefore not all the strokes match up when you zoom in on the image. This can be corrected by converting the view to Outline View by pressing Command Y. This will allow you to see imperfections where your anchor points are misaligned.
5) Where anchor points are not aligned, use the direct selection tool to select all points that you wish to be stacked, and select the Vertical Align Center and Horizontal Align Center icons in the upper tool bar. See Image 5.
Convert Strokes to Paths in Photoshop
1) Open the original color adjusted (untraced) photo in Photoshop. Locate the Paths panel by selecting Windows > Paths. In the dropdown menu on the Paths panel, select New Path and label the path TRACE.
2) Go back to your Illustrator file and use the selection arrow to highlight all of the vector polygons you created. Copy the vector paths by clicking Ctrl C. Return to your Photoshop document and with the TRACE path highlighted, press Ctrl V. Select Paths in the pop-up window that appears. You should now have your vector polygons laid out over your original image. This provides the base grid that will allow us to add gradient colors to each polygon based on the color of the photo underneath.
Coloring
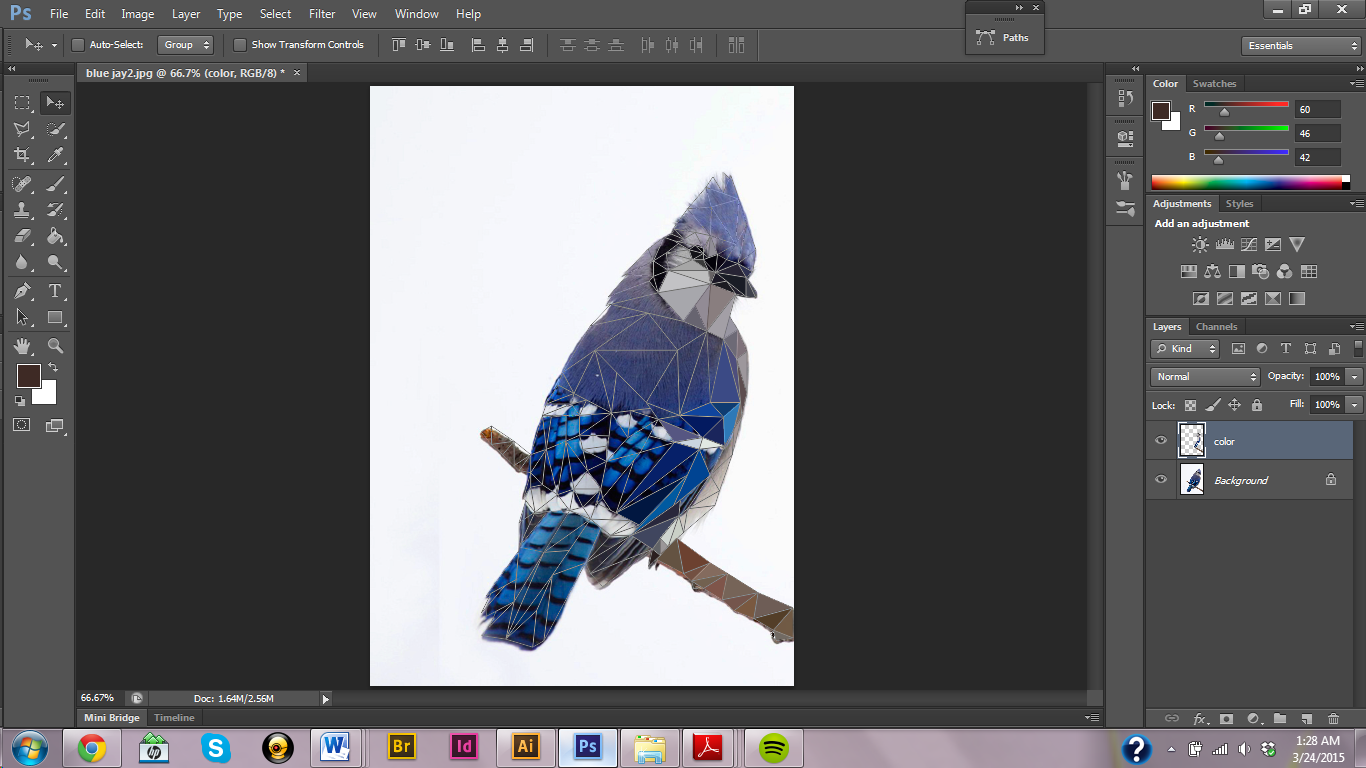
1) To begin adding color to your polygon shapes, create a new layer in Photoshop and label it Color. Zoom in on your paths and use the Direct Selection Tool (black arrow) to select a single polygon. When the desired polygon is selected, right click on it and scroll down to Make Selection.
2) In the Make Selection panel, ensure that the feather radius is set to 0 and the anti-alias box is unchecked. Hit ok, and then select the Eyedropper tool be pressing I on your keyboard. Choose a color in the polygon that seems to be the average color that is present.
3) Select the Paint Bucket tool pressing G on the keyboard and fill the polygon with the average color. See Image 6.
4) Repeat these steps for each of the polygons to start to fill in your image. The process can be very time consuming, to using keyboard shortcuts such as I and G will be helpful.
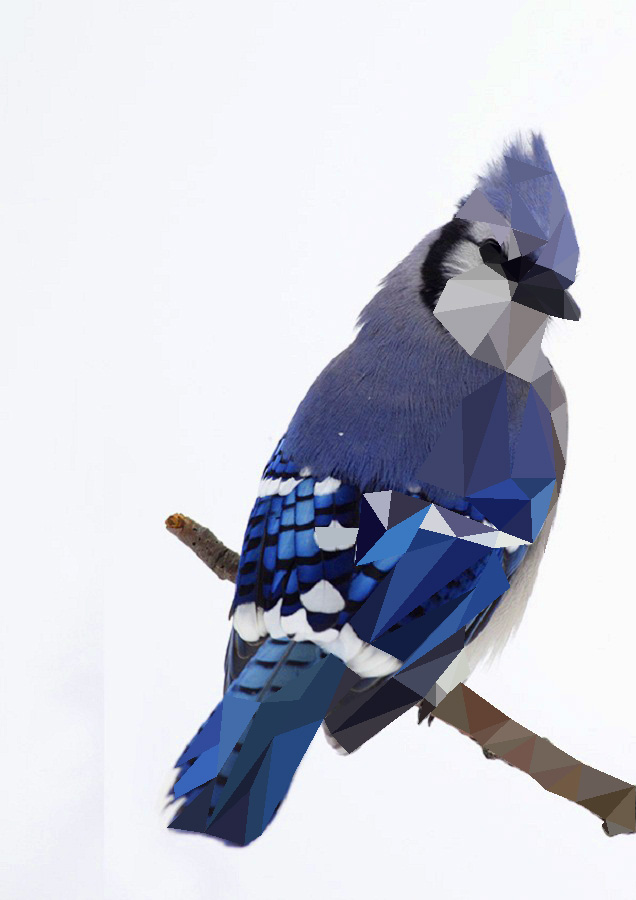
5) When your image in complete, you can choose to leave the paths showing or hide them by deselecting the TRACE layer in the Paths panel. Each version will give the illustration a slightly different look. Save your image and enjoy your artwork! See Image 7.