How to Make a Non-Touch Doorbell, Body Temperature Detection, GY-906, 433MHz Using Arduino
by DKArdu in Circuits > Arduino
664 Views, 0 Favorites, 0 Comments
How to Make a Non-Touch Doorbell, Body Temperature Detection, GY-906, 433MHz Using Arduino
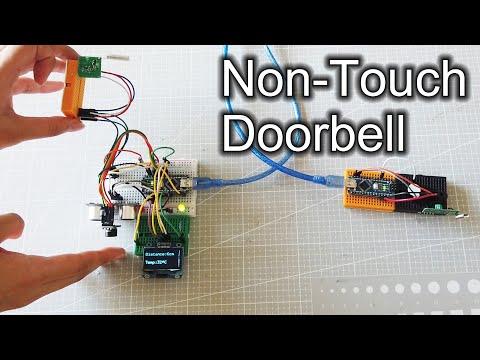
Today we will make a Non-touch doorbell, it will detect your body temperature. In now situation, It is very important to know if someone body temperature is higher than normal, when someone is kocking.
This project will shows Red light if detect any temperature higher than 38℃.
► Code in GitHub (scheme and sketch): https://github.com/DKARDU/doorbell
► Components The following parts were used in this project:
The version of the software Arduino used is 1.8.12
Arduino Nano, https://amzn.to/3ihYFBl
GY-906-BCC IR Infrared Thermometry Module,
433 MHz RF receiver and transmitter Module, https://amzn.to/3ihYFBl
Two 220Ω, https://amzn.to/3ihYFBl
RGB LED, https://amzn.to/3ihYFBl
Buzzer, https://amzn.to/3ihYFBl
Jumper wires, https://amzn.to/3ihYFBl
Breadboard, https://amzn.to/3ihYFBl
❤Subscribe It's Free https://bit.ly/2C6HdAg
Thanks for watching, Stay home and Be safe...Have a great day!
#Arduinoproject #Arduinodoorbell #Howto #COVID19
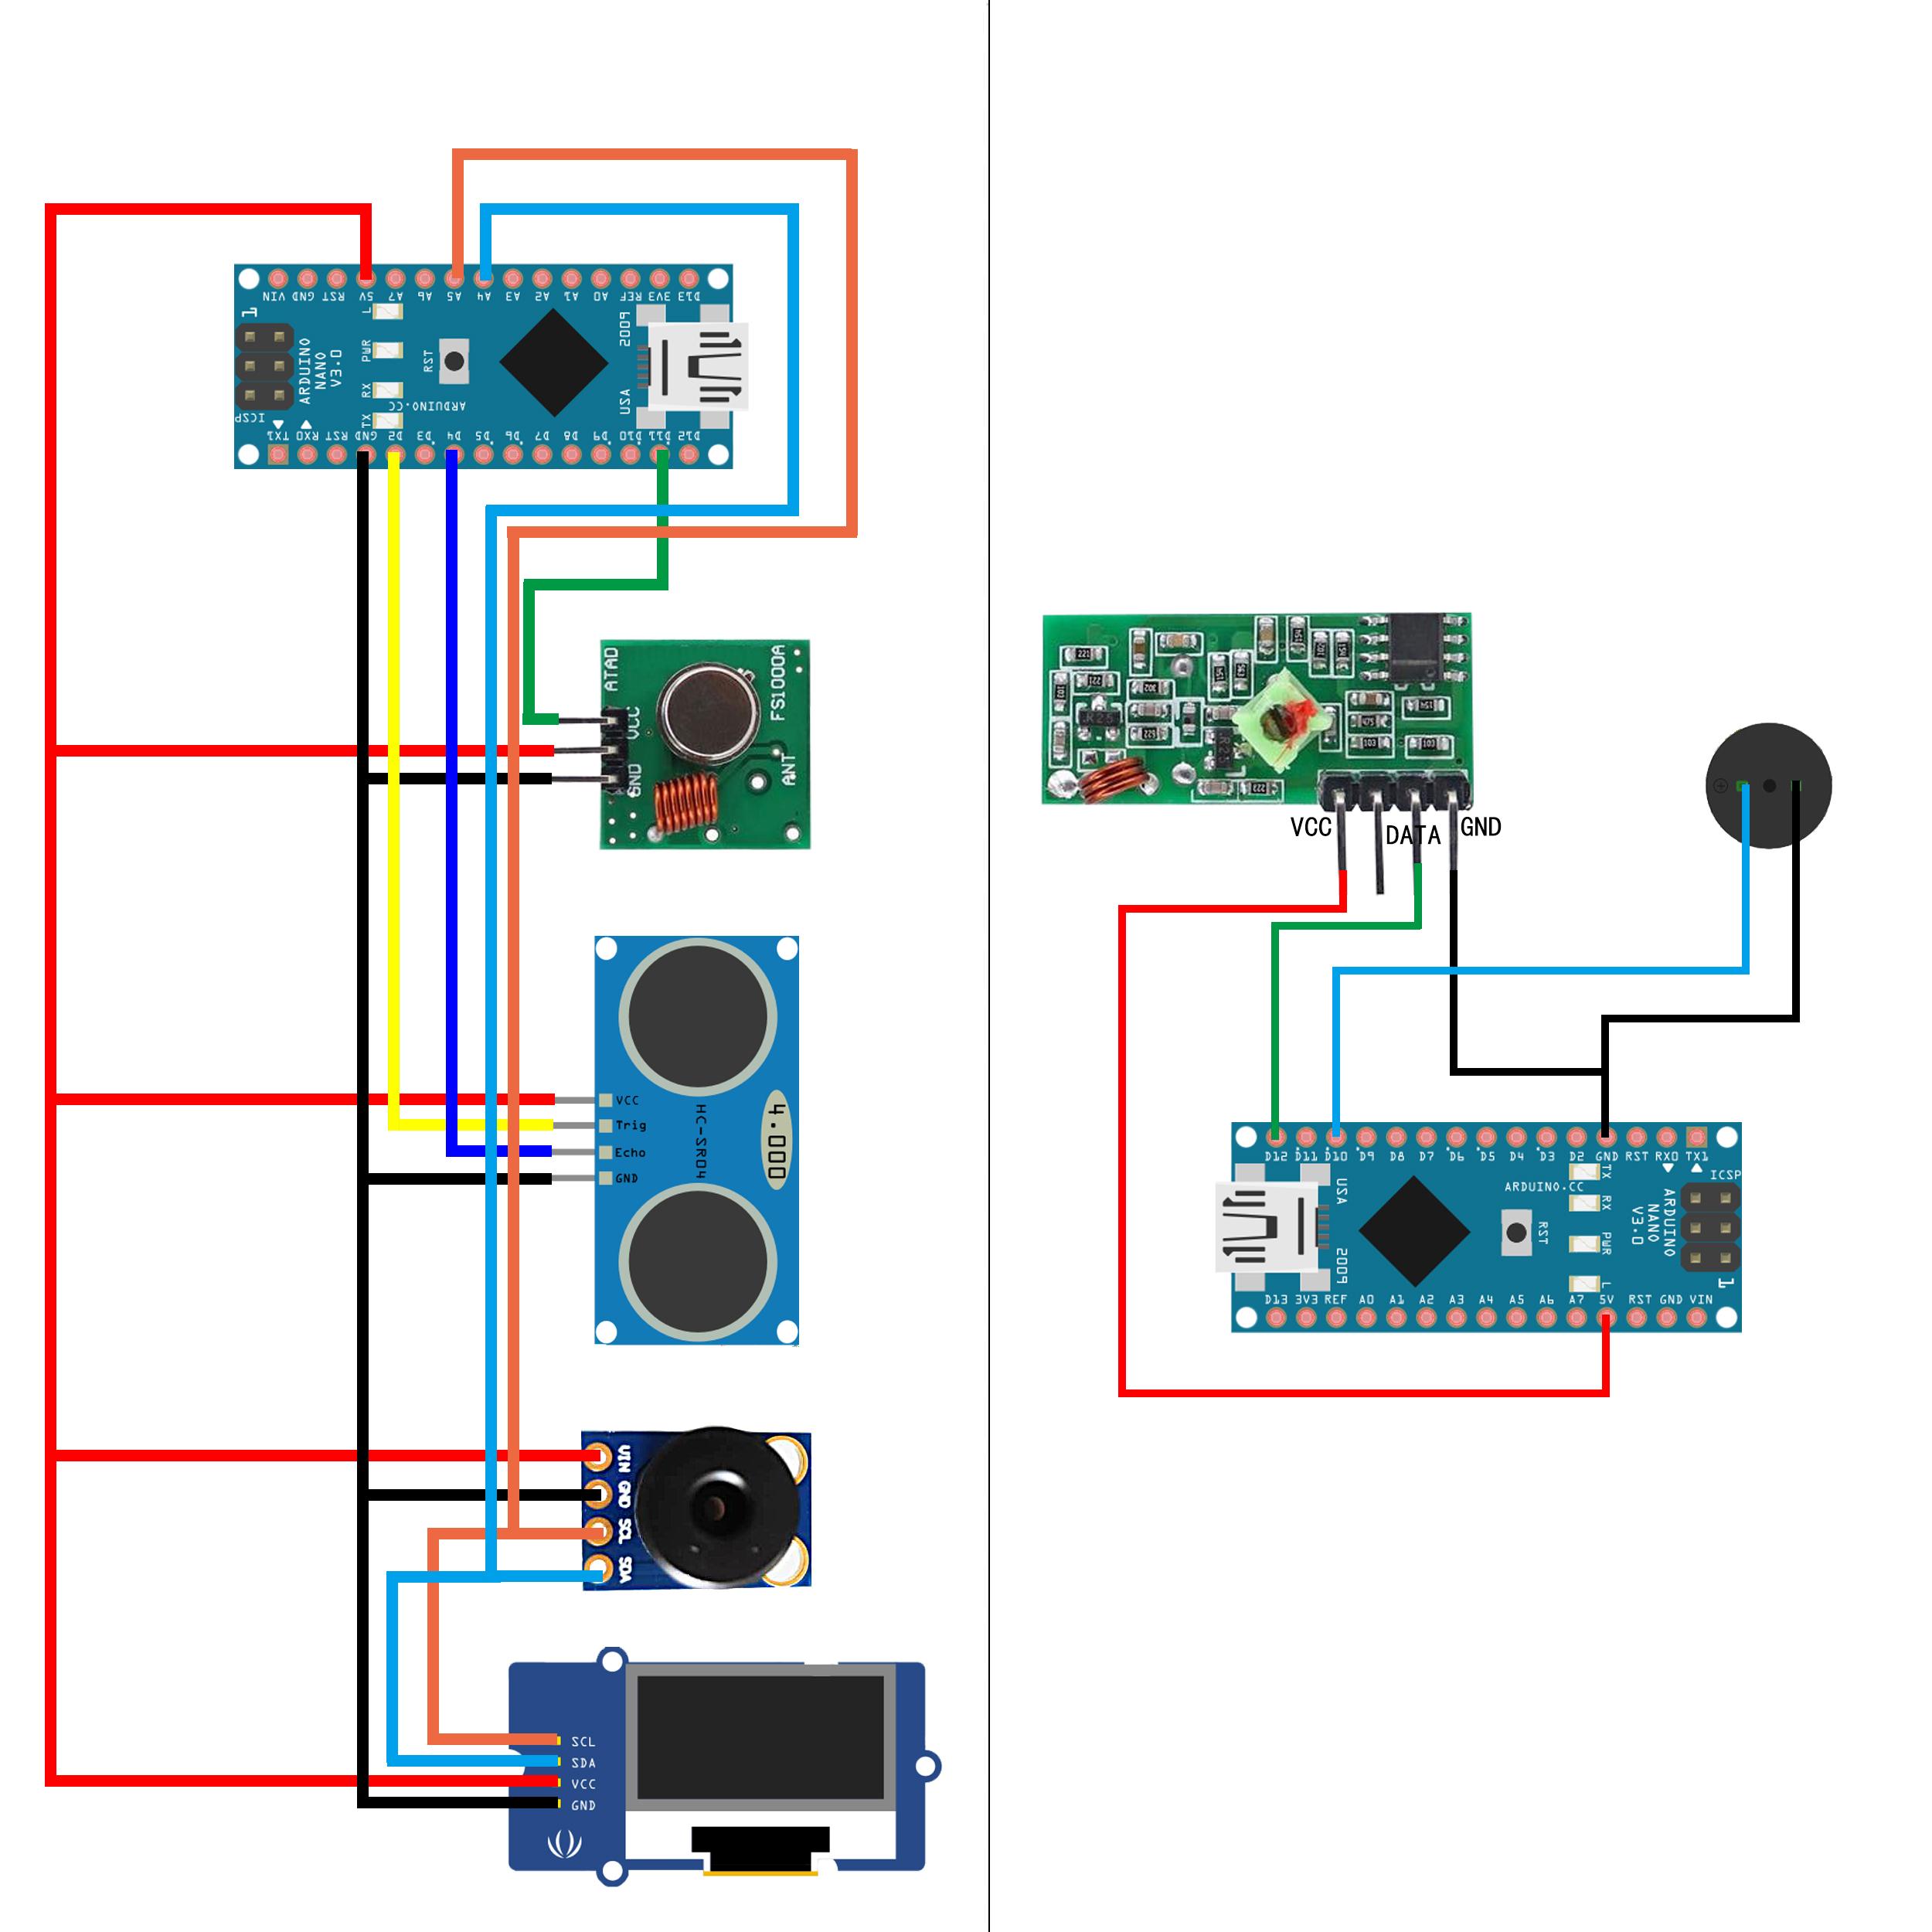
Circuit Diagram
Production
.jpg)
.jpg)
.jpg)
.jpg)
.jpg)
.jpg)
.jpg)
.jpg)
transmit.ino
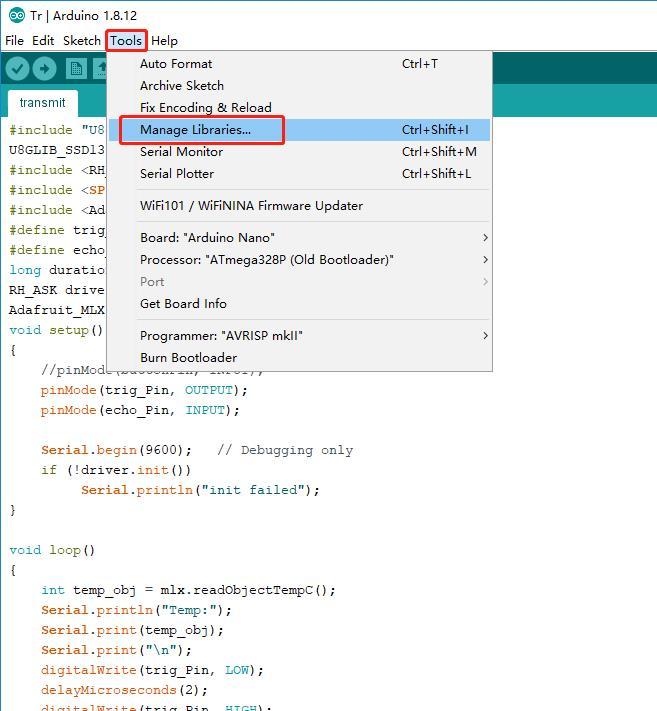
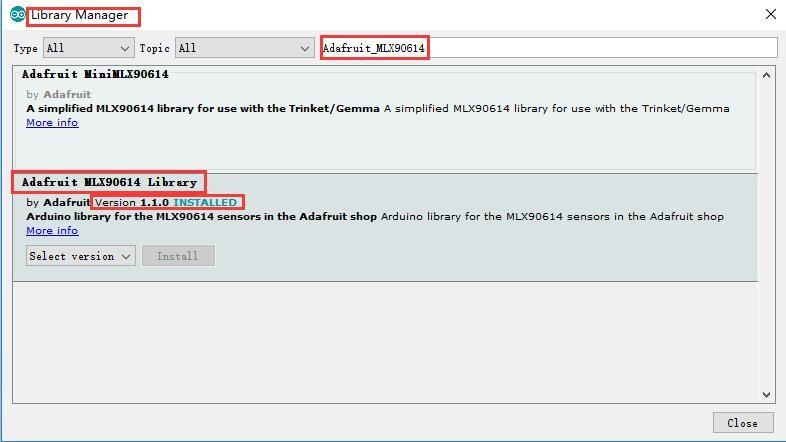
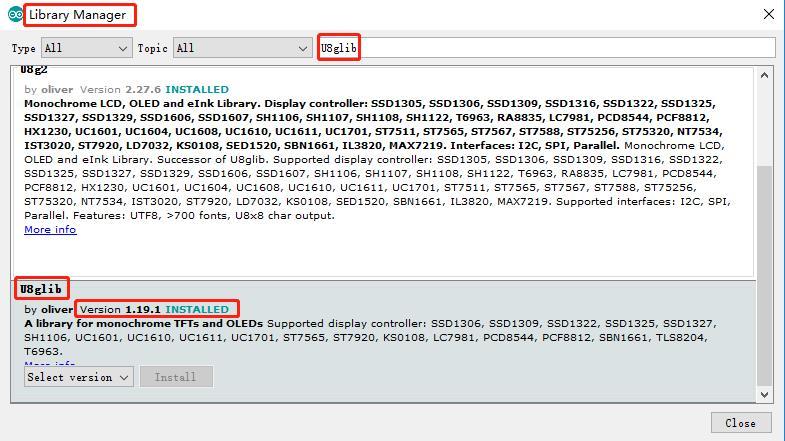
1. install the Library file: Open "Tools"-"Library Manager" in the Arduino development software, then search for “Adafruit_MLX90614 “ and “U8glib “ , And install them.
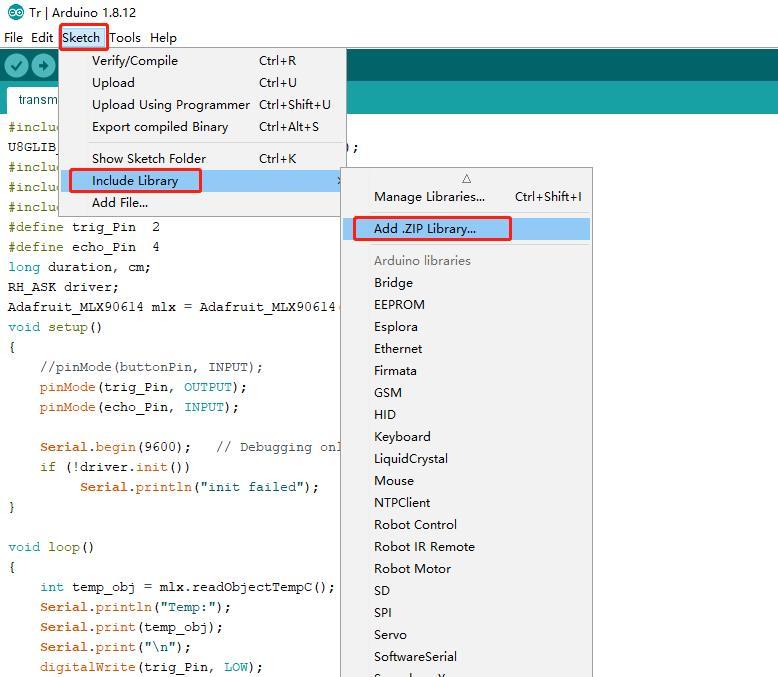
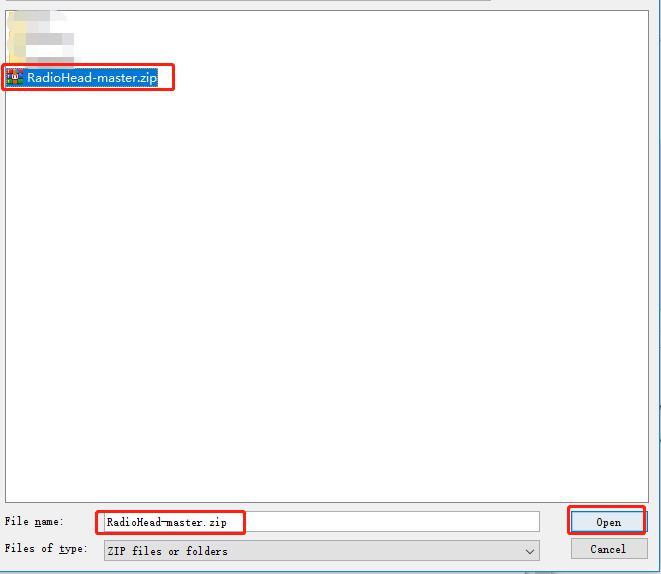
2. Install the Library file: Open "Sketch"-"Include Library"-"Add .ZIP Library" in the Arduino development software, Import RadioHead-master.zip.
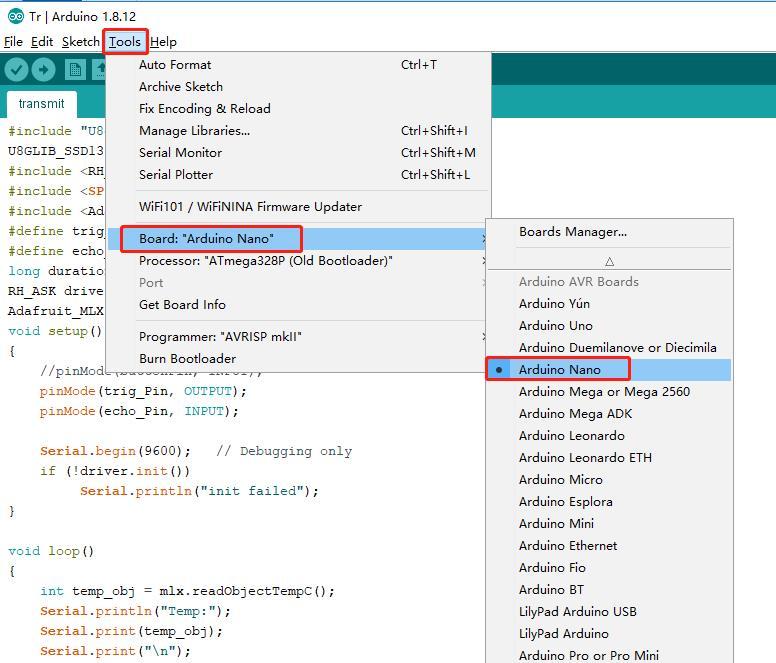
3. Choose the development board as Arduino Nano, this is to choose the right.
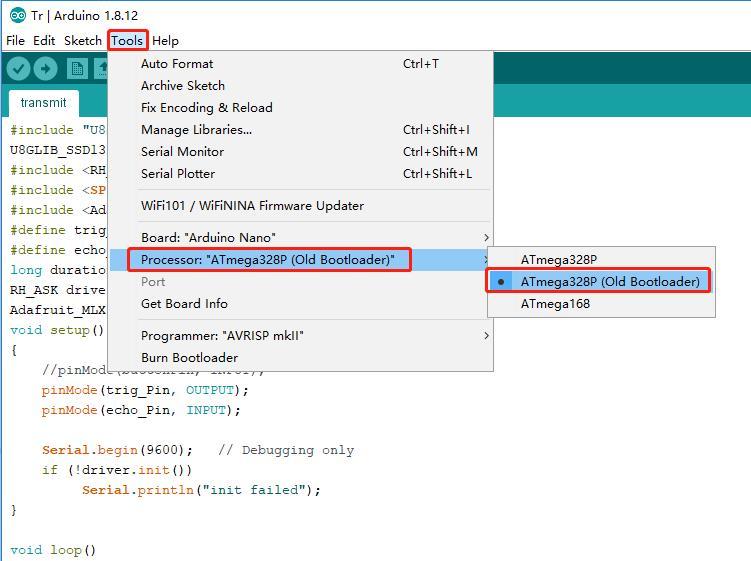
4. Select the processor as ATmega328P(Old Bootloader), this is to choose the right.
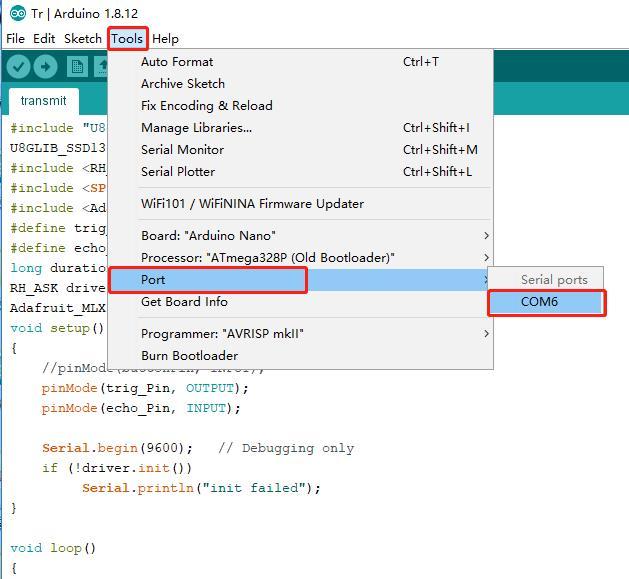
5. Select the serial port corresponding to the development board, you can burn the code into the development board.
.jpg)
.jpg)
.jpg)
receive.ino
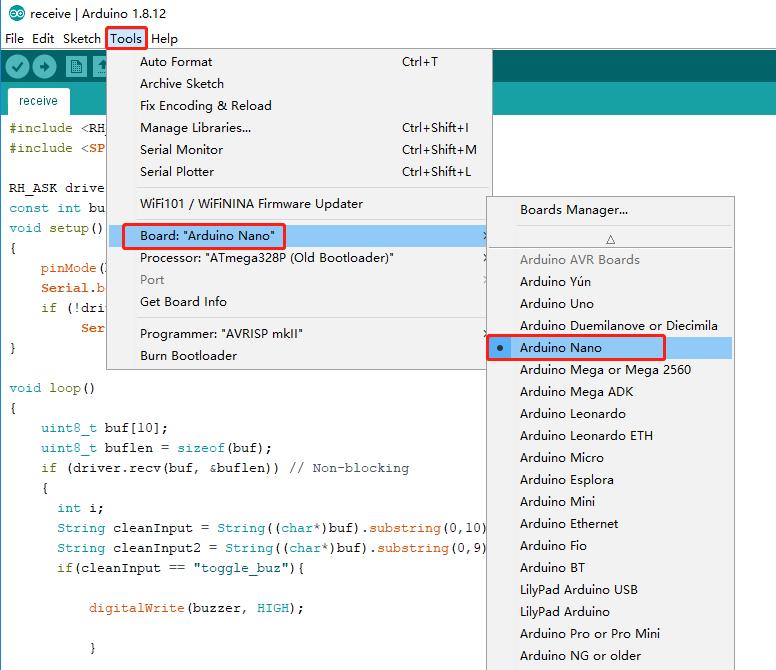
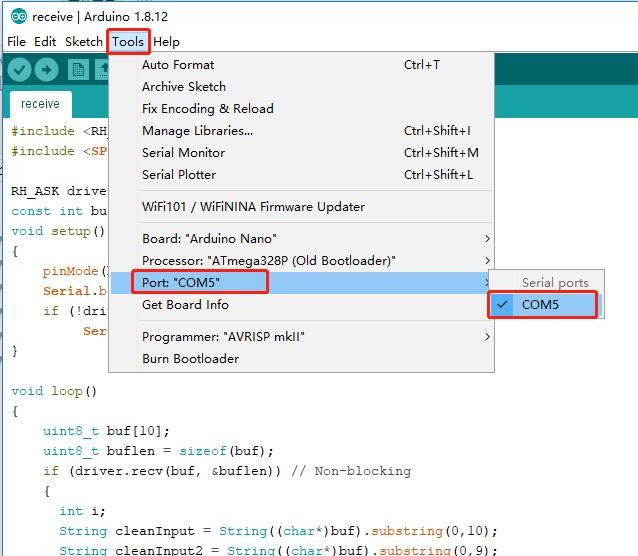
1. Choose the development board as Arduino Nano, this is to choose the right.
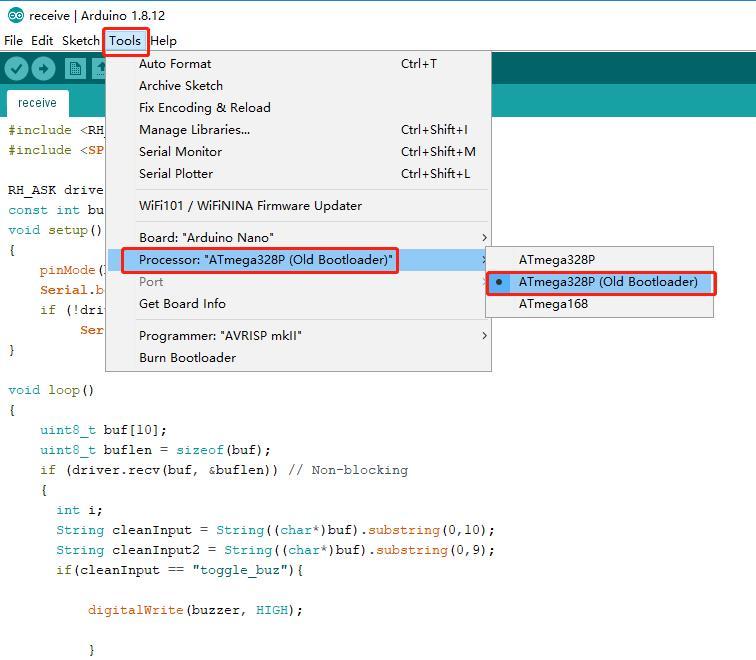
2. Select the processor as ATmega328P(Old Bootloader), this is to choose the right.
3. Select the serial port corresponding to the development board, you can burn the code into the development board.